

MegaTech AfterBurner User Manual
®
Entire Contents ©2005 Megatech International
OWNERS MANUAL

2
If you have questions about operating or installing your new Megatech
product, or if you are missing parts... Please Call Megatech First!
DO NOT RETURN THIS PRODUCT TO THE STORE
Call our Customer Service Department at:
(201) 662-2800
10:30am - 4:30pm, EST Monday through Friday (except holidays)
Technical assistance is also available on-line at www.megatech.com
or by e-mail to info@megatech.com
Congratulations on your purchase of a Megatech® Nitro-Powered
High-Speed Funny Car. Racing has never been more fun! Get ready
to speed into a new world of racing excitement! Your new After
Introduction
Burner is so easy to prepare, within minutes of opening the
box, it will be ready to race at speeds over 60 MPH.
Please read through these directions before you proceed any
further. If for some reason you think the AfterBurner is not
what you want, do not continue any further. Your hobby dealer
absolutely cannot accept a AfterBurner for return or exchange after
it has been run, or after any of the parts bags have been opened.
If you experience any problems, DO NOT take your AfterBurner back to
the store! Call one of our MegaTechnicians at 1-201-662-2800 or send
an e-mail to: info@megatech.com
TABLE OF CONTENTS
Getting Acquainted with Your AfterBurner .....................................3
Safety Warnings ...............................................................................3
The Radio System ............................................................................4
Fuel & Preparations .........................................................................5
Installing Antenna & Batteries .........................................................6
Steering Trim & Operation ..............................................................7
Engine Break In ...............................................................................8
Starting Your Engine ........................................................................9
Your First Run ................................................................................10
Brakes & Throttle Trim ..................................................................11
Maintenance ...................................................................................12
Limited Warranty ...........................................................................13
Exploded Parts View .......................................................................14
Parts List ........................................................................................16
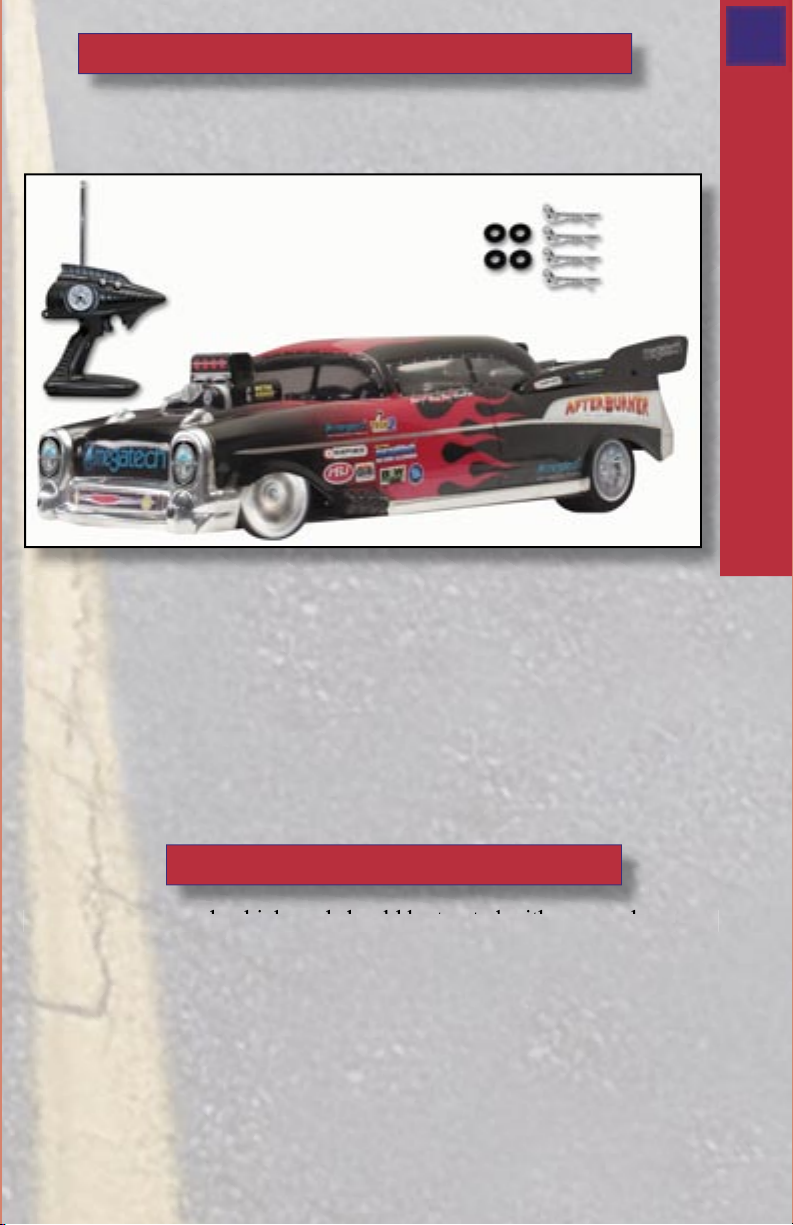
Getting Acquainted with Your AfterBurner
Review the components of the AfterBurner to ensure that your kit
is complete before you begin fi nal assembly. (See Figure 1)
C
B
A
Figure 1 - AfterBurner Contents
Kit Contents:
A. AfterBurner Nitro-Powered High-Speed Funny Car
B. 2-Channel Radio Transmitter
C. Body Washers and Clips
D. Decal Sheet (Not Shown)
3
Your New AfterBurner
Make sure that you have received all parts shown.
If something is missing, call Megatech toll-free at 1-201-662-2800
Safety Warnings
This is a high-speed vehicle and should be treated with care and respect!
Use extreme caution when operating your AfterBurner. Keep your hands,
fi ngers and any article of clothing away from the wheels and gears.
Model engine fuel is almost invisible when it burns. Always keep a fi re
extinguisher nearby when using model engine fuel. This fuel is dangerous,
poisonous, and highly fl ammable. Use a fuel dispenser with a fueling probe
to fi ll the fuel tank. Do not pour fuel into the tank directly from a can or
any other method which can spill raw fuel.
4
This vehicle is not a toy and must be operated by an adult who will
handle this car safely and take responsibility to avoid any injury.
This model is designed to be operated only in appropriate areas.
If all of the precautions are followed and your AfterBurner is operated in a safe and responsible manner, it is an exciting, safe and fun
hobby for you and all who watch.
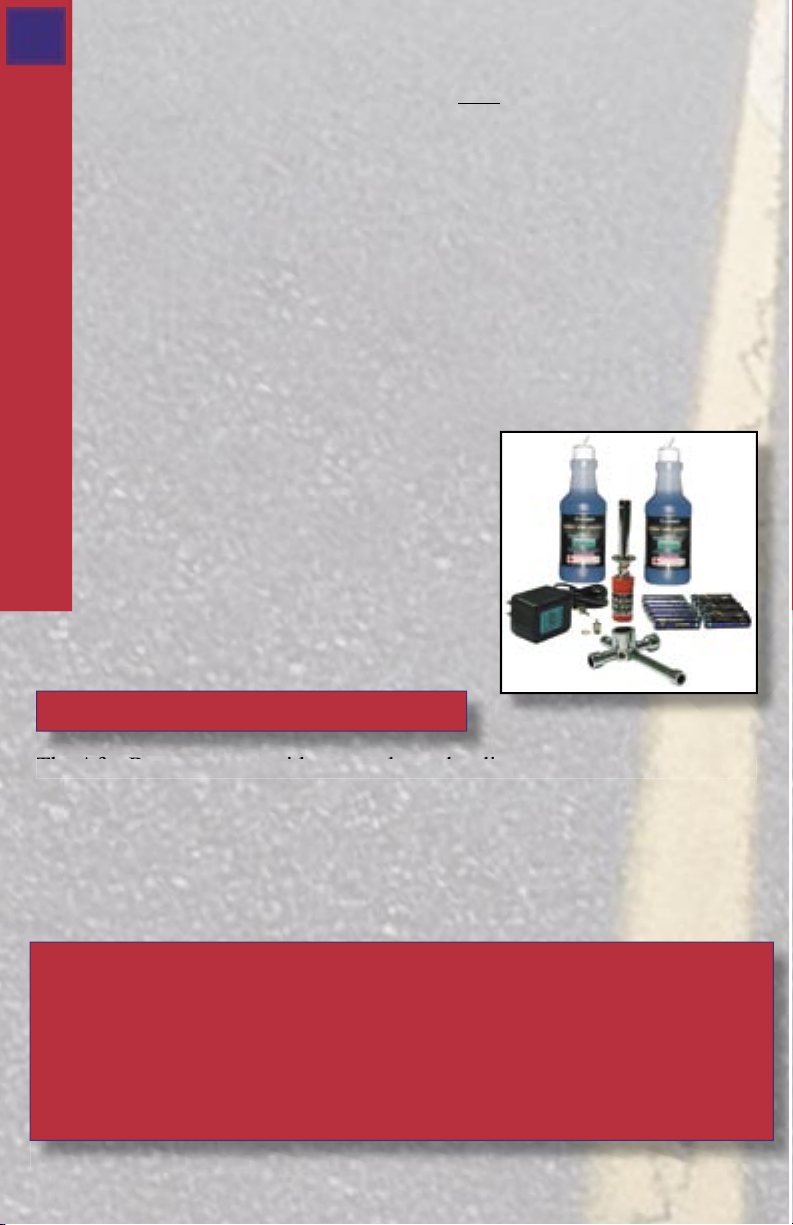
Required Running Equipment
To operate your AfterBurner, you will need the following items, which
should be available from your local hobby shop.
1. 12 AA alkaline batteries: 8 “AA” alkaline batteries for the
transmitter and 4 “AA” alkaline batteries for the receiver*
2. Glow plug ignitor*
3. Glow plug wrench*
The Radio System
4. Racing Fuel (We recommend
Megatech’s High Velocity
Racing Fuel)*
5. Fuel-fi ller bottle*
6. Flat head screw driver
* These items are available in Megatech’s
Gas Car/Truck Completer Kit, #MTC 7500
(Pictured right).
The AfterBurner Radio System
The AfterBurner comes with a two-channel radio completely installed. The
transmitter has one channel for digital proportional steering and one channel
for digital proportional throttle control. The receiver and receiver batteries
sit in the sealed radio box. Before running the vehicle, always turn on the
transmitter fi rst and then the receiver. When fi nished running your After-
Burner for the day, always turn the receiver off fi rst, then the transmitter.
WARNING/CAUTION
THE TRANSMITTER IS ALWAYS THE FIRST TO BE SWITCHED
ON AND THE LAST TO BE SWITCHED OFF. NEVER TURN THE
TRANSMITTER OFF WHILE OPERATING THE CAR. THIS WILL
CAUSE THE AfterBurner TO RUN OUT OF CONTROL AND CAUSE
A DANGEROUS CONDITION.
Figure 2 - Completer Kit
Fuel
Fuel is the most critical component for making your engine perform
properly. Improper fuels will cause hard starting, poor performance,
and excessive wear on the engine. Fuel for your vehicle must
contain a blend of BOTH synthetic oil and castor oil. Use a highquality blended fuel. We only recommend Megatech’s High
Velocity Racing Fuel or another premium quality car/truck fuel with
25% Nitro content.
CAUTION: ALWAYS FOLLOW THE PRECAUTIONS
PRINTED ON THE CONTAINER OF FUEL. KEEP IT AWAY
FROM OPEN FLAMES AND CHILDREN. THE MIXTURE
IS FLAMMABLE AND POISONOUS.
Your AfterBurner features a competition fuel tank and priming
system. The tank uses a spring-loaded fi ller cap over a wide fi ller
neck for fast, easy fueling. Simply pull open the lid and it will spring
closed when you remove the nozzle. Remember to use a fuel fi ller
bottle with an attached long nozzle that can be inserted into the fi ller
neck. Never pour fuel from an open can into the tank or use a funnel.
Preparing to Race
5
Fuel & Preparations
Your AfterBurner comes fully assembled and nearly ready to race right
from the box. Very little setup is required, however, proper
preparation is crucial to maximizing the performance and enjoyment
of your vehicle.
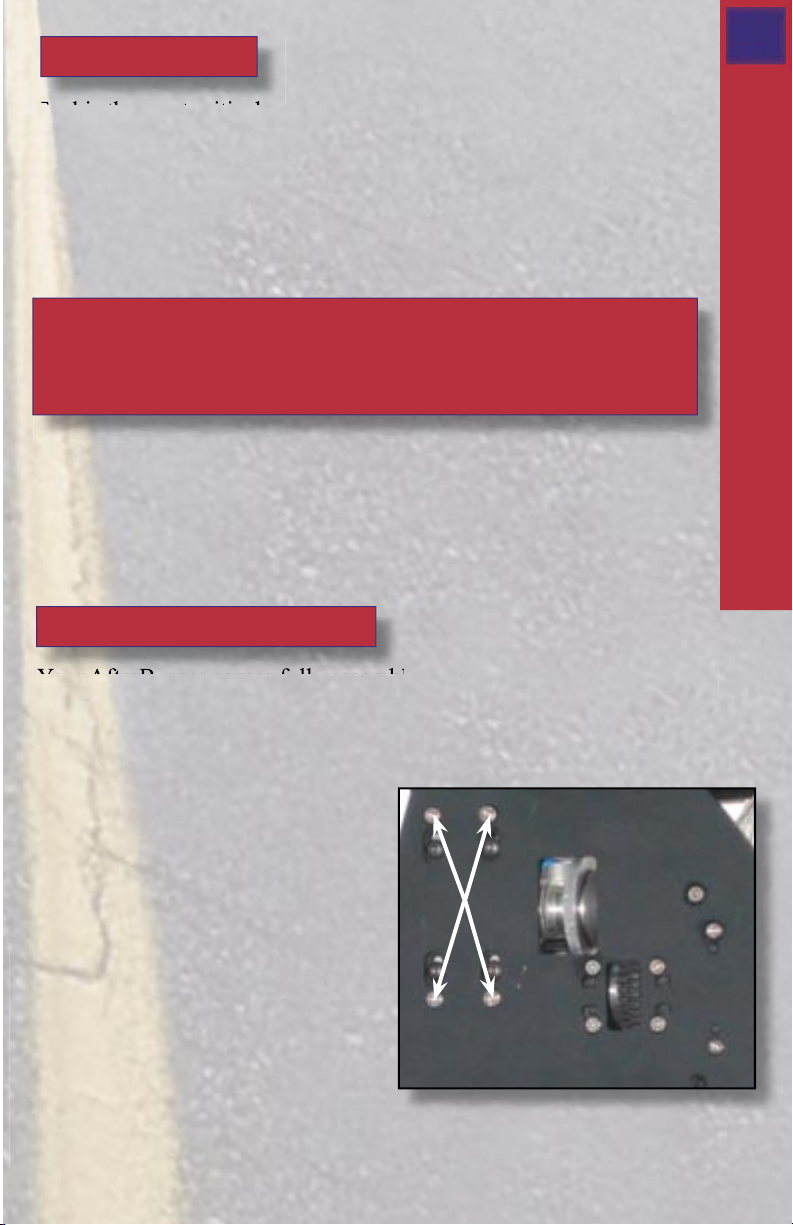
First we do recommend that you
tighten down all of the bolts, as they
may have come lose in transit. Be
especially careful with the engine
mounting bolts as shown in
Figure 3. Because the engine has
such high RPMs, it is important to
make sure the bolts have not
vibrated loose after every use.
Figure 3 - Tighten engine mounting bolts
C. To install the receiver batteries, lift
up on the clasp and gently lift the
cover to the battery box. Then, lift
out the battery guard and the
battery case. Install 4 fresh “AA”
alkaline dry cell batteries and
carefully put everything back into
the battery box (see
6
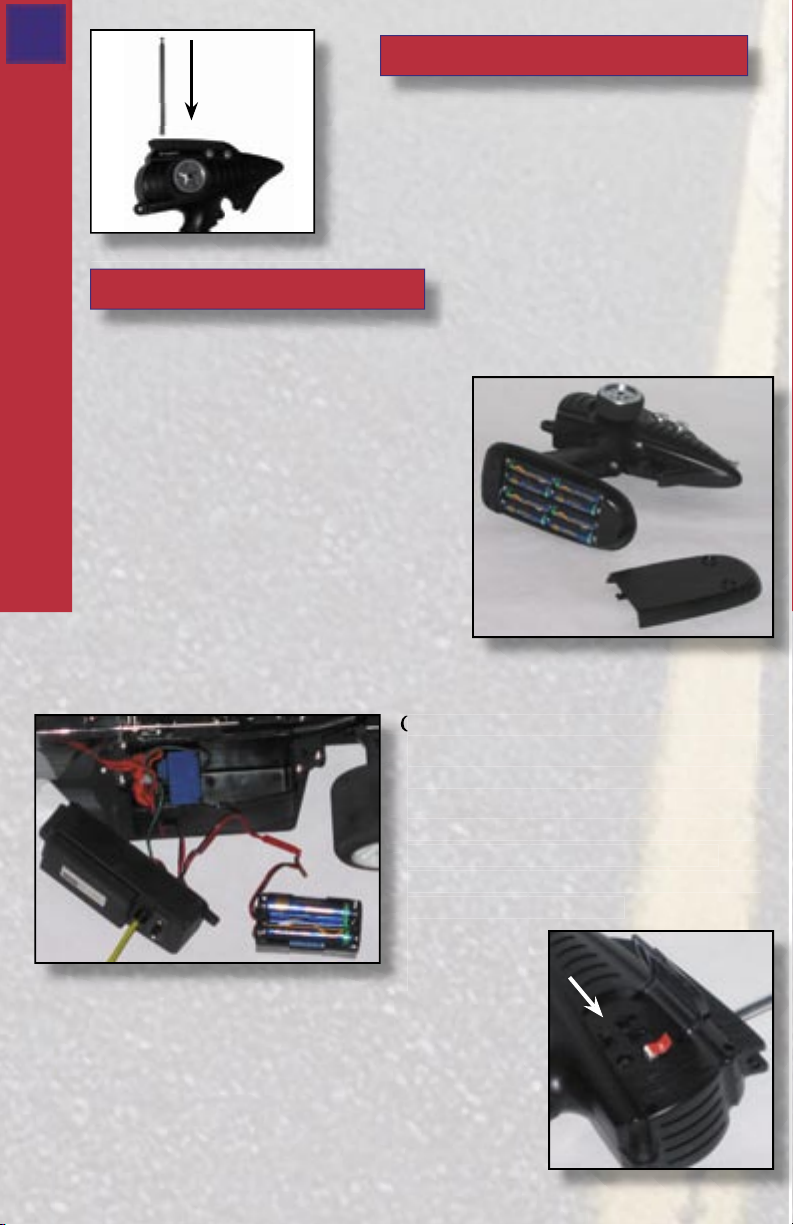
Installing the Antenna
Remove the antenna from the slot on top
of the transmitter. Slide it into the hole
on top of the transmitter and turn clock
wise until snug. Do not over-tighten.
Figure 4 - Install Antenna
Installing the Batteries
A. Be sure that both the transmitter and receiver switches are in the
“off” position.
B. Install 8 fresh “AA” alkaline dry
cell batteries in the transmitter
(see Figure 5) paying careful
attention to proper “+” and “-”
polarity. Turn the transmitter on to
make sure the LED light glows
green. Fresh batteries will provide
Installing Antenna & Batteries
2 hours of power to the
transmitter. When the red LED
light glows, immediately install
fresh batteries. Failure to do so will result
in loss of control and (most likely) a crash.
C. To install the receiver batteries, lift
up on the clasp and gently lift the
cover to the battery box. Then, lift
out the battery guard and the
battery case. Install 4 fresh “AA”
alkaline dry cell batteries and
carefully put everything back into
the battery box (see Figure 6).
Figure 5 - Transmitter Batteries
Figure 6 - Vehicle Batteries
D. Turn on the transmitter power switch, located
inside the door on the back of the transmitter
(see Figure 7). Next turn on the vehicle’s power
switch and listen for the servos to move slightly.
Move the steering control wheel and the throttle
trigger on the transmitter, making sure that the
steering control operates the front wheels and
Figure 7 - Power Switch
 Loading...