

Page 1
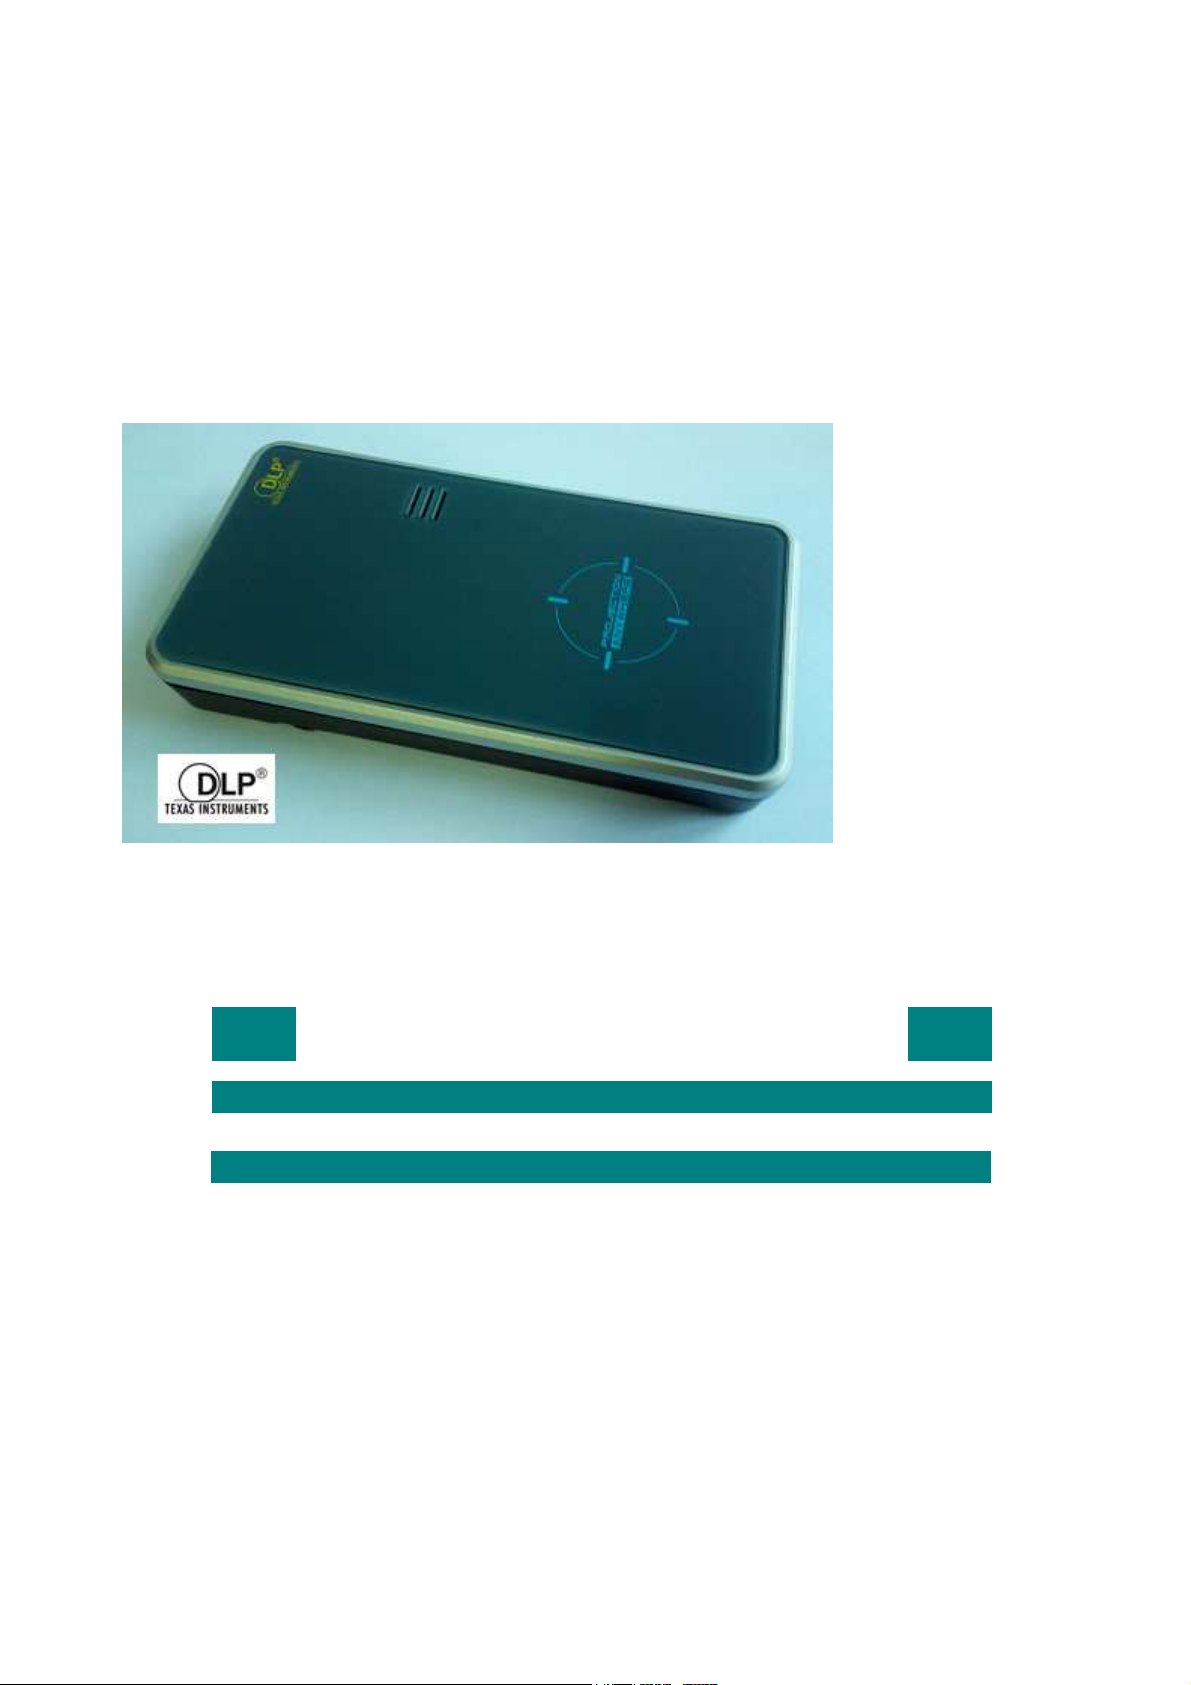
DLP SMARTPHONE PICO PROJECTOR
Users’ Manual
ML51
DLP PICO PROJECTOR
1
Page 2

TABLE OF CONTENTS
Introduction -------------------------------------------------------------------5
Box Contents ------------------------------------------------------------------ 5
Setting Up the Pico Projector --------------------------------------------- 6
Installing the remote controller application to your ---------------- 7
Android/IOS Device
Connecting to Wireless Media Devices--------------------------------- 8
Connecting to AV Sources ------------------------------------------------- 11
Play From Micro SD card and USB Storage --------------------------- 12
Connecting to external speaker ------------------------------------------- 12
Care and Maintenance ----------------------------------------------------- 12
Cleaning the Pico Projector Housing ----------------------------------- 13
Cleaning the Projection Lens --------------------------------------------- 13
Transporting the Pico Projector ----------------------------------------- 13
Troubleshooting Guide ---------------------------------------------------- 14
Appendix 1 (Product Specifications)------------------------------------ 15
2
Page 3

Notes:
1. The appliance inlet of the power supply is the disconnector from mains and must be anytime easily
accessible.
2. The maximum noise level of the product is L
1. Der Gerätestecker des Netzteilesbildet die TrennvorrichtungzumVersorgungsstromkreis und
mußjederzeitleichtzugänglichsein.
2. Max. Geräuschpegel: L
FCC Information
≤70dB (A) DIN 45635-19-01-KL2.
PA
≤70dB (A) DIN 45635-19-01-KL2.
PA
This equipment generates and uses the radio-frequency energy and, if not installed and used in accordance
with the instruction manual, may cause interference to radio and television reception. It has been tested
and found to comply with the limits for a class A computing device in accordance with the specifications
in Subpart J of Part 15 of FCC Rules, which are designed to provide reasonable protection against such
interference when operated in a commercial environment. If this equipment does cause interference to
radio or television reception, the user may try to correct the interference by one or more of the following
measures:
1. Re-orient the receiving antenna for the radio or television.
2. Relocate the equipment with respect to the receiver.
3. Plug the equipment into a different outlet so the equipment and receiver are on different branch
circuits.
4. Fasten cables using mounting screws to ensure adequate electromagnetic interference controls.
Acknowledgments
The followings are registered trademark or trademarks of their respective corporations: Google,TI, Microsoft etc.
Safety Information
Please read these instructions before using your Pico Projector. Failure to comply with these instructions could
result in electric shock, fire, personal injury or damage to your Pico Projector.
Power Source
Check the power specification plate on the back of the Pico Projector. Ensure that your line voltage matches with
the power adapter rating of the Pico Projector.The Power Adaptor accepts AC power 90-264V, 50-60 Hz.
Power Adaptor
Use only the power adaptor supplied with the Pico Projector. Do not use the power adaptor if it has become
damaged or frayed. For a replacement power adaptor, contact your authorized dealer.
Do not allow anything to rest on the power adaptor. Do not place this projector where the adaptor may be abused
by persons walking on it.
3
Page 4

Overloading
Do not overload wall outlets and extension cords as this can result in the risk of fire or electric shock.
Liquid Spills
Do not set drinks or other liquids on top of the Pico Projector. Do not place the Pico Projector near water, for
example, near a bathtub, washbowl, kitchen, sink, or laundry tub, in a wet basement, or near a swimming pool.
Spilled liquids can flow inside the Pico Projector and cause damage.
Repair
Do not disassemble the PicoProjector. Take it to an authorized technical staff when service or repair work is
required.
Technical Service
Please refer servicing to authorized technical staff under the following conditions:
• When the power adaptor or plug is damaged or frayed.
• If liquid has been spilled into the Pico Projector.
• If the Pico Projector has been exposed to rain or water.
• If the Pico Projector does not operate normally by following the operating instructions.
• If the Pico Projector has been dropped or the cabinet has been damaged.
• If the Pico Projector exhibits a distinct change in performance.
Caution: Always use the power adaptor that was shipped with the Pico Projector. The adaptor accepts power 90-264V 50-60
Hz. Check to ensure that the main voltage is within the range on the rating plate on the rear of the projector. When
disconnecting the Pico Projector, always power off the unit before attempting to remove the AC plug from the power adaptor
from the power source.
Introduction
The DLP Pico Projector is a convenient, versatile, state-of-the-art presentation and
entertainment system. It is an effective and valuable tool for projecting computer-generated
video information or full motion video signals on to a projection screen. The built-in
media player allows playback of PDF, photos, Excel files, Powerpoint and various video
files directly from the Pico Projector without the need for external signal sources. This,
coupled with the rechargeable battery, allows easy presentations on the fly. This Wireless
Pico Projector allows wireless connection to most Smart Phones. Simply installed the
corresponding Apps and connect the Smart Phone to the Projector via WIFI to enable the
wireless projection of Smart Phone contents. Photos, videos can be shared on the spot in
gatherings and parties!
4
Page 5
The following lists some of the specific features:-
- Direct playback and control from Smartphone and Tablets
- Small & Simple to Operate
- Built in WiFi
- 640x360 nHD resolution
- 50 Lumens brightness
- 1000 : 1 High contrast ratio
- Battery operated
- USB port and SDcard slot for multimedia playback
- Various Audio Visual interface connections
- Built-in Speaker
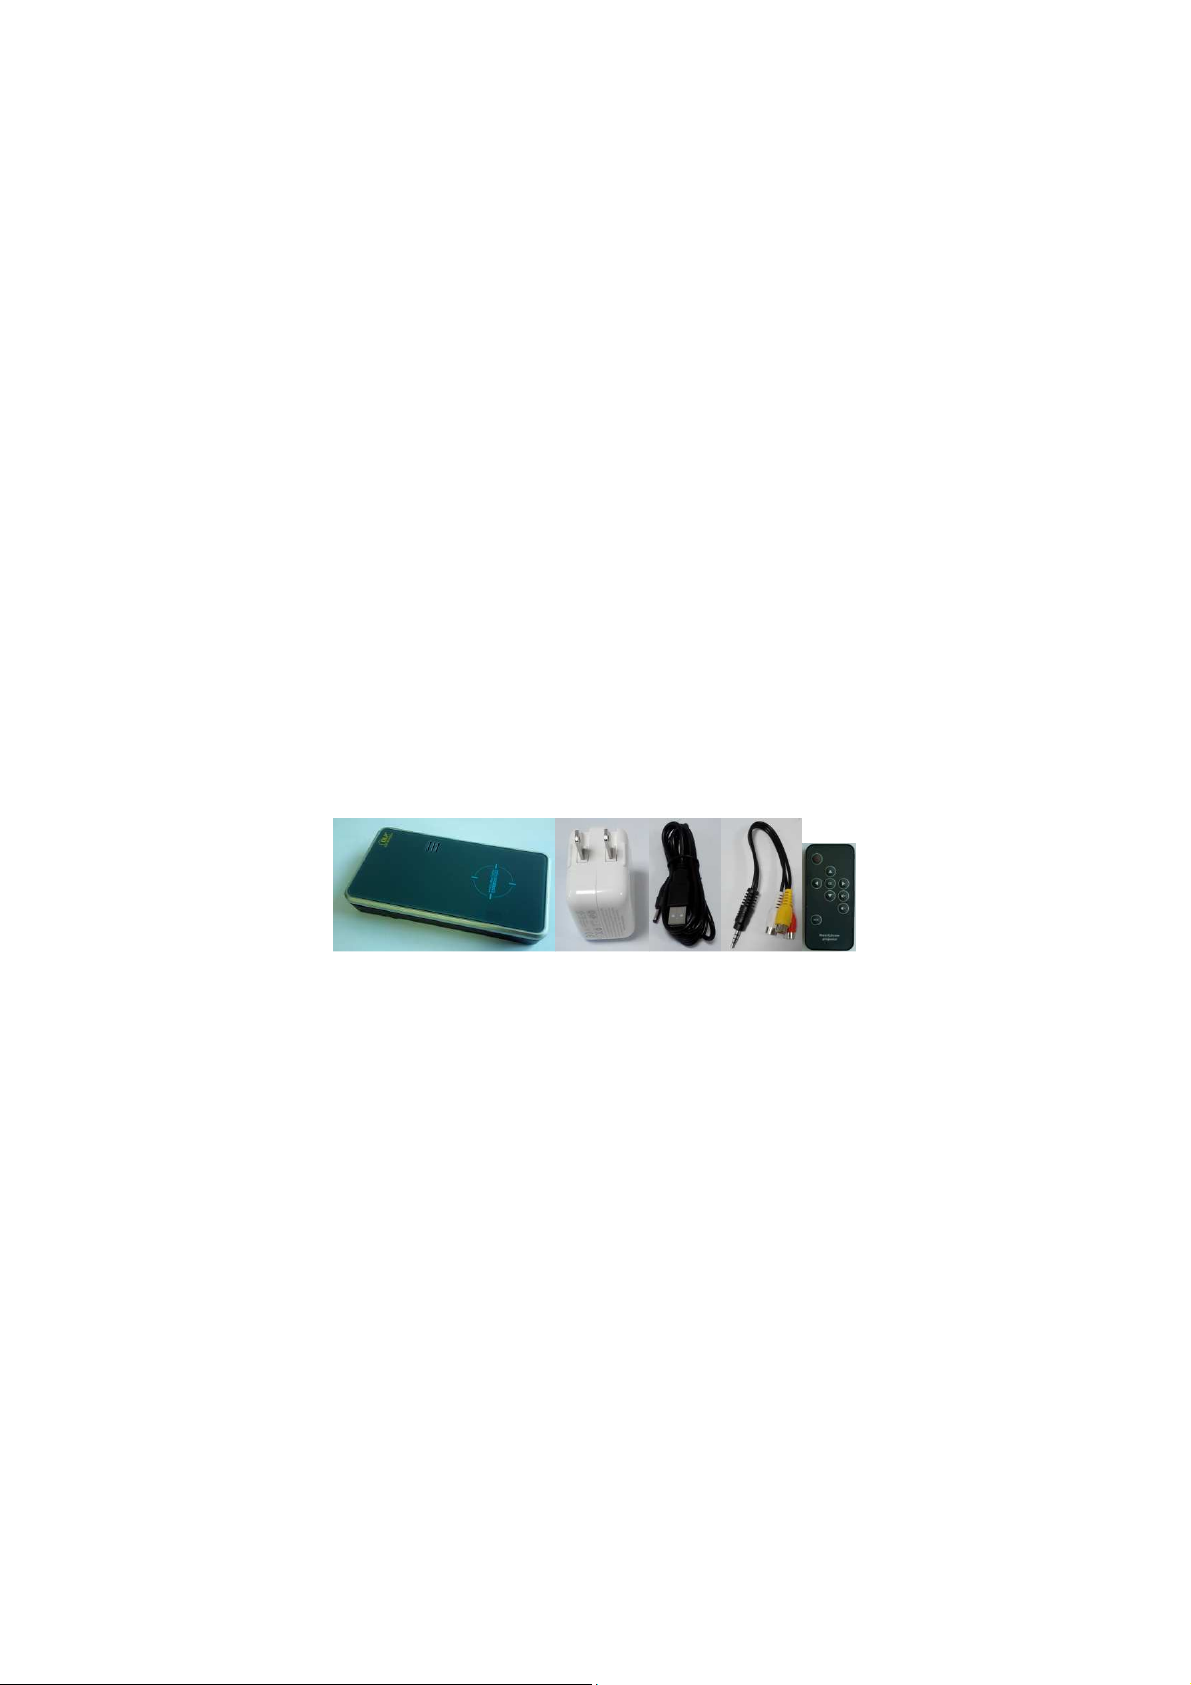
Box Contents
Handle your DLP Pico Projectorcarefully as you remove it from the packing box. The
following items should be included in your package:-
- DLP Pico Projector
- 5VDC Power Adaptor (according to national spec)
- USB-DC plug cable
- AV adapter cable
- Remote controller
- Users Instructions
Check to make sure all parts are included in the shipping box. If any are missing, contact
your dealer immediately.
5
Page 6
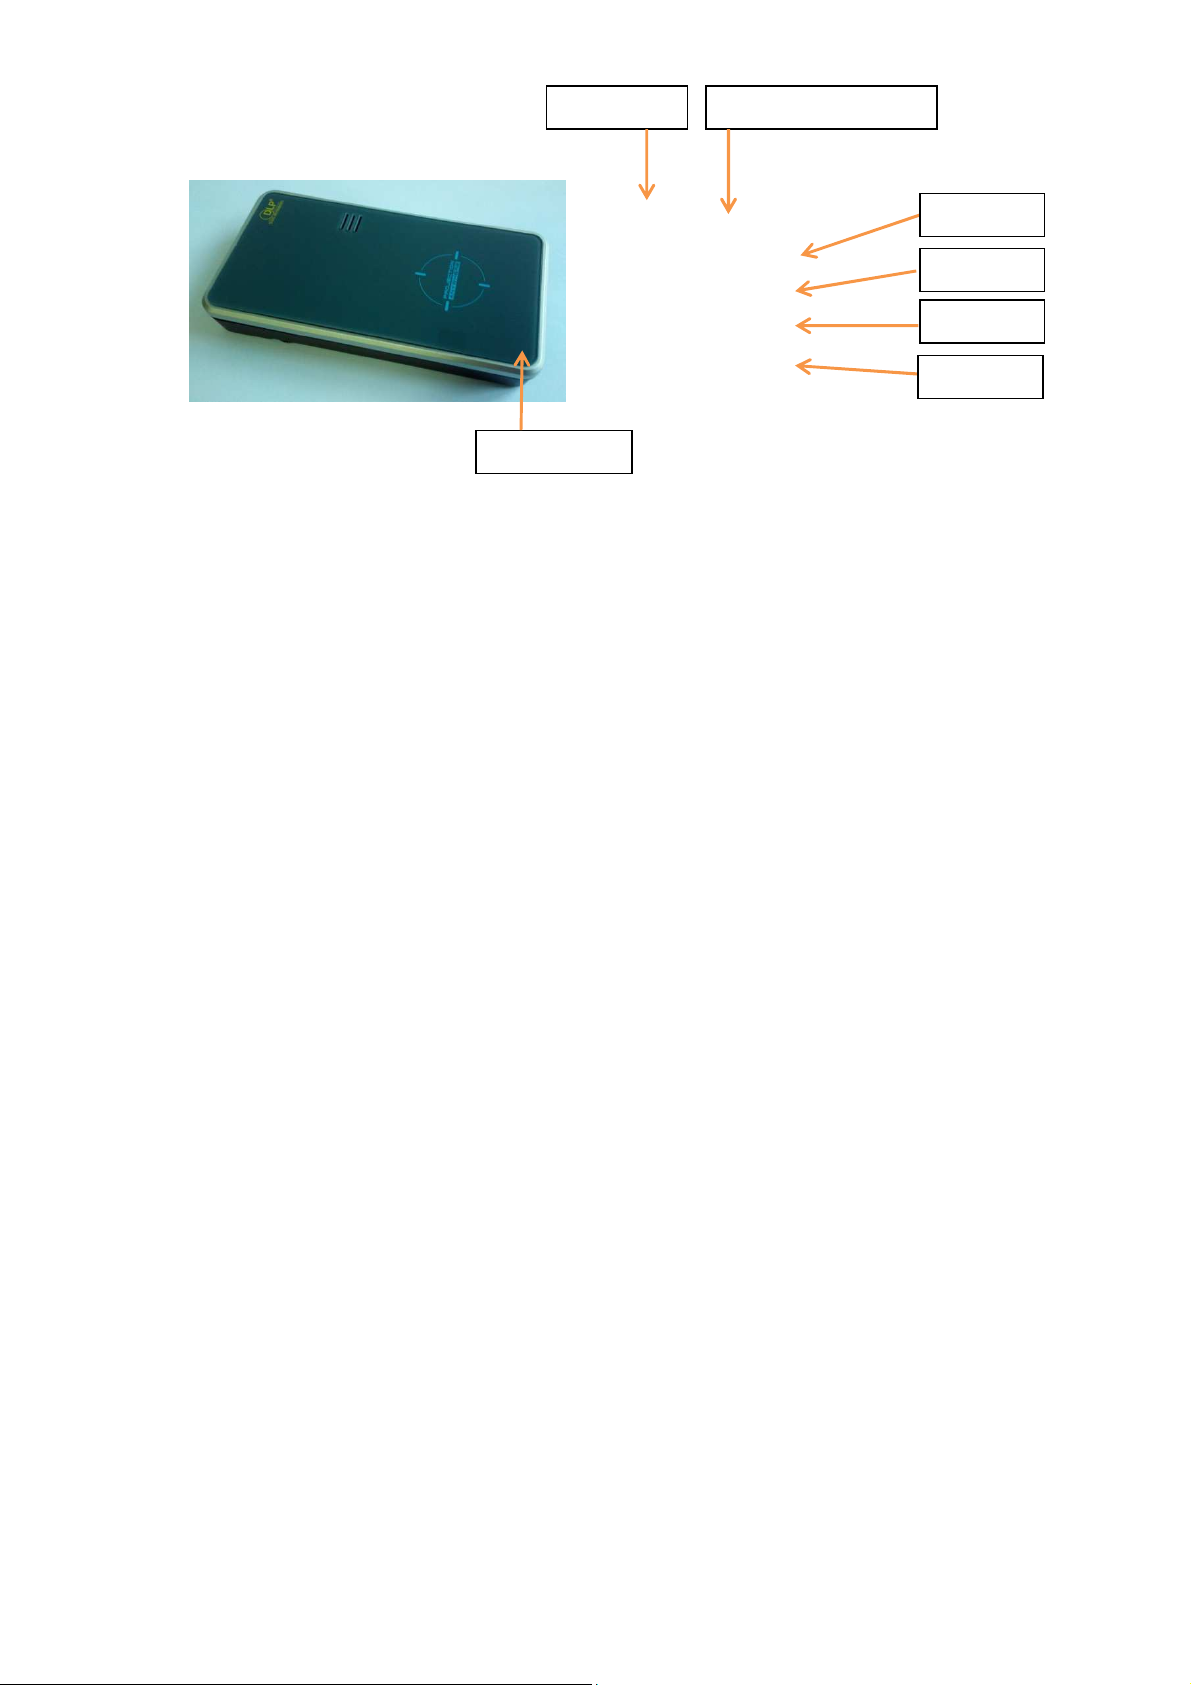
SDcard Slot
ON/OFF Slide Switch
AV Input
USB Port
Audio Out
DC Input
Focusing Ring
Setting Up the PICO Projector
1. Plug the Power Adaptor to the DC in connector at the rear of the DLP Pico
Projector.
Note : For first time use with internal battery, charge unit for about 4~5hours
2. Slide the ON/OFF power switch towards the rear of the unitto turn on Projector
and will take a short while to initialize. After booting up, the projector will display
the Home Screen
3. Place the Projector at a suitable distance so the image size is around 30” to 40”
diagonal
4. Turn the Focus Knob to bring the image into focus.
5. External signal source can also be played through the projector via the AV input
connectors.
6
Page 7

switch
Knob
slot
Focus
ON/OFF
Installing the Remote Controller application to your
Android/IOS Device
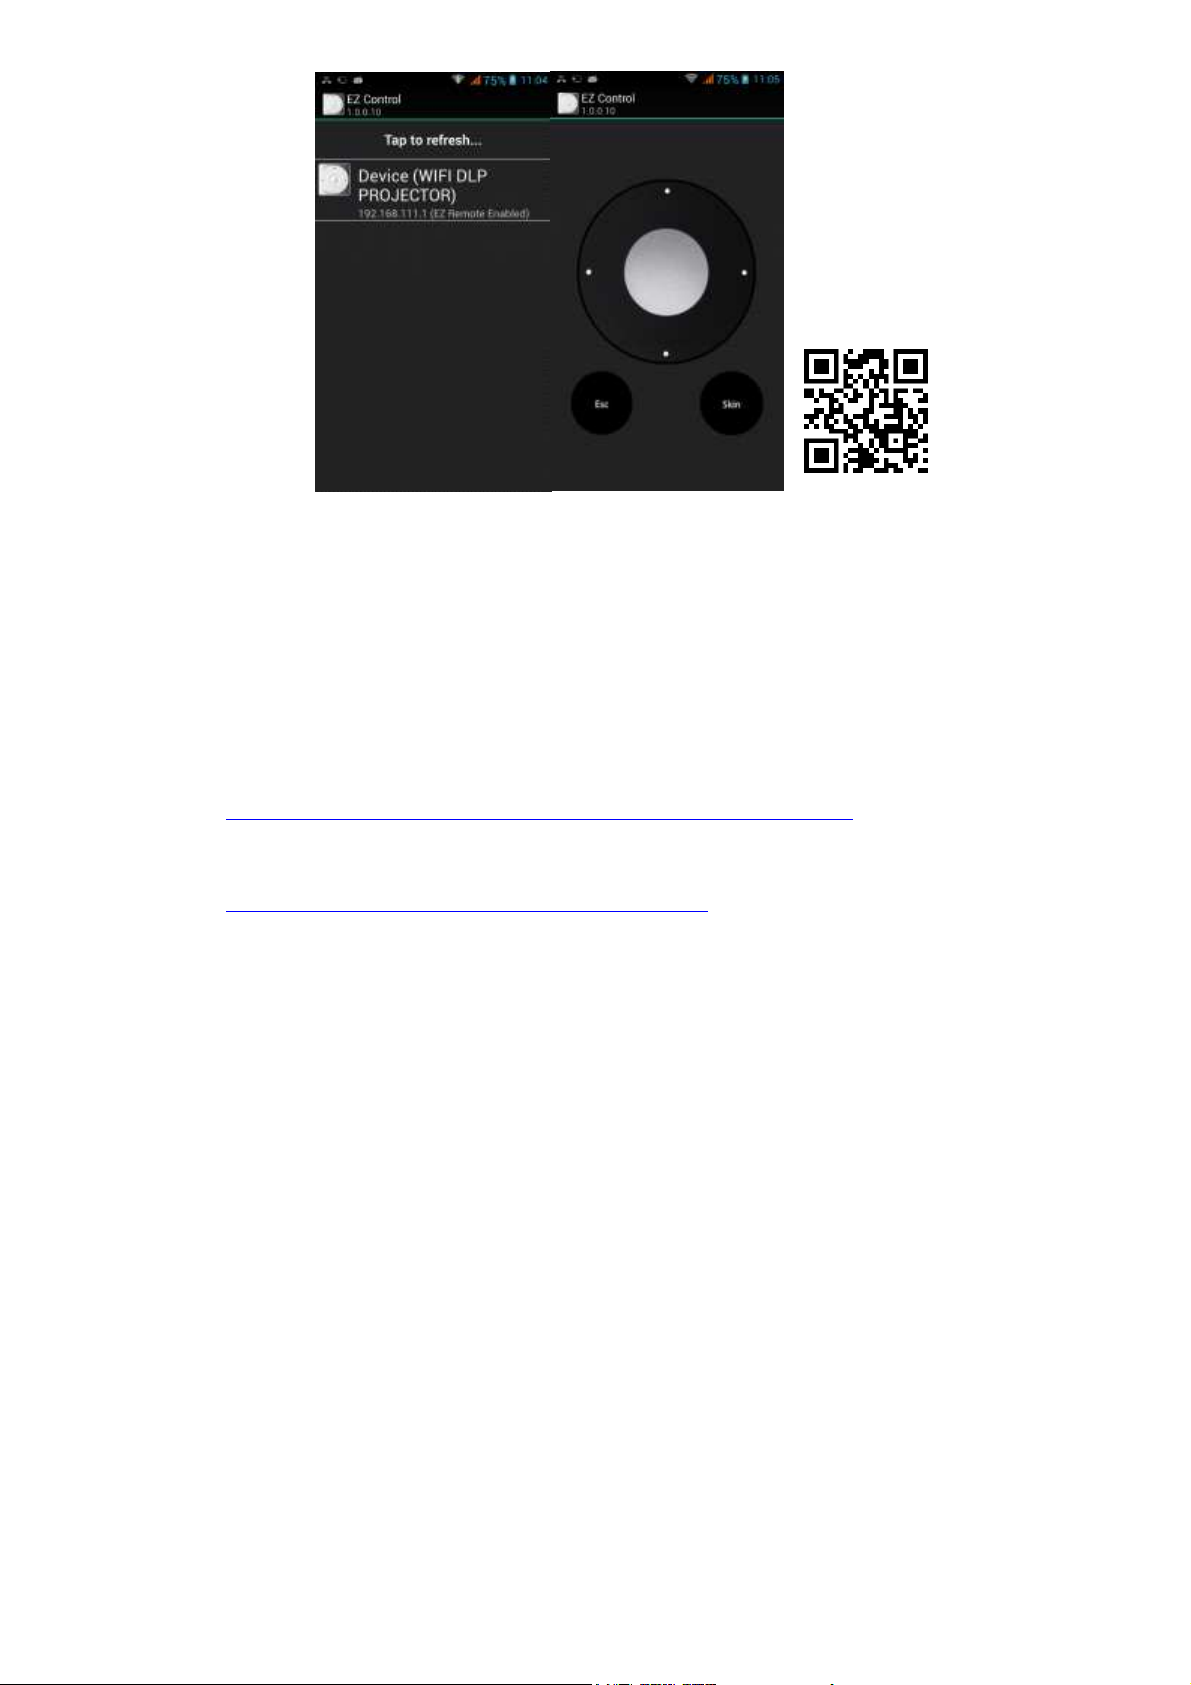
Install the App EZ Control from the Google Playstore for Android devices
https://play.google.com/store/apps/details?id=com.winnerwave.ezcontrol&hl=en
and from Apple’s Itunes
https://itunes.apple.com/us/app/ez-control/id592347370?mt=8
for Apple devices.
- In mobile phone’s/tablets wifi setting, select and connect to WIFI DLP
PROJECTOR-xxxxxx, where xxxxxx is unique for each pico projector unit.
PSK (Password) : 87654321
SD card
Home Screen
7
Page 8
QR code for
EZCONTROL
app
- Start the EZCONTROL application then tap on the name of device [Device(WIFI DLP
PROJECTOR)]. If connection is successful, the smart phone’s screen resembles a remote
control.
Connecting to Wireless Media Devices
Install the App EZVIEW application to Smartphone/tablet. The apps for Android and Apple
devices can be downloaded from Google Playstore
https://play.google.com/store/apps/details?id=com.winnerwave.ezview&hl=en
and from Apple’s Itunes
https://itunes.apple.com/hk/app/ez-view/id592341357?mt=8
respectively.
8
Page 9
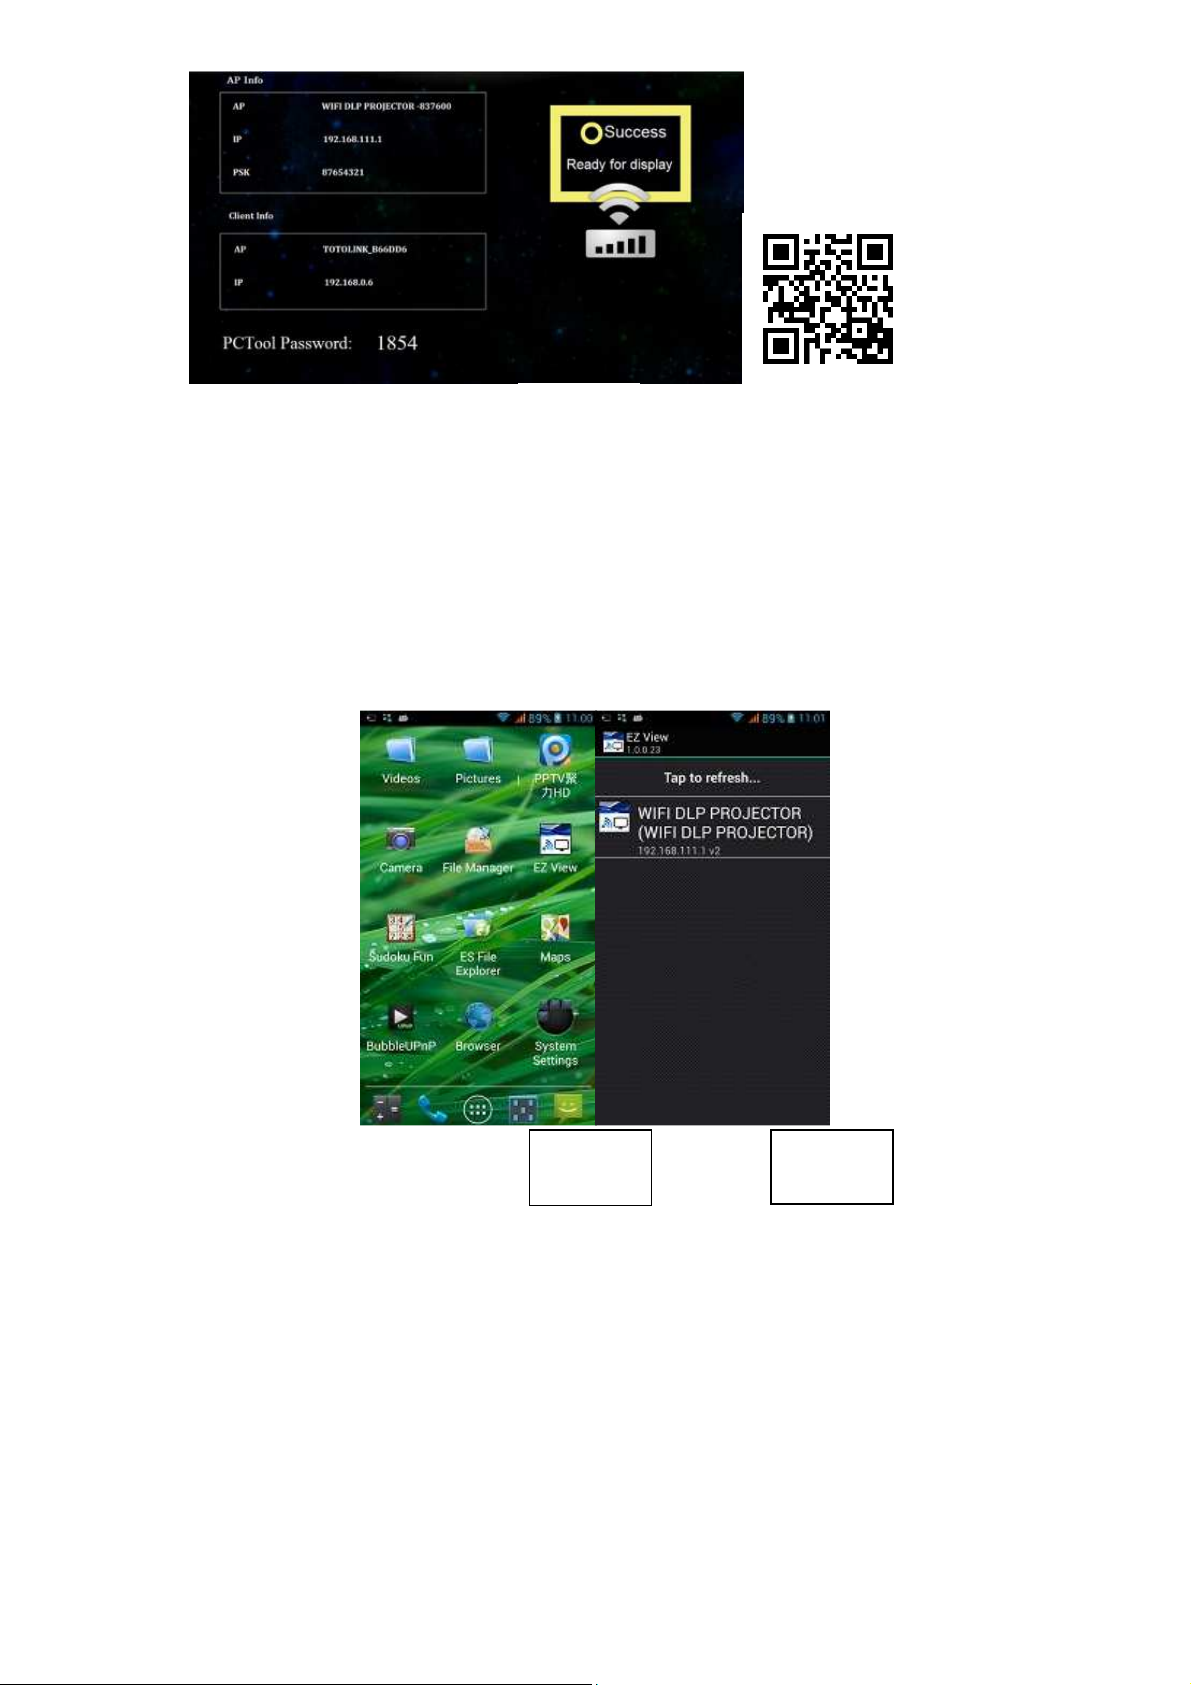
QR code for
EZVIEW app
WiFi Screen
1) Point to Point Mode
- At the Home Screen select WiFi
- At the media device’s wifi setting select and connect to WIFI DLP
PROJECTOR-xxxxxx, where xxxxxx is unique for each ML51 unit.
PSK (Password) : 87654321
- To prevent EZ CONTROL from disconnecting with the pico projector use the HOME
button on the media device not the back button to start the EZVIEW application
- StartEZVIEW wireless application and follow the on screen prompts. The EZVIEW
passcode is as the PCTool Password displayed on the screen. This is a randomly
generated code and is different each time WIFI function is selected
Android
device screen
9
After
activating
EZView
Page 10
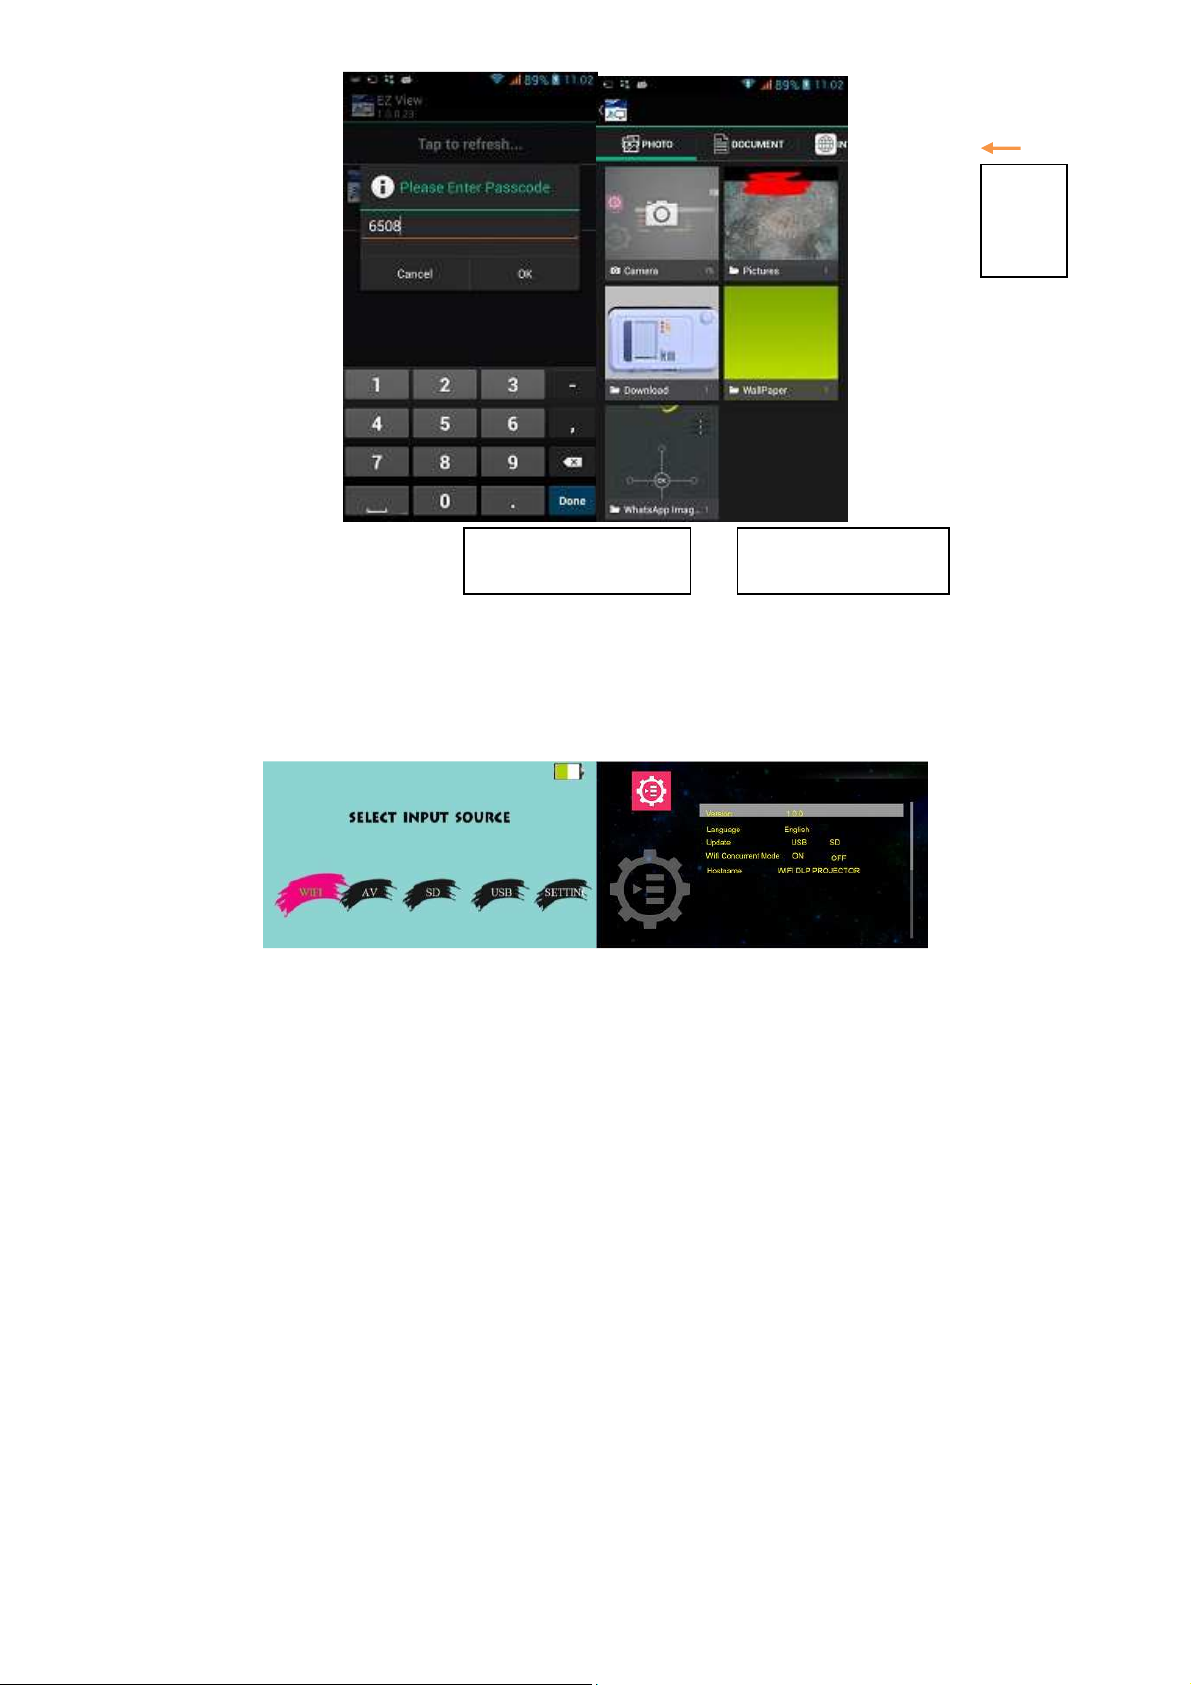
MENU
bar slide
left/right
for
options
After selecting WIFI DLP
PROJECTOR projector
2) Internet Access mode
- At the pico projector home screen select SETTING
- Highlight WiFi Concurrent Mode then press OK
- Press the right button to highlight box for AVAILABLE EXTERNAL NETWORKS
EZView home screen after
making the connection
(requires Internet access point)
10
Page 11
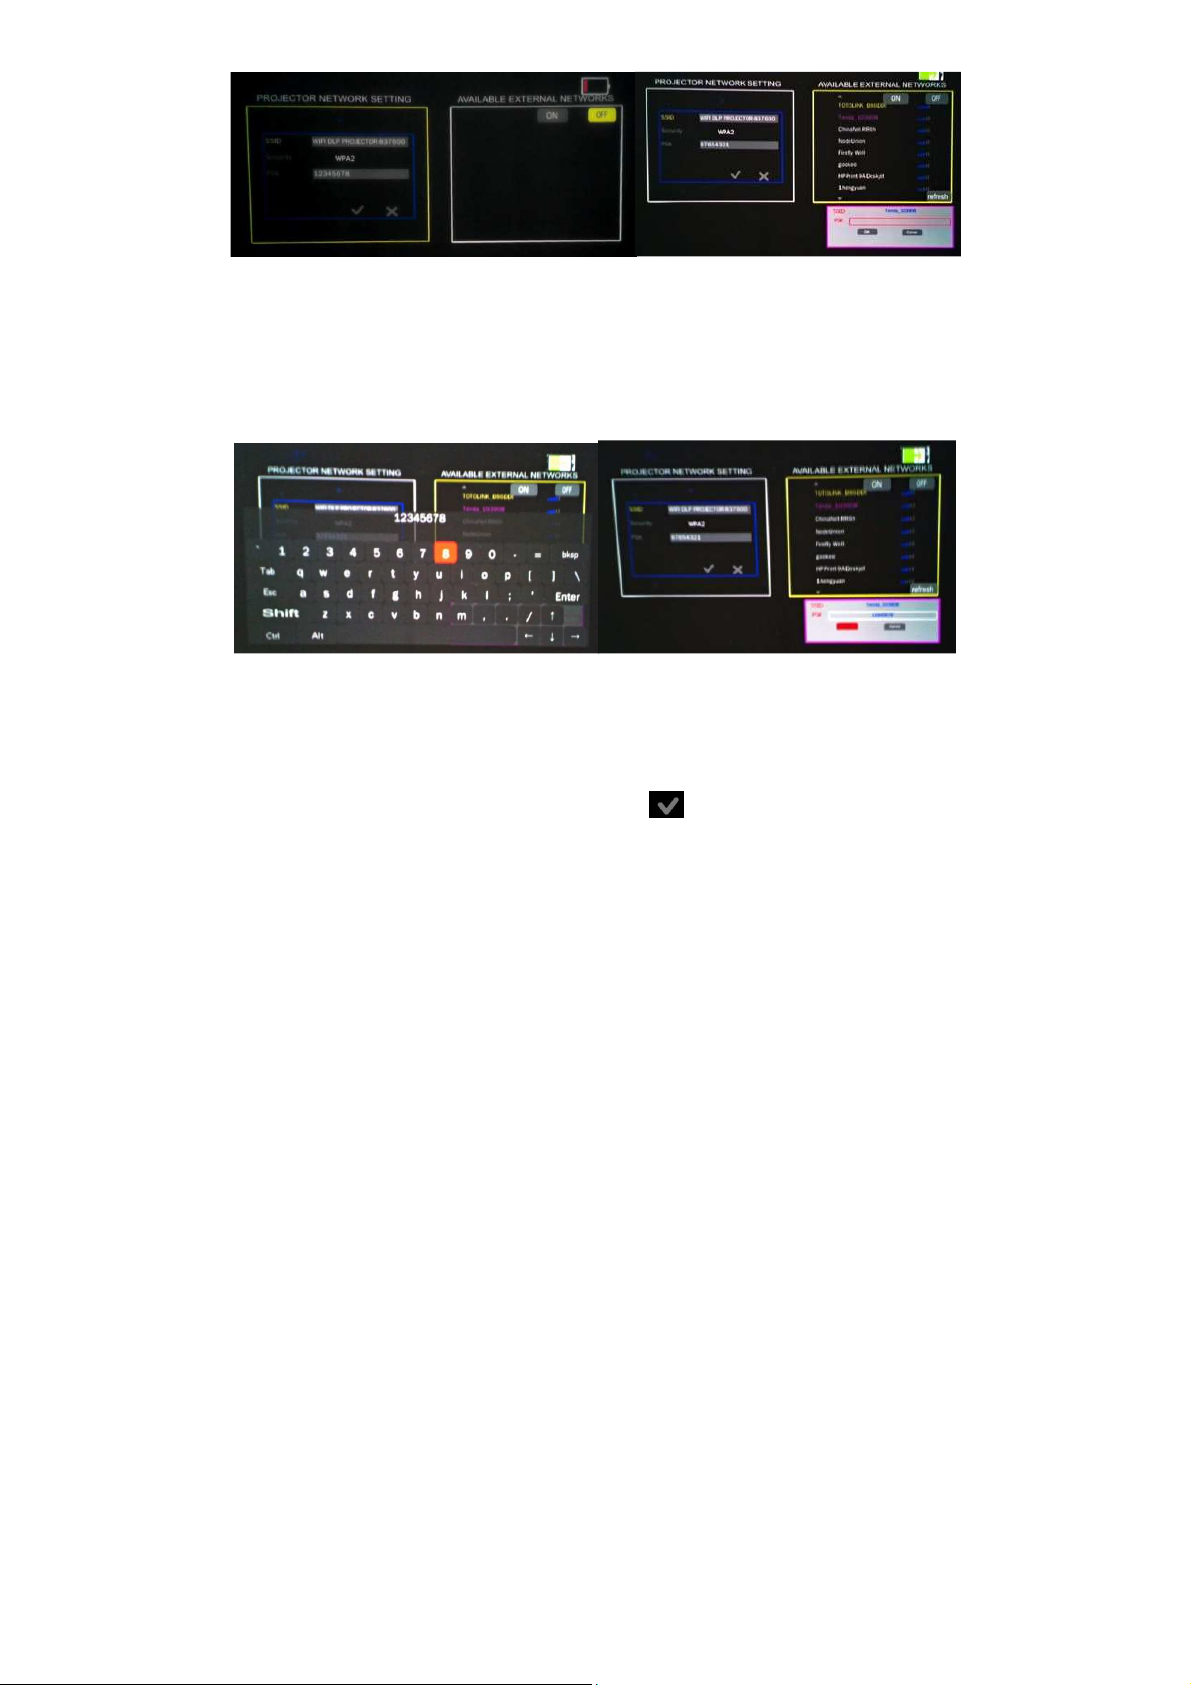
- Use the UP button to highlight ON then press OK on the remote controller to select
- Use the UP/DOWN button to select your network name, then press OK to select.
- When password input window appears, press OK again on the remote controller to
display the soft keyboard. Input the network password then press BACK on the remote
controller to hide the soft keyboard.
- Use the DOWN button to highlight OK then press OK on the remote controller to
select.
- Once connection is made “connect successfully !”indicates at the bottom of the screen
and a check mark against the name of the network
- Use the LEFT button to high light the PROJECTOR NETWORK SETTING box
- Use the UP/DOWN button to highlight the then press OK, “Configuration OK !”
will be shown at the bottom of the screen.
- Set the android device to connect to the WIFI DLP Projector-xxxxxx
- On the media device, start the EZVIEW application
- Connect to the deviceWIFI DLP Projector-xxxxxx
- Select the INTERNET option from the MENU Bar
Connecting to AV Source
- Using the supplied AV cable, insert the stereo plug end to the pico projector then a standard
RCA AV cable (not supplied) to the RCA connectors from a video source
- On the home screen select AV. The projector automatically detects and displays image
corresponding to the source
11
Page 12
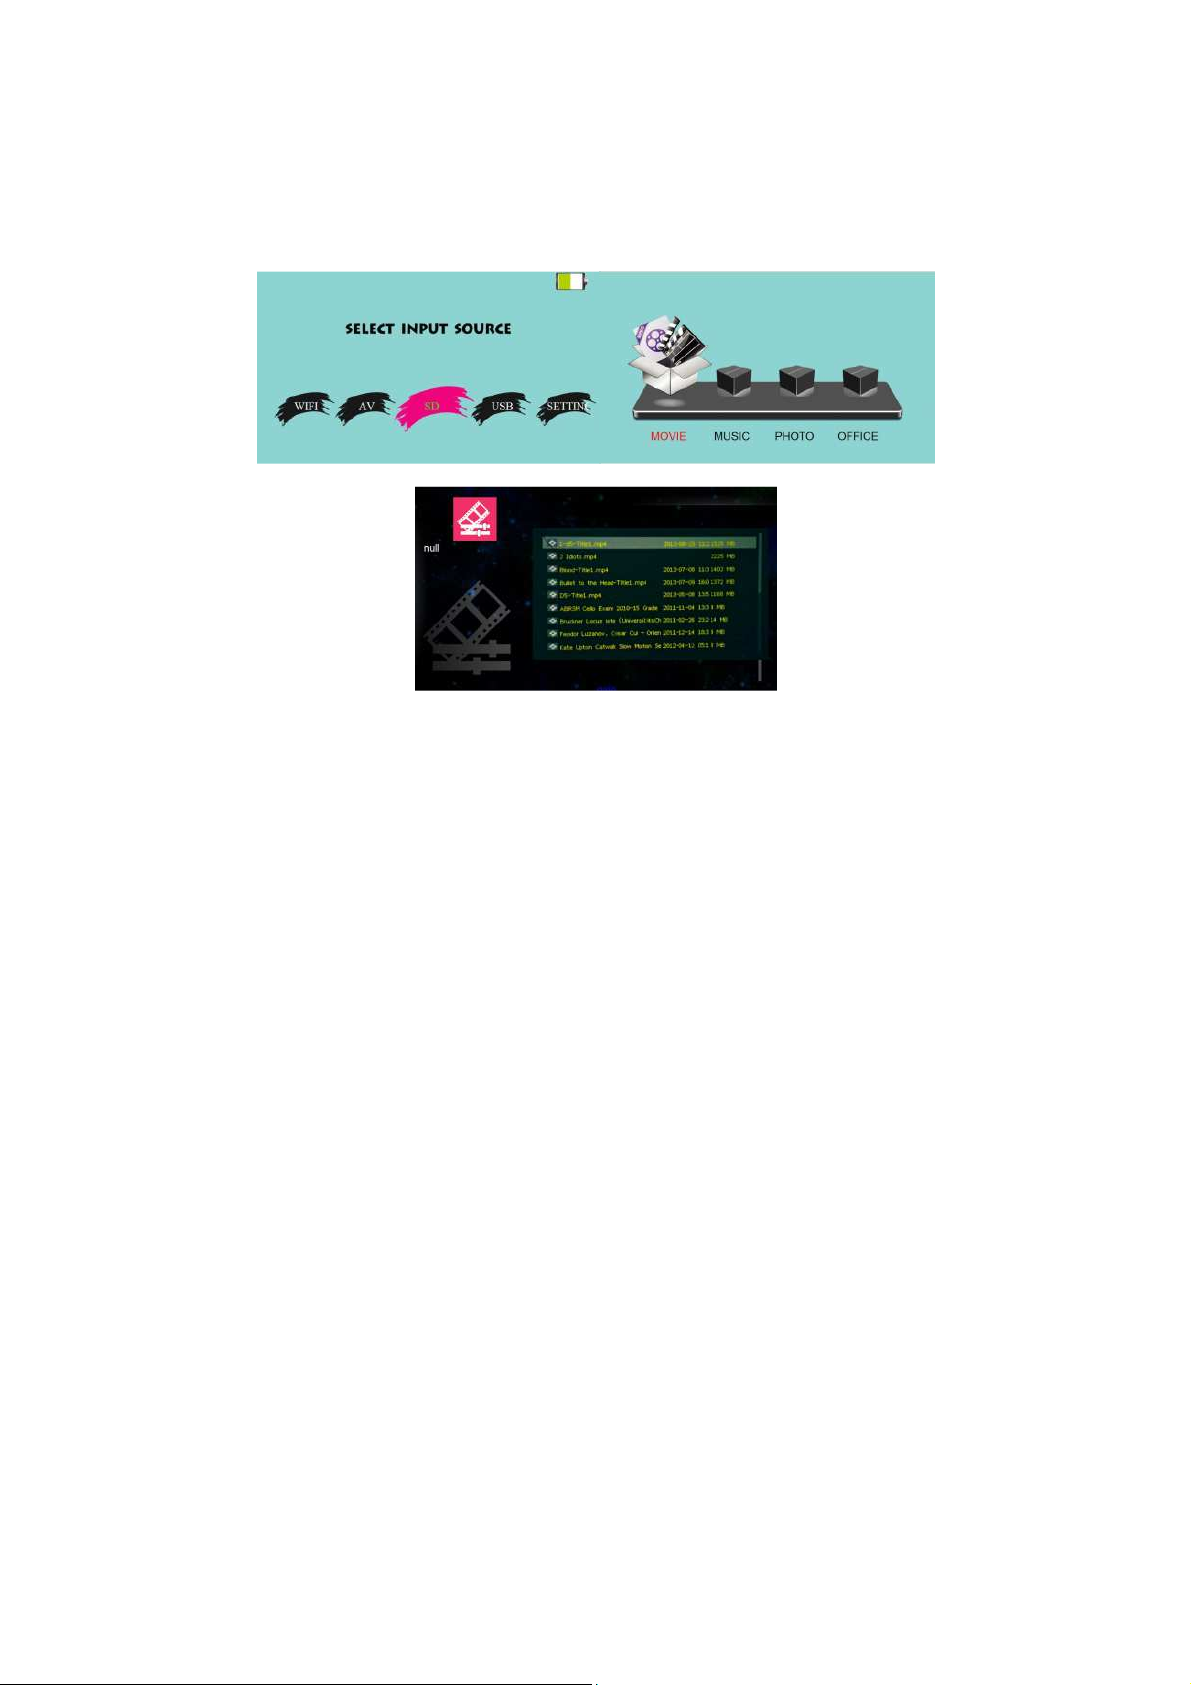
Play from Micro SD Card and USB storage
- Insert SD card (or USB drive)
- After detecting the presence of the SD card (or USB drive), the screen displays the media
type screen. Highlight the preferred media type with the LEFT/RIGHT buttons and then
select with the OK button
- Use the UP/DOWN buttons to highlight the file to play then press Ok to select
Connecting to External Audio Speaker
Insert speaker stereo plug to the audio out port, sound will output to the external speaker
Care and Maintenance
The information in this chapter describes how to care for and prevent accidental
damage to your Pico Projector. You should treat your Pico Projector with the same care
you would give to any other valuable equipment.
12
Page 13

Cleaning the Pico Projector Housing
DO NOT try to service the Pico Projector. Refer all Pico Projector servicing to your
dealer. Failure to do so can result in serious personnel injury or damage to the Pico
Projector.
DO NOT clean the housing with organic solvents, such as those containing acetone.
Wipe the exterior of the housing with a soft, damp cloth. Protect the Pico Projector
from rain, snow or extreme temperature.
Cleaning the Projection Lens
To clean the projection lens:
Use a cotton-bud stick to gently wipe dust or oil from the projection lens surface. Also,
do not use abrasive cleaners, solvents, or other harsh chemicals that might scratch the
lens.
Transporting the Pico Projector
The DLP Pico Projector is a highly sophisticated piece of electronic equipment that is
sensitive to impact, excessive heat, cold and humidity. When transporting the Pico
Projector, use a protective bag or use the original packing carton to minimize shock and
impact.
Store and transport the Pico Projector at temperature between 0 and 140 degrees
Fahrenheit (-17 to 60 degrees Centigrade). Avoid storage in automobiles during
seasonal temperature extremes. Automobile interior temperatures can exceed 160
degree Fahrenheit (70 degrees Centigrade) in summer. If the Pico Projector has been
exposed to extremely hot, cold or humid conditions, allow it to stand at room
temperature for 30 minutes before use. Extended use of the Pico in high temperature
environments may cause a reduction in brightness of the projected image.
Troubleshooting Guide
If you are having a problem operating the Pico Projector, first make sure you have set it
up according to the instructions in the Section on Setting Up the Pico Projector. You
13
Page 14

should also check the adjustments and the INPUT connections. Verify that all power is
switched on. Before calling for service, check the troubleshooting suggestions in this
Section.
Problem Solutions
There is no sound from speaker Set volume to a higher setting. Remove stereo plug from
the Audio Out port
Projector heats up excessively Remove blockage from all air vents.
Smartphone/tablet remote Check smartphone/tablet WiFi is connected to the pico
controller does not work projector
14
Page 15

Appendix 1
Product Specifications
Product Specification
Display Technology
Light Source RGB LED
Resolution nHD (640x360)
Brightness (Typical)
Contrast Ratio 1000 : 1
Built in SD Card playing Pdf, Powerpoint, Excel, Word
and USB port Directly for presentation without connecting PC
Rechargable Battery
Speaker Mono 1 W
External Connection
Dimensions / Weight
TI DLP Technology
50 Lumens
Battery capable of running for approx 80mins
USB Host, Sd Card slot, AV in & Audio out
68 (W) x 128 (L) x 18mm (H) / 250g
Power Consumption
Built-in Memory N/A
Max SD-memory
support
USB accessories USB flash drives (not included)
<7W (pico projector only)
32 GB
15
 Loading...