


Tablet PC
User Manual
1

Contents
Contents.............................................................................................................................................. 1
1 Introduction ..................................................................................................................................... 3
1.1 Acknowledgements ......................................................................................................... ... 3
1.2 Precautions ....................................................................................................................... .. 3
1.3 Safety Instructions ............................................................................................................ .. 3
1.4 Abbreviations/Terms .......................................................................................................... . 4
2 Quick Look at MID ........................................................................................................................ . 5
2.1 MID Usage and Preparation............................................................................................... 5
2.2 MID Status and Notification ............................................................................................. .. 5
3 QuickStart ....................................................................................................................................... 7
3.1 Functions of Keys ............................................................................................................ ... 7
3.2 Power On & Power Off ....................................................................................................... 7
3.3 Switch On/Off Screen ......................................................................................................... 8
3.4 Application of Touch Screen ............................................................................................... 8
3.5 Home Screen..................................................................................................................... 11
3.6 AccessApplication ............................................................................................................ 16
3.7 USB Connection ............................................................................................................ ... 17
3.8 Input Text ........................................................................................................................ ... 18
3.9 Tips and Tricks ............................................................................................................... ... 19
4 Basic Settings ............................................................................................................................... 21
4.1 SIM Management ............................................................................................................ . 21
4.2 Wi-Fi & WLAN ................................................................................................................... 24
4.3 Bluetooth ............................................................................................................................ 26
4.4 Data Usage Status ......................................................................................................... .. 30
4.5 More................................................................................................................................. .. 31
4.6 Audio Profiles .................................................................................................................. .. 38
4.7 Display ............................................................................................................................. .. 42
4.8 Storage ............................................................................................................................. . 46
4.9 Battery ................................................................................................................................ 49
4.10Apps ................................................................................................................................. 50
4.11 Location Access ............................................................................................................ .. 52
4.12 Security ............................................................................................................................ 53
4.13 Language and Input Method ....................................................................................... .. 55
4.14 Backup and Reset .......................................................................................................... 58
4.15Accounts and Sync ......................................................................................................... 59
4.16 Data and Time............................................................................................................... .. 61
4.17 Scheduled Power On & Off .......................................................................................... . 62
4.18Accessibility .................................................................................................................. ... 63
4.19 Developer Options .......................................................................................................... 64
4.20About Tablet ..................................................................................................................... 65
1

1 Introduction
1.1 Acknowledgements
Thank you very much for purchasing the product! MT-786 is a high-definition tablet
PC
with 7.85inch IPS screen. MT-786 features the master chip of MT8382 with quad-core
Cortex-A7 processor and basic frequency of 1.3GHz. The product is based on the Android
4.2
operating system.
The product’s built-in functions of Wi-Fi, BT, GPS, FM, 2G and 3G offer easy
connection to wireless network to freely surf the Internet whenever and wherever possible. The
built-in high-precision GPS module can realize navigation function by installing a map app. In
addition, the built-in kinds of sensors provide you brand-new operation and entertainment
experience. The built-in camera, shooting and other functions lead e-consumer to a
completely new age of handheld Internet entertainment.
The Manual systematically introduces multi-functions, application skills and
precautions of the mobile Internet device (MID). Please read the Manual carefully before
using the MID.
1.2 Precautions
Maintenance
Please keep the device dry. Do not expose the device, battery and charger to
water or moisture, or use wet hand to operate the device/charger to avoid short
circuit of device, failure arising from corrosion and electric shock.
Do not let the device, battery and charger be subjected to strong shock or
shake to avoid failure of the device, battery and charger.
Do not place the device, battery and charger at places with too low or too high
temperatures. Otherwise, it may cause failure of the device, battery or charger.
Do not strike, throw or prick the MID to avoid unintentional fall, crush or bend.
Do not dismantle the device and its accessories arbitrarily. Otherwise, the
device and its accessories will be deprived of warranty.
1.3 Safety Instructions
Please peruse the instructions in the section prior to using the MID, and make sure
3
your children understand all these instructions. For more details, please refer to the Safety
Instructions and Precautions.
Do not use the MID when driving for safety concerns.
Please conform to the relevant rules and regulations in medical premises.
Please shut down the MID when staying around medical facilities.
Please shut down the MID or activate the airplane mode when boarding an
airplane to prevent wireless signals from interfering in the airplane’s control
signal.
Please shut down the MID when a high-precision electronic device is
working nearby. Otherwise, it may cause failure of the electronic device.
Do not dismantle the MID and its accessories arbitrarily. Only the
authorized agencies are able to repair the MID.
Please keep the MID away from any magnetic equipment. Otherwise, the
radiation emitted by the MID will clear the information stored in the
magnetic equipment.
Do not use the MID at places with high temperature or inflammable gas, e.g.
around a gas station.
Please keep the MID and its accessories out of reach of children. Do not let
children use the MID without supervision.
Please comply with the relevant laws and regulations, and respect others’
privacy and legal rights when operating the MID.
Please strictly follow the relevant instructions contained in the Manual when
using a USB data line so as to avoid damaging the MID or PC.
Do not use the MID in bathroom or any other moist circumstances. Always
avoid soaking or flushing the MID.
1.4 Abbreviations/Terms
Abbreviation/
Full Name Description
Term
MID Mobile Internet Device Mobile Internet Terminal
Wi-Fi Wireless Fidelity WLAN based on IEEE 802.11b standard
TF TransFlash Also named Micro SD, a super-mini memory
card
4
2 Quick Look at MID
2.1 MID Usage and Preparation
Charge Battery
Please charge the battery prior to initial use of the MID.
1. Charge the MID with a power adapter.
2. Check the power indicator.
Flashing red light indicates the warning that battery level is lower than 10%; red light
indicates that the battery is charging when battery level is higher than 10%; green light
indicates that battery level is full.
2.2 MID Status and Notification
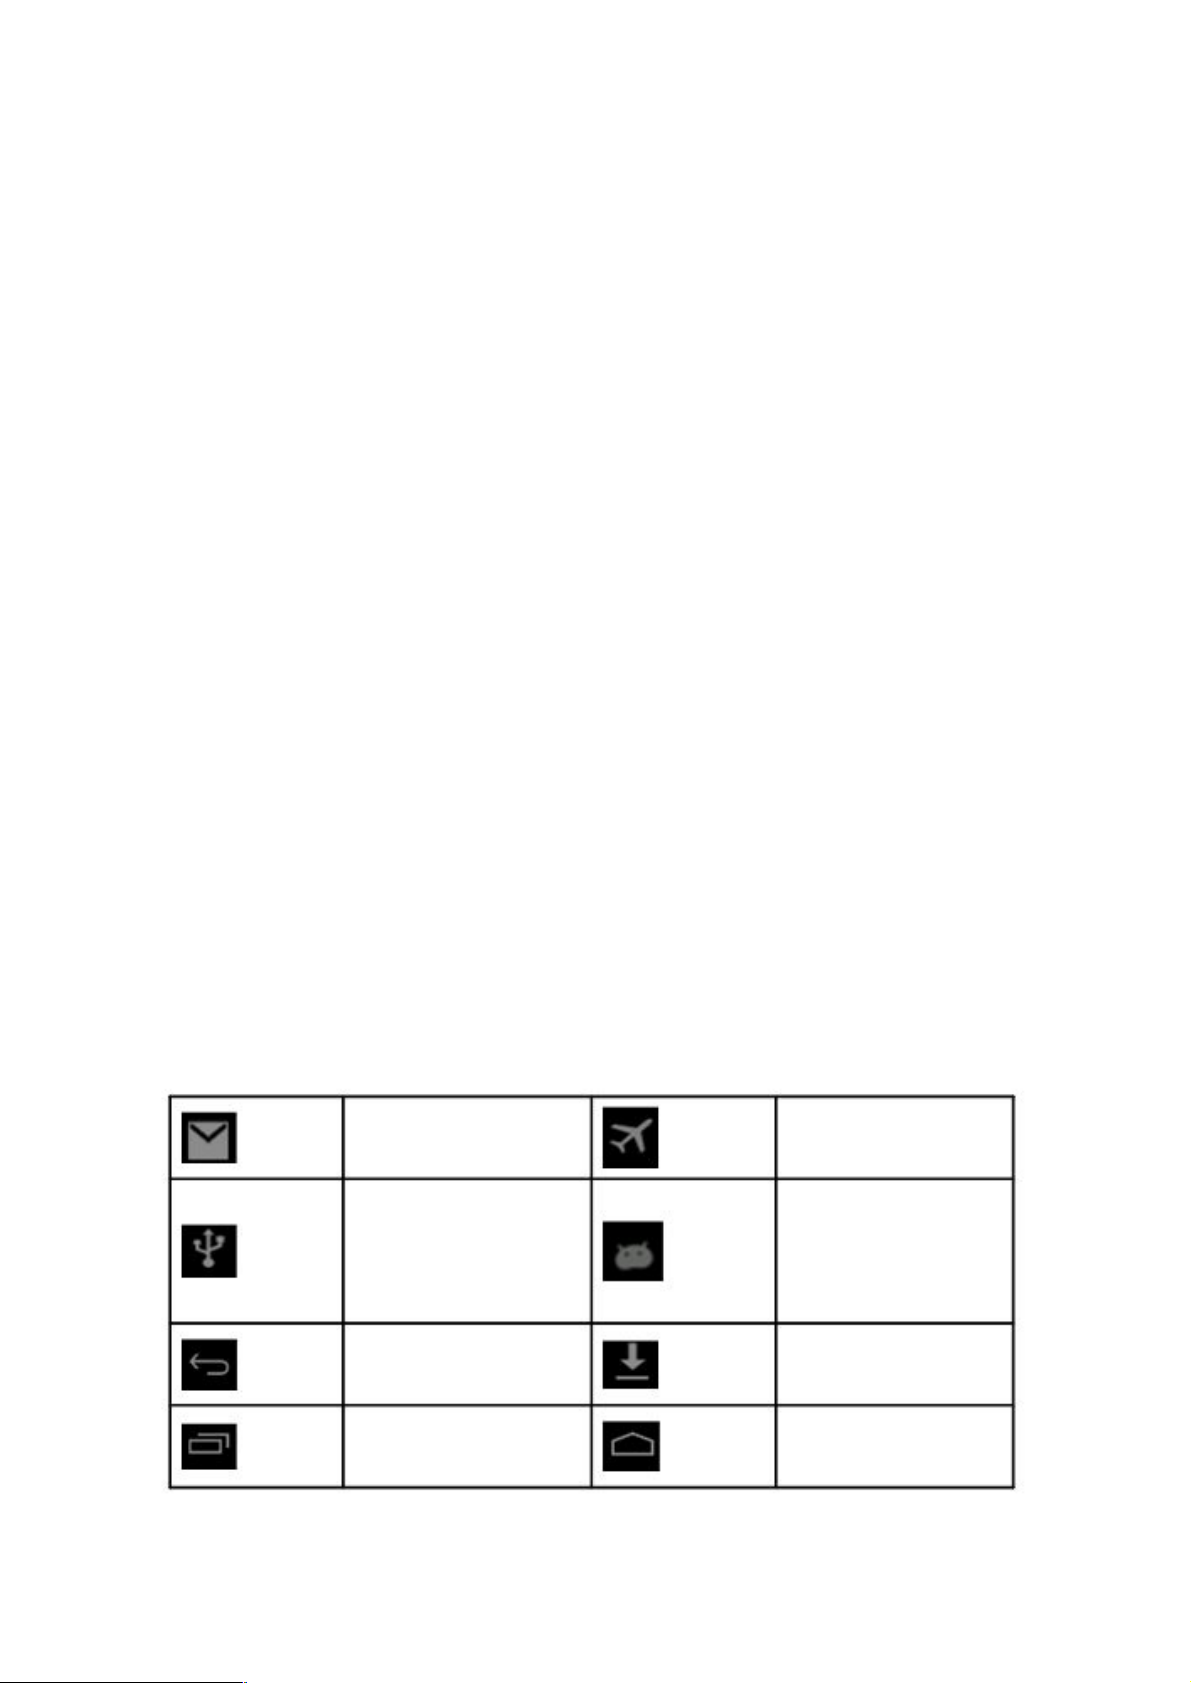
Notification Icons
When a prompt message is displayed on your notification panel, click the column box and
slide to open the notification list,. Click the option to be checked to view details. And
then it’s
available to click and slide the message box upward to close the message
window. The
status bar icons are explained below.
New Mail Airplane Mode
USB Debugging
USB Connected
Connected
Back
Downloading
Display Recent Apps Home
5

Battery Level
Connected to Wi-Fi
Picture 2.1
Notification Panel
The notification bar will report new mails, Wi-Fi activation and ongoing operations. You can
open the notification panel to view details.
Open Notification Panel
When a new notification icon is displayed on the notification bar, please click the
notification bar to open the notification panel.
6
3 QuickStart
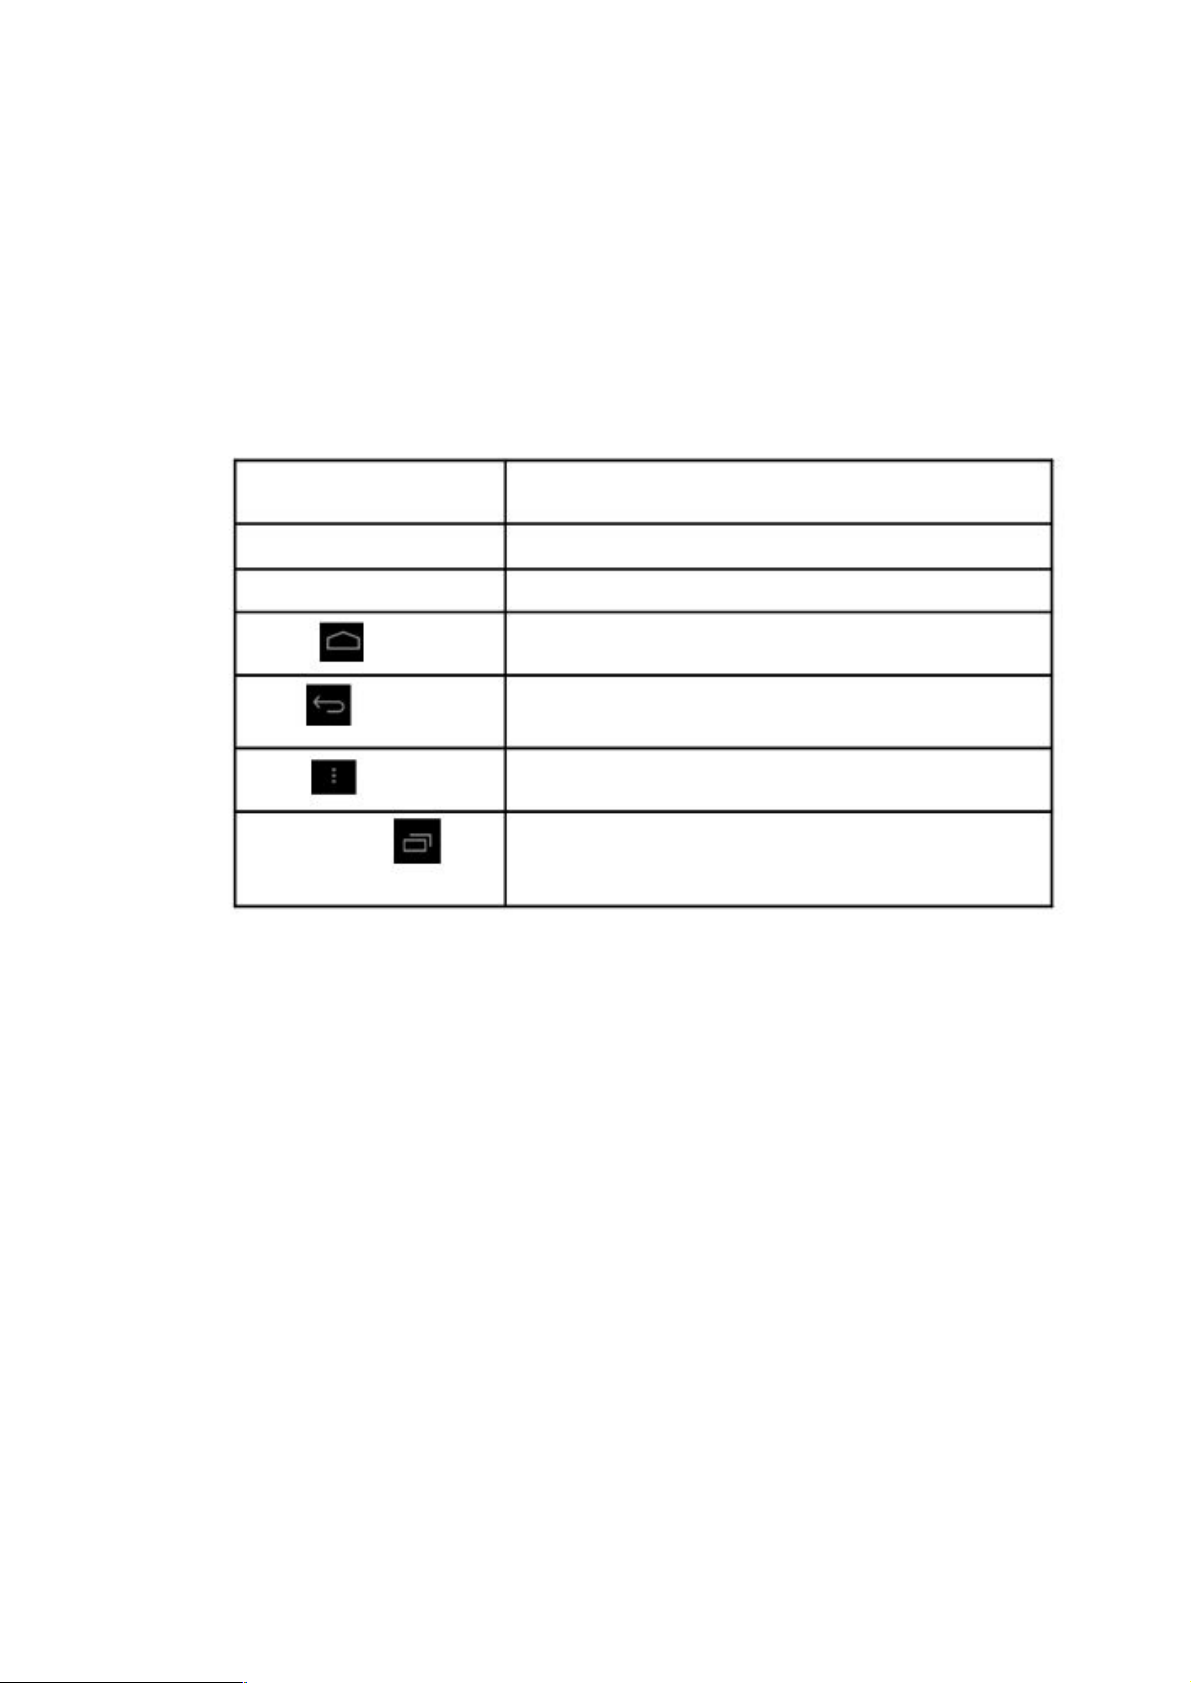
3.1 Functions of Keys
Introduction to Functions:
Power
Volume Up
Volume Down
HOME
Back
Menu
Recent Apps
Short-press to activate sleep/wake mode, long-press to
activate Power On & Power Off functions
Turn up the MID
Turn down the MID
Make a click in any interfaces to go back to main
interface
Make a click in any interfaces to go back to parent
directory
The key will be displayed in apps of the Menu key
Record the user’s browsing history
3.2 Power On & Power Off
Power On
The startup screen will be displayed after you hold the POWER key for three
seconds. The system will turn to the screen-lock mode after activation. Then you need to
unlock the screen.
Power Off
1. Power-off options will pop up after you hold the POWER key.
2. Power-off options include Mute Mode, Reboot, Airplane Mode and Power Off. 3.
Just click on the Power Off option.
7
3.3 Switch On/Off Screen
Screen will be switched off automatically in idle condition
1. After idling awhile, the screen will be switched off automatically to save power.
2. Press the POWER key when the screen is in Switched On mode and it will be
switched off immediately.
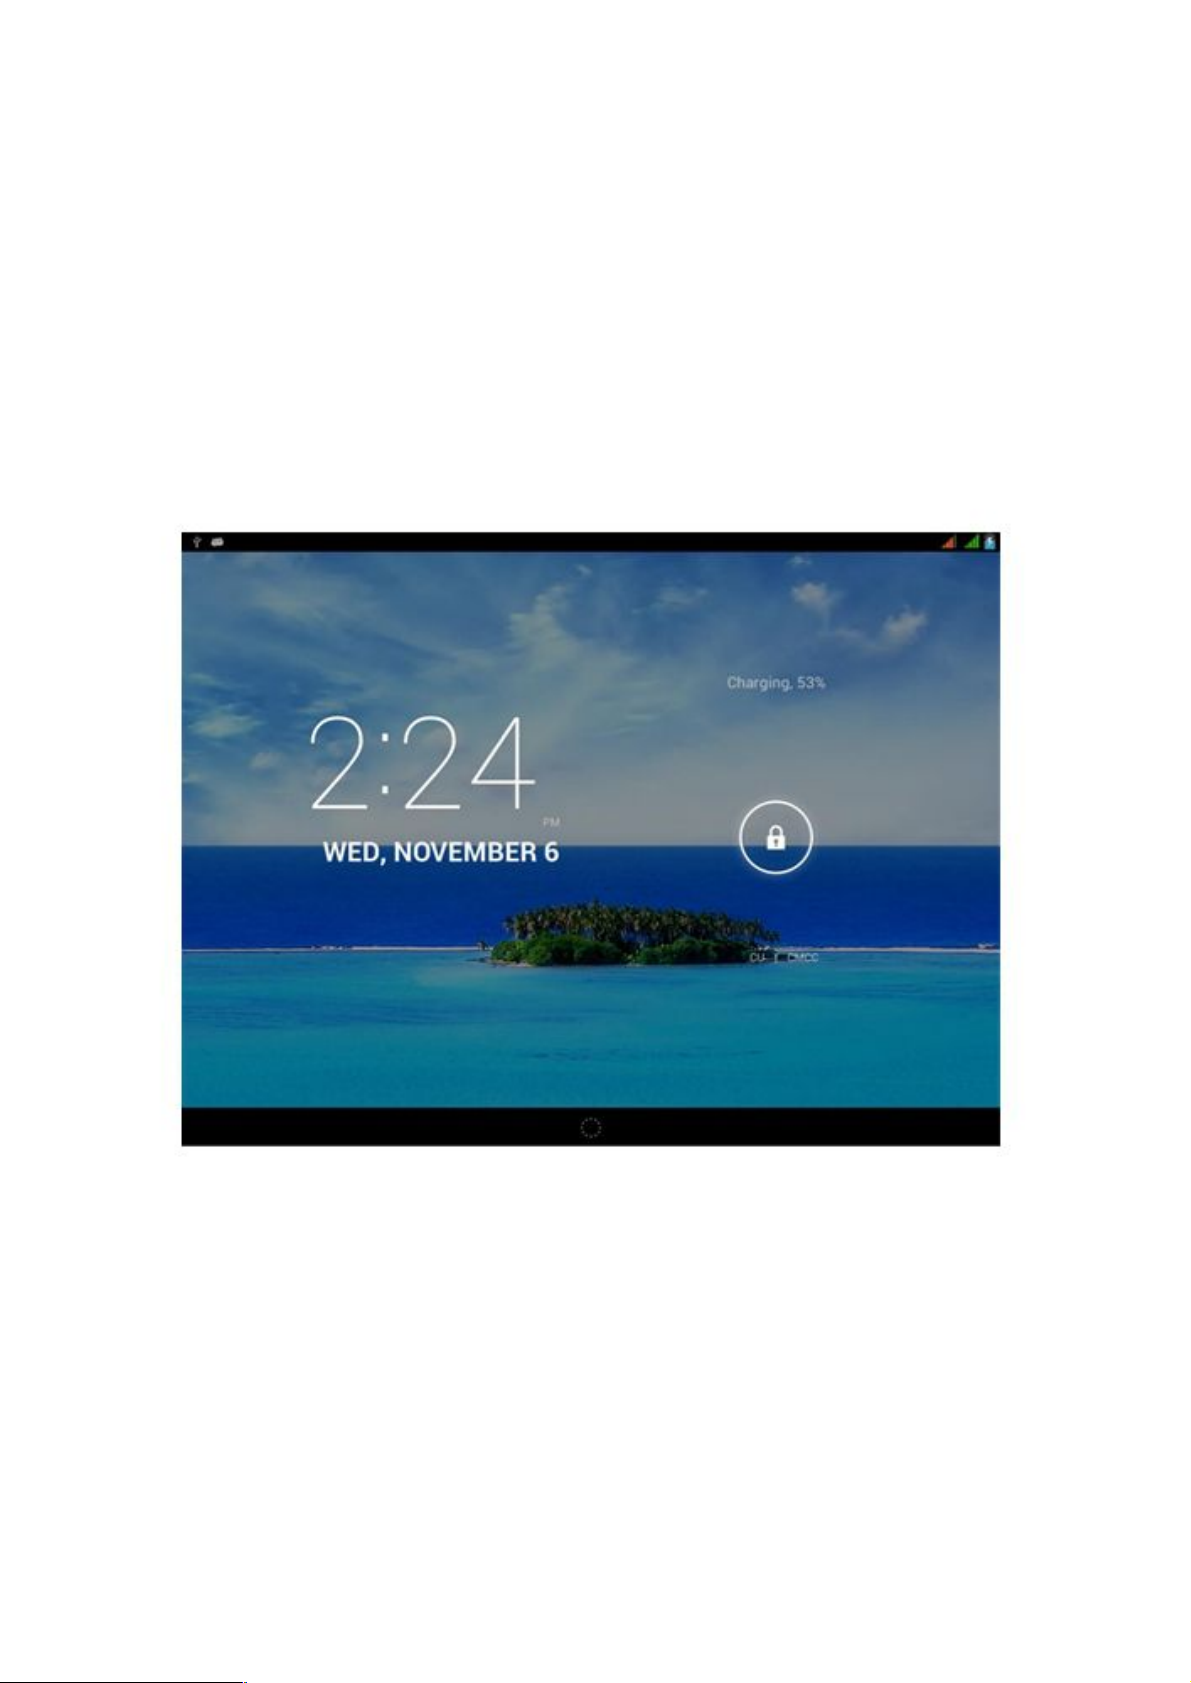
Switch on the screen under Switched Off mode
Press the POWER key to switch on the screen in Switched Off mode. The screen will
proceed to the Lock mode after being switched on. Then click the Mini Lock icon on the
screen to display the picture as shown in Picture 3.1. Slide to unlock the screen.
Picture 3.1
3.4 Application of Touch Screen
Operating Modes in MID
There are a variety of modes to browse the Home screen, Menu and apps on your MID.
Click
8

When you want to input information through screen keyboard or select apps and other items
on the main UI, just touch and click the target on the screen.
Hold
If you want to activate available options of an item, e.g. textbox or website links, or
shortcut on main UI and shift main program menu, just hold the icon of the item.
Quick Slide or Slide
Quick Slide or Slide indicates the quick action of vertical or horizontal drag-and-drop by a
finger on the screen.
Drag-and-drop
Before you start a drag-and-drop action, you must hold the item hard with your finger and
do not release your finger until the specific item is dragged to the right place.
Rotation
For most of pictures, lateral rotation of the MID during operations like text input and
music entertainment will automatically turn the screen to a vertical position from being
horizontal,
View Notification Bar
Drag downward after making a click in the upper right-hand corner of the MID, you can view
the system task notification, as shown in Picture 3.2.
9
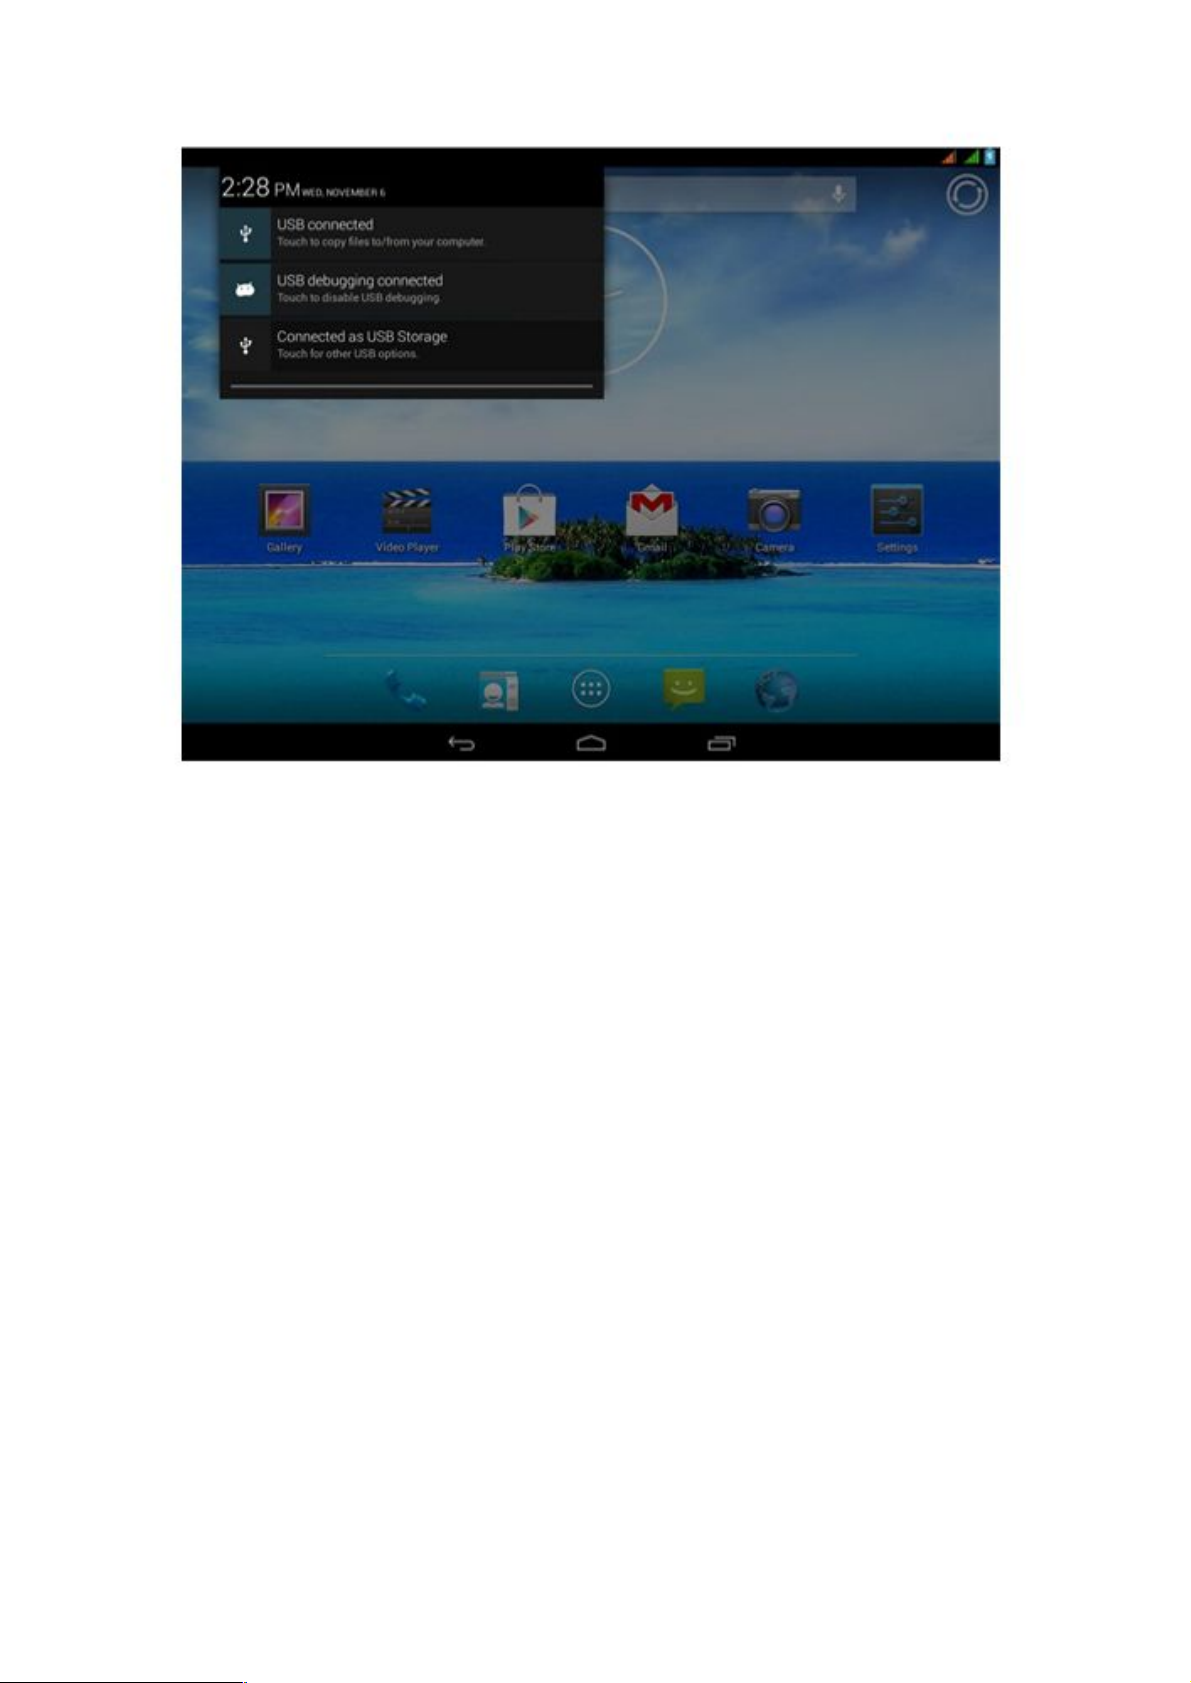
Picture 3.2
View Basic System Infomation
Drag downward after making a click on the upper left-hand corner of the MID. Then you can
view basic system infomation. You can view or revise information as required through all these
shortcuts, as shown in Picture 3.3.
10
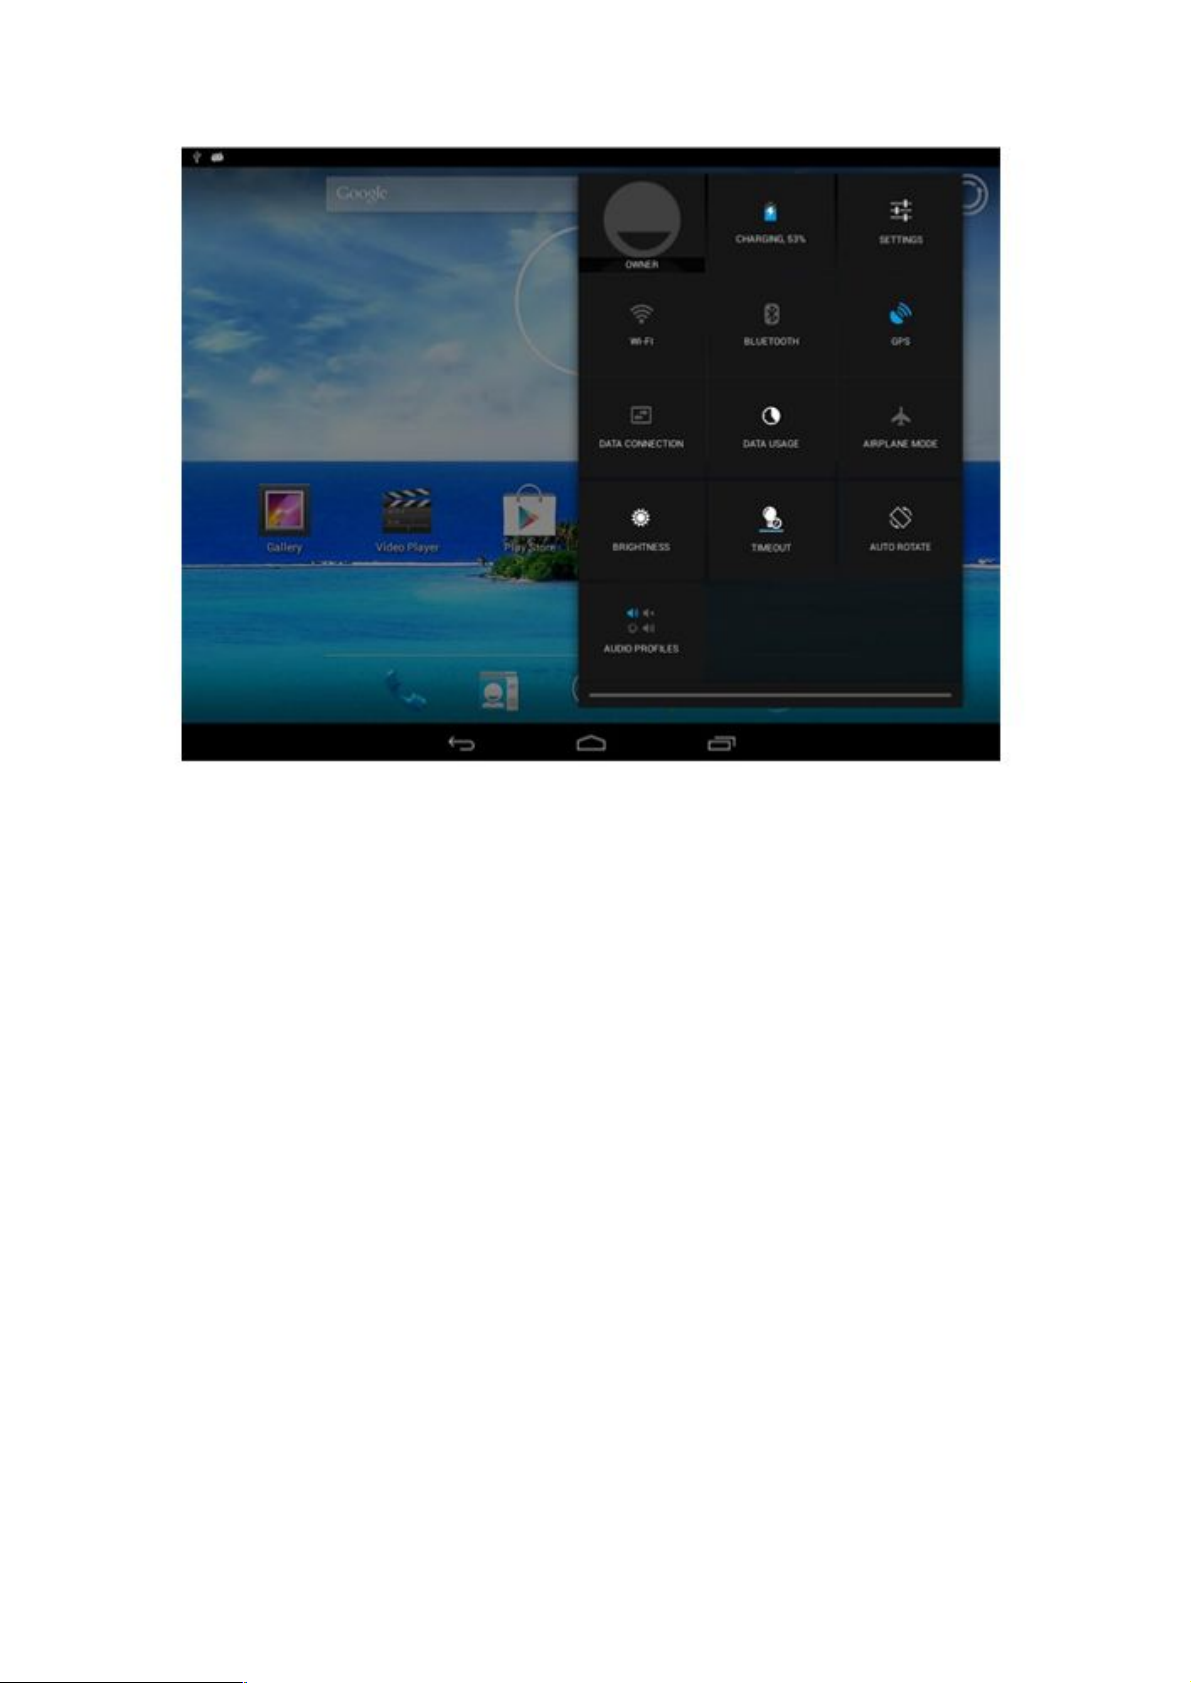
Picture 3.3
3.5 Home Screen
The Home screen is as shown in Picture 3.4. You can use apps and shortcuts, and
customize the wallpaper of the main UI (user inferface) by touching any blank space of
the screen.
11
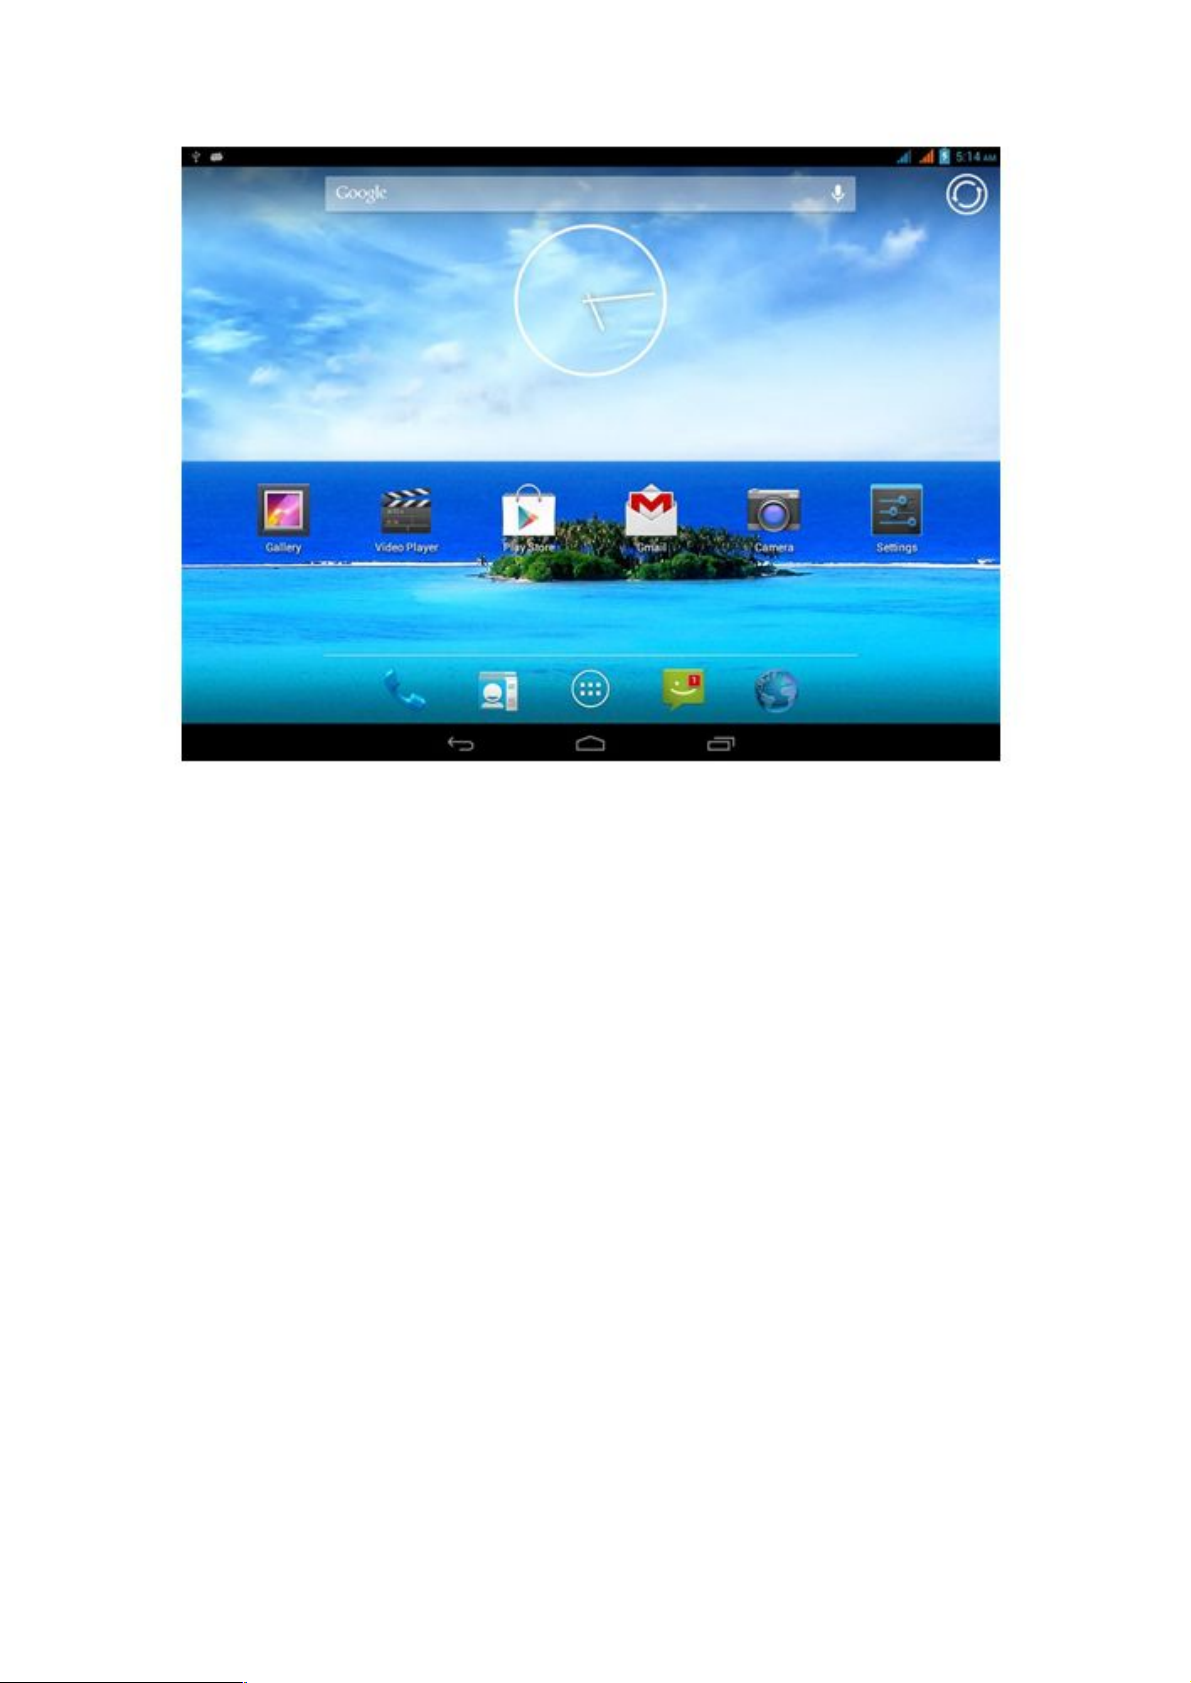
Picture 3.4
Extensible Home Screen
The Home screen or main UI can be extended beyond the screen itself, so as to
provide more space for you to accommodate additional shortcuts, widgets, etc.
Press at any blank space of the main UI and fastly slide to right or left. Then you can reach
the left or right side of the Home screen. As shown in Picture 3.5, there are more than
two (2) extensible pictures on the main UI.
12
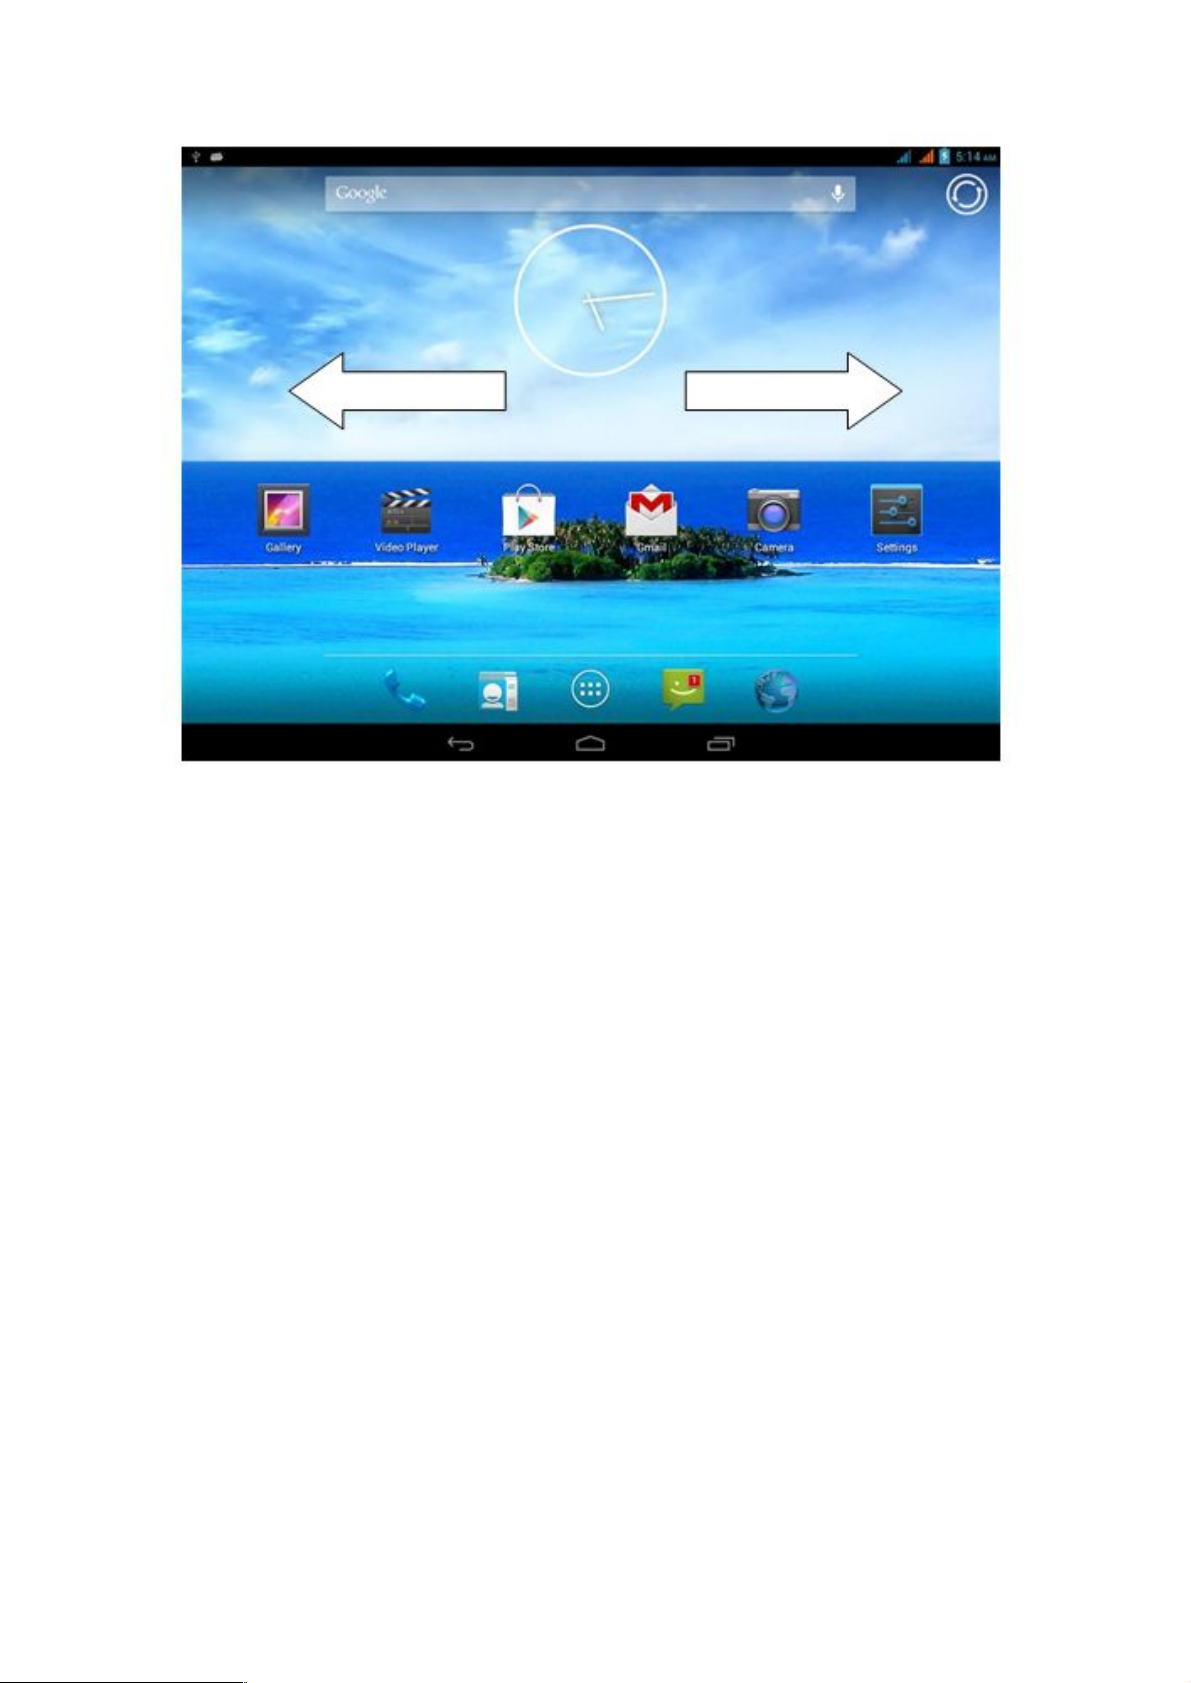
Picture 3.5
Manage Shortcut Icons of Apps on Desktop
Create Folder Icon on Desktop
1. Drag all icons together to stack on a master icon (or converge them
different icons), as shown in Picture 3.6.
2. Then click the master icon where many shorcuts are overlayed and
unfold all the app icons, as shown in Picture 3.7.
Click the lower edge of the black box to display the position of "Unnamed Folder". The hidden
keyboard will pop up for you to rename the folder (as with Apple’s IOS system). In addition, you
can hold the app icons to adjust their positions.
13
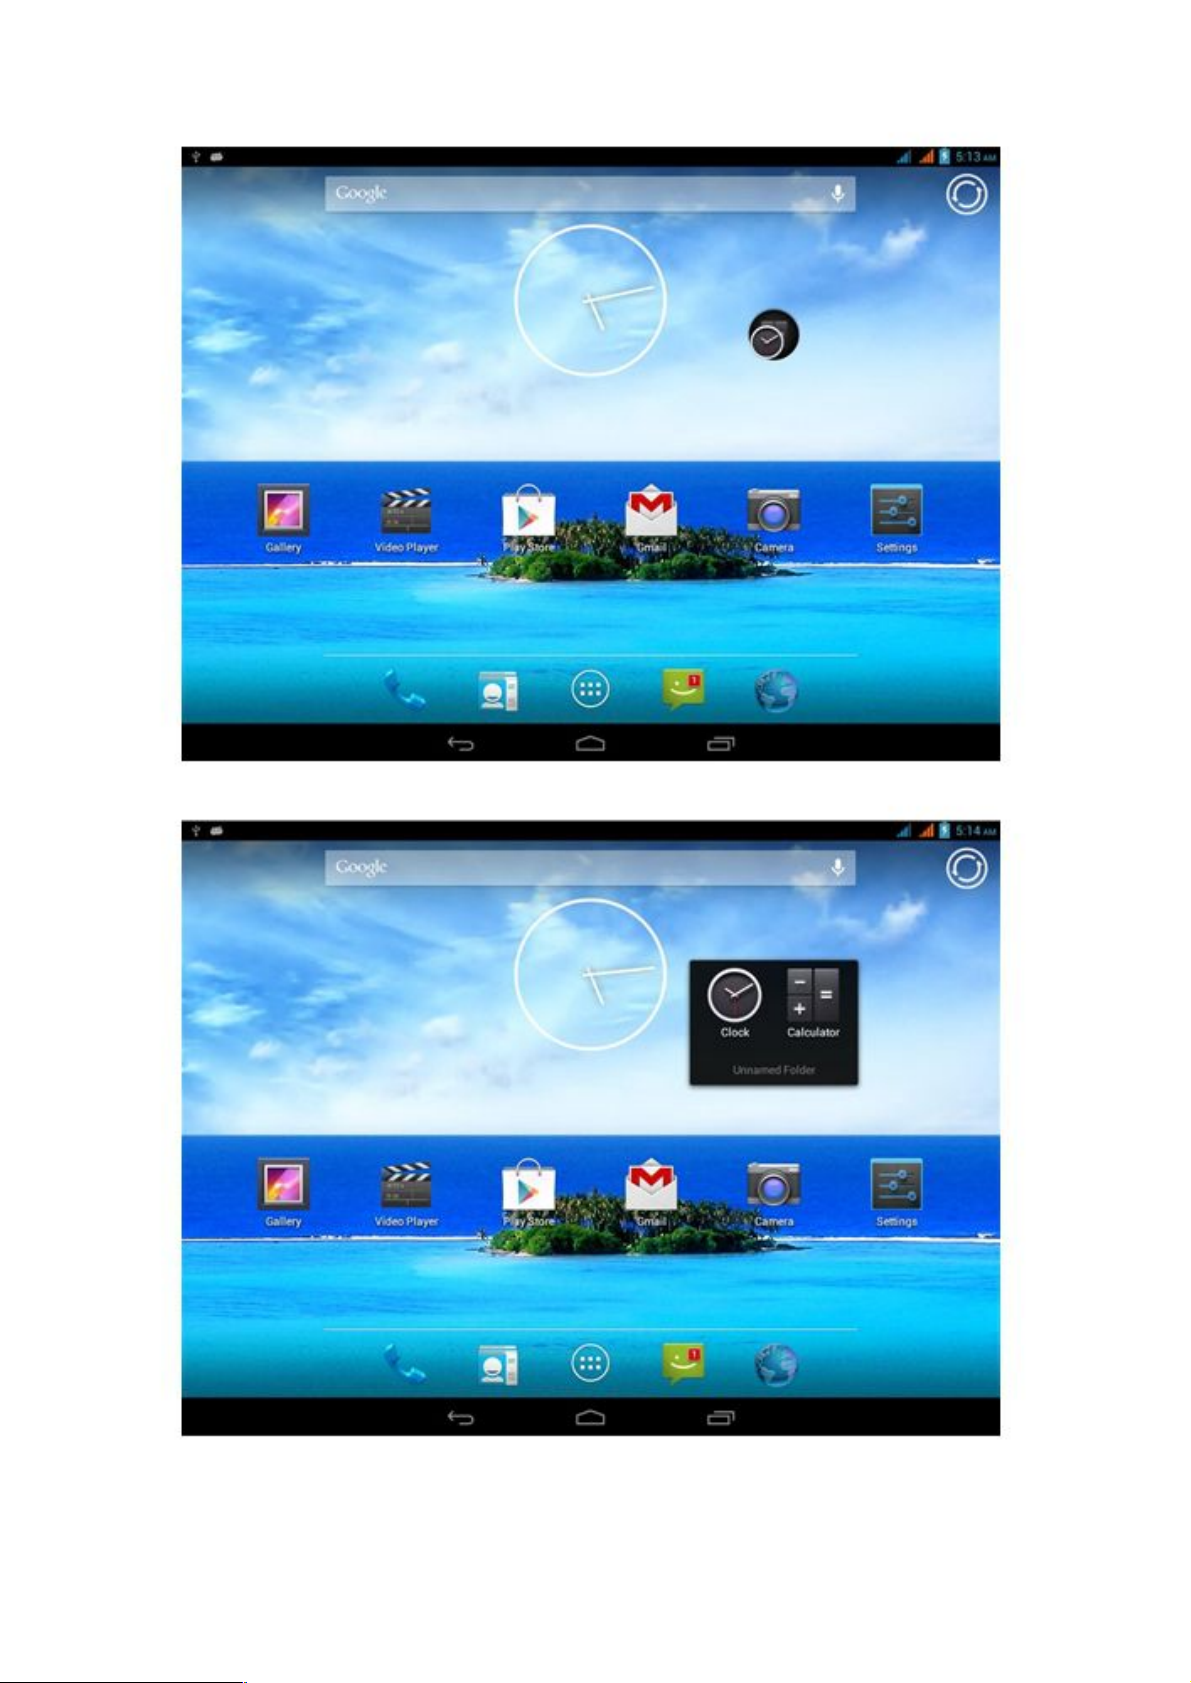
Picture 3.6
Picture 3.7
14

Delete Icon on Desktop
1. Hold the icon to be deleted until the icon will be displayed at the top of
the screen.
2. Drag the icon to the top of the icon to be deleted. After the icon
turns red, release your finger to delete it.
Replace Desktop Wallpaper
1. On the main UI, keep touching the blank space of the Home screen. Then
a window will pop up to allow you to set wallpaper.
2.Click gallery or wallpaper gallery to select a picture. Voice
Search
1. Touch the MIC icon
2. Select from the pop-up Google options as required.
3. Set a language in the pop-up voice search box as prompted. Click “OK”.
4. Speak to the MIC what you want to search, and the browser will open
search results list.
Note: Please make sure your MID is connected to the Internet before making a
voice search.
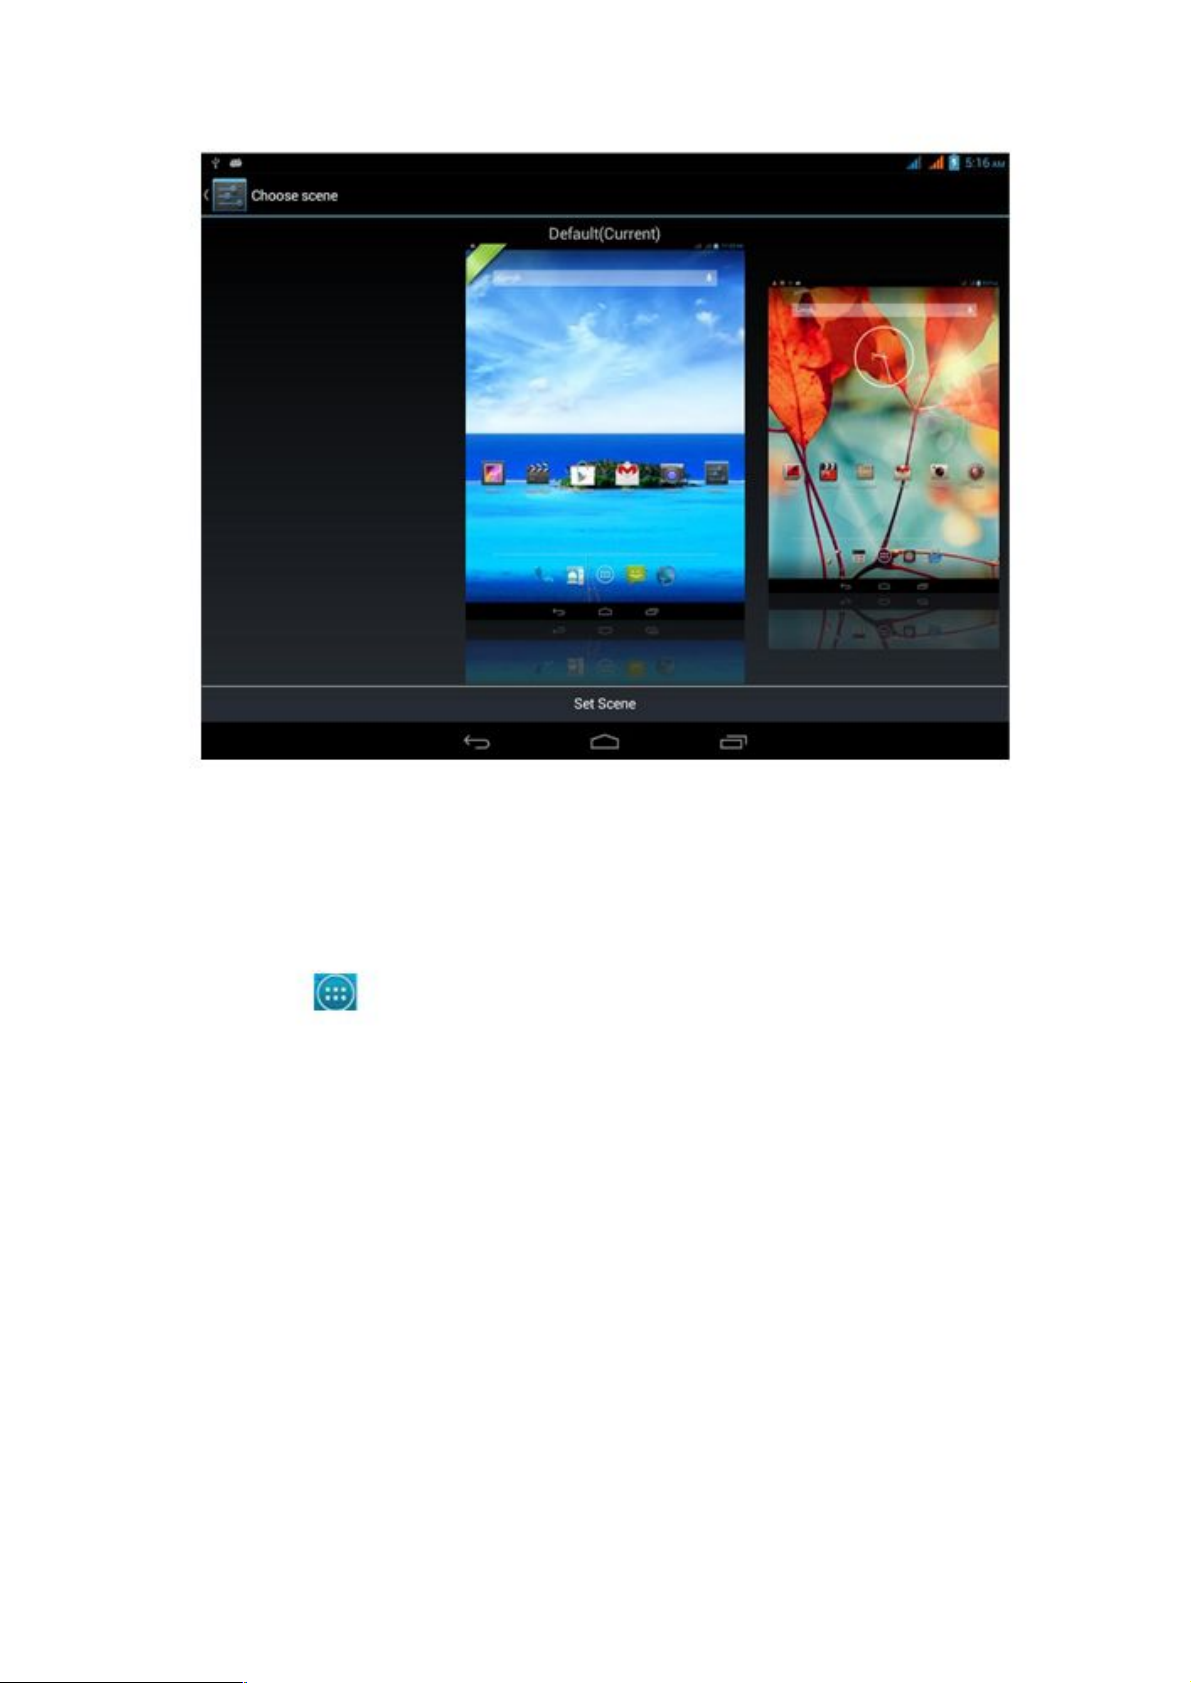
Set Scene
1. Touch the icon in the upper right-hand corner-hand corner of Picture
3.6.
2. Proceed to scene selection interface to find two available scenes. Slide to the
scene you prefer and then click “Set Scene” at the bottom to complete scene
replacement, as shown in Picture 3.8.
15
Picture 3.8
3.6 Access Application
Click the key at lower middle of Picture 3.4 to proceed to main menu interface, as
shown in Picture 3.9. Select the app to be accessed.
16

Picture 3.9
3.7 USB Connection
MID Storage Settings
You must set storage mode of the MID before transfer files:
1. Connect the MID with PC by USB cable. Prompt will be displayed in notification
bar.
2. Open notification panel; please refer to Article 2.2 -MID Status and Notification
for details of how to open panel.
3. In the notification panel, click “USB Connected” and then click “Open USB
Storage Device”, as shown in Picture 3.10.
4. Then, the USB connection is completed.
17

Picture 3.10
Copy Files to Memory Card
1. Connect the MID with PC by USB cable.
2. Realize successful connection to PC in line with “MID Storage Settings”.
3. Turn on your PC and check the information contained in “Removable Disk (x)”
from “My Computer”.
4. Find the files to be copied and then copy them to “Removable Disk (x)”.
5. After copy completes, just click “Close USB Storage Device” to uninstall the MID.
Note:
When your MID is connecting with USB cable, if you want to open USB
storage device, you won’t be able to read memory card through the MID; just
disconnect with USB to access memory card in the MID.
3.8 Input Text
Use Screen Keyboard
When you activate application or select the edit box to be input with characters or
numbers , the Android keyboard will be displayed.
Select Input Method
(1)Click “Settings”.
18
(2)Click “Language & Input Method”.
(3)All input methods installed on your MID will be listed at text setting area. (4)
Check at the end of preferred input method.
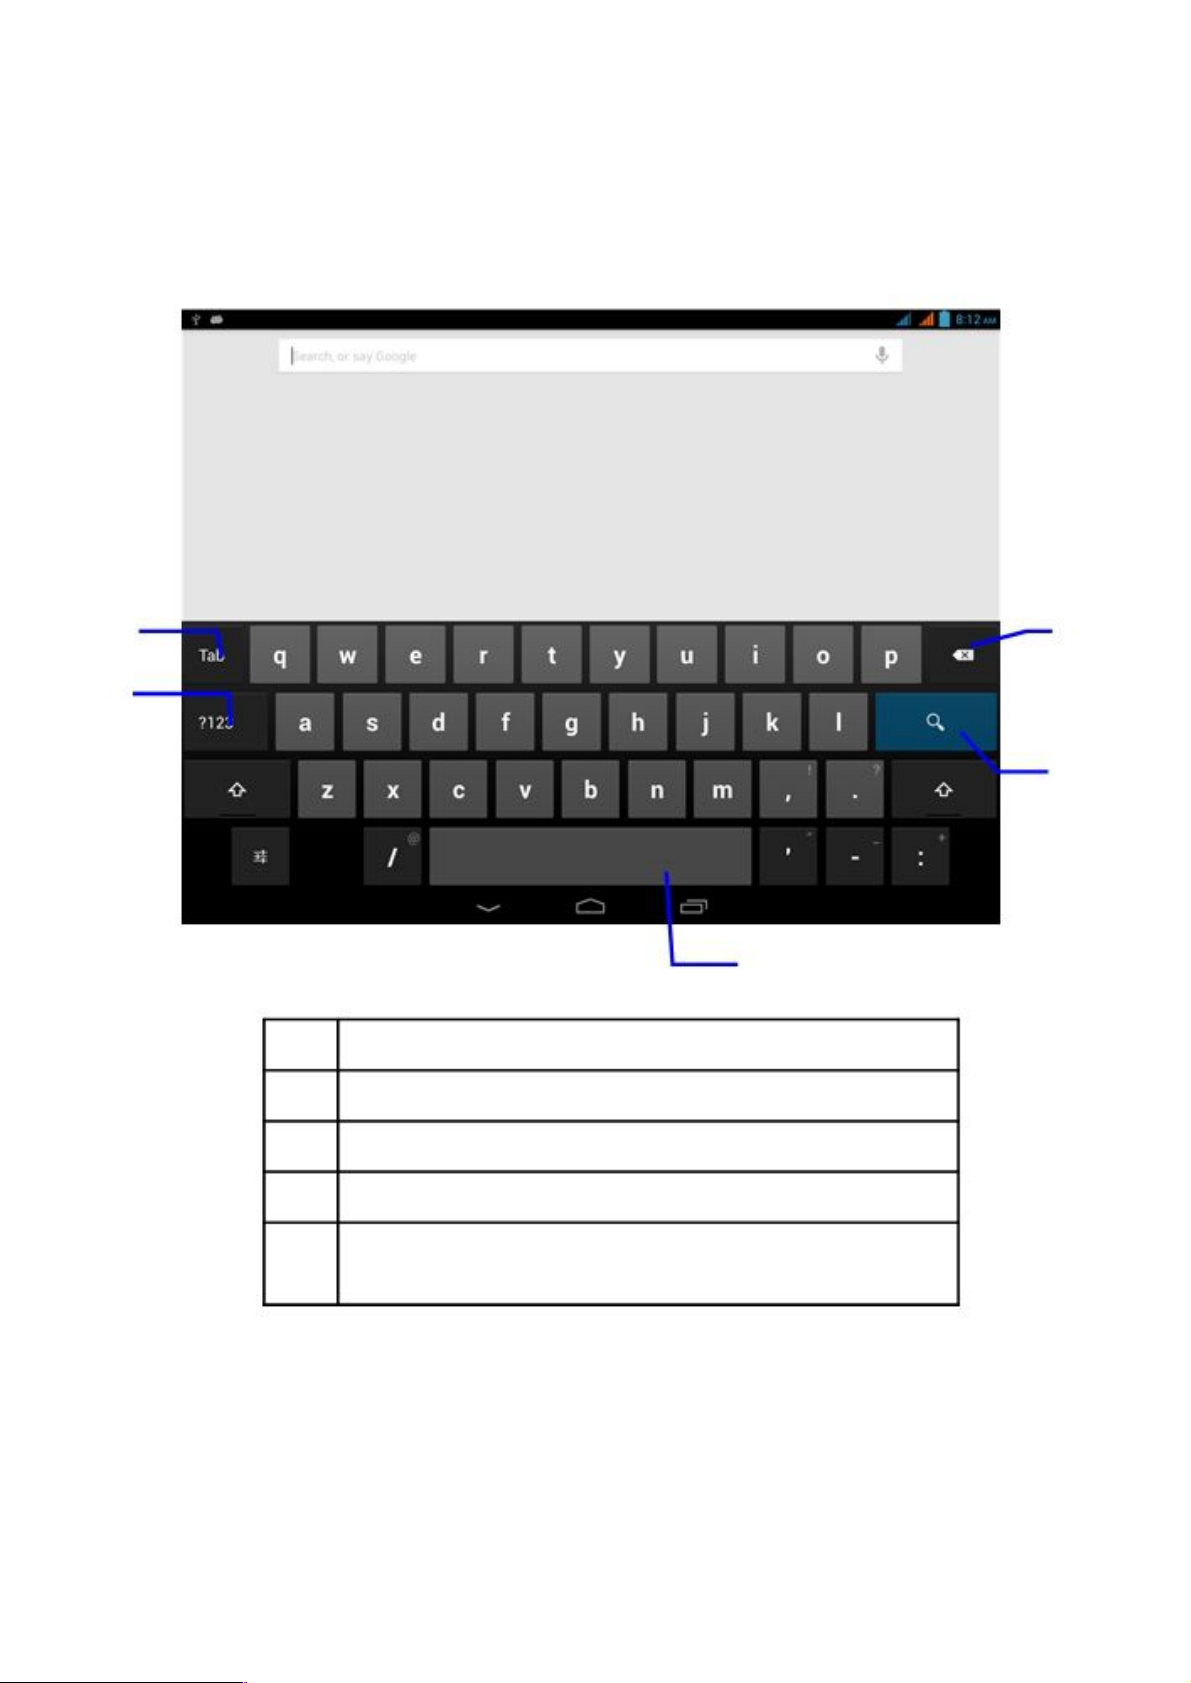
Use and Switch Input Method
① ⑤
②
④
Picture 3.11
③
1
Caps lock
2 Swithch to number input mode
3 Click to insert whitespace
4 Click to perform input operation
5 Delete the character at left side of cursor. Click and hold to
delete all characters at left side of cursor.
3.9 Tips and Tricks
Access Widgets Interface
19

Click on “Widgets” at the top of application interface and go to Widgets
interface. Keep holding any widget to create its shortcut on the desktop. Click
the shortcut on the desktop and access the corresponding app fast.
Create Shortcut Icon of Apps on Desktop
In apps or widgets interface, keep touching any icon will lead you to the desktop
automatically. By draging and holding the icon, you can put it at any position on the
desktop.
Note: If the target position of drag-and-drop has no space, the widget will fail to be
added to the Home screen.
20
4 Basic Settings
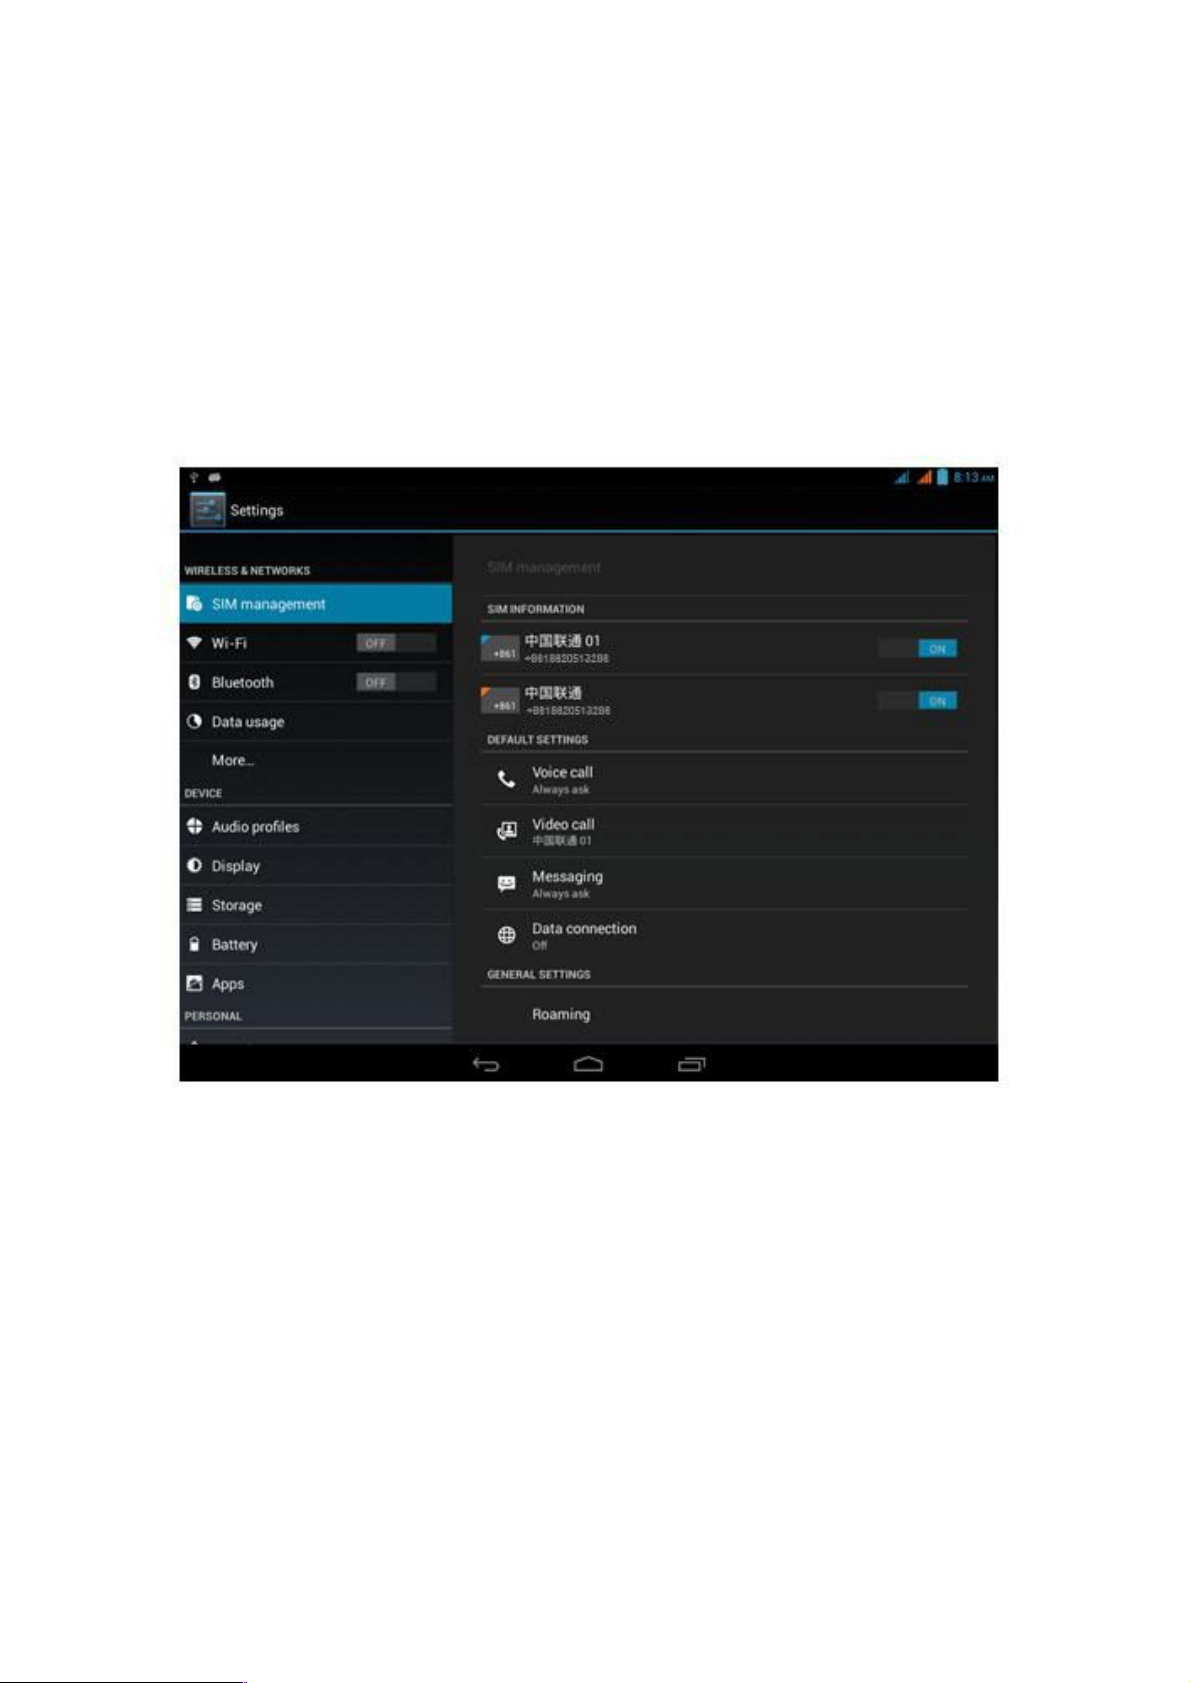
4.1 SIM Management
4.1-1 Voice Call
Select “Settings” on the main menu interface and select “SIM Management”, as
shown in Picture 4.1.
Picture 4.1
Click “Voice Call” and select the default SIM card for voice calls, as shown in
Picture 4.2.
21
This tablet pc support voice call with the earphone

Picture 4.2
4.1-2 Video Call
Select “Settings” on the main menu interface and select “SIM Management”.
Click “Video Call” and select the default SIM card for video calls, as shown in Picture 4.3.
22

Picture 4.3
4.1-3 Messaging
Select “Settings” in main menu interface and select “SIM Management”. Click
“Messaging” and select the default SIM card for messaging, as shown in Picture 4.4.
Picture 4.4
4.1-4 Data Connection
Select “Settings” on main menu interface and select “SIM Management”. Click
“Data Connection” and select the default SIM card for data reception and
transmission, as shown in Picture 4.5.
23

Picture 4.5
4.2 Wi-Fi & WLAN
Establish Wi-Fi Connection
1. Select “Settings” on main menu interface.
2. Click Wi-Fi, and the MID will automatically scan the available Wi-Fi wireless
networks, as shown in Picture 4.6.
3. Select the Wi-Fi network for connection. The “Enter Password” window will
pop up in case of encrypted network. First enter the correct password and
then click “Connect”.
24

Picture 4.6
2. Add Network
1. Click the icon in the upper right-hand corner of Picture 4.6, as shown in
Picture 4.7.
25

Picture 4.7
2. Input network SSID, i.e. the name of wireless network, and select “Save”.
3. Network Notification
After the “Network Notification” is clicked to display Wi-Fi signal, the icon in the
upper left-hand corner will prompt you that WLAN network is available.
4. Keep WLAN on During Sleep.
1. Click the icon in the upper right-hand corner of Picture 4.6 and select
“Advanced”.
2. Click to choose the status “Keep WLAN on during sleep” as shown in Picture
4.8.
Picture 4.8
4.3 Bluetooth
Application of Bluetooth function
1. Select “Settings” in main menu interface.
2. Click “Bluetooth” to turn on Bluetooth function.
3. Click “Search for Devices” in the upper right-hand corner, and the MID will
automatically search for nearby Bluetooth devices, as shown in Picture 4.9.
26

Picture 4.9
4. Click the available devices and the “Bluetooth Pairing Request” window will pop
up. Just click the “Pair”, as shown in Picture 4.10.
Picture 4.10
27

5. After paired, find the machine ID to be edited in the paired device, click the
icon
to proceed to the interface as shown in Picture 4.11. Then, you can perform the required
operations.
Picture 4.11
Bluetooth Settings
1. Rename Tablet
Click the icon in the upper right-hand corner of Picture 4.9, as shown in
Picture 4.12, select “Rename Tablet” to change name.
28

Picture 4.12
2. Settings of Visibility Timeout
Select “Visibility timeout” in Picture 4.12 to select the preferred time settings, as
shown in Picture 4.13 (Note: Visibility timeout refers to the time when Bluetooth
is visible).
29

Picture 4.13
3. Show Received Files
Select “Show received files” in Picture 4.12 to view the record of
downloaded and uploaded files.
4. Advanced Settings of Bluetooth
Select “Advanced settings” in Picture 4.12 to proceed to Picture 4.14.
Picture 4.14
1. File Transfer Service
Turn on “FTP server”, namely allow supporting connection with
Bluetooth devices of FTP client to realize access and operation to server
files.
2. Bluetooth Remote Sensor
Turn on “Bluetooth Remote Sensor”. When two Bluetooth devices stay
afar or their connection interrupts, Bluetooth devices will make a voice
prompt.
4.4 Data Usage Status
Check data usage status of Mobile and Wi-Fi, as shown in Picture 4.15.
30

Picture 4.15
4.5 More...
4.5-1 Airplane Mode
Airplane mode is the module to fast turn off Wi-Fi and GSM card functions. When
activates the Airplane mode, Wi-Fi and GSM signals will be shielded. After turning off
airplane mode, Wi-Fi and GSM modules will return to normal.
4.5-2 VPN
Open VPN and click the key
in the upper right-hand corner, as shown in
Picture 4.16. Input name and fill in the corresponding server address.
31

Picture 4.16
Click the created VPN, as shown in Picture 4.17. Input the purchased VPN account and
password, and then click “Connect”.
Picture 4.17
32

4.5-3 Tethering and Portable Hotspot
1. WLAN Hotspot
1. Select “Settings” on the main menu interface.
2. After making sure of connection to Wi-Fi, click the “More…” option and
open
“Tethering and Portable Hotspot”.
Picture 4.18
33

Picture 4.19
3. Click WLAN hotspot to turn it on, other users can apply for connection to
realize Wi-Fi tethering, as shown in Picture 4.20.
Picture 4.20
34

4. Click “Keep Wi-Fi hotspot on” to set period of keeping WLAN on, as
shown in Picture 4.21.
Picture 4.21
5. Click “Set up Wi-Fi hotspot” to perform password setting and alteration to
the activated Wi-Fi hotspot, as shown in Picture 4.22.
35

Picture 4.22
4.5-4 Mobile Network
Data Connection
After turning on data traffic, it’s applicable to access SG/3G network
through SIM.
3G Service
Click 3G service to select the SIM to be accessed to 3G network and
switch network models.
Preferred Networks
Change different network environments for SIM as per personal
preference.
Access Point Names (APN)
Click “Mobile network settings”, as shown in Picture 4.23.
Picture 4.23
Select “Access Point Names (APN)”.
Select the required connection mode, as shown in Picture 4.24.
36

Picture 4.24
Network Operator
Click “Network Operator” to choose the preferred network operator. In
addition, it’s applicable to manually select network connection type or
automatically choose network connection, as shown in Picture 4.25.
37

Picture 4.25
4.6 Audio Profiles
1 Open “Settings” and click “Audio profiles” to make option, as shown in Picture
4.26.
38

Picture 4.26
2 Click “General” to proceed to Picture 4.27.
Picture 4.27
Vibrate
39

In Picture 4.27, click “Vibrate” to vibrate the MID for incoming calls.
Volumes
In Picture 4.27, click “Volumes” to adjust volume of “Ringtone &
Notification” and “Alarms”, as shown in Picture 4.28.
Picture 4.28
Voice Call Ringtone
In Picture 4.27, click “Voice Call Ringtone” to select voice call
ringtone, as shown in Picture 4.29.
40

Picture 4.29
Video Call Ringtone
In Picture 4.27, click “Video Call Ringtone” to select video call
ringtone, as shown in Picture 4.30.
41

Picture 4.30
(Note: Except for the General mode, the Mute, Meeting and Outdoor modes cannot be
set up or adjusted but for option only.)
4.7 Display
4.7-1 Theme
1. Click “Settings” .
2. Click “Display” and then “Theme”. Four kinds of different styles are available,
as shown in Picture 4.31.
Picture 4.31
4.7-2 Wallpaper
1. Click “Settings” .
2. Click “Display” and then “Wallpaper”.
3.
As per personal reference, choose different wallpapers---live
wallpapers---Gallery (Customized) ---Wallpapers (system-provided) ---Video
wallpapers, as shown in Picture 4.32.
42

Picture 4.32
4.7-3 Brightness
1. Click “Settings”.
2. Click “Display” and then “Brightness”.
3. Brightness settings panel pops up; Drag the slider right and left to adjust
brightness, as shown in Picture 4.33.
43

Picture 4.33
4. After getting the proprt brightness, click “OK”.
Note: Automatic brightness is the light sensation; in different environments with varied light
intensity, the MID will automatically change screen brightness; if you have checked
automatic brightness, you won’t be able to manually adjust brightness until you shut the
function down.
4.7-4 Font Size
Click “Font size” to adjust font size displayed on the MID, as shown in Picture
4.34.
44

Picture 4.34
4.7-5 HDMI Setting
Open “HDMI Setting” after connection to HDMI. Click “Video Resolution” to adjust
resolution.
4.7-6 Sleep
1. Click “Settings”.
2. Click “Display”.
3. Click “Sleep”.
4. Screen timeout settings window pops up to select the preferred stand-by time,
as shown in Picture 4.35.
45

Picture 4.35
4.8 Storage
Open the “Settings” function, and then select “Storage” and “Default Write Disk” to
choose the default write disk when installing new apps.
Check available storage space of the SD card and MID
1. Select “Settings”.
2. Click “Storage” to check available storage space.
1. Internal Storage
(1) System Storage
System storage is the space the MID reserves for system files, as
shown in Picture 4.36. The content contained in the space cannot be
accessed.
46

Picture 4.36
(2) Internal Device
Internal device refers to the MID’s NAND, as shown in Picture 4.37; in
need of checking its storage content, it’s applicable to select “File
Management” on the main menu interface to view details.
47

Picture 4.37
2. SD Card
In Storage interface, you can check total space and available space of
SD
card, and perform operations of “Remove SD card” and “Format SD
Card”, as
shown in Picture 4.38.
48

Picture 4.38
Safely Remove SD Card
1. Click “Settings” .
2. Click “Storage”.
3. Click “Remove SD Card”.
4. Then, you can remove the SD card safely.
Note:
Safe removal of SD card can effectively protect SD card and extend the
service life of SD card.
4.9 Battery
Click “Settings” function, and then select “Battery” to check battery percentage, as
shown in Picture 4.39.
49

Picture 4.39
4.10 Apps
1. Select “Settings” in the apps list.
2. Select the “Apps” item to manage and delete installed apps. Then check the
used space and available space of system storage in the lower left-hand
corner, as shown in Picture 4.40.
50

Picture 4.40
3. Check the used space and available space of internal storage, as shown in
Picture 4.41.
51

Picture 4.41
4. Check the running apps, used space and available space, as shown in Picture
4.42.
Picture 4.42
4.11 Location Access
Click “Settings” function and select “Location Access”, as shown in Picture 4.43.
52

Picture 4.43
1. Access to My Location
After turning on “Access to My Location”, you can position the MID by Wi-Fi or
mobile network.
2. GPS Satellite Positioning
Turn on the “GPS Satellites” function. Set the position of the MID by GPS.
4.12 Security
Set up Screen Lock
It’s applicable to use unlocking pattern or password to lock touch screen, so as to
protect your MID’s privacy.
Note: After setting of screen lock, you are requested to enter unlock code when you
intend to start up or unlock the touch screen each time.
Set up Unlocking Pattern
1. Click “Settings” on the main UI.
2. Click “Security”.
3. Click “Screen Lock”.
4. Select “Pattern” in the pop-up text setting area.
5. Select “Next” as per wizard.
6. Unlocking pattern panel pops up and the pattern shares 9 touch spots.
53

Connect 4 spots vertically, horizontally or diagonally at least, as shown in
Picture 4.44. After completion, release finger from the screen, the system will
record your setup pattern.
7. Click “Continue”.
8. When displaying prompt, retry the screen unlocking pattern and click “OK”.
Picture 4.44
Set up Unlock PIN Code
1. Click “Settings” on the main UI.
2. Click “Security”.
3. Click “Screen Lock”.
4. Select “PIN” in the pop-up text setting area.
5. Enter new PIN code (Numbers) and select “Continue”.
6. Reenter new PIN code and select “OK”.
Set up Unlock Code
1. Click “Settings” on the main UI.
2. Click “Security”.
3. Click “Screen Lock”.
4. Select “Password” in the pop-up text setting area.
5. Enter new password (Letters and numbers) and select “Continue”.
54

6. Reenter new password and select “OK”.
Unknown Sources
1. Click “Settings” on the main UI.
2. Click “Security”.
3. Click “Unknown Sources”, as shown in Picture 4.45.
Picture 4.45
Note: Only when activating unknown sources can realize successful manual
installation of APK file.
4.13 Language and Input Method
Click “Settings” and select “Language and Input”. Select “Language” to change system
default language, as shown in Picture 4.46.
55

Picture 4.46
Click “Settings” and select “Language and Input”. Select “Android Keyboard Settings” and
“Input Language”, as shown in Picture 4.47.
56

Picture 4.47
In input languages interface, uncheck “Use System Language”, and then choose your
preferred default language under active input method, as shown in Picture 4.48.
Picture 4.48
Return to “Language and Input” and click “Default” to choose your favorite input method, as
shown in Picture 4.49.
57

Picture 4.49
4.14 Backup and Reset
Having connected to Wi-Fi and logged in your Google account, you can select
“Backup My Data”. Then the system will back up your current data to Google server.
Factory Data Reset
Click “Factory Data Reset” to erase all data from your tablet’s internal storage.
In need of erasing data in NAND, check “Erase Internal Storage” before resetting to
factory data.
58

Picture 4.50
4.15 Accounts and Sync
1. Select “Settings”.
2. Open “Accounts and Sync”, as shown in Picture 4.51.
59

Picture 4.51
3. Select the email type to be accessed.
4. Successful login will automatically activate sync function, as shown in Pictures
4.52 and 4.53.
60

Picture 4.52
Picture 4.53
4.16 Data and Time
As per presetting, the system will automatically use network-provided date, time zone and
time.
Manually adjust date, time zone and time
1. Click “Settings”.
2. Scroll down the screen and then click “Date and Time”. 3.
Turn off “Automatic Date & Time”.
4. Turn off “Automatic Time Zone”.
5.
Click “Select Time Zone” and then select the time zone in the list. Scroll
down
the list to view more time zones.
6.
Click “Set Date” and then click up or down key to adjust date, month and
year,
click “Setting” after completion.
7. Click “Set Time” and then click up or down key to adjust hour and minute, AM or
PM to change morning or afternoon (the option is hidden after selecting the “Use
24-hour Format”) and then click the “Setting” to finish.
8. Select check box of “Use 24-hour Format” to switch between 12-hour and
61

24-hour sytems. The confirmed time format will be applied to time format of
alarm.
9.
Click “Choose Date Format” and then select the date format displayed on
the
MID.
Picture 4.54
Note: In case of using network-provided automatic time, you’ll fail to set date, time and time
zone manually.
4.17 Scheduled Power On & Off
1. Access “Settings”.
2. Click the “Scheduled Power On & Off” option.
3. Steps are as shown in Picture 4.55.
62

Click to access
scheduled
power-on
settings
Click to access
scheduled
power-off
settings
Picture 4.55
4.18 Accessibility
4.18-1. Talkback
Talkback is the function specifically provided for the blind and users with visual
impairment, the system will make voice feedback for specific content you touch, select
and activate.
4.18-2.Large Font
After checking, the system font will be larger.
4.18-3.Auto Rotate Screen
After checking, the screen will rotate by following gravity sense direction.
4.18-4.Touch and Hold Delay
Click “Touch and Hold Delay” to adjust delay time, as shown in Picture 4.56.
63
On/off of
Scheduled
power-on
On/off of
Scheduled
power-off

Picture 4.56
4.18-5. Install Web Scripts
After activating, the system will allow you to install web scripts, but to increase
security risk when you browse web pages.
4.18-6. Quick Boot
After activating quick boot function, the MID will proceed to incomplete power-off
mode;
when booting, the boot speed will be promoted substantially.
4.19 Developer Options
Click “Developer Options” and check the icon in the upper right-hand corner corner to turn the
function on.
1. Unlocked Screen
After turning on “Unlocked Screen”, the MID will never automatically proceed to
sleep mode when your MID is in charging state.
2. Read-Write Protection to SD Card
Turn on “Read-Write Protection to SD Card” and the SD card will get
read-write protection. During protection, apps must request for the relevant
permission to read the data of external storage devices.
3. USB Debugging
After turining on “USB Debugging”, the MID can be read with the aid of some
64

software, but USB storage should be applied by manual operation.
4. Display Touch Operation
Turn on “Display Touch Operation”, and the touch area will display on your
MID.
It is recommended that you also use “Cursor Location” to achieve higher
accuracy
and definition.
5. Cursor Location
After turining on the “Cursor Location”, it’s applicable to read horizontal and
vertical axis coordinates of your operations to touch spots on the MID.
4.20 About Tablet
Local Update
Store update.zip package in the internal storage or root directory of SD card,
click
“Check Update” to make automatic update, as shown in Picture 4.57.
Picture 4.57
Check MID Status
1. Access “Settings”.
2. Click “About Tablet” to view “Status”, “Model”, “Android Version”, “Version”,
etc.
3. Click “Status” to view “Battery Status”, “Battery Percentage”, “SIM Status”, “IP
65

Address”and other information.
66

FCC warning statement.
67
This device complies with part 15 of the FCC Rules. Operation is subject to
the following two conditions:
(1) This device may not cause harmful interference, and
(2) this device must accept any interference received, including interference
that may cause undesired operation.
Any Changes or modifications not expressly approved by the party
responsible for compliance could void the user's authority to operate the
equipment.
Note: This equipment has been tested and found to comply with the limits
for a Class B digital device, pursuant to part 15 of the FCC Rules. These
limits are designed to provide reasonable protection against harmful
interference in a residential installation. This equipment generates uses and
can radiate radio frequency energy and, if not installed and used in
accordance with the instructions, may cause harmful interference to radio
communications. However, there is no guarantee that interference will not
occur in a particular installation. If this equipment does cause harmful
interference to radio or television reception, which can be determined by
turning the equipment off and on, the user is encouraged to try to correct the
interference by one or more of the following measures:
-Reorient or relocate the receiving antenna.

-Increase the separation between the equipment and receiver.
68
-Connect the equipment into an outlet on a circuit different from
that to which the receiver is connected.
-Consult the dealer or an experienced radio/TV technician for help.
Specific Absorption Rate (SAR) information:
This 7.85 inch Tablet PC meets the government's requirements for exposure to
radio waves. The guidelines are based on standards that were developed by
independent scientific organizations through periodic and thorough evaluation of
scientific studies. The standards include a substantial safety margin designed to
assure the safety of all persons regardless of age or health.
FCC RF Exposure Information and Statement :The SAR limit of USA (FCC) is
1.6 W/kg averaged over one gram of tissue. Device types: MT-786 IPS (FCC ID:
2AASXMTNTB786IPS) has also been tested against this SAR limit. The highest
SAR value reported under this standard during product certification for use at the
body is 1.2W/kg. This device was tested for typical body-worn operations with the
back of the handset kept 1.5cm from the body. To maintain compliance with FCC
RF exposure requirements, use accessories that maintain a 1.5cm separation
distance between the user's body and the back of the handset. The use of belt clips,
holsters and similar accessories should not contain metallic components in its
assembly. The use of accessories that do not satisfy these requirements may not
comply with FCC RF exposure requirements, and should be avoided.

69
Body-worn Operation
This device was tested for typical body-worn operations. To comply with RF
exposure requirements, a minimum separation distance of 1.5 cm must be
maintained between the user’s body and the handset, including the antenna.
Third-party belt-clips, holsters, and similar accessories used by this device should
not contain any metallic components. Body-worn accessories that do not meet
these requirements may not comply with RF exposure requirements and should be
avoided. Use only the supplied or an approved antenna.
 Loading...