

Page 1
MINIMEDTM 630G
SYSTEM USER
GUIDE
Page 2

Page 3

MiniMed™ 630G
SYSTEM USER GUIDE
Page 4

Copyright & trademarks
© 2017 Medtronic MiniMed, Inc. All rights reserved. Medtronic, Medtronic logo and Further, Together are
trademarks of Medtronic. ™* Third party brands are trademarks of their respective owners. All other
brands are trademarks of a Medtronic company.
CareLink™, Guardian™, Bolus Wizard™, MiniLink™, Dual Wave™, Square Wave™, MiniMed™, SmartGuard™,
Paradigm™
and
are trademarks of Medtronic MiniMed, Inc.
Ascensia, the Ascensia Diabetes Care logo, and CONTOUR
Tylenol™*
Wi-Fi™*
Bluetooth™*
Humalog™*
NovoLog™*
ZigBee™*
are trademarks of Ascensia Diabetes Care.
M979512A011_A
MMT-1715
Page 5

Contacts:
Africa: Medtronic Africa (Pty) Ltd.
Tel: +27 (0) 11 677 4800
Albania: Net Electronics Albania
Tel: +355 697070121
Argentina: Corpomedica S.A.
Tel: +(11) 4 814 1333
Medtronic Directo 24/7:
+0800 333 0752
Armenia: Exiol LLC
Tel: +374 98 92 00 11
or +374 94 38 38 52
Australia: Medtronic Australasia Pty.
Ltd.
Tel: 1800 668 670
Azerbaijan: Isomed
Tel: +994 (12) 464 11 30
Bangladesh: Sonargaon Healthcare
Pvt Ltd.
Mobile: (+91)-9903995417
or (+880)-1714217131
Chile: Medtronic Chile
Tel: +(9) 66 29 7126
Medtronic Directo 24/7:
+1 230 020 9750
Medtronic Directo 24/7 (From
Santiago): +(2) 595 2942
China: Medtronic (Shanghai) Ltd.
24 Hour Help (Cell):
+86 400-820-1981
24 Hour Help (Land):
+86 800-820-1981
Colombia: Medtronic Latin America
Inc. Sucursal Colombia
Tel: +(1) 742 7300
Medtronic Directo 24/7 (Landline):
+01 800 710 2170
Medtronic Directo 24/7 (Cellular):
+1 381 4902
Croatia: Mediligo d.o.o.
Tel: +385 1 6454 295
Helpline: +385 1 4881144
Medtronic Adriatic d.o.o.
Helpline: +385 1 4881120
Hong Kong: Medtronic International
Ltd.
Tel: +852 2919-1300
To order supplies:
+852 2919-1322
24-hour helpline: +852 2919-6441
India: India Medtronic Pvt. Ltd.
Tel: (+91)-80-22112245 /
32972359
Mobile: (+91)-9611633007
Patient Care Helpline:
1800 209 6777
Indonesia: Medtronic International Ltd.
Tel: +65 6436 5090
or +65 6436 5000
Israel: Medtronic
Tel. (orders):
+9729972440, option 3 + option 1
Tel. (product support):
+9729972440, option 2
Helpline (17:00 – 08:00
daily/weekends – Israel time):
1-800-611-888
Belarus: Zarga Medica
Tel: +375 29 625 07 77
or +375 44 733 30 99
Helpline: +74995830400
België/Belgique: N.V. Medtronic
Belgium S.A.
Tel: 0800-90805
Bosnia and Herzegovina:
"Novopharm“ d.o.o. Sarajevo
Tel: +387 33 476 444
Helpline: 0800 222 33
Epsilon Research Intern. d.o.o.
Tel: +387 51 251 037
Helpline: 0800 222 33
Brasil: Medtronic Comercial Ltda.
Tel: +(11) 2182-9200
Medtronic Directo 24/7:
+0800 773 9200
Bulgaria: RSR EOOD
Tel: +359 888993083
Helpline: +359 884504344
Canada: Medtronic of Canada Ltd.
Tel: 1-800-284-4416 (toll free/sansfrais)
Danmark: Medtronic Danmark A/S
Tel: +45 32 48 18 00
Deutschland: Medtronic GmbH
Geschäftsbereich Diabetes
Telefon: +49 2159 8149-370
Telefax: +49 2159 8149-110
24-Stdn-Hotline: 0800 6464633
Eire: Accu-Science LTD.
Tel: +353 45 433000
España: Medtronic Ibérica S.A.
Tel: +34 91 625 05 42
Fax: +34 91 625 03 90
24 horas: +34 900 120 330
AB Medical Group Eesti OU
Estonia:
Tel: +372 6552310
Helpline: +372 5140694
Europe: Medtronic Europe S.A. Europe,
Middle East and Africa HQ
Tel: +41 (0) 21-802-7000
France: Medtronic France S.A.S.
Tel: +33 (0) 1 55 38 17 00
Hellas: Medtronic Hellas S.A.
Tel: +30 210677-9099
Italia: Medtronic Italia S.p.A.
Tel: +39 02 24137 261
Fax: +39 02 24138 210
Servizio assistenza tecnica:
Nº verde: 800 60 11 22
Japan: Medtronic Japan Co. Ltd.
Tel: +81-3-6776-0019
24 Hr. Support Line:
0120-56-32-56
Kazakhstan: Medtronic BV in
Kazakhstan
Tel: +7 727 311 05 80 (Almaty)
Tel: +7 717 224 48 11 (Astana)
Круглосуточная линия
поддержки:
8 800 080 5001
Kosovo: Yess Pharma
Tel: +377 44 999 900
Helpline: +37745888388
Latin America: Medtronic, Inc.
Tel: 1(305) 500-9328
Fax: 1(786) 709-4244
Latvija: RAL SIA
Tel: +371 67316372
Helpline (9am to 6pm):
+371 29611419
Page 6

Lithuania: Monameda UAB
Tel: +370 68405322
Helpline: +370 68494254
Macedonia: Alkaloid Kons Dooel
Tel: +389 23204438
Magyarország: Medtronic Hungária
Kft.
Tel: +36 1 889 0688
Malaysia: Medtronic International Ltd.
Tel: +603 7946 9000
Middle East and North Africa:
Regional Office
Tel: +961-1-370 670
Montenegro: Glosarij d.o.o.
Tel: +382 20642495
México: Medtronic Servicios S. de R. L.
de C.V.
Tel (México DF): +(11) 029 058
Tel (Interior): +01 800 000 7867
Medtronic Directo 24/7 (from
México DF):
+(55) 36 869 787
Medtronic Directo 24/7:
+01 800 681 1845
Nederland, Luxembourg: Medtronic
B.V.
Tel: +31 (0) 45-566-8291
Gratis: 0800-3422338
New Zealand: Medica Pacifica
Phone: 64 9 414 0318
Free Phone: 0800 106 100
Norge: Medtronic Norge A/S
Tel: +47 67 10 32 00
Fax: +47 67 10 32 10
Philippines: Medtronic International
Ltd.
Tel: +65 6436 5090
or +65 6436 5000
Poccия: ООО «Медтроник»
Tel: +7 495 580 73 77
Круглосуточная линия
поддержки:
8 800 200 76 36
Polska: Medtronic Poland Sp. z o.o.
Tel: +48 22 465 6934
Portugal: Medtronic Portugal Lda
Tel: +351 21 7245100
Fax: +351 21 7245199
Puerto Rico: Medtronic Puerto Rico
Tel: 787-753-5270
Republic of Korea: Medtronic Korea,
Co., Ltd.
Tel: +82.2.3404.3600
Romania: Medtronic Romania S.R.L
Tel: +40372188017
Helpline: +40 726677171
Schweiz: Medtronic (Schweiz) AG
Tel: +41 (0)31 868 0160
24-Stunden-Hotline: 0800 633333
Fax Allgemein: +41 (0)318680199
Serbia: Epsilon Research International
d.o.o.
Tel: +381 113115554
Medtronic Serbia D.o.o
Helpline: +381 112095900
Singapore: Medtronic International
Ltd.
Tel: +65 6436 5090
or +65 6436 5000
Slovenija: Zaloker & Zaloker d.o.o.
Tel: +386 1 542 51 11
24-urna tehnična pomoč:
+386 51316560
Slovenská republika: Medtronic
Slovakia, s.r.o.
Tel: +421 26820 6942
HelpLine: +421 26820 6986
Sri Lanka: Swiss Biogenics Ltd.
Mobile: (+91)-9003077499
or (+94)-777256760
Suomi: Medtronic Finland Oy
Tel: +358 20 7281 200
Help line: +358 400 100 313
Sverige: Medtronic AB
Tel: +46 8 568 585 20
Fax: +46 8 568 585 11
Taiwan: Medtronic (Taiwan) Ltd.
Tel: 02-21836000
Toll free: +886-800-005285
Thailand: Medtronic (Thailand) Ltd.
Tel: +662 232 7400
Türkiye: Medtronic Medikal Teknoloji
Ticaret Ltd. Sirketi.
Tel: +90 216 4694330
USA: Medtronic Diabetes Global
Headquarters
24 Hour HelpLine:
+1-800-646-4633
To order supplies:
+1-800-843-6687
Ukraine: Med Ek Service TOV
Tel: +380 50 3311898
or +380 50 4344346
Лінія цілодобової підтримки:
0 800 508 300
United Kingdom: Medtronic Ltd.
Tel: +44 1923-205167
Österreich: Medtronic Österreich
GmbH
Tel: +43 (0) 1 240 44-0
24 – Stunden – Hotline:
0820 820 190
Česká republika: Medtronic Czechia
s.r.o.
Tel: +420 233 059 111
Non-stop helpLine (24/7):
+420 233 059 059
Zákaznický servis (8:00 - 17:00):
+420 233 059 950
Page 7

WARNING: The SmartGuard Suspend on low feature will cause the
pump to temporarily suspend insulin delivery for two hours when the
sensor glucose reaches a set threshold. Under some conditions of use
the pump can suspend again resulting in very limited insulin delivery.
Prolonged suspension can increase the risk of serious hyperglycemia,
ketosis, and ketoacidosis. Before using the SmartGuard Suspend on
low feature, it is important to read the SmartGuard Suspend on low
information in the Getting Started Guide and the MiniMed 630G
System User Guide and discuss proper use of the SmartGuard Suspend
on low feature with your healthcare provider.
Warranty
The expected life of the MiniMed insulin pump is a maximum of 4 years.
Medtronic Diabetes warrants the MiniMed insulin pump against defects in
materials and workmanship for a period of 4 years from the date of purchase.
During the warranty period, Medtronic Diabetes will, at its discretion, replace (with
a new or recertified pump, at Medtronic Diabetes’ discretion) any defective pump
or motor, subject to the conditions and exclusions stated herein. In the event that
a pump replaced, the warranty period will not be extended.
This warranty is valid only if the MiniMed insulin pump is used in accordance with
the manufacturer’s instructions. This warranty will not apply:
• If damage results from changes or modifications made to the pump by the
user or third persons after the date of manufacture.
• If damage results from use of non-Medtronic reservoirs and/or infusion sets.
• If damage results from service or repairs performed by any person or entity
other than the manufacturer.
• If damage results from a Force Majeure or other event beyond the control of
the manufacturer.
• If damage results from negligence or improper use, including but not limited
to: improper storage or physical abuse, such as dropping or otherwise.
Page 8

This warranty shall be personal to the original user. Any sale, rental or other
transfer or use of the product covered by this warranty to or by a user other than
the original user shall cause this warranty to immediately terminate. This warranty
does not apply to batteries, infusion sets, reservoirs, and other accessories.
The remedies provided for in this warranty are the exclusive remedies available
for any breach hereof. Neither Medtronic Diabetes nor its suppliers or
distributors shall be liable for any incidental, consequential, or special damage
of any nature or kind caused by or arising out of a defect in the product.
All other warranties, expressed or implied, are excluded, including the
warranties of merchantability and fitness for a particular purpose.
Page 9

Contents
■ Before you begin
3Using this user guide
4Assistance
4Emergency kit
5 Medical emergency card and travel information
6User safety
6 Indications
7 Contraindications
7Potential risks
10 Benefits
11 General warnings
14 General precautions
17 Adverse reactions
■
Contents
17 Notice
19 Keeping track of your system information
19 Insulin guidelines
20 Consumables
21 Additional 630G system devices
21 Accessories
22 Ordering supplies and accessories
■ First steps
25 Your pump
Contents vii
Page 10

26 Using the buttons
27 About batteries
28 Inserting the battery
29 Removing the battery
30 Getting to know your pump
30 Entering your startup settings
32 Unlocking your pump
33 Home screen
34 Status bar
37 Status screens
38 Using the Menu screen
40 Scroll bar
40 Power modes
41 If you remove your pump
■ Basal
45 Basal rate
46 Basal insulin settings
47 Max Basal Rate
47 Example 1: Max basal
47 Example 2: Max basal
48 Basal patterns
48 Adding a new basal pattern
52 Editing, copying, or deleting a basal pattern
52 Changing from one basal pattern to another
53 Example 1: Basal patterns
53 Example 2: Basal patterns
54 Temporary basal rates
54 About Temp Basal rates
55 Starting a Temp Basal rate
56 Preset Temp basal rates
59 Canceling a Temp Basal or Preset Temp basal rate
viii Contents
Page 11

59 Viewing your basal information
61 Stopping and resuming your insulin delivery
■ Bolus
65 About bolus deliveries
65 Bolus types
66 Bolus type example
67 Bolus delivery options
68 Bolus settings
69 Max Bolus
70 Example 1: Max bolus
70 Example 2: Max bolus
70 Bolus Increment
71 Bolus Speed
71 Bolus Wizard feature
71 Understanding your Bolus Wizard settings
72 Setting up the Bolus Wizard feature
■
Contents
75 Changing your Bolus Wizard settings
77 Turning off the Bolus Wizard feature
78 About active insulin
78 Bolus Wizard warnings
79 Normal bolus
79 Delivering a Normal bolus with the Bolus Wizard feature
81 Delivering a Normal bolus using Manual Bolus
82 Square Wave bolus
83 Turning on or off the Square Wave bolus
83 Delivering a Square Wave bolus with the Bolus Wizard feature
84 Delivering a Square Wave bolus using Manual Bolus
85 Dual Wave bolus
85 Turning on or off the Dual Wave bolus
86 Delivering a Dual Wave bolus with the Bolus Wizard feature
87 Delivering a Dual Wave Bolus using Manual Bolus
Contents ix
Page 12

88 Easy Bolus feature
89 Understanding Easy Bolus step sizes
89 Setting up the Easy Bolus feature
89 Delivering a bolus using the Easy Bolus feature
91 Preset Bolus
91 Setting up and managing Preset Bolus deliveries
93 Delivering a Preset Bolus
93 Stopping a bolus delivery
■ Reservoir and infusion set
97 Setting up the reservoir and infusion set
110 Disconnecting your infusion set
111 Reconnecting your infusion set
■ Meter
115 About your CONTOUR NEXT LINK 2.4 meter
116 Wirelessly connecting your pump and meter
116 Setting up Remote Bolus
116 Deleting a meter from your pump
■ History and events
121 History
121 Summary screen
122 Understanding the Summary screen
125 Daily History
125 Alarm History
126 Using Sensor Glucose Review
128 ISIG History
128 Event Markers
■ Reminders
133 Personal reminders
x Contents
Page 13

134 Bolus BG Check reminder
135 Missed Meal Bolus reminder
136 Low Reservoir reminder
137 Set Change reminder
137 Calibration reminders
■ General settings
141 Airplane Mode
142 Audio Options
143 Auto Suspend
143 Block Mode
145 Carb Unit
145 Display Options
146 Language
146 Managing your pump settings
150 Self Test
151 Sensor Demo
152 Time and date
■ Setting up continuous glucose monitoring
155 Understanding continuous glucose monitoring (CGM)
156 Home screen with CGM
■
Contents
159 Understanding glucose settings
159 High settings
160 Low settings
168 Turning on the Sensor feature
168 Setting up the High Settings
171 Setting up the Low Settings
174 Manually resuming basal delivery during a SmartGuard Suspend on low
event
175 Wirelessly connecting your pump and transmitter using Auto Connect
178 Wirelessly connecting your pump and transmitter using Manual Connect
Contents xi
Page 14

181 Deleting the transmitter from your pump
181 Inserting the sensor
181 Connecting the transmitter to the sensor
181 Starting the sensor
183 Calibrating your sensor
184 Where to enter your calibration BG meter reading
185 When to calibrate
186 Guidelines for calibrating
187 Disconnecting the transmitter from the sensor
187 Removing the sensor
187 Turning off Sensor Settings
■ Using continuous glucose monitoring
191 The sensor graph
192 Identifying rapid changes in sensor glucose
193 Silencing Glucose Alerts
■ Alarms, alerts, and messages
199 About alarms, alerts, and messages
200 Alarms
201 Alerts
202 Messages
202 Pump alarms, alerts, and messages
215 CGM (sensor) alarms, alerts, and messages
223 CareLink software alert and message
■ Troubleshooting
227 Troubleshooting pump issues
228 My pump buttons are stuck
228 What is a Check Settings alarm?
228 My pump is asking me to rewind
229 I dropped my pump
xii Contents
Page 15

229 I cannot get to the Manage Settings screen
229 My pump display times out too quickly
230 Where is my pump status screen?
230 My pump is asking me to enter my settings
233 Troubleshooting sensor issues
233 My pump cannot find the sensor signal
234 Calibration not accepted
235 Why does the SmartGuard suspend icon on my Home screen appear
gray?
■ Maintenance
239 Cleaning your pump
240 Cleaning your transmitter
240 Storing your pump
241 Storing your transmitter
■ Product specifications and safety information
■
Contents
245 Product specifications
245 Alarm and alert escalation
246 Altitude range
246 Audio frequency
247 Backlight
247 Basal delivery
248 BG Target
248 BG meter value
248 Bolus delivery
249 Bolus Wizard feature default settings
249 Bolus Wizard feature specifications
252 Carb ratios
252 Delivery accuracy
253 Easy Bolus feature
254 Environmental conditions
Contents xiii
Page 16

254 Essential performance
254 Filling the infusion set and cannula
254 Infusion pressure
255 Insulin delivery default settings
256 Insulin sensitivity factor
256 Low Reservoir reminder
256 Max Bolus
257 Normal bolus
257 Occlusion detection
257 Percent temp basal
257 Program safety checks
257 Pump dimensions
258 Pump memory
258 Pump weight
258 Sensor default settings
259 Alert performance
267 Guidance and manufacturer's declaration
272 Wireless communication
272 Quality of service
273 Radio frequency (RF) communications specifications
273 FCC notice
274 Data security
275 Icon glossary
■ Appendix A: End user software license agreement
279 End user software license agreement
■ Glossary
■ Index
xiv Contents
Page 17

Before you begin
Page 18

Page 19

Before you begin
This user guide is designed to help you understand the operation of the
MiniMed 630G system with SmartGuard technology. The SmartGuard technology
can temporarily suspend insulin delivery based on your sensor glucose values.
Work closely with your healthcare professional when starting insulin pump therapy.
Using this user guide
This user guide contains valuable information about using your new insulin pump.
To help you find the information you need, you can use the table of contents at
the beginning of the user guide and the index at the end of the user guide. There
is also a glossary of terms, which starts on page 283.
The following table describes certain terms, conventions, and concepts used in this
user guide.
■
Before you begin
Convention What it means
Select To activate a screen item, accept a value, or initiate an action.
Select and
hold
Press To push and then release a button.
Press and
hold
Bold text To indicate screen items and buttons. For example, "Select Next to
To perform an action using your pump screen, press the Select
button and hold until the action is complete.
To push and keep pressure on a button.
continue."
Before you begin 3
Page 20
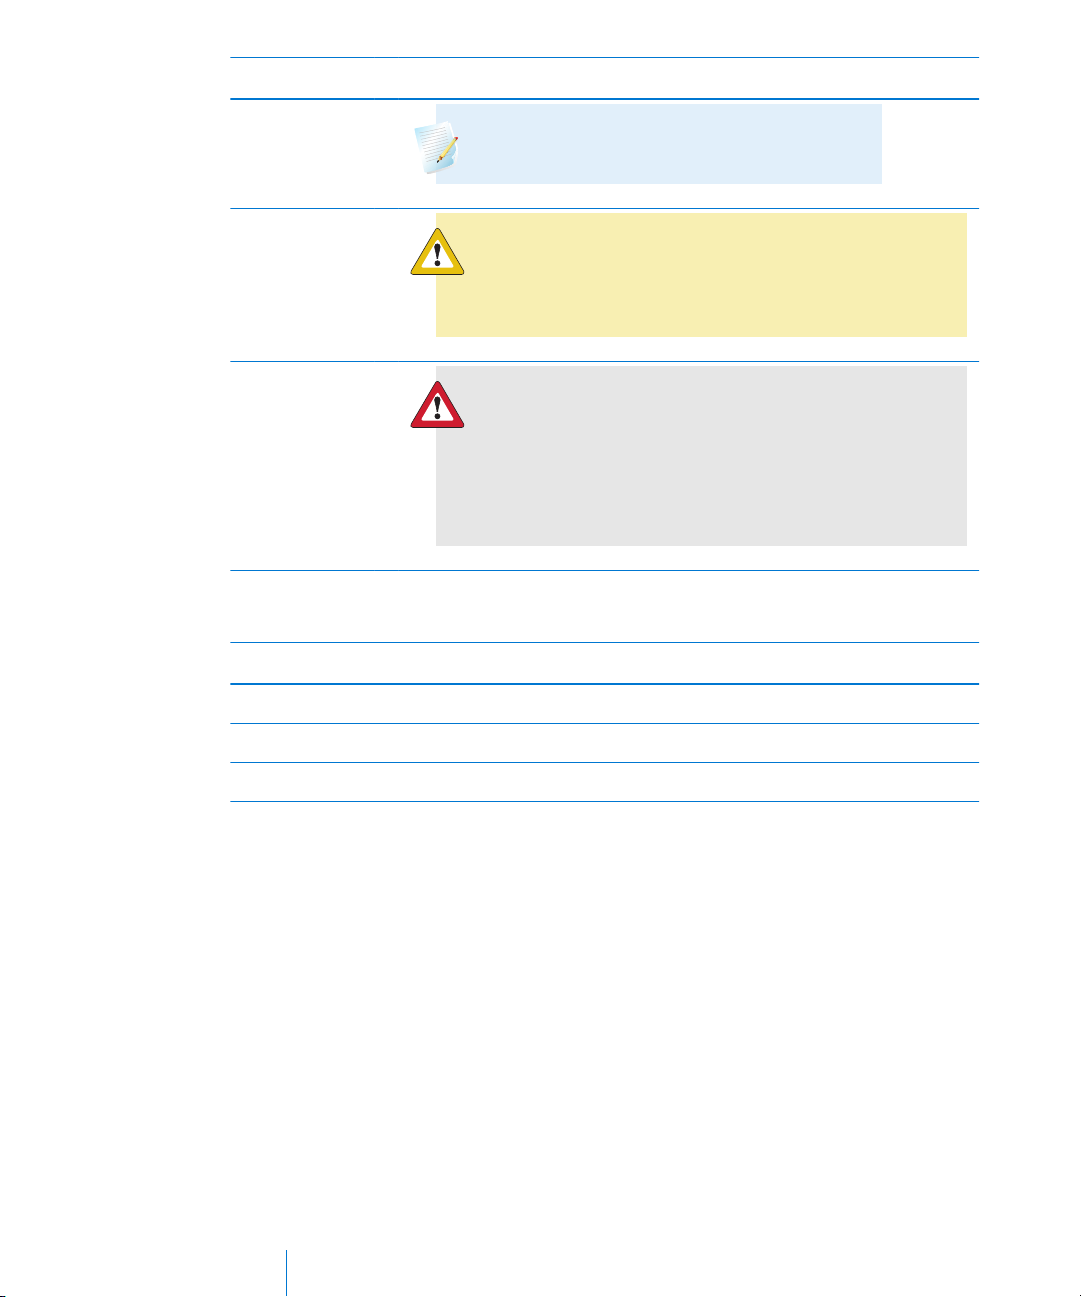
Convention What it means
Note
Note: A note provides helpful information.
Caution
Caution: A caution notifies you of a potential
hazard, which, if not avoided, may result in minor
or moderate injury or damage to the equipment.
WARNING
WARNING: A warning notifies you of a
potential hazard, which, if not avoided, could
result in death or serious injury. It may also
describe potential serious adverse reactions and
safety hazards.
Assistance
Department Telephone number
24 Hour HelpLine (calls within the United States) 800 646 4633
24 Hour HelpLine (calls outside the United States) +1 818 576 5555
Web site www.medtronicdiabetes.com
Emergency kit
Keep an emergency kit with you at all times to make sure that you always have
necessary supplies. Tell a family member, co-worker, or friend where you keep your
emergency kit.
It is important that you test your blood glucose (BG) more frequently while you are
traveling. The routine hassle of travel, including stress, changes in time zones,
schedules and activity levels, meal times and types of food, can all affect your
diabetes control. Be extra attentive to monitoring your BG frequently, and be
prepared to respond if needed.
Your emergency kit should include these items:
4 Chapter 1
Page 21

• Fast-acting glucose tablets.
• Blood glucose monitoring supplies.
• Urine or blood ketone monitoring supplies.
• Extra MiniMed infusion set and MiniMed reservoir.
• Extra new AA lithium or alkaline batteries, or fully charged NiMH batteries.
• Insulin syringe and fast-acting insulin (with dosage instructions from your
healthcare professional).
• Adhesive dressing.
• Glucagon emergency kit.
WARNING: Do not use the Bolus Wizard feature to calculate a bolus
for a period of time after giving a manual injection of insulin by
syringe or pen. Manual injections are not accounted for in the
active insulin amount. Therefore, the Bolus Wizard feature could
prompt you to deliver more insulin than needed. Too much insulin
can cause hypoglycemia. Consult with your healthcare professional
for how long you need to wait after a manual injection of insulin
before you can rely on the active insulin calculation of the Bolus
Wizard feature.
WARNING: Do not insert the reservoir into your pump until you
have been instructed to do so by your healthcare professional, and
have received formal training with a certified product trainer.
Attempting to use insulin in your pump before you have received
training may result in the delivery of too little or too much insulin,
which can cause hyperglycemia or hypoglycemia.
■
Before you begin
For details on pump safety, see User safety, on page 6.
Medical emergency card and travel information
Your pump accessories are packaged with a Medical emergency card that you
should complete and carry with you at all times, especially when traveling.
Before you begin 5
Page 22

It is important that you test your blood glucose (BG) more frequently while you are
traveling. The routine hassle of travel, including stress, changes in time zones,
schedules and activity levels, meal times and types of food, can all affect your
diabetes control. Be extra attentive to monitoring your BG frequently, and be
prepared to respond if needed.
User safety
Indications
MiniMed 630G system with SmartGuard technology
The MiniMed 630G system with SmartGuard technology is intended for continuous
delivery of basal insulin (at user selectable rates) and administration of insulin
boluses (in user selectable amounts) for the management of diabetes mellitus in
persons, fourteen years of age and older, requiring insulin as well as for the
continuous monitoring and trending of glucose levels in the fluid under the skin.
The MiniMed 630G system includes SmartGuard technology, which can be
programmed to temporarily suspend delivery of insulin for up to two hours when
the sensor glucose value falls below a predefined threshold value.
The MiniMed 630G system consists of the following devices: MiniMed 630G Insulin
Pump, Guardian Sensor (3), one-press serter, the Guardian Link (3) transmitter
system, CareLink USB, CONTOUR®NEXT LINK 2.4 Wireless Meter, and CONTOUR
NEXT Test Strips. The system requires a prescription.
The MiniMed 630G system is not intended to be used directly for making therapy
adjustments, but rather to provide an indication of when a finger stick may be
required. All therapy adjustments should be based on measurements obtained
using a home glucose monitor and not on values provided by the MiniMed 630G
system.
The MiniMed 630G system is not intended to be used directly for preventing or
treating hypoglycemia but to suspend insulin delivery when the user is unable to
respond to the SmartGuard Suspend on low alarm to take measures to prevent or
treat hypoglycemia themselves. Therapy to prevent or treat hypoglycemia should
be administered according to the recommendations of the user’s healthcare
professional.
6 Chapter 1
Page 23

WARNING: Do not use the Suspend on low feature to prevent or
treat low glucose. The Suspend on low feature is designed to
suspend insulin delivery when you are unable to respond to the
Suspend on low alarm. Always confirm your sensor glucose reading
using your BG meter, and follow the instructions of your healthcare
professional. Using Suspend on low to prevent or treat low glucose
may result in prolonged hypoglycemia.
Contraindications
Pump therapy is not recommended for people who are unwilling or unable to
perform a minimum of four blood glucose tests per day.
Pump therapy is not recommended for people who are unwilling or unable to
maintain contact with their healthcare professional.
Pump therapy is not recommended for people whose vision or hearing does not
allow recognition of pump signals and alarms.
Potential risks
Risks related to insulin pump infusion
■
Before you begin
General risks related to insulin pump infusion set may include:
• Localized infection
• Skin irritation or redness
• Bruising
• Discomfort or pain
• Bleeding
• Irritation
•Rash
Patients should be instructed to follow the provided user guides for insertions and
care of infusion sets. If an infusion site becomes irritated or inflamed, the infusion
set should be removed and another placed in a new location.
Risks related to insulin administration and pump use
Due to the use of insulin, there is risk related to the infusion of insulin and the
potential interruptions of insulin delivery. These general risks may include:
Before you begin 7
Page 24

•Hypoglycemia
• Hyperglycemia
Risks related to sensor use
General risks related to sensor use may include:
• Skin irritation or reaction to adhesives
• Bruising
•Discomfort
•Redness
• Bleeding
•Pain
•Rash
•Infection
• Irritation from tapes used with glucose-sensing products
•Raised bump
• Appearance of a small "freckle-like" dot where needle was inserted
• Allergic reaction
• Fainting secondary to needle insertion
• Soreness or tenderness
• Swelling at insertion site
• Sensor fracture, breakage or damage
• Minimal blood splatter associated with sensor needle removal
• Residual redness associated with adhesive and or tapes
• Scarring
Specific risks related to sensor use
Taking medications with acetaminophen, including, but not limited to Tylenol,
fever reducers, or cold medicine, while wearing the sensor may falsely raise your
sensor glucose readings. The level of inaccuracy depends on the amount of
acetaminophen active in your body and may be different for each person. Always
use BG meter readings to verify your glucose level before making therapy
8 Chapter 1
Page 25

decisions, including when you could have acetaminophen active in your body.
Always check the label of any medications to confirm whether acetaminophen is
an active ingredient.
Sensor placement and insertion has been studied in the belly (abdomen) and back
of upper arm only and is not approved for other sites.
Risks related to serter use
General risks with serter use may include skin infection around the area where the
serter is used.
Risks related to the MiniMed 630G insulin pump system
General risks related to the MiniMed 630G insulin pump system may include:
•Hypoglycemia
• Hyperglycemia
Specific risks related to the MiniMed 630G insulin pump system
During the conduct of the In-Clinic, Randomized, Cross-Over Study to Assess the
Efficacy of the Low Glucose Suspend (LGS) Feature in the MiniMed Paradigm X54
System with Hypoglycemic Induction from Exercise
1
, the following specific system
risks were identified:
• Bruising at sensor site (1 incident reported)
• Bleeding at sensor site (1 incident reported)
• Urine ketones resulting from improper connection of the tubing to the insulin
pump (1 incident reported)
■
Before you begin
1 Medtronic Inc., An In-Clinic, Randomized, Cross-Over Study to Assess the Efficacy of the Low Glucose
Suspend (LGS) Feature in the MiniMed Paradigm X54 System with Hypoglycemic Induction from
Exercise, CER235/Z25/A, November 2011.
Before you begin 9
Page 26

Benefits
The MiniMed 630G system provides advanced protection
glucose levels through an integrated insulin pump and continuous glucose
monitoring (CGM). Clinical studies show that integrated insulin pump and CGM
systems are proven to provide better diabetes management, compared with
multiple daily injections or with the pump alone. When you pair pump therapy
with the information provided by the sensor, it can significantly improve HbA1C
levels without increasing the risk of hypoglycemia.
3, 4
The MiniMed 630G system also features SmartGuard technology, which
automatically suspends insulin when the sensor reaches a preset low limit, referred
to as Suspend on low. When a Suspend on low event occurs, you can choose to
continue to keep insulin suspended, or you can choose to resume insulin delivery.
You can also personalize your low settings with up to eight different segments to
fit your schedule and diabetes management needs.
Patients using Suspend on low experienced 35% less low sensor glucose exposure
(<70 mg/dL), both day and night combined, as compared to patients without
Suspend on low. While using Suspend on low at night, patients had a 37.5%
reduction in the magnitude and duration of nocturnal low sensor glucose values
compared to the control group.
5
2, 3, 4
from dangerous low
In addition to the clinical benefits of the system, the new design lets you
personalize your diabetes management with customizable options and userfriendly menus. You can now easily deliver a remote manual bolus using your
CONTOUR NEXT LINK 2.4 meter and have the convenience of an informative Bolus
Wizard feature, a color screen, customizable alerts, and up to eight basal patterns.
2 Bergenstal RM, Tamborlane WV, Ahmann A, et al. Effectiveness of sensor-augmented insulin-pump
therapy in type 1 diabetes [STAR 3 study]. N Engl J Med. 2010;363:311–320.
3 Battelino T, Conget I, Olsen B, et al. The use and efficacy of continuous glucose monitoring in type 1
diabetes treated with insulin pump therapy [SWITCH study]. Diabetologia. 2012 Dec;55(12):3155-62. doi:
10.1007/s00125-012‐2708‐9. Epub 2012 Sept 11.
4 Bergenstal RM, Klonoff DC, Bode BW, et al. Threshold-based insulin-pump interruption for reduction of
hypoglycemia [ASPIRE in-home study]. N Engl J Med. 2013;369(3):224-232.
5 Bergenstal RM, Klonoff DC, Bode BW, et al. Threshold-based insulin-pump interruption for reduction of
hypoglycemia [ASPIRE in-home study]. N Engl J Med. 2013;369(3):224-232.
10 Chapter 1
Page 27

General warnings
Pump
• Do not use the pump when a flammable anesthetic mixture with air, oxygen,
or nitrous oxide is present. These environmental conditions can damage your
pump and result in serious injury.
• Never rely on the pump beeps or vibrations alone to navigate through the
pump screens or menus. Always check your pump screen as you navigate.
The pump beeps and vibrations are intended to notify you of a condition that
may require attention. Relying on the pump beeps or vibrations alone to
navigate can result in incorrect menu selection or settings.
• Do not rely on preset pump alarms or reminders alone to prompt you to
check your blood glucose. This can cause you to forget to check your blood
glucose. Set additional reminders on other devices, such as your cell phone.
• Do not use standard Luer sets with the MiniMed 630G insulin pump. Luer sets
are not compatible with the pump. MiniMed reservoirs and MiniMed infusion
sets are specifically designed for use with the MiniMed 630G insulin pump.
• Do not change or modify your MiniMed reservoir or MiniMed infusion set
unless expressly approved by Medtronic Diabetes. Modifying the devices can
cause serious injury, interfere with your ability to operate the device, and void
your warranty.
■
Before you begin
• Only use U-100 insulin that has been prescribed by your healthcare
professional for use with an infusion pump. Do not put any other drugs or
medications inside your reservoir for use with this pump. Other drugs or
medications are not intended for use with this pump. Use of other drugs or
medications can cause serious injury.
• Always make sure the infusion set is disconnected from your body before you
rewind your pump or fill the infusion set tubing. Never insert the reservoir into
the pump while the tubing is connected to your body. Doing so could result
in an accidental infusion of insulin.
• Do not insert the reservoir in the pump if you did not rewind your pump.
Doing so could result in an accidental infusion of insulin.
Before you begin 11
Page 28

• Do not use the MiniMed 630G insulin pump or additional system devices
adjacent to other electrical equipment which may cause interference with the
normal system operation. This includes mobile communication devices such
as cell phones, GPS navigation systems, anti-theft systems, and any electrical
equipment that has an output transmitter power greater than 1W. For more
information about recommended separation distance guidelines between the
insulin pump and common RF emitters, see Guidance and manufacturer's
declaration, on page 267. The recommended separation distance between the
insulin pump and common RF emitters is 12 inches. Other electrical
equipment that may compromise normal system operation has been
contraindicated. For more information, see Exposure to magnetic fields and
radiation, on page 13.
• Do not unscrew or retighten the tubing connector on the reservoir while the
infusion set is connected to your body. Doing so could result in an accidental
infusion of insulin.
•
Do not use the MiniLink transmitter, MMT-7703, with the MiniMed 630G
insulin pump. This device does not communicate with this insulin pump. Use
of this transmitter with this insulin pump can result in serious injury.
• Do not use the Guardian Link transmitter, MMT-7763, with the Guardian
Sensor (3), MMT-7020. They do not work together. Use of this transmitter with
this sensor, causes damage.to these devices and can result in serious injury.
• Do not use your pump if the screen appears broken or unreadable. In some
instances, impact to the pump can damage the screen while the buttons
continue to function. If the screen is broken or unreadable, do not press any
buttons. Remove the pump and begin using your backup insulin plan per the
direction of your healthcare professional. If the pump is accidentally
programmed while the screen is broken or unreadable, this could result in
high or low blood glucose levels. If your screen is damaged, contact the 24
Hour HelpLine to arrange for shipment of a replacement pump.
Pursuant to IEC60601-1-2:2007; subclause 5.2.2:
The MiniMed 630G insulin pump should not be used adjacent to other electrical
equipment. If adjacent use becomes necessary, the MiniMed 630G insulin pump
should be observed to verify normal system operation.
12 Chapter 1
Page 29

Exposure to magnetic fields and radiation
• Do not expose your pump to MRI equipment, diathermy devices, or other
devices that generate strong magnetic fields (for example, x-ray, CT scan, or
other types of radiation). The strong magnetic fields can cause the devices to
malfunction, and result in serious injury. If your transmitter is exposed to a
strong magnetic field, discontinue use and contact the 24 Hour HelpLine for
further assistance.
■
• Always remove your pump, sensor, transmitter, and meter before entering a
room that has x-ray, MRI, diathermy, or CT scan equipment. The magnetic
fields and radiation in the immediate vicinity of this equipment can make your
devices nonfunctional or damage the part of the pump that regulates insulin
delivery, possibly resulting in over delivery and severe hypoglycemia.
• Always carry the Medical emergency card provided with your device when
you are traveling. The Medical emergency card provides critical information
about airport security systems, and using your pump on an airplane, that can
help you and others. Not carrying the Medical emergency card could result in
serious injury.
• Do not expose your pump to a magnet, such as pump cases that have a
magnetic clasp. Exposure to a magnet may interfere with the motor inside the
pump. Damage to the motor can cause the device to malfunction, and result
in serious injury.
Reservoir and infusion sets
• Only use reservoir and infusion sets manufactured by Medtronic Diabetes. The
pump has undergone extensive testing to confirm appropriate operation
when used with compatible reservoirs and infusion sets manufactured or
distributed by Medtronic Diabetes. We cannot guarantee appropriate
operation if the pump is used with reservoirs or infusion sets offered by third
parties. We are not responsible for any injury or malfunctioning of the pump
that may occur in association with such use.
Before you begin
• Only use U-100 insulin that has been prescribed by your healthcare
professional for use with an infusion pump. Do not put any other drugs or
medications inside your reservoir for use with this pump. Other drugs or
medications are not intended for use with this pump. Use of other drugs or
medications can cause serious injury.
Before you begin 13
Page 30

• Always refer to the reservoir and infusion set user guides for all precautions,
warnings, and instructions relating to the reservoir and infusion set. Not
referring to the reservoir and infusion set user guides can result in serious
injury or damage to the sensor.
Sensor
• Do not attempt to remove the sensor yourself if you suspect that the sensor is
broken. While there is no evidence of a Guardian Sensor (3) breaking in a
patient’s body, sensor breakage can result in serious injury. Contact your
healthcare professional for assistance in removing the sensor.
• Always refer to the sensor user guide for all precautions, warnings, and
instructions relating to the sensor. Not referring to the sensor user guide can
result in serious injury or damage to the sensor.
Transmitter
• Do not allow children to put small parts in their mouth. This product poses a
choking hazard for young children.
• Always refer to the transmitter user guide for all precautions, warnings, and
instructions relating to the transmitter. Not referring to the transmitter user
guide can result in serious injury or damage to the transmitter.
Meter
• Always refer to the meter user guide for all precautions, warnings, and
instructions relating to the CONTOUR NEXT LINK 2.4 meter. Not referring to
the meter user guide can result in serious injury or damage to the meter.
General precautions
• Always test your blood glucose levels at least four times per day. Although the
pump has multiple safety alarms, it cannot notify you if the infusion set is
leaking, or the insulin has lost its potency. If your blood glucose is out of
range, check the pump and the infusion set to ensure that the necessary
amount of insulin is being delivered.
14 Chapter 1
Page 31

Waterproof capabilities
• At the time of manufacture and when the reservoir and tubing are properly
inserted, your pump is waterproof. It is protected against the effects of being
underwater to a depth of up to 12 feet (3.6 meters) for up to 24 hours.
• If the pump is dropped, hit against a hard object, or otherwise damaged, the
waterproof characteristics of the outer casing of the pump may be
compromised. If your pump has been dropped or you suspect your pump is
damaged, carefully inspect your pump to ensure there are no cracks before
exposing your pump to water.
• This waterproof capability rating applies only to your pump.
• If you believe that water has entered your pump or you observe any other
possible pump malfunction, check your blood glucose, and treat high blood
glucose as necessary, using an alternative source of insulin. Contact the 24
Hour HelpLine for further assistance. Always contact your healthcare
professional if you experience excessively high or low blood glucose levels or
if you have any questions about your care.
Electrostatic discharge
■
Before you begin
• Although your MiniMed 630G insulin pump is designed to be unaffected by
typical levels of electrostatic discharge (ESD), very high levels of ESD can result
in a reset of the pump's software and a pump error alarm. After clearing the
alarm, verify that your pump is set to the correct date and time, and that all
other settings are programmed to the desired values. The software reset could
erase your previously programmed settings.
• For more information on pump alarms, see Pump alarms, alerts, and messages,
on page 202. For more information on re-entering your pump settings, see My
pump is asking me to enter my settings, on page 230. If you are unable to re-
enter your pump settings, or otherwise believe there is a problem with your
pump, contact the 24 Hour HelpLine.
Extreme temperatures
Exposure to extreme temperatures can damage your device, which can adversely
affect safety and effectiveness of your device. Avoid the following conditions:
1. Avoid exposing your pump to temperatures above 104 °F (40 °C) or below
41 °F (5 °C). This may damage your device.
Before you begin 15
Page 32

2. Insulin solutions freeze near 32 °F (0 °C) and degrade at high temperatures. If
you are outside in cold weather, wear your pump close to your body and
cover it with warm clothing. If you are in a warm environment, take measures
to keep your pump and insulin cool.
3. Do not steam, heat, sterilize, or autoclave your pump. Exposure to high
temperatures may damage your device.
Lotion, sunscreen, and insect repellent
• Some skin care products, such as lotion, sunscreen, and insect repellents, can
cause damage to plastics, which is a material used in your pump case.
Carefully inspect your pump to ensure there are no cracks. After using such
products, be sure to wash your hands prior to handling your pump. If you get
any skin care products or insect repellents on your pump, wipe them off as
soon as possible with a damp cloth and mild soap. For instructions on
cleaning your pump, see Cleaning your pump, on page 239.
Infusion sets and sites
• Always refer to the infusion set user guide for all precautions, warnings, and
instructions relating to the infusion set and your insertion sites. Not referring
to the infusion set user guide can result in minor injury or damage to the
infusion set.
Sensor
• Always refer to the sensor user guide for all precautions, warnings, and
instructions relating to the sensor. Not referring to the sensor user guide can
result in minor injury or damage to the sensor.
Transmitter
• Always refer to the transmitter user guide for all precautions, warnings, and
instructions relating to the transmitter. Not referring to the transmitter user
guide can result in minor injury or damage to the transmitter.
Meter
• Always refer to the meter user guide for all precautions, warnings, and
instructions relating to the CONTOUR NEXT LINK 2.4 meter. Not referring to
the meter user guide can result in minor injury or damage to the meter.
16 Chapter 1
Page 33

Adverse reactions
• Always refer to the sensor user guide for adverse reactions related to the
sensor. Not referring to the sensor user guide can result in minor injury or
damage to the sensor.
Notice
Radio Frequency (RF) communication
• This device complies with the United States Federal Communications
Commission (FCC) and international standards for electromagnetic
compatibility.
• This device complies with Part 15 of the FCC Rules. Operation is subject to the
following two conditions: (1) This device may not cause harmful interference,
and (2) this device must accept any interference received, including
interference that may cause undesired operation.
• These standards are designed to provide reasonable protection against
excessive radio frequency interference, and prevent undesirable operation of
the devices from unwanted electromagnetic interference.
• This equipment has been tested and found to comply with the limits for a
Class B digital device, pursuant to Part 15 of the FCC rules. These limits are
designed to provide reasonable protection against harmful interference in a
residential installation. This equipment generates, uses, and can radiate radio
frequency energy and, if not installed and used in accordance with the
instructions, may cause harmful interference to radio communications.
However, there is no guarantee that interference will not occur in a particular
installation. If this equipment does cause harmful interference to radio or
television reception, which can be determined by turning the equipment off
and on, the user is encouraged to try to correct the interference by one or
more of the following measures:
■
Before you begin
• Reorient or relocate the receiving antenna.
• Increase the separation between the equipment and the receiver.
Before you begin 17
Page 34

• This device can generate, use, and radiate radio frequency energy and, if not
installed and used in accordance with the instructions, may cause harmful
interference to radio communications. If the device does cause interference to
radio or television reception, you are encouraged to try to correct the
interference by one or more of the following measures:
• Decrease the distance between the transmitter and the insulin pump to
6 feet (1.8 meters) or less.
• Decrease the distance between the meter and the insulin pump to 6 feet
(1.8 meters) or less.
• Increase the separation between the transmitter and the device that is
receiving/emitting interference.
Note: Harmful interference is defined by the FCC as follows.
Any emission, radiation or induction that endangers the
functioning of a radio navigation service or of other safety
services or seriously degrades, obstructs or repeatedly interrupts
a radio communications service operating in accordance with
FCC rules.
•If other devices that employ radio frequencies are in use, such as cell phones,
cordless phones, and wireless networks, they may prevent communication
between the transmitter and the insulin pump. This interference does not
cause any incorrect data to be sent and does not cause any harm to your
devices. Moving away from, or turning off, these other devices may enable
communication. If you continue to experience RF interference, please contact
the 24 Hour HelpLine.
• Do not change or modify the internal RF transmitter or antenna unless
expressly approved by Medtronic Diabetes. Doing so could interfere with your
ability to operate the equipment.
IEC60601-1-2:2007; Special EMC Precautions for Medical Electrical Equipment
1. Special Precautions regarding Electromagnetic Compatibility (EMC): This body
worn device is intended to be operated within a reasonable residential,
domestic, public or work environment, where common levels of radiated “E”
(V/m) or “H” fields (A/m) exist; such as cellular phones, Wi-Fi, Bluetooth
18 Chapter 1
Page 35

wireless technology, electric can openers, microwave and induction ovens.
This device generates, uses, and can radiate radio frequency energy and, if
not installed and used in accordance with the provided instructions, may
cause harmful interference to radio communications.
2. Portable and mobile RF communications equipment can affect Medical
Electrical Equipment as well. If you encounter RF interference from a mobile
or stationary RF transmitter, move away from the RF transmitter that is
causing the interference.
Keeping track of your system information
The serial number (SN) is located on the back of your pump. If you are using the
pump clip, you need to remove the pump clip to view the serial number. It also
displays in your Pump status screen. For more details on the status screens, see
Status screens, on page 37. You will need your pump serial number if you call the
24 Hour HelpLine. For future reference, enter the serial number of your pump and
the purchase date in the following table:
Pump serial number and purchase date
■
Before you begin
Serial Number:
Purchase Date:
Insulin guidelines
WARNING: Never start on insulin until directed by your healthcare
professional. Doing so could result in an unintended delivery of
insulin, which can cause hypoglycemia.
The MiniMed 630G insulin pump has been studied with and is intended for use
with the following rapid-acting U-100 insulins:
•U-100 Humalog
•U-100 NovoLog
The use of any other insulin in the MiniMed 630G insulin pump has not been
tested and may not be appropriate for use with this device.
Before you begin 19
Page 36

WARNING: Do not use any other insulin with your pump other
than the above specified rapid-acting U-100 insulins (Humalog,
NovoLog). Use of the incorrect insulin, or insulin with a greater or
lesser concentration, may result in over delivery or under delivery of
insulin. This could lead to very low or very high blood glucose
levels. Very high BG levels may lead to Diabetic Ketoacidosis and
very low glucose levels may lead to coma and death. If you are
unsure about whether you can use a specific insulin with this pump,
please consult with your healthcare provider.
Consumables
The pump uses disposable (single-use) MiniMed reservoirs and infusion sets for
insulin delivery.
WARNING: Only use reservoir and infusion sets manufactured by
Medtronic Diabetes. The pump has undergone extensive testing to
confirm appropriate operation when used with compatible
reservoirs and infusion sets manufactured or distributed by
Medtronic Diabetes. We cannot guarantee appropriate operation if
the pump is used with reservoirs or infusion sets offered by third
parties and therefore we are not responsible for any injury or
malfunctioning of the pump that may occur in association with such
use.
• Reservoirs – Use only Medtronic reservoirs.
Look on the back of your pump for your model number.
For the MMT-1715 pump model, use the MMT-332A, 3.0 ml (300-unit)
reservoir.
• Infusion sets – Medtronic Diabetes provides a variety of infusion sets to fit
your needs. Contact your healthcare professional for help in choosing an
infusion set. Change your infusion set every two to three days per your
infusion set manufacturer's instructions.
20 Chapter 1
Page 37

Additional 630G system devices
• CONTOUR NEXT LINK 2.4 meter – The 630G system comes with a CONTOUR
NEXT LINK 2.4 meter. It wirelessly connects to your pump, allowing you to
send BG meter readings to your pump. The Remote Bolus feature allows you
to use your meter to start a bolus on your pump. You can also use this meter
to upload system data to your diabetes management software using the USB
port on your computer. For more details, see your meter user guide.
■
• Guardian Link (3) transmitter (MMT-7811) – used with your pump for
Continuous Glucose Monitoring (CGM). A device that connects to a glucose
sensor. The transmitter collects data measured by the sensor and wirelessly
sends this data to monitoring devices.
• Guardian Sensor (3) (MMT-7020) – used with your pump for CGM. The sensor
is a small part of the continuous glucose monitoring system that you insert
just below your skin to measure glucose levels in your interstitial fluid. The
sensor is a disposable (single-use) device.
• CareLink USB device (MMT-7306) – used to upload system data to the
diabetes management software using a USB port on your computer.
Accessories
The following accessories may be used with the MiniMed 630G system.
• Pump clip – used to wear the pump on your belt. Also, you can use the tip of
the pump clip to open the battery compartment on your pump.
• Activity guard – used if you are active in sports, or if a child is wearing the
pump. Using the activity guard prevents the reservoir from being rotated or
removed from the pump.
Before you begin
• Skins – used to personalize the look of your pump. Skins are decorative
overlays. Your pump is designed to have skins attached to the back of the
pump and the front of the pump clip. Skins also provide additional protection
against surface scratches.
Before you begin 21
Page 38

Ordering supplies and accessories
To order supplies or accessories, call 800 646 4633, +1 818 362 5958 (outside U.S.),
refer to the contacts list at the beginning of this user guide, or visit our website at
www.medtronicdiabetes.com.
22 Chapter 1
Page 39

First steps
Page 40

Page 41

First steps
This chapter gives you an overview of your pump so you can become familiar with
the buttons and screens. Read this entire chapter to understand the basic features
and initial setup before using your pump to deliver insulin.
Your pump
The following illustration shows the different parts of your pump. The reservoir,
with the tubing connector attached, is inserted into the reservoir compartment.
tubing connector
■
First steps
reservoir compartment
battery compartment
screen
buttons
First steps 25
Page 42

Using the buttons
Caution: Do not use sharp objects to press the buttons on your
pump. Using sharp objects can damage your pump.
The following picture shows the buttons, the notification light, and the light sensor
on your pump. The notification light flashes when your pump has an alarm or
alert. The notification light is not visible unless flashing.
The keypad has a backlight that lights up the buttons when in use.
up
back
notification
light
left
down
Note: Do not cover the light sensor with your finger while using your
pump. Covering the light sensor may adjust the brightness on the screen
when brightness is set to Auto. See Display Options, on page 145 for more
information.
The following table describes how to use the buttons.
light sensor
menu
select
right
26 Chapter 2
Page 43

To do this: Follow these steps:
Scroll up or down a menu or list,
or increase or decrease the value
of a setting.
Select an item on a screen or
menu.
Enter a value into a field. Press the
Return to the previous screen.
Display the Menu screen. Press the
Display the Home screen. When you are on any screen other than the Home
Put the pump in sleep mode. Press and hold
Wake up the pump. Press any button.
Press the
Press the
desired item, and then press the
desired field, and then press the
field you select flashes. Press the
to enter the desired value, and then press the
button.
Press the
screen, press and hold the
one second.
or buttons.
, , , or buttons to select the
button.
, , , or buttons to select the
button. The
or buttons
button.
button.
button for about
for about two seconds.
■
First steps
About batteries
The pump requires one new AA (1.5 V) battery. For best results, use a new AA
lithium (FR6) battery. The pump also accepts an AA alkaline (LR6) or a fully charged
AA NiMH (HR6) nickel-metal hydride rechargeable battery.
Caution: Do not use a carbon zinc battery in your pump. Carbon zinc
batteries are not compatible with the pump. Use of carbon zinc
batteries can cause the pump to report inaccurate battery levels.
Note: Do not use cold batteries because the battery life may incorrectly
appear as low. This can cause a Battery Failed alarm on your pump. Allow
cold batteries to reach room temperature before you insert them in your
pump.
First steps 27
Page 44

Inserting the battery
Your pump does not ship with the battery cap on. The battery cap is located in
the pump box, separate from the pump.
battery
battery cap
pump clip
To insert the battery:
1. Insert the new or fully charged AA battery, making sure to insert the negative
end (−) first. After you insert the battery, the positive end (+) is visible.
2. Use the pump clip to tighten the battery cap.
28 Chapter 2
Page 45

Caution: Do not overtighten or undertighten the battery cap.
Overtightening the battery cap can cause damage to your pump
case. Undertightening the battery cap will prevent the pump from
recognizing the new battery. Turn the battery cap clockwise until
the cap is aligned horizontally with the pump case, as shown in
the following example.
3. If this is the first time you have inserted a battery in your pump, the Startup
Wizard begins. For more information about the Startup Wizard, see Entering
your startup settings, on page 30. If this is not the first time you have inserted
a battery into your pump, the Home screen appears and the pump resumes
your basal delivery.
■
First steps
Removing the battery
Caution: Do not remove the battery unless you are inserting a new
one, or if you are storing your pump. Your pump cannot deliver
insulin while the battery is removed. After removing an old battery, be
sure to replace it with a new battery within 10 minutes to clear the
Insert battery alarm and avoid a Power loss alarm. If power loss
occurs, you must re-enter your time and date settings.
To remove the battery:
1. Before removing a battery from your pump, clear any active alarms or alerts.
2. Use the pump clip to loosen and remove the battery cap. See Inserting the
battery, on page 28 for an illustration of battery parts.
First steps 29
Page 46

Note: Use your pump clip to remove and retighten the battery cap.
If the pump clip is unavailable, you may use a coin.
3. Remove the battery.
4. Dispose of old batteries according to local disposal requirements, or contact
your healthcare professional for disposal information.
5. After removing your battery, wait until the Insert Battery screen appears
before inserting a new battery.
If you are removing the battery to place your pump in storage, see Storing
your pump, on page 240 for more information.
Getting to know your pump
This section shows you how to navigate through the screens and menus on your
pump. It also helps you learn how to enter information and view the status of your
pump.
Entering your startup settings
Your pump has a Startup Wizard that begins when you insert your battery for the
first time. The Startup Wizard guides you through setting the language, the time
format, the current time, and the current date.
Note: Use this procedure when you are entering your settings for the
first time. If this is not the first time you are entering your pump settings,
and your pump is asking you to re-enter your settings, see My pump is
asking me to enter my settings, on page 230.
30 Chapter 2
Page 47

To use the Startup Wizard:
1. The Startup Wizard begins after the Welcome screen appears. When the
Select Language screen appears, select your language.
2. When the Select Time Format screen appears, select a 12 Hour or a 24 Hour
time format.
■
First steps
3. When the Enter Time screen appears, adjust the setting to the current time. If
you are using a 12-hour clock, be sure to specify AM or PM. Select Next.
4. When the Enter Date screen appears, adjust the Year, Month and Day to the
current date. Select Next.
First steps 31
Page 48

A message confirms that your initial setup is complete, and then the Home
screen appears.
After you enter your initial settings, see the following sections in this chapter
to become familiar with the buttons and screens on your pump.
Unlocking your pump
Your pump automatically locks when entering sleep mode. When you wake up
your pump from sleep mode, you must unlock your pump before navigating away
from the Home screen. When you press menu
screen asking you to unlock your pump. Press the highlighted button to unlock
your pump.
The pump will take you to your selected screen after you press the correct button.
If you press an incorrect button, the screen prompts you to try again.
or select , you will be shown a
After your pump is unlocked, it will remain unlocked until you re-enter sleep
mode. For information about the different power modes, or to put your pump to
sleep, see Power modes, on page 40.
32 Chapter 2
Page 49

Home screen
The Home screen appears by default after you change the battery, when you wake
the pump from sleep mode, and when you are not actively using another screen.
You can navigate to the Home screen from any other screen by pressing and
holding the
To see what your Home screen looks like if you use a sensor, see Home screen with
CGM, on page 156.
button for about one second.
status bar
BG
5:00
PM
current time
■
First steps
BG meter readings
U
active insulin
amount
basal delivery
options
bolus delivery
options
110
Active Insulin
Bolus
mg/dL
1.0
Basal
The following items appear on your Home screen:
Item Description
Status bar Displays icons that show a quick status of your pump system. For more
information, see Status bar, on page 34. By selecting the status bar you
can access more detailed status screens. For more information, see Status
screens, on page 37.
Current
time
BG meter
readings
Displays the current time of day. For details on setting the time, see Time
and date, on page 152.
If you have taken a BG meter reading using your CONTOUR NEXT LINK 2.4
meter or manually entered a BG meter reading within the last 12 minutes,
the BG meter reading appears on the Home screen.
You can enter your BG meter reading manually using the Event Markers
feature, or when you use the Bolus Wizard feature to deliver a bolus. For
details on using the Bolus Wizard feature, see Bolus Wizard feature, on
page 71. For details on entering events, see Event Markers, on page 128.
Active
Insulin
Displays the amount of bolus insulin the pump estimates is still working
to lower your blood glucose levels. For more details on active insulin, see
About active insulin, on page 78.
First steps 33
Page 50

Item Description
Bolus Allows you to access your bolus delivery options, and provides access to
all of your insulin settings. For details about entering your bolus settings
and delivering bolus insulin, see the Bolus chapter on page 65.
If you have not set up the Bolus Wizard feature and Preset Bolus features,
you only have access to Manual Bolus from this screen. For details about
setting up the Bolus Wizard feature, see Bolus Wizard feature, on page 71.
For details about setting up the Preset Bolus feature, see Preset Bolus, on
page 91.
Basal Allows you to access your basal delivery options, and provides access to
all of your insulin settings. For details about entering your basal settings
and delivering basal insulin, see the Basal chapter on page 45.
To access all of your basal options from this screen, you must have set up
a Preset Temp basal rate. For details about setting up Preset Temp basal
rates, see Preset Temp basal rates, on page 56.
Status bar
The status bar appears at the top of the Home screen to provide a way for you to
quickly check the status of your system. The status bar contains the icons that are
described in the following table, along with the current time. For information on
viewing detailed status screens, see Status screens, on page 37.
Icon Icon name What it means
Battery The charge level of your pump battery. The color and
the fill level of the icon indicate the status. When your
battery is full, the icon is solid green. As your battery
life is used, the icon changes, as shown in the following
example. For more details about batteries, see About
batteries, on page 27.
34 Chapter 2
Page 51

Icon Icon name What it means
Connection
Airplane Mode Appears in place of the Connection icon if Airplane
Reservoir Shows the approximate amount of insulin left in your
The connection icon appears green
Sensor feature is on and your transmitter is successfully
communicating with your pump. The connection icon
appears gray
but the transmitter is not connected or communication
with your pump has been lost. For more information
about the Sensor feature, see Understanding continuous
glucose monitoring (CGM), on page 155.
Mode is turned on. When Airplane Mode is turned on,
the pump cannot receive wireless communication from
other devices. The pump also cannot send wireless
communication to other devices. For more information
about using Airplane Mode, see Airplane Mode, on
page 141.
reservoir. The color and the fill level of the icon indicate
the status. When your reservoir is full, the icon is solid
green. As your insulin is used, the icon becomes
emptier, and the color of the icon changes as shown in
the following example. For more information about
your reservoir, see Reservoir and infusion set on
page 97.
when the Sensor feature is turned on,
when the
■
First steps
Audio
The audio mode you are using: vibrate only
only
about your audio settings, see Audio Options, on
page 142.
, or vibrate and audio . For more information
First steps 35
, audio
Page 52

Icon Icon name What it means
Calibration The approximate time left until your next sensor
calibration is due. Appears only when the Sensor
feature is turned on. The color and the fill level of the
icon indicate the status. When your sensor is fully
calibrated, the icon is solid green. As the time for your
next sensor calibration approaches, the icon becomes
emptier, and the color of the icon changes as shown in
the following example. For more information about
calibrating your sensor, see Calibrating your sensor, on
page 183.
When your sensor is initializing, the Calibration icon
appears with three dots
. If the time to your next
sensor calibration is unavailable, the Calibration icon
appears with a question mark
.
Sensor Life The number of days remaining in the life of your
sensor. Appears only when the Sensor feature is turned
on. The color and the fill level of the icon indicate the
status. When you insert a new sensor, the icon is solid
green. As your sensor life is used, the icon becomes
emptier. The icon turns yellow when less than 24 hours
remains in the life of your sensor. It turns red when less
than 12 hours remains in the life of your sensor.
If the number of days remaining in the life of your
sensor is unavailable, the Sensor Life icon appears with
a question mark
.
36 Chapter 2
Page 53

Icon Icon name What it means
Block Mode Indicates that the pump is in Block Mode, and that
certain functions are restricted. Caregivers, such as
parents of a young child, can use Block Mode to restrict
access to critical pump settings. For more information
about Block Mode, see Block Mode, on page 143.
Temporary
Network
Connection
Appears while you are temporarily connected to a
remote upload device.
Status screens
The Status screens provide information about your pump, any notifications you
have received, your current settings, and optional sensor. The Status screens are
described in the following table:
Status screen Displays this information
Notifications A list of alarms, alerts, and reminders that have occurred over the past
24 hours. You can display further details about a particular alarm, alert,
or reminder by selecting it from the list. For more information on
alarms and alerts, see the Alarms, alerts, and messages chapter.
Quick Status A summary of status information, including your last bolus, last BG
meter reading, current basal rate, reservoir level, and pump battery
charge level. If you are using a sensor, this screen also displays the
time that your next calibration is due and the SmartGuard suspend by
sensor status.
■
First steps
Pump Provides a detailed view of your pump status, including whether your
pump is in a specific mode, the reservoir status, battery status, the
pump serial number, and other details about your pump.
Sensor The Sensor status screen is available only if your sensor feature is
turned on. The Sensor status screen indicates if any alert silence
options are turned on. It also shows the status of your calibrations,
your sensor life, ISIG, transmitter battery, the serial number and version
number of your transmitter, and the SmartGuard suspend by sensor
status.
First steps 37
Page 54

Status screen Displays this information
Settings
Review
The Settings Review screen provides a list of all your pump settings.
The settings are organized by where they appear in the menu for
your pump. For example, your bolus settings appear under the Insulin
Settings section, and your brightness level setting appears under the
Utilities section.
Viewing the Status screens
1. Go to the Home screen.
2. Select the status bar that appears at the top of the Home screen.
5:00
PM
BG
110
Active Insulin
Bolus
The Status screen appears.
mg/dL
Basal
1.0
U
3. Select the status screen that you want to view. Refer to the table at the
beginning of this section for a description of the different status screens.
Using the Menu screen
The Menu screen is where you access the various features and functions of your
system. To display the Menu screen, press
38 Chapter 2
.
Page 55

The following options are available from the Menu screen:
Select this To do this
Suspend Delivery Stop your current basal and bolus insulin delivery.
Audio Options Set your audio, vibrate, and volume options for the notifications
you receive.
History Access the Summary, Daily History, and Alarm History screens. If
you are using a sensor, you can access the SG Review and ISIG
History screens.
■
First steps
Reservoir &
Tubing
Insulin Settings Set up and manage your insulin delivery options, including your
Sensor Settings Set up your optional continuous glucose monitoring device
Event Markers Save information about events, such as exercise, blood glucose
Reminders Set up reminders to help monitor your system and to help you
Utilities Set up and manage the features and functions of your system.
Start the process of changing your reservoir and infusion set.
Basal and Bolus settings.
settings.
readings, carbs you eat, or injections you take. If you are using a
sensor, the blood glucose readings may be used for calibration.
manage your diabetes. You can also create reminders for personal
events.
First steps 39
Page 56

Scroll bar
The scroll bar is located on the right side of the display, as shown in the following
example. It appears only when there is more information available to view on the
screen. Press
or to move up or down the screen.
scroll bar
Power modes
Your pump is designed to conserve battery power when you are not actively using
the pump screens.
In this
mode
Awake Your pump screen is on. Unless you are actively using another screen, your
Power
save
Your pump behaves like this
Home screen appears.
To wake up your pump from being in power save or sleep mode, press
any button. If your pump has been in sleep mode, the pump is locked. To
unlock your pump, see Unlocking your pump, on page 32.
Your pump is fully functional, but the screen goes dark to save power. You
can set how long it takes for your screen to enter power save mode by
changing the Backlight setting. For more information, see Display Options,
on page 145. If any button is pressed while the pump is in Power save
mode, the pump returns to the screen that was last displayed.
40 Chapter 2
Page 57

In this
mode
Sleep Your pump automatically enters sleep mode about two minutes after your
Your pump behaves like this
pump enters power save mode if no buttons are pressed. At this time,
your pump automatically locks. If any button is pressed, your pump returns
to the Home screen.
Note: In some cases, if there is an action you need to take,
your pump returns to the screen last displayed. This
includes startup settings, loading your reservoir, filling your
tubing, filling your cannula, and any screen where you have
an action pending.
To put your pump into sleep mode, press and hold the Menu button
for about two seconds.
If you remove your pump
You may have an occasion when you need or want to remove your pump. If you
have to remove and store your pump, it is recommended that you do the
following:
■
First steps
• Write down a record of your current basal rates and use the Save Settings
feature. See Saving your settings, on page 146 for more information.
• Remove the battery. See Storing your pump, on page 240 for more information.
Remember, your body still needs insulin while your pump is removed.
Consult your healthcare professional to determine an alternate method of
receiving insulin. Disconnecting from your pump for less than one hour may not
require an insulin adjustment. If you remove your pump for more than one hour,
you should take your insulin another way, as prescribed by your healthcare
professional.
First steps 41
Page 58

42 Chapter 2
Page 59

Basal
Page 60

Page 61

Basal
Basal insulin is the "background" insulin that you need throughout the day and
night to maintain your target blood glucose values when you are not eating. Your
basal insulin accounts for approximately one half of your daily insulin requirements.
Your pump mimics a pancreas by delivering insulin continuously over 24 hours.
Your basal insulin is delivered according to a basal pattern. Basal patterns and
other basal settings are described in the following sections.
Basal rate
Your basal rate is the specific amount of basal insulin that your pump continuously
delivers each hour. While some people use one basal rate all day, others require
different rates at different times of the day.
■
Basal
Your basal rates are set in one or more basal patterns. Each basal pattern covers
24 hours. For specific information about basal patterns, see Basal patterns, on
page 48.
Basal 45
Page 62

Basal insulin settings
Your basal insulin delivery settings are described in the following table.
Setting What it is What it does for you
Basal Pattern A set of one or more
basal rates that cover a
24-hour period.
Temp Basal A basal rate that you use
in place of your
scheduled basal rate for
short-term situations.
Preset Temp A temporary basal rate
that you can define
ahead of time.
Determines the amount of insulin you
receive per hour throughout the day
and night. Allows you to vary your basal
rate according to your needs. You can
set up to eight basal patterns. For
details on setting up basal patterns, see
Adding a new basal pattern, on page 48.
For details about starting a basal
pattern, see Changing from one basal
pattern to another, on page 52.
Allows you to temporarily change your
current basal rate for a duration of time
that you specify. For details about
starting a temp basal rate, see Starting a
Temp Basal rate, on page 55.
Allows you to set and save temporary
basal rates for known short-term
situations, such as when you are sick or
have times of increased or decreased
activity. For details about setting up a
preset temp basal rate, see Preset Temp
basal rates, on page 56. For details
about starting a preset temp basal rate,
see Starting a Preset Temp basal rate, on
page 58.
Max Basal Rate Maximum amount of
basal insulin that your
pump can deliver
per hour.
46 Chapter 3
Provides a safety measure by limiting
the total amount of basal insulin your
pump can deliver per hour. For details
about setting your Max Basal rate, see
Max Basal Rate, on page 47.
Page 63

Max Basal Rate
Max Basal Rate limits the amount of basal insulin that can be delivered per hour,
based on the maximum rate you set. You are unable to set any basal rates, temp
basal rates, or preset temp basal rates that exceed the max basal rate amount. You
can set your max basal rate from 0 to 35 units per hour. Set your max basal rate as
prescribed by your healthcare professional.
■
Note: If you are setting your max basal rate after you have set up your
basal patterns or preset temp basal rates, you cannot set your max basal
rate lower than any of your existing basal rates. You cannot access this
feature during a bolus delivery.
To set your Max Basal Rate:
1. Go to the Max Basal/Bolus screen.
Menu > Insulin Settings > Max Basal/Bolus
2. Select Max Basal to set the maximum number of basal insulin units that can
be delivered each hour.
Because the Max Basal Rate setting determines your basal insulin limits, a
warning message appears any time you enter the screen to change the value.
To continue setting the value, select Continue.
3. In the Max Basal Rate screen, select Max Basal to set the maximum units per
hour.
4. Select Save.
Example 1: Max basal
Basal
Helen has a very low insulin requirement. Her highest basal rate is only 0.400 units
per hour. As a safety measure, Helen's healthcare professional set her pump with a
Maximum basal rate of 1.00 units per hour.
Example 2: Max basal
Rusty needs large amounts of insulin to control his blood glucose levels. His new
pump was delivered from the factory with a Maximum basal rate of 2.00 units per
hour, but he needs 2.80 units per hour in the early morning. Rusty will reprogram
his Maximum basal to 3.00 units per hour to accommodate his needs.
Basal 47
Page 64

Basal patterns
Your basal pattern determines the amount of basal insulin you receive throughout
the day and night. Because your basal insulin needs can vary, you can set up to
eight basal patterns. For example, you might use one basal pattern during the
week and a different basal pattern during the weekend.
A basal pattern is made up of one to 48 basal rates that you set up to cover a full
24-hour period. If you only need one basal rate throughout the day, you set only
one rate for the 24-hour period. If you need the basal rates to change during the
day or night to better match your insulin needs, you can set more than one rate,
each with a separate start and end time.
The following example represents one basal pattern with three basal rates set for
three different time periods.
1.000
0.500
U/hr
12:00 A 6:00 A
12:00 A – 8:00 A
0.900 U/hr 0.900 U/hr
8:00 A – 6:00 P
0.650 U/hr
12:00 P 6:00 P
24 Hours
6:00 P – 12:00 A
Your healthcare professional will determine what rates are right for you.
Note: If you have already set up basal patterns and want to switch from
using one basal pattern to another, see Changing from one basal pattern
to another, on page 52.
Adding a new basal pattern
This procedure shows you how to add a new basal pattern.
To add a new basal pattern:
1. Go to the Basal Pattern Setup screen.
Menu > Insulin Settings > Basal Pattern Setup
12:00 A
48 Chapter 3
Page 65

The Basal Pattern Setup screen appears. Your active basal pattern appears
with a check mark and the 24-hour delivery amount, as shown in the
following example.
2. If this is your first time setting up a basal pattern, the unit amount will be 0.0.
Select Basal 1 and proceed to step 5.
If this is not your first time setting up a basal pattern, proceed to the next
step to add a new pattern.
3. To add a new basal pattern, select Add New.
The Select Name screen appears.
■
Basal
Note: The Workday, Day Off, and Sick Day patterns are available so
that you can match a basal pattern name to your insulin needs on
those particular days.
4. Select the basal pattern that you want to set up. An edit screen appears for
the pattern you selected. The following example shows the Edit Workday
screen.
Basal 49
Page 66

Caution: Always set your basal rate in units per hour. Insulin is
delivered in units per hour, and does not adjust for shorter time
periods. For example, if you set a basal rate of 0.025 U/hr for a 30minute time period, this might result in no insulin delivered for
that 30-minute period.
Use one hour as the minimum time period for a basal rate.
5. To create one continuous 24-hour basal rate for your basal pattern, continue
with this step. To create more than one basal rate for your new basal pattern,
skip to step 6.
a. Leave End time at 12:00 AM to set a 24-hour rate. The Start time of the
first time segment is always 12:00 AM.
b. Set your rate in units per hour.
c. Skip to Step 7.
6. To create more than one basal rate for your new basal pattern, enter one
basal rate at a time, as described in the following steps:
a. Set the End time and the Rate for your first basal rate. You set your rates
in 30-minute increments.
50 Chapter 3
Page 67

If you set the End time to anything other than 12:00 AM, a second basal
rate setting appears.
The Start time for the next rate is always the same as the End time of
the previous rate.
Note: If you need to make a change, you can press to scroll
up to the rate you want to change. Adjust the End time or Rate
values as desired.
■
Basal
Note that pressing
adjusts the value of that field. When there is no field selected,
pressing
basal rates.
b. Continue setting rates for different time periods as needed. The End time
for your last rate must be 12:00 AM, as shown in the example below.
7. When you finish setting your basal pattern, select Done. (The Done option
appears only when the last End time in your basal pattern is set to 12:00 AM).
A screen appears that allows you to review your basal pattern. If you need to
make any changes, press
or allows you to scroll up or down the list of
or when a field is selected (flashing)
to return to the previous screen.
8. Select Save.
Basal 51
Page 68

To activate your basal pattern, see Changing from one basal pattern to another,
on page 52.
Editing, copying, or deleting a basal pattern
To edit, copy, or delete a basal pattern:
1. Go to the Basal Pattern Setup screen.
Menu > Insulin Settings > Basal Pattern Setup
The Basal Pattern Setup screen displays all of your existing basal patterns.
2. Select the basal pattern you want to edit, copy, or delete.
3. Select Options.
4. Do one of the following:
• Select Edit to adjust the End time or rate values for one or more of the
basal rates in this basal pattern.
• Select Copy to copy the basal rate information from the selected basal
pattern to a new basal pattern. When the Select Name screen appears,
you can select any available name from the list. Use the Edit option to
adjust the new basal pattern as desired.
• Select Delete to delete the selected basal pattern. You cannot delete the
active basal pattern.
Changing from one basal pattern to another
When you change to a new basal pattern, your pump delivers your basal insulin
according to the basal pattern you selected.
To change to a different basal pattern:
1. Go to the Basal Patterns screen.
Home screen > Basal > Basal Patterns
The Basal Patterns screen shows the basal patterns you have set up. The
active basal pattern is indicated with a check mark.
2. Select the basal pattern you want to start.
The Basal screen displays the details for the selected basal pattern.
3. To start this pattern, select Begin.
52 Chapter 3
Page 69

Example 1: Basal patterns
Ken has had his insulin pump for about a month. He tests his blood glucose 4–6
times a day and records his results in his logbook. He is happy with his glucose
control during the week but on the weekends, he noticed that he has to eat more
food to prevent his blood glucose from running too low.
Ken has realized that during the week while he is at work, he is very inactive and
sits at a desk most of the time. On the weekends, though, he is busy with yard
work, running errands and playing with his kids. He determines that he needs to
have lower basal settings to receive less insulin during active times, such as his
weekends.
He can use a second basal pattern to support his weekend change in activity.
During the week, he can set his pump to deliver his Basal 1 pattern, and on
Saturday morning, he can switch over to the Day Off pattern, which he can set
with lower basal rates for the weekend. On Monday morning, he can return his
pump to Basal 1 for his weekday insulin needs.
Example 2: Basal patterns
Cynthia has had diabetes for about 12 years and has been on her pump for several
weeks. Every Monday, Wednesday and Friday, Cynthia goes on a 2 mile walk in the
morning. To prevent hypoglycemia on these days, she uses a different basal
pattern. For those days, she simply switches over to Basal 2, which she has
programmed with a lower set of basal rates. Before she learned to use the patterns
feature, she would have to eat more food throughout the day to keep her blood
glucose at a safe level. Cynthia has also noticed that a few days prior to
menstruation, her blood glucose levels seem to rise, requiring more insulin. She
has programmed a Basal 3 pattern on her pump with higher basal rates for this
time. For her usual schedule, she uses the Basal 1 pattern.
■
Basal
Basal 53
Page 70

Temporary basal rates
The Temp Basal feature and Preset Temp feature allow you to set temporary basal
rates to manage blood glucose levels during short-term activities or conditions
that require a basal rate different than your current one, such as an illness or a
change in physical activity. You can make an immediate change to your basal
insulin for a set period of time (30 minutes to 24 hours), up to your max basal rate.
About Temp Basal rates
A temp basal rate temporarily overrides all other basal programming. Your
programmed basal pattern resumes after the temp basal rate delivery is completed
or cancelled.
The Temp Basal feature allows you to set and start a temporary basal rate
immediately. The Preset Temp feature allows you to set up a temp basal rate
ahead of time for known situations. You define temp basal rates and preset temp
basal rates using either a percentage of your current basal pattern, or by setting a
specific rate, as described in the following table.
This temp basal type: Works like this:
Percent Delivers a percentage of the basal rates programmed
in your active basal pattern for the duration of the
temp basal rate. The temp basal amount is rounded
down to the next 0.025 units if your basal rate is set at
less than 1 unit per hour, or to the next 0.05 units if
your basal rate is set at more than 1 unit per hour.
Temp basal rates can be set to deliver from 0 to 200%
(twice the amount) of your scheduled basal rate. The
percent amount you can use, however, is based on the
largest basal rate scheduled during the temp basal
duration, and is limited by your max basal rate.
Rate Delivers a fixed basal insulin rate in units per hour for
the duration of your temporary basal, limited by your
max basal rate.
To use the Temp Basal feature, see Starting a Temp Basal rate, on page 55. To use
the Preset Temp Basal feature, see Preset Temp basal rates, on page 56.
54 Chapter 3
Page 71

Starting a Temp Basal rate
When you start a temp basal rate, your basal delivery changes to the temporary
basal rate for the duration you set. When the duration is complete, your basal
insulin automatically returns to the active basal pattern.
To start a temp basal rate:
1. Go to the Temp Basal screen.
Home screen > Basal > Temp Basal
2. Duration is flashing. Set the Duration for this temp basal rate. The Duration
can be set from 30 minutes to 24 hours, in 15-minute increments.
3. Select Next.
4. The Type defaults to Percent. You can switch between Percent and Rate by
selecting Type.
■
Basal
5. Depending on the Type you selected, do one of the following:
• Enter a percentage:
Basal 55
Page 72

• Enter a basal rate, making sure you do not exceed your max basal rate:
6. If desired, select Review to review your temp basal setting.
7. Select Begin to start the temp basal rate.
Your Temp Basal rate continues for the duration you set. The Basal option on
the Home screen appears as Basal (T) during your temp basal delivery. Your
scheduled basal rate automatically starts again when your Temp Basal rate
finishes.
Note: If you need to cancel your temp basal, select Basal (T) from
the Home screen, then select Cancel Temp Basal.
Preset Temp basal rates
The Preset Temp feature allows you to set up basal rates for recurring short-term
situations where you need to temporarily change your basal rate.
There are four names you can use to match your preset temp basal rate to a
situation: High Activity, Moderate Activity, Low Activity, and Sick. There are also
four additional preset temp rates available to use for other circumstances (Temp 1
through Temp 4).
56 Chapter 3
Page 73

Setting up and managing Preset Temp basal rates
This section describes how to set up, edit, rename, or delete a preset temp basal
rate. For information on how to start using a preset temp basal rate, see Starting a
Preset Temp basal rate, on page 58.
To set up a preset temp basal rate:
1. Go to the Preset Temp Setup screen.
Menu > Insulin Settings > Preset Temp Setup
2. Select Add New.
3. Select a name for the preset temp basal rate you want to set (Temp 1, High
Activity, Moderate Activity, Low Activity, or Sick).
4. The Type defaults to Percent. You can switch between Percent and Rate by
selecting Type.
5. If you are using Percent, enter the percentage you want to use. If you are
using Rate, enter the rate in units per hour. You cannot exceed your max
basal rate.
6. Set the Duration (from 30 minutes to 24 hours in 15 minute increments) that
you want this preset temp basal to be active.
7. Select Save.
To change, rename, or delete a preset temp basal rate:
1. Go to the Preset Temp Setup screen.
Menu > Insulin Settings > Preset Temp Setup
■
Basal
2. Select the desired preset temp basal.
Note: You cannot select a preset temp basal rate that is currently in
use.
3. Select Options, and then do one of the following:
• Select Edit to adjust the Type (Percent or Rate), the Percentage or Rate
amount, and the Duration for this preset temp basal rate.
Basal 57
Page 74

• Select Rename to assign a different name to this preset temp basal rate.
When the Select Name screen appears, you can select any available name
from the list.
• Select Delete to delete this preset temp basal rate.
Starting a Preset Temp basal rate
You must set up preset temp basal rates before you can use the Preset Temp
feature. For more information, see Preset Temp basal rates, on page 56.
To start a preset temp basal rate:
1. Go to the Preset Temp screen. The Preset Temp option only appears if you
have set up preset temp basal rates.
Home screen > Basal > Preset Temp
The Preset Temp screen displays the preset temp basal rates you have set up,
along with their percentage or rate amounts.
Note: Depending on your active basal pattern, it is possible for a
percentage preset temp basal rate to exceed your max basal limit.
Because you cannot use a preset temp basal rate that exceeds your
max basal limit, these rates appear in the list, but are not available
for use.
58 Chapter 3
Page 75

2. Select the preset temp basal rate that you want to use, and then select
Begin.
Your preset temp basal rate continues for the duration you set. The Basal
option on the Home screen appears as Basal (T) during your preset temp
basal delivery. Your scheduled basal rate automatically starts again when your
preset temp basal rate finishes.
Canceling a Temp Basal or Preset Temp basal rate
You can cancel a temp basal or preset temp basal rate at any time. When you do
so, your scheduled basal pattern automatically starts again.
To cancel a temp basal rate:
■
Basal
1. Go to the Basal screen.
Home screen > Basal (T)
The Temp Basal screen displays the name (Preset Temp only), current basal
rate, the set duration, and the remaining time.
2. Select Cancel Temp Basal.
Viewing your basal information
The following table describes how you can view your basal rates and patterns.
Basal 59
Page 76

To do this: Do this:
View your current basal
rate
Go to the Basal screen:
Home screen > Basal
The active basal pattern and current basal rate appear at
the top of the Basal screen.
You can also view your current basal rate by selecting the
Status Bar at the top of the Home screen, and then
selecting Quick Status.
View your basal patterns Go to the Basal Patterns screen:
Home screen > Basal > Basal Patterns
The Basal Patterns screen shows the basal patterns you
have set up, and the 24-hour insulin total for each basal
pattern. A check mark appears next to the active basal
pattern.
60 Chapter 3
To see the individual basal rates, select the desired basal
pattern.
Page 77

Stopping and resuming your insulin delivery
Use Suspend Delivery if you need to stop all active basal and bolus insulin
deliveries. When you suspend your insulin delivery, your pump beeps or vibrates,
or both depending on your audio settings. This occurs every 15 minutes to remind
you that insulin is not being delivered.
Note: The first reminder occurs 15 minutes after your pump display
times out. If you press a button and wake up your pump, the reminder
will not occur until 15 minutes after your pump display times out again.
To adjust your timeout setting, see Display Options, on page 145.
When you are ready to continue your basal insulin delivery, use the Resume
feature. When you use the Resume feature, your pump starts your programmed
basal pattern, but does not start any previously programmed bolus deliveries.
Note: If you want to stop a bolus delivery only, without stopping your
basal delivery, see Stopping a bolus delivery, on page 93.
WARNING: Always check the pump Daily History after you resume
insulin delivery to determine the amount that was delivered. If
needed, program a new bolus or fill the cannula. A bolus delivery or
fill cannula that was suspended does not restart when you resume.
Failing to resume insulin delivery can result in hyperglycemia and
ketoacidosis.
■
Basal
WARNING: Do not rely solely on the audio or vibration notifications
when using Audio or Vibrate. These notifications may not occur as
expected if the speaker or vibrator in your pump malfunctions. A
missed notification could result in the delivery of too much or too
little insulin. This is most common when using the Easy Bolus
feature, or when your pump is in Manual Suspend.
Contact the 24 Hour HelpLine with any concerns.
Basal 61
Page 78

To suspend all insulin delivery:
1. Go to the Suspend Delivery screen.
Menu > Suspend Delivery
A confirmation message appears.
2. Select Yes to suspend your pump and stop all insulin delivery.
The Home screen indicates that your insulin is suspended. Your pump
functions are limited until you resume your insulin delivery.
To resume basal insulin delivery:
1. While insulin is suspended, go to the Home screen.
2. Select Resume.
A confirmation message appears.
3. To resume your basal insulin delivery, select Yes. If a Temp Basal was active
when you suspended your pump, it resumes if the time is still within the
duration that you set.
Note: If you still need a bolus delivery that was in progress before
you suspended your delivery, check the Daily History screen for the
actual bolus units delivered and the intended bolus amount. Then
you can set up a new bolus amount as needed. See Daily History, on
page 125 for details about using the Daily History screen.
62 Chapter 3
Page 79

Bolus
Page 80

Page 81

Bolus
A bolus is the amount of insulin taken to cover an expected rise in blood glucose,
typically when you eat a meal or snack. You can also use a bolus to correct a high
blood glucose reading.
About bolus deliveries
There are different types of bolus deliveries you can use, depending on your
insulin needs at the time. There are also different ways you can deliver a bolus.
Discuss these options with your healthcare professional to determine what is best
for you.
Bolus types
■
Bolus
The following table provides general information about the available bolus types.
Type How it works When to use it
Normal Provides a single
immediate dose of
insulin.
This is the typical bolus type you use to
cover your food intake, or to correct a high
BG meter reading.
For details about using the Normal bolus
feature, see Normal bolus, on page 79.
Bolus 65
Page 82

Type How it works When to use it
Square
Wave
bolus
Dual Wave
bolus
Delivers a single bolus
evenly over an extended
period of time
(30 minutes to 8 hours).
Delivers a combination
of an immediate Normal
bolus followed by a
Square Wave bolus.
You might use a Square Wave bolus:
• If you have delayed food digestion due to
gastroparesis or meals high in fat.
• When snacking over an extended period of
time.
• If a Normal bolus drops your blood glucose
too rapidly.
For details about using the Square Wave
bolus feature, see Square Wave bolus, on
page 82.
You might use a Dual Wave bolus:
• When you eat meals that are both high in
carbs and fat, which may delay digestion.
• When your meal bolus is combined with a
correction bolus for an elevated blood
glucose.
For details about using a Dual Wave bolus,
see Dual Wave bolus, on page 85.
Bolus type example
The following example shows how the different bolus types work.
Normal (N) bolus
Bolus
now
Units of insulin
0 1 2 3
Hours
66 Chapter 4
Square Wave (S) bolus Dual Wave (D) bolus
Bolus
over time
0 1 2 3
Hours
0 1 2 3
Bolus
now
Bolus
over time
Hours
Page 83

Bolus delivery options
The following table describes the different ways you can deliver a bolus.
Delivery
method
Bolus Wizard
feature
Type of bolus available How it works
Normal bolus, Square
Wave bolus, Dual Wave
bolus
You enter your BG meter reading and
your carbs you plan to eat, and then the
Bolus Wizard feature calculates an
estimated bolus amount based on your
individual settings.
For details about using the Bolus Wizard
feature, see Bolus Wizard feature, on
page 71.
To deliver a:
• Normal bolus using the Bolus Wizard
feature, see page 79.
• Square Wave bolus using the Bolus
Wizard feature, see page 83.
•Dual Wave bolus using the Bolus
Wizard feature, see page 86.
■
Bolus
Manual Normal bolus, Square
Wave bolus, Dual Wave
bolus
Preset Bolus Normal bolus, Square
Wave bolus, Dual Wave
bolus
You do your own calculation and
manually enter your bolus amount.
To deliver a:
• Normal bolus, see page 81
• Square Wave bolus, see page 84
• Dual Wave bolus, see page 87
You select from specific bolus settings
that you define ahead of time for
recurring situations.
For details about using the Preset Bolus
feature, see Preset Bolus, on page 91.
Bolus 67
Page 84

Delivery
method
Type of bolus available How it works
Easy Bolus
feature
Remote Bolus
from your
CONTOUR NEXT
LINK 2.4 meter
Bolus settings
Normal bolus After the Easy Bolus feature is set up,
you can deliver a Normal bolus by using
button when the pump is in
the
sleep mode.
For details about using the Easy Bolus
feature, see Easy Bolus feature, on
page 88.
Normal bolus or any
Preset Bolus set up on
your pump.
For information on using the Remote
Bolus feature on your CONTOUR NEXT
LINK 2.4 meter, see the user guide that
came with your CONTOUR NEXT LINK
2.4 meter.
For information on turning on the
Remote Bolus feature on your pump,
see Setting up Remote Bolus, on
page 116.
The following table describes some bolus settings that may need to be changed
before you use your bolus options. Consult with your healthcare professional for
the settings that are right for you.
Note: There are additional settings required if you want to use the Bolus
Wizard feature. These are described in the section, Bolus Wizard feature, on
page 71.
Setting What it is What it does for you
Max Bolus Maximum amount of
bolus insulin (in units)
your pump can deliver
in a single bolus.
68 Chapter 4
Provides a safety measure by limiting
the total amount of bolus insulin you
can program for a single bolus delivery.
For details about setting the max bolus
amount, see Max Bolus, on page 69.
Page 85

Setting What it is What it does for you
Bolus Increment The amount of insulin
(in units) that is
increased or decreased
with each button press
when adjusting your
bolus amount. The Bolus
Wizard feature will also
use the increment to
display the bolus total
and adjustment
amounts. This setting
does not apply to the
Easy Bolus feature.
Bolus Speed The speed that your
pump delivers your
bolus insulin.
Max Bolus
Allows you to set your increment value
according to your typical bolus amounts.
For details about setting the bolus
increment, see Bolus Increment, on
page 70.
■
Bolus
Allows you to set your bolus insulin
delivery speed to Standard or Quick.
For details about setting your bolus
speed, see Bolus Speed, on page 71.
Max Bolus limits the amount of insulin that can be delivered in a single bolus. Your
pump prevents single bolus insulin deliveries that exceed the max bolus you set.
You can set your max bolus from 0 to 25 units. Set your max bolus as prescribed
by your healthcare professional.
If you are setting your max bolus after you have set up your Preset Bolus deliveries,
you cannot set your max bolus lower than any of your Preset Bolus amounts.
To set your max bolus:
1. Go to the Max Basal/Bolus screen.
Menu > Insulin Settings > Max Basal/Bolus
2. Select Max Bolus.
3. Because the Max Bolus setting determines your bolus insulin limit, a warning
message appears any time you go to the screen to change the value. To
continue to the Max Bolus screen, select Continue.
Bolus 69
Page 86

4. Select Max Bolus, and then set the maximum number of insulin units your
pump can deliver in one bolus.
5. Select Save.
Example 1: Max bolus
Shelby takes very small doses of insulin for her meal boluses. As a safety limit, her
healthcare professional had her reset her pump with a Maximum bolus of
5.0 units.
Example 2: Max bolus
David is a growing teenager. He loves to eat big meals and requires very large
doses of insulin for his food. David's healthcare professional had him reset his
pump with a Maximum bolus of 20.0 units so he can take more insulin when
needed.
Bolus Increment
The Bolus Increment setting determines the number of units that are increased or
decreased with each button press when you adjust your bolus delivery amount in
the Bolus Wizard, Manual Bolus, and Preset Bolus screens. Depending on your
typical bolus amount, you can set your increment to 0.1 units, 0.05 units, or
0.025 units.
Note: The Easy Bolus feature uses a setting called Step Size to determine
the number of insulin units for each button press. See Setting up the Easy
Bolus feature, on page 89 for more information.
To set your Bolus Increment:
1. Go to the Bolus Increment screen.
Menu > Insulin Settings > Bolus Increment
2. Select Increment to set your desired increment value.
3. Select Save.
70 Chapter 4
Page 87

Bolus Speed
Bolus Speed sets the rate at which your pump delivers bolus insulin. You can set a
Standard rate (1.5 units per minute), or a Quick rate (15 units per minute).
To set your Bolus Speed:
1. Go to the Bolus Speed screen.
Menu > Insulin Settings > Bolus Speed
2. Select Standard or Quick.
3. Select Save.
Bolus Wizard feature
The Bolus Wizard feature uses your individual Bolus Wizard settings to calculate an
estimated bolus amount based on the BG values and carbs that you enter. Work
with your healthcare professional to define your personal settings, which include
your carb or exchange ratio, insulin sensitivity, BG target range, and active insulin
time.
Note: If you do not know how to count carbs, consult with your
healthcare professional before using the Bolus Wizard feature.
After you set up the Bolus Wizard feature, you can use it to calculate and deliver a
food bolus, a correction bolus, or a food plus correction bolus using a Normal
bolus (see page 79), Square Wave bolus (see page 83), or Dual Wave bolus (see
page 86).
■
Bolus
The following sections describe how to set up the Bolus Wizard feature. Bolus
delivery instructions are provided in the individual sections for each bolus type.
Understanding your Bolus Wizard settings
Your pump guides you through entering the following settings when you first turn
on the Bolus Wizard feature. Get your prescribed settings from your healthcare
professional, and always consult your healthcare professional before changing your
settings. The setup procedure begins on page 72.
Bolus 71
Page 88

Setting What it does
Carb Ratio
Exchange Ratio
Insulin Sensitivity
Factor
BG Target The Bolus Wizard feature calculates your estimated bolus
Active Insulin Time Active insulin is the bolus insulin that has been delivered
Used for food bolus calculations.
• If you count carbs: the number of carb grams that are
covered by 1 unit of insulin.
• If you count exchanges: the number of insulin units that
are needed to cover 1 carb exchange.
Used to calculate correction bolus amounts.
Your insulin sensitivity factor is the amount that blood
glucose is reduced by one unit of insulin.
based on your BG target range. The high and low values
you set are the values to which your blood glucose is
corrected. To use a single target value rather than a
range, set the same value for High and Low.
If your BG value is above the high target value, a
correction dose is calculated. If your BG value is below
the low target value, a negative correction is calculated
and subtracted from your food bolus.
by the pump and is still working to lower your blood
glucose levels. Active insulin time is the length of time
that bolus insulin is tracked as active insulin.
Work with your healthcare professional to get the active
insulin time that best represents the insulin type you use
and your physiological insulin absorption rate.
For more information about how the Bolus Wizard feature
uses your active insulin amount, see About active insulin,
on page 78.
Setting up the Bolus Wizard feature
Before you can use the Bolus Wizard feature to calculate a bolus, you must turn on
this feature and enter your Bolus Wizard settings.
To set up the Bolus Wizard feature:
1. Go to the Bolus Wizard Setup screen.
72 Chapter 4
Page 89

Menu > Insulin Settings > Bolus Wizard Setup
The Bolus Wizard Setup screen appears with the Bolus Wizard turned off.
2. Select Bolus Wizard to turn on the feature.
If this is the first time you have turned on the Bolus Wizard feature, your
pump displays information about the settings you need to enter.
■
Bolus
Make sure you have the values you need, and then select Next to continue.
Note: As you enter your personal settings, your pump displays
information about each setting. Click Next to continue when you
have read each explanation.
3. When the Edit Carb Ratio screen appears, enter your carb ratio. If you are
setting a carb ratio, set the grams per unit (g/U). If you are setting an
exchange ratio, set the units per exchange (U/exch). You can set up to eight
carb ratios using different time segments. The time segments must cover a
24-hour period.
Bolus 73
Page 90

Note: Your pump uses grams as the default carb unit. If you would
like to change your carb unit to exchanges, see Carb Unit, on
page 145.
If your ratio value is outside the range of 5 to 50 grams per unit or 0.3 to
3 units per exchange, a message appears asking you to confirm your setting.
4. When the Edit Sensitivity screen appears, enter your insulin sensitivity factor.
You can set up to eight different sensitivity factors using different time
segments. The time segments must cover a 24-hour period.
If the value you enter is outside the range of 20 to 100 mg/dL, a message
appears asking you to confirm your setting.
5. When the Edit BG Target screen appears, enter your Bolus Wizard BG target
range. You can set up to eight different BG target ranges using different time
segments. The time segments must cover a 24-hour period.
74 Chapter 4
Page 91

If your BG target is outside the range of 90 to 140 mg/dL, a message appears
asking you to confirm your setting.
6. When the Active Insulin Time screen appears, enter your active insulin time
value.
7. Select Save.
A message appears letting you know the Bolus Wizard setup is complete.
You can now use the Bolus Wizard feature to calculate a bolus.
Changing your Bolus Wizard settings
This section shows you how to make changes to your personal settings after you
initially set up the Bolus Wizard feature. These settings are available only if the
Bolus Wizard feature is turned on.
■
Bolus
Changing your carb or exchange ratio
You can change either your carb ratio or exchange ratio setting, depending on
whether you use grams or exchanges as your carb unit. The carb ratio and
exchange ratio settings are available only if the Bolus Wizard feature is turned on.
Note: Your pump uses grams as the default carb unit. If you would like
to change your carb unit to exchanges, see Carb Unit, on page 145.
Bolus 75
Page 92

To change your carb or exchange ratio:
1. Go to the Carb Ratio screen or the Exchange Ratio screen, depending on the
carb units you use.
Menu > Insulin Settings > Bolus Wizard Setup > Carb Ratio
or
Menu > Insulin Settings > Bolus Wizard Setup > Exchange Ratio
2. Select Edit.
3. Select the carb or exchange ratio to adjust the Start time, the End time, and
the ratio. You can set up to eight different carb or exchange ratios using
different time segments. The time segments must cover a 24-hour period.
If you set a value outside the typical range of 5 to 50 grams per unit or 0.3 to
3 units per exchange, a message appears asking you to confirm your setting.
4. When you have made your changes, select Save.
Changing your insulin sensitivity factor
The Insulin Sensitivity Factor option is only available if the Bolus Wizard feature is
turned on.
To change your insulin sensitivity factor:
1. Go to the Sensitivity screen.
Menu > Insulin Settings > Bolus Wizard Setup > Insulin Sensitivity Factor
2. Select Edit.
3. Select the sensitivity factor to adjust the Start time, the End time, and the
Sensitivity amount. You can set up to eight different sensitivity amounts using
different time segments. The time segments must cover a 24-hour period.
If you set a value that is outside the typical range of 20 to 100 mg/dL per
unit, a message appears asking you to confirm your setting.
4. When you have made your changes, select Save.
Changing your Bolus Wizard BG target
Your target range can be from 60 to 250 mg/dL. The Bolus Wizard BG Target
option is only available if the Bolus Wizard feature is turned on.
76
Chapter 4
Page 93

To change your Bolus Wizard BG target range:
1. Go to the BG Target screen.
Menu > Insulin Settings > Bolus Wizard Setup > BG Target
2. Select Edit.
3. Select the BG target to adjust the Start time, the End time, and the Lo (low)
and Hi (high) BG Target values. Your high value cannot be less than your low
value. You can set up to eight different values using different time segments.
The time segments must cover a 24-hour period.
If your BG target is outside the typical range of 90 to 140 mg/dL, a message
appears asking you to confirm your setting.
4. When you have made your changes, select Save.
Changing your Active Insulin Time
The active insulin time setting lets the pump know which active insulin time to
use in calculating the amount of active insulin to subtract before estimating a
bolus. Your healthcare professional will prescribe the active insulin time that is best
for you.
To change your active insulin time:
■
Bolus
1. Go to the Active Insulin Time screen.
Menu > Insulin Settings > Bolus Wizard Setup > Active Insulin Time
2. Select Duration, then adjust your active insulin time (in hours), using 15-
minute increments.
3. Select Save.
Turning off the Bolus Wizard feature
You can turn off the Bolus Wizard feature at any time. Your Bolus Wizard settings
remain in your pump. When the Bolus Wizard feature is turned off, the Bolus
Wizard option does not appear in the Bolus Menu, and you cannot edit your Carb
Ratio, Insulin Sensitivity Factor, or BG Target settings from the Bolus Wizard Setup
screen.
To turn off the Bolus Wizard feature:
1. Go to the Bolus Wizard Setup screen.
Bolus 77
Page 94

Menu > Insulin Settings > Bolus Wizard Setup
2. Select Bolus Wizard to turn the feature off.
About active insulin
Active insulin is the bolus insulin that has already been delivered to your body,
and is still working to lower your blood glucose levels. The pump considers your
active insulin time setting in determining if any active insulin is still in your body
from prior boluses. This may help prevent hypoglycemia caused by over-correcting
for high blood glucose.
Your current active insulin amount displays on the Home screen, and includes only
the bolus insulin you have already received.
When you are using the Bolus Wizard feature, the Bolus Wizard feature uses your
current active insulin value to determine if there is an active insulin adjustment
needed. The active insulin adjustment calculation considers both the bolus insulin
that has already been delivered (the amount shown on the Home screen), as well
as any insulin that is going to be delivered by an active Square Wave bolus.
WARNING: Do not use the Bolus Wizard feature to calculate a bolus
for a period of time after giving a manual injection of insulin by
syringe or pen. Manual injections are not accounted for in the
active insulin amount. Therefore, the Bolus Wizard feature could
prompt you to deliver more insulin than needed. Too much insulin
can cause hypoglycemia. Consult with your healthcare professional
for how long you need to wait after a manual injection of insulin
before you can rely on the active insulin calculation of the Bolus
Wizard feature.
Bolus Wizard warnings
When you use the Bolus Wizard feature, there may be times when you see one of
the following:
78 Chapter 4
Page 95

Warning: What it means: What to do:
High BG Your BG meter reading is above
250 mg/dL.
Low BG Your BG meter reading is below
70 mg/dL.
Max Bolus
Exceeded
The bolus amount entered
exceeds your Max Bolus setting.
• Check for an occlusion.
• Check ketones.
• Consider an insulin injection.
• Monitor your BG.
Treat your low BG. Do not give
yourself a bolus until your BG
returns to normal.
Check the bolus amount. Select
No to cancel, or Yes to
continue. If you select Yes, the
bolus amount that you entered
is reduced to your max bolus
limit.
Normal bolus
A Normal bolus provides a single immediate dose of insulin. You use a Normal
bolus to cover your food intake or to correct a high BG meter reading.
■
Bolus
You cannot access the Reservoir & Tubing, Insulin Settings, or Sensor Settings
menu options during a Normal bolus delivery.
Note: Your pump allows you to deliver a Normal bolus while a Square
Wave bolus or the Square portion of a Dual Wave bolus is being
delivered.
Delivering a Normal bolus with the Bolus Wizard feature
To deliver a Normal bolus using the Bolus Wizard feature:
1. For a correction bolus or a food bolus with a correction, use your BG meter to
check your blood glucose. For a food bolus only, skip this step.
2. Go to the Bolus Wizard screen.
Home screen > Bolus > Bolus Wizard
Bolus 79
Page 96

The Bolus Wizard screen shows your current BG meter reading (if applicable)
and any insulin that is still active from previous boluses. For more information
about active insulin, see About active insulin, on page 78. For more information,
see About your CONTOUR NEXT LINK 2.4 meter, on page 115.
Note: Be aware that if you already have the Bolus Wizard feature
open prior to wirelessly sending your BG meter reading to your
pump, you must close the Bolus Wizard feature and open it again, in
order for that reading to appear.
3. If you are not using a wirelessly connected CONTOUR NEXT LINK 2.4 meter,
you can select BG to manually enter your BG meter reading.
Note: If you choose not to enter a BG value, three dashes appear
on the screen in place of the BG value.
4. For a food bolus, select Carbs to enter the carb count of your meal. For a
correction bolus where no food was eaten, leave the Carbs value at 0.
5. Your calculated bolus appears in the Bolus field.
80 Chapter 4
Page 97

If you want to change the bolus amount, select Bolus and make any desired
adjustment. If you change your bolus amount, the word “Modified” appears
next to the new bolus amount.
6. Select Next to review your bolus information.
Your bolus amount appears.
Note: If you modified your bolus amount in the previous step,
Bolus Calculated displays your original bolus amount, Modification
displays the amount you added or subtracted from your bolus, and
Bolus displays the actual bolus amount.
7. Select Deliver Bolus to start your bolus.
Your pump beeps or vibrates and displays a message when your bolus starts.
The Home screen shows your bolus amount as it is being delivered. Your
pump beeps or vibrates when your bolus is complete.
Delivering a Normal bolus using Manual Bolus
■
Bolus
The following section describes how to deliver a Normal bolus using the Manual
Bolus feature.
To deliver a Normal bolus using Manual Bolus:
1. Go to the Manual Bolus screen.
Home screen > Bolus > Manual Bolus
Note: If the Bolus Wizard feature is turned off, the Manual Bolus
screen appears when you select Bolus.
Bolus 81
Page 98

The Manual Bolus screen shows your current BG value (if applicable) and any
insulin that is still active from previous boluses. For more information about
active insulin, see About active insulin, on page 78.
2. Select Bolus to set your bolus delivery amount (in units).
3. Select Deliver Bolus to start your bolus.
Your pump beeps or vibrates and displays a message when your bolus starts.
The Home screen shows your bolus amount as it is being delivered. Your
pump beeps or vibrates when your bolus is complete.
Square Wave bolus
A Square Wave bolus delivers a bolus evenly over a period of time (30 minutes to
8 hours).
When using the Bolus Wizard feature, a Square Wave bolus is available only when
giving a food bolus without a correction for an elevated BG. A Square Wave bolus
is not available for a correction bolus alone, or a correction bolus with food bolus.
A Square Wave bolus can be useful in these situations:
• If you have delayed food digestion due to gastroparesis or meals high in fat.
• When you are snacking over an extended period of time.
•If a Normal bolus drops your blood glucose too rapidly.
Since the Square Wave bolus extends delivery over a period of time, the insulin is
more likely to be available as you need it.
Note: You cannot perform these functions during a Square Wave bolus
delivery:
• Change the Max Bolus or the Active Insulin Time settings.
• Turn off or deliver Dual Wave or Square Wave boluses.
82 Chapter 4
Page 99

• Turn the Bolus Wizard feature on or off.
•Fill the cannula.
•Rewind your pump.
• Run a self-test.
• Access the Manage Settings menu.
All other functions are available during the Square Wave bolus.
Turning on or off the Square Wave bolus
The Square Wave bolus delivery option is available only after you turn on the
Square Wave feature.
To turn on or turn off the Square Wave feature:
1. Go to the Dual/Square screen.
Menu > Insulin Settings > Dual/Square Wave
2. Select Square Wave to turn the feature on or off.
3. Select Save.
Delivering a Square Wave bolus with the Bolus Wizard feature
The Square Wave bolus option is available in the Bolus Wizard feature only after
you turn on the Square Wave feature. Also, you must have entered a Carbs value.
To deliver a Square Wave bolus with the Bolus Wizard feature:
1. Go to the Bolus Wizard screen.
■
Bolus
Home screen > Bolus > Bolus Wizard
The Bolus Wizard screen shows your current BG meter reading (if applicable)
and any insulin that is still active from previous boluses. For more information
about active insulin, see About active insulin, on page 78. For more information,
see About your CONTOUR NEXT LINK 2.4 meter, on page 115.
Note: Be aware that if you already have the Bolus Wizard feature
open prior to wirelessly sending your BG meter reading to your
pump, you must close the Bolus Wizard feature and open it again, in
order for that reading to appear.
Bolus 83
Page 100

2. If you are not using a wirelessly connected CONTOUR NEXT LINK 2.4 meter,
you can select BG to manually enter your BG meter reading.
Note: If you choose not to enter a BG meter reading, three dashes
appear on the screen instead.
3. Select Carbs to enter the amount of carbs in your food.
4. Review your calculated bolus amount in the Bolus field. If you want to
change the bolus amount, select Bolus and make your desired change.
Remember, if there is a correction bolus amount calculated, you are not able
to give a Square Wave bolus.
Note: If you change your bolus amount, the word “Modified”
appears next to the new bolus amount.
5. Select Next to review your bolus information.
6. Select Square.
The Bolus Wizard screen appears with your bolus amounts.
7. To change the time period over which your bolus is delivered, select
Duration to adjust the time. The duration can be from 30 minutes to 8 hours,
in 15 minute increments.
8. Select Deliver Bolus to start your bolus.
During a Square Wave bolus delivery, the Bolus button on your Home screen
appears as Bolus (S). You can select Bolus (S) to stop the bolus, to see details
on the insulin that has been delivered, or to access the Bolus menu. The
Bolus menu provides access to the Bolus Wizard, Manual Bolus, Preset Bolus,
and Insulin Settings options.
Delivering a Square Wave bolus using Manual Bolus
The Square Wave bolus option is available in the Manual Bolus screen only after
you turn on the Square Wave feature.
84
Chapter 4
 Loading...