

Page 1
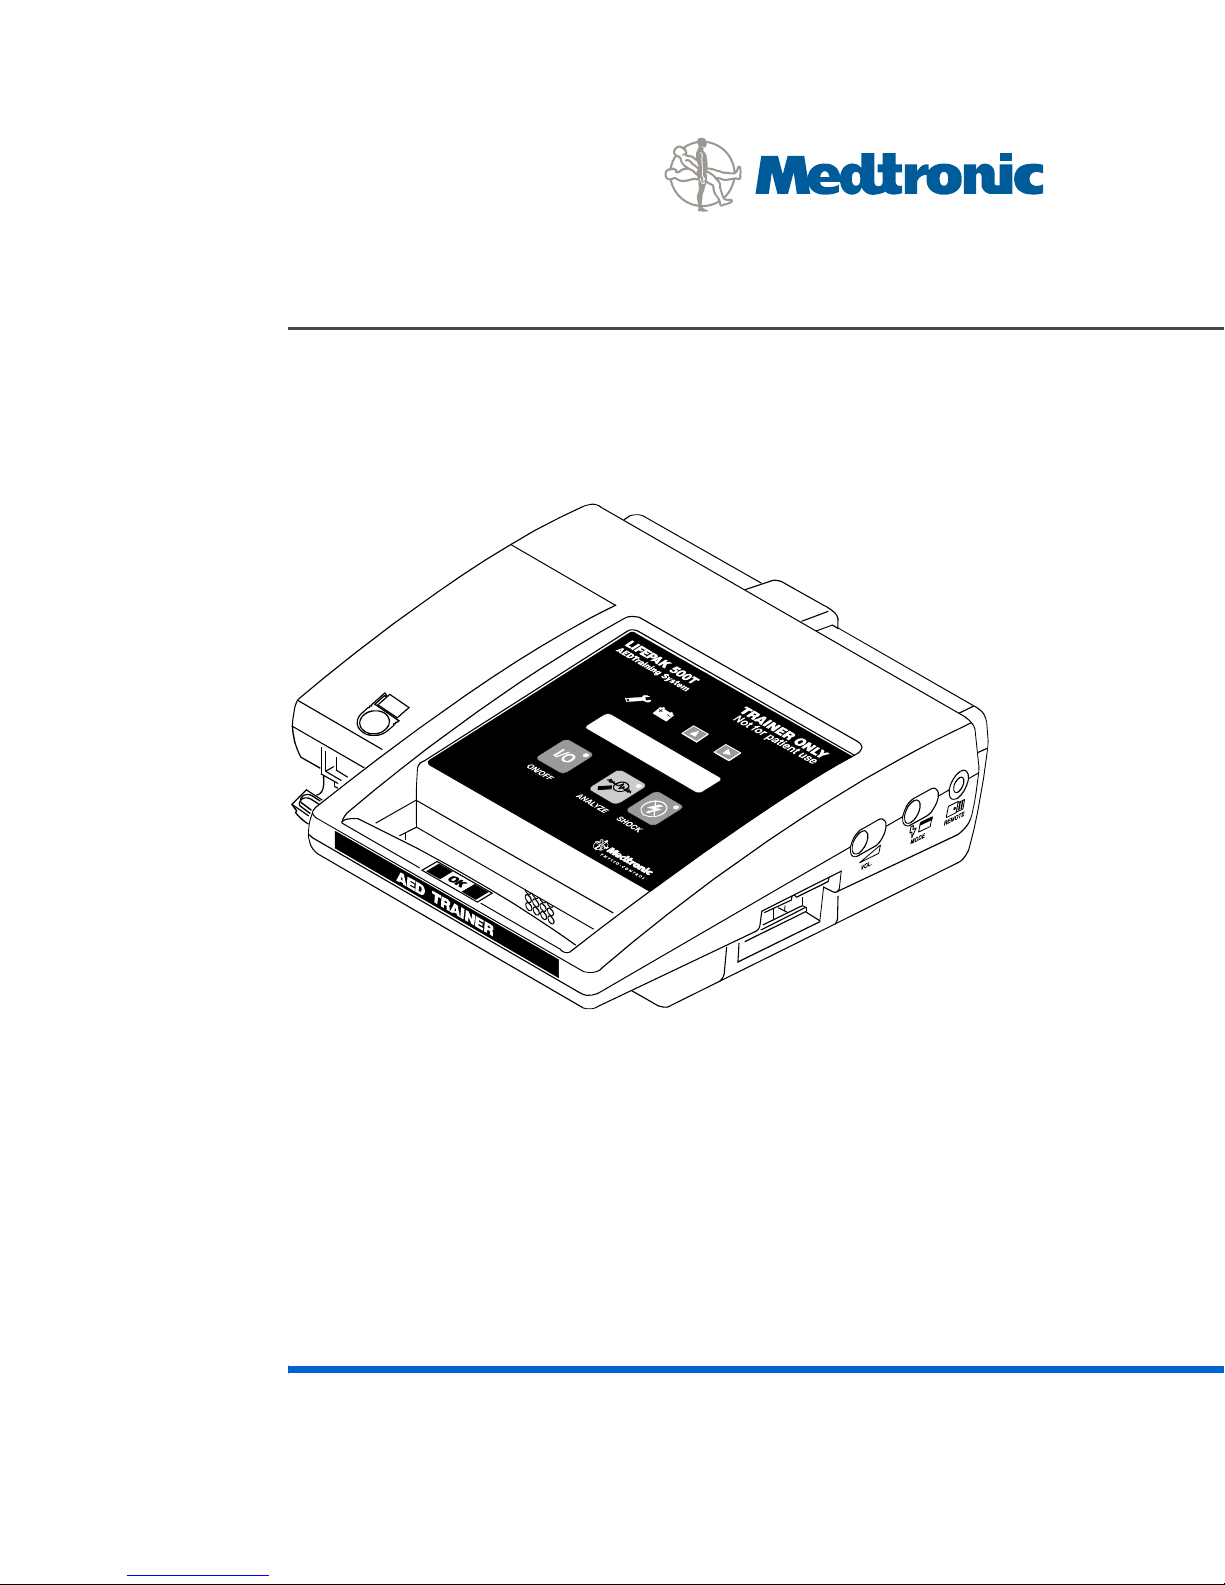
LIFEPAK® 500T
AED Training System
Operating Instructions
Page 2

Page 3

OPERATING INSTRUCTIONS
LIFEPAK® 500T
AED Training System
Page 4

Medtronic Emergency Response Systems
11811 Willows Road Northeast
Redmond, WA 98052-2003 USA
Telephone: 425.867.4000
Toll Free (USA only): 800.442.1142
Fax: 425.867.4121
Internet: www.medtronic-ers.com
www.medtronic.com
LIFEPAK is a registered trademark of Medtronic Emergency Response Systems, Inc. cprMAX is a trademark of Medtronic Emergency Response
Systems, Inc. Medtronic is a r egistered trademark of Medtronic, Inc. Specif ications are subject to change without notice.
©2002-2006 Medtronic Emergency Response Systems, Inc. All rights reserved.
Medtronic Europe S.A.
Medtronic Emergency Response Systems
Rte. Du Molliau 31
Case postale 84
1131 Tolochenaz
Switzerland
Telephone: 41.21.802.7000
Fax: 41.21.802.7900
MIN 3012699-003 / CAT. 26500-001008
Page 5
LIFEPAK® 500T AED TRAINING SYSTEM
Quick Start Reference Card
Quick Start Procedure
1 Turn AED Trainer on.
2 Press
PAUSE button on the remote control.
3 Select Shock Protocol from the Table below.
4 Press
PAUSE again to confirm shock protocol. AED Trainer will turn itself off.
5 You are now ready to begin a training session. Use the remote control to create troubleshooting situations. Refer to
the opposite side of this card for details.
6 Once the AED is turned on, the
ELECTRODE PADS on the remote control to advance to ANALYSIS.
Remote Control Button AED Trainer Shock Protocol Shock Order
F1
F2
F3
F4
C1*
C2*
* Custom settings may be changed in the set up mode (refer to operating instructions).
Fixed #1 SNNN Note: The AED Trainer powers on with
Fixed #2 SSNN
Fixed #3 NSNN
Fixed #4 NNNN
Custom #1 SSSSSSSSS
Custom #2 SSSSSSSSS
CONNECT ELECTRODES message appears (unless turned off in setup). Press
the last shock protocol selected during
the previous use.
Note: For detailed instructions, refer to
the LIFEPAK 500T AED TRAINING
SYSTEM Operating Instructions.
S: Shock Advised N: No Shock Advised
Page 6
LIFEPAK® 500T AED TRAINING SYSTEM
Quick Start Reference Card
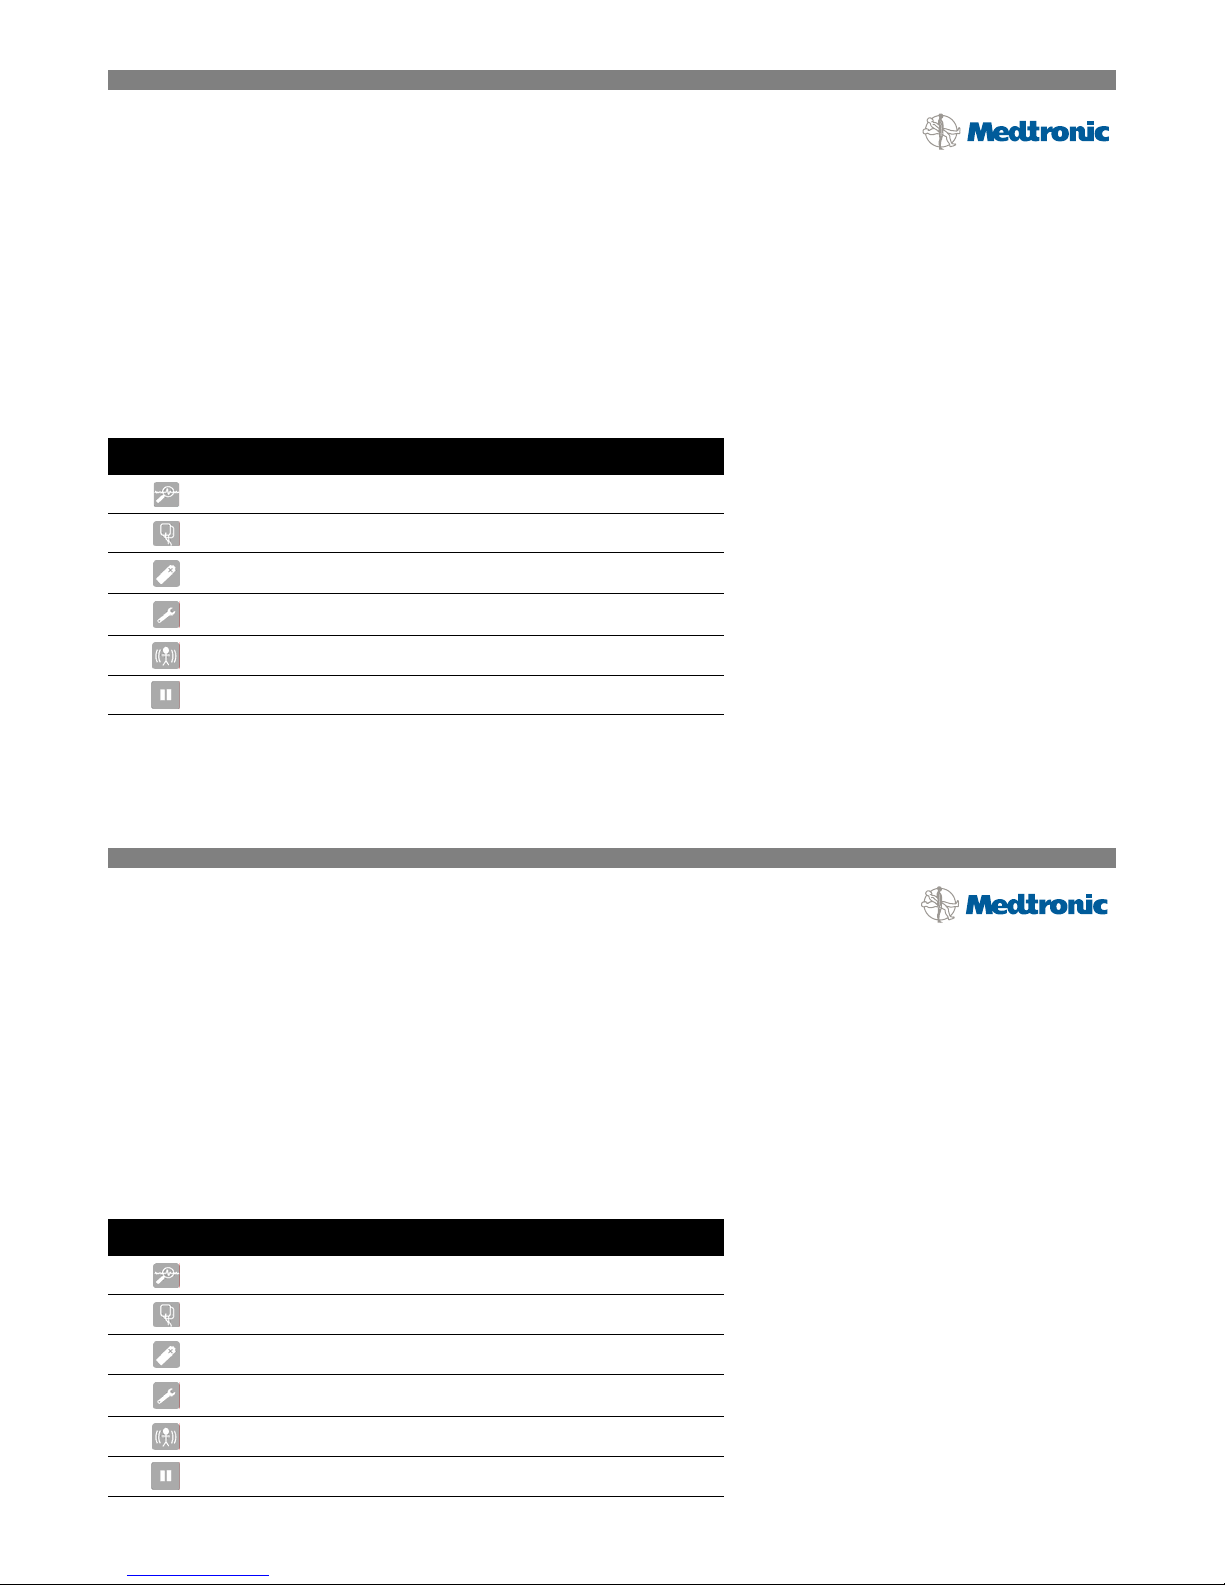
Button Function
Press to change any shock decision to NO SHOCK ADVISED. Function is active only during PUSH ANALYZE and
STAND CLEAR, ANALYZING NOW.
Press to toggle the training electrodes “on” or “off” the manikin. This feature is active when the training
electrodes are connected to the AED Trainer.
Press to toggle
MOTION DETECTED “on” and “off.” This feature is active during analysis only.
Press once to activate a service warning (red wrench). Press twice: wrench flashes and
displayed and device will not operate. To clear, turn off the AED Trainer, or remove the battery pack.
Press once to activate
LOW BATTERY. Press twice to activate REPLACE BATTERY. Press three times to simulate
failed battery. To clear, turn off the AED Trainer, or remove the battery pack.
Press to simulate device detection of a shockable rhythm. CPSS is disabled when
selected.
Press any time to suspend device operation. Press again to resume operation at point of interruption. In
PAUSE mode, press F1, F2, F3, F4, C1, or C2 to change shock protocol. Press PAUSE again to accept change
and turn off AED Trainer.
LIFEPAK is a registered trademark of Medtronic Emergency Response Systems, Inc. Medtronic is a registered trademark of Medtronic, Inc.
Specifications are subject to change without notice.
© 2002-2006 Medtronic Emergency Response Systems, Inc. All rights reserved.
LIFEPAK® 500T AED TRAINING SYSTEM
Quick Start Reference Card
CALL SERVICE is
AUTO ANALYZE 2 is
MIN 3012699-003 / CAT. 26500-001008
Button Function
Press to change any shock decision to NO SHOCK ADVISED. Function is active only during PUSH ANALYZE and
STAND CLEAR, ANALYZING NOW.
Press to toggle the training electrodes “on” or “off” the manikin. This feature is active when the training
electrodes are connected to the AED Trainer.
Press to toggle
MOTION DETECTED “on” and “off.” This feature is active during analysis only.
Press once to activate a service warning (red wrench). Press twice: wrench flashes and
displayed and device will not operate. To clear, turn off the AED Trainer, or remove the battery pack.
Press once to activate
LOW BATTERY. Press twice to activate REPLACE BATTERY. Press three times to simulate
failed battery. To clear, turn off the AED Trainer, or remove the battery pack.
Press to simulate device detection of a shockable rhythm. CPSS is disabled when
selected.
Press any time to suspend device operation. Press again to resume operation at point of interruption. In
PAUSE mode, press F1, F2, F3, F4, C1, or C2 to change shock protocol. Press PAUSE again to accept change
and turn off AED Trainer.
LIFEPAK is a registered trademark of Medtronic Emergency Response Systems, Inc. Medtronic is a registered trademark of Medtronic, Inc.
Specifications are subject to change without notice.
© 2002-2006 Medtronic Emergency Response Systems, Inc. All rights reserved.
CALL SERVICE is
AUTO ANALYZE 2 is
MIN 3012699-003 / CAT. 26500-001008
Page 7

TABLE OF CONTENTS
1. Description
Introduction ........................................................................................................... 1
Controls, Indicators, and Connectors.................................................................... 1
Remote Control ..................................................................................................... 5
2. Getting Ready
Unpacking and Initial Inspection............................................................................ 6
Installing Batteries................................................................................................. 6
Beginning a Training Session................................................................................ 7
Following a Training Session................................................................................. 8
3. Using the Remote Control
Introduction ........................................................................................................... 9
Remote Control Cable........................................................................................... 9
Table of Contents
4. Setup
5. Maintenance
Remote Control Functions .................................................................................. 10
cprMAX™ Technology......................................................................................... 12
Setup Options ..................................................................................................... 12
Setup Procedures ............................................................................................... 16
Resetting Factory Default Settings...................................................................... 20
Language Setup Procedure ................................................................................ 20
Battery Pack Battery Replacement ..................................................................... 21
Remote Control Battery Replacement ................................................................ 21
Warranty.............................................................................................................. 21
Troubleshooting ................................................................................................... 22
Cleaning .............................................................................................................. 24
Product Recycling Information ............................................................................ 24
Specifications ...................................................................................................... 24
Accessories......................................................................................................... 26
6. Reference Information
Appendix A Declaration of Conformity
LIFEPAK 500T AED TRAINING SYSTEM Operating Instructions i
© 2002-2006 Medtronic Emergency Response Systems, Inc.
Page 8

Table of Contents
LIST OF FIGURES
Figure 1 AED Trainer controls, indicators, and connectors .........................................................2
Figure 2 Battery pack and training electrodes.............................................................................3
Figure 3 Remote control and cable .............................................................................................5
Figure 4 Battery pack battery installation ....................................................................................7
Figure 5 Training electrode connection to the AED Trainer.........................................................7
Figure 6 Training electrode placement on manikin......................................................................8
LIST OF TABLES
Table 1 AED Trainer controls, indicators, and connectors .........................................................2
Table 2 AED Trainer voice prompts, display messages, tones, and indicators..........................4
Table 3 Remote control functions ............................................................................................10
Table 4 AED Trainer setup options ..........................................................................................12
Table 5 Display troubleshooting...............................................................................................22
Table 6 Voice prompt troubleshooting .....................................................................................22
Table 7 LED (indicator lights) troubleshooting .........................................................................22
Table 8 Setup options troubleshooting ....................................................................................23
Table 9 Remote control troubleshooting ..................................................................................23
Table 10 Training electrodes troubleshooting ............................................................................23
Table 11 AED Trainer specifications ..........................................................................................24
Table 12 Remote control specifications.....................................................................................25
Table 13 AED Trainer accessories.............................................................................................26
ii LIFEPAK 500T AED TRAINING SYSTEM Operating Instructions
Page 9

Description
1. DESCRIPTION
This section describes basic features, controls, and indicators of the LIFEPAK 500T Automated
External Defibrillator (AED) Trainer. Refer to the following topics:
• Introduction, page 1
• Controls, Indicators, and Connectors, page 1
• Remote Control, page 5
Introduction
The LIFEPAK 500T AED Training System provides realistic training in the use of the LIFEPAK 500
automated external defibrillator (AED) without the actual charge and discharge of electrical energy.
The AED Trainer accurately represents the appearance of the LIFEPAK 500 AED and realistically
simulates actual LIFEPAK 500 AED operations including both two or three button operation.
The AED Trainer reproduces the LIFEPAK 500 AED’s screen messages, audible tones, and voice
prompts while guiding users through simulated analysis, energy delivery, and prompted CPR time
(when selected). All AED Trainer functions are programmable to simulate the full range of scenarios
possible during actual use of the LIFEPAK 500 AED.
The AED Trainer is powered by four alkaline D-cell batteries. The batteries are housed in a battery
pack that simulates the size, shape, and installation technique of the LIFEPAK 500 AED battery.
Note: The AED Trainer does not provide training in the data management functions of the
LIFEPAK 500 AED.
An infrared, wireless remote control allows the instructor to pause AED Trainer operation or to
interrupt preconfigured routines with
SERVICE WARNING/REQUIRED, LOW/REPLACE BATTERY and CPSS prompts.
NO SHOCK ADVISED, CONNECT ELECTRODES, MOTION DETECTED,
The remote control may also be operated with the included cable. The remote control is powered by
two AAA alkaline batteries.
The AED Trainer and remote control are intended for indoor use under normal room temperature
and lighting conditions.
Controls, Indicators, and Connectors
AED Trainer controls, indicators, and connectors are illustrated in Figure 1 on page 2 and Figure 2
on page 3, and described in Table 1 on page 2. Table 2 on page 4 summarizes all the AED Trainer’s
voice prompts, screen messages, tones, and lighted indicators.
Remote control buttons are illustrated in Figure 3 on page 5 and described in Table 3 on page 10.
WARNING!
Always place the Trainer in a location separate from the defibrillator to avoid confusion in real
emergencies.
LIFEPAK 500T AED TRAINING SYSTEM Operating Instructions 1
© 2002-2006 Medtronic Emergency Response Systems, Inc.
Page 10

Description
8
2
1
11
16
12
3
Figure 1 AED Trainer controls, indicators, and connectors
Table 1 AED Trainer controls, indicators, and connectors
15
10
7
5
6
9
4
14
1 Press green ON/OFF to turn AED Trainer power on or off.
Power on is confirmed by a green light in the upper right
corner of the button.
13
ON/OFF
2 Press yellow ANALYZE to begin simulated analysis. The
yellow light in the upper right corner flashes during the PUSH
ANALYZE display and stays on steady during simulated
analysis.
ANALYZE
Note: Analysis begins automatically when Auto Analyze
2 is selected.
ANALYZE may be covered with the black sticker (included) to
simulate the appearance and operation of a 2-button
LIFEPAK 500 AED.
3 Press orange SHOCK to respond to the PUSH TO SHOCK
prompt. The light in the upper right corner of the button
flashes during display of the PUSH TO SHOCK message.
SHOCK
4 Liquid Crystal Display
(LCD)
Displays text messages and shock count. Two lines, 20
characters per line.
5 (Up arrow) Used in setup mode to scroll through configuration
S
2 LIFEPAK 500T AED TRAINING SYSTEM Operating Instructions
options.
Page 11
Description
Table 1 AED Trainer controls, indicators, and connectors (Continued)
6 (Right arrow) Used in setup mode to move the cursor to the
X
right.
7 Icon lights red to simulate low battery power. Flashing red
icon indicates replace battery immediately.
8 Icon lights red to simulate service required by authorized
personnel.
9 Volume Control Three-level selection switch controls speaker volume.
10 Remote Control Signal
Receptor and Indicator
11 Training Electrode
Remote control indicator lights to indicate signal reception
from remote control.
Connection for the training electrodes.
Connector
12 Speaker Provides audio voice prompts and tones.
13 Remote Control
Connection for the remote control.
Connector
14 Battery Compartment Accommodates the removable battery pack.
15 Remote Control Storage
Storage for remote control (in rear).
Compartment
16 Readiness Display In an actual LIFEPAK 500 AED, the readiness display allows
the operator to determine if the AED is ready for use when the
device is turned off or when the key panel is not visible. The
readiness display is not functional on the AED Trainer.
Note: Not all LIFEPAK 500 AEDs have a Readiness Display.
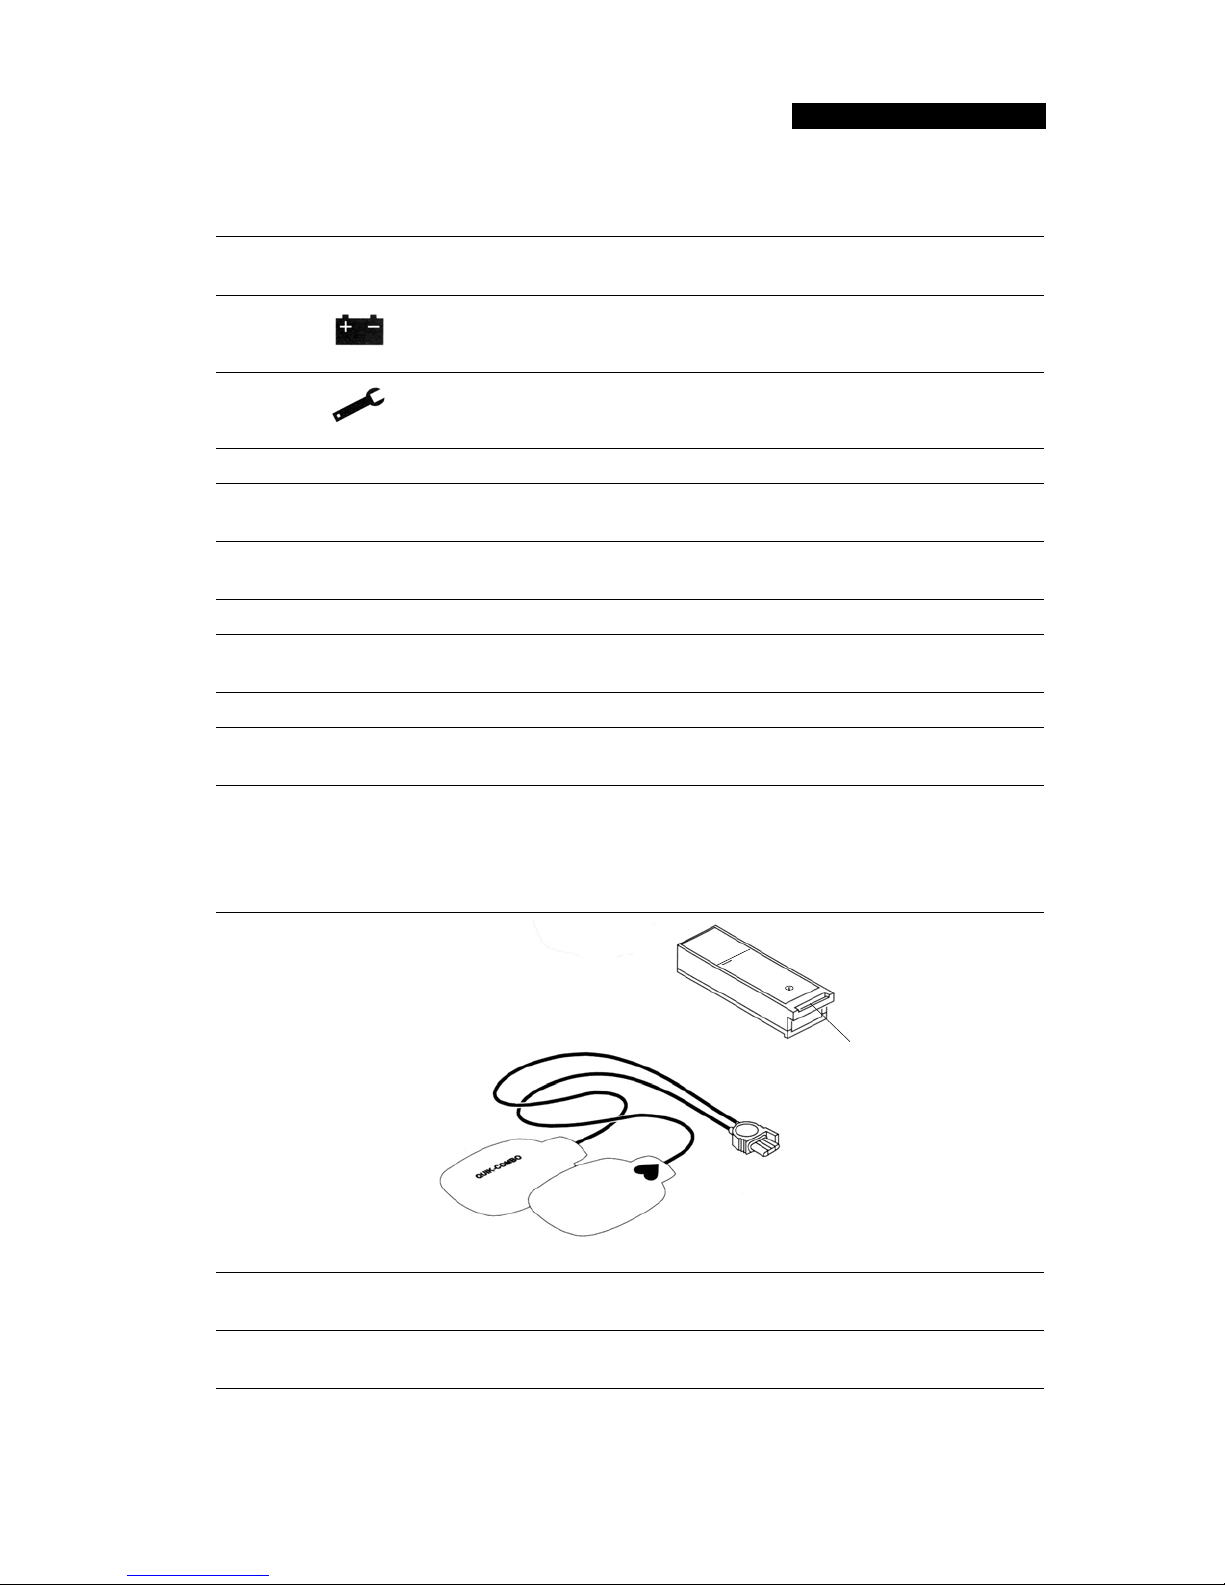
18
Latch release
17
Training Electrodes
Figure 2 Battery pack and training electrodes
17 Training Electrodes Use the AED Trainer training electrodes to practice accurate
18 Battery Pack Holds four standard D-cell batteries that provide power to the
LIFEPAK 500T AED TRAINING SYSTEM Operating Instructions 3
© 2002-2006 Medtronic Emergency Response Systems, Inc.
Electrode Connector
electrode connection and placement.
AED Trainer. Installs into battery compartment.
Page 12

Description
Table 2 AED Trainer voice prompts, display messages, tones, and indicators
Prompt Voic e
CONNECT ELECTRODES
IF YOU WITNESSED
THE ARREST
PUSH X (right arrow)
PUSH ANALYZE
ANALYZING NOW
STAND CLEAR
NO SHOCK ADVISED
CHECK FOR PULSE
CHECK FOR SIGNS OF
CIRCULATION
CHECK PATIENT
SHOCK ADVISED
PUSH TO SHOCK
IF NO PULSE
IF NO SIGNS OF CIRCULATION
IF NOT MOVING AND NOT
BREATHING NORMALLY
MOTION DETECTED
STOP MOTION
LOW BATTERY
REPLACE BATTERY
CHARGE REMOVED
ASYSTOLE
CALL SERVICE
*
XX
XX
XX
XX
XXANALYZE flashes yellow
XXANALYZE steady yellow
XXANALYZE steady yellow
XX
XX
XX
XX
XX
XXSHOCK flashes red
XX
XX
XX
XX
XX
X X Battery indicator flashes red
XX
Display
*
Indicator
X Red battery indicator on steady
X
X Service indicator flashes red
Attention “Beep” Tone X
SHOCK COUNTER
CPR COUNTDOWN TIMER
X
X
Charging Tone (8 seconds) X
Motion Tone X
Push to Shock Tone X
PAUSE (Remote Control only) X ON/OFF flashes green
START CPR
XX
* Not available in all languages.
4 LIFEPAK 500T AED TRAINING SYSTEM Operating Instructions
Page 13

Description
Remote Control
The remote control and optional cable are illustrated below in Figure 3. Refer to Using the Remote
Control on page 9 for complete remote control function information.
Service
Electrode Pads
No Shock
Motion
Battery
Connects to
remote control
PAU SE + Button = Shock Protocol
F1 Fixed #1
F2 Fixed #2
CPSS
Pause
AAA
AAA
Connects to
side of AED Trainer
Figure 3 Remote control and cable
LIFEPAK 500T AED TRAINING SYSTEM Operating Instructions 5
© 2002-2006 Medtronic Emergency Response Systems, Inc.
F3 Fixed #3
F4 Fixed #4
C1 Custom #1
C2 Custom #2
Page 14

Getting Ready
2. GETTING READY
This section describes how to prepare the AED Trainer for use. Refer to the following topics:
• Unpacking and Initial Inspection, page 6
• Installing Batteries, page 6
• Beginning a Training Session, page 7
• Following a Training Session, page 8
Unpacking and Initial Inspection
Remove the AED Trainer from the shipping container. Examine the device and accessories for any
sign of damage during shipping. Save the container for reshipping the device.
Shipping container contents include:
• AED Trainer • 2 AAA batteries (for remote control)
• Remote control • 4 D-cell batteries (for battery pack)
• Remote control cable • Operating instructions (this manual)
• Battery pack • International handle labels
• Training electrodes • International identification cards
• Analyze key cover labels (black sticker) • International control panel labels
• Softcase with identification card
Installing Batteries
The AED Trainer is powered by four D-cell alkaline batteries. The batteries are housed in a “battery
pack” that simulates the size, weight, and installation technique of the LIFEPAK 500 AED BATTERY
PAK. Four fresh batteries provide 100 hours minimum of continuous device operation.
The remote control requires 2 AAA batteries.
To install batteries in the battery pack:
1 Verify that AED Trainer power is off. Remove the battery pack by depressing the battery pack
latch on the side of the AED Trainer.
2 To remove the battery compartment cover, remove the screw and cover.
3 Insert four fresh batteries taking care to position the (+) and (-) terminals correctly (see
Figure 4).
4 Replace the battery compartment cover and insert the battery pack into the AED Trainer until
the latch snaps into place.
Note: Always replace all the batteries at the same time. Always use four identical batteries.
Note: For permanent storage, remove the batteries from the battery pack. For infrequent use
of the product (approximately once every six months), the batteries may remain in the battery
pack.
Note: To conserve battery power, the AED Trainer shuts down automatically after 15 minutes
of inactivity. In pause mode, the AED Trainer automatically shuts down after 30 minutes of
inactivity.
6 LIFEPAK 500T AED TRAINING SYSTEM Operating Instructions
Page 15

Getting Ready
Figure 4 Battery pack battery installation
To install or replace the remote control batteries (see Figure 3 on page 5):
1 On the rear of the remote control, slide the battery compartment cover open using firm
downward thumb pressure.
2 Insert two AAA batteries taking care to align the (+) and (-) terminals correctly.
3 Replace the battery compartment cover, making sure it snaps securely into place.
Beginning a Training Session
1 Confirm or setup AED Trainer configuration.
To simulate a two-button LIFEPAK 500 AED, place the black sticker (included) over the
button and select
18).
Review AED Trainer settings and configure as desired. Refer to Setup on page 12 for complete
setup and configuration information.
2 Connect the training electrodes to the AED Trainer.
To connect the training electrodes to the AED Trainer, insert the electrode connector into the
AED Trainer cable connector until it snaps into place (Figure 5).
To disconnect the training electrodes from the AED Trainer, grasp the connector and pull firmly
away from the unit. Do not disconnect the training electrodes by pulling on the cable.
Cable Connector
AUTO ANALYZE 2 in setup mode (refer to Configuring Auto Analyze on page
Training Electrode Connector
ANALYZE
Figure 5 Training electrode connection to the AED Trainer
3 Place training electrodes on the manikin.
See Figure 6 for training electrode placement on the manikin.
LIFEPAK 500T AED TRAINING SYSTEM Operating Instructions 7
© 2002-2006 Medtronic Emergency Response Systems, Inc.
Page 16

Getting Ready
Anterior
Lateral
Figure 6 Training electrode placement on manikin
To remove the training electrodes from the manikin, grasp the electrode pad at the cable end
and peel it away from the manikin at a 45° angle. Do not remove the training electrodes from
the manikin by pulling on the cable.
Note: Do not touch the adhesive or allow a training electrode to fold over on itself. This
will shorten the electrode’s useful life.
Note: During operation of the AED Trainer:
- If the training electrodes disconnect from the device, the
CONNECT ELECTRODES message
appears.
- If the training electrodes detach from the manikin, the
CONNECT ELECTRODES message
does not appear.
4 Press
ON/OFF to turn AED Trainer power on and off.
Whenever the AED Trainer is turned on, a four- to five-second self-diagnostic initialization
occurs. During initialization all display segments blink on and off once. The following messages
appear briefly:
When initialization is complete, the green
MEDTRONIC C20XX, and SELF TEST 1.XX. All indicators blink on and off once.
ON/OFF indicator stays on steady and the AED Trainer
begins automatic operation.
Depending on AED Trainer configuration, the user receives one of the following prompts:
• CONNECT ELECTRODES
• PUSH ANALYZE
• STAND CLEAR, ANALYZING NOW
Note: If the operator turns the AED Trainer off when the D-cell batteries that power the
AED Trainer are low, the AED Trainer gives the following “low battery” indicators:
-The
ON/OFF light remains on
- A 3-beep tone sounds
- A low battery message appears on the display
- The battery icon flashes red
After these low battery indicators, the AED Trainer shuts off.
Following a Training Session
WARNING!
Always place the Trainer in a location separate from the defibrillator to avoid confusion in real
emergencies.
8 LIFEPAK 500T AED TRAINING SYSTEM Operating Instructions
Page 17

Using the Remote Control
3. USING THE REMOTE CONTROL
This section describes the functions of the remote control and how the remote control interacts with
the AED Trainer. Refer to the following topics:
• Introduction, page 9
• Remote Control Cable, page 9
• Remote Control Functions, page 10
Introduction
During a training session, the instructor may use the remote control to create realistic training
scenarios. The remote control allows the instructor to:
• Vary the shock protocol at any time during the training session
• Pause AED Trainer operation
• Interrupt preconfigured routines with
SERVICE WARNING/REQUIRED, LOW/REPLACE BATTERY and CPSS prompts
• Select any one of the six available shock protocols (while in pause mode)
NO SHOCK ADVISED, CONNECT ELECTRODES, MOTION,
The remote control communicates with the AED Trainer via wireless infrared signals, or by means
of an optional cable. An indicator on the rear of the AED Trainer acknowledges received remote
control signals both with and without the cable:
• One red flash indicates valid signal reception from the remote control, and AED Trainer
operation responds accordingly.
• Three rapid red flashes indicate that an invalid remote control key was pressed, and AED
Trainer operation is unchanged.
• A steady red light indicates that the AED Trainer is in pause mode.
To use the remote control without the cable, the Trainer must stand behind the AED Trainer. During
use, hold the remote control level rather than aiming it directly at the AED Trainer.
Each time the AED Trainer is turned on, all remote selections from the previous training session are
deleted, with the exception of the current shock protocol which is stored in memory.
Remote Control Cable
To use the remote control cable, insert the cable’s right-angle connector into the remote control
connector located on the remote control. Insert the other end into the connector located on the side
of the AED Trainer (see Figure 1 on page 2).
Disconnect the remote control cable by grasping the connector at each end and pulling gently.
LIFEPAK 500T AED TRAINING SYSTEM Operating Instructions 9
© 2002-2006 Medtronic Emergency Response Systems, Inc.
Page 18

Using the Remote Control
Remote Control Functions
Remote control functions are described in Table 3.
Table 3 Remote control functions
Symbol Function Operation and Description
• Change any rhythm to NO
SHOCK ADVISED
Press NO SHOCK to change any shock decision
within a shock protocol to NO SHOCK ADVISED. This
function is enabled only during
STAND CLEAR, ANALYZING NOW periods.
PUSH ANALYZE and
• Simulate
SERVICE REQUIRED
SERVICE WARNING,
• Simulate electrode
placement/attachment on the
manikin
• Start or stop simulated
motion
• Simulate
REPLACE BATTERY, FAILED
BATTERY
LOW BATTERY,
Press SERVICE once to activate SERVICE WARNING.
The AED Trainer continues normal operation while
SERVICE wrench lights red.
the
Press
SERVICE a second time to activate SERVICE
REQUIRED
. The service wrench flashes and the AED
Trainer stops operating.
To clear either service prompt, turn the device off.
ELECTRODE PADS to toggle the training
Press
electrodes “on” and “off” the manikin.
When training electrodes are “off” the manikin, the
AED Trainer delivers
until the instructor presses
CONNECT ELECTRODES prompt
ELECTRODE PADS again.
Note: This feature is active only when training
electrodes are connected to the AED Trainer
Press
MOTION to toggle motion “on” and “off.”
When motion is “on,” the device delivers
DETECTED prompts and tone for 10 seconds before
MOTION
resuming analysis.
Press BATTERY once to activate the LOW BATTERY
icon (steady red) and prompts. The AED Trainer
continues normal operation while the
lights and a
LOW BATTERY prompts alternate with
BATTERY icon
normal prompts.
Press
BATTERY a second time to activate the
REPLACE BATTERY
icon (flashing red) and prompts.
The AED Trainer continues normal operation while
BATTERY icon flashes and REPLACE BATTERY
the
prompts alternate with normal prompts.
To clear a
LOW or REPLACE BATTERY prompt, turn
the device off or remove the battery pack.
Press
BATTERY a third time to simulate failed
batteries which automatically turns off the AED
Trainer.
10 LIFEPAK 500T AED TRAINING SYSTEM Operating Instructions
Page 19

Table 3 Remote control functions (Continued)
Symbol Function Operation and Description
Using the Remote Control
• Simulate CPSS - Continuous
Patient Surveillance System
Press CPSS to simulate device detection of a
possible shockable rhythm.
Press
initiate a 2-beep warning and
prompts. When the operator presses
normal device operation resumes.
CPSS is disabled when Auto Analyze 2 is selected.
• Pause / Resume Operation Press
operation. All prompts cease and the message
PAUSE appears on the display.
Press
the point of interruption.
• Select/configure shock
protocol
Press
change the shock protocol.
Press
automatically turns off the AED Trainer.
The AED Trainer enters pause mode when it
reaches the end of a shock protocol. The instructor
may either select another shock protocol by
pressing the appropriate remote key (see below) or
keep the same shock protocol by turning the AED
Trainer off.
CPSS to interrupt device operation and
PUSH ANALYZE
ANALYZE,
PAUSE at any time to suspend device
PAUSE again to resume normal operation at
PAUSE and F1, F2, F3, F4, C1, or C2 to
PAUSE again which saves the change and
F1 • Initiate shock protocol
Fixed #1
F2 • Initiate shock protocol
Fixed #2
F3 • Initiate shock protocol
Fixed #3
F4 • Initiate shock protocol
Fixed #4
C1 • Initiate shock protocol
Custom #1
• Initiate shock protocol
Custom #2
PAUSE, then F1 to initiate shock protocol
Press
Fixed #1 (refer to Table 4).
PAUSE, then F2 to initiate shock protocol
Press
Fixed #2 (refer to Table 4).
PAUSE then F3 to initiate shock protocol
Press
Fixed #3 (refer to Table 4).
PAUSE then F4 to initiate shock protocol
Press
Fixed #4 (refer to Table 4).
PAUSE then C1 to initiate shock protocol
Press
Custom #1 (User configurable. Default is nine
consecutive
SHOCK ADVISED prompts with CPR
time).
PAUSE then C2 to initiate shock protocol
Press
Custom #2 (User configurable. Default is nine
consecutive
SHOCK ADVISED prompts with CPR
time).
LIFEPAK 500T AED TRAINING SYSTEM Operating Instructions 11
© 2002-2006 Medtronic Emergency Response Systems, Inc.
Page 20

Setup
4. SETUP
This section explains how to set up and configure the AED Trainer. Refer to the following topics:
• Setup Options, page 12
• Setup Procedures, page 16
• Resetting Factory Default Settings, page 20
• Language Setup Procedure, page 20
cprMAX™ Technology
The cprMAX technology is designed to allow resuscitation protocols to maximize the amount of
CPR administered during treatment using the LIFEPAK 500 AED. When used with the factory
default settings enabled, the defibrillator allows AED protocols to be consistent with the 2005
American Heart Association Guidelines for Cardiopulmonary and Resuscitation and Emergency
Cardiovascular Care and the European Resuscitation Council Guidelines for Resuscitation.
Setup Options
Setup options are described in the following table.
Table 4 AED Trainer setup options
Setup Option Description Default Setting
SHOCK
PROTOCOL
Six Shock Protocol choices are available: four
preconfigured protocols and two user-
CUSTOM #1
configurable protocols. The preconfigured shock
protocols cannot be changed.
• C1 – CUSTOM #1 User-configurable. Nine consecutive
SHOCK ADVISED
decisions with
time
• C2 –
CUSTOM #2 User-configurable. Nine consecutive
SHOCK ADVISED
decisions with
time
FIXED #1 One SHOCK ADVISED, followed by three NO SHOCK
• F1 –
• F2 –
• F3 –
ADVISED
FIXED #2 Tw o SHOCK ADVISED, followed by two NO SHOCK
ADVISED
FIXED #3 One NO SHOCK ADVISED, followed by one SHOCK
ADVISED
decisions.
decisions.
, followed by two NO SHOCK ADVISED
decisions.
CPR
CPR
FIXED #4 Four NO SHOCK ADVISED decisions.
• F4 –
12 LIFEPAK 500T AED TRAINING SYSTEM Operating Instructions
Page 21

Table 4 AED Trainer setup options (Continued)
Setup Option Description Default Setting
Setup
STACK SHOCKS When set to OFF, the Stack Shocks option
eliminates the analysis after each shock and
inserts prompting for CPR after each (a single)
shock. This eliminates the three-shock stack.
CPR is prompted after the shock regardless of the
ECG rhythm. The CPR time following the shock is
determined by the
Choices for the Stack Shocks
CPR TIME 1 setting selected.
option are ON or OFF.
INITIAL CPR This option prompts the operator to START CPR or
to proceed to analysis immediately.
• OFF
• ANALYZE FIRST
The CONNECT ELECTRODES prompt displays.
The device proceeds to analysis if electrodes are
applied. If device protocol is set to an initial
SHOCK ADVISED decision, the prompt continues
with
IF YOU WITNESSED THE ARREST, PUSH X (right
NO SHOCK ADVISED
• CPR FIRST
arrow). If the device is set to a
decision, the prompt is
START CPR.
The START CPR prompt displays. When electrodes
are connected (before or during CPR), the prompt
continues with
X (right arrow), which initiates the analysis
PUSH
process. If the operator does not push
IF YOU WITNESSED THE ARREST,
X, the
countdown continues for the Initial CPR Time
period.
OFF
OFF
INITIAL CPR TIME This option applies to the setting for Initial CPR.
15, 30, 45, 60, 90, 120, or
PRE-SHOCK CPR
TIME
The time choices are:
180 seconds.
Pre-shock CPR is inserted after a SHOCK ADVISED
decision to prompt the operator to perform CPR
while the device is charging. The choices are:
15
, or 30.
120
OFF
OFF,
• OFF Following a SHOCK ADVISED decision, the device
charges with no CPR prompt.
15 or 30 Immediately following a SHOCK ADVISED decision,
•
the operator is prompted to START CPR. The
countdown timer begins for 15 or 30 seconds,
depending on setting.
LIFEPAK 500T AED TRAINING SYSTEM Operating Instructions 13
© 2002-2006 Medtronic Emergency Response Systems, Inc.
Page 22

Setup
Table 4 AED Trainer setup options (Continued)
Setup Option Description Default Setting
AUTO ANALYZE Auto Analyze options are 1, 2, or OFF.
•1
Press ANALYZE to begin the first simulated
analysis of each set of three consecutive
simulated shocks. The AED Trainer automatically
begins analysis for the second and third simulated
shock in each three-shock set. After the Initial
CPR Time period, the operator must press
ANALYZE again to start simulated analysis.
•2
All analysis cycles begin automatically. To
simulate the look of a two-button LIFEPAK 500
AED, the black sticker may be placed over the
ANALYZE button. CPSS cannot be activated with
the remote control in this mode.
• OFF
The operator must press ANALYZE to initiate every
analysis.
Note: When Stack Shocks is set to
AUTO ANALYZE 1 functions the same as AUTO
ANALYZE OFF
.
OFF,
PULSE CHECK This option determines when pulse check
prompting is allowed.
• NEVER
All prompting for pulse checks is removed.
1
NEVER
•AFTER SECOND
NSA
Pulse check prompting is allowed after the
second and all subsequent
NO SHOCK ADVISED
decisions, but not after shocks.
• AFTER EVERY NSA
•ALWAYS
Pulse check prompting is allowed after every NO
SHOCK ADVISED
decision but not after shocks.
Pulse check prompting is allowed after CPR, NO
SHOCK ADVISED
decisions, and shocks.
PULSE PROMPT This option determines which voice prompt (and
LCD message) is presented to tell the operator to
check the patient for signs of circulation. Checking
for signs of circulation is important after a
SHOCK ADVISED
decision, after three sequential
NO
shocks, and after a CPR interval.
Note: The Pulse Prompt setting is not
applicable when Pulse Check is set to
NEVER.
Note: The Pulse Prompt setting availability
depends on the language configuration.
1–CHECK PULSE
14 LIFEPAK 500T AED TRAINING SYSTEM Operating Instructions
Page 23

Table 4 AED Trainer setup options (Continued)
Setup Option Description Default Setting
Setup
•1–CHECK PULSE
•2–CHECK PATIENT
• 3–CHECK FOR
SIGNS
CPR TIME 1 and
CPR TIME 2
If 1–CHECK PULSE is selected, one of the following
voice prompts and LCD messages will be
presented:
CPR
or CHECK FOR PULSE; IF NO PULSE, PUSH
ANALYZE
CHECK FOR PULSE; IF NO PULSE, START
.
If 2–CHECK PATIENT is selected, one of the
following voice prompts and LCD messages will
be presented:
NOT BREATHING NORMALLY, START CPR,
PATIENT; IF NOT MOVING AND NOT BREATHING
NORMALLY, PUSH ANALYZE
CHECK PATIENT; IF NOT MOVING AND
or CHECK
.
If 3–CHECK FOR SIGNS is selected, one of the
following voice prompts and LCD messages will
be presented:
IF NO SIGNS OF CIRCULATION, START CPR,
FOR SIGNS OF CIRCULATION; IF NO SIGNS OF
CIRCULATION, PUSH ANALYZE
CHECK FOR SIGNS OF CIRCULATION;
or CHECK
.
The CPR Time 1 option inserts prompting to
perform CPR after a single shock or a set of three
shocks is delivered.
CPR Time 2 option inserts prompting to
The
perform CPR after a
The choices for both CPR Times 1 and 2
15, 30, 45, 60, 90, 120, and 180 seconds, and 999
(infinite CPR time). For all selections except
999, the AED prompts the operator to perform
NO SHOCK ADVISED decision.
are: 0,
0 and
CPR and then displays a countdown timer. If 999
is selected, the AED prompts the operator to
perform CPR but does not display the countdown
timer. The AED will not prompt the operator to
PUSH ANALYZE, although the operator may do so at
any time to initiate an analysis.
120
LIFEPAK 500T AED TRAINING SYSTEM Operating Instructions 15
© 2002-2006 Medtronic Emergency Response Systems, Inc.
Note: When an analysis after a shock results
NO SHOCK ADVISED decision, the CPR
in a
period is the same as CPR Time 1.
Note: CPR Time 0
ANALYZE 2
ANALYZE button or on AEDs that do not have
is selected on AEDs that have an
is not available if AUTO
an ANALYZE button. CPR Time 999 is not
available on AEDs that do not have an
ANALYZE button.
Page 24

Setup
Table 4 AED Trainer setup options (Continued)
Setup Option Description Default Setting
ASYSTOLE
DETECTOR
• OFF
•ON
INITIAL
ELECTRODE
PLACEMENT
• OFF
•ON
MOTION
DETECTION
Choose
ON or OFF.
No impact on device function.
After six consecutive NO SHOCK ADVISED
decisions, the prompt NO SHOCK ADVISED,
ASYSTOLE
is received. No further analysis is
initiated.
Choose ON or OFF.
When the AED Trainer is turned on, CONNECT
ELECTRODES
prompts begin automatically. The
device will not advance to analysis prompts until
the training electrodes are connected to the
device and the instructor presses
PADS
on the remote control.
ELECTRODE
When the AED Trainer is turned on and the
training electrodes are connected to the device,
analysis prompts begin automatically.
This option determines whether or not the motion
detection system is active during analysis. When
this option is
ON, motion that is detected prevents
analysis from proceeding for up to 10 seconds.
After 10 seconds, analysis continues regardless
of whether or not motion is present.
OFF
OFF
ON (not configurable)
LANGUAGE Trainer version -01: Choose one of eight
languages: English, German, Spanish, Italian,
Brazilian Portuguese, French, Swedish, or Dutch.
Trainer version -02: Choose one of nine
languages: English, Chinese, Danish, Finnish,
Hungarian, Japanese, Korean, Polish, or Iberian
Portuguese.
Setup Procedures
This section provides instructions for entering setup mode and configuring the setup options.
Note: Settings are retained between device uses even if the batteries are removed.
Entering Setup Mode
1 Make sure the AED Trainer is turned off.
2 Press and hold
button.
16 LIFEPAK 500T AED TRAINING SYSTEM Operating Instructions
S (up arrow) and X (right arrow) while pressing the AED Trainer ON/OFF
Page 25

Setup
The message SETUP MODE and the installed software version appear briefly, and then the SHOCK
PROTOCOL
screen appears.
Note: For two-button devices (black sticker covers
instead of the
ANALYZE button in the following setup procedures.
ANALYZE button), press the black sticker
Configuring Shock Protocol
1 After entering setup mode, the
SHOCK PROTOCOL
CUSTOM #1 SSSSSSSSS
2 Press
S to scroll through the following shock protocol options (the protocols are described in
SHOCK PROTOCOL screen appears.
Table 3 on page 10):
• CUSTOM #1 (SSSSSSSSS)
• CUSTOM #2 (SSSSSSSSS)
• FIXED #1 (SNNN)
• FIXED #2 (SSNN)
•FIXED #3 (NSNN)
• FIXED #4 (NNNN)
3 When the desired protocol appears, press ANALYZE to save your selection and proceed to the
next setup option, or press
ON/OFF to exit setup mode (the display flashes and your selection is
saved).
Configuring Custom Settings
To change the settings for CUSTOM #1 or CUSTOM #2:
1 Press
S until CUSTOM #1 or CUSTOM #2 appear on the display.
2 Press X to display a cursor ( _ ) under the first letter (S or N).
3 Press S to toggle between S (shock), N (no shock), or blank.
4 Press X to move the cursor to the right.
5 Repeat steps 3 and 4 until the shock protocol is configured as desired.
6 Press
ANALYZE to save your selection and proceed to the next setup option, or press ON/OFF to
save your selection and exit setup mode.
Configuring Stack Shocks
1 In setup mode, press
STACK SHOCKS
2 Press S to toggle between
3 When the desired setting appears, press
next setup option, or press
LIFEPAK 500T AED TRAINING SYSTEM Operating Instructions 17
© 2002-2006 Medtronic Emergency Response Systems, Inc.
ANALYZE until the STACK SHOCKS screen appears.
OFF
ON or OFF.
ANALYZE to save your selection and proceed to the
ON/OFF to save your selection and exit setup mode.
Page 26

Setup
Configuring Initial CPR
1 In setup mode, press
ANALYZE until the INITIAL CPR screen appears.
INITIAL CPR
OFF
2 Press S to scroll through the following available settings:
• ANALYZE FIRST
• CPR FIRST
• OFF
3 When the desired setting appears, press ANALYZE to save your selection and proceed to the
next setup option, or press
ON/OFF to save your selection and exit setup mode.
Configuring Initial CPR Time
1 In setup mode, press
ANALYZE until the INITIAL CPR TIME screen appears.
INITIAL CPR TIME
120
2 Press S to scroll through the following available time settings (in seconds) for initial CPR:
15, 45, 60, 90, 120, or 180.
3 When the desired setting appears, press
next setup option, or press
ON/OFF to save your selection and exit setup mode.
ANALYZE to save your selection and proceed to the
Configuring Pre-Shock CPR Time
1 In setup mode, press
2 Press S to scroll through the following available settings:
ANALYZE until the PRE-SHOCK CPR TIME screen appears.
PRE-SHOCK CPR TIME
OFF
OFF, 15, or 30.
3 When the desired setting appears, press ANALYZE to save your selection and proceed to the
next setup option, or press ON/OFF to save your selection and exit setup mode.
Configuring Auto Analyze
1 In setup mode, press
2 Press
S to scroll through the following available settings: 1, 2, or OFF.
3 When the desired setting appears, press
ANALYZE until the AUTO ANALYZE screen appears.
AUTO ANALYZE
1
ANALYZE to save your selection and proceed to the
next setup option, or press ON/OFF to save your selection and exit setup mode.
18 LIFEPAK 500T AED TRAINING SYSTEM Operating Instructions
Page 27

Configuring Pulse Check
Setup
1 In setup mode, press
2 Press
S to scroll through the following available settings:
• NEVER
•AFTER SECOND NSA
• AFTER EVERY NSA
•ALWAYS
ANALYZE until the PULSE CHECK screen appears.
PULSE CHECK
NEVER
3 When the desired setting appears, press ANALYZE to save your selection and proceed to the
next setup option, or press
ON/OFF to save your selection and exit setup mode.
Configuring Pulse Prompt
1 In setup mode, press
ANALYZE until the PULSE PROMPT screen appears (on AEDs distributed in
the English language only).
Note: The Pulse Prompt setting is not applicable if Pulse Check is set to
PULSE PROMPT
1–CHECK PULSE
2 Press
S to toggle through the following available settings:
•1–CHECK PULSE
•2–CHECK PATIENT
• 3–CHECK FOR SIGNS
NEVER.
3 When the desired setting appears, press ANALYZE to save your selection and proceed to the
next setup option, or press
ON/OFF to save your selection and exit setup mode.
Configuring CPR Time 1 and CPR Time 2
1 In setup mode, press
ANALYZE until the CPR TIME 1 or CPR TIME 2 screen appears (on AEDs
distributed in the English language only).
CPR TIME 1
120
2 Press
3 When the desired time appears, press
Note:
LIFEPAK 500T AED TRAINING SYSTEM Operating Instructions 19
© 2002-2006 Medtronic Emergency Response Systems, Inc.
S to scroll through the following available CPR time settings: 0, 15, 30, 45, 60, 90, 120,
180 seconds, or 999 (infinite CPR time).
or
ANALYZE to save your selection and proceed to the next
setup option or press
CPR TIME 0 is not available if AUTO ANALYZE 2 is selected.
ON/OFF to save your selection and exit setup mode.
Page 28

Setup
Configuring Asystole Detector
1 In setup mode, press
2 Press
S to toggle between OFF or ON.
3 When the desired setting appears, press
next setup option, or press
ANALYZE until the ASYSTOLE DETECTOR screen appears.
ASYSTOLE DETECTOR
OFF
ANALYZE to save your selection and proceed to the
ON/OFF to save your selection and exit setup mode.
Configuring Initial Electrode Placement
1 In setup mode, press
2 Press
S to toggle between the OFF or ON.
3 When the desired setting appears, press
next setup option, or press
ANALYZE until the INIT. ELEC. PLACEMENT screen appears.
INIT. ELEC. PLACEMENT
OFF
ANALYZE to save your selection and proceed to the
ON/OFF to save your selection and exit setup mode.
Resetting Factory Default Settings
To reset the default settings:
1 Turn the device off.
2 Press and hold the
3 When the
The
SHUT DOWN
SET FACTORY DEFAULTS prompt appears, press X.
RESTORING FACTORY DEFAULTS message will appear, followed by the COMPLETE, WAIT FOR
message.
4 The device will turn off. The next time the AED Trainer is turned on, the factory default settings
will be restored.
ANALYZE and SHOCK buttons while pressing the AED Trainer ON/OFF button.
Language Setup Procedure
Language settings are retained between device uses even if the batteries are removed.
To enter the language setup mode:
1 Press and hold in sequence:
2 Press
3 Press
4 When the desired language appears, press
20 LIFEPAK 500T AED TRAINING SYSTEM Operating Instructions
ON/OFF.
The software version appears briefly, then the LANGUAGE SELECT screen appears.
LANGUAGE SELECT
S repeatedly to scroll through the possible language settings.
the AED Trainer.
S, X, and ANALYZE.
ENGLISH
ON/OFF to save the language selection and turn off
Page 29

Maintenance
5. MAINTENANCE
This section provides information for maintaining the LIFEPAK AED Trainer. Refer to the following
topics:
• Battery Pack Battery Replacement, page 21
• Remote Control Battery Replacement, page 21
• Warranty, page 21
• Troubleshooting, page 22
• Cleaning, page 24
• Product Recycling Information, page 24
• Specifications, page 24
• Accessories, page 26
Battery Pack Battery Replacement
To replace the batteries (refer to Figure 4 on page 7):
1 Verify that AED Trainer power is off. Remove the battery pack by depressing the latch on the
side of the device.
2 To remove the battery compartment cover, remove the screw and cover.
3 Remove the old batteries and replace with four fresh batteries taking care to position the (+)
and (-) terminals correctly.
4 Close the battery pack’s latching door and reinsert the battery pack into the AED Trainer.
Note: Always replace all the batteries at the same time. Always use four identical batteries.
Note: For permanent storage, remove the batteries from the battery pack. For infrequent use
of the product (approximately once every six months), the batteries may remain in the battery
pack.
Remote Control Battery Replacement
The remote control is powered by two “AAA” alkaline batteries. To replace the remote control
batteries (refer to Figure 3 on page 5):
1 Open the battery compartment on the rear of the remote control by sliding the battery
compartment cover down using firm thumb pressure.
2 Remove the old batteries.
3 Replace with two fresh, identical batteries, taking care to align the positive and negative
terminals correctly.
4 Replace the battery compartment cover, making sure it snaps securely into place.
Note: Do not disassemble the AED Trainer. There are no operator-serviceable components
and operator disassembly may void the warranty.
Warranty
In the USA, call 1.800.442.1142. Outside the USA, contact your local Medtronic representative for
warranty information.
LIFEPAK 500T AED TRAINING SYSTEM Operating Instructions 21
© 2002-2006 Medtronic Emergency Response Systems, Inc.
Page 30

Maintenance
Troubleshooting
Tables 5 through 10 provide troubleshooting checklists for non-technical users. If the AED Trainer
requires service, please contact your local Medtronic representative.
Table 5 Display troubleshooting
Observation Possible Cause Corrective Action
1 Faded image, device remains
functional.
2 Blank screen, device remains
functional.
3 Blank screen, device does not
function.
• Low battery. • Replace batteries.
• Low battery.
• LCD fault.
• Incorrect battery
placement.
• Replace batteries.
• Turn device on and off.
• Reinstall batteries in correct
position.
• Batteries depleted
• Replace batteries.
or damaged.
4 ON/OFF light stays on when
device is turned off; battery
icon flashes, with 3-beeps and
LOW BATTERY display
Table 6 Voice prompt troubleshooting
Observation Possible Cause Corrective Action
1 Low volume, device remains
functional.
• Battery pack
batteries are low
(D-cells).
• Low battery.
• Speaker grill
• Replace batteries.
• Replace batteries.
• Remove obstruction.
partially covered.
2 No sound, device remains
functional.
• Speaker grill
covered.
• Speaker damaged.
• Remove blockage.
• Contact your local Medtronic
representative.
3 No sound, device does not
function.
• Batteries depleted
or damaged.
• Device damaged.
• Replace batteries.
• Contact your local Medtronic
representative.
Table 7 LED (indicator lights) troubleshooting
Observation Possible Cause Corrective Action
1 Fading intensity. • Low battery. • Replace batteries.
2 Unlit when
ON/OFF pressed,
device does not function.
22 LIFEPAK 500T AED TRAINING SYSTEM Operating Instructions
• Batteries depleted
or damaged.
• Device damaged.
• Replace batteries.
• Contact your local Medtronic
representative.
Page 31

Table 8 Setup options troubleshooting
Observation Possible Cause Corrective Action
1 Messages and prompts out of
sequence.
2 Messages and prompts
incomplete.
3
CONNECT ELECTRODES
message remains on screen
after training electrodes are
connected to the device.
• Incorrect setup
options selected.
• Review Setup Procedures on
page 16.
• Device damaged. • Contact your local Medtronic
representative.
• Instructor did not
press remote control
to begin scenario
• Press the ELECTRODE PADS
key once on the remote control
to initiate analysis prompts.
sequence.
Maintenance
• Damaged remote
control.
• IR sensor not
working properly.
• Contact your local Medtronic
representative.
• Clean/clear the sensor, if
obstructed. OR
• Contact your local Medtronic
representative.
Table 9 Remote control troubleshooting
Observation Possible Cause Corrective Action
1 Device not responding to
remote control key presses.
• IR sensor is not
receiving remote
control signal.
• Reposition remote control
relative to the AED Trainer.
• Remove anything that may be
blocking the IR sensor.
• Turn off lights that may be
interfering.
• Use remote control cable.
• Replace batteries.
• Remote control
• Replace remote control.
damaged.
Tab le 10 Training electrodes troubleshooting
Observation Possible Cause Corrective Action
1 Training electrodes do not
adhere to manikin.
2 Training electrode connector
does not plug into device.
LIFEPAK 500T AED TRAINING SYSTEM Operating Instructions 23
© 2002-2006 Medtronic Emergency Response Systems, Inc.
• Adhesive
contaminated.
• Training electrode
connector damaged.
• Device connector
damaged.
• Replace training electrodes.
• Replace training electrodes.
• Contact your local Medtronic
representative.
Page 32

Maintenance
Cleaning
Clean the AED Trainer and the remote control cable by wiping their surfaces with either:
• A lint-free, slightly damp cloth moistened with mild soap and water
• A lint-free, slightly damp cloth moistened with denatured alcohol.
Observe the following precautions when cleaning the AED Trainer:
• Do not immerse or soak the AED Trainer or the cable.
• Do not use bleach, bleach dilution, or phenolic compounds.
• Do not steam or gas sterilize.
Product Recycling Information
Recycle the device at the end of its useful life.
• Recycling Assistance
Recycle the device according to national and local regulations. Contact your local
representative for assistance.
• Preparation
The device should be clean and free of contaminants prior to recycling.
• Packaging
Recycle packaging according to local and national regulations.
Specifications
Table 11 below lists the specifications for the AED Trainer. Table 12 on page 25 lists the
specifications for the remote control.
Tab le 11 AED Trainer specifications
General Device designed for low impact, low stress environments. For use
in temperature-controlled areas protected from precipitation.
Capable of withstanding heavy usage and prolonged periods of
operation.
Size 10.2 cm x 26.5 cm x 29.5 cm (4 in. x 10.4 in. x 11.6 in.)
approximate.
Weight 2.1 kg (4.6 lb)
Batteries 6 volts/4 cells, range 3.2 Vdc ~ 6.5 Vdc.
Four non-rechargeable D-cell alkaline batteries. New batteries will
provide not less than 100 hours of continuous operation under
normal indoor-environment conditions.
Buttons
Screen Display 5 x 7 dot matrix liquid crystal display with two lines of 20
ON/OFF, ANALYZE, SHOCK, UP ARROW, RIGHT ARROW
characters per line for text messages.
24 LIFEPAK 500T AED TRAINING SYSTEM Operating Instructions
Page 33

Maintenance
Tab le 11 AED Trainer specifications (Continued)
Speaker Volume output: (average / maximum)
• Hi: 100dB / 108dB
• Med: 95dB / 105dB
• Low: 90dB / 101dB
Operating Temperature 3° to 38°C (37.4° to 100.4°F)
Storage Temperature -10° to 60°C (14° to 140°F) (remove batteries for storage)
Water Resistance Spillage resistance per IEC 601-1, part 44.3
Tab le 12 Remote control specifications
Transmission Wireless infrared signal. Range, 3 meters max.
82-inch optional cable attachment.
Size 4.57 cm x 3.38 cm x 1.65 cm (1.8 in. x 1.3 in. x .6 in.)
Weight (without batteries) 32 grams (1.1 ounce)
Batteries 3 volts supplied from two AAA alkaline batteries.
Buttons 7-key membrane switch pad. Icon-labeled for the following
functions:
PAD CONTACT, MOTION, LOW / REPLACE BATTERY, CPSS, PAUSE
NO SHOCK, SERVICE WARNING / REQUIRED, ELECTRODE
Operating Temperature 3° to 38°C (37.4° to 100.4°F)
Storage Temperature -10° to 60°C (14° to 140°F) (remove batteries for storage)
Water Resistance Spillage resistance per IEC 601-1, part 44.3
.
LIFEPAK 500T AED TRAINING SYSTEM Operating Instructions 25
© 2002-2006 Medtronic Emergency Response Systems, Inc.
Page 34

Maintenance
Accessories
The following accessories are available for the AED Trainer:
Tab le 13 AED Trainer accessories
Accessory Part Number
AED Trainer training electrodes 3006007
Soft Case 3012607
Replacement remote control and cable 3012697
Battery pack 3012698
Analyze Key Cover Labels 3012729
LIFEPAK 500T AED Training System
3012699
Operating Instructions
International Identification Cards (for
3012608
soft case)
International Control Panel Labels 3012609
International Handle Labels 3012610
26 LIFEPAK 500T AED TRAINING SYSTEM Operating Instructions
Page 35

Reference Information
6. REFERENCE INFORMATION
The following Quick Start reference guide contains information about remote control buttons and
AED Trainer setup procedures. This reference guide may be reproduced.
LIFEPAK 500T AED TRAINING SYSTEM Operating Instructions 27
© 2002-2006 Medtronic Emergency Response Systems, Inc.
Page 36

Page 37

LIFEPAK® 500T AED TRAINING SYSTEM
Quick Start Reference Card
Quick Start Procedure
1 Turn AED Trainer on.
2 Press
PAUSE button on the remote control.
3 Select Shock Protocol from the Table below.
4 Press
PAUSE again to confirm shock protocol. AED Trainer will turn itself off.
5 You are now ready to begin a training session. Use the remote control to create troubleshooting situations. Refer to
the opposite side of this card for details.
6 Once the AED is turned on, the
ELECTRODE PADS on the remote control to advance to ANALYSIS.
Remote Control Button AED Trainer Shock Protocol Shock Order
F1
F2
F3
F4
C1*
C2*
* Custom settings may be changed in the setup mode (refer to operating instructions).
Fixed #1 SNNN Note: The AED Trainer powers on with
Fixed #2 SSNN
Fixed #3 NSNN
Fixed #4 NNNN
Custom #1 SSSSSSSSS
Custom #2 SSSSSSSSS
CONNECT ELECTRODES message appears (unless turned off in setup). Press
the last shock protocol selected during
the previous use.
Note: For detailed instructions, refer to
the LIFEPAK 500T AED TRAINING
SYSTEM Operating Instructions.
S: Shock Advised N: No Shock Advised
LIFEPAK® 500T AED TRAINING SYSTEM
Quick Start Reference Card
Quick Start Procedure
1 Turn AED Trainer on.
2 Press PAUSE button on the remote control.
3 Select Shock Protocol from the Table below.
4 Press
PAUSE again to confirm shock protocol. AED Trainer will turn itself off.
5 You are now ready to begin a training session. Use the remote control to create troubleshooting situations. Refer to
the opposite side of this card for details.
6 Once the AED is turned on, the
ELECTRODE PADS on the remote control to advance to ANALYSIS.
Remote Control Button AED Trainer Shock Protocol Shock Order
F1
F2
F3
F4
C1*
C2*
* Custom settings may be changed in the setup mode (refer to operating instructions).
Fixed #1 SNNN Note: The AED Trainer powers on with
Fixed #2 SSNN
Fixed #3 NSNN
Fixed #4 NNNN
Custom #1 SSSSSSSSS
Custom #2 SSSSSSSSS
CONNECT ELECTRODES message appears (unless turned off in setup). Press
the last shock protocol selected during
the previous use.
Note: For detailed instructions, refer to
the LIFEPAK 500T AED TRAINING
SYSTEM Operating Instructions.
S: Shock Advised N: No Shock Advised
Page 38

LIFEPAK® 500T AED TRAINING SYSTEM
Quick Start Reference Card
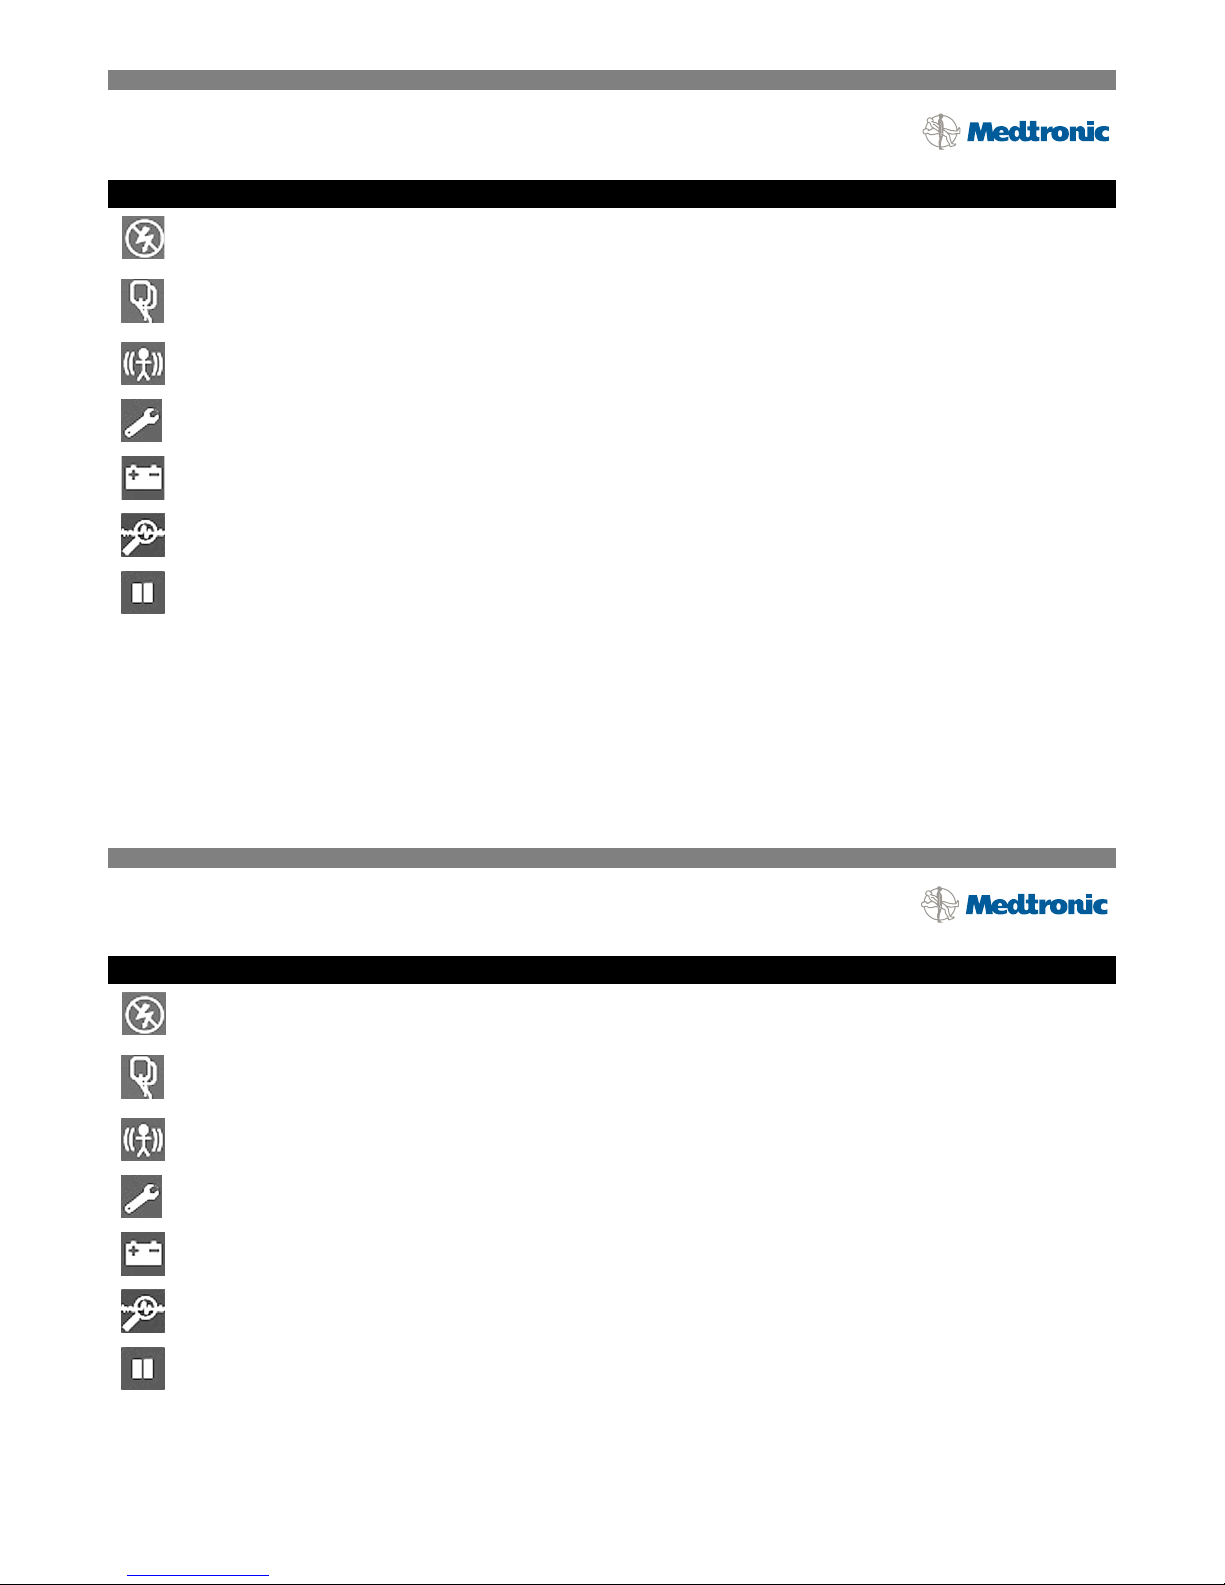
Button Function
Press to change any shock decision to
STAND CLEAR, ANALYZING NOW.
Press to toggle the training electrodes “on” or “off” the manikin. This feature is active when the training
electrodes are connected to the AED Trainer.
NO SHOCK ADVISED. Function is active only during PUSH ANALYZE and
Press to toggle
MOTION DETECTED “on” and “off.” This feature is active during analysis only.
Press once to activate a service warning (red wrench). Press twice: wrench flashes and
displayed and device will not operate. To clear, turn off the AED Trainer, or remove the battery pack.
Press once to activate
LOW BATTERY. Press twice to activate REPLACE BATTERY. Press three times to simulate
failed battery. To clear, turn off the AED Trainer, or remove the battery pack.
Press to simulate device detection of a shockable rhythm. CPSS is disabled when
selected.
Press any time to suspend device operation. Press again to resume operation at point of interruption. In
PAUSE mode, press F1, F2, F3, F4, C1, or C2 to change shock protocol. Press PAUSE again to accept change
and turn off AED Trainer.
LIFEPAK is a registered trademark of Medtronic Emergency Response Systems, Inc. Medtronic is a registered trademark of Medtronic, Inc.
Specifications are subject to change without notice.
© 2002-2006 Medtronic Emergency Response Systems, Inc. All rights reserved.
LIFEPAK® 500T AED TRAINING SYSTEM
Quick Start Reference Card
CALL SERVICE is
AUTO ANALYZE 2 is
MIN 3012699-003 / CAT. 26500-001008
Button Function
Press to change any shock decision to NO SHOCK ADVISED. Function is active only during PUSH ANALYZE and
STAND CLEAR, ANALYZING NOW.
Press to toggle the training electrodes “on” or “off” the manikin. This feature is active when the training
electrodes are connected to the AED Trainer.
Press to toggle
MOTION DETECTED “on” and “off.” This feature is active during analysis only.
Press once to activate a service warning (red wrench). Press twice: wrench flashes and
displayed and device will not operate. To clear, turn off the AED Trainer, or remove the battery pack.
Press once to activate
LOW BATTERY. Press twice to activate REPLACE BATTERY. Press three times to simulate
failed battery. To clear, turn off the AED Trainer, or remove the battery pack.
Press to simulate device detection of a shockable rhythm. CPSS is disabled when
selected.
Press any time to suspend device operation. Press again to resume operation at point of interruption. In
PAUSE mode, press F1, F2, F3, F4, C1, or C2 to change shock protocol. Press PAUSE again to accept change
and turn off AED Trainer.
LIFEPAK is a registered trademark of Medtronic Emergency Response Systems, Inc. Medtronic is a registered trademark of Medtronic, Inc.
Specifications are subject to change without notice.
© 2002-2006 Medtronic Emergency Response Systems, Inc. All rights reserved.
CALL SERVICE is
AUTO ANALYZE 2 is
MIN 3012699-003 / CAT. 26500-001008
Page 39

Appendix A Declaration of Conformity
APPENDIX A DECLARATION OF CONFORMITY
Declaration of Conformity
Manufacturer’s Name: Medtronic Emergency Response Systems, Inc.
Manufacturer’s Address: 11811 Willows Road NE
Redmond, WA 98052-2003 USA
declares that the CE-marked product
Product Name: LIFEPAK 500T AED Training System
complies with 89/336/EEC (Electromagnetic Compatibility Directive)
Specifications: EN 55022 (CISPR 22): 1998 Class B
IEC 1000 PT4-2/EN61000 PT4-2 1st edition 8kV CD, 15 kV AD
IEC 1000 PT4-3 1st edition 3 V/m
Accessories: Includes infrared remote control and training electrodes
Redmond, March 31, 2000
Michael D. Willingham
Vice President, Quality and Regulatory Affairs
This declaration applies to CE-marked devices produced after the date of issuance of this declaration
and before it is either superseded by another declaration or withdrawn.
Authorized EC Representative: Medtronic B.V., Earl Bakkenstraat 10, 6422 PJ Heerlen, The Netherlands
LIFEPAK 500T AED TRAINING SYSTEM Operating Instructions 31
© 2002-2006 Medtronic Emergency Response Systems, Inc.
Page 40

Page 41

Page 42

Medtronic Emergency Response Systems
11811 Willows Road Northeast
Redmond, WA 98052-2003 USA
Telephone: 425.867.4000
Toll Free (USA only): 800.442.1142
Fax: 425.867.4121
Internet: www.medtronic-ers.com
www.medtronic.com
LIFEPAK is a registered trademark of Medtronic Emergency Response Systems, Inc. cprMAX is a trademark of Medtronic Emergency Response Systems, Inc. Medtroni c is a registered trademark of Medtronic, In c.
Specifications are subjec t to change without notice.
© 2002-2006 Medtronic Emer gency Response Systems, Inc. All rights reserved.
Medtronic Europe S.A.
Medtronic Emergency Response Systems
Rte. Du Molliau 31
Case postale 84
1131 Tolochenaz
Switzerland
Telephone: 41.21.802.7000
Fax: 41.21.802.7900
MIN 3012699-003 / CAT. 26500-001008
 Loading...