

Page 1
Itrel® 4
NEUROSTIMULATOR FOR
SPINAL CORD STIMULATION
PROGRAMMING
REFERENCE
GUIDE
Page 2

Page 3
Overview
This guide describes many primary attributes of the
Itrel® 4 neurostimulation system and the model 8840 N’Vision®
programmer. This guide does not replace the product
technical manuals. For complete instructions, indications,
contraindications, warnings, and precautions, consult the
product technical manuals referenced on page 48.
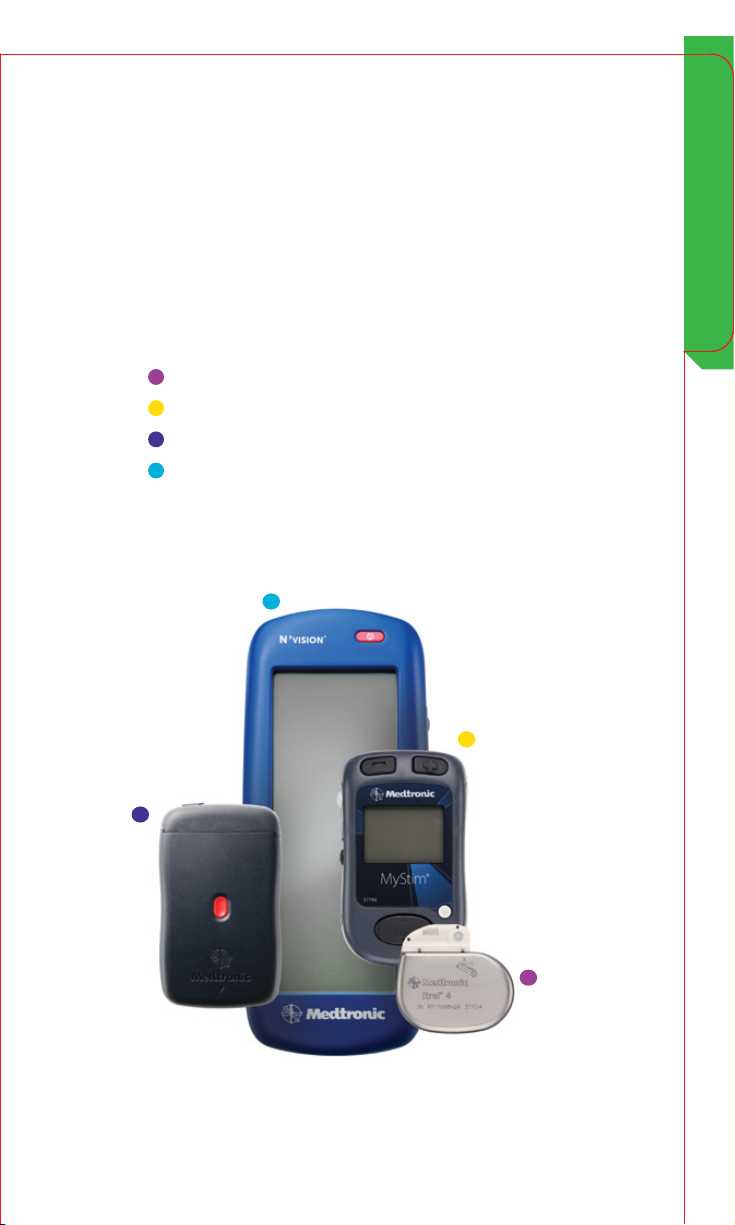
The following products are referenced:
Itrel® 4 neurostimulator (models 37703 and 37704)
MyStim® patient programmer (model 37746)
External Neurostimulation System (ENS) (model 37022)
N’Vision clinician programmer (model 8840)
Overview
3
Page 4

Table of Contents
PROFILE 13
START SESSION 19
MEASUREMENT 21
CONTENTS
4
Page 5
Contents
General Programming Sequence . . . . . . . . . . . . . . . . 7
Program Button . . . . . . . . . . . . . . . . . . . . . . . . . . . . . 7
Pain Test Stim . . . . . . . . . . . . . . . . . . . . . . . . . . . . . . . 8
Program and Parameter Settings . . . . . . . . . . . . . . . 11
Program. . . . . . . . . . . . . . . . . . . . . . . . . . . . . . . . . 11
Parameter Settings . . . . . . . . . . . . . . . . . . . . . . . . . . 11
Prole
Patient Data . . . . . . . . . . . . . . . . . . . . . . . . . . . . . . 12
Lead Conguration . . . . . . . . . . . . . . . . . . . . . . . . . . 14
Device Data . . . . . . . . . . . . . . . . . . . . . . . . . . . . . . 16
Start Session
Start Session . . . . . . . . . . . . . . . . . . . . . . . . . . . . . . 18
Measurement
Electrode Impedance . . . . . . . . . . . . . . . . . . . . . . . . 20
Therapy Measurements . . . . . . . . . . . . . . . . . . . . . . . 22
Battery . . . . . . . . . . . . . . . . . . . . . . . . . . . . . . . . . 24
Program MyStim
Program MyStim . . . . . . . . . . . . . . . . . . . . . . . . . . . 26
Limits/Settings . . . . . . . . . . . . . . . . . . . . . . . . . . . . 28
MyStim Programmer . . . . . . . . . . . . . . . . . . . . . . . . . 30
Initial Settings . . . . . . . . . . . . . . . . . . . . . . . . . . . . . 32
End Session
Print Reports . . . . . . . . . . . . . . . . . . . . . . . . . . . . . . 34
Print Screen . . . . . . . . . . . . . . . . . . . . . . . . . . . . . . 36
End Session . . . . . . . . . . . . . . . . . . . . . . . . . . . . . . 38
Slider Bar . . . . . . . . . . . . . . . . . . . . . . . . . . . . . . . . . 40
Session Data Manager . . . . . . . . . . . . . . . . . . . . . . . 42
MyStim Programmer Troubleshooting . . . . . . . . . . . 44
Glossary . . . . . . . . . . . . . . . . . . . . . . . . . . . . . . . . . . 46
References . . . . . . . . . . . . . . . . . . . . . . . . . . . . . . . . 48
Disclosure . . . . . . . . . . . . . . . . . . . . . . . . . . . . . . . . 50
Table of Contents
5
Page 6

General Programming Sequence
6
Page 7
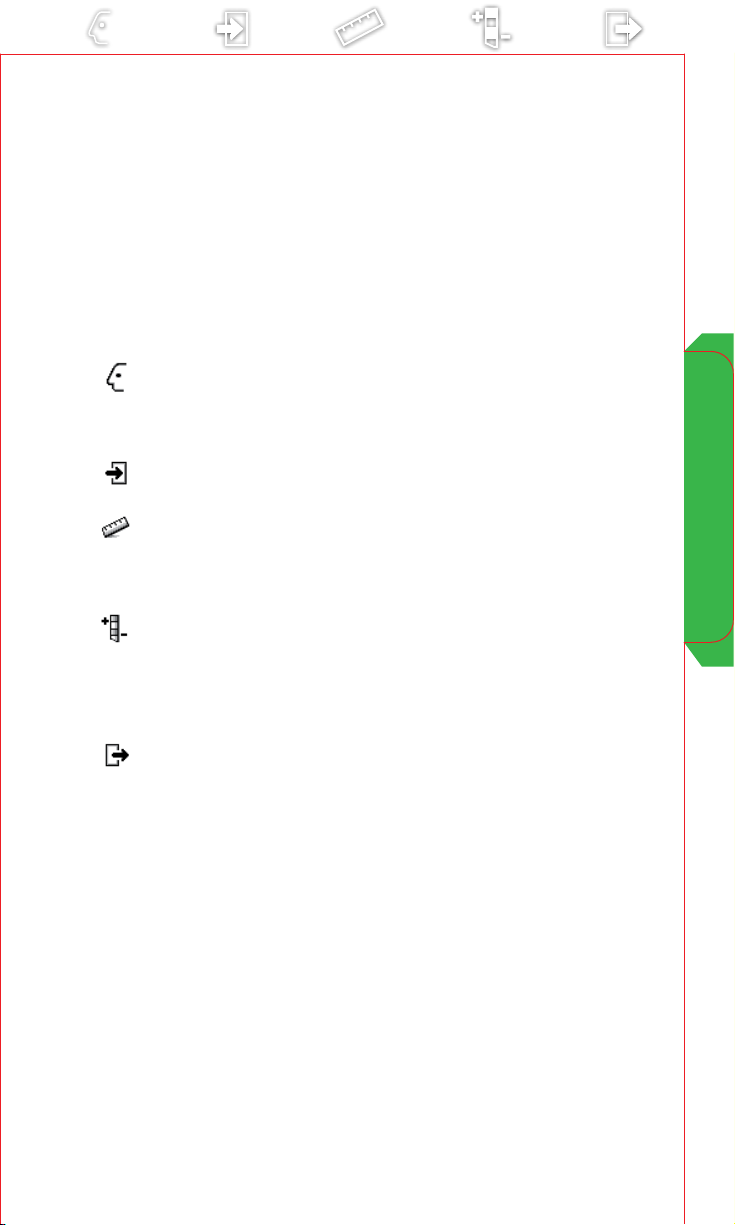
General Programming Sequence
Turn the N’Vision programmer ON.
a
Select the Neurostimulator icon to navigate to the
b
Neurostimulation Desktop screen.
Hold the programming head steady over the
c
neurostimulator and press the PROGRAMMING key.
Access the PROFILE menu. Enter/review patient
d
information, lead conguration, neurostimulator and
implant information, and set/review neurostimulator
date and time.
Access the START SESSION menu. Review patient
e
use information and check the Observations box for
signicant system events that may have occurred.
Access the MEASUREMENT menu. Run diagnostic tests
f
and review battery information.
Access the PROGRAM MyStim menu. Program the
g
device.
Access the END SESSION menu. Verify that all settings
h
are correct and end the session.
General Programming Sequence
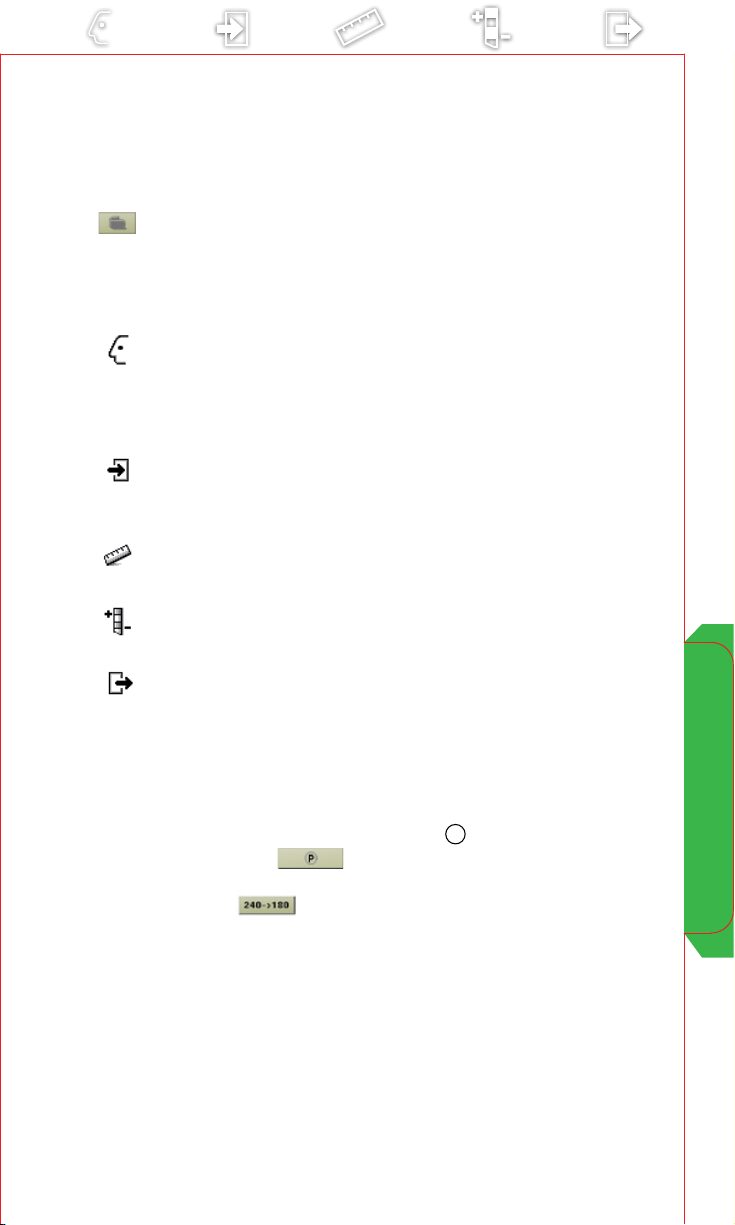
Program Button
Once you have entered new parameters or settings into the
programmer, press the Programming
Program button
your changes to the implanted device. If you have pending
parameters , you will be unable to change screens until
you have programmed the new parameters.
on the screen to send or program
P
key or select the
7
Page 8

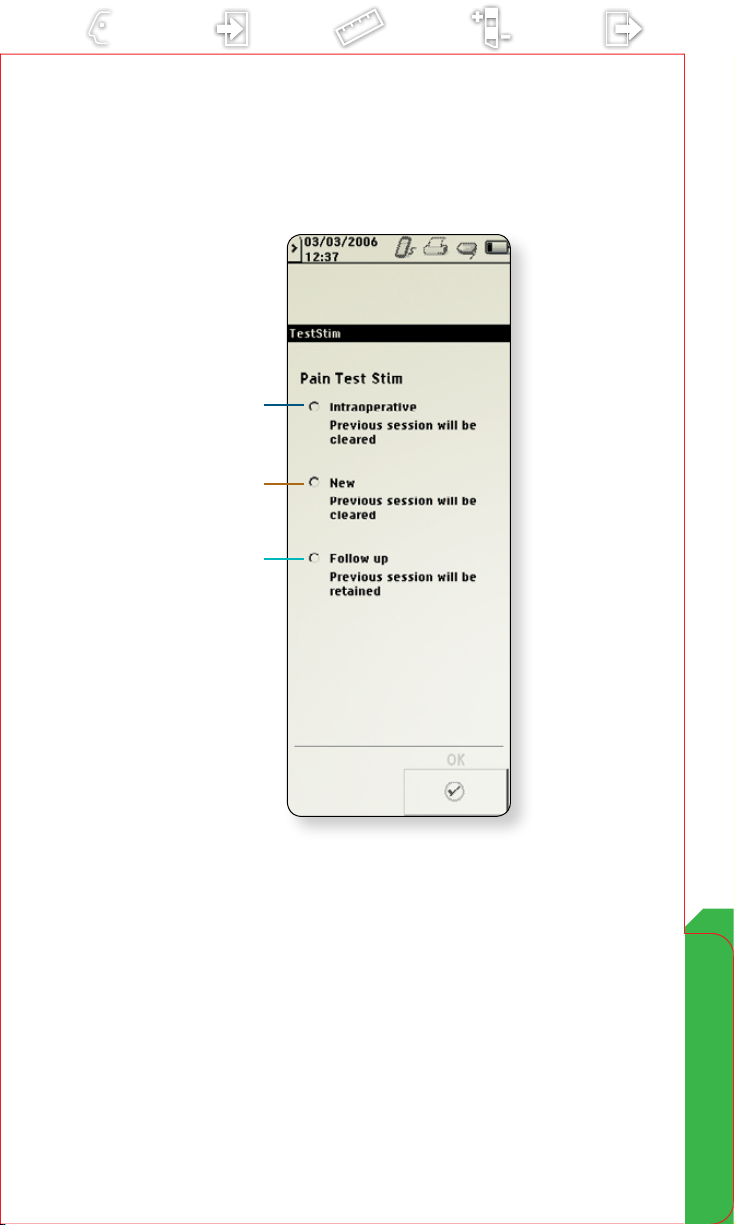
Pain Test Stim
To program for intraoperative screening or postoperative test
stimulation, the model 37022 External Neurostimulator (ENS) is
connected to the model 8840 Clinician Programmer. The model
8870 application card provides the software to program the ENS
for these procedures.
Screening and test stimulation options are available after initial
interrogation and ENS identication.
Note: When using the ENS for intraoperative screening or
postoperative test stimulation, the N’Vision programmer
software takes approximately 60 seconds to load.
Intraoperative
a
Select for intraoperative screening with minimal
programming capabilities (e.g., electrode and impedance
measurements).
• Previous session information not retained
•May be used to identify optimal lead position
New
b
Select for new test stimulation with full programming
capabilities.
•Previous session information not retained
•May be used to set up and conduct a trial
Pain Test Stim
Follow-up
c
Select for test stimulation follow-up with full
programming capabilities.
•Previous session information retained
•May be used for reprogramming during a trial or
at the completion of a trial
8
Page 9
a
b
c
Pain Test Stim
9
Page 10

Program and Parameter Settings
10
Page 11
Program and Parameter Settings
Program
The primary goal of programming is to superimpose the
stimulation or paresthesia pattern over the patient’s pain
pattern and to establish the correct stimulation parameter
values.
A program is a specic combination of pulse width, rate, and
amplitude settings acting on a specic electrode combination.
Parameter Settings
Amplitude* ( ) : 0-10.0 V with 0.05-V or 0.1-V resolution
10.0-10.5 V with 0.1-V resolution
Program and Parameter Settings
Pulse Width* (
Rate* (
10-130 Hz with 5 Hz resolution
): 60-450 µs (10-µs resolution)
): 2-10 Hz with 1 Hz resolution
11
Page 12

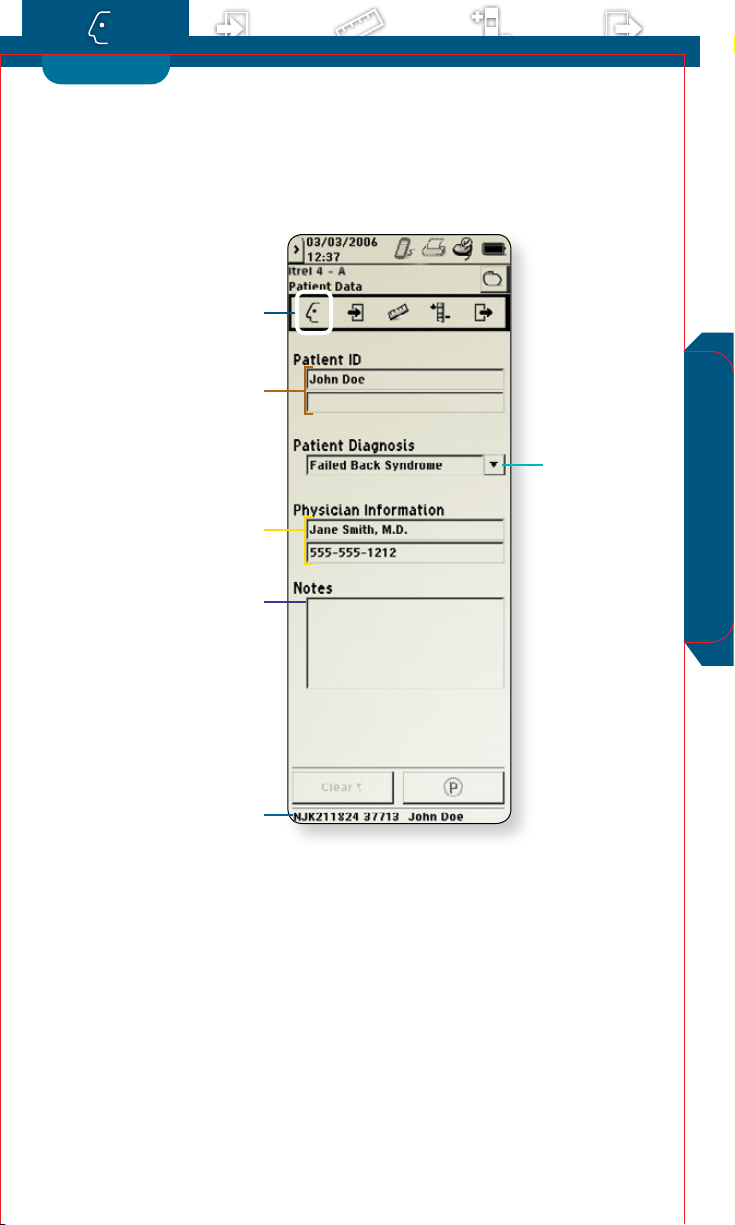
Patient Data
Use for rst-time setup of patient information displayed
across other screens. Information is stored in the implantable
neurostimulator (INS) and/or external neurostimulator (ENS)
Patient Data
for future use.
Access the Prole menu and select Patient Data
a
Patient ID
b
Select to enter patient name, ID number, or any other
appropriate information.
Patient Diagnosis
c
Touch to select patient diagnosis from the dropdown list or select the eld to enter another diagnosis.
Physician Information
d
Select to enter physician name, phone number, or any
other appropriate information.
Notes
e
Touch to open Notes screen and enter any desired
information.
Patient Session Name
f
Displays neurostimulator serial number. Also displays
patient name if entered on the Patient Data screen.
12
Page 13
PROFILE
a
b
Patient Data
c
d
e
f
13
Page 14

Lead Conguration
Use for rst-time setup of device conguration information
displayed across other screens. Information is stored in
the implantable neurostimulator (INS) and/or external
neurostimulator (ENS) for future use. (Note: The screen shown
on page 15 is for the Itrel 4 INS. The screen looks dierent for
the ENS.)
Access the Prole menu and select
a
Lead Conguration
Lead Conguration
b
Touch to select the appropriate lead conguration
from the drop-down list.
Flip Leads Vertically button
c
Lead Conguration
If appropriate, select to ip the lead orientation.
14
Page 15

a
b
c
Lead Conguration
15
Page 16

Device Data
Information is stored in the implantable neurostimulator (INS)
and/or external neurostimulator (ENS) for future use.
Access the Prole menu and select Device Data
a
Date and Time
b
View the current system date and time stored in the
neurostimulator. To reset the date and time, select the
input box and use the Increase and Decrease buttons or
select the Match N’Vision button on the Date and Time
screen.
Location
c
Touch to select the neurostimulator implant location
from the Location drop-down list or to enter another
location.
Implantation Date
d
Select to enter the date the neurostimulator was
implanted.
About Device
e
Select to view information about the N’Vision
programmer, INS, and MyStim programmer.
Device Data
16
Page 17

a
b
c
d
e
17
Device Data
Page 18

Start Session
Displays current settings and general use information.
This screen is for information only; parameters cannot be
programmed from this screen.
Access the Start Session screen from the Start
a
Session menu
Use (%)
b
Displays the percentage of neurostimulator ON time
since the last follow-up session.
Use (Hours)
c
Displays the number of hours that the neurostimulator
was on since the last follow-up session.
Since Implant (Hrs)
d
Displays the number of hours that the neurostimulator
was on since implant.
Battery/Service Life
e
Displays battery/service life status.
Observations
f
Select to view additional information about an item in
the observations box. Pay special attention to system
clock, EOS (End of Service), and ERI (Elective Replacement
Indicator) notications.
Start Session
Notes:
•Initial information can be viewed throughout the programming
session on the Start Session screen.
•Programming changes made during the session are not updated
on the Start Session screen.
18
Page 19

START SESSION
a
Start Session
b
c
d
f
e
19
Page 20

Electrode Impedance
Use to check electrode impedance and system integrity.
Access the Measurement menu and select Electrode
a
Impedance
Electrode Impedance
b
c
d
e
f
Amplitude Value drop-down list
Select an amplitude value from the drop-down list.
Available options include 0.25 V, 0.70 V, 1.5 V, and 3.0 V.
Electrode Impedance Measurement button
Select to test all electrode combinations.
Out-of-Range Results
Review results to detect potential issues with system
integrity (e.g., short circuit, open circuit).
Reference
Touch to select a reference electrode from the
drop-down list.
Electrode Impedance Results
Review the electrode impedance test results any time
during the session.
20
Page 21

a
MEASUREMENT
b
d
f
Electrode Impedance
e
c
21
Page 22

Therapy Measurements
Use to check impedance and system integrity.
Access the Measurement menu and select Therapy
a
Measurements
Measurement button
b
Select to test the impedance for the current therapy
settings.
Results
c
View the impedance and current measurements.
Note: Test results can be viewed at any time during the
programming session.
Therapy Measurements
22
Page 23

a
c
Therapy Measurements
b
23
Page 24

Battery
Use to check battery status.
Access the Measurement menu and select Battery
a
Neurostimulator information
b
Review the implanted neurostimulator battery service life
(e.g., OK, ERI, or EOS).
Battery
24
Page 25

a
b
25
Battery
Page 26

Program MyStim
Use to program therapy settings for your patient.
Access the Program MyStim menu and select
a
Program MyStim
Electrode
b
Select the electrode -, +, or blank (OFF) options on the
lead or implantable neurostimulator (INS) case to be
programmed.
Amplitude input box
c
Touch to select a target value or to change the amplitude
resolution.
Stop Amplitude Ramp button
d
Select to stop the amplitude at a new target value while
it is ramping.
Pulse Width input box
e
Touch to select a target value from the list of values that
appear in the value window.
Caution: To prevent possible uncomfortable or
unexpected stimulation (jolting or shocking sensation),
decrease the amplitude to the perception threshold (the
amplitude at which the patient rst perceives paresthesia)
before changing the pulse width. After changing the pulse
width, slowly increase the amplitude.
Program MyStim
Rate input box
f
Touch to select a target value from the list of values that
appear in the value window.
26
Page 27

a
b
PROGRAM
MyStim
®
Program MyStim
c
d
e
f
27
Page 28

Limits/Settings
Access the Program MyStim menu and select Limits/
a
Settings
Limits/Settings
Limit Types
b
Select to choose options for each stimulation parameter.
Limit type Denition
Full Range The patient is able to adjust the value for the selected stimulation parameter
Customize Clinician-set limits (custom or tracking) are programmed. The patient is able to
O The patient is not able to adjust the value for the selected stimulation parameter.
Limit Value boxes (for setting patient control limits)
c
Available only if clinician-set limits are programmed
(i.e., Customize radio button selected). Select to set
amplitude, pulse width, and rate
upper and lower limit values.
SoftStart/Stop® checkbox
d
Select to slowly increase the amplitude when the
neurostimulator is turned ON and slowly decrease the
amplitude when cycling.
SoftStart/Stop input box
e
Select to set SoftStart/Stop value.
within the entire range provided by the neurostimulator.
adjust the value for the selected stimulation parameter within these limits.
28
Cycling checkbox
f
Select to turn the neurostimulator ON and OFF at cliniciandetermined intervals (i.e., 0.1 second to 30 minutes).
Page 29

b
a
Limits/Settings
c
d
f
e
29
Page 30

MyStim Programmer
Patient control limits are set by the clinician. The patient uses
a MyStim programmer to adjust the parameters within these
limits.
Patient Control Options :
Stimulation ON/OFF
a
Patient controls stimulation ON/ OFF.
Stimulation ON/OFF and Parameter Adjustment
b
Patient controls stimulation and can select parameter
settings.
Amplitude
Changes how strong the stimulation feels or the spread of
the stimulation area.
Pulse Width
Changes how strong the stimulation feels or the spread of
MyStim Programmer
c
the stimulation area.
Rate
Changes how smooth the stimulation feels. Rate feels like
“tapping.”
Daily ERI Message
Patient needs to call clinician to schedule a visit. To
clear the screen, patient must press any arrow on the
navigation key. After clearing the screen, a low battery
icon appears on the Status row of the Therapy Screen.
30
Page 31

a
b
c
Stimulation ON Stimulation OFF
1
1.8
Stimulation ON/OFF and
Parameter Adjustment
Daily ERI Message
MyStim Programmer
31
Page 32

Initial Settings
Use to reset all parameters to values in eect at the start
of the session.
Access the Program MyStim menu and select Initial
a
Settings.
Select OK to reset all parameters to values in eect
b
at the start of the session.
Note: If you return to initial settings, you will lose
all changes made to therapy settings and patient control
limits during the session.
Initial Settings
32
Page 33

a
b
Initial Settings
33
Page 34

Print Reports
Session reports contain the settings and patient and system
information from patient sessions. You can print reports during
and after patient sessions.
Reports selected to be printed after a patient session are saved
in the Session Data Manager and named with the patient session
name.
The following reports can be selected for printing:
•Summary report – neurostimulator data and history.
•MDT Data report – data that can be provided to Medtronic
Technical Services (this report is a separate le in the Session
Data Manager).
To print a report during the session:
•Ensure the printer is ON.
•Move the programmer to within 1 meter (3.3 feet)
of the printer, with the printer and programmer
IR ports directly facing each other.
Select Print Reports from the End Session Menu.
a
Select the checkbox next to the desired reports
b
on the list.
Select the Print button.
c
Note: A printout of the nal settings should be placed in the patient
le. You can print saved session reports from the Session Data Manager
or print current settings any time during the programming session.
Print Reports
34
Page 35

a
b
END SESSION
Print Reports
c
35
Page 36

Print Screen
You can print the current screen displayed on the programmer
and send the image to a printer.
Print Screen
To print the current screen:
•Ensure the printer is ON.
•Move the programmer to within 1 meter (3.3 feet)
of the printer, with the printer and programmer IR
ports directly facing each other.
Select Print Screen from the End Session menu.
a
Printer Status screen displays.
b
36
Page 37

a
b
Print Screen
37
Page 38

End Session
Neurostimulator settings programmed during the session
are displayed on the End Session menu. Detailed settings
programmed during the session are displayed on the Program
MyStim menu.
Access the End Session menu and select End Session
a
End Patient Session button
b
Select to end the current session.
End Session
38
Page 39

a
b
End Session
39
Page 40

Slider Bar
Provides access to programmer information, system settings,
and accessories.
Click on the Slider Bar button to access the Slider Bar
a
Information
b
Select to display the names, model numbers, and
version numbers for the programmer, application,
and associated software and peripheral devices.
Settings
c
Select to adjust the display contrast, speaker volume, and
key click sound, and to calibrate the touchscreen.
Localization
d
Touch to select the language preference, select/set the
date format, select the decimal format, and select/set the
time format.
Session Data Manager
e
Select to view, print, and delete session reports.
Calculator
f
Select to access the calculator.
Slider Bar
Exit Application
g
Select to return to the Application Selection screen to
select a new application.
40
Page 41

a
b
c
d
e
f
g
41
Slider Bar
Page 42

Session Data Manager
Access the Session Data Manager screen from the Slider Bar.
To print reports:
•Highlight the session data le a you would like to print and
select the Print Short Report icon b or the Print Long Report
icon c to move a report into the print queue d.
The transmission is complete when:
•Report is automatically removed from the print queue.
•On-Screen Taskbar Indicator i changes
from to .
Printing Tips (prior to queuing report):
•Move the programmer to within 1 meter (3.3 feet)
of the printer.
•Ensure that the infrared (IR) port on the programmer and IR
port on the printer are directly facing each other.
•Hold the programmer steady until the report transmission
has completed.
Reports – Select session data les for printing,
a
reviewing, or deleting.
Print Short Report – Select to print a short version
b
of a report (i.e., summary report only).
Print Long Report – Select to print a long version of a
c
report (i.e., summary and measurement reports).
Print Queue
d
Remove From Queue – Select to remove a highlighted
e
report from the print queue.
Select/Deselect ALL Reports
f
View Report – Select to display additional details for your
g
highlighted session on screen.
Delete Session File – Select to permanently delete a
h
session from the print queue or reports list.
i On-Screen Taskbar Indicator – Changes from to
once a report transmission is complete.
Session Data Manager
42
Page 43

d
Session Data Manager
i
b c e
a
f
g h
43
Page 44

MyStim Programmer Troubleshooting
Information Screens What to Do
Upper Limit Lower Limit
(amplitude shown) (amplitude shown)
MyStim Programmer Troubleshooting
Synchronize
Press
NEUROSTIMULATOR
ON key
Programmer
batteries are low
Poor communication
The parameter has reached
the upper or lower limit of
programmability. Press any arrow
on the NAVIGATOR key to clear
the screen.
Synchronize the programmer
and neurostimulator.
Clear the information screen
by pressing the up or down
NAVIGATOR key, then turn your
neurostimulator ON and try
communication again.
Replace the MyStim programmer
batteries before the batteries
become depleted.
Reposition the programmer over
the neurostimulator with the
screen facing outward and try
again. If using a detachable
antenna, check to make sure the
antenna is connected properly,
reposition the antenna, and try
again.
Warning Screens What to Do
Replace programmer
batteries
Call doctor
Replace the MyStim programmer
batteries now.
Write down the code shown on
the screen. Call your clinician.
Communication Screen What to Do
Communication
Normal communication. No action
is needed.
44
Page 45

MyStim Programmer Troubleshooting
4545
Page 46

Glossary
Amplitude – The strength of a pulse, measured in volts (V). Amplitude
is experienced as the strength or coverage of paresthesia.
Application Card – A small, removable memory card that provides
mass storage for the programmer—contains applications and user
data.
Current Settings – Settings the patient experiences during a patient
session.
Custom Limit – A programmable patient control limit that is set at a
xed value by the clinician.
Cycling – A programmable feature in which the output is alternately
cycled ON and OFF automatically.
Cycling O Time – In cycling, the length of time between stimulation
periods; the time of the “resting” period.
Cycling On Time – In cycling, the length of time that stimulation is
delivered.
Elective Replacement Indicator (ERI) – Notication that the INS is
nearing end of service.
Electrode Impedance Measurement – Measurements of the
resistance of the lead(s), extension(s), and body tissue that can provide
information about the condition of the implanted system (e.g., short
circuit, open circuit).
Electrode Polarity – State of each electrode for all implanted leads:
positive, negative, or o.
End of Service (EOS) – Condition of an implantable device at the time
it is no longer able to operate successfully.
Final Settings – Settings in eect at the end of the patient session.
Glossary
Initial settings – Settings in eect at the start of the patient session.
Lead Conguration – The number of leads and electrodes.
Power On Reset (POR) – A neurostimulator safety feature that turns
stimulation OFF.
Pulse Width – The length of time, measured in microseconds (s),
that a particular pulse is delivered. Pulse width is experienced as the
strength or coverage of paresthesia.
Rate – The number of times per second, measured in Hertz (Hz),
that a neurostimulation pulse is delivered; controls the “smoothness” of
paresthesia.
Screening – Intraoperative testing to determine the best paresthesia
coverage.
46
Page 47

Session Data Manager – A clinician programmer feature that allows
collection and storage of patient data information gathered during
patient sessions.
SoftStart/Stop – A feature that allows stimulation to begin with a
ramped output to prevent the sensation of a sudden “burst”
of stimulation when the neurostimulator is turned on and gradually
decreases the amplitude to 0.0 V when the neurostimulator
is turned o.
Target Value – Before programming, the intended value of a parameter.
Telemetry – Radio-frequency communication between a clinician
programmer and an implanted neurostimulator.
Test Simulation – A postoperative multiday trial period of a patient’s
reaction to stimulation using an external neurostimulator and
implanted leads.
Tracking Limit – Limits that automatically remain at the specied
value above the programmed value. Tracking limits change when the
programmed value is changed with the clinician programmer.
47
Glossary
Page 48

References
Product Technical Manuals:
•Itrel4ImplantManual
•ExternalneurostimulatorUserManual
•ExternalneurostimulatorTestStimulationPatientGuide
•Itrel4NeurostimulationSystemforPain
Programmer Guide
•SystemEligibility,BatteryLongevity,Specications
Reference Manual
•InformationforPrescribersManual
•AdvancedPainTherapy:UsingNeurostimulation
for Chronic Pain Clinical Summary
References
48
Page 49

Notes
Notes
49
49
Page 50

NEUROSTIMULATION SYSTEMS FOR PAIN THERAPY
Brief Summary: Product manuals must be reviewed prior to use for detailed disclosure.
Indications
Implantable neurostimulation systems - A Medtronic implantable neurostimulation
system is indicated for spinal cord stimulation (SCS) system as an aid in the management
of chronic, intractable pain of the trunk and/or limbs-including unilateral or bilateral pain
associated with the following conditions:
• FailedBackSyndrome(FBS)orlowbacksyndromeorfailedback
• RadicularpainsyndromeorradiculopathiesresultinginpainsecondarytoFBSor
herniated disk
• Postlaminectomypain
• Multiplebackoperations
• Unsuccessfuldisksurgery
• DegenerativeDiskDisease(DDD)/herniateddiskpainrefractorytoconservativeand
surgical interventions
• Peripheralcausalgia
• Epiduralbrosis
• Arachnoiditisorlumbaradhesivearachnoiditis
• ComplexRegionalPainSyndrome(CRPS),ReexSympatheticDystrophy(RSD),
or causalgia
Contraindications
Diathermy - Do not use shortwave diathermy, microwave or therapeutic ultrasound
diathermy (all now referred to as diathermy) on patients implanted with a neurostimulation
system. Energy from diathermy can be transferred through the implanted system and
cause tissue damage at the locations of the implanted electrodes, resulting in severe injury
or death.
Warnings
Sources of strong electromagnetic interference (eg, debrillation, diathermy, electrocautery,
MRI, RF ablation, and therapeutic ultrasound) can interact with the neurostimulation system,
resulting in serious patient injury or death. These and other sources of EMI can also result
in system damage, operational changes to the neurostimulator or unexpected changes
in stimulation. Rupture or piercing of the neurostimulator can result in severe burns. An
implanted cardiac device (eg, pacemaker, debrillator) may damage a neurostimulator, and
the electrical pulses from the neurostimulator may result in an inappropriate response of
the cardiac device.
Precautions
The safety and eectiveness of this therapy has not been established for pediatric use
(patients under the age of 18), pregnancy, unborn fetus, or delivery. Patients should be
detoxied from narcotics prior to lead placement. Clinicians and patients should follow
programming guidelines and precautions provided in product manuals. Patients should
avoid activities that may put undue stress on the implanted neurostimulation system
components. Patients should not scuba dive below 10 meters of water or enter hyperbaric
chambers above 2.0 atmosphere absolute (ATA). Electromagnetic interference, postural
changes, and other activities may cause shocking or jolting.
Adverse Events
Adverse events may include: undesirable change in stimulation described by some patients
as uncomfortable, jolting or shocking; hematoma, epidural hemorrhage, paralysis, seroma,
CSF leakage, infection, erosion, allergic response, hardware malfunction or migration, pain
at implant site, loss of pain relief, chest wall stimulation, and surgical risks.
For further information, please call Medtronic at 1-800-328-0810 and/or consult Medtronic’s
website at www.medtronic.com.
USA Rx Only Rev 0209
50
50
Page 51

Page 52

professional.medtronic.com
United States of America
Medtronic Neuromodulation
710 Medtronic Parkway
Minneapolis, MN 55432-5604
USA
Tel. +1-763-505-5000
Europe/Africa/
Middle East Headquarters
Medtronic International Trading Sàrl
Route du Molliau 31
Case Postale 84
CH-1131 Tolochenaz
Switzerland
Tel. +41-21-802-7000
Asia-Pacific
Medtronic International, Ltd.
Suite 1106-11, 11/F, Tower 1
The Gateway
25 Canton Road, Tsimshatsui
Kowloon
Hong Kong
Tel. +852-2919-1362
Australia
Medtronic Australasia Pty. Ltd.
97 Waterloo Road
North Ryde, NSW 2113
Australia
Tel. +61-2-9857-9000
Canada
Medtronic of Canada Ltd.
99 Hereford Street
Brampton
Ontario L6Y 0R3
Canada
Tel. +1-905-560-3800
UC201205680 EN NI9574 © 2012 Medtronic, Inc. Printed in USA.
 Loading...