

Page 1
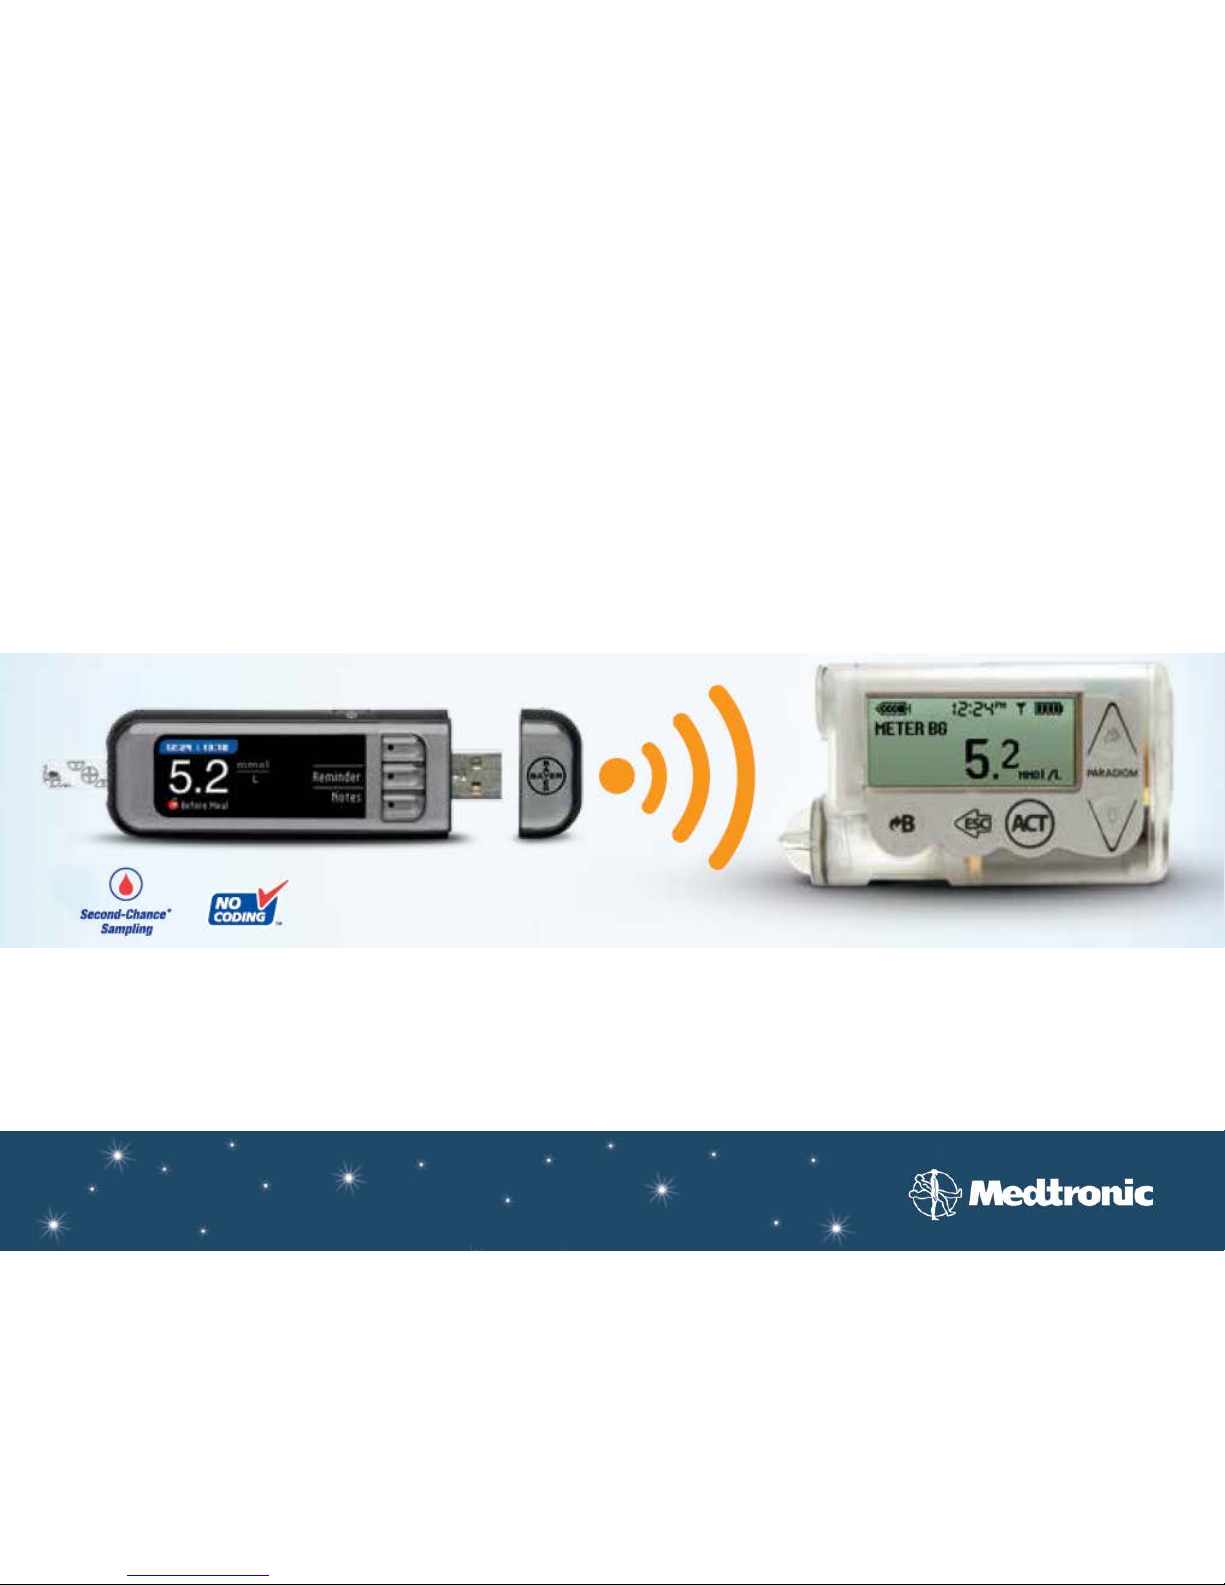
CONTOUR® NEXT LINK Meter
Page 2
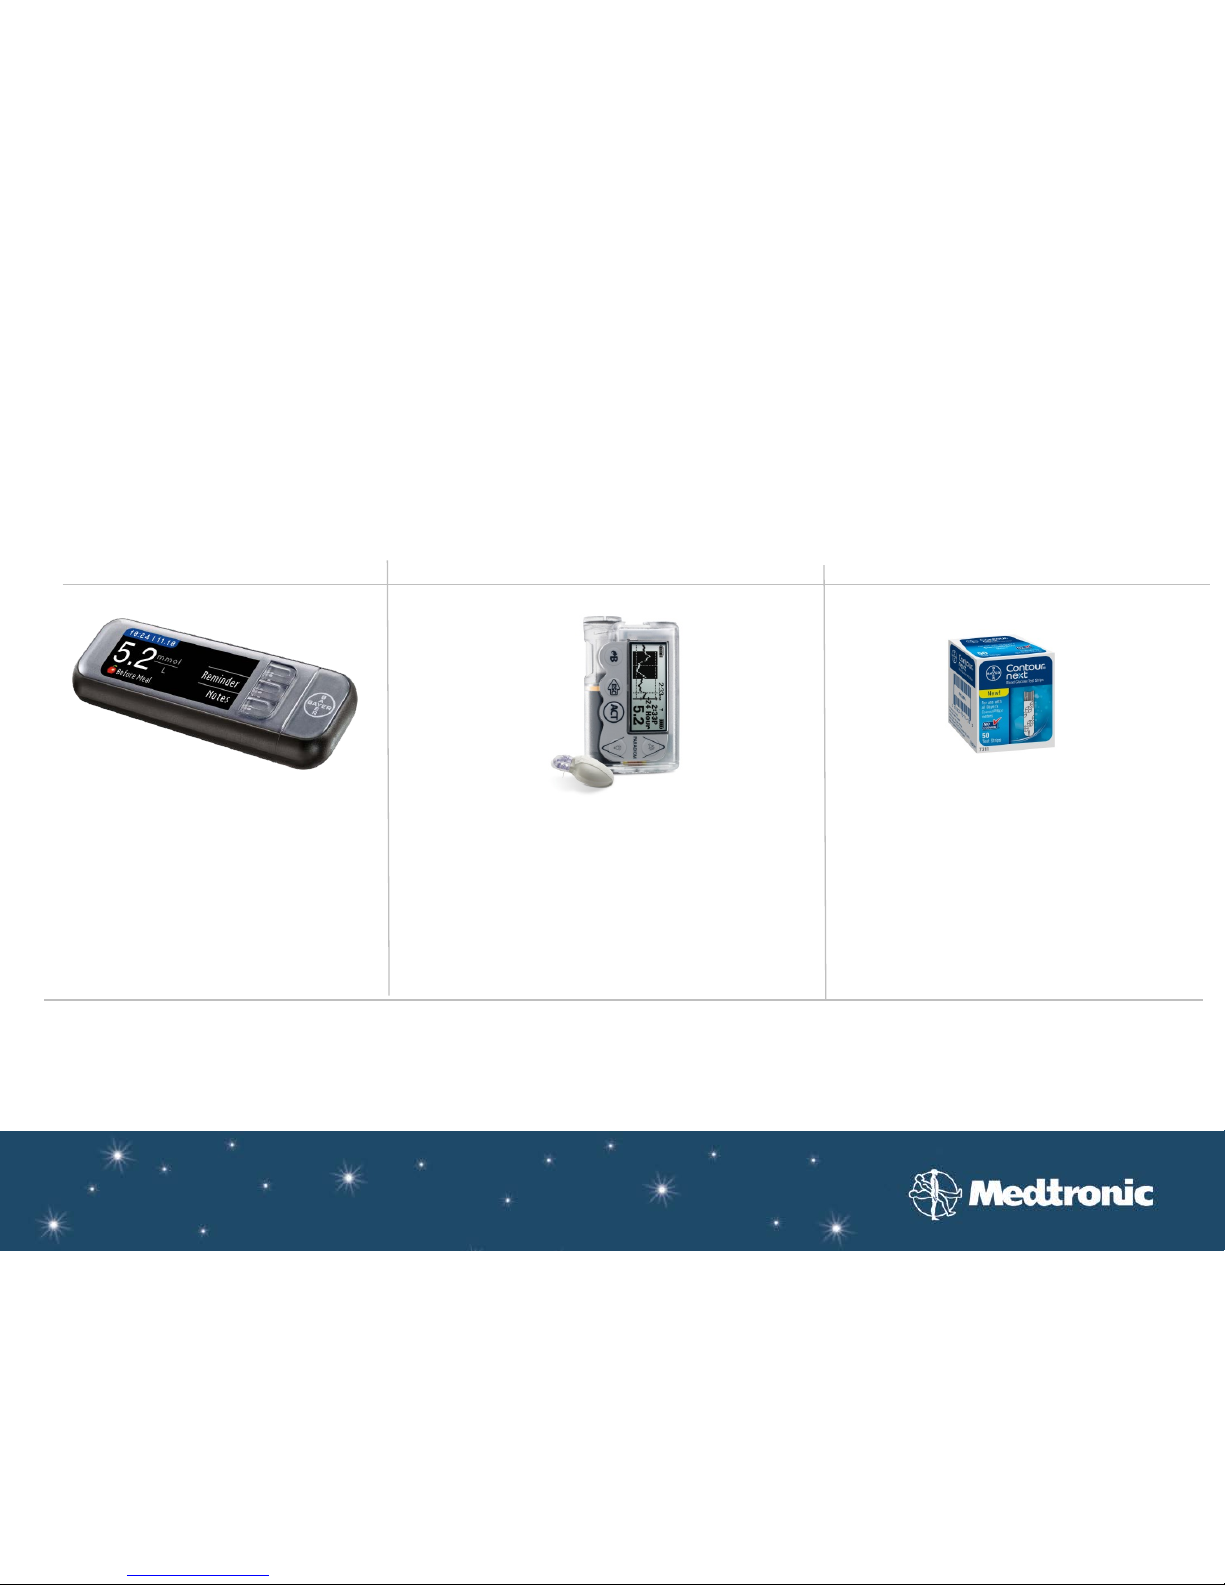
CONTOUR® NEXT LINK Product Overview
CONTOUR® NEXT LINK
For use ONLY with: Compatible with:
Paradigm® Veo™
Meter:
CONTOUR® NEXT test
strips
Paradigm® REAL-Time
(X22)
Page 3
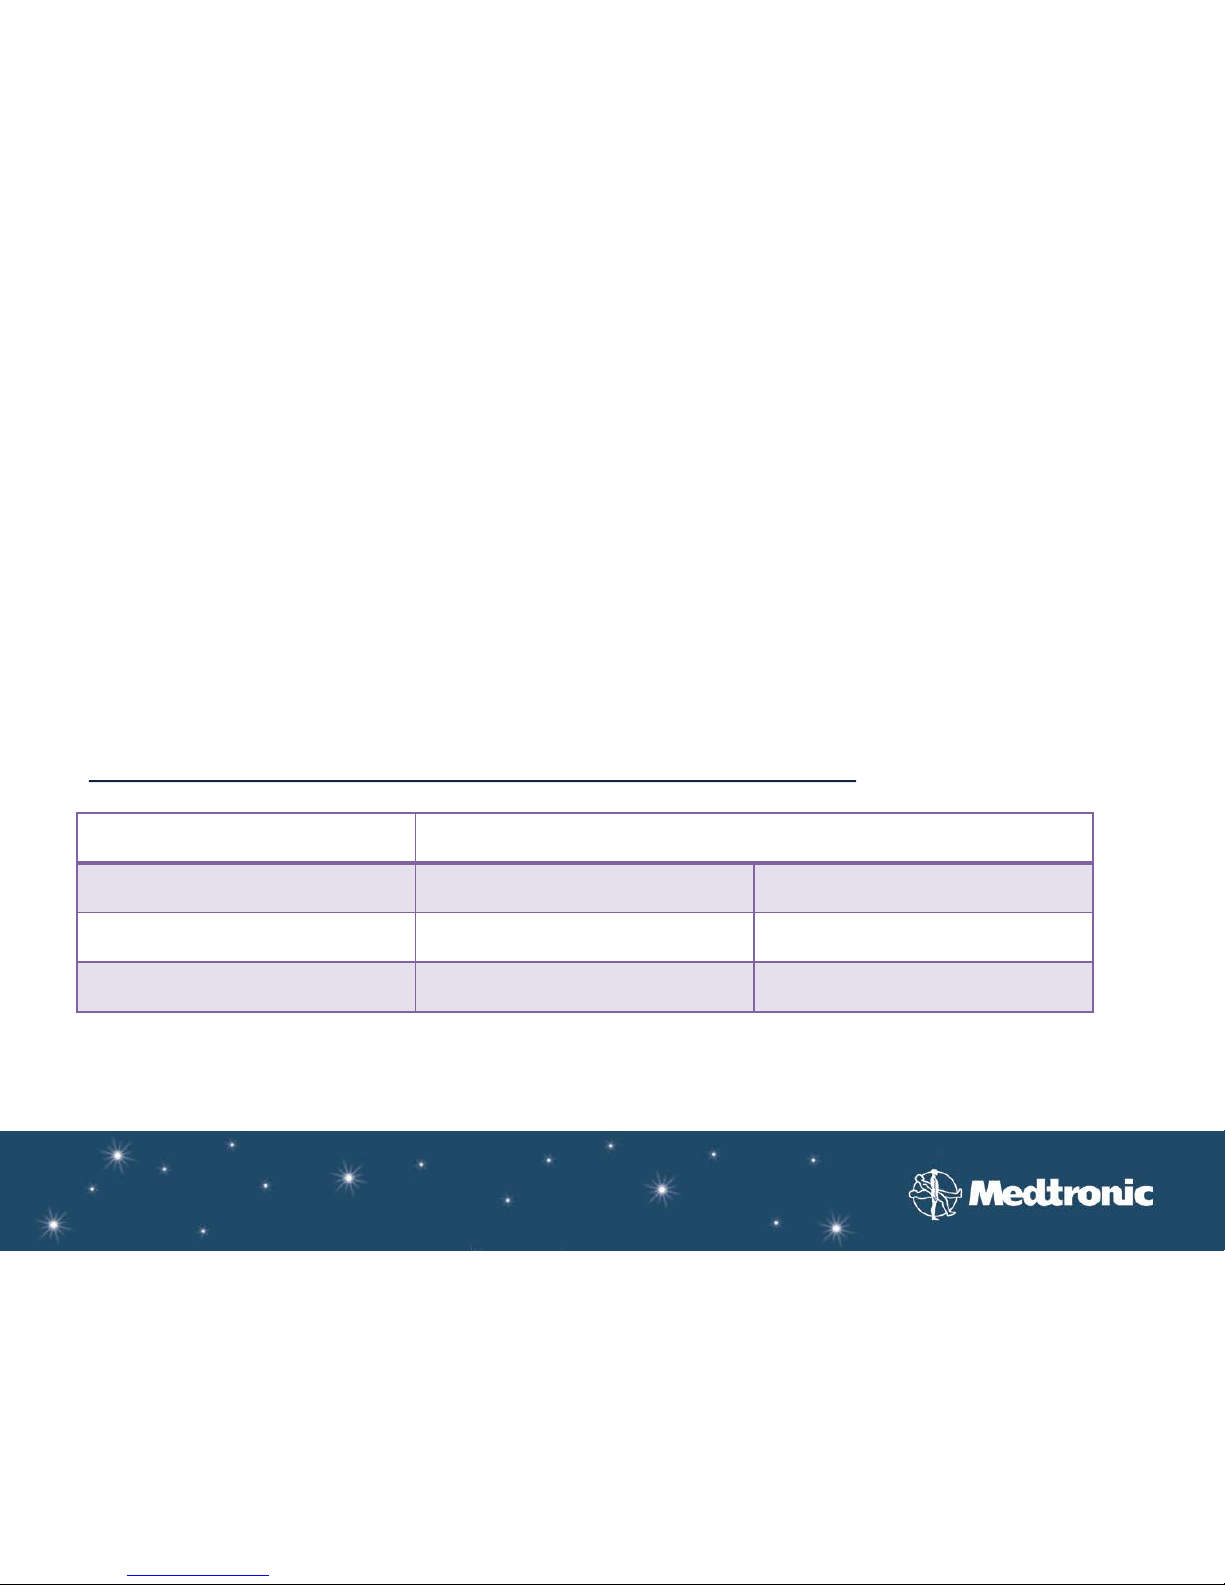
CONTOUR® NEXT LINK Accuracy
• Industry standards have an acceptabl e er ror range of ±20% to lab results.1
• Bayer’s CONTOUR® NEXT LINK meter gives even m ore accurate readings,
±10% to lab results.
2
1. International Organization for Standardization. ISO 15197:2003 section 7.4 requires results within ±20% range, specifically: ≥ 95% of results to fall within ±0.83 mmol/L of a laboratory reference value for
blood glucose concentrations <4.2 mmol/L and within ±20% of a laboratory reference value for blood glucose concentrations ≥4.2 mmol/L.
2. Exceeds the minimum accuracy requirement set out in the ISO 15197:2003 standard with ±10% accuracy vs. laboratory method for blood glucose concentrations ≥ 4.2mmol/L and ±0.56 mmol/L accuracy vs.
laboratory method for blood glucose concentrations < 4.2 mmol/L
Meter Readings
Lab Result Results ±20% to lab Results ±10% to lab
4.3 mmol/L 3.4 - 5.2 mmol/L 3.9 - 4.7 mmol/L
10 mmol/L 8 – 12 mmol/L 9-11 mmol/L
Examples of possible meter readings: ±20% vs. ±10% accuracy
Page 4
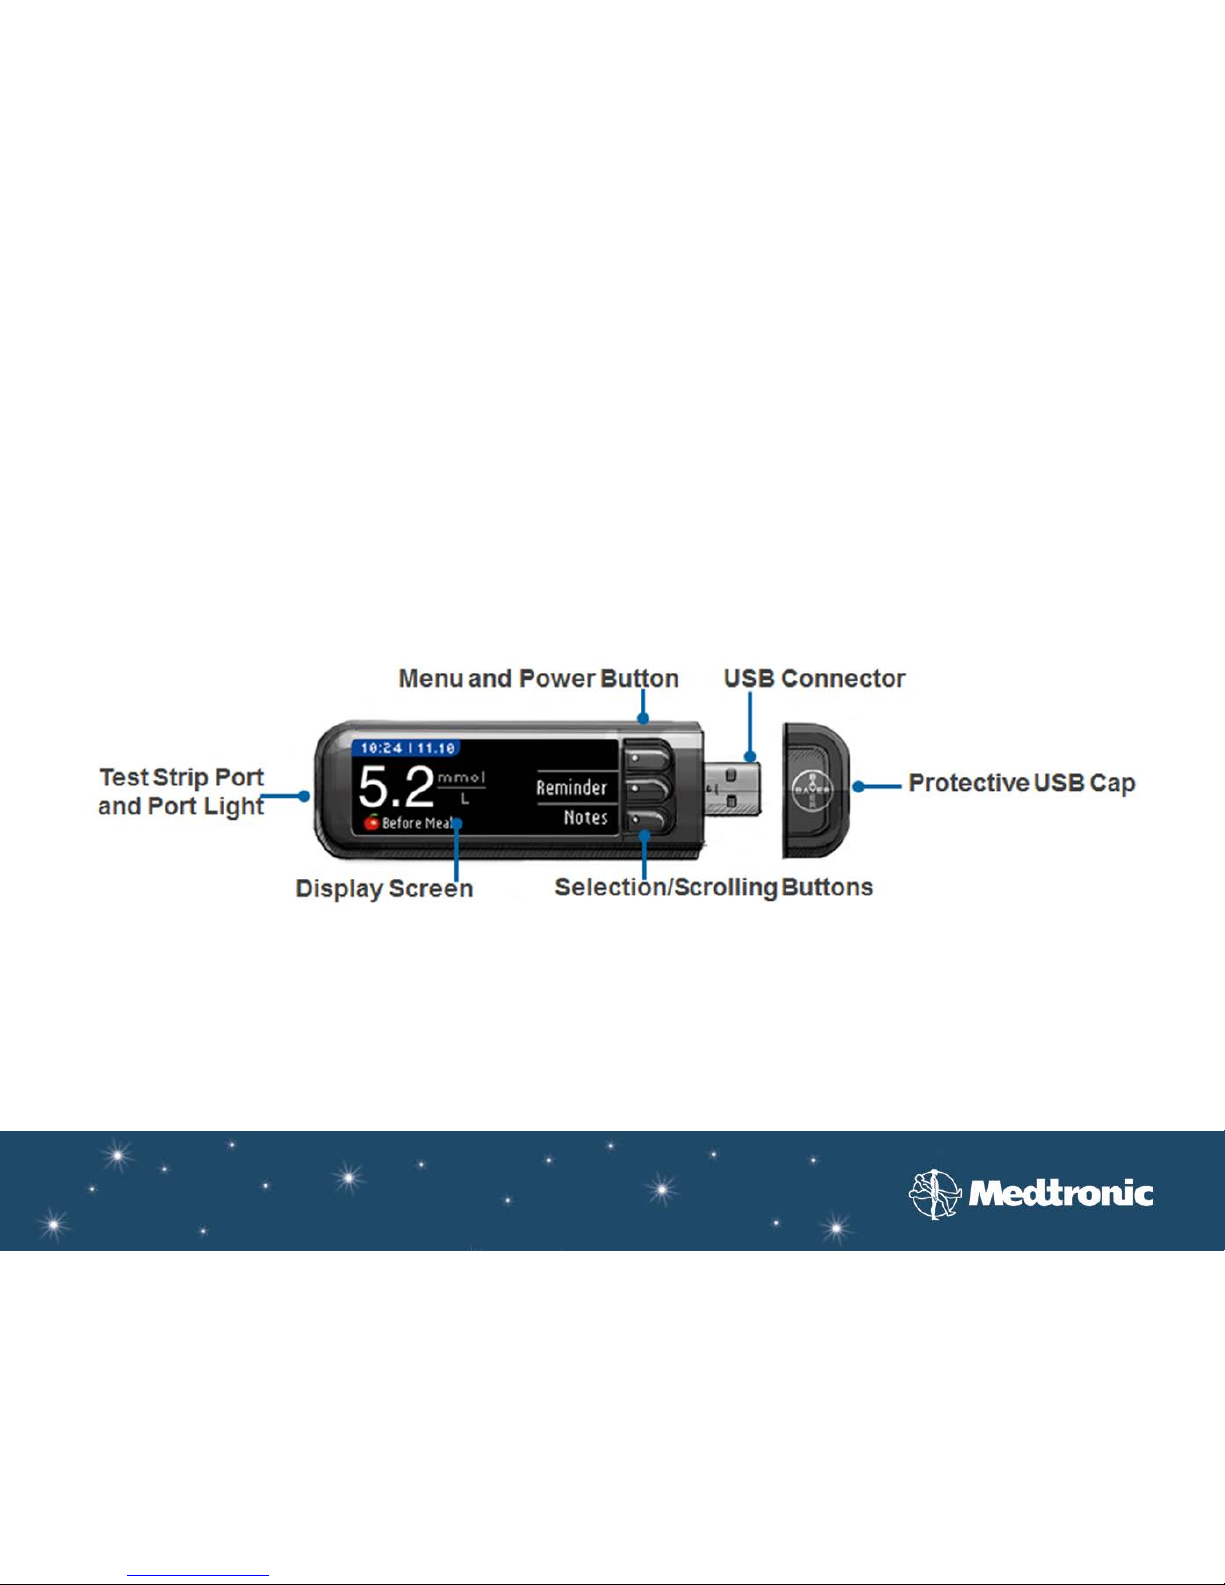
CONTOUR® NEXT LINK Meter Features
Page 5

Charging the meter
The Bayer meter has a permanent rechargeable battery . Before use, the meter needs to be fully charged.
To charge the meter:
1) Remove the cap wit h on it to reveal the USB connector.
2) Plug the USB connector into a computer. The computer must be ON and not in sleep, hibernate or power
save mode.
3) The meter will briefly display Do Not Test-charging and the test strip port light will flash. Y ou cannot do a
blood glucose test while the battery is charging.
4) When charging is complete, the test strip port light will turn off. You can then unplug your meter.
The meter will need to charge for 3 hours out of the box and 2 hours to charge thereafter. A full
charge lasts approximately 2 weeks with the send function on.
Rapid Charge Feature: The meter can rapid charge. After 1 minute of charging, you can unplug the meter
and run one blood sugar test, if needed.
Page 6

Connecting the Pump and Meter (1/5)
Follow these steps to connect your meter to your pump.
1) Hold the Menu button until the meter turns on.
2) Scroll to your language and press OK. Press OK
to confirm.
3) Press OK when asked Connect to a
MiniMed Pump?
4) Press OK.
5) STOP. Do NOT press ANY buttons. This screen
displays the meter ID number. This ID is needed
to complete the connection process.
Put down your meter. Pick up your pump
and continue with Step 6.
Page 7

Connecting the Veo Pump and Meter (2/5)
6) From the MAIN MENU of your pump, select
Utilities and press ACT
7) Select Connect Devices and press ACT
8) From the DEVICE OPTIONS screen, select
Meters and press ACT
9) Select On and pres s ACT
10) The Meter ID Menu will appear. Select Add ID
and press ACT
Page 8

Connecting the Pump and Meter (3/5)
11) Use the up and down arrow buttons to enter the
meter ID shown on the meter screen. Press
ACT after entering each character.
After entering the meter ID number into the
pump, press Next on the meter
12) After you set the last character of the ID, the
screen will return to the Meter ID Menu. Press
ESC to exit the menus when you are done.
Page 9

Connecting the Pump and Meter (4/5)
Choosing Meter Send Options
13) Choose the SEND OPTION.
Always = Meter will always send results.
Ask Me = Meter will ask you before sending
results.
Never = Meter will never send results.
Page 10

Connecting the Pump and Meter (5/5)
*For more detail on this feature, see your meter user guide.
Additional Meter S ettings
AutoLog
15) Accept or Turn On the AutoLog feature*.
AutoLog allows you to mark a test result as
Before Meal, After Meal, or Fasting
Target
16) Accept or Change the Target Range.* Press
Change or Accept to confirm.
17) Accept or Change High and Low Alerts.*
18) Setup is now complete and you are ready to
use the meter
Page 11

Auto calibrate feature in the Veo should remain off
Calibration Reminder
Page 12

CONTOUR® NEXT LINK Useful tips
Test Strips
CONTOUR® NEXT LINK meter only uses CONTOUR NEXT test trip
Port Light
To turn on the port light, double press the Menu button when the meter is off
Underfill Sampling
If the blood drop is too small, the meter will beep twice and this
screen will be displayed. User has 30 seconds to apply more blood
to the same test strip.
CONTOUR NEXT test strip CONTOUR test strip
Page 13

Comparison to the previous Contour Link meter
Features CONTOUR® LINK CONTOUR® NEXT LINK
Test Strip CONTOUR® test strip CONTOUR® NEXT test strip
Test time 5 seconds 5 seconds
Calibration No Coding No Coding
Sample size 0.6 uL 0.6 uL
Second-Chance® Sampling No Yes
Memory 480 tests 1000 tests
Alternate site testing No Palm
Meal markers Yes – Pre and Post Yes – pre, post and fasting
Testing Averaging 7, 14 day 7, 14, 30, 90 day
Under fill detection Yes Yes
Rechargeable battery No Ye s
Battery life 244 tests with wireless turned on 2 weeks under typical operating
conditions
Color Display No Yes
Illuminated test strip port No Yes
USB for wireless download No Yes
Hematocrit range 0-70% 0-70%
 Loading...