

Page 1

Instruction manual
86.4 cm (34“) LED Backlight Monitor
MEDION® AKOYA
®
X58434 (MD 22434)
Page 2

Table of Content
1. About these Instructions ..................................................................................................... 3
1.1. Warning symbols and key words used in these instructions ...................................................3
2. Proper use ............................................................................................................................. 4
3. Declaration of conformity .................................................................................................... 4
4. Safety instructions ............................................................................................................... 5
4.1. Operating safety .......................................................................................................................................5
4.2. Installation location ...............................................................................................................................5
4.3. Repairs .........................................................................................................................................................6
4.4. Environmental temperature ...............................................................................................................6
4.5. Power supply .............................................................................................................................................6
5. Package contents .................................................................................................................. 7
6. Overview of the device ......................................................................................................... 8
6.1. Front .............................................................................................................................................................8
6.2. Rear ...............................................................................................................................................................8
7. Using the device for the first time ....................................................................................... 9
7.1. Before connecting the monitor ..........................................................................................................9
7.2. Mounting ....................................................................................................................................................9
7.3. Setting up and positioning the monitor ......................................................................................10
7.4. Connecting the monitor .....................................................................................................................11
7.5. Switching on the monitor ..................................................................................................................11
7.6. Setting the screen resolution ........................................................................................................... 12
8. On-screen display (OSD) menu .......................................................................................... 13
8.1. The OSD menu ....................................................................................................................................... 13
9. Power-saving features ........................................................................................................ 14
10. Troubleshooting ................................................................................................................. 15
10.1. Picture interference or no picture ...................................................................................................15
10.2. Incorrect colour display; picture is too bright/dark ..................................................................15
11. Cleaning .............................................................................................................................. 15
12. Pixel defects on screens ..................................................................................................... 16
13. Recycling and disposal ....................................................................................................... 17
14. Technical data ..................................................................................................................... 18
14.1. Product data sheet ............................................................................................................................... 19
15. Legal notice ......................................................................................................................... 20
2
Page 3
1. About these Instructions
DE
Please be sure to read these operating instructions carefully and follow all instructions
given. The instructions will help you to operate the device reliably and help increase its
service life. Always store these instructions near the device. Keep these operating instructions so that you can pass them on with the device if you sell it.
1.1. Warning symbols and key words used in these instructions
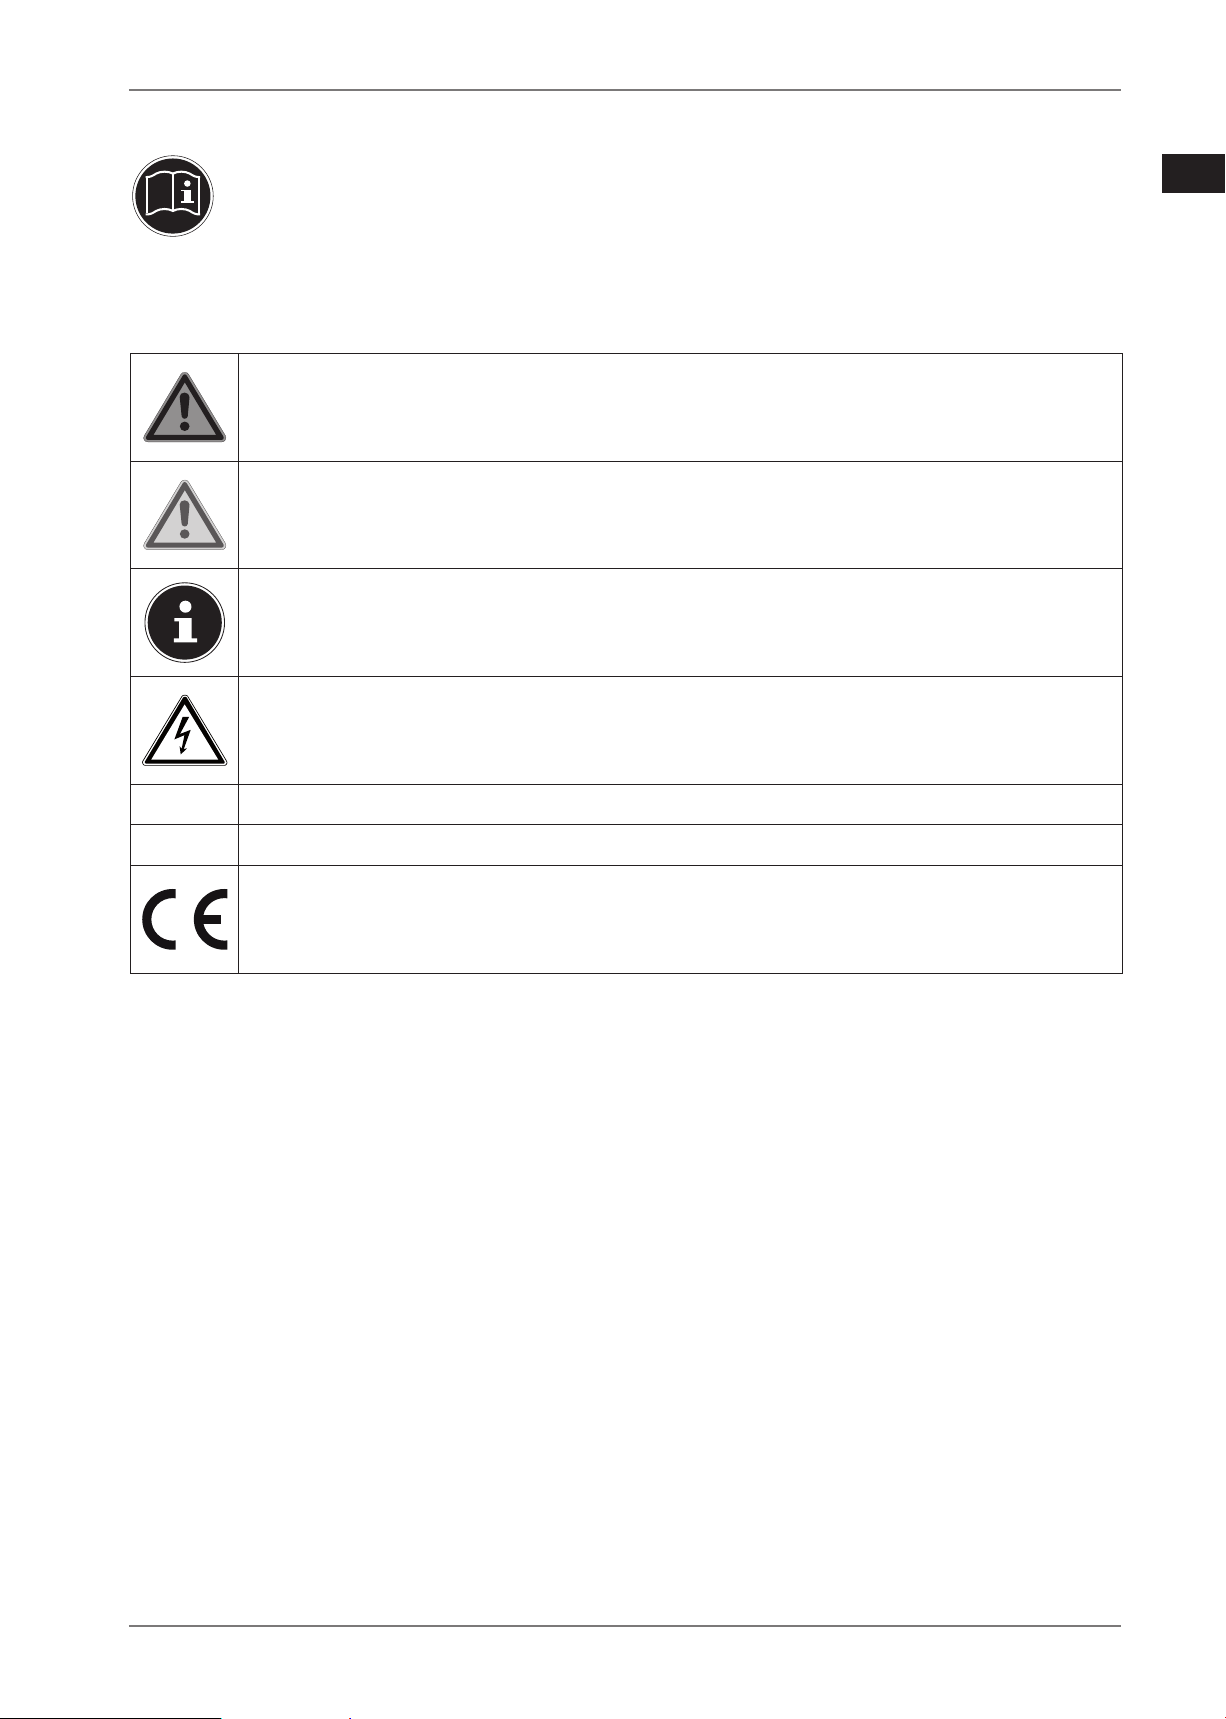
DANGER!
Warning of immediate risk of fatal injury!
WARNING!
Warning: possible mortal danger and/or serious irreversible injuries!
PLEASE NOTE!
Additional information on using the device!
WARNING!
Warning: danger of electric shock!
EN
FR
IT
NL
DK
• Bullet point/information on operating steps and results
Tasks to be performed
Declaration of conformity (see section ‘Declaration of conformity’): Products that feature this symbol meet the requirements of the EC directives.
3
Page 4

2. Proper use
This TFT monitor is designed exclusively for the playback of video signals from external devices, such as computers, whose connections and screen resolutions match the specified
technical data of the TFT monitor. Any other use is deemed as improper.
• The device is intended for private use only and not for industrial/commercial use.
Please note that we shall not be liable in case of improper use:
• Do not modify the device without our consent and do not use any auxiliary equipment
which we have not approved or supplied.
• Use only spare parts and accessories which we have supplied or approved.
• Follow all the instructions in these directions for use, especially the safety information.
Any other use is deemed improper and can cause personal injury or damage to the product.
• Do not use the device in areas where there is a risk of explosion. This includes e.g. tank
farms, fuel storage depots or areas in which solvents are processed.It is also not permitted to use this device in those areas where the air is polluted with fine particles (e.g. flour
dust or sawdust).
• Do not use the product outdoors.
• Do not expose the device to any extreme conditions. The following should be avoided:
− High humidity or moisture
− Extremely high or low temperatures
− Direct sunlight
− Open fire
3. Declaration of conformity
Medion AG hereby declares that this product conforms with the essential requirements and the remaining relevant regulations:
• Directive 2014/53/EU
• EMC Directive 2014/30/EU
• Low Voltage Directive 2014/35/EU
• Ecodesign Directive 2009/125/EC
However, the device is not equipped with a full function for minimising power consumption in
accordance with the Ecodesign Directive. In this product category, the function is normally defined or controlled by the connected end device (personal computer).
• RoHS Directive 2011/65/EU.
4
Page 5
4. Safety instructions
DE
4.1. Operating safety
• This device may be used by children over the age of 8 and by persons with limited physi-
cal, sensory or mental abilities or by those without experience and knowledge, if they are
supervised or have been instructed in the safe use of the appliance and have understood
the dangers that result from it.
• Children must not be allowed to play with the device. Cleaning and user maintenance
must not be carried out by children unless they are supervised.
DANGER!
Risk of suffocation!
Plastic wrapping can be swallowed or used improperly. Therefore, there is a risk of
suffocation!
Keep packaging material such as plastic film or plastic bags away from children.
DANGER!
Risk of injury!
There is a risk of the display breaking if excessive force is exerted on it.
Recover all broken pieces using protective gloves and send them to your Service
Centre for proper waste disposal.
Then wash your hands with soap because chemicals may have leaked out.
• To avoid damaging the screen, do not touch it with your fingers or sharp objects.
EN
FR
IT
NL
DK
4.2. Installation location
• Keep your monitor and all connected devices away from moisture and avoid dust, heat,
direct sunlight and naked flames (such as candles, for instance). Non-compliance with
these instructions can lead to faults or damage to the monitor.
• Do not use the device outdoors because external elements such as rain, snow, etc. could
damage it.
• Avoid exposing the device to water droplets or spray and do not place any liquid-filled
containers (vases or similar) on or next to the device. Liquids penetrating the device may
impair the electrical safety of the product.
• The slots and openings on the monitor are for ventilation purposes. Do not cover these
openings (overheating, fire risk)!
• Position the cable so that it cannot be stepped on or tripped over.
• Make sure that there is enough clearance from the sides of the furniture unit. Ensure a
minimum clearance of 10 cm around the device for sufficient ventilation.
• Place and operate all the components on a stable, level and vibration-free surface in or-
der to prevent the monitor from falling down.
• Avoid glare, reflections and excessive bright-dark contrast to protect your eyes and gua-
rantee pleasant workstation ergonomics.
• Take regular breaks when working at your monitor to prevent muscle tension and fa-
tigue.
5
Page 6
4.3. Repairs
• Contact customer services if:
− the power cable is burnt or damaged
− liquid has penetrated the monitor
− the monitor is not operating correctly
− the monitor has been dropped or the housing is damaged.
• Repairs to your monitor should only be carried out by qualified specialists.
• If a repair must be carried out, please contact only our authorised service partner.
4.4. Environmental temperature
• The monitor can be operated at an ambient temperature of +0°C to +35°C with a relative
humidity of < 80% (non-condensing).
• When switched off, the monitor can be stored at temperatures from -20°C to +60°C.
DANGER!
Risk of electric shock!
Large changes in temperature or fluctuations in humidity can cause moisture build-up within the monitor due to condensation. This can cause an electrical
short-circuit.
After transporting the monitor, wait until the appliance has reached room tem-
perature before switching it on.
4.5. Power supply
DANGER!
Risk of electric shock!
Even when the device is switched off, some components are live.
In order to disconnect the power to your monitor or to completely isolate the
device from voltage sources, remove the mains plug from the mains socket.
• Operate the monitor only on a 100–240 V~ 50/60 Hz earthed safety contact socket that is
close by and easy to access.
• To disconnect the power supply from your monitor, pull the mains plug from the power
outlet.
DANGER!
Risk of electric shock!
The monitor contains live parts. They pose a risk of electric shock or fire if an unintentional short circuit occurs.
Never open the monitor’s casing and do not insert anything into the monitor
through the slots and openings!
• To avoid damaging the cables, do not place any objects on them.
• Keep the device at a distance of at least one metre from sources of high-frequency or magnetic interference (televisions, loudspeakers, mobile telephones, etc.) to avoid malfunctions and data loss.
6
Page 7

5. Package contents
DE
Please check your purchase to ensure that all items are included. If anything is missing, please contact us within 14 days of purchase. The following items are supplied with your monitor:
• Monitor
• DVI cable
• HDMI cable
• Power cord
• Monitor stand
• Documentation
DANGER!
Risk of suffocation!
Plastic wrapping can be swallowed or used improperly. Therefore, there is a risk of
suffocation!
Keep packaging material such as plastic film or plastic bags away from children.
EN
FR
IT
NL
DK
7
Page 8

6. Overview of the device
6.1. Front
1) Open/close the menu
2)
3)
4)
5)
In the menu: navigate left
In the menu: navigate right
In the menu: confirm selection
Switch on the monitor/switch the monitor into standby mode
6) The operating LED displays the operating state
6.2. Rear
1 2
6
5
3
4
7) DVI IN – DVI-D connection
8)
HDMI IN – HDMI connection
9)
DP IN – Displayport connection
10)
AC IN – connection for power supply
8
7 8 9 10
Page 9

7. Using the device for the fi rst time
DE
7.1. Before connecting the monitor
It is possible that your existing monitor supports a physical resolution that is not supported by your
new monitor. In this case, the image on your new monitor may not appear correctly after it has
been connected.
To prevent this, select a a physical resolution that is supported by both of your monitors. Set this
physical resolution in your operating system before connecting your new monitor.
A table listing the physical resolutions supported by this monitor can be found in the section “Setting the screen resolution” on page 12.
7.2. Mounting
Attach the monitor stand as shown in the illustration. Carry out this step before connecting the monitor. Use a screwdriver to tighten all screws.
1) First place the monitor back in the polystyrene packaging, to protect it during the installation.
2) Install the stand as follows. Please refer to the diagrams.
a) Place the stand onto the arm.
b) Tighten three of the supplied screws between the arm and stand.
c) Place the arm onto the rear of the monitor.
d) Tighten two of the supplied screws between the arm and monitor.
e) Finally put the cover onto the rear of the arm.
EN
FR
IT
NL
DK
1
e
d
c
a
b
2
9
Page 10

7.3. Setting up and positioning the monitor
PLEASE NOTE!
Avoid dazzle, reflections and strong bright-dark contrast in order to protect your
eyes.
The monitor should never be placed next to a window because this is the brightest part of the room
in daylight. This brightness can make it more difficult for the eyes to adjust to the darker monitor.
The monitor should always be positioned so that the direction of vision is parallel to the window frontage.
The parallel line of vision should also be maintained in relation to artificial lighting equipment. In
other words, the same criteria and principles apply where the workspace is illuminated with artificial
light.
If it is not possible to position the screen as described, the following can be helpful:
• Rotate, lower or tilt the monitor;
• Slatted or vertical blinds on the windows;
• Partitions or changes to artificial lighting.
PLEASE NOTE!
Take regular breaks when working at your monitor to prevent tenseness and fatigue.
Sitting for a long time without changing position can be uncomfortable. Correct posture is very important for minimising the risks of physical problems or damage.
50 - 60 cm
40 - 45°
46 - 55 cm
90°
66 - 71 cm
• In general – change your position frequently (around every 20-30 minutes) and take regular
breaks to avoid tiredness.
• Back – when sitting at your workstation, your back must be supported by your chair’s backrest,
which must be upright or angled slightly back.
• Arms – your arms and elbows should be relaxed and loose. Your elbows should be close to your
body. Hold your forearms and hands roughly parallel to the floor.
10
Page 11

• Wrists – when working with the keyboard, mouse or trackball, your wrists should be stretched
out and not bent at an angle of more than 10°, where possible. Make sure that your wrists are not
resting on the table edge itself.
• Legs – your thighs should be horizontal or angled slightly down. Your lower legs should form an
angle with your thighs of approximately 90°. Your feet should be resting flat on the floor. Use a
foot rest if you need one, but first make sure that your seat height has been adjusted correctly.
• Head – your head should be upright or bent very slightly forward. Do not work with your head
or upper body twisted.
As you work, the top edge of the monitor should be at eye level or very slightly lower.
The distance between the monitor and the person viewing it depends on individual requirements. Distances between 50 and 70cm are commonly used.
7.4. Connecting the monitor
NOTE!
In order to avoid any damage or malfunctions, only connect the connection cable
when the monitor and the computer are switched off.
7.4.1. Connecting the signal cable
Insert the signal cable into either the HDMI IN, DVI IN or DP IN connections on the moni-
tor and into the appropriate connections on the computer.
DE
EN
FR
IT
NL
DK
7.4.2. Connecting power supply
Now connect one end of the supplied mains cable to the AC IN connection on the monitor and
then the other end to a suitable power outlet. The mains socket must be close to the monitor
and easy to access (use the same power circuit as for the computer).
7.5. Switching on the monitor
Use the switch on the underside of the device to switch on your monitor.
Then switch your computer on.
11
Page 12

7.6. Setting the screen resolution
The monitor supports the physical resolutions listed in the table. The aspect ratio of the monitor is
21:9. You will get a distortion-free picture if you select the 3,440 x 1,440 pixels resolution. This is a
native 21:9 aspect ratio. Picture distortions or black bars at the edge of the picture can occur with all
other resolutions.
Set the physical resolution on your computer according to the instructions in your operating sys-
tem.
Physical resolution
(pixels)
640 x 480 60
800 x 600 60
1,024 x 768 60
1,280 x 1,024 60
1,440 x 900 60
1,680 x 1,050 60
1,920 x 1,080 60
3,440 x 1,440
Vertical frequency
60 (DVI/HDMI)
(Hz)
100 (DP)
12
Page 13

8. On-screen display (OSD) menu
DE
You can use the on-screen display menu to set various functions, such as those for picture or language.
Press the
Use the
Confirm your selection by pressing the
Press the
button to activate the OSD.
/ buttons to select the options from the menus.
button.
button to exit the OSD.
NOTICE!
The menu disappears automatically if you do not touch any button at the monitor
within the preset time.
8.1. The OSD menu
The following explains the main functions or setting options of the OSD.
BRIGHTNESS
CONTRAST
DCR
MODE STANDARD
COLOR TEMP. COOL
ASPECT AUTO
INPUT DVI
MULTI WINDOW PIP INPUT
Set brightness
Set contrast
Switch dynamic contrast on/off
Mode suitable for general tasks
MOVIE
FPS
RTS
EYE CARE
Mode suitable for films
Mode suitable for first-person shooter games
Mode suitable for real-time strategy games
Screen easier on the eyes (reduced blue light propor-
tion)
Displays a more bluish, colder image
WARM
SRGB
USER RED
Displays a more reddish, warmer image
Displays the picture by the sRGB standard
GREEN
BLUE
Set image format
21:9
4:3
Select signal input
HDMI
DISPLAYPORT
POSITION
SWAP
RESET
PBP INPUT 1
INPUT 2
RESET
RESET
Deactivate picture-in-picture/picture-and-picture
Individual adjustment of colour values
Swap input sources
Change picture-in-picture position
Swap windows
Reset picture-in-picture position
Select source window 1
Select source window 2
Reset picture-in-picture position
EN
FR
IT
NL
DK
NOTICE!
You can only combine the input sources DisplayPort with HDMI
or DispayPort with DVI.
13
Page 14

OTHER LANGUAGE
POWER OFF
RESET
OD
FREESYNC
Set menu language
Turn automatic switch-off on/off
Reset all settings
Switch overdrive on/off
The function prevents tearing. FreeSync must be sup-
ported by the graphics card.
EXIT
GAMMA
Close menu
Select gamma values
9. Power-saving features
This monitor switches to different power-saving modes which are specified by the respective computer/operating system. This complies with the current requirements for reducing the energy consumption.
The monitor supports the following types of power-saving modes:
Status
ON
STANDBY
EXT. STANDBY*
Power consumption
(nominal value)
< 60 watt (max.)
< 0.5 watt
< 0.5 watt
*The device is switched to extended standby mode by pressing the
Colour of operating
indicator
blue
blue (flashes)
-
button on the front of the de-
Ready for operation
(approx.)
2 seconds
5 seconds
vice.
Depending on the operating system, the monitor will remain in power-saving mode until you press
a key on the keyboard or move the mouse. The monitor requires about 2 seconds to switch from
standby mode to operating mode.
14
Page 15

10. Troubleshooting
DE
If problems occur with your monitor, make sure that the monitor has been properly installed. If the
problems persist, then read this section for information about possible solutions.
10.1. Picture interference or no picture
• The mains cable must be firmly seated in the socket and the power switch (if available) must be
switched on.
• The computer must be switched on and the connection cables must be firmly seated in their sockets.
• The values set in the operating system must be suitable for the monitor. To avoid distortions, select a resolution in the 21:9 format.
• If the screen saver has been activated or the monitor is in standby mode, press any key on the
keyboard or move the mouse.
• Remove interfering devices (cordless phones, loudspeakers or similar) from the vicinity of the
monitor.
10.2. Incorrect colour display; picture is too bright/dark
• Check the colour settings in the monitor’s OSD menu or in the computer’s operating system.
11. Cleaning
• Always unplug the device and disconnect all cables before cleaning.
• Do not use solvents, corrosive agents or aerosol-based detergents to clean the device .
• Clean the screen with a soft, lint-free cloth.
• Make sure that no water droplets remain on the screen. Water can cause permanent discolouration.
• Store the packaging material in a safe place; always use this box to transport the monitor.
EN
FR
IT
NL
DK
NOTICE!
There are no parts inside the monitor housing require cleaning or maintenance.
15
Page 16

12. Pixel defects on screens
5 Pixel
5 Pixel
Sub-Pixel
Pixel fault class
00 000
I11
Rows
Pixel
blue
green
red
Defect type 1
Pixel constantly lit
For active matrix TFTs with a resolution of 3,440 x 1,440
pixels, which are each made up of three sub-pixels (red,
green, blue), there are a total of approximately 14.9 million control transistors in use. Due to this very high
number of transistors and the associated extremely
complex manufacturing processes used, occasionally
one or more pixels can fail or become incorrectly controlled.
The ISO standard ISO 9241-307 defines, amongst other
things, the generally applicable guidelines relating to
pixel defects. Pixel defects are categorised into four
fault classes and three defect types. Every individual pixel consists of three sub-pixels, each of which is assigned a basic colour (red, green, blue).
Defect type 2
Pixel constantly
black
Defect type 3
Defective sub-pixel
lit black
2
1
0
1
3
5
5
II 2 2
III 5 15
IV 50 150
n* = 1.5
The table describes the maximum number of pixel failures allowed on the screen, before a warranty
claim arises. A warranty claim may be applicable if the above number of defects in a category is exceeded.
5-n*
0
50
50-n*
0
500
500-n*
0
0
2xn*
10
0
2xn*
100
0
2xn*
1000
16
Page 17

13. Recycling and disposal
DE
If you have any questions about disposal, please contact your sales agent or our service centre.
Packaging
Your device has been packaged to protect it against transportation damage. Packaging is
raw material and can be reused or added to the recycling system.
Device
Old devices should not be disposed of with the normal household rubbish. In accordance
with Directive 2012/19/EU, the device must be properly disposed of at the end of its service life. This involves separating the materials in the device for the purpose of recycling
and avoiding any impact on the environment. Take old devices to a collection point for
electrical scrap or a recycling centre. Contact your local waste disposal company or your
local authority for more information on this subject.
EN
FR
IT
NL
DK
17
Page 18

14. Technical data
Device
Model X58434 (MD 22434)
Nominal voltage AC 100-240 V ~ 50/60 Hz 1.3 A
Power consumption
Picture
Screen size 86.4 cm (34"), TFT with LED backlight
Aspect ratio 21:9
Resolution 3,440 x 1,440 pixels
Brightness 250 cd/m² (typ.)
Contrast ratio 3,000:1 (typ.)
Response time
Connections
RGB input, digital DVI-D with HDCP decryption
HDMI input HDMI with HDCP decryption
DisplayPort input Displayport (DP)
Standby: < 0.5 watt
In operation: < 60 watt (max.)
16 ms (grey to grey, typ.)
8 ms (overdrive, grey to grey, typ.)
Environment values
Temperatures
Humidity (non-condensing)
Dimensions / weight
Weight With stand: approx. 7.32 kg
Dimensions (WxHxD) With stand: approx. 818 x 445 x 213 mm
In operation: 0°C ~ +35°C
Not in operation: -20°C ~ +60°C
In operation: < 80%
Not in operation: < 90%
18
Page 19
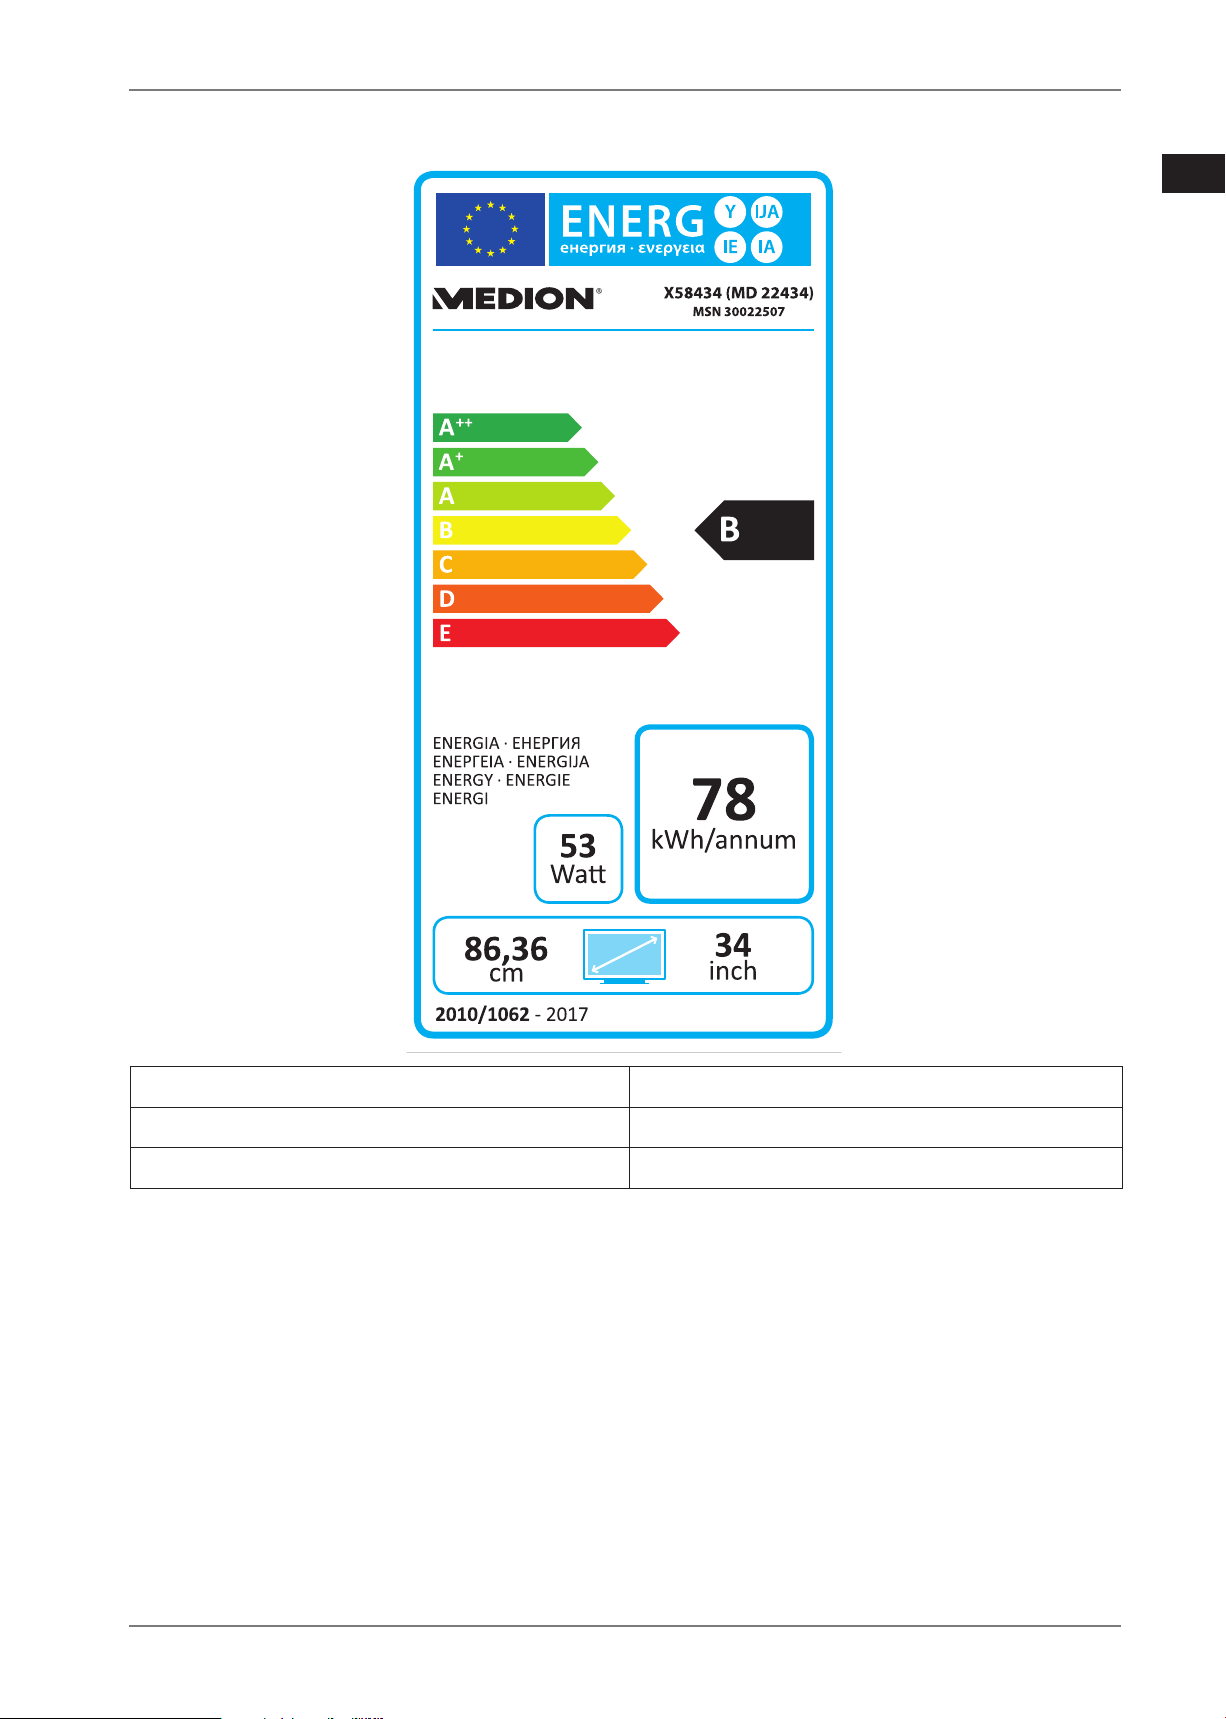
14.1. Product data sheet
As per regulation 1062/2010.
DE
EN
FR
IT
NL
DK
Power consumption in standby 0.32 Watt
Power consumption in off state 0.26 Watt
Physical resolution 3,440 x 1,440 pixels
,
19
Page 20

15. Legal notice
Copyright © 2017
Status: 2017-04-03
All rights reserved.
This operating manual is protected by copyright.
Mechanical, electronic and any other form of reproduction is prohibited without
the written permission of the manufacturer.
Copyright is owned by the company:
Medion AG
Am Zehnthof 77
45307 Essen
Germany
The operating manual can be reordered via the service hotline and is available for download via the
service portal at www.medion.com/gb/service/start/.
You can also scan the QR code above and download the operating manual onto your mobile device
via the service portal.
20
 Loading...