

Page 1
P1430 TVD-1310( 0374-04).p65 2002/12/30, PM 05:191
OPEROPER
OPEROPER
OPER
AA
AA
A
TION MANUTION MANU
TION MANUTION MANU
TION MANU
ALAL
ALAL
AL
MD6421
13" COL13" COL
13" COL13" COL
13" COL
OR OR
OR OR
OR
TV/DTV/D
TV/DTV/D
TV/D
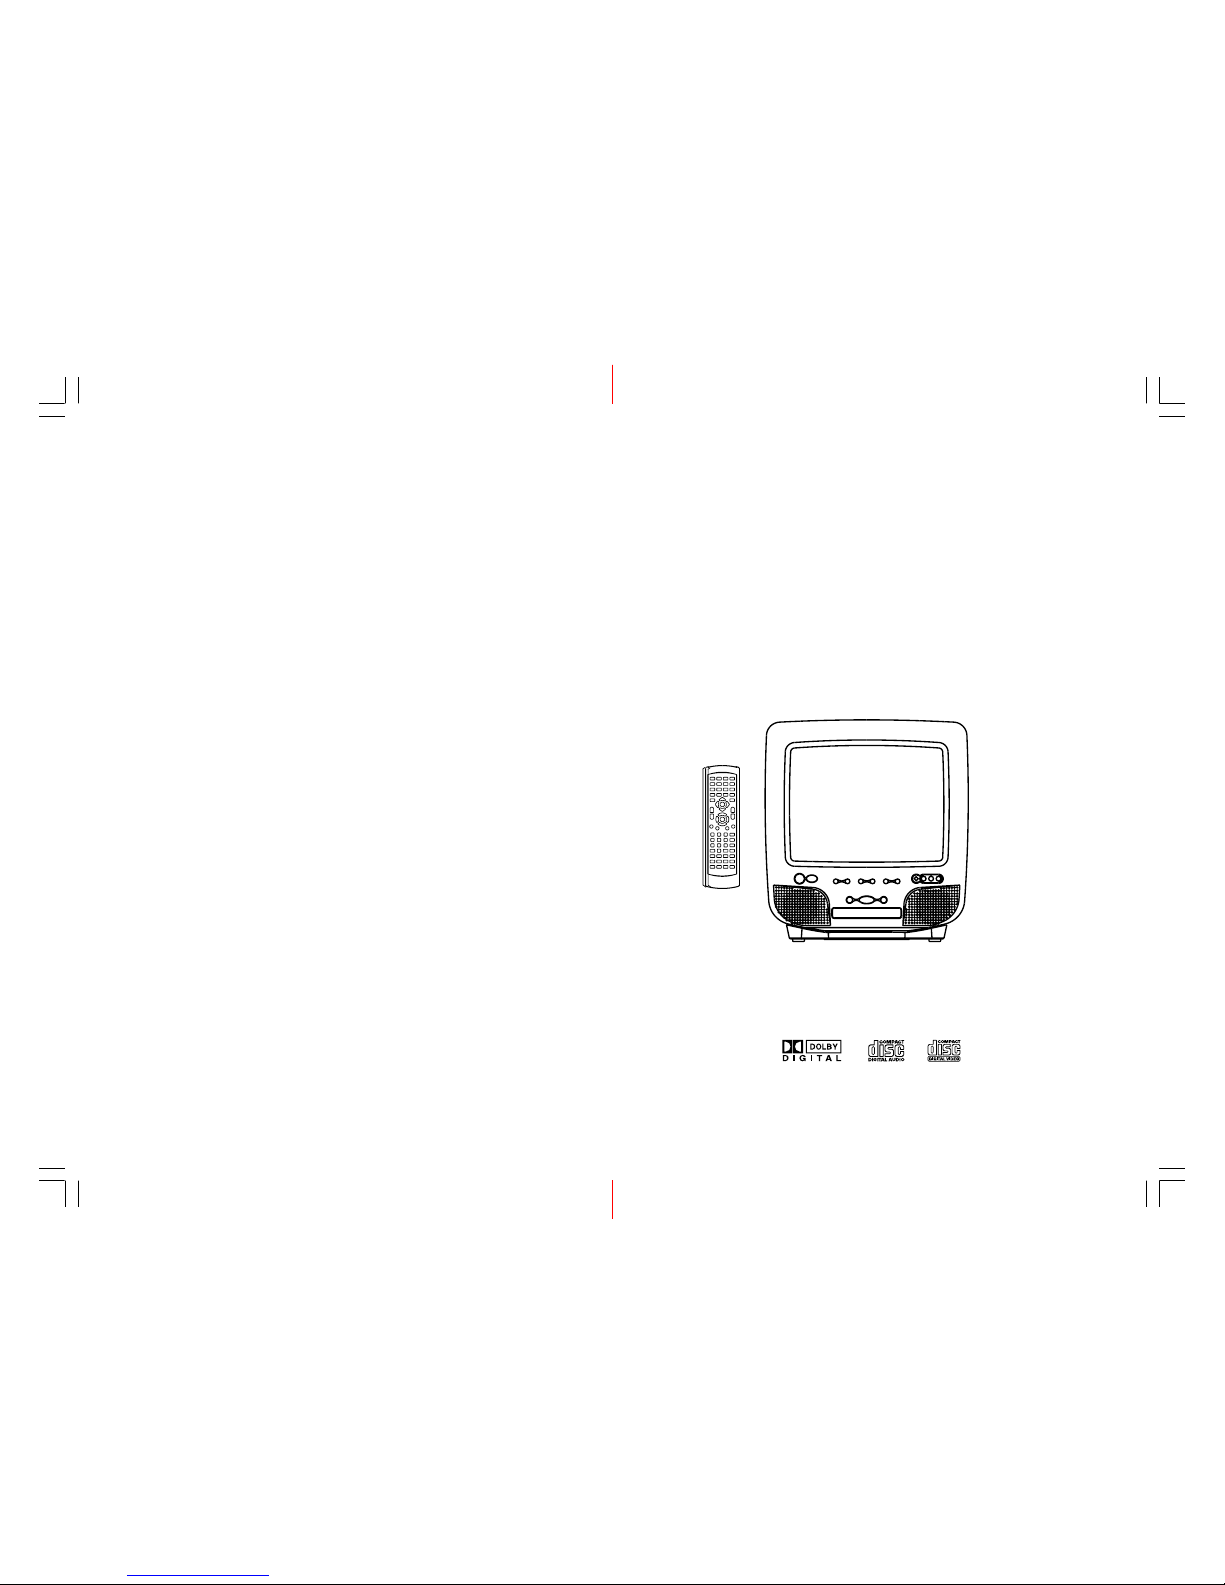
VD COMBOVD COMBO
VD COMBOVD COMBO
VD COMBO
Page 2
2
INSTALLATION
LOCATE the receiver in the room where direct light does not strike the screen. Total darkness or a reflection on the picture screen can cause eyestrain. Soft and indirect lighting is
recommended for comfortable viewing.
ALLOW enough space between the receiver and the wall to permit proper ventilation.
AVOID excessive warm locations to prevent possible damage to the cabinet or component
failure.
CONNECTION
This TV receiver can be connected to AC: 120V~ 60Hz, NEVER connect to DC supply or any
other power.
AUTOMATIC DEGAUSSING
All color television receivers are sensitive to magnetic influences, usually caused by either
moving the receiver from one place to another or using certain electrical appliances near the
receiver. This residual magnetism as it is called, sometimes causes distortion which gives
rise to "blotchy" areas of color in the picture. To avoid these effects the receiver incorporates an automatic degaussing circuit which operates for a short while immediately each
time the receiver is switched on using the mains switch. This circuit removes any residual
magnetism in the metal parts of the picture tube and therefore ensures a picture without dis-
turbances due to magnetism. If the set is moved or faced in a different direction, the mains
switch must be switched off at least 10 minutes in order that the automatic degaussing
circuit operates properly.
CAUTION: TO REDUCE THE RISK OF ELECTRIC SHOCK. DO NOT REMOVE COVER (OR
BACK).
NO USER SERVICEABLE PARTS INSIDE. REFER SERVICING TO QUALIFIED SERVICE
PERSONNEL.
The graphic symbols on the back cover of the set mean the following:
The lightning flash with arrowhead symbol within an equilateral triangle is
intended to alert the user to the presence of uninsulated "dangerous voltage"
within the product's enclosure that may be of sufficient magnitude to constitute
a risk of electric shock to persons.
The exclamation point within an equilateral triangle is intended to alert the
user to the presence of important operating and maintenance (servicing) instructions in the literature accompanying the appliance.
WARNING : TO REDUCE THE RISK OF FIRE OR ELECTRIC SHOCK, DO NOT EXPOSE
THIS APPLIANCE TO RAIN OR MOISTURE.
27
TECHNICAL SPECIFICATIONS
Receiving Channels
TV VHF 2 -13
UHF 14 - 69
CATV VHF 1-47, 95-99
UHF 48 - 94,100 - 125
Tuner Type 181 channel, Quartz PLL, Frequency Synthesized
DVD SECTION
Laser Wave length : 655nm
Laser power : Class 1
Signal System NTSC - M
Digital audio output Coaxial digital output; pin jack
AV Output RCA jack
GENERAL SECTION
AC Power Input 120V ~60 Hz
AC Power Consumption 95W
Speaker 3” 8ohm x 2
Audio Output 2W + 2W
Dimensions 420x 409x 390 (mm)
Net Weight 13.5 Kg
* Design and specifications are subject to change without notice.
This DVD Player is disigned and manufactured according to the Region Management Information that is recorded on a DVD disc. If the Region number described on the DVD disc does
not correspond to the Region number of this DVD Player, this DVD player will not play that
disc.
This Region number of this DVD Player is
.
P1430 TVD-1310( 0374-04).p65 2002/12/30, PM 05:192
Page 3
3
CAUTION
Never tamper with any components inside your set, or any other adjustment controls not
mentioned in this manual as all television receivers are high voltage instruments. The PICTURE TUBE is highly evacuated and if broken, glass fragments will be violently expelled.
When cleaning, dusting the PICTURE TUBE FACE or CABINET, the power cord should be
pulled out from the plug receptacle, Wipe the receiver with a dry soft cloth. All "servicing" on
your receiver should be performed only by Professional Service Personnel.
LASER SAFETY
This unit employs an optical laser beam system in the CD
mechanism,designed with built-in safeguards. Do not attempt to disassemble, refer to qualified service personnel.
Exposure to this invisible laser light beam may be harmful to
the human eye.
THIS IS A CLASS-1 LASER PRODUCT. USE OF
CONTROLS, OR ADJUSTMENTS OR PROCEDURES
OTHER THAN THOSE SPECIFIED HEREIN, MAY RESULT
IN HAZARDOUS LASER LIGHT BEAM EXPOSURE.
Invisible laser radiation when open
and interlock failed or defeated.
avoid direct exposure to laser beam.
Manufactured under license from Dolby Laboratories, “Dolby”, ”Pro Logic” and the double-D
symbol are trademarks of Dolby Laboratories. Confidential unpublished works.©1992-1997
Dolby Laboratories,lnc.All rights reserved.
26
PICTURE CD
The unit can also be used to navigate picture CDs. Insert a picture CD into the tray and the disc
will be loaded automatically. If the disc type can be identified, the player will start showing the
pictures one by one (Slide Show Mode).
Operations
During Slide Show Mode: -
• Pressing the STOP button will shift to the Digest Mode in which 12 pictures will be shown
on the screen each time.
• Press the PAUSE button to freeze the screen so that the current picture can be held for a
long time. To resume the slide show mode, press the PLAY button.
• Press the NEXT button on the remote control to skip to the next picture.
• Press the PREVIOUS button on the remote control will repeat the current picture.
• When all the pictures have displayed once, the player will start the Digest Mode automatically.
P1430 TVD-1310( 0374-04).p65 2002/12/30, PM 05:193
Page 4
4
IMPORT ANT SAFETY INSTRUCTIONS
- Read before operating equipment
This product was designed and manufactured to meet strict quality and safety standards. There are,
however, some installation and operation precautions which you should be particularly aware of.
1. Read Instructions - All the safety and operating instructions should be read before the appliance is
operated.
2. Retain Instructions - The safety and operating instructions should be retained for future reference.
3. Heed Warning - All warnings on the product and in the operating instructions should be adhered to.
4. Follow Instructions - All operating and use instructions should be followed.
5. Cleaning - Unplug this product from the wall outlet before cleaning. Do not use liquid cleaners or
aerosol cleaners. Use a damp cloth for cleaning.
Exception: A product that is meant for uninterrupted service and that for some specific reason, such as the
possibility of the loss of an authorization code for a CATV converter, is not intended to be unplugged by the
user for cleaning or any other purpose, may exclude the reference to unplugging the product in the cleaning
description otherwise required in 131.8(5).
6. Attachments - Do not use attachments not recommended by the product manufacturer as they may
cause hazards.
7. Water and Moisture - Do not used this product near water – for example, near a bath tub, wash bowl,
kitchen sink, or laundry tub, in a wet basement, or near a swimming pool and the like.
8. Accessories – Do not place this product on an unstable cart, stand, tripod, bracket, or table. The
product may fall, causing serious injury to a child or adult, and serious damage to the product.
Use only with a cart, stand, tripod, bracket, or table recommended by the manufacturer, or sold
with the product. Any mounting of the product should follow the manufacturer’s instructions,
and should use a mounting accessory recommended by the manufacturer.
9. A product and cart combination should be moved with care. Quick stops, excessive force, and uneven
surface may cause the product and cart combination to overturn.
10. Ventilation - Slots and openings in the cabinet are provided for ventilation and to ensure reliable
operation of the product and to protect it from overheating, and these openings must not be blocked or
covered. The openings should never be blocked by placing the product on a bed, sofa, rug, or other
similar surface. This product should not be placed in a built-in installation such as a bookcase or rack
unless proper ventilation is provided or the manufacturer’s instructions have been adhered to.
11. Power Sources - The product should be operated only from the type of power source indicated on the
marking label. If you are not sure of the type of power supply to your home, consult your product
dealer or local power company. For products intended to operate from battery power, or other sources,
refer to the operating instructions.
12. Grounding or Polarization - This product may be equipped with a polarized
alternating-current line plug (a plug having one blade wider than the other). This
plug will fit into the power outlet only one way. This is a safety feature. If you
are unable to insert the plug fully into the outlet, try reversing the plug. If the
plug should still fail to fit, contact your electrician to replace your obsolete
outlet. Do not defeat the safety purpose of the polarized plug.
Alternative Warnings - This product is equipped with a three-wire grounding-type plug, a plug having a
third (grounding) pin. This plug will only fit into a grounding-type power outlet. This is a safety feature.
If you are unable to insert the plug into the outlet, contact your electrician to replace your obsolete
outlet. Do not defeat the safety purpose of the grounding-type plug.
13. Power-Cord Protection - Power-supply cords should be routed so that they are not likely to be walked
on or pinched by items placed upon or against them, paying particular attention to cords at plugs,
convenience receptacles, and the point where they exit from the appliance.
14. Protective Attachment Plug – The product is equipped with an attachment plug having overload
protection. This is a safety feature. See Instruction Manual for replacement or resetting of protective
device. If replacement of the plug is required, be sure the service technician has used a replacement
plug specified by the manufacturer that has the same overload protection as the original plug.
25
MP3
Your unit supports ISO9660 file system CD-ROM navigation of Multi-Media files such as MP3
playback.
Operation
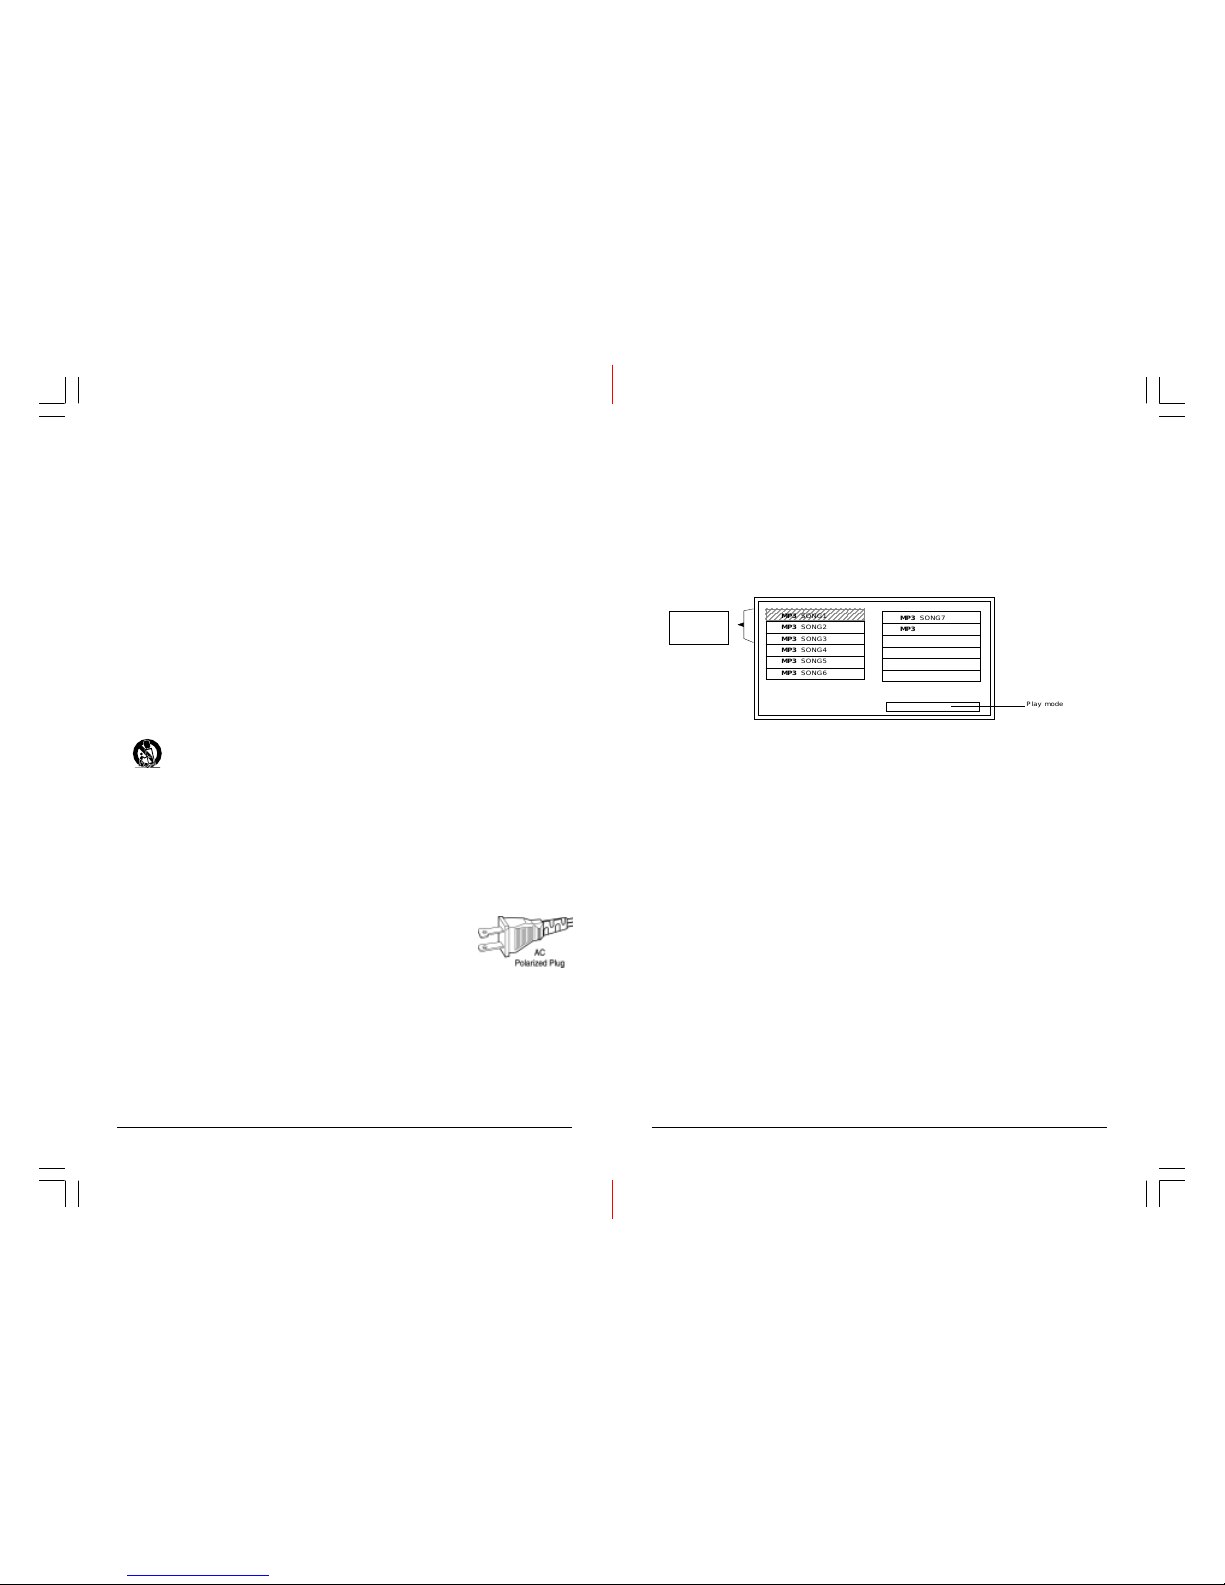
• Insert the MP3 disc into the tray. Navigation Menu will be displayed. The menu will show the
files in the root directory,and the MP3 files then be play automatically.
Note
• Operations such as “STOP”, “NEXT” and “PREVIOUS” are similar to that of CD Audio disc
playback
• Cross-folders playback is not supported and “Program Mode” is not applicable in MP3 disc
playback.
Play Mode
User can change the Play Mode by accessing the PLAY MODE field through the LEFT/RIGHT
Navigation Arrows in the menu. There are five different play modes when playing MP3 disc.
1. FOLDER
All the files in the current folder will be played once in sequence.
2. SINGLE
The selected file will be played once in sequence.
3. REPEAT ONE
The selected file will be repeated.
4. REPEAT FOLDER
All the files in the current folder will be repeated.
5. SHUFFLE
The selected file will be played in shuffle.
files in the
root directory
PALAY MODE FOLDER
123456789012345678901
1
2345678901234567890
1
1
2345678901234567890
1
123456789012345678901
Play mode
MP3 SONG1
MP3 SONG2
MP3 SONG3
MP3 SONG4
MP3 SONG5
MP3 SONG6
MP3 SONG7
MP3 SONG8
MP3 SONG9
MP3 SONG10
MP3 SONG11
MP3 SONG12
P1430 TVD-1310( 0374-04).p65 2002/12/30, PM 05:204
Page 5
5
15. Outdoor Antenna Grounding – If an outside antenna
or cable system is connected to the product, be sure the
antenna or cable system is grounded so as to provide
some protection against voltage surges and built-up static
charges. Article 810 of the National Electrical Code,
ANSI/ NF
PA 70, provides information with regard to proper
grounding of the mast and supporting structure, grounding of the lead-in wire to antenna discharge unit, size of
grounding conductors, location of antenna-discharge unit,
connection to grounding electrodes, and requirements
for the grounding electrode.
16
. Lightning – For added protection for this product during a lightning storm, or when it is left unattended
and unused for long periods of time, unplug it from the wall outlet and disconnect the antenna or cable
system. This will prevent damage to the product due to lightning and powerline surges.
17
. Power Lines — An outside antenna system should not be located in the vicinity of overhead power lines
or other electric light or power circuits, or where it can fall into such power lines or circuits. When
installing an outside antenna system, extreme care should be taken to keep from touching such power
lines or circuits as contact with them might be fatal.
18. Overloading – Do not overload wall outlets, extension cords, or integral convenience receptacles as
this can result in a risk of fire or electric shock.
19. Object and Liquid Entry – Never push objects of any kind into this product through openings as they
may touch dangerous voltage points or short-out parts that could result in a fire or electric shock.
Never spill liquid of any kind on the product.
20. Servicing — Do not attampt to service the product yourself as opening or removing covers may
expose you to dangerous voltage or other hazards. Refer all servicing to qualified service personnel.
21. Damage Requiring Service — Unplug this product from the wall outlet and refer servicing to qualified
service personnel under the following conditions:
a. When the power-supply cord or the plug is damaged,
b. If liquid has been spilled, or objects have fallen into the product,
c. If the product has been exposed to rain or water,
d. If the product does not operate normally by following the operating instructions. Adjust only those
controls that are covered by the operating instructions as an improper adjustment of other controls
may result in damage and will often require extensive work by a qualified technician to restore the
product to its normal operation,
e. If the product has been dropped, or damaged in any way, and
f. When the product exhibits a distinct change in performance – this indicates a need for service.
22. Replacement Parts – When replacement parts are required, be sure the service technician has used
replacement parts specified by the manufacturer or have the same characteristics as the original part.
Unauthorized substitutions may result in fire, electric shock, or other hazards.
23. Safety Check – Upon completion of any service or repairs to this product, ask the service technician
to perform safety checks to determine that the product is in proper operating condition.
24. Wall or Ceiling Mounting — The product should be mounted to a wall or ceiling only as recommended
by the manufacturer.
25. Heat — The product should be situated away from heat sources such as radiators, heat registers,
stoves, or other products (including amplifiers) that produce heat.
24
•
DVD
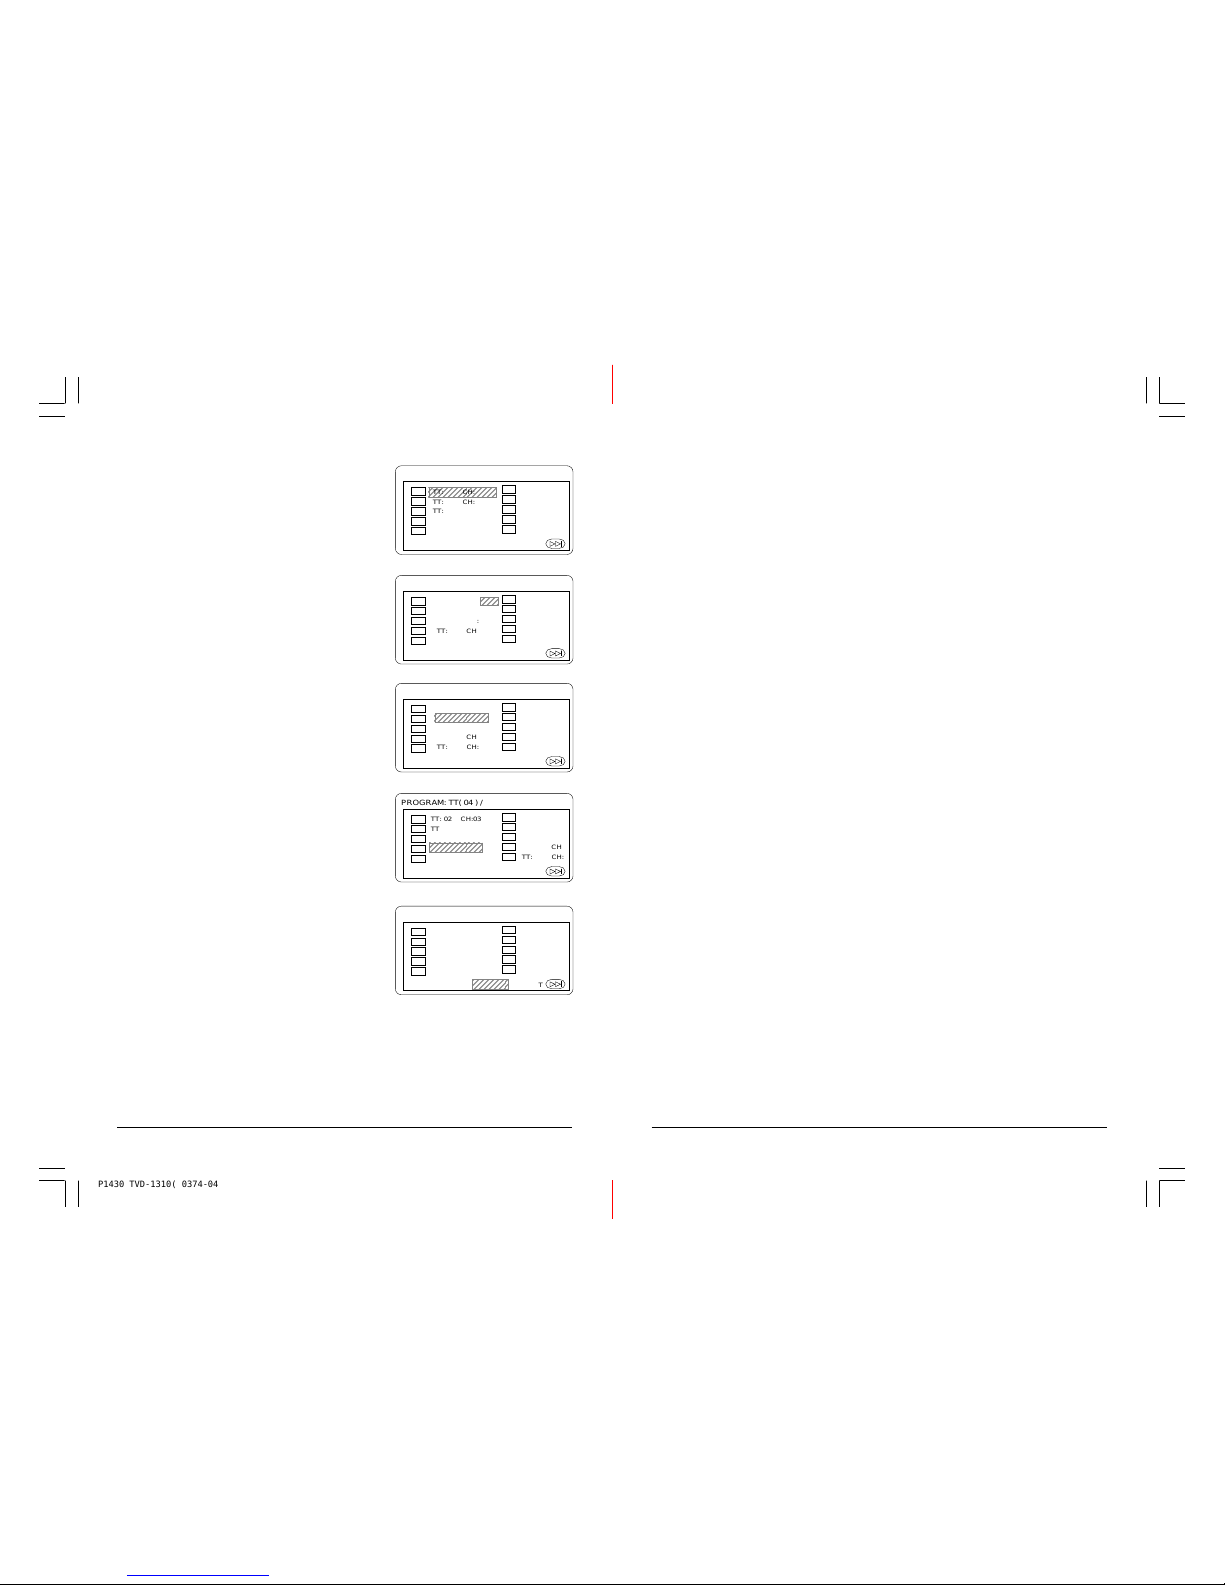
1. Press the PROGRAM Key. The Program
Sequence table will be shown on the
screen.
2. Enter the title number with the Number
keys (0-9) on the remote control.
3. Enter the Chapter number of the title
selected in the last step.
4. Repeat step 2 – 3 to input the sequence.
5.After assigning the playback
sequence, move the highlight cursor
to the START option by using the Navigation Arrows. Press ENTER onthe
remote control to confirm.
Note : The program can be removed in the same ways as CD audio.
PROGRAM: TT( 04 ) / CH (- -)
06
07
08
09
10
12345678901234
1
234567890123
4
12345678901234
TT: CH:
TT: CH:
TT: CH:
TT: CH
TT: CH:
TT: CH:
TT: CH:
TT: CH:
TT: CH
TT: CH:
01
02
03
04
05
EXIT NEXT
PROGRAM: TT( 02 ) / CH ( 03 )
06
07
08
09
10
TT: CH:
TT: CH:
TT: CH:
TT: CH
TT: CH:
01
02
03
04
05
EXIT NEXT
234
5
TT: 02 CH:
TT: CH:
TT: CH:
TT: CH
TT: CH:
PROGRAM: TT( 04 ) / CH (- -)
06
07
08
09
10
TT: CH:
TT: CH:
TT: CH:
TT: CH
TT: CH:
01
02
03
04
05
EXIT START NEXT
2345678901
2
TT: 02 CH:03
TT: CH:
TT: CH:
TT: CH
TT: CH:
2345678901
2
PROGRAM: TT( 04 ) / CH (- -)
06
07
08
09
10
TT: CH:
TT: CH:
TT: CH:
TT: CH
TT: CH:
TT: 02 CH:03
TT: 01 CH:01
TT: 04 CH:02
TT: CH
TT: CH:
01
02
03
04
05
EXIT START NEXT
PROGRAM: TT( 04 ) / CH (- -)
06
07
08
09
10
TT: CH:
TT: CH:
TT: CH:
TT: CH
TT: CH:
12345678
1
234567
8
12345678
TT: 02 CH:03
TT: 01 CH:01
TT: 04 CH:02
TT: CH
TT: CH:
01
02
03
04
05
EXIT START NEXT
P1430 TVD-1310( 0374-04).p65 2002/12/30, PM 05:205
GROUNDING ACC. TO
ARTICLE 810
of the National Electrical Code
ANSI/NFPA 70
Page 6
6
LOCATION OF CONTROL
23
PROGRAMMING
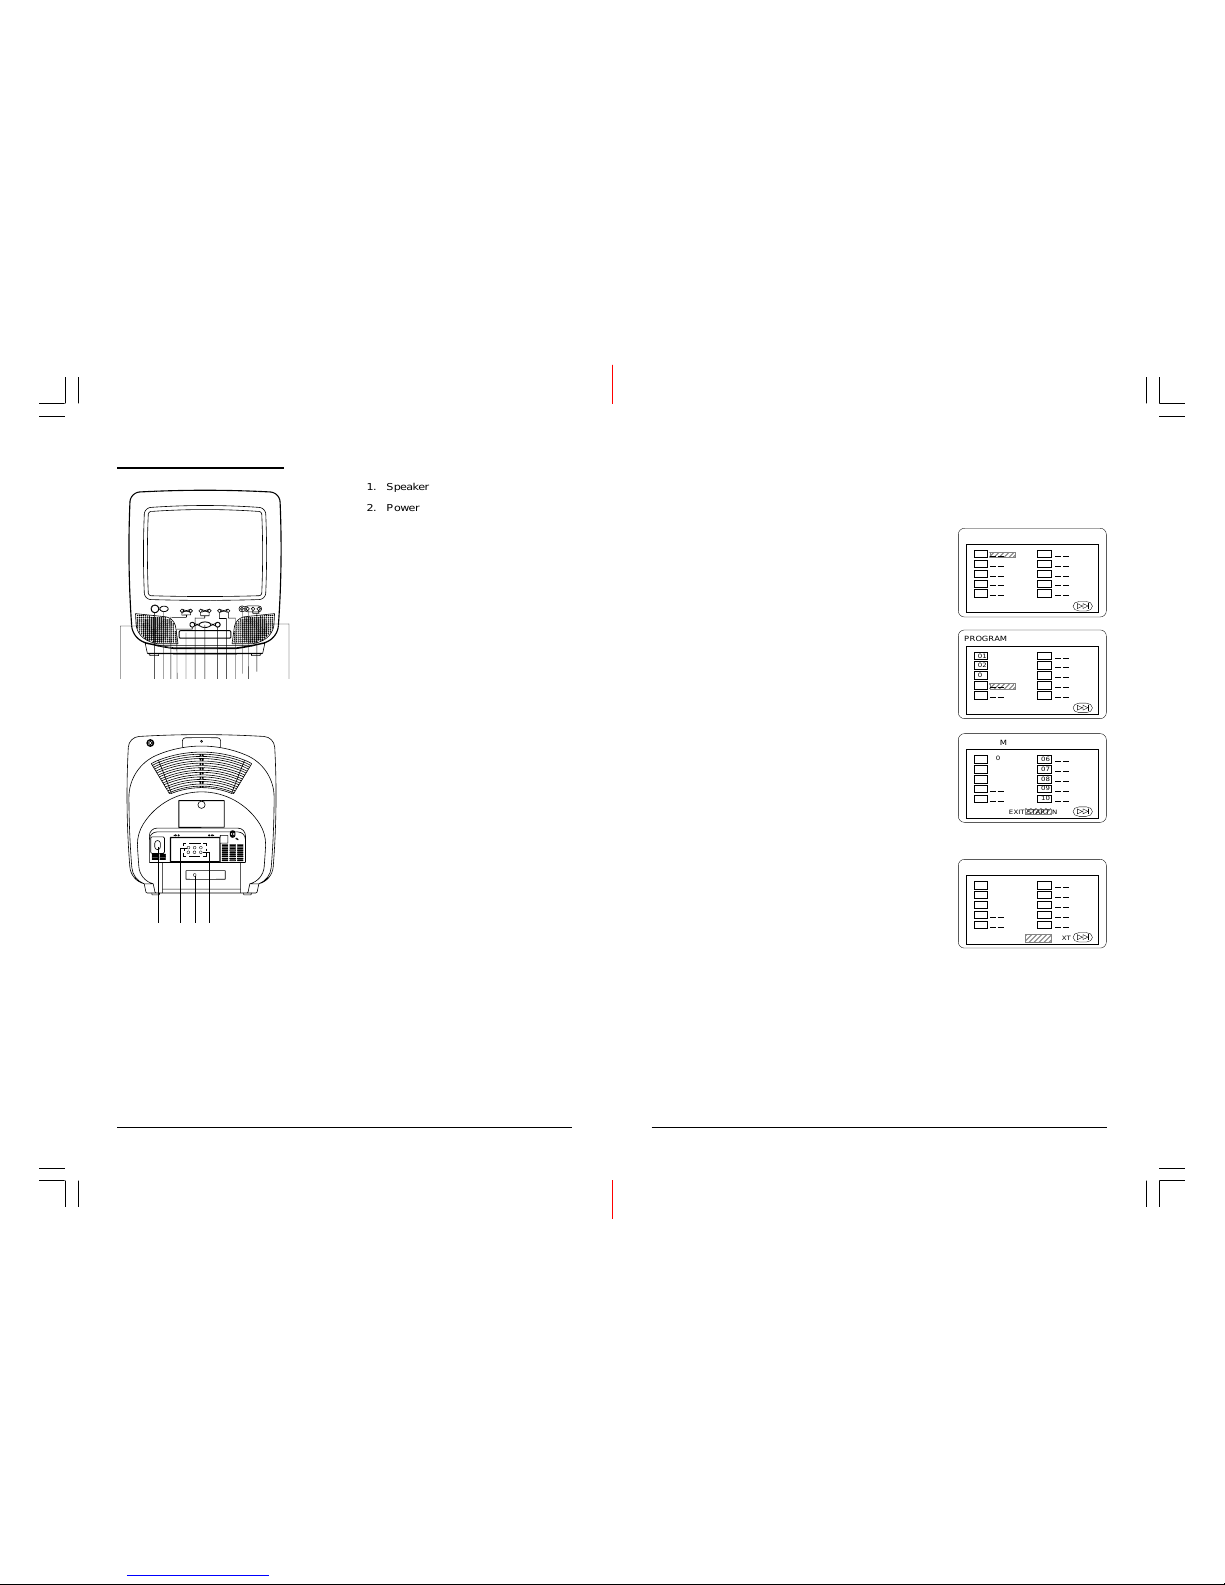
This function is applicable for DVD and CD audio. You can assign the playback sequence
according to your preference. For CD audio, you can assign the track sequence while for
DVD disc, you can assign both the title and chapter sequence.
• CD
1. Press the PROGRAM Key. The Program Sequence table will be shown on the screen.
2. Enter the track numbers according to your
preference with the number keys (0-9).
3. After assigning the playback sequence, move
the highlight cursor to the START option by using the Navigation Arrows.
Press ENTER on the remote controller to confirm.
To remove the program :
1. Press the PROGRAM Key to cancel the Program Menu.
2. Move the highlight cursor to the STOP option by
using the Navigation Arrows.
3. Press ENTER to confirm.
PROGRAM
01
02
03
04
05
EXIT NEXT
06
07
08
09
10
123456
123456
PROGRAM
01
02
03
04
05
EXIT START NEXT
06
07
08
09
10
123456
123456
05
03
08
PROGRAM
06
07
08
09
10
2345
6
05
03
08
01
02
03
04
05
EXIT START NEXT
PROGRAM
06
07
08
09
10
2345
6
05
03
08
01
02
03
04
05
EXIT STOP NEXT
1. Speaker
2. Power Button
3. Remote Sensor
4. Channel Buttons
5. Open/Close Button
6. DVD Loader
7. Volume Buttons
8. DVD Play Button
9. DVD Stop Button
10. TV Menu Button
11. TV/AV/DVD Button
12. Earphone Socket
13. Video Input Socket
14. Audio Input Socket (R+L)
15. 75 ohm Antenna Socket
16. Back Video/Audio Input
17. Video/Audio Output
18. Audio Digital Out Socket
(For DVD only)
1
2
345
67
8
9
10
111213
14
1
15 16
18 17
P1430 TVD-1310( 0374-04).p65 2003/1/2, PM 03:416
Page 7
7
REMOTE CONTROL
1. DVD Subtitle Button
2. Eject Button
3. Mark Button
4. Repeat Button
5. Audio Button
6. Program Button
7. Angle Button
8. Direction Up Button
9. Clear Button
10. Direction Left Button
11. Pause/Step Button
12. TV Channel Buttons
13. Fast Backward Button
14. Stop Button
15. Slow Play Buttons
16. Numeric Buttons
17. CCD ON/OFF Button
18. CCD-1,2,3,4 Buttons
19. CCD-TEXT Button
20. DVD/TV Buttons
21. Menu Control Button
22. TV Menu Button
23. TV/A V Button
24. TV Display Button
25. TV Sleep Button
26. TV Memory Button
27. DVD Skip Backward/Forward Button
28. Play Button
29. Fast Backward Button (Next)
30. Volume Button
31. Direction Down Button
32. Direction Right Button
33. +10 Button
34. DVD Enter Button
35. Search Button
36. DVD Zoom Button
37. Setup Button
38. GUI Button
39. DVD Menu
40. Repeat A-B Button
41. Power On/Off Button
42. Mute Button
SEARCH
Battery Installation
• Insert two "AA" or "R06" 1.5 V batteries as illustrated and put the cover back.
22
Display (Remaining Time)
This function is applicable for DVD only. It will display the timing information of the playback on
the screen.
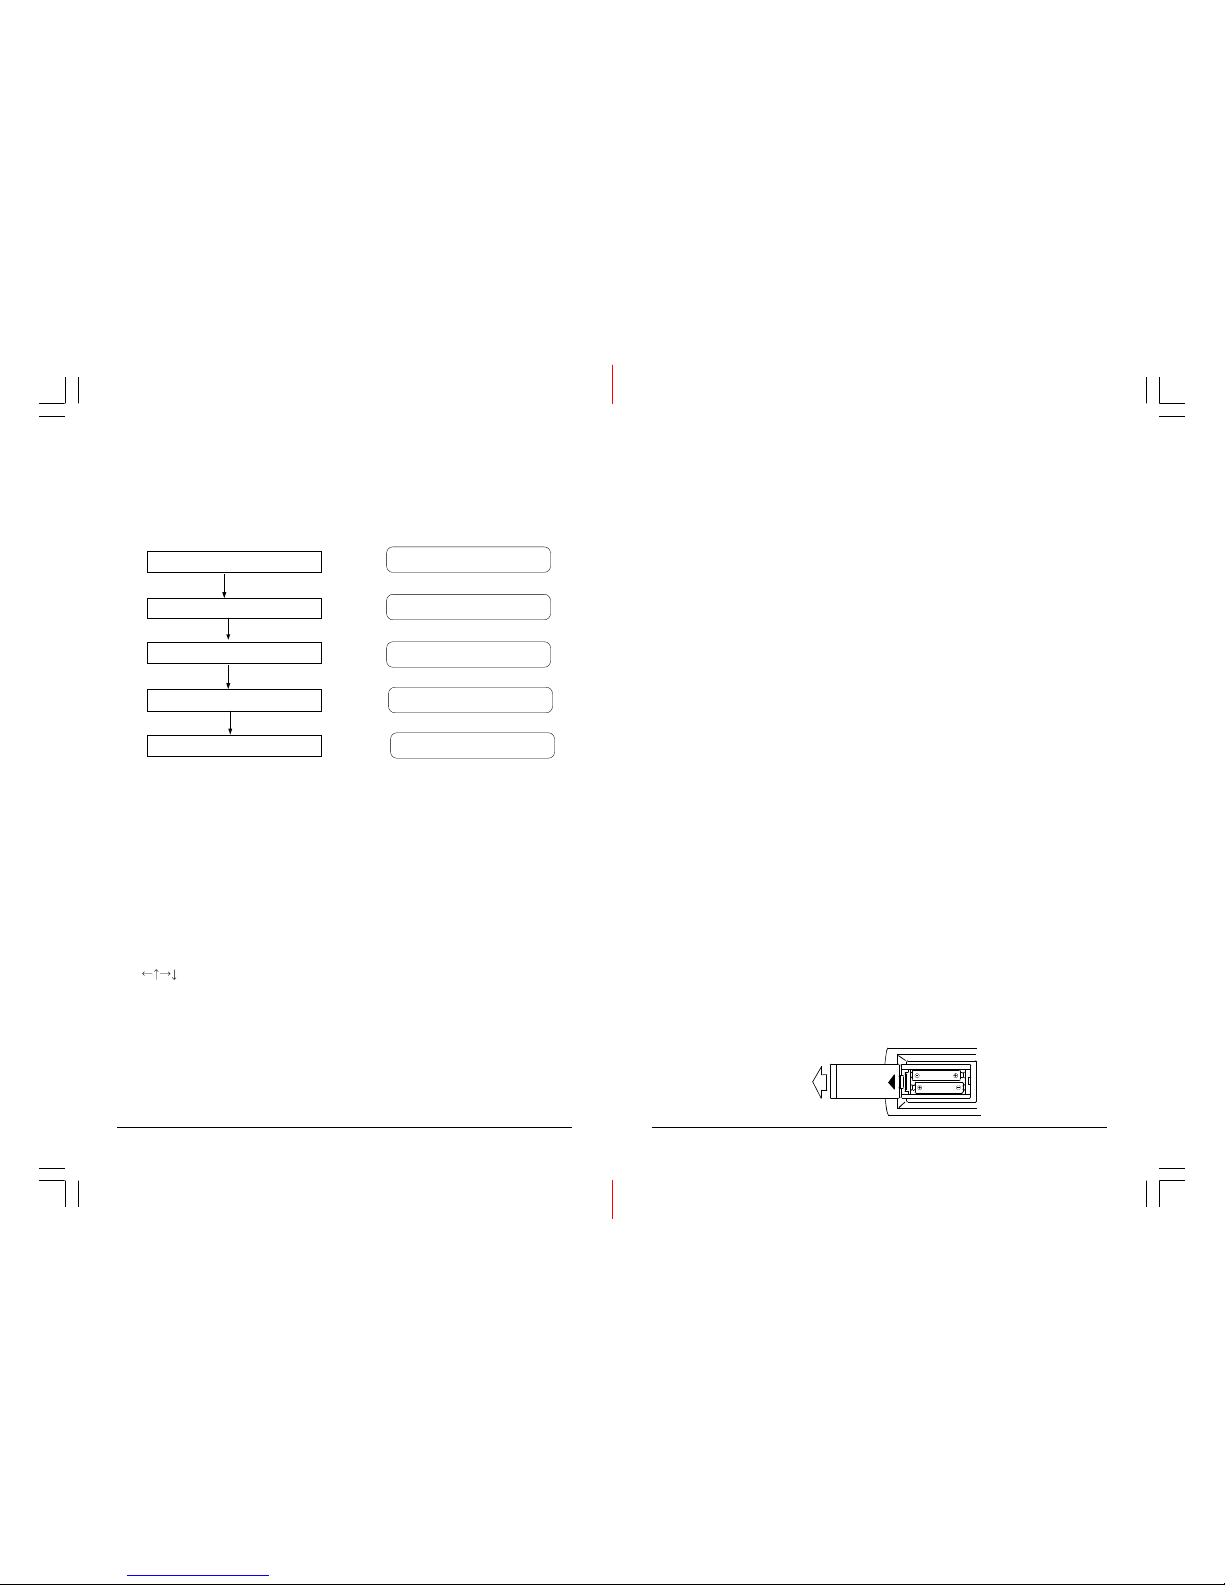
• For DVD playback, subsequent key press on the DISPLAY key will show the Title Elapsed
Time, Title Remain Time, Chapter Elapse Time and Chapter Remain Time one by one.
Press the DISPLAY Button
Press the DISPLAY Button
Press the DISPLAY Button
Press the DISPLAY Button
Press the DISPLAY Button
TITLE ELAPSED
TT 01/04 CH 01/12 0:02:13
TITLE REMAIN
TT 01/04 CH 01/12 1:33:30
CHAPTER ELAPSED
TT 01/04 CH 01/12 0:02:15
CHAPTER REMAIN
TT 01/04 CH 01/12 0:02:18
DISPLAY OFF
Resume Play
This function is applicable for DVD and CD audio. During the disc playback, when the STOP
button is pressed once, the player will enter the Resume Play mode. At this time, if the PLAY
button is pressed again, the player will resume playback at the location where the STOP button
was pressed. If the STOP button is pressed twice, the player will stop.
Zoom
This function is applicable for DVD. You can enlarge a freeze-frame picture or a moving
picture by pressing the ZOOM key. There are 3 levels of zooming (2x, 3x and 4x) that can be
selected by pressing the ZOOM key.
NOTE: The detail of the picture to be enlarged can be selected by using the navigation keys
( ).
P1430 TVD-1310( 0374-04).p65 2002/12/30, PM 05:207
Bookmark
The bookmark function allows you to define up to 12 different marks on a DVD, so that you
can quickly find the passage later. Press the MARK button during playback and the
bookmark table will be shown. Press PLAY to mark one passage. Use the navigation keys to
choose another box. Press PLAY to call up a stored bookmark and CLEAR to clear it.
( ).
Press the MARK button to leave the bookmark table.
Page 8
8
TV OPERATION
PICTURE ADJUSTMENT
! Press the [MENU] key to enter the PICTURE mode.
! Press the [ ] / [ ] keys to select the desired adjustment.
! Press [ ] / [ ] keys to adjust the level of selected item. The level setting can be adjusted
from “0” to “100”.
! Press [ ] / [ ] keys to set the BLUE BACK (blue background) to ON or OFF.
! Press the [MENU] key to go back to the previous screen.
TV CHANNEL PROGRAMMING
! Press [MENU] key twice to select TUNING mode.
! Press the [ ] or [ ] key to select a desired item.
!!
!!
! CHANNEL
! Press the [ ] or [ ] key to select the desired channel.
! TV/CATV
! Use the [ ] or [ ] key to select TV or CATV.
! ADD/ERASE
! Use the [ ] or [ ] key to select the ADD or ERASE.
! MANUAL
! Select MANUAL (Manual Search), then press the [ ] or [ ] key to start channel
automatic searching.
! The search stops when a broadcasting station is located. The station will be stored
in the memory.
! FINE
! Press the [ ] or [ ] key to fine tune the station.
PICTURE
COLOR 80
BRIGHT
80
CONT
100
SHARP 50
TINT 0
BLUE BACK
ON
SELECT ADJUST
TUNING
CHANNEL 10
TV/CATV
TV
ADD/ERASE
ADD
MANUAL DOWN
FINE +00
AUTO MEMORY
SELECT
ADJUST
-->
-->
21
Subtitle
This function is only available for DVD disc to change the subtitle language to be shown on the
screen.
Note: The number of subtitle languages available depends on the DVD.
Angle
Some discs may have multiple viewing angles during production. The ANGLE button is used to
select the viewing angle shown on the screen.
Note: The number of angle views available depends on the DVD.
Search
This function is applicable for DVD and CD audio. Through this function, the user can access
a specific passage or a specific track by entering the target time or the track number.
• In the DVD playback mode, the player provides two search modes : Search Chapter Time
and Search Title Time.
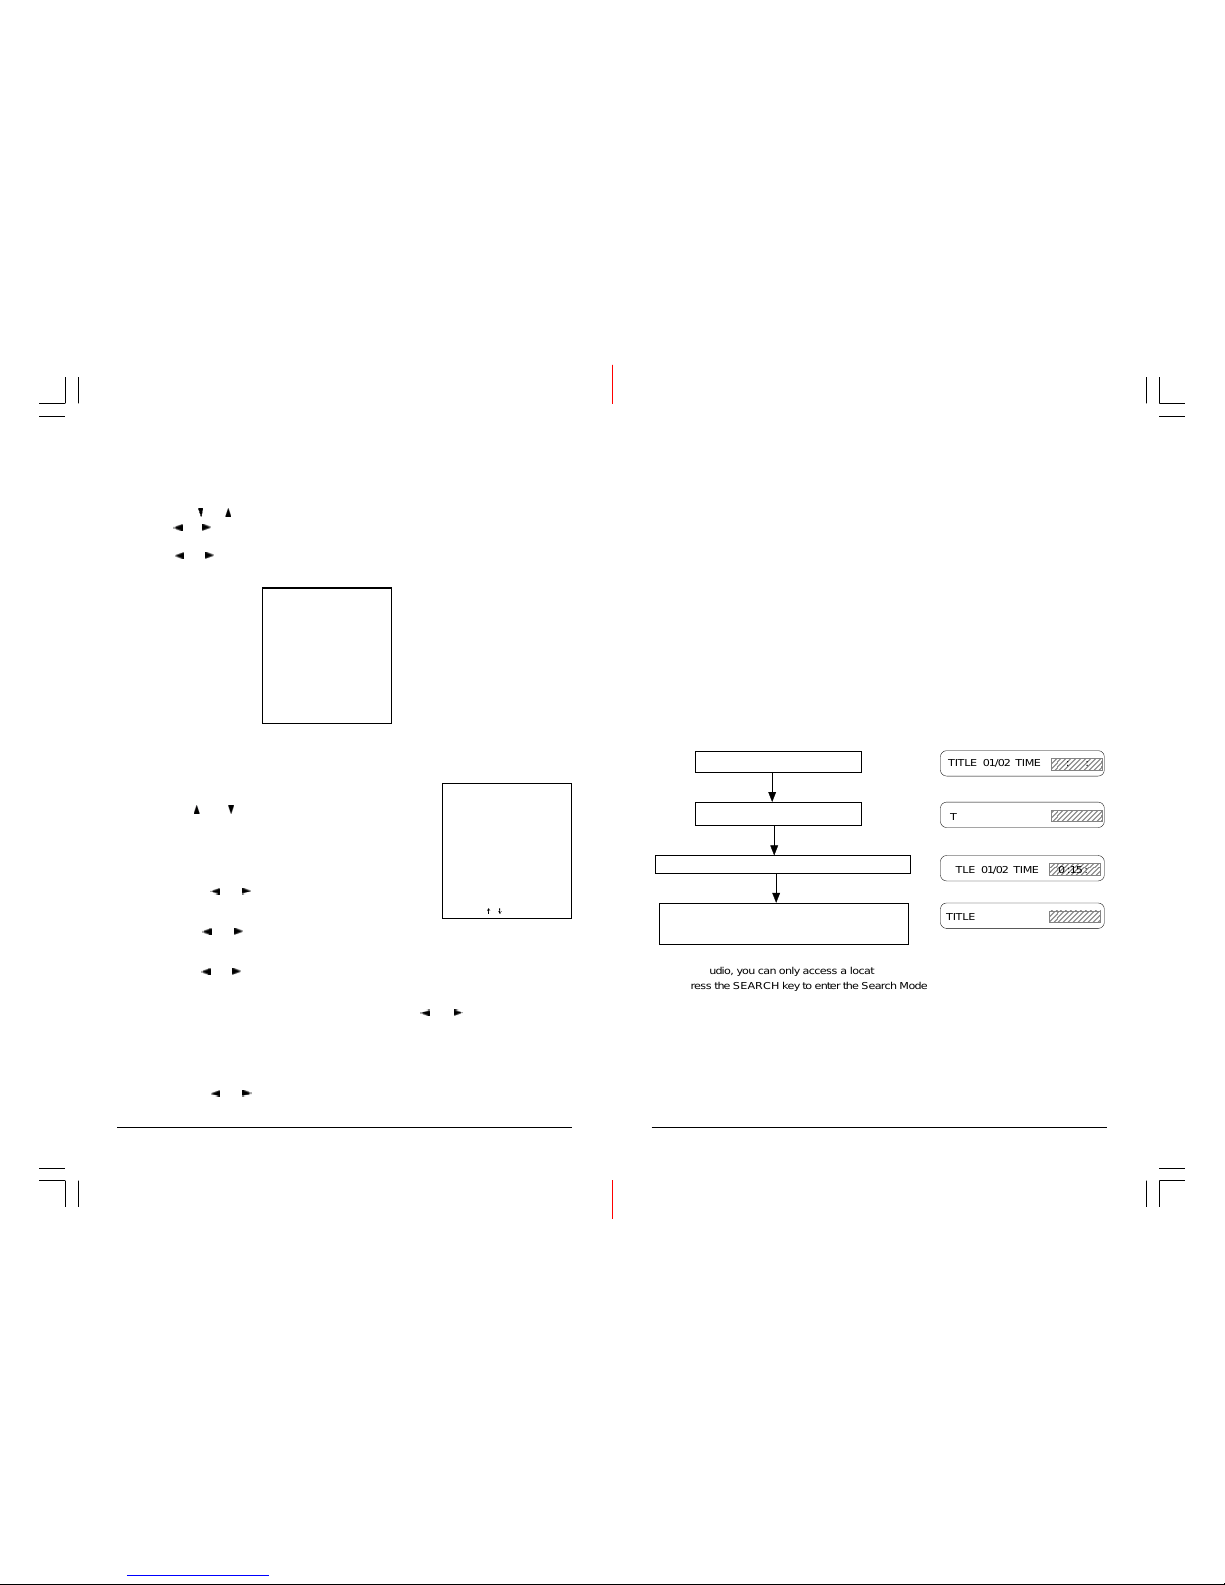
1. Press the SEARCH key to choose a search mode (Title time / Chapter time).
2. Enter the target time with the Number keys (0-9) and the player will skip to the target
location immediately.
Press the SEARCH Button
Press ‘0’ as the hour input
Press ‘1’ and then ‘5’ as the minute input
Press ‘0’ and then ‘8’ as the second input
(Playback starts at 0:15:08 of Title 1)
2345678901
2
TITLE 01/02 TIME : :
2345678901
2
TITLE 01/02 TIME 0 : :
234567890
1
TITLE 01/02 TIME 0 :15 :
234567890
1
234567890
1
TITLE 01/02 TIME 0 :15:08
• In CD audio, you can only access a location within the current track.
1. Press the SEARCH key to enter the Search Mode (there is only one mode in CD audio
playback).
2. Enter the target time with the number keys (0-9) and the player will skip to the target
location immediately.
P1430 TVD-1310( 0374-04).p65 2002/12/30, PM 05:208
Page 9
9
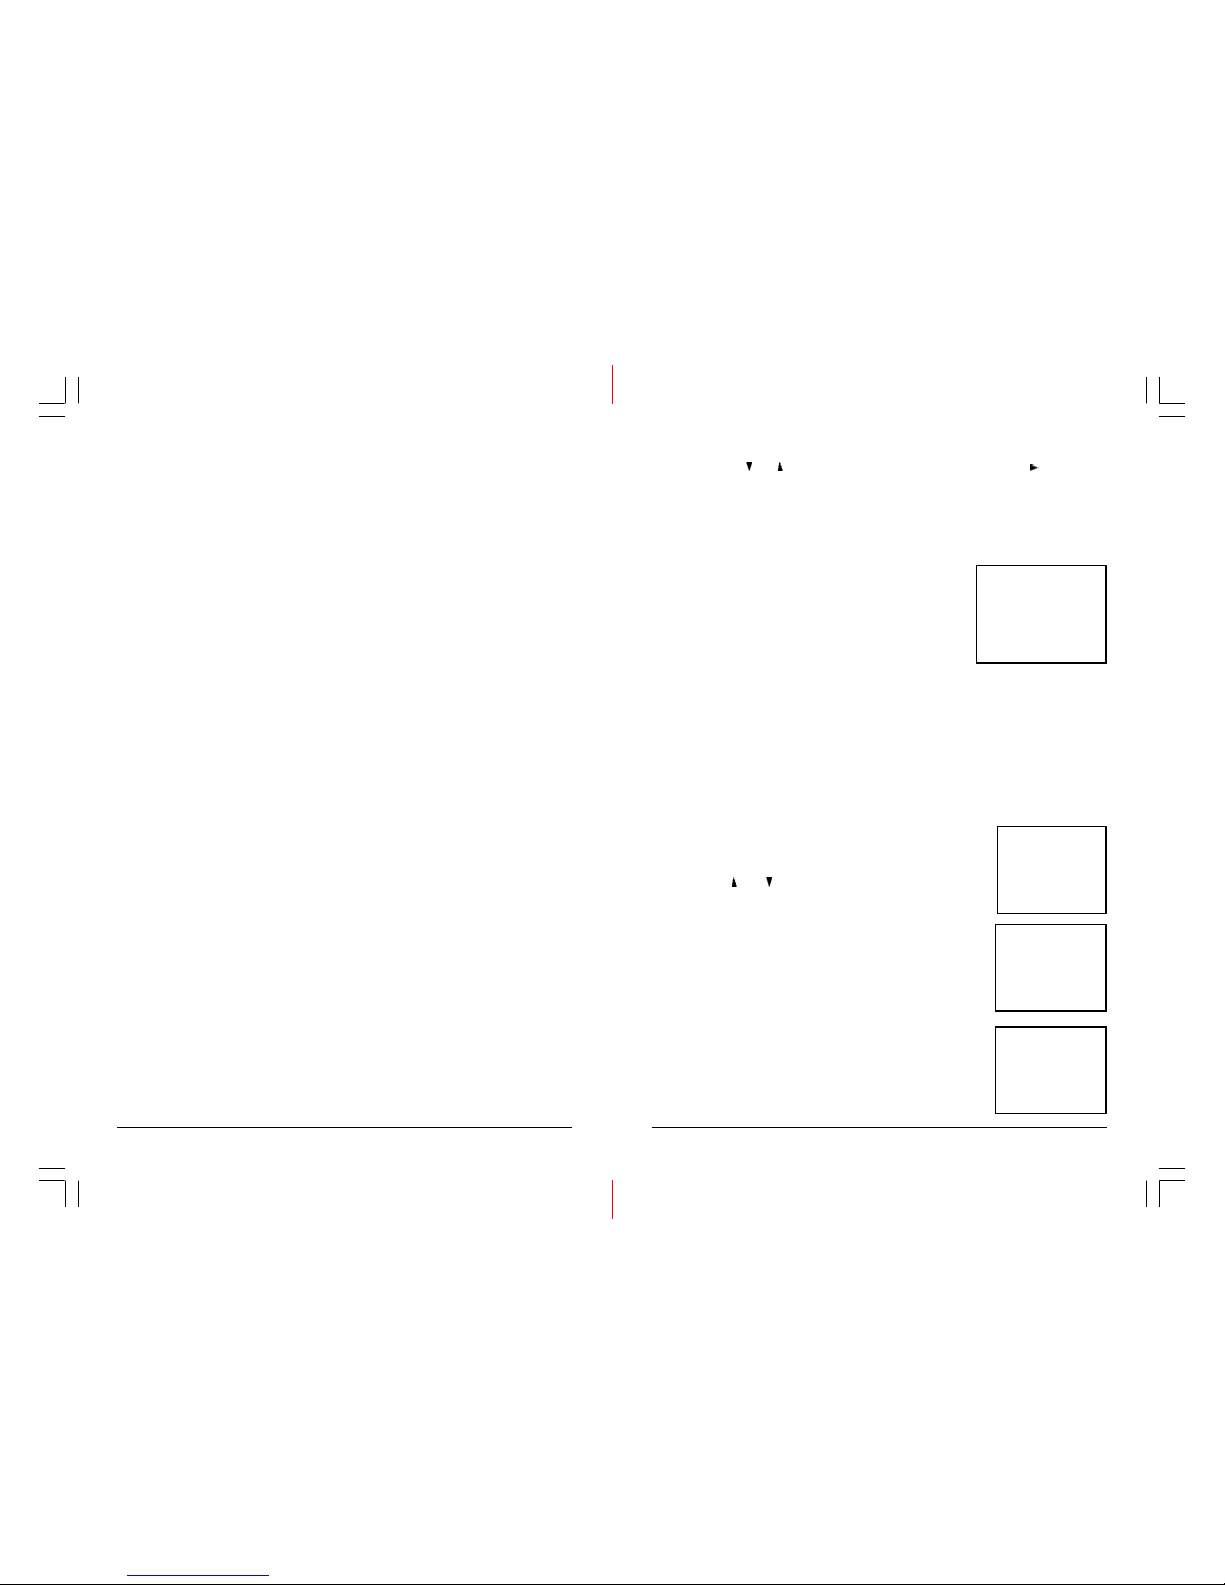
Auto Memory/Scan for Channels
! Press the [ ] or [ ] key to select “AUTO MEMORY”, then press the [
] key start the
Auto Memory process.
! If signal is detected, the current channel is entered in the memory and proceeds to
the next receivable channel.
! After the highest receivable channel is detected, the auto memory operation will
stop, and the lowest receivable channel will show on the screen.
VOLUME CONTROL
! Press the [ VOL UP ] or, [ VOL DOWN ] button to adjust the
sound level. The volume steps can be adjusted from 0 to
100.
AUTO POWER-OFF FUNCTION
! If no broadcast is received for about 15 minutes and no key
is selected during that time, the power is automatically turned
off. (This function does not operate if an AV signal is connected to input.)
BLUE BACKGROUND FUNCTION
! When no video signal is available, the screen displays with a blue background and the
audio is muted.
! This function can be switched “On” or “Off” in the picture mode.
DISPLAY BUTTON
Pressing the [DISPLAY] button displays the following information:
(1) Current channel No. or Video
DISPLAY LANGUAGE
! The language menu allows you to choose the prefered
language.
! Press the [
] or [ ] key to select the desired language.
CLOSED CAPTION DECODER CONTROL
! Press the CCD ON/OFF button to switch the CCD function on
or off.
Selecting Data Channel
! Press the CCD 1.2.3.4 button to change the CCD data
channel to C1, C2 or C3, C4 as desired.
VOLUME 30
IIIIIIIIIIIIIII.....................
LANGUAGE
ENGLISH
FRANCAIS
A B C. . . . . . . . . . .
CCD ON
CH 1
20
Select with Number Button (0 – 9)
When using the number buttons to access direct input, you are always required to enter two
digits. For example, to input the number ‘3’, press ‘0’ and ‘3’.
• During a DVD movie playback, input the Number Buttons to select the Chapter within the
current title.
• When playing an audio CD, number keys can be used to access tracks directly.
Audio Mode
This function is applicable for DVD and CD audio but with different effects.
• For a DVD disc, pressing the AUDIO button will change the language of playback.
• For CD, pressing the AUDIO MENU button will change the audio mode.
Fast Play
This function is applicable for DVD and CD audio but with different effects. The FAST FORWARD (FF) key and FAST BACKW ARD (FR) keys are used to fast play current chapter / track.
• For DVD , there are 4 different levels of speed (2x, 4x, 8x, 16x). Every successive key
press will increment the play speed .
Note : Pressing the PLAY button at any stage will resume to normal speed.
• For CD audio, the FF/FR allows fast program search. Playback will resume to normal
speed when FF/FR is released.
Slow Play
The Slow Forward is applicable only for DVD. There are 4 steps of slow motion speed; 1/2,
1/4, 1/8, 1/16. Successive key presses will reduce the playback speed.
Note : Pressing the PLAY key to switch back to normal playback speed.
Repeat Mode
This function is applicable for DVD and CD audio but with different effects.
• For DVD disc playback, you can choose to repeat the current chapter or the current title.
Press the REPEAT key to change between these two options.
• For CD, you can choose to repeat the current track or the whole disc (Repeat All). Press
the REPEAT key to change between these two options.
Repeat AB
This function is applicable for DVD and CD audio. User can specify the repeating interval by
marking the starting point and the end point.
1. Press the REPEAT AB Button to mark the starting point (the playback will continue).
2. Press the REPEAT AB Button to mark the end point (the marked part will be repeated
automatically).
Note : Pressing the REPEAT AB Button during repetition will cancel the repeat mode.
P1430 TVD-1310( 0374-04).p65 2002/12/30, PM 05:209
Page 10
10
V-CHIP
PIN NO.
ABCDEFGH...01234567.....
XYZ....
123....
Text Display Function
! Press the CCD TEXT button to display closed caption text.
Note: The CCD and text function is available only when the
current channel signal contains this information.
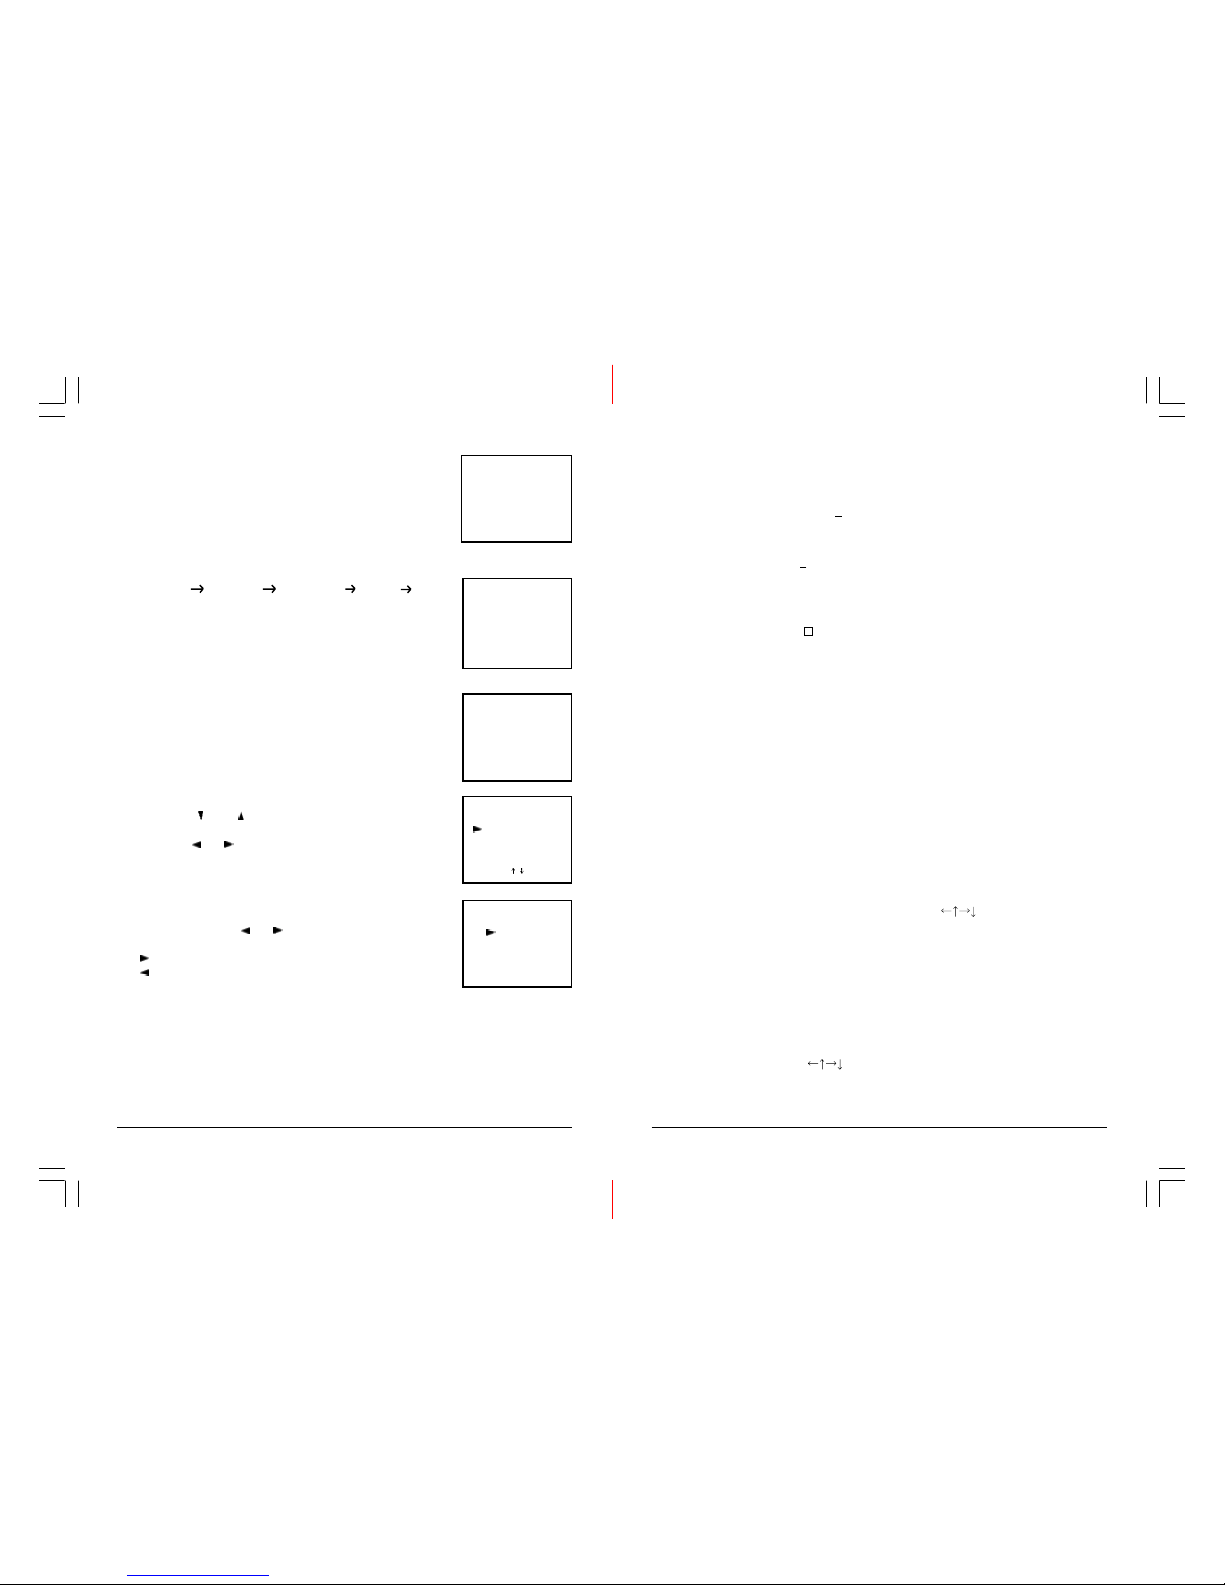
V-CHIP FUNCTION FOR PARENTAL CONTROLS
V-Chip Menu
! Press Menu button to select V-Chip
[PICTURE] [TUNNING] [LANGUAGE] [V-CHIP] EXIT
Input Pin No .
! To enter and set V-Chip function entering the Pin No is required.
1) Enter the 4 digit pin no.
Notes:
- The default PIN NO. is set to 1111 at the factory.
- When incorrect PIN NO. is entered, ”INCORRECT” mes-
sage appears.
- When correct PIN NO. is entered, V-CHIP menu is displayed.
V-Chip setting
! Press the [ ] or [ ] button to select setting options.
(MPAA, TV Guidelines, Block)
! Press the [ ] or [ ] button to enter the selection and change
rating level .
1. Setting MPAA Rating system
! In the MPAA Rating setting menu, the rating level can be set and
changed by pressing [ ] or [ ] buttons.
There are 7 level rating system
[ ] button - - (non) –> G –> PG –> PG-13 –> R –> NC-17 –> X
[ ] button - - (non) <– G <– PG <– PG-13 <– R <– NC-17 <– X
Rating System
G: General audience PG: Parental guidance suggested
PG-13: Parents strongly cautioned R: Restricted
NC-17: No one 17 and under admitted X: Not rated.
INCORRECT
V-CHIP
MPAA RATING
TV GUIDELINES
BLOCK ON
SELECT SET -->
V-CHIP
MPAA RATING
G
BLOCK
[X NC-1 7R PG-1 3 PG G]
SET-->
19
DVD Functions
Play Discs
1. Press the OPEN/CLOSE Button (∆) on the front panel and load the disc on the tray. The
label side should be facing upwards. For a
double-sided DVD Disc, place the disc with
label A/1 up.
2. Press the OPEN/CLOSE (
∆) button again to close the tray and the disc will be loaded.
3. The
disc will be played automatically.
• If it is a DVD disc, it will show the Menu/Title Page on the screen.
• If it is a CD, it will play the first track directly.
4. Press the STOP Button (
) if you want to stop the disc playback. You can resume
playback by pressing the PLAY button and it will start at the
passage where it stopped
(Resume Play).
5. Press the STOP
button twice to stop the disc completely.
PAUSE Mode
This function is applicable for DVD and CD audio.
• For DVD , the picture will become static.
• For CD audio, it will become silent.
1. Pressing the PAUSE Button ( || ) will cause the player to enter Pause mode.
2. Pressing the PLAY Button or PAUSE Button again will resume to Play State.
OSD – On Screen Display
There are 4 OSD languages embedded in the DVD Player : English, Spanish, German and
French.
1. Press the SETUP button on the remote controller to enter the setup menu main page.
2. Choose General Setup through the Navigation Arrows ( ) and press ENTER.
3. Go to the OSD LANG option and use the
navigation keys to make the selection.
4. Press ENTER to confirm.
5. Press SETUP again to quit the Setup menu.
DVD Menu
The DVD Menu Play function is only applicable for DVD movies. You can access, e.g., casting
information, production history, m
ovie introduction etc.
1. Press the DVD MENU Button on the remote controller to enter the Root Menu.
2. Use the navigation keys ( ) or input the item index through the number keys (0-9)
to make the selection.
3. Press ENTER to confirm the selection.
P1430 TVD-1310( 0374-04).p65 2002/12/30, PM 05:2110
Page 11
11
2. Setting TV Guidelines Rating System.
! In the TV Guidelines Rating setting MENU, a rating level can be
changed by [
] or [ ] button.
There are 7 level rating system.
[
] button - - (non)
–>TV-Y –>TV-Y7 –>TV-G –>TV-PG –>TV-14 –>TV-MA
[ ] button - - (non)
<
–TV-Y<–TV-Y7<–TV-G<–TV-PG<–TV-14<–TV-MA
Data content setting in TV Guidelines
! UU U(Using TV-Guidelines requires setting the content data
using below buttons:
[
] / [ ] button to select content items (FV, V, S, L, D)
[
] / [ ] button to select content block (FV, V, S, L, D)
VIEW : No contents is set
BLOCK : Setting contents is blocked.
Setting contents are available following rating system:
TV-Y7 : FV TV-PG : V, S, L, D
TV-14 : V,S,L,D TV-MA : V,S,L
Note: Meaning of each rating system
TV-Y : All children TV-Y7 : Directed to Older children
TV-G : General audienc TV-PG : Parental guidance suggested
TV-14 : Parental Guidance suggested
TV-MA : Mature Audience only
S = Sex : Programs containing sexual content
L = Language : Programs containing coarse language
V = Violence : Programs containing violence
D = Suggestive Dialogue: Programs containing suggestive dialogue, or sexual innuendo.
FV = Fantasy Violence: Programs containing cartoon violence occurring in TV-Y7
programs only.
V-CHIP Activity
V-Chip Function is active when receiving rating data that is equal to or higher than the user’s
setting of MPAA/TV Guidelines.
Blocking Cancel , Stop & Hold
• V-Chip Function will be cancelled or stopped and held under the following conditions:
[ BLOCKING CANCEL ]
** Block is “OFF” in V-Chip setting Menu
** No Rating Data in over 5 sec
** During Tuning
[ Blocking STOP and HOLD ]
** When the blocking is activated, push the MENU button, select Pin No. Input Menu. If Pin No.
is entered correctly, Blocking is stopped and on hold.
V-CHIP
TV GUIDELINES
TV-PG
CONTENT
BLOCK [TV V - L -
]
[TV -MA -17-PG]
SET-->
V-CHIP
CONTENT BLOCK
FV:BLOCK
V:VIEW
S:VIEW
L:VIEW
D:BLOCK
SET <
– –
> SELECT
18
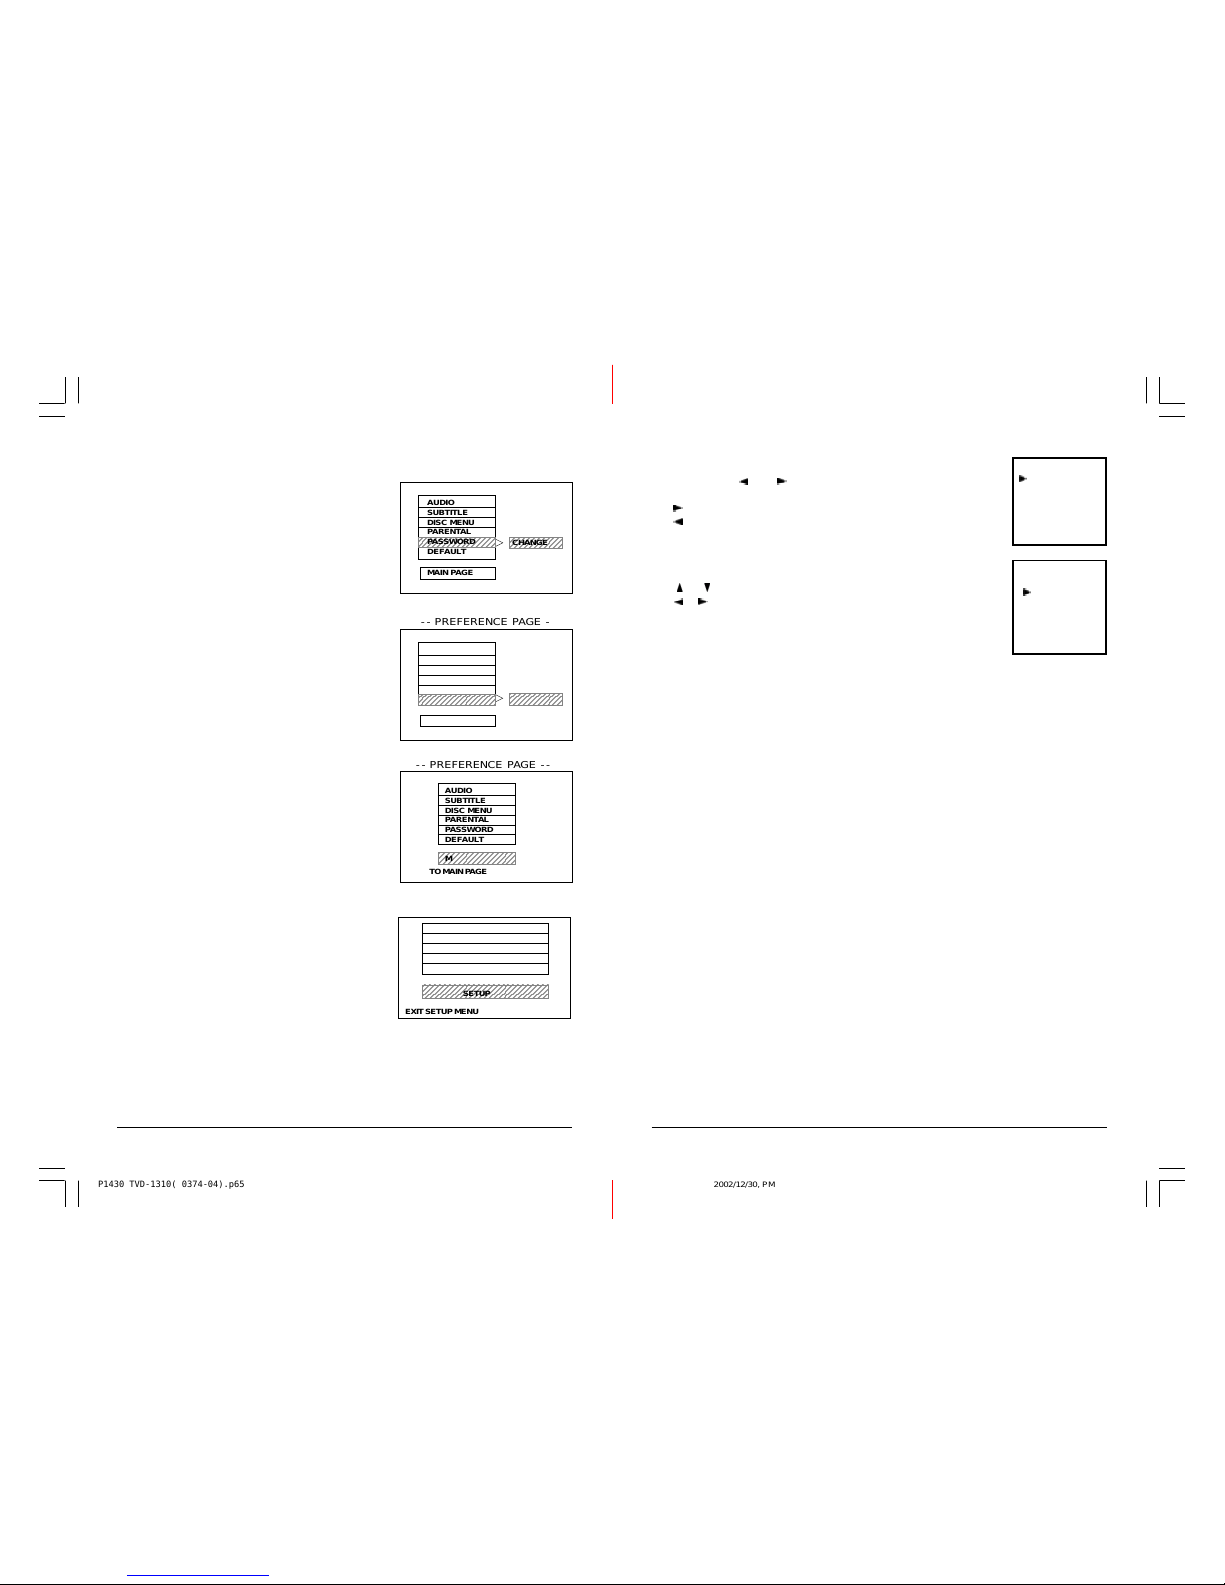
Password
You can change the password that is required
when you decide to change the Age Control Level in the Parental Lock function.
NOTE: (The factory setting is 1369 )
Default
You can load the original factory setting by choosing RESET and press ENTER.
• RESET
Main Page
Go back to main setup menu.
Exit Setup
Quit the Setup Menu.
CHANGE PASS WORD
- - PREFERENCE PAGE - -
2345678901
2
1234567890123456
1
23456789012345
6
1234567890123456
AUDIO
SUBTITLE
DISC MENU
PARENTAL
PASSWORD
DEFAULT
MAIN PAGE
CHANGE
- - PREFERENCE PAGE - -
2345678901
2
1234567890123456
1
23456789012345
6
1234567890123456
AUDIO
SUBTITLE
DISC MENU
PARENTAL
PASSWORD
DEFAULT
MAIN PAGE
RESET
LOAD FACTORY SETTING
BACK TO MAIN PAGE
- - PREFERENCE PAGE - -
1234567890123456
1
23456789012345
6
1
23456789012345
6
1234567890123456
AUDIO
SUBTITLE
DISC MENU
PARENTAL
PASSWORD
DEFAULT
MAIN PAGE
-- SETUP MENU --MAIN PAGE --
2345678901234567890123456
7
2345678901234567890123456
7
GENERAL SETUP
SPEAKER SETUP
DOLBY DIGITAL SETUP
VIDEO SETUP
PREFERENCE SETUP
EXIT SETUP
EXIT SETUP MENU
P1430 TVD-1310( 0374-04).p65 2002/12/30, PM 05:2111
Page 12
12
OPERATING WITH REMOTE CONTROL
Selecting a TV station with the remote control:
1. Channel Number Up and Down
Press the CH. " [ ] " or " [ ] " button to select a higher or lower channel number.
2. 0 - 9 Digital Button
To select TV stations using channel numbers 0 - 9, press the desired CH-number.
The channel number will appear on the left corner of the top of the screen in yellow color.
3. Two Digit Channel Number
To select TV station using channel numbers "10" - "89".
For example: selecting channel 12. Press the button "-/- -"
* Then press the number "1" button ( screen will show "1-")
* Then press the number "2" button, (channel "12" will show.)
Power Button (
)
• Press this button to switch ON/OFF the set.
Sleep Timer (
)
• The TV set can switch OFF automatically in 15 minute intervals upto 120 minutes. When
SLEEP button is pressed, the screen display will show "
" in red color and the set time
in yellow color. Keep pressing the button till the desired set time appears.
• Press the SLEEP TIMER button to display the remaining time. To cancel the setting of
sleep time, press the SLEEP TIMER button until display shows "SLEEP OFF".
Mute Button ( )
• Press the "
" button to switch OFF the sound, press once again to switch ON the
sound.
TV/AV Mode Button
• If video/audio input sockets are used, press AV Mode button. "AV" will display on the top
left corner of the screen.
DVD PLAYER OPERA TION
Basic Operation
1. Press “TV/DVD” button to turn DVD on.
2. Press “OPEN / CLOSE (EJECT)” button to load disc on disc tray.
3. Press “OPEN / CLOSE” button to close the tray.
• Hold the disc without touching either of its surfaces, position it with the printed title side
facing up, align it with the guides, and place it in it’s proper position.
17
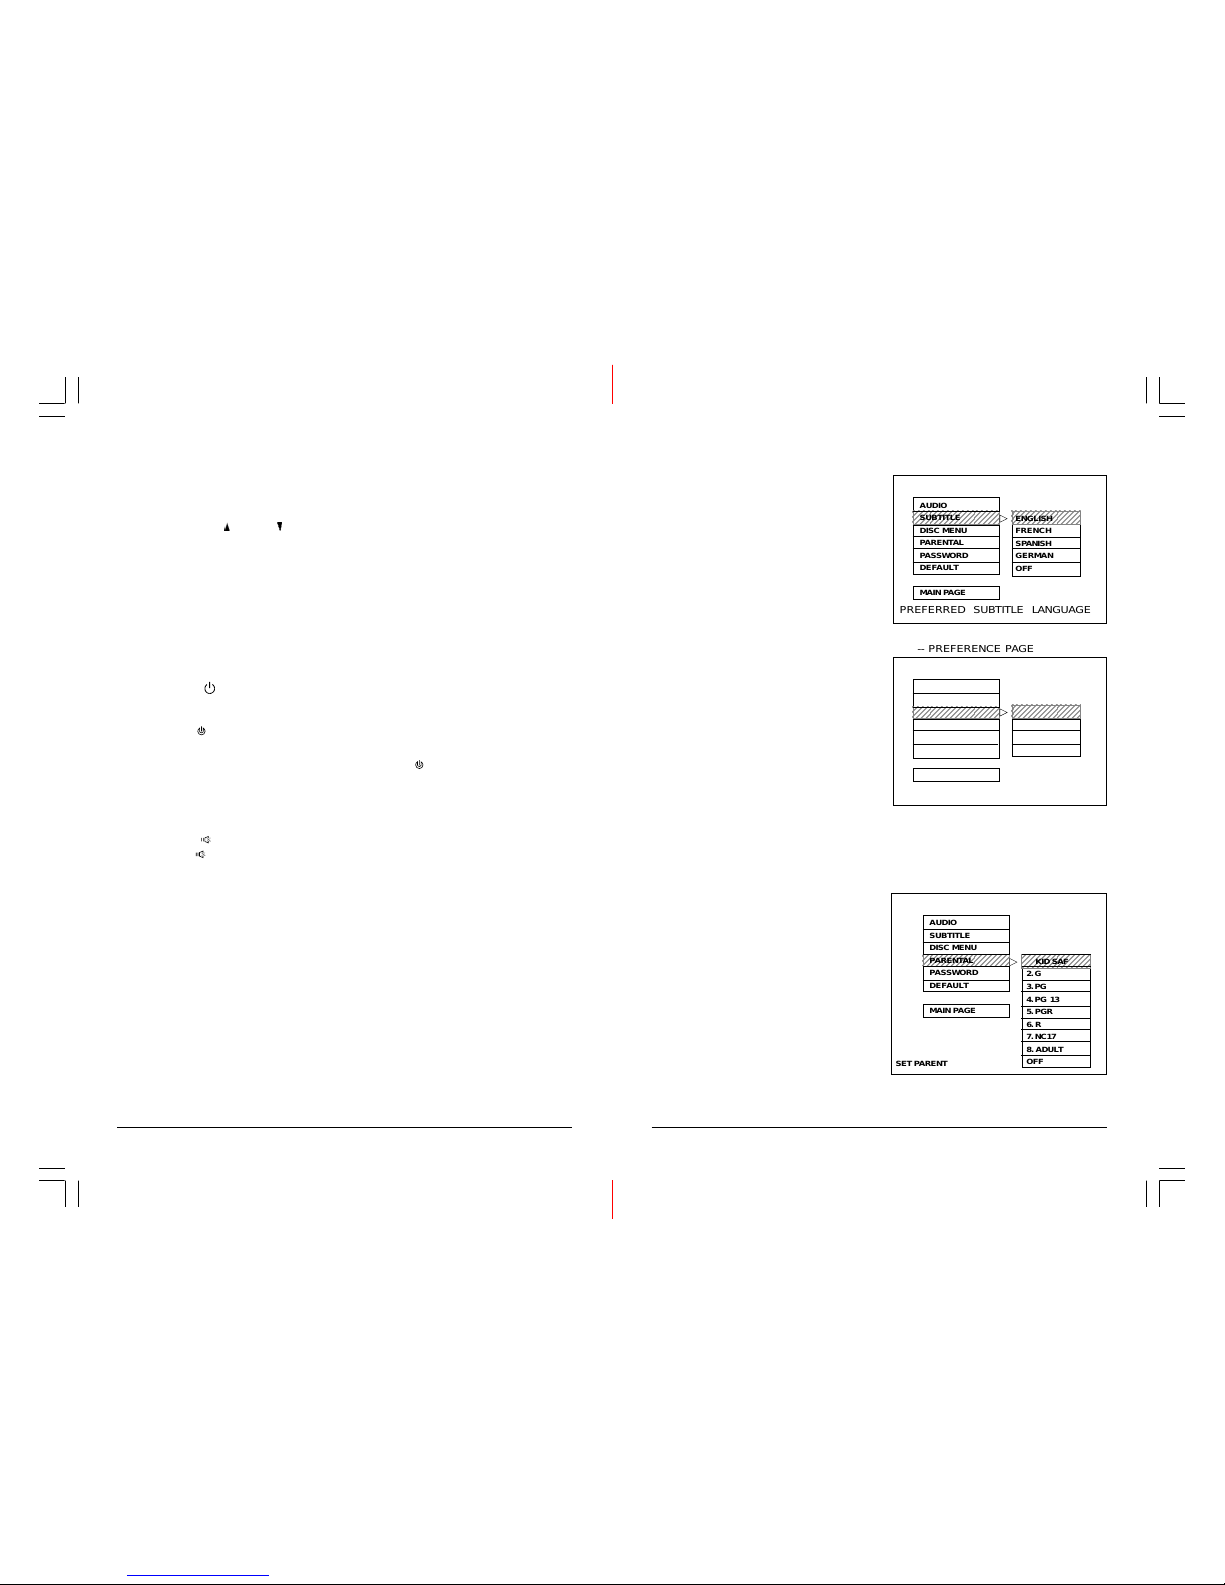
Subtitle
If a language listed below is recorded on the
disc, set the subtitle to be displayed in such
language. If not, the language recorded will
be used.
• ENGLISH
• FRENCH
• SPANISH
• GERMAN
Disc Menu
If a language listed below is recorded on the
disc, you can set the Menu to be displayed in
such language. If not, the language recorded
will be used.
• ENGLISH
• FRENCH
• SP ANISH
• GERMAN
Parental Control
When playing a disc with parental lock function, you may select an age control level according
to level of disc and your own preference. For example, if PG is selected, DVD Video disc rated
higher than the PG grade cannot be played.
• KID SAF
• G
• PG
• PG 13
• P GR
• R
• NC 17
• ADULT
• OFF
-- PREFERENCE PAGE --
23456789012345678
9
23456789012345678
9
2345678901234
5
2345678901234
5
ENGLISH
FRENCH
SPANISH
GERMAN
OFF
AUDIO
SUBTITLE
DISC MENU
PARENTAL
PASSWORD
DEFAULT
MAIN PAGE
PREFERRED SUBTITLE LANGUAGE
-- PREFERENCE PAGE --
23456789012345678
9
2345678901234
5
2345678901234
5
ENGLISH
FRENCH
SPANISH
GERMAN
AUDIO
SUBTITLE
DISC MENU
PARENTAL
PASSWORD
DEFAULT
MAIN PAGE
PREFERRED MENU LANGUAGE
-- PREFERENCE PAGE --
23456789012345678
9
23456789012345678
9
2345678901234
5
2345678901234
5
1. KID SAF
2. G
3. PG
4. PG 13
5. PGR
6. R
7. NC17
8. ADULT
OFF
AUDIO
SUBTITLE
DISC MENU
PARENTAL
PASSWORD
DEFAULT
MAIN PAGE
SET PARENTAL CONTROL
P1430 TVD-1310( 0374-04).p65 2002/12/30, PM 05:2112
Page 13
13
DVD Setup Mode
• The Setup Mode provides the menu for the configuration of TV mode, Speakers mode, Dolby
mode and user preference.
• Item selection in the Setup Menu is done by using the Navigation Arrows and the ENTER
key.
• To exit the Setup Menu, choose the EXIT option in the Setup Menu and press ENTER, then
press the Setup Button.
Setup Menu Items
Press the SETUP button on the remote control. The following menu will be shown :
NOTE: (The setup menu is displayed in stop mode only)
234567890123456789012345678901212345678
9
234567890123456789012345678901212345678
9
GENERAL SETUP
TV Display
• Normal/PS
This is selected when the DVD player
is connected to a normal TV. Widescreen images are shown on the
screen, but with some parts cut
automatically.
•
Normal/LB
This is selected when the player is
connected to a normal TV. Widescreen images are shown on the
screen, with black belt on the top and
bottom.
• WIDE
This is selected when the player is connected to a wide-screen TV.
SETUP MENU -- MAIN PAGE
GOTO GENERAL SETUP PAGE
GENER ALSETUP
SPEAKER SETUP
DOLBY DIGITAL SETUP
VIDEO SETUP
PREFERENCE SETUP
EXIT SETUP
-- GENERAL SETUP PAGE --
SET TV DISPLAY MODE
2345678901234567890
1
2345678901234567890
1
2345678901234567890
1
2345678901234567
8
2345678901234567
8
TV DISPLAY NORMAL/PS
ANGLE MARK NORMAL/LB
OSD LANG WIDE
CAPTIONS
SCREEN SAVER
MAIN PAGE
16
-- VIDEO SETUP PAGE --
1234567890123456
1
23456789012345
6
1
23456789012345
6
1234567890123456
23456789012
3
BRIGHTNESS
CONTRAST
MAIN PAGE
0
BRIGHTNESS
VIDEO SETUP
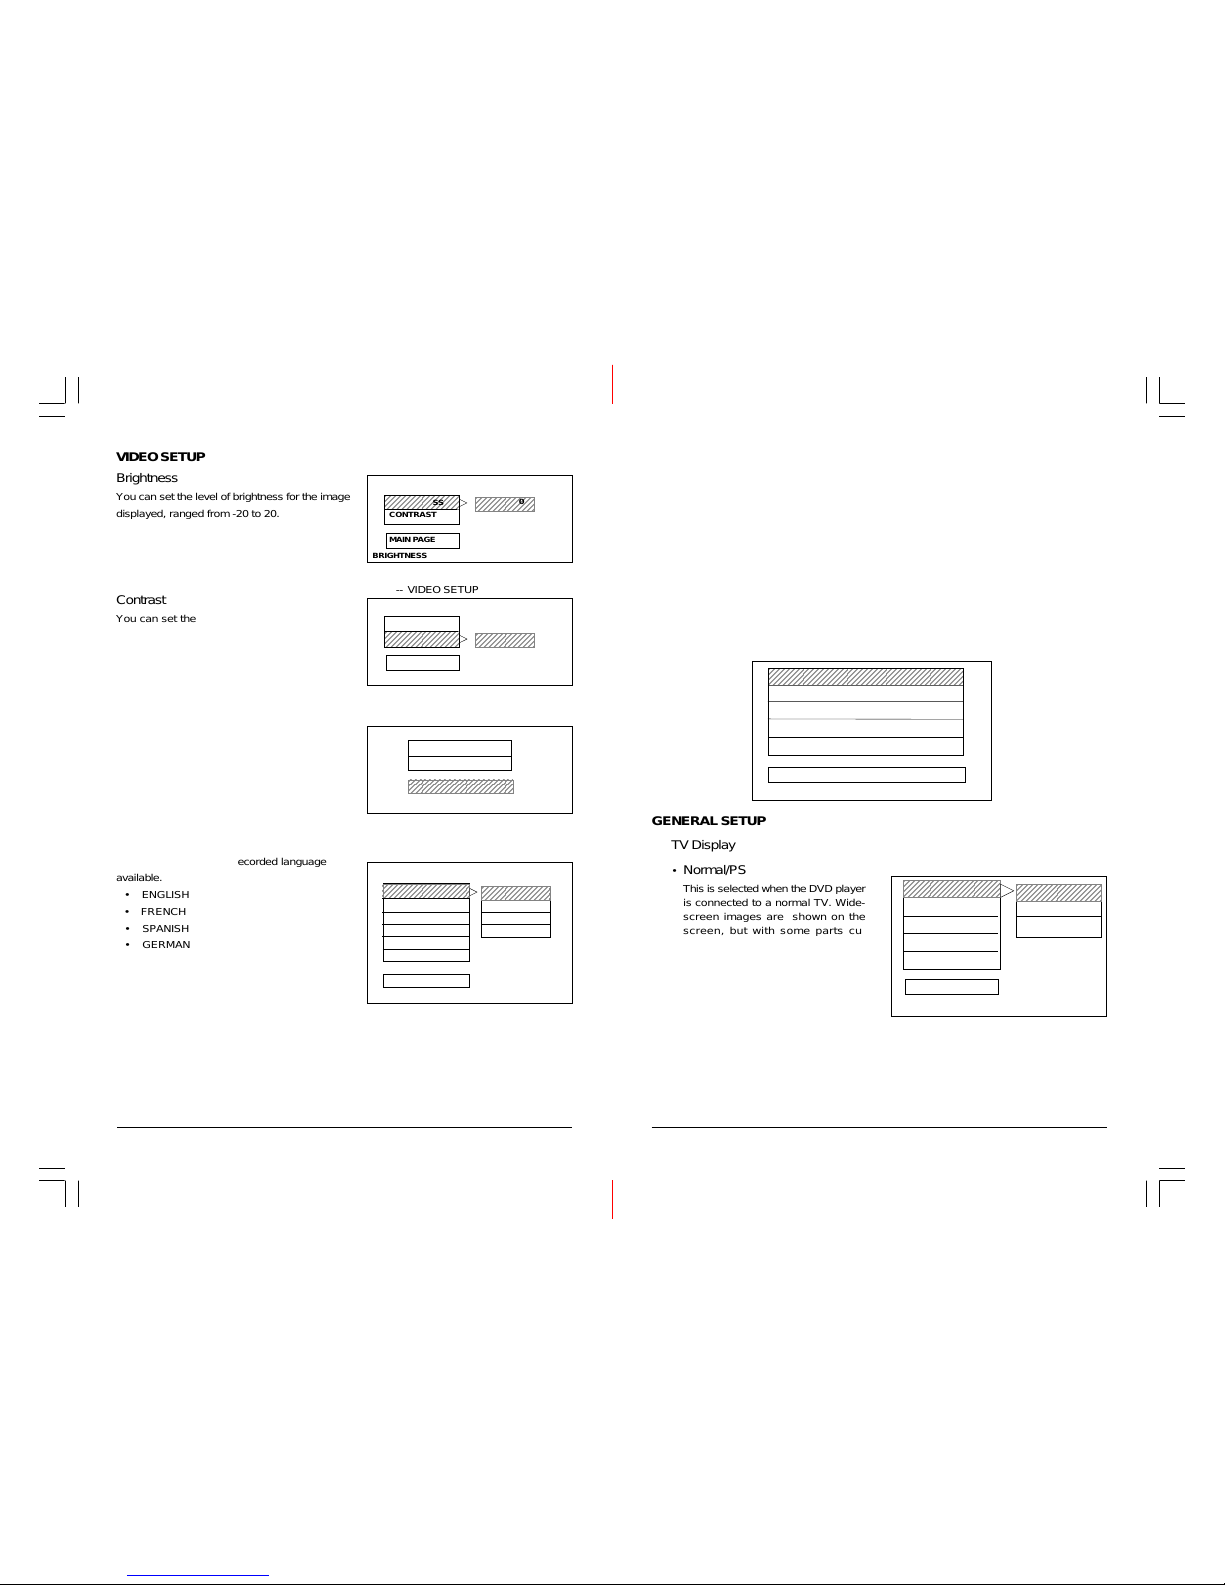
Brightness
You can set the level of brightness for the image
displayed, ranged from -20 to 20.
Contrast
You can set the level of contrast for the image
displayed, ranged from –16 to 16.
Main Page
Go back to the main setup menu.
PREFERENCE PAGE – Audio
The disc will play in the recorded language
available.
• ENGLISH
• FRENCH
• SPANISH
• GERMAN
-- VIDEO SETUP PAGE --
1234567890123456
1
23456789012345
6
1
23456789012345
6
1234567890123456
23456789012
3
23456789012
3
BRIGHTNESS
CONTRAST
MAIN PAGE
0
CONTRAST
-- VIDEO SETUP PAGE --
1234567890123456789012
1
23456789012345678901
2
1
23456789012345678901
2
1234567890123456789012
BRIGHTNESS
CONTRAST
MAIN PAGE
BACK TO MAIN PAGE
-- PREFERENCE PAGE --
23456789012345678
9
23456789012345678
9
123456789012345
1
2345678901234
5
1
2345678901234
5
123456789012345
ENGLISH
FRENCH
SPANISH
GERMAN
AUDIO
SUBTITLE
DISC MENU
PARENTAL
PASSWORD
DEFAULT
MAIN PAGE
PREFERRED AUDIO LANGUAGE
P1430 TVD-1310( 0374-04).p65 2002/12/30, PM 05:2113
Page 14
14
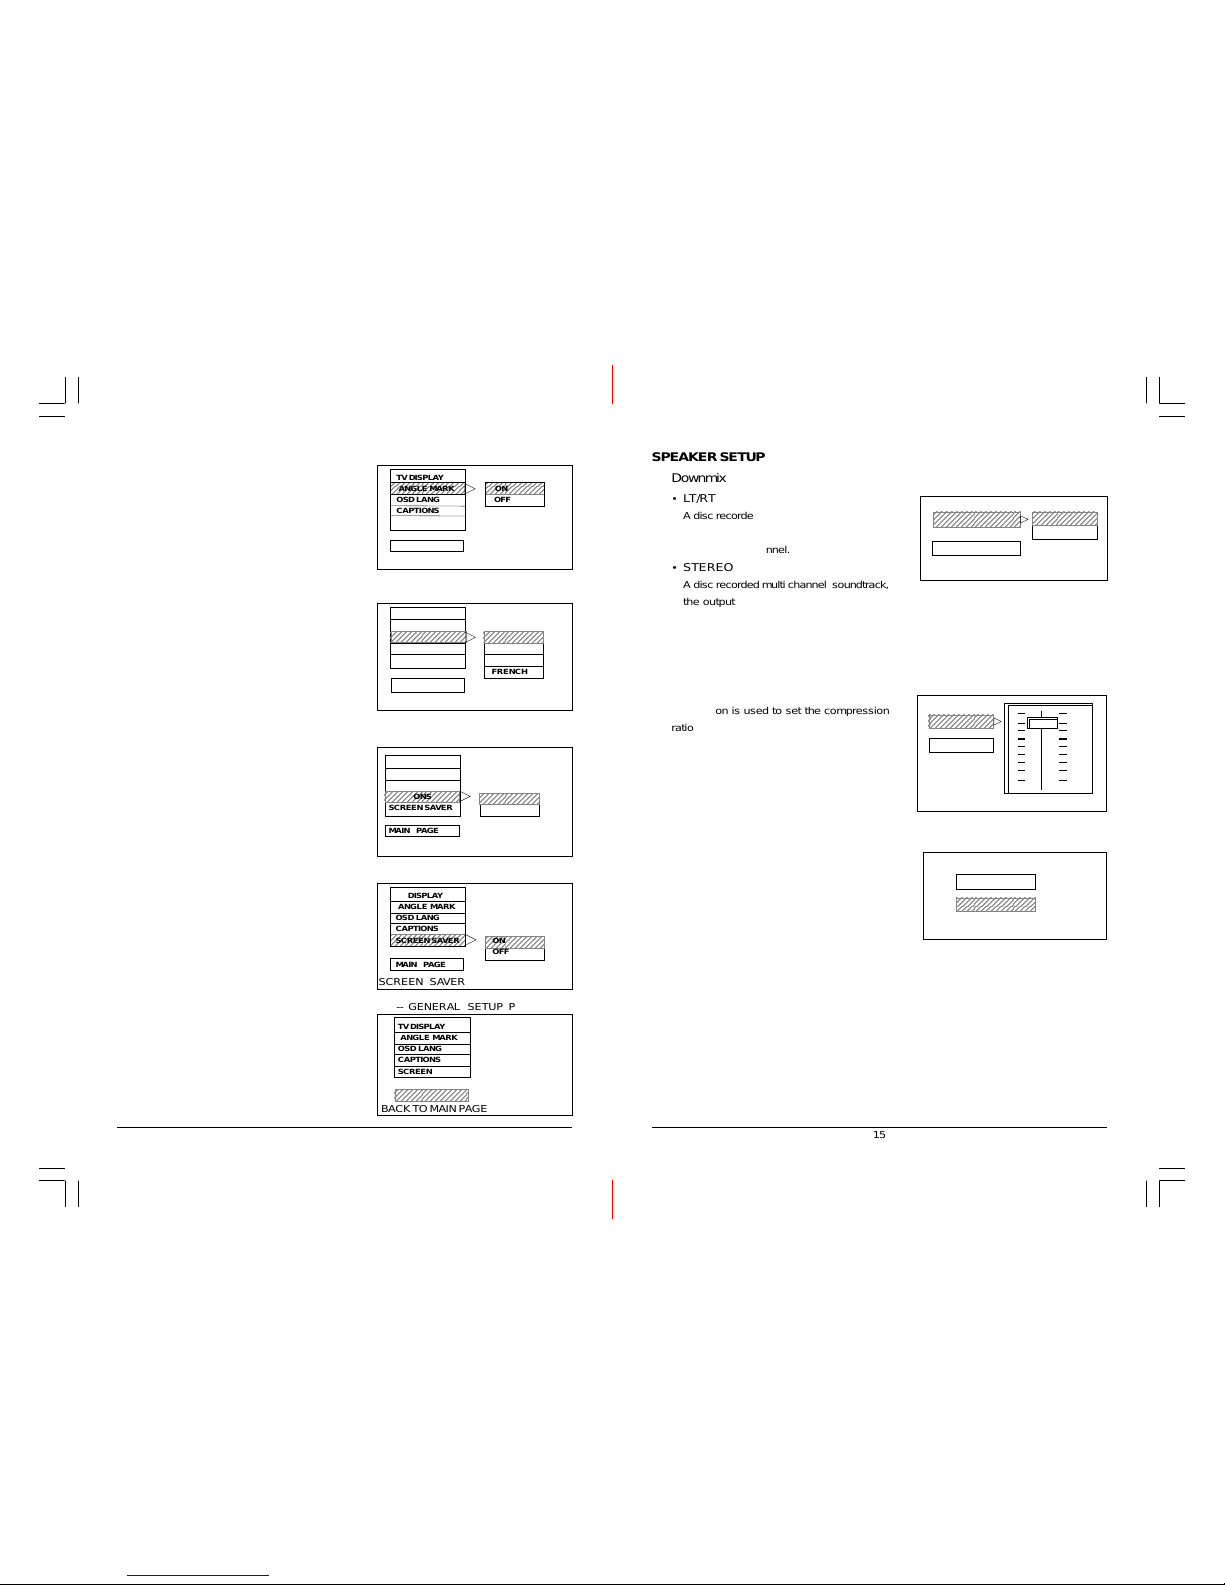
Angle Mark
This only works when there is an angle mark
on the disc. Select ON, the screen shows the
mark when playing DVD.
•On
• Off
OSD (On Screen Display) Language
This is used to select the OSD language.
• ENGLISH
• SPANISH
• GERMAN
• FRENCH
Captions
This option can show or hide the captions.
• On (Show captions)
• Off (Hide captions)
Screen Saver
Start the screen saver, the screen saver image appears when the player stops or the image is frozen for a few minutes. This saver
can keep the screen from being damaged.
• On (Start the screen saver).
• Off (Remove the screen saver).
Main Page
Go back to the Setup Main Menu.
-- GENERAL SETUP PAGE --
SET ANGLE MARK
23456789012345623456789012
3
TV DISPLAY
ANGLE MARK ON
OSD LANG OFF
CAPTIONS
SCREEN SAVER
MAIN PAGE
-- GENERAL SETUP PAGE --
SET OSD LANGUACE
23456789012
3
23456789012345
6
-- GENERAL SETUP PAGE -
CLOSED CAPTION
23456789012345623456789012
3
23456789012
3
ON
OFF
TV DISPLAY
ANGLE MARK
OSD LANG
CAPTIONS
SCREEN SAVER
MAIN PAGE
BACK TO MAIN PAGE
23456789012345
6
TV DISPLAY
ANGLE MARK
OSD LANG
CAPTIONS
SCREEN SAVER
MAIN PAGE
-- GENERAL SETUP PAGE -
23456789012345
6
23456789012345
6
TV DISPLAY
ANGLE MARK
OSD LANG
CAPTIONS
SCREEN SAVER
MAIN PAGE
SCREEN SAVER
23456789012
3
ON
OFF
-- GENERAL SETUP PAGE -
TV DISPLAY
ANGLE MARK
OSD LANG
CAPTIONS
SCREEN SAVER
MAIN PAGE
ENGLISH
SPANISH
GERMAN
FRENCH
15
SPEAKER SETUP
Downmix
• LT/RT
A disc recorded multi channel soundtrack,
the output signal will be incorporated to
left and right channel.
• STEREO
A disc recorded multi channel soundtrack,
the output signal will be incorporated to
stereo.
DOLBY DIGITAL SETUP
Dynamic
This option is used to set the compression
ratio in order to control the sound (volume)
contrast.
Main Page
Go back to the Main Page
-- SPEAKER SETUP PAGE --
23456789012345678
9
23456789012345678
9
DOWNMIX
2345678901234
5
LT/RT
STEREO
MAIN PAGE
SET DOWNMIX MODE
234567890123
4
234567890123
4
DYNAMIC
AUDIO SETUP
-- DOLBY DIGITAL SETUP --
FULL
6/8
4/8
2/8
OFF
DYNAMIC RANGE COMPRESSION
-- DOLBY DIGITAL SETUP --
234567890123456
7
DYNAMIC
MAIN PAGE
GOTO AUDIO SETUP PAGE
P1430 TVD-1310( 0374-04).p65 2002/12/30, PM 05:2114
 Loading...