

Page 1

Table of contents
Safety Information 3
Maintenance and Care 4
Welcome 5
Section 1 - Your Advent PC
Your Advent PC 8
The Mouse 9
The Keyboard 10
Monitors 11
Optical Drives 12
Memory Card Readers 13
Floppy Disk Drive 14
Base Unit 16
Speakers 17
Modem and Network (LAN) 18
Section 2 - Introducing Microsoft Windows XP
Introducing Windows XP 20
The Desktop 21
The Task Bar 22
Start Menu 22
Notification Area 23
Recycle Bin 23
Shortcuts 23
Help and Support Center 24
How do I… 25
Section 3 - Windows XP Entertainment
Windows XP Entertainment 33
Media Player 10 34
Windows Movie Maker 2 39
Games 43
Section 4 - The Internet
The Internet 47
Internet Explorer 6 48
Outlook Express 6 53
Windows Messenger 56
Anti-virus / Firewalls 57
Windows Security Center 59
Windows Firewall 60
Pop-up Blocker 65
Page 1
Page 2

Section 5 - Looking after Windows XP
Looking after Windows XP 68
Windows Update 69
Windows Service Packs 73
Disk Cleanup Wizard 74
Disk Defragmenter 76
Section 6 - Windows XP Utilities
Windows XP Utilities 79
Control Panel 80
Date and Time 82
Accessibility Options 83
Desktop Cleanup Wizard 85
User Accounts and Passwords 86
Section 7 - Troubleshooting and Support
System Restore 91
Help and Support Center 95
Troubleshooting 96
Reinstalling supplied Drivers and Software 99
System Recovery 100
Recovery CD Creator 104
Further Help 105
Page 2
Page 3

Important safety information
The following information is designed to help you use and
enjoy your Advent computer safely.
1. Always follow the instructions on any safety labels, or in
this manual.
2. You should only use your Advent PC on a sturdy, stable,
flat surface.
3. Do not cover, block, or otherwise obstruct any openings
or vents on your Advent PC. They are needed to prevent
overheating.
4. Do not put your Advent PC in a cupboard, or any other
enclosed space, unless there is adequate ventilation.
5. Never push objects through the openings on the case.
Doing so exposes you to dangerous voltages.
6. You should only connect your Advent PC to an AC power
source indicated on the rear of the case. If you are
unsure please contact your local store for help.
7. Do not place objects on the power cord ,and make sure it
is located away from walkways to avoid tripping hazards.
8. If you connect your Advent PC to an extension socket you
need to make sure that the total amperage rating of all
the products connected does not exceed that of the
extension socket.
9. You should always unplug your Advent computer and any
connected products before cleaning them.
10. Never use your Advent computer near water or liquids.
11. Your Advent is wired with a 3-pin grounding plug. This is
for your safety and you should not attempt to connect
any other type of plug, or connect it to any other type of
plug socket.
Page 3
Page 4

Maintenance and care
If you are experiencing problems with your Advent PC you
should only attempt to repair it following the instructions set
out in this manual. Improper use of your Advent PC may put
your safety at risk, and result in extensive damage to your
product.
You should unplug your Advent PC and contact PC
ServiceCall on 0870 901 3000 (24 hours) for help and
advice in any of the following cases:
1. If the power cord or plug is damaged or frayed.
2. If you spill liquid on, or into any part of your PC.
3. If your PC is exposed to rain, water, or any other liquids.
4. If you drop your PC, or the case is damaged in any way.
5. If your PC exhibits changes in performance that would
indicate a need for service.
Warning
If you ever need to remove the casing you should observe
the following:
1. Always unplug your PC and any connected products
before you remove the case.
2. Always make sure the case is replaced securely, and all
screws are tightened before you connect your PC or
connected products to the electricity supply.
Page 4
Page 5

Thank you for purchasing your new Advent
personal computer. We at Advent pride
ourselves on giving you the very latest
technology to meet your needs both now and
in the future.
This guide will help you make the most of
your new Advent and Microsoft® Windows®
XP Home Edition, the latest home operating
system from Microsoft®.
Each section of the guide will take you
through key areas and include “How do I”
guides that take you through common tasks
step by step.
You’ll also have access to a wealth of technical
support through our web site, email, and 24
hour telephone support help lines.
We hope you enjoy your new Advent
computer and wish you many years of trouble
free computing.
Page 5
Page 6
Important Details
There are a number of important
details that you should take a
note of should you need to use
our email support service or
support lines. It can be found at
the top of your receipt.
Store: Date of purchase:
Receipt no.: Branch no.:
PC Performance no.:
Serial no.:
(Located on the rear of your Advent PC)
If you need help or assistance with your Advent computer please visit
Our website contains a wealth of support information on your PC. You will
also find helpful advice on a large range of peripherals and software. The
“How do I...” section will help you with looking after your PC, protecting
against viruses, and show you how to get the most from your PC.
If you can’t find what you are looking for you can use our email support
service to contact one of our trained technicians.
PC Repair Line 0870 901 3000 (charged at BT national rate)
PC SoftwareCall
* Maximum call duration is 20 minutes. Please ask permission from the bill payer before calling.
Callers must be over 18 years of age to call premium rate lines.
www.pcservicecall.co.uk
0906 515 1180 (charged at £1.50 per minute)*
Staple
Your
Receipt
Here
Page 6
Page 7

Your
Advent PC
Page 7
Page 8

Your Advent PC
A computer is made up of many components both inside and
outside the PC’s case. These components are known as the
PC’s ‘hardware’.
Each piece of hardware serves an important function in
making your Advent computer work. In order to get the best
use from your PC you need to understand some of the most
common components that you will use, what they do, and
how to look after them.
This section of your manual covers the following hardware
components:
• Mouse
• Keyboard
• Monitor (the screen)
• Optical drives (CD writer, DVD etc.)
• Floppy disk drives
• Memory card readers
• Speakers
• Modem (for the Internet)
• LAN card (create a network)
• The PC base unit
Take a few moments to familiarise yourself with each of
these components as they are the parts of the computer that
you will use on a daily basis.
Note: the illustrations in this section are examples
only, the hardware, drives, and ports on your Advent
PC may differ slightly.
Page 8
Page 9
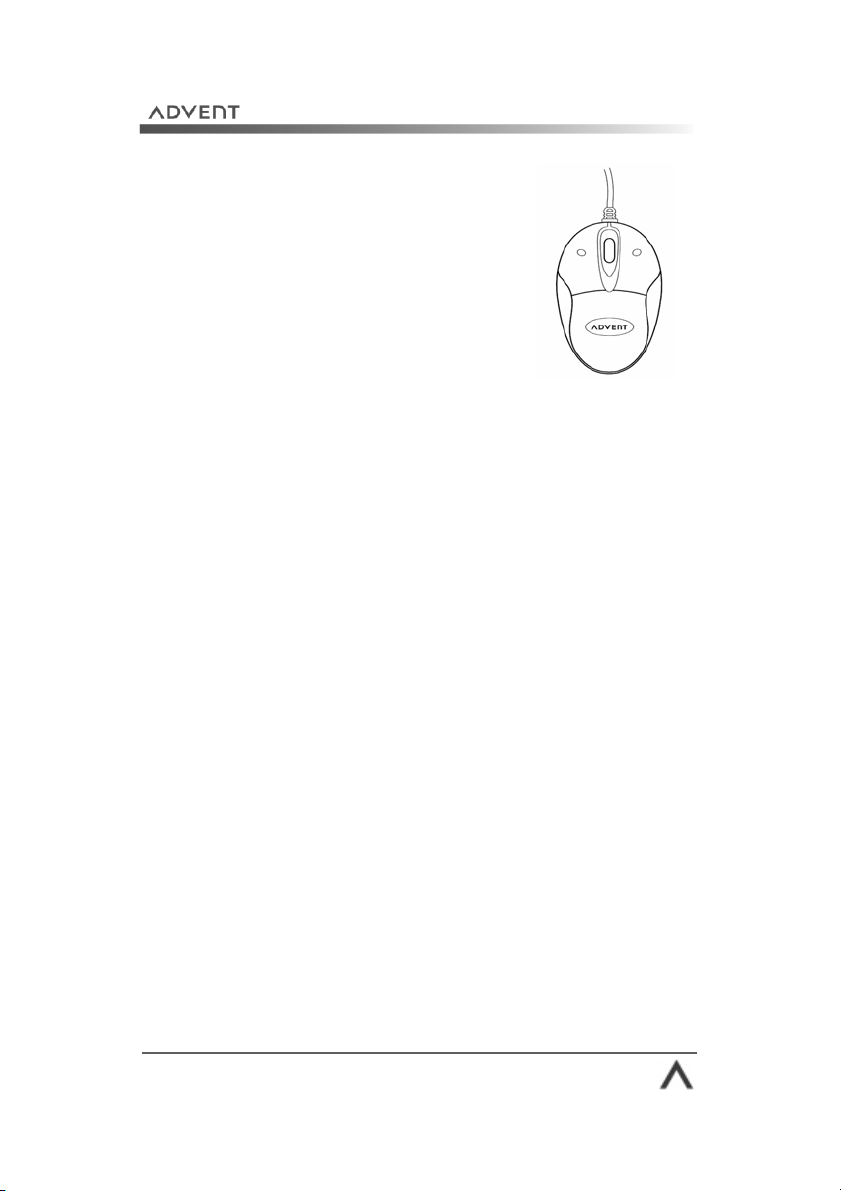
The Mouse
The mouse is one of the main tools for
working with your computer. It allows
you to move the arrow around the
screen. You can also use it to open
programs and interact with menus and
text. A normal mouse has three buttons:
• Left button: this is your main button. Use a single-
click to select an item, or insert the cursor at a certain
point in text. Use a double-click (pressing the button
twice, quickly) to open a program or document.
• Right mouse button: you can click an icon, or area
on the screen, to open a “Context Menu”. These menus
give you quick access to common functions, for
example, copy and paste.
• Scroll wheel: the scroll wheel changes functions
depending on what program you are in. On the
Internet or in a document you can scroll up and down
a page. In a graphics program it might let you zoom in
and out on a picture.
How do I…
Drag and drop? You can drag and drop text, icons, or
shortcuts with your mouse. Click an item with the left button
and keep the button held down. Move the cursor to the new
location and let go.
Clean my mouse? It is important to keep your mouse clean
to get the best performance. Use a soft cloth with polish to
clean the outside. If your mouse has a ball you need to
regularly clean the ball, you also need to clean the rollers
inside with a damp cotton bud.
Page 9
Page 10
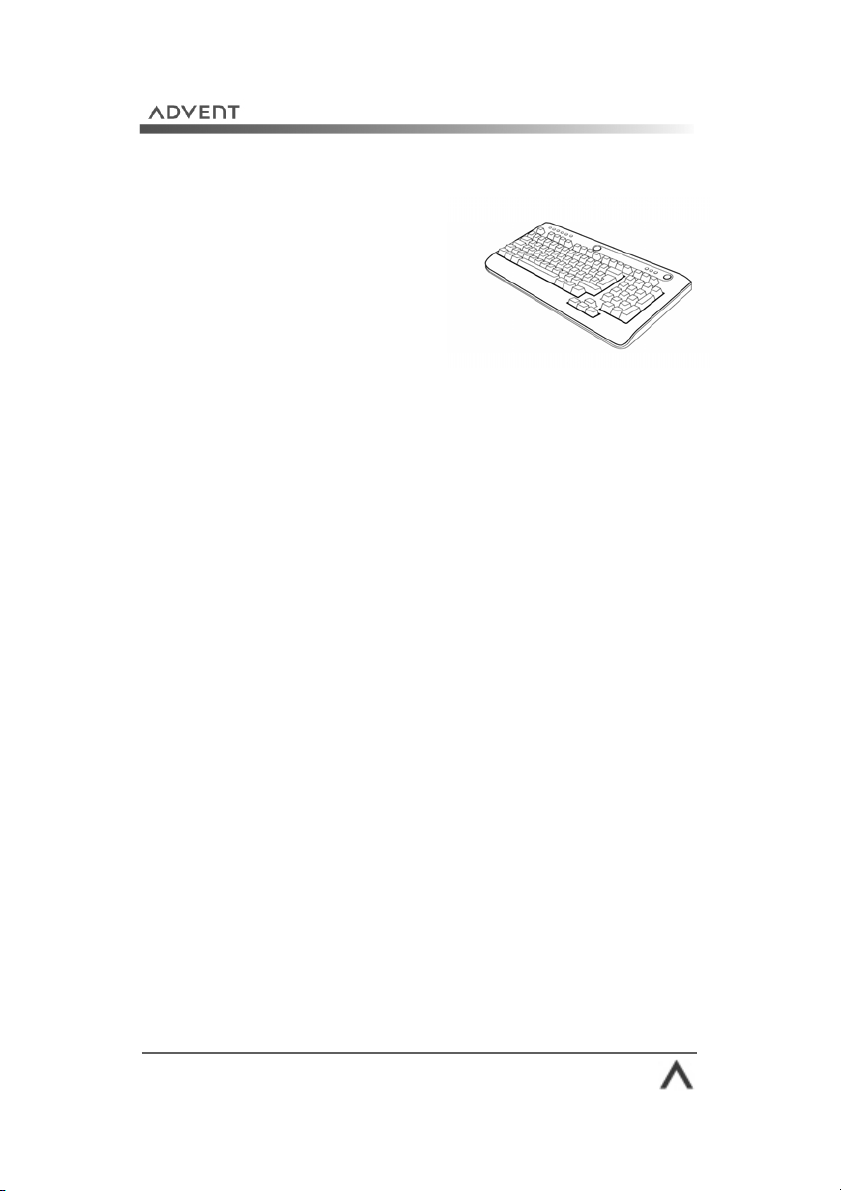
The Keyboard
Along with the mouse, your
keyboard is one of the main
tools for interacting with your
PC. The keyboard allows you to
enter text into the PC, for
example, in a letter, or email.
A lot of modern keyboards also have customisable “hot
keys”. These hot keys can be used to open your favourite
websites and programs. Some even allow you to control
music and DVD playback.
How do I…
Use keyboard shortcuts? Keyboard shortcuts are a
combination of key presses that perform common functions,
for example, pressing the CTRL and C keys allows you to
copy something, and CTRL and V allows you to paste it
somewhere else. The Help and Support Center contains a list
of common keyboard shortcuts.
Click Start > Help and Support.
Clean my keyboard? Over time your keyboard is filled with
house dust, food crumbs and other debris causing the
keyboard to become sluggish in use.
Page 10
Page 11

Monitors
The monitor is used to display
the picture from your PC. You
may hear people refer to the
monitor as “the screen”, “the
display”, or the “VDU”.
There are 2 main types of PC
monitor:
• CRT (Cathode Ray Tube): these are the most common
type of monitor supplied with a PC . Their downside is
weight, size, and energy consumption.
• TFT (Thin Film Transistor): also referred to as flat
panels. They require less energy and provide a sharper
picture. TFTs are ideal for places where space is at a
premium.
How do I…
Clean my monitor? You should clean your monitor
regularly to avoid eye strain. Special care needs to be taken
when cleaning your monitor as they have a special coating
on the surface of the screen. You should use a special
cleaner, or wipes, (available from PC World, Dixons and
Currys) never use household polish. If you use a spray
cleaner, spray it onto a soft cloth then wipe the screen.
Never spray directly onto the monitor.
Page 11
Page 12
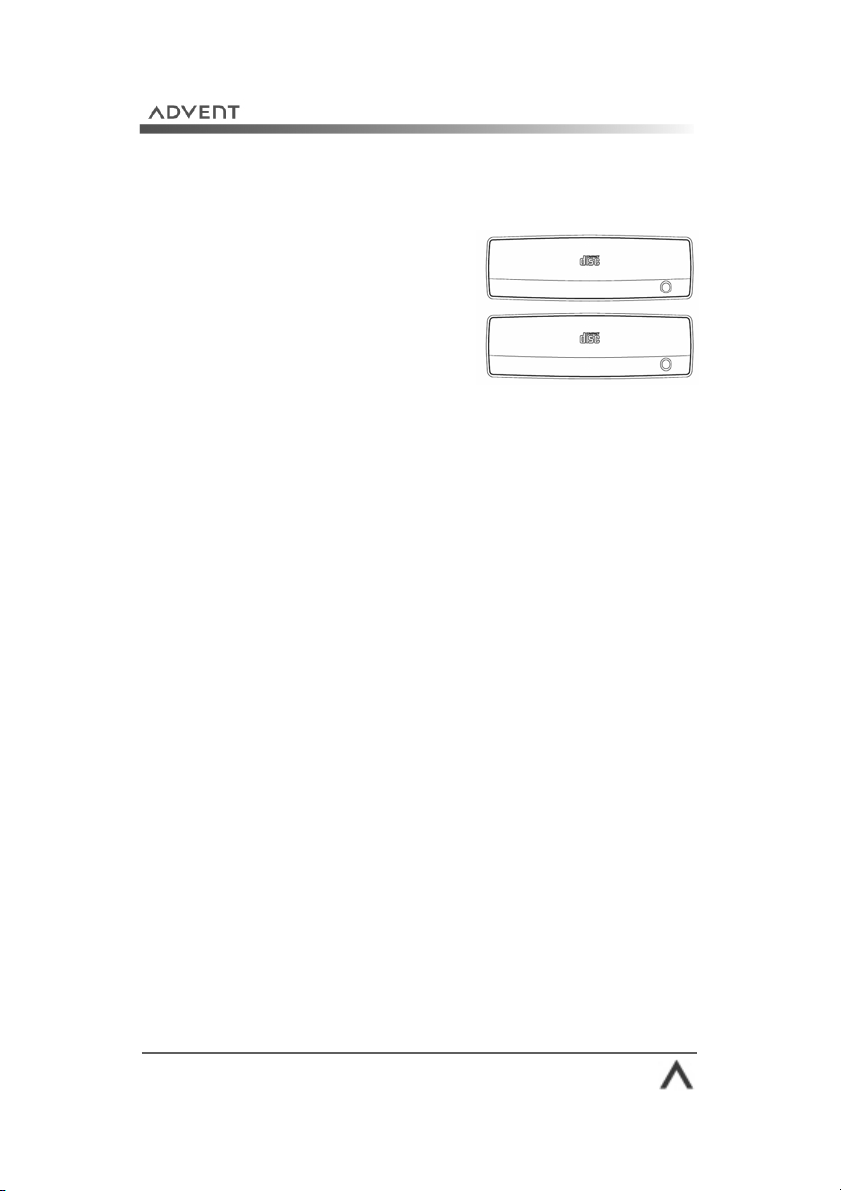
Optical drives
The term “optical drive” refers to
any laser based disc drive. These
include:
• CD ROM
• DVD ROM
• Recordable CD
• Recordable DVD
Optical drives are fitted to most modern computers, most
having both DVD ROM and recordable CD / DVD drives.
These drives have revolutionised modern computing because
they allow far larger amounts of data to be stored than a
floppy disk. As an example, a CD holds between 640 and 700
MB of data compared to 1.44 MB on a floppy disk.
How do I…
Load a disc? Normally you would press the eject button on
the front of the CD drive. This will open the tray. Insert your
disc with the label face up. Press the eject button again, or
gently push the tray to close it. Most CDs will then run
automatically using a Windows® feature called ‘Auto Play’.
Clean my drives? You can purchase special CD/DVD
cleaners from PC World, Dixons, and Currys. These gently
clean the lens inside the drive which can become covered
with dust and affect reading of the disc.
Page 12
Page 13
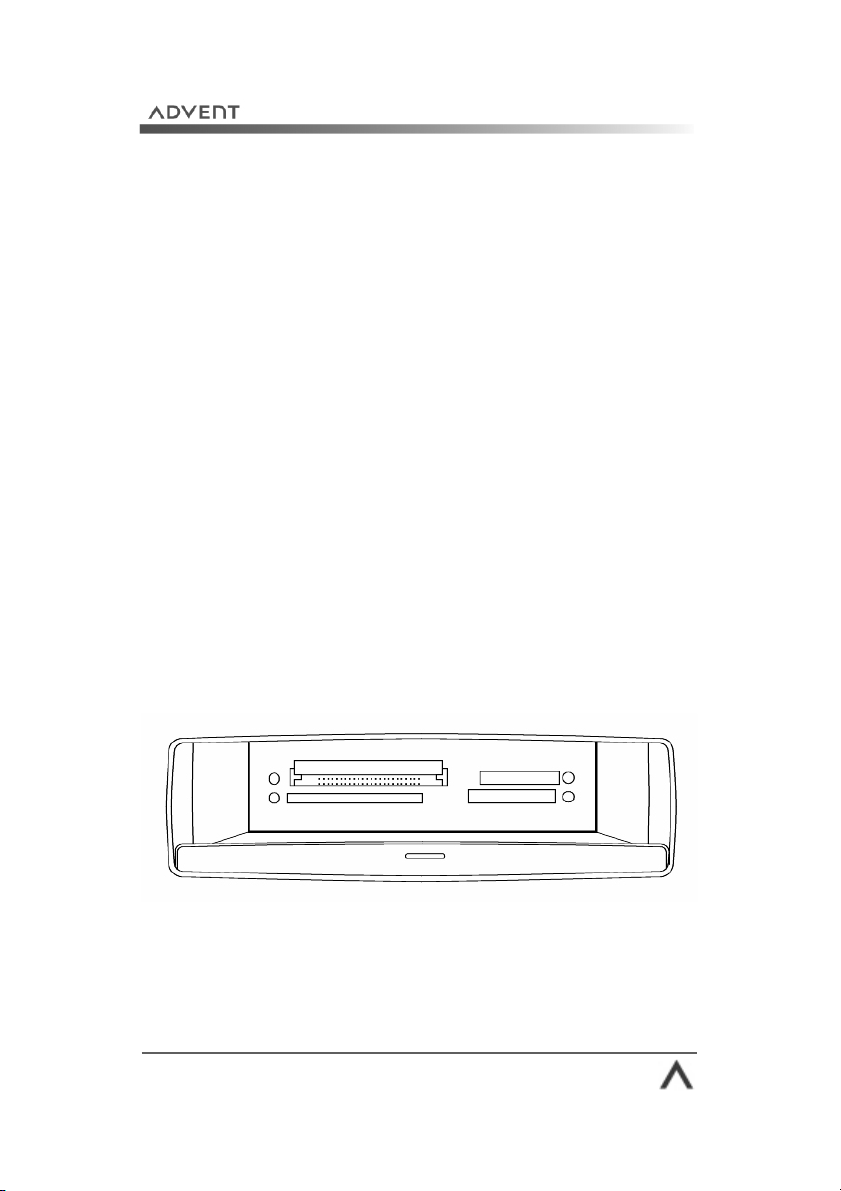
Memory card readers
Memory card readers are a relatively new addition to
personal computers and are a great alternative to floppy
disks. Memory cards come in several different formats and
are used in a variety of electronic devices including digital
cameras, PDAs, mobile phones and more.
Current formats include:
• SD Cards
• IBM Microdrive
• MMC
• Compact Flash I and II
• Sony Memory Stick (Memory Stick, Duo, and
MagicGate)
• Smart Media
• XD Picture Card
You can buy these cards in a variety of sizes from 4 MB to 1
GB and above.
Your Advent is supplied with the following readers:
Compact Flash (top left), SD™ Card (top right),
Smart Media (bottom left), MMC (bottom right).
Page 13
Page 14
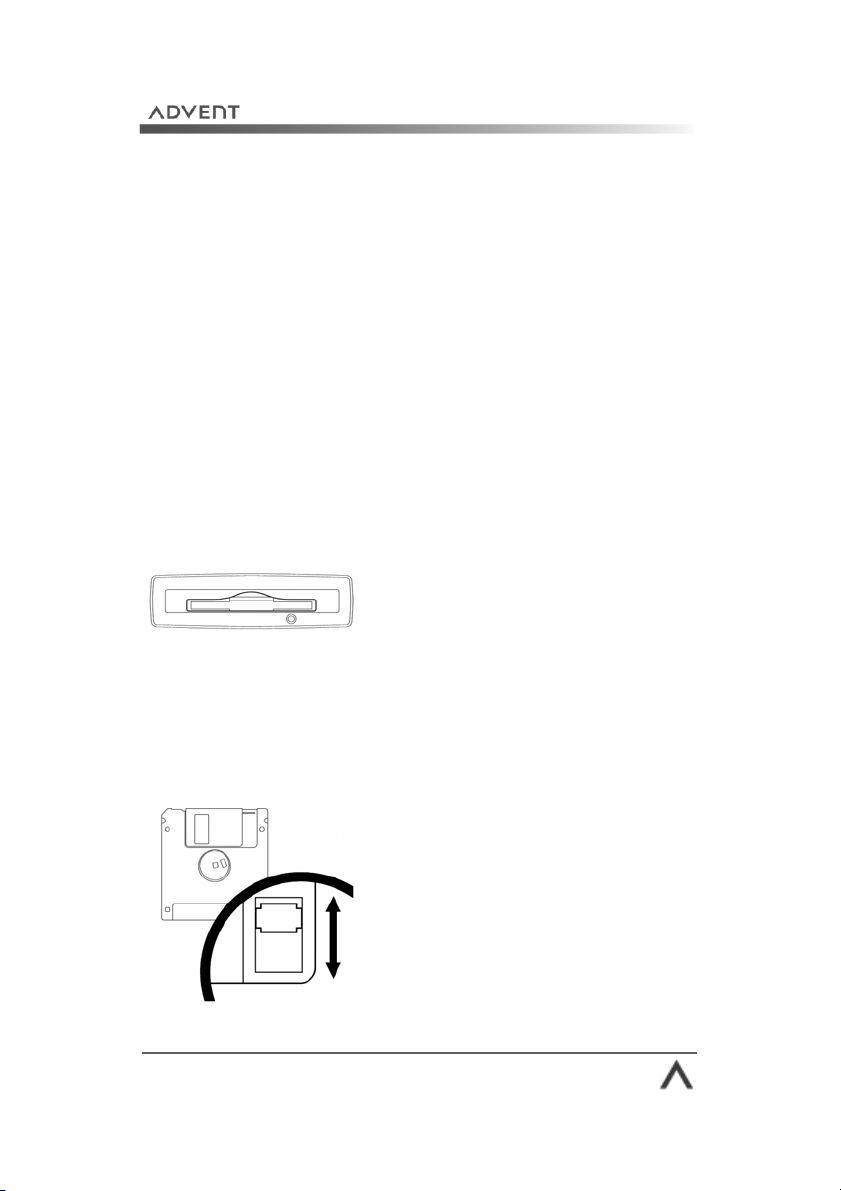
Floppy disk drive
The humble floppy disk has been an integral part of a
personal computer from the very early days of computing.
They have been an ideal way of transferring files from one
computer to another. However, in the digital age most files
are now too big for the 1.44 MB floppy disk and are being
replaced with recordable CD/DVD and memory cards.
How do I…
Insert a disk?
Insert the floppy disk with the label
facing upwards into the drive until
you hear a click.
Press the Eject button to remove
the floppy disk.
Do not eject the disk while the drive
light is on, this can damage the
surface of the disk.
Protect my data?
Slide the protection tab:
Open to protect
Closed to allow data to be written
and deleted.
Page 14
Page 15
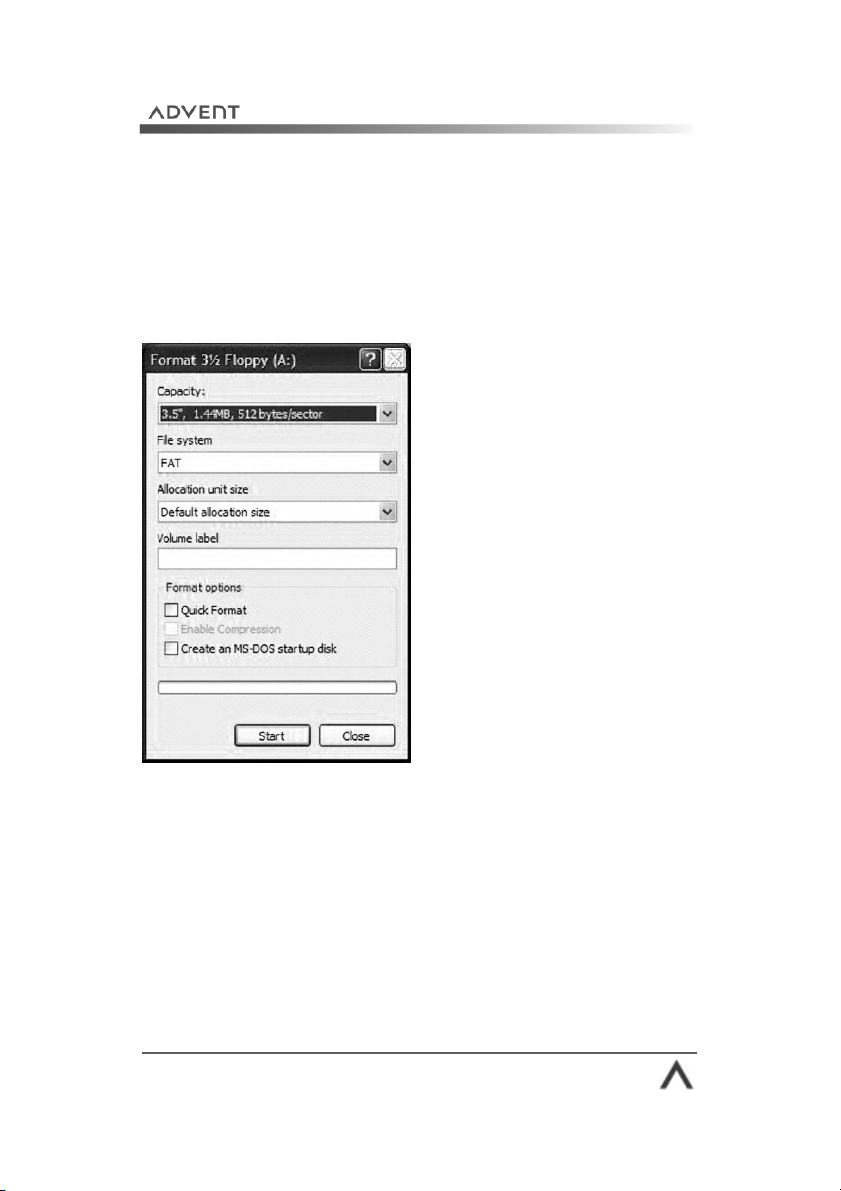
Format a floppy disk?
Most disks come pre-formatted when you buy them,
however, there may be occasions where you will need to do
this manually, for example, when you want to erase the disk.
You can do this in Windows® XP by:
1. Insert the disk into the
floppy drive.
2. Open My Computer and
right-click the 3 1/2
Floppy (A) icon.
3. Select Format from the
menu.
4. Click Start to perform a
full format.
5. Tick Quick Format then
Start to quickly erase
any files on the disk.
Fig. 1 Format dialog box
Page 15
Page 16
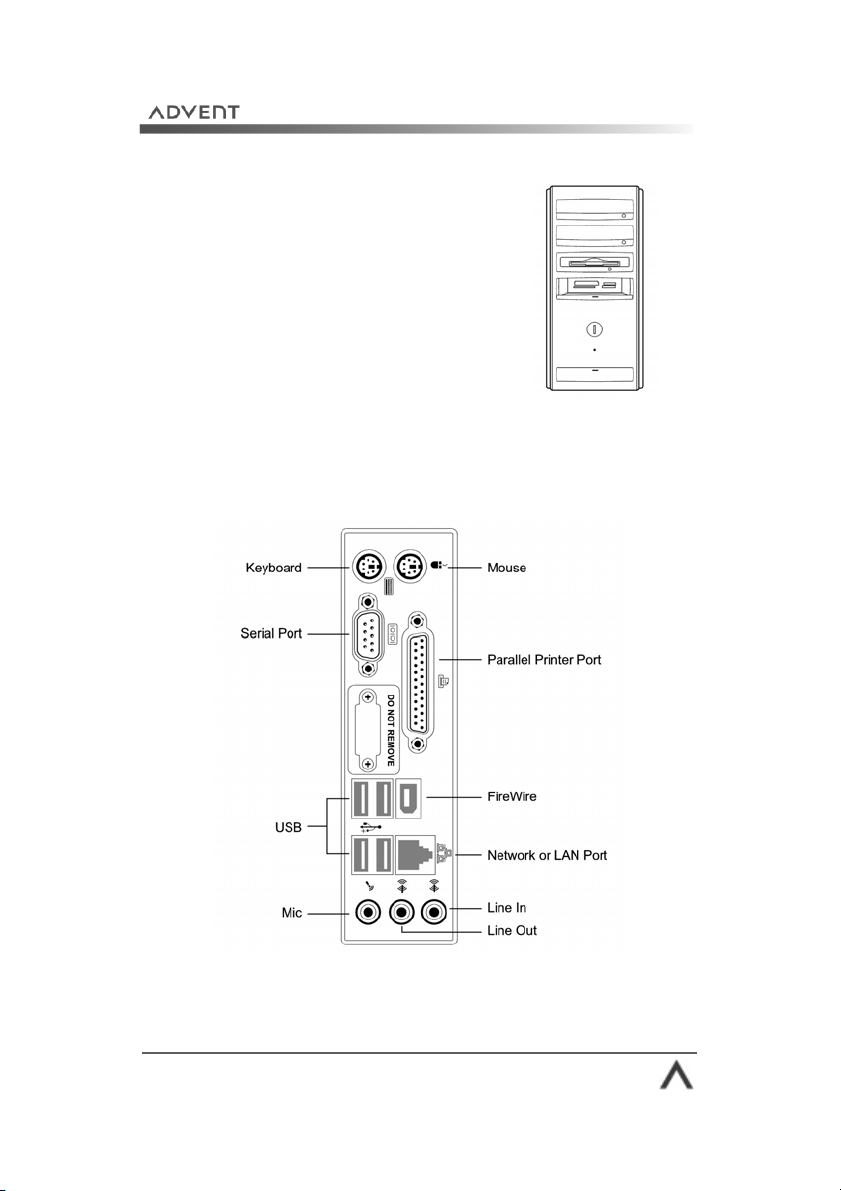
Base unit
The base unit forms the main part of
your Advent computer and contains all
the components that make it work.
Base units come in 2 configurations:
• Tower unit
• Desktop unit
On the front of your base unit you will find the CD and DVD
drives, floppy disk drive, power button, memory card
readers, and FireWire and USB ports (on some models).
Fig. 2 PC ports
Page 16
Page 17
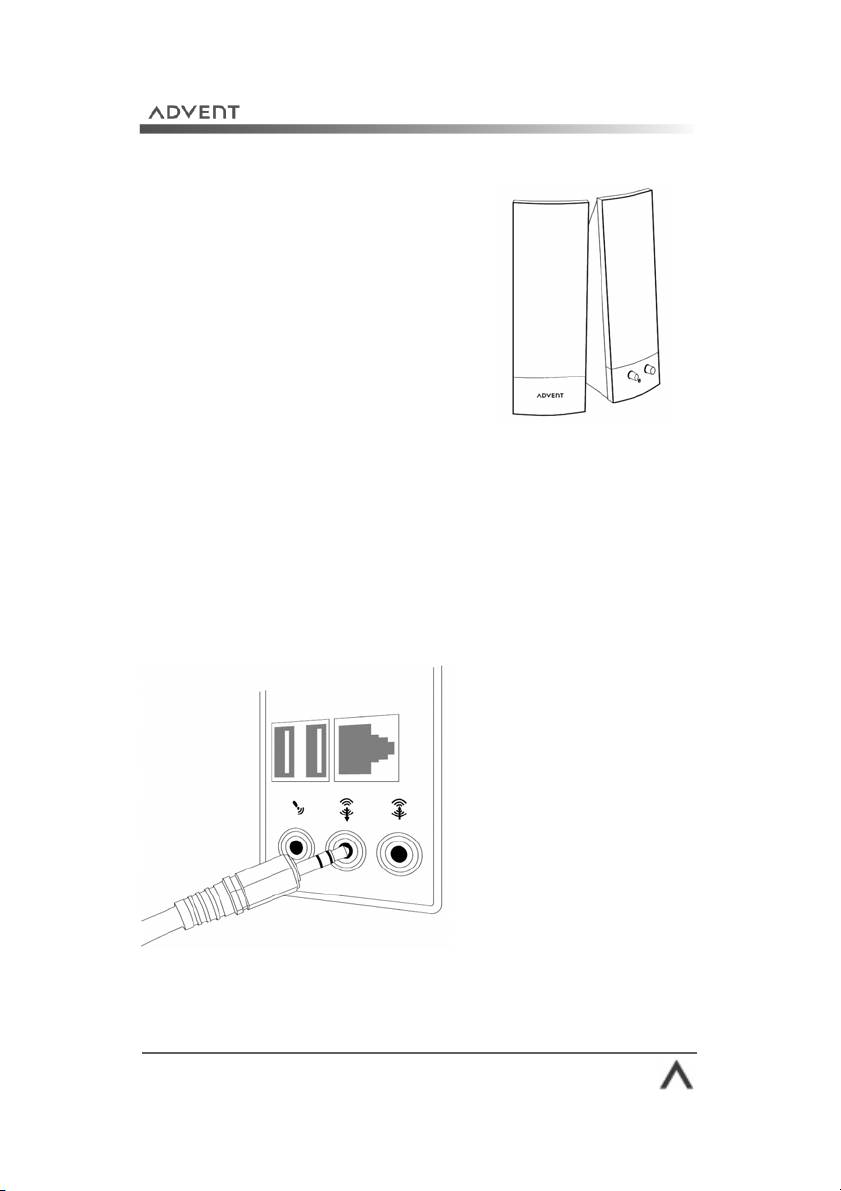
Speakers
A PC’s speakers provide sound for
your music, games, videos, and DVD
films. Depending on the sound card
supplied with your computer you can
use 2 point, 4 point, or 5.1 surround
sound speakers.
Speakers normally plug in to the “Line-out” port on the rear
of your Advent base unit (Fig.3 ). If your Advent supports 4
or 5.1 surround sound speakers you will need to adjust the
speaker configuration in the Windows® Control Panel
(methods vary depending on sound card). Refer to your
speaker’s documentation for more information.
Fig. 3 Line-out socket
Page 17
Page 18
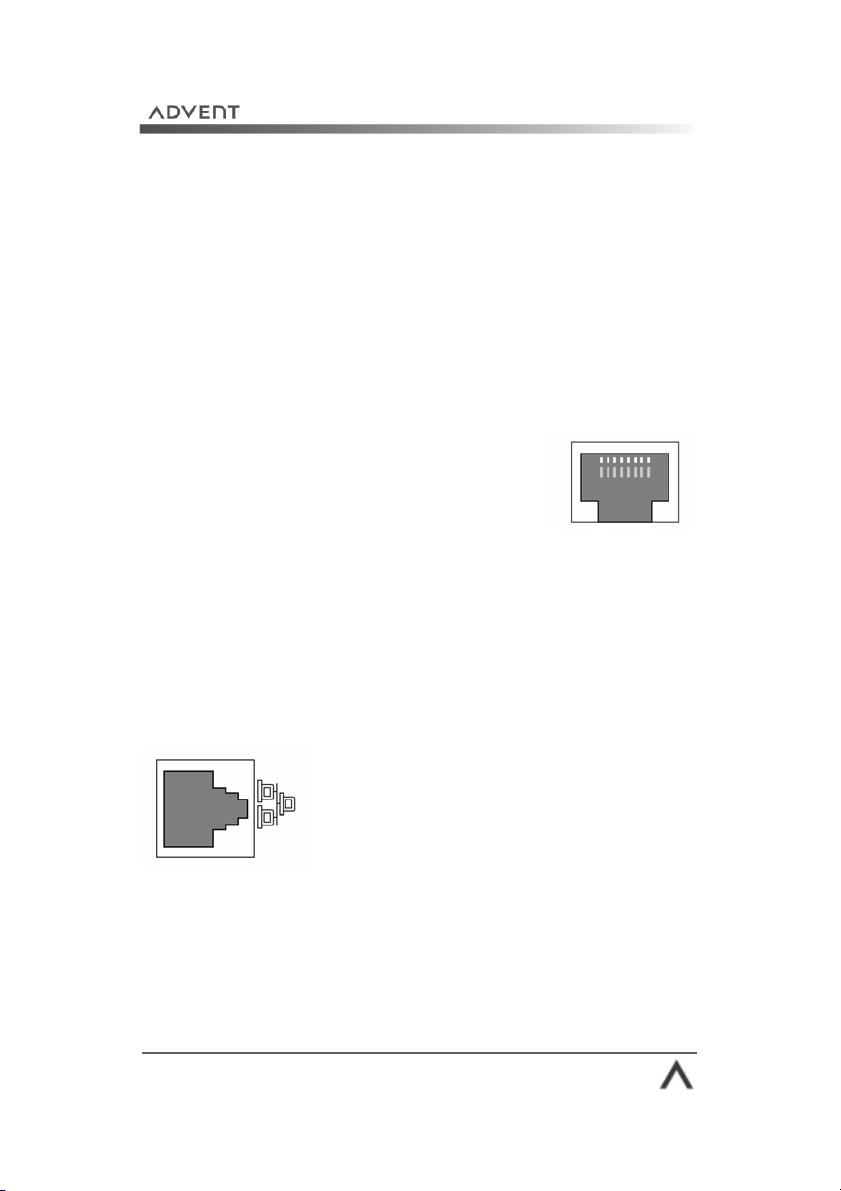
Modem and network (LAN)
There are two ports on the rear of your Advent PC that look
very similar. However, they perform different functions. It is
important that you know the difference in order to avoid
confusion later on.
The first of these is the Modem (RJ-11 port).
This port connects to your phone line and
allows you to connect to the Internet, and
send and receive faxes. Fig.4 shows a
modem port.
You should connect your phone line to the
port labelled ‘Line’. Always try to connect
your modem to the wall socket, not an
extension cable. This allows for a better
signal. You can then connect your telephone
handset to the port labelled ‘Phone’ if you wish and the port
is available (not supplied on all modems).
Fig. 4 Modem
Fig. 5 Network / LAN
The network or LAN port looks like the
one shown in Fig. 5 . Don’t confuse this
with the modem port which looks very
similar. The LAN port allows you to
connect to other computers in your
home / office to share files and an
Internet connection.
Page 18
Page 19
Introducing
Microsoft®
Windows® XP
Page 19
Page 20
Introducing Microsoft® Windows® XP
Microsoft® Windows® XP is the latest in the Microsoft®
Windows® family. For those familiar with previous versions
of Windows® you will notice a fresh new look and easier
way of working.
Windows® XP now comes in a number of versions, each
designed for a different audience. All are built around the
same core operating system.
Title Audience
Home Edition Home users with focus on
games and digital
entertainment.
Professional Edition All the benefits of Home
Edition with extra security
and network functions.
Tablet PC Edition Professional Edition
designed for Tablet PC
devices. Includes
handwriting input.
Media Center Edition The all-in-one home
entertainment centre for
music, DVD, home movies,
games and pictures.
This section of the manual will explain some of the basic
features of Windows® XP, i.e., the Desktop, which is your
main starting point in the Windows® environment.
It will also show you how to get help and support at any time
for questions, or problems you may have.
Page 20
Page 21
The Desktop
The Desktop is the first thing you will see when you turn on
your Advent computer. It is your main interface with
Windows® XP. From here you can access any file, folder, or
program installed on your system.
Those who are used to older versions of Windows® will
notice that the Desktop has changed. The most noticeable
thing is the lack of icons. This is to allow you more room to
add the things that you want!
Windows® XP is fully customisable and you can change the
Desktop picture, colours, layout, and theme to suit your
tastes.
Now we’ll explore each part of the Desktop and how to use
it.
Fig. 6 The Windows® XP Desktop
Page 21
Page 22
The Taskbar
Fig. 7 The Taskbar
The Taskbar is normally found at the bottom of the screen
(you can drag it to the top, or either side). From here you
can switch between open programs and documents, check
the time and date, and more importantly, access the Start
menu.
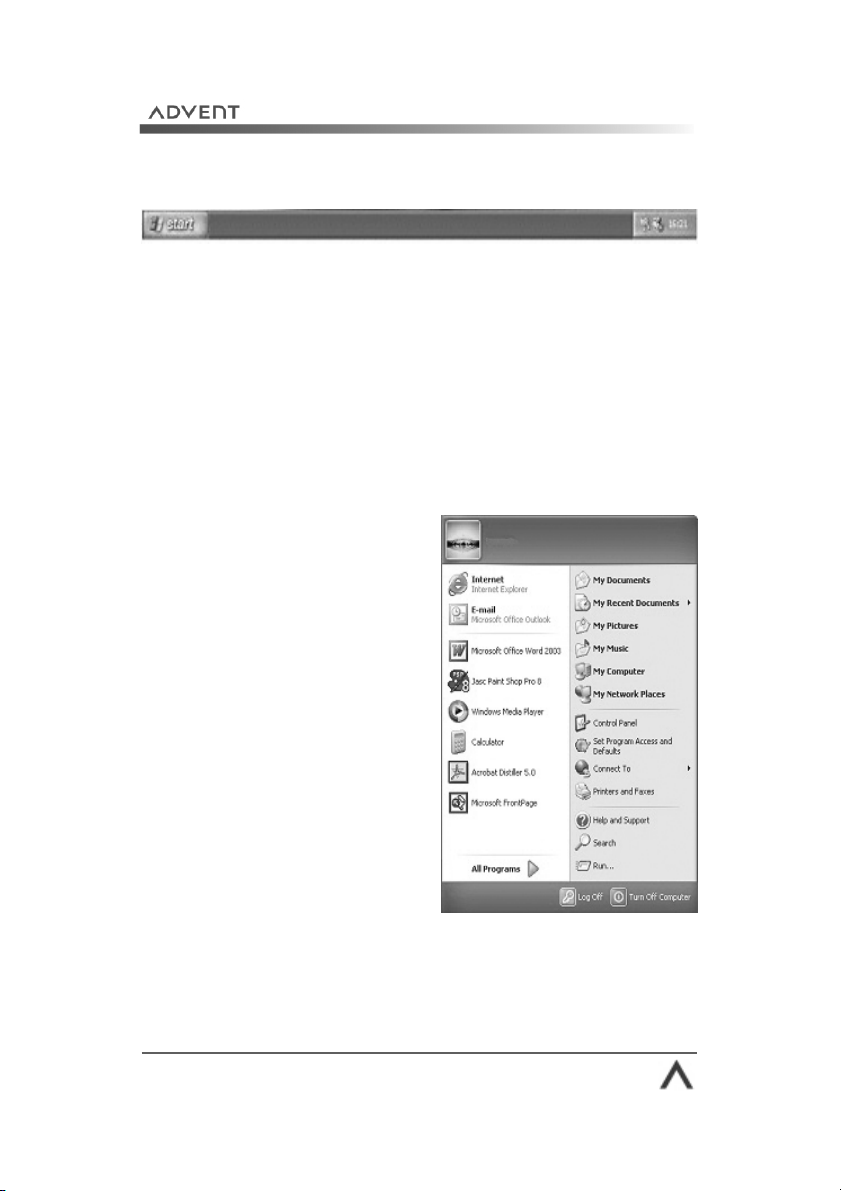
The Start menu
The Start menu has changed
from Windows® 95, 98, and
Me. You now have easy access
to commonly used areas such
as My Documents, My Videos,
My Music, E-mail, the Internet,
and Control Panel.
As you use your Advent
computer Windows® XP will
learn what your favourite
programs are and display them
on the Start menu for quick
access. This will update as
your use changes.
To open the Start menu click
the green Start button in the
bottom left of the screen.
Fig. 8 Start menu
Page 22
Page 23
The notification area
Fig. 9 Notification area
The notification area replaces the ‘System Tray’ of previous
versions of Windows®. From here you can see the time.
Hold the mouse point over the clock to see the date. You will
also see icons for running programs, for example, Windows®
Messenger.
System alerts and messages are also shown here in speech
bubbles. This happens when new hardware is detected, or
disk space is running low for example.
Recycle Bin
Fig. 10 Recycle Bin
The Recycle Bin is a temporary storage area for deleted files.
This comes in handy for those times when you accidentally
delete a file and decide that you need to keep it. You can
restore the file from the Recycle Bin to retrieve it (See “How
do I” later on).
Shortcuts
Shortcuts are a handy tool on the Windows® XP Desktop.
They are a ‘shortcut’ to a program or document that allows
you to access it quickly without having to hunt through
menus or folders.
Page 23
Page 24
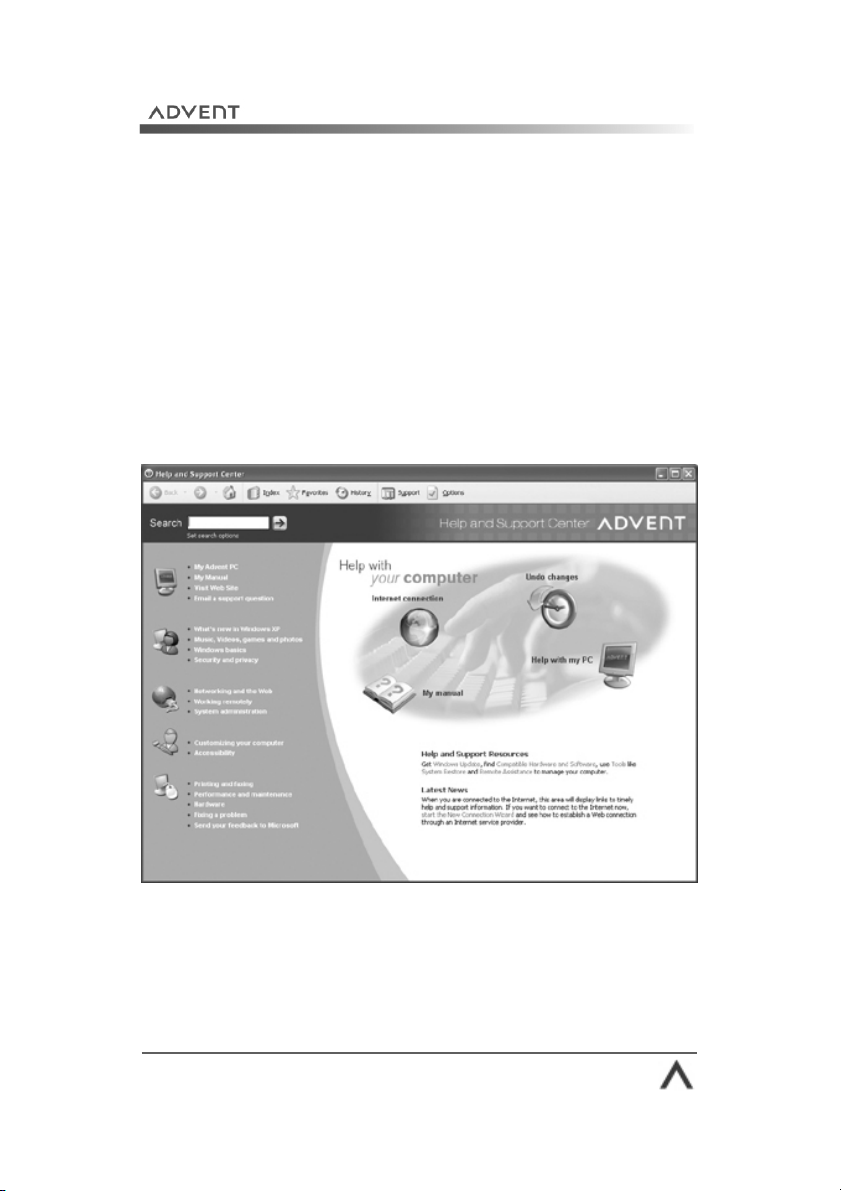
Help and Support Center
Your Advent computer comes with a customised version of
the Windows® XP Help and Support Center. From here
you can read Microsoft® help files, as well as specific help
and advice, plus PC tutorials for your Advent PC. The Help
and Support Center can also link you straight to the latest
support and information on the Internet.
To access Help and Support press the F1 key on your
keyboard, or click the Start button then Help and Support.
Fig.11 Advent Help and Support
Page 24
Page 25
How do I...
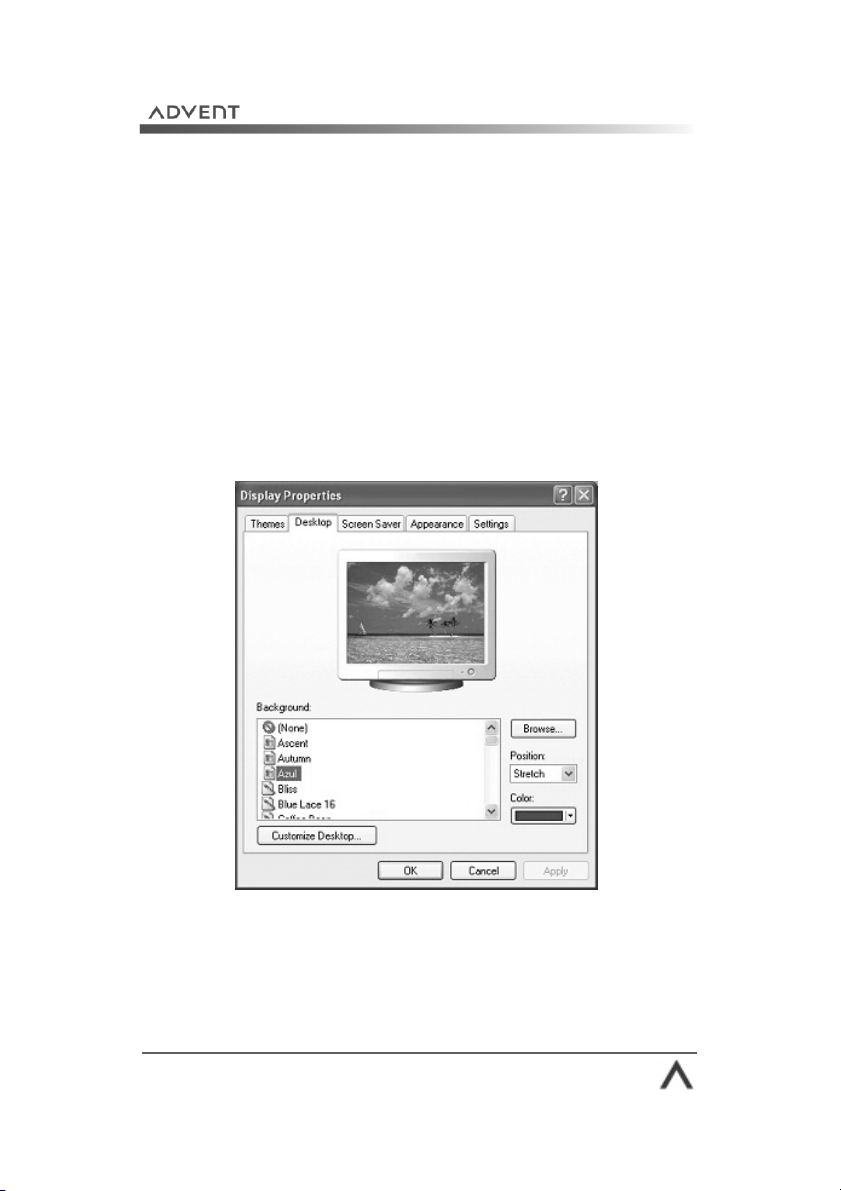
Change my Desktop picture?
1. Right-click the Desktop and select “Properties” from the
menu.
2. Click the Desktop tab (see Fig. 12 ).
3. You can select a picture from the “Background” list, or
click the Browse button to choose your own picture.
4. You will see a preview of your new picture on the
monitor. If you are happy click Apply then OK.
Fig. 12 Changing your Desktop picture
Page 25
Page 26
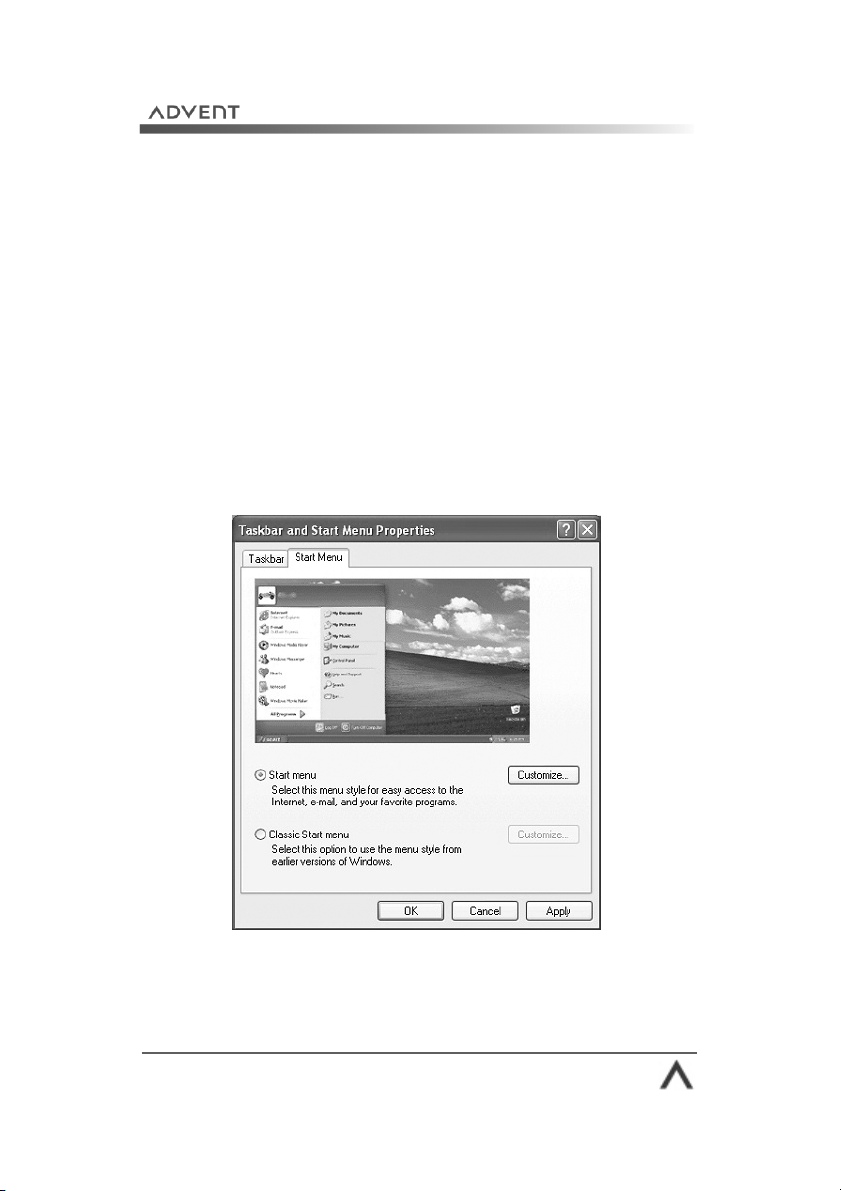
Customise my Start menu?
1. Right-click the Start button and select “Properties” from
the menu.
2. The Taskbar and Start Menu Properties screen is
displayed. Click the Start Menu tab.
3. You now have a choice. You can use the Windows® XP
Start menu by selecting “Start menu”, or you can use a
Windows® 95, 98, Me style Start menu by selecting
“Classic Start menu”.
4. Next to each selection you will see a Customize button.
Click this button to select what items appear on your Start
menu, or clear your “Recent Documents” history.
Fig. 13 Customise your Start menu
Page 26
Page 27
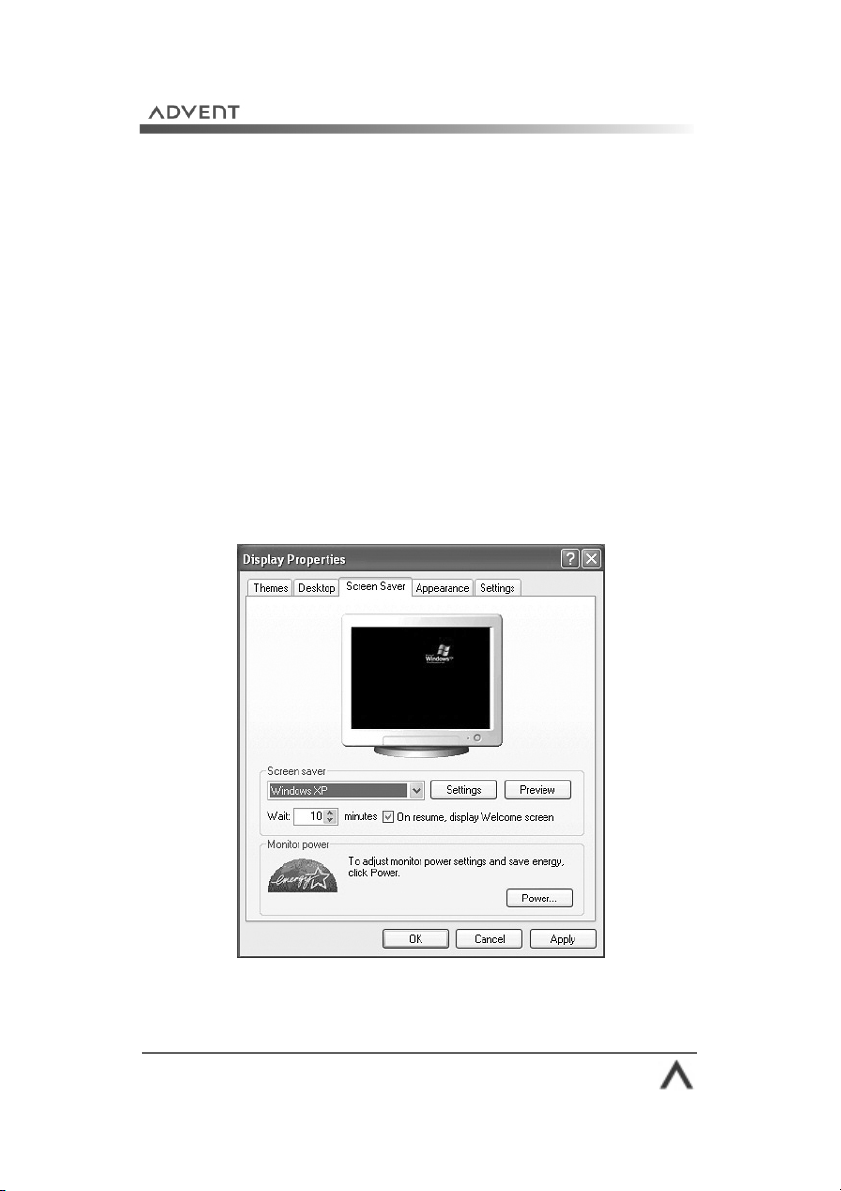
Set up a screen saver?
1. Right-click the Desktop and choose “Properties” from
the menu.
2. Click on the Screen Saver tab at the top of the “Display
Properties” box (Fig. 14 ).
3. Use the drop-down list in the Screen saver section to
choose from the available screen savers. When you select
one you’ll see a preview in the monitor.
4. You can adjust the settings by clicking the Settings
button.
5. Now set the time in minutes you want Windows® to wait
before turning the screen saver on.
6. Click Apply then OK.
Fig. 14 Setting up a screen saver
Page 27
Page 28
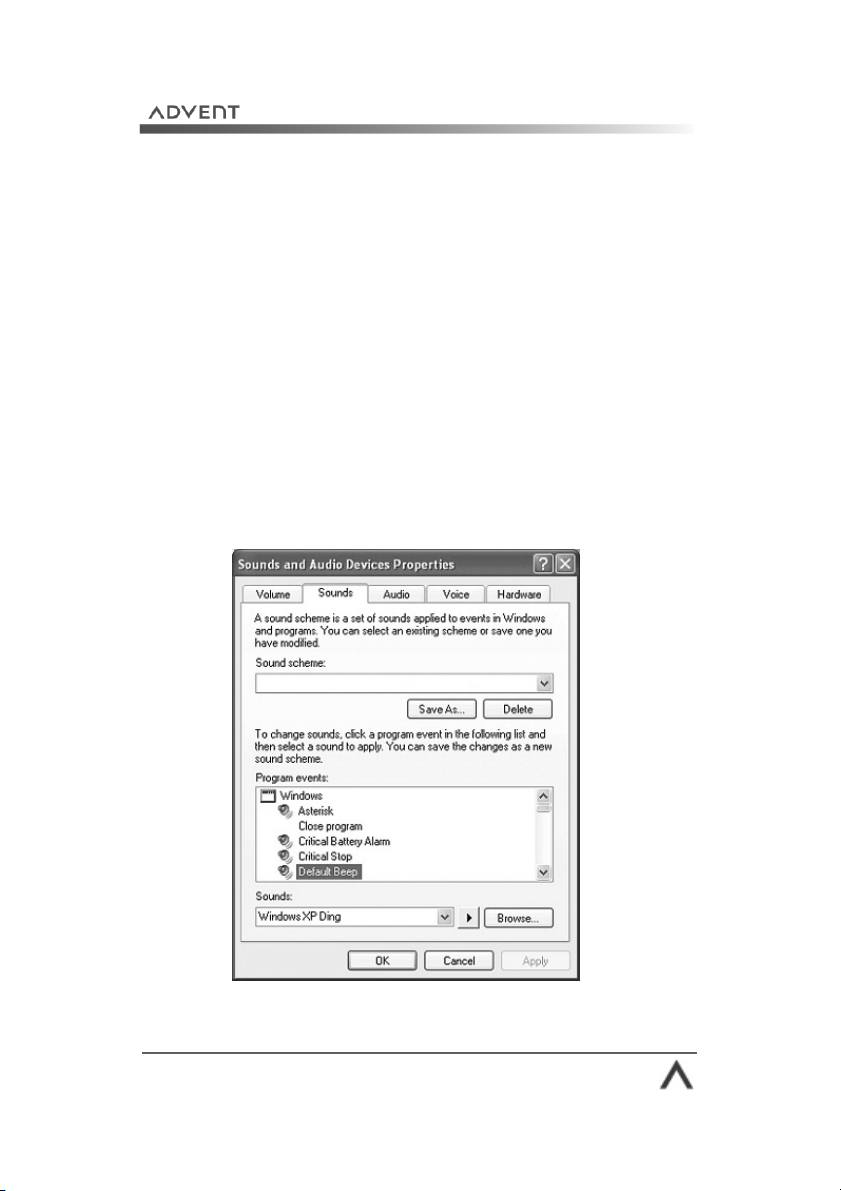
Change my Windows® sounds?
1. Click Start > Control Panel. Select Sounds, Speech,
and Audio Devices.
2. On the next screen select Change the sound scheme
under Pick a task…
3. The Sound and Audio Device Properties box is now
displayed. Select the Sounds tab (Fig. 15).
4. Choose a task you want to set a sound for in the
Program Events list.
5. Under Sounds click Browse to find the sound file you
want to use. Press the Play button to preview it.
6. When you are done click Save As to save your new
sounds as a Sound Scheme. Click Apply then OK to
finish.
Fig. 15 Changing your Windows®
Page 28
Page 29
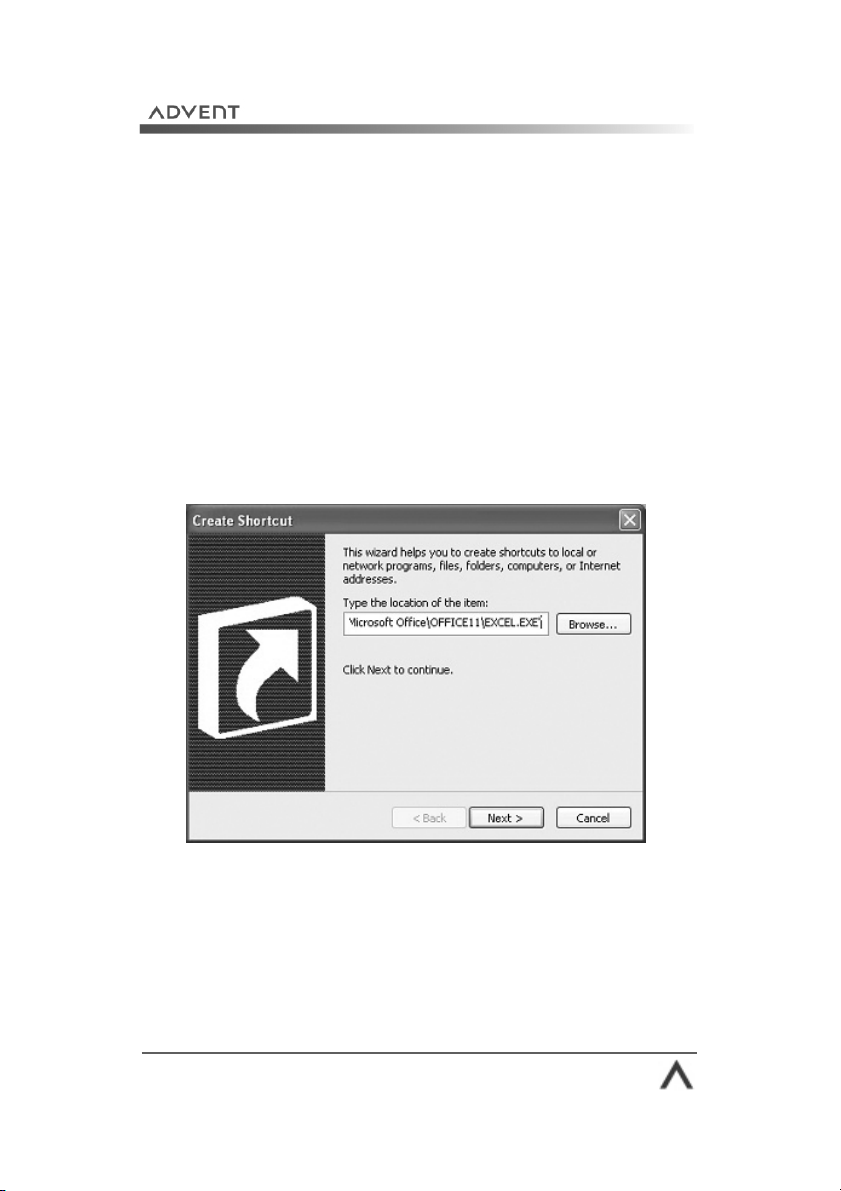
Create a shortcut?
1. Right-click the Desktop and select New > Shortcut
from the menu.
2. The Create Shortcut wizard will now open. Click the
Browse button to locate the file, folder, or program you
want to create a shortcut to, then click OK.
3. Click the Next button, then give your new shortcut a
name.
4. Click the Finish button. You will see the new shortcut on
your Desktop.
Fig. 16 Creating a new shortcut
Page 29
Page 30
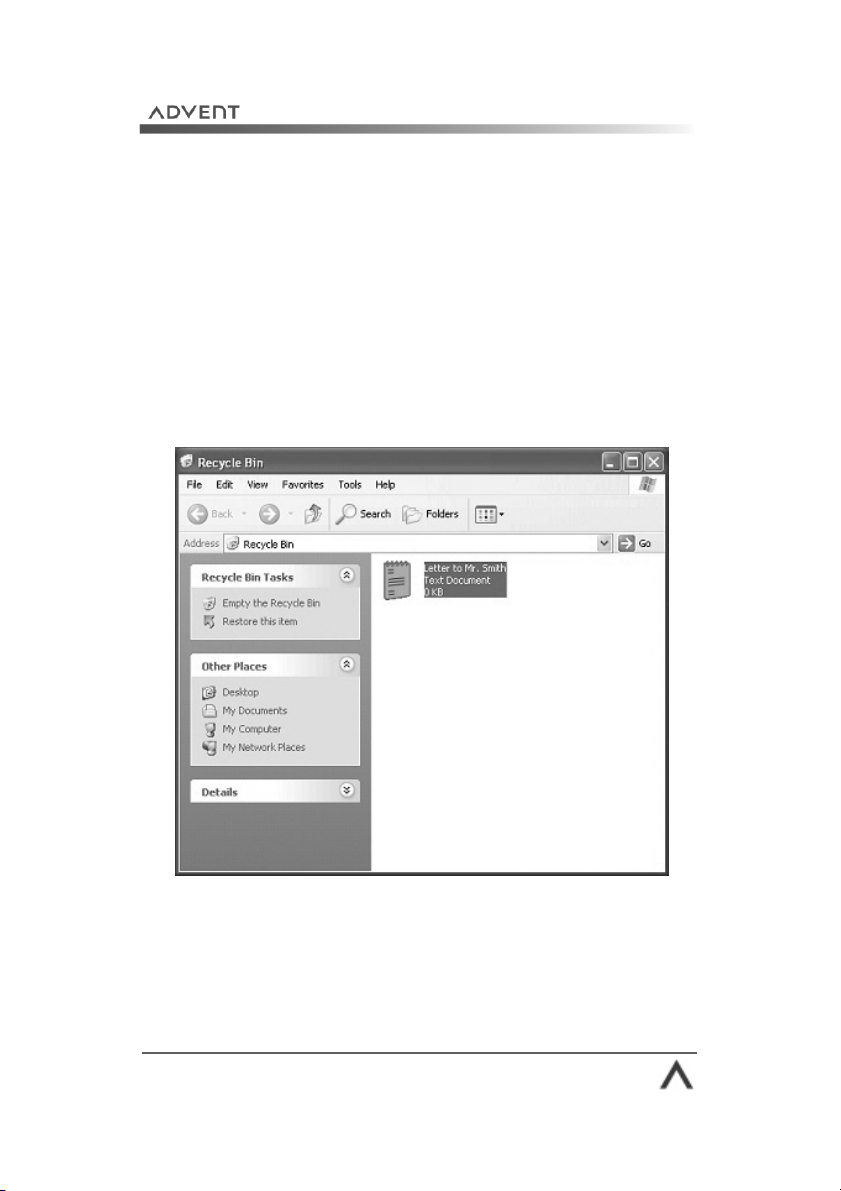
Retrieve a file from the Recycle Bin?
1. Double-click the Recycle Bin icon on your Desktop to
open it.
2. Locate the file you want to restore and click it once with
the left mouse button to highlight it.
3. On the left hand side under Recycle Bin Tasks click
Restore this item.
4. Your new file will now be returned to its original location
on your computer ready to be used.
Fig. 17 Restoring an item from the Recycle
Page 30
Page 31

Empty my Recycle Bin?
1. Right-click the Recycle Bin icon on your Desktop.
2. Select Empty Recycle Bin from the menu.
3. You will see a short animation of files being deleted.
4. Your Recycle Bin is now empty.
Note: once you have emptied your Recycle Bin you will not
be able to retrieve your files.
Fig.18 Emptying your Recycle Bin
Page 31
Page 32

Windows® XP
Entertainment
Page 32
Page 33

Windows® XP Entertainment
Microsoft® Windows® XP has been designed with digital
entertainment in mind. There are a number of features and
programs included to get you started. These include:
• Windows® Media Player 10
• Windows® Movie Maker 2
• Games
Windows® XP also includes support for a wide range of third
party applications, games, and hardware. There are a variety
of ‘Wizards’ to help you get the most from your Advent
computer. Wizards are step by step guides that help you to
perform various tasks.
DirectX® 9 is built in to Windows® XP and provides
enhanced multimedia capabilities. You can now experience
even better gaming, audio and movie playback, and better
support for multimedia devices such as joysticks, game pads,
and speakers.
This section of the manual will explain these areas of
Windows® XP and provide hints and tips on some of the
useful functions available to you.
Page 33
Page 34
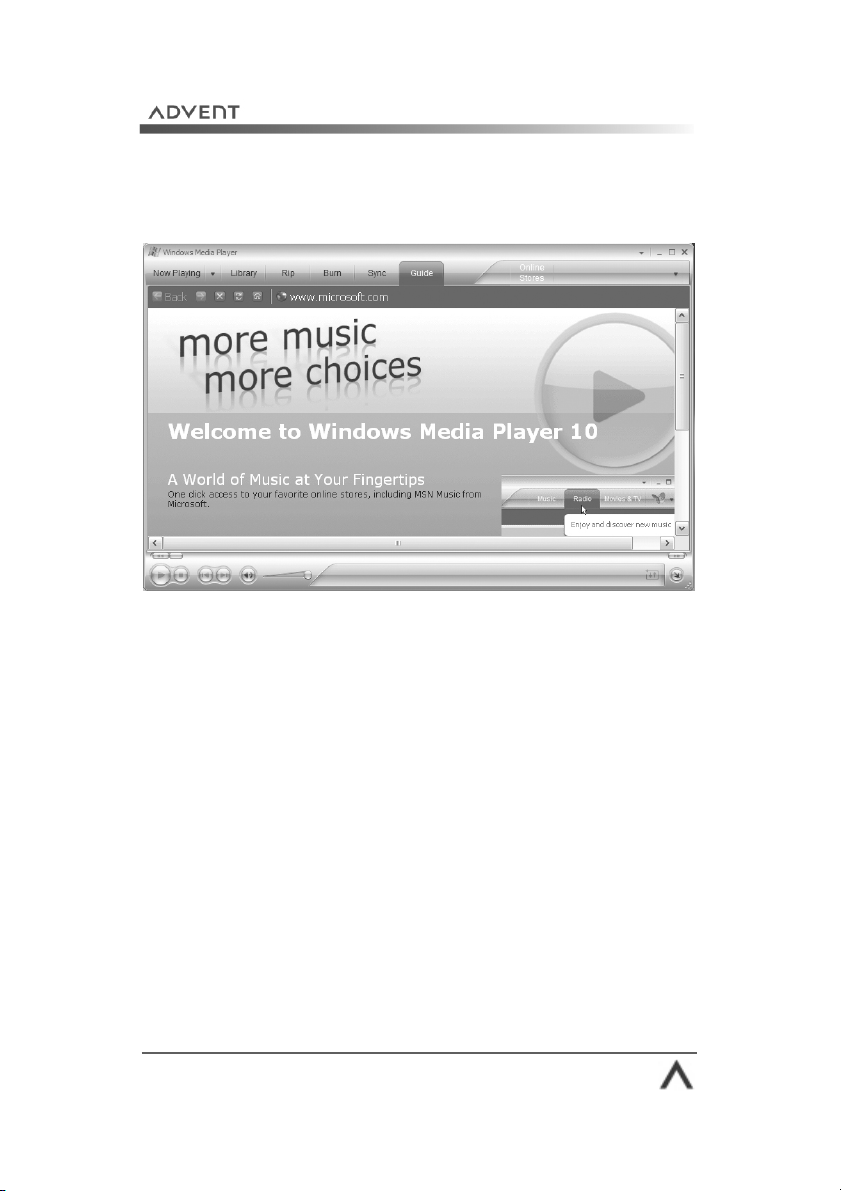
Windows® Media Player 10
Fig. 19 Windows® Media Player 10
Your Advent computer comes supplied with Windows®
Media Player 10, the latest version of the popular multimedia
file player. Media Player allows you to listen to music CDs,
music files such as MP3 and WMA, watch DVD movies
(providing a third party DVD program is installed), and watch
video files such as MPEG and AVI.
Media Player can also act as a digital juke box by copying
your audio CDs to your hard drive as WMA (Windows Media
Audio), or MP3 files. You can download album art, artist
information from the Internet, and create your own play lists.
You can even create your own compilations on CD to play in
the car on your stereo.
Page 34
Page 35

How do I…
Play a music CD?
1. Insert a music CD into the CD or DVD drive and close the
tray.
2. Media Player will open after a few seconds and begin to
play your CD using Windows AutoPlay technology.
3. If you are connected to the Internet, Media Player will
download album art and track information if it is available.
Keep my Media Library up to date?
1. Click Tools then Options from the menu at the top.
2. Select the Media Library tab and click the Monitor
Folders button.
3. You are now presented with a list of the folders that
Media Player is monitoring for new media files. Click the
Add button.
4. You now need to select the My Music and My Videos
folders in your My Documents folder. Click OK.
5. Click OK again and exit the Media Player options.
6. Media Player will now update your Media Library
whenever you add new music or video files to your
computer.
7. You can now create Playlists to include the files you want.
Page 35
Page 36

Copy a CD to your hard drive?
Fig. 20 Copying your CD to hard drive
1. Click the “Copy from CD” button down the left side of
Media Player.
2. You will see the tracks listed (with titles if Media Player
was able to download information from the Internet).
Media Player will copy all tracks by default, or you can
choose not to copy tracks by removing the tick next to
each one in the list.
3. When you are ready click the red “Copy Music” button at
the top of the Media Player screen.
4. Your CD is now copied to the My Music folder in My
Documents. You can listen to the CD while it is being
copied.
Page 36
Page 37

Copy music files to a CD?
Fig. 21 Copying music
1. Click the “Copy to CD or Device” button on the left side
of Media Player.
2. You will see a screen split into 2 sections (Fig. 21 ). On
the left are the files you want to copy. On the right is
your blank CD.
3. To add files click the Edit Playlist button. You will now
see a new screen (Fig. 22 ). Using the drop-down menu
select the artist or album you want. A list of the albums is
displayed on the left, the tracks are listed on the right.
4. Remove tracks by clicking them once and pressing the
red cross at the bottom of the screen.
5. Change the order tracks will play by highlighting a track
and pressing the blue up and down arrows.
6. When you are satisfied click the OK button.
7. You are now returned to the main copy screen (Fig. 21 )
and you will see the list of tracks you just selected.
Page 37
Page 38

8. Insert a blank CD into your CD Writer, wait a few seconds
until you see “Ready to copy” next to each track.
9. Click the red “Copy” button at the top of the screen.
10. Media Player will now convert and then create your
music CD
Fig. 22 Adding tracks to be
Page 38
Page 39

Windows® Movie Maker 2
Fig. 23 Windows® movie Maker 2
Windows® Movie Maker 2 is a fun and easy to use program
that allows you to create your own home movies without the
need for expensive software. You can capture video and
audio from a variety of sources including:
• Digital or analogue camcorders
• Web cameras
• TV tuner cards
• Video recorders
• Microphones
Once you have imported your video, pictures, sound, and
music you can use Movie Maker to edit your video, add
sound tracks and professional fade effects. You can also add
text captions to your movie.
Page 39
Page 40
How do I...
Create a basic movie?
Open Movie Maker 2 so that you see the screen in Fig. 23 .
There are 3 steps to making your movie.
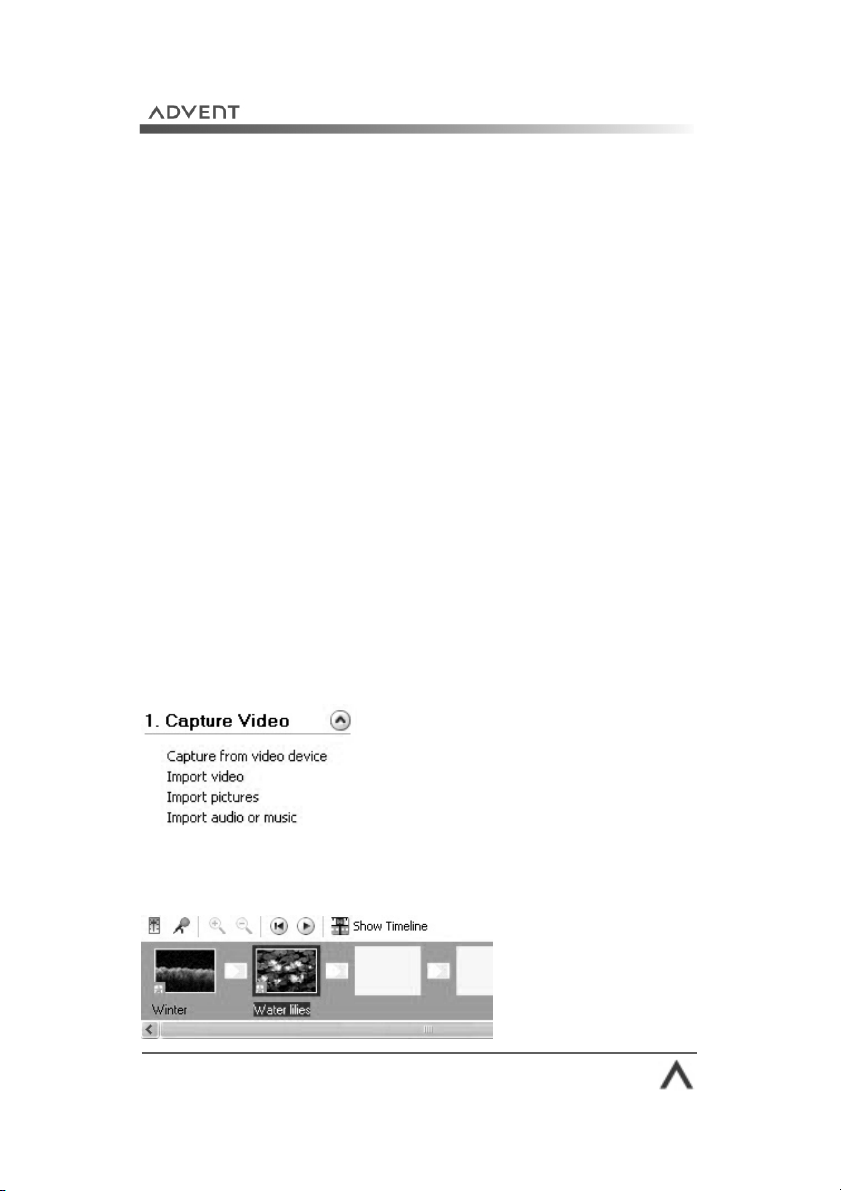
Step one – Capture video
You need to decide what you want to add to your movie. In
section 1 Capture video on the screen you have 4 choices
(Fig. 24 )
• Capture from video device (e.g., a camcorder)
• Import videos (stored on a disk, or your hard drive)
• Import pictures (stored on a disk, or your hard drive)
• Import audio or music (from your
My Music
By clicking on one of the options you will be able to add
them to your movie. You will see a thumbnail image of your
files in the ‘Collection’ area.
folder)
Fig. 24 Capture video
Now drag the thumbnails in the order you want onto the
storyboard area.
Fig. 25 Storyboard
Page 40
Page 41

Step two – Editing your movie
Now that you have added your video, pictures, and music
to the story board you can edit them and add special
effects and text. Move to section 2 Edit Movie (Fig. 26 )
on your screen.
Fig. 26 Edit movie
You have 3 options available to you. By clicking on each you
will be presented with relevant effects and how to use them.
These options are:
• View video effects
• View video transitions
• Make titles or credits
Go through each section and add the effects that you think
will enhance your video.
Step three – Finishing your movie
Once you have added the special effects and text that you
want to your movie you are now ready to create the file and
finish your movie project. Go to section 3 Finish Movie on
your screen. You have 5 options (Fig. 27)
• Save to my computer
• Save to CD
• Send in an e-mail
• Send to the Web
• Send to DV camera
Page 41
Page 42

Fig. 27 Finish movie
The 2 most likely options you will use are:
Save to my computer: this will create a WMV (Windows
Media Video) file in your ‘
My Videos’
folder. You can then
view this file through Windows® Media Player.
Save to CD: you can save your movie to a recordable CD
(providing your Advent has a CD or DVD writer fitted). Movie
Maker 2 will create the CD using Microsoft’s HighMAT™
(High-performance Media Access Technology).
In order to watch your new movie CD you need a device
capable of playing a HighMAT™ disc. Look for the logo
below.
Fig. 28 The HighMAT™ logo
Page 42
Page 43

Games
You can buy a whole variety of games from computer stores,
and you can download, or play games across the Internet.
There are many types of games to suit all tastes including
puzzles, adventure games, shoot-em ups, simulators and
more.
Microsoft® have included a number of games with
Windows® XP. Some can be played on your computer,
others are played with others through the Internet.
To access these games click the green Start button then All
Programs > Games.
Windows® XP games
PC only Internet games
FreeCell Internet Backgammon
Hearts Internet Checkers
Minesweeper Internet Hearts
Pinball Internet Reversi
Solitaire Internet Spades
Spider Solitaire
Page 43
Page 44

Installing third-party games
Before you buy and install a game on your Advent computer
you need to make sure that it will work. Things to check are:
• What CPU (processor) is required?
• What sort of graphics card and how much video
memory is needed?
• What sort of sound card does it need?
• How much computer memory does the game need?
• How much free hard drive space is needed?
• What version of Windows® is needed?
• What version of DirectX® is needed?
You can find out what your Advent PC has by using the
DXDiag program. To open this program click Start > Run.
Type DXDIAG in the white box and click OK. The
information you need is on the System, Graphics, and Sound
tabs.
To install a game, insert the CD and allow the installation
program to run. Follow the onscreen instructions provided by
the game to finish the installation successfully.
Page 44
Page 45

Page 45
Page 46

The
Internet
Page 46
Page 47

The Internet
The Internet is a giant collection of computers that spans
across the whole planet. It is the largest network ever
created. The modern Internet was born from the ARPANET,
a US Military communications project in 1969. Over the
years this grew and developed into what we see today.
It has become an icon of modern society because it plays
such an important part in our daily lives. You can chat with
friends and relatives around the world, send email that
takes seconds to deliver, you can shop, carry out your
banking, play games and use it as an educational reference
point.
We are so obsessed with the Internet that you can now
access it in number of ways, from your home computer,
your digital TV, handheld computers, and even your mobile
phone!
So how do you get online? There are a number of factors to
consider. The first is speed. Do you want dial-up access, or
an always-on broadband connection?
Dial-up: the most common way to access the net. It uses
your telephone line and a modem. The downside is very
slow speed – 56Kbps.
Broadband: you can access broadband using ADSL on a BT
phone line, Cable Modem, or Satellite. Speeds range from
150 Kbps to 2 Mbps. Faster speeds mean web pages load
faster, and you can download larger video and music files.
Internet providers: you need to sign up with an Internet
provider who gives you access to the Internet. You also get
email and free web space from most. It is advisable that
you shop around for the best deal that meets your needs.
Page 47
Page 48

Microsoft® Internet Explorer 6
Internet Explorer is supplied as part of Windows® XP and
allows you to access the Internet. This program is known as
a Web browser. You would use Internet Explorer when you
want to visit a web site.
Fig. 29 Using Internet Explorer to view a web site
Page 48
Page 49

How do I...
Get to a web site?
1. Click the Start button and select Internet. This will open
Internet Explorer and ask you to connect to the Internet if
you use a dial-up connection.
2. At the top of Internet Explorer you will see a long white
Address bar (Fig. 30 ).
3. Type in the web address (URL) and press Enter or click
the Go button.
4. The web page will now load on your screen.
5. You can move back through the pages you have viewed
by using the Back button just above the address bar.
Fig. 30 The address bar
Page 49
Page 50

Add websites to my favourites?
1. When you find a web site that you want to visit regularly
you can add it to your Favorites menu so that you don’t
have to remember the address.
2. Click the Favorites menu at the top of the screen (in
between View and Tools), then click Add to Favorites.
3. You will now see the Add Favorite screen (Fig. 31). Click
OK to add the site to your list.
4. If you want to organise your favourites you can. For
example, a Shopping folder for your shopping sites.
5. Click Create, then New Folder. Type a name for your
folder and click OK.
6. Click OK again and your new folder and website are
added.
7. To add other sites to your folder click the Create in
button. Click on your folder in the list and then click OK.
Fig. 31 Adding favourite web sites
Page 50
Page 51

View the history file?
1. Click the History button (Fig. 32).
2. The history of previously visited pages will be displayed
on the left side of Internet Explorer (Fig. 33).
Fig. 32 The History button
Fig. 33 Internet History file
Page 51
Page 52

Clear history and Internet cache?
1. In Internet Explorer click the Tools menu then Internet
Options.
2. Internet Options will now open (Fig. 34). Select the
General tab.
3. Click the Clear History button to delete your browsing
history.
4. Click the Delete Files and Delete Cookies button to
clear your Internet cache.
Fig. 34 Internet Options
Page 52
Page 53

Microsoft® Outlook Express 6
Fig. 35 Outlook Express 6
Microsoft® Outlook Express 6 is the latest version of the
popular home email program. Outlook Express allows you to
send and receive email from your Advent computer to
anyone in the world.
The advantage of email is that you can send a letter to
family, friends, or colleagues anywhere in the world. In most
cases it will arrive within a few minutes. You can even attach
photos or files to your email.
Outlook Express will also manage your contacts with its
address book. You can store a person’s email address, home
address, phone numbers, personal web page, and notes in
one convenient place.
Your Internet Provider will normally configure Outlook
Express for email when you install their software.
Page 53
Page 54

How do I...
Send an email?
1. Click Start then Email to open Outlook Express.
2. Click the Create Mail icon at the top of the screen. You
will be presented with a blank email.
3. You now need to enter the email address of the person,
or people you want to send your message to. (Tip: Click
the address book icon next to the left of To: to access
your address book).
4. Next, type a brief summary of your message in the
Subject field.
5. Now type your message in the main white area. You can
alter the font and colour, as well as check the spelling of
your message.
6. When you are happy that your message is ready click the
Send button. If you are connected to the Internet
already your message will be sent. If you are not
connected you will be asked if you want to.
Fig. 36 An email ready to be sent
Page 54
Page 55

Add an attachment to my email?
1. Create an email as normal.
2. Before you click Send, you need to click the Attach icon.
3. You can now browse to your photo or file and attach it to
the email. You can attach more than one file to a
message.
4. Now you can send your email as normal.
Fig. 37 The Attach file icon.
Add a contact to my Address Book?
1. Click the Addresses icon in Outlook Express.
2. The Address Book will open. Click New then Contact.
3. Enter the person’s details and click OK.
Fig. 38 The Address Book
Page 55
Page 56

Windows® Messenger
Fig. 39 Windows® Messenger
Windows® Messenger is an
Instant Messaging program
that allows you to chat in real
time with your friends, family
and colleagues.
With Messenger you can see
when your contacts are online
and send them a message.
You can even send files, and
chat face to face with a Web
Cam and microphone.
A big advantage over normal
chat rooms is that you can
control who you talk to.
People need to know your
email address in order to add
you as a contact, which you
can decline if you want.
You can also block users on your contact list from chatting to
you if you want.
In order to use Windows® Messenger you need to create a
Microsoft® .Net Passport which is free and easy to set up.
Messenger will guide you through this the first time you sign
in.
Page 56
Page 57

Anti-virus protection
It is a sad fact that most computer users will have their
computer infected with a virus at some point. Viruses are
most commonly spread through email and the Internet.
However, they can also be spread through infected floppy
disks, CDs and DVDs, file sharing programs, and instant
messaging software.
The effects of a virus can vary. Some are a simple
annoyance and flash up random messages on your screen,
but they can also be destructive and cause data loss, or even
damage computer hardware.
You can minimise the risk of a virus infecting your computer
by installing anti-virus software. Once installed, this software
will constantly monitor your computer for any viruses. It will
even monitor incoming and outgoing email to make sure you
are not being infected, or passing a virus on without
knowing.
There are new virus threats all the time, and simply buying
and installing anti-virus software will not keep you protected.
It is very important that you keep the software up to date.
Good anti-virus programs provide an update feature that
downloads information and cures for new viruses. You
normally get these updates free for 12 months when you buy
an anti-virus program.
For more information on anti-virus and other online safety
tips visit
www.pcservicecall.co.uk/virus
Page 57
Page 58

Firewalls
Along with anti-virus software, a firewall is another important
part of your computer’s security. A firewall sits between your
computer and the Internet and will attempt to block any
intrusion attempts from computer hackers and other
malicious sources. Think of it as your computer’s bouncer. It
stands at the door to the Internet and stops unwanted
visitors from getting in.
If you are going to use the Internet it is essential that you
install firewall software (along with anti-virus) as part of a
good security and safety routine.
You can buy software firewalls from computer stores, or
download them from the Internet. These will normally
provide the necessary security for home users or small
businesses. If you need a higher level of security you can
also purchase dedicated hardware firewalls which are used
by large companies.
Microsoft® Windows® XP includes a basic software firewall
to secure your computer while on the Internet. This is the
first time that a firewall has been included with a Windows®
operating system for the home.
For more information on anti-virus and other online safety
tips visit
www.pcservicecall.co.uk
Page 58
Page 59
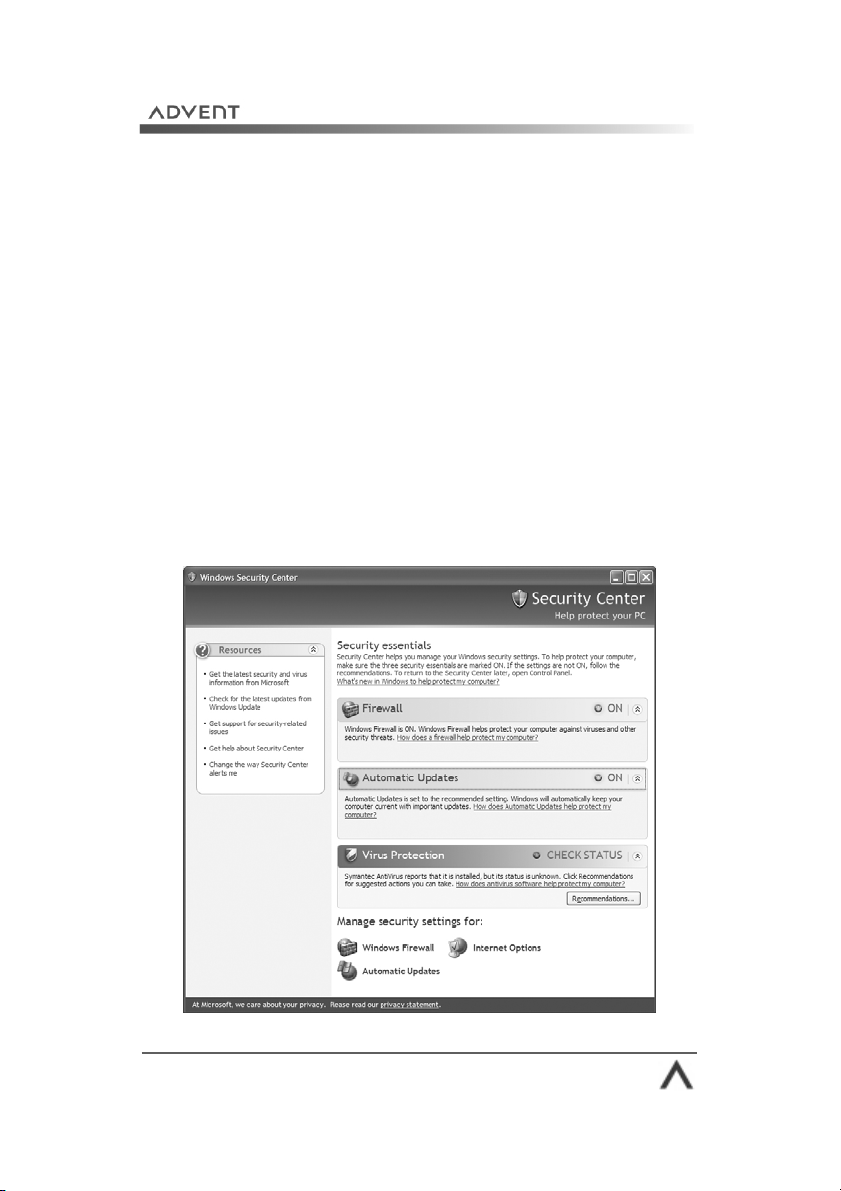
Windows Security Center
Your Advent computer is installed with the latest Windows XP
Service Pack 2 software. This introduces a number of security
upgrades and enhancements that help keep your computer
safe and secure. These enhancements can be controlled and
monitored through the easy-to-use Security Center which is a
brand new addition to Windows XP.
The Security Center will inform you:
• If you have antivirus software running and that it is up-todate;
• If the new Windows XP firewall is running; and
• If you have the Windows Update ‘Automatic update’ tool
running.
Fig. 40 Windows Security Center
Page 59
Page 60

You can access the Security Center from a number of
locations:
1. Click Start > Control Panel > Security Center
2. Click Start > All Programs > Accessories > System
Tools > Security Center.
The Security Center window is divided into 3 sections:
• Security essentials: this shows the status of your
Firewall, Automatic Updates and Virus Protection. If there
is a problem with any of these items the Security Center
will offer advice and guidance.
• Manage security settings for: this section provides
quick access to the Windows Firewall, Automatic Updates
and Internet Options.
• Resources: this section contains useful Internet links for
more information.
Windows Firewall
The Windows Firewall can help prevent hackers, worms and
other malicious software from accessing your computer and
stealing personal information. When a program tries to
access the Internet you will see a security warning similar to
the one in Fig. 42 on the screen.
If you trust the program then choose the Unblock option
and allow it to access your Internet connection. If you don’t
know what the program is then you can choose Keep
Blocking. The Windows Firewall will then prevent the
program from accessing your Internet connection.
Page 60
Page 61

Firewall settings
You can control your Windows Firewall by clicking the icon in
the Manage Settings For: area of the Security Center (Fig.
40). There are 3 tabs you can configure.
General
The General tab (Fig. 41 ) allows you to turn the Windows
Firewall on and off. However, we do not advise you turn this
off as you will be unprotected from viruses, worms and
intruders.
Fig.42 Security Alerts
Fig. 41 General Tab
Page 61
Page 62

Exceptions
The Exceptions tab allows you to tell the Firewall that you
want certain trusted programs to use the Internet. This is
useful because online games and other services need to be
able to access the Internet.
Add Program
Click this button to select a program installed on your
computer. This will appear in the tick box list of programs
that can access the Internet. If you wish to disable it later
you can remove the tick, or use the Delete button.
Add Port
Some online games, or other services need you to open
specific ports. A port is a gateway from your computer to the
Internet. The software, or service will tell you what port
number, for example, 6547, to add to the exceptions list.
Fig. 43
Page 62
Page 63

Advanced
The advanced tab is split into 4 sections:
Network connection settings
This area shows you any network or Internet connection that
can be protected. Make sure the box next to each entry has
a tick. This will tell the Windows Firewall to protect the
connection.
Security logging
If you are experiencing connection problems you can use the
security log to check if the Firewall is causing a problem. The
log is stored in C:\Windows\pfirewall.log on your hard
drive.
ICMP
These are advanced settings that allow computers on a
network to share error information. You will not normally
need to use this section. Please refer to the
for full information.
Center
Default settings
Click this button to restore the default settings for your
Windows Firewall.
Help and Support
Page 63
Page 64

Fig. 44
Fig. 45
Page 64
Page 65
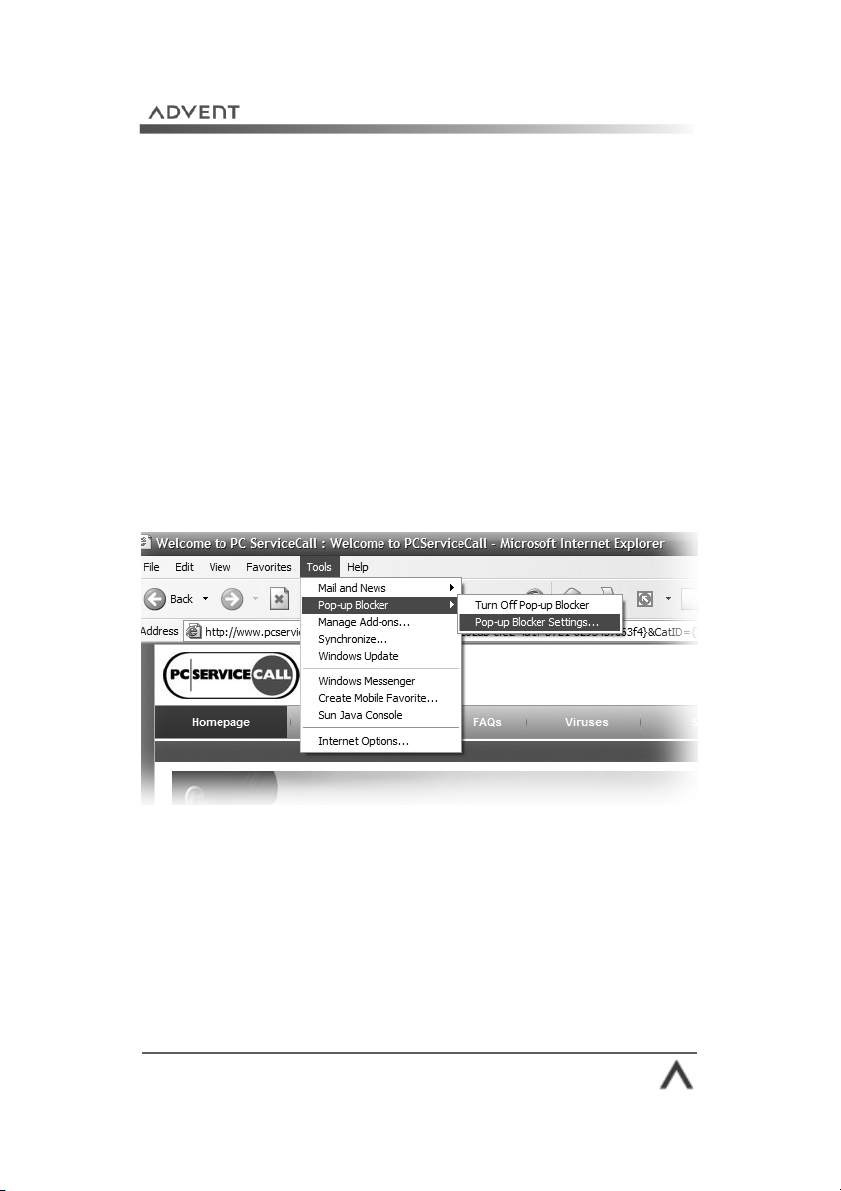
Pop-up Blocker
The Pop-up Blocker is also a new addition to Windows XP
with Service Pack 2. It monitors your Internet connection and
prevents adverts from popping up on your screen. These are
a nuisance and can often contain offensive text and images.
The Pop-up Blocker can be accessed by clicking Tools >
Pop-up Blocker in Internet Explorer (Fig. 46 )
From here you can choose from 2 options:
• Turn off Pop-up Blocker
• Pop-up Blocker Settings
Fig. 46 Pop-up Blocker
Page 65
Page 66

Pop-up Blocker settings
Some websites, for example, online banks, use pop-up
windows that you will need to use. You can add the web site
address to an ‘Allow list’ by typing the web address and
clicking the Add button.
You can also set the filter level to
Filter levels sets the Pop-up Blocker sensitivity level.
is usually adequate.
Finally you can tell
a message when a pop-up is blocked.
Pop-up Blocker
low, medium
to play a sound, or display
, or
high
Medium
.
Fig. 47
Page 66
Page 67

Looking after
Microsoft®
Windows® XP
Page 67
Page 68

Looking after Microsoft® Windows® XP
Microsoft® Windows® XP is a very complex and important
piece of software. It is known as the ‘Operating System’. In
order for a computer to function it needs both hardware and
an Operating System (OS).
Windows® XP controls your Advent computer. It allows your
hardware components to talk to each other, and controls
how your software and games work.
Because it plays such an important role in your computer, it
is important that you look after it. Just like taking your car
for a regular service.
There are a variety of ways to keep Windows® XP up to
date and running smoothly. These are covered in this section
of your manual and include:
• Microsoft® Windows® Update
• Microsoft® Windows® Service Packs
• Disk Cleanup Wizard
• Disk Defragmenter
Take a few moments to familiarise yourself with these
features of Windows® XP as it is important you use them
regularly.
Page 68
Page 69

Microsoft® Windows® Update
Fig. 48 Windows® Update web site
Microsoft® Windows® Update is a feature that has been
part of the Windows® family since Windows® 98. It
provides a way for Microsoft® to:
• Update security flaws in Windows® XP
• Fix bugs and errors that occur after release
• Provide driver and software updates
• Add new features to Windows® XP
In order to use Windows® Update you will need an Internet
connection to connect to the Windows® Update web site.
Page 69
Page 70

How do I...
Run Windows® Update?
1. Connect to the Internet if you need to.
2. Press the Start button then go to All Programs and
select Windows Update from the menu (normally
towards the top).
3. Internet Explorer will open and connect you to the
Windows® Update web site.
4. Choose Express Install to look for critical updates, or
Custom Install to look for all available updates.
5. Choose the updates you want to install from the list, then
click Go to Install Updates.
6. You’ll see a summary of the updates you chose. Click
Install (Fig. 49 ).
7. The updates will be downloaded and installed
automatically. Your computer may need to restart.
Fig. 49
Page 70
Page 71

Automatic Updates
The Security Center will turn automatic updates on by
default. This means that Windows XP will download and
install any available updates without you having to worry.
If you want to change the way updates work you can do so
by clicking the Automatic Updates button in the Manage
settings for: area of the Security Center.
Fig. shows the 4 choices you have:
• Automatic (recommended): this is default setting that
downloads and installs updates for you. We advise that
you use this setting.
• Download updates for me, but let me choose when
to install them: this setting will allow Windows to
download the updates automatically. You can then install
them at a time that is convenient for you.
• Notify me but don’t automatically download or
install them: Windows will tell you when updates are
available. You will need to go to the Windows Update site
(Start > All Programs > Windows Update) to
download. This is handy for dial-up customers.
• Turn off Automatic Updates: this option will turn off
the update system. You will need to remember to check
for updates regularly. For most users we would not
recommend that you turn off Automatic Updates.
Page 71
Page 72

Fig. 50 Automatic updates
Page 72
Page 73

Windows® Service Packs
Service Packs are an extension of Microsoft® Windows®
update. Typically they include all the current fixes, patches
and updates from Windows® Update up to the time the
Service Pack is created. This makes updating your Advent
computer a little easier.
In addition to updates, Microsoft® can also include new
features for Windows® XP and introduce support for new
technologies, for example, USB 2.0.
Another reason to install Service Packs is that some modern
software will not install until the Service Packs have been put
on to your computer. Check the minimum requirements for
your software for more information.
Advent has installed Service Pack 2 on your computer for
your convenience.
How do I…
Install a Service Pack?
Service Packs are installed as part of Windows® Update.
This is the easiest way to apply them to your Advent
Computer. However, if you want to download the Service
Pack to your hard drive and install it at a later date you can
download it from the Windows® XP website:
www.microsoft.com/windowsxp
Page 73
Page 74

Disk Cleanup Wizard
The Disk Cleanup Wizard is a useful tool for removing clutter
from your hard drives and free up storage space. The wizard
scans your drives and will prompt you to clear things like:
• Temporary Internet files
• Recycle Bin
• Temporary files
• Offline web pages
• Other items
Not only will the wizard recover more free space, you will
also gain a small speed increase.
How do I...
Run the Disk Cleanup Wizard?
1. Press the Start button, go to All Programs >
Accessories > System Tools > Disk Cleanup.
2. You will be asked which drive you want to scan. Select
Drive C and press OK.
3. The wizard will now scan your hard drive, this may take a
few minutes.
4. Once the scan is complete you will see a list of tick boxes
for the different areas of your computer that you can
recover space from (Fig.51 ).
5. Tick the areas you want to clean up then press OK.
Page 74
Page 75

Fig. 51 Disk Cleanup Wizard
Page 75
Page 76

Disk Defragmenter
Over time as you add and delete files and programs on your
hard drive the disk becomes fragmented. This means that
files can be broken up and scattered around the disk to make
sure they fit.
This can have negative effects on your computer’s
performance and efficiency because it takes longer to hunt
around the hard drive for all the pieces. The result is a
decrease in speed.
Disk Defragmenter scans your drive and re-orders the files
into more efficient structures making it quicker and easier for
Windows® to access your files. You should run the program
at least once a month if you use your computer regularly.
How do I…
Run Disk Defragmenter?
1. Delete any old files, empty the Recycle Bin, and close any
open programs.
2. Turn off your screen saver.
3. Press Start > All Programs > Accessories > System
Tools > Disk Defragmenter.
4. The Disk Defragmenter window will open (Fig. 52 ). Click
the Analyze button. Windows® will now scan your hard
drive.
5. Once completed you will be told if the drive need to be
defragmented. Click OK.
6. If you need to defragment, click the Defragment button.
7. The scan will begin, this can take several hours and is
best left over night.
Page 76
Page 77

Fig. 52 Disk Defragmenter
Page 77
Page 78

Windows® XP
utilities
Page 78
Page 79

Windows® XP utilities
Microsoft® have included a number of utilities with
Windows® XP that allow you to tweak, tune, and customise
the Operating System to meeting your computing
requirements.
There are also a number of accessibility options to help
people with disabilities make the most of computer
technology.
In this section of your manual we will cover the basics of:
• The Control Panel
• Adjusting the date and time
• Accessibility options
• The Desktop Cleanup wizard
• Setting up user accounts
• Managing your Windows® XP passwords
Remember that you can use Windows® Help and Support
for more information on each of these utilities.
Page 79
Page 80

The Control Panel
The Control Panel functions as the name suggests. It allows
you to control the various functions of Microsoft®
Windows® XP, as well as the hardware inside your Advent
computer.
There are 2 ways to view the Control Panel:
• Category view (Fig. 54) which is a very user friendly
way to move around the Control Panel.
• Classic view (Fig. 55) which allows you to view the
old style Control Panel from Window® 95, 98 and Me.
With the Control Panel you can add or remove software,
adjust your display settings, alter sounds, add or remove
printers, and much more.
How do I…
Change from Category view to Classic view?
1. Click the Start button then Control Panel.
2. Now click Switch to Classic View in the menu on the
left.
3. Control Panel will now change to Classic View.
4. To return to Category View click Switch to Category
View, again in the menu on the left.
Fig. 53 Switching to Classic View
Page 80
Page 81

Fig. 54 Category View
Fig. 55 Classic View
Page 81
Page 82

Changing the date and time
Fig. 56 Date and Time
There may be times when you need to change the date or
time within Windows®. This is very easy to do:
1. Double-click the clock in the bottom right of your screen.
2. Date and Time Properties are now displayed on your
screen.
3. Make your adjustments to the date and/or time.
4. Click Apply then OK.
Page 82
Page 83

Accessibility options
Windows® XP includes a number of accessibility options
which change the way that Windows® and your keyboard
and mouse work. These are tailored to users with physical
disabilities to help them make the most from their computer.
Accessibility Options are in the Control Panel.
Accessibility options include:
StickyKeys: this option allows you to press the CTRL, ALT,
DEL key combination one key at a time, rather than all
together. It also allows you to press the Windows key then
any other keys to access required functions.
Filterkeys: by turning this option on, Windows® will ignore
brief or repeated keystrokes, or a slow repeat rate when
typing.
Toggle Keys: Windows® will play a sound when you press
the CAPS, NUM, or SCROLL LOCK keys.
SoundSentry: Windows® will display visual alerts when a
system sound is played, this is ideal for those who cannot
hear well, or are deaf.
ShowSounds: similar to SoundSentry, this option will
display text telling you what the sounds made by Windows®
or a program means.
High Contrast: allows you to turn the Windows® display
into a high contrast, easy to read display.
MouseKeys: allows you to turn the arrow keys on your
keyboard into a mouse pad that moves the cursor around the
screen.
Page 83
Page 84

Onscreen keyboard
Fig. 57 The onscreen keyboard
The onscreen keyboard allows you to control text input and
basic keyboard functions by using a mouse or other pointing
device.
To access the keyboard press the Start button, then All
Programs > Accessories > Accessibility > Onscreen
Keyboard.
Magnifier
Magnifier uses the top of your screen to show a magnified
view of the area your mouse cursor is in. You can control the
magnification level to find a setting that is most comfortable
for you.
To access the Magnifier press the Start button, then All
Programs > Accessories > Accessibility > Magnifier.
Narrator
Narrator makes Windows® XP verbally announce any actions
you make, or describes what is on the screen at any given
time. You are able to control the pitch, volume and speed of
the computer’s voice to make it easy for you to understand.
To access the Narrator press the Start button, then All
Programs > Accessories > Accessibility > Narrator.
Page 84
Page 85

Desktop Cleanup Wizard
The Desktop Cleanup Wizard is a feature new to Windows®
XP. Over time our desktops can become cluttered with
shortcuts and program icons, leaving you nowhere to place
new things.
Windows® XP will now monitor your Desktop and every 60
days will prompt you to remove items that are no longer
used, or not used very often. This helps keep your Desktop
more manageable while you work.
How do I…
Run the Desktop Cleanup Wizard manually?
1. Right-click the Desktop and select Properties.
2. Click the Desktop tab and press the Customize
Desktop button.
3. In the Desktop Cleanup area click Clean Desktop
Now.
Turn off the Desktop Cleanup Wizard?
1. Right-click the Desktop and select Properties.
2. Click the Desktop tab and press the Customize
Desktop button.
3. In the Desktop Cleanup area remove the tick in the box
next to Run Desktop Cleanup Wizard every 60 days.
Fig. 58 Desktop Cleanup options
Page 85
Page 86

User accounts and passwords
Windows® XP is the first home operating system from
Microsoft® which allows you the user to secure your
computer with a password if you want to.
You can add as many users as you want to your Advent
computer and each person can have their own password.
This will allow them to control their own desktop and sound
settings, but you can also prevent them making changes to
Windows®, and even make your files private.
This is all set up through the Users icon in the Control
Panel (covered later on).
The downside to having a secure password is that if you
forget it, you may not be able to get back in easily. To
prevent this from happening there are 2 things you can do:
• Create a password reset disk (we’ll show you how
later)
• Add a password hint to jog your memory should you
forget it.
If you make sure that you do these 2 simple things for every
user you won’t run into any problems with passwords.
Page 86
Page 87

How do I…
Add a user to my computer?
1. Press the Start button then click Control Panel.
2. Now click User Accounts.
3. You can now pick a task: Change an account, Create a
new account, or Change my picture.
4. Select Create a new account from the list.
5. First, you are asked to give the account a name, use the
user’s name for this.
6. Next, you need to decide what level of access the account
will have. Choose Computer Administrator for full
access, or Limited, which will prevent the user from
making system changes and adding or deleting certain
types of software (ideal for the kids).
7. Finally, click Create Account.
Fig. 59 The User Accounts Control Panel.
Page 87
Page 88

Add a password to an account?
1. Press the Start button then click Control Panel.
2. Now click User Accounts.
3. Choose Change an account from the Pick a task list.
4. Select the account you want to add a password to.
5. You will now see a list of things you can change for the
account. Select Create a Password.
6. Now type in your password and a hint that will help you
remember it if you forget (Fig. 60 ).
7. Finally click Create Password.
Fig. 60 Creating a password
Page 88
Page 89

Create a password reset disk?
1. Log into the account you want to create a reset disk for
(you need one for each account).
2. Take a blank floppy disk and label it “Password reset disk
for …..” and put it into the floppy drive.
3. Go to User Accounts in Control Panel.
4. Click Change an account and select the account you are
logged in to.
5. Under the Related Tasks menu on the left, click
Prevent a forgotten password.
6. Follow the instructions in the Wizard to create your disk.
7. Keep your disk safe.
Use a password reset disk?
1. If you type the wrong password in to the Welcome
screen you will see a message “Did you forget your
password?” when you see this click “Use password
reset disk”.
2. Insert your disk and click Next.
3. Select 3.5 inch floppy and click Next.
4. You will be prompted to type a new password and hint.
5. Click Finish and your password will be reset to your new
one.
6. You will be returned to the Welcome screen where you
will need to type in your new password.
Note: once you have used your password reset disk you will
need to make a new one using the instructions above.
Page 89
Page 90

Troubleshooting
and
support
Page 90
Page 91

System Restore
System Restore is a handy tool included with Microsoft®
Windows® XP. It allows you to turn the clock back when
things go wrong and return your Advent computer to a date
when it was working properly.
Windows® will make a restore point every 24 hours, or you
can make your own. Some software will also make a restore
point before installing.
Using System Restore is a quick and easy way to fix your
Advent computer without the need to call a telephone
support line.
What is restored?
System Restore will return the following items to the state
they were in when the restore point was created:
• The Registry
• Drivers
• Application files and settings
• User Profiles (note: if you created a new user after
the restore point was made this will be lost).
• Any installed Windows® updates
• Other system files
What is not restored?
There are a number of items not restored. These include:
• Any personal files, for example, pictures, documents,
movies, music.
• User information in your user profile
• Certain types of printer drivers
Page 91
Page 92

How do I…
Restore my computer to an earlier time?
1. Press Start > All Programs > Accessories > System
Tools > System Restore.
2. The System Restore program will open (Fig. 61 ). You will
have 2 choices “Create a Restore Point”, or “Restore
my computer to an earlier time”.
3. Select “Restore my computer to an earlier time” and
press “Next”.
4. You will now see a calendar (Fig. 62 ). Dates in bold
mean that a System Restore point is available. Click on a
date, then select the restore point from the list on the
right then click Next.
5. Windows® XP will restart and restore your computer.
Once the process is complete you will see a message
telling you that the restore was successful.
Fig. 61 The System Restore welcome screen
Page 92
Page 93

Fig. 62 Selecting your restore point
Create a restore point?
1. Launch System Restore (see previous page).
2. Select “Create a restore point” from the Welcome
screen and click Next.
3. Give your restore point a name (Fig. 63 ).
4. Click the Create button to finish the process and create
your restore point.
Page 93
Page 94

Fig. 63 Creating a restore point
Undo a restore point?
1. Launch System Restore, you will see a third option
“Undo my last restoration” from the list and click
Next.
2. Confirm the date and time, save any open work, then
click Next.
3. Your computer will restart and undo the System
Restore you performed previously.
Page 94
Page 95

Advent Help and Support Center
Remember that the Advent Help and Support Center is
always available when you need advice with a question or
problem you have with Windows® XP or your computer.
You can access Help and Support by:
• Pressing the F1 key while you are on the Desktop.
• Pressing Start then Help and Support.
Fig. 64 The Advent Help and Support Center
Page 95
Page 96

Troubleshooting
My computer will not turn on
• Check that the power cable is connected and the wall
socket is turned on.
• Check the fuse in the plug.
• Try the cable in a different power socket.
There is no display on my monitor
• Check the screen is connected to the VGA port on the
rear of your computer.
• Does your computer have more than 1 VGA port? You
may have it plugged into the wrong one.
• Check that the monitor is plugged in and receiving power
(green LED on the front).
I can’t hear any sound
• Check that your speakers are connected to the green
Line-in socket.
• Are your speakers turned on and receiving power?
• Check that the Windows® volume is not muted or turned
down (double-click the speaker icon near the clock).
• Is the volume wheel on your speakers turned down?
I can’t connect to the Internet
• Check that the phone cable is connect to the modem and
not the LAN port (they look very similar).
• Is the modem cable connected to your phone socket?
• If you use an extension try plugging the modem cable
directly into the wall socket.
• Check that your Internet provider is not currently
experiencing difficulties.
Page 96
Page 97

My keyboard or mouse are not working
• Check that they are connected to the right socket on your
Advent computer.
• Remove the cable and blow on the connector and socket
to remove any dust.
• If your mouse has a ball, try cleaning the ball with a soft
cloth. You will need to clean the rollers inside the mouse
with a damp cotton bud.
My computer has stopped responding
• Press the CTRL, ALT and DEL keys on your keyboard to
open the Task Manager.
• On the Applications tab highlight the program that says
“Not responding” and click the End Task button (you
may need to do this a few times to get the program to
close).
My screen looks bigger than usual and the colours are
washed out
• Right-click the Desktop and select Properties.
• Go to the Settings tab.
• Set the Screen Resolution to 800x600, or 1024x768
pixels.
• Set the Colour Quality to 16-bit, 24-bit, or 32 bit colour.
• Press Apply then OK.
Page 97
Page 98

My hard drive light is on and constantly making
churning noises.
• Windows® XP is having to work hard to access the
information you request. Try running the Disk
Defragmenter to resolve the problem.
When I try to install a game or program if it tells me
that there is insufficient disk space.
• Your hard drive is full. Try running the Disk Cleanup
Wizard to free up more space.
• You can also use the Add/Remove Programs icon in
the Control Panel to delete any old software or games.
Page 98
Page 99

Re-installing device drivers & software
If you are experiencing problems with a particular piece of
software or hardware supplied with your Advent computer
you can re-install them without the need to erase your hard
drive and run a full System Recovery.
Drivers
1. Click Start > My Computer.
2. Double-click the icon for the Local Disk (C:) drive.
3. Double-click the Application folder.
4. Locate the folder called Driver and double-click it.
5. Inside this folder you will see folders for each device you
can re-install, for example, Modem.
6. Double-click the folder and look for an icon called
Setup.exe or Install.exe.
7. Double-click the icon and follow any on-screen
instructions to re-install the driver.
Software
1. Click Start > My Computer.
2. Double-click the icon for the Local Disk (C:) drive.
3. Double-click the Application folder.
4. Locate the folder called Tool and double-click it.
5. Inside this folder you will see folders for each piece of
software you can re-install, for example, PowerDVD.
6. Double-click the folder and look for an icon called
Setup.exe or Install.exe.
7. Double-click the icon and follow any on-screen
instructions to re-install the software.
Page 99
Page 100

System Recovery
Why re-install?
There are several reasons that you may need or want to reinstall your computer:
• Windows® XP may become irreparably damaged or
corrupt
• Key hardware such as your motherboard may be changed
during a repair
• You may simply want a clean start
We have made the process quick and painless.
Before you start...
It is important to note that the reinstallation process can
erase your hard drive and all the files stored on. Before you
attempt any form of re-installation we recommend that you
save anything important to a CD, DVD, or other external
storage device—just to be safe!
What is re-installed?
The recovery system takes between 15 and 20 minutes. It
will reinstall:
• Microsoft® Windows® XP Home Edition
• Hardware device drivers for the original hardware
• Software supplied with your Advent computer
It will not reinstall any software, hardware, or peripherals
that you have added to your computer. Please see the
documentation supplied with these devices for more
information.
Page 100
 Loading...