

Page 1

User Manual
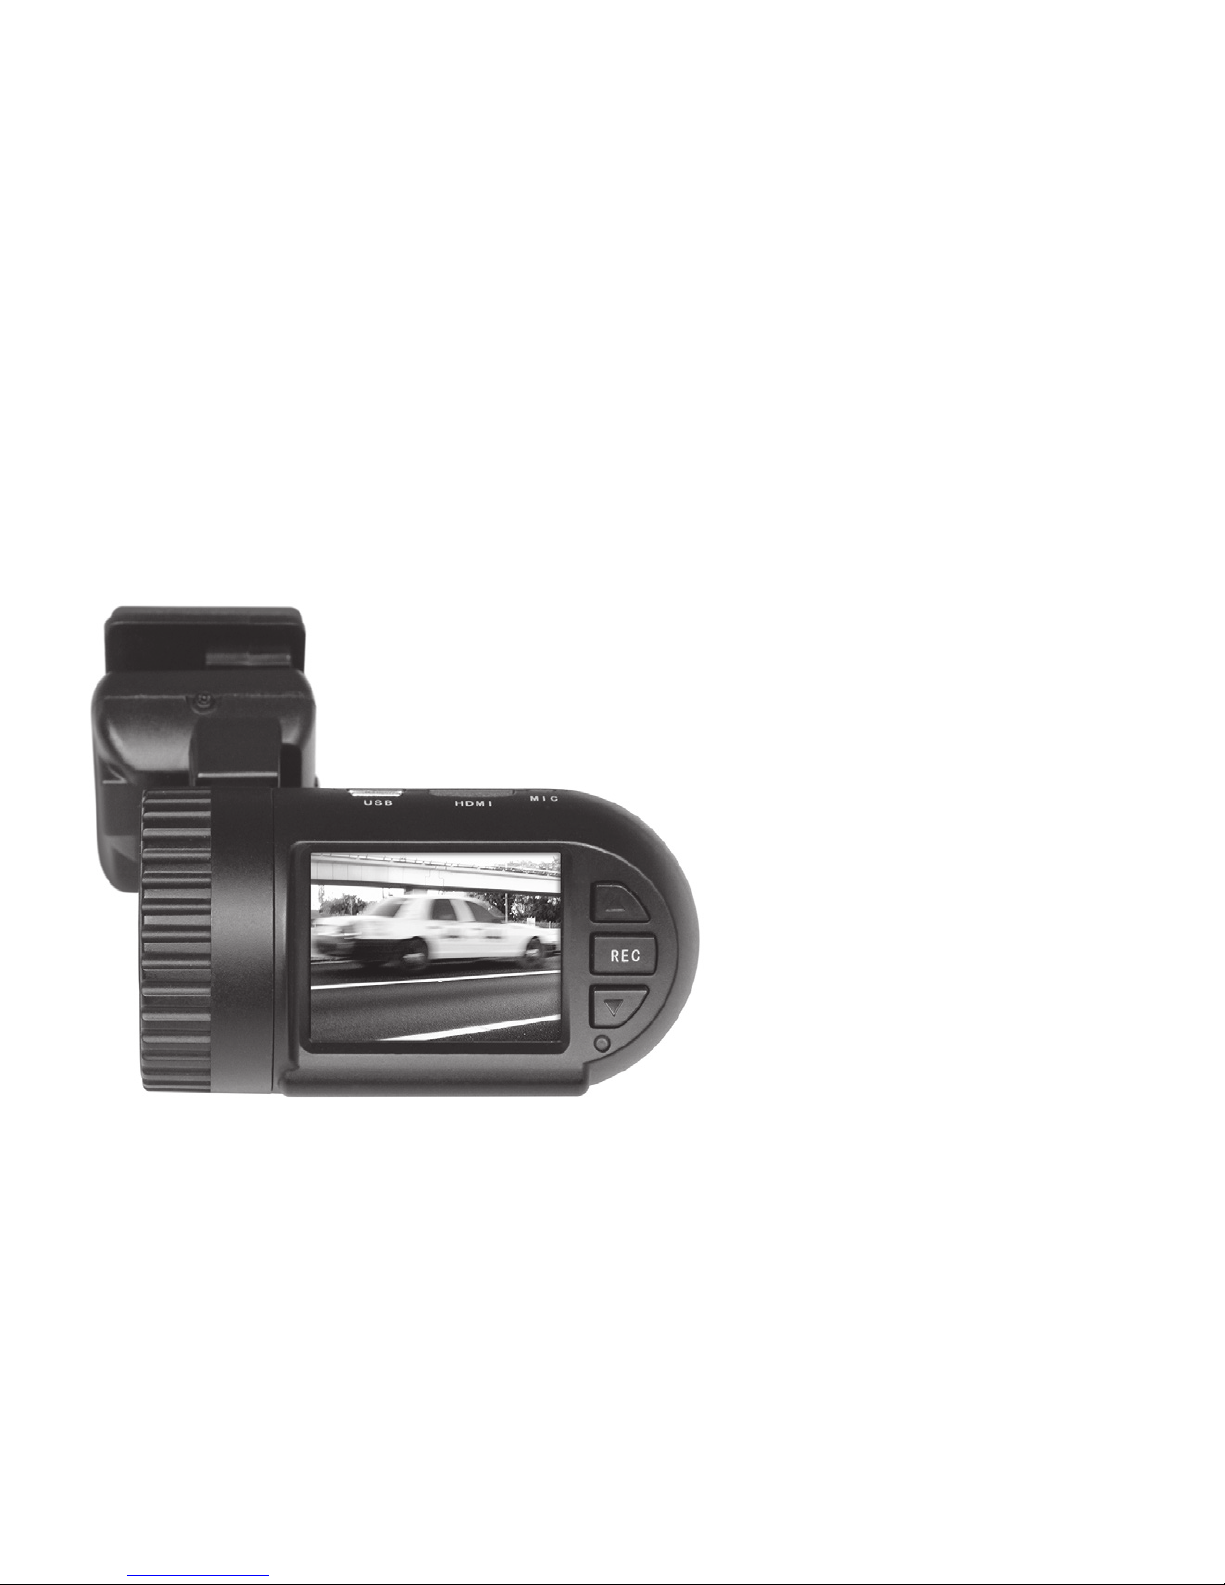
U-DRIVE
STATION
MT4048
Page 2

2
EN
Overview
Thank you for buying MT4048 U-DRIVE STATION.
Please take a moment and read this manual before
using the device.
1. USB port
2. HDMI socket
3. Docking station
4. Car charger socket
5. Power/Mode button
6. Lens
7. Speaker
8. LCD screen
9. Up/Menu (mute) button
10. REC/OK button
11. Down (SOS function) button
12. LED indicator
13. microSD socket
14. Reset switch
15. Microphone
Page 3

3
EN
In the box: Full HD DVR, 3M holder, car
charger, USB cable and user manual.
Note! Please use alcohol-based or other
cleaner before applying 3M holder on the
windscreen.
Methods to Charge Battery:
1. Connect DVR to car charger through
USB port, DVR powers on automatically
to enter standby mode and start charging with red indicator light ON.
2. Connect DVR to computer via USB
cable, DVR power on automatically
and enter mode ‘USB Mass Storage’,
charging will be continued in the background.
[Note] During charging, it’s permitted
to turn o the DVR manually. Once DVR
been fully charged, red indicator light
goes out.
For the power capacity in the battery, refer to the following icons:
Installation and Removal
of microSD card
1. In the direction as indicated, insert the
microSD card into the slot until it is
held rmly.
2. To take the microSD card out, slightly
press the microSD card to eject it.
[Note]
■ note the direction to insert the microSD card; if the direction is reverse,
the DVR and the microSD card may be
damaged.
■ when the microSD card is inserted into
the DVR, the machine will set the microSD card as preset storage unit and
the data in the original microSD card
will be unreadable.
■ if the microSD card is incompatible
with the DVR, please insert the card
again or replace it for retry.
■ supported cards: from 4GB up to 32GB
(class4 or faster).
Full Middle Low
Page 4

4
EN
Operation Instructions
Turn On/O DVR
1. Press the power key for 1 second to
switch ON and hold for 3 seconds to
switch OFF DVR manually.
2. Connect the DVR with car charger in
the car. When car engine starts up, DVR
switches ON automatically. When car
engine shuts o or car charger been
disconnected, DVR switches OFF with
10 seconds delay (as per setting).
System Setup
In Video or Photo mode, press and hold
‘UP’ button to enter menu interface>DOWN->REC/OK button to enter the
System Setup, press and hold UP button
to exit:
■ G-Sensor: On/O. When G-sensor is
ON, DVR will protect and lock the current video once G-sensor been triggered by instant impacts or shocks
from trac accident or crash.
■ File Type: Emergent Video (Event)/
Common Video/Photo. Select the specied type of les to browse at playback
mode.
■ Sounds: Voice Recording On/O, Key
Sound On/O and Volume. Press Power/Mode button to adjust and REC/OK
to conrm.
■ Power Save: O/10 sec./30 sec. Select
to screen o automatically after DVR
continue recording for 10 sec. or 30 sec.
As default, power save is ‘O’ and DVR
screen stays on indenitely.
■ Date & Time: Date and time adjust-
ment. Use Power button to select next
value.
■ OSD Language: select menu lan-
guage.
■ Light Freq: 50Hz/60Hz
■ TV out: PAL/NTSC
■ Format: Format the memory card. Se-
lect to format the memory card at the
rst use.
Page 5

5
EN
■ System: Factory Reset / System Info
(Version) / Card Info
■ Delay shutdown: On/O. As default,
10 sec. o delay is ON, to avoid any
shutdown command caused by power
interruption during recording.
Take Video and Set Video Menu
1. Take video
After power ON, DVR enters Video Mode
as default, with icon displaying at
the upper-left corner of screen. Press the
‘REC/OK’ key to start video recording if
proper microSD card been inserted. During recording, the red icon ● ashes.
[Note]
When the DVR is mounted on the windshield with car charger connected, it will
power ON and start recording automatically once car engine starts up.
2. Set Video Options
Press and hold ‘UP’ button to enter menu
interface->REC/OK button to enter video
setting.
■ Resolution: 1080P(30fps)/720P(60fps)
■ Seamless (Loop Recording): O/1min
/3min/5min. Select to store and recycle
the video les by 1 min/3 min/5 min
per section.
■ Date Stamp: On/O. Select to stamp
the date and time on video screen as
watermark.
■ Motion Detection: On/O. The DVR
can be set to record ONLY when motion is detected. This can be useful
while your car is parked. In this mode,
DVR will record automatically after
sensing motion and for 10 seconds afterward. The DVR will return to standby
mode if no other motion is detected.
Take Photos and Set Photo Menu
1. Take Photos
Power on DVR to enter the video mode as
default; press the Power/Mode button to
enter the Photo mode with icon
displaying on the upper-left corner of the
screen.
Page 6

6
EN
Then, hold the DVR rmly, press REC/OK
key to take photos. Photos will be stored
into memory card automatically.
2. Set Photo Menu
During photo mode, press and hold ‘UP’
button to enter menu interface, then
press REC/OK key to enter photo menu
settings.
■ Resolution: 12M/10M/8M/5M/2M
■ Exposure: EV -2.1/-1.0/0.0/+1.0/+2.1
Playback Mode
1. Browse Files
After the DVR powers ON and enter the
VIDEO mode, press the mode key twice
to enter the PLAYBACK mode, press the
UP/DOWN key to browse the video les
or Photo les.
[Note] If the File Type (in System Setting)
is chosen to be ‘VIDEO’, then only VIDEO
les (loop recording les) are available
in PLAYBACK mode. If File Type is chosen
to be ‘EVENT’, then only emergent video
les are available in PLAYBACK mode.
And ‘PHOTO’ File Type for photo les only
browsing in PLAYBACK mode.
2. Delete and Protect
In playback mode, press and hold ‘UP’
button to have the options Delete and
Protection Lock. Press the UP/DOWN
and REC/OK keys to select the options
“Delete the current” and “Delete All”, press
the REC/OK to enter your choice. You may
add a lock to the le. Locked le are protected to be important les and cannot
be deleted until unlocking it.
Connection to TV via HDMI Cable
(not included)
Connect DVR to TV via HDMI cable (if
available). DVR screen will go black, and
TV screen comes to show the playback
les (Video or Photo). Press UP/DOWN
key to select the desired le and REC/OK
key to enter your choice.
Page 7

7
EN
RESET
During daily operations, improper operation or incorrect memory card probably causes DVR to freeze. Please press
the RESET small key on the bottom side
of DVR to power OFF the DVR. Power ON
DVR manually and DVR will automatically
restore the factory defaulted settings.
Due to continuous development specication and appearance of product are subject
to change without prior notice. For technical
support please visit www.media-tech.eu.
Page 8

8
EN
Page 9
Instrukcja obsługi
U-DRIVE
STATION
MT4048
Page 10

2
PL
Identykacja elementów urządzenia
Dziękujemy za zakup kamery samochodowej
MT4048 U-DRIVE STATION. Prosimy o uważne zapoznanie się z niniejszą instrukcją obsługi przed
rozpoczęciem korzystania z urządzenia.
1. Gniazdo USB
2. Gniazdo HDMI
3. Stacja dokująca
4. Gniazdo ładowarki
samochodowej
5. Przycisk POWER/MODE
6. Obiektyw
7. Głośnik
8. Wyświetlacz
9. Przycisk UP/MENU (wyciszenie)
10. Przycisk REC/OK
11. Przycisk DOWN (funkcja SOS)
12. Dioda LED
13. Gniazdo karty microSD
14. Zworka RESET
15. Mikrofon
Page 11

3
PL
W opakowaniu: Full HD DVR, uchwyt na
szybę, ładowarka samochodowa, kabel
USB, instrukcja obsługi.
Ważne! Przed montażem stacji dokującej
proszę odtłuścić powierzchnię szyby aby
zapewnić pewne zamocowanie.
Aby naładować wbudowany
akumulator:
1. Podłącz DVR do ładowarki samochodowej poprzez port USB, urządzenie
uruchomi się automatycznie, przejdzie
w stan “standby” i będzie ładowane,
dioda LED zapali się na czerwono.
2. Podłącz DVR do komputera PC za pomocą kabla USB, urządzenie uruchomi
się automatycznie, będzie widoczne w
systemie jako urządzenie magazynujące USB, ładowanie będzie odbywać się
w tle.
[Uwaga!] Podczas ładowania można
urządzenie wyłączyć ręcznie przyciskiem
POWER. Gdy urządzenie naładuje się do
pełna czerwona dioda LED zgaśnie.
Stan naładowania prezentuje ikona baterii:
Instalacja karty microSD
1. Włóż kartę do gniazda zgodnie z ikoną
na obudowie, aż poczujesz mechanizm
zamocowania karty.
2. Aby wyjąć kartę wciśnij lekko do dołu
aby mechanizm zwolnił kartę.
[Uwaga]
■
zwróć uwagę na orientację karty podczas instalacji karty, niepoprawna próba
może spowodować uszkodzenie karty
microSD lub gniazda kart w urządzeniu.
■ przed instalacją karty usuń swoje dokumenty, urządzenie podczas zapisu
nagrań może spowodować, że danych
nie będzie można odczytać.
■ jeżeli karta nie może być poprawnie
rozpoznana wyjmij i włóż kartę ponownie lub użyj innej karty.
■ urządzenie akceptuje karty od 4GB do
32GB (class4 lub szybsze).
100% 50% Niski stan
Page 12

4
PL
Korzystanie z urządzenia
Włączanie/wyłączanie DVR
1. Wciśnij i przytrzymaj POWER na 1 sekundę aby uruchomić, wciśnij i przytrzymaj przycisk POWER na 3 sekundy
aby wyłączyć.
2. Podłącz DVR do ładowarki samochodowej. Gdy pojawi się napięcie na gnieździe zapalniczki DVR uruchomi się automatycznie, gdy napięcie zniknie lub
odłączysz ładowarkę urządzenie standardowo wyłączy się po 10 sekundach
(jeżeli nie ustawiono inaczej).
Ustawienia „System Setup”
Gdy urządzenie nie nagrywa i jest w trybie
“Video” lub „Photo” wciśnij i przytrzymaj
przycisk ‘UP’ aby wejść do ustawień, użyj
przycisków ‘UP’, ‘DOWN’ aby poruszać się
po menu, wciśnij przycisk ‘REC’ aby wejść
dalej, przytrzymaj przycisk ‘UP’ aby wyjść.
Uwaga! „ON – funkcja włączona” „OFF –
funkcja wyłączona”.
■ G-Sensor: On/O. Gdy funkcja jest
włączona urządzenie zabezpieczy bie-
-żący plik jako “tylko do odczytu” w
momencie wykrycia dużego wstrząsu
(zderzenie, dachowanie).
■ File Type: wybierz rodzaj plików które
będą dostępne w trybie „Viewer”.
■ Sounds: Voice Recording (nagrywanie
dźwięku) On/O, Key Sound (dźwięk
przycisków) On/O oraz Volume (głośność podczas odtwarzania).
■ Power Save: O/10 sec./30 sec. Funk-
cja wygaszania ekranu LCD podczas
pracy, domyślna wartość ‘O’ oznacza,
że ekran jest zawsze włączony.
■ Date & Time: ustaw aktualną datę i
czas, przycisk POWER pozwala na ustawienie kolejnej wartości.
■ OSD Language: wybierz język menu.
■ Light Freq: podczas nagrywania we
wnętrzach wybierz częstotliwość sieci
energetycznej aby uniknąć rejestrowania obrazu z przeplotem.
■ TV out: PAL/NTSC
Page 13

5
PL
■ Format: formatowanie karty microSD,
zalecane przed pierwszym użyciem
karty.
■ System: Factory Reset (przywrócenie
ustawień fabrycznych)/ System Info
(informacje o wersji rmware) / Card
Info (informacje o karcie microSD)
■ Delay shutdown: On/O. Opóźnienie
automatycznego wyłączenia urządzenia po utracie zasilania. Domyślnie
funkcja włączona (opóźnienie 10 sekund). Pozwala uniknąć przerw w nagraniach podczas przypadkowego zgaszenia silnika i utraty zasilania.
Tryb video i dostępne opcje
1. Nagrywanie video
Po uruchomieniu urządzenie domyślnie
przechodzi w tryb „Video”, potwierdza to
ikona widoczna w lewym górnym
rogu. Wciśnij REC aby rozpocząć nagrywanie, czerwona ikona ● będzie migała.
Aby zatrzymać nagrywanie wciśnij ponownie przycisk REC.
[Ważne]
Gdy DVR jest zamocowany w uchwycie
nas szybie i podłączona jest ładowarka
samochodowa - urządzenie uruchomi się
i zacznie nagrywać automatycznie gdy
uruchomiony zostanie silnik i pojawi się
napięcie na gnieździe zapalniczki.
2. Opcje Video
■ Resolution: rozdzielczość 1080P
(30fps) / 720P (60fps)
■ Seamless (nagrywanie w pętli):
O/1min/3min/5min. Wybierz długość
sekwencji podczas trybu nagrywania
w pętli lub wyłącz opcję nagrywania w
pętli (o).
■ Date Stamp: On/O. Stempel daty
widoczny na nagraniu.
■ Motion Detection: On/O. Detekcja
ruchu, funkcja przydatna gdy samochód jest zaparkowany. Za każdym
razem gdy zostanie wykryty ruch
przed obiektywem urządzenie nagra
10-sekundową sekwencję.
Page 14

6
PL
Tryb Photo i dostępne opcje
1. Wykonywanie zdjęć
Gdy urządzenie nie nagrywa wciśnij przycisk POWER aby zmienić na tryb “Photo”,
potwierdza to ikona
widoczna w lewym górnym rogu.
Przycisk REC wyzwala migawkę, pliki zostaną zapisane na karcie microSD.
2. Opcje Photo
■ Resolution: rozdzielczość zdjęcia
12M/10M/8M/5M/2M
■ Exposure: korekcja ekspozycji EV
-2.1/-1.0/0.0/+1.0/+2.1
Tryb Viewer i dostępne opcje
1. Przeglądanie plików
Gdy urządzenie nie nagrywa wciśnij
przycisk dwukrotnie POWER aby zmienić
na tryb “Viewer”, pojawi się lista plików
zgodnie z ustawieniem opcji „File type”,
czyli ‘VIDEO’ (pliki video z nagrań w pętli), ‘EVENT’ (pliki oznaczone jako „tylko do
odczytu”), ‘PHOTO’ (zdjęcia).
2. Dostępne opcje
W trybie przeglądania plików wywołaj
opcje przytrzymując przycisk ‘UP’, pojawi
się opcja Delete (usuń) oraz Protection
(zabezpiecz). Można usunąć lub zabezpieczyć pojedyncze pliki lub wszystkie
pliki. Zabezpieczenie polega na ustawieniu atrybutu pliku jako „tylko do odczytu”.
Przeglądanie plików na telewizorze
HDMI
Podłącz DVR do telewizora za pomocą
kabla HDMI (zestaw nie zawiera kabla
HDMI). Ekran urządzenia wygasi się, pojawi się na telewizorze w trybie “Viewer”,
wybierz przyciskami ‘UP’ lub ‘DOWN’ plik
wciśnij ‘REC’ aby uruchomić odtwarzanie.
RESET
Jeżeli urządzenie zachowuje się niepoprawnie lub zawiesza się włóż wyprostowany spinacz biurowy aby uruchomić
zworkę RESET, urządzenie wyłączy się i
przywrócone zostaną ustawienia fabryczne.
Page 15

7
PL
Ze względu na ciągły rozwój specykacja
oraz wygląd urządzenia może ulec zmianie
bez wcześniejszego powiadomienia. Pomoc
techniczna dostępna na www.media-tech.
eu.
Page 16

8
PL
Page 17

Uživatelský manuál
U-DRIVE
STATION
MT4048
Page 18

2
CZ
Obrázek produktu a jeho popis
Děkujeme, že jste si vybrali náš Full HD1080p Auto
DVR. Před použitím DVR si prosím přečtěte pečlivě
tento návod k obsluze.
1. USB port
2. HDMI port
3. Konzole
4. Port pro nabíječku
5. Power/Mode
6. Čočka
7. Reproduktor
8. LCD Displej
9. Nahoru/Menu (Mute ON/OFF)
10. REC/OK
11. Dolů (SOS lock)
12. Indikátor
13. Slot pro Micro-SD kartu
14. RESET
15. Mikrofón
Page 19

3
CZ
Obsah balení: Full HD DVR, držák 3M, nabíječka do auta, USB kabel a uživatelský
manuál.
Methods to Charge Battery:
1. CPřipojte DVR k autonabíječce přes mini-USB port, DVR se automaticky přepne do pohotovostního režimu a začne
nabíjení, červená kontrolka se rozsvítí.
2. Připojte DVR k počítači pomocí kabelu
USB, DVR se automaticky zapne a můžete volit mezi režimem „Mass Storage
(MSDC)“ a „PC-Cam“, stiskněte „UP“ /
„DOWN“ pro zvolení požadovaného
režimu a tlačítko „REC / OK“ pro potvrzení, následně začne nabíjení.
[Poznámka] Během nabíjení, můžete
vypnout DVR ručně. Jakmile je DVR plně
nabitá, červená kontrolka zhasne.
Ikony ukazují stav nabití:
Instalace a vyjmutí Micro SD karty
1. Vložte Micro SD kartu ve směru, jak je
uvedeno, zasuňte Micro SD kartu do
slotu, dokud nebude pevně držet.
2. Chcete-li vyjmout Micro SD kartu ven,
lehce ji stiskněte Micro SD karta se vysune ven.
[Poznámka]
■ Dodržujte směr ke vložení Micro SD
karty, pokud je směr opačný, může dojít k poškození DVR a Micro SD karty.
■ Když je vložena Micro SD karta do DVR,
přístroj nastaví na Micro SD kartu jako
přednastavenou ukládací jednotku a
původní data z Micro SD karty budou
nečitelné.
■ Pokud je Micro SD karta nekompatibilní s DVR, vložte kartu znovu, nebo ji
vyměňt za jinou.
■ Podporované Micro SD Karty
4GB-32GB/C4-C10
Plné Středně Nízké
Page 20

4
CZ
Návod k používání
Zapnutí a vypnutí On/O DVR
1. Stiskněte tlačítko POWER po dobu 1
sekundy pro zapnutí a pro vypnutí držte po dobu 3 sekund .
2. Připojte DVR pomocí autonabíječky do
zástrčky cigaretového zapalovače ve
vozidle. Po nastartování motoru auta
se DVR automaticky zapne. Když motor
vypne nebo auto nabíječka bude odpojena, DVR se vypne se zpožděním 10
sekund (dle nastavení).
Systémové nastavení
Ve video nebo foto režimu, stiskněte a podržte tlačítko „UP“ otevřete menu rozhraní tlačítky-> DOWN-> REC / OK pro vstup
do nastavení systému:
■ G-Sensor: On/O. Pokud je G-senzor
zapnut , DVR bude chránit a uzamkne
aktuální video jakmile G-sensor zaznamená náraz, nebo otřes při dopravní
nehodě.
■ Typ souboru: Naléhavé Video (Událost)
/Video/Foto. Vyberte zadaný typ souboru pro prohlížení v režimu přehrávání.
■ Zvuk: Hlasový záznam On / O Zvuk
tlačítek On / O a Hlasitost. Stisknutím
tlačítka Power / Mode nastavte a stisknutím REC / OK potvrdte.
■ Úspora baterie: Vypnutí/10 sec./30 sec.
Vyberte z nabýzených možností pro
automatické vypnutí obrazovky DVR
i nadále bude nahrávat.Pokud zadáte
o obrazovka se nevypne.
■ Datum a čas: Nastavení datumu a času.
■ OSD Jazyk: English/Russian/Korean/
French/Portuguese/Polish/Czech a další.
■ Frekvence: 50Hz/60Hz
■ TV výstup: PAL/NTSC
■ Formátování: Format the memory card.
Select to format the memory card at
the rst use.
■ Systém: Tovární nastavení / Systémové
Info (Verze) / Info o paměťové kartě
Page 21

5
CZ
■ Zpožděné vypnutí: On/O. Standardně
je nastaveno 10 sec. zpoždění vypnutí
ON, aby se zabránilo k vypnutí způsobené přerušením napájení během nahrávání.
Nahrávání videa a video menu
1. Nahrávání
Po zapnutí napájení DVR přejde do výchozího režimu video, ikona se zobrazí v levém horním rohu obrazovky.
Stiskněte tlačítko „REC / OK‚ pro spuštění
nahrávání videa, Micro SD karta musí být
správně vložena. Během nahrávání červená ikona ● bliká.
[Poznámka]
Pokud je DVR připojena nabíječkou do
auta, zapne se a začne automaticky nahrávat, jakmile nastartuje motor automobilu.
2. Nastavení Videa
Stiskněte a podržte tlačítko „UP“ pro
vstup nabídky rozhraní-> REC / OK tlačítko pro vstup nastavení videa.
■ Rozlišení: 1080P (30fps) / 720P (60fps)
■ Délka stopy (Nahrávání ve smyčce):
O/1min/3min/5min. Vyberte pro
uložení a recyklaci video souborů na
části o délce 1 min. / 3 min. / 5 min.
■ Datová známka: On/O. Vyberte ra-
zítko datum a čas na obrazovce videa
jako vodoznak
■ Detekce pohybu: On / O.DVR lze
nastavit pro automatický záznam při
detekci pohybu. To může být užitečné,
když je vaše auto zaparkováno. Pokud
v tomto režimu DVR zaznamená pohyb po dobu 10 sekund, začne DVR
nahrávat.DVR se vrátí do pohotovostního režimu, pokud není detekován
žádný další pohyb.
Fotky a nastavení Menu foto
1. Focení
Po zapnutí bude DVR ve výchozím režimu
videa, stiskněte tlačítko Power / Mode pro
vstup do režimu Foto, ikona
zobrazu-
je v pravém horním rohu obrazovky.
Page 22

6
CZ
Poté podržte DVR a stiskněte tlačítko REC
/ OK. Fotograe budou automaticky uloženy na paměťovou kartu.
2. Nastavení Menu Foto
V režimu foto, stiskněte a podržte tlačítko
„UP“pro vstup do nabídky rozhraní, pak
stiskněte tlačítko REC / OK pro vstup nastavení v foto menu.
■ Velikost: 12M/10M/8M/5M/2M
■ Expozice: EV -2.1/-1.0/0.0/+1.0/+2.1
Mód Přehrávání
1. Procházení souborů
Stiskněte tlačítko MODE dvakrát pro
vstup do režimu přehrávání, stiskněte
tlačítko UP / DOWN pro procházení video
souborů,nebo fotograí.
[Poznámka] Je-li vybrán typ souboru VIDEO (v Nastavení systému), pak se zobrazí
pouze video soubory (nahrávání smyčky
soubory) a jsou k dispozici v režimu přehrávání. Je-li vybrán typ souboru „EVENT“,
pak jsou k dispozici pouze videa těchto
souborů v režimu přehrávání. Pokud je
vybrán typ souboru ‚foto‘ pak jsou k dispozici fotogracké soubory, prohlížení
pouze v režimu přehrávání.
2. Mazání a ochrana
V režimu přehrávání, stiskněte a držte tlačítko „UP“pro vstup do nabídky Mazání a
Ochrana. Stiskněte tlačítka UP / DOWN a
REC / OK pro volbu možnosti „Odstranit
aktuální“ a „Vymazat vše“, stiskněte tlačítko REC / OK pro potvrzení. Můžete přidat
zámek na soubor. Zamčené soubory jsou
chráněny a nemůžou být odstraněny, dokud je neodemknete.
Připojení k TV pomocí HDMI kabelu
(není součástí balení)
Připojte DVR k TV přes HDMI kabel.Displej
DVR zčerná a přehrávané soubory se zobrazí na obrazovce TV. Stiskněte tlačítko
UP/DOWN pro výběr souboru a potvrďte
tlačítkem REC/OK.
Page 23

7
CZ
RESET
Během každodenního používání může
dojít k zamrznutí DVR, např. nevhodným
použitím nebo nesprávně nainstalovanou
paměťovou kartou.V takovém případě
stiskněte malé tlačítko RESET na spodní
straně DVR vypněte napájení DVR. Po
opětovném zapnutí bude DVR zpět v továrním nastavení.
Specikace a vzhled zařízení mohou být
změněny bez předchozího upozornění. Podpora k dispozici na www.media-tech.eu.
Page 24

8
CZ
Page 25

Ръководство
за употреба
U-DRIVE
STATION
MT4048
Page 26

2
BG
Снимка на продукта и характеристики
Благодарим Ви, че избрахте Full HD1080P Car
DVR. Моля, прочетете внимателно упътването
преди да използвате DVR-a.
1. USB порт
2. HDMI порт
3. Поставка
4. Порт за зарядно за кола
5. Захранващ бутон/Режим
6. Обектив
7. Говорители
8. LCD дисплей
9. Нагоре/меню
(заглушаване вкл/изкл)
10. Запис/ОК
11. Надолу (SOS заключване)
12. Индикатор
13. Слот за карта памет micro SD
14. Нулиране
15. Микрофон
Page 27

3
BG
В кутията: Full HD DVR, 3M стойка, зарядно за кола, USB кабел и ръководство.
Методи за зареждане
на батерията:
1. Свържете DVR-a със зарядното за
кола посредством Mini USB порта.
DVR-ът се включва автоматично в режим стендбай и започва да се зарежда със светещ червен индикатор.
2. Свържете DVR-а към компютъра
чрез USB кабел. DVR-ът се включва
автоматично в режим за избор между „устройство за съхранение на
данни“ или PC камера. Натиснете нагоре/надолу, за да изберете желания
режим и бутона запис/ОК за влизане
в DVR-а и зареждане.
[Забележка] При зареждане е позволено ръчното изключване на DVR-a.
След пълното зареждане на DVR-a, червеният индикатор угасва.
Относно зарядът на батерията може да
следите иконите по-долу:
Инсталация и отстраняване на
Micro SD картата
1. Поставете Micro SD картата в слота, в
посочената посока докато се закрепи здраво.
2. За да отстраните Micro SD картата,
натиснете я леко, за да я извадите навън.
[Забележка]
■ спазвайте посоката, за да поставите Micro SD картата; ако посоката е
обратна DVR-a или micro SD картата
може да се повредят
■ когато се постави micro SD картата в
DVR-a, устройството ще я определи
като предварително зададена единица за съхранение, а данните в оригиналната micro SD карта ще бъдат
недостъпни.
Пълен Среден Нисъ
Page 28

4
BG
Инструкции за работа
Вкл/Изкл на DVR-a
1. Натиснете захранващия бутон за 1
секунда докато DVR-a се включи и
задръжте за 3 секунди за ръчно изключване.
2. Свържете DVR-a със зарядното за
кола. Когато запалите колата DVR-a
ще се включи автоматично. Когато загасите двигателя или махнете
зарядното, DVR-ът ще се изключи с
10 секунди закъснение (според настройката).
Системни настройки
В режим на видео или снимка задръжте бутона „нагоре“ за да влезете в ме-
нюто-> бутон за запис/ОК за влизане в
системните настройки:
■ G-сензор: вкл/изкл. Когато G-сен-
зора е включен, DVR-ът ще защити
и заключи текущото видео при внезапно възникване на инцидент или
катастрофа.
■ Файлове: Спешно видео (събитие)/
Общо видео/ снимка. Изберете определен тип файлове в режим на възпроизвеждане.
■ Звуци: Гласов запис вкл/изкл, звук на
клавишите вкл/изкл и усилване. Натиснете захранващия бутон/режим и
запис/ОК за потвърждение.
■ Икономичен режим: изкл/10сек./30
сек. Изберете автоматично изключване на дисплея след като DVR-а продължи да записва за 10 или 30 сек. По
подразбиране икономичният режим
е изключен и дисплея остава включен за неопределено време.
■ Дата и време: настройка на дата и
време.
■ Ако micro SD картата е несъвместима
с DVR-a поставете я отново или я заменете с друга и опитайте пак.
■ Поддържа 4GB-32GB/C4-C10 Micro
SD карта.
Page 29

5
BG
■ Език: Английски, Руски, Корейски,
Френски, Португалски, Полски и др.
■ Честота: 50Hz/60Hz
■ ТВ изход: PAL/NTSC
■ Форматиране: Форматиране на кар-
тата памет. Изберете форматиране
на картата памет при първо използване.
■ Система: Фабрични настройки/ Сис-
темна информация (версия)/ Информация за картата
■ Забавено изключване: Вкл/Изкл.
По подразбиране е включено 10
секунди забавено изключване за избягване на команди за изключване,
причинени от прекъсване на захранването по време на запис.
Запис на видео и настойка на
видео менюто
1. Запис на видео
След включване DVR-a влиза във видео режим по подразбиране, с икона
показваща се в горния ляв ъгъл на
дисплея. Натиснете Запис/ОК бутона за
старт на видео запис, ако micro SD картата е поставена правилно. При запис
свети червена икона.
[Забележка]
Когато DVR-a се монтира на предното
стъкло и е свързан със зарядното за
кола, ще се включи и започне да записва автоматично при запалване на автомобила.
2. Видео настройки
Задръжте бутона „нагоре“ за влизане в
менюто -> запис/ОК бутона за влизане
във видео настройките.
■ Резолюция:1080P(30fps)/720P(60fps)
■ Непрекъснат запис (Loop Record-
ing): Изкл./1мин./3 мин./5 мин. Изберете за да съхраните и рециклирате
видео файловете в 1мин./3 мин./5
мин. в раздел.
■ Печат с дата: вкл/изкл. Изберете печат с дата и време във видеото като
воден знак.
Page 30

6
BG
■ Засичане на движение: вкл/изкл.
DVR-ът може да бъде настроен да
записва само при засичане на движение.Това може да бъде полезно
докато колата е паркирана. В този
режим DVR-ът записва автоматично
след разпознаване на движение и 10
секунди след това. DVR-ът се връща
в режим на готовност ако не открие
друго движение.
Правене на снимки и настройки
на менюто за снимка
1. Правене на снимки
Включете DVR-a, за да влезете във видео режим по подразбиране. Натиснете
захранващия бутон/режим за влизане в
режим снимане с икона
показваща
се в горния ляв ъгъл на дисплея.
След това задръжте DVR-a здраво, натиснете запис/ОК бутона за снимка.
Снимките ще се запазят автоматично в
картата памет.
2. Настойки на менюто за снимка
По време на фото режим задръжте бутона „нагоре“ за влизане в менюто, след
което натиснете запис/ОК бутона за
влизане в настройките за снимка.
■ Резолюция: 12M/10M/8M/5M/2M
■
Експозиция: EV-2.1/-1.0/0.0/+1.0/+2.1
Режим възпроизвеждане
1. Разглеждане на файлове
След включване на DVR-a и влизане в
режим на видео, натиснете клавиша
за режим 2 пъти за влизане в режим на
възпроизвеждане, натиснете нагоре/
надолу бутона за разлистване на видео
файловете и снимките.
[Забележка] Ако типът на файла (в системните настройки) е избран да бъде
„видео“, то само видео файлове ще
бъдат налични за възпроизвеждане.
Ако типът на файла е избран да бъде
„събитие“ то само нововъзникващите
файлове ще са на разположение за възпроизвеждане. И файлове тип снимка
Page 31

7
BG
за разлистване само на снимки за възпроизвеждане.
2. Изтриване и защита
В режим на възпроизвеждане задръжте бутона „нагоре“, за да получите опция за изтриване и защита. Натиснете
бутоните нагоре/надолу и запис/ОК, за
да изберете опциите „изтрий текущото“
или „изтрий всички“, натиснете запис/
ОК, за да изберете. Може да добавите
заключване на файла. Заключените
файлове са защитени важни файлове,
които не могат да бъдат изтрити, докато
не ги отключите.
Връзка с ТВ чрез HDMI кабел
(не е включен)
Свържете DVR-a към телевизора чрез
HDMI кабел (ако е наличен). Дисплея на
DVR-a ще стане черен, а тв екрана ще
покаже файловете за възпроизвеждане
(видео или снимки). Натиснете нагоре/
надолу, за да изберете желания файл и
запис/ОК за избор.
Функциите и техническите спецификации на устройството са обект на
промяна без предварително известие.
За техническа помощ, моля посетете
www.media-tech.eu.
НУЛИРАНЕ
По време на ежедневните операции,
неправилна експлоатация или карта
може да причини спиране работата на
DVR-a. Натиснете малкия бутон нулиране върху долната страна на dvr-a за изключване. Включете ръчно dvr-a и автоматично ще се възстановят фабричните
настройки.
Page 32

8
BG
Page 33

Manual de utilizare
U-DRIVE
STATION
MT4048
Page 34

2
RO
Imagini de ansamblu, butoane şi conectică
Vă mulțumim pentru alegerea Camerei DVR Full HD 1080p,
Media-Tech MT4048.
Vă rugăm să citiți cu atenție acest manual înainte de utilizarea echipamentului.
1. Port Mini-USB
2. Port HDMI
3. Suport prindere
4. Port alimentare
5. Buton Power/Mode
6. Obiectiv
7. Difuzor
8. Ecran LCD
9. Buton SUS/Menu
(Mute ON/OFF)
10. Buton REC/OK
11. Buton JOS (SOS lock)
12. Indicator
13. Slot card memorie
Micro-SD
14. Oriciu Reset
15. Microfon
Page 35

3
RO
In pachet: Camera auto Full HD DVR,
Suport 3M, Incarcator auto, Cablu USB si
Manual de utilizare.
Modalităi de încărcare a bateriei:
1. Conectaţi camera DVR (Digital Video
Recorder) la incarcatorul auto prin
portul Mini-USB. Camera intră în mod
automat în aşteptare (standby) şi porneşte încărcarea bateriei, cu indicatorul
luminos aprins in culoarea roşie.
2. Conectaţi camera DVR la calculator
prin cablul USB. Camera trece în mod
automat în modul alegere între “Cititor
card memorie” şi “Webcam”; apăsaţi
SUS /JOS pentru a alege opţiunea Webcam şi apoi butonul REC/OK pentru a
porni alimentarea propriuzisă.
[Notă] Pe durata încărcării, este permisă
închiderea manuală a camerei DVR. În
momentul încărcării totale a bateriei, indicatorul cu lumină roşie se stinge.
FPe display se asează icon-uri cu nformaţii despre starea de încărcare a bateriei:
Instalarea şi scoaterea cardului
Micro SD
1. Introduceţi uşor cardul de memorie Micro SD în slot, în sensul marcat, până în
momentul în care se xează ferm.
2. Pentru extragerea cardului, apăsaţi-l
uşor şi apoi scoateţi-l din fantă fără a
atinge contactele.
[Notă]
■ Atenţie la direcţia de introducere a
cardului: în cazul introducerii greşite,
cardul dar şi camera DVR pot deteriorate.
■ Când cardul Micro SD este introdus in
camera DVR, el este în mod automat
setat ca unitate de stocare prestabilită,
iar datele pe care le conţinea iniţial nu
mai pot recuperate.
Incarcată Medie Descărcată
Page 36

4
RO
Instrucţiuni de operare
Pornire / Oprire
1. Ţineţi apăsat butonul Power/Mode
timp de o secundă pentru a trece în ACTIV. (pornit) şi, respectiv, apăsaţi-l timp
de 3 secunde pentru a comuta manual
în DEZACT. (oprit).
2. Conectaţi camera DVR la alimentatorul
auto. Când motorul automobilului porneşte, camera trece automat în ACTIV.
Când motorul se opreşte sau când camera este deconectată de la încărcătorul auto, aceasta se va opri cu 10 secunde întârziere (perioadă setată).
Congurare, Meniu Congurari
Pentru a intra în Congurari, în oricare
dintre modurile Video sau Foto, se efectu-
ează secvenţa următoare de operaţii: apasati şi menţineţi apăsat butonul SUS ( se
intră in interfata Menu) -> JOS -> REC/OK.
Funcţiuni Meniu Congurari, cu opţiunile
aferente:
■ G-Senzor: ACTIV. / DEZACT. Când
G-senzor este ACTIV., camera va proteja şi bloca înregistrarea video curentă
în momentul declanşării senzorului de
către şocul sau impactul produse de
accidente de circulaţie, avarii etc.
■ Tip sier: Emergent Video (Event) /
Video / Photo Selectaţi tipul de şier
pe care doriţi să-l redaţi (vizualizaţi) în
modul redare (playback).
■ Sunet: Inregistrare voce ACTIV. / DEZ-
ACT. Sunet atingere taste ACTIV. / DEZACT. şi Volum. Apăsaţi butonul Power/
Mode pentru selectare opţiune şi butonul REC/OK pentru conrmare.
■ Oprire asaj LCD: DEZACT. / 10 sec. /
30 sec. Puteţi seta stingerea automată
a ecranului LCD la 10 sec. sau 30 sec.,
■ Carduri de memorie acceptate: Micro
SD cu capacitate de stocare în gama
4GB - 32GB, respectiv clasă de viteză C4
- C10.
Page 37

5
RO
după care camera va continua înregistrarea. Setarea implicită este DEZACT.,
ecranul rămâne aprins pe durată nelimitată.
■ Data & Ora: Stabilire format dată ca-
lendaristică şi oră înregistrare.
■ Limba: English/Russian/Korean/Fren-
ch/Portuguese/Polish, etc. Română
■ Frecventa iluminat: 50Hz / 60Hz Se-
lectare frecvenţa iluminatului pentru
lmări în lumină articială. În Romania
50Hz.
■ Standard TV: PAL / NTSC Standard de
imagine TV la ieşire. Pentru Romania,
recomandat PAL (625 linii, 50 de cadre/
sec.)
■ Formatare card: Formatare card de
memorie. Selectați pentru a formata
cardul de memorie la prima utilizare .
■ Sistem: Resetare congurare din fabri-
ca / Sistem info / Card Info Restabilire
setări din fabrică sau aşare informaţii
despre system (versiune) sau despre
cardul de memorie.
■ Oprire intarziata: ACTIV. / DEZACT.
Întârziere oprire. Implicită, 10 sec. ACTIV., pentru a evita comanzi de închidere nedorite, cauzate de întreruperi
accidentale ale alimentării în timpul
înregistrării.
Filmare, Meniul Video
1. Cum se înregistrează lme:
După Pornire (se apasă Power/Mode timp
de o secundă pentru a trece în ACTIV),
camera intră implicit în modul Video, şi
se aşează pictograma în colţul din
dreapta sus al ecranului. Apăsaţi butonul
REC/OK pentru a porni înregistrarea – în
cazul în care un card Micro SD este introdus. Pe durata lmării, pictograma roşie
● clipeşte.
[Notă]
Când camera DVR este montată pe parbriz şi conectată la încărcătorul auto, înregistrarea va porni în mod automat odată
cu pornirea motorului automobilului.
Page 38

6
RO
2. Opiuni în Meniu Video
Apăsaţi şi menţineţi apăsat butonul SUS
pentru a intra în interfaţa de meniu şi apoi
butonul REC/OK pentru a intra în setările
de meniu:
■ Rezolutie: 1080P(30fps)/720P(60fps)
■ Înregistrare continua (Loop Recor-
ding): DEZACT. / 1min/3min/5min.
■ Puteţi selecta înregistrare continuă, cu
stocare şi suprascriere (când cardul e
plin) şiere video de 1min/3min / 5min.
■ Marcare Data/Ora: ACTIV. / DEZACT.
Selectaţi ACTIV. pentru marcare data şi
oră la redare lm.
■ Detectare miscare: ACTIV. / DEZACT.
Camera poate setată să înregistreze
DOAR când este detectată mişcare. Acest
lucru poate util în timp ce masina este
parcată. În acest mod, camera DVR va
porni în mod automat înregistrarea după
detectarea mişcării şi o durată de timp
de 10 secunde după aceasta. Va reveni
la modul de aşteptare în cazul în care nu
mai este detectată nici o altă mişcare.
Fotograere, Meniul Foto
1. Cum se realizează fotograi
După Pornire (se apasă Power/Mode timp
de o secundă pentru a trece în ACTIV), camera intră implicit în modul Video. Apăsaţi butonul din nou Power/Mode pentru
a intra în modul Foto, cu aşarea simbolului
în colţul din dreapta sus al ecranului. Apoi, ţineţi ferm camera şi apăsaţi
butonul REC/OK pentru a face fotograi.
Fotograile vor stocate în cardul de memorie în mod automat.
2. Opiuni în Meniu Foto
În timp ce este activ modul Foto, apăsați şi
țineți apăsat butonul SUS pentru a intra în
interfața de meniu, apoi apăsați tasta REC
/ OK pentru a intra în setările de meniu:
■ Rezolutie: 12M/10M/8M/5M/2M
■ Expunere: EV -2.1/-1.0/0.0/+1.0/+2.1
Modul Redare
1. Răsfoire șiere
După ce camera este pornită şi intră, implicit, în modul Video, apăsaţi de două ori
Page 39

7
RO
butonul Power/Mode pentru a intra în
modul de redare, apoi apăsaţi tastele SUS
şi JOS pentru a parcurge listele de şiere
video sau şiere foto.
[Notă] Dacă Tip Fisier în Meniu Congurari
este ales să e Video , atunci numai şiere
video (şiere de înregistrare continuă) sunt
disponibile în modul redare (playback) .
Dacă Tip Fisier ales este Eveniment atunci
doar şiere video emergente sunt dispo
nibile în modul redare . Șimilar, pentru
selectia Foto, şierele disponibile in modul
de redare vor cele tip fotograe (JPEG).
2. Ștergere și protecie șiere
În modul Redare, apăsaţi şi menţineţi butonul SUS, pentru a avea disponibile opțiunile Sterge şi Protectie. Apăsați tastele
SUS/JOS şi REC / OK pentru a selecta opțiunile „Ștergeţi şierul” şi „Ștergeti toate”,
apăsați REC / OK pentru a intra în alegerea
făcută.
Puteți bloca un şier. Fişiere blocate sunt
şierele importante, protejate la ştergere,
care nu pot şterse până când nu sunt
deblocate.
Conectare la TV prin cablu HDMI
(nu este inclus)
Conectarea camerei DVR la televizor prin
cablu HDMI (dacă este disponibilă). Ecranul DVR va rămâne întunecat, în timp ce
pe ecranul TV vor redate (playback) şierele (Video sau Foto). Apasati SUS / JOS
pentru a selecta şierul dorit şi butonul
REC / OK pentru a intra în alegerea făcută.
RESETARE
În timpul operațiunilor de zi cu zi , utilizarea incorectă a camerei sau folosirea unui
card de memorie necorespunzător pot
provoca nefunţionarea camerei DVR. Vă
rugăm să apăsaţi mica tastă RESET situată
pe partea de jos a camerei DVR pentru a o
opri. Reporniţi manual camera iar aceasta
va restaura în mod automat setările implicite de fabrică.
Page 40

8
RO
Page 41

D Hinweis zum Umweltschutz: Ab dem Zeitpunkt der Umsetzung der europäischen Richtlinie 2002/96/EU in nationales Recht gilt folgendes: Elektrische und
elektronische Geräte dürfen nicht mit dem Hausmüll entsorgt werden. Der Verbraucher ist gesetzlich verpichtet, elektrische und elektronische Geräte am Ende ihrer
Lebensdauer an den dafür eingerichteten, öentlichen Sammelstellen oder an die Verkaufstelle zurückzugeben. Einzelheiten dazu regelt das jeweilige Landesrecht. Das
Symbol auf dem Produkt, der Gebrauchsanleitung oder der Verpackung weist auf diese Bestimmungen hin. Mit der Wiederverwertung, der stoichen Verwertung oder
anderer Formen der Verwertung von Altgeräten leisten Sie einen wichtigen Beitrag zum Schutz unserer Umwelt. In Deutschland gelten oben genannte
Entsorgungsregeln, laut Batterieverordnung, für Batterien und Akkus entsprechend.
D
Note on environmental protection: After the implementation of the European Directive 2002/96/EU in the national legal system, the following applies: Electrical and
electronic devices may not be disposed of with domestic waste. Consumers are obliged by law to return electrical and electronic devices at the end of their service lives
to the public collecting points set up for this purpose or point of sale. Details to this are dened by the national law of the respective country. This symbol on the product,
the instruction manual or the package indicates that a product is subject to these regulations. By recycling, reusing the materials or other forms of utilising old devices,
you are making an important contribution to protecting our environment.
GB
Remarques concernant la protection de l'environnement: Conformément à la directive européenne 2002/96/CE, et an d'atteindre un certain nombre d'objectifs
en matière de protection de l'environnement, les règles suivantes doivent être appliquées. Elles concernent les déchets d'équipement électriques et électroniques. Le
pictogramme "picto" présent sur le produit, son manuel d'utilisation ou son emballage indique que le produit est soumis à cette réglementation. Le consommateur doit
retourner le produit usager aux points de collecte prévus à cet eet. Il peut aussi le remettre à un revendeur. En permettant enn le recyclage des produits, le
consommateur contribuera à la protection de notre environnement. C'est un acte écologique.
F
Nota sobre la protección medioambiental: Después de la puesta en marcha de la directiva Europea 2002/96/EU en el sistema legislativo nacional, Se aplicara lo
siguiente: Los aparatos eléctricos y electrónicos, así como las pilas y las pilas recargables, no se deben evacuar en la basura doméstica. El usuario está legalmente obligado
a llevar los aparatos eléctricos y electrónicos, así como pilas y pilas recargables, al nal de su vida útil a los puntos de recogida comunales o a devolverlos al lugar donde
los adquirió. Los detalles quedaran denidos por la ley de cada país. El símbolo en el producto, en las instrucciones de uso o en el embalaje hace referencia a ello. Gracias
al reciclaje, al reciclaje del material o a otras formas de reciclaje de aparatos usados, contribuye Usted de forma importante a la protección de nuestro medio ambiente.
E
Informazioni per protezione ambientale: Dopo l'implementazione della Direttiva Europea 2002/96/EU nel sistema legale nazionale, ci sono le seguenti applicazioni:
I dispositivi elettrici ed elettronici non devono essere considerati riuti domestici. I consumatori sono obbligati dalla legge a restituire I dispositivi elettrici ed elettronici
alla ne della loro vita utile ai punti di raccolta collerici preposti per questo scopo o nei punti vendita. Dettagli di quanto riportato sono deniti dalle leggi nazionali di
ogni stato. Questo simbolo sul prodotto, sul manuale d'istruzioni o sull'imballo indicano che questo prodotto è soggetto a queste regole. Dal riciclo, e re-utilizzo del
material o altre forme di utilizzo di dispositivi obsoleti, voi renderete un importante contributo alla protezione dell'ambiente.
I
Notitie aangaande de bescherming van het milieu: Ten gevolge van de invoering van de Europese Richtlijn 2002/96/EU in het nationaal juridisch system, is het
volgende van toepassing: Electrische en electronische toestellen mogen niet weggegooid worden tesamen met het huishoudelijk afval. Consumenten zijn wettelijk
verplicht om electrische en elctronische apparaten op het einde van gebruik in te dienen bij openbare verzamelplaatsen speciaal opgezet voor dit doeleinde of bij een
verkooppunt. Verdere specicaties aangaande dit onderwerp zijn omschreven door de nationale wet van het betreende land. Dit symbool op het product, de
gebruiksaanwijzing of de verpakking duidt erop dat het product onderworpen is aan deze richtlijnen. Door te recycleren, hergebruiken van materialen of andere vormen
van hergebruiken van oude toestellen, levert u een grote bijdrage aan de bescherming van het mileu.
NL
Anvisninger til beskyttelse af milj¢et: Efter implementeringen af det europÒiske direktiv 2002/96/EU i det nationale lovgivningssystem gÒlder f¢lgende: Elektriske
og elektroniske apparater må ikke bortskaes med husholdningsaaldet. Forbrugeren er ved afslutningen af elektriske og elektroniske apparaters levetid lovmÒssigt
forpligtet til at aevere disse på de dertil indrettede oentlige indsamlingssteder eller hos sÒlgeren. Enkeltheder vedr¢rende dette fastlÒgges af de respektive landes
nationale lovgivning. Dette symbol på produktet, betjeningsvejledningen eller emballagen viser, at produktet er underlagt disse bestemmelser. Med genanvendelse,
genanvendelse af materialer eller andre former for genbrug af gamle apparater yder du et vigtigt bidrag til beskyttelse af vores milj¢.
DK
Page 42

Nota em Protecção Ambiental: Após a implementação da directiva comunitária 2002/96/EU no sistema legal nacional, o seguinte aplica-se: Todos os aparelhos
eléctricos e electrónicos não podem ser despejados juntamente com o lixo doméstico Consumidores estão obrigados por lei a colocar os aparelhos eléctricos e electrónicos
sem uso em locais públicos especícos para este efeito ou no ponto de venda. Os detalhes para este processo são denidos por lei pelos respectivos países. Este símbolo
no produto, o manual de instruções ou a embalagem indicam que o produto está sujeito a estes regulamentos. Reciclando, reutilizando os materiais dos seus velhos
aparelhos, esta a fazer uma enorme contribuição para a protecção do ambiente.
P
Not om miljöskydd: Efter implementeringen av EU direktiv 2002/96/EU i den nationella lagstiftningen, gäller följande: Elekriska och elektroniska apparater får inte
avyttras med hushållsavfall.
Konsumenter är skyldiga att återlämna elektriska och elektroniska apparater vid slutet av dess livslängd till, för detta ändamål, oentliga uppsamlingsplatser. Detaljer
för detta denieras via den nationella lagstiftningen i respektive land. Denna symbol på produkten, instruktionsmanualen eller på förpackningen indikerar att produkten
innefattas av denna bestämmelse. Genom återvinning och återanvändning av material bidrar du till att skydda miljön och din omgivning.
S
Ympäristönsuojelua koskeva ohje: Siitä lähtien, kun Euroopan unionin direktiivi 2002/96/EU otetaan käyttöön kansallisessa lainsäädännössä, pätevät seuraavat
määräykset: Sähkö- ja elektroniikkalaitteita ei saa hävittää talousjätteen mukana. Kuluttajalla on lain mukaan velvollisuus toimittaa sähkö- ja elektroniikkalaitteet
niiden käyttöiän päätyttyä niille varattuihin julkisiin keräyspisteisiin tai palauttaa ne myyntipaikkaan. Tähän liittyvistä yksityiskohdista säädetään kulloisenkin
osavaltion laissa. Näistä määräyksistä mainitaan myös tuotteen symbolissa, käyttöohjeessa tai pakkauksessa. Uudelleenkäytöllä, materiaalien uudelleenkäytöllä tai
muilla vanhojen laitteiden uudelleenkäyttötavoilla on tärkeä vaikutus yhteisen ympäristömme suojelussa.
FIN
Informasjon om beskyttelse av milj¢et: Etter implementering av EU-direktiv 2002/96/EU i det nasjonale lovverk, er f¢lgende gjort gjeldende: Elektrisk og
elektronisk utstyr skal ikke kastes sammen med husholdningsavfall. Forbrukere er pålagt ved lov å returnere elektrisk og elektronisk utstyr ved enden av levetiden til
oentlige oppsamlingspunkter, oppsatt for dette formål eller til utsalgssteder for slikt utstyr. Detaljer rundt dette er denert i lovverket i det respektive land.Dette
symbolet på produktet, bruksanvisningen eller forpakningen forteller at et produkt faller inn under disse betingelsene. Ved resirkulering, gjenbruk av materialet eller på
andre måter å nyttiggj¢re gammelt utstyr bidrar du på en viktig måte til å beskytte vårt felles milj¢!
N
Wskazówki dotyczące ochrony środowiska: Od czasu wprowadzenia europejskiej dyrektywy 2002/96/EU do prawa narodowego obowiazują następujące ustalenia:
Urzadzeń elektrycznych i elektronicznych nie należy wyrzucać wraz z innymi odpadami domowymi. Użytkownik zobowiązany jest, zepsute lub niepotrzebne już
urządzenia elektryczne i elektroniczne odnieść do specjalnego punktu, wyrzucić do specjalnego kontenera lub ewentualnie odnieść urządzenie do sprzedawcy.
Szczegółowe kwestie regulują przepisy prawne danego kraju. Informuje o tym symbol przekreślonego kosza na śmieci umieszczony na opakowaniu produktu lub w
instrukcji. Segregując śmieci przeznaczone do recyklingu pomagasz chronić środowisko naturalne. Jeżeli niniejszy produkt jest wyposażony w baterie lub akumulatory,
pamiętaj, że po zużyciu należy je dostarczyć do odpowiedniego punktu przyjmującego zużyte akumulatory i baterie. Nie wolno ich wyrzucać wraz z odpadami
komunalnymi.
PL
Környezetvédelmi tudnivalók: Az európai irányelvek 2002/96/EU ajánlása szerint, a megjelölt idoponttól kezdve, minden EU-s tagállamban érvényesek a következok:
A leselejtezett elektromos és elektronikus készülékeket nem szabad a háztartási szemétbe dobni. Az elhasznált és muködésképtelen elektromos és elektronikus
készülékek gyujtésére törvényi eloírás kötelez mindenkit, ezért azokat el kell szállítani egy kijelölt gyujto helyre vagy visszavinni a vásárlás helyére. A termék
csomagolásán feltüntetett szimbólum egyértelmu jelzést ad erre vonatkozóan a felhasználónak. A régi készülékek begyujtése, visszaváltása vagy bármilyen formában
történo újra- hasznosítása közös hozzájárulás környezetünk védelméhez.
H
Ochrana životního prostredí: Evropská smernice 2002/96/EU stanovuje: Elektrické a elektronické prístroje se nesmí vhazovat do domácího odpadu. Elektrické a
elektronické prístroje musí být zlikvidovány podle zákona na místech k tomu urcených. Recyklací nebo jiným zpusobem zpracování výrazne prispíváte k ochrane našeho
životního prostredí!
CZ
Ochrana životného prostredia: Európska smernica 20002/96/EU stanovuje: Elektrické a elektronické zariadenia sa nesmú vyhadzovat do domáceho odpadu.
Spotrebitel je zo zákona povinný zlikvidovat elektrické a elektronické zariadenia na miesta k tomu urcené. Symbolizuje to obrázok v návode na použitie, alebo na balení
výrobku. Recykláciou, alebo inými formami využitia starých prístrojov prispievate v znacnej miere k ochrane vášho životného prostredia.
SK
 Loading...