

Page 1
Y ou’ ve Ne ver Seen An ything Like This Before.
Measurement Specialties, Inc. introduces ParkZone-an innovative, precision-parking device which
provides solutions for depth perception and
overcrowding in the home garage environment.
High tech; low maintenance; and easy to install.
Park-Zone utilizes space-age technology and is
adaptable to all vehicles. While set-up is virtually
effortless, please read the instructions carefully.
Operation of Park-Zone is analogous to that of a
traffic-light. A green light illuminates upon entering
the garage, a yellow light cautions the approach, and
a red light comes on when you are precisely in the
park
zone.
Park-Zone’s Ultrasonic Transducer (the sensor) is
active at all times. If you listen carefully, the pinging
sound of the sensor is barely audible.
Each ping represents a sound wave, which
determines, i) if there is a vehicle within the sensing
range, and ii) how far the vehicle is from the wall as
it approaches.
The brains behind the entire operation is an
advanced on-board microcontroller which controls
the timing and function of each mode as well as the
‘shifts’ from one mode to the other.
Parts and Specifications.
Display unit
Operating V oltage 2-5.5V
Operating Current 4ma-LEDs off; 20ma on
Operating Temp. 0oC~60oC
Circuitry 100% Solid Stale (both units)
Controller Microprocessor
Case Parts ABS Plastic (both units)
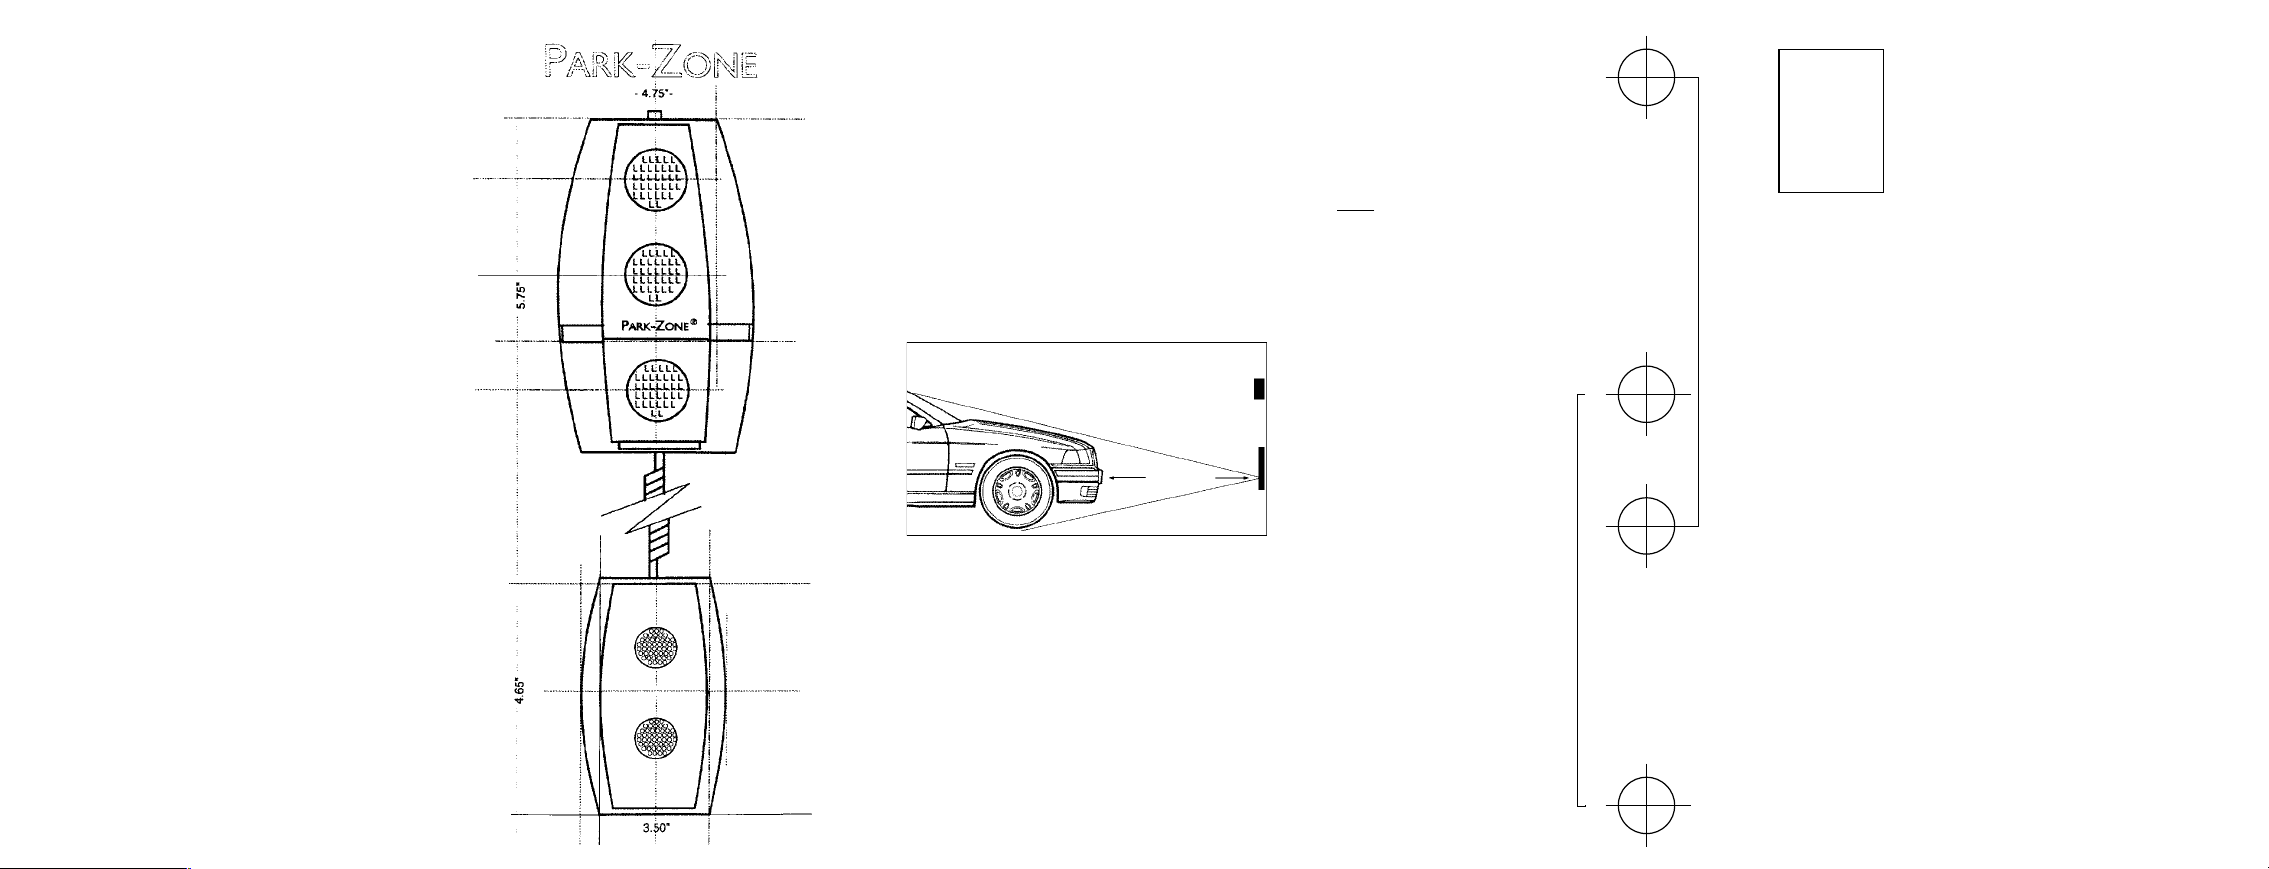
Dimensions 5.75 X 4.75 X 1.5 inches
Sensor Unit
Operating V oltage 4.6V -6.2V
Operating Current 60ma average, 200ma peak
Operating Temp 0oC~60oC
Sensor Ultrasonic T ransducer
Dimensions 4.65 X 3.5 X 1.08 inches
Parts included
5' Modular Coiled Cord (solid
copper conductors), four screws
A
C/DC Adapter
UL approved
(PlatinumOnly)
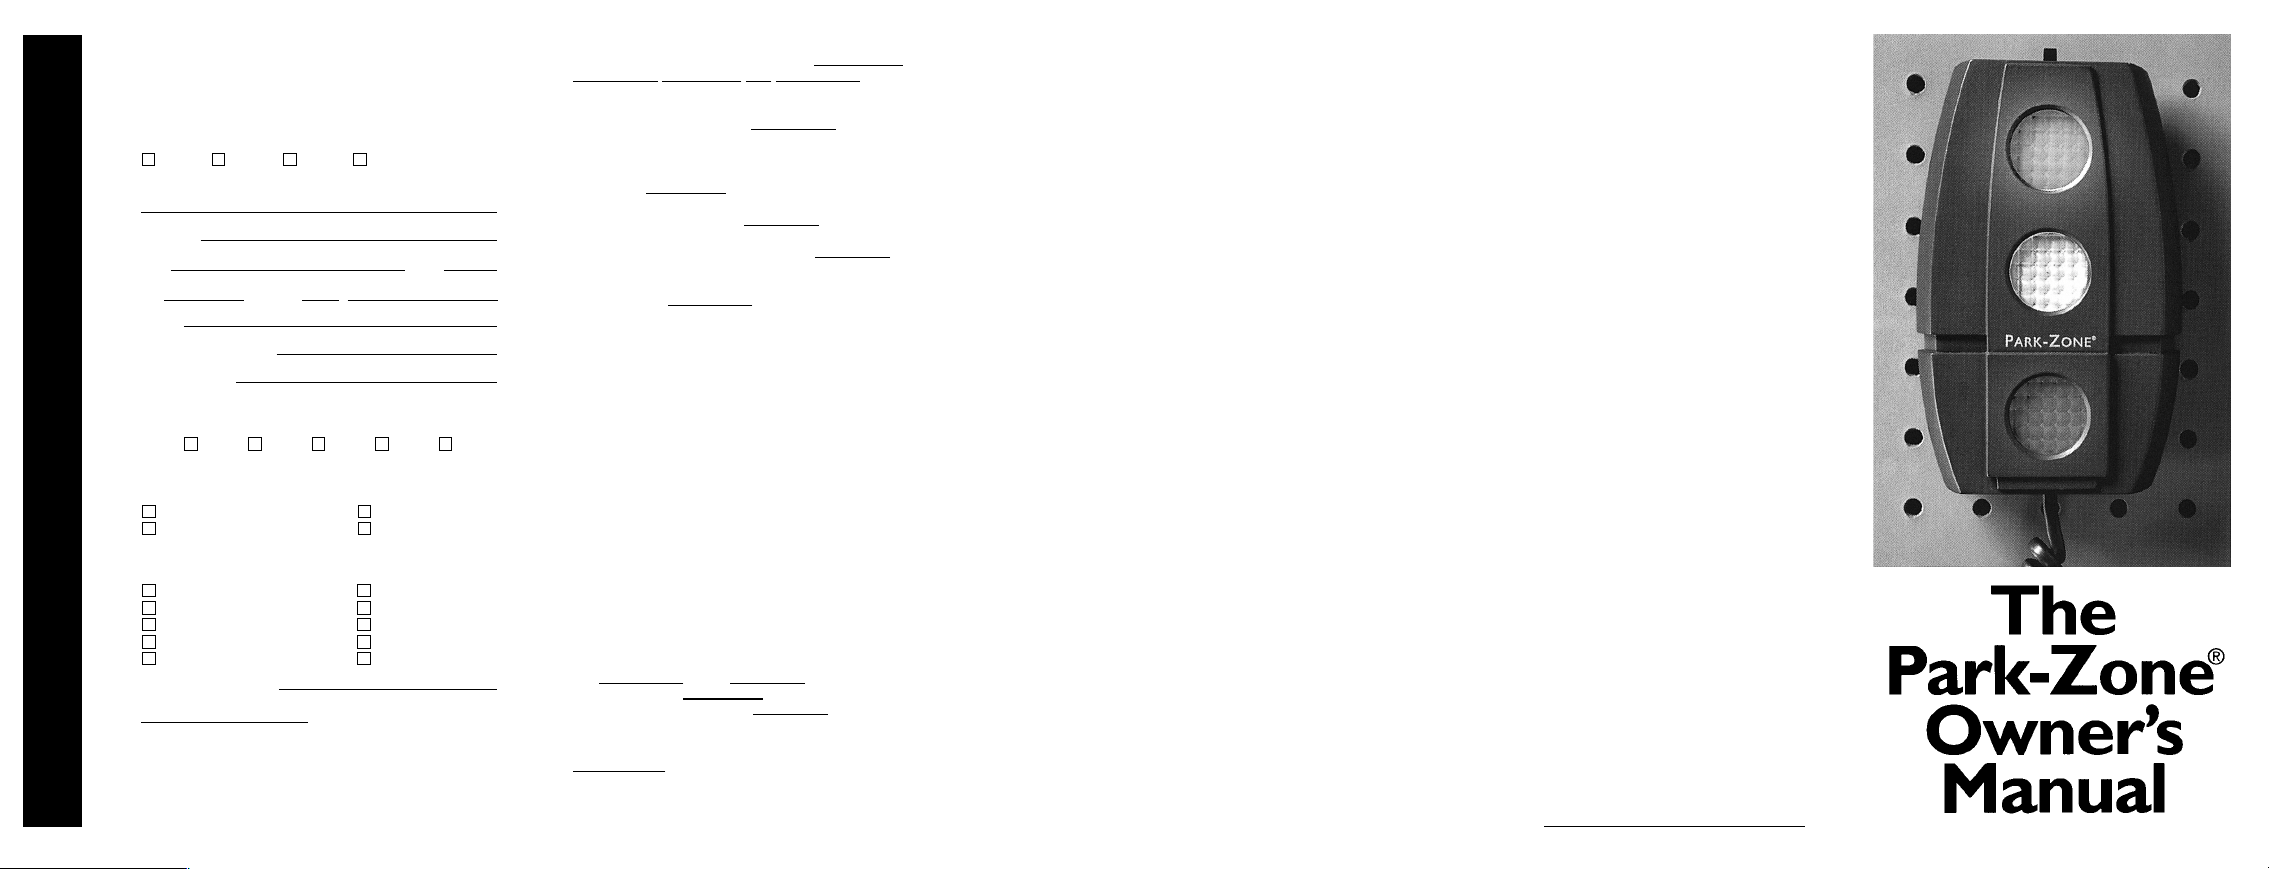
ACTIVATION BUTTON
REDLIGHT
AMBER LIGHT
GREEN LIGHT
CABLE CORD
CONNECTOR
ULTRASONIC
SENSOR
DISPLAY UNIT
DESIGN
FOR PARK-ZONE
ULTRASONIC
SENSING PARKING
DEVICE
Installation Instructions.
One of Park-Zone’s defining features is it’s ease of
installation. With for AA batteries (not included) and/
or an AC Adapter included with the Platinum Edition,
there’s no hassles. The components come right out
of the box and onto the back wall of the garage. Just
follow these five easy steps. The set-up time for
installation in focus groups averaged under 90
seconds.
Step 1.
Park your car in the desired location in your garage,
preferably, with the aid of a friend or family member.
Note: The range of the sensing unit is 1.3 to 16 feet.
We recommend that you never leave less than 1.3
feet between your bumper and the wall.
DISPLAY
UNIT
SENSOR
UNIT
1.3 to 16 feet
2.3 to 3 feet
Step 2.
The display unit should be mounted comfortably
within the driver’s field- of -vision. Once the height is
determined, insert two of the four screws, included,
into the wall.
Use the templates on the following
page as hole-guides for both units.
Step 3.
The sensor unit is mounted (with its connector facing
up) directly below the display unit, usually about 2.3
to 3 feet off the ground Different vehicles may trigger
the sensor at different points; a slight adjustment
may be necessary.
Step 4.
With both units securely mounted,
connect the units with the cable
cord (included). Plug into the
appropriate connectors on the
Units. Platinum Edition Owners
opting for AC power should not
install batteries.
Note: While it is strongly
recommended that you use the
included cable, you may have
reason to purchase a different
length. Make sure that it meets
the same electrical specifications
(see specs inside first page). An
inappropriate cable will cause
damage to Park-Zone’s complex
circuitry.
Step 5.
With the units installed and the
car in place, depress the ON/OFF
activation button on top of the
display unit. Make sure the path
between the vehicle and the
sensor unit is clear of
obstructions, such as a bicycle,
trash can, sports gear, people,
etc.
The flashing of all three LED’s in
sequence conveys that the unit
has successfully been calibrated
and that the set distance has
been programmed into the
memory.
It’s that simple.
The Perfect Park.
Park-Zone is now set to guide you
into your garage every time you
park your car, for approximately
one year without ever having to
change batteries, or shutting off
the unit.
A
C
B
sensor, place
this template
crosshairs (C
screw holes.
D
To mount
display unit,
place this
template
against wall
in the
appropriate
position
Pierce
crosshairs
(A and B)
with sharp
point to
mark screw
positions
To mount
against wall
below the
display unit
Pierce
and D)
to mark
STAMP
MEASUREMENT SPECIALTIES, INC.
Attn: Park-Zone Registration
1000 Lucas Way
Hampton, V A 23666
Page 2
Park-Zone Registration Card
Thank you for taking the time to fill out the
registration card. This information is important to
us in evaluating the various aspects of our
product and the people who purchase it.
====
==Mr. Mrs. Ms.
====
====
==Miss
====
Name (First/Middle Initial/Last)
Address
City State
Zip Phone ( )
Email
Date of Purchase
Store Name
Tell Us A Little About Yourself
AGE: ==18-24 35-44 45-54 55-64 65+
How did you first learn of Park-Zone?
Magazine Advertisement Retail Store
TV/Radio Advertisement Other
What is your profession?
Professional/Technical Student
Upper Management Farmer
Sales/Service/Middle Mgmt Military
Clerical/White Collar Home Manager
Labor/Blue Collar Other
Make of Car/Year
For Help Please Call:
Measurement Specialties, Inc.
1-800-236-6746
measurement specialties
Modes of Operation
There are four modes of operation: Home-Mode,
Away-Mode, Park-Mode, and Default-Mod. No matter
what mode Park-Zone is in, the transducer is
constantly on. Once your car is parked and the
calibrated, it’s in the Home-Mode. The unit
zone
pings; verifying that your car is in the right spot. This
calibration can only be erased by depressing the
Activation button. While away from home, Park-Zone
enters the
Whenever entering the garage, Park-Zone senses
your car and triggers the
ping rate escalates to its highest level. This ensures
precision sensing and parking. The
continues until the red light signifies a successful and
accurate park. Subsequently, Park-Zone automatically
returns to the
Be aware
may not sense the vehicle until it is 4-7 feet away from
it. Normal sensing range is greater, with a maximum
range of 16 feet.
IT IS VERY IMPORTANT TO CHECK YOUR REA CTION
TIME BETWEEN SEEING THE RED LIGHT, YOUR FOOTTO-PEDAL A CTION, AND YOUR ACTUAL STOPPAGE.
THIS REACTION TIME MAY VARY FROM PERSON TO
PERSON WHICH WILL AFFECT THE EXACT PARKZONE. IT IS RECOMMENDED T O ALLO W FOR A
VARIANCE OF 6-12 INCHES DURING THE SET-UP;
DEPENDING ON HOW FAST YOU PLAN TO PULL IN TO
PARK. THE FASTER YOU GO, THE WIDER THE
VARIANCE. ONLY PERSONAL USA GE AND
EXPERIENCE CAN DETERMINE YOUR PERFECT SETUP POSITION. AND DEPENDING ON WHERE
POTENTIAL BARRIER OR DAMAGE ZONES EXIST (I.E.
BACK WALL OR GARAGE DOOR), YOU MUST USE
YOUR JUDGMENT IN ALLO WING A VARIANCE IN
EITHER DIRECTION.
When exiting the garage, Park-Zone switches from
the
transition to the
importance in this reverse
something in the house and need to re-enter.
The dynamic park-Zone device also incorporates a
Default-Mode which activates in rare circumstances,
including but not limited to the following:
1. Your car breaks down or stalls on entry or exit.
2. If repairing your car i the garage, the unit is
Away-Mode and becomes more active.
Park-Mode. In this mode, the
Park-Mode
Home-Mode.
that if you speed into the garage, the unit
Home-Mode to the Park-Mode which acts as a
Away-Mode. The only possible
Park-Mode is if you forgot
park
activated by slight movements (e.g. car lifted with
jack).
3. A child playing; rides a bic ycle to and from unit
and/or leaving it in the middle of the garage.
4. Some other obstacle falls into or is placed
unwittingly in the sensing range.
The above instances would be draining on the battery.
The Default-Mode checks against such nuisances by
automatically shutting off the LEDs after ninety
seconds.
Battery Information
Batteries will last for approximately (1) one year. The
red light flashing repeatedly is a warning that the
batteries needs to be replaced. Turn off the unit
depressing the ON/OFF Activation Button. Replace
the batteries. Then, reactivate the unit (see
instructions). When on vacation, the drainage
indicator lasts up to two weeks.
Platinum Edition Only: If you choose to plug the unit
into the wall after using it with batteries, you must
reactivate the unit. (See Step 5.) Batteries do mot
serve as an override to the AC Adapter, or vice versa.
ANY TIME A POWER SOURCE CHANGE IS MADE,
OR IN CASE OF A POWER OUTAGE, THE
PLATINUM EDITION MUST BE RE-CALIBRATED.
Trouble Shooting
Q. Lights don’t flash on entry . T ransducer is mot pinging.
Check that the Activation button is ON and that
A.
cord is properly connected. If so, then replace cord
[see specifications]. If that doesn’t work, replace
batteries. If problems continue, unit is damaged or
malfunctioned.
Q. Lights do not accurately correspond to car’s
location. Park position is not at the set point.
Unit senses other objects in its path, or is placed in
A.
an improper location. Remove all obstacles from path.
Make sure unit is centered in the space, so as mot to
deflect off side walls. Lastly, make sure sensor is
facing a flat surface, i.e. bumper, license plate. If it’s
too high, it will deflect off grill or car hood which skews
the accuracy.
Maintaining the Park-Zone Units.
An inspection should be performed at least once a
year. It includes, but is not limited to checking
mounting stability, cord condition, connections,
general dusting/cleaning with a soft, damp cloth. DO
NOT get transducer wet. Avoid build-up of dust or
condensation.
Customer Service: 1(800)236-6746 M-F 9AM-5PM(EST).
Measurement Specialties Inc. ’s
limited Warranty
Exeter Technologies, Inc. warrants this product to be
free from defects in materials and workmanship for
one (1) year from the date of original purchase by the
consumer. If any such defect is discovered and
returned within one year of the date it was purchased,
we will replace it free of charge.
To obtain warranty service, ship the unit postagepaid with proof of purchase (date and location of
purchase) to:
Measurement Specialties, Inc.
80 Little Falls Road
Fairfield, NJ 07004
This warranty does not cover defects resulting from
abuse of unit, modification, alteration, repair or service
of unit by anyone other than Measurement Specialties
Inc., mishandling, improper maintenance, commercial
use of the unit, or damages which occur in shipment
or attributed to acts of God.
THIS WARRANTY IS THE ONLY ONE WE GIVE ON
PARK-ZONE. IT SETS FORTH ALL OUR
RESPONSIBILITIES REGARDING YOUR PARKZONE PARKING AID. THERE ARE NO EXPRESS
WARRANTIES EXCEPT THOSE LISTED ABOVE.
MEASUREMENT SPECIALTIES INC. SHALL NOT
BE LIABLE FOR INCIDENTAL OR
CONSEQUENTIAL DAMAGES RESULTING FROM
USE OF THE PRODUCT, OR ARISING OUT OF
BREACH OF THIS WARRANTY, INCLUDING THE
WARRANTIES OF MERCHANTABILITY (AN
UNWRITTEN WARRANTY THAT THE PRODUCT IS
FIT FOR ORDINARY USE), AND FITNESS FOR
PARTICULAR PURPOSE ARE LIMITED TO THE
APPLICABLE WARRANTY PERIOD SET FORTH
ABOVE.
Service Out of Warranty
Units will be repaired at ‘out of warranty’ service
rates when:
1. The unit’s original warranty has expired.
2. Dated proof of purchase is not supplied.
3. The unit has been modified, or had its housing
removed.
4. The unit has been abused or misused.
Purchase Date
 Loading...