

Page 1
DAQLog Quick Start
Install the software and hardware
Complete the following steps to install DAQLog and your LGR-5320 Series device.
1. Install DAQLog from the DAQLog CD.
2. Insert the blank SD card that came with your DAQLog device into the SD card slot on the device.
3. Connect the external power supply to the power connector on the device, and connect the device to a
USB port.
4. Connect channel 0 of the device to an analog signal source so the device acquires data in single-ended
mode.
5. Remove any other SD, SDHC, or flash drives that are installed in your computer.
Run DAQLog and add the SD card
Complete the following steps to run DAQLog and add the SD card.
1. Select Start»All Programs»Measurement Computing»DAQLog»D AQLog to run DAQLog.
2. Click Add SD card on the toolbar.
3.
Click Continue in the first SD Drive Selection dialog box.
4. Click OK in the next SD Drive Selection dialog box.
5. The SD card displays in the SD Drives pane.
Configure a settings file
Complete the following steps to create a settings file on the SD card that configures a LGR-5320 Series
device to acquire analog data.
Make sure the SD card is selected in the
1. Click New Settings File on the toolbar to open the Configuring Logging Session dialog box.
SD Drives pane
2.
In the Settings Target list, select the device to configure.
3. Enter example in the Name field, and click Next>> to open the Configuring Analog Inputs dialog
box.
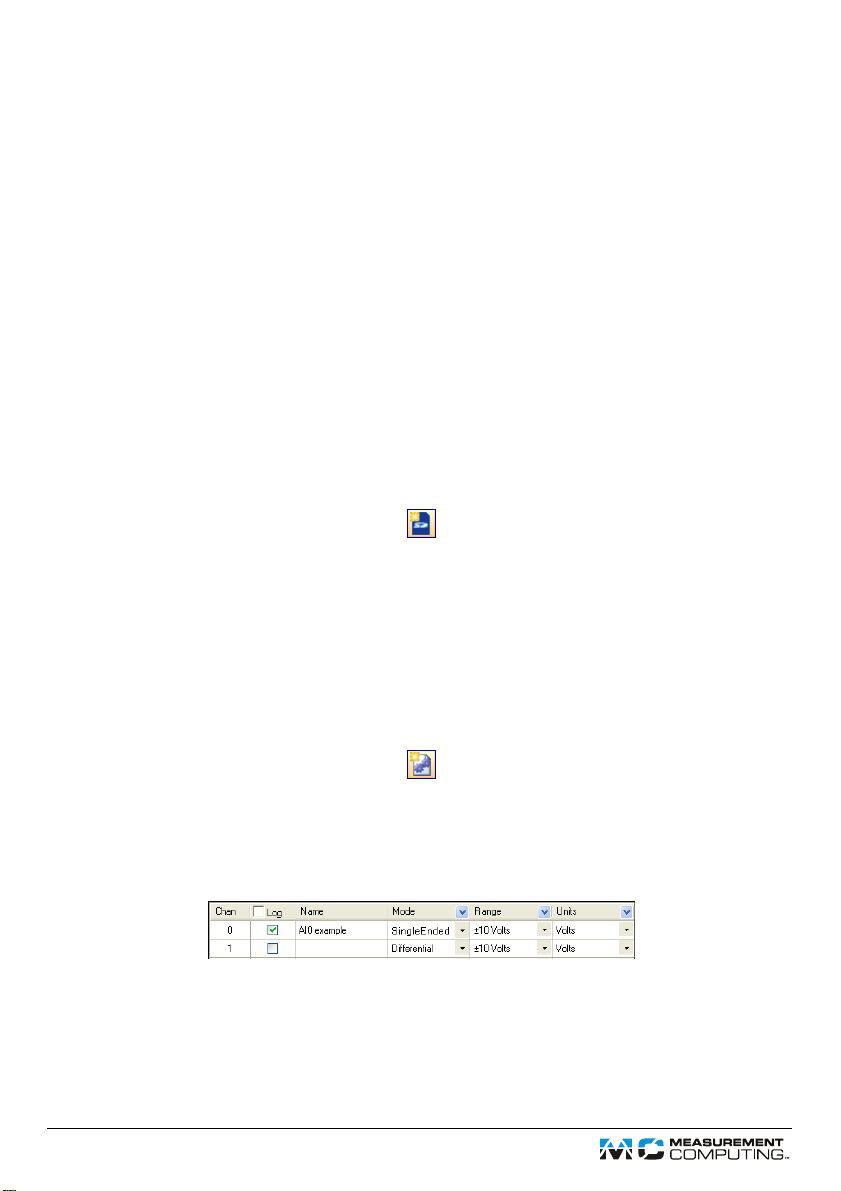
4. Configure channel 0 as shown below, and clear all other Log checkboxes for the remaining analog
channels.
5.
Click Next on the next two dialog boxes to accept the default settings for counter and digital inputs and
to open the
data is not logged in this example).
6. In the Post-Trigger row, enter 500 in the Scan Duration textbox and 1,000.0 in the Scan Rate
textbox and click
7. Clear all checkboxes in this dialog box and click Finish.
Revision 2, April, 2012
Configuring Acquisition Startup, Timing, and Duration dialog box (counter and digital
Next>> to open the Configuring Event Recording dialog box.
Page 2
The settings file is saved to the SD card and displays in the Available Items pane.
Load settings and log data
Complete the following steps to log data with a LGR-5320 Series device using a 10 Hz, ±5 V sine wave as a
signal source:
1. Disconnect the USB cable from the device.
2. Press LOAD on the device to load the settings file to the device
3. Press START on the device to begin logging data.
4. When the LOG LED turns off, the device has finished logging data.
Convert a data file
Complete the following steps to convert the data file to a comma-separated value (.csv) file:
1. Connect the device to a USB port.
2. Select the SD card on the SD Drives pane, and then click Refresh Location on the toolbar.
3.
Click on the folder in the Available Items pane, select log0000.dat, and then click Convert Data
File
on the toolbar to convert the data file to a .csv file.
View a data file
Complete the following steps to view the .csv file in a spreadsheet:
1. Click the Data folder in the Data File Folders pane, browse the folder in the Available Items pane, and
select
log0000.csv.
2. Click Locate File on Drive on the toolbar.
Open log0000.csv in your default spreadsheet application.
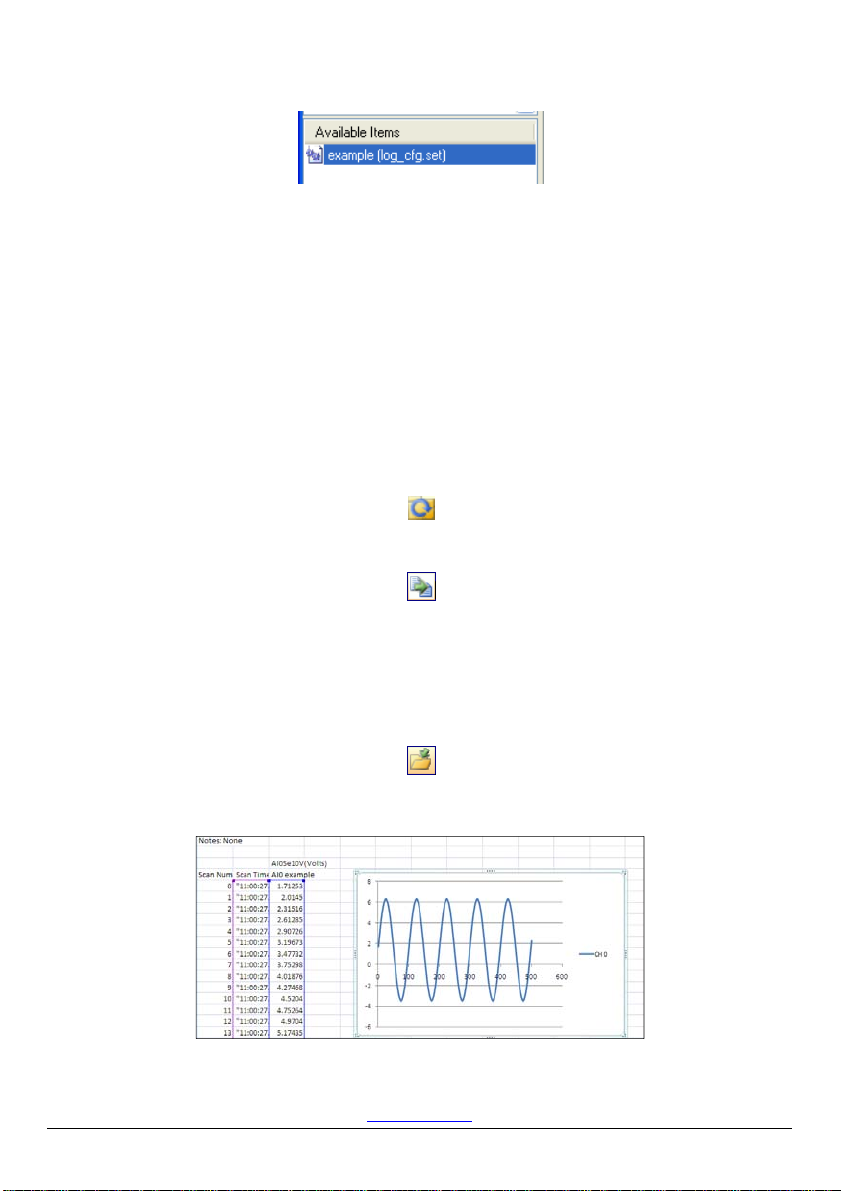
3.
A
.csv file opened in Microsoft® Excel® and plotted on a scatter chart is shown below.
Measurement Computing Corporation
10 Commerce Way
Norton, Massachusetts 02766
Tel: (508) 946-5100 Fax: (508) 946-9500
www.mccdaq.com
QS DAQLog.docx
*325588B-01*
 Loading...