

Instruction Manual
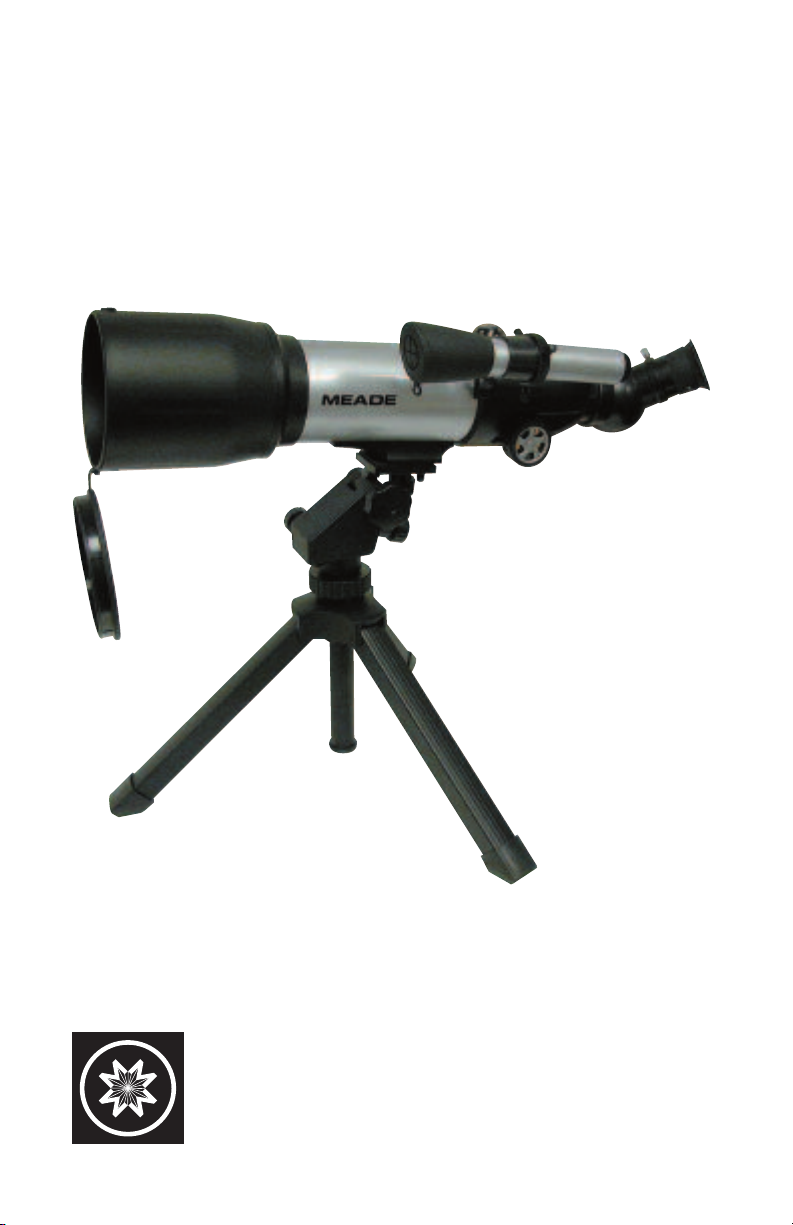
Meade 70AZ-TR
70mm Compact Refractor Telescope
Meade Instruments Corporation
6001 Oak Canyon, Irvine, California 92618 ■(949) 451-1450
Meade 70mm Compact Refractor Telescope
1@
1#
1$
1!
c
fbih1) gj
d
e
1%
1^
1&
1*
1(
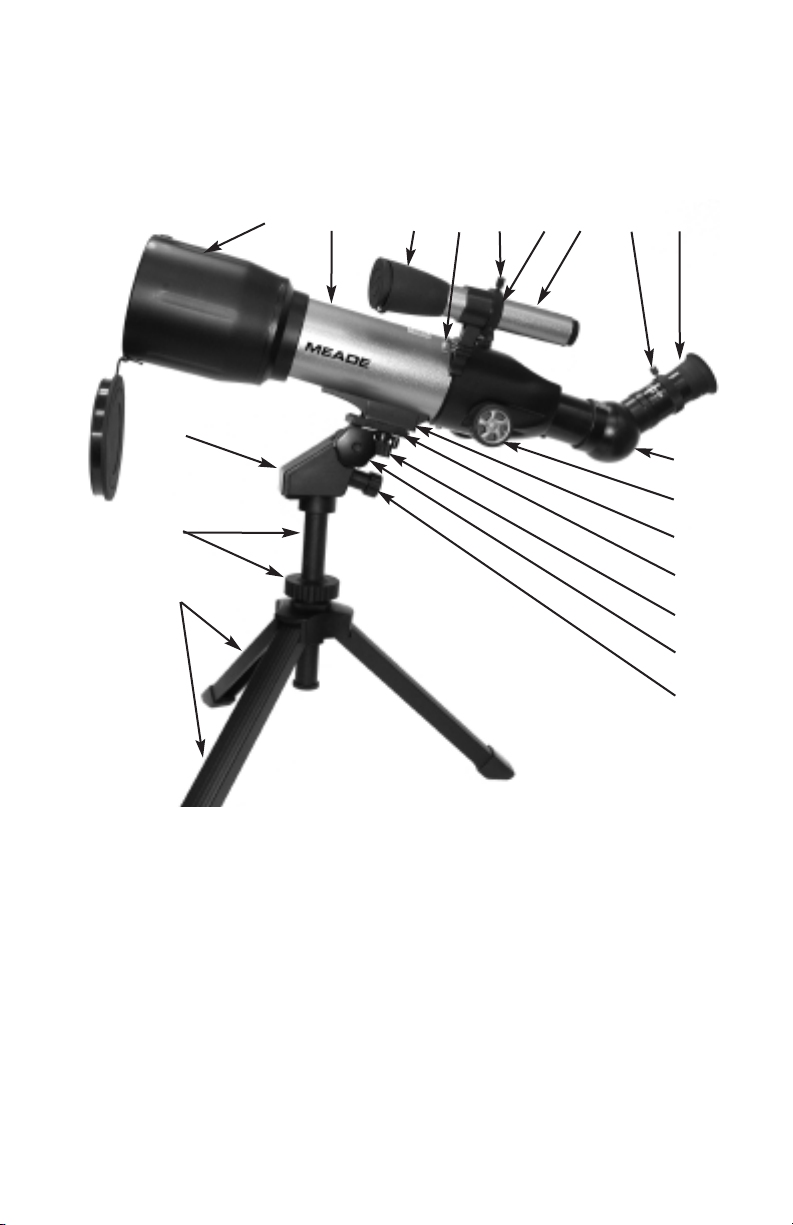
Fig. 1:Telescope Features
1. Eyepiece
2. Eyepiece Thumbscrew
3. Erecting Roof Prism with
click-stop positions
4. Focus Knob
5. Viewfinder
6. Viewfinder holder
7. Viewfinder attachment screws
8. Viewfinder holder lock knob
9. Viewfinder Rain Guard
10. Optical Tube
2
11. Dew Shield/Rain Guard
12. Slow motion Horizontal
Control Knob (not visible on
other side)
13. Tripod Locking Ring/Shaft
14. Tripod leg
15. Tripod Platform
16. Platform holder
17. Tripod Securing Knob
18. Vertical Lock Knob
19. Slow motion Altitude
Control Knob

WARNING:
RECOMMENDED FOR CHILDREN OVER THE AGE OF 5 WITH ADULT
SUPERVISION ONLY
NEVER USE A MEADE 70MM COMPACT REFRACTOR
TELESCOPE TO LOOK AT THE SUN!
SUN WILL CAUSE INSTANT AND IRREVERSIBLE DAMAGE TO
YOUR EYE. EYE DAMAGE IS OFTEN PAINLESS, SO THERE IS
NO WARNING TO THE OBSERVER THAT DAMAGE HAS OCCURRED
UNTIL IT IS TOO LATE. DO NOT POINT THE TELESCOPE AT OR NEAR
THE SUN.
OBSERVING.
CHILDREN SHOULD ALWAYS HAVE ADULT SUPERVISION WHILE
INTRODUCTION
The Meade 70mm Compact Refractor is an easy to operate telescope,
designed for both astronomical and terrestrial observing. Please take a
few moments to read the instruction manual and familiarize yourself
with its features.
ASSEMBLING THE TELESCOPE:
Numbers in parentheses refer to Fig. 1.
1. To assemble the telescope, first unfold the tripod legs
the hole on the bottom of the tripod platform (15) over the bolt on
the platform holder (16) and tighten the holder attachment knob (17)
to secure the optical tube to the tripod.
2. Slide an eyepiece (1) into the erecting roof prism (3) and tighten the
eyepiece thumbscrew (2) to a firm feel.
3. Slide the viewfinder tube (5) into the viewfinder holder (6) and tighten
the viewfinder attachment screws
(7). Before using the viewfinder, you
will need to align it. See “Aligning the Viewfinder,” page 4.
You may adjust the position of the Viewfinder by loosening the
Viewfinder holder lock knob (8) and then moving the viewfinder to a
convenient viewing position. Relock the knob when you are finished.
4. Loosen the tripod lock ring
(13) and lift or lower the telescope to a
comfortable height. Relock the tripod lock ring.
5. Loosen the Vertical Lock knob
(18) and adjust the angle of the optical
tube to a position that allows you to observe comfortably. Retighten
the knob, but do not overtighten—you may want to adjust the tube’s
position from time to time while you are observing.
5. Open the rain guards covers on both the optical tube
viewfinder (9) before observing.
LOOKING AT OR NEAR THE
(14). Place
(11) and the
3

TO SIGHT IN ON AN OBJECT AND ACHIEVE A SHARP FOCUS:
1. Place the telescope on a stable surface.
2. View objects that are at least 30 feet away.
3. Rotate the altitude control knob
optical tube (10) up and clockwise to move the tube down. If
necessary, you may also loosen the vertical lock knob and adjust
the tube up or down. Remember to relock the knob to a firm feel
when you are finished.
4. Rotate the horizontal control knob counterclockwise
the optical tube to the right and clockwise to move the tube left.
5. Look through the eyepiece
the knob with a slow and gentle motion until the object is in sharp
focus.
ALIGN THE VIEWFINDER:
Perform this procedure during the daytime.
1. Pick out a well-defined land object, such as a light post or street sign.
Focus and center it in your optical tube’s eyepiece (1).
2. Adjust the viewfinder position by loosening or tightening one or more
of the adjustment screws
eyepiece is centered on the same object centered in the eyepiece.
Now the viewfinder will point to the same position as the optical tube
eyepiece. As the viewfinder has a wider field of view than the optical
tube eyepiece, it is easier to locate objects using the viewfinder than
locating them in the telescope’s eyepiece.
(7) until the crosshair in the viewfinder’s
(19) counterclockwise to move the
(12) to move
(1) and rotate the focus knob (4). Turn
USING THE TELESCOPE
When the telescope is assembled, you are ready to begin observations.
1. Observing land objects during the daytime is a good way to become
accustomed to the functions and operations of the telescope. At
night, try observing the Moon first (if it is visible) or a bright star.
2. Use the MA17.5mm eyepiece and center an object in the
telescope’s field of view. The included MA17.5mm eyepiece is the
best eyepiece to use for the initial finding and centering of an
object. The low power MA17.5mm eyepiece presents a bright, wide
field of view, ideal for terrestrial and general astronomical observing.
4

For lunar and planetary viewing, switch to a higher power eyepiece
such as the MA9mm. Also consider using the provided 2X Barlow
lens. If the image starts to become fuzzy as magnification is
increased—back down to a lower power. See “Power” for more
information about the Barlow.
3. If you are observing an astronomical object, you will immediately
notice that the object moves in a rather slow but continuous motion
across the telescopic field of view. This motion is caused by the
rotation of the Earth which results in the motion of the object in the
telescope’s field of view.
To keep astronomical objects centered, simply move the telescope
using the altitude
higher power MA9mm eyepiece, astronomical objects will seem to
move through the field more rapidly. Place the object on the edge
of the field of view and watch as it drifts to the opposite side, then
reposition the telescope so the object can drift through the field
again.
4. Avoid touching the eyepiece while observing. Vibrations resulting
from such contact will cause the image to move. Viewing from the
upper floors of a building may also introduce image movement.
5. Allow a few minutes for your eyes to become “dark adapted”
before you begin any serious observations.
6. Some atmospheric conditions can distort an observed image.
Planets, in particular, viewed while low on the horizon, lack
sharpness. When observed higher in the sky, a planet will often
appear to be more steady and have greater contrast. Turbulent air
in the upper atmosphere can cause the images to “shimmer” in the
eyepiece. Use the MA17.5mm eyepiece until the image steadies.
Keep in mind that a bright, clearly resolved, but smaller image will
show far more interesting detail than a larger, dimmer, fuzzy
image.
7. A number of fascinating objects are visible through your Meade
70mm compact refractor:
(19) or horizontal (12) control knobs. In the
Jupiter: Jupiter has cloud belts across its surface. It’s four major
•
moons change position around the planet each night.
Saturn: Saturn’s ring system is one of the best celestial sights.
•
5

• The Moon: Our Moon offers craters, mountain ranges and fault
lines. The Moon is best observed during its crescent or half phase
when sunlight strikes the Moon’s surface at an angle—resulting
shadows add a sense of depth to the view. No shadows are visible
during a full Moon, causing the Moon’s surface to appear flat and
uninteresting.
Deep-Space: Deep Space objects are best viewed at a dark site,
•
away from city and other lights. Such objects include nebulae,
galaxies, multiple star systems, and star clusters.
Terrestrial objects: Your telescope may also be used for high
•
resolution land viewing. Terrestrial observations should almost
always be made using a low power eyepiece (such as the 17.5mm)
for bright, sharp images. Land objects offer limited applications at
higher powers because the telescope is being pointed through the
thickest part of the Earth’s atmosphere, which typically distorts
images in the eyepiece.
The general rule regarding power: Only use as much magnification as
supports a steady, well-defined image. The stability of the air varies
and is one reason why having various eyepieces is highly desirable.
Higher powers are no guaranty of better images; in fact, the opposite is
often true. Keep in mind, that land viewing and wide-field, deep-space
observation generally operate best with low-powered eyepieces.
POWER
The power, or magnification, of a telescope when used with a particular
eyepiece is determined by two factors: the focal length of the
telescope’s main (objective) lens and the focal length of the eyepiece
being used. The Barlow lens doubles the power of an eyepiece. To use
the 2X Barlow lens, place the Barlow into the roof prism
by the eyepiece. Use the thumbscrew (2) to tighten in place.
The magnification values available with your eyepieces are as follows:
Eyepiece Power With 2X Barlow Lens
MA17.5mm 20X 40X
MA9mm 39X 78X
MAINTENANCE
The Meade 70mm Compact Refractor telescope should be stored in a
dry and dust-free location. It should not be stored in direct sunlight.
Avoid overcleaning the lens. A little dust on the the lens hardly affects
image quality.
(3), followed
6

SPECIFICATIONS
Objective (main) lens focal length . . . . . . . . . . . . . . .350mm
Objective lens diameter . . . . . . . . . . . . . . . . . . . . . . .70mm
Mounting type . . . . . . . . . . . . . . . . . . . . . . . . . . . . . . .Table-top
Altazimuth
Eyepieces (1.25” Diameter) . . . . . . . . . . . . . . . . . . . .MA17.5mm
MA9mm
Barlow lens . . . . . . . . . . . . . . . . . . . . . . . . . . . . . . . . .2X
Erecting Roof Prism . . . . . . . . . . . . . . . . . . . . . . . . . .Included
Soft carry case . . . . . . . . . . . . . . . . . . . . . . . . . . . . . .Included
Table top tripod . . . . . . . . . . . . . . . . . . . . . . . . . . . . . .Included
Compass . . . . . . . . . . . . . . . . . . . . . . . . . . . . . . . . . .Included
Rubber Rain guard . . . . . . . . . . . . . . . . . . . . . . . . . . .Included
Limited Warranty
Every Meade telescope, spotting scope, and telescope accessory is warranted by Meade Instruments
Corporation (“Meade”) to be free of defects in materials and workmanship for a period of ONE YEAR
from the date of original purchase in the U.S.A. Meade will repair or replace a product, or part thereof,
found by Meade to be defective, provided the defective part is returned to Meade, freight-prepaid, with
proof of purchase.
Meade products purchased outside North America are not included in this warranty, but are
covered under separate warranties issued by Meade international distributors.
RGA Number Required:
(RGA) number must be obtained from Meade by writing, or by calling (949) 451-1450. Each returned
part or product must include a written statement detailing the nature of the claimed defect, as well as
the owner’s name, address, and phone number.
This warranty is not valid in cases where the product has been abused or mishandled, where
unauthorized repairs have been attempted or performed, or where depreciation of the product is due to
normal wear-and-tear. Meade specifically disclaims special, indirect, or consequential damages or lost
profit which may result from a breach of this warranty. Any implied warranties which cannot be
disclaimed are hereby limited to a term of one year from the date of original retail purchase.
This warranty gives you specific rights. You may have other rights which vary from state to state.
Meade reserves the right to change product specifications or to discontinue products without notice.
This warranty supersedes all previous Meade product warranties.
® The name “Meade,” and the Meade logo, are trademarks registered with the U.S. Patent Office and in principal
countries throughout the world. All rights reserved.
© 2004 Meade Instruments Corporation.
This warranty applies to the original purchaser only and is non-transferable.
Prior to the return of any product or part, a Return Goods Authorization
ADVANCED PRODUCTS DIVISION
Meade Instruments Corporation
World’s Leading Manufacturer of Telescopes for the Serious Amateur
6001 Oak Canyon, Irvine, California 92618 ■ (949) 451-1450
■ www.meade.com
04/04
 Loading...