

Bedienungsanleitung
Funkkamera McVoice “MK-6 USB”
Einführung
Geehrter Kunde,
wir möchten Ihnen zum Erwerb Ihrer
neuen Funkkamera gratulieren!
Mit dieser Wahl haben Sie sich für ein Produkt
entschieden, welches ansprechendes Design
und durchdachte technische Features gekonnt
vereint.
Lesen Sie bitte die folgenden Bedienhinweise
sorgfältig durch und befolgen Sie diese, um in
möglichst ungetrübten Genuss des Gerätes zu
kommen!
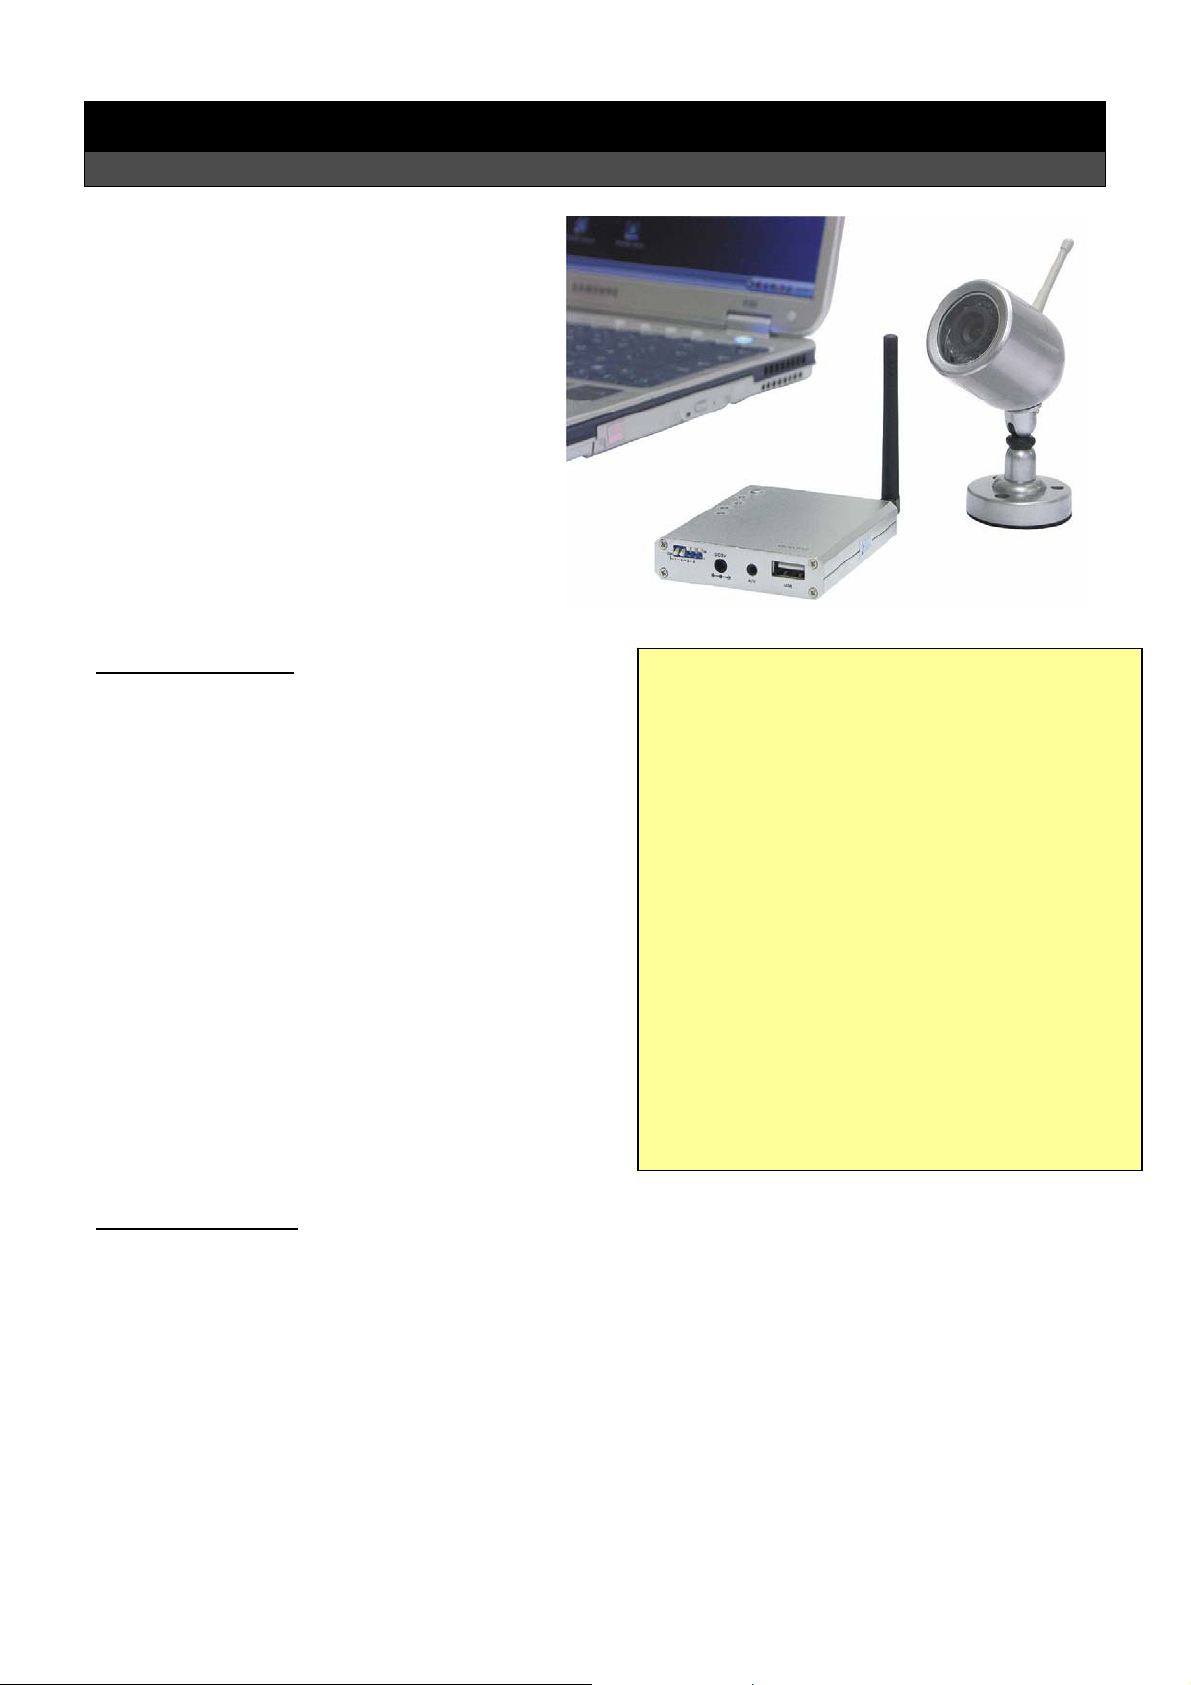
Leistungsmerkmale
• Wetterfeste Kamera mit IR-Dioden für Nachtsicht
und automatischer Schwarz/Weiss-Umstellung.
• Die Kamera besitzt ein integriertes Mikrofon.
• 4 Kanäle mit Loop-Funktion machen die
Erweiterung mit zusätzlichen Kameras und
Empfängern möglich.
• Der Empfänger hat eine USB2.0 Schnittstelle für
den Anschluss an einen Computer, der dann Bild
und Ton aufzeichnen und abspielen kann.
• Die mitgelieferte Software wird von Windows
98/ME/2000/XP und NT unterstützt.
Sicherheitshinweise
• Überprüfen Sie vor Inbetriebnahme die Geräte auf Beschädigungen, sollte dies der Fall sein, bitte die
Geräte nicht in Betrieb nehmen!
• Ziehen Sie die Netzstecker, wenn Sie die Geräte längere Zeit nicht benutzen.
• Die Geräte keinen mechanischen Belastungungen oder Feuchtigkeit aussetzen.
• Die Geräte, wegen der Durchlüftung, nicht abdecken und vor direkter Sonneneinstahlung schützen.
• Reinigen Sie die Geräte mit einem weichen trockenen Tuch.
• Wichtig! Sollten ein Gerät einmal beschädigt werden, lassen Sie es nur durch den Hersteller oder eine
Fachwerkstatt instandsetzen.
• Lassen Sie das Verpackungsmaterial nicht achtlos liegen, Plastikfolien / -tüten, Styroporteile, etc.,
könnten für Kinder zu einem gefährlichen Spielzeug werden.
• Die Geräte gehört nicht in Kinderhände. Es ist kein Spielzeug.
Technische Daten:
Gewicht: 217g [K]; 119g [E]
Maße (H*B*T): 83*45*78mm [K]; 16*68*78mm [E]
Betrieb: DC 8V [K]; DC 5V [E]
Sende- & Empfangsfrequenz: 2400 – 2483 MHz
Kanäle: 2415MHz, 2432MHz, 2450MHz, 2468MHz
Modulation / Demodulation: FM / FM
Bandbreite [K]: 18MHz
Stromverbrauch max.: 160 mA [K]; 190 mA [E]
Sendeleistung [K]: 10mW
Empfangsempfindlichkeit [E]: < -85 dBm
Sensortyp [K]: 1/3“ Farb C-MOS
Horizontalauflösung [K]: 380 Linien
Auflösung [K]: 628 x 582 (PAL); 510 x 492 (NTSC)
Öffnungswinkel [K]: 60° (PAL); 40° (NTSC)
Reichweite / Nachtsicht [K]: 100m / 7m
Antenne: 50Ω SMA
Funktionsumgebung: (-10 ~ 50)°C & 85% RH
LEGENDE: [K] = Kamera; [E] = Empfänger
861-311
P2007 Jens Broecking © Firma WJG, Braunschweig. Nachdruck oder Vervielfältigung nur mit ausdrücklicher Genehmigung

Teile und Funktionen:
861-311
1. Funkkamera
2. Empfänger
3. Antenne
4. USB-Kabel
5. CD-ROM mit Software
6. Audio / Video – Kabel (Cinch)
7. Netzgerät für den Empfänger
8. Netzgerät für die Funkkamera
P2007 Jens Broecking © Firma WJG, Braunschweig. Nachdruck oder Vervielfältigung nur mit ausdrücklicher Genehmigung

Die Kamerainstallation:
861-311
• Die Fuß der Kamera kann mit dem Untergrund verschraubt werden.
• Um den richtigen Winkel einzustellen, muss man die Halteschraube des Fusses lösen und nach der
Einstellung wieder festziehen.
• Soll die Kamera an der Decke befestigt werden, empfiehlt es sich diese um 180° versetzt auf dem Fuß
zu montieren, da sie sonst die Bilder verkehrt herum darstellt.
• Nun muss die Kamera noch mit dem Netzgerät und dieses mit einer Steckdose verbunden werden, dann
ist sie einsatzbereit.
P2007 Jens Broecking © Firma WJG, Braunschweig. Nachdruck oder Vervielfältigung nur mit ausdrücklicher Genehmigung

Installation des Empfängers:
861-311
• Befestigen Sie die Antenne am Empfänger so, dass sie senkrecht steht (1).
• Schließen den Empfänger entweder mit dem USB-Kabel an einen Computer (2), oder mit dem Audio /
Video-Kabel an einen externen Monitor oder Fernseher (3).
• Nun muss der Empfänger noch mit dem Netzgerät und dieses mit einer Steckdose verbunden werden,
dann ist sie einsatzbereit.
• Schalten Sie auch den Computer bzw. den Fernseher an und stellen sie den AV Modus ein.
• Stellen Sie am Empfänger den Empfangskanal so ein, dass er dem Sendekanal der Kamera entspricht
(4).
• Jetzt sollte auf dem Bildschirm das gesendete Bild der Kamera sichtbar sein.
• Regeln Sie am Monitor bzw. Fernseher die Helligkeit, den Kontrast und die Farbeinstellung so, dass ein
optimales Bild dargestellt wird.
Aktivierung von Empfangskanälen und der LOOP-Funktion:
1. Die Empfangskanäle 1 bis 4 können einzeln
aktiviert oder deaktiviert werden. Ist ein Kanal hier
aktiviert, so wird er bei der Kanalumschaltung
berücksichtigt.
2. Die LOOP-Funktion ist in Stellung L aktiviert und in
Stellung M deaktiviert. Ist sie aktiviert, wird alle 5
Sekunden automatisch zwischen den aktivierten
Kanälen umgeschaltet. Dies ermöglicht den
Einsatz mehrerer Funkameras gleichzeitig.
P2007 Jens Broecking © Firma WJG, Braunschweig. Nachdruck oder Vervielfältigung nur mit ausdrücklicher Genehmigung

861-311
Installation der Software:
Um den Empfänger am PC zu betreiben, empfiehlt es sich die dazugehörige Software inklusive der Treiber auf
dem Computer zu installieren. Diese wird unterstützt von den Betriebssystemen Windows 98/ME/2000/XP und
NT.
{Die Kommandos der folgenden Beschreibung beziehen sich auf Windows XP, sollten aber bei allen anderen
Betriebssystemen ähnlich sein.}
Die Softwareinstallation erfolgt in drei aufeinanderfolgenden Schritten: 1. Der Treiber, 2. Microsoft DirectX 9.0
und 3. der Videoaufzeichnungssoftware WinDVR.
1. Installation des korrekten Treibers:
• Nachdem der Empfänger an der USB-Schnittstelle angeschlossen ist, meldet der Computer, dass er neue
Hardware in Form einer TVBOX gefunden hat. Es öffnet sich eine Dialogbox, der FOUND NEW
HARDWARE WIZARD.
• Legen Sie die CD-ROM ein, wählen Sie INSTALL FROM A LIST OR SPECIFIC LOCATION (ADVANCED)
und drücken Sie NEXT.
• Im nächsten Dialogfenster markieren Sie SEARCH FOR THE BEST DRIVERS IN THESE LOCATIONS und
SEARCH REMOVABLE MEDIA (FLOPPY, CD-ROM…) und INCLUDE THIS LOCATION IN THE SEACH. Dann
finden Sie mit BROWSE den Pfad zum CD-Laufwerk. Dann drücken Sie NEXT.
• Jetzt öffnet sich eine List mit zwei Treibern, die “Trident Analog Video” heißen. Der obere ist für
Windows XP gedacht, der untere für ältere Windowsversionen. Markieren Sie den gewünschten Treiber
und drücken Sie NEXT.
• Falls jetzt die Dialogbox HARDWARE INSTALLATION mit der Warnung „Trident analog video has not
passed Windows Logo testing“, überprüfen Sie, ob Sie die richtige Treiberversion gewählt haben und
entscheiden, ob die Installation trotzdem durchgeführt werden soll (CONTINUE ANYWAY) oder eben
nicht (STOP INSTALLATION).
• Wenn Sie sich für CONTINUE ANYWAY entscheiden, wird die Installation des Treibers auf Ihrem
Computer durchgeführt. Er wird nach C:\\WINDOWS\System32 kopiert.
• Im Anschluß öffnet sich die letzte Dialogbox. Hier bestätigen Sie die erfolgte Treiberinstallation mit
FINISH. Der WIZARD wird geschlossen.
2. Installation von Microsoft DirectX 9.0:
• Falls Sie auf Ihrem Computer DirectX 9.0 schon gespeichert haben, brauchen Sie es nich nochmals zu
installieren. Andernfalls klicken Sie den Punkt im CD-ROM Menü an.
• Es öffnet sich die Dialogbox FILE DOWNLOAD. Um fortzufahren drücken Sie OPEN.
• Es öffnet sich die Dialogbox mit der Lizensvereinbahrung für DirectX, der Sie durch markieren von I
ACCEPT THE AGREEMENT zustimmen müssen, um dann NEXT anklicken zu können.
• Es öffnet sich die Dialogbox DIRECTX 9.0 RUNTIME INSTALL. Drücken Sie NEXT.
• Jetzt wird die Installation der DirectX 9.0 Komponenten auf Ihren Computer durchgeführt.
• Im Anschluß öffnet sich die letzte Dialogbox. Hier bestätigen Sie die erfolgte Installation mit FINISH. Der
WIZARD wird geschlossen und der Computer wird automatisch neu gestartet. (Stellen Sie sicher, dass
zuvor alle anderen Datein gesichert oder geschlossen sind).
3. Installation von InterVideo WinDVR:
• Klicken Sie den Punkt im CD-ROM Menü an.
• Es öffnet sich die Dialogbox WELCOME TO WINDVR SETUP. Um fortzufahren drücken Sie NEXT.
• Es öffnet sich die Dialogbox USER INFORMATION. Tragen Sie Ihren Namen und die Serienummer
(SERIAL) ein. Ohne die Nummer einzutragen, können Sie mit der Installation nicht fortfahren. Ansonsten
drücken Sie NEXT.
• Es öffnet sich die Dialogbox CHOOSE DESTINATION LOCATION. Wenn Sie mit Hilfe des Browers keinen
anderen Pfad aussuchen wird das Programm nach E:\Programm Files\Inter Video\WinDVR kopiert.
Drücken Sie dann NEXT.
• Es öffnet sich die Dialogbox SELECT PROGRAM FOLDER. Hier wird eine Liste von Ordnern angeboten, in
die bei der Installation WinDVR-Icons kopiert werden. Man kann Einträge sowohl löschen, als auch
hinzfühgen. Im Anschluß drücken Sie NEXT.
• Jetzt wird die Installation auf dem Computer durchgeführt.
P2007 Jens Broecking © Firma WJG, Braunschweig. Nachdruck oder Vervielfältigung nur mit ausdrücklicher Genehmigung

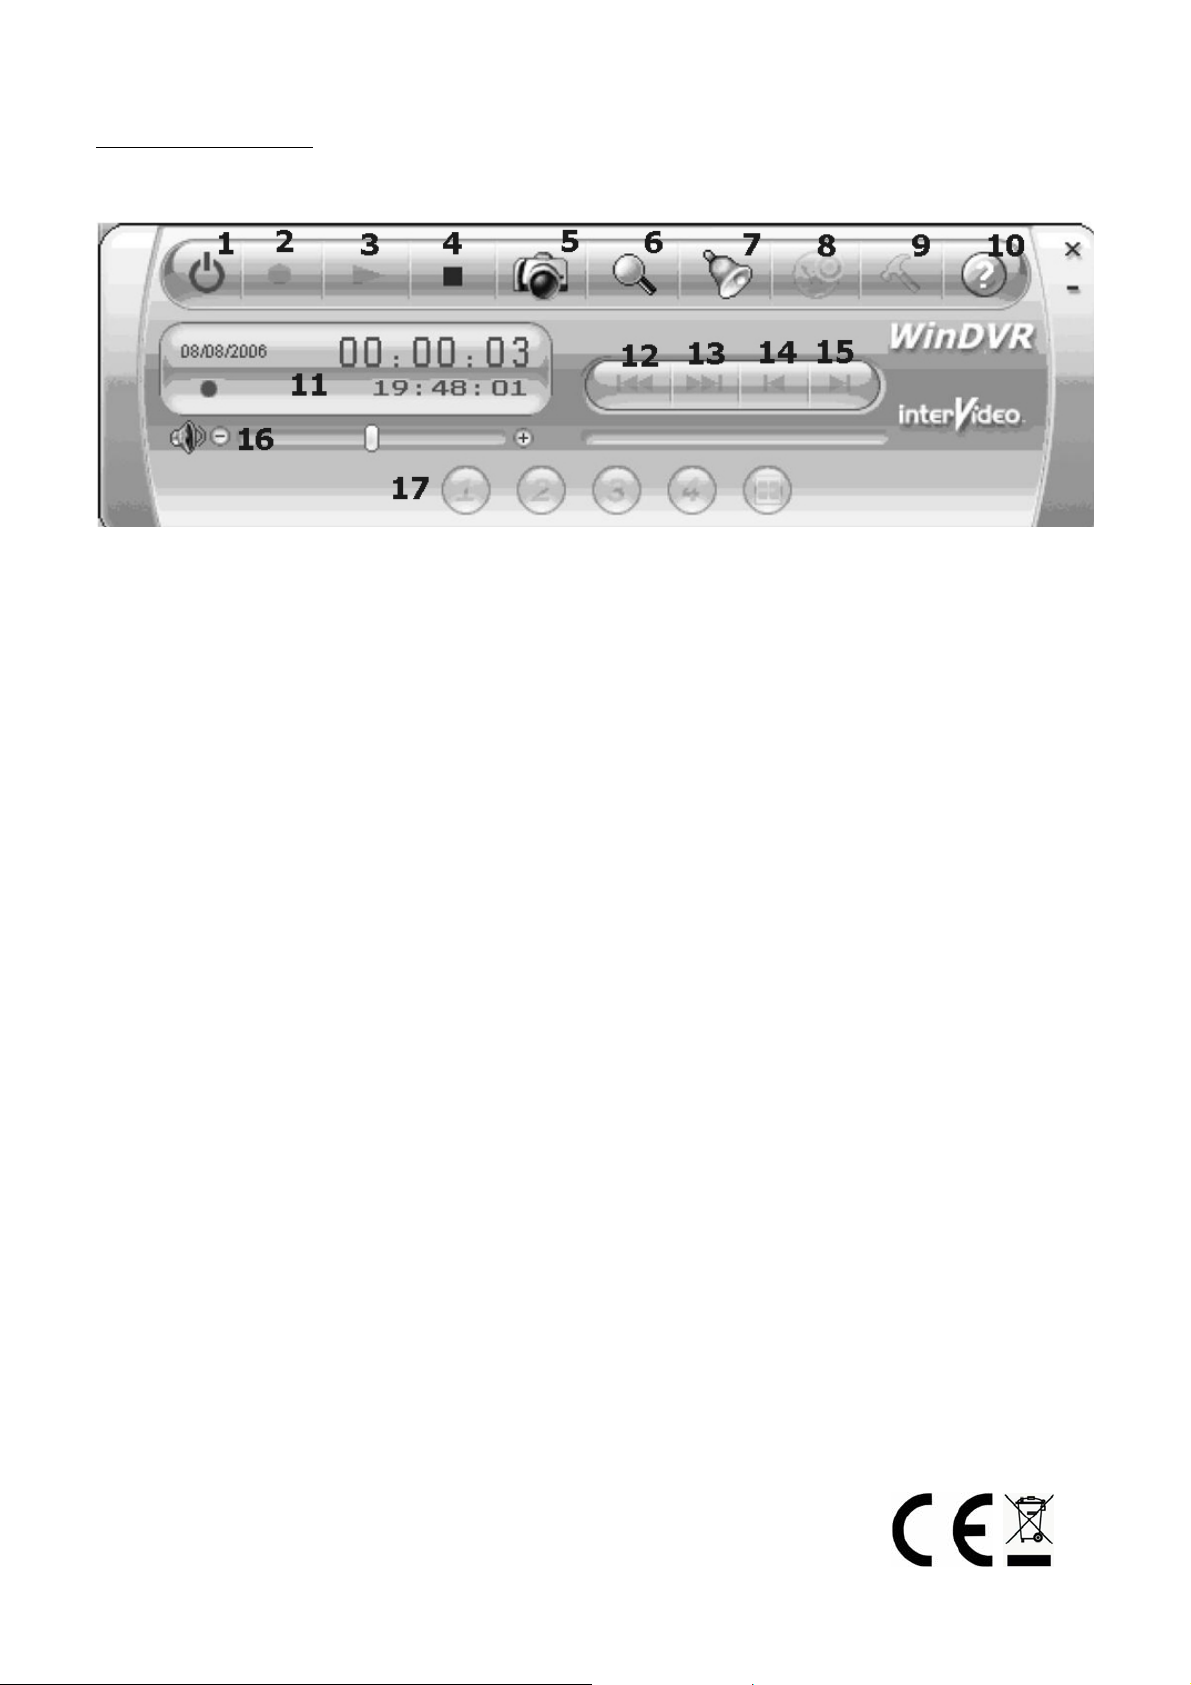
Aufnahmen mit WinDVR:
Das Programm zeigt nach dem Start folgendes Eingabefeld:
1. Ausschalten.
2. Aufnahme. Das Programm speichert die Daten, die von der Kamera kommen als MPEG-4 auf die
Festplatte.
3. Abspielen.
4. Stopp. Stoppt den Aufnahme- sowie den Abspielvorgang.
5. Einzelbilder. Speichert einzelne Bilder vom Aufnahme- sowie den Abspielvorgang.
6. Vergrößerung.
7. Alarmfunktion ein- und ausschalten.
8. Einstellungen.
9. Einstellungsmenü.
10. Hilfsfunktion.
11. Display.
12. Schneller Rücklauf.
13. Schneller Vorlauf.
14. Vorherige Datei.
15. Nächste Datei.
16. Lautstärkeneinstellung.
17. Kanalindikator. (1 – 4 und LOOP)
Das umfangreiche Einstellungsmenü ermöglicht es Ihnen WinDVR ganz Ihren Bedürfnissen anzupassen.
Um alle Möglichkeiten des Programms zu nutzen nutzen Sie bitte ein WinDVR-Handbuch.
861-311
P2007 Jens Broecking © Firma WJG, Braunschweig. Nachdruck oder Vervielfältigung nur mit ausdrücklicher Genehmigung

Reference Manual
Wireless Camera McVoice „MK-6 USB“
Preface
Dear Customer,
we like to congratulate you on the
purchase of your new wireless camera!
You have chosen a product which
combines deliberate technical features
with an appealing design.
Please read this manual conscientiously
and carry out the given instructions before
and while you are using your new device.
Capability Characteristics
• Weatherproof camera with IR-diodes for night
vision and automatic black & white toggle.
• The camera has an integrated microphone.
• 4 channels with Loop-function enable to upgrade
the system with additional cameras and receivers.
• The receiver has an USB2.0 interface to attach it
to a computer which can record and play sound
and vision.
• The enclosed software is supported by Windows
98/ME/2000/XP and NT.
Security Advices
• Before using the device, please check it for any possible damages. In case of damage do not operate it.
• Unplug the device if you do not use it for a certain time.
• The device may not become subject of mechanical stress and should not be exposed to humidity.
• To be considerate of the ventilation do not cover the device and protect it from direct solar radiation.
• Clean the device with a dry and soft cloth only.
• Caution! Should the device itself get damaged, please let the repair to the manufacturer or to a qualified
service agent.
• Please dispose packaging materials properly and do not let play children with it.
• The device itself is no toy either. Do not let children play with it too.
Technical Specifications:
Weight: 217g [C]; 119g [R]
Size (H*W*D): 83*45*78mm [C]; 16*68*78mm [R]
Operation: DC 8V [C]; DC 5V [R]
Transmission Frequency: 2400 – 2483 MHz
Channels: 2415MHz, 2432MHz, 2450MHz, 2468MHz
Modulation / Demodulation: FM / FM
Bandwidth [C]: 18MHz
Consumption Current max.: 160 mA [C]; 190 mA [R]
Transmission Power [C]: 10mW
Receiving Sensitivity [R]: < -85 dBm
Sensor Type [C]: 1/3“ Color C-MOS
Horizontal Resolution [C]: 380 lines
Resolution [C]: 628 x 582 (PAL); 510 x 492 (NTSC)
View Angle [C]: 60° (PAL); 40° (NTSC)
Range / Night Vision [C]: 100m / 7m
Antenna: 50Ω SMA
Function Environment: (-10 ~ 50)°C & 85% RH
LEGEND: [C] = Camera; [R] = Receiver
861-311
P2007 Jens Broecking © Firma WJG, Braunschweig. Nachdruck oder Vervielfältigung nur mit ausdrücklicher Genehmigung

Parts and Functions:
861-311
1 Wireless Camera
2 Receiver
3 Antenna
4 USB-Cable
5 CD-ROM with Software
6 Audio / Video – Cable (Cinch)
7 Power Supply for the Receiver
8 Power Supply for the Camera
P2007 Jens Broecking © Firma WJG, Braunschweig. Nachdruck oder Vervielfältigung nur mit ausdrücklicher Genehmigung

Installation of the Camera
861-311
• The bracket of the camera can be attached to the subsurface by screwing.
• To adjust the right view angle you have to unfasten the holding screw and fasten it again after the
adjustment.
• If you want to attach the camera to the ceiling it is recommended to install the bracket on the opposite
of the camera because the pictures will be shown upside down.
• Connect the camera with its power supply and the power supply with an electric outlet. Now the camera
is ready for operation.
P2007 Jens Broecking © Firma WJG, Braunschweig. Nachdruck oder Vervielfältigung nur mit ausdrücklicher Genehmigung

Installation of the Receiver:
861-311
• Attach the antenna to the receiver that it has a vertical position (1).
• Attach the receiver either to a computer with the USB-cable (2) or to an external monitor or TV with the
audio / video-cable (3).
• Connect the receiver with its power supply and the power supply with an electric outlet. Now the
receiver is ready for operation.
• Switch on the computer or the TV respectively and select the AV mode.
• Adjust the receiving channel of the receiver that it matches the transmitting channel of the camera (4).
• Now the transmitted picture should be shown on the screen.
• Adjust the brightness, the contrast and the color at the monitor or the TV respectively that there is an
optimal picture produced.
Enable Receiving Channels and the LOOP-Function:
1 The receiving channels 1 to 4 can be enabled or
disabled separately. If a channel is enabled it is
considered by the channel button.
2 The LOOP-function is enabled in L and disabled in
M. If it is enabled it toggles every 5 seconds
between the activated channels. This function
makes the simultaneous usage of multiple
cameras possible.
P2007 Jens Broecking © Firma WJG, Braunschweig. Nachdruck oder Vervielfältigung nur mit ausdrücklicher Genehmigung

861-311
Installation of the Software:
To use the receiver with a computer it is recommended to install the enclosed software inclusive the driver on
your PC. The software is supported by the disc operating systems Windows 98/ME/2000/XP und NT.
{The following description with its commandos belongs to Windows XP but should be similar at other systems.}
The installation of the software has three successive steps: 1. The driver, 2. Microsoft DirectX 9.0 and 3. the
video recording software WinDVR.
1. Installation of the correct Driver:
• After the receiver was connected to the computers USB interface the computer notify that it found new
hardware in the form of a TVBOX. The dialog box FOUND NEW HARDWARE WIZARD opens.
• Insert the CD-ROM and choose INSTALL FROM A LIST OR SPECIFIC LOCATION (ADVANCED) then press
NEXT.
• In the next dialog box mark SEARCH FOR THE BEST DRIVERS IN THESE LOCATIONS and SEARCH
REMOVABLE MEDIA (FLOPPY, CD-ROM…) and INCLUDE THIS LOCATION IN THE SEACH. Then find the
path to the CD-drive with BROWSE. Then press NEXT.
• Now a list with two drivers opens which both called “Trident Analog Video”. The upper one belongs to
Windows XP the other one for elder Windows versions. Mark the desired driver and press NEXT.
• If the dialog box HARDWARE INSTALLATION appears with the warning „Trident analog video has not
passed Windows Logo testing“ double-check if you really have chosen the correct driver version and
decide if the installation should be continued (CONTINUE ANYWAY) or not (STOP INSTALLATION).
• If you decide for CONTINUE ANYWAY the installation of the driver on your PC will be processed. The
driver will be copied to C:\\WINDOWS\System32.
• Finally the last dialog box opens. Here confirm the successful driver installation by pressing FINISH. The
WIZARD will close.
2. Installation of Microsoft DirectX 9.0:
• If your computer has saved DirectX 9.0 already don’t install it again now. Otherwise choose the link of
the CD-ROM menu.
• The dialog box FILE DOWNLOAD opens. To continue press OPEN.
• The dialog box with the license agreement for DirectX opens. Mark I ACCEPT THE AGREEMENT that you
can continue by pressing NEXT.
• The dialog box DIRECTX 9.0 RUNTIME INSTALL opens. Press NEXT.
• Now the installation of DirectX 9.0 components on the computer takes place.
• Finally the last dialog box opens. Here confirm the successful installation by pressing FINISH. The
WIZARD will close and the computer will be restarted automatically. (Make sure that all open files are
saved or will be closed before the restart).
3. Installation of InterVideo WinDVR:
• Choose the link of the CD-ROM menu.
• The dialog box WELCOME TO WINDVR SETUP opens. Press NEXT to continue.
• The dialog box USER INFORMATION opens. Insert your name and the serial number (SERIAL). Without
filling in the serial number the set up can not continue. Otherwise press NEXT.
• The dialog box CHOOSE DESTINATION LOCATION opens. If you don’t choose an alternative path with
the help of the browser the program will be copied to E:\Programm Files\Inter Video\WinDVR. Then
press NEXT.
• The dialog box SELECT PROGRAM FOLDER opens. Here a list of folders is offered in which the icon of
WinDVR will be copied. You can add or delete entries. Afterwards press NEXT.
• No the installation on your computer will be executed.
P2007 Jens Broecking © Firma WJG, Braunschweig. Nachdruck oder Vervielfältigung nur mit ausdrücklicher Genehmigung
Recording with WinDVR:
The program shows this panel after starting it:
1 Switch off.
2 Record. The program saves the data transmitted by the camera as MPEG-4 on your HDD.
3 Play.
4 Stop. Stops a recording as well as a playback.
5 Single pictures. Captures single pictures of a current recording or playback.
6 Magnification.
7 Switching alert function on and off
8 Settings.
9 Adjustment menu.
10 Help function.
11 Display.
12 Fast backward.
13 Fast forward.
14 Previous file.
15 Next file.
16 Volume control.
17 Channel indicator. (1 – 4 and LOOP)
The extensive adjustment menu enables you to set up WinDVR the way you need it.
To use all features of this program please use a handbook for reference .
861-311
P2007 Jens Broecking © Firma WJG, Braunschweig. Nachdruck oder Vervielfältigung nur mit ausdrücklicher Genehmigung
 Loading...