

Page 1

Installation and Maintenance Manual IM 980-1
ThinLine 3G Vertical Fan Coils
Type FCVC, FCVH, FCVS and FCWC Vertical Design
200 to 1200 cfm
IM 980-1
Group: Applied Air Systems
Part Number: 910102984
Date: May 2011
Model FCVC
Model FCVS
© 2011 McQuay International
Page 2

Table of Contents
IM 980-1 . . . . . . . . . . . . . . . . . . . . . . . . . . . . . . . . . . . . . . . . . .3
General Information . . . . . . . . . . . . . . . . . . . . . . . . . . . . . . . . . . . .3
Receiving and Storage . . . . . . . . . . . . . . . . . . . . . . . . . . . . . . . . . .4
Pre-Installation . . . . . . . . . . . . . . . . . . . . . . . . . . . . . . . . . . . . . . . .4
Fresh Air Box Openings . . . . . . . . . . . . . . . . . . . . . . . . . . . . . . . . . . . . . 4
Recommended Maintenance Clearance . . . . . . . . . . . . . . . . . . . . . . . . . 5
Duct Connections . . . . . . . . . . . . . . . . . . . . . . . . . . . . . . . . . . . . . . . . . . 5
Safety . . . . . . . . . . . . . . . . . . . . . . . . . . . . . . . . . . . . . . . . . . . . . . .5
Installation . . . . . . . . . . . . . . . . . . . . . . . . . . . . . . . . . . . . . . . . . . . .6
Uncrating and Inspecting the Unit . . . . . . . . . . . . . . . . . . . . . . . . . .6
Mounting Unit to Wall . . . . . . . . . . . . . . . . . . . . . . . . . . . . . . . . . . .6
Water Piping Connections . . . . . . . . . . . . . . . . . . . . . . . . . . . . . . . 7
General Guidelines . . . . . . . . . . . . . . . . . . . . . . . . . . . . . . . . . . . . . . . . . 7
Connecting to a Factory-Installed Valve & Piping Package . . . . . . . . . . 8
Field-Installed Valve & Piping . . . . . . . . . . . . . . . . . . . . . . . . . . . . . . . . . 8
Shutoff/Balancing Valve . . . . . . . . . . . . . . . . . . . . . . . . . . . . . . . . . . . . . 8
Condensate Drain Connection . . . . . . . . . . . . . . . . . . . . . . . . . . . . . . . . 9
Steam Piping Connections . . . . . . . . . . . . . . . . . . . . . . . . . . . . . . .9
Two-pipe systems with electric heat . . . . . . . . . . . . . . . . . . . . . . .10
External Insulating Requirements . . . . . . . . . . . . . . . . . . . . . . . . .10
Electrical Connections . . . . . . . . . . . . . . . . . . . . . . . . . . . . . . . . . 10
Standard Electrical Connection . . . . . . . . . . . . . . . . . . . . . . . . . . . . . . . 10
Thermostat and Controls . . . . . . . . . . . . . . . . . . . . . . . . . . . . . . . 11
Initial Startup . . . . . . . . . . . . . . . . . . . . . . . . . . . . . . . . . . . . . . . . .11
Cleaning & Flushing the Water System . . . . . . . . . . . . . . . . . . . . . . . . . 11
Operating Limits . . . . . . . . . . . . . . . . . . . . . . . . . . . . . . . . . . . . . . . . . . 12
Venting Hydronic Coils . . . . . . . . . . . . . . . . . . . . . . . . . . . . . . . . . . . . . 12
Operation and Maintenance . . . . . . . . . . . . . . . . . . . . . . . . . . . . .13
Controls . . . . . . . . . . . . . . . . . . . . . . . . . . . . . . . . . . . . . . . . . . . . .13
Manual 4-Position Fan Switch . . . . . . . . . . . . . . . . . . . . . . . . . . . . . . . . 13
Unit-Mounted, Mechanical Thermostat With 4-Position Fan Switch . . . 13
Digital Thermostats . . . . . . . . . . . . . . . . . . . . . . . . . . . . . . . . . . . . . . . . 13
Low-Voltage (LV) Interface Board . . . . . . . . . . . . . . . . . . . . . . . . . . . . . 15
Operation and Maintenance. . . . . . . . . . . . . . . . . . . . . . . . . . . . . .16
Accessories . . . . . . . . . . . . . . . . . . . . . . . . . . . . . . . . . . . . . . . . . .16
Fresh Air Damper . . . . . . . . . . . . . . . . . . . . . . . . . . . . . . . . . . . . . . . . . 16
Condensate Overflow Detection Device . . . . . . . . . . . . . . . . . . . . . . . . 16
Leveling Legs Option . . . . . . . . . . . . . . . . . . . . . . . . . . . . . . . . . . . . . . . 17
Cabinet Rear Extension Kit . . . . . . . . . . . . . . . . . . . . . . . . . . . . . . . . . . 17
Electric Heat Over-Temp Reset Button . . . . . . . . . . . . . . . . . . . . . . . . . 17
Key-lock Access Door Kit . . . . . . . . . . . . . . . . . . . . . . . . . . . . . . . . . . . 18
General Maintenance . . . . . . . . . . . . . . . . . . . . . . . . . . . . . . . . . . . . . . 18
Filter Changes . . . . . . . . . . . . . . . . . . . . . . . . . . . . . . . . . . . . . . . . . . . . 18
Condensate Drain Pans . . . . . . . . . . . . . . . . . . . . . . . . . . . . . . . . . . . . 18
Physical Data . . . . . . . . . . . . . . . . . . . . . . . . . . . . . . . . . . . . . . . .20
Unit Data . . . . . . . . . . . . . . . . . . . . . . . . . . . . . . . . . . . . . . . . . . . .20
Shipping Weights . . . . . . . . . . . . . . . . . . . . . . . . . . . . . . . . . . . . .20
Unit Dimensions . . . . . . . . . . . . . . . . . . . . . . . . . . . . . . . . . . . . . .21
Factory-Installed Valve & Piping Packages . . . . . . . . . . . . . . . . .25
Wiring Diagrams . . . . . . . . . . . . . . . . . . . . . . . . . . . . . . . . . . . . . . 26
Model Number Description . . . . . . . . . . . . . . . . . . . . . . . . . . . . . . 29
IM 1121 - Hideaway Unit Discharge Conversion Kit . . . . .35
Safety Information . . . . . . . . . . . . . . . . . . . . . . . . . . . . . . . . . . . . .35
Introduction . . . . . . . . . . . . . . . . . . . . . . . . . . . . . . . . . . . . . . . . . .35
Procedure . . . . . . . . . . . . . . . . . . . . . . . . . . . . . . . . . . . . . . . . . . . 35
IM 1023 - Fresh Air Damper Kit . . . . . . . . . . . . . . . . . . . . . .37
Installation Instructions . . . . . . . . . . . . . . . . . . . . . . . . . . . . . . . . . 37
Operation . . . . . . . . . . . . . . . . . . . . . . . . . . . . . . . . . . . . . . . . . . .38
Cold Weather Operation . . . . . . . . . . . . . . . . . . . . . . . . . . . . . . . . . . . . 38
IM 1028 - Fresh Air Damper Motor Kit . . . . . . . . . . . . . . . .39
Installation Instructions . . . . . . . . . . . . . . . . . . . . . . . . . . . . . . . . . 39
IM 1024 - Cabinet Rear Extension Kit . . . . . . . . . . . . . . . . .41
Installation Instructions . . . . . . . . . . . . . . . . . . . . . . . . . . . . . . . . . 41
IM 1021 - Key-Lock Access Door Kit . . . . . . . . . . . . . . . . .43
IM 1014 - MTA/B 155 Electronic Thermostats . . . . . . . . . .45
Installation . . . . . . . . . . . . . . . . . . . . . . . . . . . . . . . . . . . . . . . . . . .45
Thermostat Operation . . . . . . . . . . . . . . . . . . . . . . . . . . . . . . . . . .45
Ratings . . . . . . . . . . . . . . . . . . . . . . . . . . . . . . . . . . . . . . . . . . . . .46
Wire Lead Colors . . . . . . . . . . . . . . . . . . . . . . . . . . . . . . . . . . . . . .46
Application Notes . . . . . . . . . . . . . . . . . . . . . . . . . . . . . . . . . . . . .46
Wiring Diagrams . . . . . . . . . . . . . . . . . . . . . . . . . . . . . . . . . . . . . .46
IM 1089 - Field Installation of MT155 Thermostats . . . . . .47
General . . . . . . . . . . . . . . . . . . . . . . . . . . . . . . . . . . . . . . . . . . . . .47
Installation . . . . . . . . . . . . . . . . . . . . . . . . . . . . . . . . . . . . . . . . . . .47
Two-pipe system (Cooling or Heating) . . . . . . . . . . . . . . . . . . . . . . . . . .47
Four-pipe system (Cooling and Heating) . . . . . . . . . . . . . . . . . . . . . . . .49
IM 1015 - MT 158 and MT 168 Digital Thermostats . . . . . .51
Installation . . . . . . . . . . . . . . . . . . . . . . . . . . . . . . . . . . . . . . . . . . .51
Thermostat Operation . . . . . . . . . . . . . . . . . . . . . . . . . . . . . . . . . .52
Mode Button Operation . . . . . . . . . . . . . . . . . . . . . . . . . . . . . . . . . . . . .52
Fan Speed Switch Operation . . . . . . . . . . . . . . . . . . . . . . . . . . . . . . . . .52
Up/ Down Arrow Operation . . . . . . . . . . . . . . . . . . . . . . . . . . . . . . . . . . .52
Setback Operation . . . . . . . . . . . . . . . . . . . . . . . . . . . . . . . . . . . . . . . . .52
Pipe Sensor Operation . . . . . . . . . . . . . . . . . . . . . . . . . . . . . . . . . . . . . .52
Ratings . . . . . . . . . . . . . . . . . . . . . . . . . . . . . . . . . . . . . . . . . . . . .52
Service Menu . . . . . . . . . . . . . . . . . . . . . . . . . . . . . . . . . . . . . . . .52
Application Notes . . . . . . . . . . . . . . . . . . . . . . . . . . . . . . . . . . . . .53
Power-Up Operating Sequence . . . . . . . . . . . . . . . . . . . . . . . . . . 53
IM 1016-1 - MTB 158 Microprocessor Thermostats . . . . .55
Installation . . . . . . . . . . . . . . . . . . . . . . . . . . . . . . . . . . . . . . . . . . .55
Thermostat Operation . . . . . . . . . . . . . . . . . . . . . . . . . . . . . . . . . .56
Mode Button Operation . . . . . . . . . . . . . . . . . . . . . . . . . . . . . . . . . . . . .56
Fan Speed Switch Operation . . . . . . . . . . . . . . . . . . . . . . . . . . . . . . . . .56
Up/ Down Arrow Operation . . . . . . . . . . . . . . . . . . . . . . . . . . . . . . . . . . .56
Setback Operation . . . . . . . . . . . . . . . . . . . . . . . . . . . . . . . . . . . . . . . . .56
Pipe Sensor Operation . . . . . . . . . . . . . . . . . . . . . . . . . . . . . . . . . . . . . .56
Three Wire Floating Valve Operation . . . . . . . . . . . . . . . . . . . . . . . . . . .56
Outside Air Damper Operation . . . . . . . . . . . . . . . . . . . . . . . . . . . . . . . .56
Application Notes . . . . . . . . . . . . . . . . . . . . . . . . . . . . . . . . . . . . .57
Service Menu . . . . . . . . . . . . . . . . . . . . . . . . . . . . . . . . . . . . . . . .57
Power-Up Operating Sequence . . . . . . . . . . . . . . . . . . . . . . . . . .57
IM 1017 - MT 168 0-10Vdc/4020mA Thermostats . . . . . . .59
Installation . . . . . . . . . . . . . . . . . . . . . . . . . . . . . . . . . . . . . . . . . . .59
Electrical Ratings . . . . . . . . . . . . . . . . . . . . . . . . . . . . . . . . . . . . . .60
Application Notes . . . . . . . . . . . . . . . . . . . . . . . . . . . . . . . . . . . . .60
Thermostat Operation . . . . . . . . . . . . . . . . . . . . . . . . . . . . . . . . . .60
Configuration . . . . . . . . . . . . . . . . . . . . . . . . . . . . . . . . . . . . . . . . .60
Service Menu: . . . . . . . . . . . . . . . . . . . . . . . . . . . . . . . . . . . . . . . .61
IM 846 - MT 170 Thermostats . . . . . . . . . . . . . . . . . . . . . . .63
Installation Instructions . . . . . . . . . . . . . . . . . . . . . . . . . . . . . . . . .65
Thermostat Model and Part Number. . . . . . . . . . . . . . . . . . . . . . . . . . . 65
Optional Occupancy Detection Sensors/Kits . . . . . . . . . . . . . . . . . . . . .65
Mounting and Wiring the Thermostat . . . . . . . . . . . . . . . . . . . . . . . . . . .65
Operation . . . . . . . . . . . . . . . . . . . . . . . . . . . . . . . . . . . . . . . . . . . .67
Thermostat Button Operation . . . . . . . . . . . . . . . . . . . . . . . . . . . . . . . . .67
Verifying Thermostat Operation . . . . . . . . . . . . . . . . . . . . . . . . . . . . . . .67
Thermostat Menu Functions . . . . . . . . . . . . . . . . . . . . . . . . . . . . . . . . . .68
Fan Operation . . . . . . . . . . . . . . . . . . . . . . . . . . . . . . . . . . . . . . . . . . . . .69
Fancoil Operation . . . . . . . . . . . . . . . . . . . . . . . . . . . . . . . . . . . . . . . . . .70
Setback Operation . . . . . . . . . . . . . . . . . . . . . . . . . . . . . . . . . . . . . . . . .70
Optional Occupancy Detection Equipment Operation . . . . . . . . . .71
SB200-001 Occupancy Sensor . . . . . . . . . . . . . . . . . . . . . . . . . . . . . . .71
SD200-001 Occupancy Sensor . . . . . . . . . . . . . . . . . . . . . . . . . . . . . . .73
SD200-002 Occupancy Sensor . . . . . . . . . . . . . . . . . . . . . . . . . . . . . . .74
IM 831 - Thermostat Conversion Kit . . . . . . . . . . . . . . . . . .77
Safety Information . . . . . . . . . . . . . . . . . . . . . . . . . . . . . . . . . . . . .77
Introduction . . . . . . . . . . . . . . . . . . . . . . . . . . . . . . . . . . . . . . . . . .77
Procedure . . . . . . . . . . . . . . . . . . . . . . . . . . . . . . . . . . . . . . . . . . .77
IM 763 - Automatic Changeover Switch . . . . . . . . . . . . . . . 79
Safety Information . . . . . . . . . . . . . . . . . . . . . . . . . . . . . . . . . . . . .79
Introduction . . . . . . . . . . . . . . . . . . . . . . . . . . . . . . . . . . . . . . . . . .79
Procedure . . . . . . . . . . . . . . . . . . . . . . . . . . . . . . . . . . . . . . . . . . .79
2 McQuay IM 980-1
Page 3
General Information
FC V S - 1 02 A
Unit Type
FC = Fan Coil
FH = Cabinet Unit Heater
Unit Configuration
V= Vertical
W = Wall Hung (future)
Cabinet Type
C = Cabinet (Flat Top)
S = Slope Top
H = Hideaway
Voltage
A = 115/60/1
E = 208-230/60/1
J = 277-265/60/1
Unit Size
02 = 200 CFM
03 = 300 CFM
04 = 400 CFM
06 = 600 CFM
08 = 800 CFM
10 = 1000 CFM
12 = 1200 CFM
Design Series
Multiple Control Options
• From 3-speed switch to LV interface board
• Remote or unit-mounted
• 3-speed or staged fan
Multiple
Configurations
• Flat top
• Slope top
• Hideaway
• Wall mounted
Multiple Coil Options
• 2, 3 or 4-row main coil
• 1 or 2-row preheat or 1-row
reheat coil
• Hot water or steam
• Same or opposite end
connections
Multiple Grille Options
• Stamped discharge
louver
• Multi-directional grilles
• Return grille option
Software Selectable
Valve & Piping Packages
• Factory-mounted, wired and
tested or factory-assembled and
shipped loose for field mount
• Normally Closed or Open, On/Off
or modulating valves
Easily Removed Drain Pan & Motor Assembly
• For easy maintenance and service
• Sloped, polymer drain pan for good IAQ
Optional Secondary Drain Pan
(Supplied with Piping Packages)
• Noncorrosive
• Easily removed
Thinline™ 3G Vertical Fan Coils are intended for use in single
zone applications. They are available in sizes from 200 to 1200
cfm. Figure 2 describes the main features of these units and
can be refered to for component placement. These units are
available in two-pipe configurations with one hydronic coil,
with or without electric heat. They are also available in fourpipe configurations with one primary coil and a secondary
reheat or preheat coil. A variety of factory-built piping
packages are available, either factory or field-installed.
Units are available with a variety of thermostat and fan speed
control options, which can be mounted on the unit or shipped
loose for mounting in the controlled space. Options include:
• Four-position fan switch (Off/Lo/Med/Hi).
• Manual thermostat with On/Off valve control.
• Digital thermostat with a variety of control options,
including fan control, On/Off or modulating valve control
and automatic changeover from heating to cooling on twopipe systems.
• Low-voltage interface board for connecting a unit to
controls provided by others. The controls interface option
includes a 24 volt AC transformer and interface terminal
strips.
• No Controls, with pigtail connections to the unit’s fan motor
wiring harness.
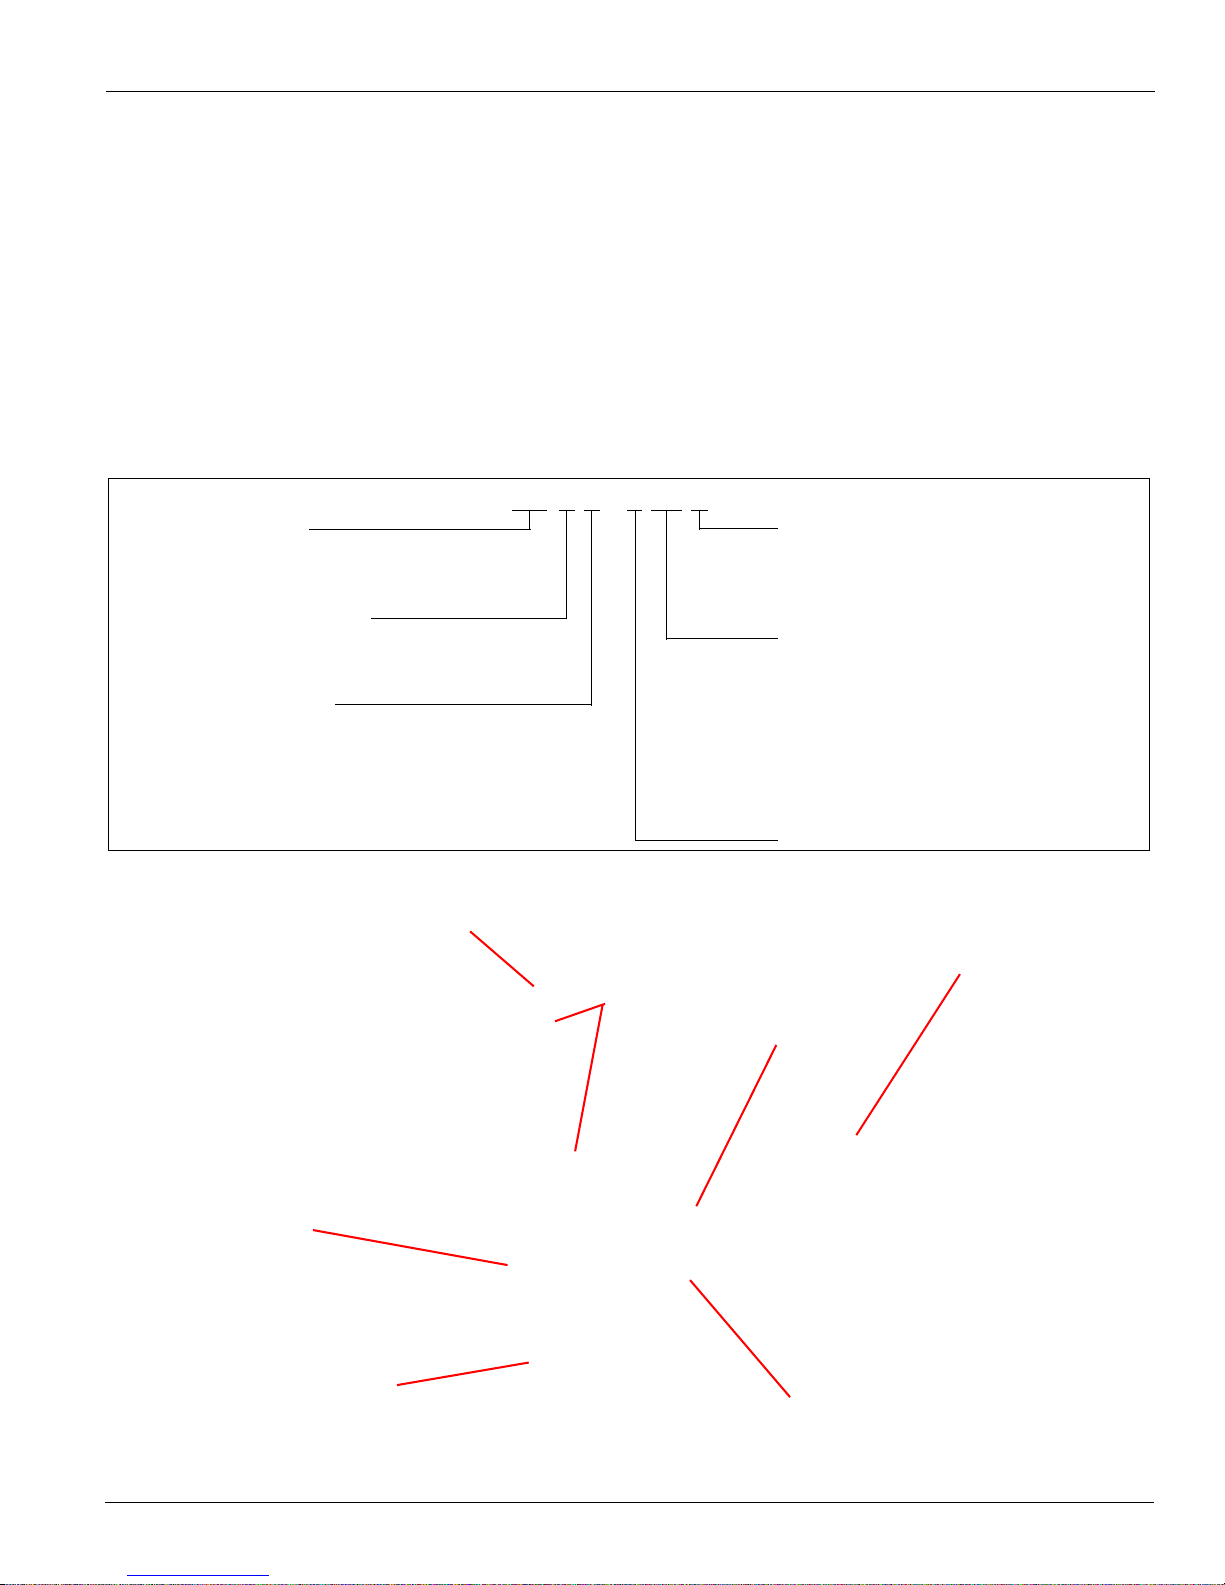
Figure 1: Nomenclature (see Table 1, page 29 for complete model number description)
General Information
Figure 2: Unit Features
McQuay IM 980-1 3
Page 4
General Information
Receiving and Storage
Upon receipt of the equipment, check carton for visible
damage. Make a notation on the shipper’s delivery ticket
before signing. If there is any evidence of rough handling,
immediately open the cartons to check for concealed damage.
If any damage is found, notify the carrier within 48 hours to
establish your claim and request their inspection and a report.
The Warranty Claims Department should then be contacted.
Do not stand or transport the machines on end. For storing,
each carton is marked with “up” arrows.
Temporary storage at the job site must be indoor, completely
sheltered from rain, snow, etc. High or low temperatures
naturally associated with weather patterns will not harm the
units. Excessively high temperatures, 140°F (60°C) and
higher, may deteriorate certain plastic materials and cause
permanent damage.
IMPORTANT
This product was carefully packed and thoroughly inspected
before leaving the factory. Responsibility for its safe delivery
was assumed by the carrier upon acceptance of the shipment.
Claims for loss or damage sustained in transit must therefore
be made upon the carrier as follows:
VISIBLE LOSS OR DAMAGE
Any external evidence of loss or damage must be noted on the
freight bill or carrier’s receipt, and signed by the carrier’s agent.
Failure to adequately describe such external evidence of loss
or damage may result in the carrier’s refusal to honor a
damage claim. The form required to file such a claim will be
supplied by the carrier.
CONCEALED LOSS OR DAMAGE
Concealed loss or damage means loss or damage which does
not become apparent until the product has been unpacked.
The contents may be damaged in transit due to rough handling
even though the carton may not show external damages.
When the damage is discovered upon unpacking, make a
written request for inspection by the carrier’s agent within
fifteen (15) days of the delivery date and file a claim with the
carrier.
Pre-Installation
Before beginning installation, please read this publication in its
entirety. Directions given in this bulletin for right and left sides
or coil hand assume a position facing the front of the unit.
1 To prevent damage, do not operate this equipment for
supplementary heating and cooling during the
construction period. Doing so will void the warranty.
2 Inspect the carton for any specific tagging numbers
indicated by the factory per a request from the installing
contractor. At this time the voltage, phase and capacity
should be checked against the plans.
3 Check the packing list and unit identification/tagging
numbers against the plans to verify that the unit is being
installed in the correct location. The unit data plate is
attached to the deck plate on the front of the fan coil (see
Figure 3). Remove the front panel on cabinet units to
access it. The panel contains specific information on
standard components as listed in Figure 1, page 3 and in
Table 1, page 29.
Figure 3: Data Plate Location
Before installation, check the available dimensions
4
where the unit is to be installed against the dimensions of
the unit.
5 Note the location and routing of water piping,
condensate drain piping, and electrical wiring. The
locations of these items are clearly marked on submittal
drawings.
6 An installing contractor may find it beneficial to confer
with piping, sheet metal, and electrical foremen before
installing any unit.
Note: Check the unit data plate for correct voltage with the
plans before installing the equipment. Also, make
sure all electrical ground connections are made in
accordance with local code.
7
The unit is not designed to be free-standing. Install it
against a wall or other flat surface that meets fire and
electrical codes requirements for heating and cooling
devices.
8 After installation, cover the unit with the shipping carton
or other appropriate material for protection during
finishing of the building. This is critical while spraying
fireproofing material on bar joists, sandblasting, spray
painting and plastering. Damage to the unit due to a
failure to protect it during finishing of the building is not
covered by the warranty.
Fresh Air Box Openings
ThinLine 3G Vertical Fan Coils can be installed with an
optional fresh air box that is designed to let in outside air while
preventing water (such as rain) from getting into the unit itself.
If used, prior to unit installation, confirm that the exterior wall
opening and the wall box are ready and installed in accordance
with the job plans.
4 McQuay IM 980-1
Page 5

General Information
0.5 in
13 mm
0.5 in
13 mm
10 in
254 mm
Recommended Maintenance Clearance
Cabinet units have removable front and side panels for easy
access to components for service and maintenance. The fan
assembly and main drain pan are easily removable from the
front for cleaning. See Accessing/removing the main drain pan
and motor assembly‚ page 19 for more information.
Figure 4 shows recommended maintenance clearances: 0.5
inches (13 mm) on either side and 10 inches (254 mm) in front.
Units are referred to as either right-hand or left-hand
depending upon the piping connection. Hand is designated by
facing the front of the unit (airflow discharges from the front
or top). Unless it is a special-order unit, the control panel is
always on the end opposite the cooling coil pipe connections.
Figure 4: Recommended maintenance clearance
Duct Connections
1 Discharge ductwork should run in a straight line,
unchanged in size or direction, for a minimum distance
of three fan diameters from the unit (approximately 20
inches).
2 Avoid making sharp turns when making duct turns and
transitions. Use proportional splits, turning vanes, and air
scoops when necessary.
3 When possible, construct and orient supply ductwork
turns in the same direction as the fan rotation.
Safety
Follow all safety codes. Wear safety glasses and work gloves.
Use a quenching cloth for brazing operations. Have a fire
extinguisher available. Follow all warnings and cautions in
these instructions and attached to the unit. Consult applicable
local building codes and National Electrical Codes (NEC) for
special requirements.
Recognize safety information. When you see a safety symbol
on the unit or in these instructions, be alert to the potential for
personal injury. Understand the meanings of the words
DANGER, WARNING, and CAUTION. DANGER identifies
the most serious hazards that will result in death or severe
personal injury; WARNING means the hazards can result in
death or severe personal injury; CAUTION identifies unsafe
practices that can result in personal injury or product and
property damage. Improper installation, adjustment, service,
maintenance, or use can cause explosion, fire, electrical
shock, or other conditions which may result in personal injury
or property damage. This product must be installed only by
personnel with the training, experience, skills, and applicable
licensing that makes him/her “a qualified professional
HVACR installer.”
Air ducts, when used with hideaway units, should be installed
in accordance with local and national codes, including
National Fire Protection Association standards for the
Installation of Air Conditioning and Ventilating Systems and
the National Fire Protection Association standards for the
Installation of Air Conditioning and Ventilation Systems other
than Residence Type.
A one-inch duct collar is provided on units with a ducted
return and/or discharge to attach ductwork. McQuay
recommends using galvanized sheet metal ductwork. Slide the
sheetmetal duct over the duct collar flange of the unit, seal the
joint and fasten with sheetmetal screws.
Note: Do not run screws through the removable front panel on
hideaway units.
Ductwork Recommendations
Follow the general recommendations listed below when
installing the ductwork for the unit.
McQuay IM 980-1 5
DANGER
Disconnect all electrical power before servicing unit. Electrical
shock will cause severe injury or death.
WARNING
Hazardous Voltage!
Use copper conductors only. Unit terminals are not designed to
accept other types of conductors. Failure to do so may cause
damage to the equipment.
WARNING
Personal injury hazard. Wear protective gloves to avoid
possible cuts and abrasions from exposed edges. Avoid
contact with sharp edges.
CAUTION
Cleaning agents may cause serious damage to internal
components, such as aluminum coils and electronic controls,
etc. Do not operate fan coil while building maintenance
cleaning agents are in use..
Page 6

Installation
Installation
Uncrating and Inspecting the Unit
1 Carefully remove the packaging, remaining alert to any
signs of shipping damage. Be careful not to discard
components that may be included with the packaging.
2 If the unit is damaged, file a claim with the carrier.
Notify the local McQuay representative immediately.
3 You may want to retain some or all of the packaging to
provide jobsite unit location information and temporary
protection for the fan coil after installation. Be sure to
dispose of plastic packaging and protective cardboard
properly, in accordance with local recycling rules and
guidelines.
WARNING
Plastic packaging is a suffocation hazard, dispose of properly.
Keep away from children.
4 Touch up painted panels if necessary. If panels need
paint, sanding is not necessary. However, clean the
surface of any oil, grease, or dirt residue so the paint will
adhere. Purchase factory approved touch up paint from
your McQuay representative or McQuay Factory
Service.
Mounting Unit to Wall
WARNING
Installation and maintenance are to be performed by qualified
personnel who are familiar with local codes and Regulations,
and experienced with this type of equipment..
CAUTION
Personal injury hazard. Wear protective gloves to avoid
possible cuts and abrasions from exposed edges. Avoid
contact with sharp edges.
1 Consult job blueprints for unit location.
2 Clean area where unit is to be installed, removing all
construction dirt and debris. Remove an y mouldings at
the floor or wall.
3 Remove the unit from the shipping carton and plastic
covering. Save the carton and plastic to use as a
protective cover after the installation is complete.
4 On cabinet units, remove the screws shown in Figure 5
that secure the right and left cabinet corner panels to the
subbase. For ease of installation, you may also remove
the center panel. Lift the panels up and out.
Note: Set the unit panels aside where they will not be
damaged. Take care not to bend the mounting tabs
on the bottom of the panels.
Figure 5: Cabinet Side Panel Removal
5
STOP! If an outside air damper kit is to be installed,
install it now. See Fresh Air Damper‚ page 16 and the IM
included with the damper for more information.
6 Position the chassis/subbase against the wall where the
unit is to be installed. Make sure that the area under the
unit is free of combustible materials such as carpet. For
cabinet units, the wall must act to close off the back of
the unit.
7 For hideaway units, if you are using McQuay’s
decorative wallplate, use blocks or other suitable
material to raise the unit off the floor a minimum of 1.5
inches (38 mm).
8 Make sure electrical and piping connections are in the
proper location within the end compartments. The
control box is in the end compartment opposite the main
coil piping connections. Power to the unit is hooked up
through the junction box/disconnect box located under
the control box. See Figure 30, page 21 through
Figure 33, page 24 for location information.
9 Use a level to check that the unit is level both front to
back and side to side (see Figure 6). Adjust the unit as
needed using the optional leveling legs or shims.
CAUTION
It is critical that the unit is level to avoid condensate
accumulation in the drain pan. This is especially important
when using a stainless steel drain pan which does not have a
sloped bottom.
10 The chassis has a series of slots on the back flange to
mount the assembly to the wall. Transfer a mark with a
marker or pencil to the wall at the mounting hole
locations.
11 Insert fasteners through the mounting holes in the chassis
and secure the unit to the wall. Do not over-tighten
fasteners. It is the installing contractor’s responsibility to
6 McQuay IM 980-1
Page 7

Installation
Make sure unit is
level front-to-back
and side-to-side.
Use a quenching cloth
when soldering or
brazing to avoid
overheating the piping
components and
creating valve damage
or eratic operation.
select the correct fasteners for each unit to meet local
codes. At location(s) where no stud is present, secure
with a Toggle bolt or equivalent.
Note: Use a minimum of two fasteners on each side to
secure the unit (field supplied).
12
On cabinet units, reinstall the side/quarter panels in
reverse order as performed in step 4.
13 If you raised the unit off the floor in step 7, remove the
block or other material supporting the bottom of the unit.
Make sure the unit is securely fastened to and supported
by the wall mounts.
14 Cut out one side and the bottom of the shipping carton,
leaving the top and three sides to place over the unit for
protection during construction.
Figure 6: Unit Mounting
Water Piping Connections
General Guidelines
1 Piping can be steel, copper or PVC, but must comply
with local codes.
2 Proper ventilation is required for soldering. When
soldering, use a quenching cloth to protect fan coil
components from overheating damage—melting
insulation, also damage to valves, wiring, electronics,
sensors, etc. See Figure 7. When McQuay provides valve
McQuay IM 980-1 7
packages with unions, o-rings are included. When
soldering near unions, remove the o-rings before heating.
Figure 7: Protect Components From Overheating
3
If sealant compound is not provided for flexible hose
fittings, apply Teflon tape to the connections to help
prevent leaks.
4 Ensure proper insulation of supply and return piping.
Proper insulation prevents loss of fan coil capacity,
overheating of end compartments, and/or moisture
dripping.
5 The piping to and from the unit must be protected from
outside air and freeze conditions. It must be suitably
insulated for condensation and for heat loss or gain.
Penetrations entering the unit end compartments must be
fitted/sealed for unit integrity.
6 Exterior condensate may be an issue if field piping does
not have a control valve. Review the supply and return
header locations in the Dimensions drawing beginning
on page 21. If using a field-assembled piping package,
allow sufficient room to install the secondary drain pan.
Piping for chilled water should not extend over the edges
of the secondary condensate drain pan.
7 Supply and return shutoff valves are recommended at
each unit. The return valve is used for balancing and
should have a “memory stop” so that it can always be
closed off, but can only be re-opened to the proper
position for the flow required.
8 Primary coils are factory-equipped with vents for venting
the system, but secondary coils (preheat or reheat) are
not. If the unit is not equipped with a factory-built piping
packages, then a vent must be added. See step 1, page 8.
9 Be sure to install control valves on the correct fan coil.
Indiscriminate mixing of valves in the field can result in
valves improperly sized for the desired flow rate, which
can result in poor operation and coil freezeups.
10 Install control valves so there is at least 2" (51mm)
minimum clearance to remove the actuator from the
valve body.
Page 8

Installation
Secondary
Coil Air
Vent
11 Do not connect a unit to the supply and return piping
until the water system has been cleaned and flushed
completely. After this is done, the initial connection
should have all valves wide open in preparation for water
system flushing.
12 Condensate piping can be steel, copper, or PVC. A
means of disconnection must be furnished to facilitate
fan section removal.
13 No point of the drain system may be above the drain pan
of any unit.
14 Automatic flow control devices must not be installed
prior to system cleaning and flushing.
15 Check local code for any requirement for electrical
fittings.
Connecting to a Factory-Installed Valve &
Piping Package
To view connection locations for factory-i nstalled valve &
piping packages, see Figure 34, page 25. Before instal ling
supply and return lines to a factory piping package, review the
following items.
• All piping connections are 5/8" O.D.S. (1/2" nominal)
female copper connections.
• Supply and return piping should not interfere with the
secondary drain pan or condensate line.
• The installer must provide adequate piping system filtration
and water treatment.
• McQuay Deluxe and Enhanced piping packages include a
strainer which prevents debris from entering the coil. Clean
the strainer regularly.
• The fan coil ships with brackets to adequately support the
piping package during shipment. Remove these brackets
before connecting water piping to the unit.
• Set end valves to the fully open position to prevent damage
to the valve seat during brazing.
• Remove the secondary drain pan, if in place, to prevent
exposure to dripping solder or excessive temperatures.
• Solder water piping connections to supply and return end
connections. Avoid overheating factory soldered joints to
prevent the possibility of leakage.
• Insulate fan coil piping to secondary drain pan connections
and any piping that is not above the secondary drain pan.
Field-Installed Valve & Piping
Review General Guidelines‚ page 7 before beginning. Then
carry out the following steps to install valves and piping.
1 For units equipped with a secondary coil make sure that
an air vent is included in the return line piping (see
Figure 8). Primary coils are factory-equipped with vents
for venting the system, but secondary coils (preheat or
reheat) are not.
IMPORTANT
Venting is required on the return piping for secondary preheat
or reheat coils. It is included on factory-built piping packages,
but must be added by the installing contractor for field-installed
piping. See Figure 8.
Figure 8: Secondary Coil Air Vent
2 Remove the secondary drain pan, if in place, to prevent
exposure to dripping solder or excessive temperatures.
Note: Factory-installed valve and piping packages include
the secondary drain pan, which ships with the unit.
For other arrangements, the secondary drain pan
must be ordered separately.
3
Push the main drain pan condensate hose back inside the
end plate to prevent it from getting burned when making
sweat connections. Be sure to pull the hoses back
through and route to the secondary drain pan when the
end panel has cooled.
4 Slide ½" copper tubing or connection couplings (installer
provided) onto the coil connections. Solder the joint
using a good-quality, lead-free solder to provide a
watertight connection.
WARNING
Avoid overheating when soldering field connections to the coil
to prevent leakage, overheating of the copper tubes, and
melting of valves, factory-soldered joints or component
gasketing. A quenching cloth is recommended. See Figure 7.
5 After connections are complete, insulate all piping to the
coil connections as necessary to prevent condensate from
dripping outside of the secondary drain pan.
6 Install the optiona l seco nd ary drain pan.
Shutoff/Balancing Valve
Each fan coil should be at least be equipped with shutoff
valves on both the supply and return lines for easy
serviceability and removal if it becomes necessary. We suggest
using our combination shutoff/balancing valves between the
8 McQuay IM 980-1
Page 9

Installation
7/8-inch OD
copper pipe
Changeover switch
Changeover sensor
main supply line and the fan coil unit. These can be furnished
as part of a factory-installed valve & piping package or they
can be installed in the field. The balancing valve installed on
the return line is used to adjust the water flow to provide the
best performance.
Condensate Drain Connection
1 Connect a copper or plastic pipe to the 7/8 inch copper
pipe on the secondary drain pan. This should be a
mechanical connection that allows easy removal of the
secondary drain pan when servicing the piping end
pocket.
2 Slide the pipe over the drain pan nipple and tighten the
collar on the pipe with a hose clamp (installer supplied).
A drain line pitch of one inch per ten feet of drain line
run must be maintained to provide adequate condensate
drainage.
3 The drain line should be supported to prevent undue
stress on the secondary drain pan. Make sure the drain
line is free of kinks and obstructions and the secondary
drain pan is level.
4 The installer is responsible for adequately insulating
field piping. See External Insulating Requirements‚ page
10 for more information.
Figure 9: Condensate Drain Connection
Automatic Changeover Sensor
Two-pipe changeover units require an automatic changeover
switch or pipe sensor that determines heating or cooling mode
based on the supply water temperature. A switch is provided
with a unit-mounted analog thermostat on a two-pipe system.
A sensor is provided with any digital control on a two-pipe
system. On units with a factory-installed valve & piping
package, the factory straps the changeover switch or sensor to
the piping supply water pipe. See Figure 10.
For a two-pipe system with intermediate electric heat, a second
set is required including a changeover switch or sensor.
Figure 10: Changeover switch & sensor attachment
If the unit does not have a factory-installed valve & piping
package, the changeover switch or sensor can be ordered for
field installation. The installer should attach the sensor or autochangeover switch parallel to and in direct contact with the
supply water pipe.
Note: The installer is responsible to ensure the changeover
sensor is installed in a location that can sense active
water temperature. Otherwise, the unit may fail to sense
the correct operating mode and disable temperature
control.
When using field-supplied three-way valves, install the
changeover sensor upstream of the valve on the supply water
pipe. When using field-supplied two-way control valves,
install the changeover sensor in a location that will detect
active water temperature. The unit must always be able to
sense the correct system water temperature, regardless of the
control valve position.
Note: The maximum length of the automatic changeover wire
cannot exceed ten feet from the control panel to the
sensor. If the wire extends beyond the unit chassis, use
shielded conductors to eliminate radio frequency
interference (RFI).
Steam Piping Connections
CAUTION!
Coil Damage!
In all steam coil installations, the condensate return connections
must be at the low point of the coil to ensure condensate flows
freely from the coil at all times. Failure to do so may cause
physical coil damage from water hammer, unequal thermal
stresses,freeze-up and/or corrosion.
McQuay IM 980-1 9
Make piping connections to the steam coil per job
requirements. (McQuay does not supply steam piping
connections.) Install a 1/2", 15-degree swing check vacuum
breaker in the unused condensate return trapping as close as
possible to the coil.The following procedures are
recommended:
Page 10

Installation
Low-voltage
conductors
brought in here
Electric heat
power conductors
brought in here
Unit power
conductors
brought in here
1 Vent the vacuum breaker line to atmosphere or connect it
into the return main at the discharge side of the steam
trap.
2 Pitch all steam supply and return mains down a
minimum of one inch per ten feet in the direction of flow.
3 Do not drain the steam mains or takeoff through the
coils. Drain the mains ahead of the coils through a steam
trap to the return line.
4 Overhead returns require one psig of pressure at the
steam trap discharge for each two-feet elevation to
ensure continuous condensate removal.
5 Proper steam trap selection and installation is necessary
for satisfactory coil performance and service life. For
installation, use the following steps:
a Position the steam trap discharge at least 12 inches
below the condensate return connection. This
provides sufficient hydrostatic head pressure to
overcome trap losses and ensure complete condensate
removal.
b McQuay recommends using flat and thermostatic
traps because of gravity drain and continuous
discharge operation.
c Use float and thermostatic traps with atmospheric-
pressure gravity condensate return, with automatic
controls or where the possibility of low pressure
supply steam exists.
d Always install strainers as close as possible to the trap
inlet side.
Electrical Connections
Installation and maintenance must be performed only by
qualified personnel who are familiar with local codes and
regulations, and are experienced with this type of equipment.
DANGER
Hazardous Voltage!
The installer must determine and follow all applicable codes
and regulations. This equipment presents hazards of
electricity, rotating parts, sharp edges, heat and weight. Failure
to read and follow instructions can result in property damage,
severe personal injury or death.
Standard Electrical Connection
Field electrical power connections are made in the electrical
junction box, which is mounted to the control box on the side
of the chassis opposite the primary coil piping connections.
See Figure 11. If the unit is equipped with an optional
disconnect switch, it is located in this junction box.
Units with an electric heat option that has the same voltage as
the unit can bring the power conductors into this same junction
box. Units with electric heat that has a different voltage should
bring the electric heat into one of the knockouts on the control
box. See Figure 11.
Low voltage wires should be brought into the conduit located
next to the field electrical power junction box. See Figure 11.
Figure 11: Electrical Power Connections
Two-pipe systems with electric heat
The electric heating coil is designed to be the total source of
heat for the unit. If used for auxiliary intermediate season
heating, additional control is required. A second switch or pipe
sensor is required. Contact your McQuay representative for
more information.
To protect the electric heat elements, an automatic and manual
electric heat switch disengages the electric heat to prevent
overheating. For information on resetting the manual switch,
see Electric Heat Over-Temp Reset Button‚ page 17.
External Insulating Requirements
Insulate and vapor-seal surfaces that are colder than the
surrounding air dew point to prevent unplanned condensation.
McQuay recommends field-insulation in the following areas to
prevent potential condensate problems:
• Supply and return water piping connections
• Condensate drain lines and connections
• Fresh air intake duct connections
• Discharge duct connections
• Wall boxes
If electrical wiring or conduit comes through the floor, all
wires or conduit should be sealed at this point. It will prevent
any condensation or water leakage that may occur due to lack
of preventive maintenance.
Note: Wiring coming through the wall should be sealed to stop cold air
infiltration through the wall cavity, which could affect unit
thermostat operation. Wiring coming through the floor should be
sealed to prevent condensation or water leakage from reaching
live wires.
10 McQuay IM 980-1
Page 11
Installation
Cabinet unit:
Wiring diagram
inside cabinet
corner panel
Hideaway unit:
Wiring diagram on
front panel
Return Runout
Supply Runout
Mains
Flexible Hose
Install a strain relief and pass the wires through the strain relief
into the junction box. Make the connections and reinstall the
junction box cover.
Electrical Data
The wiring diagram for the unit is attached to the inside of the
corner panel on cabinet units. It is attached to the front cover
of the unit on hideaway units. See Figure 11. Be sure the
available power is the same voltage and phase as that shown
on the unit serial plate. See Figure 3, page 4 for the location of
the serial plate.
Figure 12: Wiring Diagram Locations
Note: Voltages listed are to show voltage range. However,
units operating with overvoltage and undervoltage for
extended periods of time will experience premature
component failure.
Thermostat and Controls
DANGER
READ THE INSTRUCTIONS INCLUDED WITH THE
THERMOSTAT/CONTROL CAREFULLY BEFORE
ATTEMPTING TO INSTALL, OPERATE OR SERVICE IT.
Failure to observe safety information and comply with
instructions could result in PERSONAL INJURY, DEATH AND/
OR PROPERTY DAMAGE.
To avoid electrical shock or damage to equipment, disconnect
power before installing or servicing. Use only wiring with
insulation rated for full thermostat operating voltage. Use
copper wire only. Insulate or wirenut all un-used leads. Any
wiring, including the remote probe,may carry the full operating
voltage of the thermostat.
To avoid potential fire and/ or explosion do not use in
potentially flammable or explosive atmospheres.
Retain the installation instructions for future reference. You
must review your application and national and local codes to
ensure that your installation will be functional and safe.
After wiring and installation are complete, energize the system
and check the operation. Adjust the thermostat as necessary
to complete at least one cycle. Be sure the thermostat and all
other equipment are functioning correctly.
Line and voltage wiring must be done in accordance with local
codes or the National Electrical Code, whichever is applicable.
Apply correct line voltage to the unit. Power to the unit must
be sized correctly. Branch circuit overcurrent protection must
be provided per local codes. See the nameplate for correct
ratings.
All 208-230V single-phase units are factory wired for 230 volt
operation. For 208 V operation the L1 wire connection to the
unit transformer (found in the main control box) must be
changed. The L1 wire must be disconnected from the 230 V
(orange) wire and connected to the 208 V (red) wire. The 230
V wire must then be capped off with a wire nut or male
terminal as appropriate. Please refer to the unit wiring
diagram.
Operating Voltages
Operating voltages are as follows (+/– 10%).
• 115/60/1
• 208-230/60/1
• 265-277/60/1
McQuay IM 980-1 11
Initial Startup
Cleaning & Flushing the Water System
1 Prior to first operation of any unit, clean and flush the
water circulating system of all construction dirt and
debris.
2 If units are equipped with water shutoff valves, either
electric or pressure operated, connect the supply and
return runouts together at each unit location. This will
prevent the introduction of dirt into the unit. See
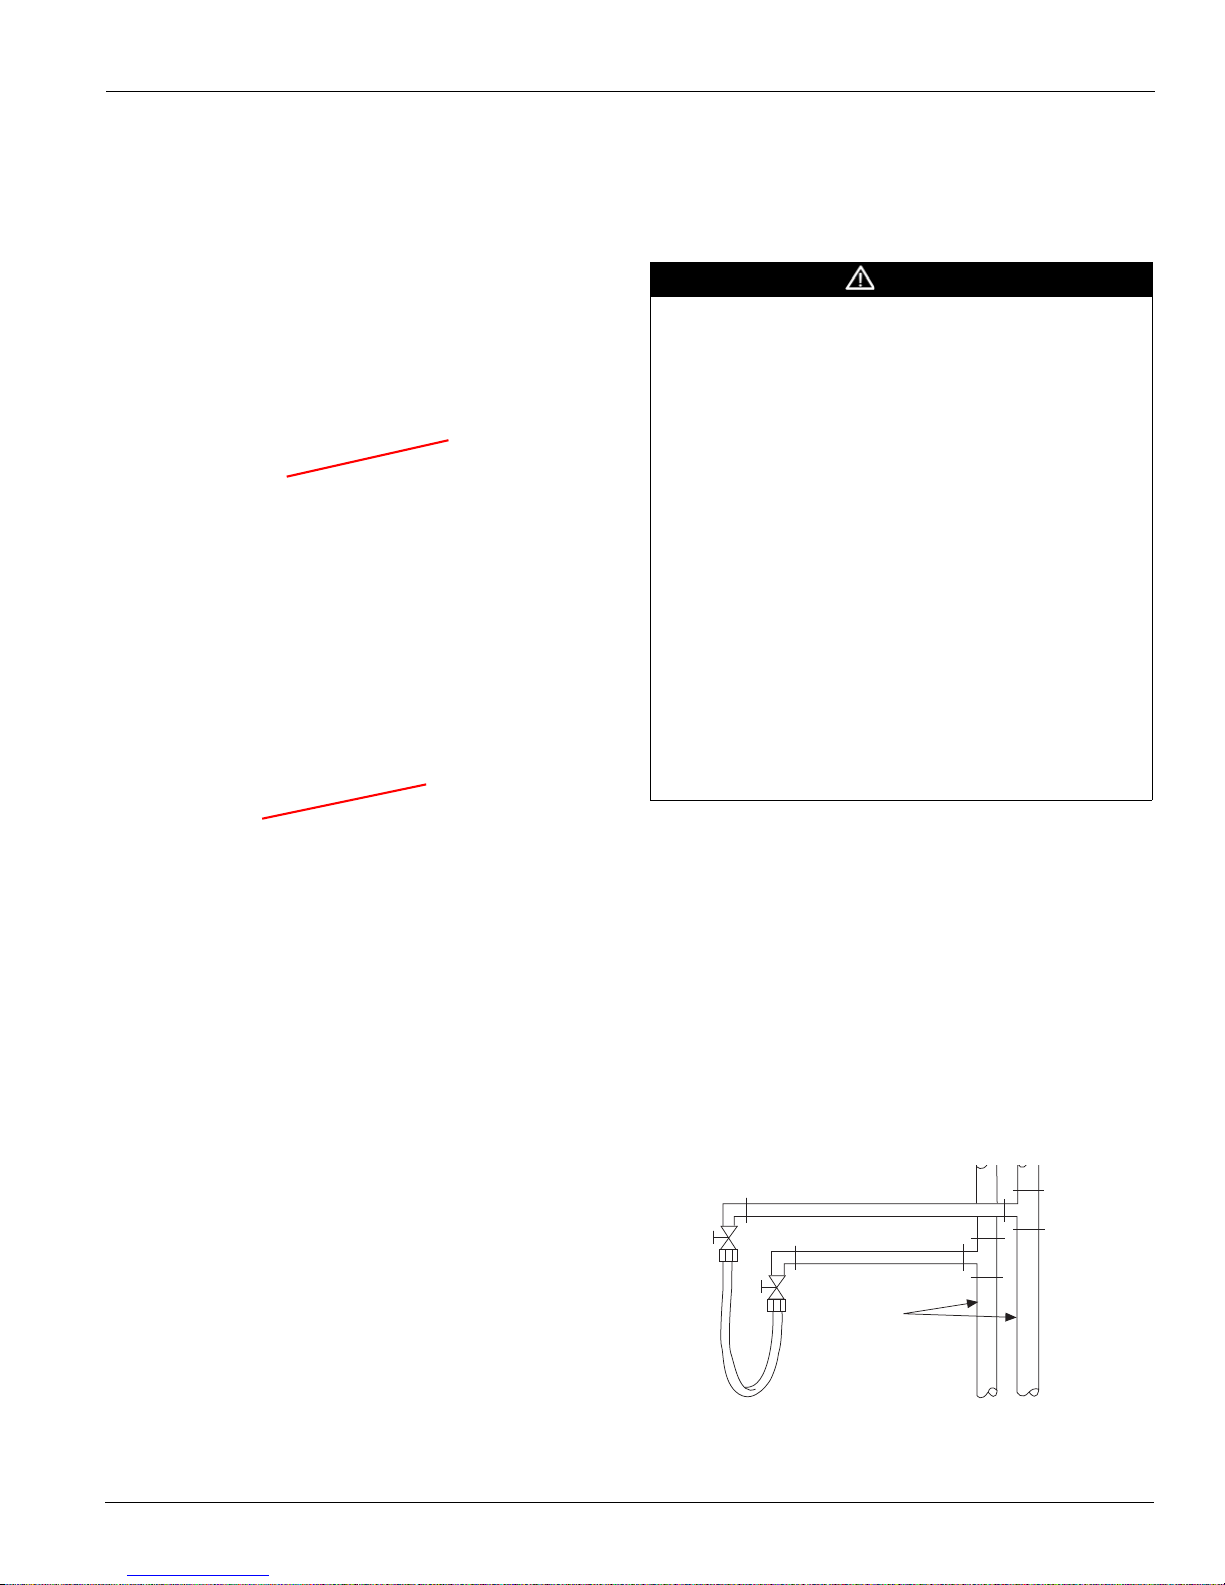
Figure 13.
Figure 13: Connections for flushing system piping
Page 12
Installation
Primary coil
air vent
Reheat coil air vent on
factory-installed package
3 Fill the system at the city water makeup connection with
all air vents open. After filling, close all air vents.
4 Start the main circulator with the pressure reducing valve
open.
5 Check vents in sequence to bleed off any trapped air,
ensuring circulation through all components of the
system.
6 While circulating water , check and repair any leaks in the
unit and surrounding piping.
CAUTION
Units must be checked for water leaks upon initial water
system startup. Water leaks may be a result of mishandling or
damage during shipping. Failure by the installing contractor to
check for leaks upon start-up of the water system could result
in property damage
7 Drains at the lowest point(s) in the system should be
opened for initial flush and blow-down, making sure city
water fill valves are set to make up water at the same
rate.
8 Check the pressure gauge at pump suction and manually
adjust the makeup to hold the same positive steady
pressure both before and after opening the drain valves.
9 Flush should continue for at least two hours or longer
until the drain water is clean and clear.
10 Shut off the circulator pump and open all drains and
vents to completely drain down the system.
11 Short-circuited supply and return run outs should now be
connected to the unit supply and return connections. Do
not use sealers at the swivel flare connections of hoses.
12 Refill the system with clean water.
13 Test the water using litmus paper for acidity, and treat as
required to leave the water slightly alkaline (pH 7.5 to
8.5).
14 Antifreeze may also be added at this time. Use
commercial grade antifreeze designed for HVAC
systems only. Do not use automotive grade antifreeze.
Antifreeze will have an effect on the performance of the
unit.
15 Once the system has been filled with clean water and
antifreeze (if used), precautions should be taken to
protect the system from dirty water conditions.
It is McQuay’s policy not to make recommendations on water
treatment. It is the responsibility of the user to check that the
water supply to the units is free of contaminants or corrosive
agents, chemicals or minerals. The general contractor or
owner should contact a local water treatment company
regarding water treatment. A fouled water system will lead to
premature component failure.
IMPORTANT
Operating Limits
This equipment is designed for indoor installation only.
Sheltered locations such as attics, garages, etc., generally will
not provide sufficient protection against extremes in
temperature and/or humidity , and equipment performance,
reliability , and service life may be adversely affected.
Venting Hydronic Coils
Hydronic coils require a vent, either manual or automatic, to
release air from the unit. Primary coils on all Thinline fan coils
come standard with a coil air vent. It is located on the piping
side of the unit, above the coil connections. See Figure 14.
Secondary coils on ThinLine units are not equipped with an air
vent, but one is included on all factory-supplied valve and
piping packages. It is located on the pipe closest to the outlet
coil connection. See Figure 14.
Perform the following steps to vent both primary and
secondary coils after installing the unit.
1 Pressurize the building piping system with water and
vent any trapped air at system vents.
2 For units with manual air vents, back the set screw out to
expel air from the unit and then re-tighten the set screw.
3 Automotic air vents should require no adjustment for the
coil to vent. However, if the coil does not vent
immediately, unscrew the outer portion of the fitting to
expel air from the port. If debris has become trapped in
the vent, completely remove the outer portion of the
fitting and clean.
Figure 14: Coil Air Vents
12 McQuay IM 980-1
Page 13

Operation and Maintenance
Operation and Maintenance
Controls
A wide variety of control options are available for ThinLine
3G Vertical Fan Coils, both unit-mounted and remotemounted. This section provides a brief overview of these
options and their operation. For more complete information,
contact your McQuay representative.
Manual 4-Position Fan Switch
This four-position fan switch (Off, High,
Med, Low) option, shown at the right, is
available remote-mounted. It operates on
low-voltage or line-voltage power and can
be provided with a factory-mounted lowvoltage interface board, which contains
three-24 volt relays with line voltage
contactors and terminal connections. The
transformer is factory-installed and wired.
Sequence of operation
• Off: Fan is turned off. The motorized fresh-air damper, when
supplied, is closed (see Fresh Air Damper‚ page 16).
• High, Medium, Low: Fan runs continuously at the selected
speed. The two-position, motorized fresh-air damper, when
supplied, is opened.
Unit-Mounted, Mechanical Thermostat With
4-Position Fan Switch
The unit-mounted
option, shown at the
right, combines the
four-position fan switch
with a mechanical
thermostat. For twopipe systems with a
factory installed valve
package, it can be
provided with a manual
switch (shown in
picture to the right) to
change from heating to
cooling. Alternatively, the changeover can be automatic.
• Changeover Switch: With a manual switch, the user selects
whether heating or cooling is desired. With automatic
changeover, a pipe sensor works with the thermostat to
operate the heating or cooling valve.
• Heating: Opens the valve when the temperature is below
the setpoint.
• Cool: Opens the valve when the temperature is above the
setpoint.
Digital Thermostats
McQuay offers a broad
range of unit-mounted and
remote, wall-mounted
digital thermostats with
the capabililty to control
On-Off, 3-wire and
proportional modulating
valves, and Normally
Closed or Normally Open
actuator valves. For more
information, refer to the
McQuay publication ED 18513-1 and ED 18527.
MT155 Thermostat
For more details refer to page 47. The MT155 series thermostat
provides on-off control for low-voltage or line-voltage valves
and fan motors. This thermostat is designed as a remote-mount
with connection to the LV interface board mounted on the fan
coil unit. Options include manual or automatic changeover and
three-speed fan control for continuous or cycling fan operation.
The thermostat may be mounted on units already at the job site.
Each unit should be equipped with an LV Interface Board, if
not, a Controls Mounting Kit PN9101120 80 needs to be
ordered. For field installation instructions of the MT155 on a
unit, refer to page 45.
Figure 15: MT155 Thermostats
Sequence of operation
• Fan Switch
• Off: Fan is turned off. The two-position, motorized
fresh-air damper, when supplied, is closed (see Fresh Air
Damper‚ page 16).
• High, Medium, Low: Fan runs conti nuously at the
selected speed. The two-position, motorized fresh-air
damper, when supplied, is opened.
• Thermostat
• Cycles the valve(s) open or clo sed on deman d based on
occupant-desired level.
McQuay IM 980-1 13
Three standard control options are available:
• On-Off fan cycle operation only: The thermostat cycles the
fan from the manually selected fan speed (high, medium or
low) to off.
• Continuous fan and On-Off valve cycle operation: The
thermostat cycles the valves on and off. The fan runs
continuously at the manually selected fan speed.
Page 14

Operation and Maintenance
• On-Off fan and On-Off valve cycle operation: The
thermostat cycles the fan from the manually selected fan
speed to off and it cycles the valves on and off.
When the system switch is in the OFF position, the fan coil
system including the fan is shut off.
TA155: A HEAT-OFF-COOL system switch manually selects
heating or cooling mode. In the HEAT position, only the heat
output cycles with demand. In the COOL position, only the
cool output cycles with demand. In the OFF position, heating
and cooling outputs are off. Units with a two position system
switch or without a system switch must use a load transfer
switch when both heating and cooling outputs are used. This
prevents control failure and equipment damage caused by
direct cycling between loads.
TB155: An ON-OFF system switch enables auto-changeover
of heating and cooling modes. In the ON position the
thermostat activates heating or cooling outputs dependant
upon the relationship between set point and ambient
temperature. Heat on to cool on dead band is 4°F. In the OFF
position, heating and cooling outputs are off. Units without a
system switch cycle between heating and cooling with a 4°F
dead band.
FAN: Some units have a switch for manual selection of fan
speed. On these units fan operation is either internally wired
for fan continuous operation or is dependant upon connection
to the fan supply input . When internally wired for fan
continuous operation, the fan will be off when the system
switch is off. When dependant upon external connections the
fan may not be off with the system switch in the off position.
The fan supply input is switched to fan speed outputs (HIMED-LO).
Heating and cooling outputs for the MT158 are individually
configurable for three-wire floating control valves or On/Off
valves in the Normally Open or Normally Closed modes.
Heating and cooling outputs for the MT168 provide 0-10 Vdc
or 4-20 mA for proportional modulating valve control. The
integrated, three-speed fan control switch is line voltage to
allow direct connection to the fan motors. Manual or automatic
changeover is provided with remote setback capability from a
time clock or facility management system. Features include a
Fahrenheit or Celsius digital display and a built-in purge cycle
which assists the controller to determine if the system is
supplying hot water or cooling.
Two standard control options are available:
• Continuous fan and modulating (or On-Off) valve
operation: The fan runs continuously at the manually
selected fan speed (high, medium or low). The controller
modulates the valves or, on the MT158, dip-switches can be
set to cycle the valves on and off.
• On-Off fan cycle operation and modulating (or On-Off)
valve operation: The controller cycles the fan from the
manually selected fan speed to off. The controller modulates
the valves or, on the MT158, dip-switches can be set to cycle
the valves on and off.
T170 Thermostat with Digital Display
Two thermostats are offered for remote installation only:
TA170 for three-speed fan control and TB170 for staged fan
operation. Both thermostats are used for On-Off control of
low- or line-voltage valves with auto changeover. Detailed
installation instructions and modes of operation can be found
in page 63.
MT158 and MT168 Thermostat-Controllers with
Digital Display
For more details refer to page 51, 55 or 59. Series MT158 and
MT168 microprocessor-based thermostat-controllers combine
a proportional integral control algorithm with adaptive logic.
They may be unit-mounted or remote-wall mounted.
Figure 16: MT158 and MT168 Thermostats
Figure 17: T170 Thermostat with Digital Display
14 McQuay IM 980-1
Page 15

Operation and Maintenance
Low Voltage Fan motor control
Low-voltage valve actuators
Room air or return air temperature sensor
Pipe temperature sensor
Condensate overflow sensor
Remote thermostat 24 VAC power
Low-Voltage (LV) Interface Board
The low-voltage interface board is used with any remote (wall
mounted) McQuay thermostat or control. It can also be used in
conjunction with a controller of a building automation system
(BAS) control where low voltage is needed to operate the fan
coil. It is located in the control box for the unit (see Figure 11,
page 10).
The LV interface board includes:
• Three 24-volt relays with line-voltage contactors to operate
the fan motor speeds.
• Terminal connections for interfacing to:
• An optiona l rem ote-mounted thermostat.
• Low-voltage actuators for heating and cooling valves.
• A return air sensor.
• A pipe temperature sensor for changeover from heating
to cooling on two-pipe systems.
• A factory-wired and installed transformer.
Figure 18: LV Interface Board 24 VAC connections
See Figure 18 for a list of connecting points to the board. For
additional wiring information, see the typical wiring diagram
Figure 37, page 28 or the unit’s wiring diagram, which is
attached to the corner panel on cabinet units and to the chassis
front cover on hideaway units. (see Figure 12, page 11).
For instructions on field-mount MT155 thermostats on units
supplied with LV Interface boards (a typical arrangement for a
5-day Quick Ship Program), refer to page 45.
McQuay IM 980-1 15
Page 16
Operation and Maintenance
To open damper, reach under the unit
and pull the damper handle toward you
To adjust damper tension, loosen or
tighten nuts on each end of damper axis.
Accessories
Fresh Air Damper
The fresh air damper kit provides up to 25% outside air to the
unit heater. It consists of an intake with damper blade and
insect screen. The damper may be manually controlled through
the return air opening or with an optional field-installed
damper motor. For detailed installation information, refer to
page 37.
Operation
To open the damper, reach under the unit and pull the damper
handle toward you. To close, push the damper away from you.
See Figure 19.
Figure 19: Opening and Closing the Damper
Fresh Air Damper Motor Kit (Low Voltage)
This damper motor kit is for field installation with the fresh air
damper kit. The damper kit must be ordered separately. For
detailed installation instructions, refer to page 39, which is
supplied with the damper motor kit. Under most control
schemes, the damper motor is set up to open the damper
automatically whenever the unit fan is in operation.
Figure 21: Damper Motor Kit Installed in Unit
Condensate Overflow Detection Device
The condensate overflow detection device is a factory-installed
option on fan coils. This device has a condensate overflow
floater with dry contacts and is connected to the LV interface
board. See Figure 22.
If the damper is difficult to open or moves too freely, you can
adjust the tension by tightening or loosening the nuts on its
pivot axis. See Figure 20.
Figure 20: Adjusting Damper Tension
Cold Weather Operation
Unit heaters may experience erratic operation during cold
ambient conditions with the outside air damper in the open
position.
If you suspect it is not working properly, check to be sure that
the float is installed straight up with the proper elevation. See
Accessing/removing the main drain pan and motor assembly‚
page 19 for instructions on removing the main drain pan to
access the device.
The condensate overflow switch needs to be wired to the
proper controller (T170 for example) to shut off the fan if
water is present in the drain pan.
Figure 22: Condensate Overflow Switch Installation
16 McQuay IM 980-1
Page 17

Operation and Maintenance
To adjust height, loosen the locking nut
with a 9/16” wrench. Then, turn the
leveling leg bolt head clockwise to raise
the unit, or counterclockwise to lower it.
Cabinet
Rear
Extension
Vertical
Fan Coil
Unit
Push the red reset button
Leveling Legs Option
Field or factory-installed kits are available with 0” to 1"
adjustment for positive leveling of floor-mounted units.
Height Adjustment
To adjust the height of a leveling leg:
1 Loosen the locking nut on the leveling leg bolt with a
9/16-inch wrench.
2 Turn the leveling leg bolt clockwise to lower the unit or
counterclockwise to raise it.
3 When you are finished adjusting the height, hold the
leveling leg bolt in place and draw the locking nut up
tight against the mounting bracket.
Figure 23: Leveling Legs Adjustment
Electric Heat Over-Temp Reset Button
The elecric heat options comes with two over-temperature
switches. The first resets automatically when the overtemperature condition no longer exists. The second, backup
switch must be reset manually.
Note: The need to reset the manual switch may indicate that
there are improperly functioning system components. If
the switch trips again, contact McQuay Factory Service
for help in diagnosing the cause.
T o reset the manual switch, carry out the following steps:
1 Disconnect all power to the unit. Verify the power has
been disconnected.
DANGER
Personal Injury Hazard.
Power supply can cause electrical shock. Always disconnect
power to unit before servicing.
2 Remove the main drain pan and motor assembly from
the unit (see Accessing/removing the main drain pan and
motor assembly‚ page 19).
3 Access and push in the red reset button. See Figure 25.
Figure 25: Electric Heat Over-Temp Reset Button Location
Cabinet Rear Extension Kit
The field-installed cabinet rear extension option may be
utilized to place the fan coil farther out from the wall than the
standard unit allows. Refer to page 41 for more details.
Figure 24: Cabinet Rear Extension Kit
McQuay IM 980-1 17
Reinstall the drain pan and motor assembly.
4
5 Reconnect the power.
Page 18

Operation and Maintenance
Push filter
backward
and tilt
down front
edge to
remove
Main Drain Pan
Secondary
Drain Pan
Remove screws and
slide forward to access pan
Key-lock Access Door Kit
The key-lock access door kit (see Figure 26) can be installed
on ThinLine 3G cabinet units to prevent access to unit
controls. For detailed installation information, refer to page 43.
Figure 26: Key-Lock Access Door Kit
General Maintenance
Normal maintenance on all units is generally limited to filter
changes and cleaning the condensate drain pans. Units are
provided with permanently lubricated motors and require no
oiling even though oil caps may be provided.
Record performance measurements of volts, amps, and water
temperature differences (both heating and cooling). A
comparison of logged data with start-up and other annual data
is useful as an indicator of general equipment condition.
Filter Changes
4 Remove the filter from under the unit.
To install a new filter:
1 Slide the filter under the unit and tilt its rear 0edge
upward and into the pocket at the rear of the filter
housing.
2 Push the front edge of the filter backward until it clears
the front lip on the filter housing, then push it up and into
place.
Figure 27: Filter Removal
Condensate Drain Pans
The main and secondary condensate drain pans should be
checked annually and cleaned and flushed as required. See
Figure 28.
Figure 28: Drain Pan Locations
Filter changes are required at regular intervals. The time
period between changes will depend upon the project
requirements. Some applications, such as motels, produce a lot
of lint from carpeting and linen changes, and will require more
frequent filter changes. Check filters at 60-day intervals for the
first year until experience is acquired. If light cannot be seen
through the filter when held up to sunlight or a bright light, it
should be changed. A more critical standard may be desirable.
Filters can be removed without removing any panels. See
Figure 27. However, if the unit is equipped with a return air
grille, this must first be removed to access the filter. To remove
the filter:
1 Slide your hands under the front opening on the bottom
of the unit and feel for the filter above.
2 Slide your fingers along the bottom of the filter until they
reach the rear paperboard edge.
3 Push the paperboard edge backward about a half-inch
until the front edge of the filter drops down.
18 McQuay IM 980-1
Accessing the secondary drain pan
To access the secondary drain pan, remove the corner panel
from the side of the unit where the main piping connections
are made (this is opposite the side where the control access
panel is located on units with unit-mounted controls. See
Figure 5, page 6 for a description of how to remove it.
Page 19

Operation and Maintenance
Accessing/removing the main drain pan and motor
assembly
The main drain pan is housed in the top of the unit’s fan deck.
Both the fan deck and the main condensate drain pan are easily
removed for access and cleaning as follows.
1 Disconnect electrical power to the unit.
2 Remove the two screws that attach the center panel of
the unit to the base ( see Figure 5, page 6).
3 Lift the center panel upward and off the unit.
4 Pull the main condensate drain line out of the side of the
chassis where it flows into the secondary drain pan.
5 Disconnect the fan motor wiring harness by removing
the plug where it attaches to the connector on the side of
the chassis. See Figure 29.
Note: Push the tabs inward on the sides of the plug to free
it from the connector base.
Figure 29: Motor Connector Location
6
Remove the screws that attach the fan deck to the unit
chassis. See Figure 28
7 Firmly grasp the fan deck, then slide it towards you and
out of the unit.
8 The main condensate drain pan sits atop the fan deck and
is now easily accessed for cleaning.
9 To reinstall, follow these steps in reverse order.
McQuay IM 980-1 19
Page 20

Physical Data
Physical Data
Unit Data
Table 1: Unit Data
02 03 04 06 08 10 12
Primary Coil Data
Face Area, ft2 (cm2)
Fins/inch (cm) 12 [4.7] 12 [4.7] 12 [4.7] 12 [4.7] 12 [4.7] 12 [4.7] 12 [4.7]
Coil Connection 1/2" Nominal copper female (5/8" OD)
Coil Dimensions
2-Row
L x D x H, in (cm)
3-Row
L x D x H, in (cm)
4-Row
L x D x H, in (cm)
Coil Volume, Gal (Liters)
2-Row 0.15 (0.6) 0.19 (0.7) 0.24 (0.9) 0.32 (1.2) 0.37 (1.4) 0.46 (1.7) 0.55 (2.1)
3-Row 0.20 (0.7) 0.26 (1.0) 0.32 (1.2) 0.45 (1.7) 0.52 (2.0) 0.64 (2.4) 0.77 (2.9)
4-Row 0.26 (1.0) 0.34 (1.3) 0.43 (1.6) 0.61 (2.3) 0.70 (2.6) 0.87 (3.3) 1.05 (4.0)
Reheat Coil Data: 1-Row, Hot Water or Steam
Face Area, ft2 (cm2)
Fins/inch (cm) 12 [4.7] 12 [4.7] 12 [4.7] 12 [4.7] 12 [4.7] 12 [4.7] 12 [4.7]
Coil Connection 1/2" Nominal copper female (5/8" OD)
L x D x H, in (cm) 11.8 x 0.9 x 6
Volume, Gal (Liters) 0.04 (0.1) 0.05 (0.2) 0.07 (0.3) 0.10 (0.4) 0.11 (0.4) 0.14 (0.5) 0.17 (0.7)
Preheat Coil Data, 2-Row, Hot Water or Steam
Hot Water or Steam
Face Area, ft2 (cm2)
Fins/inch (cm) 12 [4.7] 12 [4.7] 12 [4.7] 12 [4.7] 12 [4.7] 12 [4.7] 12 [4.7]
Coil Connection 1/2" Nominal copper female (5/8" OD)
L x D x H, in. (cm) 11.8 x 1.7 x 6
Volume, Gal (Liters) 0.08 (0.3) 0.10 (0.4) 0.13 (0.5) 0.19 (0.7) 0.22 (0.8) 0.29 (1.1) 0.35 (1.3)
Fan/Motor Data
Fan Quantity 1 1 2 2 3 4 4
Size, Dia” x W” (cm) 6.26 x 6.3
Motor Quantity 1 1 1 1 2 2 2
Filter Data
Part Number 668332901 668332902 668332903 668332907 668332905 668332906 668332904
1” (25.4 cm) Media TA only TA only TA only TA only TA only TA only TA only
Quantity 1 1 1 1 2 2 2
L x D x H, in. (cm) 16 x 8.75 x 1
0.74 (685) 1.08 (1004) 1.43 (1323) 2.11 (1962) 2.46 (2281) 3.14 (2917) 3.83 (3559)
11.8 x 1.7 x 9
(30.0x4.4x22.9)
11.8 x 2.6 x 9
(30x6.6x22.9)
11.8 x 3.5 x 9
(30.0x8.8x22.9)
0.49 (456) 0.72 (669) 0.95 (882) 1.41 (1308) 1.64 (1521) 2.09 (1944) 2.55 (2372)
(30.0x2.2x15.2)
0.49 (456) 0.72 (669) 0.95 (882) 1.41 (1308) 1.64 (1521) 2.09 (1944) 2.55 (2372)
(30.0x4.4x15.2)
(15.9 x 16)
(40.6 x 22 x 2.5)
17.3 x 1.7 x 9
(43.9x4.4x22.9)
17.3 x 2.6 x 9
(43.9x6.6x22.9)
17.3 x 3.5 x 9
(43.9x8.8x22.9)
17.3 x 0.9 x 6
(43.9x2.2x15.2)
17.3 x1.7 x 6
(43.9x4.4x15.2)
7.95 x 6.3
(20 x 16)
21.5 x 8.75 x 1
(54.6 x 22 x 2.5)
22.8 x 1.7 x 9
(57.9x4.4x22.9)
22.8 x 2.6 x 9
(57.9x6.6x22.9)
22.8 x 3.5 x 9
(57.9x8.8x22.9)
22.8 x 0.9 x 6
(57.9x2.2x15.2)
22.8 x 1.7 x 6
(57.9x4.4x15.2)
6.26 x 6.3
(15.9 x 16)
27 x 8.75 x 1
68.5 x 22 x 2.5
33.8 x 1.7 x 9
(85.9x4.4x22.9)
33.8 x 2.6 x 9
(85.9x6.6x22.9)
33.8 x 3.5 x 9
(85.9x8.8x22.9)
33.8 x 0.9 x 6
(85.9x2.2x15.2)
33.8 x 1.7 x 6
(85.9x4.4x15.2)
7.95 x 6.3
(20 x 16)
38 x 8.75 x 1
(96.5 x 22 x 2.5)
39.3x 1.7 x 9
(99.8x4.4x22.9)
39.3 x 2.6 x 9
(99.8x6.6x22.9)
39.3 x 3.5 x 9
(99.8x8.8x22.9)
39.3 x 0.9 x 6
(99.8x2.2x15.2)
39.3 x 1.7 x 6
(99.8x4.4x15.2)
6.26 x 6.3
(15.9 x 16)
21.7 x 8.75 x 1
(56.1 x 22 x 2.5)
50.2 x 1.7 x 9
(127.6x4.4x22.9)
50.2 x 2.6 x 9
(127.6x6.6x22.9)
50.2 x 3.5 x 9
(127.6x8.8x22.9)
50.2 x 0.9 x 6
(127.6x2.2x15.2)
50.2 x 1.7 x 6
(127.6x4.4x15.2)
6.26 x 6.3
(15.9 x 16)
27.2 x 8.75 x 1
(69.0 x 22 x 2.5)
61.3 x 1.7 x 9
(155.7x4.4x22.9)
61.3 x 2.6 x 9
(155.7x6.6x22.9)
61.3 x 3.5 x 9
(155.7x8.8x22.9)
61.3 x 0.9 x 6
(155.7x2.2x15.2)
61.3 x 1.7 x 6
(155.7x4.4x15.2)
7.95 x 6.3
(20 x 16)
32.7 x 8.75 x 1
(83.1 x 22 x 2.5)
Shipping Weights
Table 2: Approximate Shipping Weights - lbs (kg)*
Unit Type
FCVC,FCVS 84 (38) 95 (43) 108 (49) 131 (60) 152 (69) 177 (80) 202 (92)
FCVH 55 (25) 63 (29) 74 (34) 91 (41) 110 (50) 129 (59) 149 (68)
Note: *Approximate shipping weights do not include valve packages, hot water coils, electric heaters or other options.
20 McQuay IM 980-1
S02S03S04S06S08S10S12
Unit Size
Page 21

Unit Dimensions
PREHEAT OPTION NOITPO TAEHERNOITPO TAEH CIRTCELE
PRIMARY
PREHEAT
EE
DD
GG
AA
CC
BB
HH
FF
A
B
F
FRONT VIEW
K
8.9
227
6.1
154
8.8
[224]
8.8
[224]
BACK VIEW
ELECTRICAL
CONTROL BOX
OPTIONAL
DISCONNECT
SWITCH
DRAIN PAN 7/8" OD
CONNECTION
ELECTRIC HEAT
PANEL BOX
1.3
33.8
C
3.6
90.3
E
TOP VIEW
DISCHARGE
GRILL
ELECTRICAL CONTROL
ACCESS DOOR
ELECTRIC
HEAT
PRIMARY
EE
AA
BB
DD
CC
GG
1.0
24.7
PRIMARY
REHEAT
DD
GG
BB
EE
HH
FF
CC
AA
4.6
[117]
9.3
[236]
3.4 [86]
15.7
[399]
17.6
[447]
J
FRESH AIR DAMPER
OPENING
2.4 [61
]
Figure 30: Dimensions: Flat Top Fan Coils
Physical Data
Dimension
inch mm inch mm inch mm inch mm inch mm inch mm inch mm
Unit Width A 35.0 889 40.5 1029 46.0 1168 57.0 1448 62.5 1588 73.5 1867 84.5 2146
Unit Height B 25.0 635 25.0 635 25.0 635 25.0 635 25.0 635 25.0 635 25.0 635
Unit Depth C 10.0 254 10.0 254 10.0 254 10.0 254 10.0 254 10.0 254 10.0 254
Discharge Grille - Width E 16.3 414 21.8 554 27.3 693 38.3 973 43.8 1113 54.8 1392 65.8 1671
Return Air Opening - Width F 16.2 411 21.7 551 27.2 691 38.2 970 43.7 1110 54.7 1389 65.7 1669
AA 15.1 384 15.1 384 15.1 384 15.1 384 15.1 384 15.1 384 15.1 384
CC 3.0 76 3.0 76 3.0 76 3.0 76 3.0 76 3.0 76 3.0 76
DD 21 533 21 533 21 533 21 533 21 533 21 533 21 533
EE 1.1 28 1.1 28 1.1 28 1.1 28 1.1 28 1.1 28 1.1 28
BB 16.7 424 16.7 424 16.7 424 16.7 424 16.7 424 16.7 424 16.7 424
GG 7.8 198 7.8 198 7.8 198 7.8 198 7.8 198 7.8 198 7.8 198
CC 18.7 475 18.7 475 18.7 475 18.7 475 18.7 475 18.7 475 18.7 475
HH 1.2 30 1.2 30 1.2 30 1.2 30 1.2 30 1.2 30 1.2 30
AA 15 381 15 381 15 381 15 381 15 381 15 381 15 381
FF 4.7 119 4.7 119 4.7 119 4.7 119 4.7 119 4.7 119 4.7 119
CC 23.2 589 23.2 589 23.2 589 23.2 589 23.2 589 23.2 589 23.2 589
HH 4.2 107 4.2 107 4.2 107 4.2 107 4.2 107 4.2 107 4.2 107
AA 20.3 516 20.3 516 20.3 516 20.3 516 20.3 516 20.3 516 20.3 516
FF 8.3 211 8.3 211 8.3 211 8.3 211 8.3 211 8.3 211 8.3 211
Electric Heat Connection
Primary Coil - Water Return
Primary Coil - Water Supply
Preheat Coil - Water Return
Preheat Coil - Water Supply
Reheat Coil - Water Return
Reheat Coil - Water Supply
McQuay IM 980-1 21
S02 S03 S04 S06 S08 S10 S12
Page 22
Physical Data
A
B
F
FRONT VIEW
6.1
154
8.9
227
5
[127]
15.7
[399]
17.6
[447]
BACK VIEW
ELECTRICAL
CONTROL BOX
OPTIONAL
DISCONNECT
SWITCH
DRAIN PAN 7/8" OD
3.7
95.1
C
1.9
47.4
E
TOP VIEW
ELECTRIC HEAT OPTION
PREHEAT OPTION
REHEAT OPTION
DISCHARGE
GRILL
ELECTRIC CONTROL
ACCESS DOOR
AA
DD
CC
HH
FF
EE
GG
BB
4.6
[117]
9.3
[236]
3.4 [86]
.9
23.1
REHEAT
PRIMARY
DD
EE
GG
CC
AA
HH
FF
BB
PREHEAT
PRIMARY
DD
EE
GG
AA
CC
BB
PRIMARY
ELECTRIC
HEAT
8.8
[224]
8.8
[224]
J
FRESH AIR DAMPER
OPENING
2.4 [61
]
Figure 31: Dimensions: Slope Top Fan Coils
Dimension
S02 S03 S04 S06 S08 S10 S12
inch mm inch mm inch mm inch mm inch mm inch mm inch mm
Unit Width A 35.0 889 40.5 1029 46.0 1168 57.0 1448 62.5 1588 73.5 1867 84.5 2146
Unit Height B 27.6 701 27.6 701 27.6 701 27.6 701 27.6 701 27.6 701 27.6 701
Unit Depth C 10.0 254 10.0 254 10.0 254 10.0 254 10.0 254 10.0 254 10.0 254
Discharge Grille - Width E 16.3 414 21.8 554 27.3 693 38.3 973 43.8 1113 54.8 1392 65.8 1671
Return Air Opening - Width F 16.2 411 21.7 551 27.2 691 38.2 970 43.7 1110 54.7 1389 65.7 1669
AA 15.1 384 15.1 384 15.1 384 15.1 384 15.1 384 15.1 384 15.1 384
CC 3.0 76 3.0 76 3.0 76 3.0 76 3.0 76 3.0 76 3.0 76
DD 21 533 21 533 21 533 21 533 21 533 21 533 21 533
EE 1.1 28 1.1 28 1.1 28 1.1 28 1.1 28 1.1 28 1.1 28
BB 16.7 424 16.7 424 16.7 424 16.7 424 16.7 424 16.7 424 16.7 424
GG 7.8 198 7.8 198 7.8 198 7.8 198 7.8 198 7.8 198 7.8 198
CC 18.7 475 18.7 475 18.7 475 18.7 475 18.7 475 18.7 475 18.7 475
HH 1.2 30 1.2 30 1.2 30 1.2 30 1.2 30 1.2 30 1.2 30
AA 15 381 15 381 15 381 15 381 15 381 15 381 15 381
FF 4.7 119 4.7 119 4.7 119 4.7 119 4.7 119 4.7 119 4.7 119
CC 23.2 589 23.2 589 23.2 589 23.2 589 23.2 589 23.2 589 23.2 589
HH 4.2 107 4.2 107 4.2 107 4.2 107 4.2 107 4.2 107 4.2 107
AA 20.3 516 20.3 516 20.3 516 20.3 516 20.3 516 20.3 516 20.3 516
FF 8.3 211 8.3 211 8.3 211 8.3 211 8.3 211 8.3 211 8.3 211
Electric Heat Connection
Primary Coil - Water Return
Primary Coil - Water Supply
Preheat Coil - Water Return
Preheat Coil - Water Supply
Reheat Coil - Water Return
Reheat Coil - Water Supply
22 McQuay IM 980-1
Page 23
Figure 32: Dimensions: Hideaway, Front-Discharge Fan Coils
ELECTRIC
HEAT
DRAIN PAN 7/8 OD
CONNECTION
BB
D
D
E
E
GG
B
A
A
C
C
HH
F
F
PRIMARY
REHEAT
5
127
4.6
1
17
9.3
2
36
ELECTRIC HEAT OPTION
PREHEAT OPTION REHEAT OPTION
E
5.4
138.2
F
1.0
26.6
H
G
F
RON
T VIEW
FRONT DISCHARGE
E
LECTRIC
CONTROL BOX
OPTIONAL
DISCONNECT
SWITCH
8.9
227
6.1
154
BACK VIEW
E
LECTRIC HEAT
PANEL BO
X
A
C
TOP VIEW
PRIMARY
B
FF
HH
AA
BB
CC
DD
EE
GG
PRIMARY
PREHEAT
0.6 [15.9]
0.6 [15.9]
H
G
J
FRESH AIR DAMPER
OPENING
2.4 [61
]
Physical Data
Dimension
Unit Width A 18.8 475 24.3 617 29.8 757 40.8 1036 46.3 1176 57.3 1455 68.3 1735
Unit Height B 24.0 610 24.0 610 24.0 610 24.0 610 24.0 610 24.0 610 24.0 610
Unit Depth C 9.6 243 9.6 243 9.6 243 9.6 243 9.6 243 9.6 243 9.6 243
Discharge Grille - Width E 16.3 414 21.8 554 27.3 693 38.3 973 43.8 1113 54.8 1392 65.8 1671
Return Air Opening - Width F 16.2 411 21.7 551 27.2 691 38.2 970 43.7 1110 54.7 1389 65.7 1669
Control Box to Floor G 17.6 447 17.6 447 17.6 447 17.6 447 17.6 447 17.6 447 17.6 447
Disconnect Switch to Floor H 15.7 399 15.7 399 15.7 399 15.7 399 15.7 399 15.7 399 15.7 399
Electric Heat Connection
Primary Coil - Water Return
Primary Coil - Water Supply
Preheat Coil - Water Return
Preheat Coil - Water Supply
Reheat Coil - Water Return
Reheat Coil - Water Supply
S02 S03 S04 S06 S08 S10 S12
inch mm inch mm inch mm inch mm inch mm inch mm inch mm
AA 15.1 384 15.1 384 15.1 384 15.1 384 15.1 384 15.1 384 15.1 384
CC 3.0 76 3.0 76 3.0 76 3.0 76 3.0 76 3.0 76 3.0 76
DD 21 533 21 533 21 533 21 533 21 533 21 533 21 533
EE 1.1 28 1.1 28 1.1 28 1.1 28 1.1 28 1.1 28 1.1 28
BB 16.7 424 16.7 424 16.7 424 16.7 424 16.7 424 16.7 424 16.7 424
GG 7.8 198 7.8 198 7.8 198 7.8 198 7.8 198 7.8 198 7.8 198
CC 18.7 475 18.7 475 18.7 475 18.7 475 18.7 475 18.7 475 18.7 475
HH 1.2 30 1.2 30 1.2 30 1.2 30 1.2 30 1.2 30 1.2 30
AA 15 381 15 381 15 381 15 381 15 381 15 381 15 381
FF 4.7 119 4.7 119 4.7 119 4.7 119 4.7 119 4.7 119 4.7 119
CC 23.2 589 23.2 589 23.2 589 23.2 589 23.2 589 23.2 589 23.2 589
HH 4.2 107 4.2 107 4.2 107 4.2 107 4.2 107 4.2 107 4.2 107
AA 20.3 516 20.3 516 20.3 516 20.3 516 20.3 516 20.3 516 20.3 516
FF 8.3 211 8.3 211 8.3 211 8.3 211 8.3 211 8.3 211 8.3 211
McQuay IM 980-1 23
Page 24

Physical Data
1.3
32.9
1.3
32.9
ELECTRIC
HEAT
5
127
4.6
117
9.3
236
F
H
G
FRONT VIEW
ELECTRIC
CONTROL BOX
OPTIONAL
DISCONNECT
SWITCH
T
T
8.9
227
6.1
154
BACK VIEW
A
E
3.5
89.6
4.8
120.7
TOP V
IEW
TOP DISCHARGE
PRIMARY
DRAIN PAN 7/8 OD
CONNECTION
REHEAT
BB
DD
EE
GG
AA
CC
HH
FF
B
1.3
32.9
PRIMARY
PREHEAT
FF
HH
AA
BB
CC
DD
EE
GG
B
PRIMARY
BB
DD
EE
GG
B
AA
CC
ELECTRIC HEAT OPTION
PREHEAT OPTION REHEAT OPTION
J
FRESH AIR DAMPER
OPENING
2.4 [61
]
Figure 33: Dimensions: Hideaway, Top-Discharge Fan Coils
Dimension
S02 S03 S04 S06 S08 S10 S12
inch mm inch mm inch mm inch mm inch mm inch mm inch mm
Unit Width A 18.8 475 24.3 617 29.8 757 40.8 1036 46.3 1176 57.3 1455 68.3 1735
Unit Height B 24.0 610 24.0 610 24.0 610 24.0 610 24.0 610 24.0 610 24.0 610
Unit Depth C 9.6 243 9.6 243 9.6 243 9.6 243 9.6 243 9.6 243 9.6 243
Discharge Grille - Width E 16.3 414 21.8 554 27.3 693 38.3 973 43.8 1113 54.8 1392 65.8 1671
Return Air Opening - Width F 16.2 411 21.7 551 27.2 691 38.2 970 43.7 1110 54.7 1389 65.7 1669
Control Box to Floor G 17.6 447 17.6 447 17.6 447 17.6 447 17.6 447 17.6 447 17.6 447
Disconnect Switch to Floor H 15.7 399 15.7 399 15.7 399 15.7 399 15.7 399 15.7 399 15.7 399
AA 15.1 384 15.1 384 15.1 384 15.1 384 15.1 384 15.1 384 15.1 384
CC 3.0 76 3.0 76 3.0 76 3.0 76 3.0 76 3.0 76 3.0 76
DD 21 533 21 533 21 533 21 533 21 533 21 533 21 533
EE 1.1 28 1.1 28 1.1 28 1.1 28 1.1 28 1.1 28 1.1 28
BB 16.7 424 16.7 424 16.7 424 16.7 424 16.7 424 16.7 424 16.7 424
GG 7.8 198 7.8 198 7.8 198 7.8 198 7.8 198 7.8 198 7.8 198
CC 18.7 475 18.7 475 18.7 475 18.7 475 18.7 475 18.7 475 18.7 475
HH 1.2 30 1.2 30 1.2 30 1.2 30 1.2 30 1.2 30 1.2 30
AA 15 381 15 381 15 381 15 381 15 381 15 381 15 381
FF 4.7 119 4.7 119 4.7 119 4.7 119 4.7 119 4.7 119 4.7 119
CC 23.2 589 23.2 589 23.2 589 23.2 589 23.2 589 23.2 589 23.2 589
HH 4.2 107 4.2 107 4.2 107 4.2 107 4.2 107 4.2 107 4.2 107
AA 20.3 516 20.3 516 20.3 516 20.3 516 20.3 516 20.3 516 20.3 516
FF 8.3 211 8.3 211 8.3 211 8.3 211 8.3 211 8.3 211 8.3 211
Electric Heat Connection
Primary Coil - Water Return
Primary Coil - Water Supply
Preheat Coil - Water Return
Preheat Coil - Water Supply
Reheat Coil - Water Return
Reheat Coil - Water Supply
24 McQuay IM 980-1
Page 25
Factory-Installed Valve & Piping Packages
Front View
4-Pipe, Right Hand with
Same-Side Secondary Coil
4.2”
[107 mm]
6.9” [175 mm]
End View
Primary Coil Piping
(preheat piping hidden)
4.9” [125 mm]
6.4”
[163 mm]
1.3” [33 mm]
2” [51 mm]
Supply
Return
End View
Preheat Coil Piping
(primary piping hidden)
4.8” [122 mm]
1.3” [33 mm]
3.5”
[90 mm]
Supply
Return
End View:
Reheat Coil Piping
(primary piping hidden)
3.7” [94 mm]
1.3” [33 mm]
4.7” [120 mm]
3.4” [86 mm]
Supply
Return
4.2” [107 mm]
1.7”
[43 mm]
2.8”
[71 mm]
3.4” [86 mm]
1.4” [36 mm]
4.9” [124 mm]
5.5”
[140 mm]
End View:
Preheat Coil Piping
Return
Supply
End View:
Primary Coil Piping
Front View: 4-Pipe, Right Hand with Opposite-End Preheat
ypg
4.9” [125 mm]
2”
[51 mm]
6.7”
[170 mm]
1.2” [32 mm]
Return
Supply
Front View
2-Pipe, Right Hand
4.2”
[107 mm]
End View
2-Pipe, Right Hand
4.9” [125 mm]
6.4”
[163 mm]
1.3” [33 mm]
2” [51 mm]
Supply
Return
4-Pipe Arrangement with Same-End Connections
4-Pipe Arrangement with Opposite-End Connections
2-Pipe Arrangement
Deluxe package cofiguration shown
Note: All valve packages, regardless of
components included, have the same
hookup locations. RIght-hand connections
are shown here. Left-hand connection
distances are the same. Distances to
connections from chassis are from unit
mounting holes. Dimensions may vary
slightly from given values.
See catalog CAT 722-1 for detailed descriptions of piping packages.
Figure 34: Hook Up Locations: Factory-installed Valve & Piping Packages
Physical Data
McQuay IM 980-1 25
Page 26

Wiring Diagrams
Note: All field installed conductors should have an insulation rating of 300 volts or greater.
Wiring Diagrams
Figure 35: Fan Coil Wiring Diagram - Typical with solid-state thermostat
26 McQuay IM 980-1
Page 27

Figure 36: Fan Coil Wiring Diagram - Typical with unit-mounted three-speed fan switch
Note: All field installed conductors should have an insulation rating of 300 volts or greater.
Wiring Diagrams
McQuay IM 980-1 27
Page 28

Wiring Diagrams
Note: All field installed conductors should have an insulation rating of 300 volts or greater.
Figure 37: Fan Coil Wiring Diagram - Typical with electric heat and low-voltage interface board
28 McQuay IM 980-1
Page 29

Model Number Description
Table 1: Model Number Description: Fields 1 - 21
Field
Code
123456789101112131415161718192021
FC VC 1 02 A A G M Y YY W 3 12 R F T YY 12 Y Y N
Model Number Description
Unit Type
1
•FC = fan coil
• FH = cabinet unit heater
2 Product Identifier
• VC = vertical cabinet, flat top
• VH = vertical hideaway
• VS = vertical cabinet, slope top
• WC = wall-hung cabinet
3 Design Series
•1 = Design 1
4 Unit Size - nominal capacity
• 02 = 200 cfm
• 03 = 300 cfm
• 04 = 400 cfm
• 06 = 600 cfm
• 08 = 800 cfm
• 10 = 1000 cfm
• 12 = 1200 cfm
• 14 = 1400 cfm
5 Volts/Hertz/Phase
• A = 115/60/1
• E = 208-230/60/1
• J = 265-277/60/1
6 Coil fin type
• A = alumi num
7 Coil casing material
• G = galvanized
8 Coil air vent
• M = manual
•A = auto
9 Coil coating
• Y = none
10 Not currently used
• YY = none
11 Primary Coil Type
• C = chilled water only
• W = CW/HW 2-pipe
• H = hot water only
• S = steam
12 Primary Coil Rows
•2 = 2 row
•3 = 3 row
•4 = 4 row
13 Primary Coil Fins Per Inch
• 12 = 12 fins per inch
14 Primary Coil Connection Hand
• L = left hand
• R = right hand
15 Primary Coil Piping Package
• F = factor installed
• L = shipped loose
• Y = none
16 Primary Coil Connection Type
• S = sweated
• T = threaded
• N = none
17 Preheat Coil Type
• E1 = electric single stage
• W1 = 1-row water
• W2 = 2-row water
• S1 = 1-row steam
• S2 = 2-row steam
• YY = none
18 Preheat Coil Fins Per Inch
• 12 = 12 fins per inch
19 Preheat Coil Connection Hand
• L = left hand
• R = right hand
• Y = none
20 Preheat Coil Piping Package
• F = factor installed
• L = shipped loose
• Y = none
21 Preheat Coil Connection Type
• S = sweated
• T = threaded
• N = none
McQuay IM 980-1 29
Page 30

Model Number Description
Table 2: Model Number Description: Fields 21 - 41
Field
Code
22 23 24 25 26 27 28 29 30 31 32 33 34 35 36 37 38 39 40 41
YY W1 12 R F T Y 000 Y P PSC S 3 Q Y MR Y D Y R
Not currently used
22
• YY = none
23 Reheat Coil Type
• W1 = 1-row water
• S1 = 1-row steam
• YY = none
24 Reheat Coil Fins Per Inch
• 12 = 12 fins per inch
25 Reheat Coil Connection Hand
•L = left hand
• R = right hand
• Y = none
26 Reheat Coil Piping Package
• F = factor installed
• L = shipped loose
• Y = none
27 Reheat Coil Connection Type
•S = sweated
• T = threaded
• N = none
28 Electric Heat Power Supply
• A = 115-60-1
• E = 208-230/60/1
• J = 277-265/60/1
•Y = None
29 Electric Heat Wattage
• 005 = 0.5 kW Electric Heat
• 010 = 1.0 kW Electric Heat
• 015 = 1.5 kW Electric Heat
• 020 = 2.0 kW Electric Heat
• 025 = 2.5 kW Electric Heat
• 030 = 3.0 kW Electric Heat
• 040 = 4.0 kW Electric Heat
• 050 = 5.0 kW Electric Heat
• 060 = 6.0 kW Electric Heat
• 000 = None
30 Not currently used
• YY = none
31 Drain Pan Material
• P = plastic, non-corrosive
• S = stainless steel
32 Blower Motor Type
• PSC = PSC motor
• XXX = special
33 Discharge Conditions
• S = st a nda rd static
34 Motor Speed
• 3 = 3 speed
35 Motor Connections
• Q = quick connect
36 Not currently used
• YY = none
37 Fresh Air Damper
• MR = manual rear
• 2R = automatic, 2-position, rear
• ER = automatic, economizer
• XX = special
• YY = none
38 Not currently used
• YYY = none
39 Unit Disconnect Switch
• D = toggle disconnect switch
• X = special
• Y = none
40 Future Control Function
• Y = none
41 Control Type
• A = analog
• D = digital
•R = DDC Ready
• X = Special
• Y = None
30 McQuay IM 980-1
Page 31
Table 3: Model Number Description: Fields 43-59
3O M U
Coil Valve Type
Y = none
2 = two-way
3 = three way
Unpowered Position
Y = none
C = closed
O = open
Control Type
Y = none
E = EOC
M = modulating
Actuator Input
Y = None
L = Low Voltage (24 Volt)
U = Unit Voltage
P = 0-10V Proportional
F = 3 Wire Floating Point
Field
Code
42 43 44 45 46 47 48 49 50 51 52 53 54 55 56
YYYRLMORY3MOUYYYY3MOUYYCYYY
Model Number Description
Network Communication Card
42
• Y = none
43 Changeover Type
• Y = none
•A = auto
• M = manual
• U = user selectable
44 Programmability
• Y = none
45 Setpoint Adjustment
• YY = none
• UL = unit-mounted, +/- 3 degrees
• UF = unit-mounted, full range
• RL = remote-mount ed, +/- 3 degrees
• RF = remote- mounted, full range
46 Fan Speed Control
• YYY = None
• MOU = manual, on/off, unit-mounted
• MOR = manual, on/off, remote-mounted
• MAU = manual, low/med/high, unit-mounted
• MAR = manual, low/me d/h igh, remote-mounted
• MPU = manual, off/proportional, unit-mounted
• MPR = manual, off/proportional, remote-mounted
• SOU = SCR, on/off, unit-mounted
• SOR = SCR, on/off, remote-mounted
• SAU = SCR, low/med/high, unit-mounted
• SAR = SCR, lo w/med/high, remote-mounted
• SPU = SCR, off/proportional, unit-mounted
• SPR = SCR, off/proportional, remote-mounted
47 Timed Override
• Y = none
48 Valve - Primary Coil
• See Table 4
49 Valve - Preheat Coil
• See Table 4
50 Valve - Reheat Coil
• See Table 4
Table 4: Model Number Detail: Coil Valve Fields 49, 50, 51
51
Future Control Function
• Y = None
52 Low Temperature Protection
• Y = None
• X = special
53 Condensate Overflow Protection
• C = condensate overflow protection
• Y = None
• X = special
54 Discharge Air Thermistor
• Y = None
• X = special
55 Smoke Input Sensor
• Y = None
• X = special
56 Occ / Vacant Control Input
• Y = None
• X = special
McQuay IM 980-1 31
Page 32

Model Number Description
Table 5: Model Number Description: Fields 57 - 72
Field
Code
57 58 59 60 61 62 63 64 65 66 67 68 69 70 71 72
YYYYS18P I00S000030FTAFR1
Filter Status Sensor
57
•Y = None
• X = special
58 Fan Status Sensor
•Y = None
• X = special
59 Future Control Function
•Y = None
60 Future Control Function
•Y = None
61 Cabinet Style
•S = Standard
• T = Tamperproof
•Y = None
62 Cabinet Gauge
• 16 = 16 Gauge
• 18 = 18 Gauge
• YY = None
• XX = Special
63 Cabinet Coating Type
• B = Powder Coat
•Y = None
64 Color- Cabinet
• I = Antique Ivory
•W = Off White
•G = Soft Gray
•C = Cupola White
• P = putty Beige
•Y = None
• X = Special
65 Cabinet Depth Extension
• 00 = None
• 04 = 4 Inch Extended Depth
• 08 = 08 inch Extended Depth
66 Unit Lineup Position
•S = Standalone
67 Left Hand End Pocket Extension
• 00 = None
• 04 = 4 Inch Extended Length
• 08 = 8 inch Extended Length
68 Right Hand End Pocket Extension
• 00 = None
• 04 = 4 Inch Extended Length
• 08 = 8 inch Extended Length
69 Subbase
• 30F = 3" subbase with leveling feet
• 30Y = 3" subbase without leveli ng feet
• XXF = special with leveling feet
• XXY = special without leveling feet
• YYY = none
70 Discharge Air - Outlet
• TA = top discharge with stamped louver grille
• TB = top discharge with multi-directional grille
• TY = top discharge with no grille
• TD: top discharge with duct collar
• FD = front discharge with duct collar
• FY = front discharge with no duct collar
• BD = bottom discharge with duct collar
• BY = bottom discharge with no duct coll ar
• XX = special
71 Return Air Inlet
• FR = front inlet with open return
• FS = front inlet with stam ped louver
• FT = front inlet with toe space
• TR = top inlet with open return
• TS = top inlet wit h stamped louver
• BR = bottom inlet with open return
• BS = bottom inlet with stamped louver
• BT = bottom inlet with toe space
• XX = special
72 Filter
•1 = 1” Throwaway Filter
• 3 = 1” Throwaway + (1) Extra
32 McQuay IM 980-1
Page 33

Table 6: Model Number Description: Fields 73 - 78
Field
Code
73 74 75 76 77 78
YYYYASY1
Model Number Description
Special Options
73
• YYY = none
74 Reserved for future use
• Y = none
75 Agency Listing
• A = ETL, CETL, ARI
• R = ETL, CSA
• X = special
• Y = none
76 Packaging
•S = Standard
• T = palletized based on tag ging and by floor
77 Extended Warranty
• Y = none (standard warranty)
• 1 = 1 year Extended component warranty (30 month
from shipment or 24 month from installation)
• 2 = 2 year Extended component warranty (42 month
from shipment or 36 month from installation)
• 3 = 3 year Extended component warranty (54 month
from shipment or 48 month from installation)
• 4 = 4 year Extended component warranty (66 month
from shipment or 60 month from installation)
• X = special
78 Product Style
•1 = Style 1
McQuay IM 980-1 33
Page 34

This page intentionally left blank.
McQuay IM 980-1
Page 35

IM 1121 - Hideaway Unit Disch arge Conversion Kit
Installation and Maintenance Manual IM 1121
ThinLine™ 3G Hideaway Unit
Discharge Conversion Kit
Safety Information
WARNING
The installation of this equipment shall be in accordance with
the regulations of authorities having jurisdiction and all
applicable codes. It is the responsibility of the installer to
determine and follow the applicable codes. This equipment is to
be installed only by an experienced installation company which
employs trained personnel.
WARNING
Rigorously adhere to field wiring procedures regarding proper
lockout and tagout of components.
WARNING
To avoid electrical shock, personal injury or death:
1. Installer must be qualified, experienced technician.
2. Disconnect power supply before installation to prevent
electrical shock and damage to equipment.
Introduction
There may be instances when the airflow discharge direction
needs to be changed. The appropriate conversion kits are
available from McQuay for field installation. Contact your
McQuay Sales Represetative for details.
Group: Applied Air Systems
Part Number: 910118016
Date: March 2011
Table 1: Discharge Conversion Kits
Unit Size Part Number Quantity
02 910113221 1
03 910113222 1
04 910113223 1
06 910113224 1
08 910113225 1
10 910112579 1
12 910113226 1
Procedure
Top discharge to front discharge
1 Remove the discharge duct coll ar from the top of the unit
by removing the screws (see Figure 1). Save all screws
for future use.
2 Remove the screws holding the fan deck to the front
block-off plate and slide the fan deck part-way out.
3 Remove the front block-off plate by removing the
mounting screws located on either side of the chassis
(see Figure 1).
4 Attach the top block-off plate to the top of the unit
replacing the discharge duct collar using the retained
screws (see Figure 2).
5 Attach the short front panel to the front of the chassis as
shown. Secure the short panel with four of the retained
screws, two on either side (see Figure 2).
Page 35 © 2011 McQuay International 800-432-1342 www.mcquay.com
Page 36

Figure 1: Removing the Discharge Duct Collar and Front Block-off Plate
Front Block-Off Plate
Discharge Duct Collar
Short Front Panel
Top Block-Off Plate
Figure 2: Attaching the Top Block-Off Plate and Short Front Panel
36 McQuay IM 1121
Page 37

IM 1023 - Fresh Air Damper Kit
Align dimples on bottom of the
damper box with slots in base pan.
Bend tabs in base pan over damper
edge to secure in place.
Installation and Maintenance Manual IM 1023
Fresh Air Damper Kit for
ThinLine™ 3G Vertical Fan Coils
The fresh air damper kit provides up to 25% outside air to the
fan coil. It consists of an intake with damper blade and insect
screen. The damper may be manually controlled through the
return air opening or with an optional field-installed damper
motor.
Installation Instructions
CAUTION
Sharp metal edges are potential injury hazards. Wear
protective gloves.
1 Locate components and remove from carton. Kit
includes:
• Damper box
• Screen
2 Place the screen against the opening in the back of the
unit base. See Figure 1.
Group: Applied Air Systems
Part Number: 668115702
Date: August 2009
3 Slide the damper box in place against the screen,
matching the dimples on the bottom of the damper box to
the slots on the unit base (see Figure 2).
Figure 2: Slide the Damper Against the Screen
Figure 1: Place Screen Against Opening in Unit Base
4
T o secure the damper to the unit, bend the tabs in the unit
base pan against the left and right edges of the damper
(see Figure 3).
Figure 3: Secure Damper with Tabs in Unit Base Pan
Page 37 © 2009 McQuay International 800-432-1342 www.mcquay.com
Page 38

Operation
To open damper, reach under the unit
and pull the damper handle toward you
To adjust damper tension, loosen or
tighten nuts on each end of damper axis.
To open the damper, reach under the unit and pull the damper
handle toward you. To close, push the damper away from you.
See Figure 4.
Figure 4: Opening and Closing the Damper
If the damper is difficult to open or moves too freely, you can
adjust the tension by tightening or loosening the nuts on its
pivot axis. See Figure 5.
Figure 5: Adjusting Damper Tension
Cold Weather Operation
Fan coils may experience erratic operation during cold
ambient conditions with the outside air damper in the open
position.
IMPORTANT
It is the responsibility of the contractor to ensure that factoryinstalled gasketing matches up with the wall opening, or that
additional material is used, to provide a positive seal and
prevent infiltration of ambient conditions.
© 2009 McQuay International 800-432-1342 www.mcquay.com IM 1023/Page 38
Page 39

IM 1028 - Fresh Air Damper Motor Kit
Remove nuts, flat washers and lock
washers from both
ends of damper
pivot rod.
Unit Size Cut Rod Length
02 3.75 in (96 mm)
03 6.5 in (165 mm)
04 6.25 in (159 mm)
06 11.75 in (298 mm)
08 6.5 in (165 mm)
10 12 in (305 mm)
12 17.5 in (445 mm)
Kit Components:
• Coupling with setscrews
• Damper control rod
• Motor mounting screws,
(2) #10 x 1/2" (13 mm)
• Motor mounting bracket
• Motor
• Motor bracket mounting
screws, (2) #8-32 x 3/8"
(10 mm)
Remove knockout
Installation and Maintenance Manual IM 1028
Fresh Air Damper Motor Kit for
ThinLine™ 3G Vertical Fan Coils
This damper motor kit is set up for field installation with the
corresponding fresh air damper kit for ThinLine 3G fan coils.
The damper kit must be ordered separately. The damper motor
is always mounted on the same end as the unit control box.
The unit control box is always mounted on the opposite side of
the primary coil connections. (Example: For right-hand units
use left-hand damper motor kit.) Inspect the contents for
shipping damage and the correct items. See Figure 1for a list
of kit components.
NOTICE
Installation and maintenance are to be performed only by
qualified personnel who are familiar with and in compliance
with state, local and national codes and regulations, and
experienced with this type of equipment.
Figure 1: Damper Motor Kit Assembly (Right Hand Ki t Shown)
Group: Applied Air Systems
Part Number: 910103368
Date: August 2009
CAUTION
Sharp edges! Metal edges are potential injury hazards. Wear
protective gloves.
Installation Instructions
1 Before installing the fresh air damper kit, remove the
nuts and washers from each end of the damper pivot rod.
See Figure 1.
2 Install the fresh air damper kit according to the
instructions provided in McQuay IM 1023.
3 Locate all damper motor kit components and remove
from carton. See Figure 1 for a component list.
Page 39 © 2009 McQuay International 800-432-1342 www.mcquay.com
Page 40

4 Install the coupling on the end of the damper pivot rod
closest to the unit control box With the damper blade in
the closed (up) position, secure the coupling by
tightening the setscrew with the setscrew facing the front
of the unit.
Note: Suggestion: flatten the threads of the damper pivot
rod where it contacts the setscrew to prevent the
setscrew from slipping.
5
Attach the damper motor to the mounting bracket with
two #8-32 x 3/8" screws.
6 Remove the end pocket cabinet panel from the control
box side of the fan coil (remove attaching screw from tab
on the bottom front of the panel and lift off panel).
7 Remove the knockout in the fan coil chassis that
provides access for attaching the motor control rod to the
damper. See Figure 1.
8 Cut the damper control rod to the proper length
according to the chart in Figure 1.
9 Slide the damper control rod through the knockout hole
and into the coupling you installed in Step 4. Do not
tighten set screw!
10 Position the damper motor so that the motor control rod
fits into the motor coupling (do not tighten set screw)
and secure the motor bracket to the chassis using the #10
x 1/2" sheet metal screws.
Note: This is for preliminary positioning of the control rod.
Now position the rod so that the set screws on both the
11
damper coupling and the motor coupling will grip the
rod firmly. Mark the rod on the motor end.
12 Remove or back out the motor bracket until you are able
to tighten the 1/8" Allen set screw on the motor coupling,
then secure the motor coupling according to your
previous mark.
13 Slide the rod back into the damper coupling and secure
the motor bracket to the end panel, making sure the rod is
centered in the knockout hole.
14 The damper rod should be positioned according to the
earlier alignment. Tighten the setscrew on the coupling
with the damper in the closed position. This requires
holding the damper in the closed position while marking
the proper angle.
15 Manually open the damper blade on the fresh air intake
box and let the spring return on the damper motor close
the damper blade. If necessary, loosen the setscrew on
the coupling and adjust the damper blade until the spring
will close the damper blade, then retighten the setscrew.
16 The 24 VAC air damper actuator contains 2 yellow
wires. One wire connects to the air damper control’s
24 VAC power wire. The other wire connects to neutral.
Power consumption = 10 VA.
Figure 2: Damper Motor Kit Installed in Unit
© 2009 McQuay International 800-432-1342 www.mcquay.com IM 1028/Page 40
Page 41

IM 1024 - Cabinet Rear Extension Kit
Right Cabinet Side Panel
Left Cabinet Side Panel
Top Cabinet Panel
Right Chassis
Support Panel
Left Chassis
Support Panel
Subbase
Extension
Subbase
Extension
Center Chassis
Support Panel
#8 x 0.375
Screws (23)
Slide Subbase Extensions onto
Chassis Support Panels and
fasten with screws
Fasten Center
Chassis Support
Panel to Left and
Right Panels with
4 screws
Installation and Maintenance Manual IM 1024
Cabinet Rear Extension Kit for ThinLine™
3G Vertical Fan Coils and Unit Heaters
The field-installed cabinet rear extension option may be
utilized to place the fan coil farther out from the wall than the
standard unit allows.
Note: This option is not designed to be an air duct or outside
air plenum.
NOTICE
Installation and maintenance are to be performed only by
qualified personnel who are familiar with and in compliance
with state, local and national codes and regulations, and
experienced with this type of equipment.
Figure 1: Kit Components
Installation Instructions
Electrical shock will cause severe injury or death. Disconnect
all electrical power before servicing unit.
Wear protective gloves to avoid possible cuts and abrasions
from exposed edges. Avoid contact with sharp edges.
1 Locate all components and remove from carton. See
Figure 1. Kit includes:
• Package of 23 screws - #8 x 0.375
• Left and Right Chassis Support Panels
• Center Chassis Support Panel
• Top Cabinet Panel
• Left and Right Cabinet Side Panels
• 2 Subbase Extensions
2 Attach Center Chassis Support Panel to Right and Left
Chassis Support Panels using 4 screws. See Figure 2.
Group: Applied Air Systems
Part Number: 910102148
Date: August 2009
DANGER
WARNING
Figure 2: Chassis & Subbase Assembly
Page 41 © 2009 McQuay International 800-432-1342 www.mcquay.com
Page 42

3 Attach Subbase Extensions to the Right and Left Chassis
Attach top
cabinet panel
to right and left
side panels with
4 screws
Insert tabs into slots in
Subbase Extensions
Fasten in
place with 3
screws
Lower the Cabinet Assembly
onto the Chassis Support
Assembly
Attach Subbase
Extensions to
unit subbases
with 4 screws.
Attach Chassis Support
Panels to coil panels on the
unit with 6 screws
Support Panels using 1 screw in each. See Figure 2.
4 Attach the Top Cabinet Panel to the Right and Left
Cabinet Side Panels using 4 screws (2 on each side). See
Figure 3.
Figure 3: Cabinet Panel Assembly
5
Lower the Cabinet Assembly from step 4 onto the
Chassis Support Assembly from step 3 (see Figure 4).
Note that the tabs on the Cabinet Side Panels are inserted
into the slots in the Subbase Extensions.
6 Use 3 screws to fasten the Top Cabinet Panel to the
Center Chassis Support Panel.
7 Attach extension to fan coil unit as follows (see
Figure 5):
a Attach the Subbase Extensions to the left and right
subbases on the unit using 4 screws.
b Attach the Left and Right Chassis Support Panels to
the left and right coil panels on the fan coil unit using
6 screws.
Figure 5: Attach Extension To Unit
Figure 4: Attach Cabinet Assembly To Chassis Assembly
Some common applications for the rear cabinet extension
include:
• Allow additional depth for appearance of unit.
• Allow additional clearance for cross-over piping and
connections.
• Extend the discharge grille past drapery or wall hangings.
• Cover floor covering terminations in remodeling projects.
• Allow for piping entry through the side panels of the unit.
© 2009 McQuay International 800-432-1342 www.mcquay.com IM 1024/Page 42
Page 43

IM 1021 - Key-Lock Acce s s D o or Kit
Unscrew attaching screws and
remove control door from unit.
Remove hinge pins from old control door and
separate door from hinge bracket.
Attach tamperproof control door to hinge bracket
with new hinge pins.
Attach locking mechanism to tamperproof
control door.
Installation and Maintenance Manual IM 1021
Key-Lock Access Door for
ThinLine™ 3G Vertical Fan Coils
The key-lock access door kit can be installed on ThinLine 3G
cabinet units to prevent access to unit controls. It is installed as
follows.
1 Locate all components and remove from carton. Kit
includes:
• Tamperproof control door
• 2 hinge pins
• Locking mechanism
• Locking mechanism keys
2 Open the control door on the fan coil. Then unscrew the
two attaching screws and remove the door from the unit.
See Figure 1. Save screws for reattachment!
Figure 1: Remove Control Door From Unit
Group: Applied Air Systems
Part Number: 668115705
Date: August 2009
3
Remove the hinge pins from the old control door by
either re-rounding the flattened pin ends with a needlenose pliers or drilling out the pins with a 5/32” drill bit.
Then separate the door from the hinge bracket.
Figure 2: Remove Old Door from Bracket
4
Attach the locking mechanism to the tamper-proof
control door. See Figure 3.
5 Attach the new tamperproof control door to the hinge
bracket using new hinge pins. See Figure 3. Secure the
hinge pins to the bracket by pinching protruding ends
with a needle-nose pliers.
Figure 3: Attach Bracket and Lock to New Door
Install the new door and locking mechanism on the unit
6
using the screws removed in Step 2.
Page 43 © 2009 McQuay International 800-432-1342 www.mcquay.com
Page 44

This page intentionally left blank.
McQuay IM 980-1
Page 45

IM 1014 - MTA/B 155 Electronic Thermostats
Installation and Maintenance Manual IM 1014
MT 155 Thermostat
Installation
DANGER
READ THESE INSTRUCTIONS CAREFULLY BEFORE
ATTEMPTING TO INSTALL, OPERATE OR SERVICE THIS
THERMOSTAT.
Failure to observe safety information and comply with
instructions could result in PERSONAL INJURY, DEATH AND/
OR PROPERTY DAMAGE.
To avoid electrical shock or damage to equipment, disconnect
power before installing or servicing. Use only wiring with
insulation rated for full thermostat operating voltage. Use
copper wire only. Insulate or wirenut all un-used leads. Any
wiring, including the remote probe,may carry the full operating
voltage of the thermostat.
To avoid potential fire and/ or explosion do not use in
potentially flammable or explosive atmospheres.
Retain these instructions for future reference. You must review
your application and national and local codes to ensure that
your installation will be functional and safe.
1 Install the thermostat with the two furnished mounting
screws to a standard 2" x 4" electrical box, 4-11/16" x 21/8" square device box with a 2" x 4" adapter ring or to a
4" x 4" box with accessory adapter plate.
2 For wall installations, mount the thermostat on an inside
wall approximately 5 feet above the floor. The location
should provide circulation at average room temperature.
Avoid direct sunlight or sources of hot or cold air in the
room or wall.
3 Remove the knob and then the cover. Mount thermostat
base assembly to the outlet box using the screws
provided, tighten the screws evenly but do not over
tighten. Make wiring connections as noted.
4 To use a remote sensor, remove jumper JP-1 to disable
local sensing. See Figure 1. Failure to remove JP-1 when
using a remote sensor will cause improper operation of
the thermostat. Some units do not have remote sensing
capability . See Application Notes.
Group: Applied Air Systems
Part Number: 910102989
Date: August 2009
Figure 1: Removing Jumper JP-1
INSTALL COVER
LOCKING SCREW
REMOVE JP1
WHEN USING A
REMOTE SENSOR
5
Reinstall the cover assembly. Install cover locking screw
JP1
provided. Reinstall the knob.
6 Checkout: After wiring and installation are complete,
energize the system and check the operation. Adjust the
thermostat as necessary to complete at least one cycle.
Be sure the thermostat and all other equipment are
functioning correctly.
Thermostat Operation
Temperature Range: 50°F - 90°F (10°C - 32°C)
TA155: A HEAT-OFF-COOL system switch manually selects
heating or cooling mode. In the HEAT position, only the heat
output cycles with demand. In the COOL position, only the
cool output cycles with demand. In the OFF position, heating
and cooling outputs are off. Units with a two position system
switch or without a system switch must use a load transfer
switch when both heating and cooling outputs are used. This
prevents control failure and equipment damage caused by
direct cycling between loads.
TB155: An ON-OFF system switch enables auto-changeover
of heating and cooling modes. In the ON position the
thermostat activates heating or cooling outputs dependant
upon the relationship between set point and ambient
temperature. Heat on to cool on dead band is 4°F. In the OFF
position, heating and cooling outputs are off. Units without a
system switch cycle between heating and cooling with a 4°F
dead band.
Page 45 © 2009 McQuay International 800-432-1342 www.mcquay.com
FAN: Some units have a switch for manual selection of fan
speed. On these units fan operation is either internally wired
Page 46

for fan continuous operation or is dependant upon connection
1
2
3
1
2
5
1
2
3
4
TB1
TB2
TB3
NO CONNECTION
L2 or NEUTRAL
TB1-3
TB1-4
FAN
COOL
OUTPUT
HEAT
OUTPUT
TB2-3
FAN HIGH
FAN LOW
FAN MED
L1
FAN SUPPLY
TB2-2
TB2-1
TB2-4
TB2-5
TB3-3
CONNECT
FOR FAN
CONTINUOUS
TB3-2
TB3-1
SWITCHED POWER
COOL
OUTPUT
HEAT
OUTPUT
1
2
3
1
2
TB1
TB3
L1
TB3-3
TB3-2
TB3-1
NO CONNECTION
L2 or NEUTRAL
TB1-3
TB1-4
to the fan supply input . When internally wired for fan
continuous operation, the fan will be off when the system
switch is off. When dependant upon external connections the
fan may not be off with the system switch in the off position.
The fan supply input is switched to fan speed outputs (HI MED - LO).
SWITCHED POWER: L1 power is switched to this output any
time the system switch is out of the OFF position.
Ratings
Table 1: Fan and system switches
Voltage
Rating
24 VAC N.A. N.A. N.A. 24 VA 10 VA
120 5.8 34.8 6.0 125 VA 20 VA
240 2.9 17.4 5.0 125 VA 20 VA
277
Inductive
FLA LRA
Resistive
Amps
Pilot
Duty
2.4 14.4 4.2 125 VA 20 VA
Wire Lead Colors (if applicable)
White with Orange Stripe Fan High
White with Red Stripe Fan Med.
White with Brown Stripe Fan Low
Red Heat
Blue Cool
Black L1
Yellow L2 or Neutral
Orange Switched Power
Violet Fan Supply
Brown Remote Probe
Brown Remote Probe
Application Notes
1 To use a remote sensor, remove jumper JP-1 to disable
local sensing. See Figure 1. Failure to remove JP-1 when
using a remote sensor will cause improper operation of
the thermostat. Some units do not have remote sensing
capability.
2 Units with remote sensing capability have a four-position
terminal block at TB1. If TB1 is two position the unit is
local sensing only.
3 Remote probe wiring should be located away from any
electrical motors or power wiring
4 Some units are internally wired for permanent fan
continuous operation.
5 On units with a Fan Supply input, the operation of the
fan is determined by wiring connection. For fan
continuous, jumper the Fan Supply input (TB2-5) to the
Switched Power output (TB3-3).
6 For fan cycling operation with a call for heat or cool, a
fan relay must be used.
© 2009 McQuay International 800-432-1342 www.mcquay.com IM 1014/Page 46
Thermostatic
Switching
7 Observe electrical ratings. Thermostatic outputs are pilot
duty only.
Wiring Diagrams
Figure 2: Units with remote sensing capability
TB3-1
HEAT
OUTPUT
TB3-2
TB3
1
2
TB3-3
3
TB2-1
TB2
1
L2 or NEUTRAL
NO CONNECTION
REMOTE PROBE 1
REMOTE PROBE 2
TB1-4
TB1-3
TB1-2
TB1-1
4
3
2
1
TB1
TB2-2
2
TB2-3
3
4
TB2-4
5
TB2-5
Figure 3: Units with switches used for local sensing only
Figure 4: Units with no switches with local/remote sensing
capability
TB3
1
2
3
L2 or NEUTRAL
NO CONNECTION
REMOTE PROBE 1
REMOTE PROBE 2
TB1-4
TB1-3
TB1-2
TB1-1
4
3
2
1
TB1
Figure 5: Units with no switches used for local sensing
only
COOL
OUTPUT
SWITCHED POWER
L1
FAN HIGH
FAN MED
FAN LOW
FAN SUPPLY
TB3-1
TB3-2
TB3-3
FAN
HEAT
OUTPUT
COOL
OUTPUT
CONNECT
FOR FAN
CONTINUOUS
L1
5
Page 47

IM 1089 - Field Installation of MT155 Thermostats
G0
to TB3 - 1
of T-stat
to TB3 - 2
of T-stat
RED
BLUE
WHITE 60
WHITE 61
WHITE 62
BLACK WHITE
ACO CLG
+
CLG
–
COM
Wiring Harness
Valve
Acuator
LV
Board
Cap the
wire
Installation and Maintenance Manual IM 1089
Field installation of Thermostat (MTA155 or MTB155) and
24V valve packages on Vertical Thinline 3G fan coil units
with factory-installed Low Voltage Interface Board
General
DANGER
READ THESE INSTRUCTIONS CAREFULLY BEFORE
ATTEMPTING TO INSTALL, OPERATE OR SERVICE THIS
THERMOSTAT.
Failure to observe safety information and comply with
instructions could result in PERSONAL INJURY, DEATH
AND/ OR PROPERTY DAMAGE.
To avoid electrical shock or damage to equipment, disconnect
power before installing or servicing. Use only wiring with
insulation rated for full thermostat operating voltage. Use
copper wire only. Insulate or wire-nut all un-used leads. Any
wiring, including the remote probe, may carry the full operating
voltage of the thermostat.
To avoid potential fire and/ or explosion do not use in
potentially flammable or explosive atmospheres.
Retain these instructions for future reference. You must review
your application and national and local codes to ensure that
your installation will be functional and safe.
Step 1: Installing NC (Normally Closed)
valve packages
• Solder the appropriate inlet and outlet pipe connections from
the valve package to the coil connections.
• Snap-on the SPDT ACO Switch on the supply side of the
valve package (SPDT ACO Kit P/N 039398600 to be
ordered as field-installed option)
• Cut white wire 60 of the wiring harness leading from the
Low Voltage Interface Board terminal connection (see Fig.
1) prior to attaching the quick-connect connector of the OnOff valve actuator to the interface board (Fig. 3). The white
wire lead going to the actuator will be connected to terminal
No. 1 of the ACO switch (see Fig. 5):
• Terminal No. 1: black wire - to be connected to the valve
side (G terminal) with white wire of the terminal strip
• Terminal No. 2: red wire – to be connected to the red
wire (TB3-1) of the thermostat
• Terminal No. 3: blue wire – to be connected to the blue
wire (TB3-2) of the thermostat
Group: Applied Air Systems
Part Number: IM 1089
Date: October 2010
CAUTION
Care should be used to avoid electrostatic discharge to the
microprocessor.
This unit has configuration dip switches and jumpers. You may
need to reconfigure the thermostat for your application.
Installation
Please refer to Fig. 1, 2, 3 and 4
Two-pipe system (Cooling or Heating)
To field wire a T*155 thermostat (either as wall-mounted or
unit-mounted) and field-install valve package for a 2-pipe
system the following accessories are required:
• Single-Pole Double-Throw Automatic Changeover
Switch (SPDT ACO Kit P/N 039398600)
• Thermostat TA155 (kit) – PN 107345302 or
Thermostat TB155 (kit) – PN 107345304
• 10K Return Air Sensor - PN 107345501
© 2010 McQuay International 800-432-1342 www.mcquay.com
Figure 1: Automatic changeover connection between the
valve actuator and the interface board
Step 2: Provide power to thermostat
(refer to Fig. 2 and 4)
• Connect a wire from thermostat terminal TB1- 4 (L2
Neutral) to the common terminal on Low Voltage Interface
Board (terminal C )
• Connect a wire from thermostat terminal TB2- 1 (24V AC) to
the 24 V terminal connection R.
• Connect fan speed wires from the thermostat to appropriate
Low Voltage Interface Board terminals:
• Connect a wire from thermostat terminal TB2- 2
( High fan speed) to the HI terminal
• Connect a wire from thermostat terminal TB2- 3
( Med fan speed) to the Med terminal
Page 48
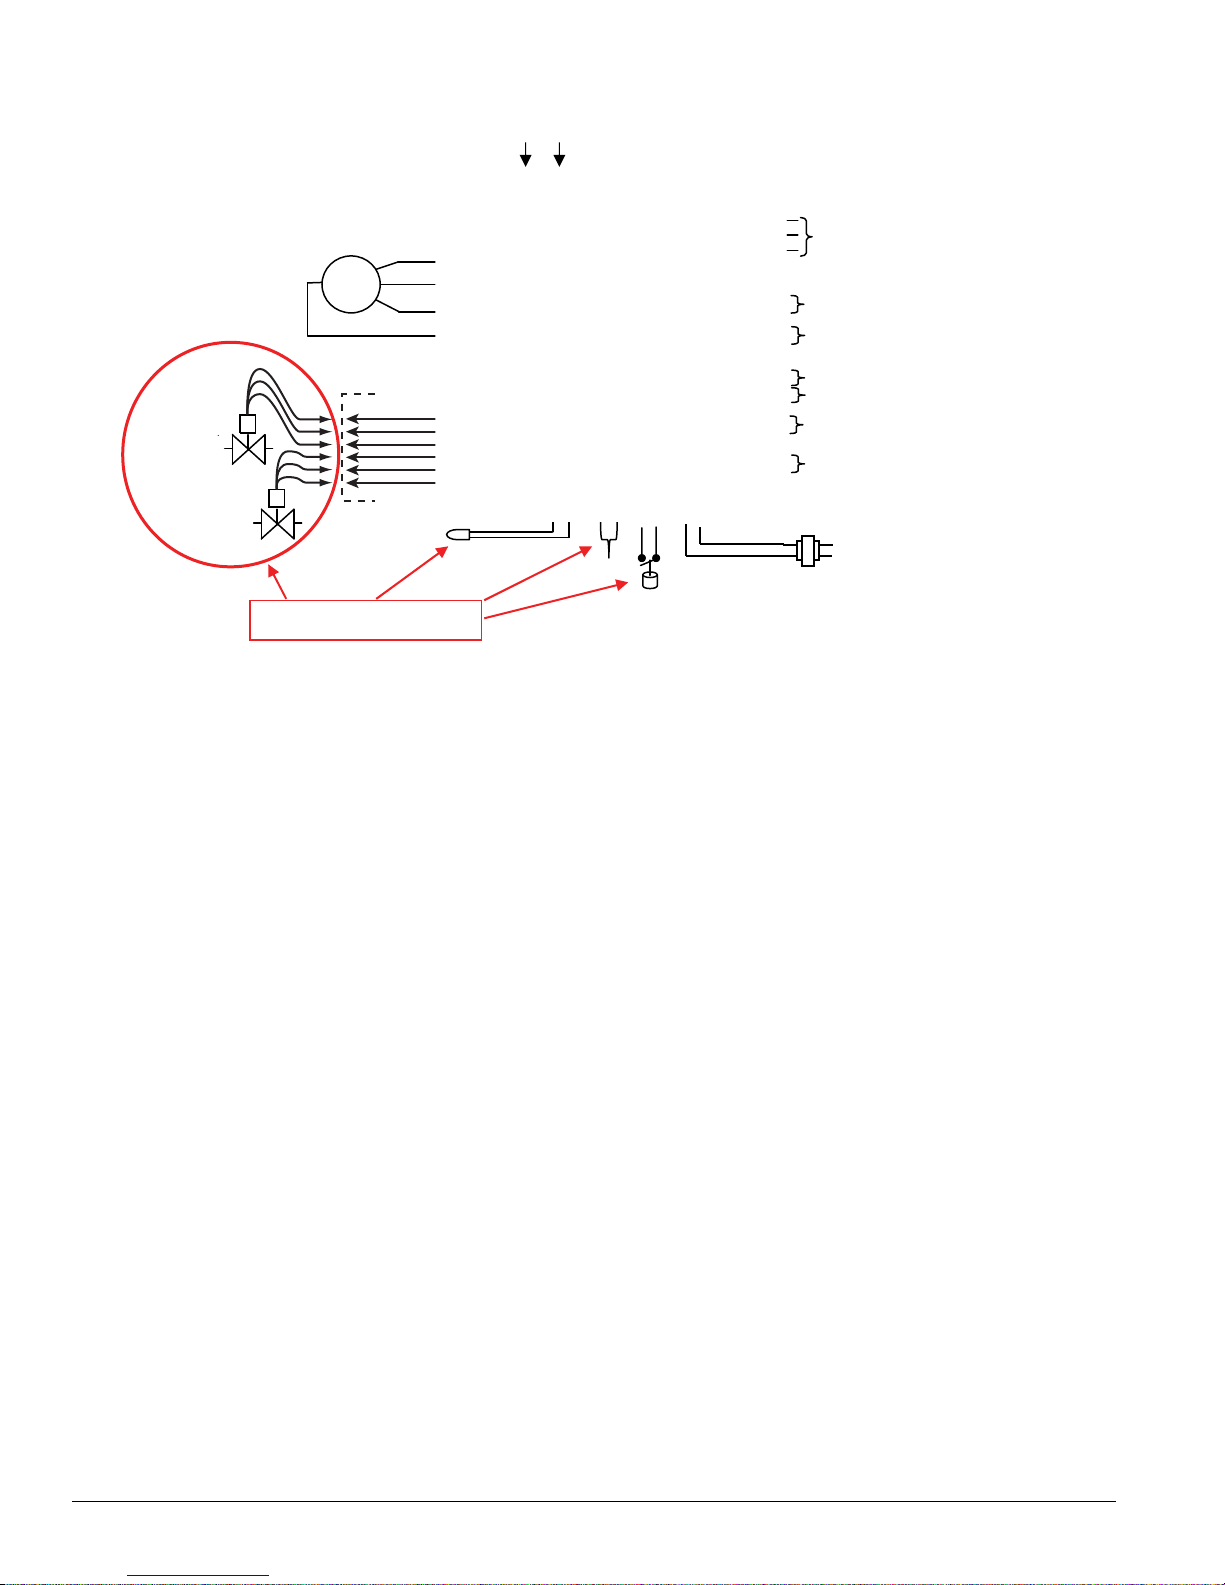
Figure 2: Low Voltage Interface Board shown with all additional support options
Condensate overflow senso
r
24VA
XFMR
LINE
VOLTAGE
Clg. 24vac
valve actuators
– with quick
connects
Htg. 24vac
valve actuators
– with quick
connects
Hi-Med-Lo Fan
motor control
Clg. 24vac valve actuators inputs
Remote thermostat 24 VAC power
Condensate overflow sensor out
p
ut
Htg. 24vac valve actuators inputs
FA
Line Voltage
Available in Stock
Changeover
pipe sensor
or switch
Unit mounted
sensor
Wiring Harness
Figure 3: Factory-installed and wired Low Voltage Interface Board (Wiring Diagram)
Page 48 McQuay IM 1089
Page 49

Figure 4: Thermostat TB155 autochangeover to be used with On-Off 24V valve packages, SPDT ACO and unit-mounted
Low Voltage Interface Board
Figure 5: Automatic changeover switch
(SPDT ACO Kit P/N 039398600)
• Connect a wire from thermostat terminal TB2- 24
( Low fan speed) to the Low terminal
• Remove Jumper JP1 to allow the remote mounted
10K Return Air Sensor to operate.
• Mount the 10K Return Air Sensor (PN 107345501) above the
filter through the knockout provided
Note: (1) If a fan coil unit is to be used for heating or cooling
only, the SPDT ACO Switch (SPDT ACO Kit P/N
039398600) is not required. For such applications just
follow Step 2.
Four-pipe system (Cooling and Heating)
Two piping packages will be required for CW and HW coils.
The following accessories needed for field-installed thermostat
model T*155 (unit-mounted or wall-mounted):
• Thermostat TA155 (kit) – PN 107345302 or Thermostat
TB155 (kit) – PN 107345304
• 10K Return Air Sensor - PN 107345501 for unit-mounted
applications only (for wall-mounted applications the sensor is imbedded with the thermostat)
Step 1: Installing valve packages
• Solder the appropriate inlet and outlet CW pipe connections
from the valve package to the coil connections.
• Solder the appropriate inlet and outlet HW pipe connections
from the valve package to the coil connections.
• Snap-on the Quick-connects of the valve actuators to the
appropriate terminals of the Low Voltage Interface Board as
per Fig. 2.
Step 2: Provide power to thermostat
(refer to Fig. 2 and 4)
• Connect a wire from thermostat terminal TB1- 4 (L2 Neutral)
to the common terminal on the interface board (terminal C)
• Connect a wire from thermostat terminal TB2- 1 (24VAC) to
the 24 V terminal connection R.
• Connect fan speed wires from the thermostat to the
appropriate Low Voltage Interface Board terminals:
• Connect a wire from thermostat terminal TB2- 2 ( High
fan speed) to the HI terminal
• Connect a wire from thermostat terminal TB2- 3 ( Med
fan speed) to the Med terminal
• Connect a wire from thermostat terminal TB2- 24 ( Low
fan speed) to the Low terminal
• Remove Jumper JP1 to allow the remote mounted the
10K Return Air Sensor to operate.
• Mount the 10K Return Air Sensor (PN 107345501) above the
filter through the knockout provided
Note: (2) For thermostats supplied by others refer to the
manufacturer’s installation literature and use this manual
as a guideline only.
McQuay IM 1089 Page 49
Page 50

This page intentionally left blank.
McQuay IM 980-1
Page 51

Installation and Maintenance Manual IM 1015
LOW VOLTAGE
CONNECTIONS
LINE VOLTAGE
CONNECTIONS
FAN
L2 OR NEUTRAL
REMOTE PROBE
PIPE SENSOR
L1 (HOT)
LO
MED
HIGH
OR SINGLE SPEED FAN
24 VAC 1
24 VAC 2
SETBACK INPUT
24 VAC
XFMR
MAIN 1
SEC 1
MAIN 1
OUTPUT
SECONDARY
1 OUTPUT
10
11
12
13
14
15
16
17
1
2
3
4
5
6
7
MTA 158 Microprocessor Thermostat
On/Off Controller
IM 1015 - MT 158 and MT 168 Digital Thermostats
Installation
DANGER
READ THESE INSTRUCTIONS CAREFULLY BEFORE
ATTEMPTING TO INSTALL, OPERATE OR SERVICE
THIS THERMOSTAT.
Failure to observe safety information and comply with
instructions could result in PERSONAL INJURY, DEATH
AND/ OR PROPERTY DAMAGE.
To avoid electrical shock or damage to equipment,
disconnect power before installing or servicing. Use only
wiring with insulation rated for full thermostat operating
voltage. Use copper wire only. Insulate or wirenut all unused leads. Any wiring, including the remote probe,may
carry the full operating voltage of the thermostat.
To avoid potential fire and/ or explosion do not use in
potentially flammable or explosive atmospheres.
Retain these instructions for future reference. You must
review your application and national and local codes to
ensure that your installation will be functional and safe.
Figure 1: Wiring Diagram for On/Off Ouput Configuration
Group: Applied Air Systems
Part Number: 910102990
Date: August 2009
CAUTION
Care should be used to avoid electrostatic discharge to
the microprocessor.
This unit has configuration jumpers. You may need to
reconfigure this thermostat for your application.
1 Install the thermostat with the two furnished mounting
screws to a standard 4-11/16" x 2-1/8" square device
box with a 2" x 4" adapter ring.
2 For wall installations, mount the thermostat on an
inside wall approximately 5 feet above the floor. The
location should provide circulation at average room
temperature. Avoid direct sunlight or sources of hot or
cold air in the room or wall.
3 Remove the cover . Mount thermostat base assembly to
the outlet box using the screws provided, tighten the
screws evenly but do not over tighten. Connect wires
as shown in the appropriate wiring diagram for your
thermostat style.
4 To use a remote sensor on units with local sensing
capability, remove jumper JP-1 to disable local
sensing. Failure to remove JP-1 will cause improper
operation of the thermostat.
© 2009 McQuay International 800-432-1342 www.mcquay.com Page 51
Table 1: MTA 158 Operation*
Output Off with Demand On with Demand
Main 1
Terminal 10
Main 2 (Terminal
12)
Secondary
(Terminal 11)
Secondary 2
(Terminal 13)
Note: * Operation determined by configuration. See Dip Switch
Configuration Table.
On at temperature
demand
NA NA
Summer: Off with heat
demand
Winter: Disabled
NA NA
On at Temperature
Demand
Summer: On wtih
heat demand
Summer: Disabled
5 Remove the LCD plastic protective film. Reinstall the
cover assembly. Install the cover locking screw
provided in the hole at the left side of the control
enclosure to complete the installation.
6 Checkout: After wiring and installation are complete,
energize the system and check the operation. Adjust
the thermostat as necessary to complete at least one
cycle. Be sure the thermostat and all other equipment
are functioning correctly.
Page 52

Thermostat Operation
1 2 3 4 5 6
SEC ONDARY 1 OFF WITH DEMAND
MAIN 1 O FF WITH DE MAND
CENTIGRADE DISPLAY
N/A
N/A
85 F/ 60 F S ETB ACK
SE CONDAR Y 1 ON WITH DE MAND
MAIN 1 O N WI TH D E MAND
FAHRE NHEIT DISP LAY
OPE RATING POSITION
90 F/ 50 F S ETB ACK
ON
OPE RATING POSITION
Example: This Dip Switch Is Configured For On With Demand, °F
Display, On-Off Operation And 90/50 F Setback.
NOTE: Thermostat power must be cycled for changes in dip switch
configuration to take effect.
These thermostats are designed to control On-Off, N.O. and
N.C. valves, relays and Erie® three wire floating valves. These
units may include a fan switch with one or more fan speed
selections.
Mode Button Operation
OFF: All thermostat outputs are off, fan is still operational if
connected to manual fan speed switch.
AUTO: The thermostat automatically selects heating or
cooling mode depending on the set point and room
temperature. The appropriate HEAT or COOL indicator is
enabled in addition to AUTO. A 3°F dead-band is provided to
prevent short cycling between heating and cooling modes.
After change-over the control points automatically shift so that
the heating off-point or the cooling off-point equals the set
point temperature.
COOL: The thermostat operates as a cooling-only thermostat.
The heating outputs are disabled.
HEAT: The thermostat operates as a heating-only thermostat.
The cooling outputs are disabled.
If constructed without a mode button, the thermostat operates
in Auto mode, subject to configuration of the 2/4 pipe jumper
and pipe sensor input.
Fan Speed Switch Operation
Fan speed is determined by manual selection from fan switch
OFF to HIGH, MEDIUM and/ or LOW. In units with the
Cycling Fan Option (demand output), the Fan operation
(CYCLING vs. CONTINUOUS) is determined by application
connections. In OFF position all outputs are off and display
blank.
detected, the system will operate in winter mode, the Main
output will be heating and First Stage Secondary Output will
be disabled. In the case of an ambiguous reading, neither hot
nor cold, the thermostat will initiate a purge cycle.
Ratings
Table 2: Fan and system switches
Voltage
Rating
24 VAC N.A. N.A. N.A. 24 VA 10 VA
120 VAC 5.8 34.8 6.0 125 VA NA
240 VAC 2.9 17.4 5.0 125 VA NA
277 VAC 2.4 14.4 4.2 125 VA NA
Inductive
FLA LRA
Resistive
Amps
Pilot
Duty
Thermostatic
Switching
Service Menu
Access: Press UP and DOWN arrows for 5 seconds.
Menu Selection: Select 1 to 5 by pressing the mode button or
by pressing the UP and DOWN arrows simultaneously.
Adjust Value: Use UP or DOWN arrow.
Item # Function Range Default
1 Zone Temp Offset -5.1 F to 5.1 F 0F
2 Valve Stroke Time 30 sec. To 5 min. 120 sec.
3 Fan Delay to OFF 0 to 10 Minutes 0 Sec.
4
5 Purge Cycle
Figure 2: Dipswitch Configuration
Compressor
Minimum Off Time
30 Sec. To 10 min. 120 Sec.
0 = Time Based
1 = Temperature Based
1
Up/ Down Arrow Operation
A first touch of either arrow will display the set point (a single
set point is employed for both heating and cooling). Continued
pressure on either arrow will scroll the s et poi nt to new va lues.
After three seconds with no pressure on either arrow, the
selected set point becomes effective and the display of the
room temperature resumes.
Setback Operation
Connection of the Setback Input to 24 VAC 1 will force the
control into unoccupied mode (see wiring diagram). Pressing
an arrow key or the mode button on the thermostat cover will
disable the setback input for one hour.
Pipe Sensor Operation
If cold water is detected, the system will operate in summer
mode and the Main output will be cooling. If hot water is
Page 52 IM 1015
Page 53

Figure 3: Circuit Board Jumpers
AUTO
JP4
JP1
1
23
4 56
DIP SW ITCH
ON
1 2 3 4 5 6 7
10 11 12 13
15 16 17
Table 3: Circuit Board Jumper Configuration
Jumper
Designation
Jumper Installed
ON
Jumper
Removed
JP1 Local Sensing Remote Sensing
JP4 2 Pipe System* 4 Pipe System
Application Notes
1 When no pipe sensor is used the main output controls
cooling and the secondary output controls heating.
2 The pipe sensor should be mounted on the main coil
input for water system operation and in the main duct
system for forced air operation.
3 The set point and operating mode will be retained on a
loss of power.
4 When using either a remote probe or pipe sensor, run
wiring away from any electrical motors or power wiring.
Power-Up Operating Sequence
Upon application of power, an MTA158 will go directly to
normal operation.
IM 1015/Page 53 © 2009 McQuay International 800-432-1342 www.mcquay.com
Page 54

This page intentionally left blank.
McQuay IM 980-1
Page 55

IM 1016-1 - MTB 158 Microprocessor Thermostats
LOW VOLTAGE
CONNE C TIONS
LINE VOLTAGE
C ONNE CTIONS
L1 (HOT)
LO
MED
24 VAC 1
24 VAC 2
SETBACK INPUT
MAIN 1 OPEN
SEC 1 OPEN
MAIN 2 CLOSE
SEC 2 CLOSE
REMOTE PROBE
PIPE SENSOR
FAN
L2 OR NEUTRAL
24 VAC
XFMR
MAIN
SECONDARY
OUTSIDE AIR
DAMPER OUTPUT
10
11
12
13
14
15
16
17
1
2
3
4
5
6
7
HIGH
OR SINGLE SPEED FAN
Installation and Maintenance Manual IM 1016-1
MTB 158 Microprocessor Thermostat
On/Off and 3-Wire Controller
DANGER
READ THESE INSTRUCTIONS CAREFULLY BEFORE
ATTEMPTING TO INSTALL, OPERATE OR SERVICE THIS
THERMOSTAT.
Failure to observe safety information and comply with
instructions could result in PERSONAL INJURY, DEATH
AND/ OR PROPERTY DAMAGE.
To avoid electrical shock or damage to equipment, disconnect
power before installing or servicing. Use only wiring with
insulation rated for full thermostat operating voltage. Use
copper wire only. Insulate or wirenut all un-used leads. Any
wiring, including the remote probe,may carry the full operating
voltage of the thermostat.
To avoid potential fire and/ or explosion do not use in
potentially flammable or explosive atmospheres.
Retain these instructions for future reference. You must review
your application and national and local codes to ensure that
your installation will be functional and safe.
Figure 1: Wiring Diagram for 3-Wire Valve Configuration
Care should be used to avoid electrostatic discharge to the
microprocessor.
This unit has configuration jumpers. You may need to
reconfigure this thermostat for your application.
Figure 2: Wiring Diagram for On/Off Ouput Configuration
1
2
3
4
LINE VOLTAGE
CONNECTIONS
5
6
7
10
11
12
13
14
15
LOW VOLTAGE
CONNECTIONS
16
17
Group: Applied Air Systems
Part Number: 910102991
Date: November 2010
CAUTION
L1 (HOT)
LO
MED
HIGH
OR SINGLE SPEED FAN
24 VAC 1
24 VAC 2
SETBACK INPUT
MAIN 1
SEC 1
SECONDARY
1 OUTPUT
FAN
HEAT 2
2ND STAGE
HEAT
FAN
MAIN 1
OUTPUT
DEMAND
OUTPUT
OUTSIDE AIR
DAMPER OUTPUT
REMOTE PROBE
PIPE SENSOR
L2 OR NEUTRAL
24 VAC
XFMR
Page 55 © 2010 McQuay International 800-432-1342 www.mcquay.com
Table 1: Ratings
Voltage
Rating
24 VAC N.A. N.A. N.A. 24 VA 10 VA
120 VAC 5.8 34.8 6.0 125 VA NA
240 VAC 2.9 17.4 5.0 125 VA NA
277 VAC 2.4 14.4 4.2 125 VA NA
Fan and system switches
Inductive
FLA LRA
Resistive
Amps
Pilot
Duty
Thermostatic
Switching
(Pilot Duty)
Installation
1 Install the thermostat with the two furnished mounting
screws to a standard 4-11/16" x 2-1/8" square device box
with a 2" x 4" adapter ring.
Page 56

2 For wall installations, mount the thermostat on an inside
wall approximately 5 feet above the floor. The location
should provide circulation at average room temperature.
Avoid direct sunlight or sources of hot or cold air in the
room or wall.
3 Remove the cover. Mount thermostat base assembly to
the outlet box using the screws provided, tighten the
screws evenly but do not over tighten. Connect wires as
shown in the appropriate wiring diagram for your
thermostat style.
4 To use a remote sensor on units with local sensing
capability, remove jumper JP-1 to disable local sensing.
Failure to remove JP-1 will cause improper operation of
the thermostat.
5 Remove the LCD plastic protective film. Reinstall the
cover assembly . Install the cover locking screw provided
in the hole at the left side of the control enclosure to
complete the installation.
6 Checkout: After wiring and installation are complete,
energize the system and check the operation. Adjust the
thermostat as necessary to complete at least one cycle.
Be sure the thermostat and all other equipment are
functioning correctly.
Thermostat Operation
These thermostats are designed to control On-Off, N.O. and
N.C. valves, relays and three-wire floating valves. These units
may include a fan switch with one or more fan speed
selections.
Table 2: Main and Secondary Output Operation*
Output
Main 1
Terminal 10
Main 2
(Terminal 12)
Secondary
(Terminal 11)
Secondary 2
(Terminal 13)
Note: * Operation determined by configuration. See Dip Switch
Configuration Table.
3-Wire
Floating
Powers main
valve open
Powers main
valve closed
Powers
secondary
valve open
Powers
secondary
valve closed
Mode Button Operation
OFF: All thermostat outputs are off, fan is still operational if
connected to manual fan speed switch.
AUTO: The thermostat automatically selects heating or
cooling mode depending on the set point and room
temperature. The appropriate HEAT or COOL indicator is
enabled in addition to AUTO. A 3°F dead-band is provided to
prevent short cycling between heating and cooling modes.
Off with
Demand
On at temp
demand
Cycles on with
demand
Summer: Off with
heat demand
Winter: Disabled
On at second
stage heating
demand
On with
Demand
On at temp
demand
Cycles on with
demand
Summer: On with
heat demand
Winter: Disabled
On at second
stage heating
demand
After change-over the control points automatically shift so that
the heating off-point or the cooling off-point equals the set
point temperature.
COOL: The thermostat operates as a cooling-only thermostat.
The heating outputs are disabled.
HEAT: The thermostat operates as a heating-only thermostat.
The cooling outputs are disabled.
If constructed without a mode button, the thermostat operates
in Auto mode, subject to configuration of the 2/4 pipe jumper
and pipe sensor input.
Fan Speed Switch Operation
Fan speed is determined by manual selection fr om fan switch
OFF to HIGH, MEDIUM and/ or LOW. In units with the
Cycling Fan Option (demand output), the Fan operation
(CYCLING vs. CONTINUOUS) is determined by application
connections. In OFF position all outputs are off and display
blank.
Up/ Down Arrow Operation
A first touch of either arrow will display the set point (a single
set point is employed for both heating and cooling). Continued
pressure on either arrow will scroll the set point to new values.
After three seconds with no pressure on either arrow, the
selected set point becomes effective and the display of the
room temperature resumes.
Setback Operation
Connection of the Setback Input to 24 VAC 1 will force the
control into unoccupied mode (see wiring diagram). Pressing
an arrow key or the mode button on the thermostat cover will
disable the setback input for one hour.
Pipe Sensor Operation
If cold water is detected, the system will operate in summer
mode and the Main output will be cooling. If hot water is
detected, the system will operate in winter mode, the Main
output will be heating and First Stage Secondary Output will
be disabled. In the case of an ambiguous reading, neither hot
nor cold, the thermostat will initiate a purge cycle.
Three Wire Floating Valve Operation
Open and Close outputs are used to position the valve. Stroke
time is factory set at two minutes. Outputs are off after
reaching full on or off position. Valves are periodically reset
for accuracy.
Outside Air Damper Operation
This output is ON any time the control is turned ON.
Page 56 McQuay IM 1016-1
Page 57

Application Notes
1 When no pipe sensor is used the main output controls
cooling and the secondary output controls heating.
2 The pipe sensor should be mounted on the main coil
input for water system operation and in the main duct
system for forced air operation.
3 The set point and operating mode will be retained on a
loss of power.
4 When using either a remote probe or pipe sensor, run
wiring away from any electrical motors or power wiring.
Service Menu
Access: Press UP and DOWN arrows for 5 seconds.
Menu Selection: Select 1 to 5 by pressing the mode button or
by pressing the UP and DOWN arrows simultaneously.
Figure 3: Circuit Board Jumpers
ON
1 2 3 4 5 6 7
AUTO
DIP SW ITCH
10 11 12 13
JP4
15 16 17
Table 4: Circuit Board Jump e r Conf igu r ation
Jumper
Designation
Jumper Installed
ON
Jumper
Removed
JP1 Local Sensing Remote Sensing
JP4 2 Pipe System* 4 Pipe System
1
23
4 56
JP1
Adjust Value: Use UP or DOWN arrow.
Table 3: Service Menu Functions
Item # Function Range Default
1 Zone Temp Offset -5.1 F to 5.1 F 0F
2 Valve Stroke Time 30 sec. To 5 min. 120 sec.
3 Fan Delay to OFF 0 to 10 Minutes 0 Sec.
4
5 Purge Cycle
Compressor
Minimum Off Time
30 Sec. To 10 min. 120 Sec.
0 = Time Based
1 = Temperature Based
1
Power-Up Operating Sequence
Upon application of power, an MTA158 will go directly to
normal operation.
Page 57 © 2010 McQuay International 800-432-1342 www.mcquay.com
Page 58

This page intentionally left blank.
McQuay IM 980-1
Page 59

IM 1017 - MT 168 0-10Vdc/4020mA Thermostats
LOW V OLTAGE
CONNECTIONS
LINE VOLTA GE
CONNECTIONS
FAN
L2 OR NEUTRAL
OPTIONAL REMOTE PROBE
OPTIONAL PIPE SENSOR
L1 (HOT)
LO FAN
MED FAN
HIGH FAN
OR SINGLE SPEED
24 VAC 1
24 VAC 2
SETBACK
24 VAC
XFMR
MAIN 1
0-10 VDC
OUTPUT
SECONDARY
0-10 VDC
1 OUTPUT
FAN
OUTPUT
AUXILIARY
HEAT
OUTPUT
DAMPER
OUTPUT
10
11
12
13
14
15
16
17
1
2
3
4
5
6
7
Installation and Maintenance Manual IM 1017
MT 168 0-10 VDC/4-20mA Thermostat
Installation
DANGER
READ THESE INSTRUCTIONS CAREFULLY BEFORE
ATTEMPTING TO INSTALL, OPERATE OR SERVICE THIS
THERMOSTAT.
Failure to observe safety information and comply with
instructions could result in PERSONAL INJURY, DEATH
AND/ OR PROPERTY DAMAGE.
To avoid electrical shock or damage to equipment, disconnect
power before installing or servicing. Use only wiring with
insulation rated for full thermostat operating voltage. Use
copper wire only. Insulate or wire-nut all un-used leads. Any
wiring, including the remote probe, may carry the full operating
voltage of the thermostat.
To avoid potential fire and/ or explosion do not use in
potentially flammable or explosive atmospheres.
Retain these instructions for future reference. You must review
your application and national and local codes to ensure that
your installation will be functional and safe.
Figure 1: Mounting
Figure 2: Typical Wi ring *
Group: Applied Air Systems
Part Number: 910102992
Date: August 2009
CAUTION
Care should be used to avoid electrostatic discharge to the
microprocessor.
This unit has configuration dip switches and jumpers. You may
need to reconfigure the thermostat for your application.
1 Install the thermostat with the two furnished mounting
screws to a standard 4-1/16" x 2-1/8" square device box
with a 2" x 4" adapter ring.
2 For wall installations, mount the thermostat on an inside
wall approximately 5 feet above the floor. The location
should provide circulation at average room temperature.
Avoid direct sunlight or sources of hot or cold air in the
room or wall.
Page 59 © 2009 McQuay International 800-432-1342 www.mcquay.com
Note: * Specific models may have fewer connections.
3 Remove the cover . Mount thermostat base assembly to
the outlet box using screws provided. Tighten the screws
evenly but do not overtighten. Connect wires per wiring
diagram.
4 To use a remote sensor on units with local sensing
capability, remove jumper JP-1 to disable local sensing.
Failure to remove JP-1 will cause improper operation of
thermostat.
Page 60

5 Connecting a jumper between terminals 16 and 17 will
disable the secondary output and change the main output
to heat mode.
6 Connection of a 24 VAC set- back signal will force the
control into unoccupied mode (see diagram). Pressing an
arrow key or the mode buttons on the thermostat cover
will disable the setback input for one hour.
7 Remove the LCD plastic protective film to complete the
installation. Reinstall the cover assembly. Install cover
locking screw provided.
8 Checkout: After wiring and installation are complete,
energize the system and check the operation. Adjust the
thermostat as necessary to complete at least one cycle.
Be sure the thermostat and all other equipment are
functioning correctly.
Electrical Ratings
Table 1: Fan switch (terminals 1-4) line voltage connections
Voltage
Rating
24 VAC N.A. N.A. N.A. 24 VA 10 VA
120 VAC 5.8 34.8 6.0 125 VA NA
240 VAC 2.9 17.4 5.0 125 VA NA
277 VAC 2.4 14.4 4.2 125 VA NA
Inductive Resistive
FLA LRA
Amps
Pilot
Duty
Thermostatic
Switching
Application Notes
1 When no changeover pipe sensor is used, the main
output controls cooling and the secondary output
controls heating.
2 The fan output, terminal 12, is energized whenever there
is a demand for heating or cooling. This output can be
connected to a relay that can be used to provide fan
cycling to terminal 1.
3 The changeover pipe sensor should be mounted on the
main coil input for water system operation and in the
main duct system for forced air operation.
4 The set point and operating mode will be retained on a
loss of power.
5 When using either a remote probe or pipe sensor, run
wiring away from any electrical motors or power wiring.
6 The auxiliary heat output supplies a 24 VAC signal with
call for heat. This output is shipped configured for staged
heat.
7 The thermostat is shipped with all dip switches in the
"ON" (closed) position.
8 The damper output is ON when mode is AUTO, HEAT
or COOL. Damper is OFF in set back.
Thermostat Operation
These thermostats are designed to control 0-10 VDC/4-0 mA
valves. These units may include a fan switch with one or more
fan speed selections.
Mode Button Operation
OFF: All thermostat outputs are off, fan is still operational if
connected to a manual fan switch.
AUTO: The thermostat automatically selects heating or
cooling mode depending upon the relationship of the setpoint
and the room temperature. The appropriate HEAT or COOL
indicator is enabled in addition to AUTO. A 3°F dead band is
provided to prevent short cycling between heating and cooling
modes. After changeover, the control points automatically shift
so that the heating off-point equals the set point temperature or
the cooling off-point equals the set point temperature.
COOL: The thermostat operates as a cooling only thermostat.
The heating outputs are disabled.
HEAT: The thermostat operates as a heatin- only thermostat.
The cooling outputs are disabled.
Fan Speed Switch Operation
Fan speed is determined by manual selection fr om fan switch
OFF to HIGH, MEDIUM and/or LOW. In the OFF position,
all outputs are off and the display is blank.
Up/Down Arrow Operation
A first touch of either arrow will display the setpoint (a single
set point is employed for both heating and cooling). Continued
pressure on either arrow will scroll the setpoint to new values.
After three consecutive seconds on either arrow, the selected
setpoint becomes effective and the display of the room
temperature resumes.
Configuration
Table 2: Circuit Board Jump e r Conf igu r ation
Jumper Closed On* Open Off
JP1 Local Sensing Remote Sensing
JP2 2 Pipe System 4 Pipe System
JP3 Factory Use Only
JP4 0-10 VOC Main Output 4-20 mA Main Output
JP5
0-10 VOC Secondary
Output
4-20 mA Secondary
Output
Page 60 McQuay IM 1017
Page 61

Table 3: Dip Switch Configuration
Switch Closed On* Open Off
1 Not Used Not Used
2
3 F Display C Display
4
5 Operating Position Not Used
6 Setback= 90°F & 50°F Setback = 85°F & 60°F
Note: * On is with the dip switch handle to the right. See diagram below.
Staged Heat
3°F Diff. (Term. 13)
Main & Sec. Outputs
0-10 VOC (Term. 10 & 11)
requires JP4 & JP5
Aux. Heat No Diff.
(T erm. 13)
Main & Sec. Outputs
4-20 mA (Term. 10 & 1 1)
Remove JP4 & JP5
Figure 3: Circuit Board
Service Menu:
Access: Press UP and DOWN arrows for 5 seconds.
Menu Selection: Select 1 to 5 by pressing the mode button or
by pressing the UP and DOWN arrows simultaneously.
Adjust Value: Use UP or DOWN arrow.
Table 4: Service Functions
Item # Function Range Default
1 Zone Temp Offset -5.1 F to 5.1 F 0 F
2 Valve Stroke Time 30 sec. to 5 min. 120 sec.
3 Fan Delay to OFF 2 to 10 minutes 120 sec.
4
5Purge Cycle
Compressor
Minimum Off Time
30 seconds to 10
minutes
0 = time based
1 = temperature
based
120 sec.
1
IM 1017/Page 61 © 2009 McQuay International 800-432-1342 www.mcquay.com
Page 62

This page intentionally left blank.
McQuay IM 980-1
Page 63

US
IM 846 - MT 170 Thermo stats
Installation and Maintenance Manual IM-846
T170 Thermostat
Group: Fan Coil
Part Number: 910102993
Date: July 2006
24 VAC/120–277 VAC
3-Speed Fan Control (Continuous or Cycling) or Staged Fan Control
© 2006 McQuay International 800-432-1342 www.mcquay.com
Page 64

Table of Contents
Table of Contents
Installation Instructions. . . . . . . . . . . . . . . . . . . . . . 3
Thermostat Model and Part Number. . . . . . . . . . . . . . . . . . . . . . . . 3
Optional Occupancy Detection Sensors/Kits. . . . . . . . . . . . . . . . . . 3
Mounting and Wiring the Thermostat . . . . . . . . . . . . . . . . . . . . . . . 3
Operation. . . . . . . . . . . . . . . . . . . . . . . . . . . . . . . . . . 5
Thermostat Button Operation . . . . . . . . . . . . . . . . . . . . . . . . . . . . . 5
System Button Operation . . . . . . . . . . . . . . . . . . . . . . . . . . . . 5
UP/Down Arrow Button Operation . . . . . . . . . . . . . . . . . . . . . 5
Fan Button Operation . . . . . . . . . . . . . . . . . . . . . . . . . . . . . . . 5
Speed Button Operation (TA170-001) . . . . . . . . . . . . . . . . . . 5
F/C Button Operation (TB170-001). . . . . . . . . . . . . . . . . . . . . 5
Verifying Thermostat Operation . . . . . . . . . . . . . . . . . . . . . . . . . . . 5
Thermostat Menu Functions . . . . . . . . . . . . . . . . . . . . . . . . . . . . . . 6
Menu Function Access . . . . . . . . . . . . . . . . . . . . . . . . . . . . . . 6
Menu Functions. . . . . . . . . . . . . . . . . . . . . . . . . . . . . . . . . . . . 6
Condensate Overflow Interrupt. . . . . . . . . . . . . . . . . . . . . . . . 6
Fan Operation . . . . . . . . . . . . . . . . . . . . . . . . . . . . . . . . . . . . . . . . . 7
Standard Fan Configuration (TA170-001) . . . . . . . . . . . . . . . . 7
Staged Fan Configuration (TB170-001). . . . . . . . . . . . . . . . . . 7
Controlled Off Factory Configuration. . . . . . . . . . . . . . . . . . . . 7
Fancoil Operation . . . . . . . . . . . . . . . . . . . . . . . . . . . . . . . . . . . . . . 8
2-Pipe Operation . . . . . . . . . . . . . . . . . . . . . . . . . . . . . . . . . . . 8
4-Pipe Operation . . . . . . . . . . . . . . . . . . . . . . . . . . . . . . . . . . . 8
Setback Operation. . . . . . . . . . . . . . . . . . . . . . . . . . . . . . . . . . . . . . 8
Optional Occupancy Detection
Equipment Operation . . . . . . . . . . . . . . . . . . . . . . . 9
SB200-001 Occupancy Sensor . . . . . . . . . . . . . . . . . . . . . . . . . . . . 9
Operation. . . . . . . . . . . . . . . . . . . . . . . . . . . . . . . . . . . . . . . . . 9
SD200-001 Occupancy Sensor . . . . . . . . . . . . . . . . . . . . . . . . . . . 10
Operation. . . . . . . . . . . . . . . . . . . . . . . . . . . . . . . . . . . . . . . . 10
SD200-002 Occupancy Sensor . . . . . . . . . . . . . . . . . . . . . . . . . . . 11
Operation. . . . . . . . . . . . . . . . . . . . . . . . . . . . . . . . . . . . . . . . 11
Page 64 McQuay IM 846
Page 65

Installation Instructions
WARNING
• BEFORE ATTEMPTING TO INSTALL, OPERATE, OR
SERVICE THIS THERMOSTAT, CAREFULLY READ
THESE INSTRUCTIONS.
• Failure to observe safety information and co mply with
instructions could result in PERSONAL INJURY, DEATH,
AND/OR PROPERTY DAMAGE.
• To avoid potential fire and/or explosion, do not use in
potentially flammable or explosive atmospheres.
• Retain these instructions for future reference. This product,
when installed, is part of an engineered system whose
specifications and performance characteristics are not
designed or controlled by McQuay. You must review your
application and national and local codes to assure that your
installation is functional and safe.
DANGER
Hazardous voltage. To avoid electrical shock or damage to
equipment, disconnect power before installing or servicing.
Failure to follow these instructions will result in death or serious
injury.
Installation Instructions
Mounting and Wiring the Thermostat
The thermostat base mounts to a field provided 4 × 4 outlet
box with a 2
assembly mounts to the thermostat base.
Figure 1: Mounting the thermostat
To avoid damaging the unit,
make all wiring connections
inside the box.
× 4 mud ring (Figure 1). The thermostat cover
4 × 4 outlet box
CAUTION
2 × 4 mud ring
Cover locking snaps
(both sides)
Base
Cover assembly
Thermostat Model and Part Number
McQuay offers two different thermostats depending on the fan
speed control used (Table 2).
Table 1: Thermostat model and part numbers
Thermostat Model # McQuay Part # Fan Speed Control
TA170-001 107345335
TB170-001 107345336
Note – For a list of thermostat features, refer to ED 3611.
3-Speed Fan Control
Staged Fan
Optional Occupancy Detection Sensors/Kits
In addition to the T170 thermostat, McQuay offers optional
occupancy detection sensors (see page 71) that can be ordered
and used in conjunction with the thermostat. When ordering,
use the associated kit number(s) provided in Table 2.
Table 2: Occupancy sensor model and kit numbers
Sensor Model # McQuay Kit #
SA200-001 667787721 1
SB200-001 667787731 1
SD200-001 667787741 1
SB200-002 667787751 1
1
Disconnect power before installing or servicing.
2 Run line voltage wiring (and low voltage wiring if
applicable) into the field provided outlet box and mud ring
(Figure 1).
3 Locate all connections within the mud ring/connection box
and wire nut all unused wires.
4 Remove the thermostat cover assembly from its base to
gain access to the circuit board (Figure 2).
Figure 2: Circuit board
McQuay IM 846 Page 65
Page 66
Installation Instructions
THERMOSTAT CONNECTIONS
LOW VOLTAGELINE VOLTAGE
White/Black
White/Yellow
White/Violet
White/Blue
White/Gray
White/Brown
White/Red
White/Orange
Yellow
Blue
Red
Black
Brown
Setback input/door switch
Remote probe
Circuit common
Pipe sensor
L2/Neutral
Occupacy detector
L1
Outputs
(see ratings)
Accessories
available
from
McQuay
Cool
(main output)
Heat
(secondary output)
Fan low
Fan medium
Fan high
Outside air
5
On the circuit board, set the voltage selection switch
(Figure 2) to the appropriate voltage for the application
• 24 V = 24 VAC
• 110–277 V = 120, 240, or 277 VAC.
Note:
The circuit board is shipped with the voltag e selection switch
in the 110-227 V position. For 24 VAC use, the switch must
be in the 24 V position.
CAUTION
Before applying power, the voltage selection switch must be in
the appropriate position. Failure to select the correct voltage
can cause thermostat malfunction or permanently damage the
thermostat.
6 The circuit board is also equipped with configuration
jumpers (JP1, JP3, and JP4 in Figure 2). Depending on the
application, it may be necessary to reconfigure the
following jumpers:
•JP4: 2/4 Pipe Sensor Jumper - This jumper selects
between 2-pipe (jumper ON) and 4-pipe (jumper OFF)
operation (see “Fan Operation” on page 69).
•JP3: Door/Window Switch Jumper - This jumper is
shipped normally open. Placement of a jumper allows
for occupancy detection and door/window switch only
operation (see “Optional Occupancy Detection
Equipment Operation” on page 71).
•JP1: Removal of this jumper allows the sensor to be
located in a remote location.
CAUTION
To use a remote sensor on units with local sensing capability,
remove jumper JP1 to disable local sensing. Failure to remove
JP1 can cause improper operation of the thermostat with a
remote probe installed.
7 Connect the color coded thermostat wires (Figure 3) to the
line voltage wires located in the mud ring/connection box
and secure the connections with wire nuts.
Page 66 McQuay IM 846
Figure 3: Wiring diagram
CAUTION
Use copper wire only. Insulate or wire nut all unused leads.
Avoid electrostatic discharge to the thermostat.
Failure to do so can cause thermostat malfunction or
permanently damage the thermostat.
8 Install the thermostat base to the mud ring/outlet box using
two furnished mounting screws. Tighten the screws evenly
but do not over tighten.
Note: An output ratings chart (Table 3) is located on the
inside of the base.
Table 3: Output ratings
Output ratings
Voltage
24 VAC NA NA NA 24 VA NA
120 VAC 5.8 34.8 6.0 125 VA 1/4
240 VAC 2.9 17.4 5.0 125 VA 1/4
277 VAC 2.4 14.4 4.2 125 VA 1/4
Inductive
FLA LRA
Resistive
amps
Pilot duty HP
DANGER
Hazardous voltage. Combined load current is not to exceed 20
amps. Mount only to a grounded metallic box.
Low voltage wiring is Class 2. To avoid electrical shock or
damage to equipment, disconnect power before installing or
servicing. Failure to follow these instructions will result in death
or serious injury.
9
With the base now secured, verify that the circuit board is
firmly snapped into the cover and is not dislodged.
10 Install the cover assembly to the base, pressing firmly to
engage the cover locking snaps.
Page 67

Operation
OFF
HEAT
COOL
AUTO
FAN
BUTTON
SYSTEM
BUTTON
SPEED
BUTTON
or
F/C
BUTTON
(part #107345336)
UP/DOWN
ARROW
BUTTONS
MODES:
Operation
Thermostat Button Operation
The thermostat interface (Figure 4) contains buttons for use in
navigating to accompanying menus/screens and for performing
specific operations. These buttons and operations are described
below.
Figure 4: Thermostat interface (model #TA170-001 shown)
System Button Operation
The System button (Figure 4) contains and displays the
following modes of operation:
OFF—All thermostat outputs are off. The fan is still
operational if FAN ON is selected.
AUTO—The thermostat automatically selects heating or
cooling mode depending on the set point and room
temperature. If demand exists, the appropriate HEAT or COOL
icon illuminates. A 3°F dead band is provided to prevent short
cycling between heating and cooling modes. After changeover,
the control point automatically shifts so that the control OFF
point equals the set point temperature.
COOL—The thermostat operates as a cooling only
thermostat.
UP/Down Arrow Button Operation
Use the Up and Down arrow buttons (Figure 4) to increase or
decrease the temperature.
Fan Button Operation
Use the Fan button (Figure 4) to control operation of the fan.
In the ON position, the fan output operates continuously. In the
AUTO position, the output cycles with demand. In the OFF
position, all outputs are off.
Note – Model #TB170-001 (part #107345336) has staged fan
control.
Speed Button Operation (TA170-001)
The fan Speed button (Figure 4) for model #TA170-001 (part
#107345335) is determined by manually selecting HI, MED,
or LO. Press and hold the Speed button for five seconds to
toggle the displayed temperature from Fahrenheit to Celsius.
F/C Button Operation (TB170-001)
Model #TB170-001 (part #107345336) is configured for
staged fan control and therefore utilizes a F/C button
(Figure 4) instead of a Speed button. When pressed, the F/C
button toggles between Fahrenheit and Celsius.
Verifying Thermostat Operation
T o verify thermostat operation after mounting and wiring it,
perform the following:
1 Energize the system.
2 Set the fan to ON.
3 Select each fan speed, if available, to verify operation.
4 Set the system button to AUTO or other available selection.
5 Using the UP arrow, adjust the temperature to more than
5°F above ambient temperature to cycle on heating.
6 Using the DOWN arrow, adjust the temperature to more
than 5°F below ambient temperature to cycle on cooling.
HEAT—The thermostat operates as a heating only thermostat.
McQuay IM 846 Page 67
Page 68

Operation
Normally
closed
condensate
switch
Remote probe
White/Yellow
Circuit common
White/Violet
Normally
open
condensate
switch
Remote probe
White/Yellow
Circuit common
White/Violet
Thermostat Menu Functions
The thermostat menu contains nine functions which can be
accessed using controls on the thermostat. Accessing the menu
functions and details of each function are described below.
Menu Function Access
1 Press and hold the UP and DOWN arrow buttons (Figure 5)
for five seconds.
2 The current display clears and the number “1” appears.
3 Press the SYSTEM button to scroll to the next item
number.
4 Use the UP and DOWN buttons to make changes within the
selected number.
Figure 5: Thermostat menu
Press and
hold both for
5 seconds.
and
Temperature
adjustment
Menu Functions
1 F/C (Fahrenheit/Celsius) display selection
When this function is selected, the F and C icons appear
and the selected icon flashes. To toggle between F or C,
press the up or down arrow button.
2 Continuous set point display
When this function is selected, the F or C icon, current
digits, and the set point icon appear. If the Continuous set
point display is enabled, the set point icon flashes. To
toggle between continuous display of set point and display
of zone temperature, press the up or down arrow button.
3 FAN off delay
When this function is selected, the FAN, OFF, and digits
appear. The digits represent the number of seconds the fan
stays on after the heating and cooling outputs are turned
off. To increase or decrease the value from 0–255 seconds,
press the up or down arrow button.
4 Range limit low
When this function is selected, the current minimum range
setting, the SET POINT icon. and the LO icon appear. To
increase or decrease the value, press the up or down arrow
button.
Press to step
through selections
(see list).
System
1 F/C display selecton
2 Continuous set point display
3 Fan off delay
4 Range limit low
5 Range limit high
6 Setback heat
7 Setback cool
8 Zone temperature offset
9 Keypad lockout
5 Range limit high
When this function is selected, the current maximum
temperature range adjustment, SET POINT icon, and LO
icon appear. To increase or decrease the value, press the up
or down arrow button.
6 Set back heat
When this function is selected, the current temperature
range adjustment, the SET BACK icon, and the HEA T icon
appear. To increase or decrease the value, press the up or
down arrow button.
7 Set back cool
When this function is selected, the current Cool setback
value, the SET BACK icon, and the COOL icon appear. To
increase or decrease the value, press the up or down arrow
button.
8 Zone temperature offset
When this function is selected, the numeric ones and tenths
(0.0) appear with a leading minus sign. To increase or
decrease the value +/– 9°F, press the up or down arrow
button. Increments are made in 1°F and 0.5°C.
9 Keypad lockout
When this function is selected, the ON and OFF icons
appear. The enabled icon flashes. OFF is the default. ON
disables the keypad except for entry into the service menu.
To increase or decrease the value, press the up or down
arrow button.
Note – In the event of a power failure, these values are stored
and can be recalled.
Condensate Overflow Interrupt
The remote probe input can be used with a condensate
overflow switch (CO), either in conjunction with a remote
probe (normally closed CO switch, Figure 6), or with local
sensing (normally open CO switch, Figure 7). When the
condensate switch activates, the thermostat displays a service
wrench icon and disables all outputs.
Figure 6: Remote probe installation
Figure 7: Local sensor installation
Page 68 McQuay IM 846
Page 69

Fan Operation
SPEED: Fan speed is
selected by the user.
Fan ON: fan is on continuously.
Temperature demand—heat
S
e
t
p
o
i
n
t
Fan AUTO: fan cycles on with demand.
Temperature demand—cool
Fan ON: fan is on continuously.
Fan AUTO: fan cycles on with demand.
–4°F –3°F –2°F –1°F 4°F3°F2°F1°F
Fan high
Fan medium
Fan low
Fan ON: fan stays at lowest speed.
Temperature demand—heat
Fan ON: fan stays at lowest speed.
Temperature demand—cool
System
ON
Set
point
Control
OFF
System
ON
Fan low
Fan high
Fan medium
–5°F –4°F –3°F
–2°F
–1°F 5°F4°F3°F2°F1°F
The thermostat may be factory configured for standard or
staged fan operation.
Standard Fan Configuration (TA170-001)
Units with standard fan operation (Figure 8) have a selectable
fan Speed button.
Figure 8: Standard fan operation
Operation
Staged Fan Configuration (TB170-001)
Factory configuration is available for staged fan operation
(Figure 9) to provide occupant comfort while using the most
effective fan speed.
Figure 9: Staged fan operation
Controlled Off Factory Configuration
A factory configuration may be provided for minimum heating
and cooling requirements. Using this configuration, the HEAT
and COOL outputs are automatically cycled on at the heat
setback limit. Your thermostat may not have this feature.
McQuay IM 846 Page 69
Page 70

Operation
Fancoil Operation
Fancoil operation is either a 2-pipe or 4-pipe configuration
which is determined by jumper selection JP4 (see “Mounting
and Wiring the Thermostat” on page 65).
2-Pipe Operation
In this configuration, the thermostat permanently disables the
secondary output and disables the fan from cycling in an
invalid mode. The main output configuration is dependent on
the pipe sensor input. With a pipe sensor connected, the
thermostat automatically selects heating or cooling depending
on the sensed water temperature. If the pipe sensor input is
open (unconnected), the main output only cools. If the pipe
sensor input is shorted, the main output only heats. Normal
thermostat default is for 4-pipe operation. For 2-pipe
operation, install a jumper on JP4.
4-Pipe Operation
In this configuration, both the main output (COOL) and the
secondary output (HEAT) are available. These both cycle ON
depending on the mode of the thermostat. With a pipe sensor
connected, the thermostat automatically changes the main
output to heat and disables the secondary output if the main
coil water is hot. For 4-pipe operation, the JP4 jumper is
removed.
Pipe Sensor Operation
A pipe sensor can be connected when the thermostat is
configured for either 2-pipe or 4-pipe configuration. The pipe
sensor is used to determine the water temperature in the main
coil, which should be connected to the primary output.
Pipe sensor input—use a 10K Rem ote Probe or a standard ONOff Aquastat for summer/winter changeover.
Purge Cycle
With a pipe sensor connected, the thermostat initiates a purge
cycle if the sensed water temperature is ambiguous (not
adequately hot or cold). The sequence for purge cycle
operation is as follows:
1 The thermostat has a call for heat or cooling.
Note: If at any time the call goes away, the thermostat
stops the purge cycle.
2 The thermostat checks the pipe sensor to verify water
temperature.
3 If the water temperature is beyond 15°F of the set point,
normal HVAC control occurs.
4 If the water temperature is not beyond 15°F of the set point,
the thermostat checks to see if the water temperature is
above 80°F or below 60°F.
If yes, normal HVAC control occurs.
If no, the thermostat opens the main output (COOL) for
three minutes.
5 After the three minute purge cycle occurs, the thermostat
checks to see if the water temperature is more than 15°F
from the set point, or above 80°F, or below 60°F.
If yes, normal HVAC operation occurs.
If no, the valve is left open and the thermostat continues to
search for a valid reading.
Note – If at any time the demand goes away, the thermostat will
stop the purge cycle.
T able 4 shows output operation, depending on the sensed
water temperature.
Table 4: Output operation
2-Pipe/4-Pipe
selection
2-pipe
JP4 ON
4-pipe
JP4 OFF
Water
temperature
Cold
Hot
Cold Cooling Heating
Hot
The fan does not cycle on
The fan does not cycle on
The fan does not cycle on
Output operation
Main output
Cooling only
with a heat demand.
Heating only
with a cool demand.
Heating only
with a cool demand.
Secondary
output
Disabled
Disabled
Disabled
Setback Operation
In this configuration, the low level switch input normally is
open. To enable setback operation, the JP3 jumper is removed
(see “Mounting and Wiring the Thermostat” on page 65). The
input will close and the thermostat heating and cooling setback
limits can then be used as temperature control points. Fan
operation in setback is cycled with demand. Press any
thermostat key to override setback for one hour. Setback
overrides any user setting except if the control is turned to
OFF.
Page 70 McQuay IM 846
Page 71

Optional Occupancy Detection Equipment Operation
Optional Occupancy Detection Equipment Operation
The T170 thermostat can be used with optional S200 series
occupancy detection equipment. Purchasing and installing this
equipment to compliment the thermostat adds energy savings
by setting back HVAC operation during occupied and
unoccupied times. Optional detection equipment
configurations and operation are described below.
SB200-001 Occupancy Sensor
The SB200-001 occupancy sensor (Figure 10) serves as an
occupancy sensor for automatic control of a guest room HV AC
system. It incorporates an innovative dual delay processor
which allows the sensor to verify the nature of occupancies,
and is capable of eliminating unnecessary actuations of the
HVAC device due to unintentional passages or short time
occupancies. The sensor may also serve as a slave sensor
(Figure 11 on page 73).
The sensor switch is open in occupied mode and closed in
unoccupied mode. An optional door and/or window switch
(Figure 10) is open when the door/window is open and is
closed when the door/window is closed.
Note – To use this configuration, a jumper must be installed to
JP3 to allow occupancy input.
Note – An optional door and/or window switch (Figure 10) can be
added for use with the SB200-001 sensor.
Operation
In an occupied mode, the thermostat operates normally and
looks for a door open signal. When the door opens, the
thermostat waits for a door close signal. If the door is open for
more than two minutes, the thermostat turns the HVAC system
outputs to OFF. During this two minute period, if any button is
pressed on the keypad, the time delay is extended to ten
minutes. The time delay can only be extended once. Once the
HVAC outputs transition to OFF, a door closure is required to
re-enable the outputs. When the door closes, the thermostat
starts a two minute timer and tries to detect occupancy. If the
timer expires and no occupancy is detected, the thermostat
transitions to an unoccupied state. If occupancy is detected
while the timer is running, the thermostat will remain in the
occupied mode.
In an unoccupied mode, the thermostat sets heating and
cooling set points to setback values as determined by factory
or user settings. The fan is automatically set to cycle with
demand. The thermostat continually monitors the occupancy
sensor and will enter into occupied mode if occupancy is
detected.
If the installation is only using a door/window switch, the
thermostat will disable the HVAC outputs if this output is open
for longer than two minutes.
T o enable door/window switch only operation, install a jumper
to JP3 (see “Mounting and Wiring the Thermostat” on page
65) and the occupancy input must be shorted to circuit
common.
McQuay IM 846 Page 71
Page 72

Optional Occupancy Detection Equipment Operation
Figure 10: Optional equipment configuration #1
Page 72 McQuay IM 846
Page 73

Optional Occupancy Detection Equipment Operation
SD200-001 Occupancy Sensor
The SD200-001 occupancy sensor (Figure 11) serves as a
master sensor for a guest room HVAC management system.
The sensor provides HVAC operation according to occupancy
status, as well as door/window switch monitoring, selectable
high/low temperature setback, form-C output, slave sensor
connectivity, and a five minute door open HVA C shut-o ff.
Note – To use this configuration, the jumper to JP3 is removed to
allow setback input.
Note – An optional door and/or window switch (Figure 11) and
slave sensor can be added for use with the SD200-001
sensor.
Figure 11: Optional equipment configuration #2
Operation
In an occupied mode, the SD200-001 occupancy sensor
(Figure 11) and door switch use advanced microprocessor
logic to determine occupancy. A door open signal will initiate
occupancy status detection. If the sensor determines that a
room is occupied, it will allow normal HVAC control. The
sensor will wait for another door open signal before
determining occupancy again.
In an unoccupied mode, the sensor continually monitors the
room. Any occupancy detection will set the op eration to
occupied mode.
McQuay IM 846 Page 73
Page 74

Optional Occupancy Detection Equipment Operation
SD200-002 Occupancy Sensor
The SD200-002 occupancy sensor serves as a stand alone
master sensor for a guest room HVAC management system.
The sensor provides HVAC operation according to occupancy
status, as well as selectable high/low temperature setback,
form-C output, and a five minute door open HVAC shut-off.
This system provides basic room setback and is ideal for
control of HVAC in commercial spaces.
Note – To use this configuration, the jumper to JP3 is removed to
allow setback input.
Figure 12: Optional equipment configuration #3
Operation
With each occupancy detection, an OFF delay is started and
can be set to delay for up to 30 minutes.
Page 74 McQuay IM 846
Page 75

This page intentionally left blank.
McQuay IM 980-1
Page 76

McQuay Training and Development
Now that you have made an investment in modern, efficient McQuay equipment, it s care should be a high priority.
For training information on all McQuay HVAC products, please visit us at www.mcquay.com and click on train ing, or
call 540-248-9646 and ask for the Training Department.
Warranty
All McQuay equipment is sold pursuant to its standard terms and conditions of sale, including Limited Product
Warranty. Consult your local McQuay Representative for warranty details. Refer to Form 933-43285Y. To find your
local McQuay Representative, go to www.mcquay.com.
This document contains the most current product information as of this printing. For the most up-to-date product
information, please go to www.mcquay.com.
© 2006 McQuay International • www.mcquay.com • 800-432-1342
Page 77
IM 831 - Thermostat Conversion Kit
Installation and Maintenance Manual IM 831
Thermostat Conversion Kit
Safety Information
WARNING
The installation of this equipment shall be in accordance with
the regulations of authorities having jurisdiction and all
applicable codes. It is the responsibility of the installer to
determine and follow the applicable codes. This equipment is to
be installed only by an experienced installation company which
employs trained personnel.
WARNING
Rigorously adhere to field wiring procedures regarding proper
lockout and tagout of components.
WARNING
To avoid electrical shock, personal injury or death:
1. Installer must be qualified, experienced technician.
2. Disconnect power supply before installation to prevent
electrical shock and damage to equipment.
CAUTION
If the FAN Switch remains in the left-most (Off) position the thermostat
will NOT function properly.
Group: Applied Air Systems
Part Number: 667757200
Date: May 2006
Procedure
1 Carry out this procedure before mounting the thermostat
or applying power to it. If the thermostat is already
mounted, turn off all power to it before proceeding.
2 Slide the F AN switch on the front of the thermostat to the
setting at which you want the motor to run all the time.
Note: Once you exchange thermostat covers, the user can no
longer change this setting.
3
Remove the cover from the thermostat by gently prying
behind the left hand edge of the cover with a small
screwdriver, then pulling it off as shown in Figure 1 and
Figure 2.
4 Adjust the dip switch and jumpers to your desired
configuration (see thermostat installation manual).
5 Pull off the fan slide switch cap (Figure 3).
Note: Be careful not to change the position of the switch you
set in Step 2.
6 Place the new thermostat cover that does not have the 3-
speed switch opening on the thermostat (Figure 4).
Figure 1: Pry behind left hand edge of cover to remove
Introduction
This thermostat conversion kit number 107345245 converts a
fan coil unit thermostat to a thermostat without a 3-speed
switch. The thermostat kit includes a cover that does NOT
have an opening for the 3-speed control switch. The following
is the proper procedure to convert the thermostat.
Figure 2: Pull left end of cover away until tabs at right end
are cleared
Page 77 © 2011 McQuay International 800-432-1342 www.mcquay.com
Page 78

Figure 3: Remove plastic fan slide switch cap Figure 4: Thermostat cover without 3-speed switch
opening
© 2011 McQuay International 800-432-1342 www.mcquay.com IM 831/Page 78
Page 79

IM 763 - Automatic Changeover Switch
Installation and Maintenance Manual IM 763
Automatic Changeover Switch for
Automatic Seasonal Changeover on
Two-pipe Systems
Safety Information
WARNING
Installation and maintenance are to be performed only by
qualified personnel who are familiar with and in compliance with
state, local and national codes and regulations, and
experienced with this type of equipment.
CAUTION
Sharp edges and coil surfaces are a potential injury hazards.
Avoid contact with them.
Introduction
These line voltage changeover switches are designed to switch
a thermostat from heating to cooling based on a change in
supply water temperature. The switches can be mounted on
5/8" or 7/8" O.D. copper tube or iron pipe.
Figure 1: Automatic Changeover Switch
(Kit P/N 039398600)
Group: Applied Air Systems
Part Number: 10333101
Date: August 2002
Both models are easily mounted to the supply piping with a
simple spring clip included with the thermostat.
Procedure
Models
The 039398600 model (fig. 1) has 110 in. leads and is the
standard changeover switch. The 06361801 model (fig. 2) has
the same operating characteristics and includes 18 in. conduit
and connector.
Both models are snap acting, SPDT switches.
Terminal No. 1 has a black wire and is the common (C)
connected to valve (valve cycle) or to the yellow wire of the
speed switch (fan cycle).
Terminal No. 2 has a red wire and is normally open (N.O.).
Connected to the heating (red) wire of the thermostat.
Terminal No. 3 has a blue wire and is normally closed (N.C.).
Connected to the cooling (blue) wire of the thermostat.
At approximately 65°F, plus or minus 6°F, terminals 1 and 3
are closed and terminals 1 and 2 are open. At 95°F, plus or
minus 6°F, terminals 1 and 2 are closed and terminals 1 and 3
are open.
Page 79 © 2011 McQuay International 800-432-1342 www.mcquay.com
Page 80

Specifications
Table 1: Electrical Rating
Model Voltage FLA LRA Restive
039398600
061361801
Changeover Range 65ºF to 95ºF (18ºC to 35ºC)
Maximum Operating
Temperature Limits
Agency Approval UL Listed, CSA Approved
The specifications above are nominal and conform to generally acceptable
industry standards. McQuay International is not responsible for damages
resulting from misapplication or misuse of its products.
24—240 15—5 90—30 25
220ºF Fluid Temperature @ 125ºF Ambient
(104ºC Fluid Temperature @ 52ºC Ambient)
Figure 2: Automatic Changeover S witch
(Kit P/N 061361801)
© 2011 McQuay International 800-432-1342 www.mcquay.com IM 763/Page 80
Page 81

This page intentionally left blank.
McQuay IM 980-1
Page 82

McQuay Training and Development
Now that you have made an investment in modern, efficien t McQuay equipment, its care should be a high priority.
For training information on all McQuay HVAC products, please visit us at www.mcquay.com and click on training,
or call 540-248-9646 and ask for the Training Department.
Warranty
All McQuay equipment is sold pursuant to its standard terms and conditions of sale, including Limited Product
Warranty. Consult your local McQuay Representative for warranty details. Refer to Form 933-43285Y. To find your
local McQuay Representative, go to www.mcquay.com.
This document contains the most current product info rm a tio n as of this pr int ing . Fo r th e mo st up - to- d ate pro d uc t
information, please go to www.mcquay.com.
© 2011 McQuay International • www.mcquay.com • 800-432-1342 05/11
 Loading...