

Page 1
IRIS
TABLE OF CONTENTS
IRIS OVERVIEW 2
SETTINGS 9
RADIO 22
MEDIA 29
PHONE 41
CONTACTS 53
NAVIGATION 60
IRIS.book Page 1 Thursday, October 18, 2012 8:21 AM
Page 2
2
IRIS OVERVIEW
INTRODUCTION
IRIS OVERVIEWINTRODUCTION
Purpose
This document provides all the
information needed to gain the
maximum benefit from the
entertainment system that is
accessed using the IRIS controls
and screen.
The information is divided into
chapters and sections. Each
chapter deals with a system, i.e.
Media and each section provides
information on a specific device
or feature that the user, will need
to operate.
Each chapter is listed on the
contents page, for easy access.
Please read carefully and
familiarize yourself with all the
systems before driving.
WARNING: For your
safety, ensure that you do
not become distracted from
the task of driving, through
use of any of these systems.
FCC Declaration
This device complies with Part
15 of the FCC Rules. Operation
is subject to the following two
conditions:
1. This device may not cause
harmful interference.
2. This device must accept any
interference received,
including interference that
may cause undesired
operation.
No changes shall be made to the
equipment without the
manufacturer’s permission as
this may void the user’s authority
to operate the equipment.
This device complies with Part
2.1091 of the FCC Rules for an
uncontrolled environment. This
equipment should be installed
and operated with a minimum
distance of 20cm between the
radiator and your body.
IRIS.book Page 2 Thursday, October 18, 2012 8:21 AM
Page 3
3
IRIS OVERVIEW
INTRODUCTION
Industry Canada Declaration
This device complies with
Industry Canada licence-exempt
RSS standard(s). Operation is
subject to the following two
conditions:
1. This device may not cause
interference.
2. This device must accept any
interference, including
interference that may cause
undesired operation of the
device.
Le présent appareil est conforme
aux CNR d'Industrie Canada
applicables aux appareils radio
exempts de licence.
L'exploitation est autorisée aux
deux conditions suivantes:
1. l'appareil ne doit pas
produire de brouillage.
2. l'utilisateur de l'appareil doit
accepter tout brouillage
radioélectrique subi, même si
le brouillage est susceptible
d'en compromettre le
fonctionnement.
Copyright
McLaren Automotive is
constantly updating the systems
covered within this document,
and therefore reserves the right
to change the specification
without notice at any time.
Every attempt is made to ensure
that this information is totally
accurate, however no liabilities
for inaccuracies or the resulting
consequences are accepted by
McLaren Automotive or its
Dealers, except in the case of
personal injury caused by the
negligence of these parties.
Other Information
The Bluetooth® word mark and
logos are owned by the
Bluetooth® SIG Inc., and any
use of such marks by McLaren
Automotive Ltd. is under licence.
Other trademarks and trade
names are those of their
respective owners.
IRIS.book Page 3 Thursday, October 18, 2012 8:21 AM
Page 4
4
IRIS OVERVIEW
SYSTEM CONTROLS AND ICONS
SYSTEM CONTROLS AND ICONS
Systems
The systems and features
available on IRIS are shown
below. Further information can
be found in the individual
chapters:
x PHONE, page 41
x MEDIA, page 29.
x NAVIGATION, page 60.
x CONTACTS, page 53
x RADIO, page 22;
x SETTINGS, page 9;
Operation of the systems and
their features is achieved by
using a combination of the
controls located beneath the
screen and by touching the icons
on the screen.
Screen brightness
Brightness of the screen is
manually controlled through the
left-hand display of the
instrument cluster, and is
automatically reduced for night
driving.
Date and time
IRIS takes its date and time
information from the vehicle.
Settings are made through the
left hand display on the
instrument cluster.
Switching between systems
You can switch between
systems, i.e. from Phone to
Media, using the MCC. For more
information, see MCC control,
page 7.
IRIS.book Page 4 Thursday, October 18, 2012 8:21 AM
Page 5
5
IRIS OVERVIEW
SYSTEM CONTROLS AND ICONS
Touch screen controls
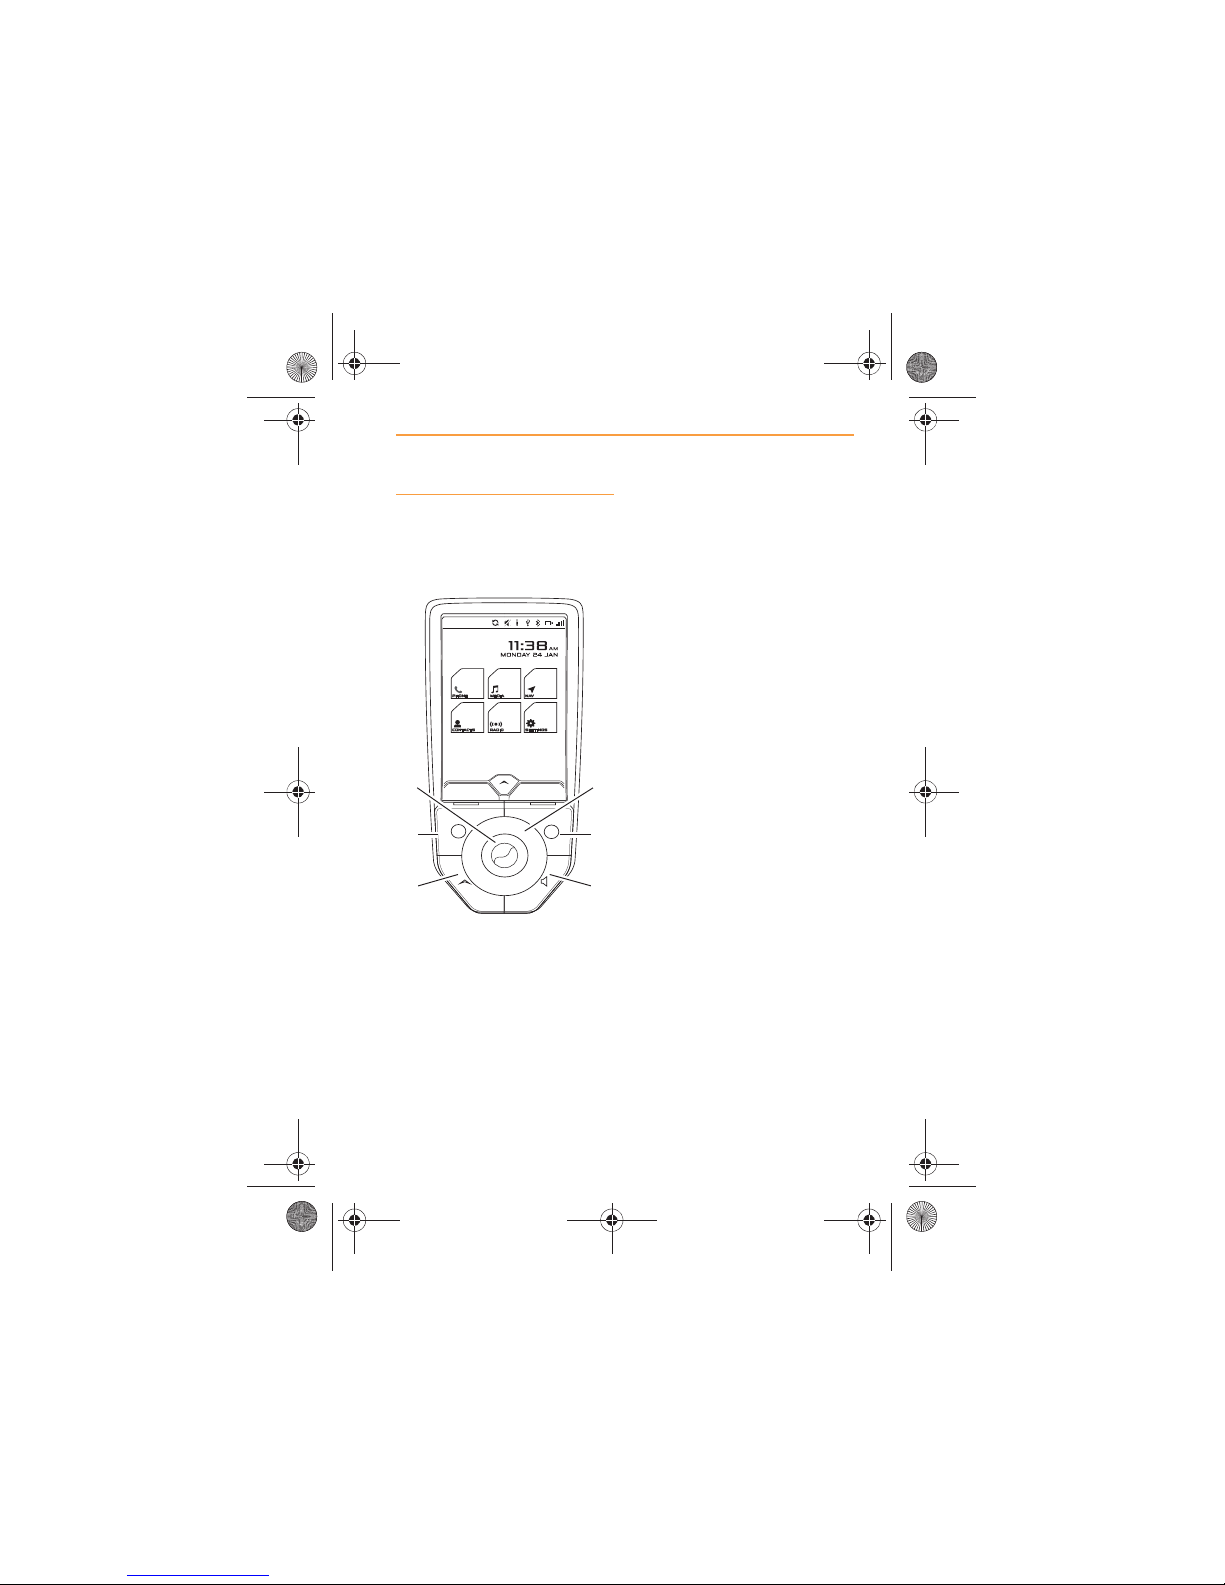
IRIS will start up and display the
Home screen when the ignition
is switched on.
1. On/Off and Home
2. Volume
3. Left- hand screen icon
function
4. Right-hand screen icon
function
5. Micro Control Center
(MCC)
6. Mute
On/Off and Home control
To switch IRIS off, press and
hold the control (1) for more than
a second.
When IRIS is active, a brief
press of the control will return
you to the Home screen from
anywhere in the system.
Press and hold the control for
more than two seconds to restart
IRIS.
3
5
4
6
12
IRIS.book Page 5 Thursday, October 18, 2012 8:21 AM
Page 6
6
IRIS OVERVIEW
SYSTEM CONTROLS AND ICONS
Volume control
Rotate the control (2) clockwise
to increase volume or counter
clockwise to reduce the volume.
A number representing the
volume setting will appear briefly
on the screen
The volume control is used to set
the volume of the system that is
currently active. The description
of the active system will appear
on the screen. For additional
information on setting a volume
level, see Volume Level, page
14.
Rotate the volume control in
either direction to restore the
sound after muting.
NOTE: You can adjust any
volume source by rotating
the volume control dial. For
temporary sources of audio
(phone calls), this can be
adjusted using the dial when the
source is active, or via the
Settings, see Volume Level,
page 14.
Left-hand screen icon control
This control adopts the same
functionality as the icon at the
bottom left-hand side of the
screen. The function will change
according to the system selected
and the active feature. Press the
control (3) to make your
selection.
Right-hand screen icon
control
This control adopts the same
functionality as the icon at the
bottom right-hand side of the
screen. The function will change
according to the system selected
and the active feature. Press the
control (4) to make your
selection.
72
MEDIA
VOLUME LEVEL
IRIS.book Page 6 Thursday, October 18, 2012 8:21 AM
Page 7
7
IRIS OVERVIEW
SYSTEM CONTROLS AND ICONS
MCC control
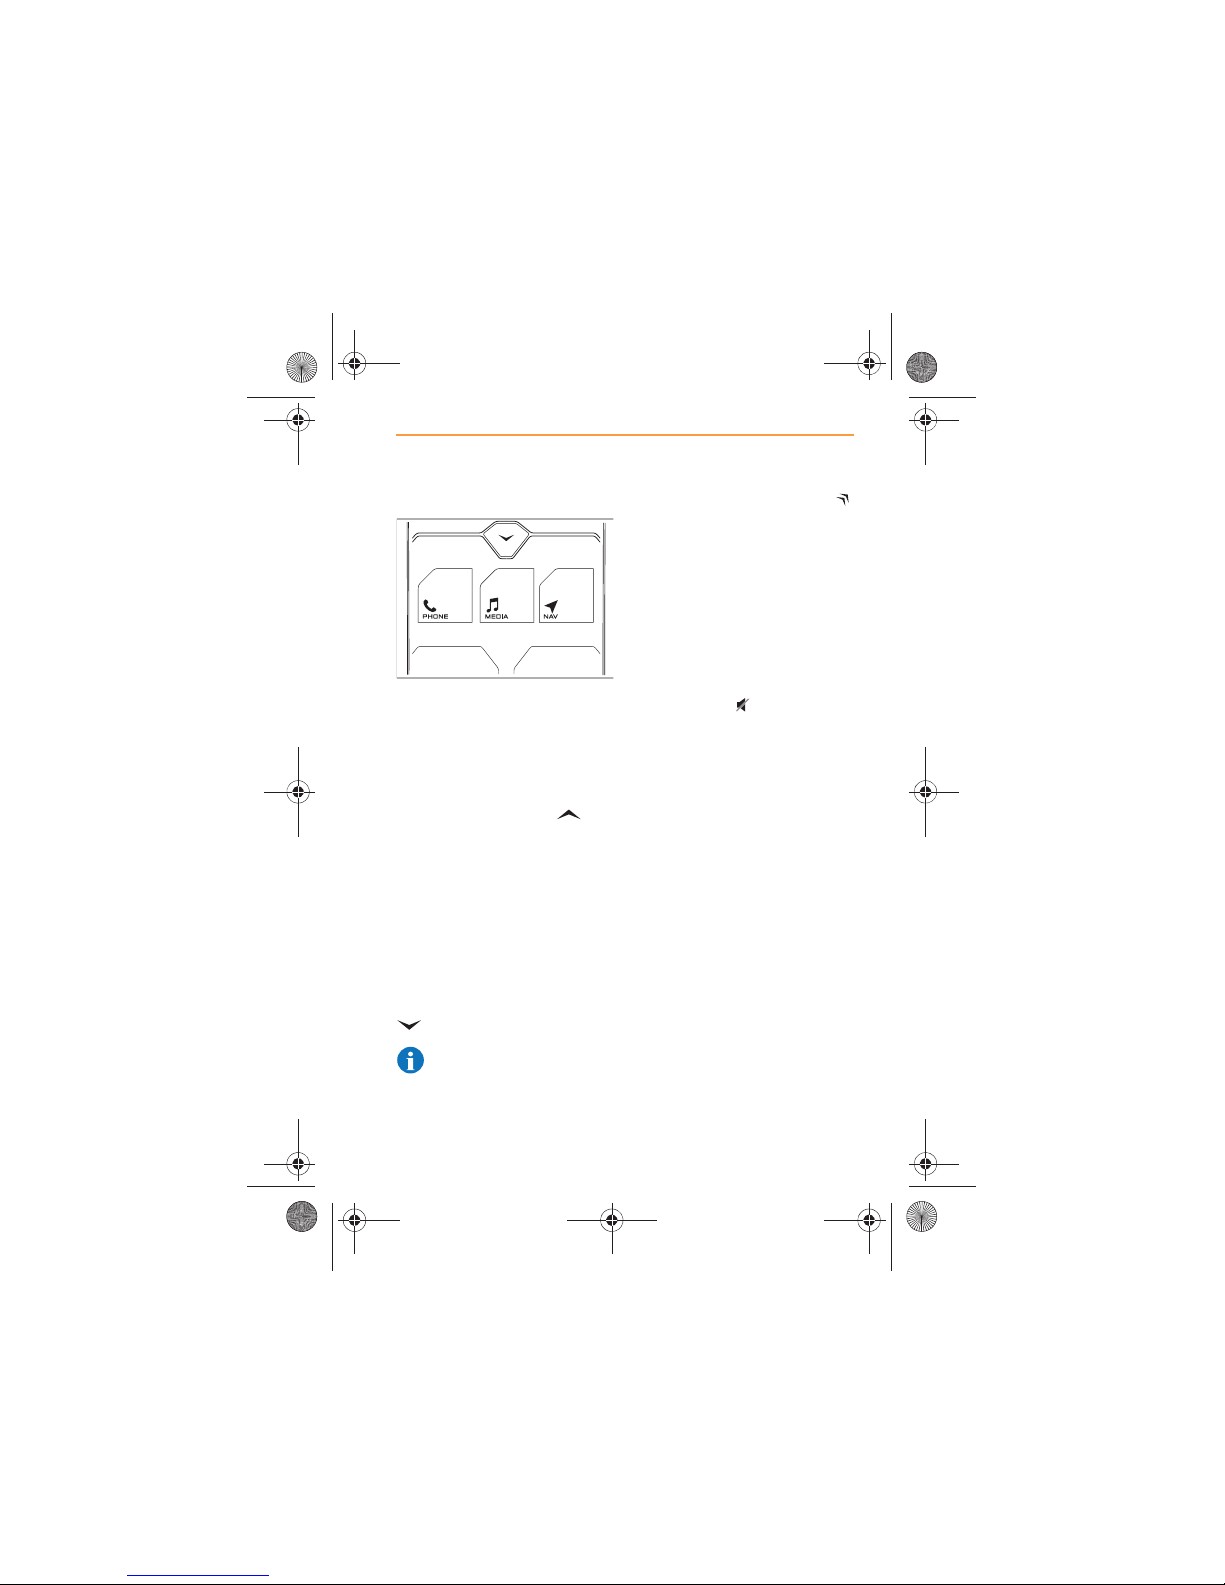
The MCC fulfils a number of
functions. The window will open
automatically to advise you of
changes of status within a
system.
To open the MCC window, press
control (5), or touch the
icon.
Any information relevant to the
system being operated, or icons
of other available systems will be
displayed.
Touch an icon to quickly switch
to a different system.
To close the window, press
control (5) again, or touch the
icon.
NOTE: The arrow will point
upwards when the MCC
window is closed, and point
downwards when it is open.
If relevant, the full screen icon
will appear in the top right-hand
corner of the MCC window, when
open. Touch the icon to display
the full screen relating to the
system or feature displayed in
the MCC window.
Mute control
Press control (6) to mute the
sound from all devices. The
MUTE symbol will appear at
the top of the screen.
Press again to restore the
sound. Sound can also be
restored by rotating the volume
control in either direction.
BROWSESOURCE
IRIS.book Page 7 Thursday, October 18, 2012 8:21 AM
Page 8
8
IRIS OVERVIEW
SYSTEM CONTROLS AND ICONS
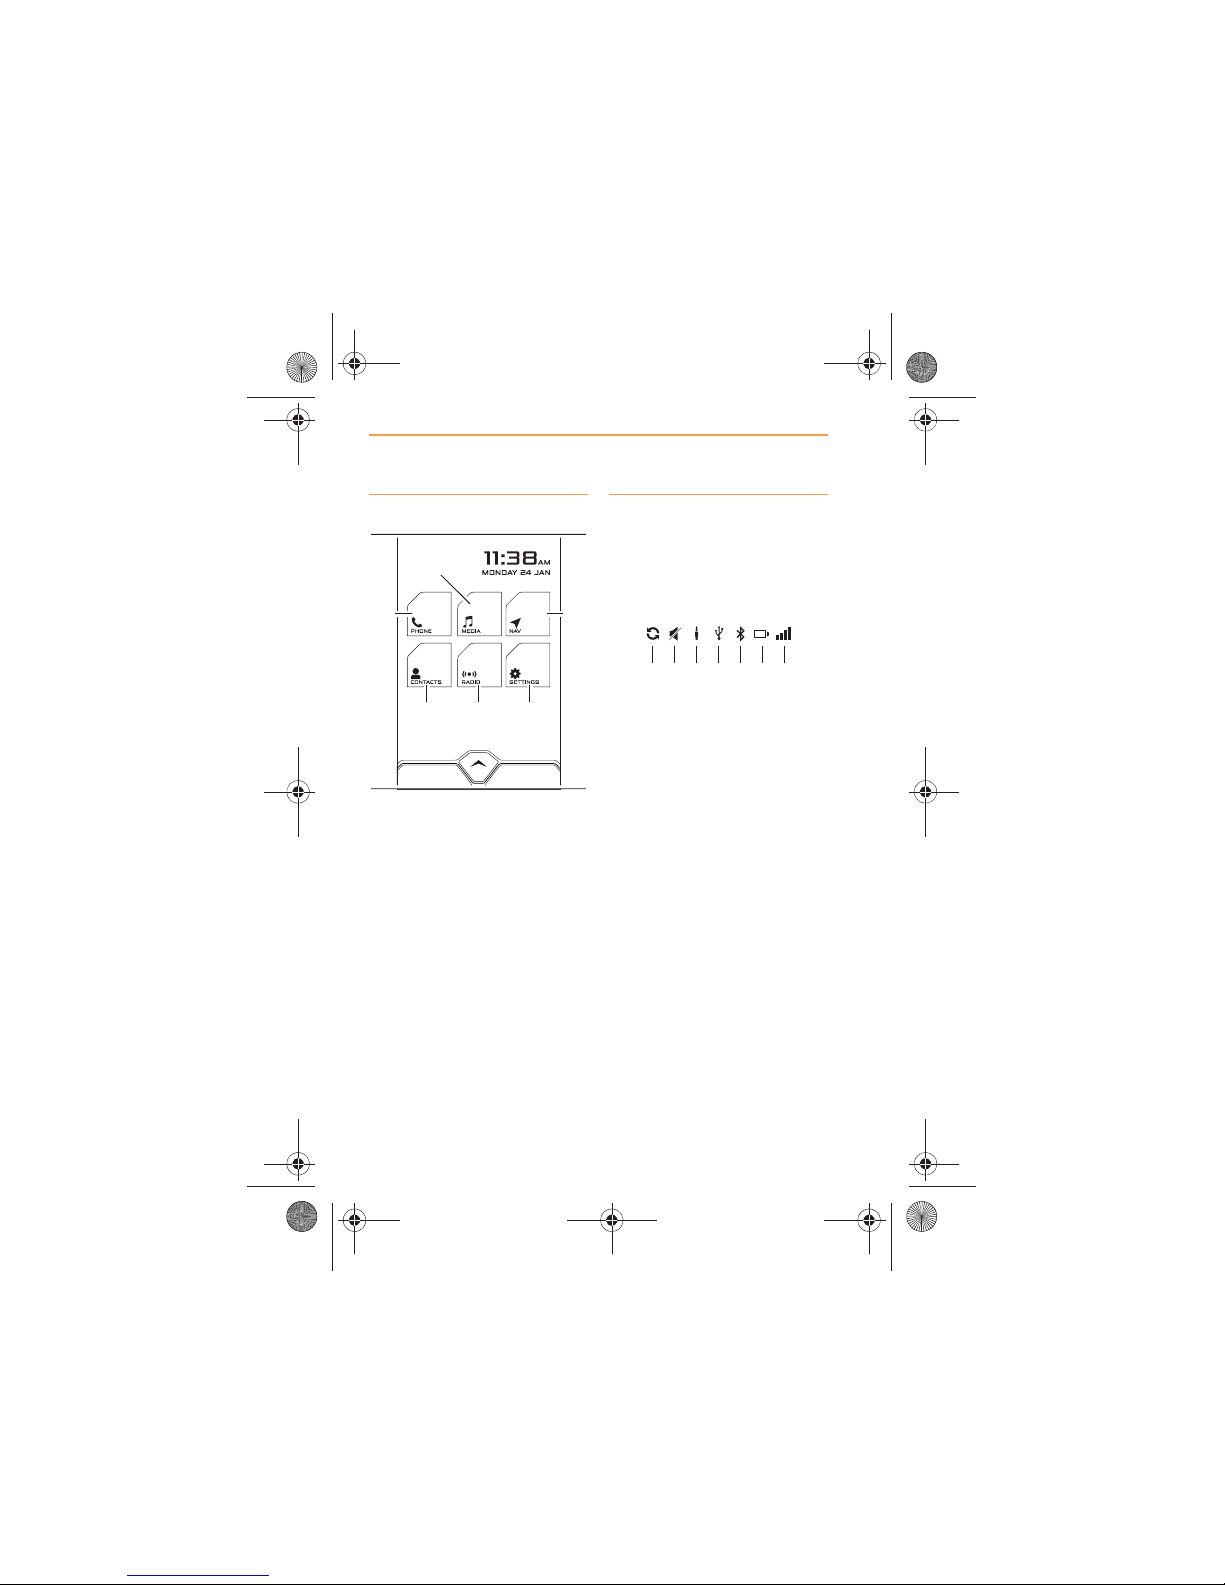
Home screen icons
1. Phone.
2. Media.
3. Navigation.
4. Contacts.
5. Radio.
6. Settings.
Touch the icon representing the
system that you wish to access.
Information bar
A number of symbols will appear
at the top of the screen, when
certain systems are in operation
or features are active.
1. Media/Phone system
synchronizing.
2. Mute active
3. Media device connected to
auxiliary socket.
4. Media device connected to
USB port.
5. Phone connected using
Bluetooth®.
6. Phone battery charge
status.
7. Phone signal strength
indicator.
1
4 5 6
3
2
2 431 6 75
IRIS.book Page 8 Thursday, October 18, 2012 8:21 AM
Page 9
9
SETTINGS
INTRODUCTION
SETTINGS
INTRODUCTION
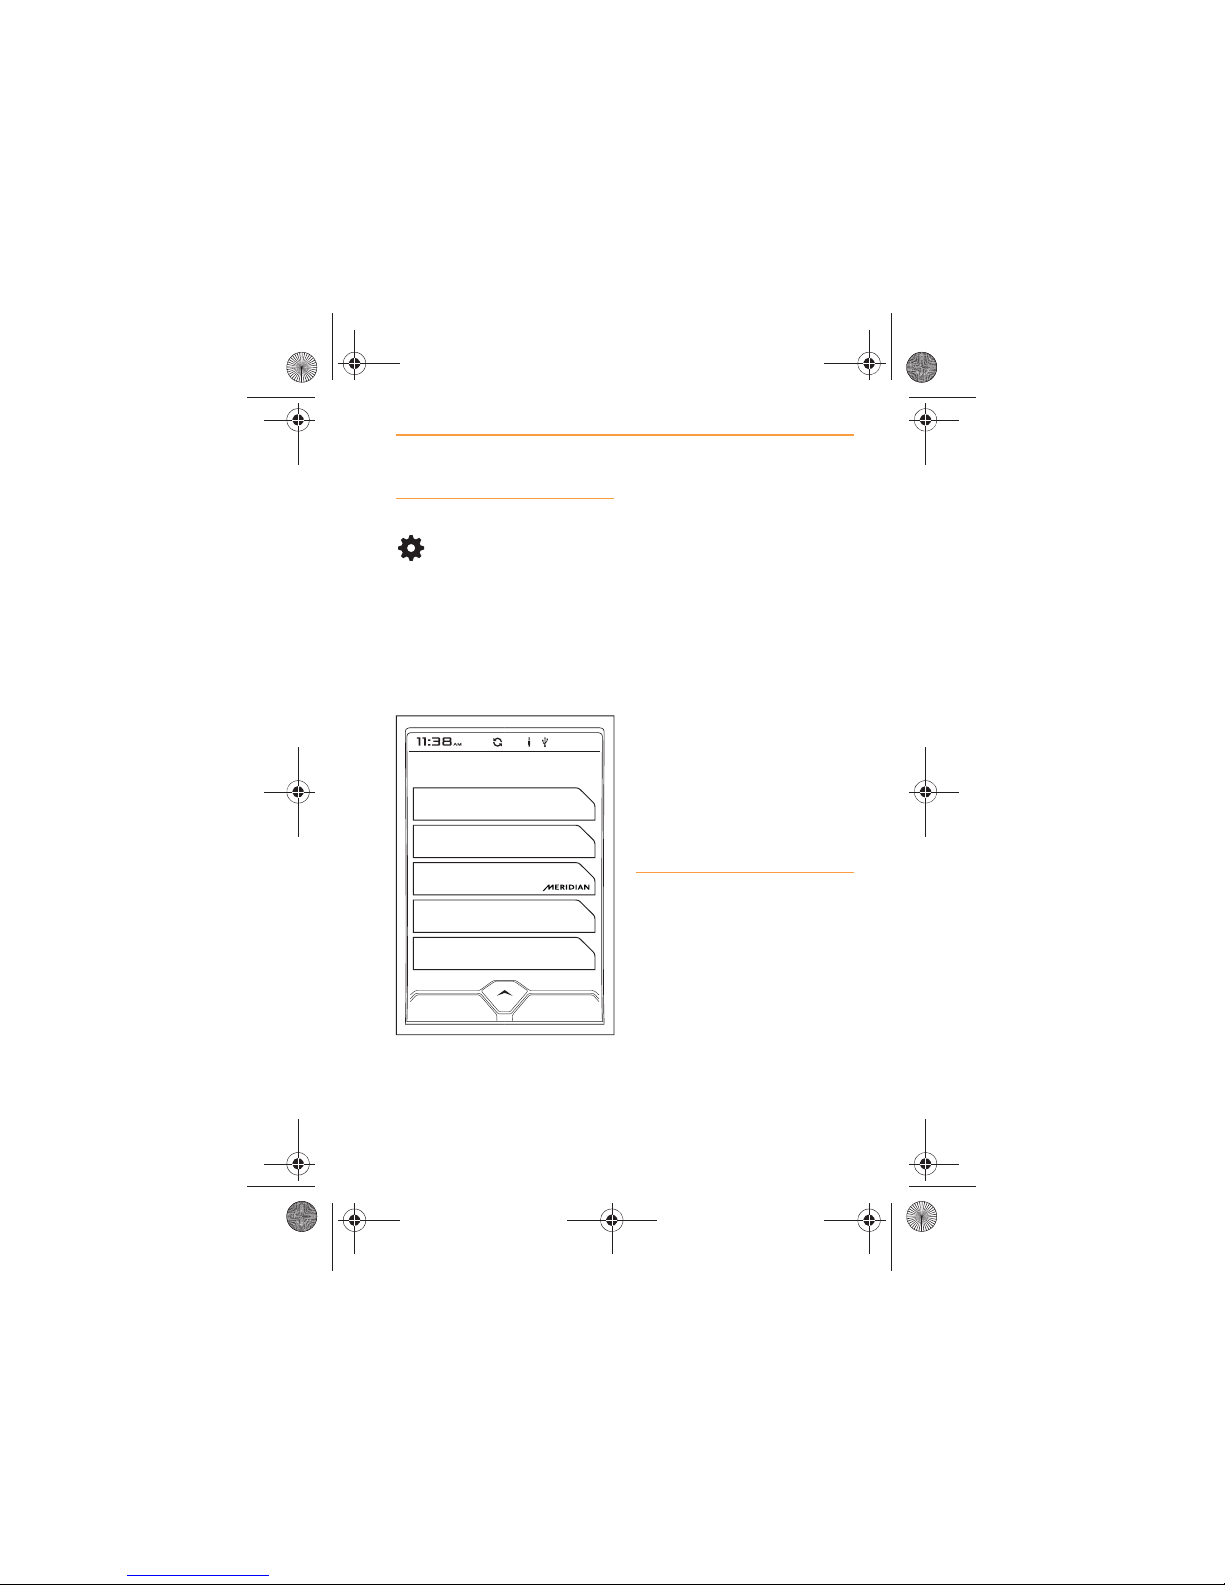
Functions
Touch the Settings icon to
access the following
functions:
x Bluetooth®, page 10;
x Volume Level, page 14;
x Meridian, page 15;
x Language, page 20;
x About, page 21.
Touch the BLUETOOTH icon, to
view details of the phone(s)
which are paired or connected to
IRIS, and other phone related
details and settings, see
Bluetooth®, page 10.
Touch the VOLUME LEVEL icon
to change the volume for the
individual systems, see Volume
Level, page 14.
Touch the MERIDIAN icon to
configure your Meridian settings.
For more information, see
Meridian, page 15.
Touch the LANGUAGE icon, to
set the language you wish IRIS
to use, see Language, page 20.
Touch the ABOUT icon, to view
details of your IRIS system, see
About, page 21.
Switching between systems
You can switch between
systems, i.e. from Phone to
Media, using the MCC. For more
information, see MCC control,
page 7.
BLUETOOTH
VOLUME LEVEL
ABOUT
LANGUAGE
SETTINGS
IRIS.book Page 9 Thursday, October 18, 2012 8:21 AM
Page 10
10
SETTINGS
ADJUSTMENTS
ADJUSTMENTS
Bluetooth®
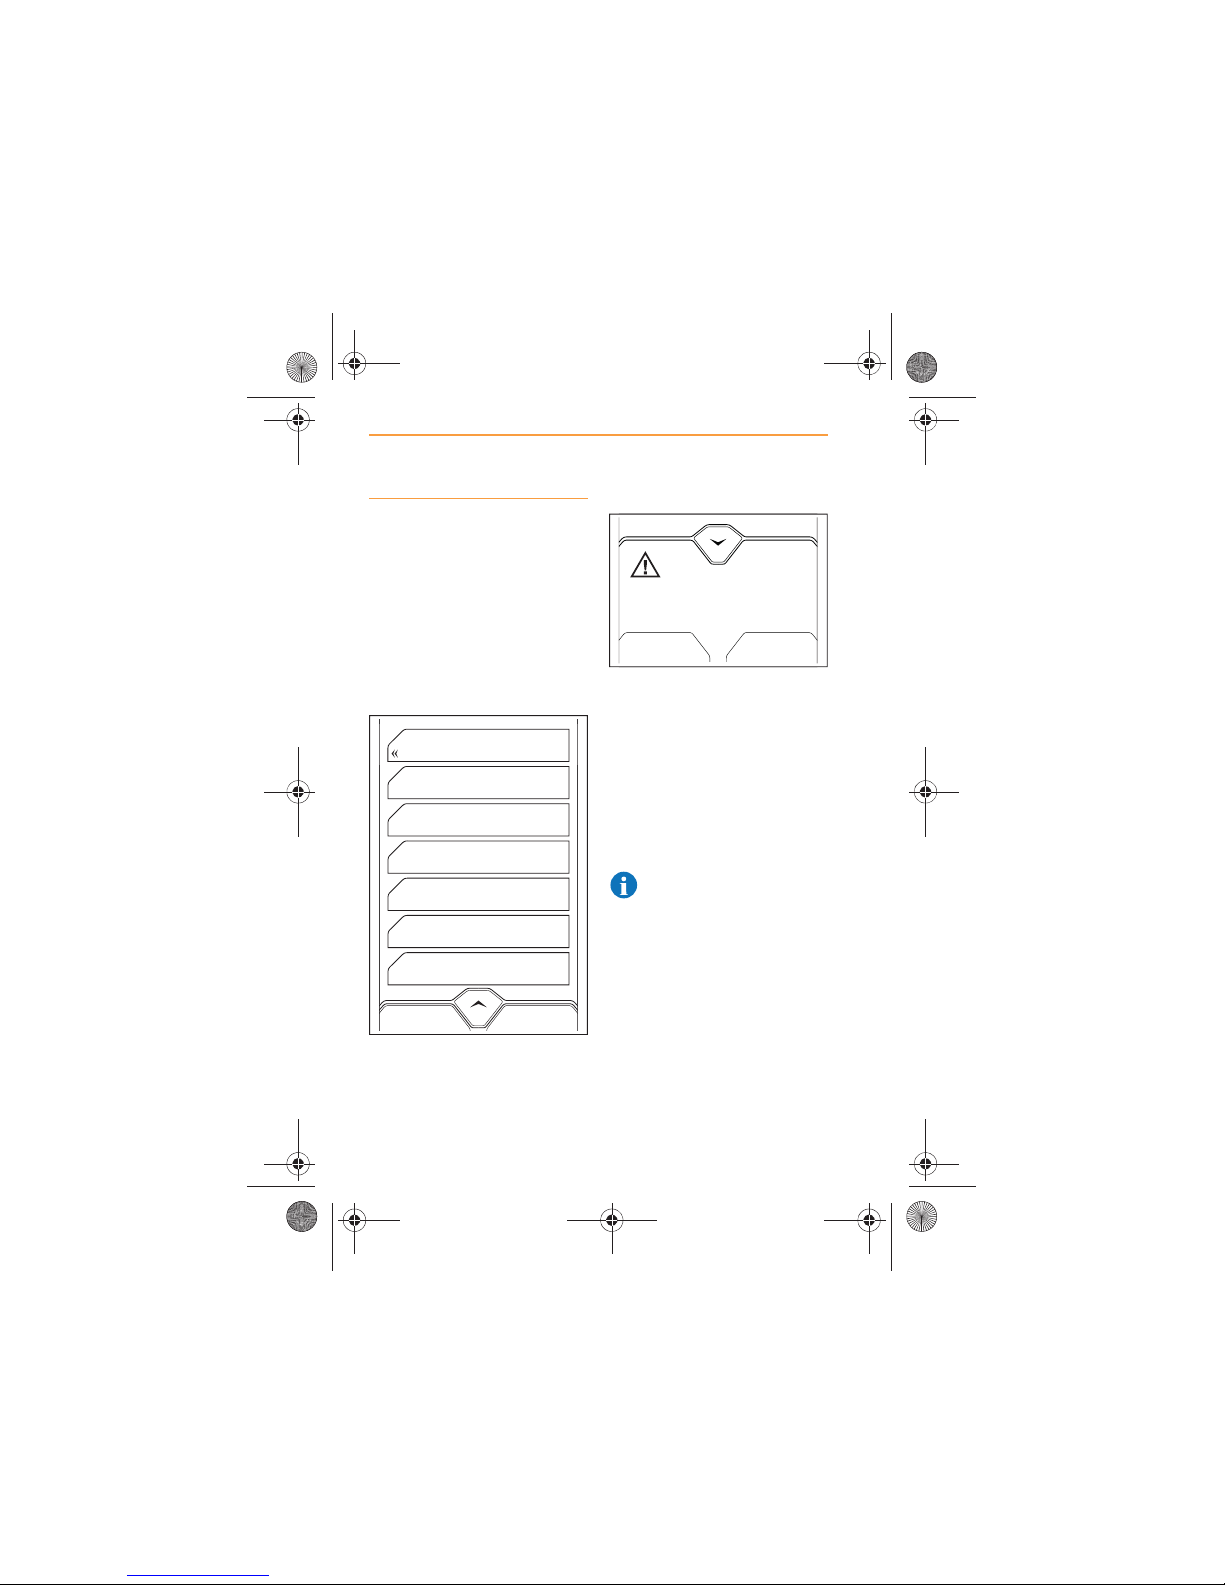
Touch BLUETOOTH to view a
list of the phones that are
already paired. Touch
DISCOVERABLE to start the
phone pairing procedure. For
more information on pairing, see
PHONE, page 41.
Discoverable mode
Discoverable must be ON in
order that a cell phone can find
IRIS and subsequently be paired
and connected.
When Discoverable is ON, the
screen displays the passcode
which must be entered on the
phone being paired and
connected.
Touch the Discoverable icon, the
word ON will appear when it is
set to on. Touch again to switch
off.
NOTE: The vehicle will time
out of Discoverable mode
once a phone is connected or
after 3 minutes of no Bluetooth®
activity.
*DAVID’S IPHONE
DISCOVERABLE ON
NEXUX ONE
IPHONE
NOKIA 7290
BLACKBERRY
SETTINGS
CANCEL
Enter this code on your device to connect Bluetooth:
768443
BLUETOOTH PASSCODE
IRIS.book Page 10 Thursday, October 18, 2012 8:21 AM
Page 11
11
SETTINGS
ADJUSTMENTS
Paired devices
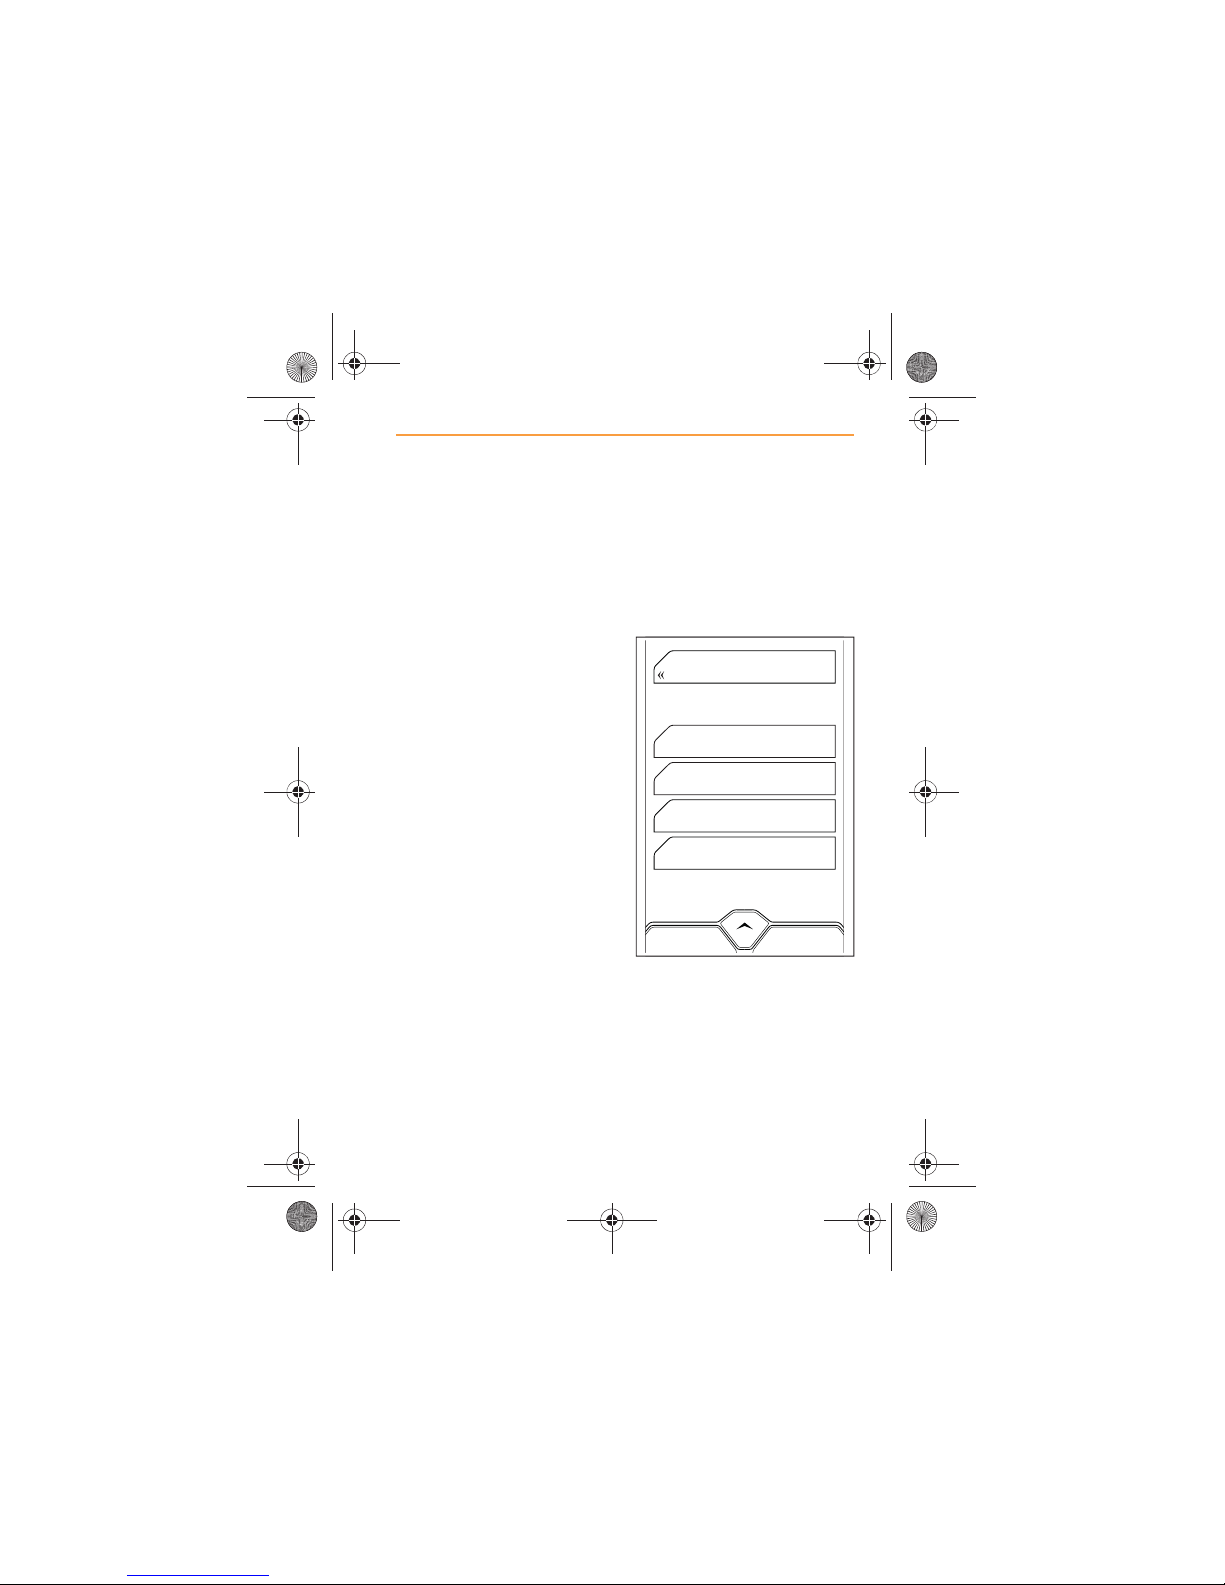
Within BLUETOOTH all the
paired devices are listed.
Touch on a specific device icon
and the following features are
displayed:
x Set as Primary, page 11;
x Sync Contacts, page 12;
x Connect or Disconnect, page
12;
x Forget, page 13.
Set as Primary
Setting a phone as Primary
ensures that this phone will
always connect automatically to
the system when more than one
phone is detected in the car.
To set a phone as Primary,
locate the phone in the list of
paired devices, and touch the
entry.
David’s iPhone
BACK
SYNC CONTACTS
SET AS PRIMARY
DISCONNECT
FORGET
IRIS.book Page 11 Thursday, October 18, 2012 8:21 AM
Page 12
12
SETTINGS
ADJUSTMENTS
Next touch the SET AS
PRIMARY icon, an asterix (*) will
appear at the beginning of the
device name to show that this is
set as the primary device.
When a device is connected to
IRIS via Bluetooth®, the device
name will be highlighted in
orange.
NOTE: If no phone is
currently connected, and
two or more paired phones are
detected, IRIS will connect the
one that is Set as Primary.
If you no longer wish the phone
to be Primary, touch the icon
again.
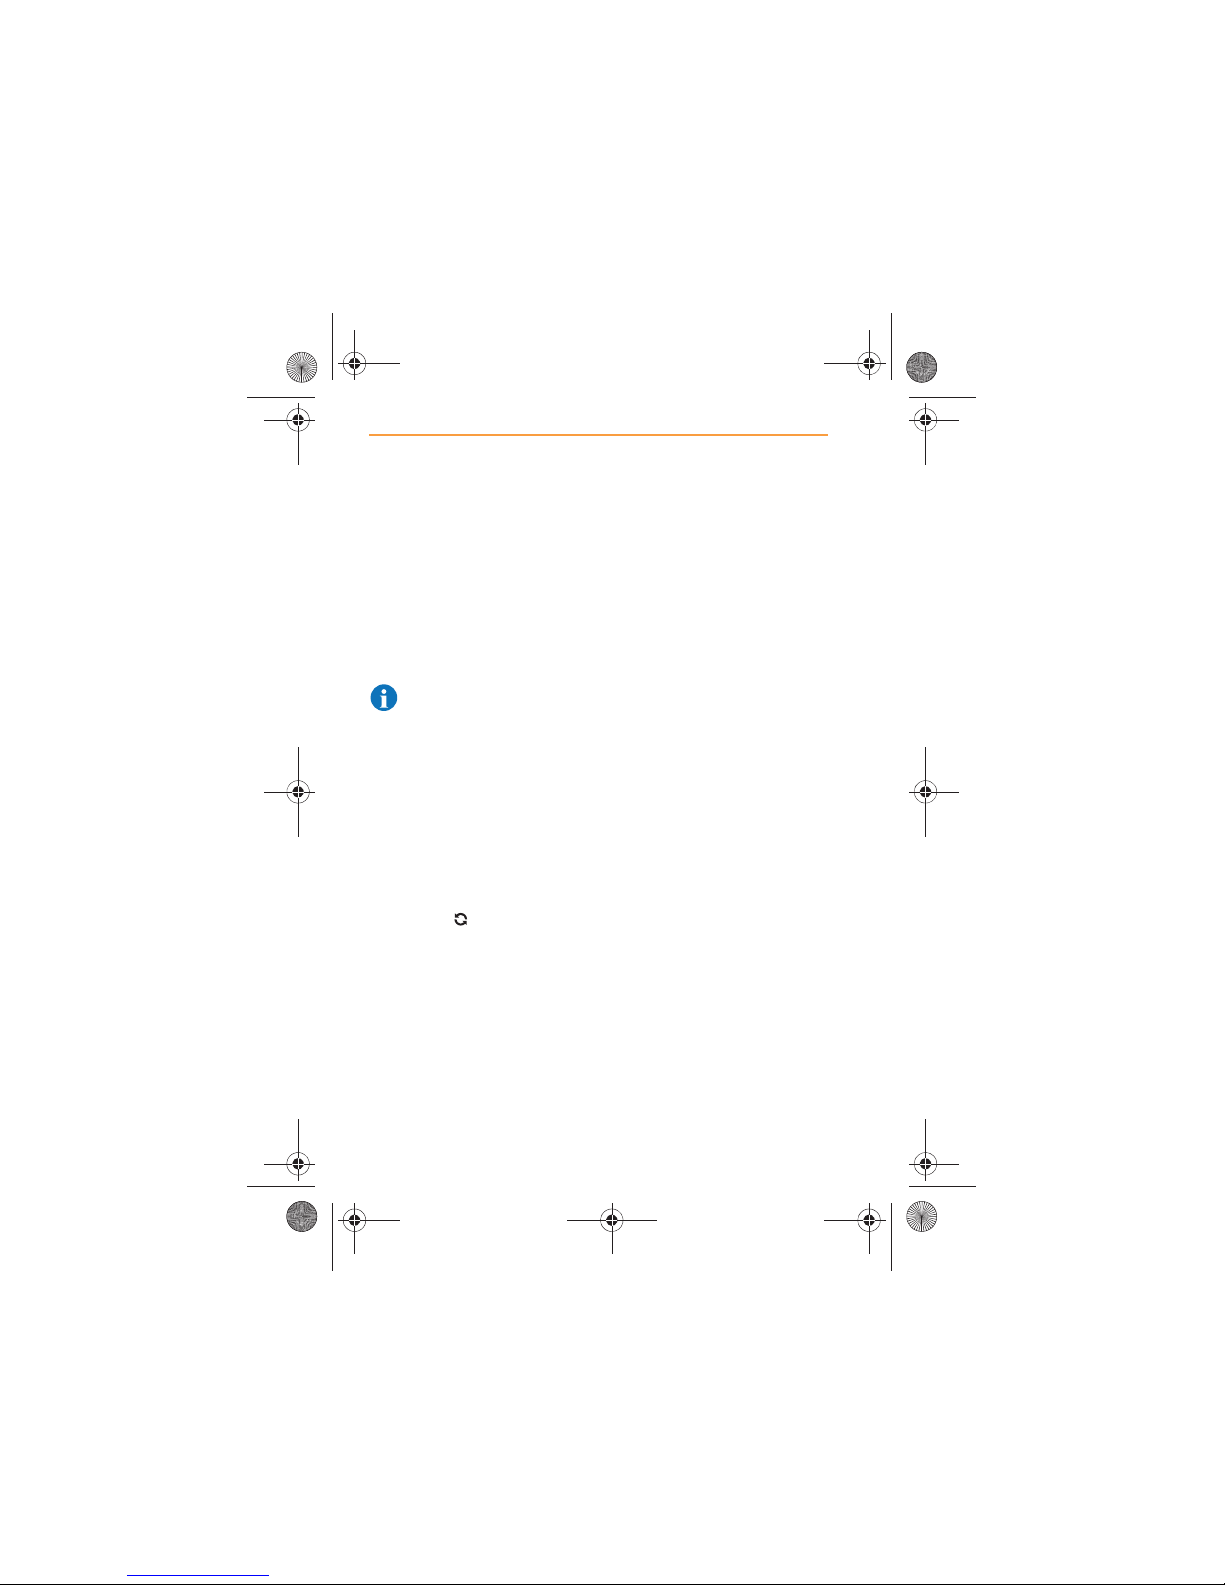
Sync Contacts
Touch the icon to manually
synchronize Contacts and Call
History. The icon at the top of
the screen is visible while
synchronization is in progress.
If contact details are changed in
the phone, while it is connected,
you will need to manually
synchronize again.
Each time your phone
reconnects via Bluetooth®, you
will be asked to confirm that you
wish to update your contacts and
call history from the phone. If this
is not completed, the latest
contacts and call history
changes on your phone will not
be visible on IRIS. To avoid
having to confirm the
synchronization on your phone
every time you enter the vehicle,
set your phone to allow IRIS to
automatically share contacts and
call history.
Connect or Disconnect
Only one phone can be
connected at any one time.
To disconnect that phone from
the system, locate the phone in
the list of paired devices and
touch the entry.
Then touch DISCONNECT. The
phone will be disconnected from
the system, and the icon name
will change to CONNECT.
The phone will remain paired for
re-connection in the future.
To re-connect the phone, touch
the CONNECT icon.
If you attempt to connect a
phone while another one is
already connected, the MCC will
IRIS.book Page 12 Thursday, October 18, 2012 8:21 AM
Page 13
13
SETTINGS
ADJUSTMENTS
open and offer the choice of
continuing to disconnect the
existing phone or not.
Whenever the primary device is
connected to IRIS via
Bluetooth®, the device name will
be highlighted in orange.
Forget
To remove all details relating to a
specific phone, locate the phone
in the list of paired devices, and
touch the entry.
Next, touch the FORGET icon.
Details of the phone will
disappear from the list of paired
devices.
IRIS.book Page 13 Thursday, October 18, 2012 8:21 AM
Page 14
14
SETTINGS
ADJUSTMENTS
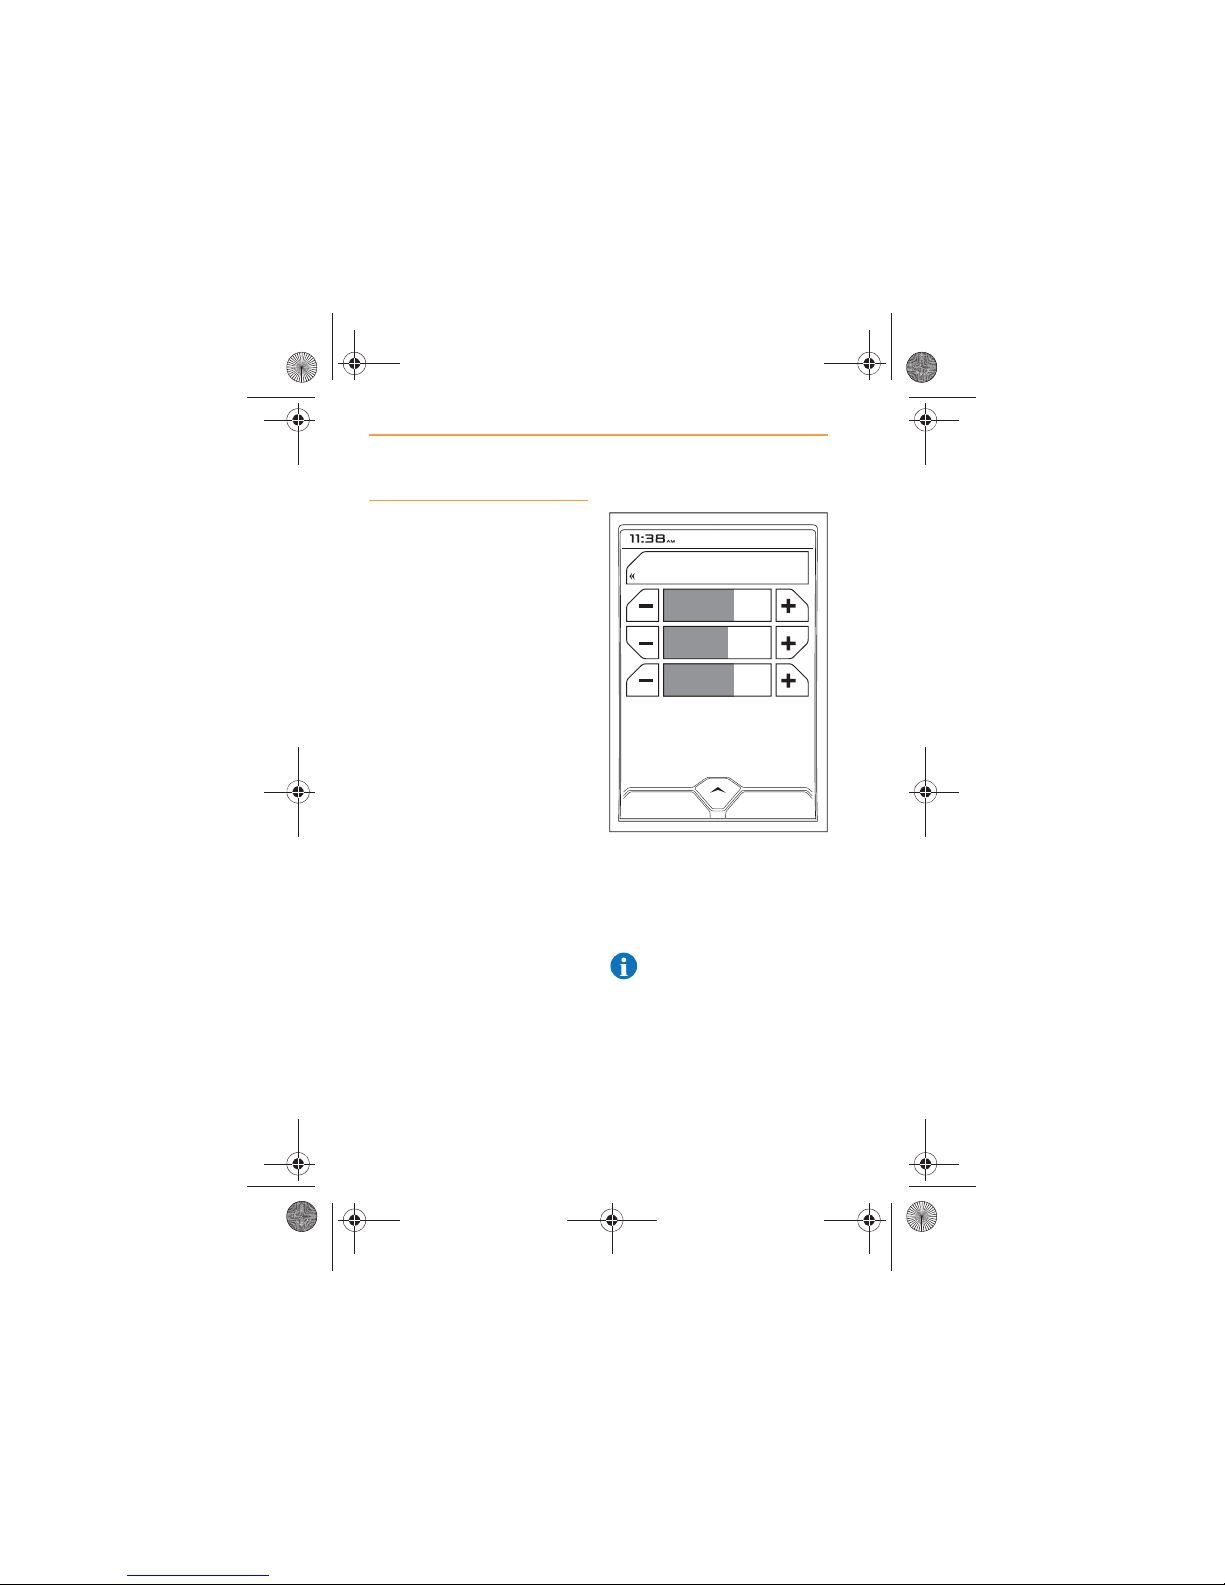
Volume Level
Different volume levels can be
set for the following:
x Phone;
x Media;
x Nav.
To change the volume level,
touch the ‘+’ or ‘-’ icon adjacent
to the audio source you wish to
change. The volume setting is
shown as a percentage and the
icon is partially filled grey, to
reflect the percentage setting.
The active source is displayed in
orange.
To mute a system, touch the icon
containing the name of the
system. The display confirms the
system is muted. Touch again to
restore sound.
NOTE: Rotating the volume
control will also restore the
sound for Media and Radio.
BACK
PHONE
65
MEDIA
60
NAV
65
IRIS.book Page 14 Thursday, October 18, 2012 8:21 AM
Page 15
15
SETTINGS
ADJUSTMENTS
Meridian
The Meridian settings apply to all
IRIS systems, and can be
accessed by touching the
MERIDIAN icon.
NOTE: MERIDIAN can also
be accessed from MEDIA
and RADIO.
There are two levels of Meridian
fitted to the MP4-12C; Standard
and Premium.
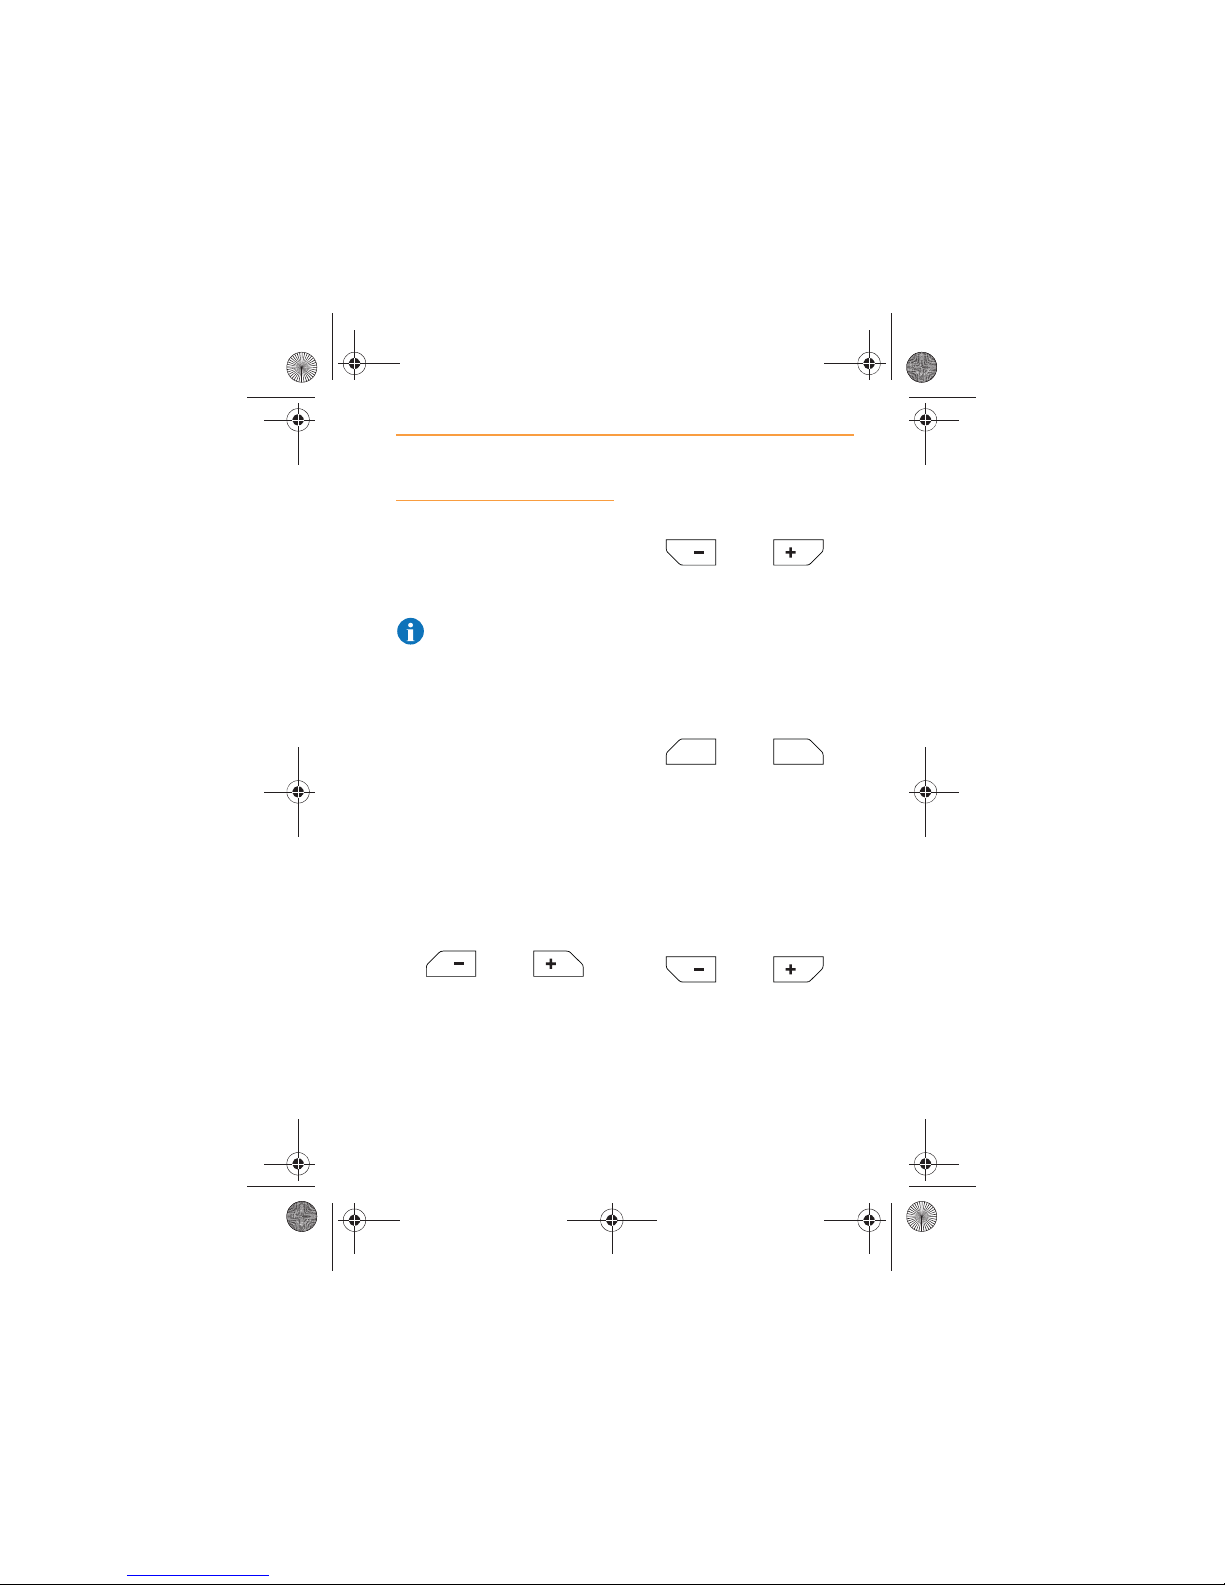
The following adjustments can
be carried out.
x Bass, page 15;
x Treble, page 15;
x Speaker balance, page 15;
x Rear Level - Premium only,
page 15.
Bass
Touch the ‘+’ or ‘-’ icons adjacent
to BASS to achieve the desired
sound reproduction quality. The
range is 00 to +10 or 00 to -10 in
increments of 1.
Treble
Touch the ‘+’ or ‘-’ icons adjacent
to TREBLE to achieve the
desired sound reproduction
quality. The range is 00 to +10 or
00 to -10 in increments of 1.
Speaker balance
Touch the ‘L’ or ‘R’ icons
adjacent to BALANCE to
achieve the desired sound from
the speakers. The range is c00
to L10 or c00 to R10 in
increments of 1.
Rear Level - Premium only
Touch the ‘+’ or ‘-’ icons adjacent
to REAR LEVEL to achieve the
desired sound from the
speakers. The range is 00 to +10
or 00 to -10 in increments of 1.
+02
BASS
+02
TREBLE
R
02
BALANCE
LR
+02
REAR LEVEL
IRIS.book Page 15 Thursday, October 18, 2012 8:21 AM
Page 16
16
SETTINGS
ADJUSTMENTS
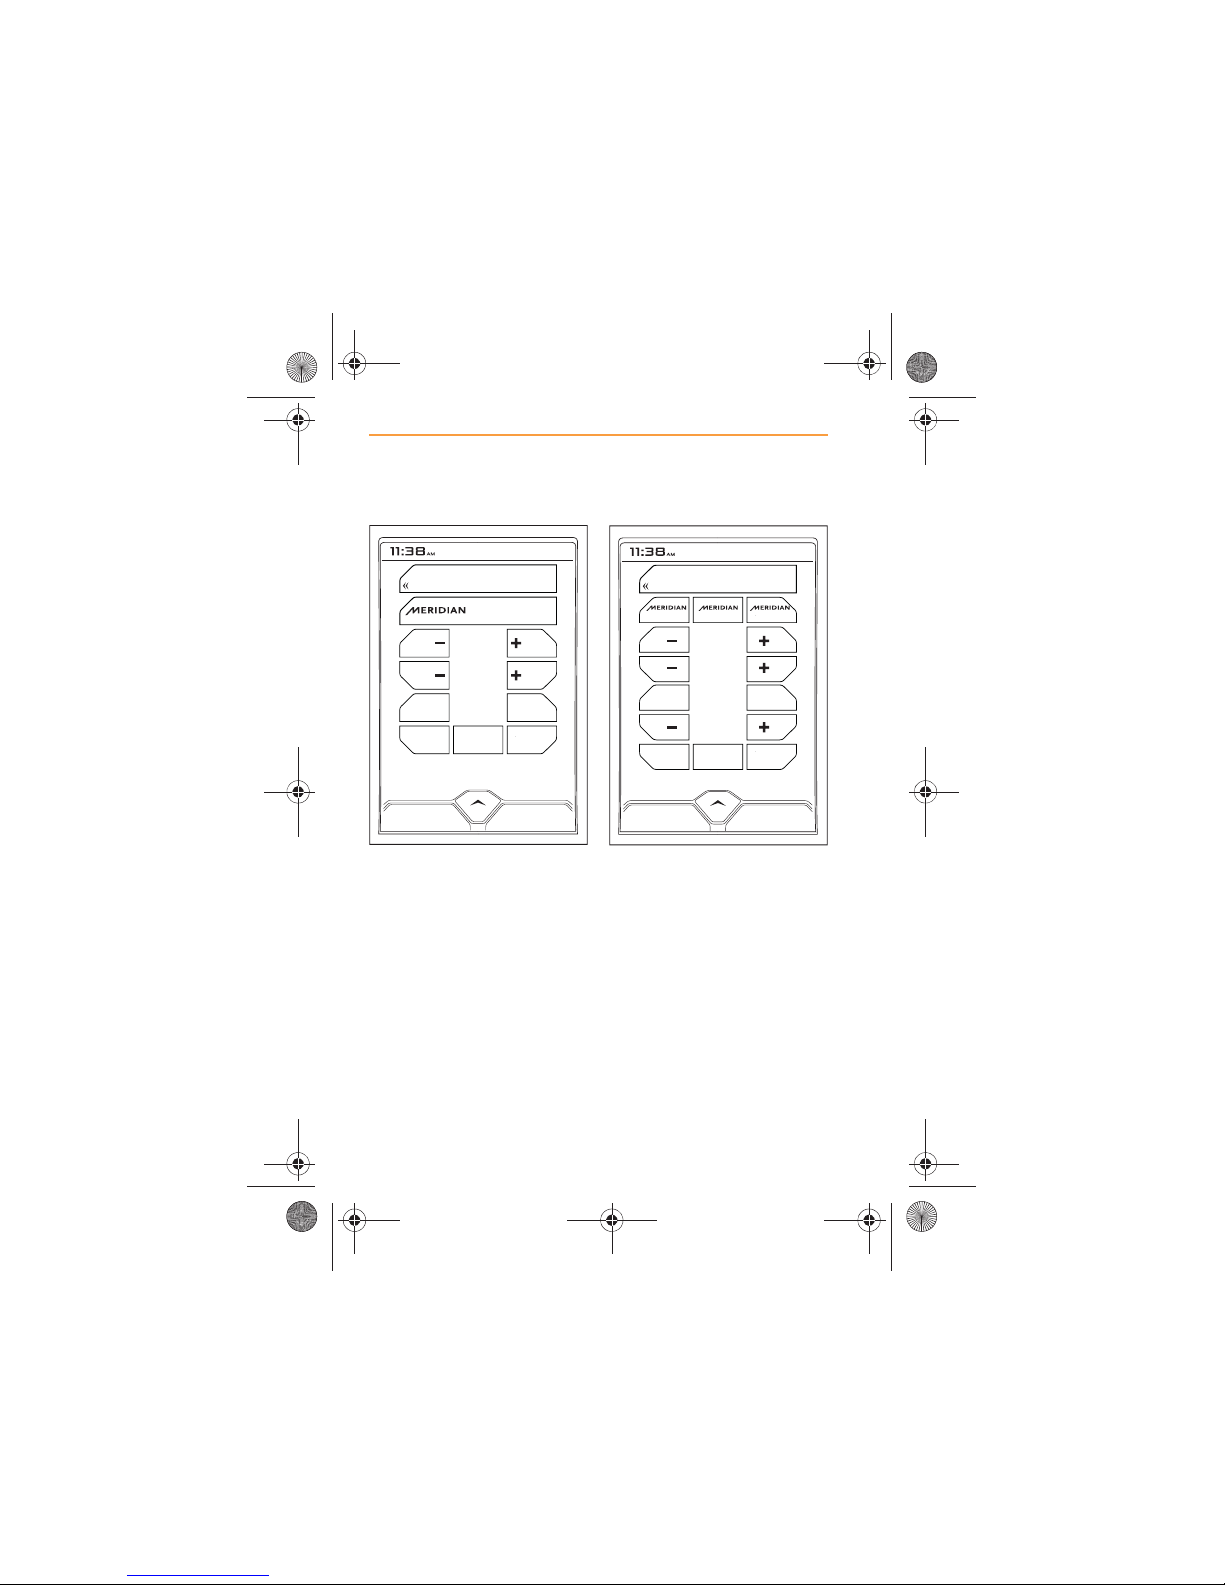
Standard Meridian
Standard Meridian
Standard Meridian uses the Pure
sound reproduction from the
Premium Meridian.
Adjust the Bass, Treble and
Balance settings to suit your
listening preferences.
Premium Meridian
Premium Meridian
Premium Meridian offers the
following options.
x Pure;
x Expanded;
x Extreme.
The sensitivity and mid point of
the Bass, Treble, Balance and
Rear Level is different for each
option. Bass level is at a
minimum on Pure, and at a
maximum on Extreme.
TP
BACK
OPTIMISED SETTINGS
+02
BASS
+02
TREBLE
R
02
BALANCE
LR
DRC
AUTO
AVC ATC
MAX ON
FLATCENTER
BACK
PURE EXPANDED EXTREME
+02
BASS
+02
TREBLE
R
02
BALANCE
+02
REAR LEVEL
LR
DRC
AUTO
AVC ATC
MAX ON
FLATCENTER
IRIS.book Page 16 Thursday, October 18, 2012 8:21 AM
Page 17
17
SETTINGS
ADJUSTMENTS
Pure is the default setting. Adjust
the Bass, Treble, Balance and
Rear Level settings to suit your
listening preferences.
Touch the Expanded icon and
adjust the Bass, Treble, Balance
and Rear Level settings for that
option.
Repeat the process for the
Extreme option.
Touch the Meridian icon you
prefer when playing a particular,
album, artist or genre. The
Meridian icon is highlighted in
orange, depending on setting
chosen.
Advanced sound features
In addition to the settings
described previously, there are
other features that can enhance
your listening experience, these
are:
x Dynamic Range Control
(DRC), page 18
x Automatic Volume Control
(AVC), page 18;
x Automatic Tone Control
(ATC), page 19;
x Flat, page 19;
x Center, page 19.
IRIS.book Page 17 Thursday, October 18, 2012 8:21 AM
Page 18
18
SETTINGS
ADJUSTMENTS
Dynamic Range Control (DRC)
DRC is a technique
which narrows the
dynamic range of the
audio signal. This effectively
reduces the volume of loud
sounds and boosts the volume of
quieter sounds.
Repeatedly touch the DRC icon
to change between On, Off and
Auto. Select the option which
best suits your listening
requirements.
Automatic Volume Control
(AVC)
AVC automatically
increases the volume
setting at higher engine
and road speeds to compensate
for the background mechanical
noise.
Repeatedly touch the AVC icon
to change between Min, Max
and Off. Select the setting which
offers the optimum sound
reproduction.
DRC
AUTO
AVC
MAX
IRIS.book Page 18 Thursday, October 18, 2012 8:21 AM
Page 19
19
SETTINGS
ADJUSTMENTS
Automatic Tone Control (ATC)
ATC compensates for
road and wind noise.
The Bass is increased
to offset the low frequency
rumble caused by road noise
and the Treble is increased to
minimize the impact of wind
noise.
Touch the ATC icon to change
between On and Off. Select the
setting which best suits your
listening requirements.
Flat
Touch the FLAT icon or the
control immediately below it to
reset the Treble and Bass
settings to 00.
Center
Touch the center icon or the
control immediately below it to
reset the Rear Level and
Balance settings to 00.
ATC
ON
IRIS.book Page 19 Thursday, October 18, 2012 8:21 AM
Page 20
20
SETTINGS
ADJUSTMENTS
Language
Touch the LANGUAGE icon and
a list of all supported languages
will appear on the screen.
Touch the language of your
choice and the all the icon
descriptions will immediately be
displayed in that language.
NOTE: This language
setting will not affect the
text language shown in the lefthand display on the instrument
cluster.
IRIS.book Page 20 Thursday, October 18, 2012 8:21 AM
Page 21
21
SETTINGS
INFORMATION
INFORMATION
About
Touch the ABOUT icon to access
the following information about
the IRIS system fitted to your
McLaren:
x Software version info;
x IRIS version info;
x MAC address.
IRIS.book Page 21 Thursday, October 18, 2012 8:21 AM
Page 22
22
RADIO
OPERATION
RADIO
OPERATION
Switching on and off
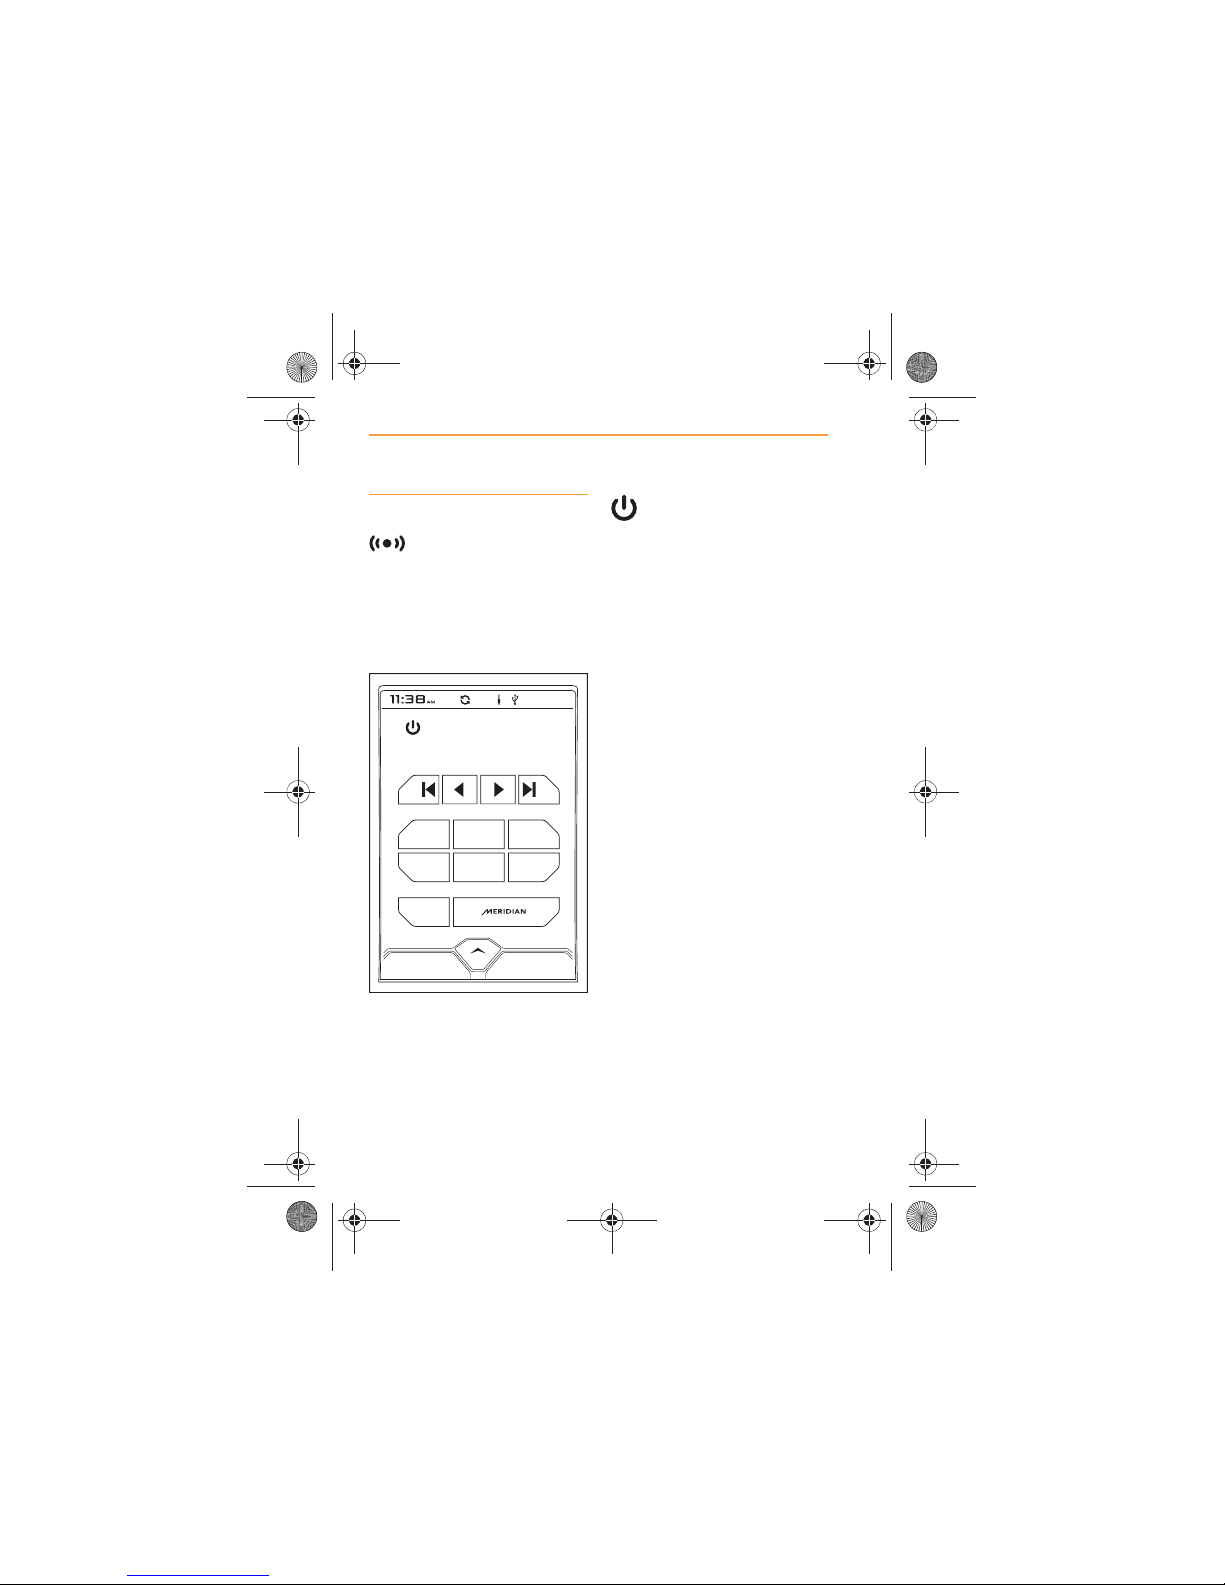
When RADIO is selected,
either from the MCC
window or from the Home
screen, the screen will show the
main radio screen, the radio will
tune to the previously selected
station and commence play.
To switch off the radio,
touch the icon in the top
left-hand corner of the screen. To
switch the radio on, touch the
icon again. The icon will be
displayed as orange when the
radio is on.
Changing the source to a
different media device will also
stop radio play, see Sources,
page 30.
Alternatively, switch off IRIS, see
On/Off and Home control, page
5.
FM
1
23
4
56
KAFE
KAAP KAQQ
KCLK
KISW KIXI
KAAP
99.5
PRESET 2
AVAILABLE
STATIONS
IRIS.book Page 22 Thursday, October 18, 2012 8:21 AM
Page 23
23
RADIO
OPERATION
Wavebands
The radio has two wavebands;
AM (Amplitude Modulation) and
FM (Frequency Modulation).
AM is a medium frequency
waveband and has a range from
520 kHz to 1710 kHz changes
are in steps of 10 kHz.
FM is a very high frequency
waveband with a range from
87.7 MHz to 107.9 MHz changes
are in steps of 0.2 MHz.
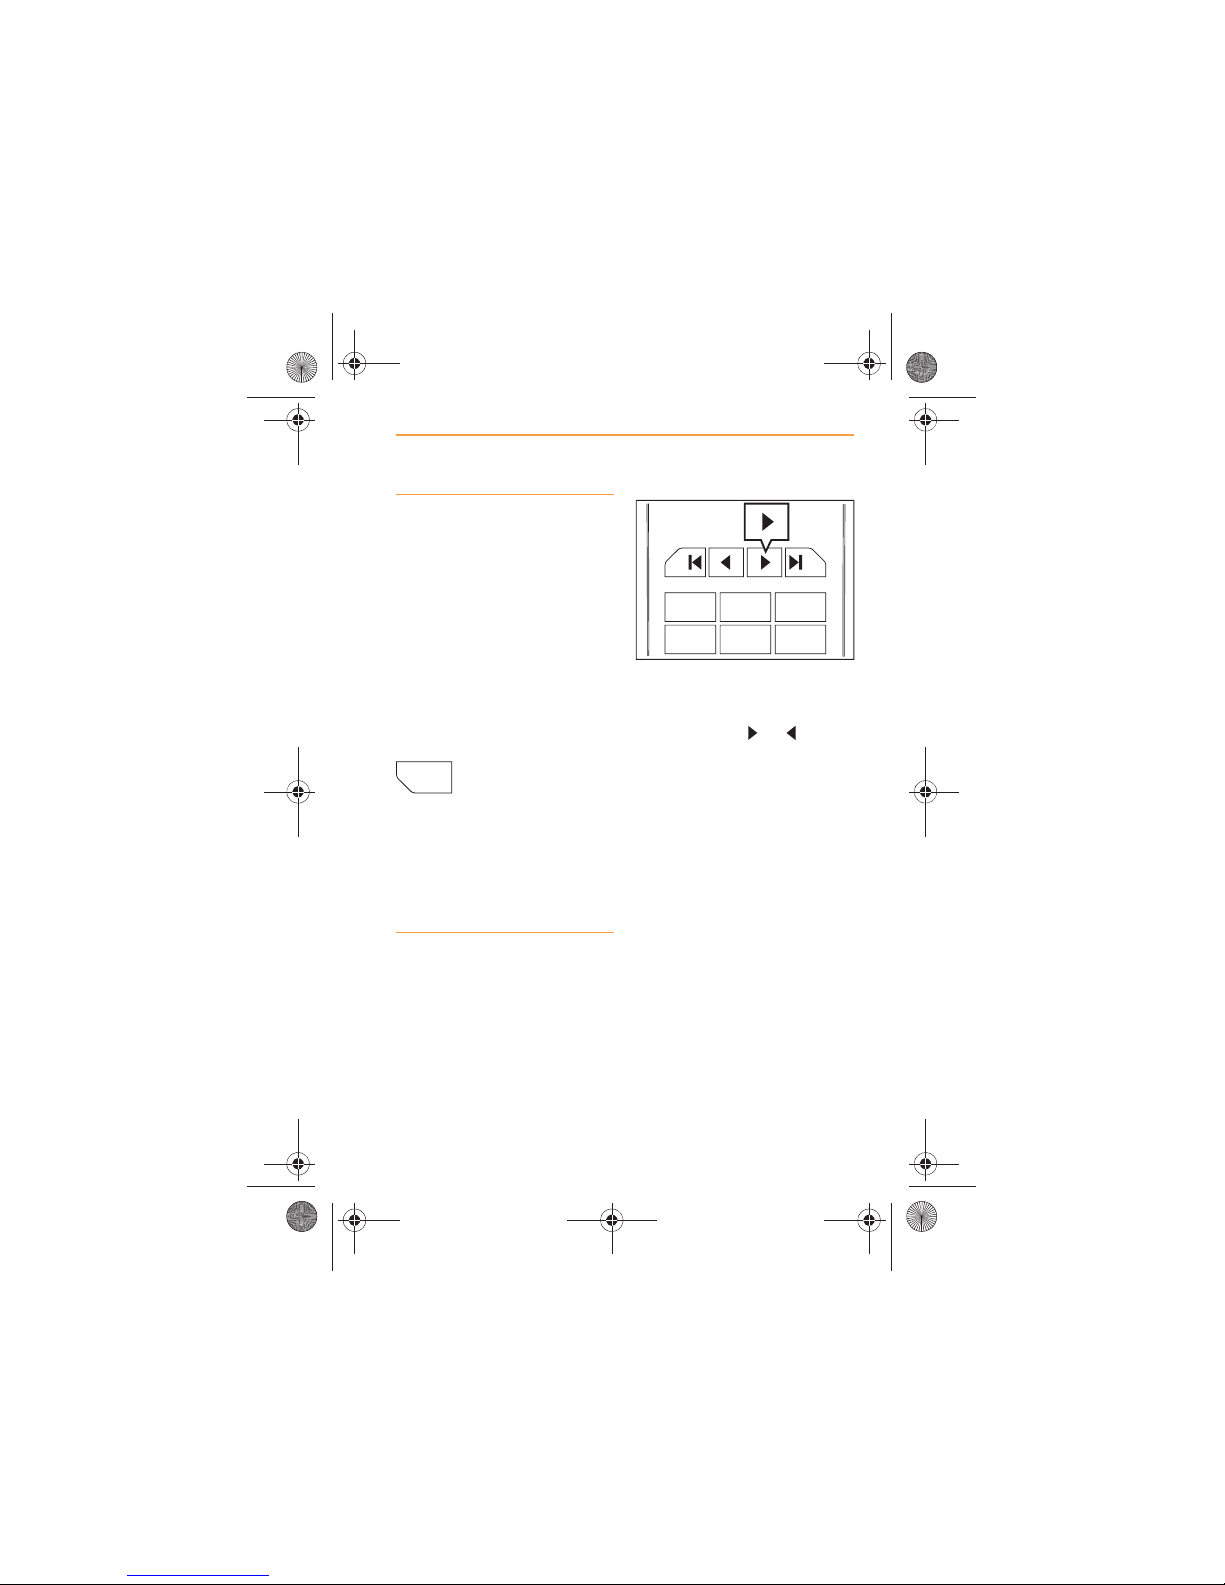
The waveband
currently selected is
displayed in orange on
the waveband icon. To change
the waveband, briefly touch the
icon. AM or FM will be displayed
in orange to reflect the change in
waveband.
Station search and store
The radio allows a total of up to
six stations to be stored on the
preset icons, for each
waveband.
1. To store a station, select the
required waveband, AM or
FM, see Wavebands, page
23.
2. If you wish to manually tune
to a known frequency,
repeatedly touch one of the
tuning icons or
(forward or back). The tuning
will occur in steps of 0.2 MHz
on FM or 10 kHz on AM.
3. When the desired frequency
is reached, touch and hold
the preset that you wish to
store it on for more than 2
seconds.
FM
AM
456
123
IRIS.book Page 23 Thursday, October 18, 2012 8:21 AM
Page 24
24
RADIO
OPERATION
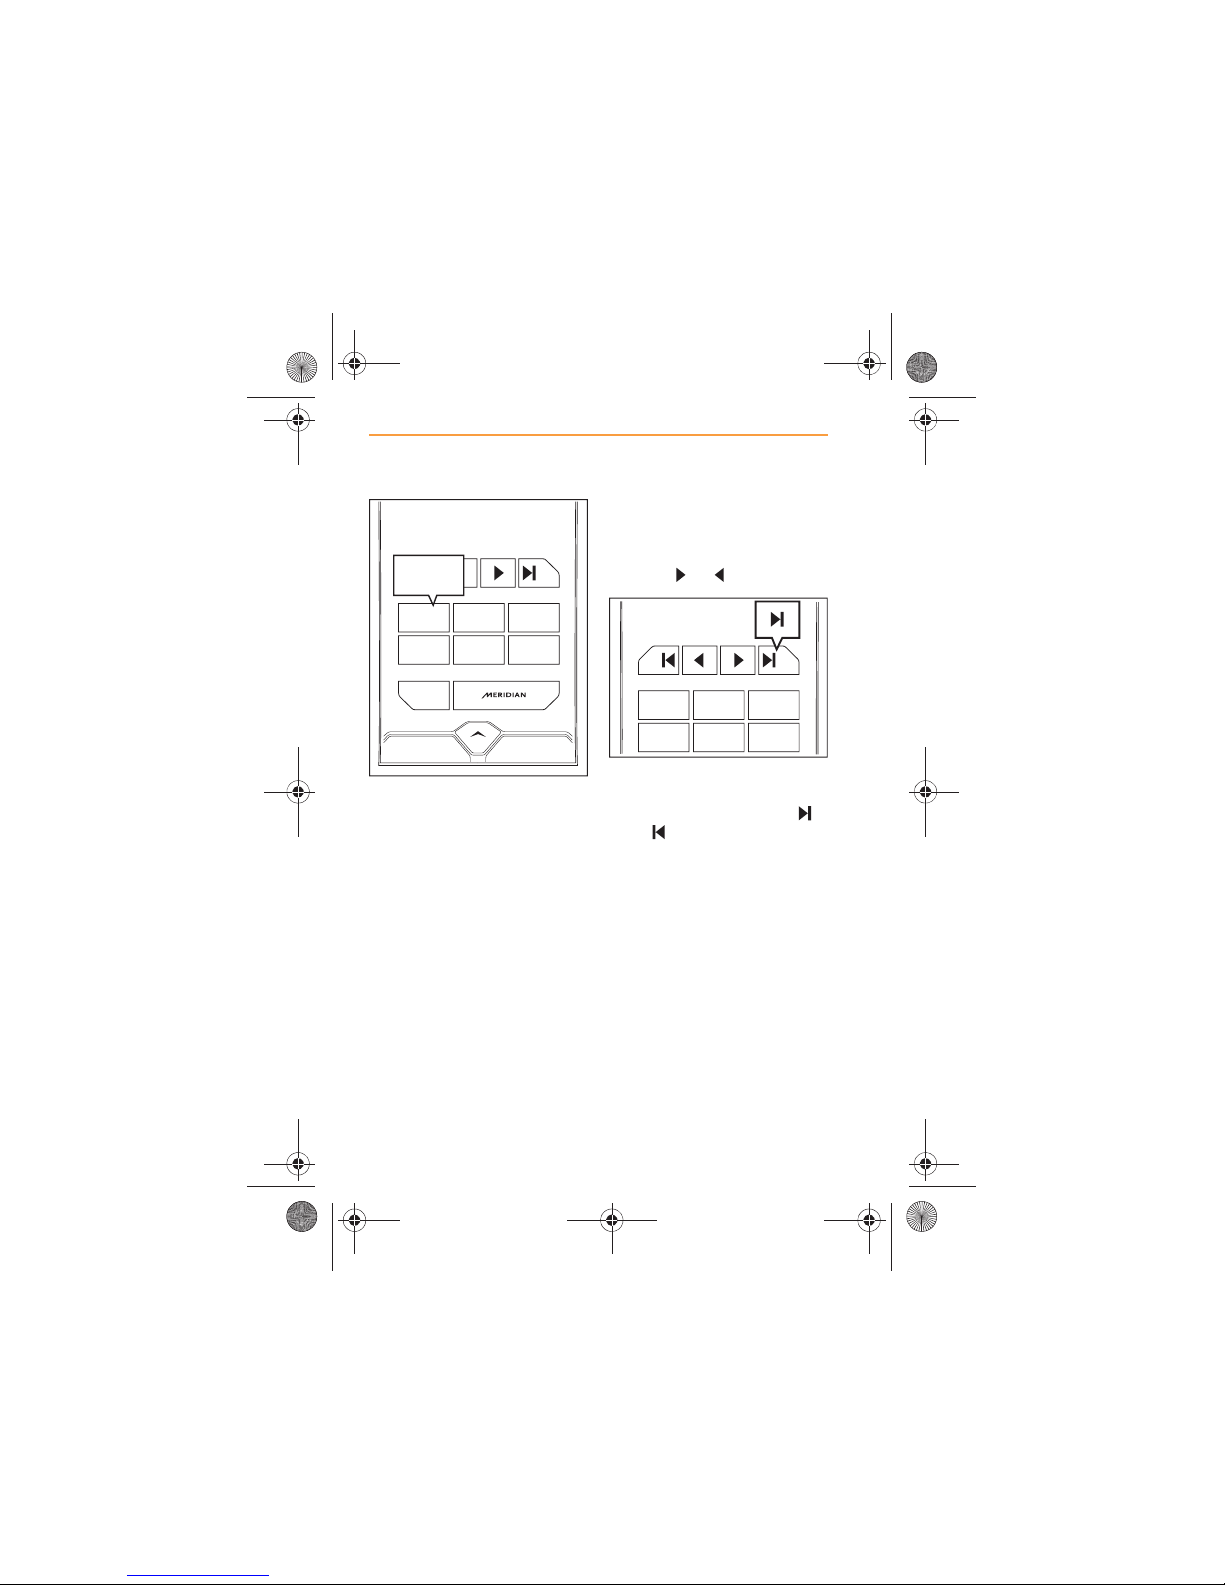
4. The frequency will appear on
the preset as confirmation it
is stored. If available, the
station name will be
displayed instead of the
frequency.
5. If you do not want to store
the frequency that has been
found, continue the search
by touching one of the tuning
icons or again.
6. If you want to automatically
search the waveband, touch
one of the search icons,
or (forward or back).
FM
KAAP
KAAP
99.5
PRESET 1
AVAILABLE
STATIONS
123
1
KAAP
456
456
123
IRIS.book Page 24 Thursday, October 18, 2012 8:21 AM
Page 25
25
RADIO
OPERATION
7. Searching will stop when a
station is found. If you wish to
store this station, touch the
preset that you wish to store
it on, and hold for more than
two seconds.
8. The frequency will appear on
the preset as confirmation it
is stored. If available, the
station name will be
displayed instead of the
frequency.
9. If you do not want to store
the station that has been
found, continue the search
by touching one of the
search icons, or again.
10. Repeat the procedure to
store stations or frequencies
on the remaining five
presets.
FM
KAAP
KAAP
99.5
PRESET 1
AVAILABLE
STATIONS
123
1
KAAP
456
IRIS.book Page 25 Thursday, October 18, 2012 8:21 AM
Page 26
26
RADIO
OPERATION
Selecting a station
Once all the required stations
are stored, touch the preset
where the required station is
stored. The radio will
automatically tune to that station,
automatically switching
wavebands as necessary.
The screen will show the preset
number and the frequency.
The frequency will appear on the
preset as confirmation it is
stored. If available, the station
name will be displayed instead of
the frequency.
Rotate the volume control and
adjust the sound settings to suit
your listening requirements, see
Volume control, page 6 and
Meridian, page 15.
NOTE: If the station
frequency changes, the
preset will have to be set again.
Available stations
During radio play AVAILABLE
STATIONS will appear in the
bottom right-hand corner of the
screen.
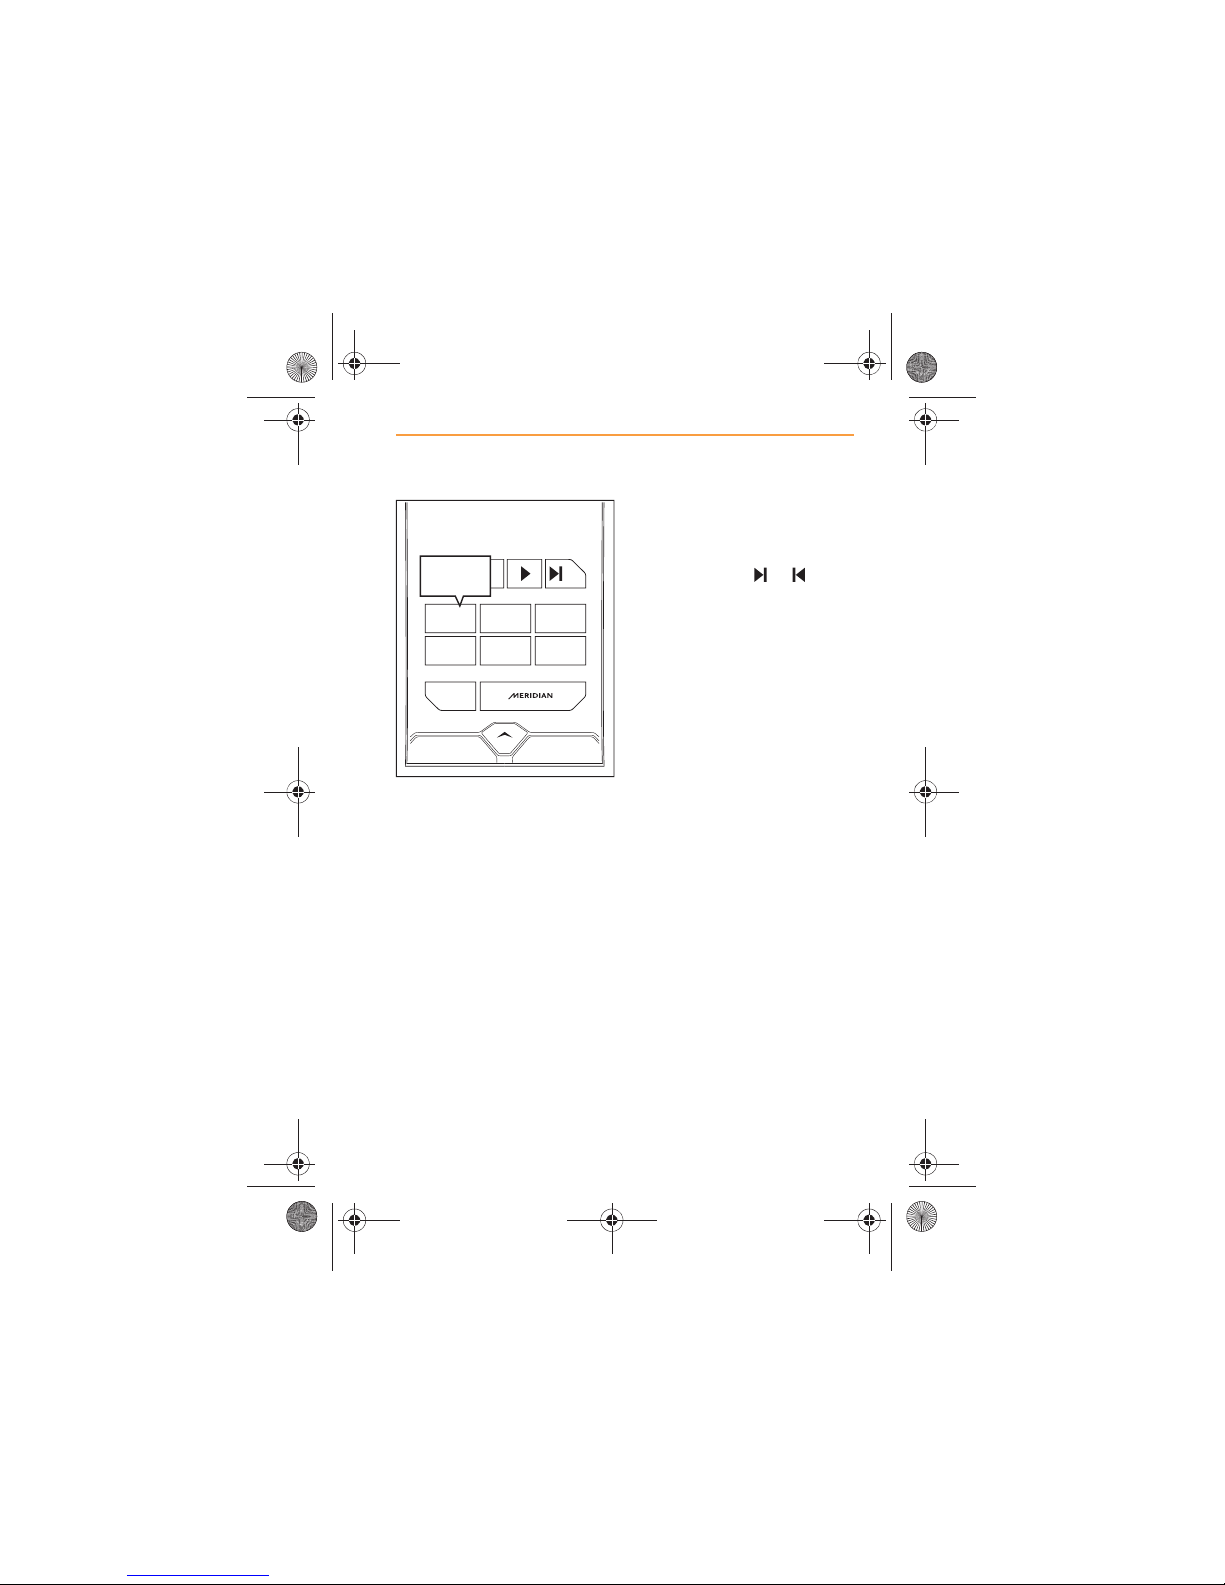
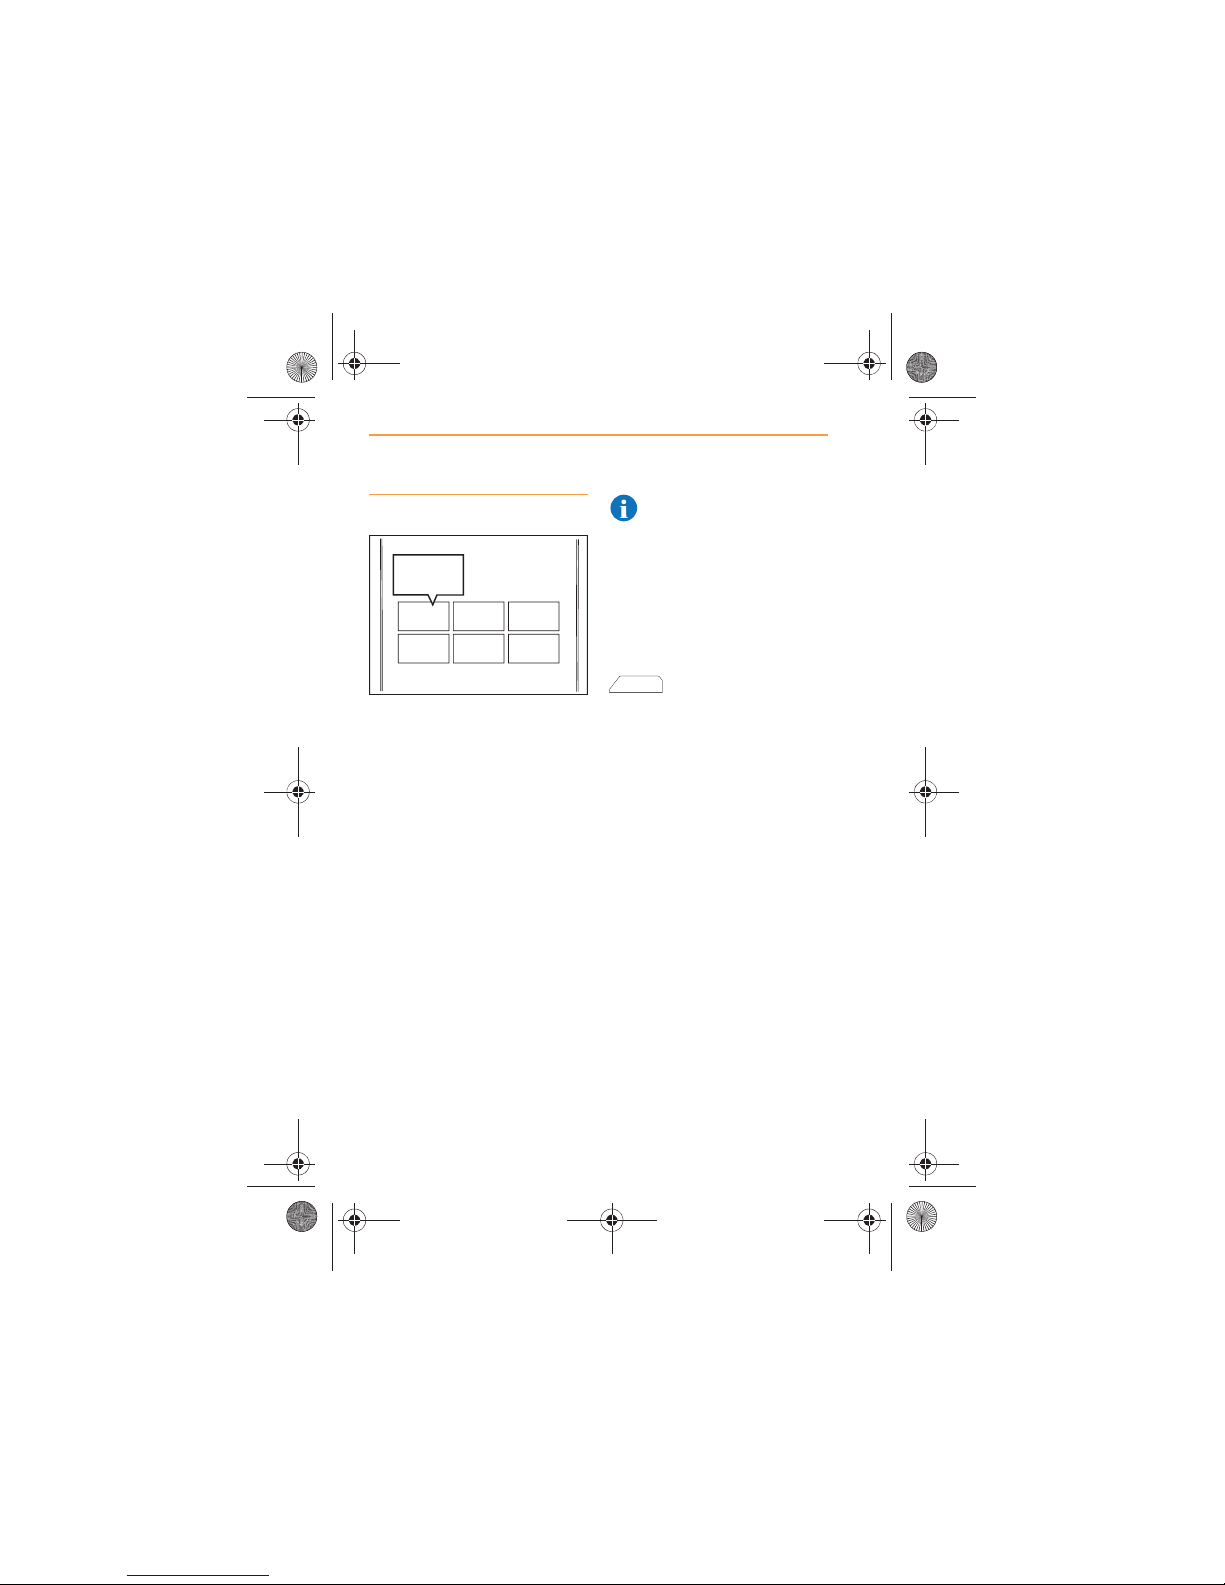
Touch the icon (or the
control below it) to
display a list of all stations which
are currently transmitting a
receivable signal.
If you wish to listen to one of
these stations, touch the entry
for that station in the list.
456
123
1
KAFE
KAAP KAQQ
KCLK
KISW KIXI
KAFE
AVAILABLE
STATIONS
IRIS.book Page 26 Thursday, October 18, 2012 8:21 AM
Page 27
27
RADIO
OPERATION
Radio Data System (RDS)
Radio Data System (RDS) is a
system which allows digital data
to be sent to radio receivers at
the same time as the FM audio
signal.
Information that RDS transmits
enhances the entertainment
experience in the following ways.
x Alternative Frequencies
(AF), page 27;
x Program Identification (PI),
page 28;
x Program Service (PS), page
28
Alternative Frequencies (AF)
The AF feature constantly
monitors all transmitters which
are transmitting the radio station
you are listening to and
automatically selects the
strongest signal.
As your vehicle moves away
from one transmitter and nearer
to another, AF will switch
transmitters to maintain the best
reception possible.
IRIS.book Page 27 Thursday, October 18, 2012 8:21 AM
Page 28
28
RADIO
OPERATION
Program Identification (PI)
PI is an individual identifier for
each radio station, and it is this
identifier that allows the AF
feature to switch between
frequencies to maintain audio
quality.
Program Service (PS)
PS is the method used to display
the station name, or an
abbreviation of it, on the radio
screen.
Switching between systems
You can switch between
systems, i.e. from Phone to
Media, using the MCC. For more
information, see MCC control,
page 7.
IRIS.book Page 28 Thursday, October 18, 2012 8:21 AM
Page 29
29
MEDIA
OVERVIEW
MEDIA
OVERVIEW
Introduction
The system can play files of the
following format/encoding
combinations.
File formats
x ASF
x WMA
x MP3
x WAV
x SND
x AU
x AIF, AIFF, AIFC
Codec support
x AAC Level 1, AAC Level 2
(LC) (Sample rate: Up to 48
kHz, number of channels 1, 2
Bit-rate: Up to 576Kbps.
x Fraunhofer MPEG-1 Layer 3
(MP3)
x Microsoft MPEG-1 Layer 1
x Microsoft MPEG-1 Layer 2
x MPEG-1 Layer 3 (MP3)
(sampling rates of 32 kHz,
44.1 kHz and 48 kHz)
x MPEG-1 Layer 3 (MP3)
(sampling rates of 16 kHz,
22.05 kHz and 24 kHz)
x Fraunhofer Extension
MPEG-2.5 (MP2.5)
(sampling rate of 8 kHz,
11.025 kHz and 12 kHz)
x Window Media Audio (WMA)
v2, v7, v8, v9 (Lossless,
WMA Pro *)
* WMA Pro multichannel is
downmixed to stereo.
ID3 Tag support
x v1, v2 and v2.4
IRIS.book Page 29 Thursday, October 18, 2012 8:21 AM
Page 30
30
MEDIA
OVERVIEW
The functions of the media
player can be accessed by
touching the MEDIA icon on the
Home screen. Alternatively,
when listening to the radio, it is
possible to touch the icon
and select MEDIA from within
the MCC window.
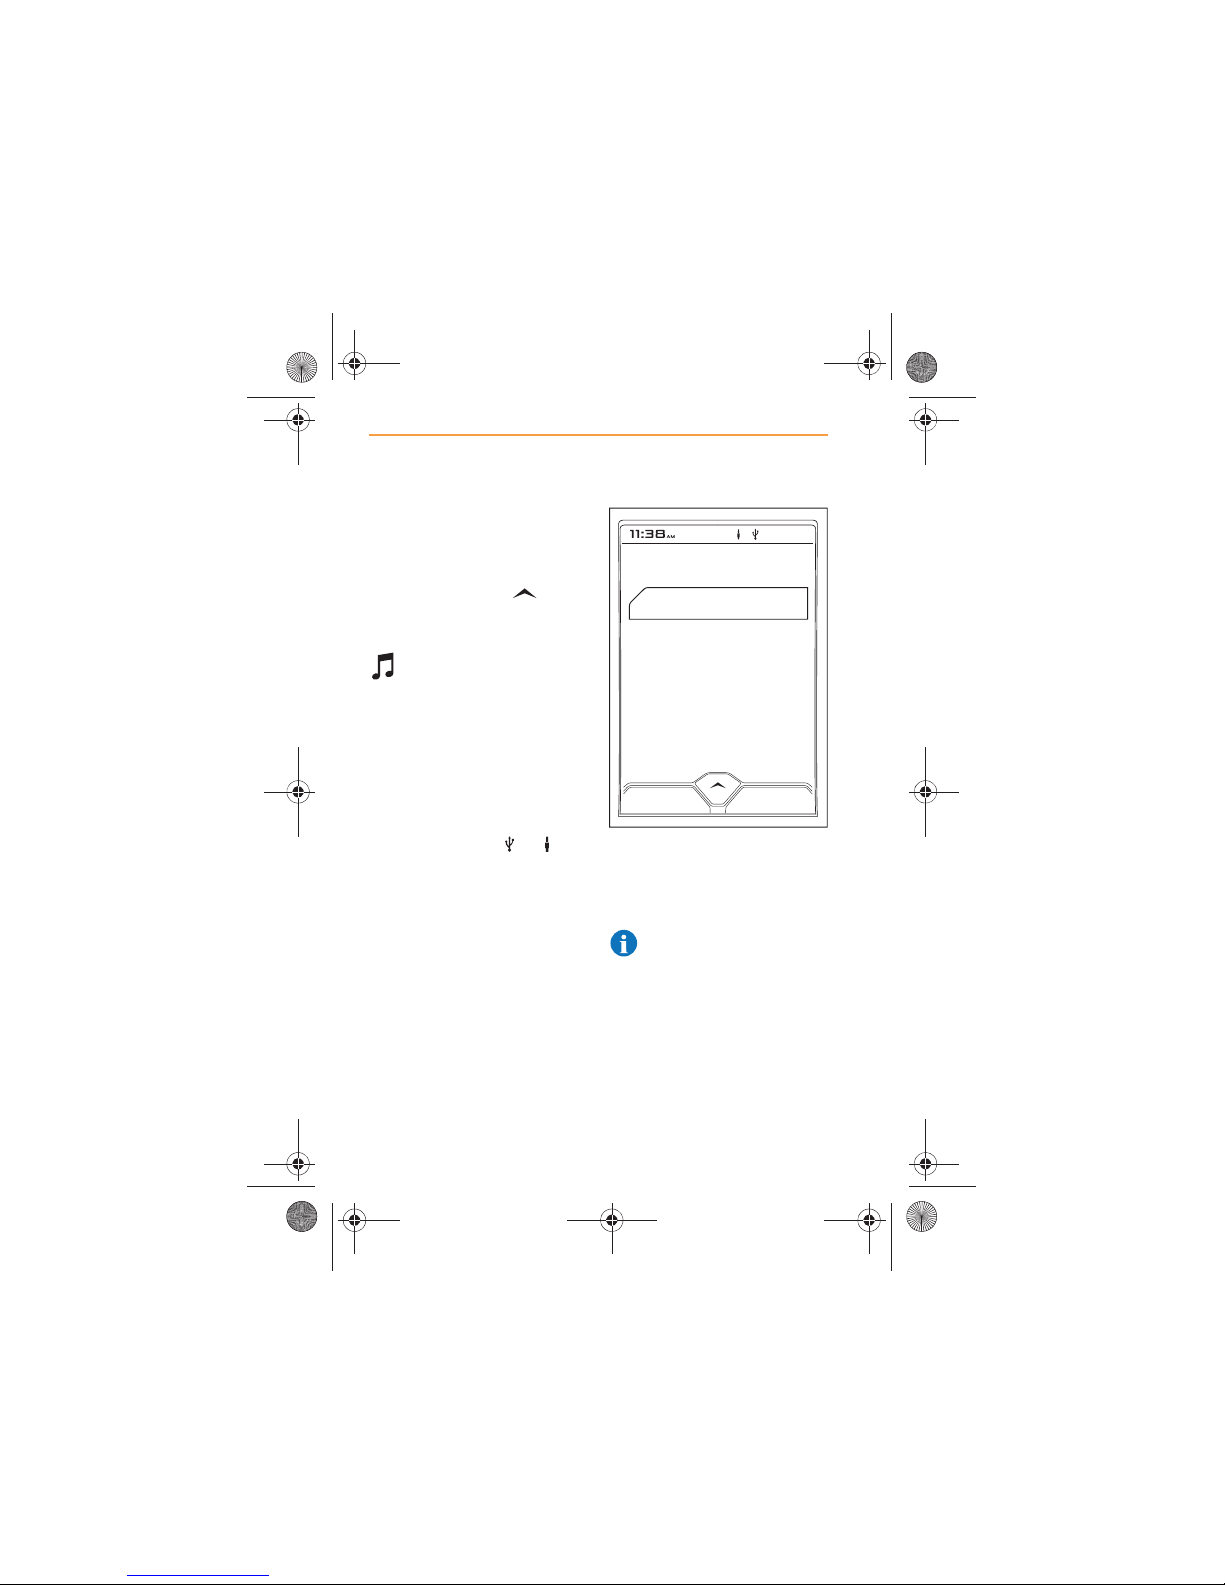
Selecting MEDIA will
present the option of
choosing from the available
sources.
Sources
If music devices are connected
to the USB port and the auxiliary
socket, both sources will appear
on the screen, and the
respective symbols or will
appear at the top of the screen.
x USB, page 32 - displays
device name;
x AUXILIARY, page 39 -
displays AUX.
NOTE: If a device is not
available, it will not be
shown in the list.
If you have no devices
connected to your media player,
the screen will display No
Sources Available.
SOURCE
IRIS IPOD TOUCH 32GB
IRIS.book Page 30 Thursday, October 18, 2012 8:21 AM
Page 31
31
MEDIA
OVERVIEW
Supported media devices
The following media devices can
be operated through the IRIS
system:
x iPod Nano 4G, 5G and 6G;
x iPod Touch 2G, 3G and 4G
x iPhone 3G, 3GS and 4.
NOTE: iPod and iPhone are
trademarks of Apple Inc.,
registered in the USA and other
countries.
Other media devices, not listed,
may function via the USB port,
however full functionality may be
reduced.
Switching between systems
You can switch between
systems, i.e. from Phone to
Media, using the MCC. For more
information, see MCC control,
page 7.
IRIS.book Page 31 Thursday, October 18, 2012 8:21 AM
Page 32
32
MEDIA
USB
USB
Media
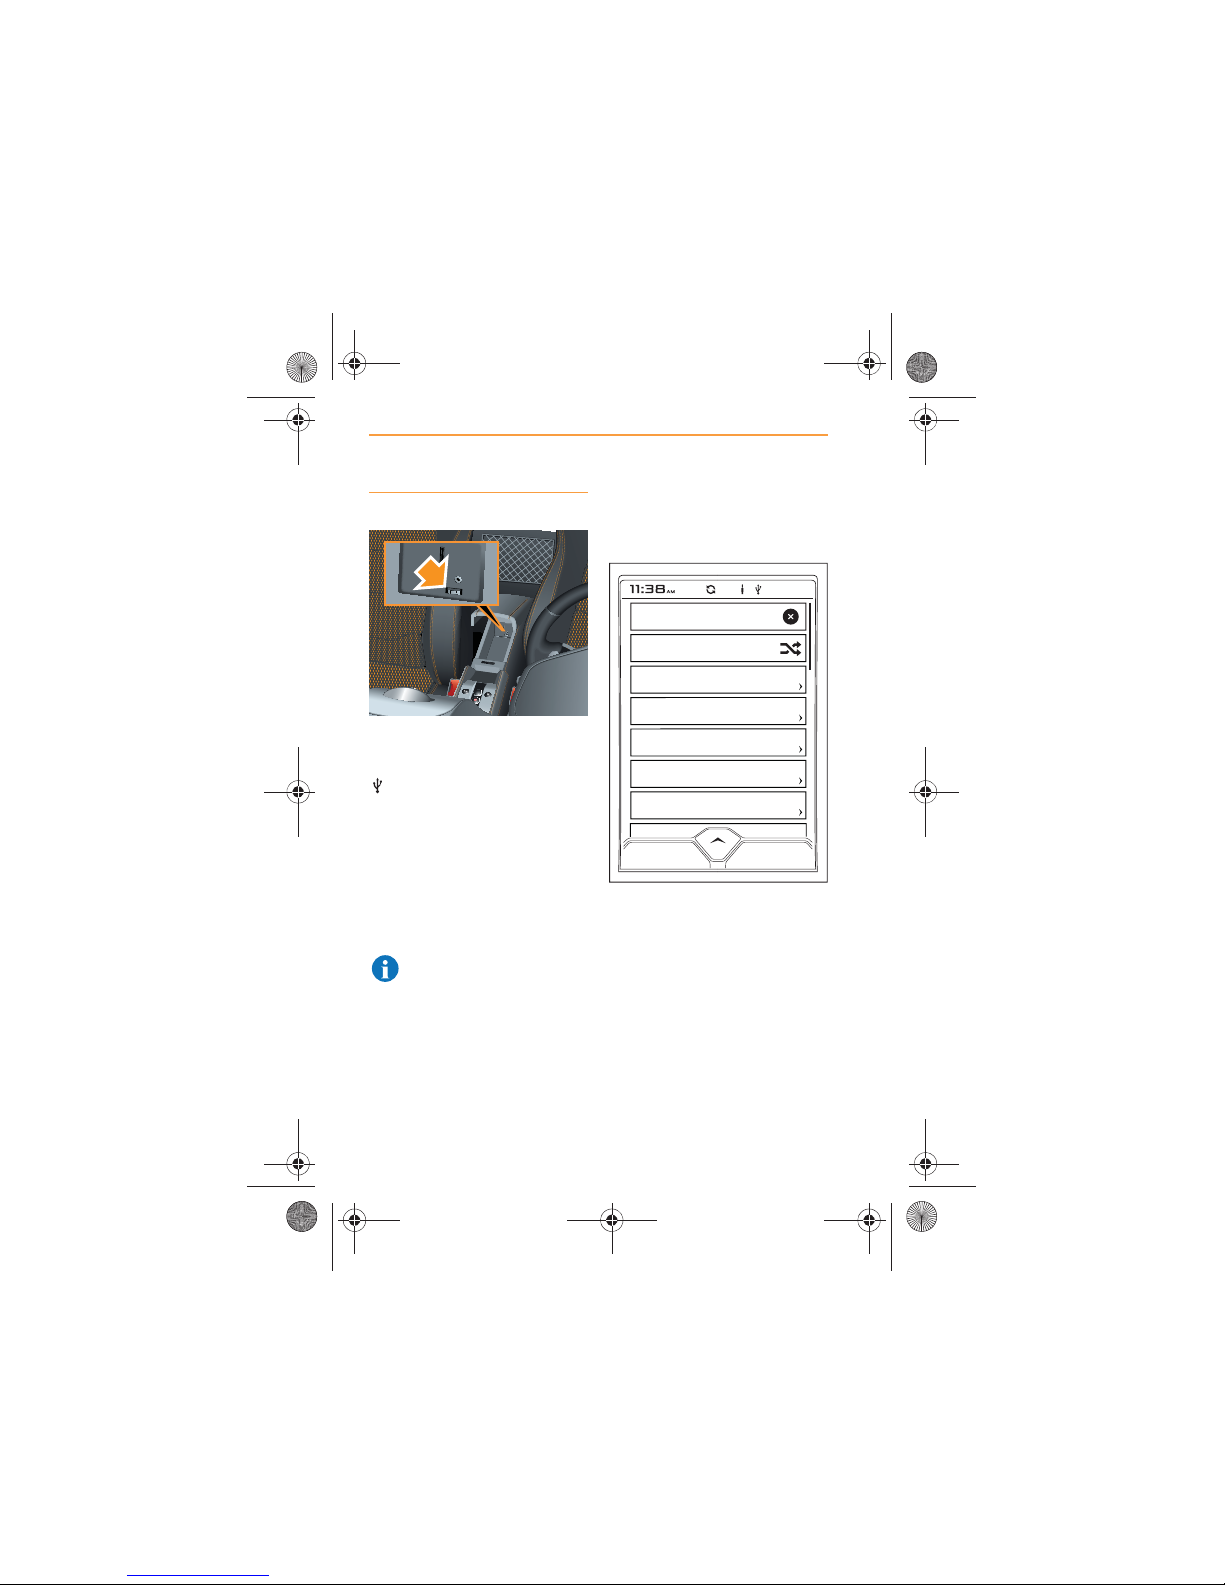
Open the center console and
connect the device to the USB
port, (arrowed). The USB symbol
will appear at the top of the
screen.
Ensure that the center console is
closed, before driving.
Touch the MEDIA icon on the
Home Screen, the name of the
device connected to the USB
port will appear.
NOTE: Any internal
batteries fitted to your
device will be charged through
the USB port.
Touch the device name and the
following list of choices will be
shown.
These choices will enable you to
refine your selection of tracks to
suit your current listening
requirements.
Alternatively, you can use the
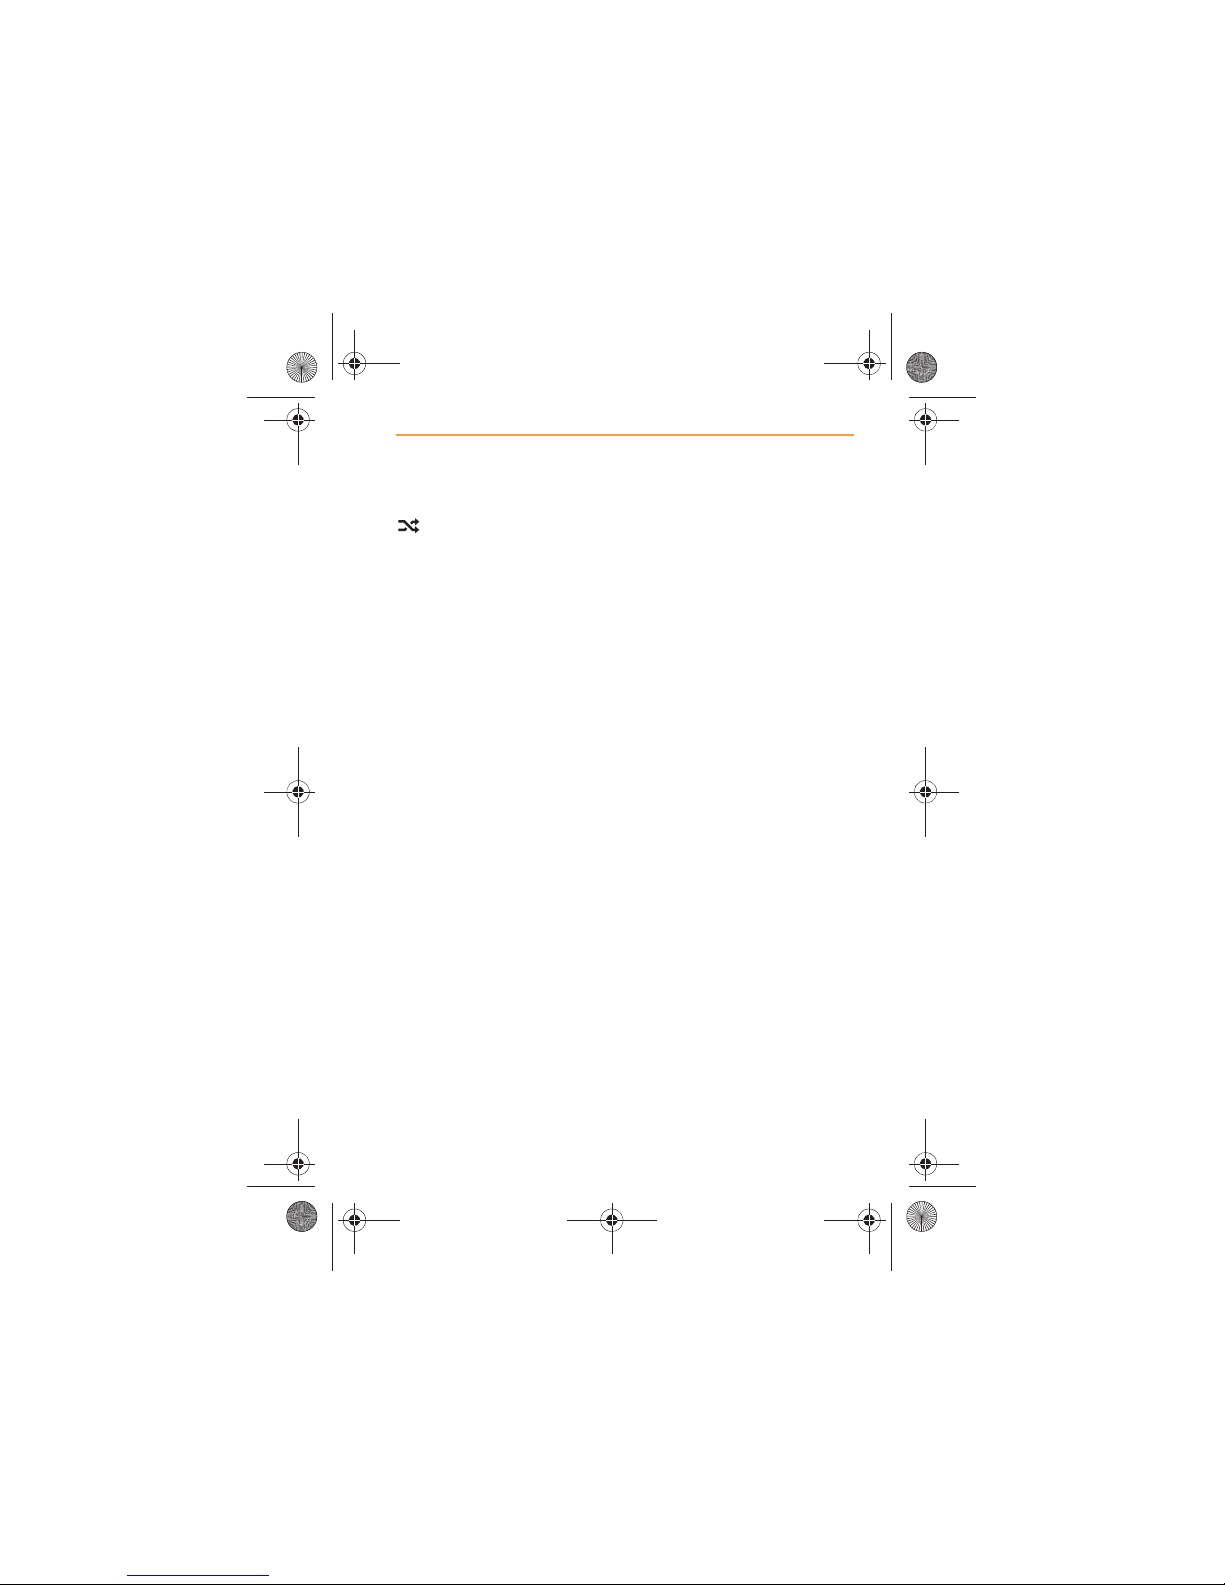
search feature to select
individual, artists, albums or
tracks, see Search, page 35.
R
SHUFFLE ALL
PLAYLISTS
GENRES
ARTISTS
ALBUMS
SONGS
Search
IRIS.book Page 32 Thursday, October 18, 2012 8:21 AM
Page 33
33
MEDIA
USB
Shuffle All
Touch this icon to play all
tracks on the device in a
random sequence.
Playlists
If one or more playlists have
been created on the device,
touch PLAYLISTS and select the
playlist you require from the list
which will be displayed, see
Lists, page 36.
Touch the first track in the
playlist, to commence play.
At the end of the playlist, the
media player will start at the
beginning of the list.
Genres
Touch GENRES. The screen will
show all the genres that are
stored on the device, i.e. Pop,
Rock, Country. From the list,
select the genre that best suits
your current listening
requirements, see Lists, page
36.
You may further refine your
music selection by choosing a
specific album or artist within
that genre.
Touch the first track in the list, to
commence play. At the end of
the list, the media player will
start at the beginning of the list.
IRIS.book Page 33 Thursday, October 18, 2012 8:21 AM
Page 34
34
MEDIA
USB
Artists
Touch ARTISTS to list all artists
whose tracks are stored on the
device. From the list displayed
on screen, select the artist who
suits your current listening
requirements, see Lists, page
36.
You may further refine your
music selection by choosing a
specific album by your chosen
artist.
Touch the first track in the list, to
commence play. At the end of
the list, the media player will
start at the beginning of the list.
Albums
Touch ALBUMS to list all the
albums which are stored on the
device. From the list, select the
album which suits your current
listening requirements, see Lists,
page 36.
Touch the first track in the list, to
commence play. At the end of
the list, the media player will
start at the beginning of the list.
Songs
Touch SONGS to view a list of all
songs on the device. Make a
selection to suit your current
listening requirements.
When the selected song is
finished, the media player will
play the next track on the album
that the song was taken from.
IRIS.book Page 34 Thursday, October 18, 2012 8:21 AM
Page 35
35
MEDIA
USB
Search
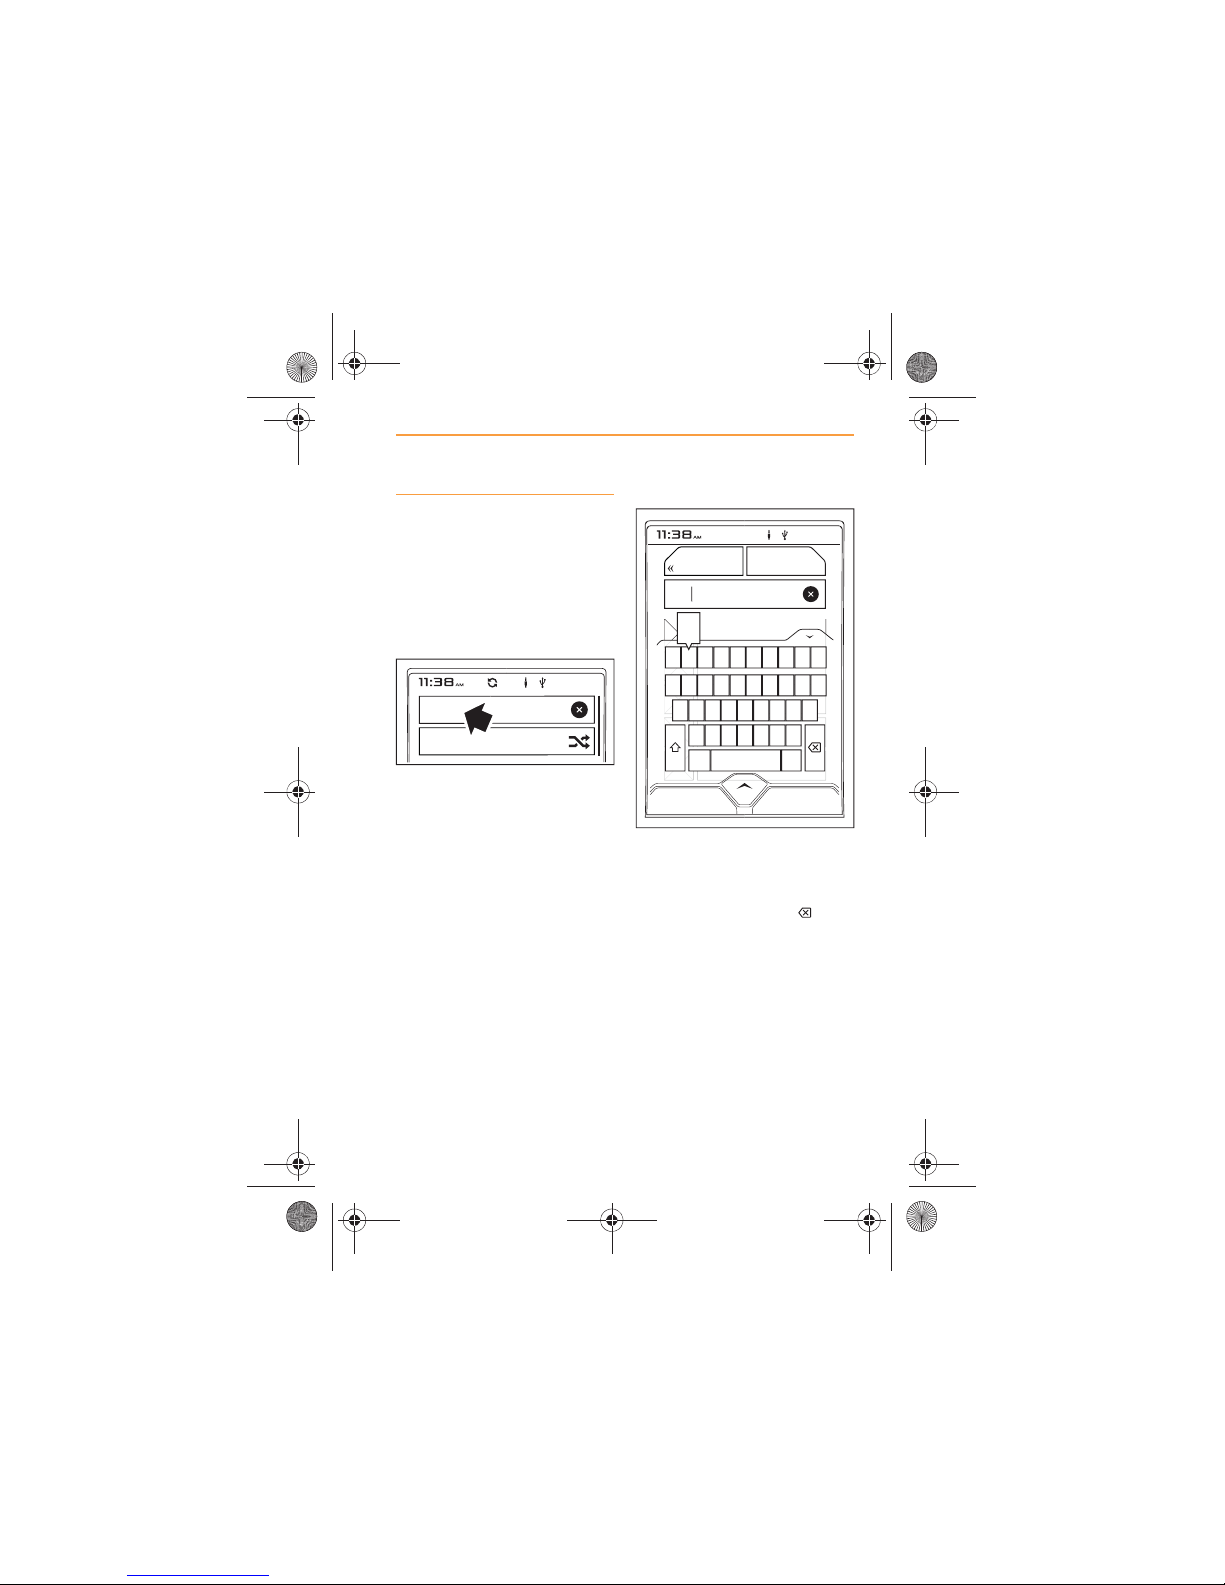
A search can be carried out at
any level within a device
connected to the USB port.
1. For the best results, make
the initial selection of Artist,
Album or Song first.
2. Touch Search and a
keyboard will appear in the
screen.
3. The number of items found is
displayed in the Search area.
4. Enter the first few characters
of the Artist or Album.
5. If you enter an incorrect
character, touch the icon
to delete.
SHUFFLE ALL
Search
Item
Item
Item
Item
Item
ALBUM
Item
Ite
m
Item
It
em
Q
1 2 3 4 5 6 7 8 9 0
A
ZXC
SPACE
.?$*
VBNM
SDFGHJKL
WE R T Y U I O P
U2
147
NOW PLAYINGBROWSE ALL
2
IRIS.book Page 35 Thursday, October 18, 2012 8:21 AM
Page 36
36
MEDIA
USB
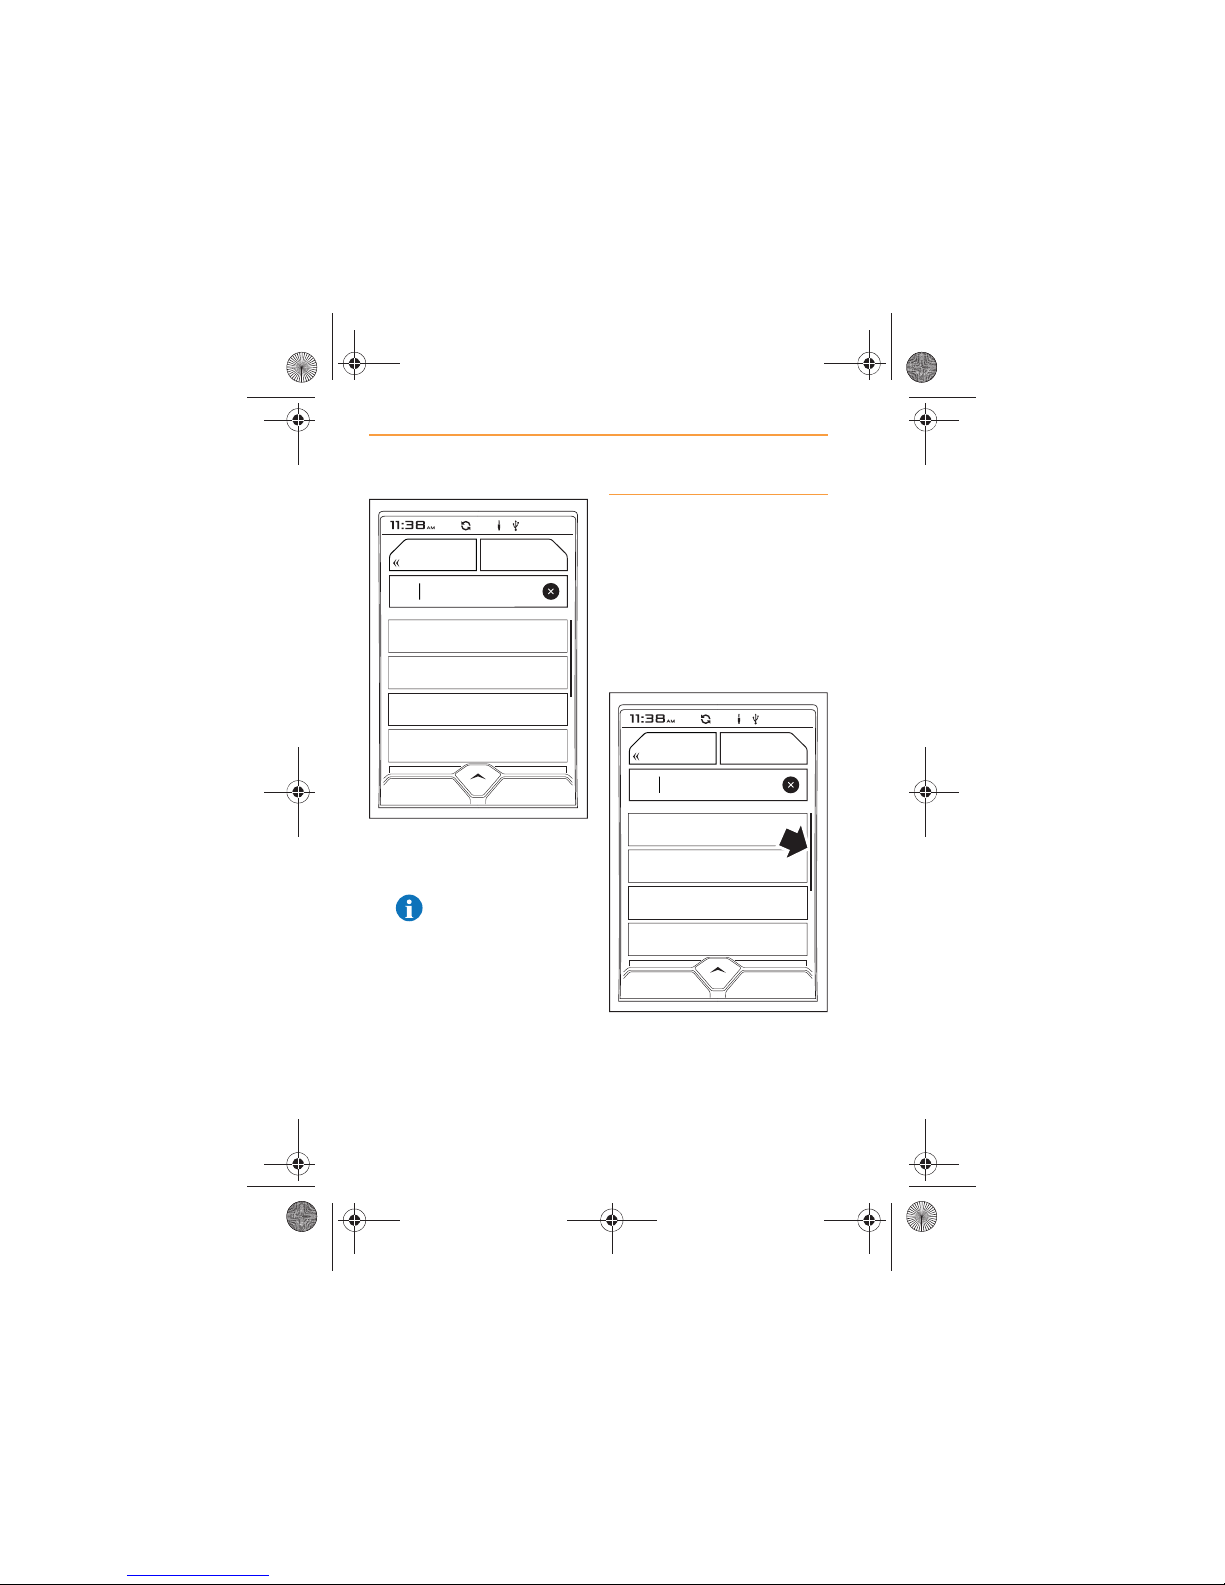
6. The first available search
result will be displayed above
the keyboard.
NOTE: Touch the icon
in the top right hand
corner of the keyboard, to
hide the keyboard and view
more entries.
7. Touch the entry to make your
selection.
Lists
If your selection of music creates
a list which extends beyond the
depth of the screen, scroll up
and down using the left-hand or
right-hand screen icon controls,
or gently swipe your finger
upwards or downwards on the
screen.
The size of the scroll bar
(arrowed) on the right-hand side
of the screen indicates how long
a list is. The shorter the scroll
bar, the longer a list is.
Boy
October
Rattle and Hum
The Joshua Tree
U2
147
NOW PLAYINGBROWSE ALL
Boy
October
Rattle and Hum
The Joshua Tree
U2
147
NOW PLAYINGBROWSE ALL
IRIS.book Page 36 Thursday, October 18, 2012 8:21 AM
Page 37
37
MEDIA
USB
Music play
Play from any device connected
through the USB port can be
controlled using the touch
screen and IRIS controls.
This includes adjusting the
sound settings, see Touch
screen controls, page 5 and
Meridian, page 15.
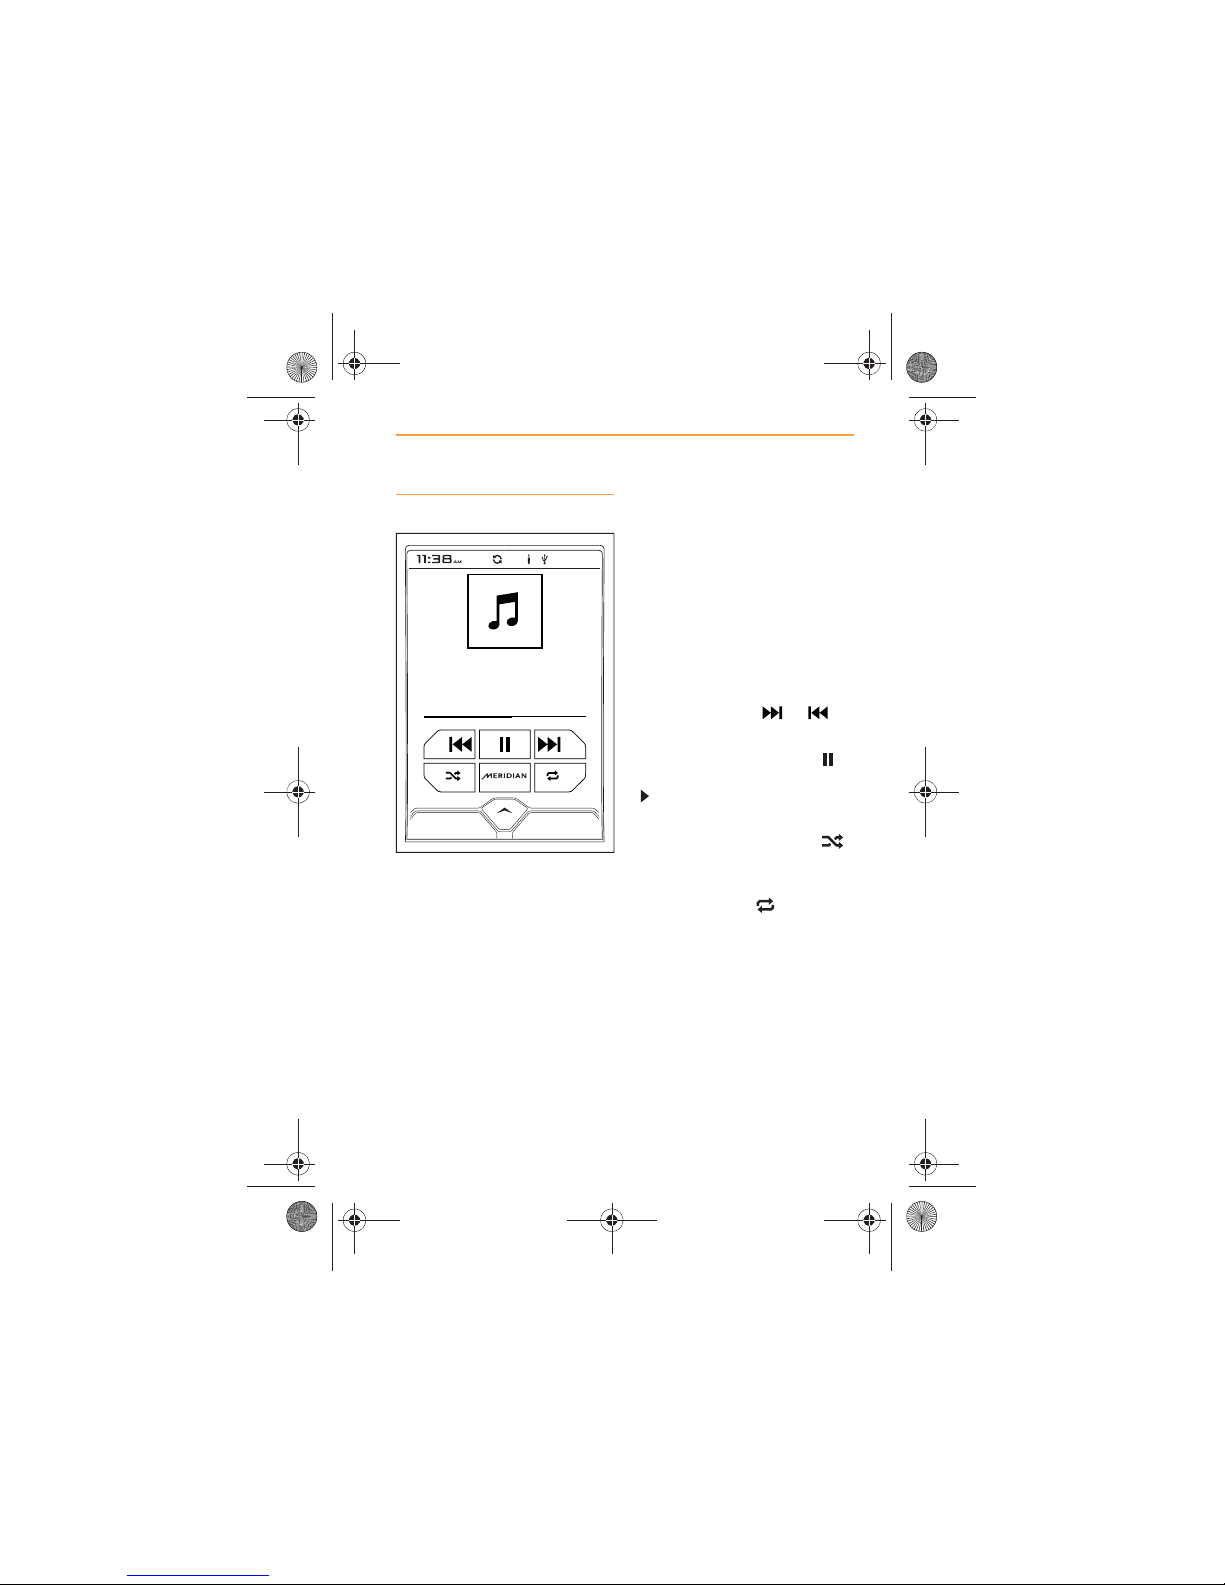
Once music play has started the
album title, the artist’s name and
the song title will appear on the
screen. If there is any artwork
associated with the song, that
will also be displayed, if no
artwork is available, a
representation of a musical note
will be shown.
Move forward or backward
through the current selection of
tracks by touching or
icons.
To pause a track, touch the
icon. To resume play, touch the
icon.
To SHUFFLE the tracks in the
current selection, touch the
icon.
To REPEAT the track being
played, touch the icon.
Love Lost
00:38 / 2:24
BROWSESOURCE
Conditions
The Temper Trap
IRIS.book Page 37 Thursday, October 18, 2012 8:21 AM
Page 38
38
MEDIA
USB
To change the music being
played, you can touch BROWSE
at any time and make a new
selection.
To stop play from the USB
device, touch the icon, the
SOURCE icon and select
auxiliary input, or select radio
from within the MCC.
Alternatively, briefly press the
On/Off and Home control to
return to the Home screen to
make another selection, or turn
the media player off.
IRIS.book Page 38 Thursday, October 18, 2012 8:21 AM
Page 39
39
MEDIA
AUXILIARY
AUXILIARY
Media
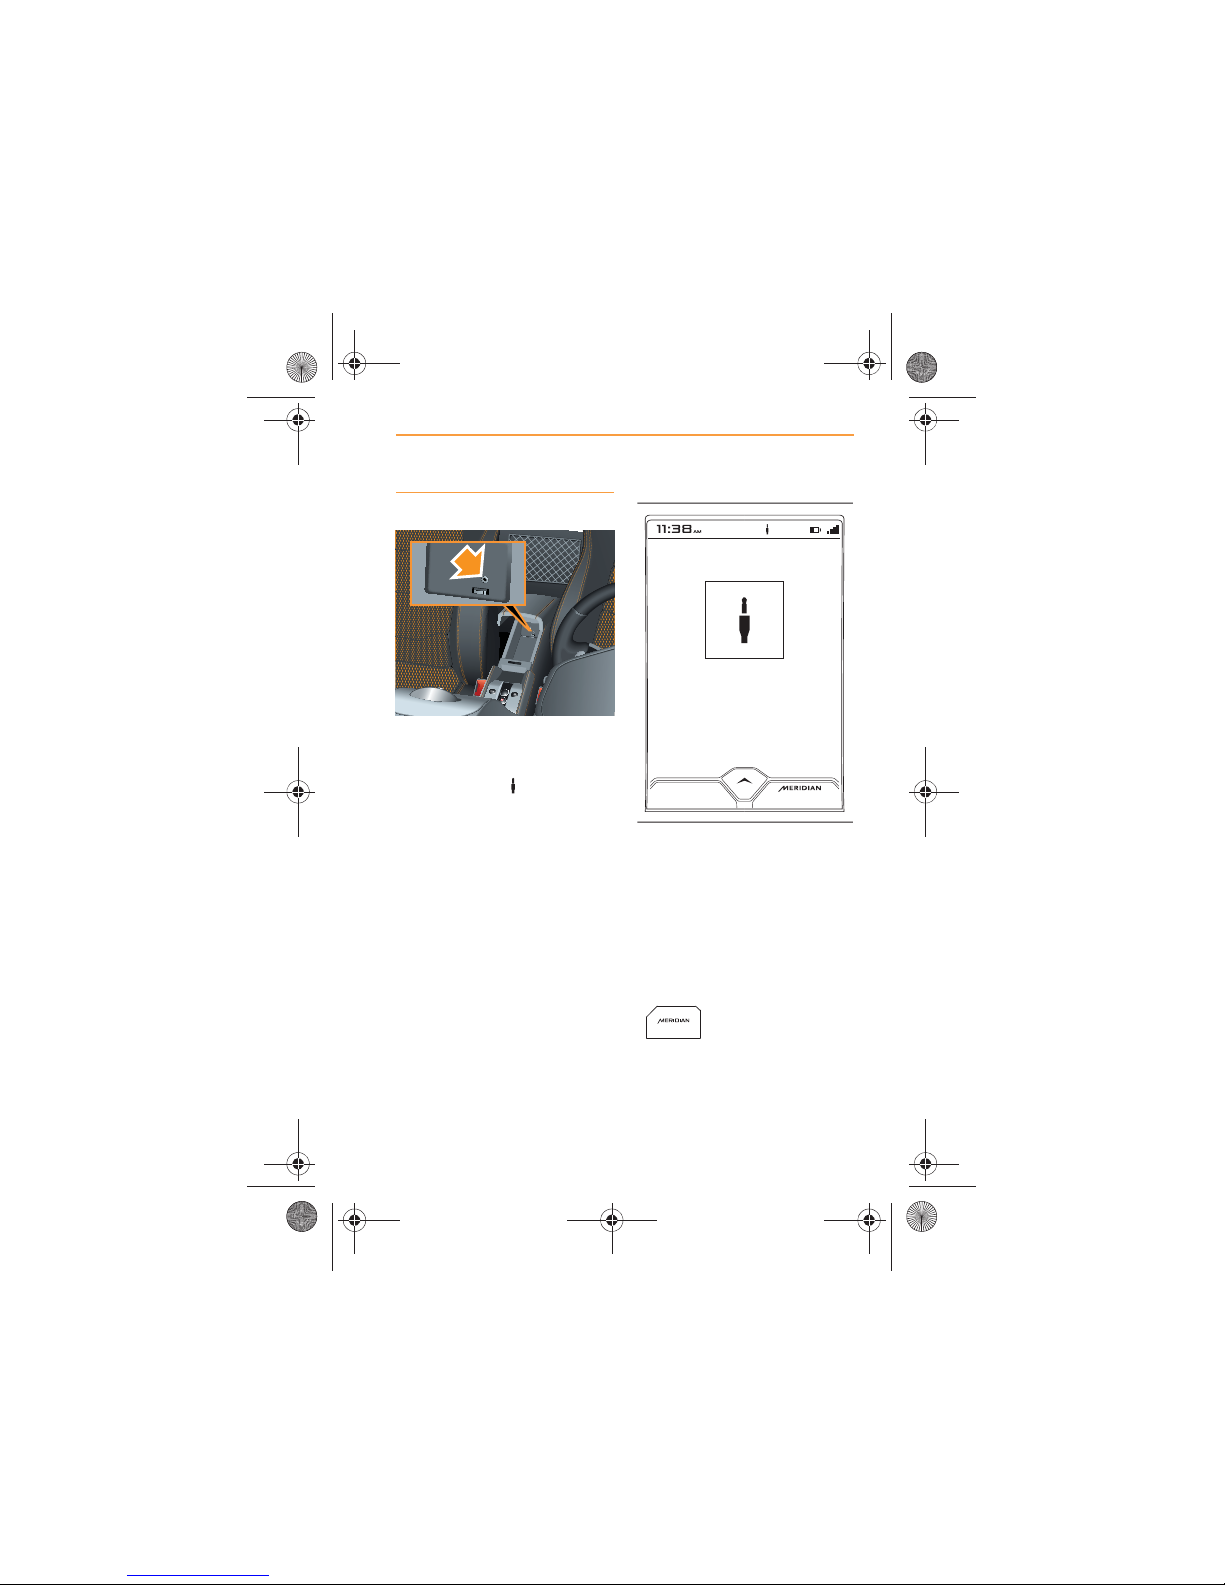
Open the center console and
connect the device to the
auxiliary socket, (arrowed). The
auxiliary symbol will appear at
the top of the screen.
Ensure that the center console is
closed, before driving.
Play from any device connected
through the auxiliary socket will
have to be controlled from the
device itself.
The screen will show a graphic
representing a jack plug, when
media play is from a device
connected to the auxiliary
socket.
Touch the SOURCE icon (or the
control below it) to change
source.
Touch the MERIDIAN
icon (or the control
below it) to optimise
the sound for a particular artist or
track.
R
Aux Input
SOURCE
IRIS.book Page 39 Thursday, October 18, 2012 8:21 AM
Page 40
40
MEDIA
AUXILIARY
Switching on or off, volume or
mute can be adjusted using the
touch screen and IRIS controls,
see Touch screen controls, page
5 and Meridian, page 15.
NOTE: Any internal battery
fitted to the device will not
be charged by the auxiliary
socket while it is connected.
To stop play from the device
connected to the auxiliary
socket, touch the SOURCE icon
and select USB input, or select
radio from within the MCC.
Alternatively, briefly press the
On/Off and Home control to
return to the Home screen to
make another selection, or turn
the media player off.
Audio volume is dependant on
the output volume of the device
attached, and the IRIS volume.
NOTE: If a static or hiss
sound is heard, adjust the
volume of the device and/or IRIS
to compensate.
IRIS.book Page 40 Thursday, October 18, 2012 8:21 AM
Page 41
41
PHONE
INTRODUCTION
PHONE
INTRODUCTION
Functions
IRIS provides the facility to
make and receive calls
safely and hands-free, by
connecting to your cell phone
using Bluetooth®.
The connection provides you
with access to the contacts and
call history stored on your
phone. IRIS also makes it
possible for you to initiate
conference calls.
WARNING: Do not allow
yourself to become
distracted by the phone while
driving. You could cause an
accident.
Safety precautions
WARNING: Never attempt
to operate the phone
while the vehicle is moving.
You could become distracted
and cause an accident.
Always store your phone
securely. Unsecured objects
can become dangerous
missiles in the event of an
accident.
WARNING: Always switch
off the phone in areas
with a high risk of explosion.
These areas include gas
stations, gas storage areas or
chemical factories, as well as
places where the air contains
fuel vapour, chemicals or
metal dust.
WARNING: The operation
of cardiac pacemakers or
hearing aids may be impaired
when the phone is in use.
Check with your doctor or the
manufacturer of the
equipment to establish if
anyone who is using such
devices, is sufficiently
protected against high
frequency energy.
We recommend that, to avoid
potential interference, a
minimum distance of 15 cm (6
in) is maintained between a
wireless phone antenna and a
cardiac pacemaker.
IRIS.book Page 41 Thursday, October 18, 2012 8:21 AM
Page 42
42
PHONE
INTRODUCTION
Bluetooth®
Bluetooth® is the short-range
radio frequency (RF) technology
which allows electronic devices
to communicate with each other
wirelessly.
Compatible Bluetooth® phones
can be used in conjunction with
IRIS.
The McLaren Bluetooth® system
supports Bluetooth® HandsFree Profile 1.6 (HFP 1.6). If the
mobile phone connected to the
system also supports this profile,
features such as battery meter
and signal strength may be
displayed on the screen.
Your cell phone must be paired
and connected with IRIS before
it can be operated, see Pairing a
phone, page 43 and Connecting
a phone, page 46.
Paired means that IRIS
remembers a particular phone or
phones.
Connected means this is the
phone which is currently
connected to IRIS and can be
used to make and receive calls.
Only one phone can be
connected at any one time.
Switching between systems
You can switch between
systems, i.e. from Phone to
Media, using the MCC. For more
information, see MCC control,
page 7.
IRIS.book Page 42 Thursday, October 18, 2012 8:21 AM
Page 43
43
PHONE
USING THE PHONE
USING THE PHONE
Pairing a phone
The exact process of pairing and
connecting your cell phone to
IRIS, will depend on the type of
phone you are attempting to pair.
1. Switch the ignition on,
ensure that IRIS is active and
that no other phone is
currently connected to the
system.
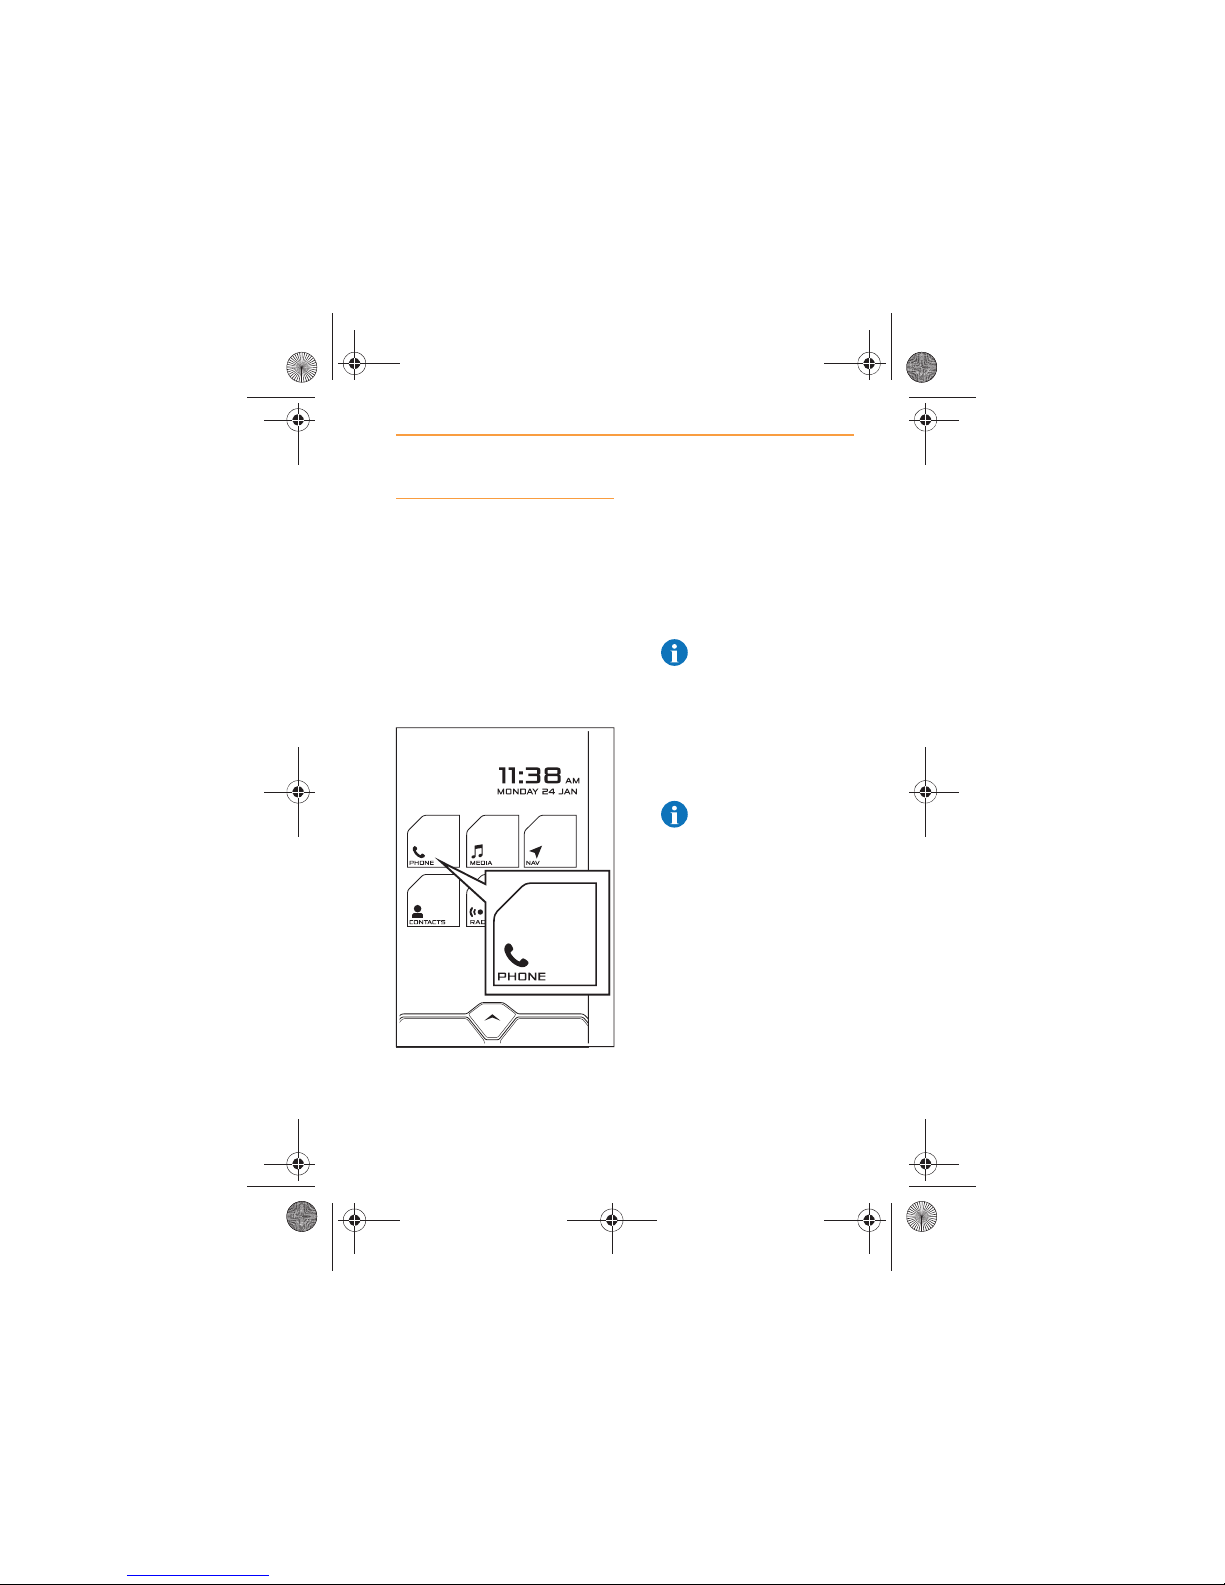
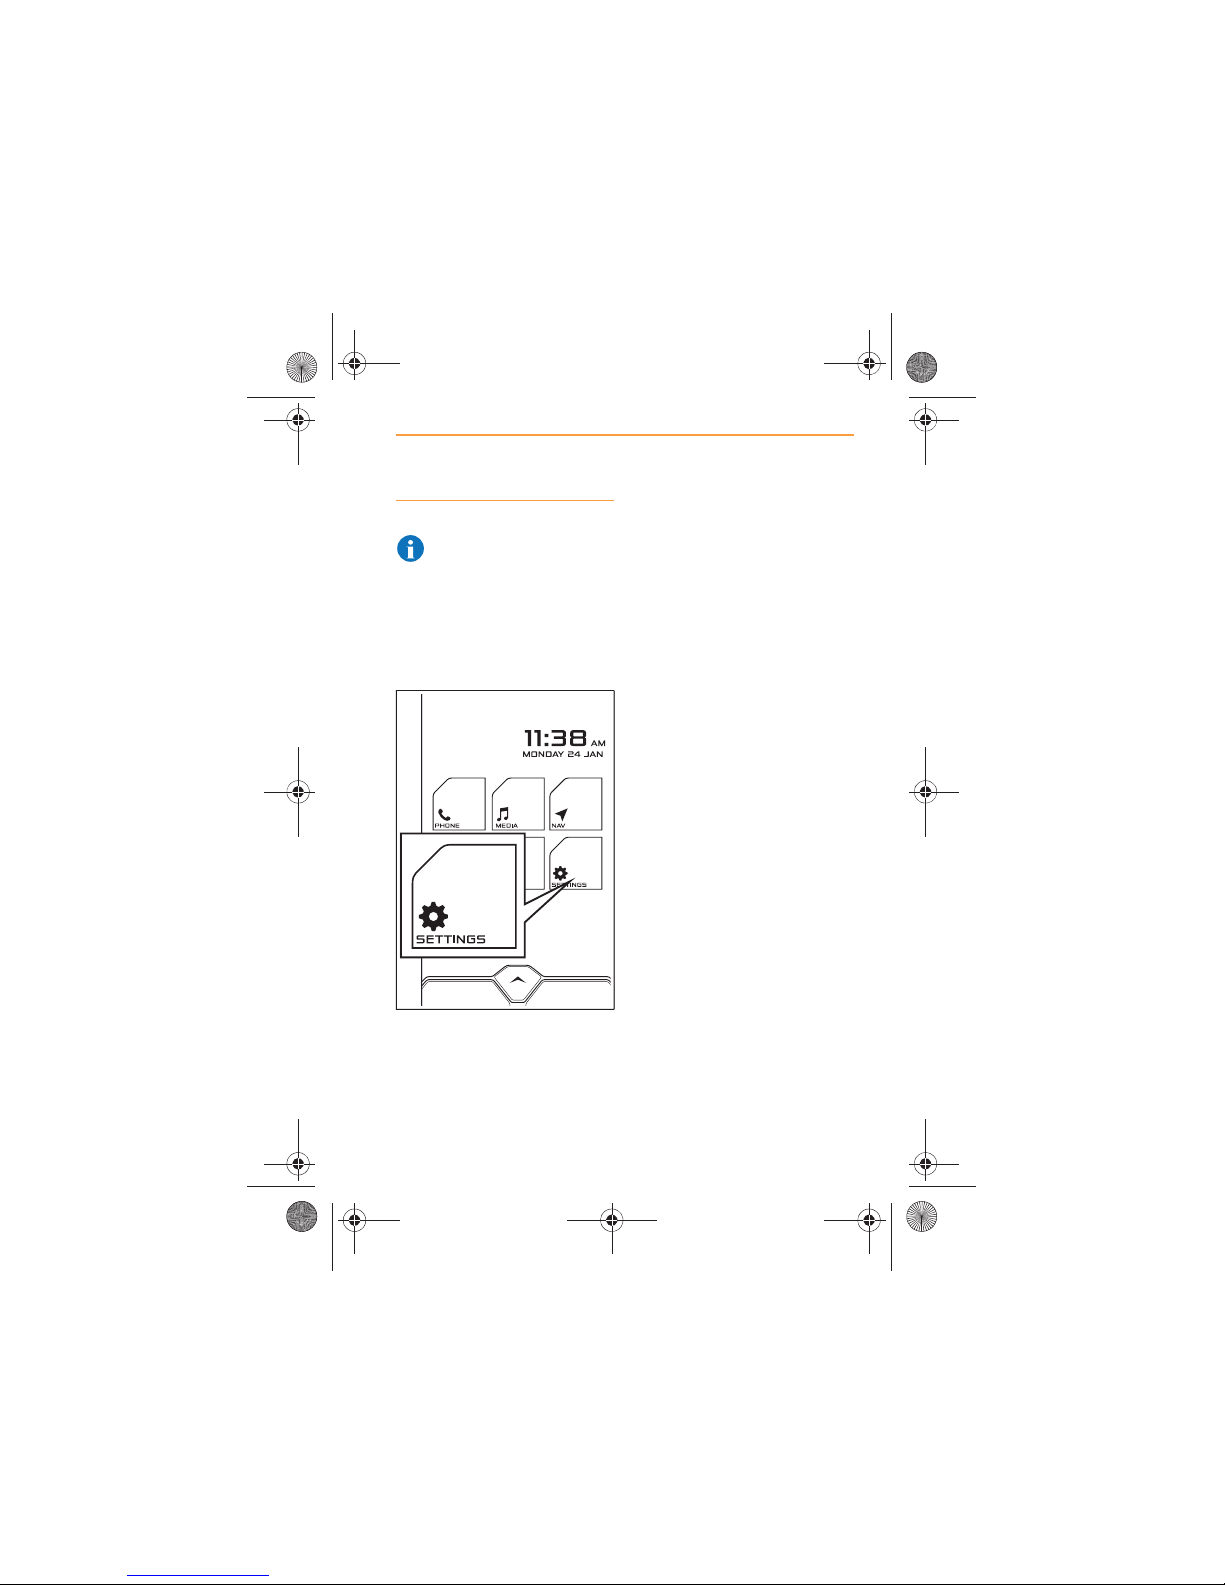
2. From the Home Screen,
touch the PHONE icon.
3. If no phone has been
previously connected, the
system will automatically
switch on Discoverable
mode. If Discoverable is not
on, switch on manually, see
Discoverable mode, page 10.
NOTE: IRIS will time
out of Discoverable
mode once a phone is
connected or after 3 minutes
of no Bluetooth® activity.
4. Using your cell phone, select
the search for Bluetooth®
devices function.
NOTE: On some
phones, this is referred
to as a new paired device.
Refer to your phone's
operating instructions for the
exact description.
IRIS.book Page 43 Thursday, October 18, 2012 8:21 AM
Page 44
44
PHONE
USING THE PHONE
5. When IRIS is found,
‘McLaren MP4-12C’ will
appear on your phone
display.
6. Select this device from the
list.
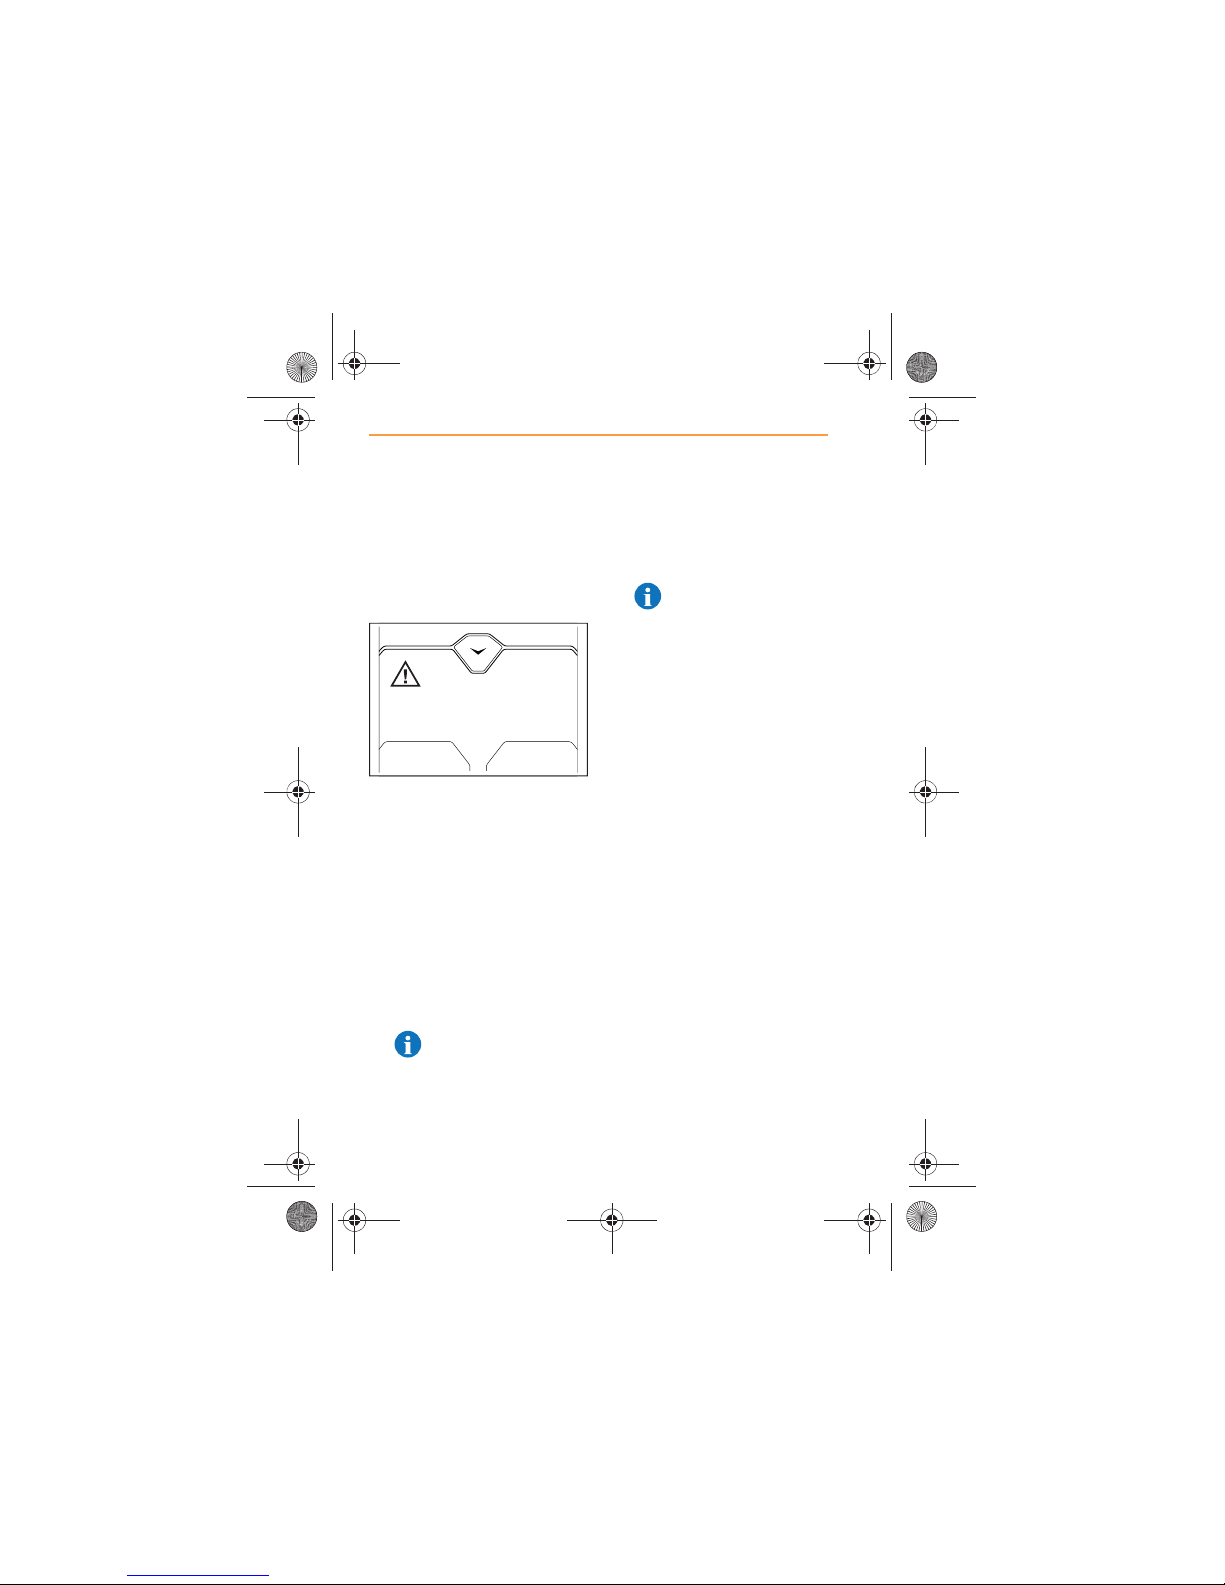
7. IRIS will display a randomly
generated passcode.
8. Enter the passcode into your
phone when prompted. Once
the passcode is entered,
IRIS will automatically
connect to your phone.
9. Once your phone has been
paired and connected to
IRIS, it will connect
automatically whenever it
comes within range.
NOTE: If two or more
paired phones come
within range together, the
one Set as Primary will be
connected.
10. If it does not automatically
connect, you will have to
connect manually to IRIS,
using the cell phone controls.
NOTE: Some cell
phones always need to
be manually connected.
Some phones require the
connection to be authorized
each time. Set McLaren
MP4-12C as authorized in
the cell phone’s known
device list, to prevent this.
11. Check that your contacts and
call history can be accessed
through IRIS. To synchronize
the contacts manually, see
Sync Contacts, page 12.
CANCEL
Enter this code on your device to connect Bluetooth:
768443
BLUETOOTH PASSCODE
IRIS.book Page 44 Thursday, October 18, 2012 8:21 AM
Page 45
45
PHONE
USING THE PHONE
Pairing additional phones
NOTE: If a phone is
connected to IRIS when
another phone is being paired,
the system will disconnect that
phone during pairing. This will
occur even if the connected
phone is Set as Primary.
1. From the Home Screen,
touch the SETTINGS icon.
2. Select BLUETOOTH and
make sure that Discoverable
is switched on.
3. The procedure is now the
same as when pairing the
first phone, see Pairing a
phone, page 43.
4. A maximum of 12 phones
can be paired to IRIS, but
only one can be connected at
a time.
IRIS.book Page 45 Thursday, October 18, 2012 8:21 AM
Page 46
46
PHONE
USING THE PHONE
Connecting a phone
If you have already paired a
phone, IRIS will automatically
reconnect to it when the phone
comes within range unless
another phone is connected.
If a phone is connected and you
wish to connect a different one,
see Connect or Disconnect,
page 12.
Your phone will be disconnected
when IRIS or the car is switched
off. Automatic reconnection may
take several seconds when the
car or IRIS is switched on again.
Making a Call
There are a number of ways of
making a call, and these are
explained in the following
information.
Using the keypad
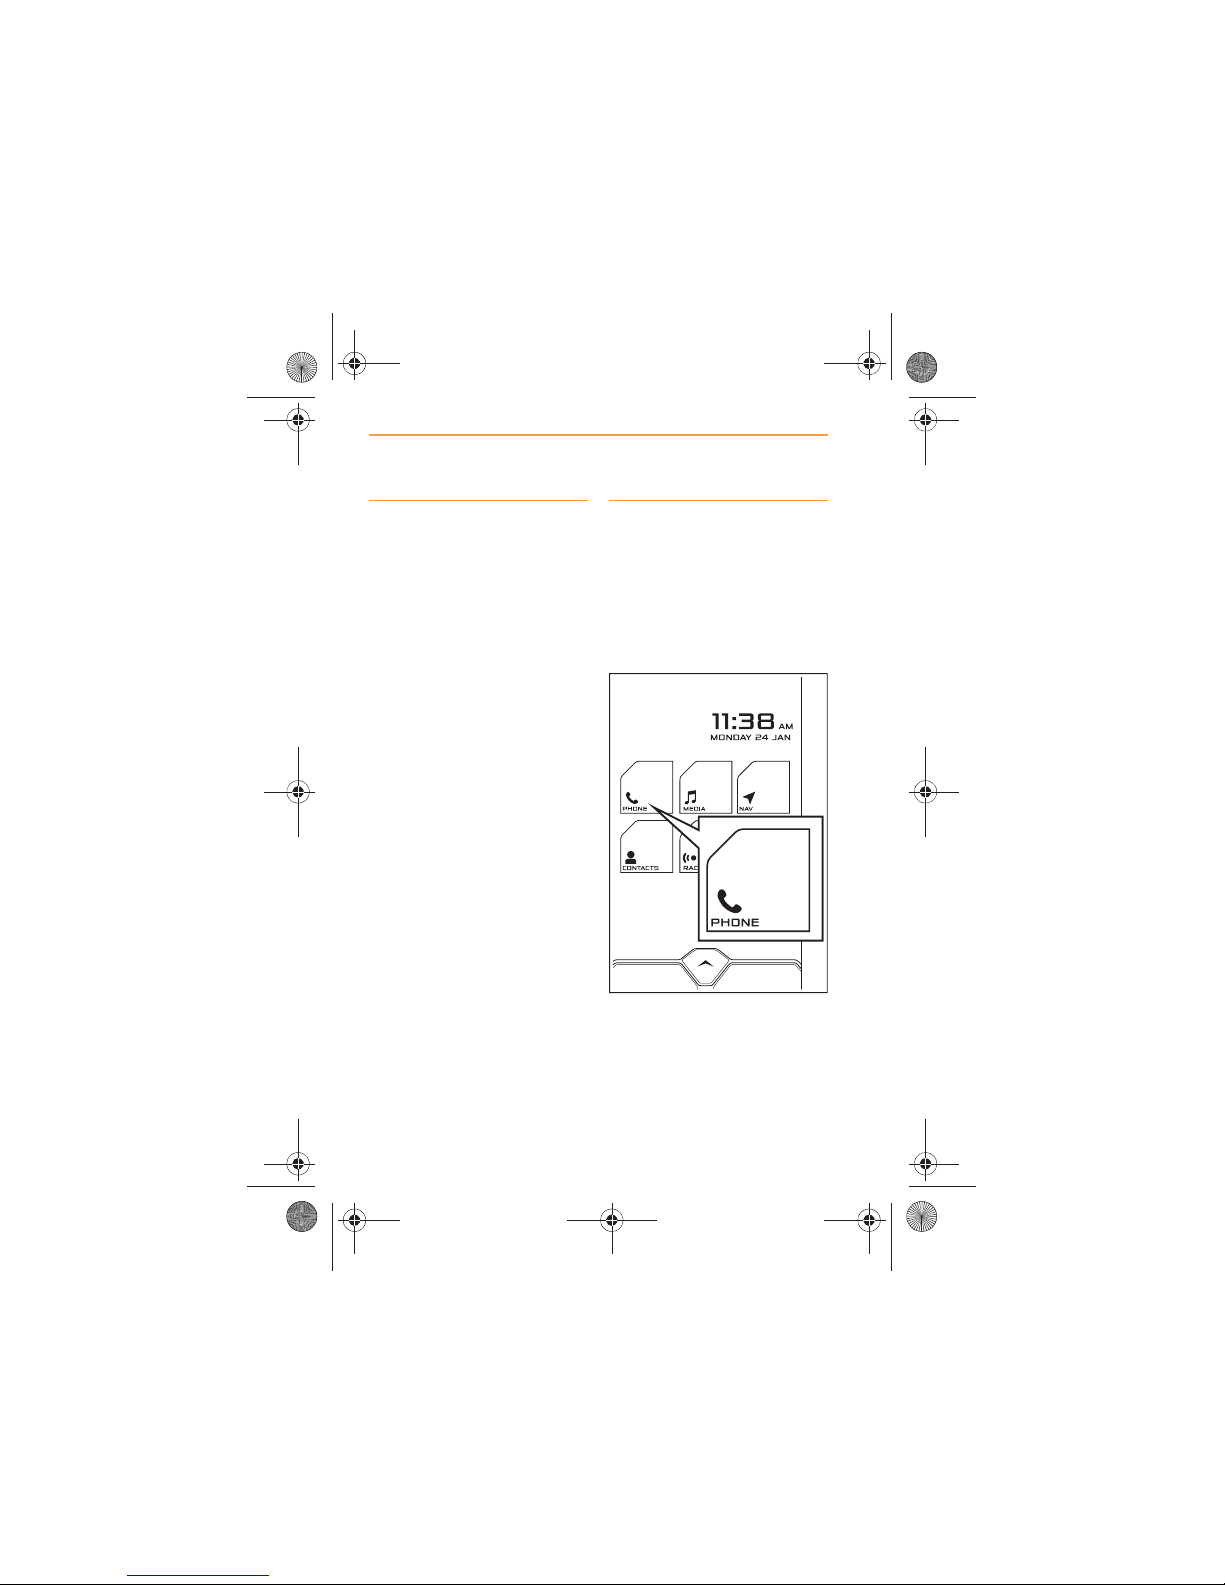
1. From the Home Screen,
touch the PHONE icon.
IRIS.book Page 46 Thursday, October 18, 2012 8:21 AM
Page 47
47
PHONE
USING THE PHONE
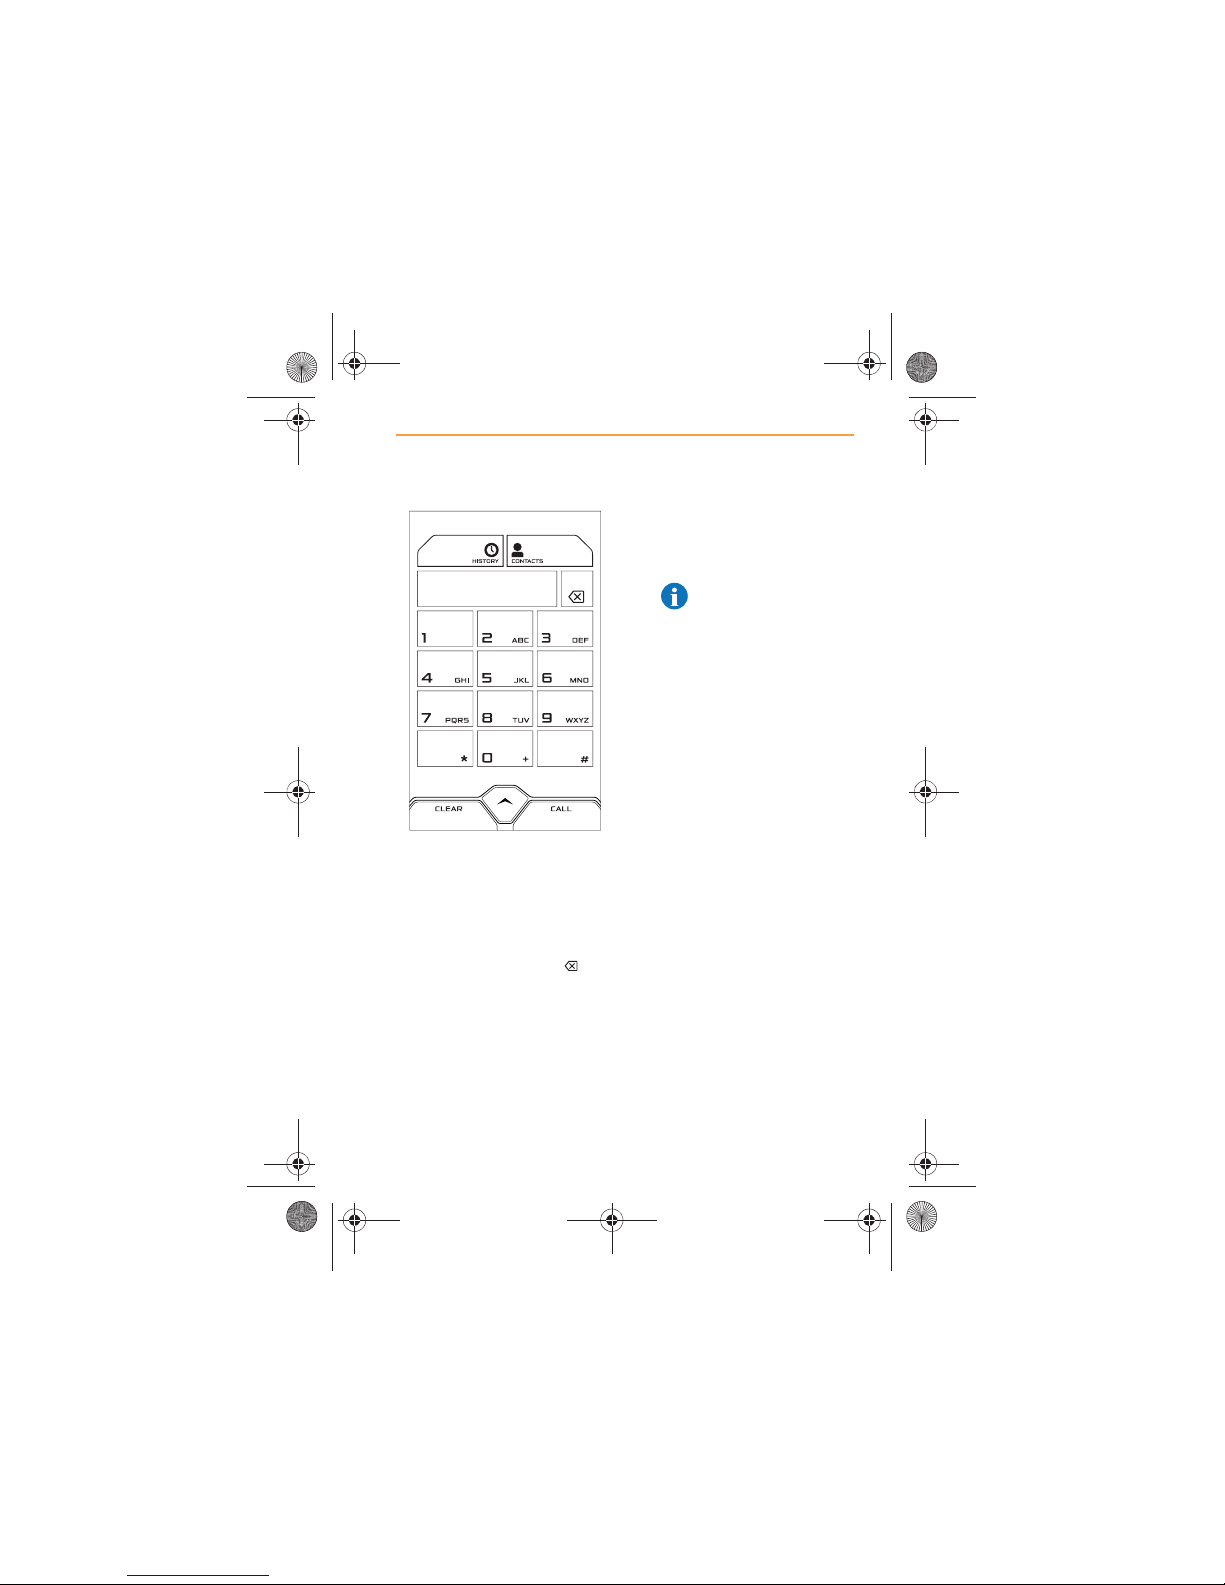
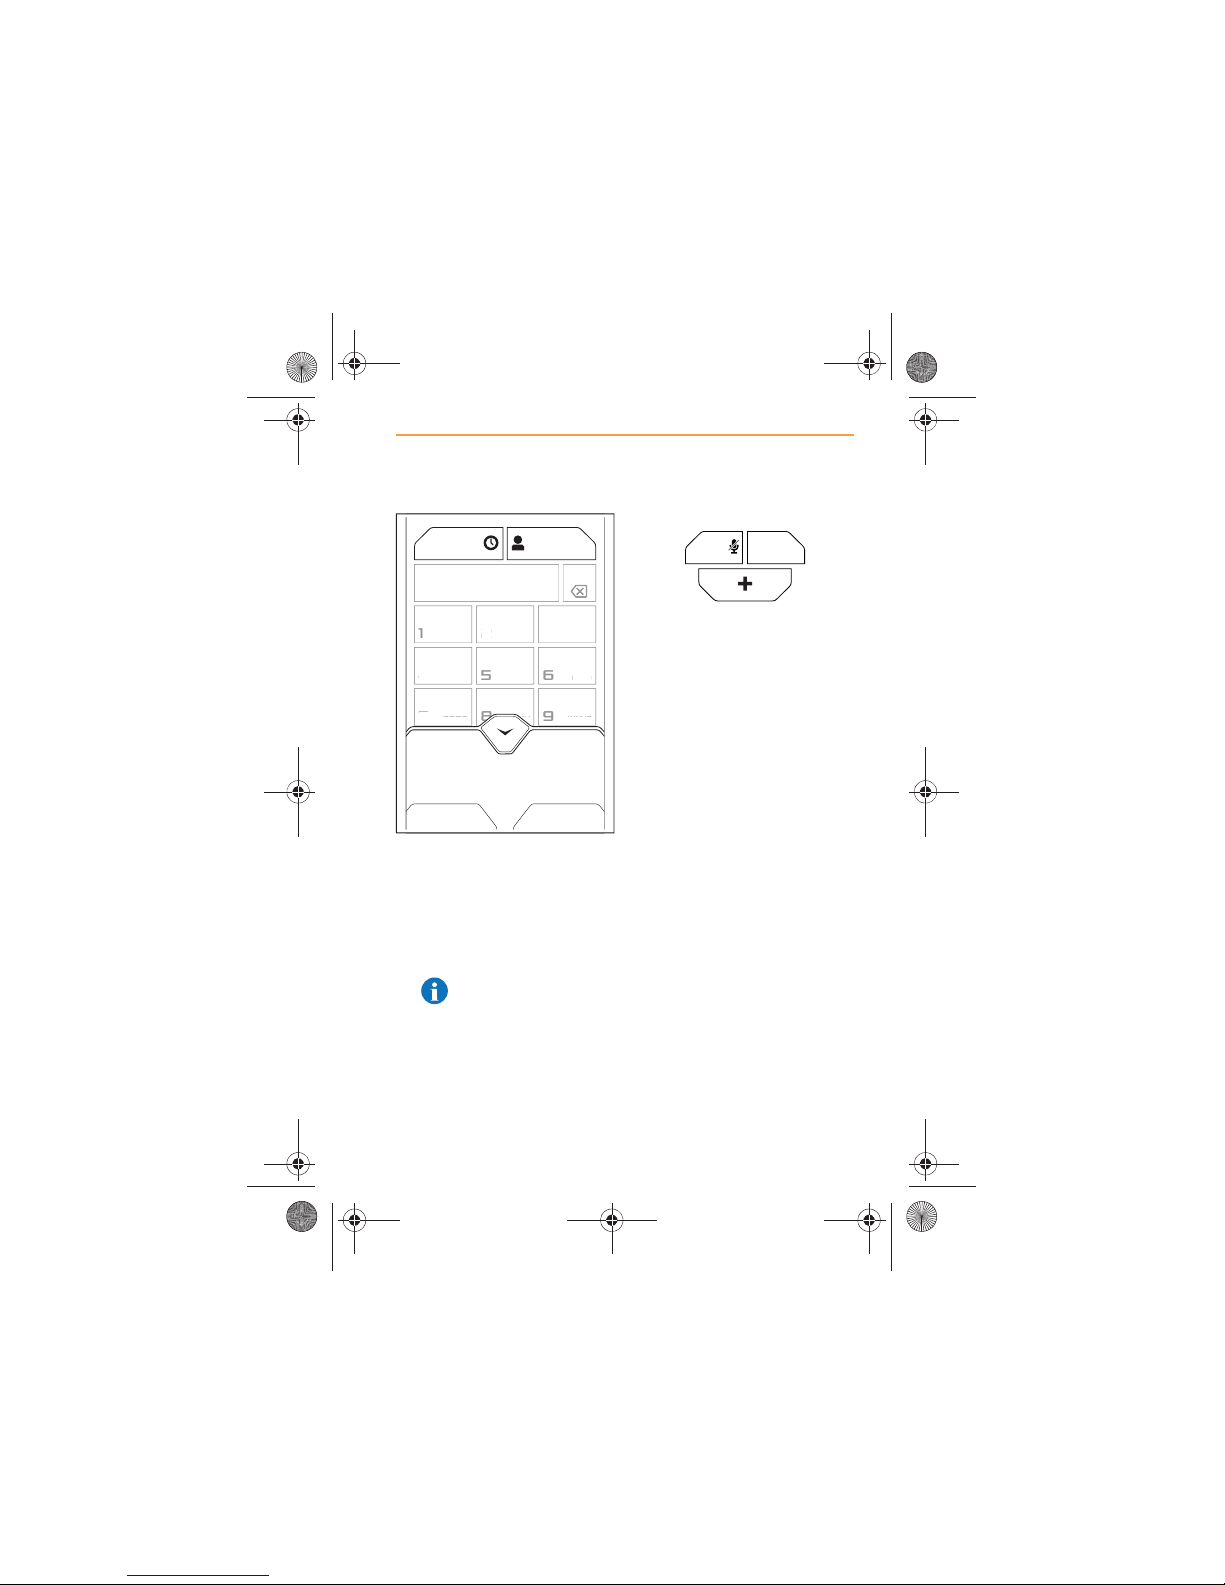
2. Phone numbers can be
entered using the on screen
key pad.
If you enter an incorrect
number or digit, touch
CLEAR to delete all the
numbers or touch the icon
to delete the last digit.
3. Touch the CALL icon when
the complete number is
displayed on the screen.
4. The number will disappear
from the screen, as the call is
being connected.
5. A call can be cancelled, while
the system is dialling, by
touching the CANCEL icon
or button.
NOTE: Any media or
radio play will be muted
while a call is in progress.
+445555555555
IRIS.book Page 47 Thursday, October 18, 2012 8:21 AM
Page 48
48
PHONE
USING THE PHONE
Using Contacts
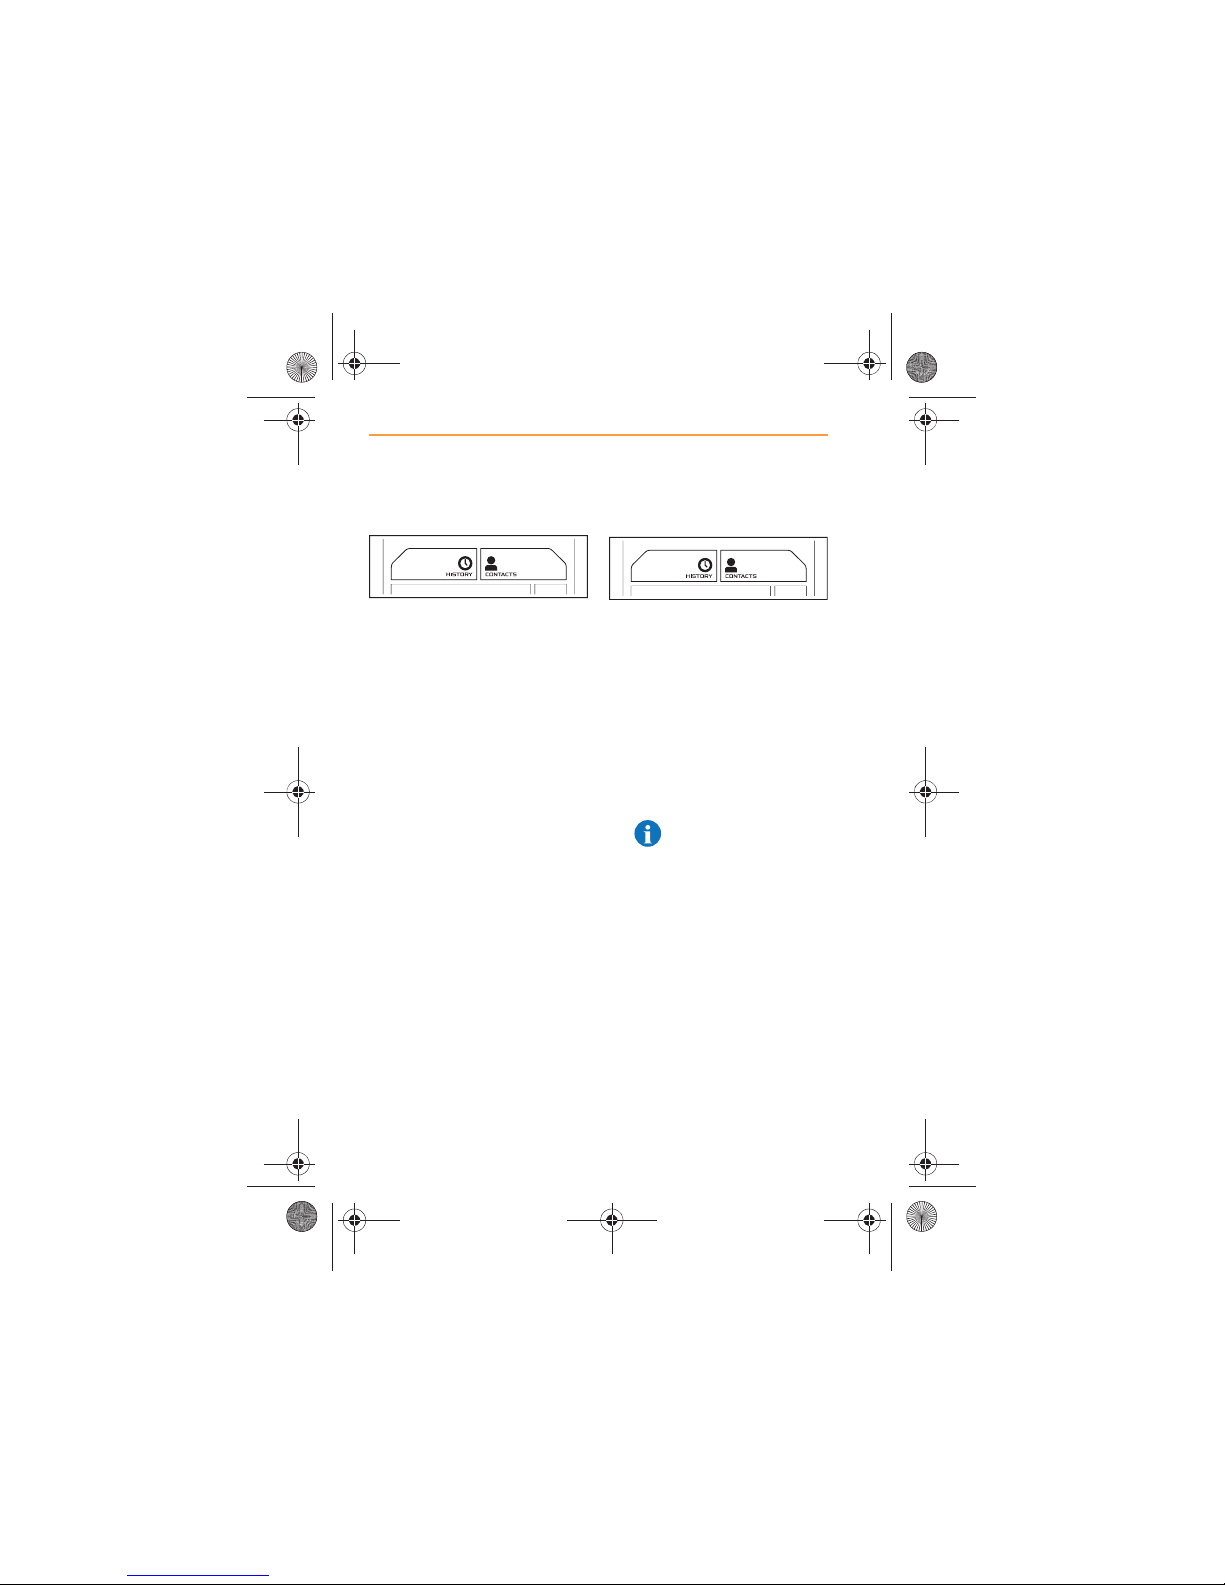
1. From the Home Screen or
the Phone screen, touch
CONTACTS.
2. Once your contacts are
displayed, a specific person
can be found by scrolling or
searching. For more
information on scrolling and
searching, see CONTACTS,
page 53.
Using Call History
1. From the Phone Screen,
touch the History icon.
2. A list of previous calls
received, made, and missed,
during the current session,
will be displayed in
chronological order with most
recent on top.
3. Select the contact you wish
to call.
NOTE: Unless Contacts
and Call History are
synchronized with IRIS, only
calls made or received using
Bluetooth® will be displayed.
IRIS.book Page 48 Thursday, October 18, 2012 8:21 AM
Page 49
49
PHONE
USING THE PHONE
4. Touch the entry and dialling
will commence.
5. A call can be cancelled, while
the system is dialling, by
touching the CANCEL icon
or button.
NOTE: Any media or
radio play will be muted
while a call is in progress.
Call Privacy
1. If a call is of a sensitive or
private nature, touch the
SWITCH TO PHONE icon
and conversation will only be
heard through the cell phone
and not IRIS. The display on
the icon will change to
SWITCH TO CAR.
2. To revert to the conversation
being heard through IRIS,
touch the SWITCH TO CAR
icon.
123
456
78
0
*
#
9
ABC DEF
GHI
PQRS TUV
+
WXYZ
JKL MNO
1
B
CDEF
PQR
S
TU
V
WXY
Z
CONTACTSHISTORY
CANCEL
+445555555555
DIALLING...
SWITCH
TO PHONE
ADD
MUTE
IRIS.book Page 49 Thursday, October 18, 2012 8:21 AM
Page 50
50
PHONE
USING THE PHONE
Making a conference call
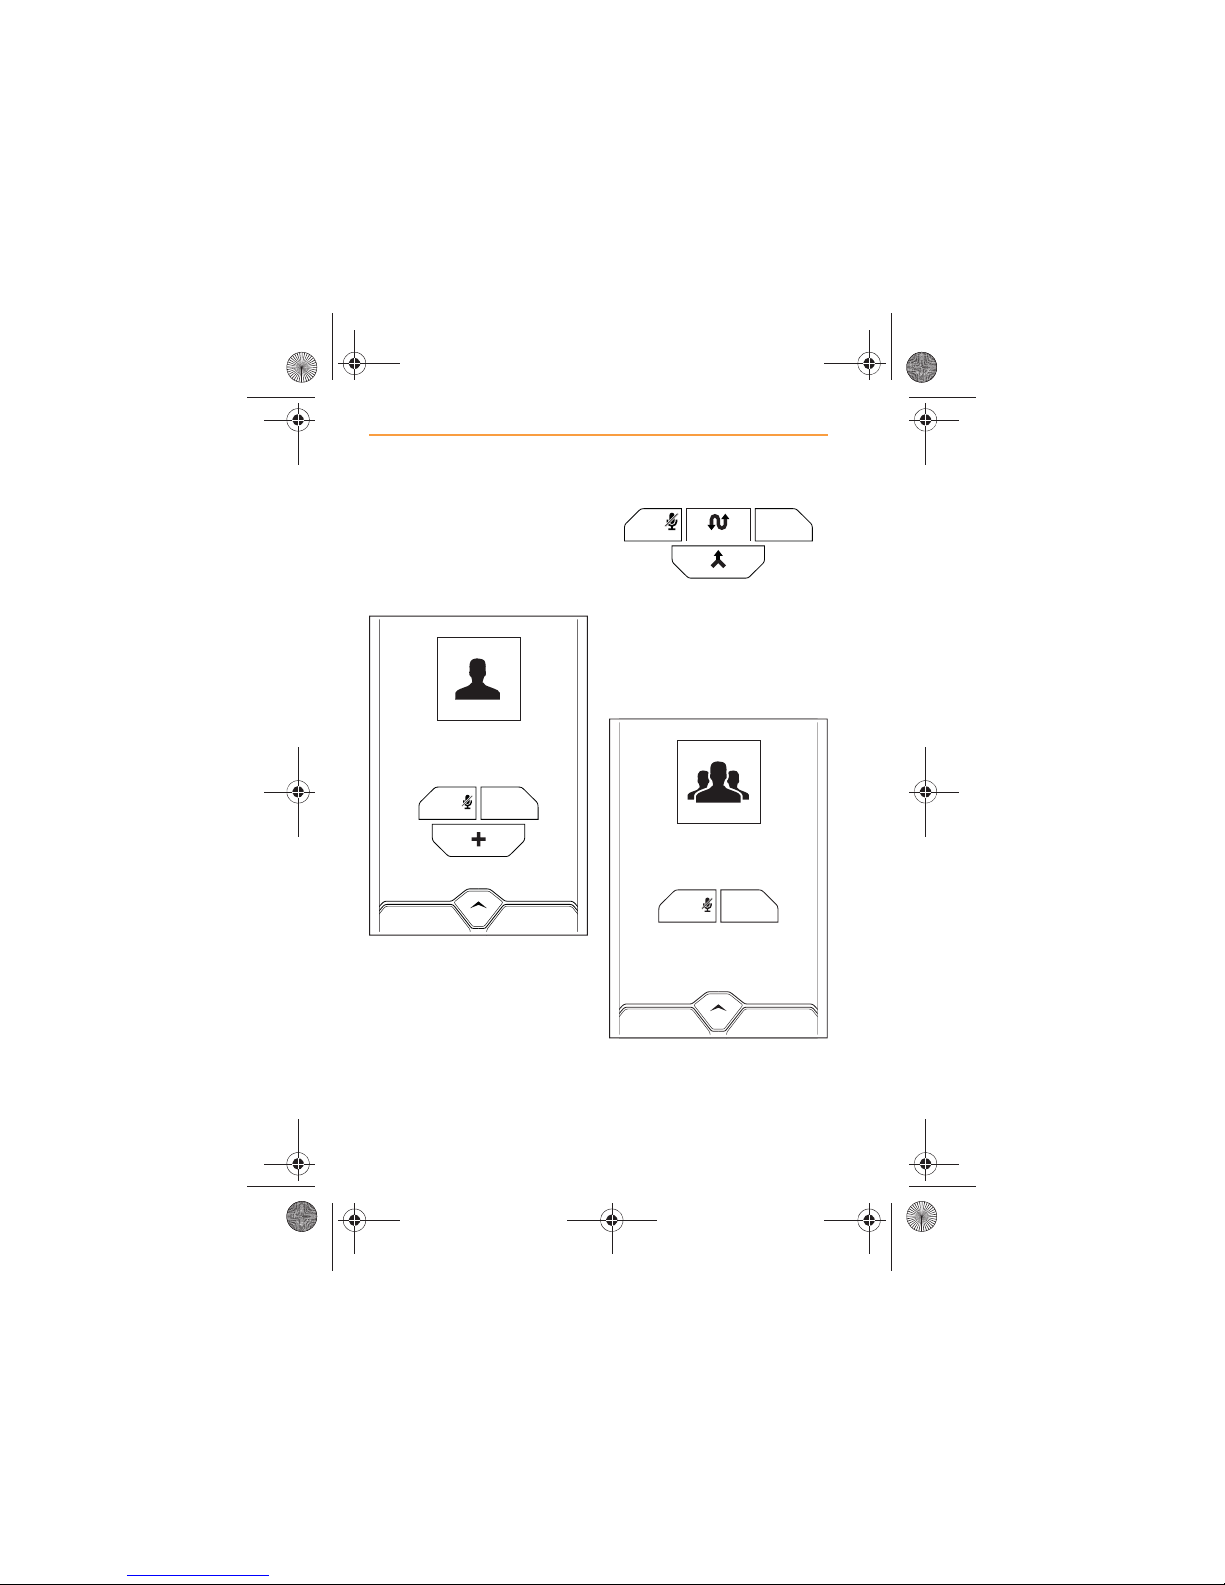
1. Call one of the intended
participants using either
method previously
described.
2. From the Call in Progress
screen, touch the ADD icon,
and either enter the number
of the next participant, or
select from CONTACTS.
3. The first call will be placed on
hold. Wait to be connected to
the second participant.
4. The Call in Progress screen
will be displayed. Touch the
MERGE icon to start a
conference call. Alternatively,
use the SWAP icon to
change between participants.
5. If conference call was
selected, this is confirmed by
the above screen with call
duration appearing.
SWITCH
TO PHONE
ADD
KEYPADEND
John Smith
00:32
MUTE
SWITCH TO
PHONE
MERGE
MUTE
SWAP
KEYPADEND
01:18
SWITCH
TO PHONE
MUTE
IRIS.book Page 50 Thursday, October 18, 2012 8:21 AM
Page 51
51
PHONE
USING THE PHONE
NOTE: It is only
possible for three
participants in a conference
call; the caller and two
recipients.
6. When a conference call is
ended, all calls are ended
simultaneously.
NOTE: Conference
calling is phone model
dependent.
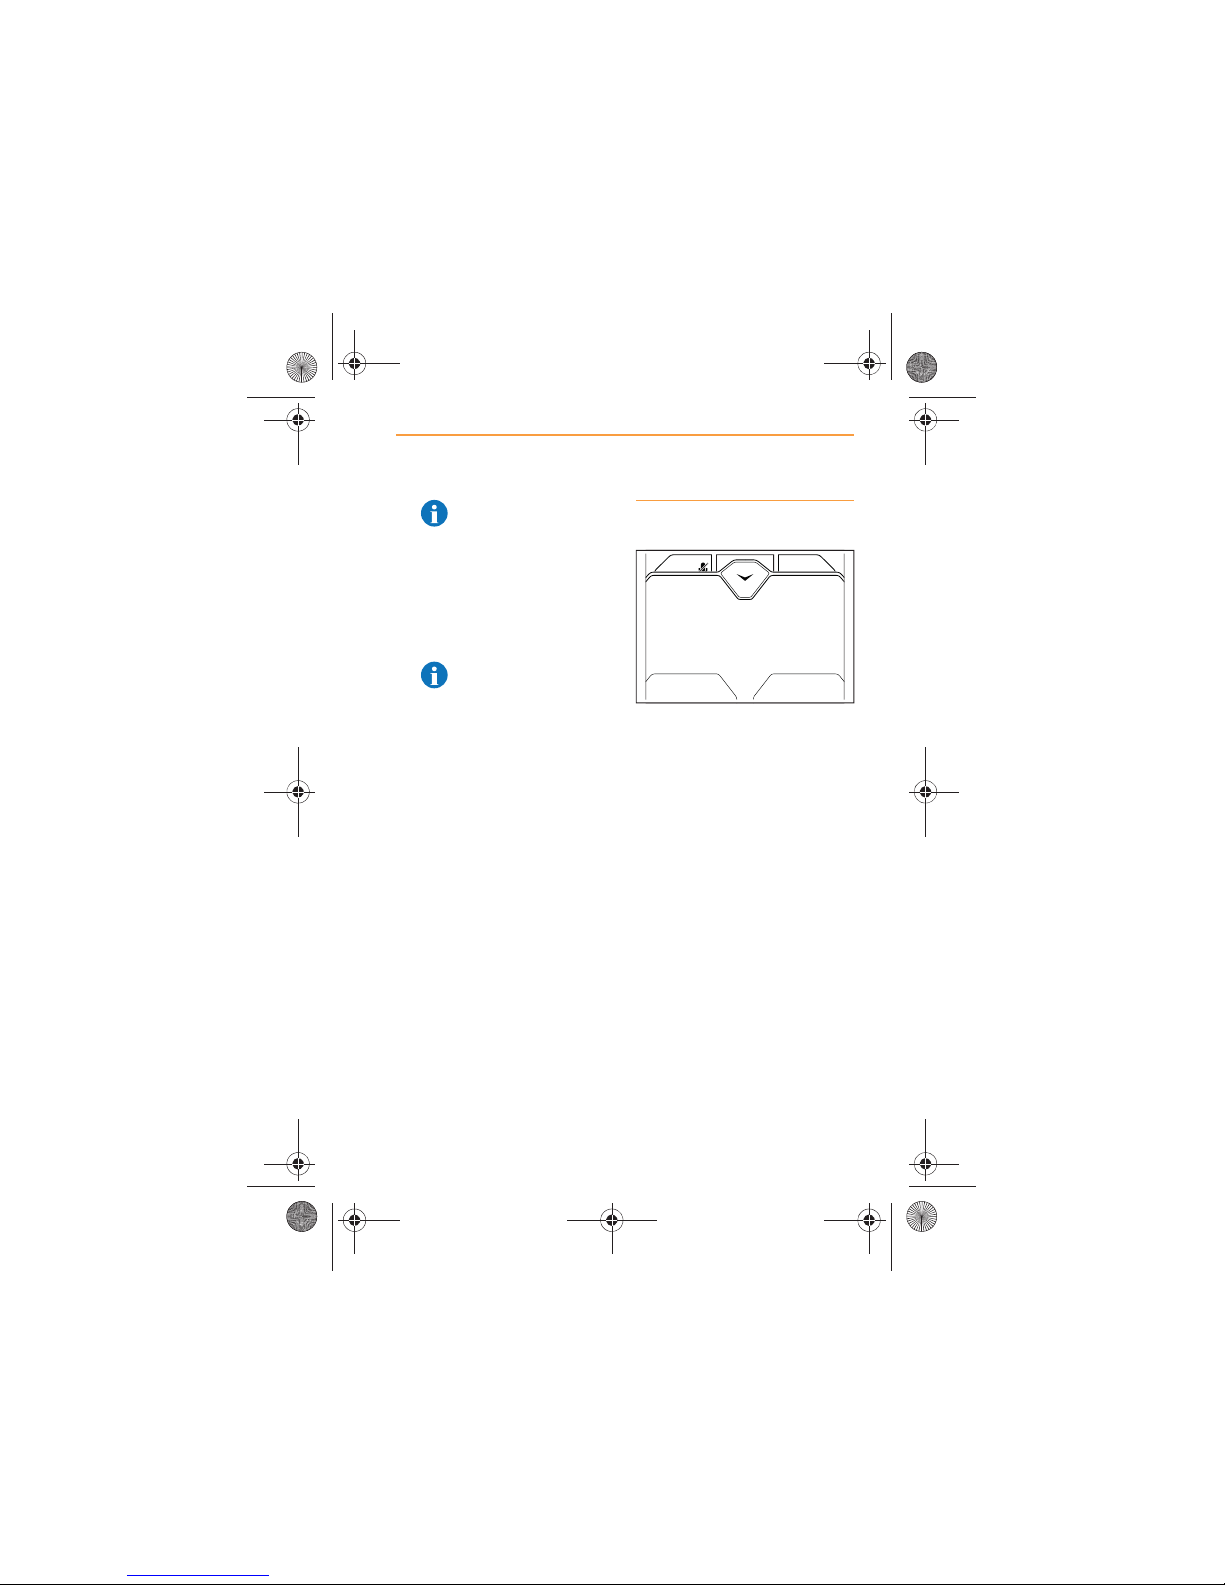
Incoming calls
When you receive an incoming
call the MCC will open and
display caller details.
To accept the call. touch the
ACCEPT icon (or the control
below it).
To decline the call, touch the
DECLINE icon (or the control
below it).
HOLD
SWITCH
TO PHONE
ADD CONTACTS
MUTE
+445555555555
INCOMING CALL...
DECLINE ACCEPT
IRIS.book Page 51 Thursday, October 18, 2012 8:21 AM
Page 52
52
PHONE
USING THE PHONE
Call waiting
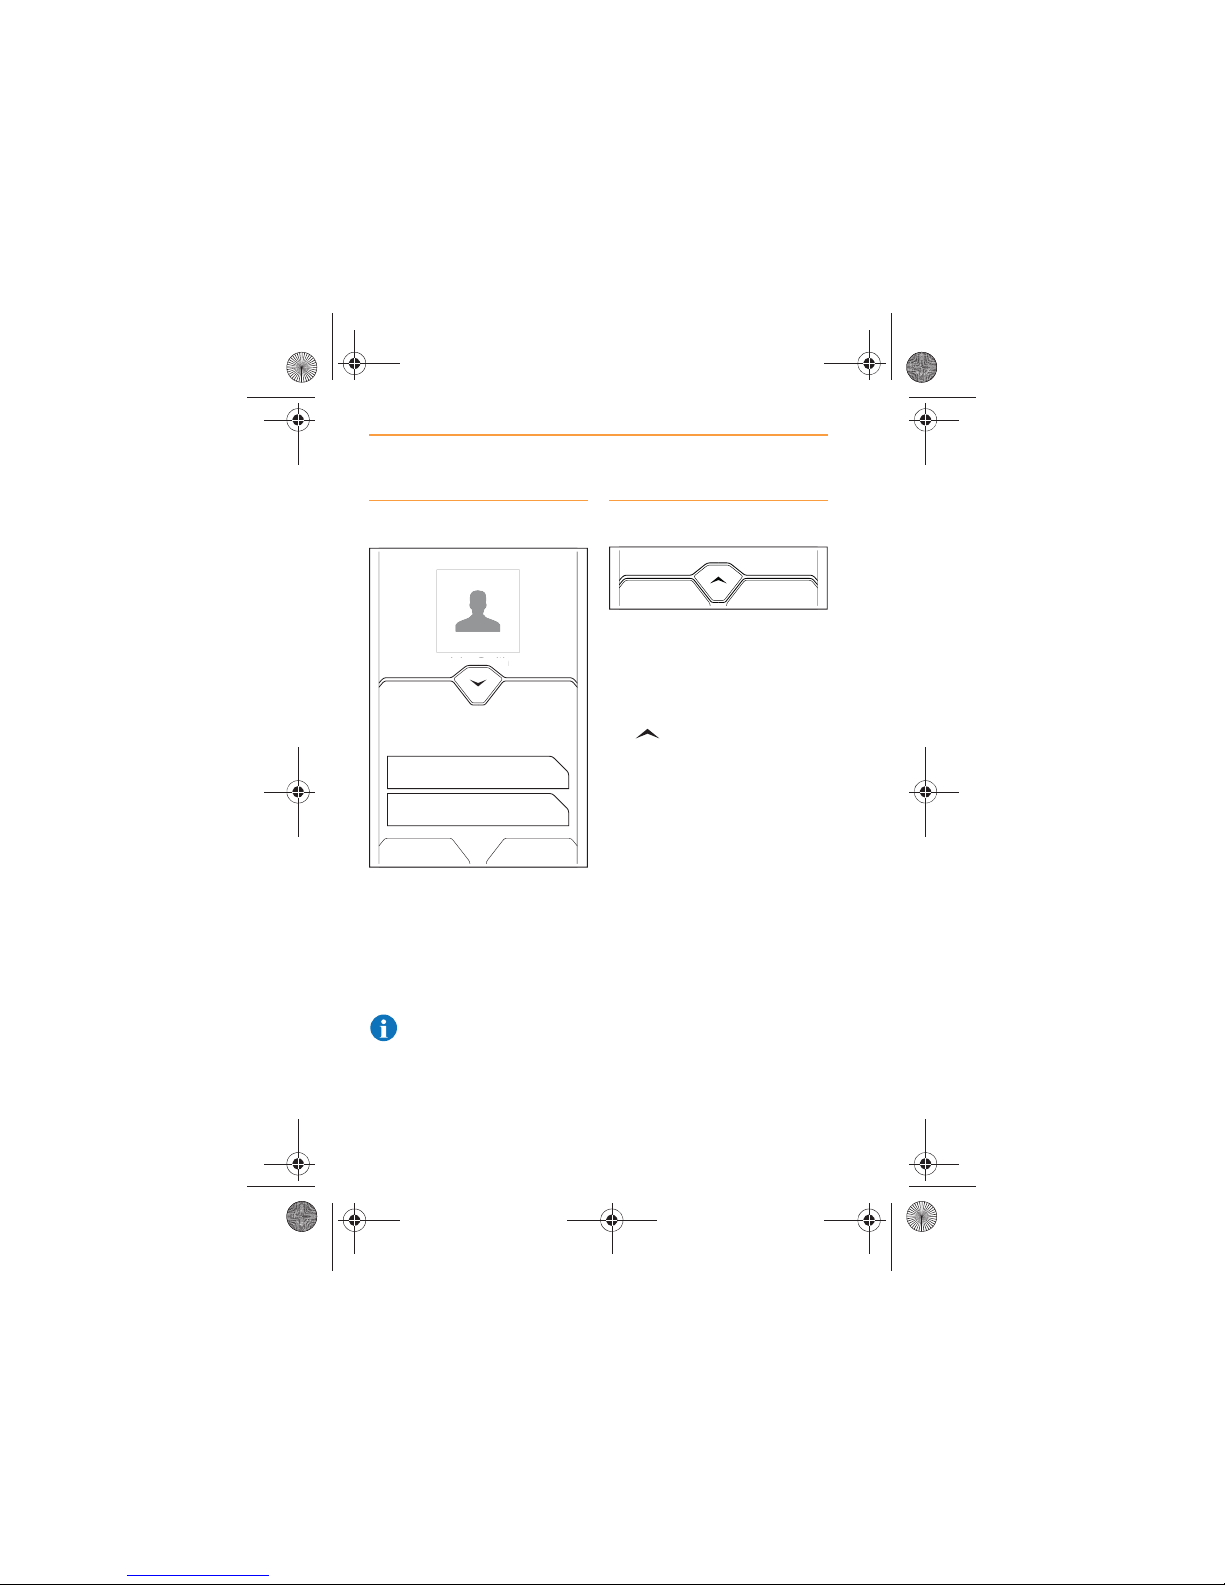
When a call is in progress, and a
second call is incoming, the
MCC will open to advise you of
the second call.
Choose one of the options
displayed on the screen.
NOTE: Call waiting is
phone model dependent.
Ending a call
To end a call from the Call in
Progress screen, touch the END
icon.
To end a call while viewing a
different system screen, touch
the icon to open the MCC.
The indicator will flash showing a
call is in progress. Touch the
END icon.
John Smith
ohnSmith
END CALL AND ANSWER
HOLD CALL AND ANSWER
SECOND INCOMING CALL...
+445555555555
DECLINE
END
IRIS.book Page 52 Thursday, October 18, 2012 8:21 AM
Page 53
53
CONTACTS
INTRODUCTION
CONTACTS
INTRODUCTION
Function
Contacts provides a quick
and easy route to the list of
contacts stored on your phone.
NOTE: Dependant on
phone model, if pictures of
contacts are stored on your
phone, these will be displayed
on the screen during a call if
contacts have been
synchronized with IRIS
In addition, several options are
available to refine your search to
a specific contact.
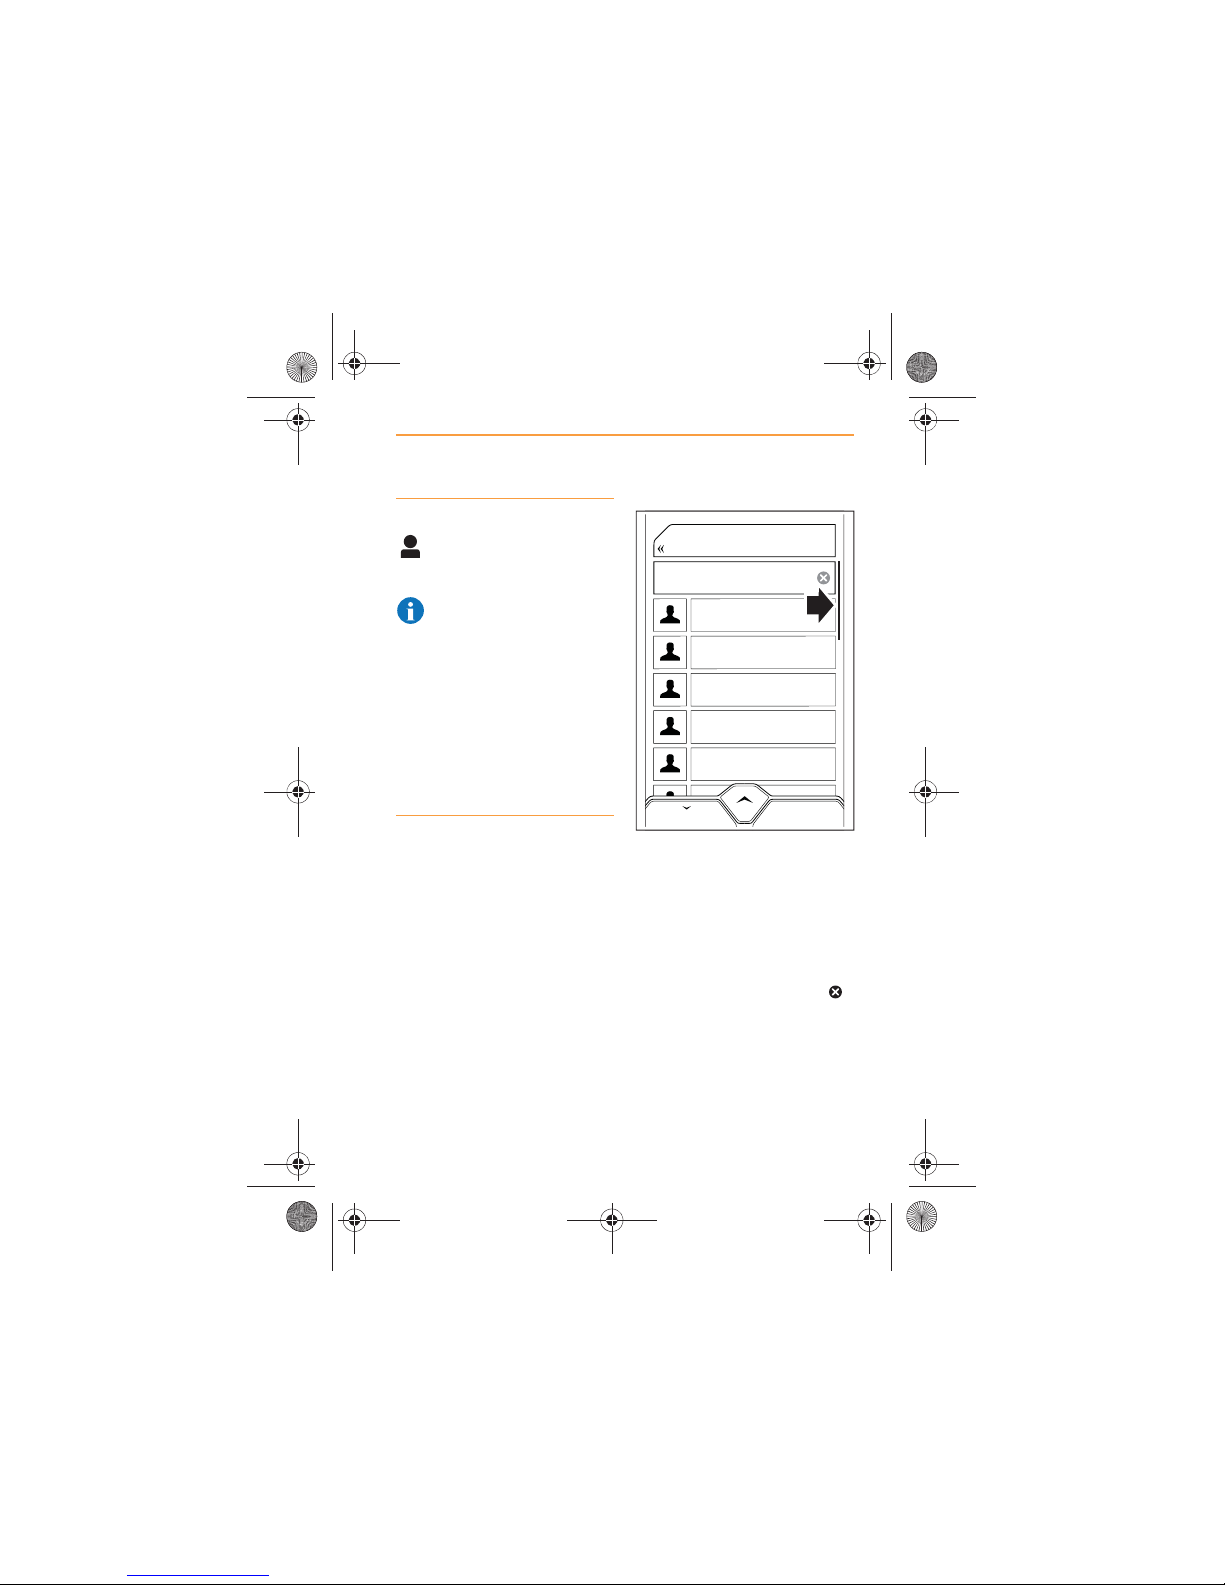
Contact list
If your contacts list extends
beyond the depth of the screen,
scroll up and down using the lefthand or right-hand screen icon
controls, or gently swipe your
finger upwards or downwards on
the screen.
The size of the scroll bar
(arrowed) on the right-hand side
of the screen indicates how long
a list is. The shorter the scroll
bar, the longer a list is.
The number of contacts is
displayed in the Search area,
above and to the right of the
icon.
Andrew Jones
Jane Smith
John Smith
Norman Jones
Sarah Brown
Tom Brown
BACK
46
Search
IRIS.book Page 53 Thursday, October 18, 2012 8:21 AM
Page 54
54
CONTACTS
INTRODUCTION
Switching between systems
You can switch between
systems, i.e. from Phone to
Media, using the MCC. For more
information, see MCC control,
page 7.
IRIS.book Page 54 Thursday, October 18, 2012 8:21 AM
Page 55
55
CONTACTS
OPERATION
OPERATION
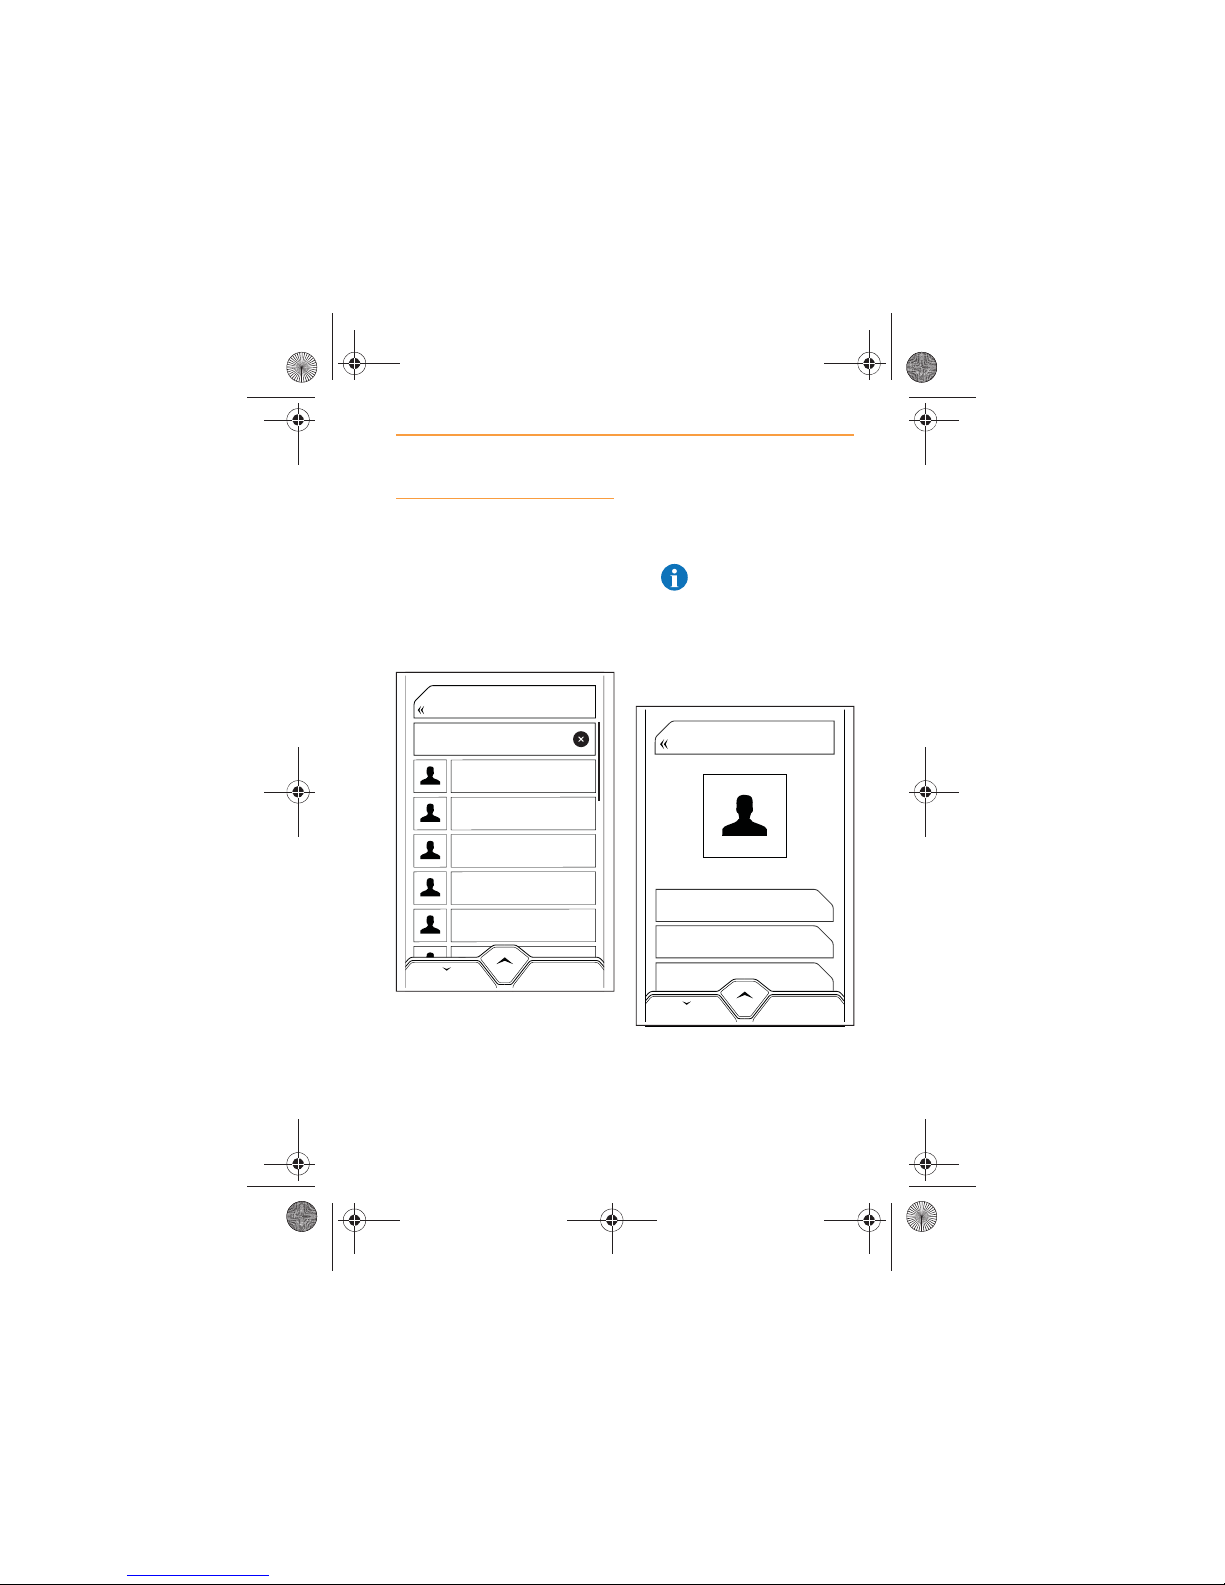
Scrolling Contacts
1. From the Home Screen or
the Phone Screen touch the
CONTACTS icon. A list of the
contacts in your phone will
appear on the screen, in
alphabetical order by first
name.
2. Scroll through the list and
select the contact to view
calling details.
NOTE: Dependant on
phone model, if pictures
of contacts are stored on
your phone, these will be
displayed on the screen
during a call if Contacts have
been synchronized with IRIS
3. The display will show all the
numbers available for that
contact together with the type
or location of phone to which
each number relates.
Andrew Jones
Jane Smith
John Smith
Norman Jones
Sarah Brown
Tom Brown
BACK
Search
46
BUSINESS
+445555555555
HOME
+445555555555
MOBILE
+445555555555
BACK
John Smith
IRIS.book Page 55 Thursday, October 18, 2012 8:21 AM
Page 56
56
CONTACTS
OPERATION
NOTE: The information
displayed will only be as
detailed as the information
you have entered into your
cell phone.
4. Select the number you wish
to call, and dialling will
commence, see Making a
Call, page 46.
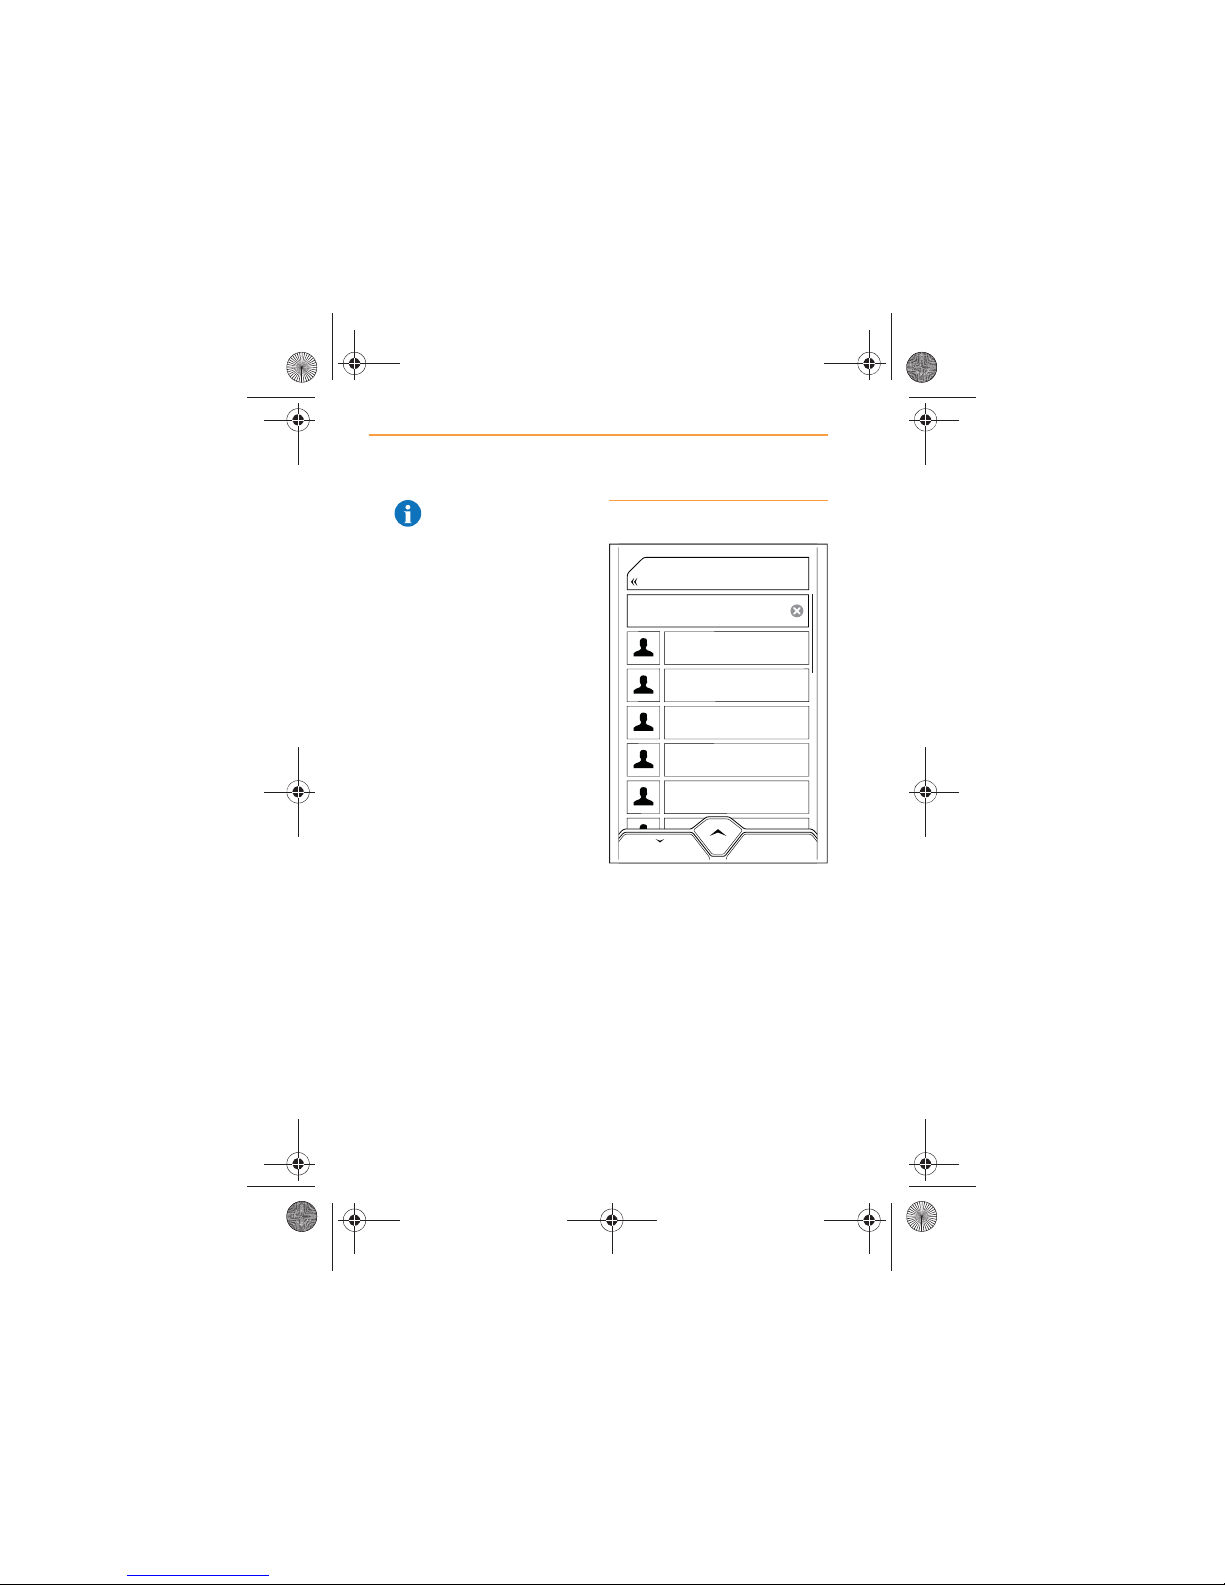
Searching Contacts
1. From the Home Screen or
the Phone Screen touch the
CONTACTS icon and a list of
the contacts in your phone
will appear on the screen.
The list is alphabetical by first
name.
Andrew Jones
Jane Smith
John Smith
Norman Jones
Sarah Brown
Tom Brown
BACK
Search
46
IRIS.book Page 56 Thursday, October 18, 2012 8:21 AM
Page 57
57
CONTACTS
OPERATION
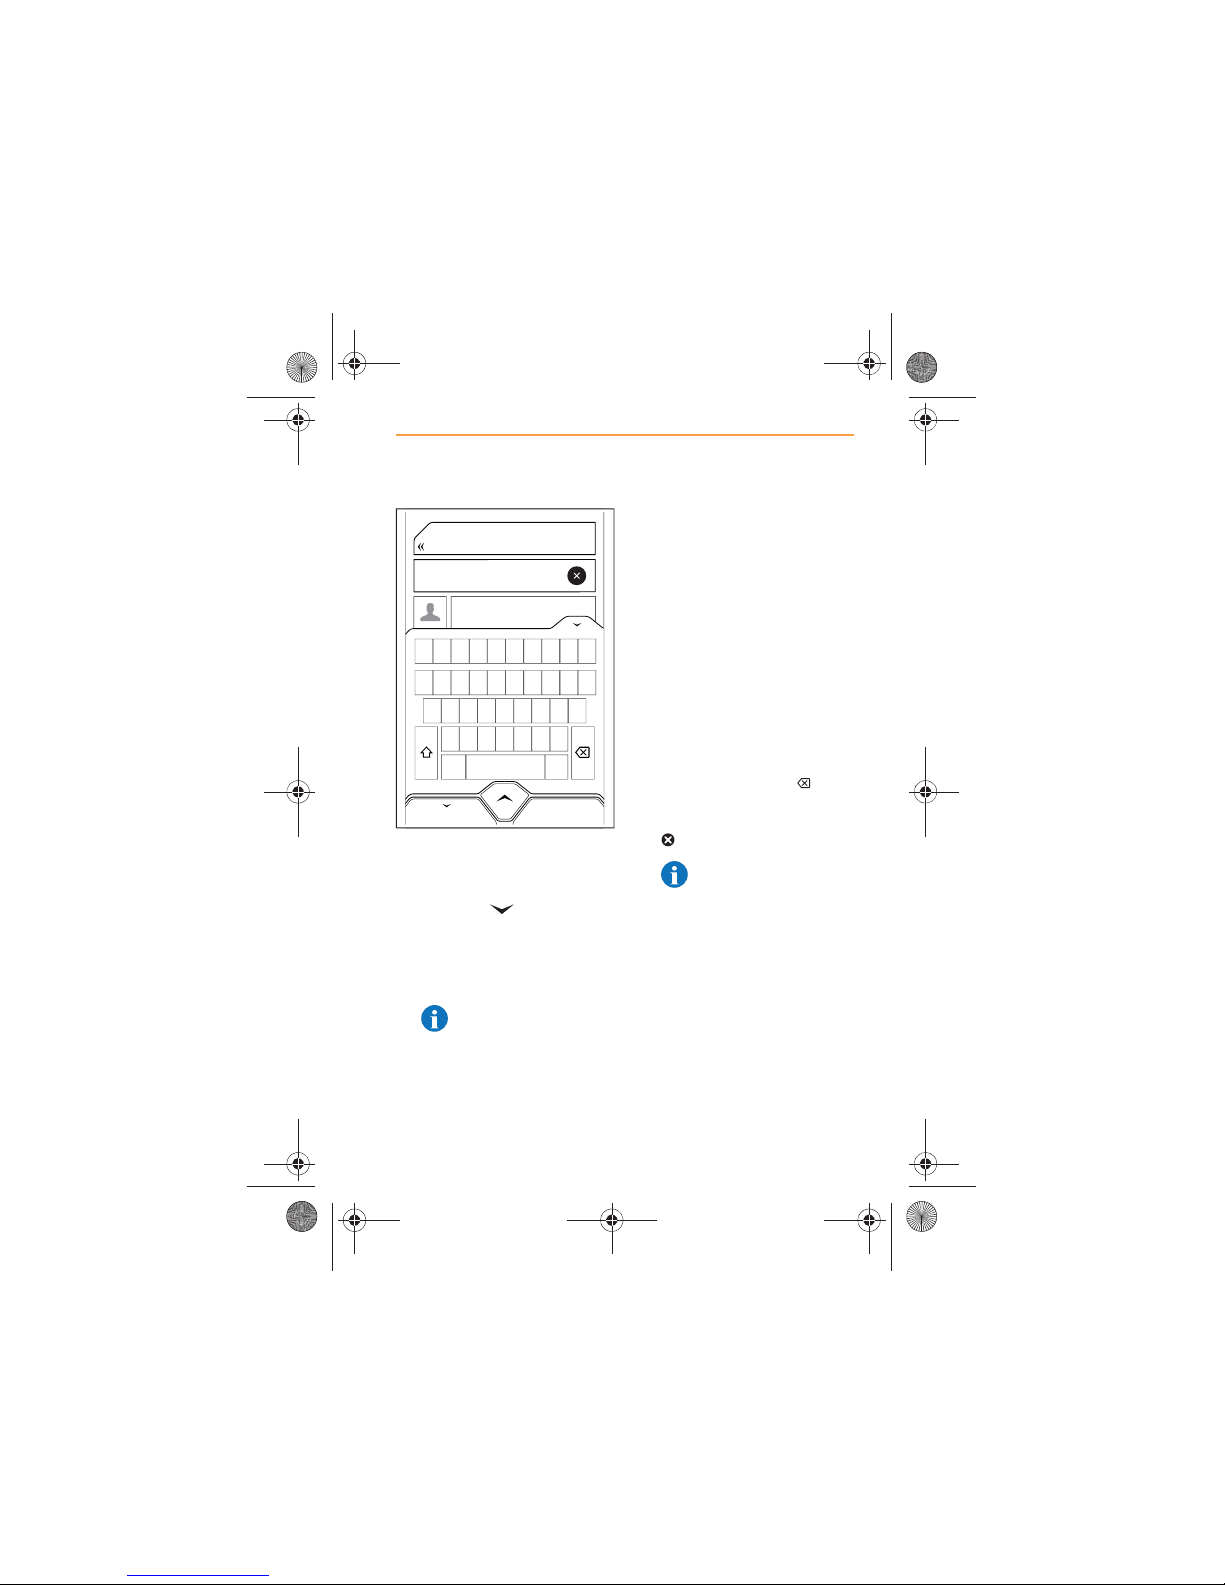
2. Touch the word ‘Search’ and
a keyboard will appear on
screen.
3. Touch the icon in the top
right-hand corner of the
keyboard to hide the
keyboard and view more
contacts.
NOTE: BACK will return
you to the previous
screen, it does not hide the
keyboard.
4. Use the keyboard and start
to enter the name of the
contact you wish to call.
5. The list will be refined to only
those names that contain the
characters that you have
entered.
6. The list will be further refined
with every character that is
entered.
7. Scroll through the list and
select the contact to view
their calling details.
8. If you enter an incorrect
character, touch the icon
to delete. To delete all the
characters entered, touch the
icon.
NOTE: For more details
on the characters
available on the keyboard,
see Keyboard functions,
page 59.
Tom Brown
Andrew Jones
Norman Jones
John Smith
Joan Smith
Oliver Smith
BACK
Q
1 2 3 4 5 6 7 8 9 0
A
ZXC
SPACE
.?$*
VBNM
SDFGHJKL
WE R T Y U I OP
IRIS.book Page 57 Thursday, October 18, 2012 8:21 AM
Page 58
58
CONTACTS
OPERATION
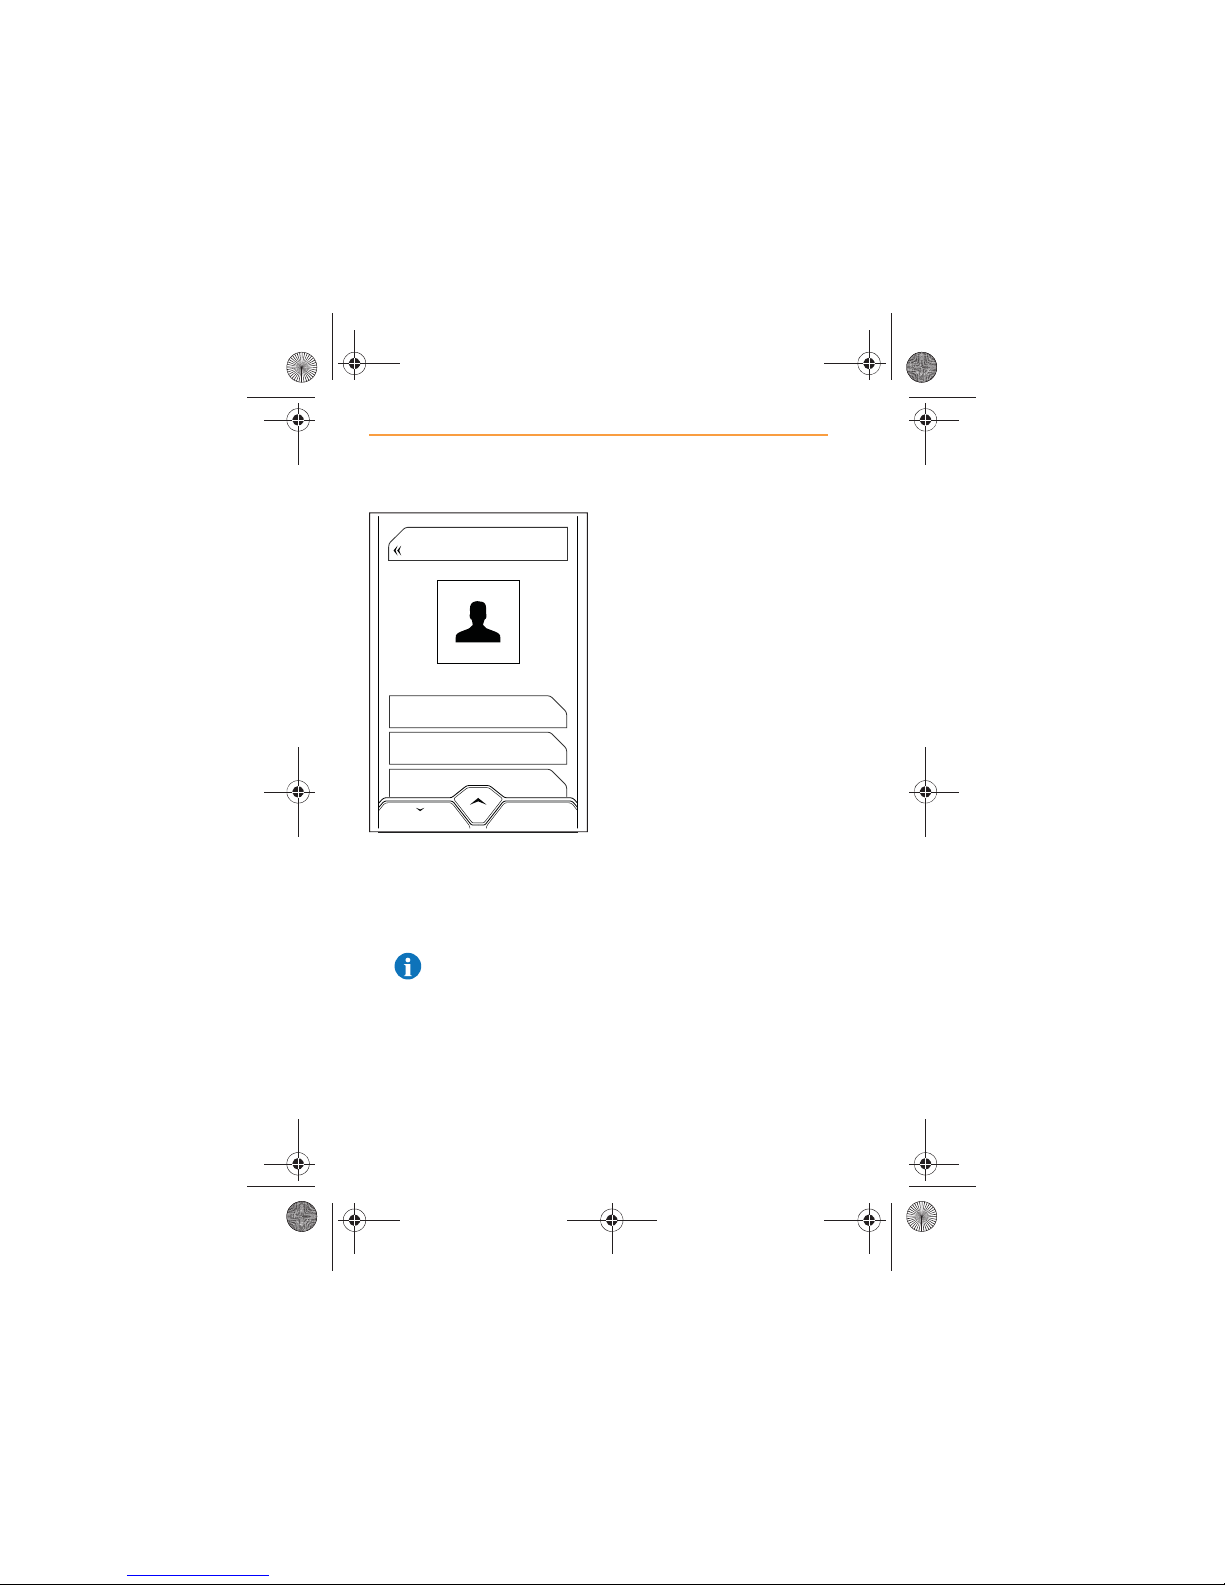
9. The display will show all the
numbers available for that
contact together with the type
or location of phone to which
each number relates.
NOTE: The information
displayed will only be as
detailed as the information
you have entered into your
cell phone.
10. Select the number you wish
to call, and dialling will
commence, see Making a
Call, page 46.
BUSINESS
+445555555555
HOME
+445555555555
MOBILE
+445555555555
BACK
John Smith
IRIS.book Page 58 Thursday, October 18, 2012 8:21 AM
Page 59
59
CONTACTS
OPERATION
Keyboard functions
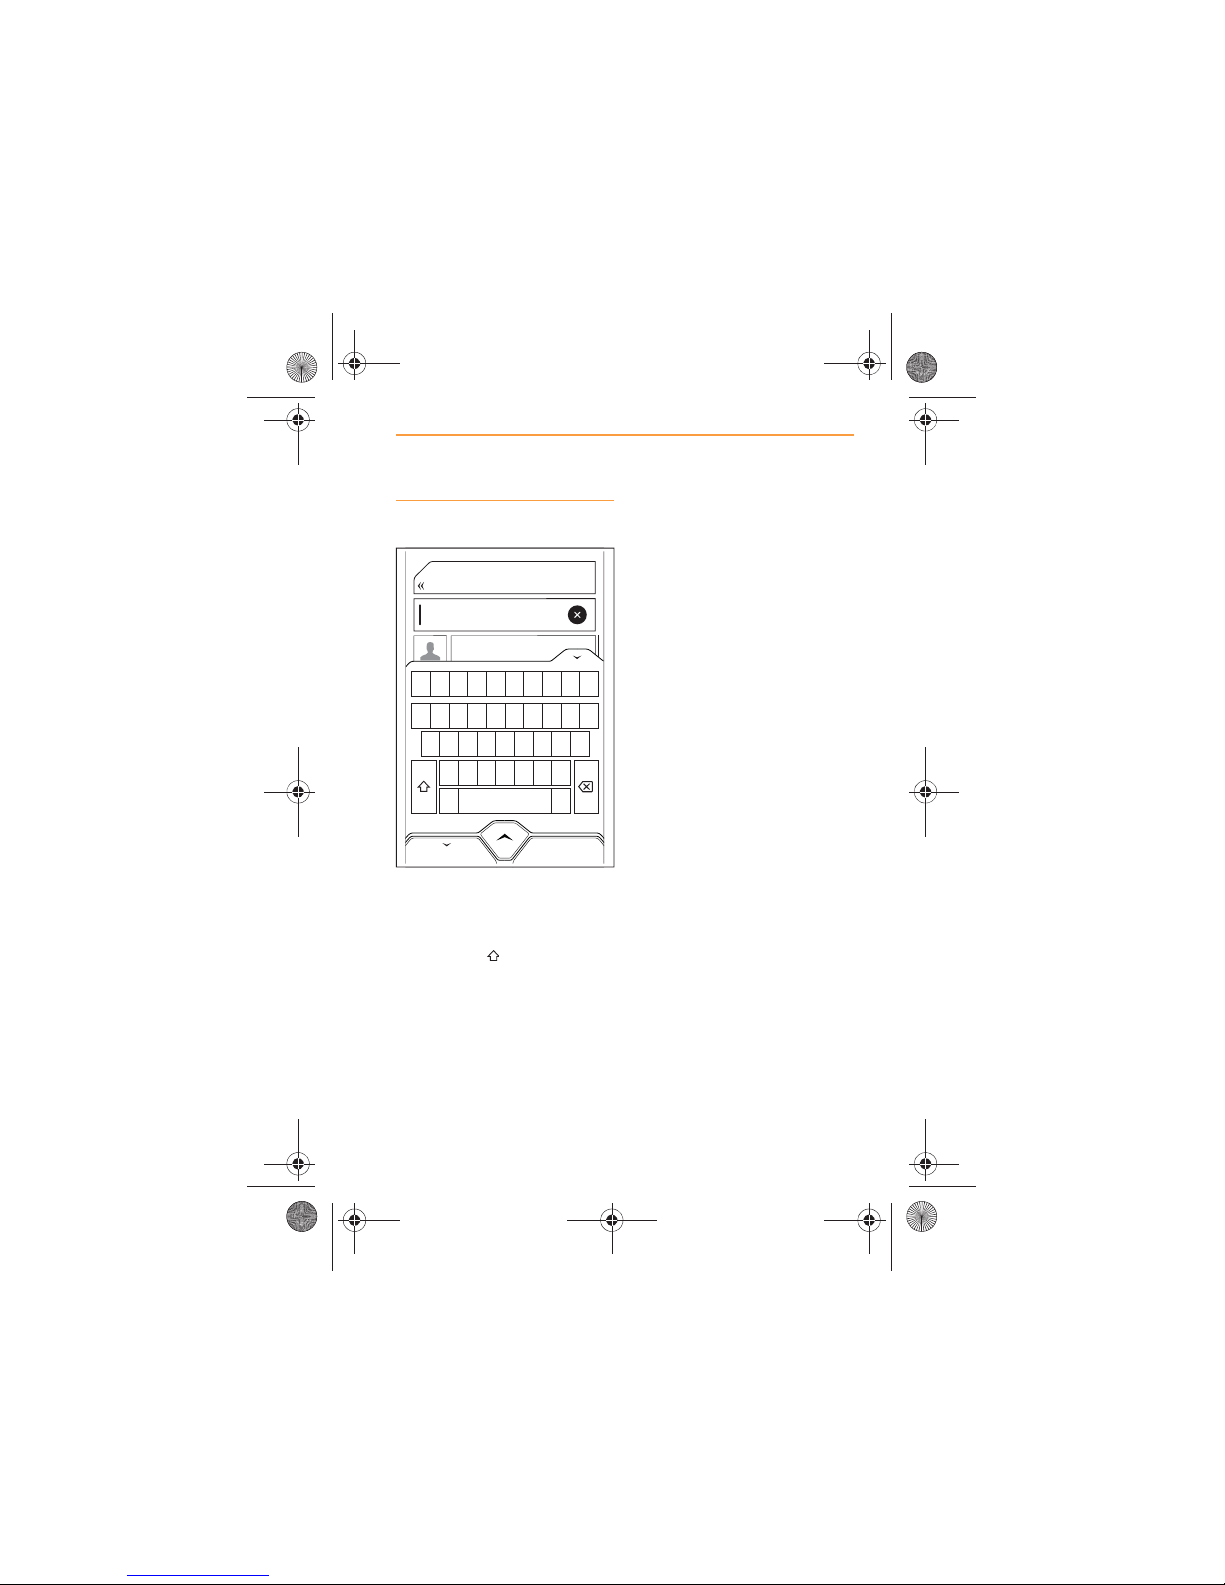
The keyboard is a QWERTY
layout.
Capital letters can be entered by
touching the icon. The
characters on the keyboard do
not physically change when the
shift icon is touched.
Accented characters can be
viewed and selected by touching
and holding the character. All the
accented and alternate versions
of the character will appear at
the top of the keyboard and all
other characters will be greyed
out. Touch to make your
selection.
Special characters can be
viewed and selected by touching
the icon. Touch to make your
selection.
John Smith
Andrew Jones
Norman Jones
John Smith
Joan Smith
Oliver Smith
64
BACK
1 2 3 4 5 6 7 8 9 0
^ $ € £ ¥ [ ] / -
* < > # % = + ’ ”
~
@ & ? ! : ; ,
?$* .
?$*
IRIS.book Page 59 Thursday, October 18, 2012 8:21 AM
Page 60
60
NAVIGATION
INTRODUCTION
NAVIGATION
INTRODUCTION
Functions
The navigation system
uses signals from Global
Positioning System (GPS)
satellites together with
information from vehicle sensors
and map data stored on IRIS to
determine the precise location of
the vehicle.
Using this data, the system is
able to create the optimum route
to your destination, taking into
account any journey preferences
you may have set, i.e. quickest
or shortest route.
To set your preferences, see
Options, page 89.
Creation of a specific route is
achieved by using the on screen
menus and the IRIS controls, to
make your selections.
This results in your route being
highlighted on the map in
orange. Once you have started a
journey, turn information is
displayed on the IRIS screen,
supplemented by voice guidance
if required, at appropriate points
during the journey.
IRIS.book Page 60 Thursday, October 18, 2012 8:21 AM
Page 61
61
NAVIGATION
INTRODUCTION
Safety
WARNING: For your
safety, ensure that you do
not become distracted from
the task of driving, through
use of the navigation system.
Read and adhere to the safety
message which appears the
first time you enter the
navigation system after
switching on the ignition.
National road traffic laws and
traffic signals must always be
obeyed.
Always remember that the
purpose of the navigation
system is to help in determining
the optimum route, it must never
be considered as an aid when
visibility is reduced.
GPS signals may be interrupted
when travelling through tunnels
or other situations where GPS
signal could be blocked.
Navigation will continue on the
route until GPS signal is
regained.
IRIS.book Page 61 Thursday, October 18, 2012 8:21 AM
Page 62
62
NAVIGATION
INTRODUCTION
Errors in vehicle position are
also possible under the
conditions described, and if any
of the following have occurred:
x travelling on a ramp inside a
building;
x travelling on a road with a
second parallel roads very
close;
x a turntable has been used to
rotate the vehicle;
x the vehicle has been
transported to a different
location.
Switching between systems
You can switch between
systems, i.e. from Phone to
Media, using the MCC. For more
information, see MCC control,
page 7.
IRIS.book Page 62 Thursday, October 18, 2012 8:21 AM
Page 63
63
NAVIGATION
USING THE NAVIGATION SYSTEM
USING THE NAVIGATION SYSTEM
Using navigation
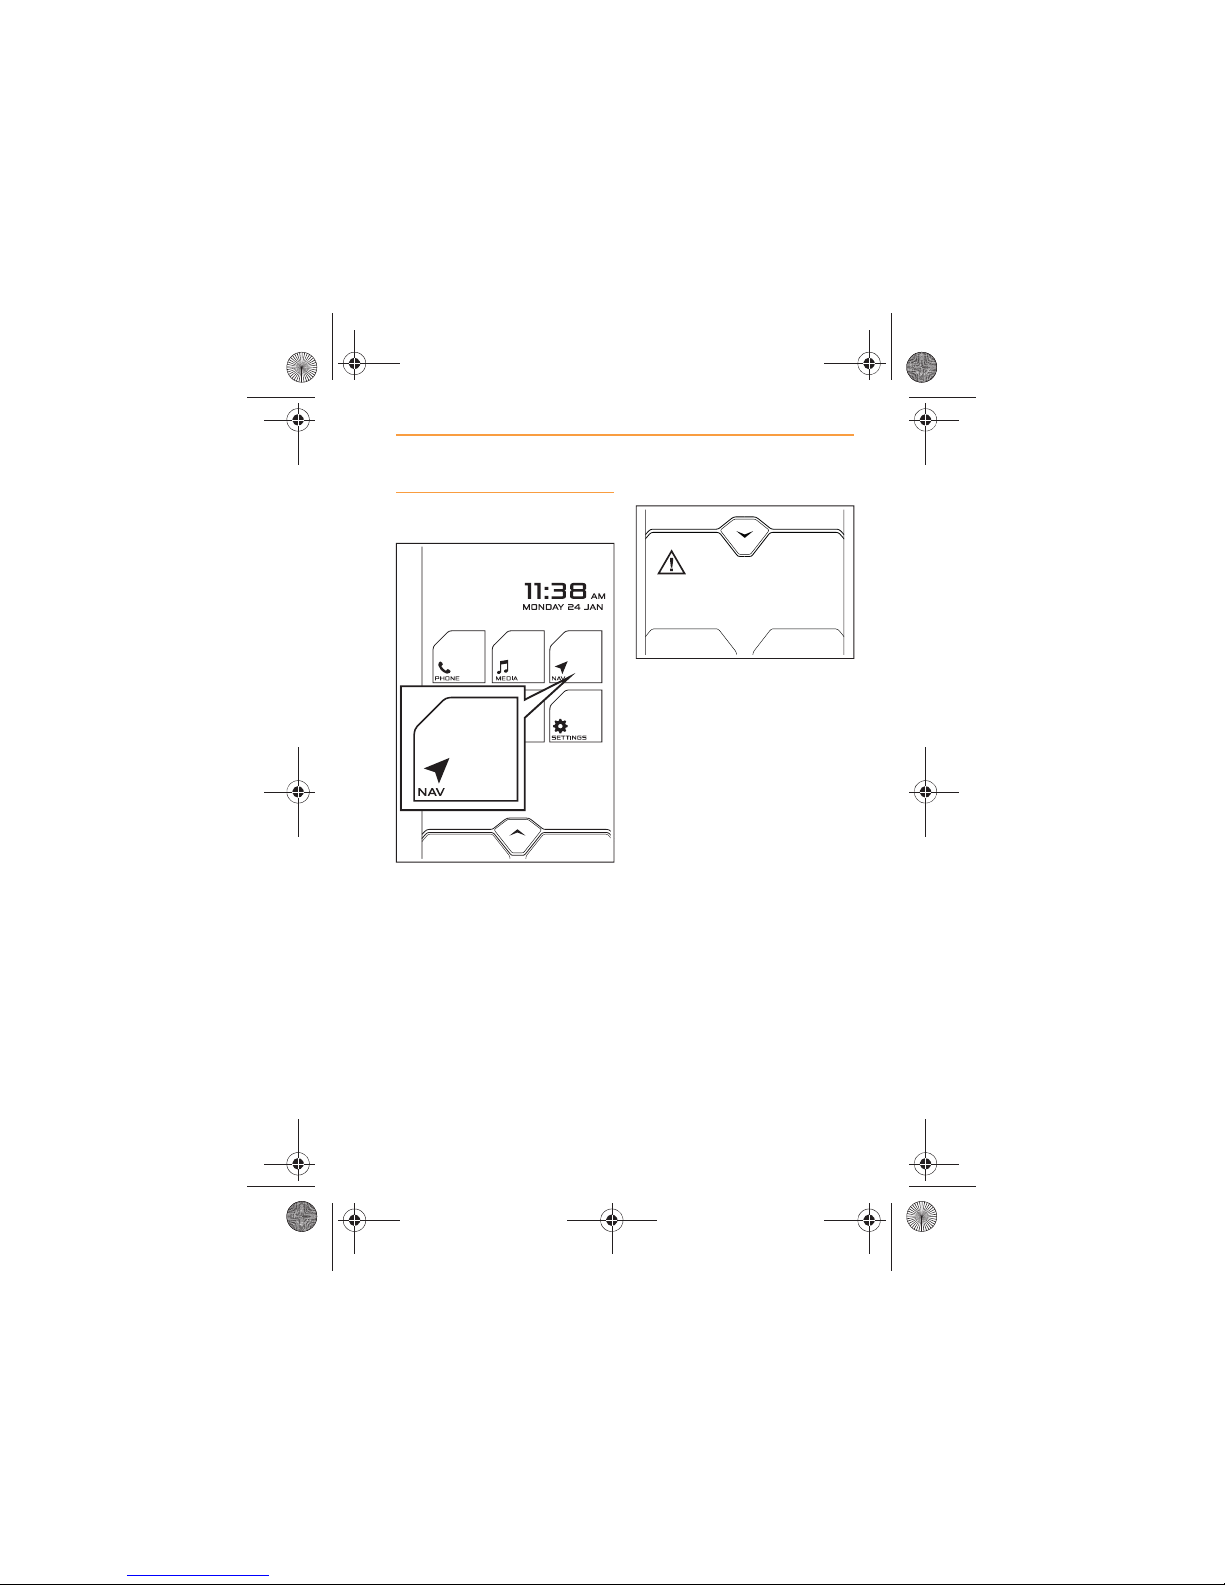
Touch the icon, to enter the
navigation system.
This safety message will appear
on the screen, the first time you
access navigation after the
ignition is switched on.
Touch the OK icon on the righthand side at the bottom of the
screen, to acknowledge the
message.
If the safety message appears in
the incorrect language, touch the
left-hand icon, LANGUAGE, to
select your preferred language.
Distraction may cause accidents. Do not enter data
while driving. The driver is responsible for safety at all
times.
CAUTION
OKLANGUAGE
IRIS.book Page 63 Thursday, October 18, 2012 8:21 AM
Page 64
64
NAVIGATION
USING THE NAVIGATION SYSTEM
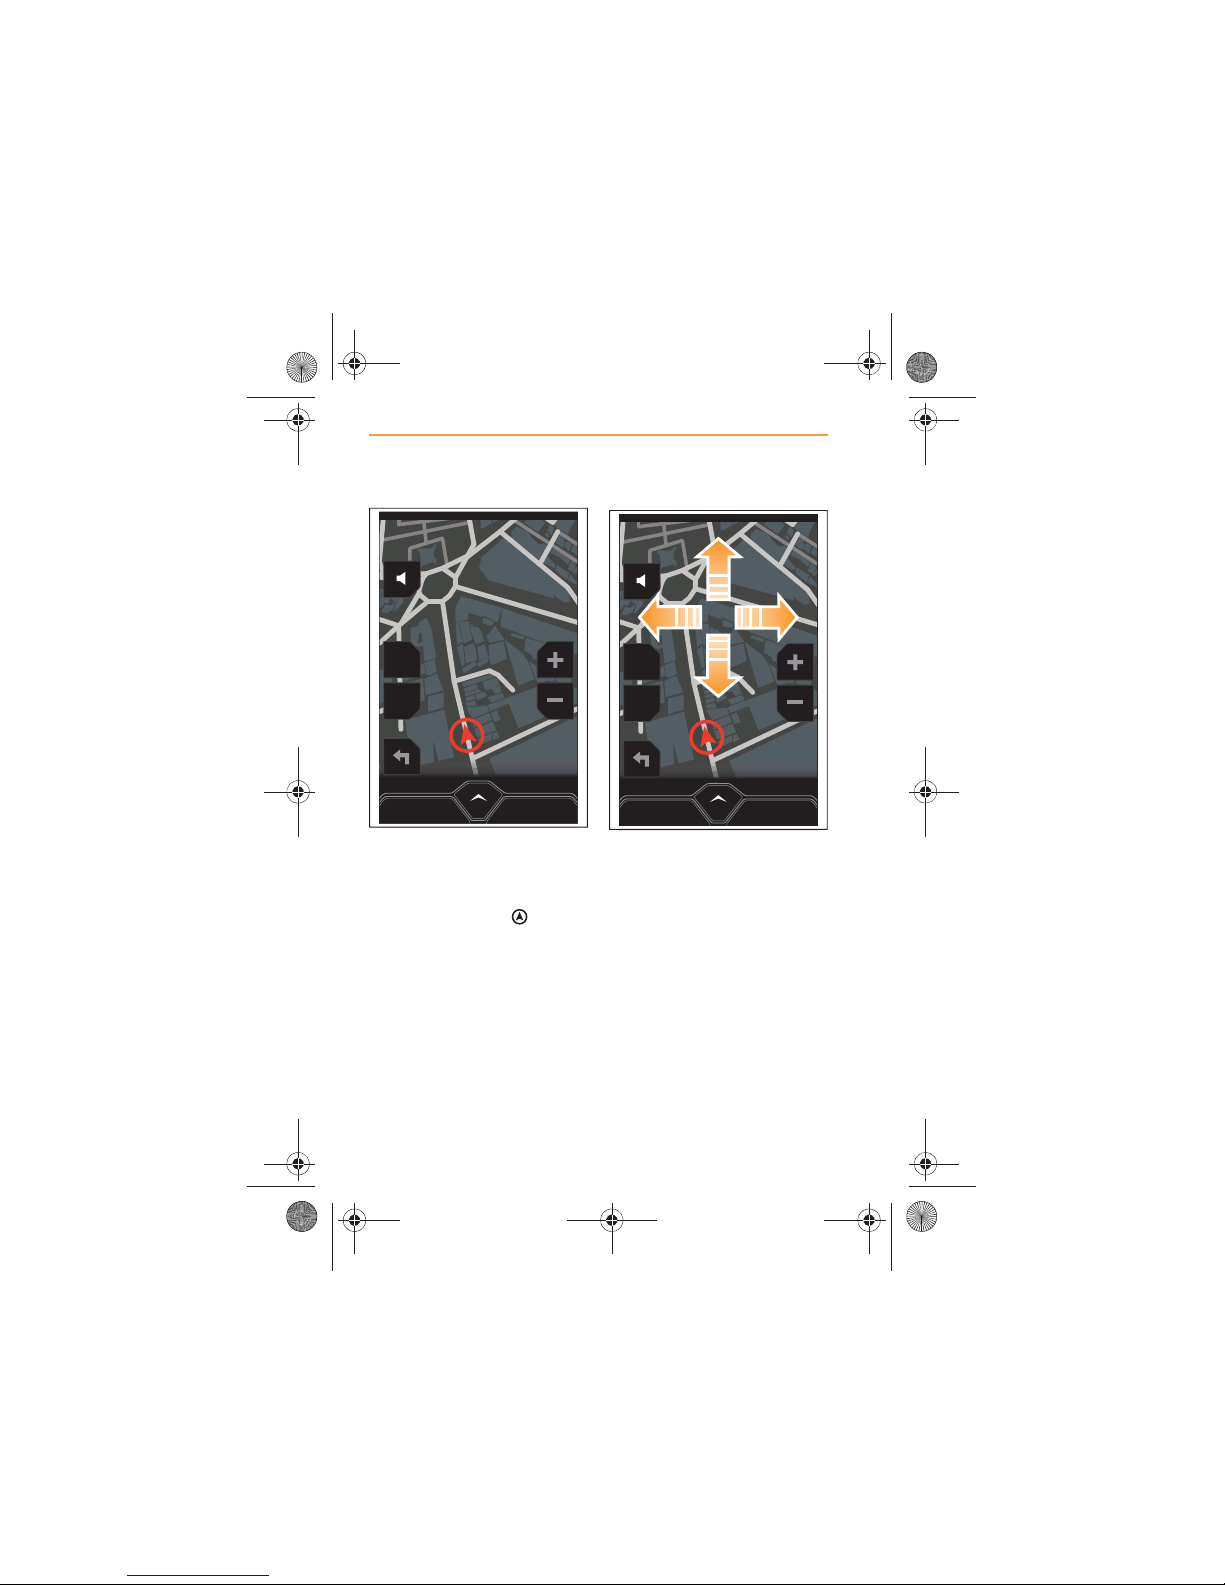
A map showing your current
location will appear on the
screen.
Your car is shown as on the
screen.
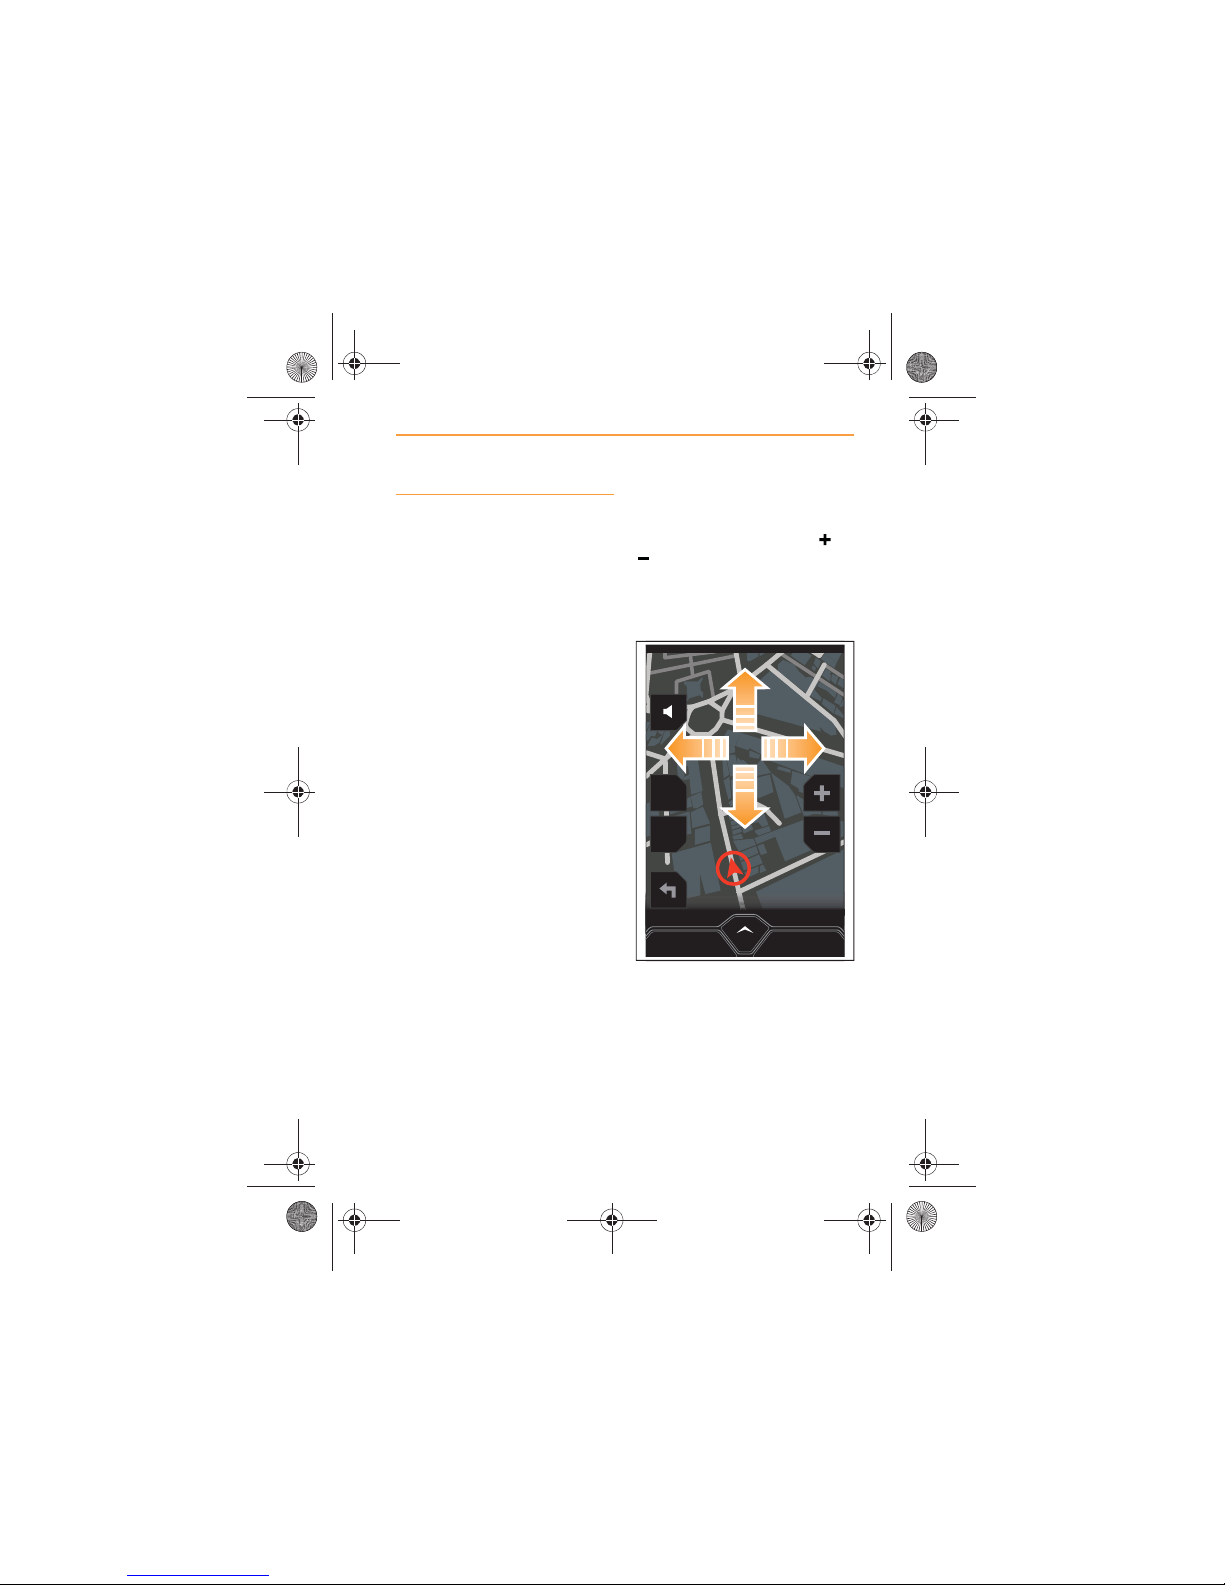
To manipulate the part of the
map which is displayed, gently
swipe your finger up, down or
side to side on the screen and
the view of the map will move.
This feature is needed when
using the screen interactively to
set a destination, see Using the
screen, page 69.
POI
MENU
2D
CANCEL ROUTE
MENU
POI
2D
CANCEL ROUTE
IRIS.book Page 64 Thursday, October 18, 2012 8:21 AM
Page 65
65
NAVIGATION
USING THE NAVIGATION SYSTEM
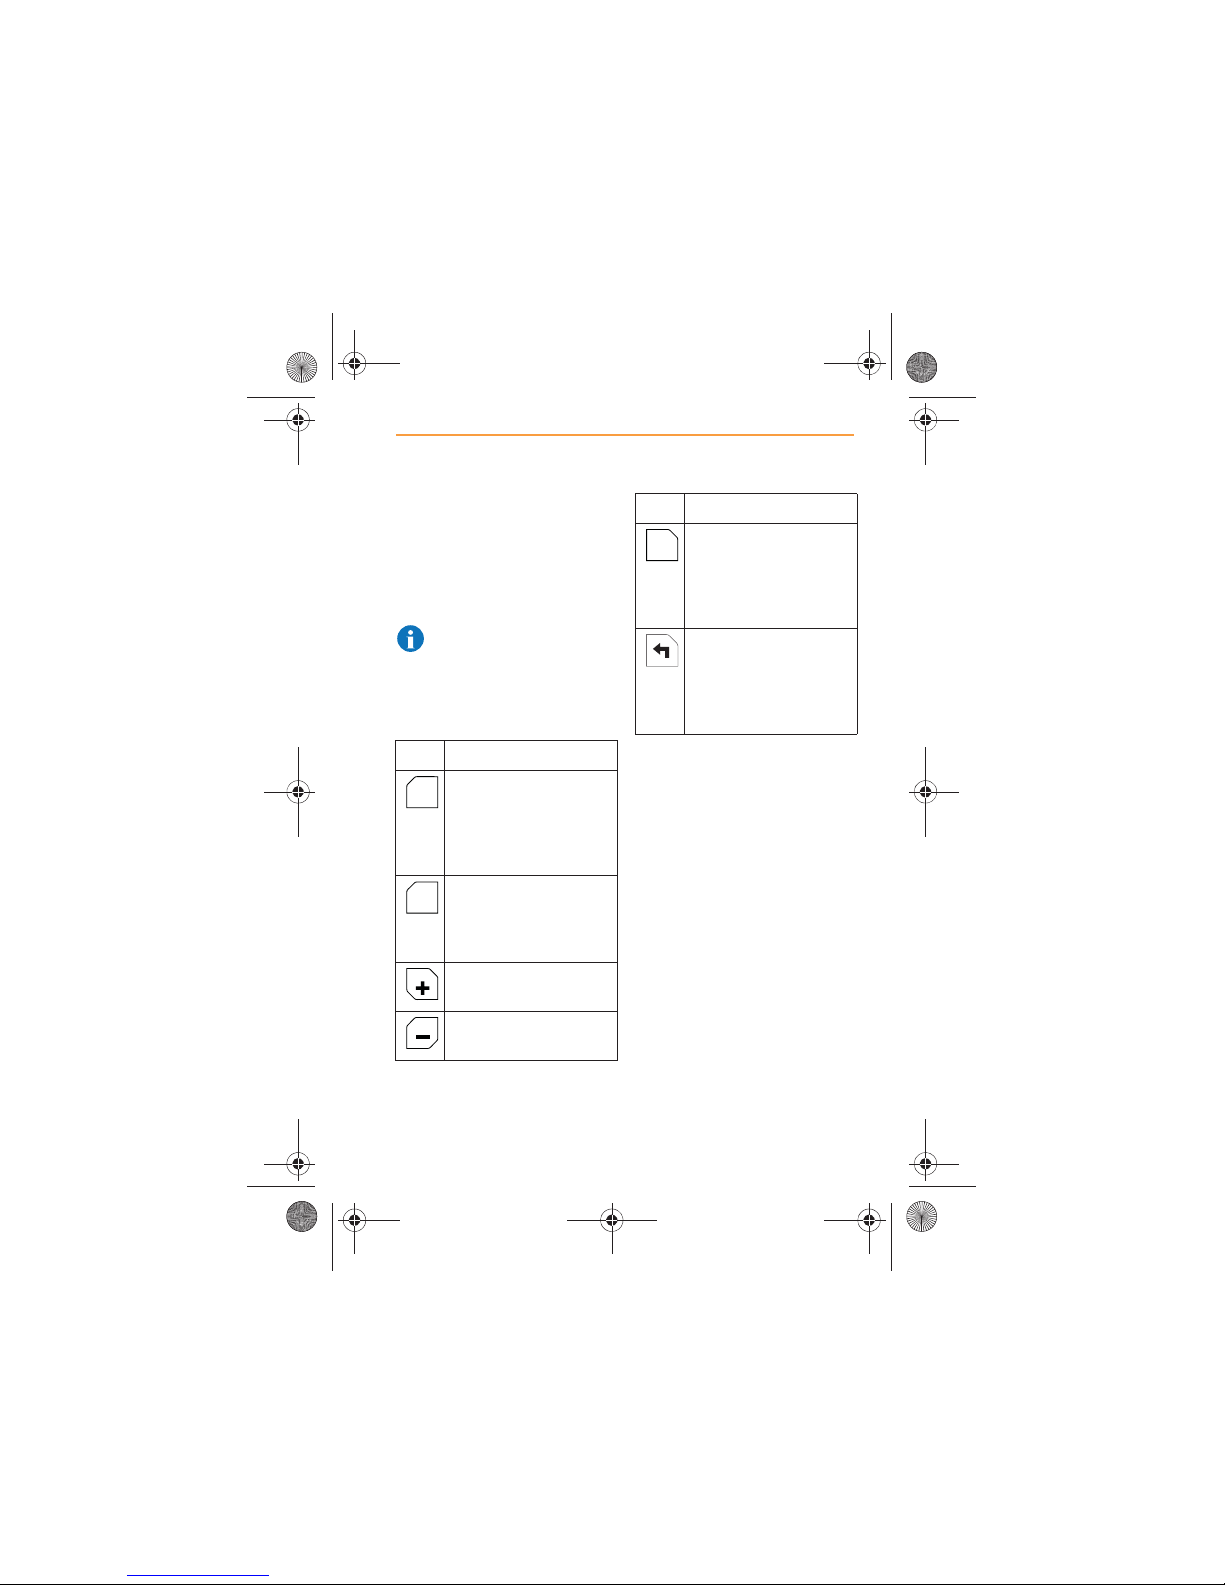
Screen icons
The following icons will appear
on the navigation screen, their
functions are explained below.
When POIs are visible, the icon
will change from white to orange.
NOTE: After a period of no
activity, the icons will
disappear from the screen.
Touch the screen and they will
re-appear.
Icon Function
Displays the map so
the vehicle is always
travelling up the
screen, see Screen
aspect, page 68.
Displays the map with
North at the top of the
screen, see Screen
aspect, page 68.
Provides a zoom in
feature on the map.
Provides a zoom out
feature on the map.
2D
N
Displays a list of all
Points of Interest that
have been switched on,
see Points of Interest,
page 86.
Displays the turn
instructions that make
up your particular route,
see Turn information,
page 92.
Icon Function
POI
IRIS.book Page 65 Thursday, October 18, 2012 8:21 AM
Page 66
66
NAVIGATION
USING THE NAVIGATION SYSTEM
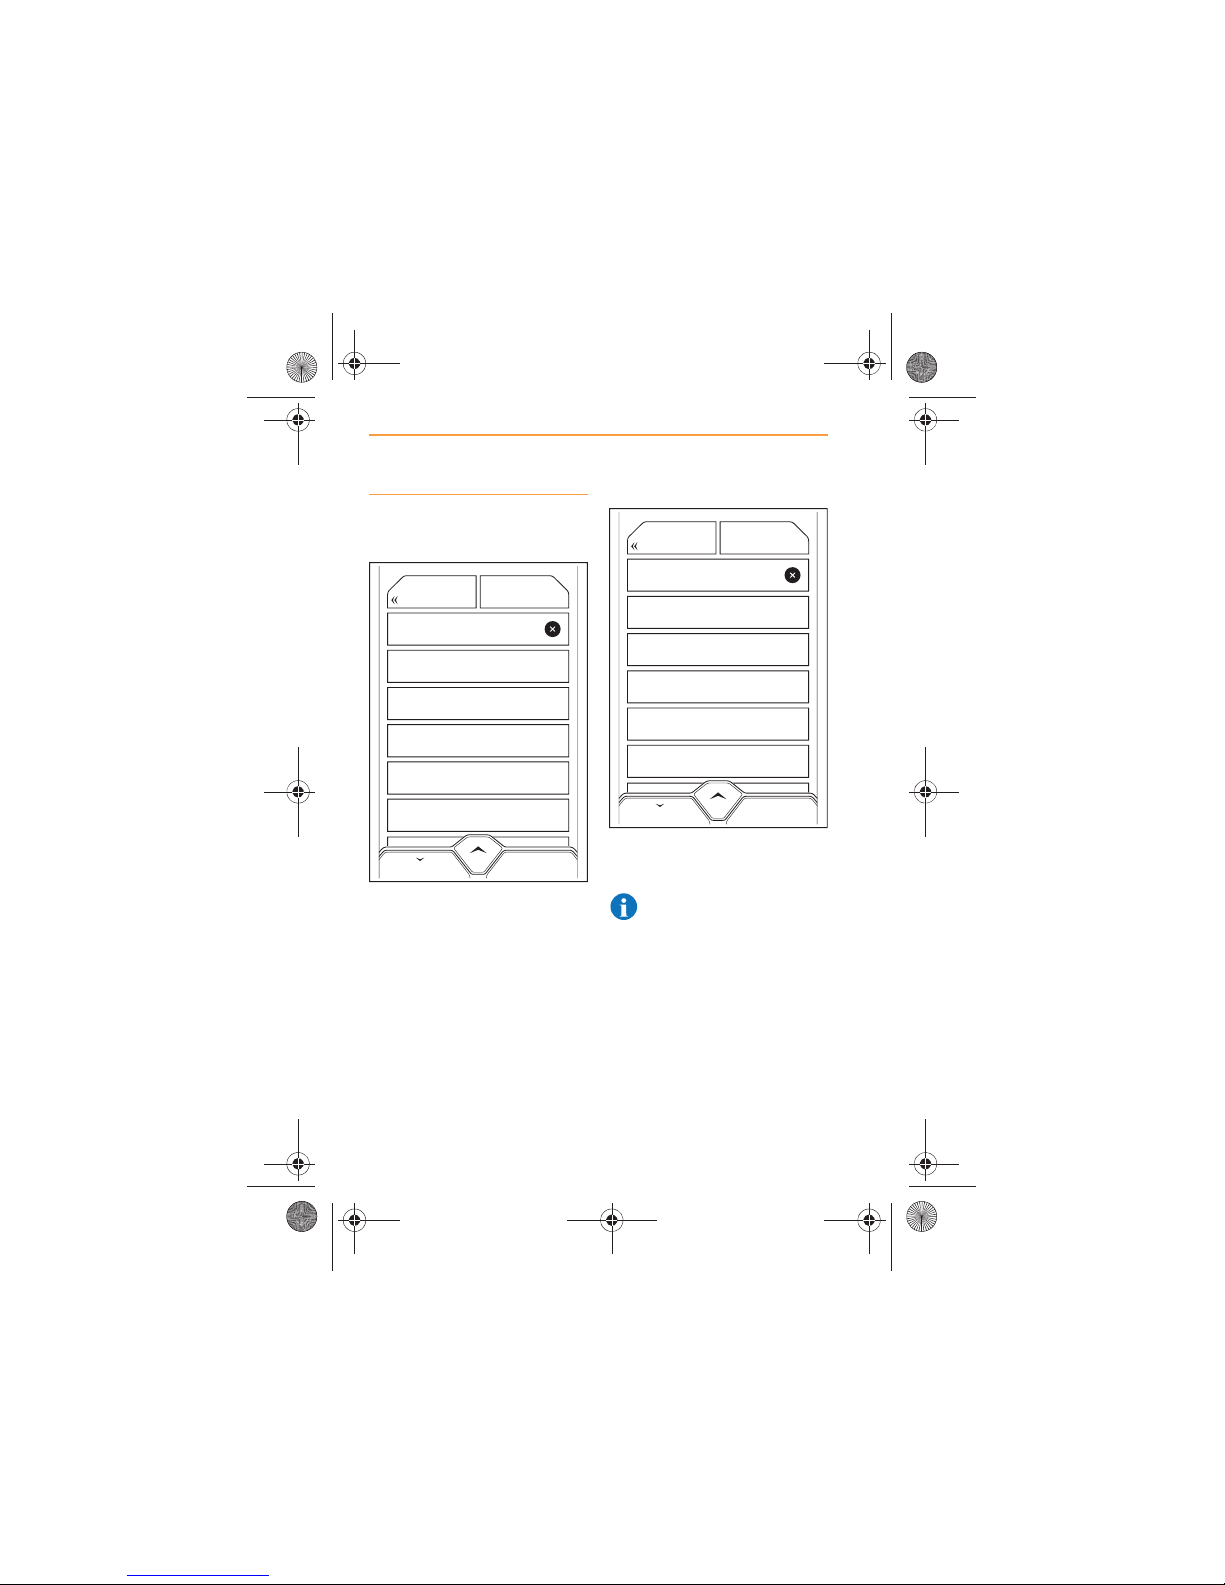
Initial setting for country and
city
The first time that you start to
enter a destination using the
menus, a screen will appear
displaying all countries within
your part of the world.
Select the country where your
destination is located. A list of all
the cities in that country will be
displayed.
Select the city where your
destination is located.
NOTE: The navigation
system will retain this
information until a destination in
a different country or city is
required.
Albania, Bosnia Herzegovina, Balkan, Serbia
Search
MAPBACK
Austria, Switzerland, Liechtenstein
Belarus, Moldova, Ukraine
Belgium, Netherlands, Luxembourg
Bulgaria
9
Cove (England)
COV
MAPBACK
Cove (Ireland)
Cove (Scotland, Aberdeenshire)
Cove (Scotland, Berwickshire)
Cove (Scotland, Dunbartonshire)
9
IRIS.book Page 66 Thursday, October 18, 2012 8:21 AM
Page 67
67
NAVIGATION
USING THE NAVIGATION SYSTEM
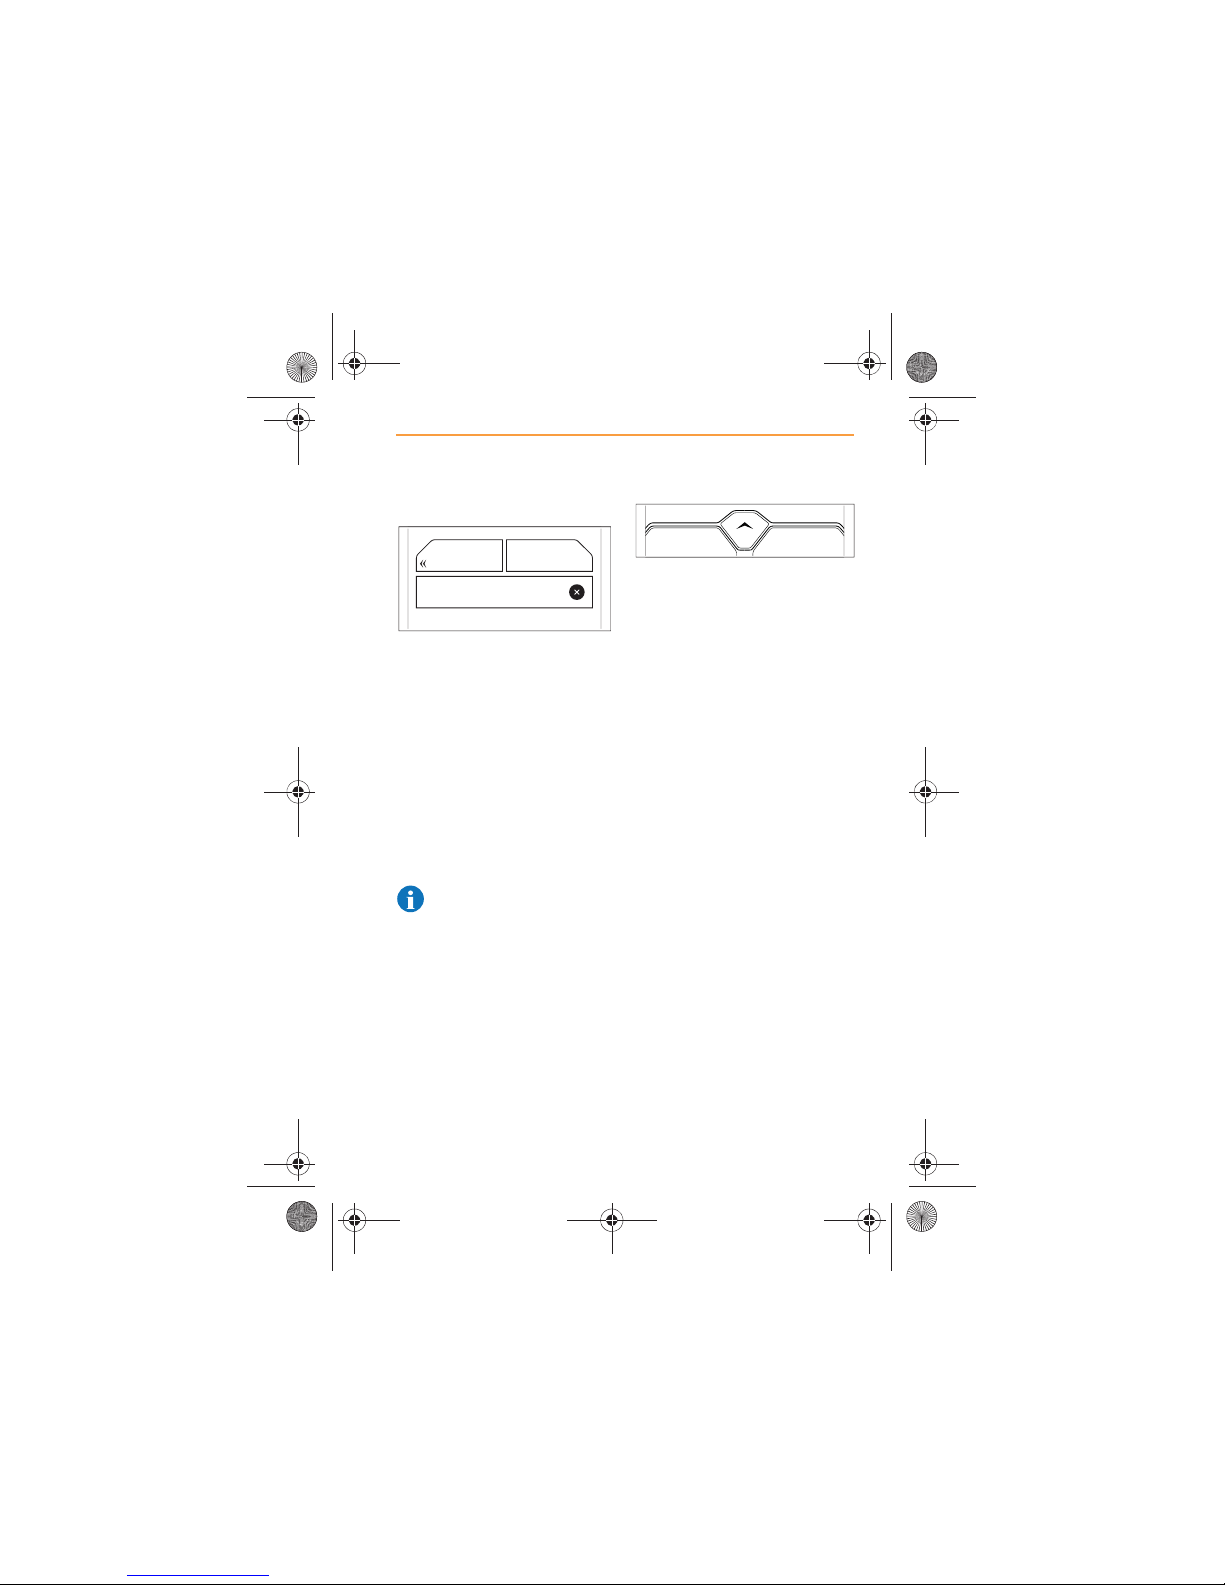
Changing a country or city
To change a country or city,
touch the NEW DESTINATION
ICON, select the method of
setting a new destination that is
required, then touch the BACK
icon, see Setting a destination,
page 68.
The list of countries will appear
on the screen. Touch to select
the country or city required, see
Initial setting for country and city,
page 65.
NOTE: To display the list of
countries when shown the
list of cities, touch the BACK icon
again.
The new country and city that is
selected will now become the
default setting for future
destinations, until it is changed
when setting a new destination,
or by manually changing.
You may also manually change
the default country or city before
selecting a destination. Touch
the NEW DESTINATION icon,
then touch the Change City/
Country icon to change the
country or city.
Search
MAPBACK
70052
CHANGE CITY/
COUNTRY
IRIS.book Page 67 Thursday, October 18, 2012 8:21 AM
Page 68
68
NAVIGATION
USING THE NAVIGATION SYSTEM
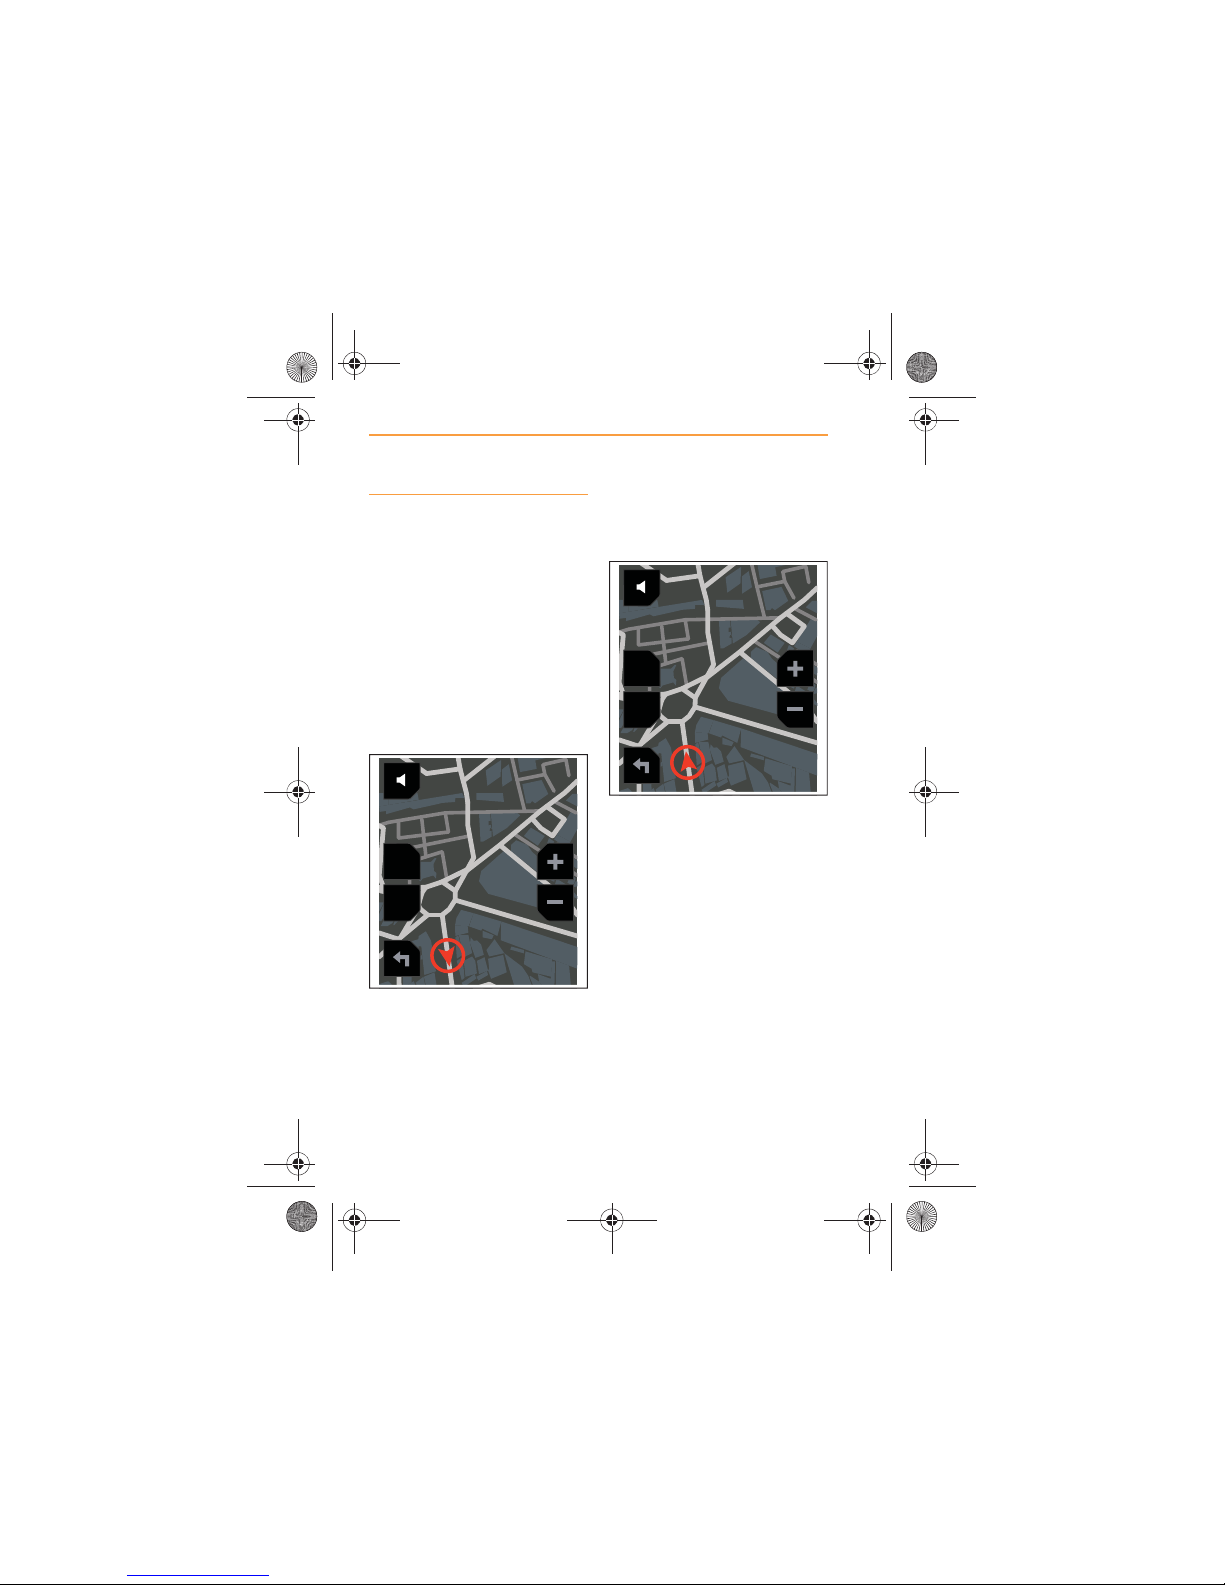
Screen aspect
The navigation map can be
displayed in either of the
following aspects.
x Two dimensional - ;
x North up - .
Touch the icon on the left hand
side of the screen, to change the
map view.
The icon description will change
according to the selection made.
When is selected, the map is
viewed with North at the top of
the screen and the icon which
represents the vehicle will travel
around the screen, according to
the actual direction that you are
travelling, i.e downwards if you
are travelling south; to the left if
you are travelling west.
When is selected, the icon
representing the vehicle will
always travel up the screen and
the orientation of the map will
change when the car changes
direction.
2D
POI
N
2D
POI
2D
IRIS.book Page 68 Thursday, October 18, 2012 8:21 AM
Page 69
69
NAVIGATION
USING THE NAVIGATION SYSTEM
Setting a destination
There are a number of ways to
set a destination. You can use
the screen interactively or use
the menus.
Using the screen
If you wish to use the screen to
set a destination, touch the or
icon until the map is
displayed at the most effective
scale for locating the general
area of your destination.
Gently swipe a finger up, down
or side to side until your
destination appears on the
screen.
MENU
POI
2D
CANCEL ROUTE
IRIS.book Page 69 Thursday, October 18, 2012 8:21 AM
Page 70
70
NAVIGATION
USING THE NAVIGATION SYSTEM
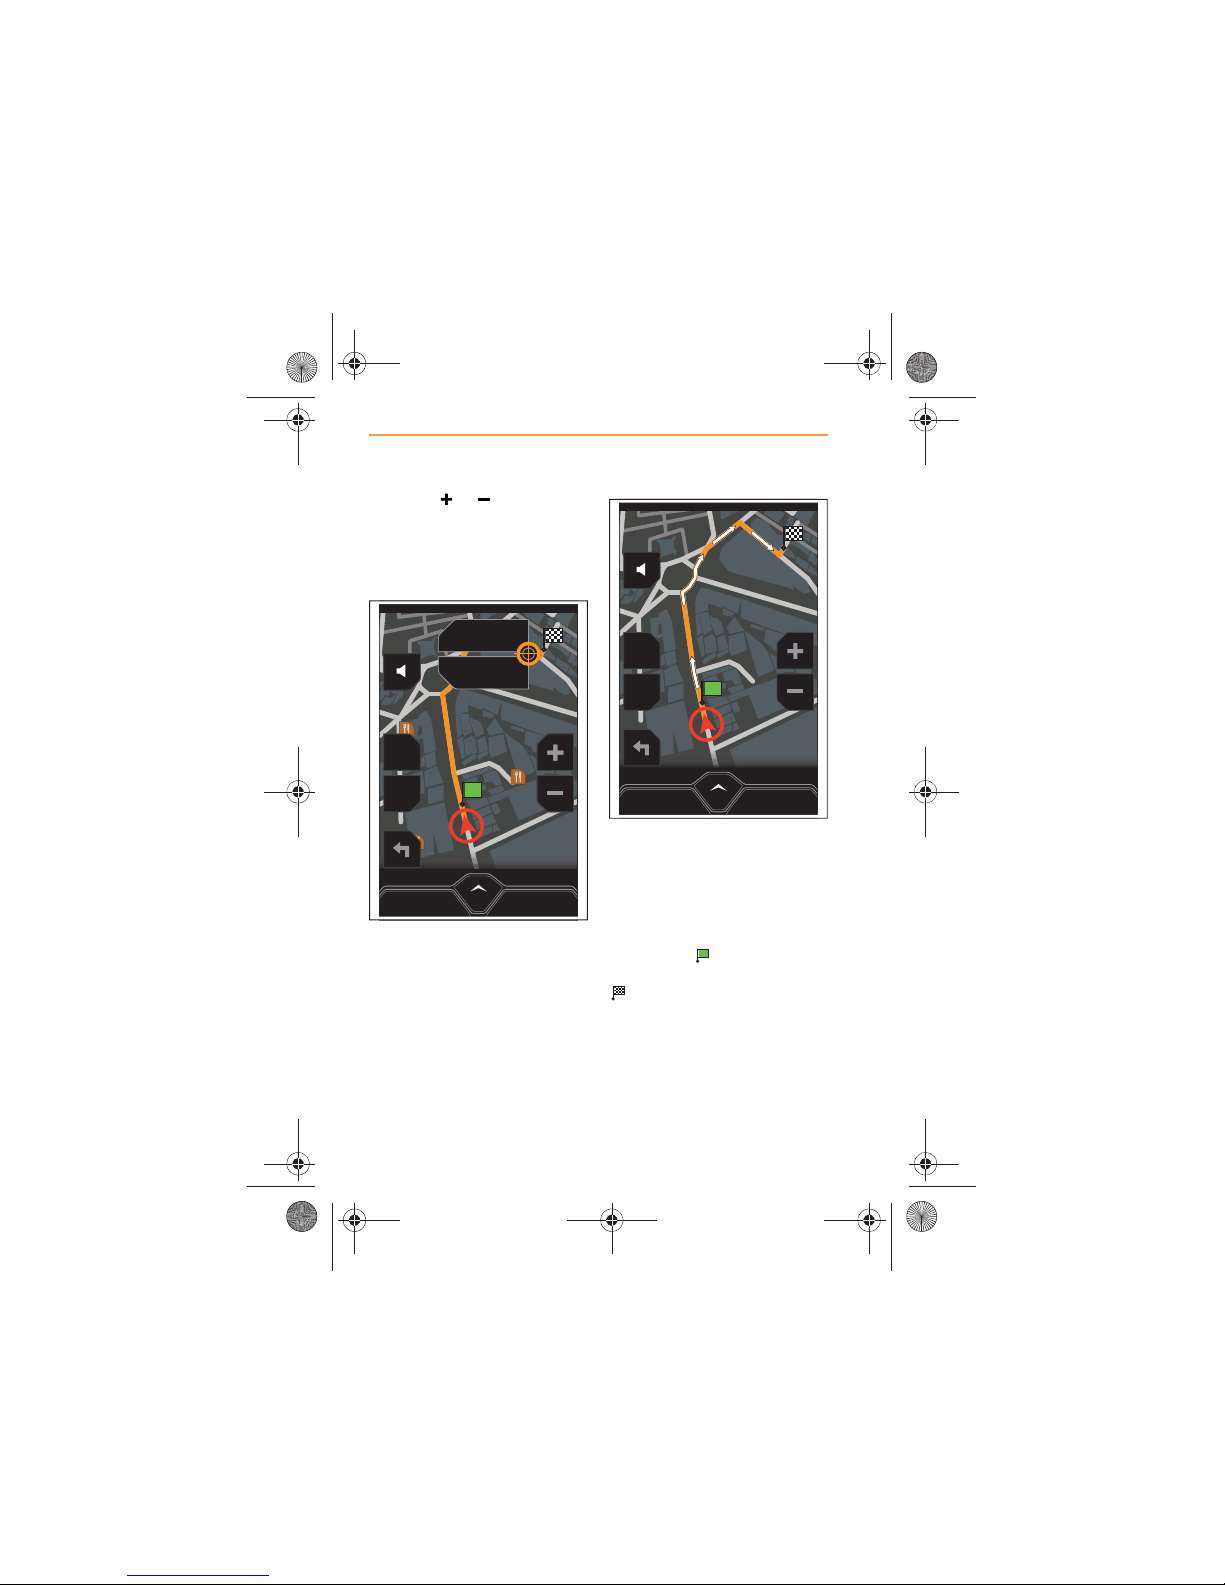
Touch the or icon to
optimise the scale of the map, so
that the precise location can be
viewed and then touch that point
for approximately two seconds.
An icon will be displayed,
providing the option to either
SAVE or GO HERE.
Touch GO HERE and a route will
be calculated. Touch SAVE to
store this destination in
Favorites.
When the route has been
calculated, it will be highlighted
on the map in orange, with white
arrows indicating the route
direction.
Your start position will be
identified by and the
destination will be identified by
.
MENU
POI
MENU
2D
POI
CANCEL ROUTE
GO HERE
SAVE
MENU
2D
POI
CANCEL ROUTE
IRIS.book Page 70 Thursday, October 18, 2012 8:21 AM
Page 71
71
NAVIGATION
USING THE NAVIGATION SYSTEM
Using menus
There are several ways that a
destination can be set by using
menus.
Some destinations may be
stored within the following areas
of the system.
x Go Home, page 73;
x Favorites, page 74;
x Recent Destinations, page
84.
Other destinations can be
created as new. The route to
new destinations are calculated
by accessing the New
Destination menu, and are
created by using the following
information.
x By Address, page 76;
x By Intersection, page 79;
x By Zip Code, page 82.
IRIS.book Page 71 Thursday, October 18, 2012 8:21 AM
Page 72
72
NAVIGATION
USING THE NAVIGATION SYSTEM
Navigation Menu
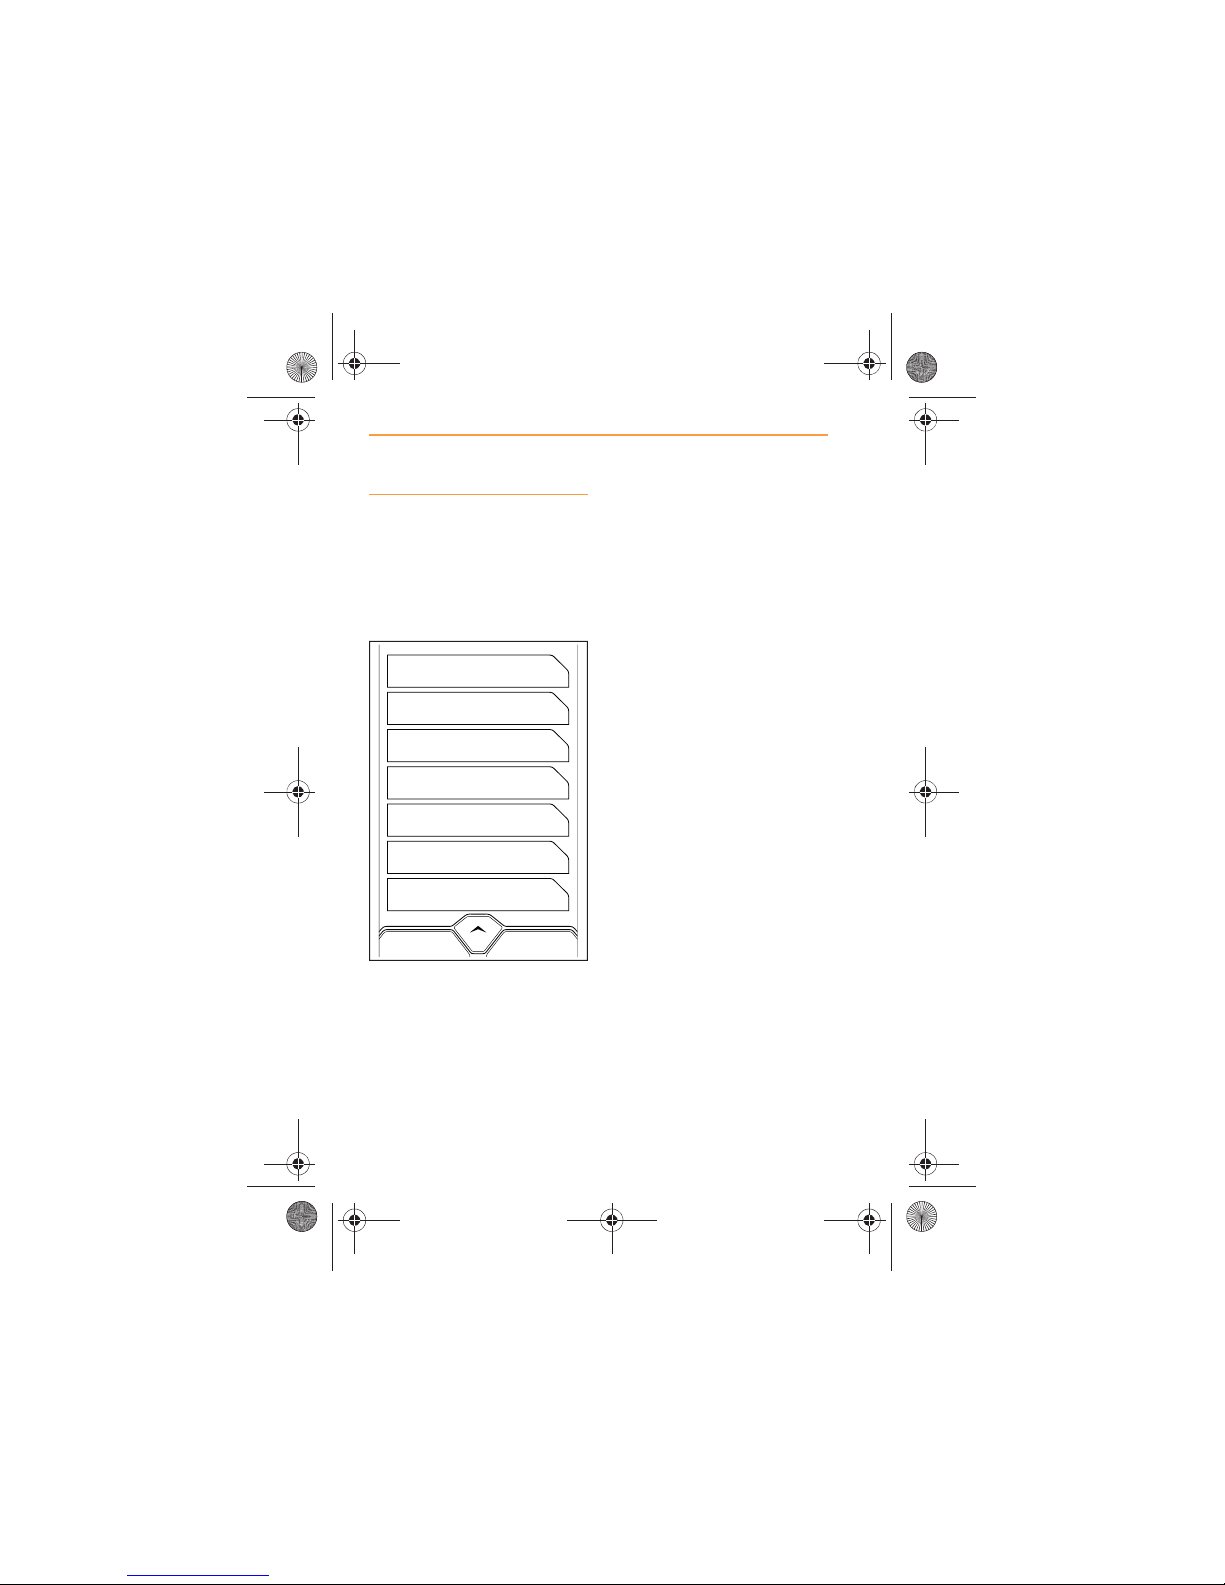
When a map is displayed, the
navigation menu can be
accessed by touching the MENU
icon in the bottom right-hand
corner of the screen.
The following selections can be
made.
x Go Home, page 73;
x Favorites, page 74;
x New Destination, page 76;
x Recent Destinations, page
84;
x Points of Interest, page 86;
x Options, page 89.
To return to the map screen,
touch the MAP icon at the top of
the screen.
MAP
GO HOME
FAVOURITES
NEW DESTINATION
RECENT DESTINATIONS
POINTS OF INTEREST
OPTIONS
IRIS.book Page 72 Thursday, October 18, 2012 8:21 AM
Page 73
73
NAVIGATION
USING THE NAVIGATION SYSTEM
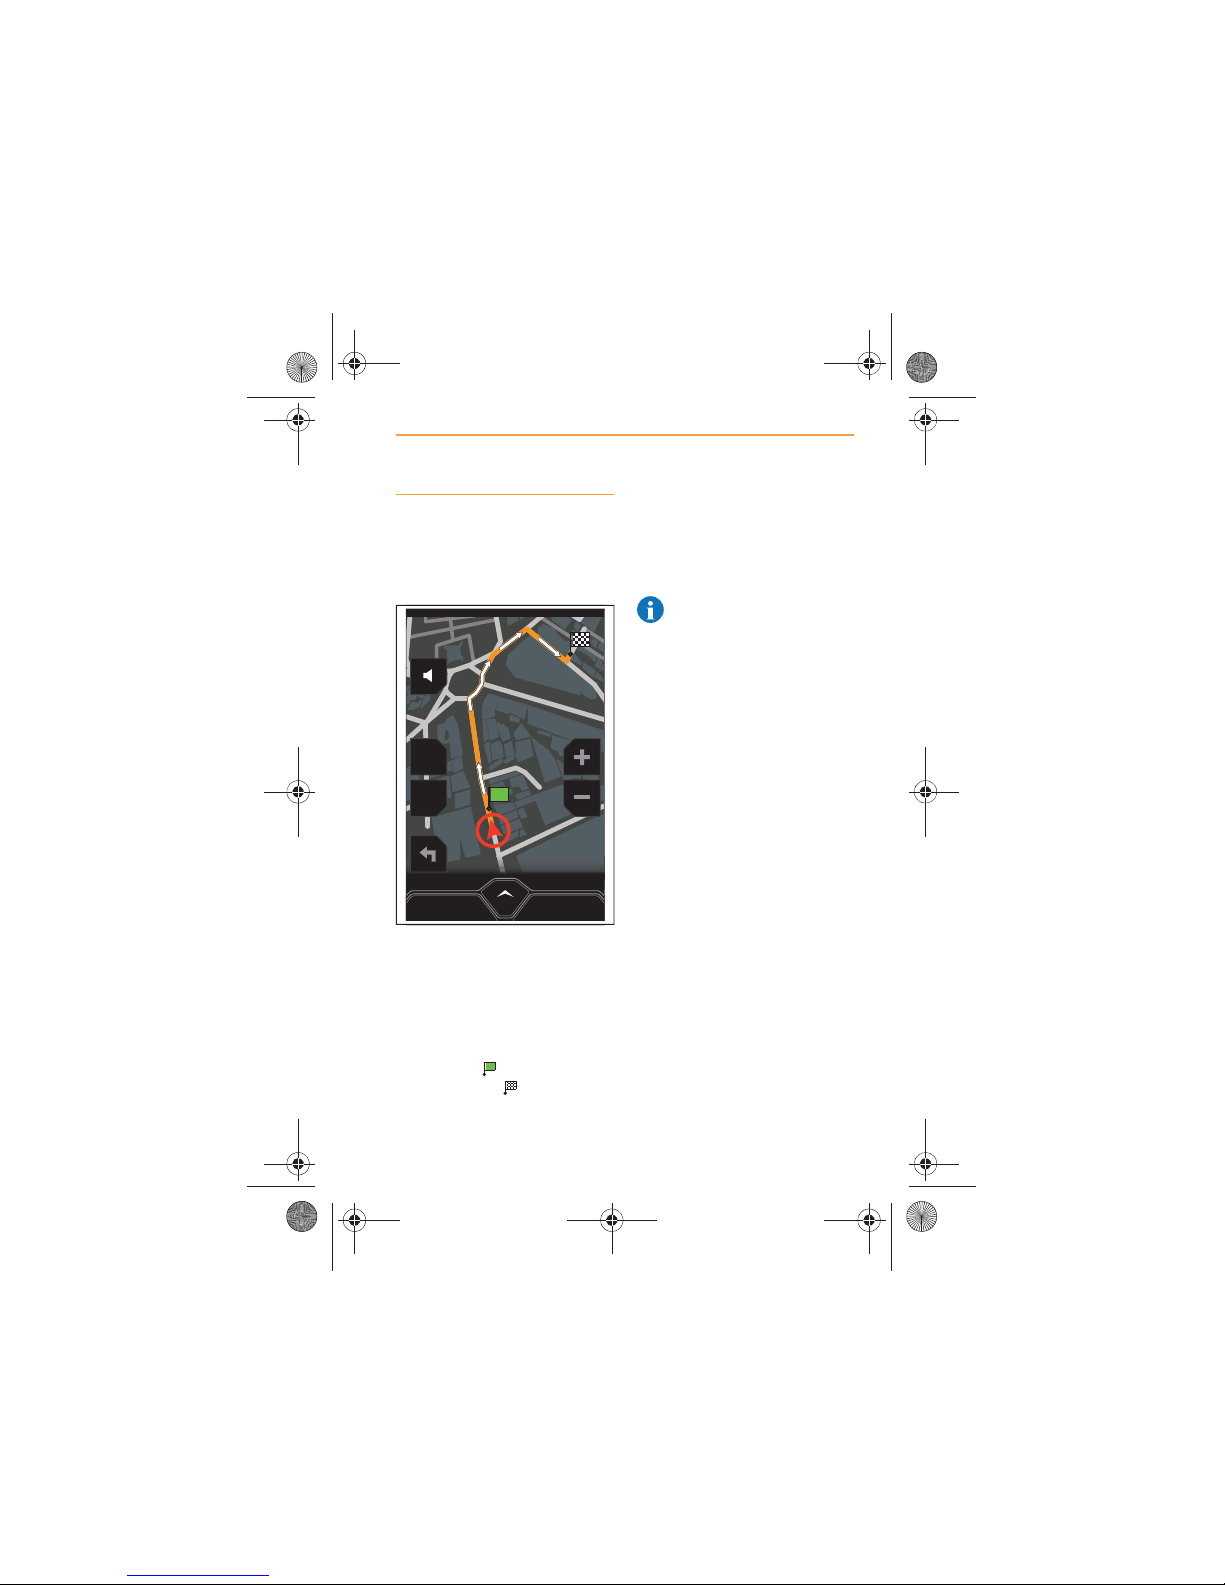
Go Home
To set your Home Address in the
Go Home feature, see Home
Address, page 89.
Touching this icon will then
create a route to your home. The
route will be highlighted in
orange, with white arrows
indicating the route direction.
Your start position will be
identified by and Home will
be identified by .
If no address has been saved as
home, the screen will display No
Home Address Set. Refer to
Home Address, page 89, to set
your Home address.
NOTE: Never use your
actual address, always
choose a location nearby. If your
car is stolen, thieves will
otherwise be able to locate your
property.
MENU
2D
POI
CANCEL ROUTE
IRIS.book Page 73 Thursday, October 18, 2012 8:21 AM
Page 74
74
NAVIGATION
USING THE NAVIGATION SYSTEM
Favorites
Once the route to a specific
destination has been calculated,
that destination can be stored as
a favorite.
Use one of the following
methods to create a route to a
favorite destination.
x Using the screen, page 69;
x By Address, page 76;
x By Intersection, page 79;
x By Zip Code, page 82.
A favorite destination can be
recalled for immediate use.
Favorites are listed in the
chronological order that they
were saved.
If the list is long, searches can
be used to refine the list. Touch
the Search field and use the
keyboard to start entering the
characters of your favourite.
The list will be refined to
favorites containing those
characters.
Touch the favorite when it
appears on screen. Address
details will be displayed.
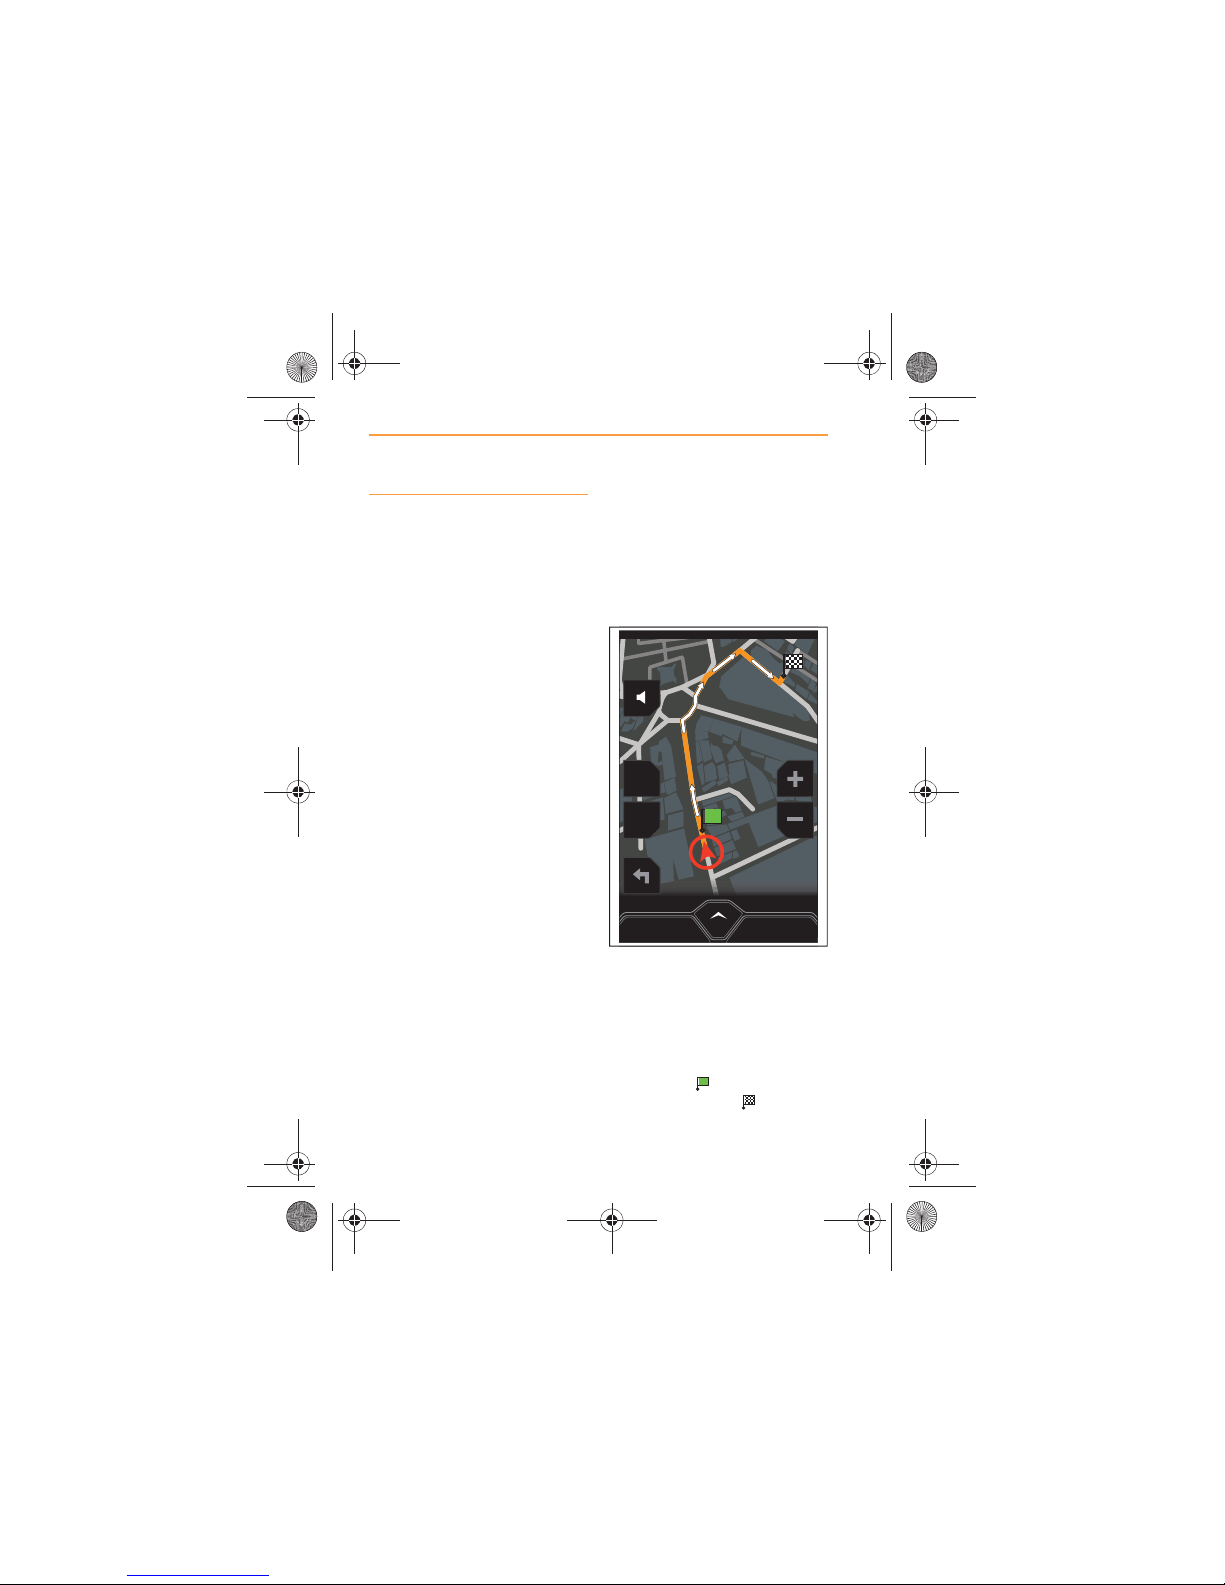
Touch the GO HERE icon and
the route will be displayed on the
screen in orange, with white
arrows indicating the route
direction.
Your start position will be
identified by and the favorite
will be identified by .
MENU
2D
POI
CANCEL ROUTE
IRIS.book Page 74 Thursday, October 18, 2012 8:21 AM
Page 75
75
NAVIGATION
USING THE NAVIGATION SYSTEM
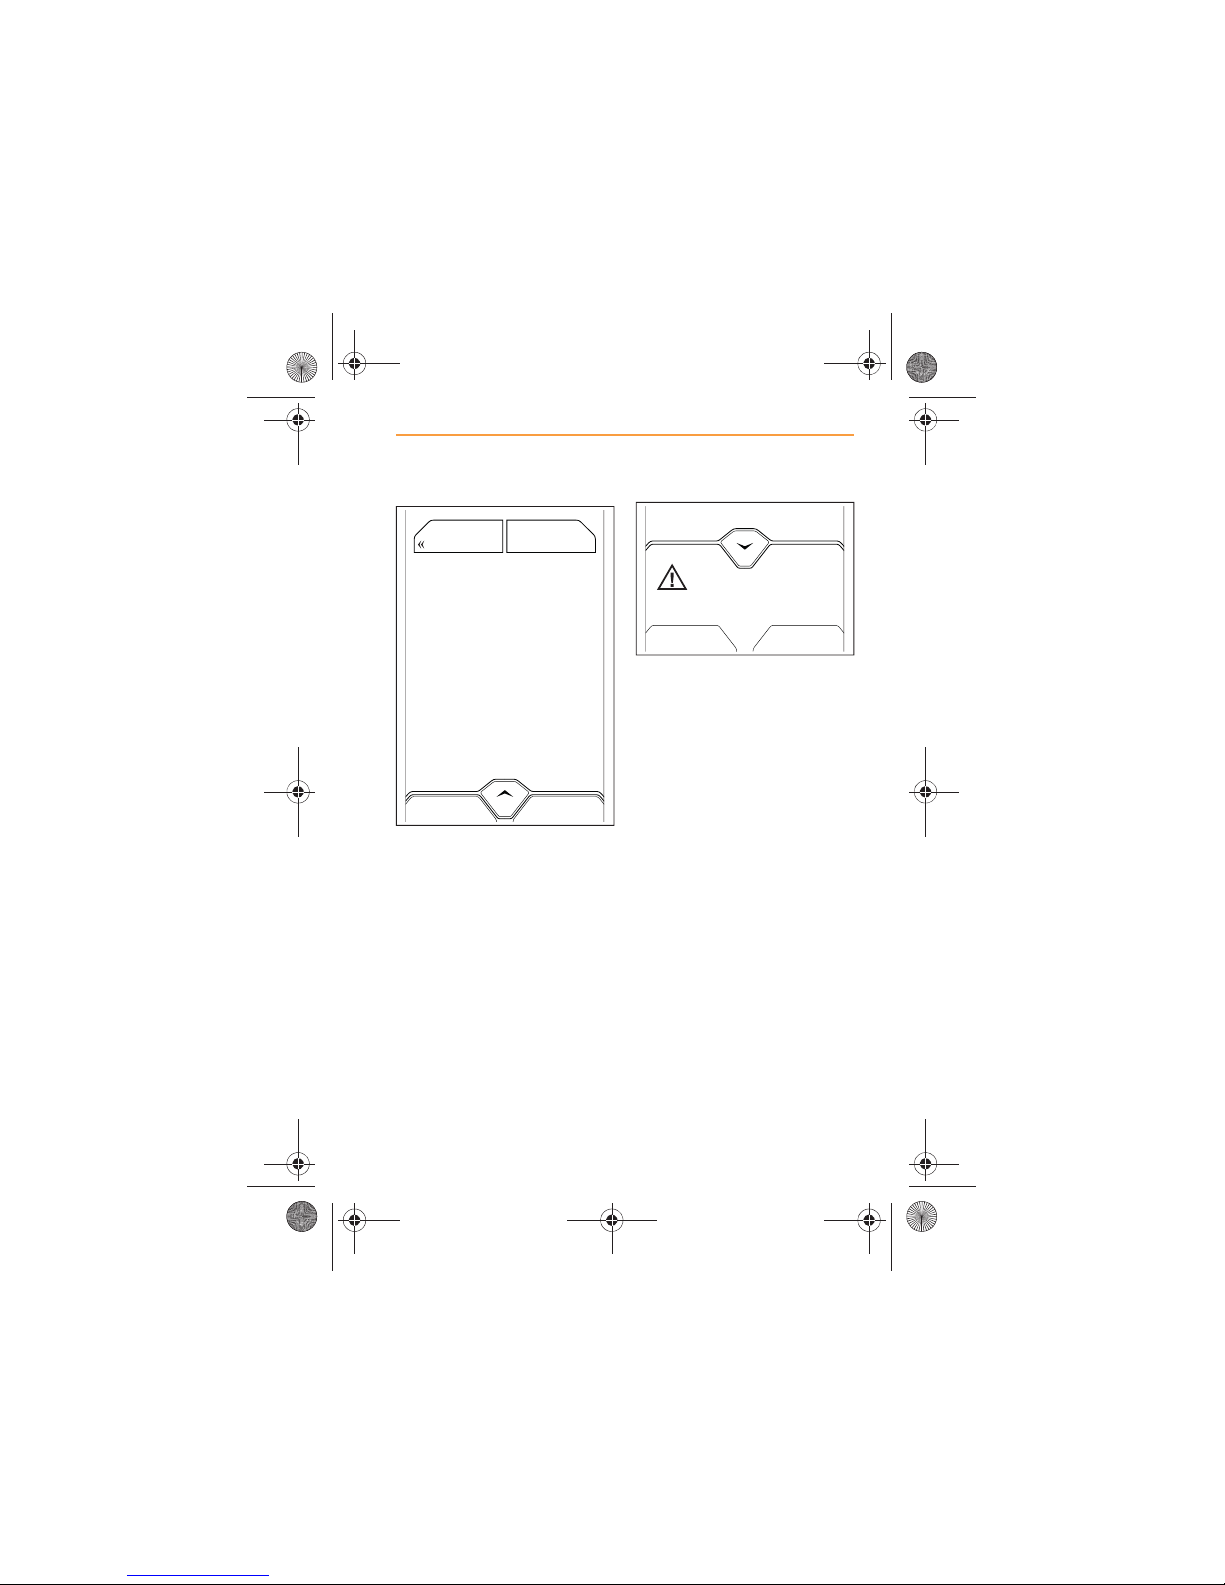
To delete, touch the favorite. Full
details of the destination will
appear on the screen.
Touch DELETE, the MCC will
open, for confirmation. Touch
YES to delete or NO to retain the
favorite.
GO HEREDELETE
MAP
BACK
McLaren Technology Centre, Chertsey Rd,
Woking, Surrey, GU21 4YH
DELETE THIS FAV0RITE?
YESNO
IRIS.book Page 75 Thursday, October 18, 2012 8:21 AM
Page 76
76
NAVIGATION
USING THE NAVIGATION SYSTEM
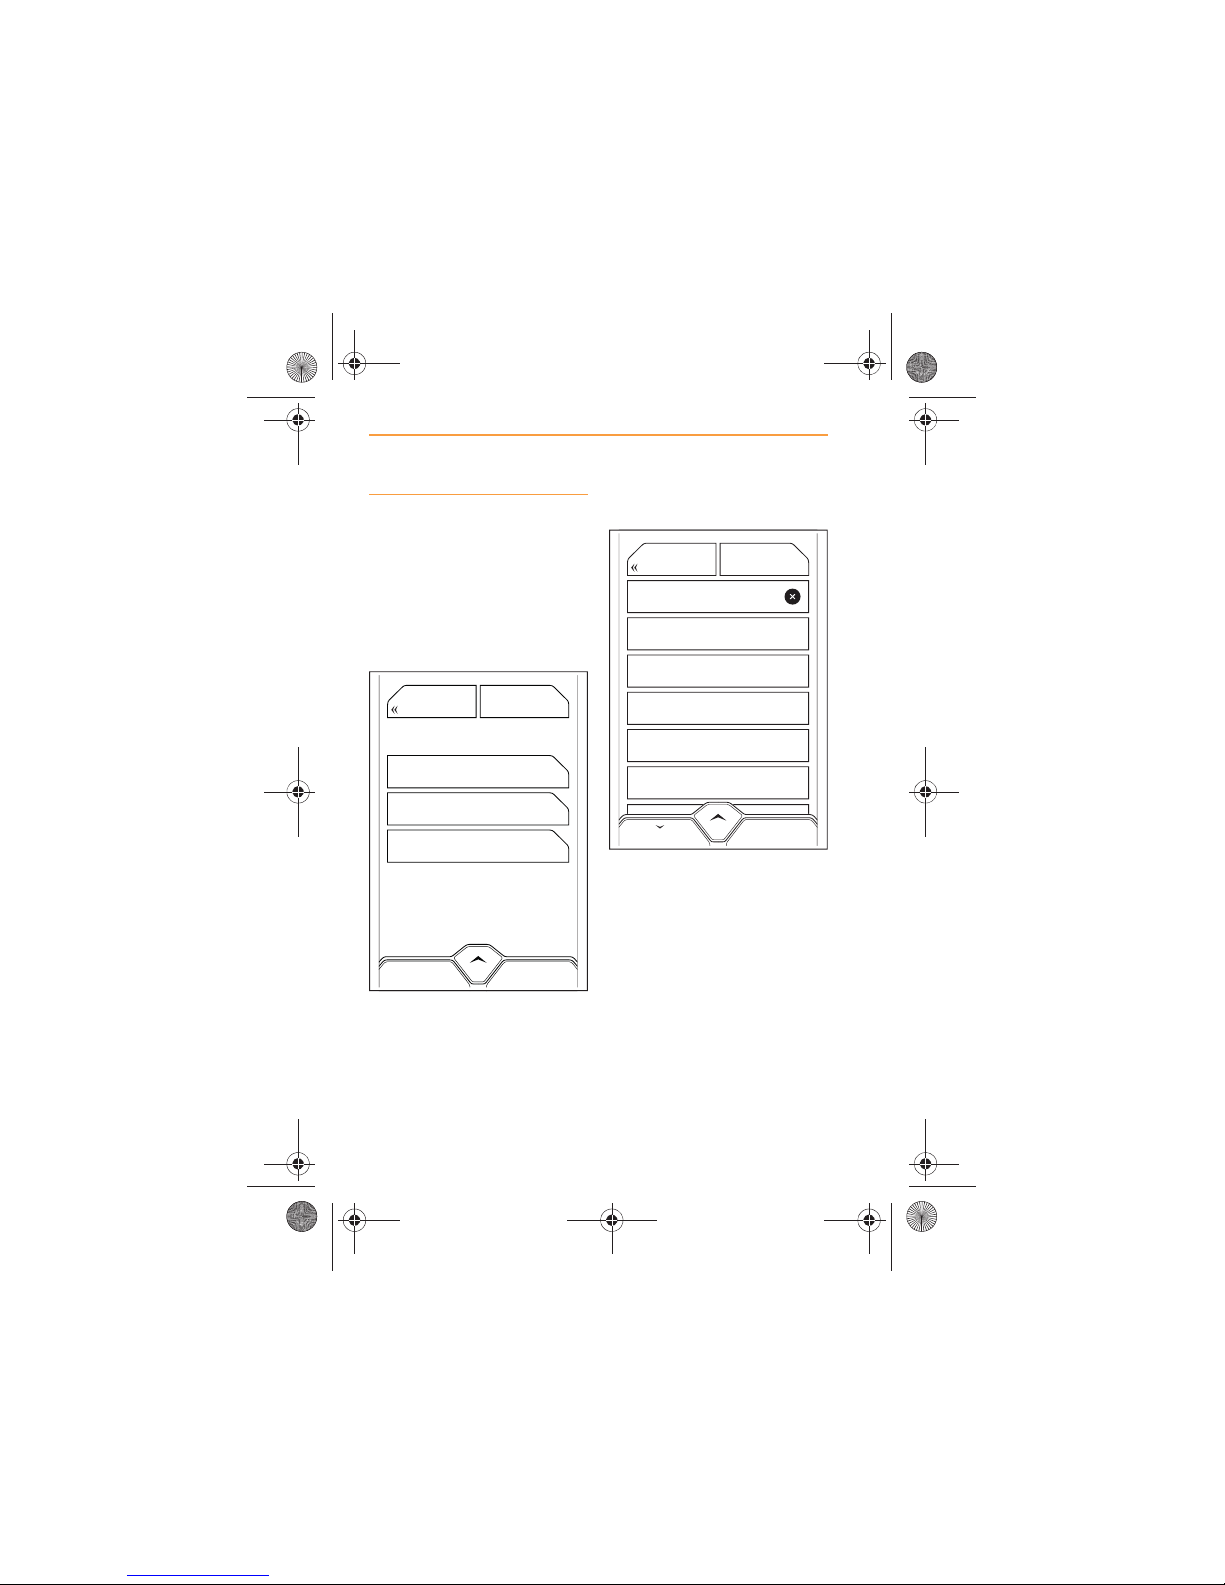
New Destination
Touch the NEW DESTINATION
icon.
If your destination is in a different
country or city from that
displayed, see Changing a
country or city, page 66.
The following options are
displayed.
x By Address, page 76;
x By Intersection, page 79;
x By Zip Code, page 82.
By Address
Touch BY ADDRESS, a list of
towns and cities will appear in
alphabetical order.
BY ADDRESS
BY INTERSECTION
BY POST CODE
MAPBACK
United Kingdom, Ireland
CHANGE CITY/
COUNTRY
Aasleagh
Search
MAPBACK
Abberley (England)
Abberley (Ireland)
Abbert
Abbert Demesne
70052
IRIS.book Page 76 Thursday, October 18, 2012 8:21 AM
Page 77
77
NAVIGATION
USING THE NAVIGATION SYSTEM
Scroll through the list until the
target town or city appears and
touch that icon.
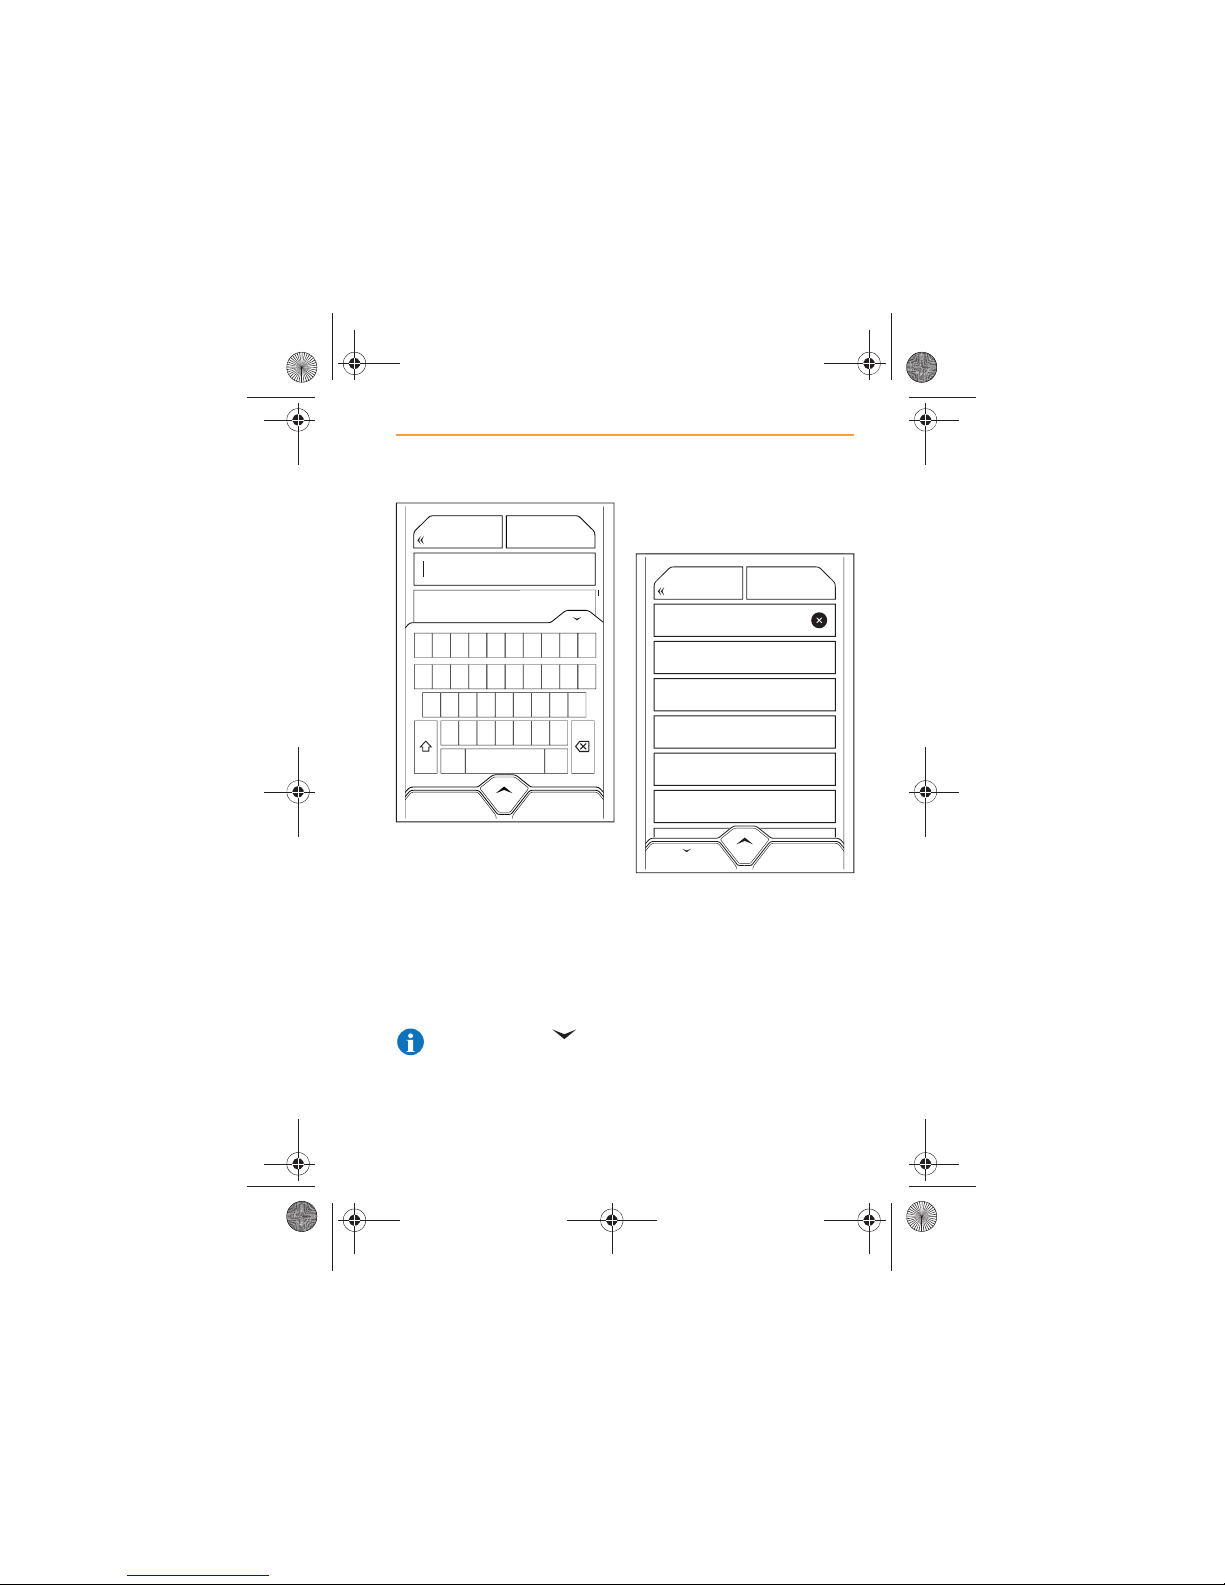
Alternatively, use the keyboard,
and start to type your destination
in the Search Field.
A list of places beginning with
the same characters as your
destination, will appear.
NOTE: Touch the icon
in the top right-hand corner
of the keyboard to hide the
keyboard and view more entries.
Select your target town or city
when it appears.
A list of road numbers and street
names in the target town or city
will appear, with Town/City
Centre at the top.
Scroll through the list until the
target street appears and touch
that icon.
Woking,
Colorado
Connecticut
Delaware
Florida
Georgia
Q
1 2 3 4 5 6 7 8 9 0
A
ZXC
SPACE
.?$*
VBNM
SDFGHJKL
WE R T Y U I OP
Woking, United Kingdom, Ireland
MAPDESTINATION
1
Search
MAPBACK
2
3
A4053
A4082
3680
IRIS.book Page 77 Thursday, October 18, 2012 8:21 AM
Page 78
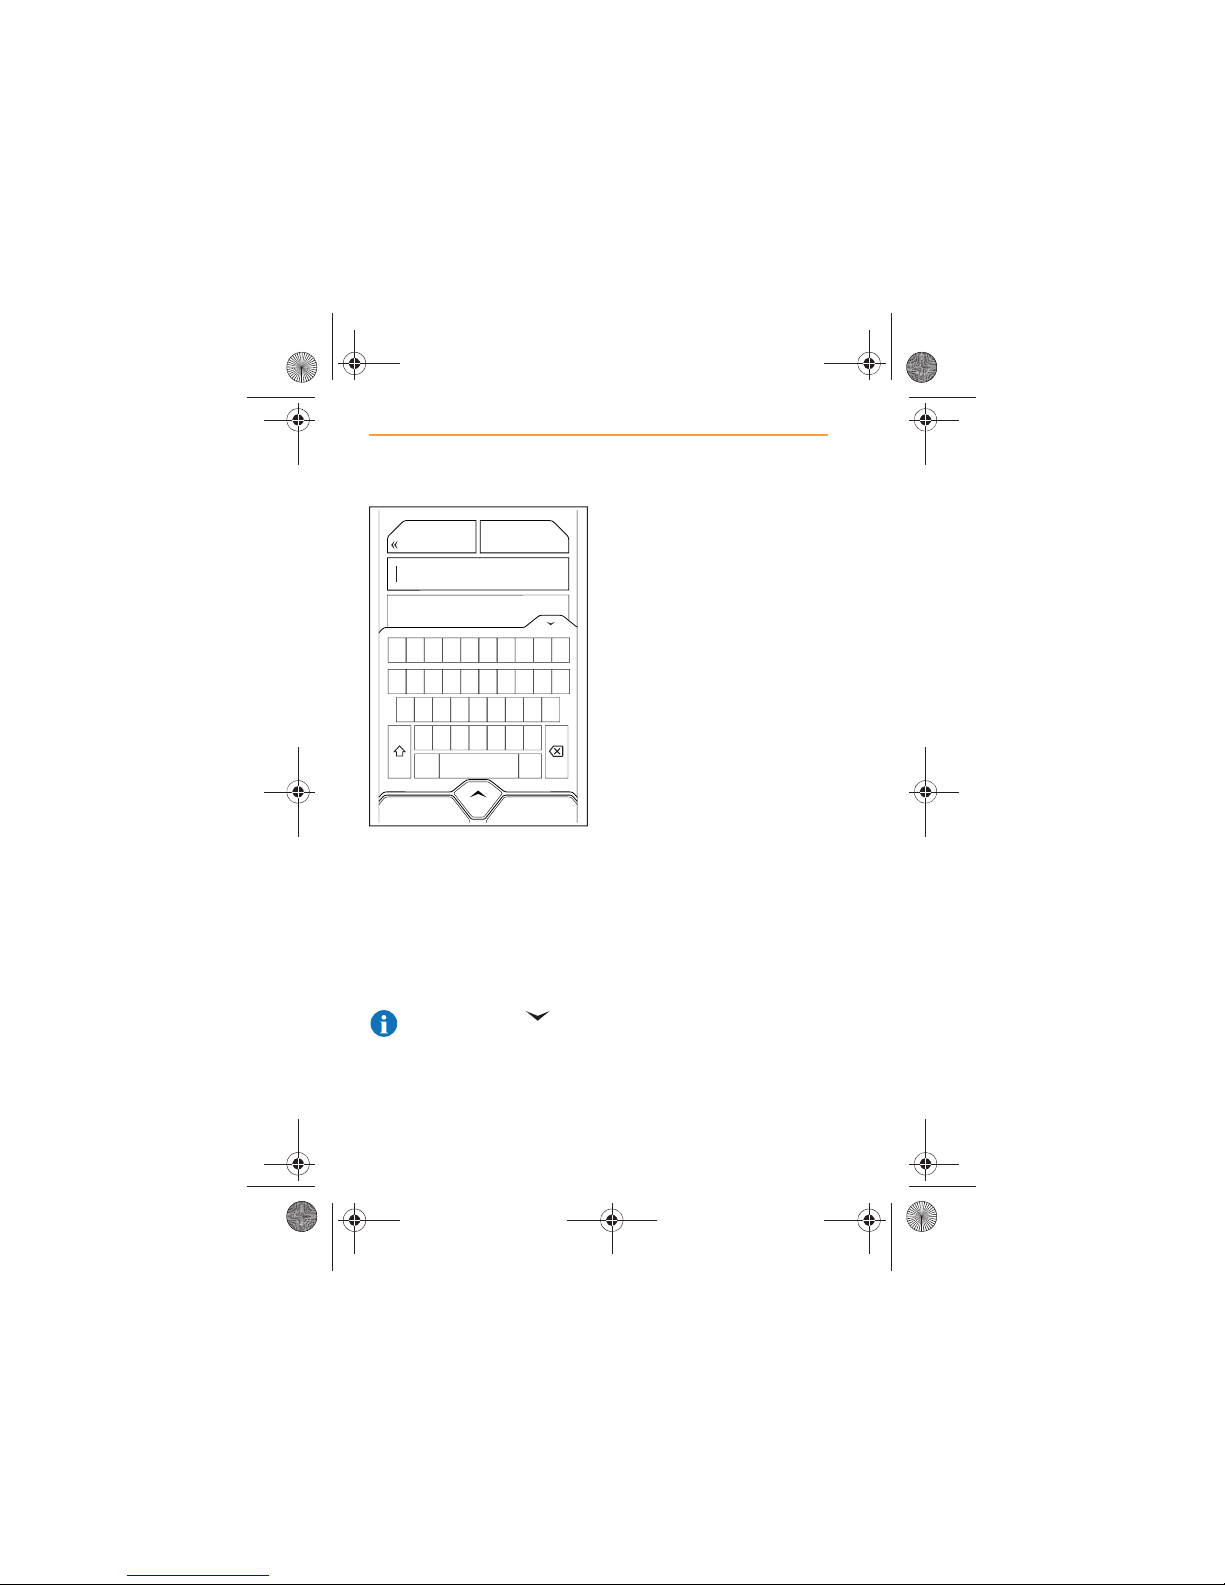
78
NAVIGATION
USING THE NAVIGATION SYSTEM
Alternatively, use the keyboard,
and start to type the name of the
street or number of the road (e.g.
A321) in the Search Field.
A list of streets beginning with
the same characters as the
target street will appear. Select
the street when it appears.
NOTE: Touch the icon
in the top right-hand corner
of the keyboard to hide the
keyboard and view more entries.
A list of all building numbers will
appear, as well as an icon
allowing the mid point of the
street to be selected.
Select the building number. If the
number is not known, set the
destination as the mid point of
the street.
Touch GO HERE and a route will
be calculated. Touch SAVE to
store this destination in
Favorites.
Hamilton Street
1
10
100
100th Street
E 100th Street
Q
1 2 3 4 5 6 7 8 9 0
A
ZXC
SPACE
.?$*
VBNM
SDFGHJKL
WE R T Y U I OP
MAPWOKING
Hamilton Street
1,234
IRIS.book Page 78 Thursday, October 18, 2012 8:21 AM
Page 79
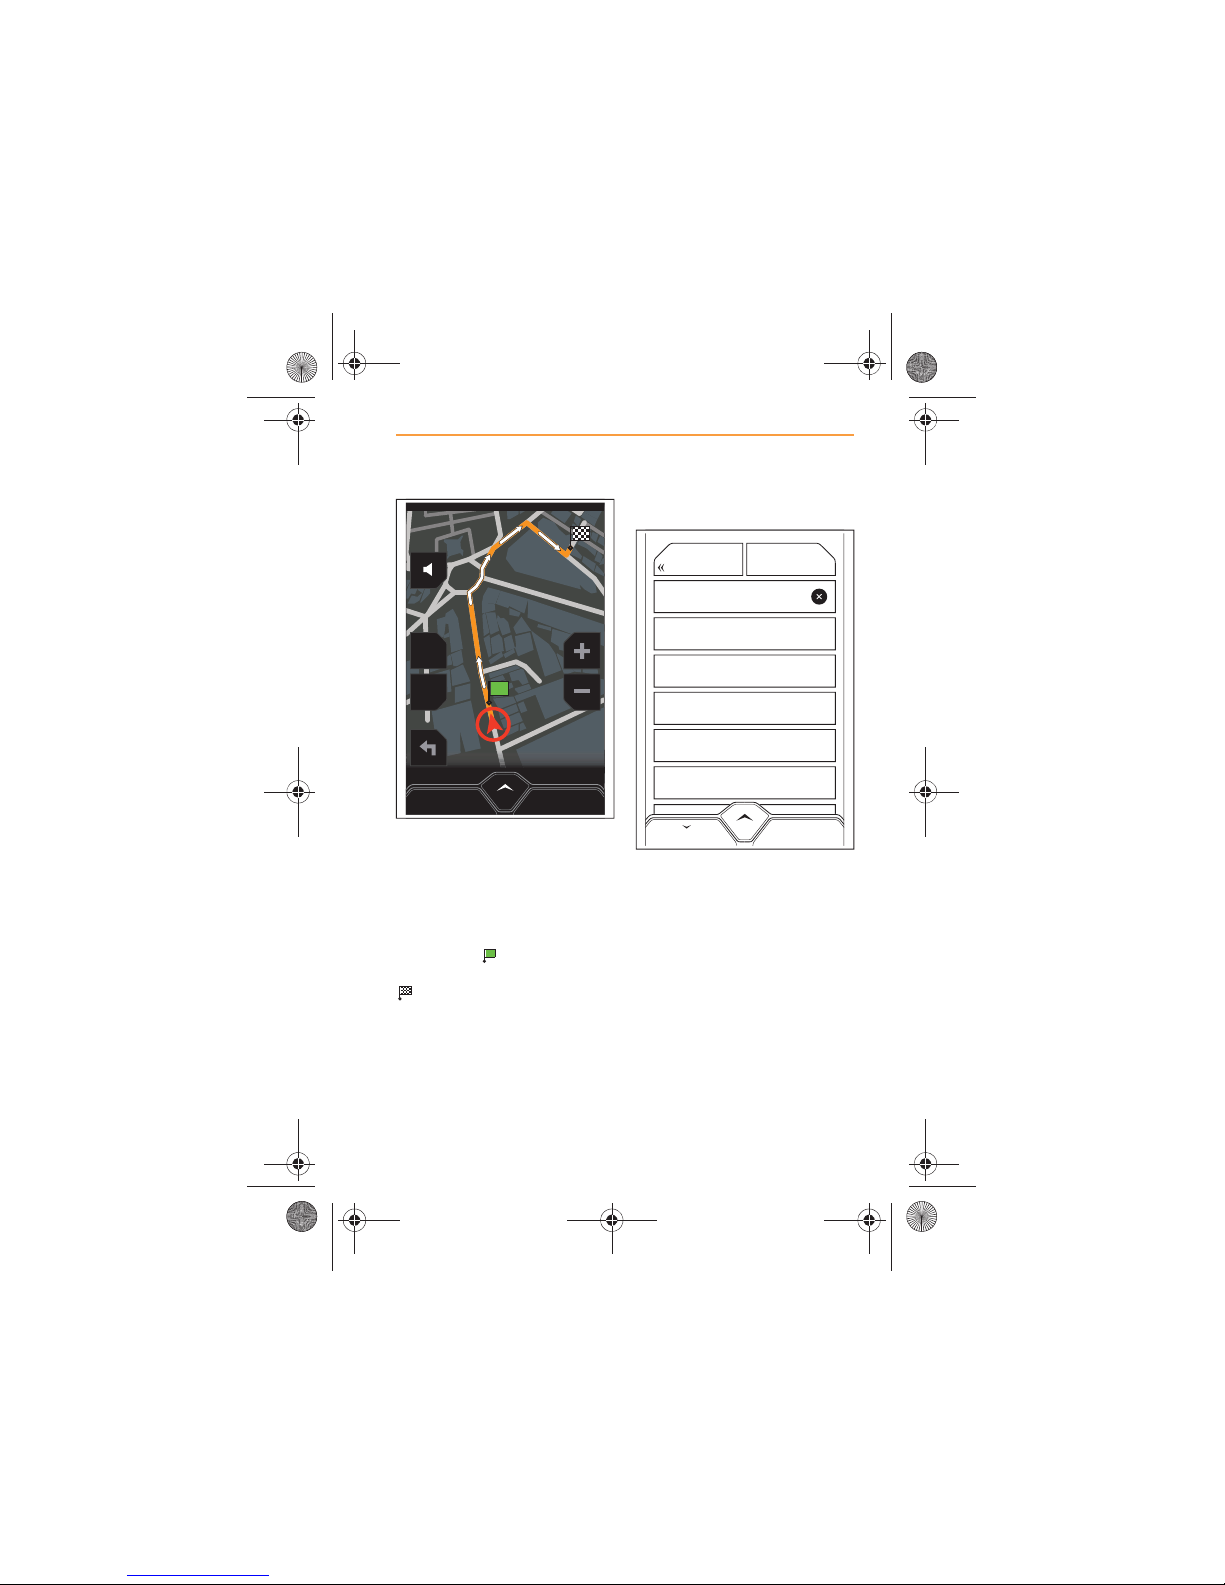
79
NAVIGATION
USING THE NAVIGATION SYSTEM
When the route has been
calculated, it will be displayed on
the map in orange, with white
arrows indicating the route
direction.
Your start position will be
identified by and the
destination will be identified by
.
By Intersection
Touch BY INTERSECTION, a list
of towns and cities will appear in
alphabetical order.
Scroll through the list until the
target town or city appears and
touch that icon.
Alternatively, use the keyboard,
and start to type your destination
in the Search Field.
A list of places beginning with
the same characters as your
destination, will appear.
MENU
2D
POI
CANCEL ROUTE
Aasleagh
Search
MAPBACK
Abberley (England)
Abberley (Ireland)
Abbert
Abbert Demesne
70052
IRIS.book Page 79 Thursday, October 18, 2012 8:21 AM
Page 80
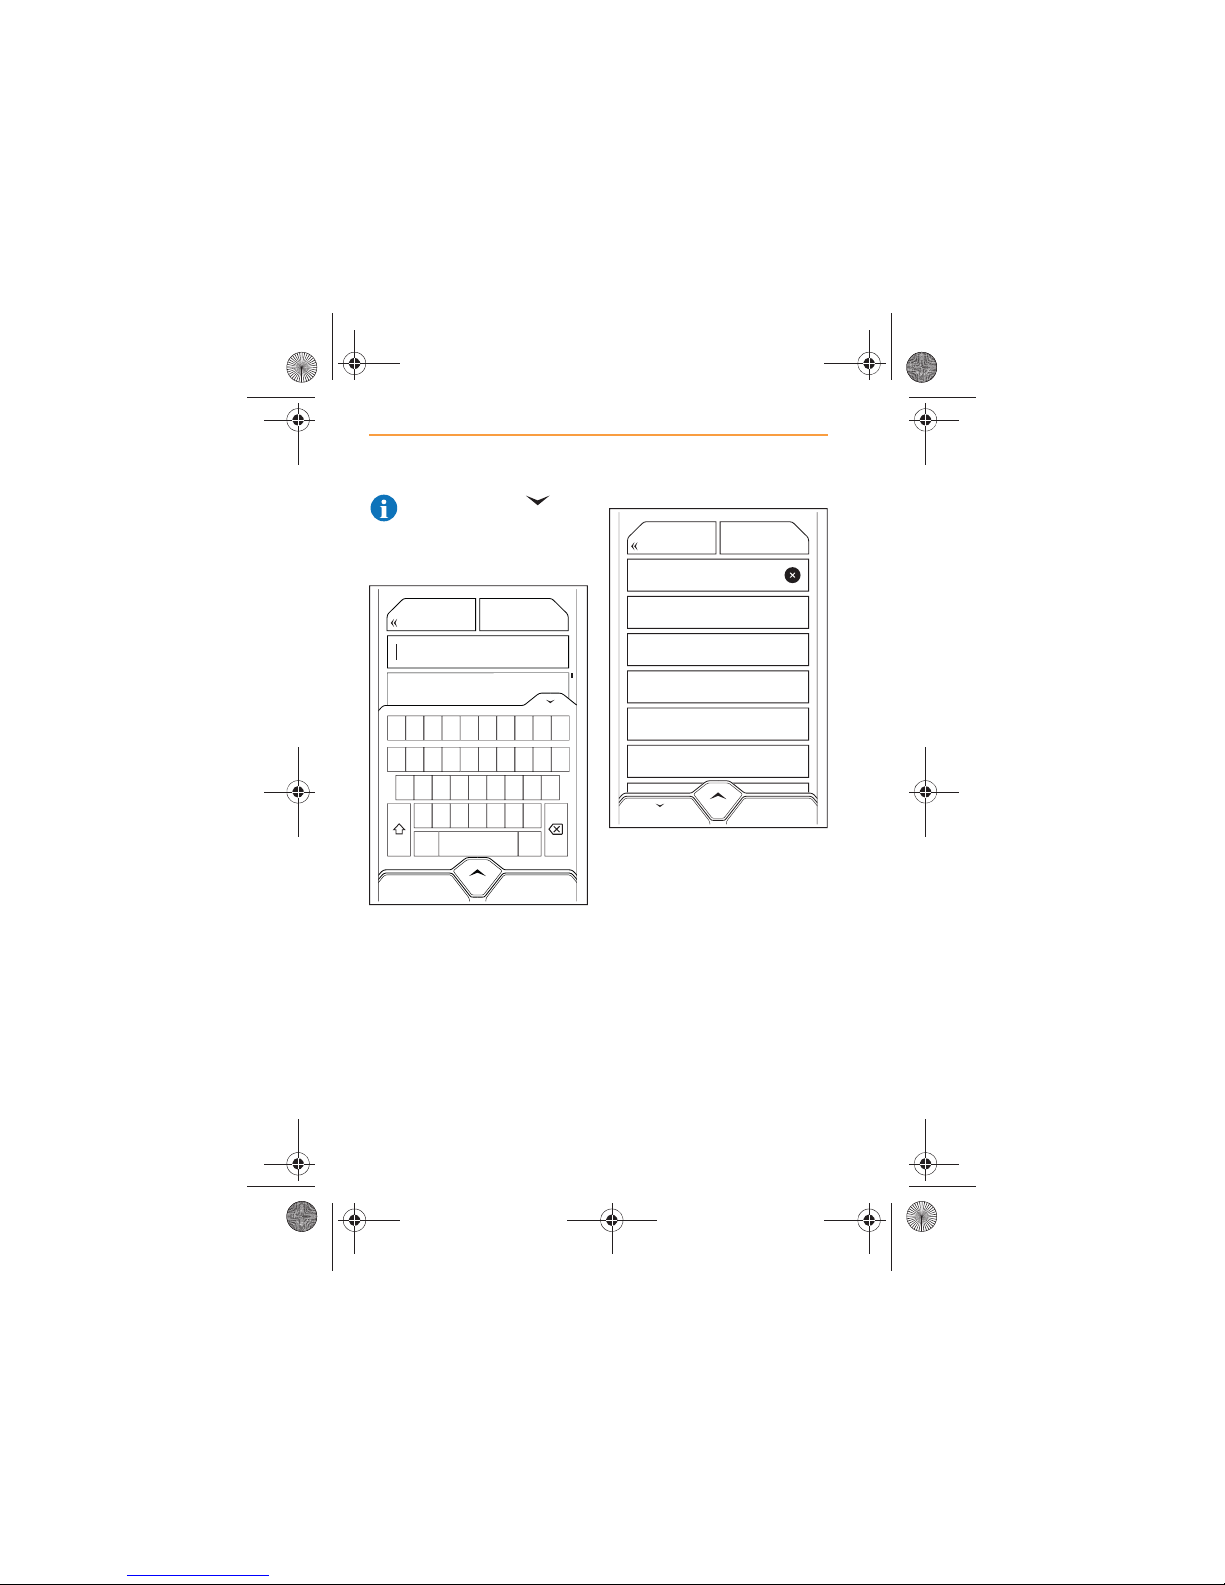
80
NAVIGATION
USING THE NAVIGATION SYSTEM
NOTE: Touch the icon
in the top right-hand corner
of the keyboard to hide the
keyboard and view more entries.
Touch the target town or city
when it appears.
A list of road numbers and street
names in the target town or city
will appear.
Scroll through the list until the
target street appears and touch
that icon.
Woking,
Colorado
Connecticut
Delaware
Florida
Georgia
Q
1 2 3 4 5 6 7 8 9 0
A
ZXC
SPACE
.?$*
VBNM
SDFGHJKL
WE R T Y U I OP
Woking, United Kingdom, Ireland
MAPDESTINATION
1
Search
MAPBACK
2
3
A4053
A4082
3680
IRIS.book Page 80 Thursday, October 18, 2012 8:21 AM
Page 81
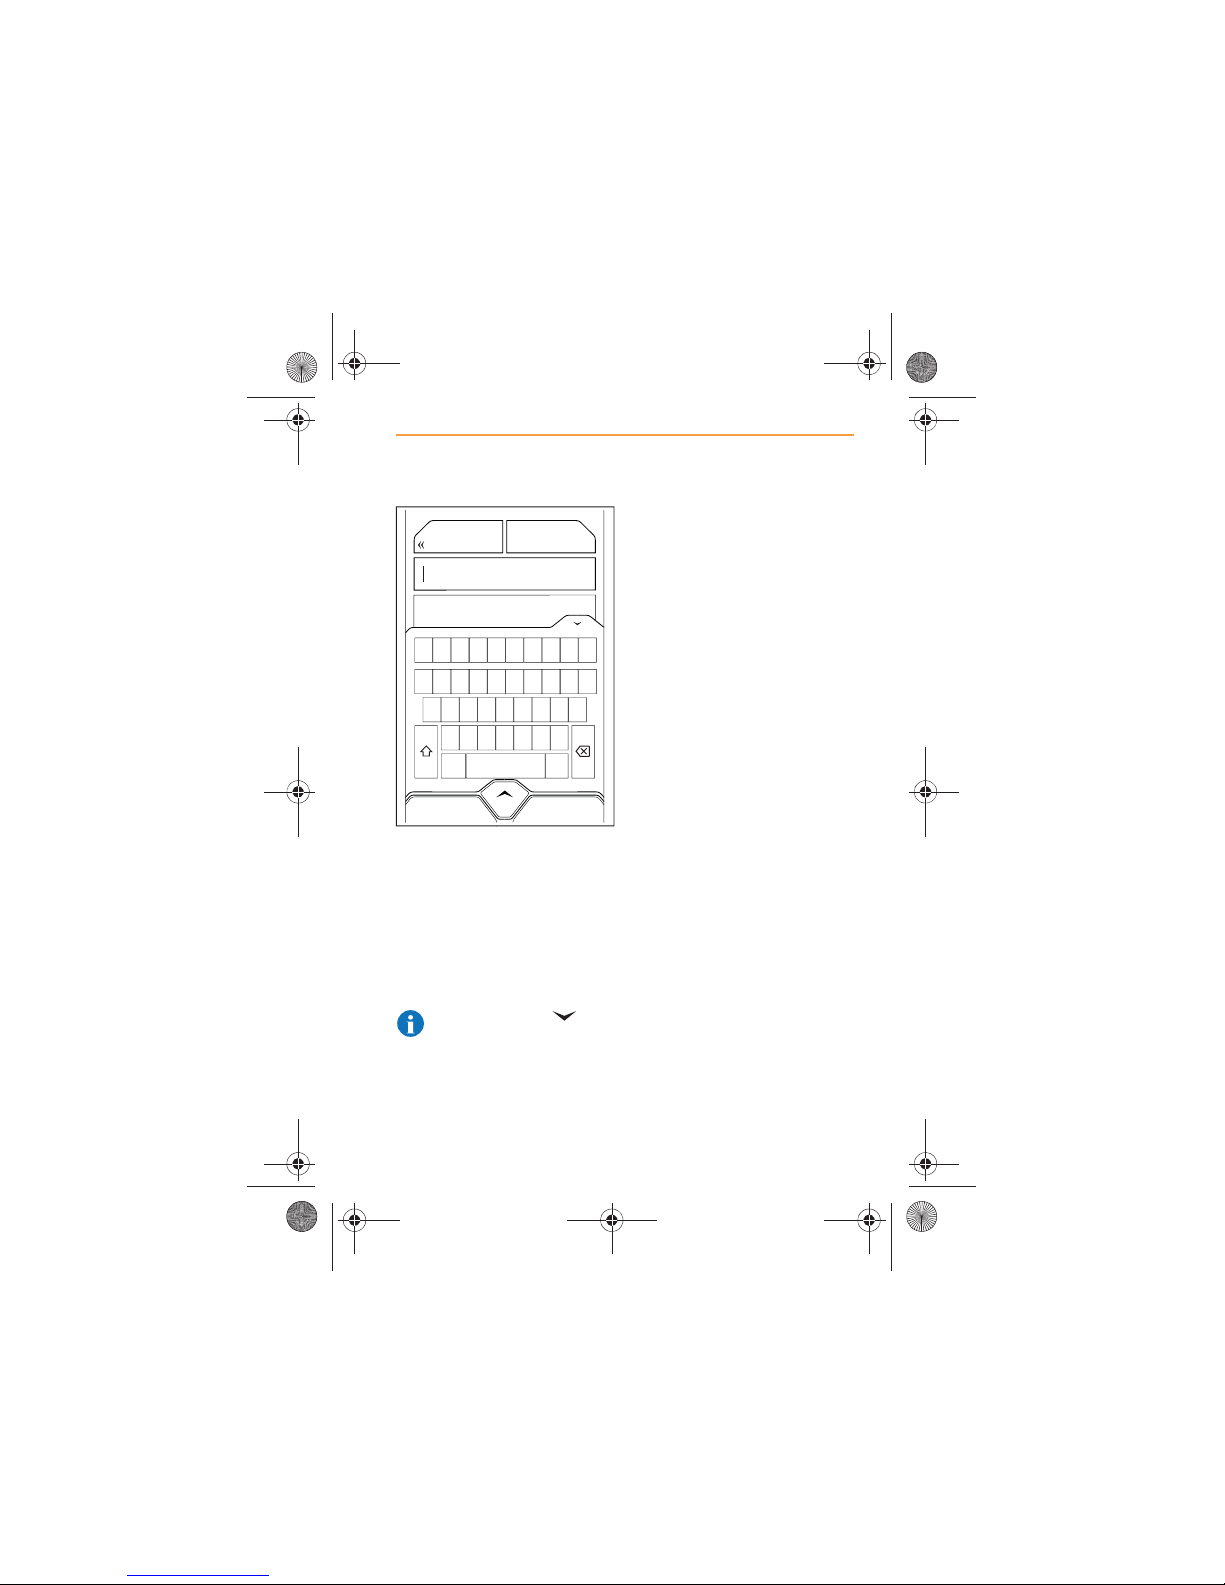
81
NAVIGATION
USING THE NAVIGATION SYSTEM
Alternatively, use the keyboard,
and start to type the name of the
street or number of the road (e.g.
A321) in the Search Field.
A list of streets beginning with
the same characters as the
target street will appear. Select
the street when it appears.
NOTE: Touch the icon
in the top right-hand corner
of the keyboard to hide the
keyboard and view more entries.
Select the target street when it
appears.
A second list of streets will
appear, these will intersect with
the street selected.
Select the second street you
require.
The intersection of these two
streets will be set as your
destination.
Touch GO HERE and a route will
be calculated. Touch SAVE to
store this destination in
Favorites.
Hamilton Street
1
10
100
100th Street
E 100th Street
Q
1 2 3 4 5 6 7 8 9 0
A
ZXC
SPACE
.?$*
VBNM
SDFGHJKL
WE R T Y U I OP
MAPWOKING
Hamilton Street
1,234
IRIS.book Page 81 Thursday, October 18, 2012 8:21 AM
Page 82
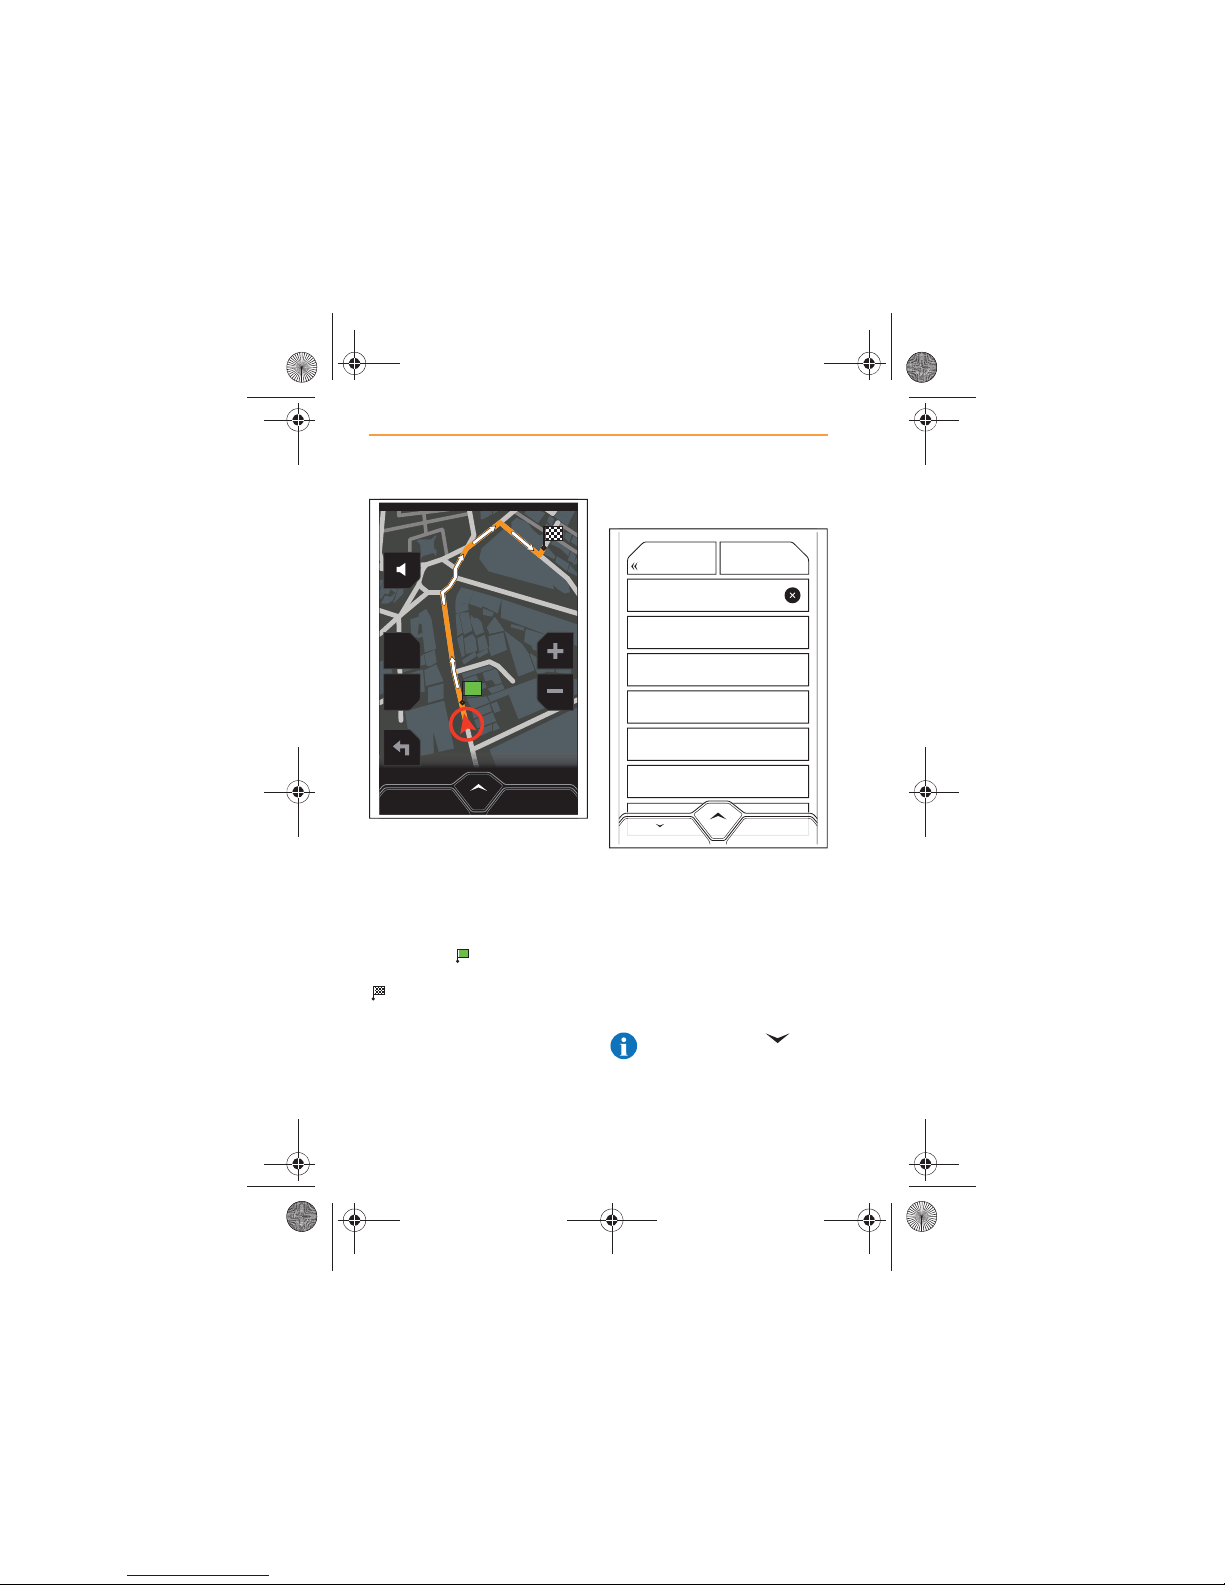
82
NAVIGATION
USING THE NAVIGATION SYSTEM
When the route has been
calculated, it will be highlighted
on the map in orange, with white
arrows indicating the route
direction.
Your start position will be
identified by and the
destination will be identified by
.
By Zip Code
Touch BY ZIP CODE, a list of all
the zip codes in the country will
appear, in alphabetical order.
Using the keyboard, start to type
your destination zip code. A list
of zip codes beginning with the
same characters as your zip
code will appear.
NOTE: Touch the icon
in the top right-hand corner
of the keyboard to hide the
keyboard and view more entries.
MENU
2D
POI
CANCEL ROUTE
8
Search
MAPBACK
9
AB10 1
AB10 1BB
AB10 1BD
1281692
IRIS.book Page 82 Thursday, October 18, 2012 8:21 AM
Page 83
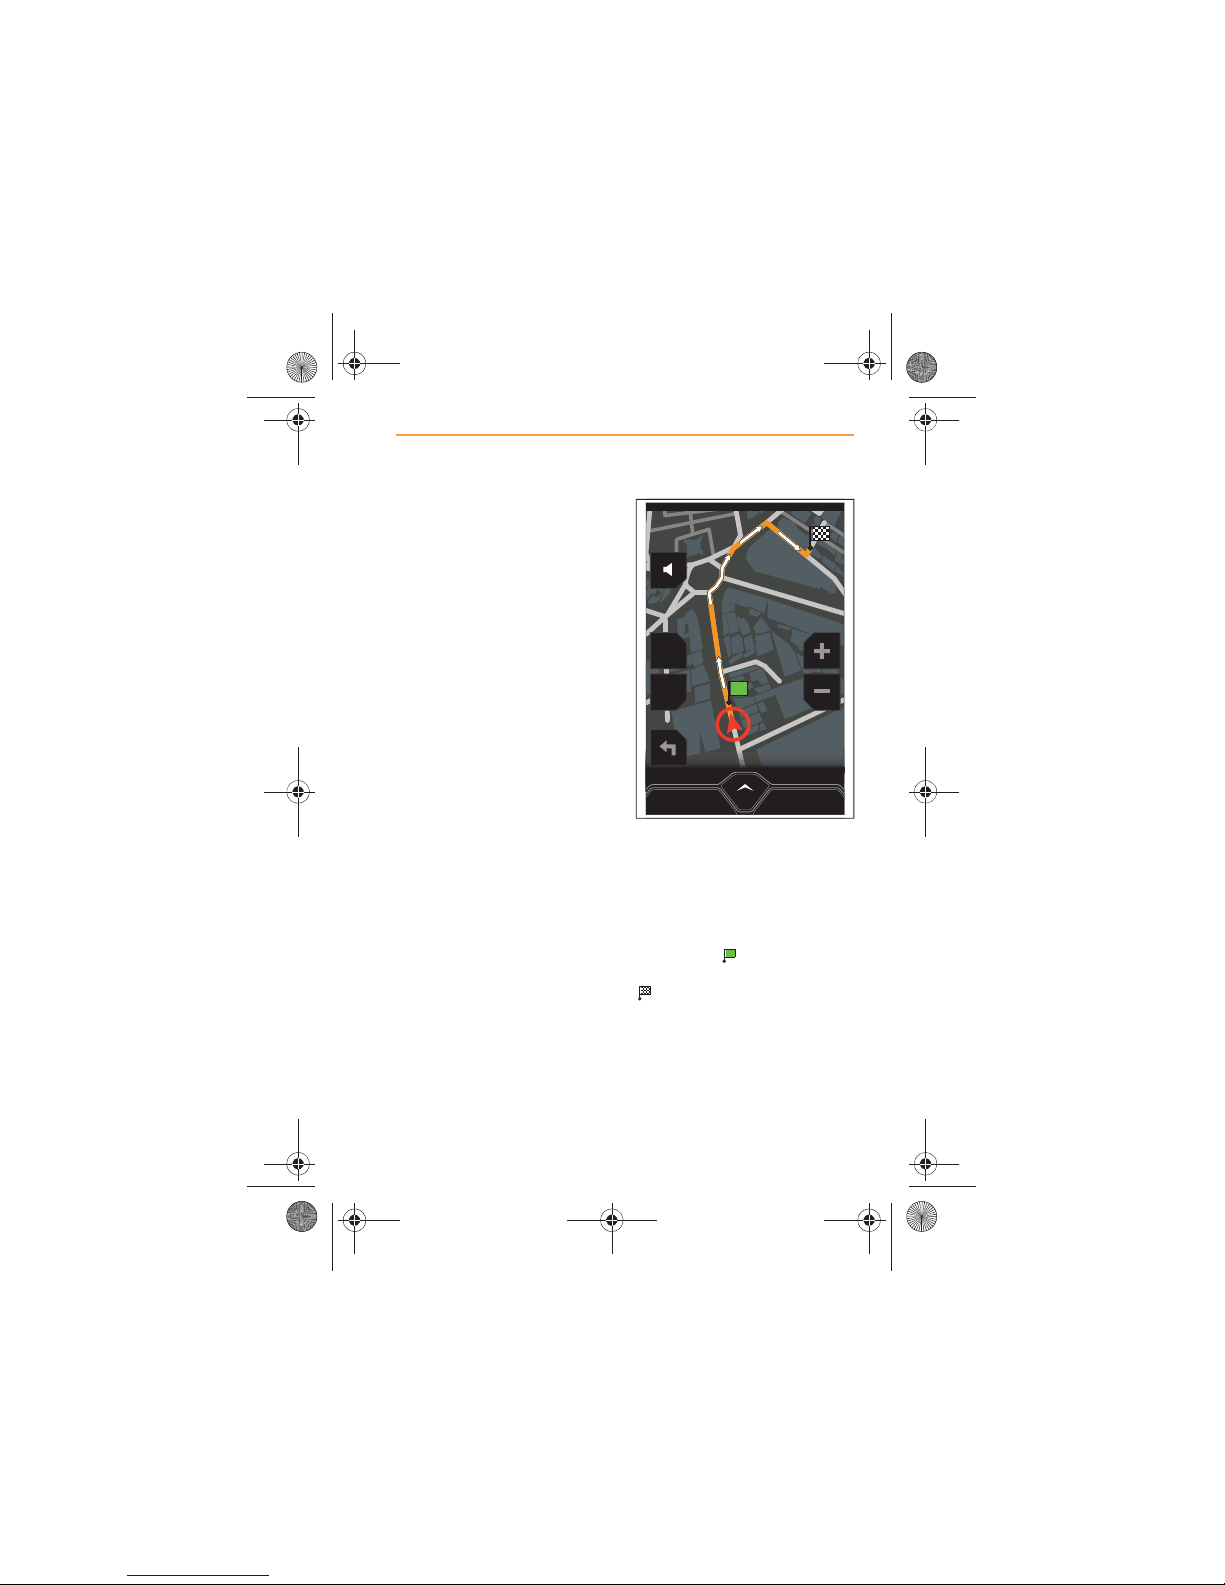
83
NAVIGATION
USING THE NAVIGATION SYSTEM
Select the target zip code when
it appears.
The screen will display a list of
all the streets covered by the
postcode.
Touch the target street and a list
of all building numbers will
appear, as well as an icon
allowing the mid point of the
street to be selected.
Touch GO HERE and a route will
be calculated. Touch SAVE to
store this destination in
Favorites.
When the route has been
calculated, it will be displayed on
the map in orange, with white
arrows indicating the route
direction.
Your start position will be
identified by and the
destination will be identified by
.
MENU
2D
POI
CANCEL ROUTE
IRIS.book Page 83 Thursday, October 18, 2012 8:21 AM
Page 84
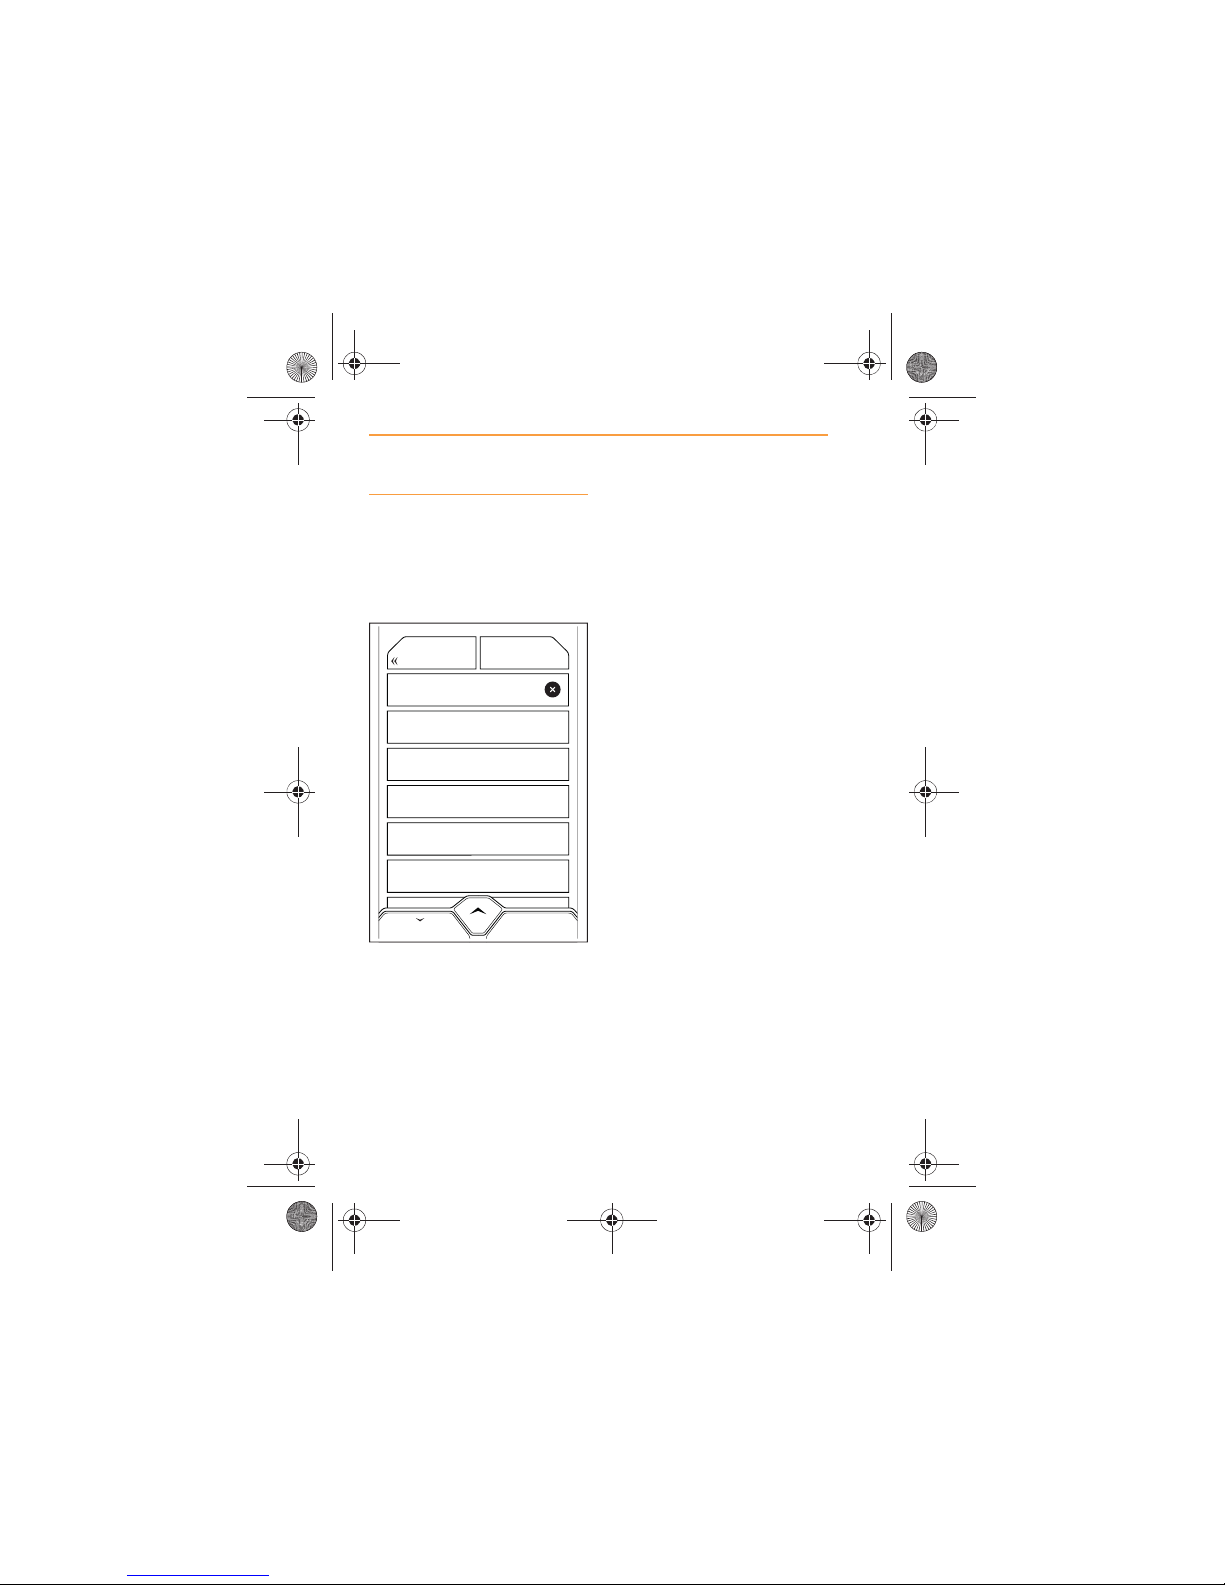
84
NAVIGATION
USING THE NAVIGATION SYSTEM
Recent Destinations
Once a destination has been
used by the navigation system, it
will be stored in Recent
Destinations.
Recent destinations are listed in
the chronological order that they
were set.
If the list is long, searches can
be used to refine the list. Touch
the Search field and use the
keyboard to start entering the
characters of your target
destination.
The list will be refined to
destinations containing those
characters.
MTC, Chertsey Rd, Woking, Surrey GU
41 Senna House, Brazil Road,
10 Hunt Street, Belmont, Surrey
25 Lauda Close, Vienna Way,
4 McLaren House, Bruce Street, Aucklan
17 Hamilton House, Button Lane
MAPBACK
IRIS.book Page 84 Thursday, October 18, 2012 8:21 AM
Page 85
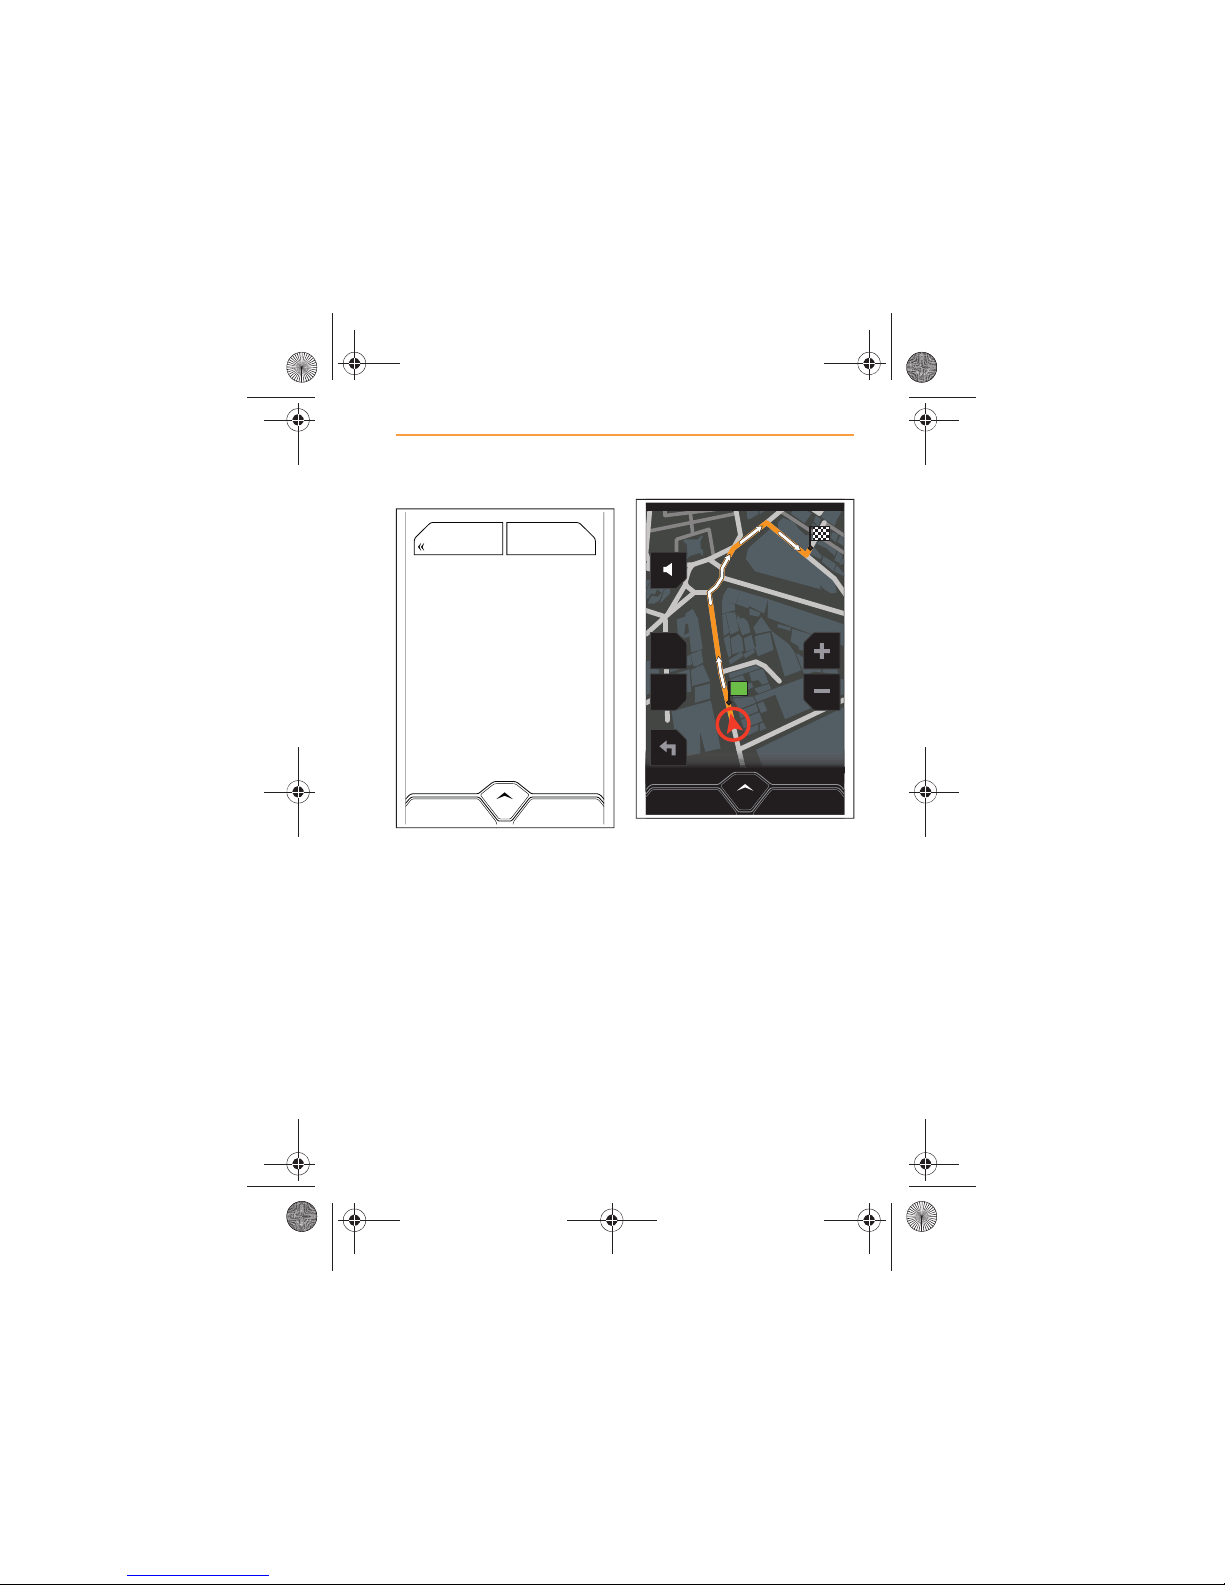
85
NAVIGATION
USING THE NAVIGATION SYSTEM
Touch the entry when it appears.
Details of that entry will be
displayed on the screen.
Touch the GO HERE icon and
the system will calculate the
route. Touch SAVE to store this
destination in Favorites.
When the route has been
calculated, it will be highlighted
on the map in orange, with white
arrows indicating the route
direction.
Entries cannot be deleted from
Recent Destinations.
GO HERESAVE
MAP
BACK
McLaren Technology Centre, Chertsey Rd,
Woking, Surrey, GU21 4YH
MENU
2D
POI
IRIS.book Page 85 Thursday, October 18, 2012 8:21 AM
Page 86
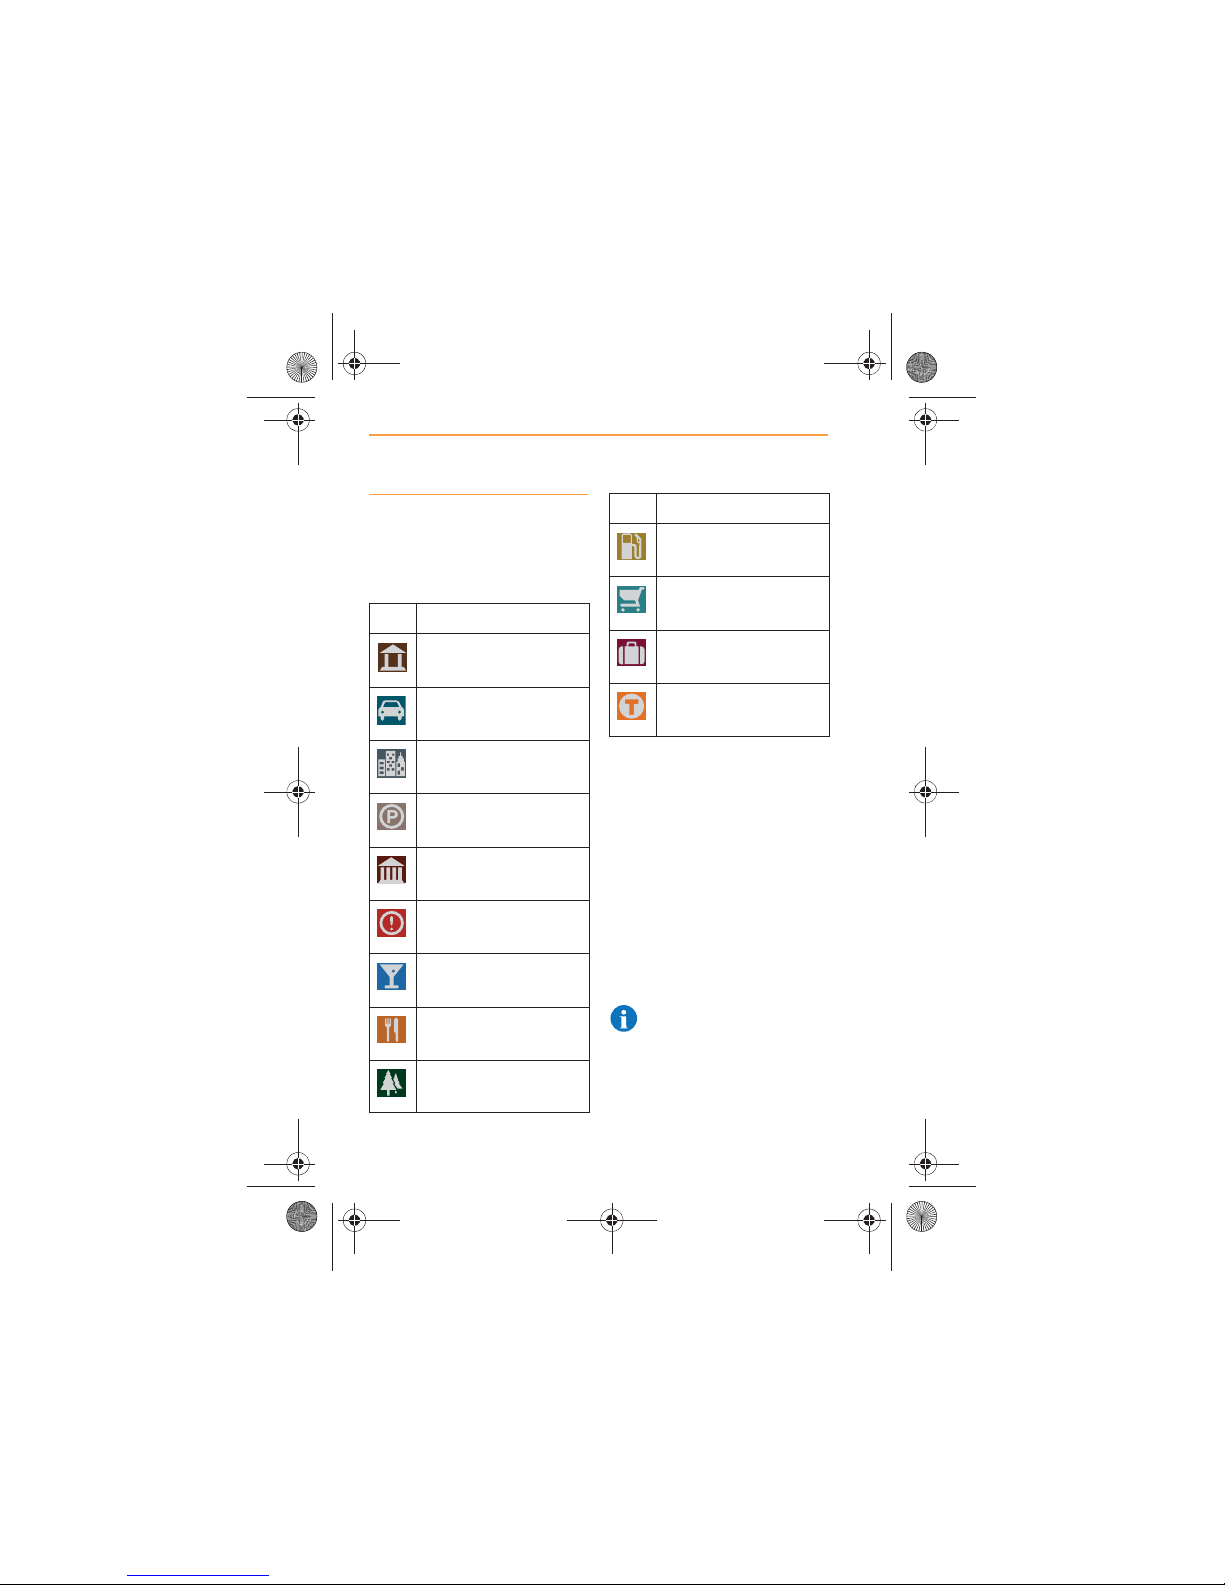
86
NAVIGATION
USING THE NAVIGATION SYSTEM
Points of Interest
The following categories of
Points of Interest (POI) are listed
within the system.
Touch icon on the screen
and all the POIs that have been
selected will appear on the map.
To change which POIs can be
viewed on the map, press and
hold the icon to display
categories.
Touch all those that you wish to
appear on the map, at the
locations you specified.
Alternatively, touch TURN ALL
ON, to display all POIs.
NOTE: With all POIs
displayed, the screen may
at times become over populated
with icons, having a negative
impact on the usefulness of the
map.
Icon POI
ATM & Banking
Auto
Business
Car Park
Civic
Emergency services
Entertainment
Food
Park & Recreation
Petrol
Shopping
Tourism
Transport and Travel
Icon POI
POI
POI
IRIS.book Page 86 Thursday, October 18, 2012 8:21 AM
Page 87
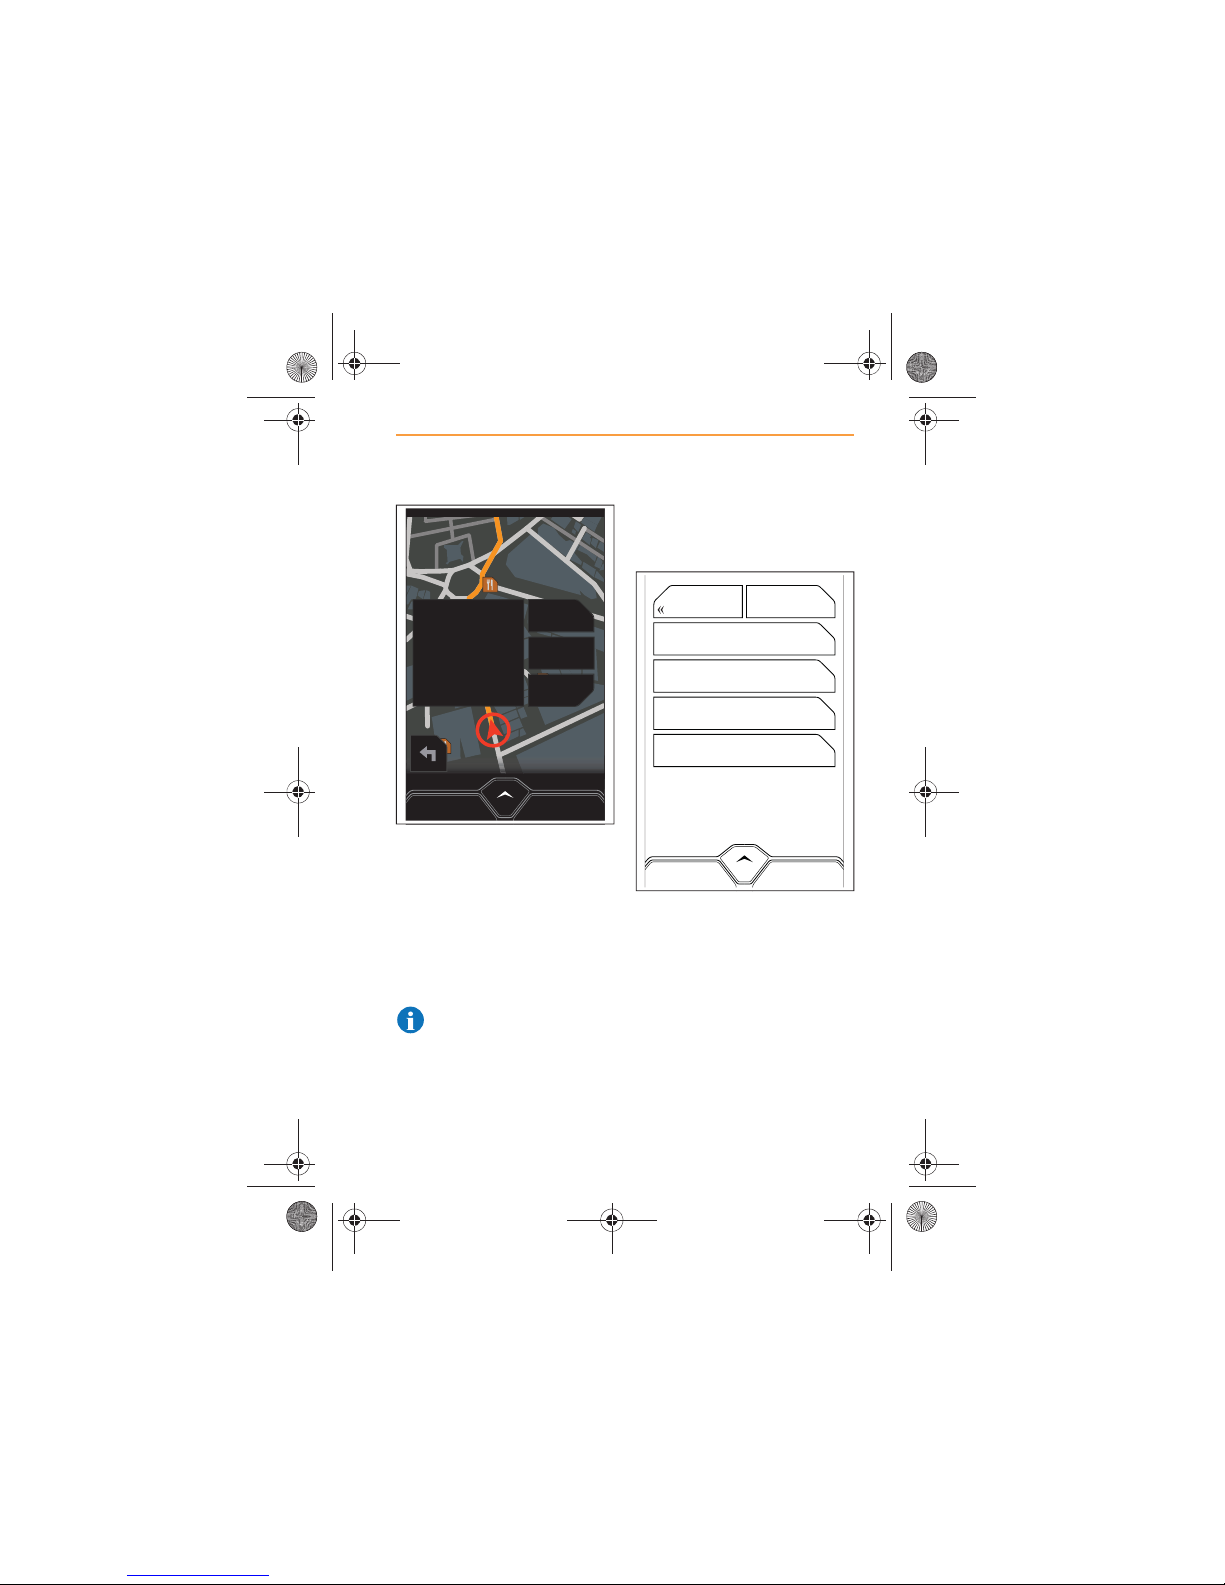
87
NAVIGATION
USING THE NAVIGATION SYSTEM
With POIs displayed on the map,
touch the POI you wish to visit
and, if appropriate, the name of
the establishment is displayed.
There is also the option to set
this as a destination, store in
Favorites, or make a telephone
call to the establishment.
NOTE: A phone will have to
be paired and connected in
order for a call to be made.
Briefly touch icon again to
hide all POIs.
Selecting POIs
On the main menu, touch
POINTS OF INTEREST.
From the choices on the screen,
select the location of the POIs
you wish to view or to set as a
destination.
x Browse All;
x Near Current Location;
x Near Destination;
x Along Route.
MENUCANCEL ROUTE
GO HERE
SAVE
CALL
The Ivy Restaurant
POI
NEAR CURRENT LOCATION
BROWSE ALL
NEAR DESTINATION
ALONG ROUTE
MAPBACK
IRIS.book Page 87 Thursday, October 18, 2012 8:21 AM
Page 88
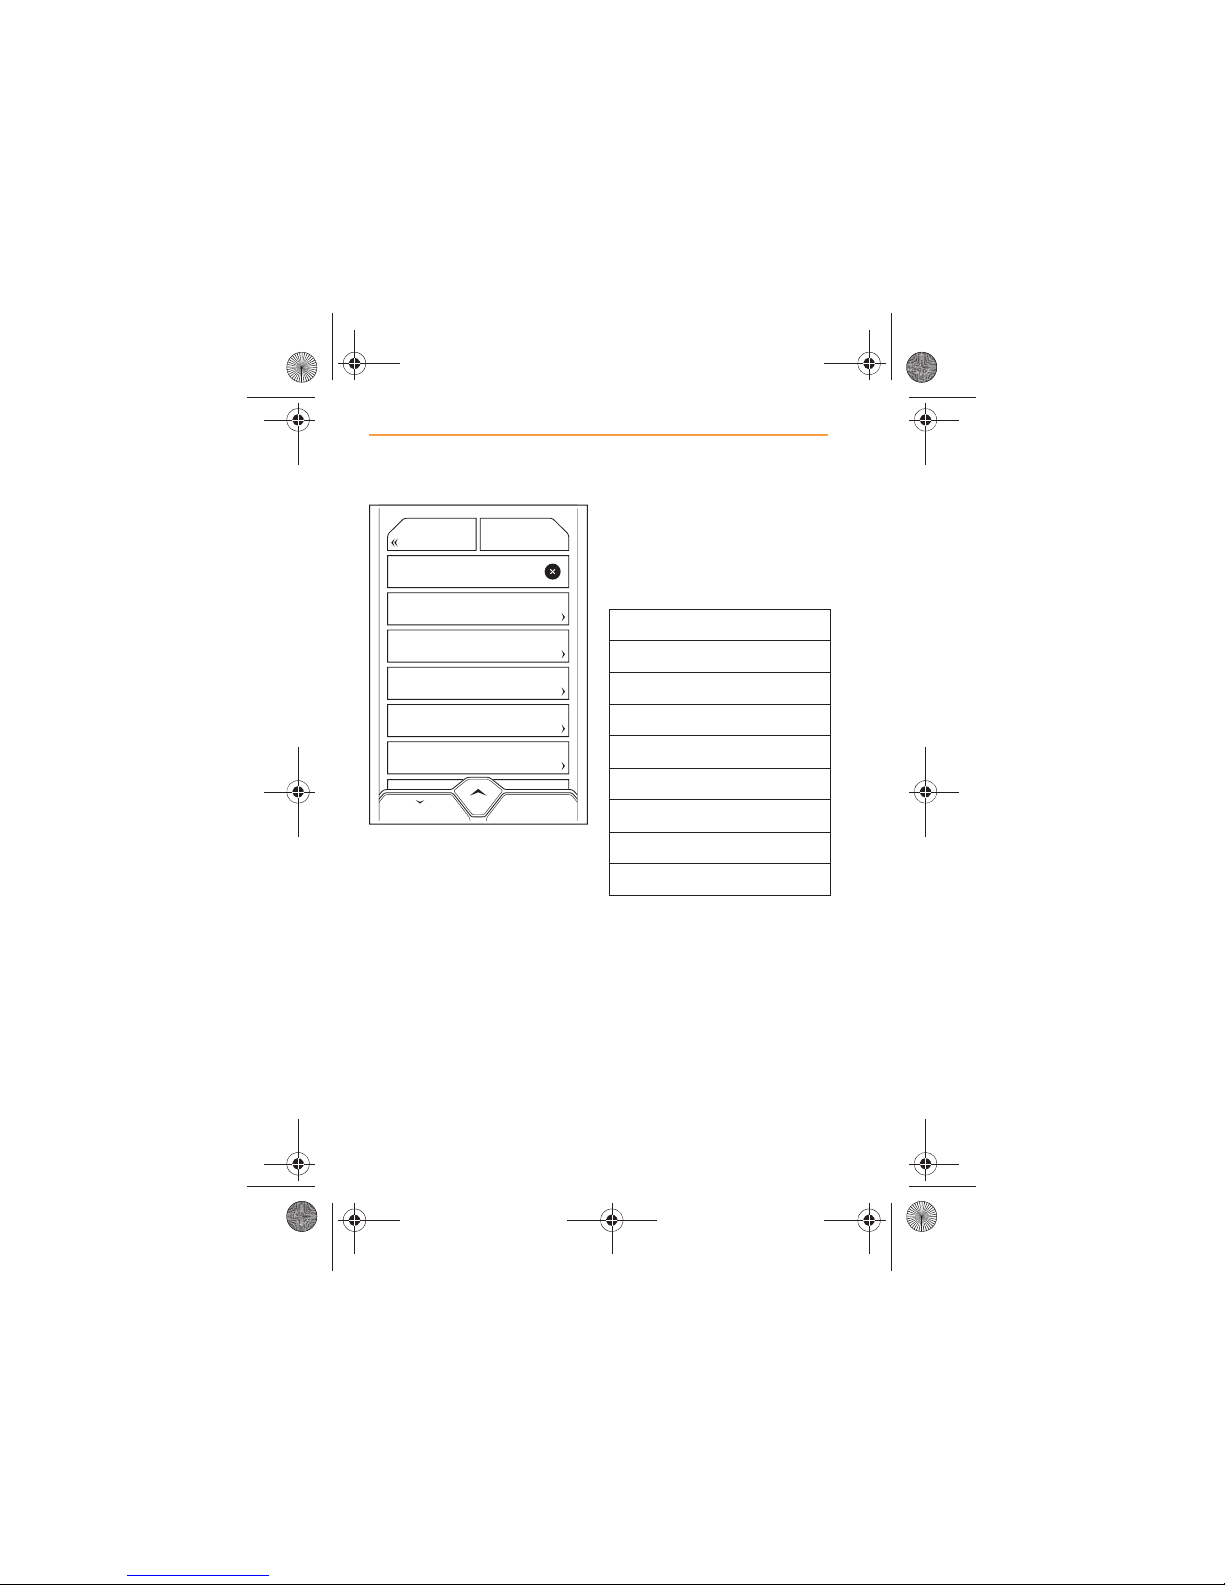
88
NAVIGATION
USING THE NAVIGATION SYSTEM
When the location has been
selected, a list of all POI
categories, will be displayed.
Some categories contain a list of
more specific POIs, for example,
Transportation and Travel
includes the following additional
types of POI.
Touch the category you require
and a list of all the facilities
meeting that criteria will appear
in order of their proximity.
Touch the entry required and
then touch SAVE or GO HERE.
ATM & BANKING
MAPBACK
AUTO
BUSINESS
CAR PARK
CIVIC
13
POI
Airport
Border Crossing
Bus Station
Commuter Rail Station
Ferry Terminal
Marina
Rental Car Agency
Train Station
IRIS.book Page 88 Thursday, October 18, 2012 8:21 AM
Page 89
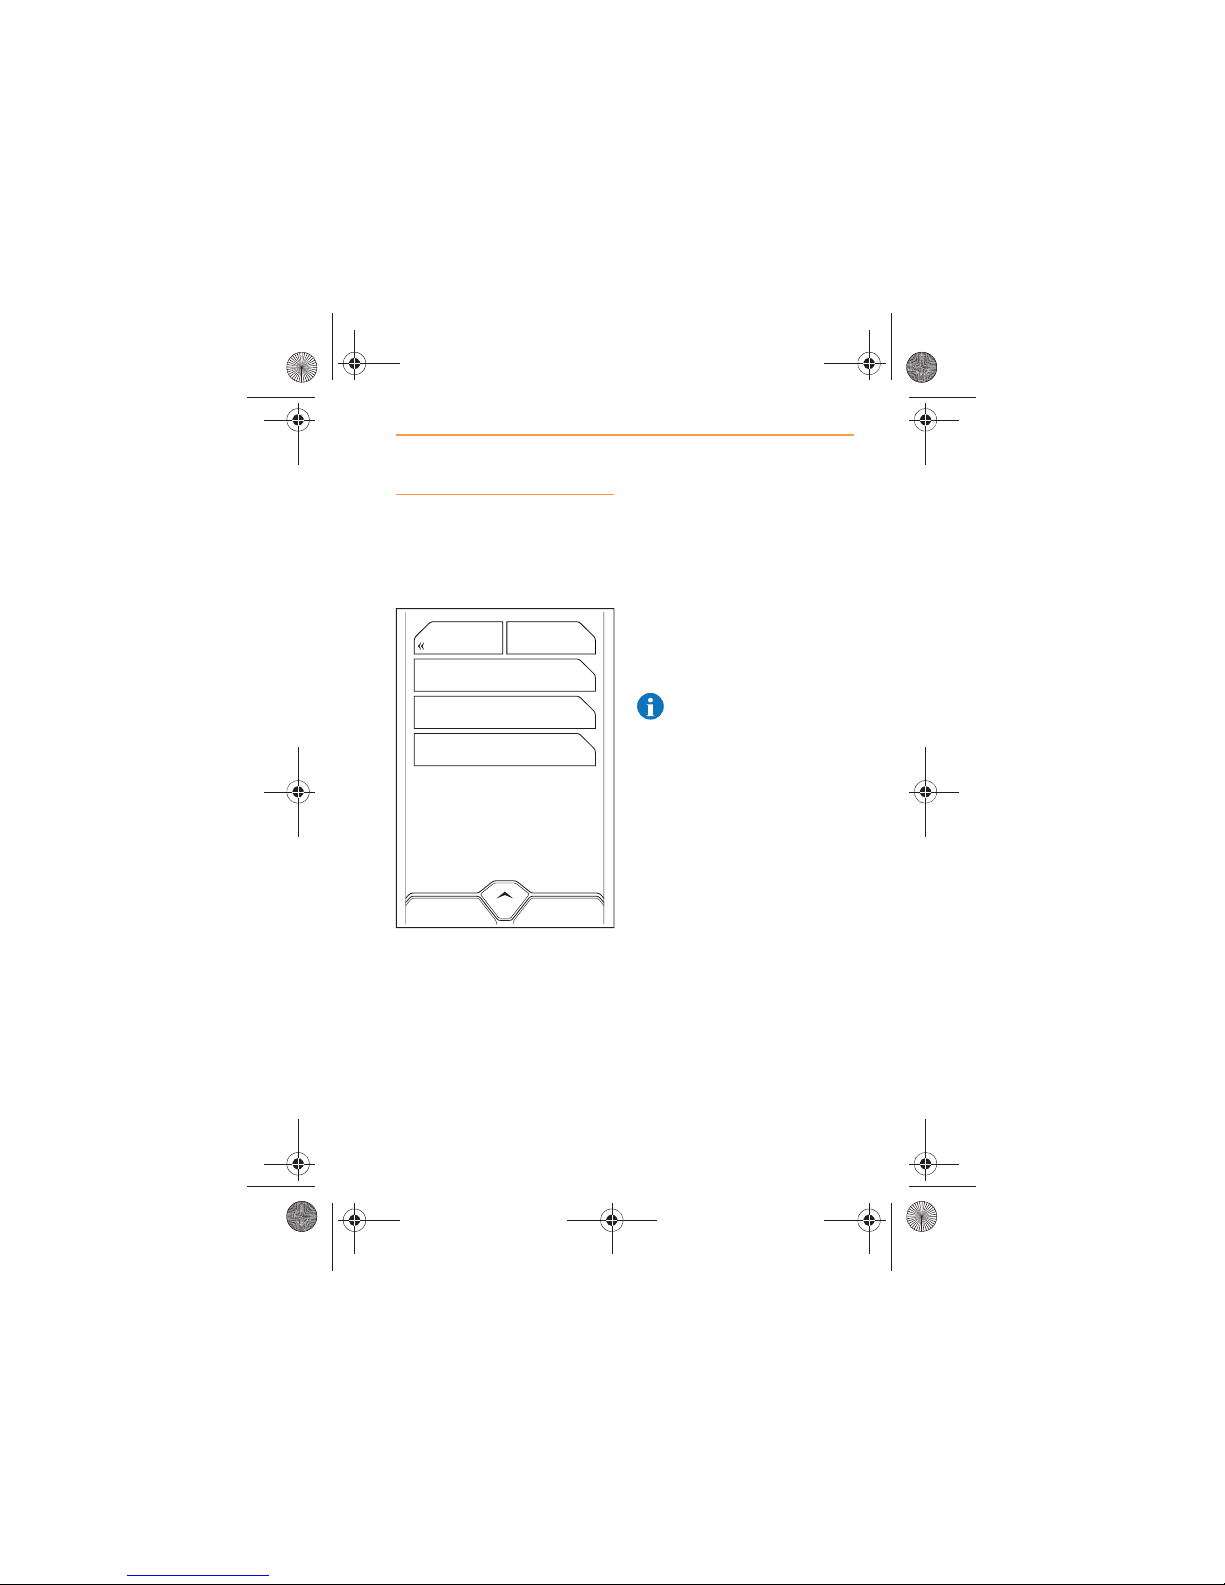
89
NAVIGATION
USING THE NAVIGATION SYSTEM
Options
The options menu allows you to
personalise some aspects of the
navigation system.
x Miles/Kilometres allows you
to set the units of distance
used by the navigation
system;
x Home Address, page 89;
x Routing, page 90;
Home Address
Allows you enter your Home
Address as a destination which
can be quickly accessed.
Use one of the following
methods.
x By Address, page 76;
x By Intersection, page 79;
x By Zip Code, page 82.
NOTE: Never use your
actual address, always
choose a location nearby. If your
car is stolen, thieves will
otherwise be able to locate your
property.
HOME ADDRESS
KILOMETRES
ROUTING
MAPBACK
IRIS.book Page 89 Thursday, October 18, 2012 8:21 AM
Page 90
90
NAVIGATION
USING THE NAVIGATION SYSTEM
Routing
This feature provides the system
with information needed to
create a route which meets your
needs.
The following choices are
available.
x Quickest/Shortest, page 90.
x Avoid, page 91;
Quickest/Shortest
Touch Quickest or Shortest
depending on your preference.
The system will calculate either
quickest or shortest routes for
every journey, until you change
this selection.
AVOID
SHORTEST ROUTE
MAPMENU
IRIS.book Page 90 Thursday, October 18, 2012 8:21 AM
Page 91
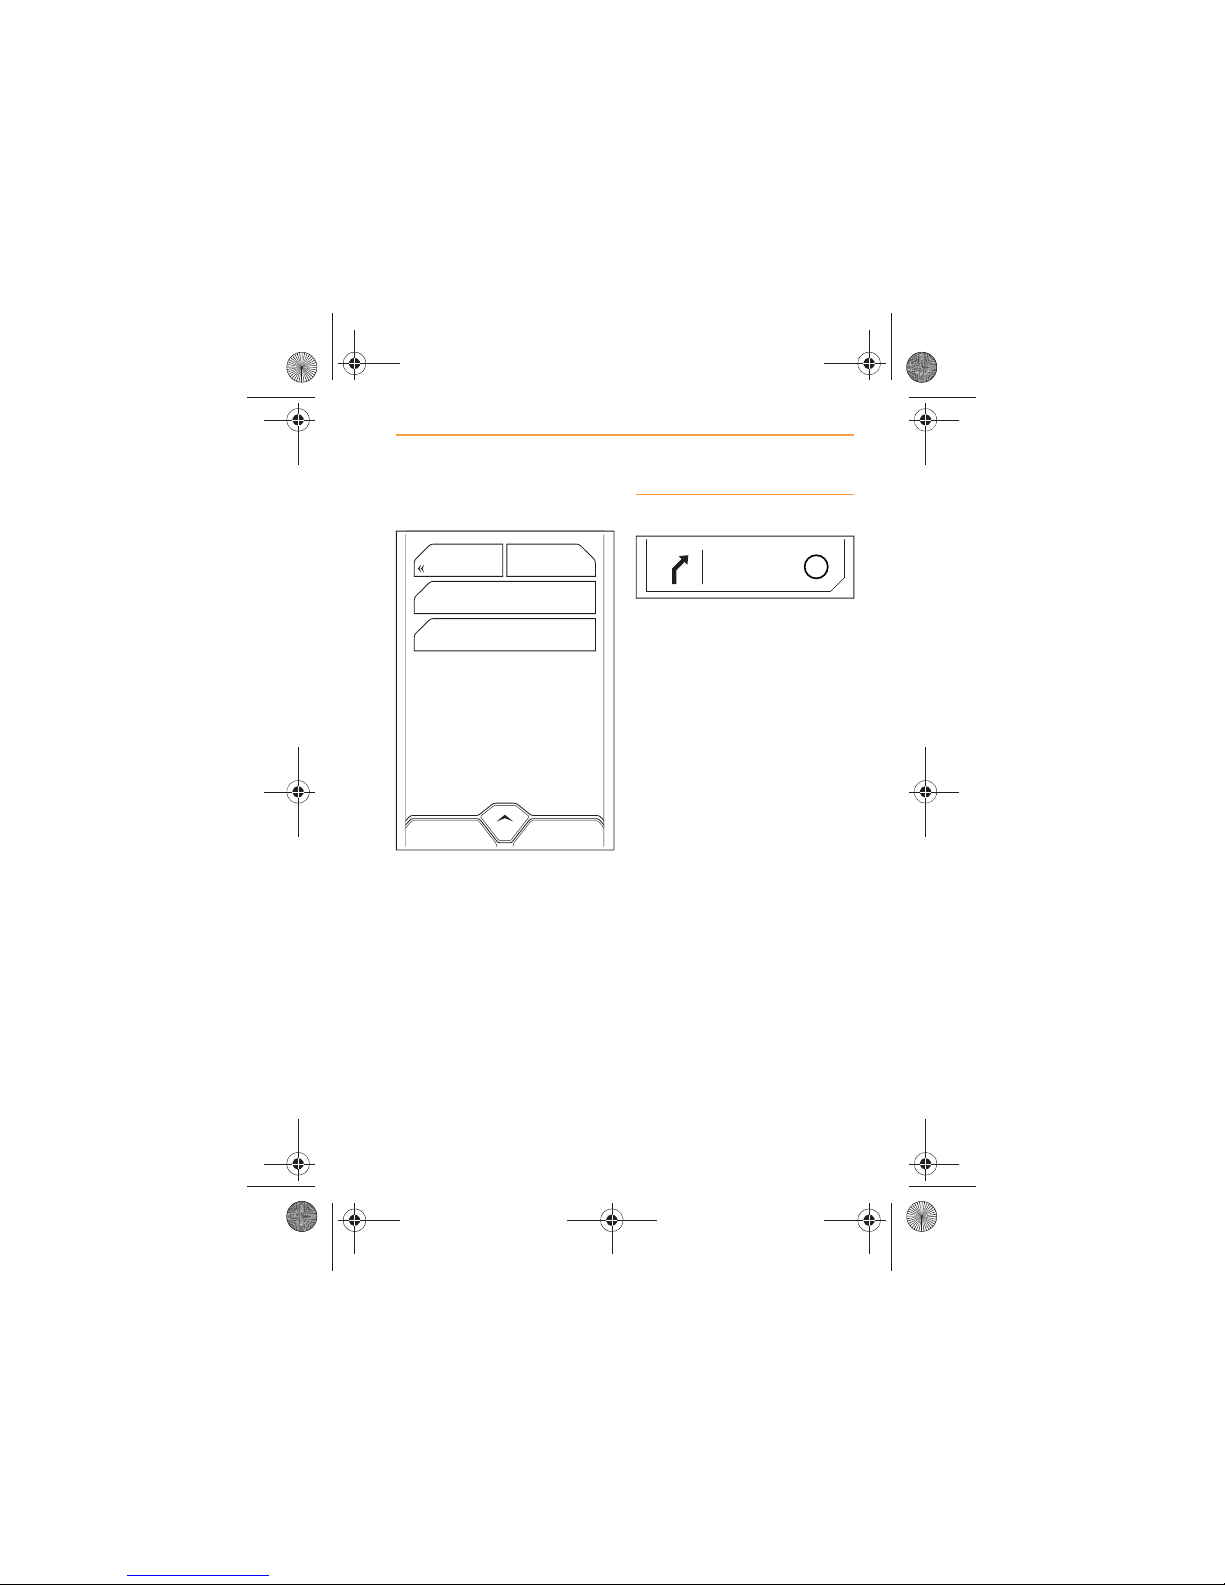
91
NAVIGATION
USING THE NAVIGATION SYSTEM
Avoi d
Each of the following can be
switched on or off depending on
your intended route.
x Avoid Toll Roads;
x Avoid Ferries.
The system will calculate routes
meeting the criteria selected for
every journey, until you change
this selection.
Following a route
When you have entered your
destination and the route has
been confirmed by the system,
your current location and an
arrow showing initial direction of
travel is shown at the top of the
screen. Any speed restrictions in
force will also be displayed.
ON
ON
AVOID FERRIES
AVOID TOLL ROADS
MAPROUTING
5mi
Chertsey Road/A320
50
IRIS.book Page 91 Thursday, October 18, 2012 8:21 AM
Page 92
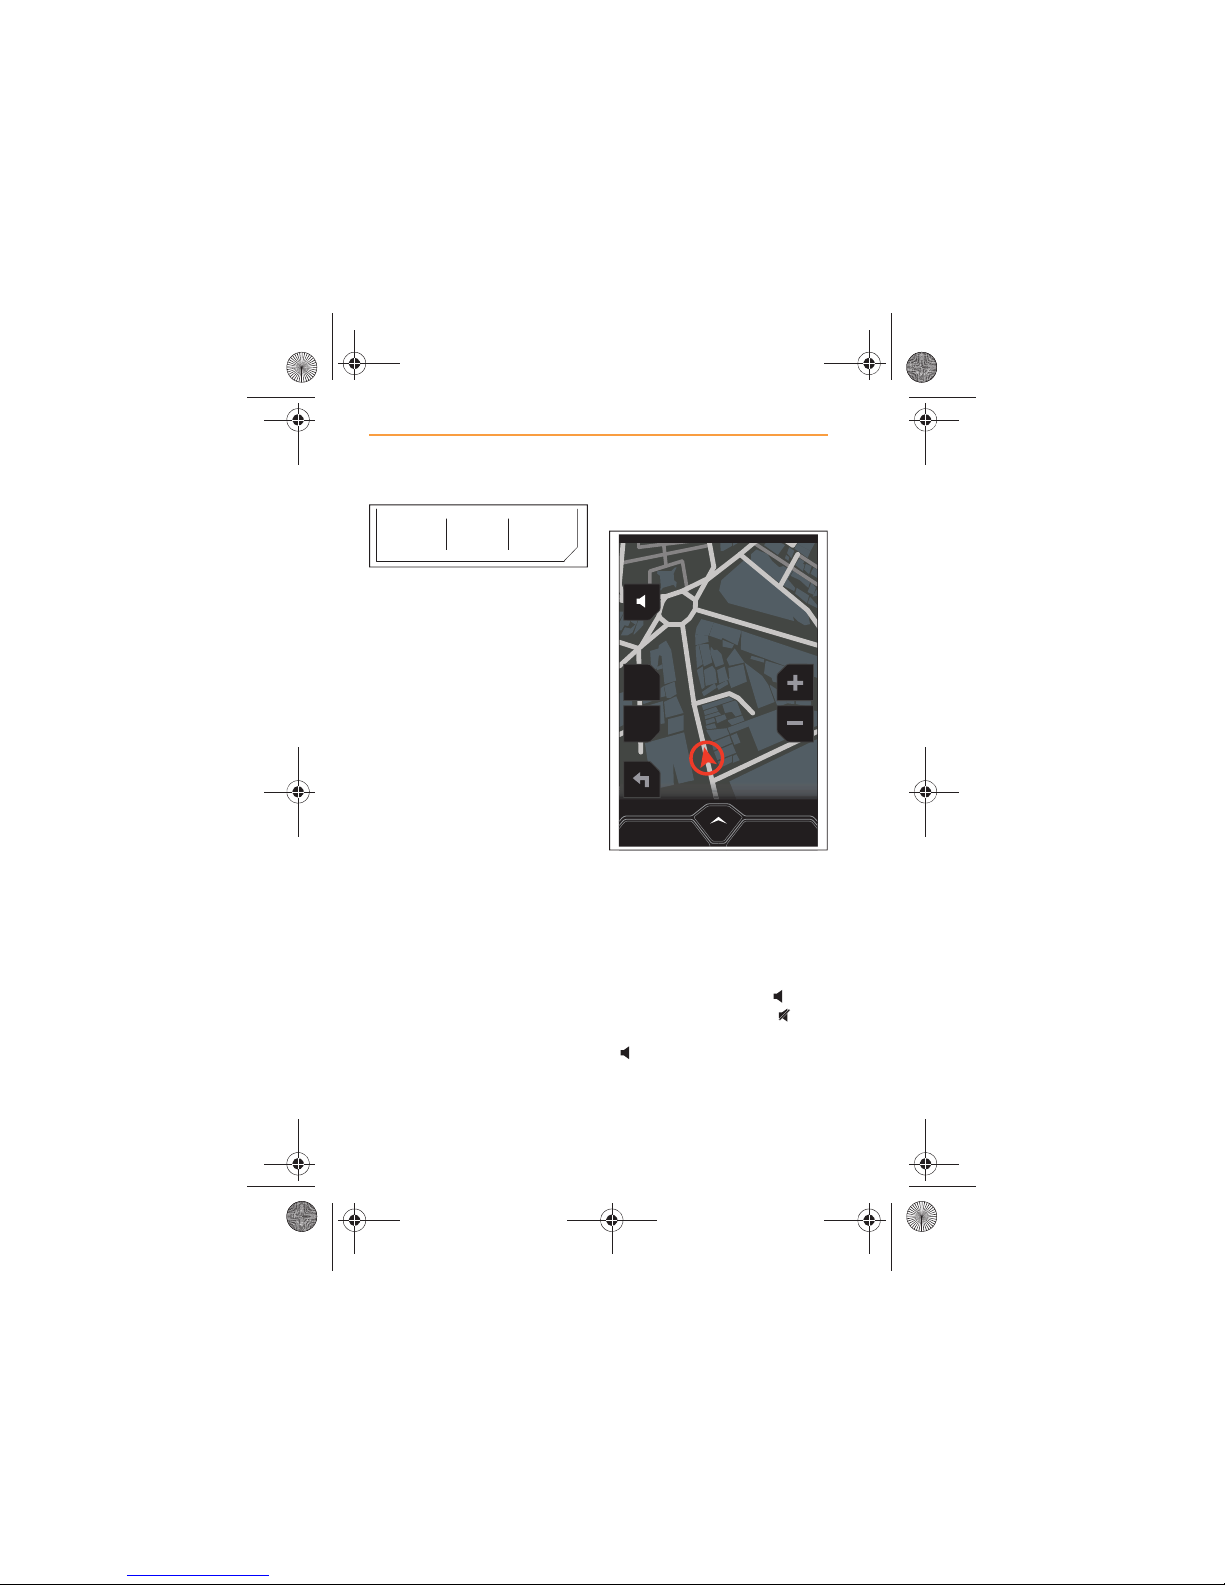
92
NAVIGATION
USING THE NAVIGATION SYSTEM
To view important information
about your journey, touch the
current location at the top of the
screen.
Distance to destination, time to
destination and time of arrival
will be displayed.
As you travel the route, you will
be prompted by voice
messages, turn information and
on screen icons to assist you in
reaching your destination.
Voice guidance
In addition to route guidance
using the map and turn
information, you can activate
voice guidance to support the
visual information.
By default, voice guidance is
switched on. Touch the icon
to mute voice guidance, will
appear on the screen. Touch
again to restore voice
guidance.
ARRIVALDISTANCE DURATION
34mi 00:53 11:50AM
POI
MENU
2D
CANCEL ROUTE
IRIS.book Page 92 Thursday, October 18, 2012 8:21 AM
Page 93
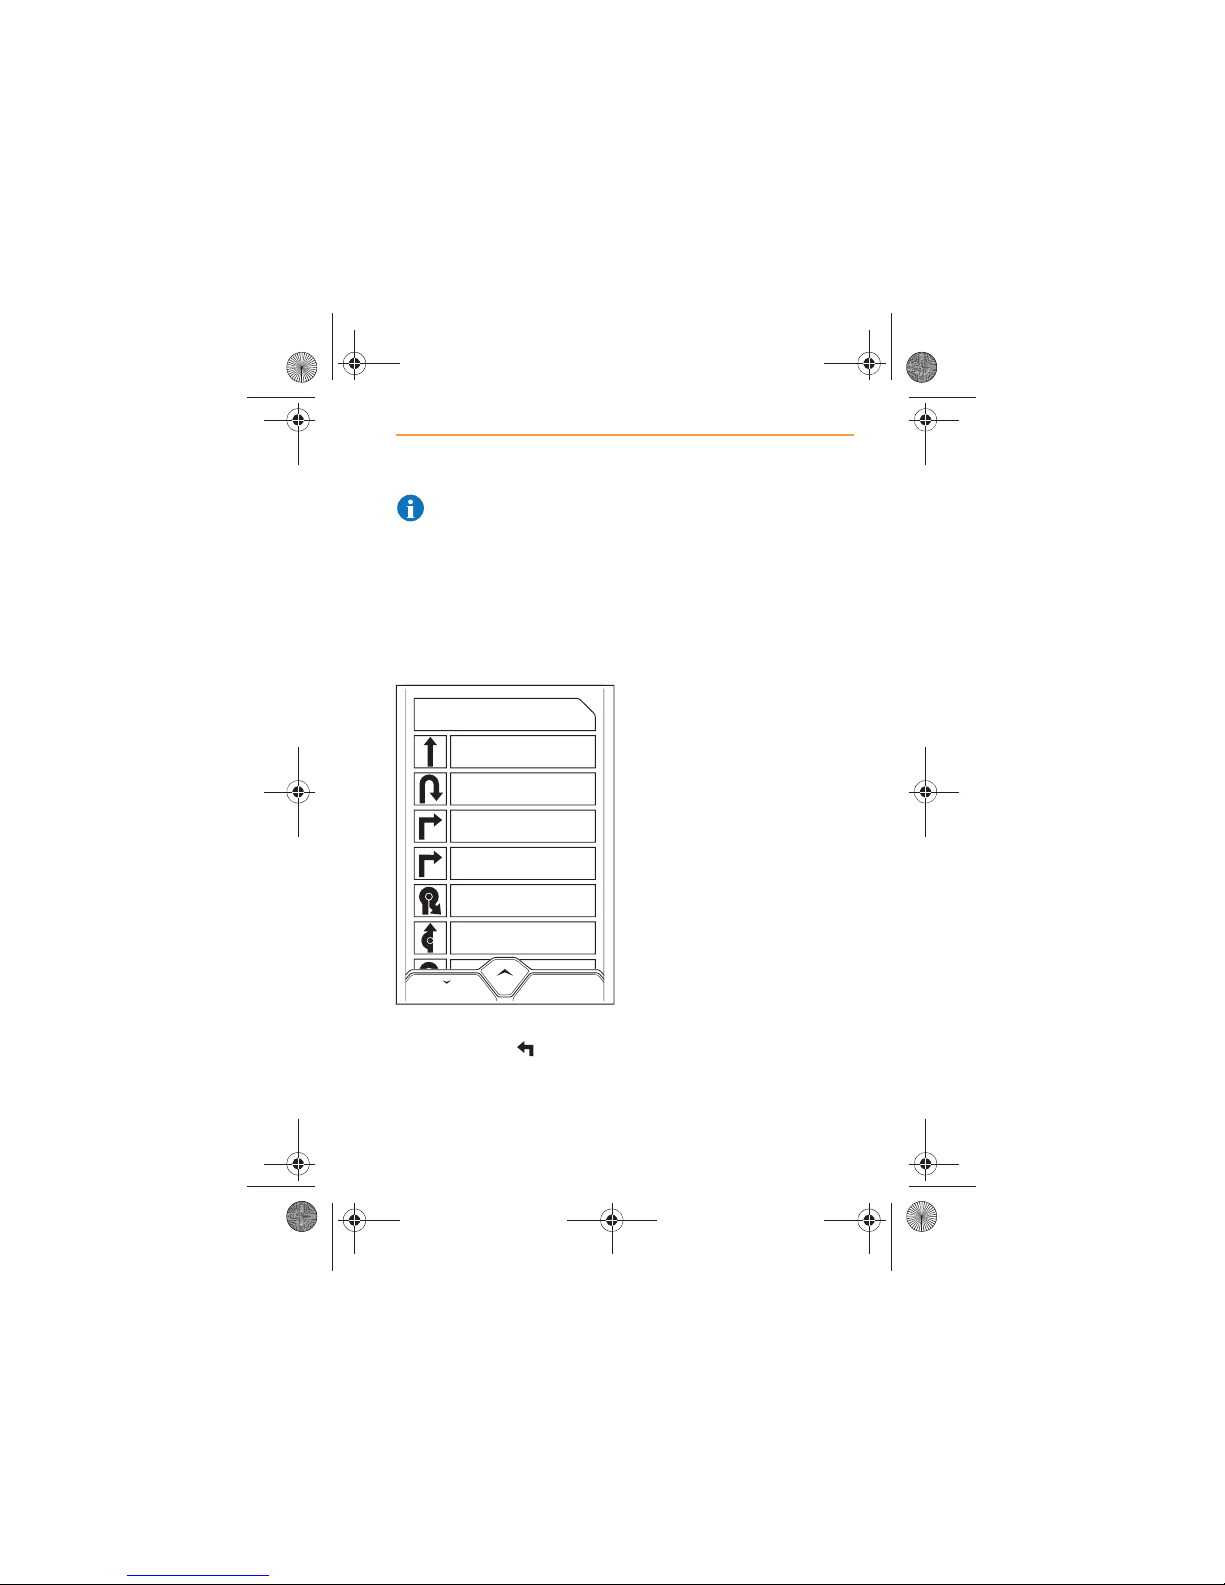
93
NAVIGATION
USING THE NAVIGATION SYSTEM
NOTE: If the voice icon is
not visible on the screen,
touch any part of the screen and
all icons will appear.
To set the volume of voice
guidance, see Volume Level,
page 14
Turn information
Once the system has calculated
a route, touch the icon and a
list of all the turns and junctions
that you will encounter on route
to your destination will appear in
the order that you will have to
negotiate them.
Touch the particular turn to
display a detailed map view of
the turn.
If you wish to avoid the turn, for
example, to avoid road works or
closures, touch the AVOID THIS
TURN icon and the route will be
recalculated.
MAP
Leofric Court / Leofric Business Park /
Progress Way NE for 25m
Leofric Court / Leofric Business Park /
Progress Way for 25m
Leofric Court / Leofric Business Park /
Progress Way for 190m
Herald Way for 260m
Brandon Road / A428 for 260m
Brandon Road / A428 for 180m
Herold Way for 260m
IRIS.book Page 93 Thursday, October 18, 2012 8:21 AM
Page 94
94
NAVIGATION
RMS AND CONDITIONS
RMS AND CONDITIONS
Copyright
Navigation
© 2012 NAVTEQ All rights
reserved.
The Data for areas of Canada
includes information taken with
permission from Canadian
Authorities, including
© Her Majesty the Queen in
Right of Canada,
© Queen’s Printer for Ontario,
© Canada Post Corporation,
GeoBase®,
© Department of Natural
Resources Canada. All rights
reserved.
NAVTEQ holds a non-exclusive
licence from the United States
Postal Service® to publish and
sell ZIP+4® information.
© United States Postal Service®
2012.
Prices are not established,
controlled or approved by the
United States Postal Service®.
The following trademarks and
registrations are owned by the
USPS: United States Postal
Service, USPS and ZIP+4.
Gogo Navigation Software
powered by EnGIS
Technologies.
Copyright (c) 2012, EnGIS
Technologies, Inc All rights
reserved. EnGIS and the Gogo
logo are trademarks of EnGIS
Technologies, Inc. Visit http://
www.engistech.com for the
official website.
© McLaren Automotive Limited.
Printed in United Kingdom,
11Q0316CP.04
IRIS.book Page 94 Thursday, October 18, 2012 8:21 AM
 Loading...