

McKesson PharmaClik POS ONE Installation Manual
PharmaClik POS ONE
Self-Installation Guide
Congratulations on your purchase of PharmaClik POS ONE!
Your system is pre-configured and PharmaClik POS is pre-i nstalled so that installation is as simple as
possible.
This install should take approximately one hour to complete and may need two people to unpack.
Note: We highly recommend the system be set up four to seven (4-7) days before going live to allow the
self-training to take place on the system itself.
Before You Begin
Be sure you have read the PharmaClik POS ONE Planning Guide and prepared your
environment before unpacking the boxes (power, network, counters).
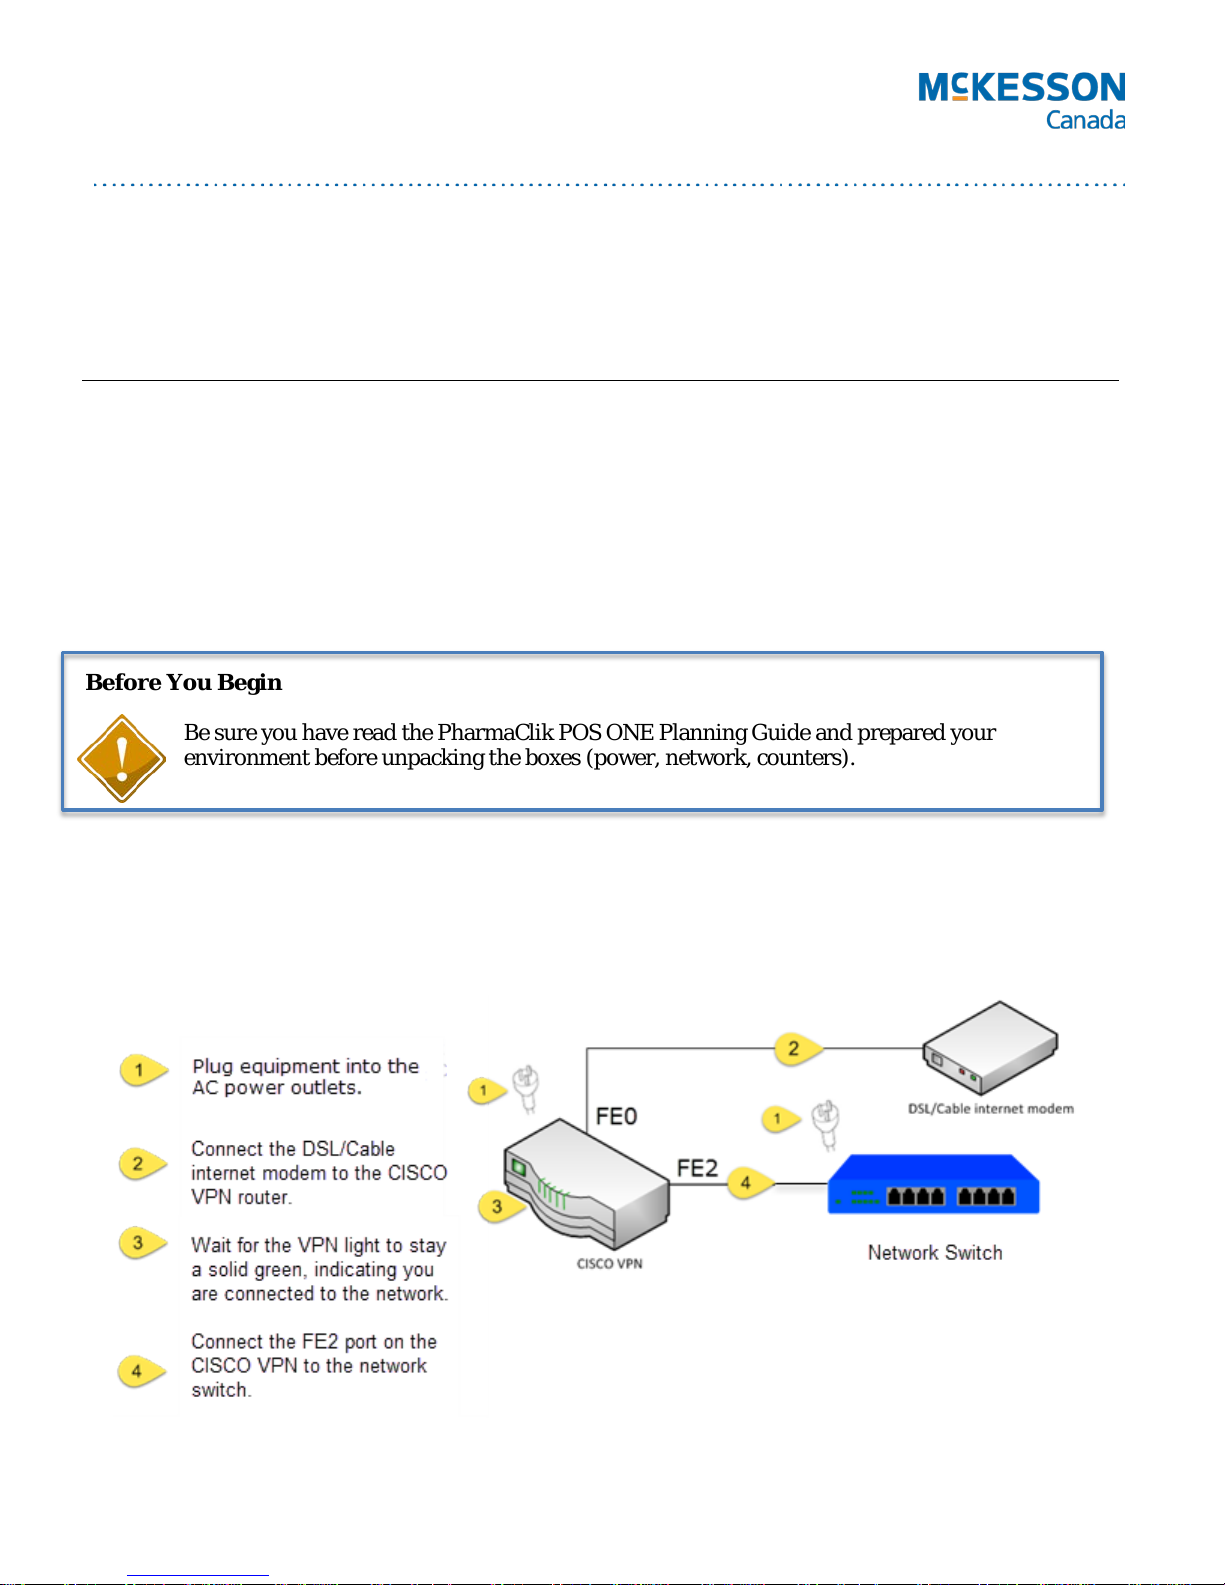
Network Connection
McKesson provides a virtual private network (VPN) service which connects you to our secure network. If
you are using this, follow the Netwo rk Setup Instructions below.
If you did not order this service then plug the switch into your existing internet network.
**All instruc tions are related to the PTS p rovided equipment.
Last Updated: 8 November 2016 Page 1 of 4

Rear View of the Till Computer (Reference for Till Setup)
Com 1
Com 3
Receipt
printer cable
Serial cable
Cat5 Cable
PharmaClik POS ONE Till Installation and Setup Instructions
Section 1 Unpack Cash Drawer (Box 1) and place in prepared location.
Section 2 Unpack the Till Computer (Box 2)
a) Place the Till computer into its location (preferably under the counter
and out of the way).
b) Plug in the power cord into the Till computer and leave other end
unplugged for now.
c) Connect the keyboard and mouse to the back of the Till computer.
d) Connect the Till computer to the network switch using a Cat5 network
cable and insert one end into any port on the switch or to the wall
jack.
Section 3 Unpack the Receipt printer (Box 3)
a) Connect the cash drawer to the Receipt printer using the cable shown.
It should already be connected to the cash drawer.
b) Connect one end of the serial cable to COM1 port on the Till computer
and the other end to the Receipt printer. Hand-tighten screws.
c) Press the light grey button on the top right of the printer to open the
cover and install the receipt paper (see video for details).
d) Plug in the power cable to the printer. Leave the other end unplugged
for now.
Last Updated: 8 November 2016 Page 2 of 4
 Loading...