

Page 1
Xcarét Pro
Expansion Bay CD-RW Drive
or
Expansion Bay DVD/CD-RW
Combo Drive
User’s Guide
http://www.mcetech.com
Page 2
Xcarét Pro CD-RW and DVD/CD-RW Drive 1
Introduction
Thank you for purchasing the MCE Xcarét Pro Expansion Bay Drive! We are
sure that your new drive will enrich your PowerBook computing experience.
Please be sure to read the manual thoroughly before using your new device.
The MCE Xcarét Pro line of expansion bay optical drives consists of several
different models:
•(RW161024) 16x10x24 Xcarét Pro CD-RW Drive for PowerBook G3
1998
•(RW2K161024) 16x10x24 Xcarét Pro 2000 CD-RW Drive for PowerBook G3 1999 and 2000
•(DVRW88824) 8x8x8x24 Xcarét Pro DVD/CD-RW Combo Drive for
PowerBook G3 1998
•(DVRW2K88824) 8x8x8x24 Xcarét Pro 2000 DVD/CD-RW Combo
Drive for PowerBook G3 1999 and 2000
Please check the part number of the drive to ensure that it is the appropriate
mechanism for your PowerBook.
Throughout this manual we will refer to these drive models as simply Xcarét Pro
drive, unless there is a major difference between the different products which
requires distinguishing.
To take advantage of all of the drive’s full capabilities, one must use it with CD
recording software. A very popular CD-recording program, Roxio Toast Lite, is
included with the drive. For detailed information about the software, please
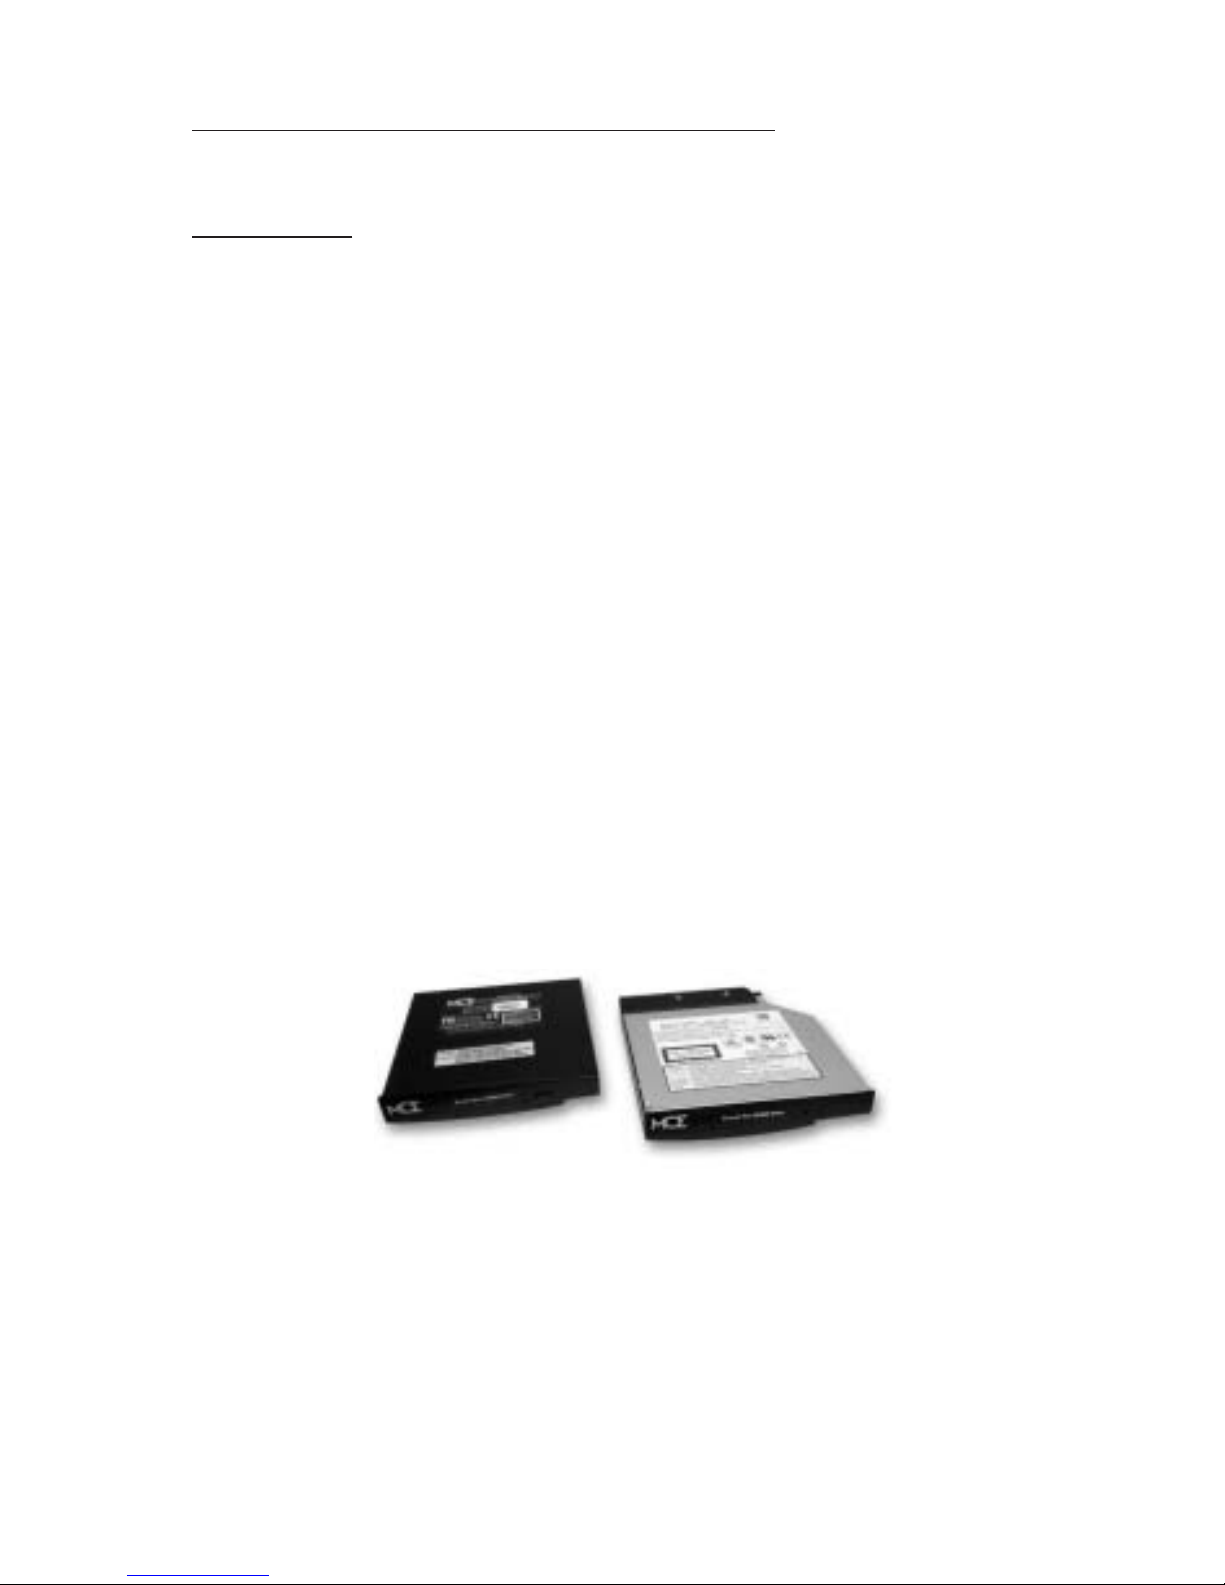
Xcarét Pro 2000
Expansion Bay Drive
for
PowerBook G3
1999/2000
Xcarét Pro
Expansion Bay Drive
for
PowerBook G3
1998
Page 3

2
Xcarét Pro CD-RW and DVD/CD-RW Drive
refer to its documentation, which is installed onto your hard drive in PDF format
when the program is installed (you’ll need the free Adobe Acrobat Reader
program, downloadable from the
Adobe web site, in order to view this file).
Getting Started
Under Mac OS 8.6 through 9.x the Xcarét Pro drive is recognized by the Apple
CD/DVD Driver software extension. If you were previously using an Apple
CD-ROM or DVD expansion bay drive and have the Apple CD/DVD Driver
extension enabled, then you may begin to use the Xcarét Pro drive immediately
to read pre-recorded audio or data CD's (or DVD video discs for those with
DVD/CD-RW combo drives).
To write to a CD-R or CD-RW disc you’ll need to use a CD recording program
such as the Roxio Toast Lite application which comes bundled with the Xcarét
Pro drive. Simply load the Toast CD into your computer and double-click on
the Toast installer icon and follow the on-screen instructions.
Note: In addition to the Roxio Toast Lite program, the Toast installer
places three files into your computer’s Extensions folder: Toast CD
Reader, Toast FireWire Support, and Toast USB Support. Since these
files are not necessary for operation of the Xcarét Pro drives, they may
be disabled using the Extensions Manager control planel or simply
removed from the Extensions folder.
To play DVD video discs with the Xcarét Pro DVD/CD-RW Combo Drive you
may use the Apple DVD Player application that is included with the Mac OS.
If your PowerBook does not automatically launch the Apple DVD Player
application upon insertion of a DVD movie into the Xcarét Pro Combo Drive,
you may launch it manually either by selecting it from the Apple menu, if it is
present there, or by double clicking it’s icon located on your hard drive (usually
in the Applications folder).
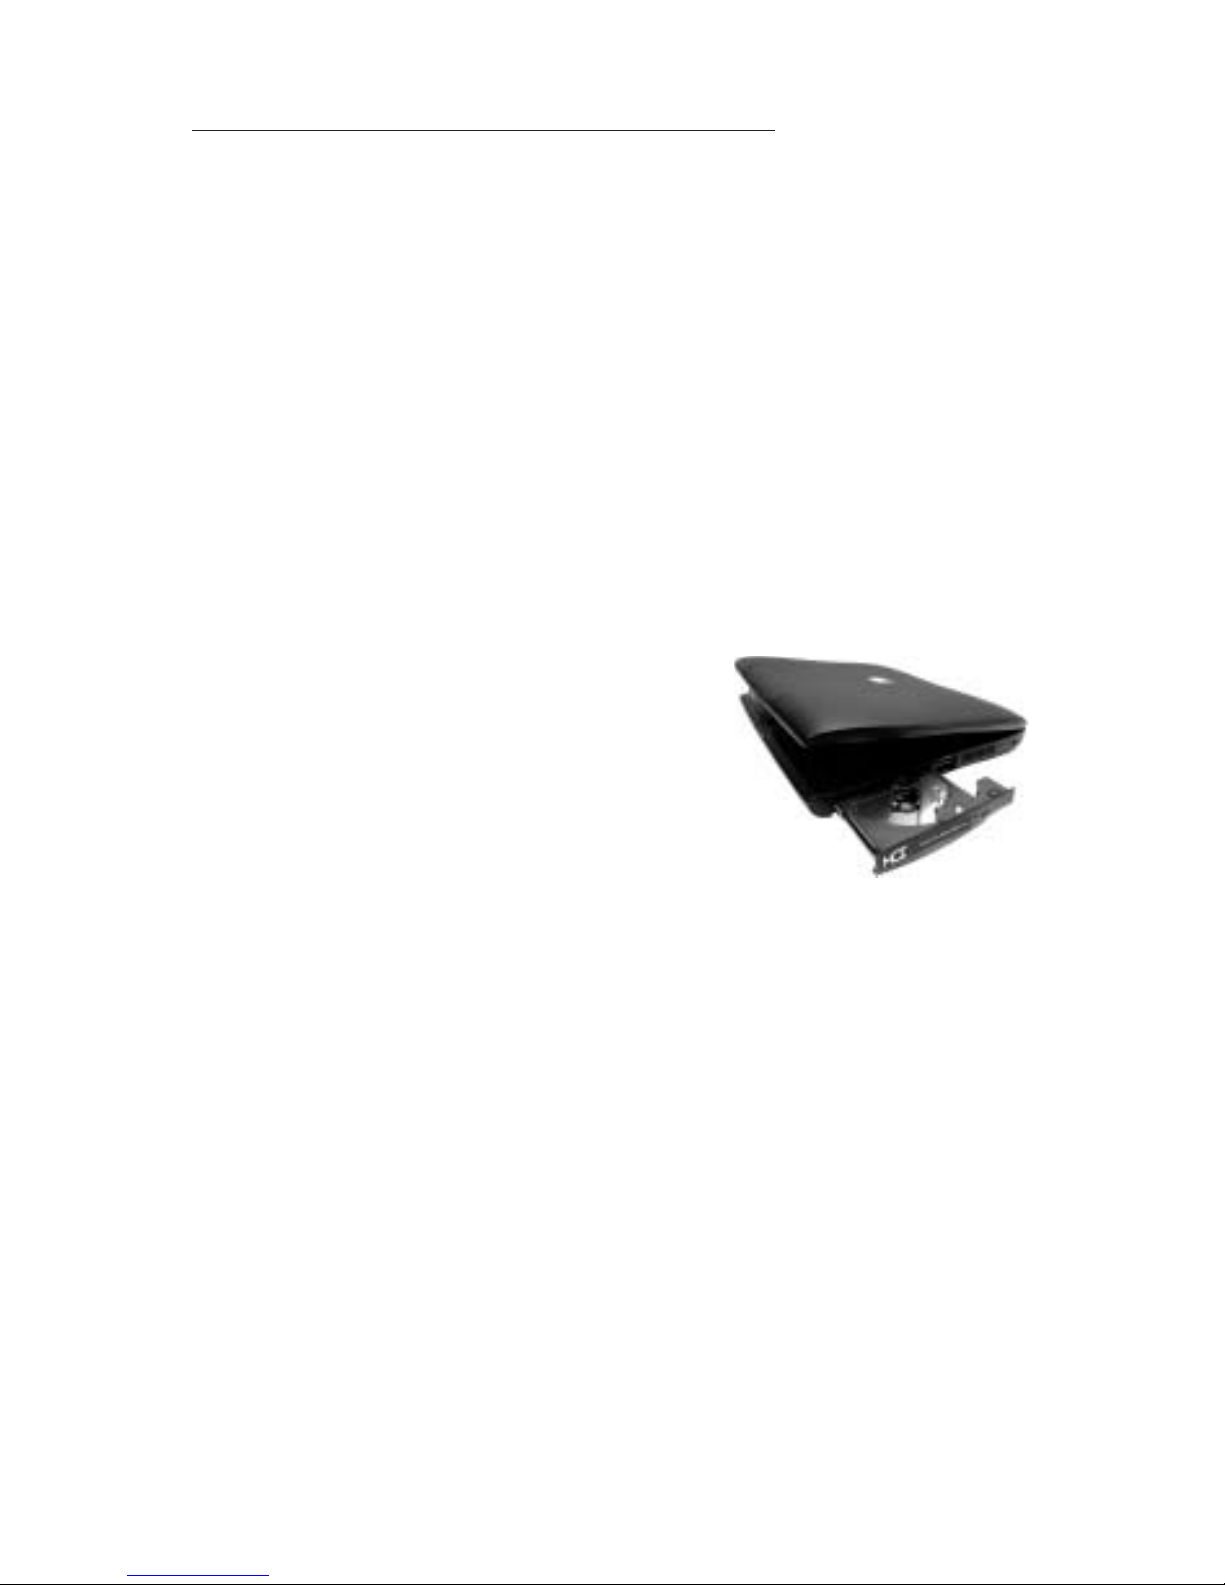
Using the Xcarét Pro Drive
The Xcarét Pro drive slides into only the right-side expansion bay of the
PowerBook model for which it was designed. It does not fit into the left bay of
any PowerBook. Also, before attempting to insert the drive into the PowerBook,
ensure that the drive is oriented correctly by confirming that its front label is
facing outward and right-side up.
!
Page 4
Xcarét Pro CD-RW and DVD/CD-RW Drive 3
Inserting the drive
To insert the Xcarét Pro Drive into your PowerBook:
1) Make sure any right-side expansion bay device has been removed and
that the bay is empty.
2) Carefully insert the drive into the expansion bay.
3) Very gently push the drive all the way into the PowerBook expansion
bay from the rightmost side until an audible click is heard. This locks the
drive into place inside the PowerBook.
Inserting a CD Disc
When placing a CD disc into the Xcarét Pro Drive, make sure that the CD is
completely seated upon the drive’s center spindle.
Failure to do so could cause damage to the drive
or CD and lead to possible loss of data. Once the
CD is placed properly in the drive, gently push
the CD tray closed until a soft click is heard. If
the CD contains data, then it will mount onto your
PowerBook's Desktop automatically.
The Drive’s Activity LED
The Xcarét Pro drive has a green activity LED located on its front bezel which is
normally not lit. It lights up when data on a CD is being accessed or when data
is being written to a CD. It also lights up when your PowerBook is communicating with the Xcarét Pro drive (even though there may be no disc inside the
drive at the time).
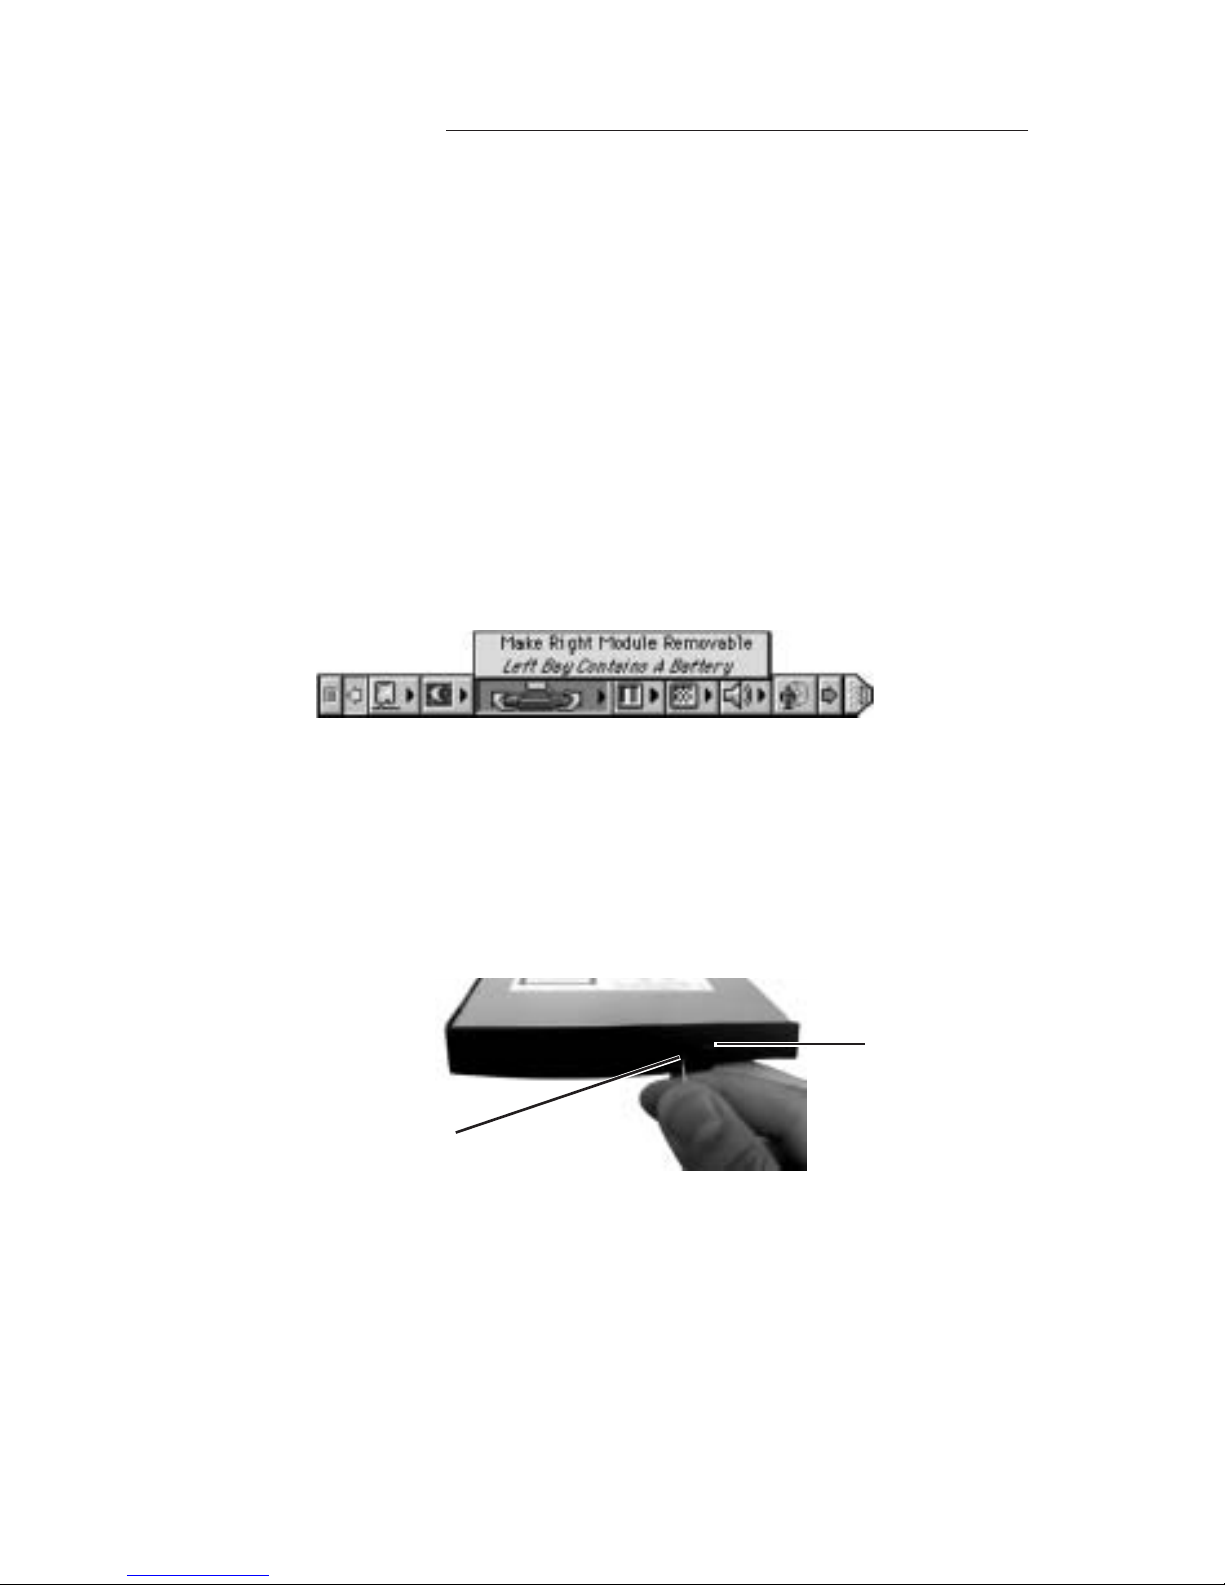
Ejecting the CD Tray
Also located on the front bezel of the Xcarét Pro drive, the drive’s eject button is
used to eject the CD tray under the following conditions:
1) The drive is completely inserted into the PowerBook and
2) The PowerBook is turned on and
3) There is no CD in the drive or the CD which is present in the drive is not
mounted onto the PowerBook's Desktop.
Simply push the button and the CD tray will be ejected. This has no effect when
the Xcarét Pro drive is outside of the PowerBook, or when the PowerBook is
Page 5
4
Xcarét Pro CD-RW and DVD/CD-RW Drive
turned off, or when a CD disc is present in the drive and it is mounted onto the
PowerBook's Desktop.
To eject the CD tray when a CD is present and mounted on the PowerBook's
Desktop, simply highlight the CD icon and either:
1) Under Mac OS 8.6-9.x, simultaneously press the Command and Y keys
on the PowerBook’s keyboard (or under Mac OS X, simultaneously
press Command and E);
2) Drag the icon of the CD onto the Trash icon; or
3) Under Mac OS 8.6-9.x, select "Make Right Module Removable" using
the expansion bay control strip.
The Xcarét Pro drive has an emergency CD tray eject mechanism in the event
that the methods mentioned above are ineffective. Carefully insert the end of a
straightened paperclip into the small hole under the activity LED on the front of
the drive. Once the paperclip encounters resistance, apply a slight pressure with
it and then remove it from the hole. The CD tray will disengage.
Removing the Xcarét Pro Drive
To remove the drive from the PowerBook, one of the following conditions must
be met:
1) Your PowerBook must be powered off, or
2) Your PowerBook must be in Sleep mode, or
3) If your PowerBook is powered on make sure that the expansion bay
control strip indicates that the "Right Module Is Removable."
emergency
eject hole
eject button
Page 6

Xcarét Pro CD-RW and DVD/CD-RW Drive 5
Once one of the above conditions is met, then gently pull on the right side expansion bay eject lever. The drive will be ejected partially and you may now grasp it
and pull it completely out of the PowerBook expansion bay.
Booting from the Xcarét Pro Drive
In order to boot the PowerBook from the Xcarét Pro drive,
1) Insert a bootable CD disc into the drive while your PowerBook is on and
wait for the CD to mount onto the Desktop.
2) Open the Startup Disk control panel (usually located under the Apple
menu).
3) Select the inserted bootable CD as the Startup Disk.
4) Close the Startup Disk control panel.
5) Select Restart from the Special menu in the Desktop.
6) P
ress the "C" key until your computer begins booting from the CD.
If you instead select Shut Down from the Special menu in the Finder after
selecting the bootable CD as the Startup Disk, you must still press the "C" key
down when starting up in order to boot the PowerBook from the bootable CD in
the drive.
Having booted from a CD in the Xcarét Pro drive, you will not be able remove
the CD from the drive or replace the drive with another device. You must first
select and boot from another bootable volume. From the Startup Disk control
panel, select another volume not currently in the Xcarét Pro drive to be the
startup disk. Restart the PowerBook, booting from the newly selected volume.
You can then replace the CD disc or exchange the Xcarét Pro drive with another
expansion bay device.
Toast or iTunes?
If you are debating on whether to use Toast or Apple’s iTunes and/or Disc
Burner for your CD-Recording needs, please visit the following web site for
assistance:http://www.roxio.com/en/support/toast/itunes.html. This web site
contains very sound information about Toast and iTunes/Disc Burner as well as
tips on how you can use them together.
Note: If you plan to use Toast along with iTunes/Disc Burner then,
using the “Extensions Manager” control panel, disable the “FireWire
Authoring Support” extension.
!
Page 7

6
Xcarét Pro CD-RW and DVD/CD-RW Drive
Using the Xcarét Pro CD-RW Drive with iTunes/Disc Burner
under Mac OS 9.1 to 9.2.x
If you would like to use your Xcarét Pro CD-RW Drive with Apple’s iTunes
and Disc Burner software, you will need to have the latest versions of the
following software items:
• Apple iTunes (v2.0.4 as of this writing), available from http://
www.apple.com/itunes/download/
• Apple Authoring Support Update (v1.1.5 as of this writing) available
from http://docs.info.apple.com/article.html?artnum= 120006
• Apple Disc Burner (v1.0.1 as of this writing) available from http://
docs.info.apple.com/article.html?artnum=75106
Mac OS 9.2.x automatically includes Disc Burner v1.0.2. Disc Burner v1.0.1 is
for those users using Mac OS 9.1. (Upgrading to Mac OS 9.2.x is highly
recommended.)
Note: Many systems ship with the iTunes and Disc Burner programs
preloaded. Check the version you have as it may already be current.
1. Download the MCE-L16ACDR.sit file from http://www.mcetech.com/
drivers/MCE-L16ACDR.sit (if it does not unstuff automatically, you may
double click it to unstuff it).
2. Drop the "MCE-L16ACDR" Authoring Support File into the "Authoring
Support Files" folder located in the "Extensions" folder within your
"System Folder".
3. Remove the "ToshibaCDR" file from the "Authoring Support Files" folder
but keep it safely on your hard drive in another location such as a folder
on your desktop. (When you next update your system software it is
recommended to first go back and replace the "MCE-L16ACDR" with the
"ToshibaCDR" file.)
4. Restart your Mac and you will now be able to use the Xcarét Pro
16x10x24x Expansion Bay Drive with iTunes and Disc Burner.
!
Page 8

Xcarét Pro CD-RW and DVD/CD-RW Drive 7
Using the Xcarét Pro CD-RW Drive with iTunes/Finder Burning
under Mac OS X
The Xcarét Pro 16x10x24 Expansion Bay CD-RW Drive is supported natively
by Finder Burning under Mac OS X (10.1.2 or later).
To use the Xcarét Pro 16x10x24x Expansion Bay CD-RW Drive with iTunes
under Mac OS X (10.1.2 or later), follow these steps in order:
1. Under Mac OS 9.2.x, download the MCE-L16ACDR.device-plugin.sit file
from http://www.mcetech.com/drivers/MCE-L16ACDR.device-plugin.sit
(if it does not unstuff automatically, you may double click it to unstuff it).
2. Still within Mac OS 9.2.x, open the following folders: System/Library/
PrivateFrameworks/DiscRecording.framework/Versions/A/Resources/
DevicePlugIns
3. Drop the "MCE-L16ACDR.device-plugin" file into the "DevicePlugIns"
folder.
4. Remove the "ToshibaCDR.device-plugin" file from this folder but keep it
safely on your hard drive in another location such as a folder on your
desktop. (When you next update your system software it is recommended
to first go back and replace the MCE-L16ACDR.device-plugin file with
the "ToshibaCDR.device-plugin" file. This must be done under Mac OS
9.2.X as well.)
5. Restart your Mac under Mac OS X and you will now be able to use the
Xcarét Pro 16x10x24x Expansion Bay CD-RW Drive with iTunes under
Mac OS X!
Using the Xcarét Pro DVD/CD-RW Combo Drive with iTunes/
Disc Burner under Mac OS 9.1 to 9.2.x
In order to use the Xcarét Pro 8x8x8x24 DVD/CD-RW Combo Drive with
Apple’s iTunes and Disc Burner software under Mac OS 9.1 to 9.2.x, you will
need to have the latest versions of the following software items:
• Apple iTunes (v2.0.4 as of this writing), available from http://
www.apple.com/itunes/download/
• Apple Authoring Support Update (v1.1.5 as of this writing) available
from http://docs.info.apple.com/article.html?artnum= 120006
• Apple Disc Burner (v1.0.1 as of this writing) available from http://
docs.info.apple.com/article.html?artnum=75106
Page 9

8
Xcarét Pro CD-RW and DVD/CD-RW Drive
Mac OS 9.2.x automatically includes Disc Burner v1.0.2. Disc Burner v1.0.1 is
for those users using Mac OS 9.1. (Upgrading to Mac OS 9.2.x is highly
recommended.)
Note: Many systems ship with the iTunes and Disc Burner programs
preloaded. Check the version you have as it may already be current.
Follow these steps in order to use the Xcarét Pro 8x8x8x24 DVD/CD-RW
Combo Drive with iTunes and Disc Burner under Mac OS 9.1 to Mac OS 9.2.x:
1. Download the MCEcomb8CDR.sit file from http://www.mcetech.com/
drivers/MCEcomb8CDR.sit (if it does not unstuff automatically, you may
double click it to unstuff it).
2. Drop the "MCEcomb8CDR" Authoring Support File into the
"Authoring Support Files" folder located in the "Extensions" folder within
your "System Folder".
3. Remove the "ToshibaCDR" file from the "Authoring Support Files" folder
but keep it safely on your hard drive in another location such as a folder on
your desktop. (When you next update your system software it is recommended to first go back and replace the "MCEcomb8CDR" with the
"ToshibaCDR" file.)
4. Restart your Mac and you will now be able to use the Lucid-16 Drive with
iTunes and Disc Burner.
Using the Xcarét Pro DVD/CD-RW Combo Drive with iTunes/
Finder Burning under Mac OS X
The Xcarét Pro 8x8x8x24 DVD/CD-RW Combo Drive is supported natively by
Finder Burning under Mac OS X (10.1.2 or later).
Follow these steps in order to use the Xcarét Pro 8x8x8x24x DVD/CD-RW
Combo Drive with iTunes under Mac OS X (10.1.2 or later):
1. Under Mac OS 9.2.x, download the MCEcomb8CDR.device-plugin.sit file
from http://www.mcetech.com/drivers/MCEcomb8CDR.device-plugin.sit
(if it does not unstuff automatically, you may double click it to unstuff it).
2. Still within Mac OS 9.2.x, open the following folders: System/Library/
PrivateFrameworks/DiscRecording.framework/Versions/A/Resources/
DevicePlugIns
3. Drop the "MCEcomb8CDR.device-plugin" file into the "DevicePlugIns"
folder.
!
Page 10

Xcarét Pro CD-RW and DVD/CD-RW Drive 9
4. Remove the "ToshibaCDR.device-plugin" file from this folder but keep it
safely on your hard drive in another location such as a folder on your
desktop. (When you next update your system software it is recommended to
first go back and replace the MCEcomb8CDR.device-plugin file with the
"ToshibaCDR.device-plugin" file. This must be done under Mac OS 9.2.x
as well.)
5. Restart your Mac under Mac OS X and you will now be able to use the
Xcarét Pro 8x8x8x24x DVD/CD-RW Combo Drive with iTunes under Mac
OS X!
Making a bootable CD with Toast Software
The Toast software allows you to make a bootable CD by simply “dragging and
dropping” the current Mac OS 9.x System folder onto the Toast window.
1) Within Toast window, cllick the Data button.
2) Click on New CD.
3) Drag your System folder icon into the Toast window.
4) Click on the Record icon.
Note: It’s a good idea to run with minimal extensions while creating a
bootable CD since many extensions need to be able to write to the
startup volume during startup, which is not possible with a CD.
Important Usage Notes
The MCE Xcarét Pro Expansion Bay Drive is designed to withstand the normal,
reasonable handling involved with mobile use. It is not designed to handle
abrupt shock such as that experienced in dropping, pounding, banging or
otherwise smashing the Xcarét Pro Drive. Exercise care when handling the
Xcarét Pro drive and it will provide you with reliable and extended storage
capabilities. To avoid possible damage to the CD tray or the drive, keep the tray
closed when you are not using it. Also, be sure to always store the Xcarét Pro
Drive in its handy protective case during transport when it is not in the PowerBook, such as when it’s inside a computer carrying case.
Page 11

10
Xcarét Pro CD-RW and DVD/CD-RW Drive
Troubleshooting
I can't boot from the Xcarét Pro drive.
•Verify that the CD in the Xcarét Pro CD-RW drive is bootable
• Make sure it is selected in the Startup Disk control panel.
• Make sure you hold down the "C" key while selecting restart and continue
holding it down until the PowerBook begins booting from the CD.
When I launch the Toast application, a warning message appears which
indicates that an unknown driver is installed and suggests disabling the driver.
This indicates that the Apple CD/DVD Driver is handling the Xcarét Pro Drive.
Select OK and proceed using the Toast software.
Can I get rid of the Toast message concerning the unknown driver?
Yes. You must disable all Apple CD/DVD extensions and/or any third party
CD-ROM extensions and restart your computer. When you launch Toast, if no
CD driver is present, a driver will be automatically loaded by Toast for the
Xcarét Pro Drive, and this message will not appear.
Can I boot my computer from the Xcarét Pro CD-RW drive even though I didn’t
select it in the Startup Disk control panel?
Yes. If your PowerBook is turned on and finds that it can't boot from your
internal hard drive, it will look to boot from the Xcarét Pro CD-RW drive. Make
sure that you have a bootable CD in your Xcarét Pro Drive and your PowerBook
will boot from it. To force your PowerBook to look for the boot volume on a
CD in the Xcarét Pro, simultaneously press the keyboard keys Command,
Option, Shift and Delete at startup.
Why isn’t the DVD/CD-RW Combo Drive playing the DVD video when using
a CardBus DVD Decoder Card for DVD playback?
You must use the Apple DVD Player application that is version 1.3,
downloadable from the MCE Technologies web site (http://www.mcetech.com).
Page 12

Xcarét Pro CD-RW and DVD/CD-RW Drive 11
Why won't the Xcarét Pro Drive’s tray disengage when I push the eject button?
The following conditions must be met for the eject button to disengage the CD
tray:
• The Xcarét Pro Drive must be inserted in the PowerBook and the Power-
Book must be powered on.
• If there is a CD in the Xcarét Pro Drive, it must not be mounted onto the
Desktop.
If the above two conditions are met and the eject button is still not working, then
it is necessary to disengage the CD tray using the emergency eject hole. It is
recommend that this is done with the PowerBook powered off.
Why won't my music CD play from the Xcarét Pro Drive using the CD Control
Strip or the AppleCD Audio Player?
In order to use the CD Control Strip or the AppleCD Audio Player to listen to a
music CD using the Xcarét Pro Drive, you must startup your PowerBook with
the Apple CD/DVD extension enabled. Upon startup, this driver loads for the
Xcarét Pro drive and enables it to work with the CD Control Strip and the
AppleCD Audio Player application.
Does Retrospect software recognize the Xcarét Pro Drive?
Currently, Retrospect software does not recognize non-mounting PowerBook
expansion bay storage devices. We are working closely with the software maker
now to ensure compatibility in the near future.
Can I write to CD-R's and CD-RW's using Toast while I have other applications running?
This is not recommended. The reason is that the uninterrupted transfer of data is
the most critical condition for successfully writing a CD-R or CD-RW. Applications running in the background run the risk of interrupting this data flow and
causing a fatal error while writing. This will render your CD-R and, in most
cases, your CD-RW media useless.
Troubleshooting tips for T oast software are found in the Documentation.pdf file
located in the same folder as your Toast application.
Page 13

12
Xcarét Pro CD-RW and DVD/CD-RW Drive
If you have exhausted all of the troubleshooting recommendations outlined here and still
have not resolved the problem with your new hard drive, you may receive technical
assistance by calling (949)458-0800 or by sending an email to support@mcetech.com.
Please provide the following information:
•Your name
• Invoice number
• Date of the invoice
• MCE part number
• PowerBook model
• Mac OS version number
• Description of the problem, including any relevant error messages
Since technical assistance representatives do not have access to invoice information, it is
necessary that you have this information with you when contacting them.
Laser Information
Warning: Making adjustments or performing procedures other than those specified in
your equipment’s manual may result in hazardous radiation exposure.
Do not attempt to disassemble the cabinet containing the laser. The laser beam used in
this product is harmful to the eyes. The use of optical instruments, such as magnifying
lenses, with this product increases the potential hazard to your eyes. For your safety,
have this equipment serviced only by an authorized service provider.
Your computer is a Class 1 laser product. The Class 1 label, located in a user-accessible
area, indicates that the drive meets minimum safety requirements. A service warning
label is located in a service-accessible area.
High-Risk Activities Warning
This product is not intended for use in the operation of nuclear facilities, aircraft
navigation or communications systems, or air traffic control machines, or for any other
uses where the failure of the computer system could lead to death, personal injury or
severe environmental damage.
CLASS 1
LASER PRODUCT
LASER KLASSE 1
PRODUKT
Class 1 label
CAUTION-LASER RADIATION WHEN OPEN.
DO NOT STARE INTO BEAM.
CAUTION-INVISIBLE LASER RADIATION WHEN OPEN.
DO NOT STARE INTO BEAM OR VIEW
DIRECTLY WITH OPTICAL INSTRUMENTS.
Service warning label
Page 14

MCE Technologies, LLC
Irvine, California, USA
Technical Support
(949)458-0800
support@mcetech.com
Sales
(800)500-0622
sales@mcetech.com
http://www.mcetech.com
Copyright © 2002 MCE Technologies, LLC. All rights reserved.
MCE, the MCE logo, and Xcarét Pro are trademarks of MCE Technologies,
LLC.
Apple, Mac, the Mac OS logo, Macintosh, PowerBook, iBook, and Apple
DVD Player are trademarks of Apple Computer, Inc. registered in the U.S.
and other countries.
Products and company names are trademarks of their respective companies, and are mentioned for informational purposes only and constitute
neither an endorsement nor a recommendation.
Every effort has been made to ensure that the information in this manual
is accurate. MCE Technologies, LLC is not responsible for printing or
clerical errors. Information in this document is subject to change without
notice and does not represent a commitment on the part of MCE Tech-
nologies, LLC.
Rev. 0218a
 Loading...