

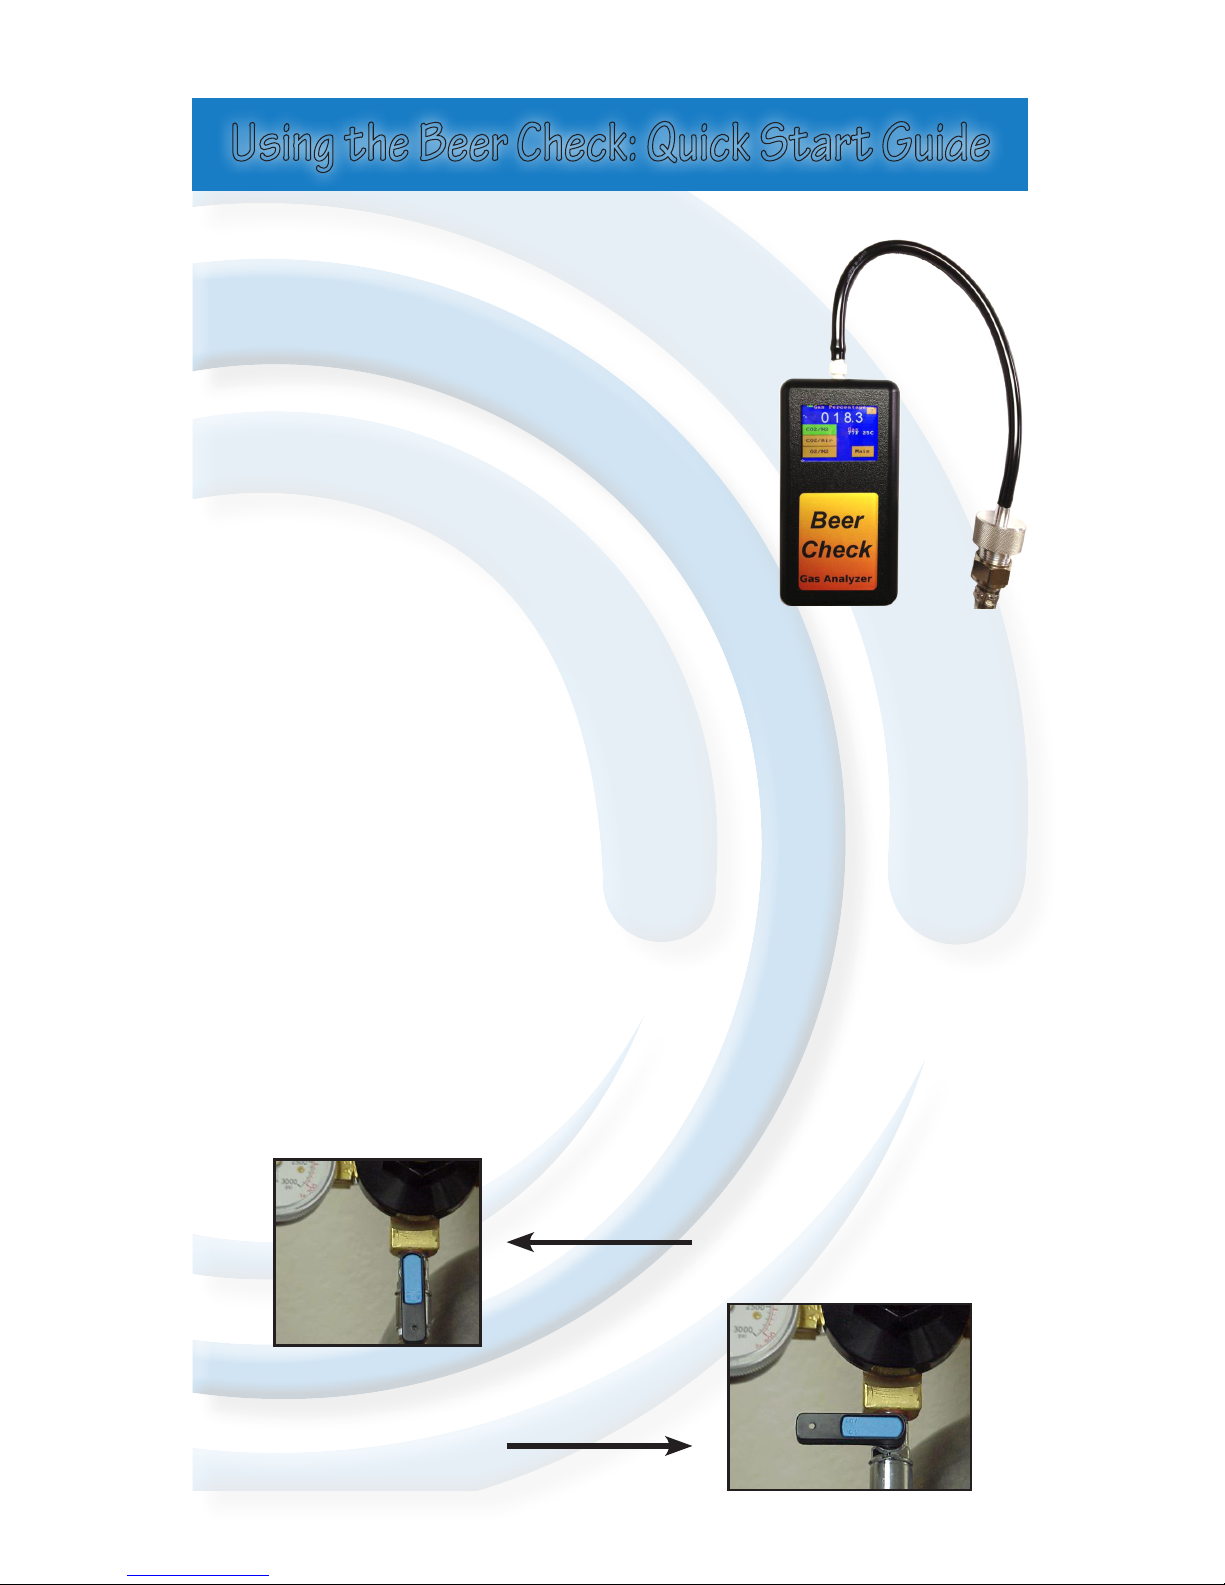
McDantim Beer Check Quick Start Manual
Connect the adaptor and tube to the
Beer Check by twisting the Luer Lock fittings
clockwise until snug. (The tubing should be
pushed on the adaptor.)
Connect to the gas system: Read
Caution on the Back Page! The threads on
the adaptor are 7/8” - 14 threads like the
connections on a typical keg coupler. Turn off
the gas to the keg and release the handle
of the coupler. Reduce the outlet pressure
of the Secondary regulator to 5 to 10 psi.
Disconnect the gas supply from the coupler and attach to the
adaptor.
Turn on the Beer Check by touching the screen. It will open in
the CO2/N2 mode within 10 seconds. Turn on the gas to the Beer
Check.
Take a reading: The most accurate reading is when the numbers
first stop flashing for more than a few seconds.
Turn off and disconnect the Beer Check: The Beer Check will
turn itself off but you’ll increase times between battery charges if
you turn it off after you have taken a reading.
Turning the Beer Check Off: Touch “Main” and then “Off”.
Gas Supply ON
Gas Supply OFF
Using the Beer Check: Quick Start Guide
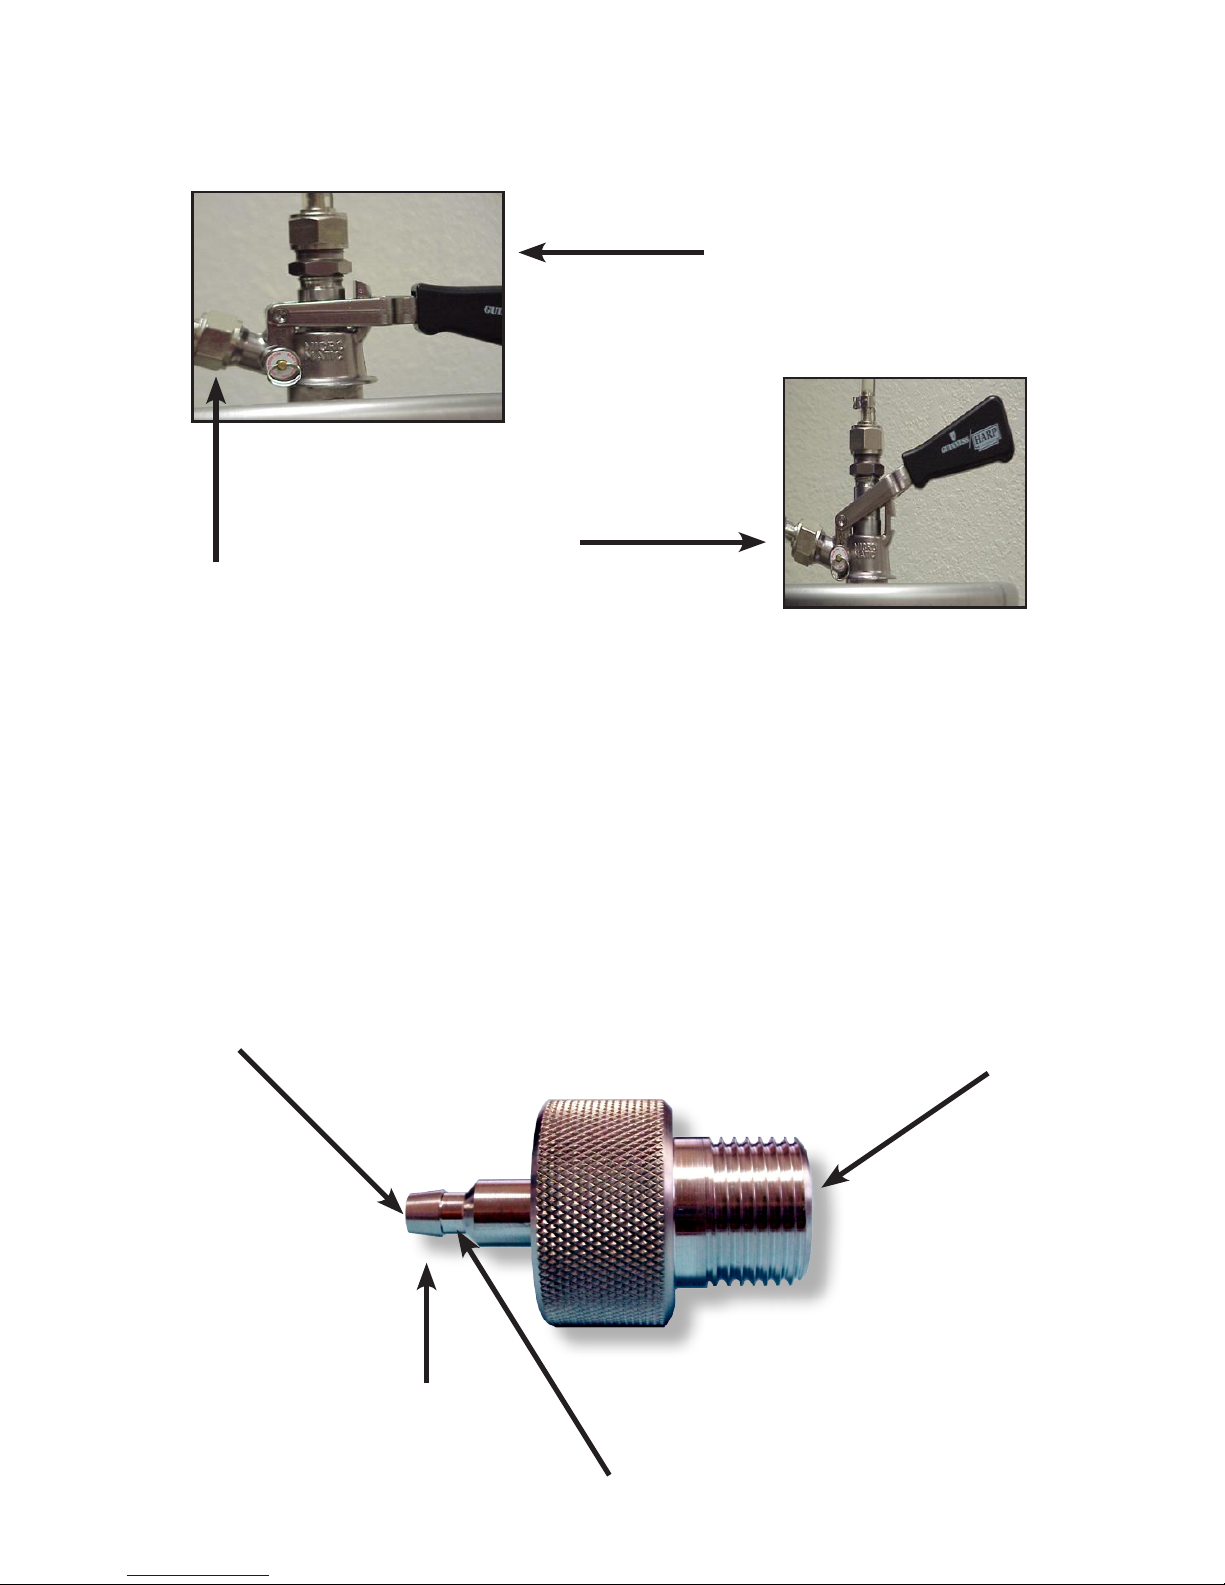
Uncouple the keg coupler.
Remove the gas line
at the coupler by loosening the nut (keep
track of the washer).
Aach the nut to the adaptor (use the washer).
Coupled (turned ON)
Uncoupled (turned OFF)
Gas Line Nut
0.011 Ø Hole here limits flow
(1 to 2 scfh @ 5 to 10 psig).
7/8-14 Thread
(Same thread as keg couplers)
attach gas line nut here.
1/4 hose barb attach
Beer Check tube here.
0.022” Ø Hole here allows flow of
(8 to 15 scfh @ 5 to 10 psig)
 Loading...