

Page 1

McAfee Office
Version 3.1
User’s Guide
Page 2

COPYRIGHT
Copyright (c) 1999-2000 Networks Associates Technology, Inc. All Rights Reserved. No part of this
publication may be reproduced, transmitted, transcribed, stored in a retrieval system, or translated into
any language in an y form or by any means without the written permission of Networks Associates
Technology, In c., or its suppliers or affiliate companies.
TRADEMARK ATTRIBUTIONS
* ActiveHelp, Bomb Shelter,Building a World of Trust,CipherLink,Clean-Up,Cloaking, CNX, * ActiveHelp, Bomb
Shelter, Building a World of Trust, CipherLink, Clean-Up, Cloaking, CNX, Compass 7, CyberCop, CyberMedia,
Data Security Letter, Discover, Distributed Sniffer System, Dr Solomon's, Enterprise Secure Cast, First Aid,
ForceField, Gauntlet, GMT, GroupShield, HelpDesk, Hun ter, ISDN Tel/Scope, LM 1, LANGuru, LeadingHelp
Desk Technology, Magic Solutions, MagicSpy, MagicTree, Magic University, MagicWin, MagicWord, McAfee,
McAfeeAssociates, MoneyMagic,M ore Power To You, MultimediaCloaking, NetCrypto, NetOctopus, NetRoom,
NetScan, Net Shield, NetShield, NetStalker, Net Tools, Network Associates, Network General, Network Uptime!,
NetXRay, Nuts & Bolts, PC Medic, PCNotary, PGP, PGP (Pretty Good Privacy), PocketScope, Pop-Up,
PowerTelnet, Pretty Good Privacy, PrimeSupport, RecoverKey, RecoverKey-International, ReportMagic,
RingFence, Router PM, Safe & Sound, SalesMagic, SecureCast, Service Level Manager, ServiceMagic, Site Meter,
Sniffer, SniffMaster, SniffNet, Stalker, Statistical Information Retrieval (SIR), SupportMagic, Switch PM,
TeleSniffer,TIS, TMach, TMeg, Total Network Security,Total Network Visibility, Total Service Desk, Total Virus
Defense, T-POD, Tr u sted Mach,Trusted Mail, Uninstaller, Vi rex, Virex-PC, Virus Fo rum, ViruScan, VirusScan,
VShield, WebScan, WebShield, WebSniffer, WebStalker, WebWall, and ZAC 2000 are registered trademarks of
Network Associates and/or its affiliates in the US and/or other countries. All other registered and unregistered
trademarks in this document are the sole property of their respective owners.
LICENSE AGREEMENT
NOTICE TO ALL USERS: CAREFULLY READ THE FOLLOWING LEGAL AGREEMENT
("AGREEMENT"), FOR TH E LICENSE OF SPECIFIED SOFTWARE ("SOFTWARE") BY NETWORK
ASSOCIATES, INC . ("McAfee"). BY CLICKING THE ACCEPT BUTTON OR INSTALLING THE
SOFTWARE, YOU (EITHER AN INDIVIDUAL OR A SIN GLE ENTITY) CONSENT TO BE BOUND BY
AND BECOME A P ARTY TO THIS AGREEMENT. IF YOU DO NOT AGREE TO ALL OF THE TERMS
OF THIS AGREEMENT, CLICK THE BUTTON TH AT INDICATES THAT YOU DO NOT ACCEPT THE
TERMS OF THIS AGREEMENT AND DO NOT INSTALL THE SOFTWARE. (IF APPLICABLE, YOU
MAY RETURN THE PRODUCT TO THEPLACEOF PURCHASE FORA FULL REFUND.)
1. License G rant. Subject to the payment of the applicable license fees, a nd subject to the terms and
conditions o f this Agreement, McAfee hereby grants t o you a non-exclusive, non-transferable rig ht
to use one copy of the specified version of the Software and the accompanying documentation (the
"Documentation"). You may install one copy of the Software on one computer, workstation,
personal digital assistant, pager, "smart phone" or other electronic device for which the Software
was designed (each, a "Client Device"). I f the Software is licensed as a su ite or bundle with more
than o n e specified Software product, this license applies to all such specified Software products,
subjectto any restrictions or u sage terms specifiedon the ap plicable p r ice list or product
packaging
that apply to any of such Software products individually.
a. Use. The Software is licensed as a single product; it may not be used on more than one Client
Device or by more than one user at a time, except as set forth in this Section 1. The Software is "in
use" o n a Client Device when it is loaded into the temporary memory (i.e., random-access
memory or RAM) or installed into t he permanent memory (e.g., hard disk, CD-ROM, or other
Issued August 2000 / McAfee Office v3.1
Page 3

storage device) of that ClientDevice. This license authorizes you to make one copy of
the Software solely for backup or archivalpurposes,providedthat the copy you make
contains all of the Software's proprietary notices.
b. Server-Mode. You may use the Software on a Client Device as a server ("Server") within a
multi-user or networked en vironment ("Server-Mode") only if such use is permitted in the
applicable price list or productpackagingfor the Software. A separate license is required for each
Client Device or "seat" that may connect to the Server at any time, regardless of whether such
licensed Client Devices or seats are concurrently connected to, accessing or using the Software.
Use of so ftware or hardware that reduces the number of Client Devices or seats directlyaccessing
or utilizing the Software (e.g ., "multiplexing" or "pooling"software or hardware) does not reduce
the number of licenses required (i.e., the required number of licenses would equal the number of
distinct inputs to the multiplexing or pooling software or hardware "front end"). If the number
of Client Devices or seats that can connect to the Software can exceed the number of licenses you
have obtained, then you must have a reasonable mechanism in place to ensure that your use of
the Software does not exceed the use limits specified for the lic enses you have obtained. This
license authorizes you to make or download one copy of the Documentation for each Client
Device or seat that is licensed, provided that each such copy contains all of the Documentation's
proprietary notices.(i.e., the required number of licenses would equal the number of distinct
inputs to the multiplexing or pooling software or hardware "front end"). If the number of Client
Devices or seats that can connect to the Software can exceed the number of licenses you have
obtained, then you must have a reasonable mechanism in place to ensure that your use of the
Software does not exceed the use limits specified for the licenses you have obtained. This license
authorizes you to make or download one copy of the Documentation for each Client Device or
seatthat is licensed, providedt hat each such copy containsallof the Documentation'sproprietary
notices.
c. VolumeLicenses.If the Software is licensed with volume lic ense termsspecifiedin thea pplicable
price list or product packaging for the Software, you may make, use and install as many
additional copies of the Software o n the number of Client Devices as the volume license
authorizes. You must have a reasonable mechanism in place to ensure that the number of Client
Devices on which the Software has been installed d oes not exceed the number o f licenses you
have obtained. This license authorizes you to make or download one copy of the Documentation
for each additional copy authorized by the volume license, provided that each such copy contains
all of the Documentation's p roprietary notices.
2. Term. This Agreement is effective for an unlimited duration unless and until earlier terminated as
set forth herein. This Agreement will terminate automatically if you fail to comply with any of the
limitations or other requirements described herein. Upon any termination or expiration of this
Agreement,you must destroy all copies of theS oftware and theDocumentation. Youmay terminate
this Agreement at any point by destroying all copies of the Software and the Documentation.
3. Updates. For the time period specified in the applicable price list or product packaging for the
Software you are entitled to download revisions or updates to the Software when and as McAfee
publishes them via its electronic bulletin board system, website or through o ther online services.
For a period of ninety (90) days from the date of the o riginal purchase of the Software, you are
entitled to download one (1) revision or upgrade to the Software when and as McAfee publishes it
via its electronic bulletin board system, website or through other online services. After the specified
time period,you have no further rights to receive any revisions or upgrades without purchase of a
new license or annual upgrade plan to the Software.
4. Ownership Rig h ts. The Software is p rotected by United States copyright laws and international
treaty provisions. McAfee and its suppliers own and retain all righ t, title and interest in and to the
Software, including all copyrights, patents, trade secret rights, trademarks and other intellectual
property rights therein. Your possession, installation, or use of the Software does not transfer to you
any title to the intellectual property in the S oftware, and you will not a cquire any rights to the
Software except as expressly set forth in this Agreement. All copies of the Software and
Documentation made hereunder must contain the same proprietary notices that appear on and in
the Software and Documentation.
User’s Guide iii
Page 4

5. Restrictions. You may not rent, lease, loan or resell the Software. You may not permit
third parties to benefit from the use or functionality of the Software via a timesharing,
service bureau or o ther arrangement, except to the extent such use is specified in the
applicable list price or product packaging for the Software. You may not transfer any of
the rights granted to you under this Agreement. You may not r everse engineer,
decompile, or disassemble the Software, except to the extent the foregoing restriction is
expressly prohibited by applicable law. You may not modify, or create derivative works
based upon, the Software in whole or in part. You may not copy the Software or
Documentation except as expres sly permitted in Section 1 above. Y ou may not remove
any proprietary notices or labels on the Software. All rights not expressly set forth
hereunder are reserved by McAfee. McAfee reserves the right t o periodically conduct
audits upon advance written notice to verify compliance with the terms of this
Agreement.
6. Warranty and Disclaimer
a. Limited Warranty. McAfee warrants that for sixty (60) days from the date of original
purchasethe media(e.g., diskettes)on which the Software is contained will be freefrom
defects in materials and workmanship.
b. Customer Remedies. McAfee's and its suppliers' entire liability and your exclusive
remedy for any br each of the foregoing warranty shall be, at McAfee's option, either (i)
return of the purchase price paid fo r t he license, if a ny , o r (ii) replacement o f the
defective media in which the Software is c ontained. You must return the defective
media to McAfee at your expensewith a copy of your receipt. This limited warranty is
void if the defect has resultedfrom accident,abuse, or misapplication. Any replacement
media will be warranted for the remainder of the original warranty period. Outside the
United States, this remedy is not available to the ex tent McAfee is subject to restrictions
under United States export control laws and regulations.
c. Warranty Disclaimer. Except for the limited warranty set forth herein, THE
SOFTWARE IS PROVIDED "AS IS." TO THE MAXIMUM EXTENT PERMITTED BY
APPLICABLE LAW, MCAFEE DISCLAIMS ALL WARR A NTIES, EITHER EXPRESS
OR IM PLIED, INCLUDING BUT NOT LIMITED TO IMPLIED WARRANTIES OF
MERCHANTABILITY, FITNESS FOR A PARTICULA R PURPOSE, AND
NONINFRINGEMENT WITH RESPECT TO THE SOFTWARE AND THE
ACCOMPANYING DOCUMENTATION. YOU ASSUME RESPONSIBILITY FOR
SELECTING THE SOFTWARE TO ACHIEV E YOUR INTENDEDRESULTS,AND FOR
THE I NSTALLATION OF, USE OF, AND RESULTS OBTAINED FROM THE
SOFTWARE. WITHOUT LIMITING THE FOREGOING PROVISIONS, MCAFEE
MAKES NO WARRANTY THAT THE SOFTWARE WILL BE ERROR-FREE OR FR EE
FROM INTERRUPTIONS OR OTHER FAILURES OR THAT THE SOFTWARE WILL
MEET YOUR REQUIREMENTS. SOME STATES AND JURISDICTIONS DO NOT
ALLOW LIMITATIONS ON IMPLIED WARRANTIES, SO THE ABOVE LIMITATION
MAY NOT APPLY TO YOU. The foregoing provisions shall be enforceable to the
maximum extent permitted by applicable law.
iv McAfee Office
Page 5

7. Limitation of Liability. UNDER NO CIRCUMSTANCES AND UNDER NO LEGAL
THEORY, WHETHER IN TORT, CONTRACT, OR OTHERWISE, SHALL MCAFEE OR
ITS SUPPLIERS BE LIABLE TO YOU OR TO ANY OTHER PERSON FOR ANY
INDIRECT, SPECIAL, INCIDENTAL, OR CONSEQUENTIAL DAMAGES OF ANY
CHARACTER INCLUDING, WITHOUT LIMITATION, DAMAGES FOR LOSS OF
GOODWILL, WORK STOPPAGE,COMPUTERFAILURE OR MALFUNCTION,OR FOR
ANY AND ALL OTHER DAMAGES OR LOSSES. IN NO EVENT WILL MCAFEE BE
LIABLE FOR ANY DAMAGES IN EXCESS OF THE LIST PRICE MCAFEE CHARGES
FOR A LICENSE TO THE SOFTWARE, EVEN IF MCAFEE SHALL HAVE BEEN
ADVISED OF T HE POSSIBILITY OF SUCH DAMAGES. THIS LIMITATION OF
LIABILITY SHALL NOT APPLY TO LIABILITY FOR DEATH OR PERSONAL INJURY
TO THE EXTENT THAT APPLICABLE LAW PROHIBITS SUCH LIMITATION.
FURTHERMORE, SOME STATES AND JURISDICTIONS DO NOT ALLOW T HE
EXCLUSION OR LIMITATION OF INCIDENTAL OR CONSEQUENTIAL DAMAGES,
SO THIS LIMITATION A ND EXCLUSION MAY NOT APPLY TO YOU. The foregoing
provisions shall be enforceable to the maximum extent permitted by applicable law.
8. United States G overn ment. TheSoftware andaccompanying Documentationaredeemed
to be "commercial computer software" and "commercial computer software
documentation," respectively, pursuant to DFAR Section 227.7202 and FAR Section
12.212, as applicable. Any use, modification, reproduction, release, performance, d isplay
or disclosure of the Software and accompanying Documentation by the United States
Government shall be governed solely by the terms of this Agreement and s hall be
prohibited except to the extent expressly permitted by the terms of this Agreement.
9. Export Controls. Ne ither the Software nor the Documentation and underlying
information or technology may be downloaded or otherwise exported or re-exported (i)
into (or to a national or resident of ) Cuba, Iran, Iraq, Libya, North Korea, Sudan, Syria or
any other country to which the United States has embargoed goods; or (ii) to anyone on
the United States Treasury Department's list o f Specially Designated Nations or the
United States Commerce Department's Table of Denial Orders. By downloading or using
the Software you are agreeing to the foregoing and you are certifying that you are not
located in, under the control of, or a national or resident of any such country or on any
such list.
IN ADDITION, YOU SHOULD BE AWARE OF THE FOLLOWING: EXPORT OF THE
SOFTWARE MAY BE SUBJECT TO COMPLIANCE WITH THE RULES AND
REGULATIONS PROMULGATED FROM TIME TO TIME BY THE BUREAU OF
EXPORT ADMINISTRATION, UNITED STATES DEPARTMENT OF COMMERCE,
WHICH RESTRICT THE EXPORT AND RE-EXPORT OF CERTAIN PRODUCTS A ND
TECHNICAL DATA. IF THE EXPORT OF THE SOFTWARE IS CONTROLLED UNDER
SUCH RULES AND REGULATIONS, THEN THE SOFTWARE SHALL NOT BE
EXPORTED OR RE-EX PORTED, DIRECTLY OR INDIRECT LY , (A) WITHOUT ALL
EXPORT OR RE-EXPORT LICENSES AND UNITED STATES OR OTHER
GOVERNMENTAL APPROVALS REQUIRED BY ANY APPLICABLE LAWS, OR (B) IN
VIOLATION OF ANY APPLICABLE PROHIBITION AGAINST THE EXPORT OR
RE-EXPORT OF ANY PART OF THE SOFTWARE.
User’s Guide v
Page 6

SOME COUNTRIES HAVE RESTRICTIONS ON THE USE OF ENCRYPTION WITHIN
THEIR BORDERS, OR THE IMPORT OR EXPORT OF ENCRYPTION EVEN IF FOR
ONLY TEMPORARY PERSONAL OR BUSINESS USE. YOU ACKNOWLEDGE THAT
THE IMPLEMENTATION AND ENFORCEMENT OF THESE LAWS IS NOT ALWAYS
CONSISTENT AS TO SPECIFIC COUNTRIES. ALTHOUGH THE FOLLOWING
COUNTRIES ARE NOT AN EXHAUSTIVE L IST THERE MAY EXIST RESTRICTIONS
ON THE EXPORTATION TO, OR IMPORTATION OF, ENCRYPTION BY: BELGIUM,
CHINA (INCLUDING HONG KONG), FRANCE, INDIA, INDONESIA, ISRAEL,
RUSSIA, SAUDI ARABIA, SINGAPORE, AND SOUTH KOREA. YOU
ACKNOWLEDGE IT IS YOUR ULTIMATE RESPONSIBILITY TO COMPLY WITH ANY
AND ALL GOVERNMENT EXPORT AND OTHER APPLICABLE LAWS AND THAT
MCAFEE HAS NO FURTHER RESPONSIBILITY AFTER THE INITIAL SALE TO YOU
WITHIN THE ORIGINAL COUNTRY OF SALE.
10.High Risk Activities. The Software is not fault-tolerant and is not designed or intended
for use in hazardous environments requiring fail-safe performance, including without
limitation, in the operation of nuclear facilities, aircraft navigation or communication
systems, air traffic c o ntrol, weapons systems, direct life-support machines, or any other
application in which the failure of the Software could lead directly to death, personal
injury, or severe physical or property damage (collectively, "High Risk Activities").
McAfee expressly disc laims any exp ress or imp lied warranty of fitness for High Risk
Activities.
11.Miscellaneous. This Agreement is governed by the laws of the United States and the State
of California, without reference to conflict of laws principles. The application of the
United Nations Convention of Contracts for the International Sale of Goods is expressly
excluded. This Agreement s ets forth all rights for the user of theSoftware and is theentire
agreement between the parties. This A greement supersedes any other communications
with respect to the Software and Documentation. This Agreement may not be modified
except b y a written addendum issued by a duly authori zed representative of Mc Afee. N o
provision hereof shall be deemed waived unless such w a iver shall be in writing and
signedby McAfee or a duly authorizedrepresentative of McAfee. If any provisionof this
Agreement is held invalid, the re mainder of this Agreement shall continue in full force
and effect. The parties confirm that it is their w ish that this Agreement has been written
in the Eng lish language only.
12.McAfee Customer Contact. If you have any questions concerning these terms and
conditions, o r if you would like to contact McAfee for any other reason, please call (408)
988-3832,fax(408) 970-9727, or write: McAfeeSoftware,3965 Freedom Circle,Santa C lara,
California 95054. http://www.mcafee.com.
Statements made to you in the courseof this sale are subject to the Year 2000 Information
and Readiness DisclosureAct (PublicLaw 105-271). In the case of a dispute, this Act m ay
reduce your legal rights regarding the use of any statements regarding Year 2000
readiness, unless otherwise specified in your contractor tariff.
vi McAfee Office
Page 7

Table of Contents
Chapter1. WelcometoMcAfeeOffice...........................15
Programsandfeatures............................................15
Centralinterface.............................................15
McAfeeVirusScan ...........................................16
McAfeeUtilities..............................................16
McAfeeUnInstaller...........................................17
McAfeeInternetGuardDog....................................18
McAfeeFirewall .............................................19
McAfeePGPPersonalPrivacy .................................19
Otherfeatures ...................................................20
McAfeeVirtualOffice .........................................20
McAfeeontheWeb ..........................................20
McAfeeWebView............................................20
Improvements ...................................................21
Wheretogoformoreinformation...................................21
Chapter2. InstallatingMcAfeeOffice ...........................23
Systemrequirements .............................................23
Individualproductrequirements ...............................23
Installation ......................................................24
Chapter3. McAfeeVirusScan..................................27
HowdoesVirusScansoftwarework?................................27
WhatcomeswithVirusScansoftware? ..............................27
What’snewwithVirusScan? .......................................31
StartingtheVirusScanapplication ..................................33
DisplayingtheVirusScanapplicationmainwindow................33
Ifyoususpectyouhaveavirus... ...................................37
WhatdoestheVShieldscannerdo?.................................40
WhyusetheVShieldscanner?.................................41
Browserande-mailclientsupport ..............................42
EnablingorstartingtheVShieldscanner.............................42
User’s Guide vii
Page 8

Table of Contents
UsingtheVShieldconfigurationwizard ..............................47
UsingtheVShieldshortcutmenu ...................................51
Chapter 4. McAfee Utilities . . . .................................53
McAfeeUtilitiescentralwindow ....................................53
McAfeeUtilitiesProperties ........................................54
CommonDialogstab .........................................54
IconAnimationtab ...........................................54
WindowPatternstab .........................................55
DiskToolstab...............................................55
StartMenutab ..............................................56
TrashGuardtab .............................................56
FileShreddertab ............................................57
QuickCopytab..............................................57
ZipFileManagertab..........................................58
RepairandRecover ..............................................58
DiskMinder.................................................58
UsingDiskMinder .......................................58
CustomizingDiskMinderProperties........................60
CreatingandrevertingtoanUndofile ......................61
UsingDiskMinderinDOS ................................61
McAfeeImage ...............................................62
CreatinganImageofyourdisks ...........................62
SettingImageProperties .................................63
RestoringdrivesfromanImagefile.........................63
RescueDisk ................................................65
UsingaRescueDisk .....................................66
DiskMinderinDOS ......................................66
FirstAid....................................................66
Using CheckUp .........................................66
UsingUniversalUndo ....................................68
UsingAskAdvisor.......................................70
CreatingaRescueDisk...................................70
DiscoverPro ................................................71
DiscoverProwindow ....................................71
viii McAfee Office
Page 9

Table of Contents
Workingwithadvancedinformation ........................72
SpecifyingDiscoverProsettings...........................74
Usingthemulti-windowviews .............................74
Undelete ...................................................75
CleanandOptimize...............................................76
CleanupWizard .............................................76
DiskTune ..................................................76
UsingDiskTunetodefragmentorconsolidateadisk..........77
Theharddiskmap.......................................78
Settingadvancedoptions.................................78
Specifyingfilecategories .................................80
RegistryWizard .............................................82
Backing up & Restor ing the Registry .......................83
CleaningtheRegistry ....................................84
RepairingtheRegistry ...................................84
TuninguptheRegistry ...................................85
RegistryPro ................................................86
FindingaRegistryentry ..................................86
Findingorphans.........................................87
EditingaRegistryentry ..................................87
ImportingaRegistryfile ..................................87
ExportingaRegistryfile ..................................87
RefreshingtheRegistrydatabase ..........................87
LaunchRocket ..............................................88
QuickCopy .................................................88
ShortcutWizard .............................................89
Prevent an d Protect . . . ...........................................89
CrashProtector .............................................89
RecoveringfromanApplicationError.......................89
Recovering a crashed, locked-up, or hung application .........90
SelectingCrashProtectorProperties .......................91
Deactivating Crash Protector ..............................92
WinGauge ..................................................93
Themostimportantgauges ...............................93
Workingwithgauges.....................................94
User’s Guide ix
Page 10

Table of Contents
SecureandManage .............................................111
PGP ..........................................................119
ManipulatingtheWinGaugewindow ........................95
ChangingWinGaugeproperties............................97
Savingandloadinggaugesettings ........................101
VirusScan .................................................102
TrashGuard ...............................................102
SpecifyingTrashGuardProperties ........................102
Safe&Sound ..............................................103
RegularbackupswithSafe&Sound .......................103
Creatingautomaticbackups..............................104
Definingyourbackupstrategy............................104
Creating a backup set ...................................105
Restoringfilesfromabackupset .........................108
Modifyingordeletingbackupsets.........................109
Repairingandrebuildingabackupset .....................110
EZSetup ..................................................111
Systemtab ............................................111
Explorertab ...........................................113
Run/Add/Removetab ...................................115
SendTotab ...........................................116
ContextMenutab.......................................116
LaunchPad................................................117
StartingLaunchPad ....................................118
Adding,updating,andremovingicons .....................118
ManipulatingtheLaunchPadwindow......................118
UsingPGP.................................................120
Tocreateakeypair .....................................120
Encryptingemailsandfiles ..............................121
Decryptingemailsandfiles ..............................122
PGPdisk...................................................122
CreatinganewPGPdiskvolume ..........................123
Add/RemovePublicKeys ................................124
McAfeeShredder ...........................................125
Shreddingselectedfiles .................................125
x McAfee Office
Page 11

Table of Contents
Shreddingnon-filedata..................................127
McAfeeZipManager ........................................127
ZipFiles ..............................................128
UsingZipManWizard ...................................128
SelectingMcAfeeZipManagerproperties ..................129
Extracting,archiving,oraddingfiles.......................131
Buildingself-extractingarchives ..........................131
SwitchingbetweentheWizardandMcAfeeZipManager ......131
UsingAdvancedMcAfeeZipManager......................131
McAfeeOilChange..........................................133
Chapter5. McAfeeFirewall...................................135
AboutMcAfeeFirewall ...........................................135
HowMcAfeeFirewallworks.......................................135
AboutWinsock2................................................136
ConfiguringMcAfeeFirewall ......................................136
Applications ...............................................137
Controlapplications ....................................137
Defaultsettingsforapplications ..........................137
Systems...................................................138
Control system .........................................138
DefaultsettingsforSystemactivity........................138
Password Protection ....................................139
InstructionsforAdministrators....................................139
ConfiguringNetwork,DisplayandLoggingControls..............139
NetworkControl........................................139
DisplayControl ........................................140
LoggingControl........................................140
ConfiguringApplications ....................................140
ConfiguringSystemSettings .................................141
ConfigurationafterAdding/RemovingNetworkDevices ...........142
Using Password Protection ...................................142
Chapter6. McAfeeUnInstaller ................................145
UsingMcAfeeUnInstaller.........................................145
User’s Guide xi
Page 12

Table of Contents
UsingQuickClean...............................................150
Using Spa ceMaker ..............................................151
UsingRemove..................................................152
UsingTransport ................................................153
UsingArchive ..................................................154
UsingMove ....................................................155
UsingBackTrack................................................156
UsingRestore ..................................................158
UsingPowerClean ..............................................160
AboutReportsdialogbox ........................................168
CreatingtheSmartLinksdatabase .............................145
CustomizationInterview .....................................146
UnInstallerwizards..........................................146
AboutPowerClean ..........................................148
AboutMcAfeeGuardian .....................................148
HowdoIsetupQuickCleantorunautomatically?................150
HowdoIscheduleQuickCleantorunataspecifictime? ..........151
How do I rebuild a transported application on another computer? . .153
How do I set BackTrack Monitor to ru n in the background? ........156
HowdoImonitorinstallationofasingleapplication? .............157
HowdoIundoanapplicationinstallationthatImonitored?........157
HowdoIrestoredeletedfiles? ................................159
WhydoesthePowerCleanfeatureopeninread-onlymode? .......161
PowerCleanmenus .........................................165
Usingthetabpanes?........................................166
Whatdothecolorcodesmean? ..........................166
ChangingthedefaultsforthePowerCleanfeature................167
ViewingchangesdoneusingthePowerCleanfeature ........168
Chapter7. McAfeeInternetGuardDog .........................171
HowInternetGuardDogworks ....................................171
UserSetup ................................................171
VirusScan .................................................171
ActivityLogs ..............................................172
SecurityCheck .............................................172
xii McAfee Office
Page 13

Table of Contents
InternetGuardDogandyouronlineconnection ......................172
InternetGuardDogfeatures ......................................172
Protection from privacy thr eats . . .............................173
Protection from security threats . .............................173
Protectionfromvirusthreats .................................174
UsingtheInternetGuardDogInterview.............................174
HowInternetGuardDogAdministratorworks........................175
Self-Administrator ..........................................176
How password prote ction works in Guard Dog ......................176
UsingtheInternetGuardDogHomescreen .........................176
HowUserSetupworks ......................................177
UserProfile............................................178
HowInternetFilteringworks .................................178
Internetfiltering ........................................178
ViewingActivityLogs .......................................179
PerformingaSecurityCheck .................................180
Responding to Product Name alert messages . . .................180
Using Browser B uddy to retrieve or store your Web site passwords 181
Privacy features ................................................183
What Cookie Blocker does ...................................183
WhatIdentityProtectordoes .................................184
WhatWebTrailCleanerdoes .................................185
WhatSearchFilterdoes .....................................185
Securityfeatures................................................185
What Gatekeeper does . . ....................................185
WhatFileGuardiandoes .....................................186
WhatPasswordManagerdoes ...............................187
Chapter 8. PGP Personal Privacy . . . ...........................189
Using PGP Personal Privacy . . ....................................189
BasicstepsforusingPGPPersonalPrivacy ....................190
Running PGP Personal Privacy ....................................191
FromtheSystemtray........................................192
PerformingPGPfunctionsfromtheclipboard ...............192
OpeningthePGPkeyswindow............................192
User’s Guide xiii
Page 14

Table of Contents
SettingPGPPreferences ................................192
GettingHelp ...........................................193
QuittingPGP ..........................................193
Fromsupportedemailapplications ............................193
UsingPGP/MIME .......................................194
FromtheWindowsExplorer ..................................194
Selectingrecipients.....................................194
Takingshortcuts .......................................195
FromthePGPtoolsapplication................................195
PGPdisk .......................................................195
CreatinganewPGPdiskvolume ..............................196
Changing a passphrase . . ....................................197
Add/RemovePublicKeys ....................................198
AppendixA. ProductSupport.................................199
Customerservice ...........................................199
Technicalsupport ..........................................200
Supportviatheweb.....................................200
Telephonesupportnumbers .............................200
Index......................................................201
xiv McAfee Office
Page 15
1Welcome to McAfee Office
Thankyou fo r purchasingMcAfee Office—a suiteof powerful and easy-to-use
Windows software utilities that helps keep your PC working at optimum
efficiency and speed, as well as diagnosing, repairing,and protectingyour PC
and its valuable data.
McAfee Office contains a suite of utility programs that provide you with
diagnostic, preventive, and security tools to help maintain your PC’s health
and well-be ing. Use McAfee Office utilities together, or individually, to
protect your PC from viruses, ensure privacy of your PC’s data files, and
improve overall performance of your computer.
Programs and features
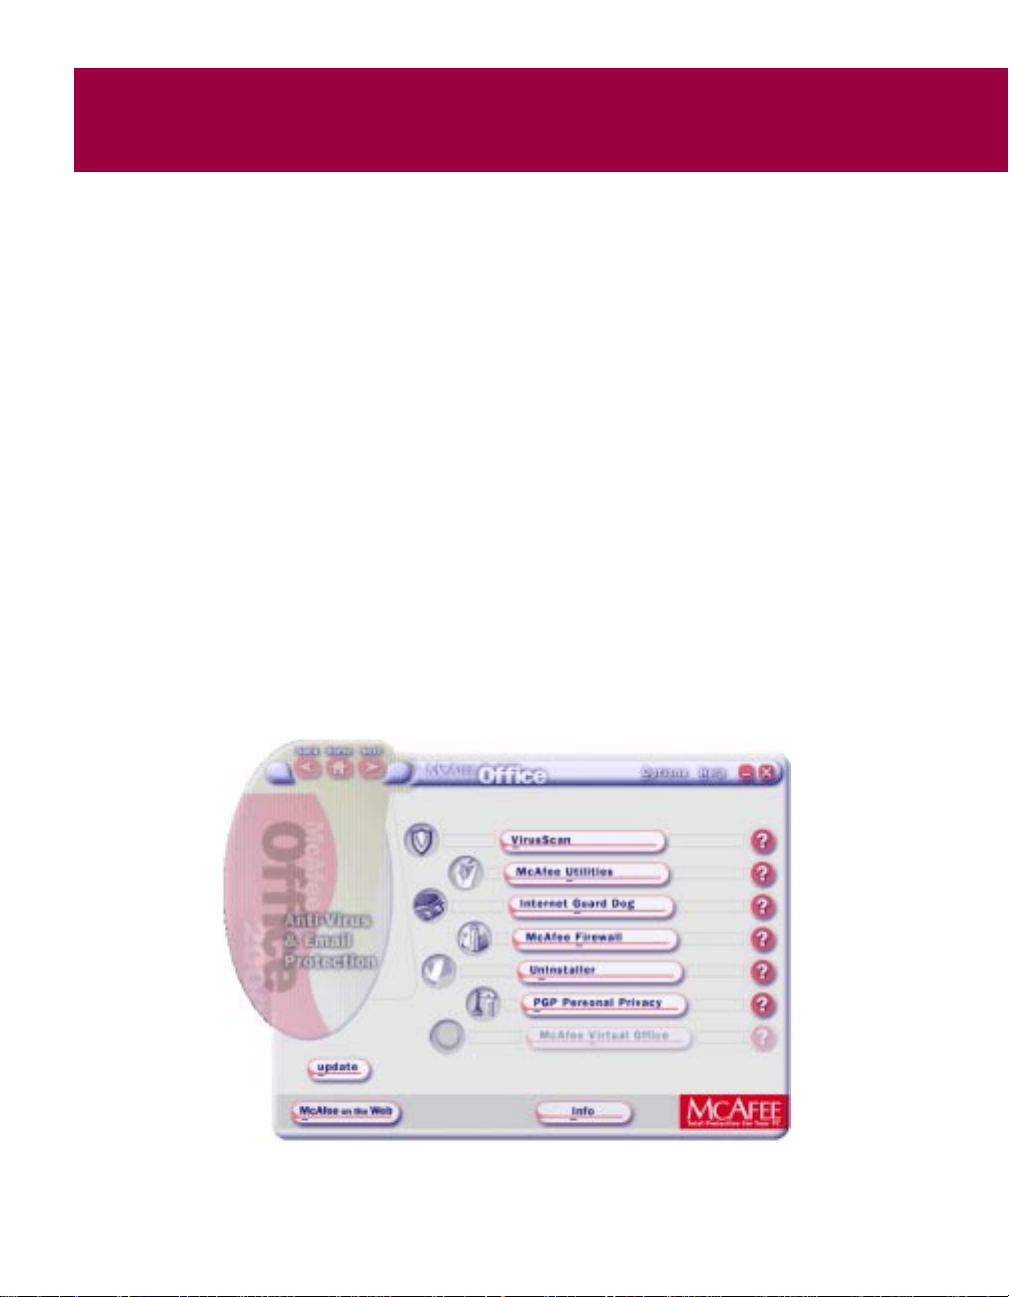
Central interface
Through a central interface, McAfee Office improvs integration with the
individual components of the product suite.For example, instead of launching
a separate Mc Af e e Utilities main m en u, a user can access all functions of
McAfee Utilities directly from the McA fee Office Central interface.
1
Figure 1-1. McAfee Office main win do w
User’s Guide 15
Page 16

Welcome to McAfee Office
McAfee VirusScan
McAfee Vi rusScan provides complete desktop protectionwith an array of
scanning features that keep your system clean, mean, and virus-free. Using
onlythe latest technology, VirusScan d etects 100%of viruses including floppy
disks, Internet downloads, email attachments, Intranets, shared files,
CD-ROM, and online services (even inside the most popular compressed file
types).
• Hunter, VirusScan’s award-winning scanning engine, includes
ground-breaking variant detection and heuristic technology that detects
even new un known macro viruses before they have a chance to inflict
damage.
• SecureCast ensures that your virus signature files are always the latest.
New updates are pushed directly to your desktop the moment they ar e
released.
• AVERT (Anti-Virus Emergency Research Team) staffs more than 85
experiencedv irus r esearchers around thew orld, providing c ustomers with
unparalleled follow-the-sun support. AVERT even makes hourly beta
virus signature files available to all customers 24 hours a day.
McAfee Utilities
McAfee Utilities helps you keep your PC working at optimum efficiency and
speed. You can diagnose and repair your system and application software;
create a recovery disk and image snapshots of critical sectors of y our hard
drives; avoid lost data during application crashes; create backup sets
automatically or interactively; back up to a protected volume file, which
makes your data recoverable when it otherwise would not be.
From the mo ment you install McAfee Utilit ies, it begins protecting your PC.
First, by helping create a recovery diskthat you can use if problems arise.
Second, by activating Bomb Shelter, which immediately protects you against
losingun saved informationin the eventthat anapplicationcrashes. Next, you
can create a backup set of your valuable d ata with Safe & Sound.
After repairing and protecting your system, you’re ready to use other McAfee
Utilities to clean and optimize , prevent and protec t, and secure and manage
information.
McAfee U tilities can diagnose,repair, and protect your system in the
following ways:
• Discover shows a wealth of information about your hardware and
software.Italsoletsyourundiagnosticsandbenchmarktests.
16 McAfee Office
Page 17

Welcome to McAfee Office
• DiskMinder safely, easily, a nd quickly diagnoses and repairs existing or
potential disk problems.
• McAfee Image saves a cop y of critical disk information in a file and
restores the image later if your disk is corrupted.
• Registry Wizard allows you to easily maintain, troubleshoot, or repair the
Registrydatabase.
• Rescue Disk createsa custom rescuedisk that you can use to bootup your
PC and begin recovery if y ou can’t start from the system hard drive.
•FirstAidquickly examines areas of your computer for any problems that
can be automatically fixed at the click of a button.
• Safe & Sound lets you create automatic or interactive backups of selected
drives, directories, files, or file types. You can back u p to a protected
volume file (a separate area on the drive).
NOTE:A protected volume file contains information about each file
in every sector to ensure that files can be recovered even if the hard
drive’s directories and data are severely damaged or lost. You can
also createmirrorbackupsthat instantlyback updata as you saveit,
make backups after a time delay when the PC is id le, o r create
manual backups.
• Trash Guard protects all the files you delete, by sending them to the
RecycleBin.
• Undelete lets you recover files that you have deleted.
McAfee UnInstaller
If you think you’re running out of room on your PC and need to buy a new
hard drive—think again! Did you know every time you visit a website, useless
files are left on your compute r? Remnants of old files are scattered all over
your PC. It’s crammedwith bits and pieces of old softwareand junk files that
can slow it down and cause problems—and that’s exactly the debris that
McAfee UnInstaller gets rid of.
• Safe: UnInstaller safely deletes Windows applications but never removes
criticalsystem files, so you can clear your PC with completepeace of mind.
• Fast scanning speed: Scans your PC for unwant e d files with thorough link
determination capability.
• One-click QuickClean: W hen time is of the essence, t his feature opens up
disk space immediately.
User’s Guide 17
Page 18

Welcome to McAfee Office
• Scheduled cleaning: S chedule UnInstaller to automa tic ally delete usele ss
filesatanytime,dayornight.
• BackTrack: Restores and reconstructs your original setup after poor
program installations.
• Customization in terview: Notify UnInstaller w hat files are most
important to you, and it will never touch them.
• Moves and archive s programs: Moves and archives applications to
another folder, drive, or computer—with all links intact.
• Full anti-virus and privacy protection: Now UnInstaller includes
anti-virussoftware that can even eradicate hostile cookies, ActiveX
controls, and Java applets.
McAfee Internet Guard Dog
McAfee Internet Guard Dog is designed to ensure that you can use all aspects
of th e Internet without worrying that your privacy and c omp uter security will
be compromised.
Internet Guard Dog provides security by:
• Checking your computer for potential security risk and privacy issues
allowing you to fix these problems before data is damaged o r your privacy
compromised. It checks:
• ProgramsthathaveaccessedtotheInternet.
• Sensitive data such as financial files and the programs that access
these files.
• Viruses that can damage the data on your computer or even go so
farastoreformatyourharddisk.
• ActiveX control and Java applets that may or may not perform
dangerous actions on your computer.
• Alerting you of potential harmful events that will threaten your privacy
andsecurity.SomeoftheeventsthattriggersGuardDogtoalertyou
include:
• Unwarranted intrusion from other sources on the Internet.
• Programs on y our computer that pass sensitive data to other sites.
• Web sites that send cookies to your computer as you use the
Internet.
18 McAfee Office
Page 19

McAfee Firewall
McAfee Firewall is a personal firewall that lets you monitor, control and log
your PC's network activity. It protects you from Internet hackers and keeps
your PC private.
McAfeeFirewallfilterstrafficatthedevicesthatyoursystemuses-network
cards and modems. This means that it can reject inbound traffic before that
traffic can reach vital functions in your PC and before it can waste valuable
system resources.
It monitors applications that are either trusted or not trusted. When trusted
applications need to access a network, it manages everything in the computer
to allow that application's traffic. When it detects non-trusted applications
trying to access a network, it blocks all traffic to and from that application.
McAfee PGP Personal Privacy
McAfee PGP Personal Privacy protects the privacy of your email messages
and files via encryption so that only the intended recipients can read them.
You can also digitally signed messages and files ensuring its authenticityand
verifying that information has not been tampered in any way.
Welcome to McAfee Office
Features of the McAfee PGP Personal Privacy include:
• PhotographicUser ID. You can add your photographto yourpublickey.
When your Photo ID is signed, it provides additional information when
verifying your key.
• PGPdisk Functionality. This encryption application enables you to set
aside an area of disk space for storing your sensitive or personal data.
• Sig nature Verification. When signatures collected o n keys are
automatically verified when added to your ring, this feature allows you
to reverify signatures for added security.
• Unknown Recipient or Signer Server Loo kup. Wh en d ecrypting or
verifying a message, you can automatically perform a server lookup via
this feature. PGP scans all the keys which the message is encrypted to or
signed by to determ ine the identity of the recipient or signer.
User’s Guide 19
Page 20

Welcome to McAfee Office
Other features
McAfee Virtual Office
McAfee offers full featured web sites with unequaled ease of use. No HT ML
or design experience is required to create your multi-page site. Select the
McAfee Ultra Web Site, which has both business and personal templates, as
wellasreal-timecommunicationfeaturessuch aschat andfile exchange, or the
free McAfee Basic Web Site.
Your free McAfee Basic Web Site includes five pages—Home, Contact Info,
Pictures, Links and My Stuff—to provide information to your friends,
colleagues,family.And yoursitecomes with web-basedemail so yo u cankeep
in touch from anywhere on the web.
McAfee on the Web
McAfee.com unveiled a new web sit e w ith a host of new services and online
applications dedicated to u pdating, upgrading, and managing PCs over the
web. McAfee.com provides personalized PC managem ent.
The site delivers Internet-based software services for both the novice and
expert user - to defend, diagnose, and repair their PCs.
McAfee.com provides e-software to seamlessly blend the power of the online
computer,the ubiquityof the Internet, and the richness of the Web to furnish
visually appealing, browser-based, v ersionless software applications that can
be accessed at anytime from anywhere via the Internet. T his new wave of
Internettechnology is focused on targeted, personalized customer services.
By design, McAfee.com protects the security and respects the privacy of its
online community. Users are assured that McAfee.com records their
registration information only. As a subsidiary of Network Associates, the
world leader in network security, McAfee.com understands its customers'
privacyconcernsand has taken extremeprecautions to ensure the integrityof
the services provided.
McAfee Web View
This browser, powered by Neoplanet, enables you to control how you
experience the Web, making navigation faster and more intuitive. With
McAfee Web V iew: you can create your o wn visual and audio backgrounds;
accesssiteswithouttypingentire URLaddress;anddownloadfaster,g raphics
and files using the Modem Speed Booster. You can also sign up to get FR E E
email.
20 McAfee Office
Page 21

Improvements
Reductionof overlappingfeatures
McAfeeOfficehassubstantiallyreducedthe amount of disk space requiredfor
installation by only installing a shared component feature once versus the
multiple in stallations required by the previous v ersion.
Microsoft compatibility
McAfee Office is fully co mpatible with Windows ME.
Improveduninstallcapabil ity
McAfee Office will allow yo u to remove all installed component s at once,
versus having to remove them individually. This will save the user
considerable time and effort if they decide to uninstall or upgra de McAfee
Office.
Common rescue disk
McAfee Office will allow the user to create a single rescue d isk for use in the
event that their Windows system will not boot.
Single update button
Welcome to McAfee Office
McAfee Office can automatically update all of the installed components via
the info button.
Improve d central informati on screen
Additionshave been madeto the McAfeeOffice Central informationscreento
monitor for such things as the last time a diagnostic was performed, the last
time the user checked for new updates, or if a r escue disk has been created.
Click the update button to view any of these information.
Wher e to go for more informa t io n
You can view the User’s Guides for the products contained in McAfee Office
CD by opening the Manuals directory on the CD. The User’s Guides are in
Adobe Acrob at.PDF file format. To view the User’s Guides, you must have
already insta lled Acrobat Reader, either from a previous installation or from
the CD.
To open the User’s Guides:
1. Insert the CD into your CD-ROM drive.
User’s Guide 21
Page 22

Welcome to McAfee Office
2. In Windows Explorer, navigate to the Manuals directoryon the CD and
3. From here you can do the following:
double-click the User’s Guide you want to view.
(To open W indows Explorer, click the Start button on your desktop,
point to Programs, and then choose Windows Explorer.)
The User’s Guide opens in Acrobat Reader.
• Browse the User’s Guide, by scrolling, using the hyper text links in
the Table of Contentsand Index,or searchfor informationusing the
Find feature.
• Print one or all pages of th e User ’s Guide fo r offline reference.
• View Acrobat Reader Help for more information on using Acrobat
Reader.
NOTE: After installing McAfee Office on your computer, you can al so
view addition al product information by openingthe whatsnew.tx t (text
document) files. In Windows Explorer:navigate to the Program Files
folder on your hard drive; locate the McAfee Office folder; find any
whatsnew.txt files in the folder; then double-click to open and view
information.
22 McAfee Office
Page 23

2Installating McAfee Office
System requirements
Prior to installing McAfee Office, please ver ify your existing PC system
hardware components and configuration.
The installation requirements and recommendations for the entire suite of
McAfee Office are as follows:
®
• Intel 486 or higher, Pen tium
®
•Windows
• 16 MB RAM minimum
• Hard drive with minimum 145 MB free d isk space for complete
installation of all products
• 4X CD-ROM recommended
• 256-color VGA or higher monitor
• An Internet connection is n eeded for some of the components
98, Windows 95 or W indows ME
recommended
2
Individu al product requirements
Per product drive and memory requirements are provided below:
McAfeeVirusScan
• Minimum 8 MB of RAM (16 MB recommended)
• 40MBoffreeharddrivespace
McAfee Utilities
• 16 MB required, 32 MB recommended
• 100 MB hard drive space for all components
•CD-ROMdrive
• Internet connection for some fea ture s
McAfeeUnInstal ler
• Minimum 8 MB of RAM (16 MB recommended) for Windows 95/9 8;
Minimum 16 MB of RAM for Windows NT
User’s Guide 23
Page 24

Installating McAfee Office
• 18MBoffreeharddrivespace
McAfee Internet Guard Dog
• 16 megabytes (MB) minimum of RAM
• 20MB free hard diskspace
• Windows 95/98 Web browser (also called a 32-bit browser); 256-color
• Acce ss to the Internet, either a dial-up account with an Internet Se rvice
PGP Personal Privacy
•8MBRAM
•3MBharddiskspace
•CD-ROMdrive
• Windows 95 or Windows 98
Installation
video displayor better
Provider (ISP) or a constant connection through a network.
24 McAfee Office
Whenyoubegin installation of McAfeeOffice,theAutoRunprogramprompts
you to choose a location where you want to install McAfee Office. You can
accept the default location, or type in a new location.
Use the following procedure to install the su ite of utilities included with
McAfee Office.
To install McAfee Office
1. InserttheMcAfeeOfficeCDintotheCD-ROMdrive. The McAfee Office installation window automatically appears.
2. If the McAfee Office installation window does not appear, do the following:
a. Click the Start button on your desktop and choose Run.
b. W hen the R un dialog box appears, click the Browse button and
navigate to your CD-ROM drive’s directory.
c. Select SETUP.EXE, and then c lick Open.
d. Click OK.
Page 25

Installating McAfee Office
3. Click Install McAfee Office.
4. Follow the instructionsdisplayedin thewindowto complete installation.
NOTE: Prior to installing any application from the McAfee Office
suite, McAfee Office Central will identify any existing co pies o n
your system.
McAfee Office Centralwill pro ceedwith uninstalling thesecopies to
eliminate file redundanciesand minimize disk space consumption
before loading your ne w applications.
User’s Guide 25
Page 26

Installating McAfee Office
26 McAfee Office
Page 27

3McAfee VirusScan
How does VirusScan software work?
VirusScan software combines the anti-virus industry’s most capable scan
engine with top-notch interface enhancements that give you complete access
to that engine’s power. The VirusScan graphical user interface unifies its
specialized program components, but without sacrificing the flexibility you
need to fit the software into your computing environment. The scan engine,
meanwhile, combines the best features of technologies that McAfee and
McAfee VirusScan researchers developed independently for more than a
decade.
What comes with VirusScan software?
VirusScansoftware consists of several components that combine one or more
related programs, each of which play a part in defendingyour computer
against viruses and other malicious software. The components are:
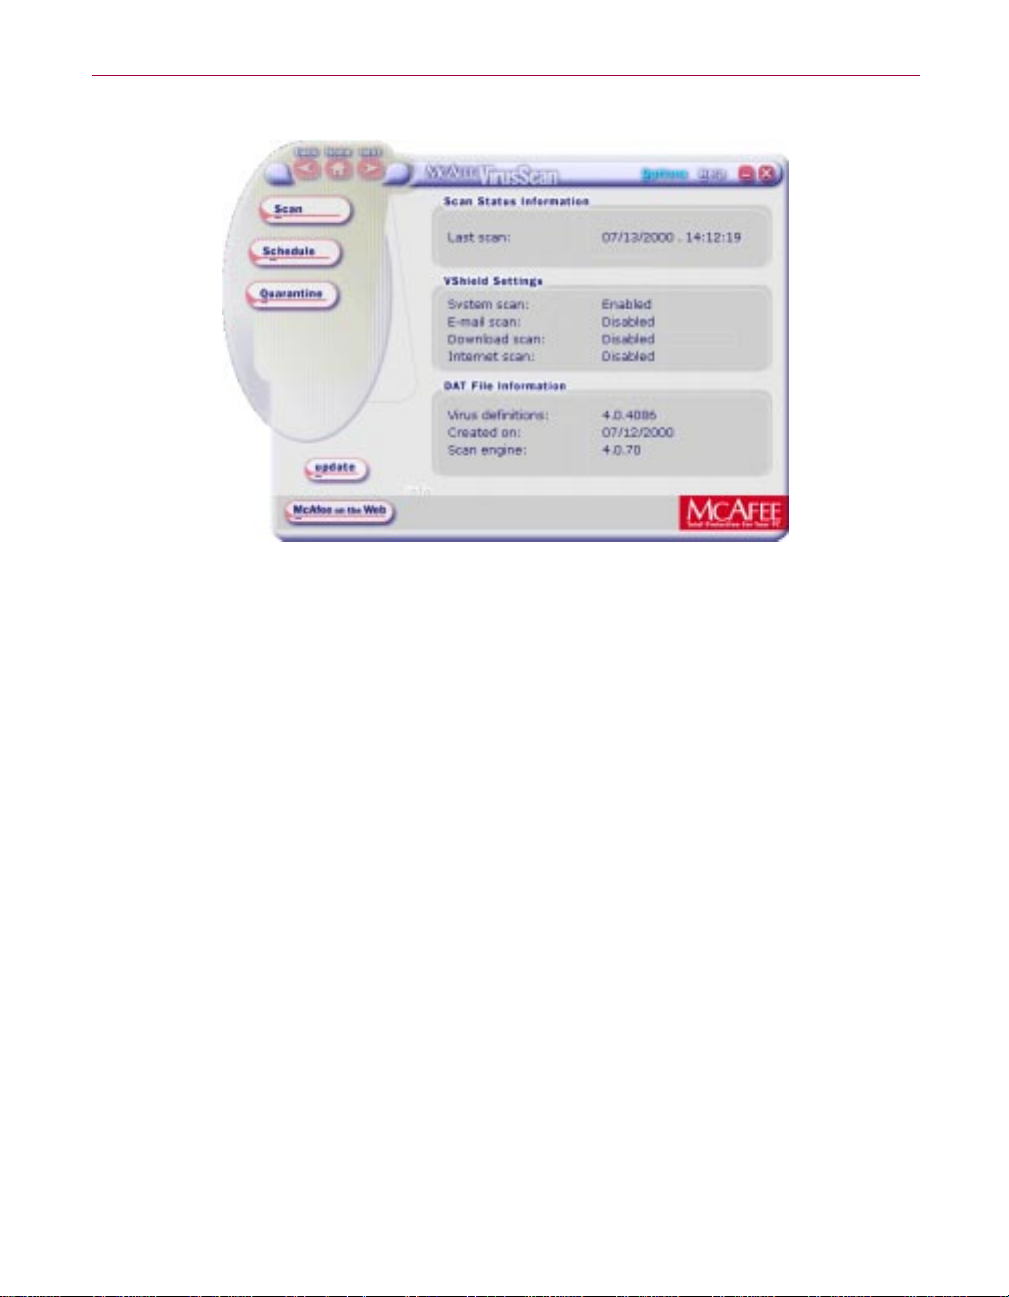
• The VirusScan Central. This is your main entry point in using all of the
available components of McAfee VirusScan. This home screen (see Figure
1-2) provides relevant information such as the last time a vir us scan was
performed on your computer; what VShield s ettings are enabled o r
disabled a nd available DAT information and when it was created.
3
User’s Guide 27
Page 28
McAfee VirusScan
Figure 3-1. McAfee VirusScan Central screen
Through this user-friendly interface, you can access the main functions of
McAfee VirusScan. Click the appropriate buttons as displayed to start
performing a particular task within McAfee VirusScan (e.g., Scan, Schedule,
Quarantine, etc).
28 McAfee Office
You can also click the Update button to start searching and downloading any
availableupdatestoMcAfeeVirusScaninstalledon your computer.Makesure
that you are connected to the Internet p rior to using this feature. For more
information and step-by-step instructions, click the H elp icon on the upper
right-hand corner of the window. To view available options in customizing
how you want McAfee VirusScan component s to work on your PC, click the
Options button.
• The VirusScan Console. T his component allows you to create, conf igure
and run VirusScantasks at times you specify. A “task”can include
anything from running a scan operation on a set of disks at a specific time
orinterval,to runningan updateorupgrade operation.You can also enable
or disable the VShield scanner from the Console window.The Console
comes with a preset list of tasks that ensures a minimal level of protection
for your system—you can, for example, immediately scan and clean your
C: drive or all disks on your computer. See “Creating and Configuring
Scheduled Tasks” o n page 1 91 of the VirusScan User’s Guide for details.
Page 29

McAfee VirusScan
• The VShield scanner. This compon e nt gives you continuous anti-virus
protection from viruses that arriveon floppy disks,from your network, or
from various sources on the Internet.The VShield scannerstarts whenyou
start your computer,and stays in memory until you shut down. A flexible
setofpropertypagesletsyoutellthescannerwhichpartsofyoursystem
to examine, what to look for, which parts to leave alone, and how to
respond to any infected files it finds. In addition, the scanne r can alert you
when it finds a virus, and c an summarize each of its actions.
The VShield scanner comes with three other specialized mo dules that
guard against hostile Java applets and ActiveX controls, that scan e-mail
messages and attachments that you receive from the Internet via Lotus
cc:Mail, Microsoft Mail o r other mail clients that comply with Microsoft’s
MessagingApplication Programming Interface (MAPI) standard,and that
block access to dangerous Internet sites. Secure password protection for
your configuration options prevents others from making unauthorized
changes. The same convenient dialog box controls configuration options
for all VShield modules.
• Safe & Sound.Thiscomponent allowsyoutocreatebackupsetsin
protectedvolume files, which is the safestand preferred type of backup.A
protected volume file is a sectioned-off area of the drive, sometimes called a
logical drive.
NOTE:Safe & Sound is only available for Windows 95, 98 and
Windows ME.
• Quarantine. This component allows yo u to move infected files to a
quarantine folder. This mo ves i nfected files from areas where they can be
accessed and enables you to clean or delete them at your convenience.
• T he E-Mail Scan extension. This component allows you to scan your
Microsoft E xchange or Outlook mailbox, or public folders to which you
have access, directly on the server. This invaluable “x-ray” peek into your
mailbox means tha t VirusScan software can find potential infections b efore
they make their way to your desktop, which can stop a Melissa-like virus
in its tracks.
• A cc:Mail scanner. This component includes technology optimized for
scanning Lotus cc:Mail mailboxes that do not use the MAPI standard.
Install and use this component if your workgroup or network uses cc:Mail
v7.x or earlier.
User’s Guide 29
Page 30

McAfee VirusScan
• The Alert Ma nager Client configuration utility. This component lets you
choose a destination for Alert Manager “events” that VirusScan software
generateswhen it detects a virus or takes other noteworthy actions. You
can also specify a destination directory for older-style Centralized Alerting
messages, or supplement either method with Des ktop Management
Interface (DMI) alerts sent via your DMI client software.
• T he ScreenScan utility. This op tional component scans your computer as
your screen saver run s during idle periods.
• T he SendVirus utility. This component gives y ou an easy and painless
way to su bmit files that you believe are inf ected directly to McAfee
anti-virusresearchers.A simple wizard guides you as you choose files to
submit, include contact deta ils and, if you prefe r, s trip out any personal or
confidential data from document files.
• T he E m ergency Disk c reation utility. This essential utility helps you to
create a floppy disk that you can use to boot your computer into a
virus-free environment, then scan essential s ys tem areas to rem ove any
viruses that could load at startup.
• Command-line scanners. This component consists of a set of full-featured
scanners you can use to run targeted scan operations from the MS-DOS
Prompt or Command Prompt windows, or from protected MS-DOS mode.
The set includes:
30 McAfee Office
– SCAN.EXE, a scanner for 32-bit environments only.This is the
primary command-line interface. When you run this file, it first
checks its environment to see whether it can run by itself. If your
computer is running in 16 -bit or protected mode, it will trans fer
control to one of the other scanners.
– SCANPM.EXE, a scanner for 16- and 32-bit environments. This
scanner provides you with a full set of scanningoptions for 16- and
32-bit protected-mode DOS environments. It also includes support
for extended memory and flexible memory allocations. SCAN.EXE
will transfer control to this scanner when its specialized capabilities
can enable your scan operation to run m o re efficiently.
– SCAN86.EXE,a scannerfor16-bitenvironmentsonly.Thisscanner
includes a limited set of cap abilities geared to 16-bit environments.
SCAN.EXE will transfer control to this scanner if your computer is
running in 16-bit mode, but without special memory configurations.
– BOOTSCAN.EXE, a smaller, specialize d scanner for use primarily
with the Emergency Disk utility. This scanner ord inarily runs from
a floppy disk you create to provide you with a virus-free boot
environment.
Page 31

All of the command-line scanners allow you to initiate targeted scan
operations from an MS-DOS Prompt or Command Prompt window, or
from protected MS-DOS mode. Ordinarily, you'll use the VirusScan
application's graphical u ser interface (GUI) to perform most scanning
operations, but if you have trouble s tarting Windows or if the VirusScan
GUI compon e nts will not run in your environment, you can use the
command-lin e scanners as a ba ckup.
What ’s new with VirusS ca n ?
This VirusScan release introduces a number of innovative new features to t he
product’s core functionality, to its range of coverage, and to the detailsof its
application architecture. The single mos t significantchange between previous
VirusScan versions and this release, however, is the integration of two
separateVirusScan versions optimizedto run on separate Windows platforms
into a single product that runs on both. This single product also takes full
advantage of each platform’s strengths.
The next sections discuss other changesthat this VirusScanrelease introduces.
Installationand distribution features
McAfee anti-virus products, including VirusScan software, now use the
MicrosoftWindows Installer (MSI), which comes with all Windows 2000
Professional systems. This Setup utility offers a wealth of cus tom installation
and configuration features that make V irusScan software rollout across large
organizations much easier and more intuitive.
McAfee VirusScan
Interfaceenhancement s
This release moves the VirusScan interface for all supported platforms solidly
into the territory VirusScan anti-virus software for Windows 95, Windows 98
and Windows ME pioneered with its v4.0.1 release. This adds extensive
VShield scanner configuration opt ions for the Windows NT Workstation v4.0
and Windows 2000 Professional platforms, while reducing the complexity of
some previous configuration options. Alert Manager server configuration, for
example, moves entirely over to the NetShield product line—VirusScan
software now acts strictly as a co nfigurable client application.
This release also adds a new VirusScan control panel, which functions as a
central point from which you can enable and disable all VirusScan
components. This control pa nel also lets you set a ceiling for the number of
items you can scan in or exclude from a single operation, a nd can set the
VShield scanner and VirusScan control panel to run at startup.Other changes
include:
• N ew VShield system tray i con states tell you more about which VShield
modules are active. These states are:
User’s Guide 31
Page 32

McAfee VirusScan
– All VShield modules are active
– The System Scan module is active, but one or more of the other
VShield modules is inactive
– TheSystem Scan moduleis inactive, but one or more of theother
VShield modules is active
– All VS hield modules are inactive
• N ew interface settings for task configuration allow you to tell the
VirusScan application how you want it to appear as your scheduled task
runs and what you want it to do when it finishes. You can also set a
passwordto protect individualtask settings from changes, or to protect an
entire task configurationat once.
• An updated randomization feature for scheduled tasks allows you to set a
time for the task to run, then set a random ization “window.” The
VirusScan Console then picks a random time within the window to
actually start the task.
• S ys tem Sc a n m o dule action options now include a new Prompt Type
configuration option for Windows 9 5 and Windows 98 systems. This
option lets you determine how the Prompt for user action alert appears.
Changes in product functionality
• A new Alert Manager Client configuration utility allow s you to choose an
Alert Manager server installed on your network as an alert message
destination, or to select a network share as a destination for Centralized
Alerting messages. You c an also supplement either of these alert methods
with Desktop Management Interface alert messages.
• The Alert Manager server supports Intel Pentium III processor serial
numbers to identify individual machines for virus notification. For more
information about Intel processor serial numbers,consult the Intel FAQ at
http://support.intel.co m/support/processors /p entiumiii/psqa.htm.
New update optionsforyourVirusSc an softwar e
Even with the majority of the virus definitions it requi res now incorporated
directly into its engine in generic routines, VirusScan software still requires
regular .DAT file updates to keep pace with the 200 to 300 new viruses that
appear each month. To meet this need, McAfee has incorporated updating
technology in VirusScan softwar e from its earliest incarnations. With this
release,that technology takes a quantumleap forwardwith incremental.DAT
file updating.
32 McAfee Office
Page 33

McAfee VirusScan
The Network Associates SecureCast service provides a convenient method
you can use to receive the latest virus definition(.DAT) file updates
automatically, as they become available, without your having to download
them.
NOTE: To update the McAfee VirusScan softwareinstalled on your
computer, click the update button in the M cAfee Office main window.
Make sure that your PC is conne ct e d to the internet prior to performing
this task.
Starting the VirusScan application
You can start the VirusScan application in its own window, or as part of a
scheduled scan task. T he method you choose d epends on what sort of sc an
operation you want to run. When you first start it, the application window
opensso thatyou canmake changes to its configuration.You must click Scan
Now or Run Now in a separatestep to start an actual scan operation.
Displayi ng the VirusScan applicatio n main window
Follow these steps:
1. Click Start in the Windows task bar, point to Programs,thentoMcAfee
Office. Next, choose McAfee VirusScan.
The VirusScan main window appears.
User’s Guide 33
Page 34

McAfee VirusScan
Figure 3-2. VirusScan main win dow
From the McAfee VirusScan main window, you can:
• Start scanning immediately. Click Scan to have the application
scanyoursystemwith the lastconfigurationoptions you set,or with
default options.
The following screen (Figure 3-2) allows you to select which area of
your computer you want t o scan. After selecting, click Scan N o w.
Following through the succeeding screens to complete the task.
34 McAfee Office
Page 35

McAfee VirusScan
Figure 3-3. Scan No w window
• View theVirusScan application activitylog.Throughthis window
you are able to view a log of VirusScan activities performed on your
your computer. You can also select to clear or print any o f these
activity logs (see Figure 3-3).
Figure 3-4. VirusScan Activity Log
User’s Guide 35
Page 36

McAfee VirusScan
• Open th e online help file. Choose Help Topics from the Help
menu to see a list of VirusScan help topics. To see a context-sensitive
description of buttons, lists and other items in the VirusScan
window, choose What’s this? from the Help menu, then click an
item with your left m o use button after your mouse cursor changes
to .
• Set options.From the main window,the Options icon allows you to
access and customize settings of the other components of McAfee
VirusScan via a drop-down menu (e.g., Safe & Sound, and
Emergency Disk).
36 McAfee Office
Figure 3-5. Options drop-down menu
2. Choose X from the Filemenu to quit the application.
NOTE: For more information on any of features, options and tools
available via the main screen, refer to the online Help.
Page 37

If you susp e ct you have a virus...
First of all, don’t panic! Although far from harmless, most virusesthatinfect
your machine will n ot destroy data, play pranks, or render your computer
unusable. Even t he comparatively rare viruses that d o carry a destructive
payload usually produce their nasty effects in response to a trigger event. In
most cases, unless you actually see evidence of a payload that has activated,
you will have time to deal with the infection properly. The very p resence of
thesesmallsnippetsof unwanted computer code can, however,interferewith
yourcomputer’snormal operation,consumesystemresourcesandhave other
undesirable effects, so you sho uld t ake them seriously and be sure to remove
them when you encounter them.
A second idea to keep in mind is that odd computer behavior, unexplained
system crashes, or other unpredictable events might have causes other than
virus infections.If you believeyou have a virus on your computer because of
occurrences such as these, scanning for viruses might not produce the results
you expect, b ut it will help eliminate one potentia l cause of your co mputer
problems.
The safest course of action you can take is to install VirusScan software, then scan
your system immediately and thoroughly.
McAfee VirusScan
When you install VirusScan software, Setup starts the VirusScan application
to examine your computer’s memoryand your harddisk boot sectors in order
to verify that it can safely copy its files to your hard disk without risking their
infection. If the application does not detect any infections, continue with the
installation, then scan your system thoroughly as soon as you restart your
computer. File-infector viruses that don’t load into your computer’s memo ry
orhideiny our hard diskbootblocksmight stillbelurkingsomewhereon your
system. to learn how to scan your system.
If the VirusScan application detects a virus during Setup, you’ll need to
remove it from your system before you install the program.
æ IMPORTANT: To ensure maximum security, you should also follow
these same steps if a VirusScan component detects a virus in your
computer’smemory at some point after installation.
If VirusScan software found an infection during installation, follow these steps carefully:
1. Quit Setup immediately, then shut down your computer. Be sure to turn the power to your system off completely. Do not press
CTRL+ALT+DELor reset your computer to restart your system—some
viruses can remain intact during this type of “warm” reboot.
User’s Guide 37
Page 38

McAfee VirusScan
2. If you c reated a VirusScan Emergency Disk during in stallation, or if your
VirusScan copy came with one, lock the disk, then insert it into your
floppy drive.
NOTE: If your VirusScan software copy did not come with an
Emergency Disk, or if y ou could not create an Emergency Disk
during Setup, you must create a diskon an uninfected computer.
3. Wait at least 15 seconds, then start your computer again.
NOTE:If you have your computer's BIOS configured to look for its
boot code first on your C: drive, you should change your BIOS
settings so that your computer looks first on your A: or B: drive.
Consult your hardware documentation to learn how to configure
your BIOS settings.
After it starts your computer, the Emergency Disk runs a batch file that
leads you through an emergencyscan operation. The batch file firstasks
you whether you cycled th e po w er on your computer.
4. Type y to continue, then skip to Step 7. If you did not, type n,thenturn
your computer com p let ely o f f a nd begin again.
38 McAfee Office
The batch file next tells you that it will start a scan operation.
5. Read the notice shown on your screen, then press any key on your keyboard to continue.
The Emergency Disk will load the files it nee ds into mem ory. If you have
extended memory on your computer, it will load its database files into
that memory for faster execution.
BOOTSCAN.EXE, the command-line scanner that comes with the
Emergency Disk, will make four scanning passes to examine your hard
disk boot sectors, your Master Boot Record (MBR), your system
directories, program files, and other likely points of infection on all of
your local computer's hard d isks.
NOTE:McAfee strongly recommends that you do not interrupt the
BOOTSCAN.EXE scanner as it runs its scan operation. The
EmergencyDisk will not detect macro viruses, script viruses, or
Trojan horse programs, but it will detect common file-infecting and
boot-sector viruses.
Page 39

McAfee VirusScan
If BOOTSCAN.EXE finds a virus, it will try to clean the infected fil e. If it
fails, it will deny access to the file and continue the scan operation. After
it finishes all of its scanning passes, it shows a summary report the
actions it took for each hard disk on the screen. The report tells you:
• How many files the scanner examined
• How many files of that number are clean, or uninfected
• How many files contain potential infections
• How many files of that number the scanner cleaned
• How many boot sector and MBR files the scanner examined
• How many boot sector and MBR files contain potential infections
If the scanner detects a virus, it beeps and reports the name and location
of the virus on the screen.
6. When the scanner finishes examining your hard disk, remove the
Emergency Disk from your floppy drive, then s hut your computer off
again.
7. When BOOTSCAN.EXE finishes examining your system, you can either:
• Return to w orking with your computer. If BOOTSCAN.EXE did
not find a virus, or if it cleaned any infecte d files it did find, remove
the Emergency Disk from your floppy drive, then restart your
computer normally. If you had planned to install VirusScan
software on your computer but stopped when Setup found an
infection, you can now continue with yo ur installation.
• Try to c lean or delete infected files yourself. If BOOTSCAN.EXE
found a virus that it could not remove, it will identif y the infected
files and tell you that it could not clean them,or that it does nothave
a currentremover for the infectingvirus.
As your next step, locate and delete the infected file or files. You will
need to restore any files that you delete from backup files. Be sure to
check your backup files for infections also. Be sure also to use the
VirusScan application at your earliest opportunit y to scan your sys tem
completelyinordertoensurethatyoursystemisvirus-free.
User’s Guide 39
Page 40

McAfee VirusScan
What does the VShield scanner do?
McAfee desktop anti-virus products use two general methods to protect your
system. The first method, background scanning, operates continuously,
watching for viruses a s you use your computer fo r ev e ryd a y t a sks. In the
VirusScan prod uct , the VShield scann e r performs this function. A second
method allows you to initiate your own scan operations. The VirusScan
application generally handles these tasks.
Depending on how you configure it, the VShield scanner can monitor any file
that arrives on or leaves your system, whether on floppy disk, over your
network, in file attachments that accompany e-mail messages, or from the
Internet. The scannerlooks for viruses as you open, save, copy, rename or
otherwise modifyyour files, and it probes your computer's memory during
any file activity. The scanner starts when you start your computer,and stays
in memory until you shut it or your system down. The scanner also includes
optionalfeaturesthat guard against h ostile Java appletsand ActiveX controls,
and that keep your computer from connecting to dangerous Internet sites.
The VShield scanner consists of five related modules, each of which has a
specialized function. You can configure settings for all of these modules in the
VShield Properties dialog b ox. The VShield modules are:
• System Scan. Thismodulelooksfor viruseson your hard diskas you work
withyourcomputer.Ittracksfilesasyoursystemorothercomputersread
files from your hard disk or write files to it. It canalso scan floppydisks and
network drives mapped to your sy stem.
• E-Mail Scan. Thismodulescanse-mailmessagesand messageattachments
thatyou receivevia intraoffice e-mailsystems,and via theInternet.It scans
your Microsoft Exchange or Outlookmailbox on your Microsoft Exchange
server, and older cc:Maile-mail systems.
• Download Scan. This mod ule scans files that you download to your
system from the Internet. If you have enabled the Internet mail option in
the E-Mail Scan module, this will include e-mail and file attachments that
arrive via SMTP or POP-3 e-mail systems.
• Internet Filter. This module looks for and blocks hostile Java classes and
ActiveXcontrolsfrom d ownloading to and executing from your system as
you visit Internet sites. It can also block your browser from connecting to
potentially da ngerous Internet sites that harbor malicious software.
• Security. This module provides password protection for the remaining
VShield modules. You can protect any or all individual module property
pages and set a password to prevent unauthorized changes.
40 McAfee Office
Page 41

NOTE: Because the VShield scanner runs continuously, you should
not install o r run more than one VShield sc anner on the sa me
workstation. Doing so can cause the scanners to interfere with each
others' operations.
Why use the VShield scanner?
The VShield scanner has unique capabilities that make it an integral part of the
VirusScan comprehensive anti-virus software security package. These
capabilities in clude:
• On-access scanning. This means th at the scanner looks for viruses in files
that you open, copy, save, or otherwise modify, and files that you read
from or write to floppy disks and network drives. It therefore can detect
and stop viruses as soon as they appear on your system, including those
that arrivevia e-mail or as downloads from the Internet. This means you
canmake the VShield sc anner both your first line of anti-virus defense, and
your backstop protection inbetween each scan operationthat you per form.
The VShield scanner detects viruses in memory and as they attempt to
execute from within infected files.
• Malicious object detection and blocking. The VShield scanner can block
harmful ActiveX and Java objects from gaining access to your system,
before they pose a threat. The scanner does this by scanning the hundreds
ofobjectsyou downloadasyouconnectto the web or toother Internetsites,
and the file attachments you receive with your e-mail.It compares these
itemsagainstacurrentlistofharmfulobjectsthatitmaintains,andblocks
those that could cause problems.
McAfee VirusScan
• Internet site filtering. The VShield scanner comes with a list of dangerous
web-or Internet sites thatposea hazard to yoursystem, usuallyin theform
of downloadable malicious software. You can add any other site that you
wanttokeep your browsersoftwarefrom connectingto,eitherbylistingits
Internet Protocol (IP) address or its domain name.
• Automatic operation. The VShield scanner integrates with a range of
browser software and e-mail client applications. This allows the scanner to
log on to and scan your e-mail attachments for viruses before they ever
reach your computer.
User’s Guide 41
Page 42

McAfee VirusScan
Browser and e-mail client support
The VShield scanner works seamlessly with many of the most popular web
browsers and e-mail client software available for the Win dows platform. To
workwithyourbrowser,thescannerrequiresno setupbeyondwhatyouhave
already done to connect your computer to the Internet. You must configurethe
scanner, however, to work correctly with your e-mailclient software.
McAfeehas tested these web browsers and verified that they work correctly
withthe VShield scanner:
• N etscape Navigator v3.x
• N etscape Navigator v4.0.x (not i ncluding v4.0.6)
• Microsoft InternetExplorer v3.x, v4.x and v5.x
McAfee has also tested these e-mail clients and verified that they work with
the VShield Download Scan module:
• Microsoft Outlook Express
• Qualcomm Eudora v 3.x and v4.x
• N etscape Mail (included with most versions of Netscape Navigator and
Netscape Communicator)
• America Onlinemail v3.0, v4.0 and v5.0
In order to work with the V Shield E-mail Scan m odule, your corporate e-mail
system must use Lotus cc:Mail, MicrosoftExchange, or Microsoft Outlook
client. McAfeehas tested these clients a nd has verified that they work correctly
with the E-mail Scan module:
• Microsoft Exchange v4.0, v5.0 and v5.5
• Microsoft Outlook 97 and Outlook 98
• Lotus cc:Mail v6.x, v7.x, and v8.x (not MAPI-compliant)
McAfee does not certify VShield software compatibility with client software
not listed a bove.
Enabling or starting the VShield scanner
At the end of the VirusScan installation, Setup asks if you want to enable the
VShield scanner at that time. If you agree, the VShield scanner should load
intomemory immediatelyand beginworkingwitha defaultsetofoptionsthat
give you basic anti-virus protection. If you do not agree, the VShield scanner
will load automatically the next time you restart your computer.
When the VShield scanner first starts, it displays an icon in the Windows
system tray that indicates which of its modules are active.
42 McAfee Office
Page 43

McAfee VirusScan
At first, the scanner enables only its System Scan module, which scans viruses
that arrive on your system from floppy disks and other removable media,
from local-area network connections, and similar areas. The System Scan
module also scans files that arrive via your e-mail system and from the
Internet, but to do so, it requires the aid of the other VShield modules: E-Mail
Scan, Downlo ad Scan, and Internet Filter.
æ IMPORTANT: To use the E-Mail Scan, Download Scan or Intern et Filter
modules, you must install them from the Custom option in Setup.
If your computer runs Windows NT Workstation v4.0 or Windows 2000
Professional, the VShield scanner loads as a Windows NT service called
VShield, which you can see in the W indows Services control panel.
NOTE: McAfee recommendsthat you do not startor stop the VShield
service from the Windows control panel. Instead, you can stop and
restart the scanner from the provided VirusScan control panel.
If your computer runs Windows 95 or Windows 98, the scanner loads in a way
that mimics a Windows service on that platform. This service is not visible in
the Windows user interface.
Starting the scanner automatically
If the V Shield scanner does not start automatically, you can set it to do so in
the VirusScan control panel.
Follow these steps:
1. Click Start in the Windows taskbar, point to Settings,thenchoose Control Panel.
2. Locate and double-click the VirusScan control panel to open it.
3. Click the Components tab.
User’s Guide 43
Page 44

McAfee VirusScan
Figure 3-6. VirusScan control p anel - Components page
4. Select the Load VShield on startup checkbox at the top of the Components property page.
5. Click OK to close the control pa nel.
Enabling the VShield scanner and its modules
Once you have all VShield components installed , you can use any of four
methods to enable t hem , invarious combinations. Three methodsappearhere.
NOTE: Enabling a module means activating it and loading it into your
computer's memory for use. The VShield scanner can start and remain
active in memory even with none of its m odules enabled.
Method 1: Use the VShieldshortcut menu
Follow these steps:
1. Right-click t he VShie ld icon in the Windo ws system tray to display its shortcut menu.
2. Point to Quick Enable.
3. Choose one of the module n ames shown withouta check mark. Module
names that have a check mark b eside them are active. Those without a
check mark are inactive. If y ou use this method to enable a module, it
remains enabled until you restart your VirusScan software or your
computer. At that point, its state will depend on whether you hav e
enabled or disabled the module in the VirusScan Properties dialog box.
44 McAfee Office
Page 45

McAfee VirusScan
Depending on which combination of modules you enable, the VSh ield icon
will display a differentstate.
Method 2: Use the System Scan Status dialog box
Follow these steps:
1. Double-click the VShield icon in the Windowssystem tray to open the
System Scan Status dialog box.
Figure3-7. System Scan Status dialog box
2. For each module that you want to enable, click the corresponding tab,
then click Enable. The same button in the property page for active
modules will read Disable.
3. Click Close to close the dialog box.
Method 3: Use the VShieldProperties dialog box
Follow these steps:
1. Right-clickthe VShield icon inthe Windowssystemtray to d isplay the
VShield shortcut menu, point to Properties, then choose System Scan
to open the VShield Properties dialog box.
User’s Guide 45
Page 46

McAfee VirusScan
Figure 3-8. VShield Properties dialog box
2. For each module that you want to en able, click the corresponding icon
along the left side of the dialog box, then click the Detection tab.
46 McAfee Office
3. Select the Enable checkbox at the top of each page.
Understandin gthe VShield system tray icon states
TheVShieldscannerdisplays four differenticon states in the Windowssystem
tray to indicate which,if any, of its modules are active. An active moduleis one
that the VShield scanner has enabled, or loaded into memory, an d that is ready
to scan inbound and outbound files. An inactive module is one that the
VShield scanner has disabled. Such modules do not scan files.
The following table shows and describes each icon state:
This icon means that the VShield scanner has started and all VShield
modules are active
This icon means that the SystemScan module is active,but one or more
of the other VShield modules is inactive
This icon means that the System Scan module is inactive, but one or
more of the other VShield modules is active
This icon means that all VShield modules are inactive
Page 47

UsingtheVShieldconfigurationwizard
After you install VirusScan software and restart your computer, the VShield
scanner loadsinto memory imm ediately and beginsworkingwith a default set
of options tha t give you basic anti-virus protection. Unless you disable it or
one of its modules—or stop it entirely—you never have to worry about
starting the scanner or scheduling scan tasks for it.
To ensure more than a minimal level of security, however , you should
configure the scanner to work with your e-mail client software and ha ve it
examine yo u r Internet traffic closely for viruses and malicious software. The
VShield configuration wizard can help you s et up many o f these options right
away—youcanthentailortheprogramtoworkbetterinyourenvironmentas
you become more familiar wit h the scanner and your system’s sus ceptibility
to harmful software.
To start the VShield configuration wizard:
1. Right-clickthe VShield icon inthe Windowssystemtray to d isplay the
VShield shortcut menu, point to Properties, then choose System Scan
to open the VShield Properties dialog box.
2. Click Wizardin the lower-leftcorner of the dialog box to display the
configuration wizard welcome panel.
McAfee VirusScan
3. Click Ne xt> to display the System Scan configuration panel.
Figure 3-9. VShield configuration wizard - System Scan panel
Here you can tell the VShield scanner to look for viruses in files
susceptible to infectionwheneveryou open,run, copy, saveor otherwise
modify them. Susceptible files include various types of executable files
and document files with embedded macros, such as Microsoft Office
files.
User’s Guide 47
Page 48

McAfee VirusScan
The System Scan module will also scan files stored on flop py disks
whenever you read from o r write to them, or when you shut down your
computer.
If it find s a virus, the module will sound a n alert and prompt you for a
response. The module will also record its action s and summarize its
current settings in a log file that you can review later.
4. To enable these functions, click Yes, then click Next>. Otherwise, click
No, the n click Next> to continue.
The E-mail Scan wizard panel will appear.
48 McAfee Office
Figure 3-10. VShield configuration wizard - E- m ail Scan panel
5. Select the Enable e-mai l scanning checkbox, then select the checkbox
that corresponds to the type of e-mail client you use. Your choices are:
• Internet e-mail clients.Select this checkbox if you use a Post Office
Protocol (POP-3) or Simple Mail Transfer Protocol(SMTP) e-mail
client that sends and receives standard Internet mail directly or
through a dial-up connection. If you send and receive e-mail from
home and use Netscape M ail, America Online, or such popular
clients as Qualcomm’s Eudora or Microsoft’s Outlook E xpress, be
sure to select this option.
• En able Corporate Mail. Select this checkbox if you use a
proprietary e-mail system at work or in a networked environment.
Most such systems use a central n etwork server to receive and
distribute mail that individ u al users send to each other from client
applications.Such systems might send and receive mail from
outside the network or from the Internet, but they usually do so
through a “gateway” application run from the server.
The E-Mail Scan module supports corporate e-mailsystems thatfall
into two general categories:
Page 49

McAfee VirusScan
– Lotuscc:Mail.Selectthisbuttonif y ou usecc:Mailv ersions6.x
and later, which use a proprietary Lotus protocol for sending
and receiving mail.
– MAPI-compliant e-mail client. Select this button if you use
Microsoft Exchange or MicrosoftOutlook, as your corporate
e-mail system.
Specify which e-mail system you use, then click Next> to continue.
NOTE: If you use both types of mail systems, select both
checkboxes. Note that the E-Mail Scan module supports only
one type of corporate e-mail system at a time, however. If you
need to verifywhich e-mail system your o ffice uses,check with
your network administrator.
Be sure to distinguish between Microsoft Outlookand
MicrosoftOutlook E xpress. Although the two programs share
similar names, Outlook 97 and Outlook 98 are MAPIcompliant corporate e-mail systems, while Outlook Express
sends and receives e-mail throug h the POP-3 and SMTP
protocols.To learn more about these programs, consult your
Microsoft documentation.
The next wizard panel sets options for the VShield Download Scan
module.
Figure 3-11. VShield Configuration Wizard - Download Scan panel
6. To h ave theDownload Scan modulelookfor viruses in each file thatyou
download from the Internet, select the Yes, do scan my downloaded
files for viruses checkbox, then click Ne xt> to continue.
User’s Guide 49
Page 50

McAfee VirusScan
The module will look f or viruses in those files most susc eptible to
infection a nd will scan compressed files as you receive them.
Otherwise , select the No, do no t enable download scanning checkbox,
then click Next> to continue.
The next wizard panel sets options for the VShield Internet Filter
module.
Figure 3-12. VShield configuration wizard - Internet Filter panel
7. To have the Internet Filter module block hostile Java and ActiveX o bjects
or dangerous Internet sites that can cause your system harm, select Yes,
enable hostile applet protection and access prevention to unsafe
websites, then click Next>.
The Inter net Filter module maintains a list of harm ful objects and sites
that it uses to check the sitesyou visitand the objectsyou encounter. If it
finds a match, it can either block it automatically, or offer you the chance
toallowordenyaccess.
To disable this function, sele ct No, do not enable hostile applet
protection and access prevention to unsafe websites, then click
Next> to continue.
The final wizard panel summarizes the options you chose.
50 McAfee Office
Page 51

McAfee VirusScan
Figure 3-13. VShield configuration wizard - summary p a nel
8. If the summary list accurately reflects y our choices, click Finish to save
your changes and returnto theVShieldPropertiesdialog box. Otherwise,
click <Back to change any options you chose, or Cancel to return to the
VShield Properties dialog box without saving any of your changes.
UsingtheVShieldshortcutmenu
The VShield scanner groups several of its common commands in a shortcut
menu associatedwith its systemtray icon . Double-clickthis icon to display
the VShield Status dialog box. Right-click the icon to display these commands:
• Status. Choose this to open the VShield Status dialog box.
• Properties. Pointto this, thenchoose one of the modules listedto openthe
VShield Properties dialog box to the property page for that module.
• Quick Enable. Point to this,then choose one of the VShieldmoduleslisted
to activate or deactivate it. Those modules displayed in the menu w ith
check marks are active; those without are inactive. If you use this method
to disable a module, it stays disabled until you restart your computer.
• About. Choose this to display the VShield scanner’s version number and
serial number, the version number and creation date for the current .DAT
files in use, and a McAfee copyright notice.
• Exit. Choose this to stop all VShield modules an d to unload the entire
VShield scanner from memory.
User’s Guide 51
Page 52

McAfee VirusScan
52 McAfee Office
Page 53

4McAfee Utilities
As you use your computer, the information stored on th e hard driv e cha nge s.
Thishappenswhenyou save, modify or movedocumentsas well as whenyou
install, update or uninstall programs. As the information changes, there is a
chance that c ritical information can become damaged.
McAfee Utilities central window
4
Figure 4-1. McAfee Utilities Central window
The McAfee Utilities Central window offers buttons to take you to the four
suites of u tilities (Figure 4-1).
If you need help, click the Help icon at the upper right-hand side of the
window to display the Mc Afee Utilities Central Help.
You can also customize how you want to access these utilities and how you
want them to work on your computer. From the Options drop-down menu,
select Properties to display options (see McAfee Utilities Properties ).
User’s Guide 53
Page 54

McAfee Utilities
McAfee Utilities Properties
Before using McAfee Utilities, you can access the properties dialog box to
customize the way you want its components to display and work on your
computer. From the McAfee Utilities central window, click Opt ions and select
Properties to displaythe Properties dialog box.From this box,clickany of the
tabs displayed to view and select available o ptions.
Common Dialogs tab
The Common Dialogs tab displays options you can s elect to enable you to get
in and out of applications fasterthan usual. Select Enable Common Dialog
Enhancements to activate this option. Once this option is activated,you can
further customize the way you access applications via selecting any of the
following additional options:
• Show recent files. Select this option if y ou want todisp lay list ofdocuments
or files you have recently opened. Click do cument button to display list.
• S how recent folders. Select this option if you w ant to display list of folders
you have recently looked into. Click folder buttonto display list.
• History List. Use this option to indicate the number of files or f olders you
want to display in either of the list. Click spin box to set the number of list
to be displayed.
After making your selection, click Apply; then click OK.
Icon Animation tab
The Icon Animation tab displays options you can selec t to enable you to
animate icons on your desktop.
• In the Animation Theme box, select from the drop down menu the type of
animationyou wantto use (e.g.,Circle, Current Theme,Radar, etc.).Notice
that events associated with the animation you selected is disp layed on the
lower part of the dialog box.
You can change or update these events (e.g., when deleting, opening files,
selecting files,etc.); eitherdouble-clicka line entry, orclick Options. Follow
the screen instructions to apply changes.
• Select Show Tray Icon if you want to display tray icon.
• S elect Show in Display Properties if you want display icons in display
properties.
After making your selection, click Apply; then cl ick O K.
54 McAfee Office
Page 55

Window Pattern s tab
TheWindowPatterns tabdisplaysoptions youcan selecttoc ustomizethelook
of applications on your computer.
• Select Enable McAfee Utilities Window P atterns to activate this optio n.
• Select the application you want to customize from the drop-down menu.
• Select Window Patterns enabled to activateyour selection. Notice that a
preview of your selection is displayed on the lower part of the di alog box.
• If you want to change the pattern of your selection, click Change Pattern.
Follow the screen instructions to apply your changes.
After making your selection, click Apply; then click OK.
Disk Tools tab
The Disk Tools tab displays options you can set to access McAfee Utilities
properties when you point and right-click drives on your computer.
When this option is activated, select a drive on your computer; point and
right-click on the drive; then select Properties from the drop-dow n m enu and
the following tabs are displayed:
McAfee Utilities
General tab disp lays information on available and used space on your
computer.
Tools tab displays information as to when you have last performed a
particulartaskon your computer.Youcanalsoperformseveraltasks fromthis
dialog box.
• Error-checking status displays information as to when you last checked
selecteddrive for errors.You can click CheckNow... to run a check v ia the
ScanDisk dialog box. Follow the wizard to complete the task.
• Backup status displays information as to when you last backed up files on
selected drive. You can click Backup Now... to perform backup on this
drive.
• Defragmentation status displays information as to when you last
defragmented s elected drive. You can click Defragment Now... t o perform
defragmentation o n selected drive.
McAfeeUtilitiestab displaysinformationas to when you have last performed
aparticulartask on selected drive using McAfee Utilitiescomponents.You ca n
also perform several tasks using these components from this dialog box.
User’s Guide 55
Page 56

McAfee Utilities
• Defragmentation status displays the information as to when you last
defragmented selected drive with Disk Tune. You can click Run Disk
Tune... now to perform de fragmentation on this drive using Disk Tune.
• Error-checking status displays information as to when you last checked
selected drive for errors with Diskminder. You can click Diskminder
Now... to run a check on this drive for errors using Diskminder. Follow the
wizard to complete the task.
• Disk recovery status displays information as to whether an image of
selected dri ve have been made using McAf ee Image. Yo u can click Run
Image N ow... to take a snapshot of this drive using the McAfee Image.
Follow the screen wizard to complete the task.
If you do not want to p erform any of these McAfee Utilities components via
the Properties dialog box, select Disable this property sheet page.
After making your selection, click Apply; then click OK.
Start Menu tab
The Start M enu tab displays options you can selectto accessfaster, frequently
run applications and control panel applets. Select Enable Start Menu
Enhancements to activate this option. After activating this option, two
additional options are also available:
• Select Cascade Control Panel applets to add a cascading control panel to
thestartmenu.Thisenablesyoutogoinstantlytotheappletyouwantto
access.
• Select Cascade Run Menu to add a cascading run menu listing comm ands
you have run recently. This enables you to run these commands again
directly from the menu.
After making your selection, click Apply; then click OK.
Trash Guard tab
The TrashGuard tab displays optionsyou can selectto customize the way you
want Trash Guard to work on your computer.
• In the Settings box, check Enable Trash Guard to activate utility on your
computer.
• In the Files to exclude text box, select a file form at you want to modify or
remove. Next, click the appropriate button on the right-hand side of the
text box.
56 McAfee Office
Page 57

• If you want to add a new file format to be excluded, click Add New. Type
the new file format in the space provided within the Files to exclude text
box.
After making your selection, click Apply; then click OK.
File Shredder tab
The File Shredder tab displays options you can select to customize the way
you want Shredder to work on your computer.
• In the Shredding level box, select either Quick or US Gov’t multipass to set
the shredding level.
• In the Miscellaneous box, select from the following ad ditional options:
• Prompt before shredding
•Showiconondesktop
• Add to Send To menu
• Check d isk fo r error before shr edding
After making your selection, click Apply; then click OK.
McAfee Utilities
Quick Copy tab
The Quick Copy tab displays options you can select to customizethe way you
want Quick Copy to work on your computer.
Settings box
• Select Show Icon on Desktop to access Quick Copy from your desktop.
• Select Enable Quic k Copy to activate utility on your computer.
Default Transfer Mode box
• Select Co py to s et copy as the d efault transfer mode.
• Select M ove to s et move as the d efault transfer mode.
Animation box
• S elect On to t ur n o n animation.
• Select Off to turn off animation.
After making your selection, click Apply; then click OK.
User’s Guide 57
Page 58

McAfee Utilities
Zip File Manager tab
The Zip File Manager tab displays options you can select to customizethe way
you want Zip Manager to work on your computer.
• General Options are: Show Icon on Desktop; Add to Send To menu; and
Start with Wizard.
• Compression Option is Save Folder Information.
After making your selection, click Apply; then click OK.
Repair and Recover
Use McAfee Utilities Repair andRecover utilities to help you resolve problems
with your PC’s system software and data.
Disk Minder
Disk Minder lets you safely, ea sily, and quickly diagnose and repair existing
or potentialproblems with the disk drives where you save y our valuable
application programs and data.
When should you use Disk Minder? Immediately after a system crash or
whenever you receive a message telling you a file cannot be accessed for any
reason, you should use Disk M inder to verify the integrity of the disk
containing that file. The earlier you fix a disk problem, the less chance there is
of it causing a more serious problem down the road.
TIP:Whenyou use Disk Minder,always create an Undofile. Then if the
repairs causeany unexpected or undesirable results,you canrevert tothe
Undo file so the disk returns to its state before you r an Disk Minder.
Using Disk Minder
You can use Disk Minder in three main ways:
Auto fix errors
Use Disk Minder for Windows to a utomatically fix errors. Just start Disk
Minder, select the disk drives to check, select whet her you w a nt to check the
disk surface for read errors, select the Fix Errors Automatically Using Default
Values check box , and click t he Start button. Untilt he process is complete,you
can walk away from your PC because no further interaction is required.
58 McAfee Office
Page 59

McAfee Utilities
Repor t errorsonly
Before interactively fixing errors, you can run Disk Minder with the Report
Errors Only option selected to examine or print reports describing a disk’s
problems.
To use Disk Minder to report errors only, start Disk Minder, click Properties,
select the Report Errors Only check box and click OK. Then select the disks to
check, whether t o scan the disk surfa ce and click Start. Disk Mind erchecks the
disk and displays the Sum m ary report.
If you selected two or more drives,use these
buttons to jump from one report to another
Click Detail to display details of the repair Click Print to print the report Click Save to save the report
as a text file
Figure 4-2. Disk Minder Summary Report
Interactively fixing errors
Disk M inder defaultsto informing you when it finds an error and letting you
interactively decide whether or not you want to fix the pr o blem. W hen Disk
Minder find s a problem while checking a drive interactively, it displays a
message that asks you what to do to resolve it. The suggested response is
indicated by the default settings, including which button is the default (in the
illustration, the Fix button is the default, which means that pressing E
like clicking the Fix button ).
NOTE: Disable the option, Check f or Non-AnsiFile Names when
running under an international version of Windows that uses e xtended
ASCIIcharacters.
NTER,is
User’s Guide 59
Page 60

McAfee Utilities
Customiz ingDisk Minder Properties
In addition to auto fix, report, and interactively fixing errors options, you can
also select other propertiesoptions to set how you want Disk Minder to work
on your computer.
Figure 4-3. Disk M inder Properties Options
Other optio ns include:
• Check Partition Tables–verifies partition tables, that define the
partitions subdividing a physical drive into more than one logic al drive.
• Check File Dates + Times–verifies that dates and times associated with
files are valid. In Windows 95, Disk Minder verifies the Created,
Modified, and Accessed date and time stamps.
Select Propertiesoptions
and click OK
60 McAfee Office
• C he ck Host Drive First–checks the physical drive where DriveSpace or
DoubleSpace compressed volume files are stored. Then it checks the
compressed volume files, or logical disks.
• Check for Valid File Names–verifies that file names use acceptable
characters. Valid characters for file names ar e numbers 0-9, letters A-Z,
and basic symbols excluding the backslash ( \ ), greater than ( > ), less
than ( < ), colon ( : ), double quotations ( “ ), and bar or pipe ( | ). Disk
Minder fo r Windows 95 also checks long file names as well as short file
names that follow the 8.3 file name convention.
• Check for Non-ANSI File Names–finds any non-ANSI file names. All
characters are u niquely numbered from 0 through 255. Two standards
exist for numbering characters: ANSI and IBM ASCII. Windows uses
ANSI, and characters that appear on both numbering systems are
automatically translated by Windows to their ASCII equivalents for use
in file names, which must be stored in ASCII.
NOTE: Disable this option when running under an international
version of Windows that uses extended ASCII characters.
Page 61

• Check for Duplicate File Names–checks for duplicate file names—files
with the same name in the same d irectory.
• Test Drive Surface–performs read/write tests of a disk’s recordable
surface media. If a sector is damaged,Disk Minder saves the data
elsewhereso you can try to recover it later. Disk Minder maps out the
bad sector so it won’t be used in the future.
• Surface Scan Repetitions–becomes active if you select the Test Drive
Surface check box. Enter a number between 1 and 10, for the num ber of
times you want to perform a complete read/write test on the drive’s
surface. If you decide to run several repetitions, you m ay als o want to
use the Auto Fix Errors option and let Disk Minder perform the tests
whileyouareawayfromyourPC.
NOTE: There is also a Read/Write/Read/Compare Surface Scan
available. This is a more in-depth diagnostic test and can of ten find
damaged sectors (or sectors that are likely to fail) where the normal
surface scan cannot.
Creating and reverting to an Undo file
McAfee Utilities
IfDisk Minder findsa problem, it asks if youwant to create anUndo file befo re
making any changes to the disk.
• To create an Undo file, click Yes and pick a destination f or the Undo file.
• To revert to an Undo file, click Undo in the Disk Minder window. Selectthe
drive with an Undo file you want to use. Then click OK.
Using Disk Minder in DOS
Disk Minder lets you repair disks even if you cannot start Windows.
To use Disk Minder in DOS:
1. Do one of the following at the DOS prompt, a nd press E
Type: C:\WINDOWS\DMDOS
Disk Minder searches your PC for drives and then asks you to select the
drivesyouwanttocheckfromtheDriveslist.
2. Press the T
scanned. Selected drives have an x beside them in the list.
AB key to chang e the drives that are currently selected to be
NTER:
User’s Guide 61
Page 62

McAfee Utilities
3. Press the UP ARROW and DOWN ARROW keys to highlight a drive and
press E
NTER to select it.
4. Press the R
5. Select Start and press E
Disk Minder displaysa screen showing the kind of data it is checking and the
options in effect. If the Display Summary for Each Drive option is set, Disk
Minder displays a summary message showing the total number of errors
found on each drive, if any. It a lso shows information aboutthe clusters on the
drive.
McAfee Image
An important step in preventing your PC from having lost or co rrupted data
isto make a “snapshot” of the most critical areas on your hard d rives. You can
useMcAfeeImageto make asnapshotof themost crucialinformation on your
drives. It s av es information that you’ll need if your hard disk ever fails. This
ensures that you can use Image’s Restore option to restore the latest states of
your filesand folders (or directories). Image stores its information in a file on
your hard drive. This file is stored using a special, patent-pending method that
allows the file to be recovered even if the hardware is severely damaged.
IGHT ARROW key to move the cursor back to the buttons.
NTER to start checking the drives.
NOTE:Set the Image Properties sheet option to runImage automatically
each time you start Windows. Image will examine your system and
update the image as needed. Doing this ensures you always have the
latest data saved for your disks.
Creating an Image of your disks
Creatingan image copyof your hard disksas a file(nbimage.dat)onlytakes
a moment. You should create a new image file any time you’ve rearranged
files or added many new files to your hard drive.
To create an image of your hard drives, select the Create a New Image Backup
option and click Finish. Image saves the nbimage.dat file on your system
hard drive, and displays a message letting you know the process is complete.
Click OK.
Be sure to create a Rescue disk using McAfee Utilities’ Rescue Disk. Rescue
Disk places some Image information on your 3.5-inchdisk.
62 McAfee Office
Page 63

Click Properties
to set whether
Image will save
FAT information
andtoturnon
Image’s auto-save
option,which
updates the image
each time you
startWindows
Setting Image Properties
You can setImage Properties tospecify whet her Imagesaves th e File Allocation
Tables (FAT), which is a roadmap or index to where all the pieces of files on a
disk drive are located. Most likely, you’ll want to keep this check box selected.
Youcan also haveImage createa new image copy of your hard disks each time
you start Windows (recommended).
McAfee Utilities
The first time you run
Image, it records the
date and time;thereafter,
Image shows you when
the last Image file was
created
Select whether to create
animagefileorrestore
an image file; then click
Finish
Figure 4-4. M c Afee Image Wizard
Restoring drives from an Image file
When all else fails, you can restorethe critical information on one or more
drives fro m an Image file. Restoring an image file does NOT recover deleted
files.If you have deleted data files that you need, you can restore a copy of
them from your last backup set (protected volume file or d irectory) created
with Safe & Sound.
WARNING:Do not restorean image, except as a last resort. The Image
file does not contain your data files, those are located in your Safe &
Sound backup set.
To restore one or more drives from an image file:
1. Start McAfee Image, select the Restore drive(s) from saved image radio
button, and click Next > .
User’s Guide 63
Page 64

McAfee Utilities
Select an image file from
the list and click Next >
to begin restoring your
hard disks
ClickScan>>tolocate
image files stored on
any disk drive on your PC;
you can restore image
files from any drive, even
damaged hard drives
Figure 4-5. McAfee Image Recover
2. Do one of the following and click the Next > button:
• Select an image file to use for restoring your drives from the list of
those found on your system hard drive.
• Click the Scan >> button to look for addit ional image files if you
don’tseetheoneyouwanttouse.Imagescansyourharddrivesfor
image f iles. Select one of them and click Next >.
64 McAfee Office
3. Select the hard drives you want to restore and click Next >.
4. Select the kinds of information you want to restore. Image defaults to restoring the masterboot sector, partitions and theFile
Allocation Tables. In most cases, you should use the Image default
settings. If you are an advanced user, you may want to only restore one
or two of the options:
• Master boot sector–Selectthisoption if you cannotstart the PC from
yoursystem hard drive. The masterbootsectoris the sectoron your
system hard disk that contains boot information with instructions
for starting up your PC.
• Partitions–Select this option if you cannot find a logica l d rive on
yourPC. Partitions subdivide a physical drive into multiple logical
drives. Each partition has its own drive letter.
Page 65

5. Click Finish to restore the drives with the specified kinds of data.
Rescue Disk
RescueDisk letsyou createan emergencybootdiskthat you can use to boot up
your PC if you encoun ter a problem that prevents you from starting the
computerfrom the system hard drive. The system hard drive is the hard drive
that contains your Windows directory or folder.
You can use the Rescue disk that is created by default.
McAfee Utilities
• File allocation tables–Select this option if your files are corrupted
and you have been unable to repair them using Disk Minder. Often
much or all of your data may be intact on the disk, but the file
allocation tables (FATs) may be damaged. By restoring the most
currentcopy of a disk’sFAT, you can often recoverfiles that would
otherwisebe lost.
NOTE: If your Image file is m or e than a day or two old, or if you ha ve
optimizedyour hard disk and have not run Image, try using Disk Minder
to repair the hard drive first.
NOTE:The rescue disk setboots froma floppy but includesa companion
ZIP or SyQuest disk that lets you run Windows in a paired-down
configuration to tryto recoveryour system in the event of a catastrophe.
The large companion rescue disk also con tains c rit ical parts of W indows
that can help recover your system in the event some portions of
Windows become damaged. To use thisfeature,simply run RescueDisk
on a system that hasa ZIPor other high-capacity removable media drive
and follow the on-screen instructions.
To create a Rescue Disk:
1. ClicktheNext>buttonintheRescueDiskWizard.
2. Use the default Rescue disk.
3. Click Next >. T hen click Finish.
4. Insert a disk into drive A and click OK.
Rescue Disk formats the disk and copies critical startup files to it, as well as
any files you added. When the process is complete, Rescue Disk exits and
returns to the desktop.
User’s Guide 65
Page 66

McAfee Utilities
Using a Rescue Disk
Insert your Rescue disk into drive A, reboot your computer (or turn on the
power).If yoursystem doesn’t boot,access CMOS and make sure the Booting
From Floppy option is enabled. Then follow the instructions on the screen.
Disk Minder in DOS
Disk Minder displaysa screen showing the kind of data it is checking and the
options in effect. If the Display Summary for Each Drive option is set, Disk
Minder displays a summary message showing the total number of errors
found on each drive, if any. It a lso shows information aboutthe clusters on the
drive..
First Aid
First Aid detects common computer problems rangingfrom hardware,
software, to configuration problems. It examines your entire computer and
display options that you can select such as: fixing prob lems automatically,
undoing previous c onfiguration settings, and accessing a databaseof
information to assist in troubleshooting common computer problems.
There are three main buttons to select in the main window to start using First
Aid 2000:
• Universal Undo allows you to return your PC to its previous settings by
reversing changes that have been made to your computer.
•AskAdvisorallows you to access sources of information about your
computer which can assist you in troubleshooting problemsor simply
learn more about your comput er.
• CheckUp provides a systematic method of quickly identifying and fixing
PC problems automatically.
Using CheckUp
First Aid’s CheckUp examines your entire PC at once, or if you ar e having
troublewith just one component,youcan performa rigorousCheckUpon that
component only.
To perform a complete CheckUp
1. To perform a CheckUp on your entire PC, click the CheckUp button at
the bottom center of the CheckUp desktop. The CheckUpprocess begins.
66 McAfee Office
Page 67

McAfee Utilities
2. During CheckUp, the component currently under examination is
highlighted.Statusinformationat the bottomof thescreen lets you know
exactly what CheckUp is doing.
To perform a specific CheckUp
1. If you are having a specific hardware problem, click the appropriate
component in the CheckUp desktop. A pop-up menu appears.
2. Click the check for the selected component. First Aid will perform a
CheckUp on that component only.
Fixingproblem s
When CheckUp is finished, First Aid displays the number of problems it
found via the CheckUp Report screen. The problems are in order of severity:
• CriticalProblems. Urgent problem s such as a failing hard drive or missing
softwarecomponents that need to be attended to immediately.
• Potential Problems. Less serious pr oblems t hat might affect your PC. For
example, a potentialproblem isa bad shortcut, one that no longer pro perly
points to an application on your PC.
• Tips & PerformanceIssues. Suggestions for improving the performance of
your PC. For example, a perform ance tip might suggest that you install
QuickTime if it isn’t alrea dy installed.
From the CheckUp Report screen, you can:
• Fix many pro blems automatically using AutoFix.
• Fix problems t hat require manual fixes.
• View the problems First Aid found. If you are curious about what First Aid
found, click View to display the Fix Info s creen, which lists each problem
identified during the CheckUp. From the Fix Info screen, you can AutoFix
individualproblems or find out additional information about a problem.
• Can cel the Report and return to the CheckUp d es ktop. Click Cancel or the
Back button to return to the CheckUp desktop. To return to the initial
CheckUp Report screen, click the Back button.
Using AutoFix
When CheckUp reports that your PC has problems, your best course of action
is to click AutoFix from the in itial CheckUp report screen. First Aid wi ll then
attempttofix all of theglitcheslistedin the Ch eckU p Report.AfteranAutoFix,
First Aid might report that some problems identified in the CheckUp cannot
be AutoFixed: a manual fix is the solution for these problems.
User’s Guide 67
Page 68

McAfee Utilities
NOTE: If you know a component is operating properly but First Aid
reports a problem, do not AutoFix it. First Aid may have incorrectly
identified a “problem,” and the suggested fix m ay inadvertently cause a
real problem to occur. If AutoFix produces unwanted changes in y our
PC, you can usually reverse the changes with Undo.
You can AutoFix from several points in the CheckUp report:
• Click AutoFix on the main CheckUp Report screen to fix critical and
potential problems.
• After clicking View on the initial CheckUp Repo rt. Depend ing on the fix
available for a given problem, you will see either an AutoFix or Manual Fix
button in the screen.
To return to the main CheckUp desktop, click Finished.
Manually fixing a problem
AutoFix is a skilled PC technician, but cer tain PC problems cannot be fixed
automatically. First Aid still provides a solution for these problems but needs
your participation to fix them. For example, if CheckUp determines that an
important software component is missing, you’ll need to locate the required
CD or floppy disk and insert it in the drive.
NOTE:You can learnifyour PC hasany problems requiring a manualfix
before or after an AutoFix. To learn befo rehand, click View from themain
CheckUp Report screen and select a problem from thelist. Click Fix Info,
and the Fix Info screen appears. The Possible Solutions screen lists any
solutions requiring a manual fix. To learn after an AutoFix, click View
from the final CheckUp Report screen.
To manually fix a problem, click Manual Fix on the Fix Info screen, and follow
the instructions provided.
Using Universal Undo
First Aid 2000 helps you undo mistakesyou make with your PC’s settings.
Quite often, seemingly innocent changes such as upgrading software or
making a change in the Windows control panel can lead to unintended
consequences. Universal Undo offers a suite of undos that automatically
monitor changes in your PC, and allow you to quickly restore your p revious
settings when things go wrong.
68 McAfee Office
Page 69

McAfee Utilities
Universal Undo allows you to undo:
• A monitored event. UniversalUndomonitorscommoneventssuchas
installing new software and drivers, and a llows you to restore—safely and
selectively—the changes made in the course of these events.
• Changes to Windows settings. Most Windows configuration settings are
housed in the Control Panel. Universal Undo automatically monitorsthe
changes you make to Control Panel settings, and makes it ea s y t o return
settings to the state they were in prior to the change.
• Changes to document files. Universal Undo can track changes made to
your documents and allows you to restoreearlier versions, even if you
don’t have a backup.
• A change to Internet or network settings. Small changes to your Internet
or networkingsettings can cause your connection to slow down or even
fail. Universal Undo keeps a chronological list of all setting changes,
allowing you to quickly fix your network settin gs without having to
disturb your Windows configur ation.
• Most First Aid fixes. Although all First Aid 2000 fixes are safe, there a re
certain “fixes” that may not be appropriate for your PC. In addition, a fix
may cause problems if First Aid 2000 mistakenly identifie s a problem on
your PC and you goahead and “fix” it. Since Fix Undo allows you to undo
almost any fix, you can feel comfortable in letting First Aid 2000 fix your
PC—you can always safely restore your settings if you wish.
Undoing a monitored change:
1. Click Universal Undo on the main First Aid 2000 screen. The Universal Undo screen appears.
2. Click Undo an Installation. The Undo an Installation screen appears.
3. Select an installa tio n to undo, and then click Next. Installation Undo
analyzesyour PC anddetermines the components toremoveand restore.
Click Next to complete the installation und o. (Installations that took
place before First Aid 2000 was installed cannot be undone, and do not
appear in the list).
NOTE: From the Analyze screen you can c lick Details to view
details about the installation, as well as select individual items to
restore.
4. When Installation Undo is finished, a summary screen appears, displaying the results of the undo.
User’s Guide 69
Page 70

McAfee Utilities
To undo a Control Panel setting:
1. Click Undo a Windows Settings Change on the Universal Undo screen.
The Undo a Windows Setting dialog bo x appears.
2. Follow the screen instructions.
Using Ask Advisor
Ask Ad visorallows you to access sources of information about your computer
which can assist you in troubleshootingproblems or simply learn more about
your computer. These sources of information include:
• KnowledgeBase which contain thousands of solutions to PC problems.
• Glossary which list terms and acronyms.
• Technical SupportYellowPages provides names, addresses and technical
support contact numbers of hardware and software companies;Videos
displays presentation about Windows and your PC.
• System Info generates detailed inventory of your computer’s
configuration which is useful when contacting technical support.
To display any of these information:
1. Click Ask Advisor from the First Aid 2000 main screen.
2. Select the source you want to view.
3. Click Back if youwantto return to thepreviousscreen and selectanother source.
Creating a Rescue Disk
Rescue disk is an emergency boot disk that you can use to retstart your PC
lateri f you encountera problem thatprevents you fromstartingthe computer
from the system hard drive.
You can use the Rescue disk that is created by default.
A rescue disk is created via the RescueDisk wizard. After the wizard w indow
is displayed:
1. Click the Next > button in the Rescue Disk Wizard.
2. Use the default Rescue disk.
70 McAfee Office
Page 71

3. Click Next >. T hen click Finish.
4. Insert a disk into drive A and click OK.
Rescue Disk formats the disk and copies critical startup files to it, as well as
any files you added. When the process is complete, Rescue Disk exits and
returns to the desktop.
For more information, see related topic on Rescue Disk.
Discover Pro
Discover Pro is a unique utility that lets you view a wealth of system
information,as well as perform benchmark anddiagnostic tests. D iscover Pro
is your complete system analysis tool. It can help you understand PC
hardwareand software configurations, and is designed to help you use,
analyze, and configure your PC. It provides all the information you need to
make optimum use of all available memory.
McAfee Utilities
NOTE: YoushouldhavegeneralknowledgeofDOSandWindows
memory architectures and terminology.
Discover Pro window
DiscoverPro is easy to use and most windows are self-explanatory. Click the
Help button for context-sensitive help from any window (see Figure 4-6).
Click Print to display
the Print dialog
box where you can
decide which
screens to print to
your printer or save
in a text file
Click Edit to
edit an INI file
Click a tab
to bring it
to the front,
makingit
active
Click Advanced
to view the
Advanced
window for the
active tab,
which shows
details about
that aspect of
your system
Figure 4-6. Discover Pro Window
User’s Guide 71
Page 72

McAfee Utilities
Discover Pro lets you view information about your hardware and software.
Each tab in the Discover Pro window covers a speci fic aspect of your PC ,
ranging from a generaloverview of your system configuration through
softwareto benchmark and diagnostic tests. You can click the Advanced
button at any time to obtain a far more detailed analysis of the current tab’s
topic.
• System tab–sho ws information about the most critical hardware
componentsof your system, including your CPU, RAM, video, hard
drives, BIOS ROM and PCI Bus.
• Memory tab–gives you information on Window’s usage of your PC’s
memory, via easy-to-understand charts and tables.
• Software tab–provides you with information about the software you are
currently running,and the softwarecomponents of Windows, such as the
numbers of virtual machines, threads, tasks, virtual device drivers and
modules.
• Drivestab–gives you a complete summary of any drive installed on your
system and of all the directories, folders and files on that drive. You can
immediately see the total size of each drive,the amount of free space,
fragmentation levels a nd the size of your drive’s free slack.
• I/O Devices tab–shows information on the secondary and optiona l
hardwaredevices installed on your PC, such as sound devices, serial and
parallel ports, printers (including fax/modems) and networkdata
including network type, driver, specification, version and use r name.
• Benchmarks tab–an easy-to-use method to benchmark t he performance of
your CPU and compare it to average benchmarks for three other
“commonly configured” PCs.
• Diagnostics tab–a diagnostics center that lets you run diagnostic tests on
various aspects of yourPC, including serial, parallel, hard drive, RAM and
DMA tests.
Working with advanced information
You can view detailed information about any of the tabs in the Discover Pro
window.
To work with advanced information:
1. Click a tab to bring it to the front.
2. Click the Advanced button.
72 McAfee Office
Page 73

Discover Pro displays the Advanced window for the act ive tab. All the
Advanced windows have these elements in common:
• IconPanel–Click any of the icons in the panel at the left to view that
type of information in the panel at the right.
• Detail Information Panel–The deta il information shown in the
panelattherightisforthecategoryindicatedbythecurrently
selected icon. Thedetail information is mostly self-ex planatory with
scrolling lists and buttons you can click t o obtain additional
information or perform related tasks, such as running or stopping
benchmark tests.
TIP: In several of the detail information panels, you’ll see legends with
small color boxes showing the kind of information that is graphically
representedinthatcolor.If you clicka colorbox,theColorChange dialog
box appears where you can select a different color to use for that legend
item.
Click an icon here . . . .. . and DiscoverPro changes the panel here.
McAfee Utilities
o the Discover Pro window
Figure 4-7. Discover Pro advanced inform ation
Pointtoabit(bitsareonesClick Summary to go back
or zeros) to see its name
User’s Guide 73
Page 74

McAfee Utilities
Specifyin g Discover Pro settings
Discover Pro lets you specify options (after clicking the Settings button) that
determine the appearance of the Discover Pro win dow itself, whether you can
view one or more category windows at a time, and w hether Discover Pro
should remember the positions of windows.
• Display Style–lets you pick the Discover Pro display style that you are
most comfortable using. Each display style provides a differently designed
DiscoverPro window.When you select one of the radio buttons, Discover
Pro displays a preview of that display style, which graphically describes
that window design.
Discover Professional
Preview
Figure 4-8. Discover Pro settings
If you are an advanced user, you may prefer using one of the
multi-window views: Discover Professi onal or Discover - Small Size.For
details about these two display styles.
• Save Window Positions–lets you save the locations of your Discover Pro
windows so the next time you s tart D iscover Pr o, they appear exactly
where you last positioned them.
• Only One W indow at a Time–lets you display only one window at a time
when using the Discover Professional or Discover - Small Size display
styles. While this check box is selected, Discover Pro changes the contents
of a single window. When this check b ox is deselected, Discover Pro opens
multiple, tiered windows.
Using the multi-win dowviews
Discover Pro provides two multi-window views: DiscoverProfessionaland
Discover - Small Size. You can changethe view by selecting a different Disp lay
Stylein the Options dialog box that appears after you click the Settings button
(or choose the Settings command from the File menu in one of the
multi-windo w views).
Discover-Small
Size preview
Discover preview
74 McAfee Office
Page 75

McAfee Utilities
The Discover Professional display style is the larger of the two windows. It
contains large but tons for each category, making them very easy to s el e ct, so if
you have a large monitor, you may like using this multi-window view best.
The Discover - SmallSize display s tyleis a good choiceif youwant the flexibility
of a multi-windowview,butyou have a smallermonitor and need to conserve
desktop“real estate.”Thiswindow displaysthecategoriesin a drop-downlist
box rather than graphically as large buttons.
Access Categories
from the Category
menu
or…
Access Categories
by clicking the
graphic buttons
DiscoverProfessional display style
Undelete
Access Categories
from the Categories
drop-down menu
Discover- SmallSize display style
Figure 4-9. Discover Pro multi-window views
McAfee Utilities Undelete lets you r ecover files that you’ve deleted even after
you’ve emptied the Recycle B in. Your best chances of successfully undeleting
a file is immediately after you perform the deletion. Onc e you save additional
filesafter deleting one you’d like toundelete,parts of itmay have been written
over.
McAfee Utilities provides both a Windows and DOS versionof the Undelete
program. TheDOS version of Undelete is alsoincluded on the McAfee Utilitie s
Rescue disk w he n you create it. To undelete a file, select it in the list at the
bottom and click the Undelete button.
NOTE:Check your R ecycle Bin to see if your deleted files are there, prior
to running Undelete.
User’s Guide 75
Page 76

McAfee Utilities
Clean and Optimize
Use McAfee Utilities Clean and Optim ize utilities to help you ensu re
maximum performance of your computer via easy-to-usemaintenanceand
optimization tools.
Cleanup Wizard
Cleanup Wizard allows you to reclaim s pace on the hard disk by helping you
identify files that you no longer need su ch as duplicate files; and files that are
considered no longer useful. Once these files are identified, Cleanup Wizard
walks yo u through the process of either deletingthe files , compressing thefiles
or moving the files to another location so you c an save space on your
computer.
It scans your disk or hard drive for files that can be deleted based on selected
safety levels (e.g., temporary files and files int eh Recycle Bin). A list of files is
generated and displayed for you to review and dec ide which files should be
deleted, moved, compressed, etc.
Disk Tune
Disk Tune optimizes your hard disk and improves your computer’s
performance by rearranging files on your hard disk for maximum efficiency.
It defragments your Windows Swap File—the file used by Windows to store
information temporarily so that memory can be freed for other applications. A
fragmented Swap File also affects the performance of your system.
You should run Disk Tunewhenever your drivebecomes fragmen ted by more
than 2 or 3 percent. When you start Disk Tune, it reviews your drive and
recommends the type of defragmentation and optimization process that you
should use.
TIP: You can monitor the fragmentation levels of your hard disk using
WinGauge’s Disk Fragmentation gauge.
If you are using Windows 98, Disk Tune lets you use the application log file
that Windows 98 creat es to d etermine how applications and their related files
will be optimally stored o n your drive.
76 McAfee Office
Page 77

Using Disk Tune to defragme nt or consolidate a disk
After you specify one or more drives to tune and click Next >, Disk Tune
analyzesthe drive to determinethe most suitablelevelsof optimization.Once
the analysis is complete, depending upon the degree of fragmentation, Disk
Tune recommends one of four methods:
• Reorder and U nfra gment–defragments your files and arranges them on
the hard disk according to all the crite ria specified in the Advanced
options.
• Full Unfragment–defragments your files and writes them to t he hard disk
so that all fr ee spaceis grouped separately fromused space, without regard
to the File Placement criteria spe cified in the Defragmentation O ptions
dialog box (click the Advanced button).
• Quick Unfragment–defragments yo ur fragmented fil es and rewritesthese
to the disk without rearranging other files, and w ithout regard to the File
Placement criteria. Free space remains fragmented.
• Consolidate Free S pace –moves files and file segments to the beginning of
the disk without regard to the File Placementcriteria,so that all free space
appears at the end. Files remain fragmented.
McAfee Utilities
Click a Legend
Color box to
display the
Color dialog box
where you can
select a different
color for that item
After analyzing
your drive,
Disk Tune
recommends
an optimization
method; you can
select a different
method if you
prefer
Disk Tune displays a map of your hard drive with blocks that are color coded
by status.You can watch the map c hange as Disk T une analyzes the disk, and
you can customize the colors codes and click a block in the hard drive map to
identify its contents.
Click a block in
the Hard Disk
Maptoidentify
its contents
Figure 4-10. Disk Tune hard disk map
User’s Guide 77
Page 78

McAfee Utilities
The hard disk map
Disk Tune displays a map of thehard disk withblocks—eachblockconsistsof
a variable number of clusters, depending on the disk’s size—color coded to
indicate their status.
You can identify the contents of a block in the hard drive map by clicking it.
This is useful if youwant anindication of which files makeup a block, whether
these particular files are fragmented, or held (designated as unmovable), and
so on. The file list offers information on the Cluster Number, Contents,
Condition, Type, and Attributes of a ll the files in the bloc k. You can also click
a column title to sort files by that column.
Setting advanced options
You can access D isk Tune’s advanced options by clicking the Advanced
button. The Defragmentation Options dialog box appears, which provides
three tabs o f options: Functions, File Placement and Directory Sort.
The Functionstab
The Functions tab allows you to select the functions, safety level and write
verification levels.
• ZeroFreeSpace–zerosout the free clusters after you finishtuning the disk.
This wipes out any leftover data from deleted files, and prevents recovery
using an undelete program.
• Show Final Organization–showsthefinalmapofyourdiskonceyouhave
completeddefragmentation and optimization.
• Single Sector I/O–reads and writes data on a “singlesector by single
sector” basis. This method is very slow but may be n ecessary for some
types of disk drive controllers.
• Remove Deleted Directory Entries–removes deleted entries from
directories and consolidates active entries to optimize directories.
• Optimizethe Swap File–optimizesthe W indows SwapFile to improvethe
performance of your system.
• Safe Mode and Exclusive Lock–increases the safety of your d ata during
optimization . Safe Mode takes extra steps to ensure that you will not lose
any drive data even in the event of a power failure. Exclusive Lock
prevents any other applicationfrom accessingyour disk during the
tune-up which would slow down the tuning process.
78 McAfee Office
Page 79
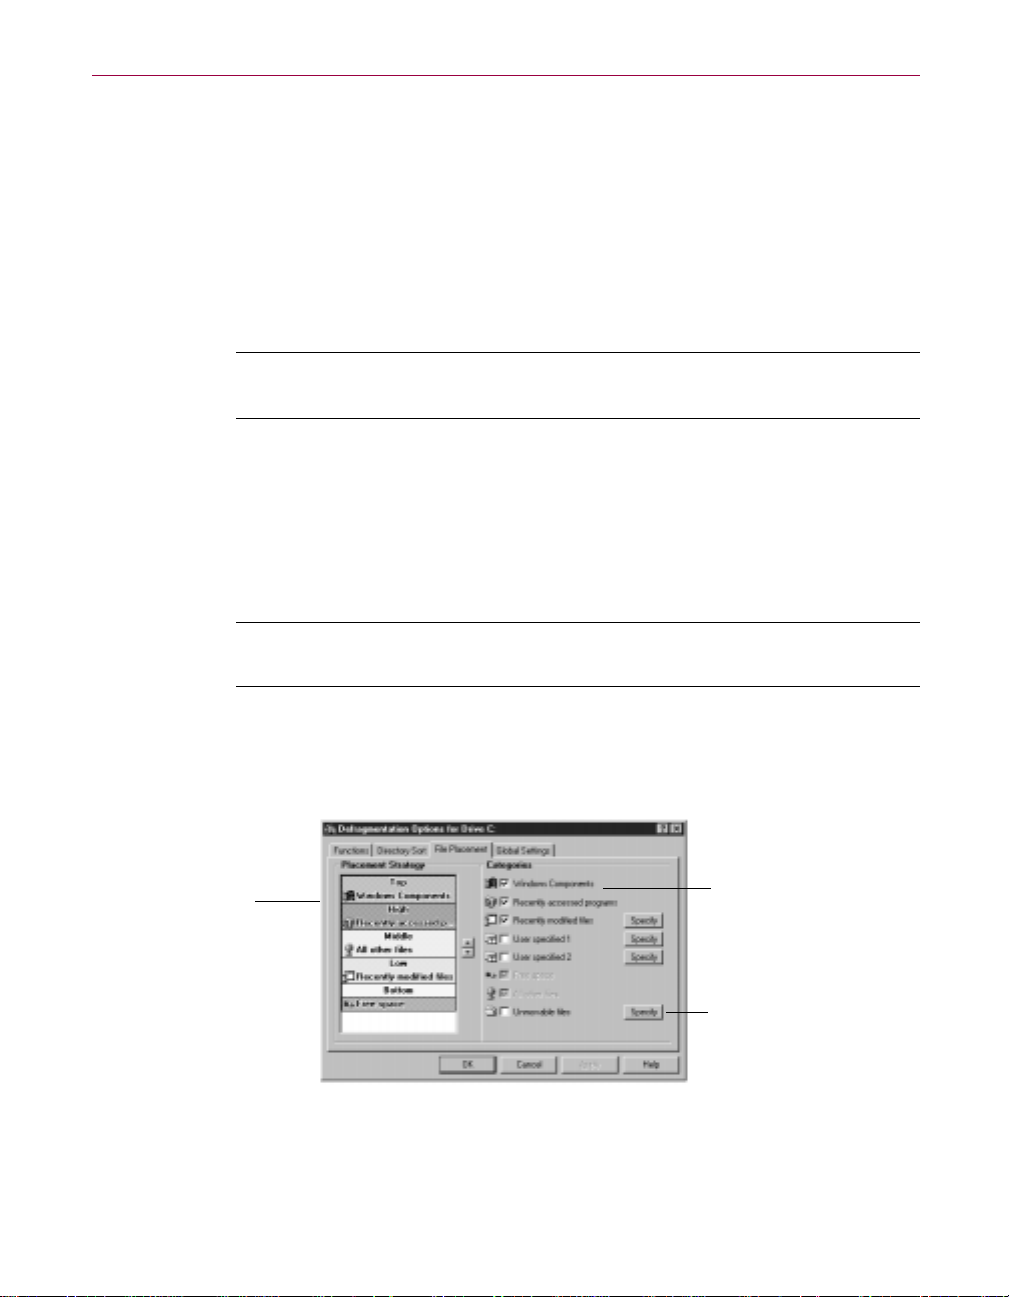
McAfee Utilities
• Disk Tune provides three verification levels: Verify(slow–ensures data
written to a new cluster can be read), Compare (slowest–compares a
relocated file’s contents against the original toensure it is exact ly the same),
and None (fastest).
• Ordering byTask–(Windows 98 only) Windows 98 tracks how often each of
your programs are used and maintains this information in an application
log file. If you select the Ordering by Task option, Disk T une uses this log
fileto place the most often usedprograms at the front of your drive,so the
programs you use most often startas fast as possible.
NOTE: When the hard drive is organized using the Ordering by Task
option, other defragmenters might see the drive as highly fragmented.
The File Placement tab
Disk Tune classifiesyour disk into five regions: Top, High, Middle, Low, and
Bottom.You can group your filesinto five categories: Windows Components,
Recently accessed programs, Recently mo dified files, User specified files, and
All Other Files. There are two additional categories: Free Space and
Unmovable files.
The File Placement tab let s you decide where the five file categories (such as
Windows Components) should be located in the regions of the disk. Normally,
you should put the programs and files you use most often at the front of the
disk (where access times are the quickest).
Select a Category item
in the Placement
Strategy panel and
click the Up or Down
Arrow buttons to
move it up or down
in the list
TIP: The o ptions you specify in the F ile Placement tab only apply wh en
you run a Reorder and U nfragment.
Select a Category
check box to add
it to the Placement
Strategypanel at
the right
Click Specify to
set file characteristics
for the corresponding
Category
Figure 4-11. Disk Tune File Placement tab
User’s Guide 79
Page 80

McAfee Utilities
Selecting a file category’s check box puts that f ile category in the Placement
Strategy panel. You canhighlight acategory inthe panel at the right, and move
it up or d own in the five disk regions. For example, if you want to place
recently modif ie d files in the middle region of your disk, click the Recently
Modified Files check box, highlight this category in the Placement S t rategy
panel, and move it to the Middle (light blue) ba nd by clicking the Up or Down
Arrow buttons.
DirectorySort tab
Disk Tune places files into drive regions in th e o rder they appear in your
folders,or directories.The D irectorySorttabletsyou changethe orderfilesare
placed in the region, as well as the order in which they appear in the folder or
directory.
Global Settings tab
The Global Settings tab lets you customize the appearance of the Hard Drive
map by selecting the shape of the clusterand sector blocks and the minimum
size of these blocks. Y ou can also enable or disable the McAfee Utilities
Property sheet for supported drives and enable or disable Disk Tune in the
Context menu for supported drives.
Figure 4-12. Disk Tune Global Settings tab
Specif yin g fil e categories
The File Placement tab in Disk Tune’s Defragmentation Options dialog box
lets you specify file characteristics for three types of file categories:
• R ecently mod ified files
•Userspecified1
•Userspecified2
80 McAfee Office
Page 81

McAfee Utilities
In advanced file placement configurations, you can d ecide where on the disk
various file groups will be located. Disk Tune divides the disk into five
regions: Top, High, Middle, Low, and Bottom, and it lets you specify in which
of these regions the various file catego ries are placed. In addition to the default
filecategories, Disk Tune letsyou createtwo categoriesof your own filetypes,
such as help files, gr aphic images, and so on. You can also group recently
modified f iles and allocate specific areas of the disk t o hold them. The dialog
boxes wher e you specify file characteristics of any of these customizes file
groups are identical, allowing you to create file groups for you r own exact
requirements.
Initially, you need to identify the file types to include in your group in th e File
Specifications text box, using the adjacent Add, Remove, or Clear All buttons.
After youclick Add, youcan find individualfiles to add to your list. DiskTune
lets you use wildcards in the Add dialog b ox to locate all files of a certain type.
For example, e nt ering *.HLP locates all the help file s. You can find all files on
your drive, or limit your search for all files in a directory (including or
excluding subdirectories). Clicking the msoffice directory and entering the
file name *.HLP creates a file specification of \msoffice\*.HLP,which
locates all the help files in t he Microsoft Office directory. You can also include
or exclude files that are greater than, or less than, a specific size range.
Your other options include:
Using the operators And and Or, so you can group all files you have selected
in the File Specifications text box. And or Or files must meet the criteria you
specify in the other check boxes, such as:
• The condition of your files (Fragmented, Optimized or Straddled).
• The attributes of your files, (such as Archive, Read-o nly, or Hidden).
• The date range of your files, where you can specify a date range (in
dd/mm/yyyy form a t) when the files were last modified , last accessed
and/or created.
In most cases, the defaults provided by Disk Tune should work fine.
Occasionally, you may need to customize the positions of file categories on
yourdisk.In general,filesyou do notmodify,but accessfrequently,shouldbe
placed as high (near the beginning) on the d isk as possible to improve access
times. Files that you frequently modify should be placed as close to the free
space as possible, to decrease the amount of work your system has to do.
User’s Guide 81
Page 82

McAfee Utilities
Registry Wizard
RegistryWizard (for Windows 95/98 only) makes maintenance,
troubleshooting, and repair of the Windows Registry database a quick and
easy process. The Windows Registry is a database that replaces many functions
of Windows 3.x’s AUTOEXEC.BAT, CONFIG.SYS, and *.INI files. This
Registry contains all the information about the hardware, system, programs,
and network user settings on your PC .
Each time you add new hardware or software, the Registry is updated. Some
of these changes can occasionally leave other components inoperable, or create
problems with other aspects of your system.
RegistryWizard lets you troubleshoot an d maintain the Windows Registry,
ensuring that it is optimized for the maximum performance of your system.
You can perform any of these tasks using the Registry Wizard: Backup &
Restore, Clean, Repair, Tune-up.
Your overall objectivesare to remove unnecessaryitems, ensure that allitems
pointtoactualfiles,sorttheRegistrysothatassociateditemsaregrouped
together,and reduce the size of your Registry so it c an be accessed more
quickly. In fact, there are many similarities between optimizing your hard
disk, and optimizing your Registry.
82 McAfee Office
• Backup & Restore. That is, either backup your existing registry or restore
an old version of your registry.
• Clean. That is, locate items that you can safely delete from the Registry,
such as y our Recent Doc list, the Tip of The Day, y our Run List, and so on.
• Repair.Thatis, identifyall of theRegistry items that point tofilesthathave
moved or to nonexistent items, and repair or delete them.
• Tune-up. After you remove unneeded items and repair the rest, you need
totune up your Registry. That is, closethe gaps andgroup associated items
together.Registry Wizard will walk you through, and perform, all these
tasks for you.
Page 83

McAfee Utilities
Figure 4-13. Registry Wizard window
Select the task you want Registry Wizard to perform and click the Next >
button. For step-by-step procedure, see the following topics on this chapter:
• “Backing up & Restoring the Registry.”
• “Cleaning the Registry.”
• “Repairing the Registry.”
• “Tuning up the Registry.”
Backing up & Restoring the Regist ry
TheRegistryWizard -Backup & Restoredialogbox appears after you selectthe
Backup & Restore option and click Next> in the Regustry Wizard.
From this dialog box, select whether you want to Backup or Restore your
registry; then click Next>.
If you are backing up a registry, enter a comment in the text box. If you are
restoring a registry, selectwhich backup registry you want to restore.
After selecting t he appro priate task you want to perform, click Finish to
completethe backup or restore process.
User’s Guide 83
Page 84

McAfee Utilities
Cleaning the Registry
The Registry Wizard - Clean dialog box appears after you selected the Clean
option and clicked Next > in the Registry Wizard.
• Select the items to clean up and click Finish.
• R egistry W izard removes selected items from the R egistry and ex its.
Repairing the Registry
After you selected the Repair option and clicked Next > in the Registry
Wizard, it scans the Registry and displays the Registry Wizard - Repair dialog
box, which lists all invalid entries in the Registry.
You can start by clicking the Repair All b utton toallow Registry Wizard repair
all the entries t hat it can. Registry Wizard displays the Registry Wizard Repair Report dialog box.
This Repair Report l ists the Registry key entries that Registry Wizard can fix
along with a description of the file (and its location) that will be used to repair
each Registry key entry.
Select any key entries that you want to fix or not fix, then click either the Fix or
Don’t Fix button.The selected key entries are fixedor notfixed,and theRepair
Report dialog bo x closes. The Registry Wizard - Repair dialog box reappears,
displaying the remaining key entries that still need to be fixed. You can select
a key entry and click the Repair button to manually change the value for that
key. Or, you can click the Advanced button to go to Registry Pro and edit the
orphan entries using the M cAfee utility instead of Registry Wizard.
84 McAfee Office
Page 85

Selecta column title to
change the sort order
of the keys
Selecta key handle or
child key and click Repair
to manually edit its value
Click Repair All to let
Registry Wizard repair
invalid key entries
McAfee Utilities
Click Advanced to
go to Registry Pro
where you can
edit an Orphan key
entry that Registry
Wizard has found in
the Orphan tab list
Select an invalidkey
entry and click Repair
to manually edit the
value, or delete the entry
from the database
Clickanorphankey
and Registry Pro
selects it in the
list above so you
can edit its value
Tuning up the Registry
Registry Wizard’s Tune Up process rebuilds your Registry files in optimal
order. The Tune Up process does not remove any information. Rather, it sorts
andcompactsthe Registry,removing“holes” left by Registry entriesthathave
been deleted in the past.
Point to the separator
bar between these
panelsanddragit
up or down to resize
the panels, as has
been done in this
illustration
Figure 4-14. Repairing the Registry
User’s Guide 85
Page 86

McAfee Utilities
When you rebuild the Registry using theRegistry Wizard Tune Up option, the
current Registry files are saved in your Windows directory as system.hlx
and user.hlx. In the unlikely event that you encounter any problems in
Windows after a tune up, you can restore your originalRegistry by pressing
F5 when you see the Starting Windows message when you boot, and by then
typing REGUNDO at the C:> prompt.
After you sele ct Tune-up and click t he Next > button in the Registry W izard,
it displays the Registry Wizard - Optimize dialog box asking you to exit all
currently running programs before you continue.
To tune up the Registry:
1. Exit all programs that are running. Be sure you check the taskbar and
close any programs that you’ve minimized as well.
2. Click Next >. Registry Wizard displays a message explaining that a new copy of your
Registryhasbeen created, and you need to restartWindows to apply the
new Registry.
3. Click Finish.
4. Click the Start button and choose the Shut D own command.
5. Select the Restart the Computer option. Then click Yes to restart
Windows and apply the new Registry.
Registry Pro
RegistryPro (for Windows 95/98only) lets you perform advanced editingof the
valueentriesfor key handles(thetoplevelfolders)andtheirsubordinatechild
keys in the Windows 95/98 Registry database. W ith Registry Pro, you can
troubleshoot and r epair start-up files defined as entries in the Registry. You
can import and export registry files, find entries containing specified text, or
find orphans (entries for programs that have moved or no longer exist).
TIP: Choose Key Info from the Help menu to get information on any
selected key.
Finding a Registry entry
Choose the Find command from the Search menu (or press CTRL-F3).Then
enter the value to search for, selectwhere to search, what to display, and other
search options. Then click Find.
86 McAfee Office
Page 87

Finding orphans
An orphan is an entry for a program that has moved or no longer exists.
Choose the Find Orphans command from the Search menu.
RegistryProdisplaysalistofalltheorphansitfindsinthedatabaseinthe
Orphans tab. You can selectan orphan key entry and RegistryPro selectsit for
you in the Registry database in the top two panels of the window. You can
double-click an orphan entr y in the top right panel to change its value data.
Editing a Registry entry
Double-click a database entry in the top right panel of the Registry Pro
window.
Importing a Registry file
The Registry file in use on your PC is located in your Windows folder on th e
system hard drive. You can import a Registry file that has been created
elsewhere, or one exported earlier, intoRegistry Pro so you can examine it or
edititscontents.When you exporta Registry file,you can save it w ith aunique
file name in any location y ou like. This lets you create and use different
Registrydatabasesfor particular purposes.
McAfee Utilities
To importa regist r yfile:
1. Choose the Import Registry File command from the File menu.
2. Locate a Registry file (with a file type of .REG) and click Open. Registry Pro opens the Registry file you selected, displaying its key
handles, child keys, along with key values of a key yo u select.
Exportin g a Registr y fil e
You can export t he open Registry file, saving it with a unique file name and a
.REG file extension. You might do this to keep Registry files for different
purposes, or to share a Registry file with so meone else.
Choose the Export Registry File command from the File menu.
Refreshing the Registry database
You can refresh the Registry so it displays the latest data stored in the active
Registryfile in your Windows folder on the system hard d rive.
User’s Guide 87
Page 88

McAfee Utilities
Choose Refresh from the View menu. Registry Pro updates the Registry.
Launch Rocket
The time it takes to launch applications in Windows can vary from a few
seconds to a few minutes, depending on thesize ofthe app lication, the number
of component files that make up the ap plication, and the lo cation of these files
on your hard drive.
McAfee Uti lities Launch Rocket Wizard dramatically reduces ap plication
launch times. It does this in two ways:
• Normal Acceleration–McAfee Utilit ies keeps track of the order in which
various parts of an application load. Thereafter, w hen ever you launch that
application, McAfee Utilities directs your system to read those files from
the hard disk in the most efficient manner.
• SuperAcceleration–McAfee Utili ties monitors how an application loads in
your system. It copies andcompresses the start-up parts of that application
in the correct order in a single file on the hard disk. Thereafter, when you
launch that application, the system reads a single file, rather than multiple
files across the hard drive.
The Launch Rocket W izard lets you enable the utility and configur e its
settings. With the Wizard, you can:
• S elect which applications benefit from Normal Acceleration, which benefit
• Specify the drive where the acceleration files are stored. Estimated disk
Quick Copy
Quick Copy allows you to copy files and folders from one location to another
fasterthan the using Windows Explorer’s standard copy methods.Follow the
wizard to complete the task you want to perform.
The fastest and most convenient way to use Quick Copy is to select the files
you want to copy and drag into the Q uick Copy icon. T his automatically
launches the Quick Copy wizard box with the paths to the files and folders
already indicated in the Items to Copy List.
from Super Acceleration, and which are excluded from launch
acceleration. The Wizard displays a list of all applications you have run
since installing McAfee Utilities. You can right-click a listed ap plication to
specify its d egree of launch acceleration.
space for these files is also shown.
88 McAfee Office
Page 89

Shortcut Wizard
Shortcut Wizard allows you to fix or delete shortcut icons that you have
created which may no longer be valid as the files or applications it p oints to
may have already been moved to another location or deleted entirely.
The Shortcut Wizard box allows you to:
• Repair orphaned shortcut s au tomatically. After list of invalid or orphaned
shortcuts is displayed in the wizard box, you can set Shortcut Wizard to
automatically repair any orphaned shortcuts possible.
• R epair orphaned shortcuts manually. After list of invalid or orphaned
shortcuts is displayed, you can select an entry and repair it manually by
entering a new path to the original file, orby browsing to locate theoriginal
file.
• Deleteorphaned shortcuts. If wizard displays orphaned shortcut that
points to a file or folder that has been deleted already, you can select to
delete shortcut sinceit no longer serves any purpose.
For step-by-stepinstructions to performany ofthese tasks, see online Help of
Shortcut Wizard in McAfee Utilities or click the Help button within the wizard
dialog box.
McAfee Utilities
Prevent and Protect
McAfee Utilities Prevent and Protect suite of utilities take you step-by-step
throughthe process of protectingyour system from system errors beforethey
happen.
Crash Protector
Recovering from an Application Error
Crash Protector continuously monitors your system to detect when an
applicationperforms an invalidoperation or damages any criticalpart of your
system. When such "Fault" conditions occur, Crash Protector suspends the
application and displays a dialog box (see Figure 4-15).
User’s Guide 89
Page 90

McAfee Utilities
Figure 4-15. M cAfee Crash Protector dialog box
When you see this dialog box, the application has caused an error which
usually means it has gone astray. T he refore your data may already be lost or
damaged.This dialogbox letsyouchoosewhat to dowith the faulty program.
The followingoptions are available:
• Close Application - closes the application that caused the error and allows
you to continue working.
• AutoFix - reactivatesthe faultyprogramat a point that shouldlet you save
your data.This procedure has some inherent risks and you should follow
the steps in the procedure below when trying to AutoFix a crashed
program.
Recovering a crashed, locked-up, or hung application
Sometimes application errors cause programs to stop responding to the
keyboardor mouse.InWindows95/98,ComputerProgramReactivator(CPR)
can "unlock" programs and allow you totry to recover any previously unsaved
information in documents you had open in the application when it stopped
responding.
To unlock a locked program:
1. Hold down the CTRL and ALT Keys and simultaneously press the DELETE k ey (sometimes labeled DEL).
CPR displays the CloseProgram dialog box.
90 McAfee Office
Page 91

McAfee Utilities
2. Select the application that has stopped responding. CPR tries to recognize the program and pre-select it for you.
3. Click End Task to have CPR close the program, or click Reactivateto
have CPR try to reactivate the program.
IMPORTANT: An application that has stopped responding may
have other problems as well. Therefore your data may already be
lost or damaged. If you need to recover your work, follow the
instructions in the following procedure.
To attemptto recover your work:
1. Use Explorer to make a backup copy of the open document you were working with in the application.
2. Click the Reactivate button in the Crash Protector box.
3. Attempt to save your work in the application.
4. Exit the application immediately and restart Windows.
Selecting Crash Protector Properties
McAfee Crash Protector lets you select a variety of properties that determine
how the utility behaves and what kind of protection it gives you.
To select Crash Protector properties:
1. Right-click on the Guardian icon in the system tray.
2. Highlight the Crash Protector Menus option
3. Click the Crash Protector Properties entry. The properties you can select are:
• 16-bit Protection - provides protection from crashes and errors
generated by 16-bit programs and files.
• 32-bit Protection - provides protection from crashes and errors
generated by 32-bit programs and files.
• Kernel Mode Protection - provides protectionfrom W indows "Blue
Screen" errors and crashes.
User’s Guide 91
Page 92

McAfee Utilities
4. Click the A pply button when you finish selecting options.
5. Click OK to close the Crash Protector Properties.
Deactivat ing Crash Protector
You can deactivate Crash Protector whenever you like without restarting
Windows.
To deactivateCrash Protector:
1. Right-click on the Guardian icon in the system tray (The blue cross icon near the system clock)
2. Highlight the Crash Protector Menus option
3. Click the Crash Protector Properties entry. Deselect the portion of Crash Protector that you want to disable.
• 16-bit Protection - provides protection from crashes and errors
generated by 16-bit programs and files.
• 32-bit Protection - provides protection from crashes and errors
generated by 32-bit programs and files.
92 McAfee Office
• Kernel Mode Protection - provides protectionfrom W indows "Blue
Screen" errors and crashes.
4. Click the A pply button when you finish selecting options.
5. Click OK to close the Crash Protector Properties.
To deactivate Computer Program Reactivator (CPR):
1. Right-click on the Guardian icon in the system tray (The blue cross icon near the system clock)
2. Highlight the Crash Protector Menus option
3. Click the Crash Protector Properties entry.
4. Click on the CPR tab.
5. Deselect the "Allow use of Ctrl-Alt-Del to Reactivate" option.
6. Click the A pply button when you finish selecting options.
7. Click OK to close the Crash Protector Properties.
Page 93

WinGauge
McAfee Utilities
NOTE: By disabling CPR, Crash Protector, or portions of it, you
eliminate error protection,crash recoverability, and reactivation of
programs that are not responding.
WinGauge is a dynamic reporting tool that constantly monitors your use of
Windows and your applications, to alert you to potential problems before they
become serious.
Informationabout your system is displayed using gauges . You can select what
to monitor and the type of gauge to use. Most importantly, you can choose
when you want to be notifie d in the event that your specified limits have been
reached.
WinGauge alerts you so that you can save your data, close programs, or take
other actions to prevent your system from slowing down, crashing, or
locking-up. As an added bonus , you can also drag application icons and
folders into WinGauge so that the program becomes your one-stop system
monitoring and application launch pad .
The most important gauges
The following list summarizes the most important gauges:
• Highest Resources–The Highest Resources gauge measures “system
resources”— small, critical memory regions in Windows itself.When any of
these regions fill up, your system may crash. You can increase your
resourcesby closing some applications.
• Virtual Memory–The Virtual Memory gauge measures how much of your
disk swap file isin use.The more of your swapfile you use, the slower your
system will run. If your swa p file fills up, your system may crash.
If you find that your virtual m emory is frequently high, you should
consider bu ying and installing more RAM and making more room
available on your Windows drive.
• Swap File Requests–The Swap File Requests gauge measures how often
Windows is accessing the sw ap file. The more frequently Windows
accesses, t he less efficient your overall system.
• DriveSpace–The Drive Space gaugemeasures the amount of room left on
your drives. If a disk fills up while a program i s runnin g , your system may
crash.
User’s Guide 93
Page 94

McAfee Utilities
Working with gauges
In WinGauge, you can set gl obal gauge commands or set specific commands
for each gauge. You can also add, update, or remove gauges.
Adding a new gauge
If you don’t see a particular gauge in the WinGauge window, you can add it
to the window.
To add a gauge:
1. Point to a gauge or the empty gauge area and press the Right mouse button.
2. Point to and click “New Gauge” from the menu.
94 McAfee Office
3. Click on one of the gauge sets to expand and view a list of available gauges.
Page 95

NOTE: A short description about a gauge’s function w ill appear in
the description window of thisdialogue box when you click on the
gaugename.
Click the Help button for additional gauge information
4. Click OK to add a gauge.
The gauge is added in the WinGauge window.
Updati nggaugeinformat ion
To immediately update your gauge information:
1. PointtoagaugeandpresstheRightmousebutton
2. Choose the Update command.
WinGauge upda tes the gauge information .
Removi nga gauge
McAfee Utilities
To removea gauge from the WinGauge window:
1. PointtoagaugeandpresstheRightmousebutton
2. Choose the Remove command.
WinGauge removes the gauge and automatically resizes the window to fit the
remaining gauges.
Manipulating the WinGauge window
You can interactively change the appearance of the WinGauge window by
doing any of the following:
• Resizing only the window
• Resizing gauges and the window
• Rearranging gauges inside the window
Resizingthe WinGa ugeWindow
While the WinGauge window is undocked, you can resize the window by
dragging it s sides or corner s to a new location.
User’s Guide 95
Page 96

McAfee Utilities
To resize the WinGauge window:
1. Point to any corner or side of the WinGauge window.
2. Dra g the window edge in any direction to a new location.
Pointto a side or cornerof
theWinGaugewindowand
the pointer changesto a
double-tipped pointer
(arrow).
You can drag the edge of
the frameto resize the
window without affecting
the size of the gauges.
Resizinggauges
While the WinGauge window is u ndocked, you can resize all of the gauges in
the window, as shown below.
To resize gauges in the WinGauge window:
1. Point to any corner or side of the WinGauge window.
2. Hold down the C
TRL keyanddragthecornerorsideofthewindowto
modify the dimensions of the window.
Point to a side or corner of
theWinGaugewindowand
press the Ctrl key.
While pressingthe Ctrl
key, drag the window
frametoexpandorreduce
the gauge sizes.
You can also resize all of the gauges in the Properties sheet’s Global tab.
96 McAfee Office
Page 97

Rearrang inggaugesin the WinGauge window
You can drag gauges around in the gauge area to move them to a new location
in the WinGauge window. Y ou might do this to place related gauges in
adjacent positions. The titlebar must be visible in order to rearrange gauges.
To rearrange the gauges within the WinGauge window:
1. Point to a gauge and click the Left mouse button
2. “Pick-up” a gaugeand drag it to reposition it within the WinGauge window.
Changing WinGauge properties
WinGauge allows you to customize the properties of gauges . You can select
properties to:
• m odify the ap pearance of a selected gauge;
• s et the th reshold level of your gauges;
• change the global dimensions, font s, and Bubble Help options;
McAfee Utilities
• a pply a background pattern to your gauge window;
• m anage the alarm notification system for your gauges.
Properties: Appearance tab
The Appearance tab contains options which allow you to individually
customize each gauge.
Type
You can select a gauge type from the drop-down list box. The gauge preview
shows what the currently selected gauge type looks like.
Refresh Duration
The Refresh Du rat ion defines the frequency w hich WinGauge checks th e
system to updateinformation. You c an setthe r efresh durationfor each gauge.
Toincreaseor decrease the Refresh Duration, drag the sliderto theleftor right.
Threshold style
You can highlight the threshold limits on each gauge by marking the
thresholds as a Line or Color.
User’s Guide 97
Page 98

McAfee Utilities
Data style
Selecting a Data Style of Colo r Lines, Color Fill, Solid Lines,or Solid Fillmakes
certain Colors options visible.
Size
Selecting doub le wide or tall, both, or default adjusts the gauge size.
Gauge text
You can select whether to display a gauge’s title and value, show the title
verticallyor h orizontally, and show the value as a percent. You can alsoselect
whereonthegaugethetitleandvalueappear.
Colors
You can customize a gaugeby changing the colors. To changethe color on any
part of the gauge, select the gauge part and click the Set Color button. A
standardWindows Color dialogbox appears whereyou can s elect basiccolors
or define your own custom colors.
Text
Regular Background
(default black)
(default olive green
Warning Background
(default khaki brown)
98 McAfee Office
Regular
(default lime green)
Alarm Background
(default maroon red)
• Text(default black)–Setsthe colorfor gauge text (visible when GaugeText
issettoeitherorboththeTitleandValue).
• Regular (default lime green)–Sets the color for regular data usage (v isible
when Data Style is set to Color Lines or C olor Fill).
• Regular Background (default olive green)–Sets the color for the regular
background of the gauge indicator.
• WarningBackground(defaultkhaki brown)–Setsthe color for the warning
background of the gauge indicator.
Page 99

McAfee Utilities
• Alarm Background (default maroon red)–Sets the color for the alarm
background of the gauge indicator.
Text
Regular
(default lime green
(default black)
Warning
(default bright yellow)
Frame
(default white)
Alarm
(default bright red)
• Warning (default bright yellow)–Sets the color for warning dat a usage
(visible wh en Data Style is set to Color Lines or Col or Fill).
• Alarm (defau lt bright red)–Sets the color for the alarm data usag e (visible
when Data Style is set to Color Lines or Color Fill).
• Frame (default white)–Selects Frame from the Colors drop-down list box.
Then select an edge of the gauge preview to turn on or off t he g auge’s
highlighted edges. You can also change the color used for the frame in the
Color dialog box (click the Set Color button).
Background
(set Threshold style to
None - default black)
SolidPointer
(set Data Style to Solid
line - default white)
Text
(default black)
• Background (defaultblack)–Setsthecolorfor the gauge’sdatabackground
(visible when Threshold Style is set to Lines or None).
• Solid Pointer (default white)–Sets the color for the gauge’s data usage
indicator (visible when Data Style is set to Solid Lines).
Propertie s: Thresholdstab
The Thresholds tab contains sev e ral options from which to set gauge warnings
and alarms.
User’s Guide 99
Page 100

McAfee Utilities
Warningsand AlarmsThresho ld s
Threshold settings are available for warn ings and alarms. Simply point, click,
and drag the slider on each rule to set the threshold for warnings and/or
alarms.
The thresholds are constrained to each other (from Off to 100%). This
constraint relationshipis determinedby whether theInvert Alarms check box
is selected.
Inver tAlarms
WinGauge allows you to monitor both increasing and de creasing values.
The regular setting provides theproportionof an availabletotal youare using.
Occasionally, you will need to monitor a value that is dropping, such as
available disk space.
Selecting the Invert Alarms check box allows you t o monitor diminishing
values.
If you are monitoring availab le disk space, you would use Inverted Alarms,
and could set your warning threshold to 10% available, with an alarm being
triggered when your availa ble disk space drops to 5%.
Propertie s: Global tab
The Global tab contains several options which allow you to change the
appearance of all gauges.
Changedimensions
Drag the sliders at the top and left of the gauge preview to resize all gauges.
As you dr ag the sliders, the gauge preview changes size i n real-time to s how
the current dim e nsions for all gauges.
Gauge title font, gauge value font, and gauge font
Click the Select Font button to select a different font family, font style, or font
size for all ga uge titles, values, or ga uge fonts, respectively. WinGauge
displays a standard Font dialog box where you can select from the fonts
available on your computer.
TIP:Tit le text is visible when the Title check box is selected in the Gauge
Text section of the Appearance tab. Value text is visible when the Value
check box is selected. The fonts for titles and values are set in the Gauge
Title Font section and Gauge Font section. The Gauge Font is the font
used when you select a gauge type of Text Gauge.
100 McAfee Office
 Loading...