

Page 1

McAfee Email and Web Security
Appliance 5.5
Installation Guide
Page 2

COPYRIGHT
Copyright © 2009 McAfee, Inc. All Rights Reserved.
No part of this publication may be reproduced, transmitted, transcribed, stored in a retrieval system, or translated into any language in any form
or by any means without the written permission of McAfee, Inc., or its suppliers or affiliate companies.
TRADEMARK ATTRIBUTIONS
AVERT, EPO, EPOLICY ORCHESTRATOR, FLASHBOX, FOUNDSTONE, GROUPSHIELD, HERCULES, INTRUSHIELD, INTRUSION INTELLIGENCE,
LINUXSHIELD, MANAGED MAIL PROTECTION, MAX (MCAFEE SECURITYALLIANCE EXCHANGE), MCAFEE, MCAFEE.COM, NETSHIELD,
PORTALSHIELD, PREVENTSYS, PROTECTION-IN-DEPTH STRATEGY, PROTECTIONPILOT, SECURE MESSAGING SERVICE, SECURITYALLIANCE,
SITEADVISOR, THREATSCAN, TOTAL PROTECTION, VIREX, VIRUSSCAN, WEBSHIELD are registered trademarks or trademarks of McAfee, Inc.
and/or its affiliates in the US and/or other countries. McAfee Red in connection with security is distinctive of McAfee brand products. All other
registered and unregistered trademarks herein are the sole property of their respective owners.
LICENSE INFORMATION
License Agreement
NOTICE TO ALL USERS: CAREFULLY READ THE APPROPRIATE LEGAL AGREEMENT CORRESPONDING TO THE LICENSE YOU PURCHASED,
WHICH SETS FORTH THE GENERAL TERMS AND CONDITIONS FOR THE USE OF THE LICENSED SOFTWARE. IF YOU DO NOT KNOW WHICH
TYPE OF LICENSE YOU HAVE ACQUIRED, PLEASE CONSULT THE SALES AND OTHER RELATED LICENSE GRANT OR PURCHASE ORDER DOCUMENTS
THAT ACCOMPANIES YOUR SOFTWARE PACKAGING OR THAT YOU HAVE RECEIVED SEPARATELY AS PART OF THE PURCHASE (AS A BOOKLET,
A FILE ON THE PRODUCT CD, OR A FILE AVAILABLE ON THE WEB SITE FROM WHICH YOU DOWNLOADED THE SOFTWARE PACKAGE). IF YOU
DO NOT AGREE TO ALL OF THE TERMS SET FORTH IN THE AGREEMENT, DO NOT INSTALL THE SOFTWARE. IF APPLICABLE, YOU MAY RETURN
THE PRODUCT TO MCAFEE OR THE PLACE OF PURCHASE FOR A FULL REFUND.
License Attributions
Refer to the product Release Notes.
McAfee Email and Web Security Appliance 5.5 Installation Guide2
Page 3

Contents
Introducing McAfee Email and Web Security Appliances. . . . . . . . . . . . . . . . . . . . . . . . . . . . . . 6
Pre-installation. . . . . . . . . . . . . . . . . . . . . . . . . . . . . . . . . . . . . . . . . . . . . . . . . . . . . . . . . . . . . . . . . . . . . . . . . . . . 10
How to use this guide. . . . . . . . . . . . . . . . . . . . . . . . . . . . . . . . . . . . . . . . . . . . . . . . . . . . . . . . . . . . . . . . . . . . . . . 6
Who should read this guide. . . . . . . . . . . . . . . . . . . . . . . . . . . . . . . . . . . . . . . . . . . . . . . . . . . . . . . . . . . 6
Definition of terms used in this guide. . . . . . . . . . . . . . . . . . . . . . . . . . . . . . . . . . . . . . . . . . . . . . . . . . . . . . . . . . 6
Graphical conventions. . . . . . . . . . . . . . . . . . . . . . . . . . . . . . . . . . . . . . . . . . . . . . . . . . . . . . . . . . . . . . . . . . . . . . . 8
Documentation. . . . . . . . . . . . . . . . . . . . . . . . . . . . . . . . . . . . . . . . . . . . . . . . . . . . . . . . . . . . . . . . . . . . . . . . . . . . 8
Available resources . . . . . . . . . . . . . . . . . . . . . . . . . . . . . . . . . . . . . . . . . . . . . . . . . . . . . . . . . . . . . . . . . . . . . . . . 8
What’s in the box. . . . . . . . . . . . . . . . . . . . . . . . . . . . . . . . . . . . . . . . . . . . . . . . . . . . . . . . . . . . . . . . . . . . . . . . . 10
Plan the installation. . . . . . . . . . . . . . . . . . . . . . . . . . . . . . . . . . . . . . . . . . . . . . . . . . . . . . . . . . . . . . . . . . . . . . . . 10
Inappropriate use. . . . . . . . . . . . . . . . . . . . . . . . . . . . . . . . . . . . . . . . . . . . . . . . . . . . . . . . . . . . . . . . . . . . . . . . . 11
Operating conditions. . . . . . . . . . . . . . . . . . . . . . . . . . . . . . . . . . . . . . . . . . . . . . . . . . . . . . . . . . . . . . . . . . . . . . . 11
Positioning the appliance. . . . . . . . . . . . . . . . . . . . . . . . . . . . . . . . . . . . . . . . . . . . . . . . . . . . . . . . . . . . . . . . . . . 11
Considerations about Network Modes. . . . . . . . . . . . . . . . . . . . . . . . . . . . . . . . . . . . . . . . . . . . . . . . . . . . . . . . . 12
Transparent bridge mode. . . . . . . . . . . . . . . . . . . . . . . . . . . . . . . . . . . . . . . . . . . . . . . . . . . . . . . . . . . . 13
Transparent router mode. . . . . . . . . . . . . . . . . . . . . . . . . . . . . . . . . . . . . . . . . . . . . . . . . . . . . . . . . . . . 14
Explicit proxy mode. . . . . . . . . . . . . . . . . . . . . . . . . . . . . . . . . . . . . . . . . . . . . . . . . . . . . . . . . . . . . . . . . 15
Deployment Strategies for Using the device in a DMZ. . . . . . . . . . . . . . . . . . . . . . . . . . . . . . . . . . . . . . . . . . . . 17
SMTP configuration in a DMZ. . . . . . . . . . . . . . . . . . . . . . . . . . . . . . . . . . . . . . . . . . . . . . . . . . . . . . . . . 18
Workload management. . . . . . . . . . . . . . . . . . . . . . . . . . . . . . . . . . . . . . . . . . . . . . . . . . . . . . . . . . . . . . 20
Connecting and configuring the appliance. . . . . . . . . . . . . . . . . . . . . . . . . . . . . . . . . . . . . . . . . . . . . 21
Installation quick reference table. . . . . . . . . . . . . . . . . . . . . . . . . . . . . . . . . . . . . . . . . . . . . . . . . . . . . . . . . . . . . 21
Ports and connections. . . . . . . . . . . . . . . . . . . . . . . . . . . . . . . . . . . . . . . . . . . . . . . . . . . . . . . . . . . . . . . . . . . . . . 22
3000, 3100 panel layout. . . . . . . . . . . . . . . . . . . . . . . . . . . . . . . . . . . . . . . . . . . . . . . . . . . . . . . . . . . . . 22
3200 panel layout. . . . . . . . . . . . . . . . . . . . . . . . . . . . . . . . . . . . . . . . . . . . . . . . . . . . . . . . . . . . . . . . . . 23
3300 panel layout. . . . . . . . . . . . . . . . . . . . . . . . . . . . . . . . . . . . . . . . . . . . . . . . . . . . . . . . . . . . . . . . . . 23
3400 panel layout. . . . . . . . . . . . . . . . . . . . . . . . . . . . . . . . . . . . . . . . . . . . . . . . . . . . . . . . . . . . . . . . . . 23
Panel components: 3000, 3100, 3200, 3300, 3400. . . . . . . . . . . . . . . . . . . . . . . . . . . . . . . . . . . . . . . 23
Physically installing the appliance. . . . . . . . . . . . . . . . . . . . . . . . . . . . . . . . . . . . . . . . . . . . . . . . . . . . . . . . . . . . 25
Mounting the appliance in a rack. . . . . . . . . . . . . . . . . . . . . . . . . . . . . . . . . . . . . . . . . . . . . . . . . . . . . . 26
Connect to the network. . . . . . . . . . . . . . . . . . . . . . . . . . . . . . . . . . . . . . . . . . . . . . . . . . . . . . . . . . . . . . . . . . . . 26
3McAfee Email and Web Security Appliance 5.5 Installation Guide
Page 4

Contents
Port numbers. . . . . . . . . . . . . . . . . . . . . . . . . . . . . . . . . . . . . . . . . . . . . . . . . . . . . . . . . . . . . . . . . . . . . . 26
Using Copper LAN connections. . . . . . . . . . . . . . . . . . . . . . . . . . . . . . . . . . . . . . . . . . . . . . . . . . . . . . . 26
Using Fiber LAN connections. . . . . . . . . . . . . . . . . . . . . . . . . . . . . . . . . . . . . . . . . . . . . . . . . . . . . . . . . 27
Monitor and keyboard. . . . . . . . . . . . . . . . . . . . . . . . . . . . . . . . . . . . . . . . . . . . . . . . . . . . . . . . . . . . . . . 27
Supplying power to the appliance. . . . . . . . . . . . . . . . . . . . . . . . . . . . . . . . . . . . . . . . . . . . . . . . . . . . . . . . . . . . 27
Installing the software. . . . . . . . . . . . . . . . . . . . . . . . . . . . . . . . . . . . . . . . . . . . . . . . . . . . . . . . . . . . . . . . . . . . . 28
Using the Configuration Console. . . . . . . . . . . . . . . . . . . . . . . . . . . . . . . . . . . . . . . . . . . . . . . . . . . . . . . . . . . . . 28
Welcome page. . . . . . . . . . . . . . . . . . . . . . . . . . . . . . . . . . . . . . . . . . . . . . . . . . . . . . . . . . . . . . . . . . . . . 29
Performing a standard installation. . . . . . . . . . . . . . . . . . . . . . . . . . . . . . . . . . . . . . . . . . . . . . . . . . . . . 29
Performing a custom setup. . . . . . . . . . . . . . . . . . . . . . . . . . . . . . . . . . . . . . . . . . . . . . . . . . . . . . . . . . 32
Restoring from a file. . . . . . . . . . . . . . . . . . . . . . . . . . . . . . . . . . . . . . . . . . . . . . . . . . . . . . . . . . . . . . . . 38
Testing the Configuration. . . . . . . . . . . . . . . . . . . . . . . . . . . . . . . . . . . . . . . . . . . . . . . . . . . . . . . . . . . . . . . . . . . 39
Introducing the user interface. . . . . . . . . . . . . . . . . . . . . . . . . . . . . . . . . . . . . . . . . . . . . . . . . . . . . . . . 39
Testing the device. . . . . . . . . . . . . . . . . . . . . . . . . . . . . . . . . . . . . . . . . . . . . . . . . . . . . . . . . . . . . . . . . . 41
Using the device. . . . . . . . . . . . . . . . . . . . . . . . . . . . . . . . . . . . . . . . . . . . . . . . . . . . . . . . . . . . . . . . . . . . . . . . . . 42
Updates and HotFixes. . . . . . . . . . . . . . . . . . . . . . . . . . . . . . . . . . . . . . . . . . . . . . . . . . . . . . . . . . . . . . . 42
After installation. . . . . . . . . . . . . . . . . . . . . . . . . . . . . . . . . . . . . . . . . . . . . . . . . . . . . . . . . . . . . . . . . . . 42
Exploring the appliance. . . . . . . . . . . . . . . . . . . . . . . . . . . . . . . . . . . . . . . . . . . . . . . . . . . . . . . . . . . . . . . . . . 43
Generating reports. . . . . . . . . . . . . . . . . . . . . . . . . . . . . . . . . . . . . . . . . . . . . . . . . . . . . . . . . . . . . . . . . . . . . . . . 43
Using policies to manage message scanning. . . . . . . . . . . . . . . . . . . . . . . . . . . . . . . . . . . . . . . . . . . . . . . . . . . 43
Creating an anti-virus scanning policy. . . . . . . . . . . . . . . . . . . . . . . . . . . . . . . . . . . . . . . . . . . . . . . . . . 44
Creating an anti-spam scanning policy. . . . . . . . . . . . . . . . . . . . . . . . . . . . . . . . . . . . . . . . . . . . . . . . . 45
Creating an email compliance policy. . . . . . . . . . . . . . . . . . . . . . . . . . . . . . . . . . . . . . . . . . . . . . . . . . . 46
Creating a content filtering policy. . . . . . . . . . . . . . . . . . . . . . . . . . . . . . . . . . . . . . . . . . . . . . . . . . . . . 46
About Virtual host management. . . . . . . . . . . . . . . . . . . . . . . . . . . . . . . . . . . . . . . . . . . . . . . . . . . . . . 47
Troubleshooting. . . . . . . . . . . . . . . . . . . . . . . . . . . . . . . . . . . . . . . . . . . . . . . . . . . . . . . . . . . . . . . . . . . . . . . . . . . 49
General problems. . . . . . . . . . . . . . . . . . . . . . . . . . . . . . . . . . . . . . . . . . . . . . . . . . . . . . . . . . . . . . . . . . . . . . . . . 49
The appliance is not receiving power. . . . . . . . . . . . . . . . . . . . . . . . . . . . . . . . . . . . . . . . . . . . . . . . . . 49
The appliance is not receiving traffic from the network. . . . . . . . . . . . . . . . . . . . . . . . . . . . . . . . . . . . 49
FAQ. . . . . . . . . . . . . . . . . . . . . . . . . . . . . . . . . . . . . . . . . . . . . . . . . . . . . . . . . . . . . . . . . . . . . . . . . . . . . . . . . . . . 50
Interface problems. . . . . . . . . . . . . . . . . . . . . . . . . . . . . . . . . . . . . . . . . . . . . . . . . . . . . . . . . . . . . . . . . 50
Mail issues. . . . . . . . . . . . . . . . . . . . . . . . . . . . . . . . . . . . . . . . . . . . . . . . . . . . . . . . . . . . . . . . . . . . . . . . 51
Delivery. . . . . . . . . . . . . . . . . . . . . . . . . . . . . . . . . . . . . . . . . . . . . . . . . . . . . . . . . . . . . . . . . . . . . . . . . . 52
Email attachments. . . . . . . . . . . . . . . . . . . . . . . . . . . . . . . . . . . . . . . . . . . . . . . . . . . . . . . . . . . . . . . . . 52
POP3. . . . . . . . . . . . . . . . . . . . . . . . . . . . . . . . . . . . . . . . . . . . . . . . . . . . . . . . . . . . . . . . . . . . . . . . . . . . 53
Physical configuration. . . . . . . . . . . . . . . . . . . . . . . . . . . . . . . . . . . . . . . . . . . . . . . . . . . . . . . . . . . . . . . 53
System configuration. . . . . . . . . . . . . . . . . . . . . . . . . . . . . . . . . . . . . . . . . . . . . . . . . . . . . . . . . . . . . . . 54
McAfee Email and Web Security Appliance 5.5 Installation Guide4
Page 5

Contents
System maintenance. . . . . . . . . . . . . . . . . . . . . . . . . . . . . . . . . . . . . . . . . . . . . . . . . . . . . . . . . . . . . . . . 54
Anti-virus automatic updating. . . . . . . . . . . . . . . . . . . . . . . . . . . . . . . . . . . . . . . . . . . . . . . . . . . . . . . . 54
Anti-spam. . . . . . . . . . . . . . . . . . . . . . . . . . . . . . . . . . . . . . . . . . . . . . . . . . . . . . . . . . . . . . . . . . . . . . . . 55
Getting more help — the links bar. . . . . . . . . . . . . . . . . . . . . . . . . . . . . . . . . . . . . . . . . . . . . . . . . . . . . . . . . . . . 57
5McAfee Email and Web Security Appliance 5.5 Installation Guide
Page 6

Introducing McAfee Email and Web Security
Appliances
This guide provides the necessary information for installing the McAfee®Email and Web Security
Appliance 5.5. It provides steps and verification of the installation process.
This guide demonstrates how to configure Email and Web Security software and when completed
the user will have a fully functional appliance.
Contents
How to use this guide
Definition of terms used in this guide
Graphical conventions
Documentation
Available resources
How to use this guide
This guide helps you to:
• Plan and perform your installation.
• Become familiar with the interface.
• Test that the product functions correctly.
• Apply the latest detection definition files.
• Explore some scanning policies, create reports, and get status information.
• Troubleshoot basic issues.
You can find additional information about the product's scanning features in the online help.
Who should read this guide
The information in this guide is intended primarily for network administrators who are responsible
for their company's anti-virus and security program.
Definition of terms used in this guide
This information defines some key terms used in this guide.
McAfee Email and Web Security Appliance 5.5 Installation Guide6
Page 7

Introducing McAfee Email and Web Security Appliances
Definition of terms used in this guide
DefinitionTerm
demilitarized zone (DMZ)
DAT files
operational mode
policy
Reputation Service check
A computer host or small network inserted as a buffer
between a private network and the outside public network
to prevent direct access from outside users to resources
on the private network.
Detection definition (DAT) files, also called signature files,
containing the definitions that identify, detect, and repair
viruses, Trojan horses, spyware, adware, and other
potentially unwanted programs (PUPs).
Three operating modes for the product: explicit proxy
mode, transparent bridge mode, and transparent router
mode.
A collection of security criteria, such as configuration
settings, benchmarks, and network access specifications,
that defines the level of compliance required for users,
devices, and systems that can be assessed or enforced by
a McAfee security application.
Part of sender authentication. If a sender fails the
Reputation Service check, the appliance is set to close the
connection and deny the message. The sender's IP address
is added to a list of blocked connections and is
automatically blocked in future at the kernel level.
7McAfee Email and Web Security Appliance 5.5 Installation Guide
Page 8

Introducing McAfee Email and Web Security Appliances
Graphical conventions
Graphical conventions
Figures in this guide use the following symbols.
InternetAppliance
Documentation
This Installation Guide is included with your product. Additional information is available in the
online help included with the product, and other documentation available from the
http://mysupport.mcafee.com website.
Mail server
VLAN)
Other server (such as DNS
server)
RouterUser or client computer
FirewallSwitch
NetworkNetwork zone (DMZ or
Perceived data pathActual data path
Available resources
This information describes where to get more information and assistance.
McAfee products
Product Guide
Online help
McAfee Email and Web Security Appliance 5.5 Installation Guide8
McAfee KnowledgeBase. Go to
https://mysupport.mcafee.com/eservice/Default.aspx
and click Search the KnowledgeBase. From
the Product list, select Email and Web
Security Appliance Software.
McAfee download site. Includes information
about basic concepts, policies, protocols
(SMTP, POP3, FTP, HTTP, and ICAP),
maintenance, and monitoring. You will need
your Grant ID number.
Product interface. Includes information about
basic concepts, policies, protocols (SMTP,
Page 9

Introducing McAfee Email and Web Security Appliances
Available resources
POP3, FTP, HTTP, and ICAP), maintenance,
and monitoring.
9McAfee Email and Web Security Appliance 5.5 Installation Guide
Page 10

Pre-installation
To ensure the safe operation of the product, consider the following before you begin the
installation.
• Familiarize yourself with its operational modes and capabilities. It is important that you
choose a valid configuration.
• Decide how to integrate the appliance into your network and determine what information
you need before you start. For example, the name and IP address for the appliance.
• Unpack the product as close to its intended location as possible.
• Remove the product from any protective packaging and place it on a flat surface.
• Observe all provided safety warnings.
CAUTION: Review and be familiar with all provided safety information.
Contents
What’s in the box
Plan the installation
Inappropriate use
Operating conditions
Positioning the appliance
What’s in the box
To check that all components are present, refer to the packing list supplied with your product.
Generally, you should have:
• An appliance
• Power cords
• Network cables
• Email and Web Security v5.5 installation and recovery CD
• Linux source code CD
If an item is missing or damaged, contact your supplier.
Pre-installation
Plan the installation
Before unpacking your blade server, it is important to plan the installation and deployment.
Consider the following:
McAfee Email and Web Security Appliance 5.5 Installation Guide10
Page 11

Pre-installation
Inappropriate use
• Environmental requirements
Information on environmental site requirements, including temperature, airflow, and space
requirements.
• Power requirements and considerations
Power requirements and electrical factors that must be considered before installation.
• Hardware specifications and requirements
• Configuration scenarios
• Preparing for installation.
Pre-installation
Inappropriate use
The product is:
• Not a firewall. — You must use it within your organization behind a correctly configured
firewall.
• Not a server for storing extra software and files. — Do not install any software on
the device or add any extra files to it unless instructed by the product documentation or
your support representative. The device cannot handle all types of traffic. If you use explicit
proxy mode, only protocols that are to be scanned should be sent to the device.
Pre-installation
Operating conditions
Relative humidity
Maximum shock
Positioning the appliance
Install the appliance so that you can control physical access to the unit and access the ports
and connections.
A rack-mounting kit is supplied with the appliance, allowing you to install the appliance in a
19-inch rack — see Mounting the appliance in a rack.
10 to 35°C (50 to 95°F).Temperature
20% to 80% (non-condensing) with a maximum humidity
gradient of 10% per hour.
0.25 G at 3–200 Hz for 15 minutes.Maximum vibration
One shock pulse in the positive z axis (one pulse on each
side of the unit) of 31 G for up to 2.6 ms.
-16 to 3,048 m (-50 to 10,000 ft.).Altitude
11McAfee Email and Web Security Appliance 5.5 Installation Guide
Page 12

Pre-installation
Considerations about Network Modes
Considerations about Network Modes
Before you install and configure your Email and Web Security Appliance, you must decide which
network mode to use. The mode you choose determines how you physically connect your
appliance to your network.
You can choose from the following network modes.
• Transparent bridge mode — the device acts as an Ethernet bridge.
• Transparent router mode — the device acts as a router.
• Explicit proxy mode — the device acts as a proxy server and a mail relay.
If you are still unsure about the mode to use after reading this and the following sections,
consult your network expert.
CAUTION: If you plan on deploying one or more scanning blades running McAfee Web Gateway
(formally WebWasher) software, you must configure your blade server in Explicit Proxy mode.
Architectural considerations about network modes
The main considerations regarding the network modes are:
• Whether communicating devices are aware of the existence of the device. That is, if the
device is operating in one of the transparent modes.
• How the device physically connects to your network.
• The configuration needed to incorporate the device into your network.
• Where the configuration takes place in the network.
Considerations before changing network modes
In explicit proxy and transparent router modes, you can set up the device to sit on more than
one network by setting up multiple IP addresses for the LAN1 and LAN2 ports.
If you change to transparent bridge mode from explicit proxy or transparent router mode, only
the enabled IP addresses for each port are carried over.
TIP: After you select an operational mode, McAfee recommends not changing it unless you
move the device or restructure your network.
Contents
Pre-installation
Transparent bridge mode
Transparent router mode
Explicit proxy mode
McAfee Email and Web Security Appliance 5.5 Installation Guide12
Page 13

Pre-installation
Considerations about Network Modes
Transparent bridge mode
In transparent bridge mode, the communicating servers are unaware of the device — the
device’s operation is transparent to the servers.
Figure 1: Transparent communication
In Figure 1: Transparent communication, the external mail server (A) sends email messages
to the internal mail server (C). The external mail server is unaware that the email message is
intercepted and scanned by the device (B).
The external mail server seems to communicate directly with the internal mail server — the
path is shown as a dotted line. In reality, traffic might pass through several network devices
and be intercepted and scanned by the device before reaching the internal mail server.
What the device does
In transparent bridge mode, the device connects to your network using the LAN1 and LAN2
ports. The device scans the traffic it receives, and acts as a bridge connecting two separate
physical networks, but treats them as a single logical network.
Configuration
Transparent bridge mode requires less configuration than transparent router and explicit proxy
modes. You do not need to reconfigure all your clients, default gateway, MX records, Firewall
NAT or mail servers to send traffic to the device. Because the device is not a router in this
mode, you do not need to update a routing table.
Where to place the device
For security reasons, you must use the device inside your organization, behind a firewall.
Figure 2: Single logical network
TIP: In transparent bridge mode, position the device between the firewall and your router, as
shown in Figure 2: Single logical network.
In this mode, you physically connect two network segments to the device, and the device treats
them as one logical network. Because the devices — firewall, device, and router — are on the
same logical network, they must all have compatible IP addresses on the same subnet.
Devices on one side of the bridge (such as a router) that communicate with devices on the
other side of the bridge (such as a firewall) are unaware of the bridge. They are unaware that
13McAfee Email and Web Security Appliance 5.5 Installation Guide
Page 14

Pre-installation
Considerations about Network Modes
traffic is intercepted and scanned, therefore the device is said to operate as a transparent
bridge.
Figure 3: Transparent bridge mode
Transparent router mode
In transparent router mode, the device scans email traffic between two networks. The device
has one IP address for outgoing scanned traffic, and must have one IP address for incoming
traffic.
The communicating network servers are unaware of the intervention of the device — the device’s
operation is
What the device does
In transparent router mode, the device connects to your networks using the LAN1 and LAN2
ports. The device scans the traffic it receives on one network, and forwards it to the next
network device on a different network. The device acts as a router, routing the traffic between
networks, based on the information held in its routing tables.
Configuration
Using transparent router mode, you do not need to explicitly reconfigure your network devices
to send traffic to the device. You need only configure the routing table for the device, and
modify some routing information for the network devices on either side of it (the devices
connected to its LAN1 and LAN2 ports). For example, you might need to make the device your
default gateway.
transparent
to the devices.
McAfee Email and Web Security Appliance 5.5 Installation Guide14
Page 15

Pre-installation
Considerations about Network Modes
In transparent router mode, the device must join two networks. The device must be positioned
inside your organization, behind a firewall.
NOTE: Transparent router mode does not support Multicast IP traffic or non-IP protocols, such
as NETBEUI and IPX.
Where to place the device
Use the device in transparent router mode to replace an existing router on your network.
TIP: If you use transparent router mode and you do not replace an existing router, you must
reconfigure part of your network to route traffic correctly through the device.
Figure 4: Transparent router mode configuration
You need to:
• Configure your client devices to point to the default gateway.
• Configure the device to use the Internet gateway as its default gateway.
• Ensure your client devices can deliver email messages to the mail servers within your
organization.
Explicit proxy mode
In explicit proxy mode, some network devices must be set up explicitly to send traffic to the
device. The device then works as a proxy or relay, processing traffic on behalf of the devices.
Explicit proxy mode is best suited to networks where client devices connect to the device through
a single upstream and downstream device.
TIP: This might not be the best option if several network devices must be reconfigured to send
traffic to the device.
15McAfee Email and Web Security Appliance 5.5 Installation Guide
Page 16

Pre-installation
Considerations about Network Modes
Network and device configuration
If the device is set to explicit proxy mode, you must explicitly configure your internal mail server
to relay email traffic to the device. The device scans the email traffic before forwarding it, on
behalf of the sender, to the external mail server. The external mail server then forwards the
email message to the recipient.
In a similar way, the network must be configured so that incoming email messages from the
Internet are delivered to the device, not the internal mail server.
Figure 5: Relaying email traffic
The device scans the traffic before forwarding it, on behalf of the sender, to the internal mail
server for delivery, as shown in Figure 5: Relaying email traffic.
For example, an external mail server can communicate directly with the device, although traffic
might pass through several network servers before reaching the device. The perceived path is
from the external mail server to the device.
Protocols
To scan a supported protocol, you must configure your other network servers or client computers
to route that protocol through the device, so that no traffic bypasses the device.
Firewall rules
Explicit proxy mode invalidates any firewall rules set up for client access to the Internet. The
firewall sees only the IP address information for the device, not the IP addresses of the clients,
so the firewall cannot apply its Internet access rules to the clients.
Where to place the device
Configure the network devices so that traffic needing to be scanned is sent to the device. This
is more important than the location of the device.
McAfee Email and Web Security Appliance 5.5 Installation Guide16
Page 17

Pre-installation
Deployment Strategies for Using the device in a DMZ
The router must allow all users to connect to the device.
Figure 6: Explicit proxy configuration
The device must be positioned inside your organization, behind a firewall, as shown in Figure
6: Explicit proxy configuration.
Typically, the firewall is configured to block traffic that does not come directly from the device.
If you are unsure about your network’s topology and how to integrate the device, consult your
network expert.
Use this configuration if:
• The device is operating in explicit proxy mode.
• You are using email (SMTP).
For this configuration, you must:
• Configure the external Domain Name System (DNS) servers or Network Address Translation
(NAT) on the firewall so that the external mail server delivers mail to the device, not to the
internal mail server.
• Configure the internal mail servers to send email messages to the device. That is, the internal
mail servers must use the device as a smart host. Ensure that your client devices can deliver
email messages to the mail servers within your organization.
• Ensure that your firewall rules are updated. The firewall must accept traffic from the device,
but must not accept traffic that comes directly from the client devices. Set up rules to prevent
unwanted traffic entering your organization.
Deployment Strategies for Using the device in a
DMZ
A demilitarized zone (DMZ) is a network separated by a firewall from all other networks, including
the Internet and other internal networks. The typical goal behind the implementation of a DMZ
is to lock down access to servers that provide services to the Internet, such as email.
Hackers often gain access to networks by identifying the TCP/UDP ports on which applications
are listening for requests, then exploiting known vulnerabilities in applications. Firewalls
dramatically reduce the risk of such exploits by controlling access to specific ports on specific
servers.
17McAfee Email and Web Security Appliance 5.5 Installation Guide
Page 18

Pre-installation
Deployment Strategies for Using the device in a DMZ
The device can be added easily to a DMZ configuration. The way you use the device in a DMZ
depends on the protocols you intend to scan.
Contents
Pre-installation
SMTP configuration in a DMZ
SMTP configuration in a DMZ
The DMZ is a good location for encrypting mail. By the time the mail traffic reaches the firewall
for the second time (on its way from the DMZ to the internal network), it has been encrypted.
Devices which scan SMTP traffic in a DMZ are usually configured in explicit proxy mode.
Configuration changes need only be made to the MX records for the mail servers.
NOTE: You can use transparent bridge mode when scanning SMTP within a DMZ. However, if
you do not control the flow of traffic correctly, the device scans every message twice, once in
each direction. For this reason, explicit proxy mode is usually used for SMTP scanning.
Mail relay
Figure 7: Device in explicit proxy configuration in a DMZ
If you have a mail relay already set up in your DMZ, you can replace the relay with the device.
To use your existing firewall policies, give the device the same IP address as the mail relay.
Mail gateway
SMTP does not provide methods to encrypt mail messages — you can use Transport Layer
Security (TLS) to encrypt the link, but not the mail messages. As a result, some companies do
not allow such traffic on their internal network. To overcome this, they often use a proprietary
mail gateway, such as Lotus Notes®or Microsoft®Exchange, to encrypt the mail traffic before
it reaches the internal network.
McAfee Email and Web Security Appliance 5.5 Installation Guide18
Page 19

Pre-installation
Deployment Strategies for Using the device in a DMZ
To implement a DMZ configuration using a proprietary mail gateway, add the scanning device
to the DMZ on the SMTP side of the gateway.
Figure 8: Protecting a mail gateway in DMZ
In this situation, configure:
• The public MX records to instruct external mail servers to send all inbound mail to the device
(instead of the gateway).
• The device to forward all inbound mail to the mail gateway, and deliver all outbound mail
using DNS or an external relay.
• The mail gateway to forward all inbound mail to the internal mail servers and all other
(outbound) mail to the device.
• The firewall to allow inbound mail that is destined for the device only.
NOTE: Firewalls configured to use Network Address Translation (NAT), and that redirect inbound
mail to internal mail servers, do not need their public MX records reconfigured. This is because
they are directing traffic to the firewall rather than the mail gateway itself. In this case, the
firewall must instead be reconfigured to direct inbound mail requests to the device.
Firewall rules specific to Lotus Notes
By default, Lotus Notes servers communicate over TCP port 1352. The firewall rules typically
used to secure Notes servers in a DMZ allow the following through the firewall:
• Inbound SMTP requests (TCP port 25) originating from the Internet and destined for the
device.
• TCP port 1352 requests originating from the Notes gateway and destined for an internal
Notes server.
• TCP port 1352 requests originating from an internal Notes server and destined for the Notes
gateway.
• SMTP requests originating from the device and destined for the Internet.
All other SMTP and TCP port 1352 requests are denied.
Firewall rules specific to Microsoft Exchange
A Microsoft Exchange-based mail system requires a significant workaround.
19McAfee Email and Web Security Appliance 5.5 Installation Guide
Page 20

Pre-installation
Deployment Strategies for Using the device in a DMZ
When Exchange servers communicate with each other, they send their initial packets using the
RPC protocol (TCP port 135). However, once the initial communication is established, two ports
are chosen dynamically and used to send all subsequent packets for the remainder of the
communication. You cannot configure a firewall to recognize these dynamically-chosen ports.
Therefore, the firewall does not pass the packets.
The workaround is to modify the registry on each of the Exchange servers communicating
across the firewall to always use the same two “dynamic” ports, then open TCP 135 and these
two ports on the firewall.
We mention this workaround to provide a comprehensive explanation, but we do not recommend
it. The RPC protocol is widespread on Microsoft networks — opening TCP 135 inbound is a red
flag to most security professionals.
If you intend to use this workaround, details can be found in the following Knowledge Base
articles on the Microsoft website:
• Q155831
• Q176466
Workload management
The appliances includes its own internal workload management, distributing the scanning load
evenly between all appliances configured to work together.
The blade server includes its own internal workload management, distributing the scanning
load evenly between all scanning blades installed within the enclosure.
You do not need to deploy an external load balancer.
Pre-installation
McAfee Email and Web Security Appliance 5.5 Installation Guide20
Page 21

Connecting and configuring the appliance
McAfee recommends that you consider installing the appliance in the following order:
1 Unpack the appliance and confirm no parts are missing (check against parts lists in the
box)
2 Rack-mount the appliance.
3 Connect the peripherals and power (monitor, keyboard).
4 Connect the appliance to the network, noting deployment scenarios and intended network
mode.
5 Install the software onto the appliance.
6 Use the Configuration Console to carry out the basic configuration (server name, IP
addresses, gateway, and so on).
7 Connect to the administration interface.
8 Run the Setup Wizard.
9 Route test network traffic through the appliance.
10 Test that the network traffic is being scanned.
11 Configure policies and reporting.
12 Route production traffic through the appliance.
CAUTION: Connecting the appliance to your network can disrupt Internet access or other
network services. Ensure that you have arranged network down-time for this, and that you
schedule this during periods of low network usage.
Contents
Installation quick reference table
Physically installing the appliance
Connect to the network
Supplying power to the appliance
Using the Configuration Console
Installation quick reference table
To install the appliance, go through the steps in this table:
1.
parts lists in the box.
is described here ...This step ...
What’s in the boxUnpack the pallet and check the contents against the
Monitor and keyboardConnect the peripherals and power.2.
21McAfee Email and Web Security Appliance 5.5 Installation Guide
Page 22

Connecting and configuring the appliance
Ports and connections
Ports and connections
This chapter shows the panel layouts for each model of appliance.
3000, 3100 panel layout
3200 panel layout
3300 panel layout
3400 panel layout
Panel components: 3000, 3100, 3200, 3300, 3400
is described here ...This step ...
Connect to the networkConnect the appliance to the network.3.
Installing the softwareInstall the software.4.
Using the Configuration ConsolePerform basic configuration.5.
Using the Configuration ConsoleConnect to the administration interface.6.
Testing the deviceRoute the test network traffic through the appliance.7.
Testing the deviceTest that the network traffic is being scanned.8.
Using policies to manage message scanningConfigure policies and reporting.9.
Using the Configuration ConsoleConfigure production traffic through the system.10.
3000, 3100 panel layout
McAfee Email and Web Security Appliance 5.5 Installation Guide22
Page 23

Connecting and configuring the appliance
Ports and connections
3200 panel layout
3300 panel layout
3400 panel layout
Panel components: 3000, 3100, 3200, 3300, 3400
CD-ROM
drive
status
and hard
disk drive
Use the CD-ROM drive only when restoring, upgrading, or diagnosing system faults on the
appliance.
System status LEDSystem
• Lights — during normal use.
•
Flashes — when the System Identification ( ) button is pressed.
23McAfee Email and Web Security Appliance 5.5 Installation Guide
Page 24

Connecting and configuring the appliance
Ports and connections
(HDD)
LEDs
and LED
Power
socket
System
identification
button
port
port
port
• Flashes amber when there is a system fault.
HDD LED
• Flashes green when the hard disk drive is in use.
Turns the appliance on and off.Power
• Lights — when the appliance is operational.
• Flashes — when the appliance is in standby mode. It is receiving power through the power
socket, but the power button is off. The network ports remain active but no protocols or
data intended for the appliance can pass through the appliance.
Use the correct power cord for your location.
NOTE: 3300 and 3400 appliances only — McAfee recommends you connect both power
supplies.
The system identification buttons on the front and back panels help you locate the appliance
within a rack. Push the button to flash the System Status LEDs () on the front panel and System
indication button LED on the back panel. Push the button again to stop the LEDs flashing.
Connect a monitor to this port when you are:Monitor
• Initially configuring the appliance.
• Restoring and upgrading the appliance’s software.
• Diagnosing system faults.
For connecting a keyboard.Keyboard
These appliances can now all use USB Keyboards.
For connecting a mouse.Mouse
These appliances can now all use a USB mouse.
LAN1
port (NIC
1) and
LAN2
port (NIC
2)
Fiber
LAN1
port and
LAN2
port
(3300
and 3400
appliances
only)
See the labeling on the back of the unit to identify the LAN ports.Copper
All ports are RJ-45 10/100/1000 Mbps auto-negotiating (auto-sensing) Ethernet network ports.
They must only be used with equipment designed for 10 Mbps, 100 Mbps or 1000 Mbps (1Gb)
Ethernet network use.
Each LAN port has built-in LEDs:
• Lights green — when the port has a good link to the attached Ethernet.
• Flashes amber — when the port detects activity on the attached Ethernet.
The 3300 and 3400 appliances also have two fiber LC connectors for 1000 BASE-SX Ethernet
network connections. You can use copper or the fiber LAN ports.
The fiber ports are disabled by default.
To enable the fiber ports, use one of the copper LAN ports to make a management connection;
a local management connection using copper LAN2, or a remote Management Connection
using copper LAN1. Use a web browser to access the interface and enable the fiber ports using
the Setup Wizard. See the Product Guide for more information.
NOTE: The fiber ports have covers to protect the optics when not in use. Remove covers before
use and replace covers if disconnecting the fiber connections.
The following information applies to the copper and fiber ports.
LAN1 port
The LAN1 port is used to connect the appliance to your network. It receives and transmits the
following traffic:
• Inbound and outbound protocol traffic.
• Management and log data, including the communication from the remote web browser that
you use to access the appliance’s user interface. If you use ePolicy Orchestrator software
with the appliance, its communication is also transmitted through this port.
McAfee Email and Web Security Appliance 5.5 Installation Guide24
Page 25

Connecting and configuring the appliance
Physically installing the appliance
If you have DHCP configured on your network, the IP addresses for these ports are now
automatically allocated. Otherwise, the LAN1 port has a default IP address of 10.1.1.108
(subnet mask 255.255.255.0) to allow you to access the appliance initially across the network.
LAN2 port
The LAN2 port has a default IP address of 10.1.2.108 (subnet mask 255.255.255.0).
The operation of the LAN2 port depends on how you are using the appliance:
• Explicit Proxy mode — The LAN2 port is only used for direct local management connections.
It cannot receive and transmit inbound and outbound protocol traffic. Use this port if you
cannot achieve a remote management connection through the LAN1 port, because:
• The LAN1 port IP address is in a different subnet to your remote computer.
• You have forgotten the LAN1 port IP address that you set, and have disabled the default
IP address of 10.1.1.108 for that port.
• You connected fiber cables to the fiber LAN1 and LAN2 ports, and now want to enable
these ports.
• Transparent Router and Transparent Bridge modes — The LAN2 port is used (with
LAN1) to connect the appliance to your network. It receives and transmits the same type
of traffic as the LAN1 port.
Remote
Access
Card —
3300 and
3400
appliances
only
drives
Provides remote access and limited management of the 3300 and 3400 appliances. It allows
you to reboot the appliance using a CD in a remote administration computer. You can connect
an Ethernet Cat 5e cable to the RJ-45 port.
3000, 3100 appliances only — The 3000 and 3100 appliances have a single hard disk drive.Hard disk
3200 appliances only — The 3200 appliances have two SCSI hard disk drives, managed in
a RAID 1 (mirror) configuration.
3300 and 3400 appliances only — There are two "hot-pluggable" SCSI hard disk drives,
managed in a RAID 1 (mirror) configuration.
The drives mirror the appliance’s operating system and data, ensuring seamless operation in
the event of a problem with one of the drives. You can then remove the failed drive and insert
a new drive without needing to turn off the appliance, see Troubleshooting.
The LEDs show the following status information:
• Operational — the top LED lights green when the drive is in use.
CAUTION: Do not remove a drive when it is operational because this can cause data loss
or hardware damage.
• Predicted failure — The bottom LED flashes green, amber, and off if the drive is about
to fail.
• Failure — The bottom LED flashes amber when the drive has failed.
• No power — Both LEDs are off when the drive is not receiving power from the appliance.
Connect Keyboard, Mouse and Out of Band Management adapter (if required).USB
Connectors
Physically installing the appliance
Use this task to physically install the appliance.
Task
1 Remove the appliance from the protective packaging and place it on a flat surface.
25McAfee Email and Web Security Appliance 5.5 Installation Guide
Page 26

Connecting and configuring the appliance
Connect to the network
2 If you are going to install the appliance in a 19-inch rack, perform the steps in Mounting
the appliance in a rack.
3 Connect a monitor, keyboard and mouse to the appliance.
4 Connect power leads to the monitor and the appliance, but do not connect to the power
supplies yet.
5 Connect the appliance to the network, taking into consideratation your chosen operating
mode.
Mounting the appliance in a rack
The rack kit enables you to install the appliance into a four-post rack. The kit can be used with
most industry-standard 19-inch rack cabinets.
The rack kit contains:
• 2 mounting rails
• 8 screws
• 2 releasable tie wraps
You will need a screwdriver that is suitable for use with the supplied screws.
CAUTION:
Make sure you follow the supplied safety warnings. Always load the rack from the bottom up.
If you are installing multiple appliances, start with the lowest available position first.
Contents
Connect to the network
This section describes how to connect the appliance to your network.
The ports and cables that you use to connect the appliance to your network depend on how
you are going to use the appliance. For information about network modes, see Considerations
about Network Modes.
Port numbers
When you connect the appliance to your network, use the following port numbers:
• For HTTPS, use Port 443.
• For HTTP, use Port 80.
• For SMTP, use Port 25.
• For POP3, use port 110.
• For FTP, use Port 21.
Using Copper LAN connections
Using the LAN1 and LAN2 switch connections and the supplied network cables (or equivalent
Cat 5e or Cat 6 Ethernet cables), connect the appliance to your network according to the network
mode you have chosen.
McAfee Email and Web Security Appliance 5.5 Installation Guide26
Page 27

Connecting and configuring the appliance
Supplying power to the appliance
If you have DHCP configured on your network, the IP addresses for these ports are now
automatically allocated.
Transparent bridge mode
Use the copper LAN cables (supplied) to connect the appliance’s LAN1 and LAN2 switches to
your network so that the appliance is inserted into the data stream.
Transparent router mode
The appliance functions as a router. The LAN segments connected to its two network interfaces
must therefore be on different IP subnets. It must replace an existing router, or a new subnet
must be created on one side of the appliance. Do this by changing the IP address or the netmask
used by the computers on that side.
Explicit proxy mode
Use a copper LAN cable (supplied) to connect the LAN1 or LAN2 switch to your network. The
cable is a straight-through (uncrossed) cable, and connects the appliance to a normal uncrossed
RJ-45 network switch.
In explicit proxy mode, the unused switch connection can be used as a dedicated management
port. To manage the appliance locally, use a crossover Cat 5e Ethernet cable to connect the
appliance to your local computer’s network card.
Using Fiber LAN connections
Use the fiber cables to connect the LAN1 and LAN2 connectors to your network. The connectors
use depend on how you are going to use the appliance.
Transparent bridge mode
Use the fiber cables to connect the LAN1 and LAN2 switches to your network.
Transparent router mode
Use the fiber cables to connect the LAN1 and LAN2 switches to different IP subnets.
Explicit proxy mode
Use a fiber cable to connect the apliance’s LAN1 switches to your network.
In explicit proxy mode, the unused connector can be used as a dedicated management port.
If your management computer has a compatible Network Interface Card (NIC), connect it to
the remaining connector for local management.
Monitor and keyboard
Connect a monitor and keyboard to the appliance.
Supplying power to the appliance
Use this task to supply power to the appliance and switch it on.
27McAfee Email and Web Security Appliance 5.5 Installation Guide
Page 28

Connecting and configuring the appliance
Installing the software
Task
1 Connect the monitor and appliance power cables to power outlets.
NOTE: If the power cord is not suitable for the country of use, contact your supplier.
2 Turn on the appliance by pushing the power button. After booting up, the Configuration
Console appears on the monitor. See Using the Configuration Console
Installing the software
Use this task to install the Email and Web Security software on the device.
Tasks
1 From a computer with internet access, download the latest version of the Email and Web
Security software from the McAfee download site. (You will need your Grant Number to do
this.)
2 Create a CD from this image.
3 Attach a monitor, keyboard and mouse to the device.
4 With the device switched on, insert the CD into the CD-ROM drive.
5 Re-boot the device. The software is installed on the device.
Using the Configuration Console
With the version 5.5 software, the configuration process has been simplified. You can now
configure your device either from the Configuration Console, or from the Setup Wizard within
the user interface.
The Configuration Console launches automatically at the end of the startup sequence after
either:
• an unconfigured device starts,
• or after a device is reset to its factory defaults.
When launched, the Configuration Console provides you with options to either configure your
device in your preferred language from the device console, or provides instructions for you to
connect to the Setup Wizard within the user interface from another computer on the same class
C subnet. Both methods provide you with the same options to configure your device.
NOTE: From the Configuration Console, you can configure a new installation of the appliance
software. However, to configure your appliance using a previouosly saved configuration file,
you need to log onto the appliance user interface, and run the setup Wizard (System | Setup
Wizard).
This version of the software also introduces automatic configuration using DHCP for the following
parameters:
• Host name
• Domain name
• Default gateway
• DNS server
McAfee Email and Web Security Appliance 5.5 Installation Guide28
Page 29

Connecting and configuring the appliance
Using the Configuration Console
• Leased IP address
• NTP server
Welcome page
Performing a standard installation
Performing a custom setup
Restoring from a file
Welcome page
This is the first page of the Setup Wizard. Use this page to select the type of installation you
want to perform.
NOTE: If you access this page from the Setup Wizard, you will be prompted to enter your
username and password.
• Select Standard Setup (default) to set up your device in Transparent Bridge mode, and
configure it to protect your network. Configure the device for transparent bridge mode only.
If you choose to protect mail traffic the SMTP protocol will be enabled. If you choose to
protect web traffic the HTTP protocol will be enabled.
• Select Custom Setup to select the operating mode for your device. If you choose to protect
mail traffic you can enable SMTP and POP3. If you choose to protect web traffic you can
enable HTTP, FTP and ICAP. You should use this if you need to configure IPv6 and to make
other changes to the default configuration.
• Select Restore from a File (not available from the Configuration Console) to set up your
device based on a previously saved configuration. Following the import of the file you will
be able to chack the imported settings before finishing the wizard.
Performing a standard installation
For the Standard Setup, the wizard includes these pages:
• Traffic
• Basic Settings
• Summary
NOTE: Choosing Standard Setup forces the device to run in Transparent bridge mode.
Traffic
Use this page to specify the type of traffic that the device scans.
Option definitions
DefinitionOption
Web traffic includes HTTP traffic only. After installation:Scan web traffic
• The device protects your network against viruses, and uses McAfee SiteAdvisor when
visiting web sites.
• If you want to scan more types of traffic, you can enable each protocol from its page.
From the menu, select Web | Web Configuration | HTTP, Web | Web Configuration
| ICAP or Web | Web Configuration | FTP.
You can also select:
29McAfee Email and Web Security Appliance 5.5 Installation Guide
Page 30

Connecting and configuring the appliance
Using the Configuration Console
DefinitionOption
• Enable protection against Potentially Unwanted Programs (including Spyware)
McAfee Anti-Spyware protects your network from many types of potentially unwanted
software such as spyware, adware, remote administration tools, dialers and password
crackers. This feature is not enabled by default.
NOTE: McAfee Anti-Spyware is designed to detect and, with your permission, remove
potentially unwanted programs (PUPs). Some purchased or intentionally downloaded
programs act as hosts for PUPs. Removing these PUPs may prevent their hosts from
working. Be sure to review the license agreements for these host programs for further
details. McAfee, Inc. neither encourages nor condones breaking any license agreements
that you may have entered into. Please read the details of all license agreements and
privacy policies carefully before downloading or installing any software.
Email traffic includes SMTP traffic only. After installation:Scan email traffic
• The device protects your network against viruses, spam and phish, and uses McAfee
TrustedSource to protect your network from unwanted email.
• If you want to scan more types of traffic, you can enable each protocol from its page.
From the menu, select Email | Email Configuration | Protocol Configuration |
Connection Settings (POP3) or Email | Email Configuration | Protocol
Configuration | Connection Settings (SMTP).
You can also select:
• Enable protection against Potentially Unwanted Programs (including Spyware)
Local relay domain
Under Relaying options, the device suggests the domain information if this is available via
DHCP. Delete the asterisk to accept the domain name, or type another domain name.
Basic Settings
Use this page to specify basic settings for the appliance, in transparent bridge mode.
NOTE: Several of these settings are automatically configured from your netwrok DHCP server.
Firewall or Gateway server
McAfee®Email and Web Security Appliance 5.5
Active Directory or Domain Name System server
Option definitions
DefinitionOption
Specifies a name, such as device1.Device name
McAfee Email and Web Security Appliance 5.5 Installation Guide30
Page 31

Connecting and configuring the appliance
Using the Configuration Console
DefinitionOption
Specifies a name, such as domain1.com.Domain name
IP address
Gateway IP
DNS Server IP
Specifies an address, such as 198.168.200.10.
The fully qualified domain name (Device name. Domain name) must resolve to this IP
address when the DNS server (specified here) is called. McAfee recommends that this IP
address resolves to the FQDN in a reverse lookup.
Specifies a subnet address, such as 255.255.255.0.Subnet
Specifies an address, such as 198.168.10.1. This is likely to be a router or a firewall. You can
test later that the appliance can communicate with this device.
Specifies the address of a Domain Name Server that the appliance will use to convert website
addresses to IP addresses. This can be an Active Directory or a Domain Name Service server.
You can test later that the appliance can communicate with this server.
Specifies the mode - Transparent bridge.Mode
User ID
Password
Time zone
Set time now
Summary
Use this page to review a summary of the settings that you have made through the Setup
Wizard. To change any value, click its blue link to display the page where you originally typed
the value.
After you click Finish, the setup wizard has completed.
Use the IP address shown on this page to access the interface. For example
https://192.168.200.10. Note that the address begins with https, not http.
When you first log onto the interface, type the user name, scmadmin and the password that
you gave to this setup wizard.
The scmadmin user is the super administrator. You cannot change or disable this account
and the account cannot be deleted. However, you can add more login accounts after
installation.
Specifies the new password. Change the password as soon as possible to keep your appliance
secure.
You must type the new password twice to confirm it. The original default password is
scmchangeme.
Offers a choice of time zones. The zones are organized from West to East to cover mid-Pacific,
America, Europe, Asia, Africa, India, Japan, and Australia.
Specifies the date and the local time. To set the date, click the calendar icon.System Time
When clicked, sets the time on the appliance. You need to click this button before you click
Next.
If it is needed, you can configure Network Time Protocol (NTP) after installation.
Option definitions
DefinitionOption
The value is set according to best practice.
The value is probably not correct.
Although the value is valid, it is not set according to best practice. Check the value before
continuing.
31McAfee Email and Web Security Appliance 5.5 Installation Guide
Page 32

Connecting and configuring the appliance
Using the Configuration Console
DefinitionOption
No value has been set. The value has not been changed from the default. Check the value
before continuing.
Performing a custom setup
For the Custom setup, the wizard includes these these pages:
• Traffic
• Basic Settings
• Network Settings
• Cluster Management
• DNS and Routing
• Time Settings
• Password
• Summary
Traffic
Use this page to specify the type of traffic that the device scans.
• Web traffic includes HTTP (for web browsing), ICAP (for use with ICAP clients), and FTP for
file transfer.
• Email traffic includes SMTP and POP3.
You can enable or disable each protocol (SMTP, POP3, HTTP, ICAP and FTP). If the device is
in Transparent Router or Transparent Bridge mode, and the protocol is disabled, traffic for the
protocol passes through the device, but is not scanned.
If the device is in Explicit Proxy mode, and a protocol is disabled, traffic directed to the blade
server for that protocol is refused. The protocol is blocked at the device. In Explicit Proxy mode,
only SMTP, POP3, HTTP, ICAP and FTP traffic is handled by the blade server. All other traffic
is refused.
If, after installation, you do not want to scan any of the types of traffic, you can disable each
protocol from its page. From the menu, select Email | Email Configuration | Protocol
Configuration or Web | Web Configuration
Option definitions
DefinitionOption
Web traffic includes HTTP, FTP and ICAP traffic. After installation:Scan web traffic
The device protects your network against viruses, and uses McAfee SiteAdvisor when
visiting web sites.
Further options include:
• Enable protection against Potentially Unwanted Programs (including
Spyware)
McAfee Email and Web Security Appliance 5.5 Installation Guide32
Page 33

Connecting and configuring the appliance
Using the Configuration Console
DefinitionOption
McAfee Anti-Spyware protects your network from many types of potentially
unwanted software such as spyware, adware, remote administration tools, dialers
and password crackers. This feature is not enabled by default.
NOTE: McAfee Anti-Spyware is designed to detect and, with your permission, remove
potentially unwanted programs (PUPs). Some purchased or intentionally downloaded
programs act as hosts for PUPs. Removing these PUPs may prevent their hosts from
working. Be sure to review the license agreements for these host programs for further
details. McAfee, Inc. neither encourages nor condones breaking any license
agreements that you may have entered into. Please read the details of all license
agreements and privacy policies carefully before downloading or installing any
software.
• Scan HTTP traffic
• Enable the ICAP server
• Scan FTP traffic
Email traffic includes SMTP and POP3 traffic. After installation:Scan email traffic
The device protects your network against viruses, spam and phish, and uses McAfee
TrustedSource to protect your network from unwanted email.
Further options include:
• Enable protection against Potentially Unwanted Programs (including
Spyware)
• Scan SMTP traffic
• Scan POP3 traffic
Local relay domain
Under Relaying options, the device suggests the domain information if this is available
via DHCP. Delete the asterisk to accept the domain name, or type another domain name.
Basic Settings
Use this page to specify basic settings for the device.
The device tries to provide some information for you, and shows the information highlighted
in amber. To change the information, click and retype.
Option definitions
Cluster Mode • Off - This is a standard appliance.
Default Gateway (IPv4)
DefinitionOption
• Cluster Scanner - The appliance receives its scanning workload from a master
appliance.
• Cluster Master - The appliance controls the scanning workload for several other
appliances.
• Cluster Failover - If the master fails, this appliance controls the scanning workload
instead.
Specifies a name, such as appliance1.Device Name
Specifies a name such as domain.example.com.Domain Name
Specifies an IPv4 address such as 198.168.10.1. You can test later that the appliance can
communicate with this server.
Specifies an IPv6 address, such as FD4A:A1B2:C3D4::1.Next Hop Router (IPv6)
33McAfee Email and Web Security Appliance 5.5 Installation Guide
Page 34

Connecting and configuring the appliance
Using the Configuration Console
Network Settings
The first time you run a configuration on a new install (or revert to default settings) the Network
Settings page is launched. If you change the Cluster Mode of the device, this page will also be
launched.
Use this page to configure the IP address, network speeds and operating mode for the device.
If possible, your device will populate many of these options using DHCP. The IP addresses must
be unique and suitable for your network. Specify only as many IP addresses as you need.
Option definitions
DefinitionOption
When clicked, starts a wizard with the following options.Change Network Settings
Offers a choice of mode.Operating mode
In Transparent Route or Transparent Bridge mode, other network devices, such
as mail servers, are unaware that the blade server has intercepted and scanned the
email before forwarding it. The operation is transparent to the devices.
In Explicit Proxy mode, some network devices send traffic to the appliance. The
blade server then works as a proxy, processing traffic on behalf of the devices.
LAN Interface Type
IP Address
Network Mask
Cluster Management
Use this page to specify load-balancing requirements.
• Cluster Management Configuration (Standard appliance)
• Cluster Management (Cluster Scanner)
• Cluster Management (Cluster Master)
• Cluster Management (Cluster Failover)
A
cluster
traffic.
The cluster can contain:
• One
and at least one of the following:
is a group of devices that shares both its configuration and balances the network
cluster master
of network traffic to the other cluster members.
Specifies the type of connection — copper wire or optical fiber. This option is available
only with higher-speed appliances.
Specifies network addresses to enable the appliance to communicate with your
network. For example, 198.168.10.1 or FD4A:A1B2:C3D4::1.
You can specify multiple IP addresses for the appliance's ports. If the appliance is in
Transparent Bridge mode, the IP addresses are combined into one list for both ports.
In the other modes, click Network Interface 1 or Network Interface 2 to work on
each of the two lists.
Configure the IP address for the Failover appliance. If you are in explicit proxy or
transparent router mode, create a virtual IP address. The virtual IP address must be
the same for both the Master and the Failover Management blade.
The IP address at the top of a list is the primary address. Any IP addresses below it
are "aliases."
Specifies an IPv4 network mask, for example: 255.255.255.0, or specifies the IPv6
prefix length (1-64 or 128).
. The master both synchronizes the configuration and balances the load
McAfee Email and Web Security Appliance 5.5 Installation Guide34
Page 35

Connecting and configuring the appliance
Using the Configuration Console
• One
cluster failover
. If the cluster master fails, the cluster failover will seamlessly take over
the work of the cluster master.
• One or more
cluster scanners
. They scan traffic according to the policies synchronized from
the master.
Note that the master and the failover can also scan traffic.
Benefits
• Scalable performance through load balancing multiple devices removes the need for costly
upgrades.
• Easier management through synchronization of configuration and updates, reducing
administrative overhead.
• Improved resilience through high availability, reducing possibility of unscheduled outages.
• Improved intelligence through consolidated reports.
Setting up the cluster
All members of the cluster must be installed and configured separately.
When configuring a master or failover, the administrator must do the following:
• For Proxy or Transparent Router Mode, set a virtual IP address that is the same on both the
master and failover. The cluster members then use VRRP to failover.
• For Transparent Bridge, set up the cluster to use STP to failover. The bridge priority must
be lower on the master (set by default).
For all cluster members, the administrator must set the
cluster identifier
. This unique identifier
ensures that members of the cluster are joined correctly. To create multiple clusters, you can
use a different identifier for each cluster.
Direct all network traffic that is to be scanned to the Cluster Master (or the virtual IP address
if a Cluster Failover will be used.
Managing the cluster
Once configured, the cluster is joined automatically using the cluster identifier. The Dashboard
on the cluster master lists the device and cluster type.
The administrator then only needs to use the user interface of the cluster master for
management, for example, setting scanning policies. The cluster master will then automatically
push this configuration to the other cluster members.
The cluster master collates:
• Anti-virus updates
• Reports
• Queued email
• McAfee Quarantine Manager (MQM)
NOTE: Software patches need to be applied to each separate device in turn.
Cluster Management Configuration (Standard appliance)
Cluster management is disabled.
Cluster Management (Cluster Scanner)
Use this page to specify information for a scanning appliance.
35McAfee Email and Web Security Appliance 5.5 Installation Guide
Page 36

Connecting and configuring the appliance
Using the Configuration Console
DefinitionOption
Specifies an identifier. Range is 0-65535.Cluster identifier
Cluster Management (Cluster Master)
Use this page to specify information for a master appliance.
DefinitionOption
balancing
Enable scanning on this
appliance
Specifies the appliance address.Address to use for load
Specifies an identifier. Range is 0-65535.Cluster identifier
If not selected, this appliance distributes all scanning workload to the scanning
appliances.
NOTE: For systems containing two or three appliances, it is likely that you want to
enable scanning on all appliances. For larger systems, you may prefer to not have the
Cluster Master scanning.
Cluster Management (Cluster Failover)
Use this page to specify information for a failover appliance.
DefinitionOption
balancing
Enable scanning on this
appliance
Specifies the appliance address. Provides a list of all subnets assigned to the appliance.Address to use for load
Specifies an identifier. Range is 0-65535.Cluster identifier
If not selected, this appliance distributes all scanning workload to the scanning
appliances.
NOTE: For systems containing two or three appliances, it is likely that you want to
enable scanning on all appliances. For larger systems, you may prefer to not have the
Cluster Failover scanning.
DNS and Routing
Use this page to configure the device’s use of DNS and routes.
Domain Name System (DNS) servers translate or "map" the names of network devices into IP
addresses (and the reverse operation). The device sends requests to DNS servers in the order
that they are listed here.
Option definitions
Server Address
McAfee Email and Web Security Appliance 5.5 Installation Guide36
DefinitionOption
Specifies the DNS servers. The first server in the list must be your fastest or most
reliable server. If the first server cannot resolve the request, the device contacts the
second server. If no servers in the list can resolve the request, the device forwards
the request to the DNS root name servers on the Internet.
If your firewall prevents DNS lookup (typically on port 53), specify the IP address of
a local device that provides name resolution.
Displays the network address of a routing device.Network Address
Displays the network subnet mask such as 255.255.255.0.Mask
Page 37

Connecting and configuring the appliance
Using the Configuration Console
DefinitionOption
Gateway
Specifies the IP addresses of other gateways (typically firewall or routers) through
which the device will communicate with the network.
The Basic Settings page specified the default gateway.
Displays a number used by routing software. Default value is 0.0.Metric
Enable dynamic routing
Time Settings
Use this page to set the time and date, and any details for the use of the Network Time Protocol
(NTP). NTP synchronizes timekeeping among devices in a network. Some Internet Service
Providers (ISPs) provide a timekeeping service. For more information about NTP, see RFC 1305
at www.apps.ietf.org/rfc/rfc1305.html, www.ntp.org or www.ntp.isc.org
The device can synchronize its time settings to other devices, keeping its own logs, reports and
schedules accurate. Because NTP messages are not sent often, they do not noticeably affect
the blade servers performance.
Option definitions
Time zone
Dynamic routing allows your network devices, including the device, to listen for the
routing information that routers broadcast on your network. The devices can use
that information to configure their own routing information.
NOTE: The device supports only the Routing Information Protocol (RIP) and Open
Shortest Path First (OSPF) routing protocols.
DefinitionOption
Specifies your local time zone. You might need to set this twice each year if your region
observes daylight saving time.
Specifies the date and the local time. To set the date, click the calendar icon.System time (local)
Set time now
Enable NTP client
broadcasts
NTP Server
Password
Use this page to specify a password for the device. For a strong password, include letters and
numbers. You can type up to 15 characters.
When clicked, sets the time on the device. You need to click this button before you
click Next.
If it is needed, you can configure Network Time Protocol (NTP) after installation.
When selected, accepts NTP messages from a specified server or a network broadcast.Enable NTP
When selected, accepts NTP messages from network broadcasts only. This method is
useful on a busy network but must trust other devices in the network.
When deselected, accepts NTP messages only from servers specified in the list.
Displays the network address or a domain name of one or more NTP servers that your
device uses.
If you specify several servers, the device examines each NTP message in turn to
determine the correct time.
37McAfee Email and Web Security Appliance 5.5 Installation Guide
Page 38
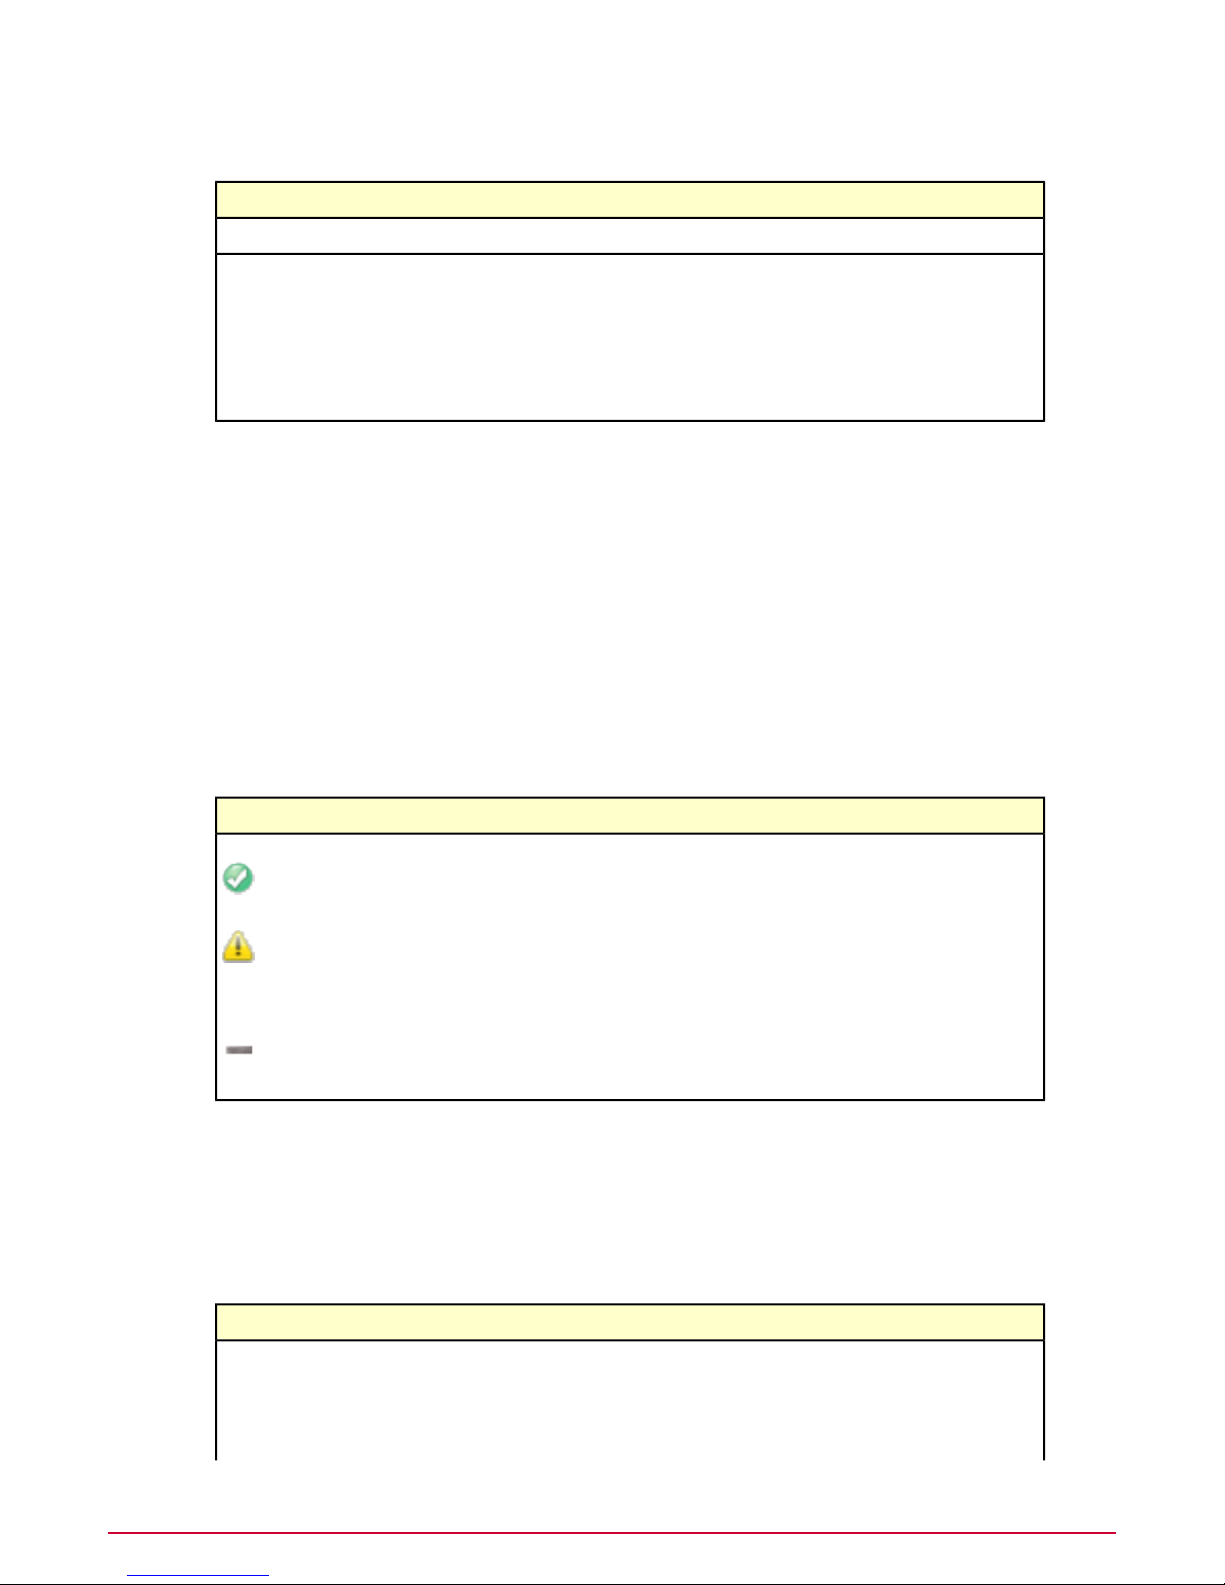
Connecting and configuring the appliance
Using the Configuration Console
Option definitions
DefinitionOption
This is scmadmin. You can add more users later.User ID
Password
Summary
Use this page to review a summary of the settings that you have made through the Setup
Wizard. To change any value, click its blue link to display the page where you originally typed
the value.
After you click Finish, the setup wizard has completed.
Use the IP address shown on this page to access the interface. For example
https://192.168.200.10. Note that the address begins with https, not http.
When you first log onto the interface, type the user name, scmadmin and the password that
you gave to this setup wizard.
Option definitions
Specifies the new password. Change the password as soon as possible to keep your
device secure.
You must enter the new password twice to confirm it. The original default password
is scmchangeme.
NOTE: You must change the password from its default value before you can apply the
configuration.
DefinitionOption
The value is set according to best practice.
The value is probably not correct.
Although the value is valid, it is not set according to best practice. Check the value before
continuing.
No value has been set. The value has not been changed from the default. Check the value
before continuing.
Restoring from a file
When configuring your device from the Setup Wizard within the user interface, using the Restore
from a file option enables you to import previously saved configuration information and apply
it to your device. After this information has been imported you can make changes before applying
the configuration.
Values to Restore
DefinitionOption
Browse to and select a previously saved configuration file to upload to your device.Import Config
By default all configuration is restored. You can choose to restore only specific parts
of your configuration by de-selecting the information you do not want restored.
You will have the chance to review these changes before applying them.
McAfee Email and Web Security Appliance 5.5 Installation Guide38
Page 39

Connecting and configuring the appliance
Testing the Configuration
DefinitionOption
Messages
Once the configuration information has been imported, you are taken to the Custom Mode of
the Setup Wizard. (See Performing a custom setup.) All imported options are shown on the
wizard pages, giving you the opportunity to make any amendments before applying the
configuration.
Using the Configuration Console
As the configuration file is imported, messages are displayed.Configuration Import
Testing the Configuration
You are now ready to test the configuration on the device. This section includes some information
to help you get started:
• How to start the user interface again.
• Tasks to complete to make sure that the device is working correctly.
Contents
Introducing the user interface
Testing the device
Introducing the user interface
To start the interface for the device, you must log on using the username and password. The
user interface opens on the Dashboard page.
NOTE: The interface you see might look slightly different from that shown here, because it can
vary depending on the hardware platform, software version and language.
Figure 9: Interface components - Dashboard page
39McAfee Email and Web Security Appliance 5.5 Installation Guide
Page 40

Connecting and configuring the appliance
Testing the Configuration
Support control buttonsNavigation bar
View controlUser information bar
Content areaSection icons
Tab bar
Navigation bar
The navigation bar contains four areas: user information, section icons, tab bar, and support
controls.
User information bar
The left-hand side of the user information bar displays a list of currently logged on users (and
the server they’re logged on to), a Change Password button, and a Log Off button. On the
right-hand side of the bar, About the Appliance gives you appliance and package version
information. Resources provides instructions on how to submit a virus sample to McAfee correctly
and links to additional McAfee resources such as our Service Portal and the Virus Information
Library.
These links can be accessed from the user information bar.
About
Resources
Product and licensing information.
Contact and the following information:
Technical Support — Frequently asked questions on the McAfee website.
Submit a Sample — Instructions for submitting a virus sample to McAfee.
Virus Information Library — Links to the Virus information Library,
which describes every virus and other potentially unwanted programs that
McAfee detects and cleans.
Download SNMB files — Download files for SMI, MIB and HP
Openview.
Opens the Online Help.Help Topics button
Section icons
There are five or six section icons depending on the software that you are using. Click an icon
to change the information in the content area and the tab bar.
Use the Web icon , when displayed, to open the page for the web scanning software you
have installed. When you have McAfee Web Gateway installed, use this icon to open the McAfee
Web gateway interface directly in the content area.
Tab bar
The contents of the tab bar are controlled by the selected section icon. The selected tab dictates
what is displayed in the content area.
Support control buttons
The support control buttons are actions that apply to the content area. They are (from left to
right) Back and Help. Two additional buttons appear when you configure something that allows
you to apply or cancel your changes.
View control
The view control button turns an optional Status window on and off.
Content area
McAfee Email and Web Security Appliance 5.5 Installation Guide40
Page 41

Connecting and configuring the appliance
Testing the Configuration
The content area contains the currently active content and is where most of your interaction
will be.
NOTE: The changes that you make take effect after you click the green checkmark.
Testing the device
Use these tasks to test:
• The device configuration
• Mail traffic
• Virus detection
• Spam detection
NOTE: Before using the device, update its DAT files.
Testing connectivity
Use this task to confirm basic connectivity.
Task
1 From the interface, select Troubleshoot | Tests | System Tests.
2 Click Start in the upper-right corner. Each test should succeed.
3 Look in the System Tests area and check that all the tests are successful.
Testing mail traffic
Use this task to ensure that mail traffic is passing through the device.
Task
1 Send an email message from an external email account (such as Hotmail) to an internal
mailbox and confirm that it arrived.
2 Select Dashboard.
The SMTP protocol section shows that a message was received.
Testing virus detection
Use this task to test the software by running the EICAR Standard AntiVirus Test File. This file
is a combined effort by anti-virus vendors throughout the world to implement one standard by
which customers can verify their anti-virus installations.
Task
1 Copy the following line into a file, making sure you do not include any spaces or line breaks:
X5O!P%@AP[4\PZX54(P^)7CC)7}$EICAR-STANDARD-ANTIVIRUS-TEST-FILE!$H+H*
2 Save the file with the name EICAR.COM.
3 From an external email account, create a message that contains the EICAR.COM file as an
attachment and send the message to an internal mailbox.
4 Return to the Dashboard page.
41McAfee Email and Web Security Appliance 5.5 Installation Guide
Page 42

Connecting and configuring the appliance
Using the device
The SMTP protocol section shows that a virus was detected.
Delete the message when you finish testing your installation, to avoid alarming unsuspecting
users.
This file is not a virus. For more information about the EICAR test file, visit:
http://www.eicar.org/.
Testing spam detection
Use this task to run a
device is detecting incoming spam.
Task
1 From an external email account (SMTP client), create a new email message.
2 In the body of the message, copy the following text:
XJS*C4JDBQADN1.NSBN3*2IDNEN*GTUBE-STANDARD-ANTI-UBE-TEST-EMAIL*C.34X
Make sure that you type this line with no line breaks.
3 Send the new email message to an internal mailbox address.
The device scans the message, recognizes it as a junk email message, and deals with it
accordingly. The GTUBE overrides blacklists and whitelists.
For more information about the GTUBE, visit http://spamassassin.apache.org/.
General Test mail for Unsolicited Bulk Email
Using the device
Read this information before you use the device.
Contents
Updates and HotFixes
After installation
(GTUBE) to verify that the
Updates and HotFixes
Before deploying the device, download and apply the latest applicable updates and HotFixes
from the download site:
http://www.mcafee.com/us/downloads/
NOTE: You will need a valid grant number.
After installation
After you have installed the device, make sure that your configuration is working correctly. See
Testing the device.
McAfee Email and Web Security Appliance 5.5 Installation Guide42
Page 43

Exploring the appliance
This section contains tasks and scenarios that show some key benefits of using a appliance to
protect your gateway.
To complete the tasks and scenarios, you will need some of the information that you entered
in the configuration console and Setup Wizard.
Tasks
Generating reports
Generating reports
The appliance log displays event information according to the report type and period you select.
The appliance’s own reporting features can generate reports, or show logs, statistics, performance
counters and graphs for a wide range of data about the appliance and its activities, such as
memory and processor usage.
For example, after you performed the steps in Testing virus detection, look at the Detections
pane, select Anti-Virus Engine detections, then click Next. The log shows the EICAR test
file that you detected.
Task
Use this task to update the appliance’s DAT files and to then view the the update report.
NOTE: The System Status page is displayed by default each time you log on to the appliance.
1 In the navigation pane, select System | Component Management | Update Status.
2 From the Version information and updates, click Update now for any anti-virus or
anti-spam DAT file updates that you want to update.
3 Return to the navigation pane and select Reports | System reports.
4 Select Filter.
5 From Event Type:, select Updates.
6 Click Apply. Information about the updates applied to your appliance is displayed.
Using policies to manage message scanning
Use these tasks to demonstrate the blade server scanning features in action. It provides
step-by-step instructions to create and test some sample policies and tells you how to generate
applicable reports.
43McAfee Email and Web Security Appliance 5.5 Installation Guide
Page 44

Exploring the appliance
Using policies to manage message scanning
A policy is a collection of settings and rules that tells the blade server how to combat specific
threats to your network. When you create real scanning policies for your organization, it is
important that you spend time researching and planning your requirements. You can find
guidelines to help you in your policy planning in the
Online help
Creating an anti-virus scanning policy
Create an anti-virus scanning policy to:
• Detect viruses in incoming messages.
• Quarantine the original email.
• Notify the recipient.
• Alert the sender.
Task
Use this task to demonstrate what happens when a mass mailer virus rule is triggered by the
EICAR test file, and actions that can be taken.
1 On the device, ensure that you are using McAfee Quarantine Manager ( Email |
Quarantine Configuration | Quarantine Options ).
2 On the device, select Email | Email Policies | Scanning Policies.
The default policy is set to Clean or Replace with an alert, if cleaning fails.
3 Click Viruses: Clean or replace with an alert to display the Default Anti-Virus
Settings (SMTP).
4 Under Actions, in If a virus is detected ensure that Attempt to clean is selected.
5 In the And also section beneath the action, select Deliver a notification email to the
sender and Quarantine the original email.
6 In If cleaning fails, select Replace the detected item with an alert.
7 In the And also section beneath If cleaning fails, select Deliver a notification E-mail
to the sender and Quarantine the original email as the secondary actions.
8 Click OK.
9 Select Email | Email Policies | Scanning Policies [Scanner Options] -- Email
address configuration.
10 In Bounced emails, assign the email address as an administrator email address.
Without this configuration, the device does not include a From: address on the email
notification. Most email servers do not deliver email without a From: address.
11 Click OK, then click the green checkmark.
12 Select Email | Email Policies | Scanning Policies [Anti-Virus] | Custom Malware
Options.
13 Select Mass mailers, then set If detected to Deny connection (block).
The sending mail server receives a Code 550: denied by policy error message. The
device keeps a list of connections that are not allowed to send email under any
circumstances. The list can be viewed at Email | Email Configuration | Receiving
Email | Permit and Deny [+] Permitted and blocked connections. The Denied
Connections option is described in the
14 Test the configuration:
a Send an email from <client email address> to <server email address>.
Online help.
.
McAfee Email and Web Security Appliance 5.5 Installation Guide44
Page 45

Exploring the appliance
Using policies to manage message scanning
b Create a text file that includes the following string:
X5O!P%@AP[4\PZX54(P^)7CC)7}$EICAR-STANDARD-ANTIVIRUS-TEST-FILE!$H+H*
c Save the file as eicar.txt.
d Attach the file to the email.
The gateway security device replaces the file with an alert and the sender receives a
notification alert.
15 Return to Custom Malware Options and click Specific detection name:.
16 Type EICAR.
17 Ensure the primary action is Refuse the original data and return an error code
(block), then click OK.
18 From an external email account, create a message and attach the EICAR test file.
The email client returns with an error 550: denied by policy error message.
Email | Email Configuration | Receiving Email | Permit and Deny Lists [+]
Blocked connections is empty.
19 In Custom Malware options, change the primary action to Deny the connection, then
click OK.
20 Send the same email and check the denied connection. It has the IP address of your client
machine (example IP address).
21 Try to send a benign email. This is also denied because of the denied connections list. To
the sending server, it appears that the server is not online.
The device checks the message as it enters your mail gateway and identifies that it contains a
virus. It quarantines the message and notifies the intended recipient and the sender that the
message was infected.
Creating an anti-spam scanning policy
Use this task to set up a policy to protect your organization from receiving unsolicited messages.
A policy like this protects users from receiving unsolicited email messages that reduce productivity
and increase the message traffic through your servers.
Task
1 On the device, ensure that you are using McAfee Quarantine Manager Email | Quarantine
Configuration.
2 Select Email | Email Policies | Scanning Policies.
You must set up a separate anti-spam policy for the SMTP and POP3 protocols.
3 Set the primary action to Accept and drop the data.
4 Set the secondary action to Quarantine the original E-mail. Change the spam score to
5.
If you enable anti-spam detection, McAfee recommends that you also enable anti-phishing
detection. Scanning performance is not impacted by performing both anti-spam and
anti-phish checks.
5 From an external email account, create a message to a mailbox protected by the device.
6 In the message body, use the text:
XJS*C4JDBQADN1.NSBN3*2IDNEN*GTUBE-STANDARD-ANTI-UBE-TEST-EMAIL*C.34X
7 Send the message.
8 Open McAfee Quarantine Manager and look at the spam queue.
45McAfee Email and Web Security Appliance 5.5 Installation Guide
Page 46

Exploring the appliance
Using policies to manage message scanning
9 Release the spam message.
10 Check the recipient email account to see the message.
Detected messages are sent to McAfee Quarantine Manager and can be managed by an
administrator.
Creating an email compliance policy
Use this task to set up a policy to ensure that messages your users send to external mail accounts
comply with official content libraries.
This policy maintains regulatory compliance to standards such as the HIPAA personal medical
information privacy standard and privacy standards on messages that contain sensitive
information. It notifies senders that their messages failed the compliance requirements.
Task
1 On the device, select Email | Email Policies | Dictionaries.
2 Select Privacy Rules.
3 View the List of terms for selected dictionary.
4 Select Email | Email Policies | Scanning Policies.
5 Under Content, select Content Scanning.
6 Select Enable content scanning | Yes.
7 Click OK.
8 Under Content scanning rules, click Create new content scanning rule.
9 Select Privacy Rules, from within Type: Compliancy.
10 Click OK.
11 In If Triggered, select Accept and then drop the data (Block).
12 Click OK.
13 Click OK.
14 Create an email on the server from <example server email address> to <example client
email address>. Include the line: Hi: We need to assess the accredited accumulation on your
annuity. Please consider arbitration if your assets have less capital than expected.
15 Send the message.
16 Use Email | Email Overview | INCOMING EMAIL SUMMARY to see the results.
The client email agent does not receive the email. The server email account should receive two
email messages: an email notification that the message failed the compliancy test and a copy
of the original email.
Creating a content filtering policy
Use this task to set up a policy to quarantine incoming messages that contain unwanted content.
This is now achieved using a wizard to guide you.
Use the following to set up an example of content filtering:
Task
1 On the device, select Email | Email Policies | Scanning Policies.
McAfee Email and Web Security Appliance 5.5 Installation Guide46
Page 47

Exploring the appliance
Using policies to manage message scanning
If content scanning is disabled, select Yes in Enable content scanning.
2 From the Content section, click Content scanning.
If content scanning is currently disabled, click Yes.
3 Type a Rule name:.
4 Click Next >.
5 From The rule is triggered if any selected dictionary applies, select one or more
dictionaries, for example, Gambling (English).
6 Click Next >.
7 From The rule is ignored if any selected dictionary applies, select any dictionary you
want ignored. For this example, do not select any dictionaries.
8 Click Next >.
9 From If the content scanning rule is triggered, select your required action, for example
Replace the content with an alert (Modify).
10 Select Quarantine from the Original email options area.
11 Click Finish.
12 Click OK to complete the wizard.
13 Apply your configuration changes.
14 From an external email account, create a message to a test mailbox that the device protects.
In the message body, type the words: See you at the blackjack table tonight!
15 Send the message.
16 Open the mailbox to which you addressed the message and view the alert message.
17 Use Email | Email Overview | INCOMING EMAIL SUMMARY to see the event.
18 View the Dashboard to see information about items quarantined because of their content.
19 Using the recipient’s email account, open McAfee Quarantine Manager User interface and
select Unwanted Content.
20 Select the message and click Submit for Release.
21 Open the McAfee Quarantine Manager Administrator interface and select User
Submissions.
22 Select Submitted for Release.
23 Select the message and click Release.
24 Open the mailbox to which you sent the message to view the received message.
The device checks the message as it enters your mail gateway and identifies that it contains a
virus. The device quarantines the message and notifies the intended recipient and the sender
that the message was infected.
About Virtual host management
Using virtual hosts, a single device can appear to behave like several devices. Each
can manage traffic within specified pools of IP addresses, enabling the device to provide scanning
services to traffic from many sources or customers.
Benefits
• Separates each customer's traffic.
• Policies can be created for each customer or host, which simplifies configuration and prevents
clashes that might occur in complex policies.
virtual
device
47McAfee Email and Web Security Appliance 5.5 Installation Guide
Page 48

Exploring the appliance
Using policies to manage message scanning
• Reports are separately available for each customer or host, which removes the need for
complex filtering.
• If any behavior places the device on a reputation black list, only a virtual host is affected —
not the whole device.
Setting up the virtual hosts
The feature is available for SMTP scanning only. To specify the pool of inbound IP addresses
and the optional pool of outbound addresses, see the System | Virtual Hosting | Virtual
Networks page.
Managing the virtual hosts
BehaviorFeature
Each virtual host has its own tab, where you can create its scanning policies.Email Policy
Email Configuration
Each virtual host has its own tab, where you can configure MTA features specific for
that host.
You can view all queued email, or just queued email for each host.Queued Email
You can view all quarantined email, or just quarantined email for each host.Quarantined Email
You can view all reports, or just reports for each host.Reporting
Behavior between the device and MTAs
When the device receives email sent to the virtual host's IP address range, the virtual host:
• Responds to the SMTP conversation with its own SMTP Welcome banner.
• Optionally adds its own address information to the Received header.
• Scans the email according to its own policy.
When the device delivers email:
• The IP address is taken from an outbound address pool, or a physical IP address (if this is
not set).
• The receiving Mail Transfer Agent (MTA) sees the IP address of the virtual host.
• If there is a pool of addresses, the IP address will be selected "round robin."
• The EHLO response will be for the virtual host.
McAfee Email and Web Security Appliance 5.5 Installation Guide48
Page 49

Troubleshooting
This section includes solutions to problems that you might encounter when installing and running
the appliance, as well as an FAQ.
General problems
FAQ
Getting more help — the links bar
General problems
This section lists some general problems.
The appliance is not receiving power
Check that the appliance is using the correct power cord(s) and is connected properly to a
working power outlet. If the power outlet has a switch, make sure it is on.
If the appliance is still not receiving power, check the power outlet by connecting other equipment
to it. If the power outlet is working, there is a problem with the appliance or its power cord.
Contact your supplier.
The appliance is not receiving traffic from the network
Check the following:
• The appliance is switched on and its software is running.
If the power button LED is orange, the appliance is connected but is not turned on. If the
power LED is green, the appliance is connected and turned on.
• The network cables are undamaged and connected properly to the appliance’s ports and
your network equipment. If you have not used the cables supplied with the appliance, ensure
that your cables meet the correct specification.
• Your network equipment is connected to the correct LAN ports on the appliance.
• The NIC speeds and full or half duplex settings at both ends of the connections are compatible
and have auto-negotiated their settings correctly.
• The LAN LEDs are on.
If the appliance is still not receiving network traffic, check the network cables and the network
ports on your network equipment. If the cables and ports are working, there is a problem with
the appliance. Contact your supplier.
49McAfee Email and Web Security Appliance 5.5 Installation Guide
Page 50

Troubleshooting
FAQ
FAQ
This section describes some of the problems you might encounter when integrating your
appliance into the existing network.
Interface problems
This section contains solutions to problems you might encounter when trying to configure the
appliance through its interface.
Why does using the Back button on my browser take me to the Logon screen?
This is a known issue with the web browser version of the appliance software. Use the appliance
application instead.
I cannot access the Logon screen.
Check the following:
• The appliance is turned on and its software is running — the power LED is lit and the hard
disk drive LEDs are off.
• You used https (not http) in the address field of your web browser. Ensure that your
browser supports Secure Sockets Layer (SSL) encryption and that it is enabled.
• The computer you are using to manage the appliance does not have the appliance configured
as its proxy. If you have a proxy between the management computer and the appliance,
the proxy must be configured with the appliance as its handoff host.
• If you are remotely connected to the appliance (across the network) through the LAN1 port,
ensure that:
• The computer you are using has a working connection to your network, and that it can
reach the same subnet to which the appliance is connected.
• You have used the new IP address that you configured for the LAN1 port, in the URL
field of your web browser. If you have not disabled or deleted the default IP address
10.1.1.108, try using that IP address (https://10.1.1.108).
The appliance’s IP address must be suitable for the subnet to which the appliance is
connected. If it is not, use the default IP address and, if that fails, try a direct management
connection.
NOTE: You can obtain a direct management connection through the LAN2 port only if
you are using the appliance in explicit proxy mode and you have not disabled the LAN2
port
• The appliance has a working connection to your existing network, indicated by the NIC
1 network activity LED flashing on the control panel.
If the LEDs are not flashing, ensure that the cable you are using is undamaged and
connected properly to the appliance’s LAN1 port and your existing network equipment.
If you have not used the blue cable supplied with the appliance, ensure that the cable
is a UTP straight-through (uncrossed) network cable.
• If the appliance is operating in explicit proxy mode and you have a direct local management
connection through its LAN2 port, ensure that:
• You have not disabled the LAN2 port. Connect remotely to check this.
McAfee Email and Web Security Appliance 5.5 Installation Guide50
Page 51

Troubleshooting
FAQ
• You used the new IP address that you configured for the LAN2 port (the default is
10.1.2.108), in the URL field of your web browser.
• The appliance has a working connection to your computer, indicated by the NIC 2 network
activity LED flashing on the control panel.
If the LED is not flashing, ensure that the cable you are using is undamaged and connected
properly to the appliance’s LAN2 port and your computer’s network port. If you have not
used the orange cable supplied with the appliance, ensure that the cable is a UTP crossed
network cable.
My password does not work.
If you recently restored the appliance’s software without maintaining the previous settings, the
management password reverts to the default password, scmchangeme.
I forgot my password.
Using the appliance’s recovery CD, return the appliance’s password to the default passwords,
which are scmchangeme and dlpchangeme.
Some of the interface does not display properly.
The appliance’s interface is intended for Internet Explorer 6.0 or later on Windows, and Mozilla
Firefox 2.0 on Linux. Check the accompanying release notes for known issues when using some
web browsers on particular operating systems.
Client (software) cannot communicate through theappliance.
Check the following:
• The correct protocols are enabled for the appliance (all protocols are enabled by default).
• The clients and other devices are configured to route traffic to and from the appliance.
• The network has no problems, and your device is connected correctly.
Web browsing does not work or URL blocking is not enforced.
The appliance must have access to a DNS server to verify web browsing (HTTP) requests and
determine which URLs to block, if URL blocking is configured.
Mail issues
This section discusses mail issues.
Anti-relay is not working.
To enable the anti-relay feature:
1 In the navigation pane, select Configure | SMTP.
2 Select Protocol Settings | Anti-Relay Settings.
3 Specify at least one local domain in Local Domains. Otherwise, the appliance is open to
relaying and abuse by spammers from outside your network.
Why can’t I just give the name of the sender that I want to block from relaying?
Think of anti-relay as system-to-system blocking, while anti-spam is sender-based blocking.
51McAfee Email and Web Security Appliance 5.5 Installation Guide
Page 52

Troubleshooting
FAQ
Anti-relay is configured using the domains and networks that the appliance delivers mail for,
while the anti-spam configuration blocks a message based on who sent it.
Directory Harvest Prevention does not work.
For Directory Harvest Prevention to work correctly, your email server must check for valid
recipients during the SMTP conversation, and then send a non-delivery report.
Several email servers do not send User unknown errors as part of the SMTP configuration.
These include (but might not be limited to):
• Microsoft Exchange 2000 and 2003 (when using their default configuration).
• qmail.
• Lotus Domino.
Check the user documentation for your email server to see if your email server can be configured
to send 550 Recipient address rejected: User unknown reports as part of the SMTP conversation
when a message to an unknown recipient is encountered.
LDAP integration can provide a workaround for this. See the
Appliances 4.5 Product Guide
.
Messaging and Web Security
Delivery
This section describes delivery issues.
When I select Retry All in the Deferred Mail folder, why are the messages not sent?
After selecting Retry All, select Refresh to see the progress that the appliance has made
through the list of messages.
The appliance works through the messages until each one is sent. If there is still a delivery
problem caused by the network or an appliance configuration problem, the message is returned
to the Deferred Mail folder.
The appliance automatically retries all the deferred messages after 30 minutes, and periodically
after that.
What can I check if I have problems with mail delivery?
To deliver mail via DNS, ensure that the DNS option is selected in the interface.
If your internal mail server is not receiving inbound mail, check that this mail server is configured
to accept email from the appliance.
In the list of local domains for email delivery, do not specify a wildcard catch-all rule. Instead,
enable the fallback relay, and specify it there.
Email attachments
This section discusses email attachment issues.
The appliance blocks all email when I reduce the number of attachments to block.
This setting is intended to block email messages with huge numbers of attachments, which
waste bandwidth.
Some mail clients (like Outlook Express) store extra information in extra attachments, and even
embed the main body of the message in an attachment.
McAfee Email and Web Security Appliance 5.5 Installation Guide52
Page 53

Troubleshooting
FAQ
If this number is set too low, even normal email might be rejected.
EICAR (the test virus) or content that must be blocked is still getting through.
Make sure the appliance is in the mail path. Look at the headers of an email message (in Outlook,
select View | Options | Internet Headers).
If the appliance is in the mail path, you see a header of the form Received: from sender by
server_name via ws_smtp with sender and server_name replaced with the actual sender’s
name and the name of the appliance.
When the appliance detects a virus, I get notification of a content violation.
This problem might be due to a conflict between the HTML template warning page, and a
content-scanning rule.
For example, if you are content-filtering on the word Virus but you have also set up the HTML
template for virus detection to warn you that a virus has been detected, an incoming message
containing a virus triggers the message to be replaced with the message, A virus has been
detected. This replacement message then passes through the content filter which triggers on
the word Virus, and the message is replaced with a content violation instead of a virus
notification.
POP3
Mail from some senders is getting through, while others are being blocked.
Check the configuration of your inside and outside networks. Make sure that the list of outside
networks has an asterisk (*) as the last entry. Also, make sure that the list of inside networks
does not have an asterisk.
This section discusses POP3 issues.
I set up a dedicated POP3 connection, and POP3 no longer works.
Check that the generic and dedicated servers do not share the same port. The default port
number for POP3 is 110. The dedicated server will override the generic server.
When fetching mail with Outlook Express over POP3, I sometimes get a time-out
message, giving me the option to Cancel or Wait.
The appliance needs to download and scan the entire mail message before it can start passing
it to Outlook Express. For a large message or a slow mail server, this can take some time. Click
Wait to force Outlook Express to wait for the appliance to finish processing the message.
I sometimes get two copies of POP3 mail messages.
Some mail clients do not handle timeouts correctly. If the appliance is downloading and scanning
a very large message, the client might time out while waiting for a response.
A popup window prompts you to wait for or cancel the download. If you select Cancel and try
to download again, two copies of the message might appear in your mailbox.
Physical configuration
This section discusses physical configuration issues.
53McAfee Email and Web Security Appliance 5.5 Installation Guide
Page 54

Troubleshooting
FAQ
I connected the appliance to the network but I cannot connect to it with my browser.
In explicit proxy mode, make sure you have connected the LAN1 adapter to your network. LAN2
is for administration only, and needs to connect directly to a laptop or computer.
My network has two appliances but I can log on to only one
If you have installed a appliance, or recently used the Restore Configuration option, two or
more appliances on your network might have the same default IP addresses.
To make sure all appliances have unique IP addresses, you can use:
• The Setup Wizard.
• The network settings.
• The Configuration Console.
System configuration
This section discusses system configuration issues.
I set up different rules for inbound and outbound traffic. When I receive email
messages or browse outside websites, the Outbound rule is triggered instead of the
Inbound rule.
Make sure that the IP address of the firewall is included in the list of outside networks.
Connections from the outside may appear to the appliance as though they were coming from
the firewall.
System maintenance
This section discusses system maintenance issues.
The appliance does not accept the HotFix file.
Do not unzip the HotFix file before uploading it to the appliance. The appliance accepts the
original file as you received it — with a .TGZ extension.
How can I control the size of the appliance’s log files?
The appliance stores its log files in a text-like (XML) format in a partition (/log) on its internal
disk. By default, the logs are purged every few days. The appliance issues warnings when its
areas are nearing full, typically at 75% and 90%.
• To find the percentage usage of the logging partition, select Monitor | Status in the
navigation pane. Click Settings to adjust the indicator colors.
• To purge the log, select Configure | Logging, Alerting and SNMP in the navigation
pane, then under Channel settings, select the XML tab.
• To adjust the warning levels, select Monitor | Resources in the navigation pane, then
select Disk usage.
Anti-virus automatic updating
This section discusses issues with anti-virus automatic updating.
McAfee Email and Web Security Appliance 5.5 Installation Guide54
Page 55

Troubleshooting
FAQ
When I request an immediate update, nothing happens. How do I know when the
DAT is updated?
To see the installed DAT version number:
• In the navigation pane, select Monitor | System Status, then General Status.
• Alternatively, select Monitor | Updates.
The DAT files are downloaded, checked and applied.
The appliance does not wait for the update to complete (which can take a few minutes even
with a fast Internet connection) but starts it in the background.
Select Monitor | System Status to show the new DAT version number when you next view
the page after the new DAT files have been successfully installed.
Anti-spam
This section discusses anti-spam issues.
I cannot find the anti-spam features described in this guide.
Some anti-spam features need the Anti-Spam Module to be enabled.
I have configured the appliance to reject spam with an RBL Servers check but some
spam mail is still getting through.
No anti-spam software is fully effective, and cannot guarantee to block all spam email messages.
The appliance uses a list of the names of known email abusers and the networks they use.
These lists are effective in reducing unwanted email messages but are not complete.
To block a specific sender of spam:
1 In the navigation pane, select Configure | SMTP.
2 Select Protocol Settings | Permit and Deny Settings.
3 At Deny Sender, type the sender’s email address.
Users are not getting normal email messages.
Users might not receive normal email messages for several reasons:
• The email messages might be coming from someone listed in the Deny Sender list. You
might need to:
• Refine the Deny Sender list to ensure that wanted email messages are not blocked. For
example, you might need to type specific email addresses rather than ban a whole domain
or network.
• Add the sender, domain, or network to the Permit Sender list. The appliance does scan
email from senders, domains and networks in this list for spam. The Permit Senders
list overrides entries in the Deny Sender lists.
• The email message might have been blocked because it comes from a sender or organization
that has been recognized by one of your real time anti-spam lists as a potential source of
spam.
• The balance between blocking spam and normal email messages might need changing. For
example, if the appliance is blocking email messages when there is only a small chance that
they contain spam, you risk unintentionally blocking normal email messages. It is better to
risk letting some spam through.
55McAfee Email and Web Security Appliance 5.5 Installation Guide
Page 56

Troubleshooting
FAQ
• The email message might contain a virus or potentially unwanted program, and has been
blocked by anti-virus scanning.
Users are still receiving spam.
Users might still receive spam for several reasons:
• No anti-spam software can block all email messages that might contain spam. For the best
chance of detecting and preventing spam, ensure that the appliance is using the latest
versions of the anti-spam engine, anti-spam rules, and extra rules files, as well as using all
the features that can block unwanted email.
• The appliance is allowing streaming media to pass through.
NOTE: Allowing streaming media to pass through the appliance is a security risk, because
streaming media is not scanned by the appliance. McAfee recommends that you do not allow
streaming media of type
application/octet-stream or application/*
to pass through the
appliance because these MIME types are executable and are a security risk
• Scanning for spam is not enabled on the appliance. Scanning must be enabled in the right
direction for spam detection. To detect spam from an external source, enable inbound
scanning. To detect spam from an internal source, enable outbound scanning.
• You might need a more stringent anti-spam policy. For example, you might want to ensure
that more email messages are marked as spam before they are received by users, or to
simply block the spam at the appliance.
• The email messages might be coming from senders, domains, or networks that are in the
Permit Sender list. Review the list to make sure that you really want email messages from
these senders to bypass anti-spam scanning. You might need to refine the entry in the list.
For example, rather than permitting whole domains or networks, specify individual email
addresses instead.
• The mail client software does not automatically move unwanted messages into a spam
folder, so users still see spam in their inboxes.
• The email message might be larger than is permitted, so it is not scanned for spam. See
your advanced settings for spam to change the size.
• Email messages are not being routed through an appliance with the Anti-Spam Module
enabled.
How can I stop a particular type of spam?
To ensure that you have the best chance of detecting and preventing spam, check that:
• The appliance is using the latest versions of the anti-spam engine and anti-spam rules.
• The appliance has not been configured to allow streaming media to pass through.
Why has the performance changed?
Scanning email messages for spam requires appliance resources and affects SMTP performance.
Users are complaining that their mailboxes are full.
If users automatically divert spam to a spam folder in the mailbox, their mailboxes can quickly
exceed their size limit. Remind users to regularly check their spam folder and delete spam.
McAfee Email and Web Security Appliance 5.5 Installation Guide56
Page 57

Troubleshooting
Getting more help — the links bar
Getting more help — the links bar
The links bar in the appliance interface window provides links to more sources of information.
You can:
• Access the McAfee online virus information library to find out more about a specific virus.
• Submit a virus sample to McAfee for analysis.
• Contact McAfee Technical Support.
See the
Online help
for more information.
57McAfee Email and Web Security Appliance 5.5 Installation Guide
Page 58

Page 59

Page 60

700-2315A00
 Loading...