

Page 1
Div. of Interlink Systems, Inc.
40219 Otero Road, Magnolia, TX 77354
Telephone and fax: (281) 356-7567
jpmcadams@sbcglobal.net
Operator’s Manual
for the
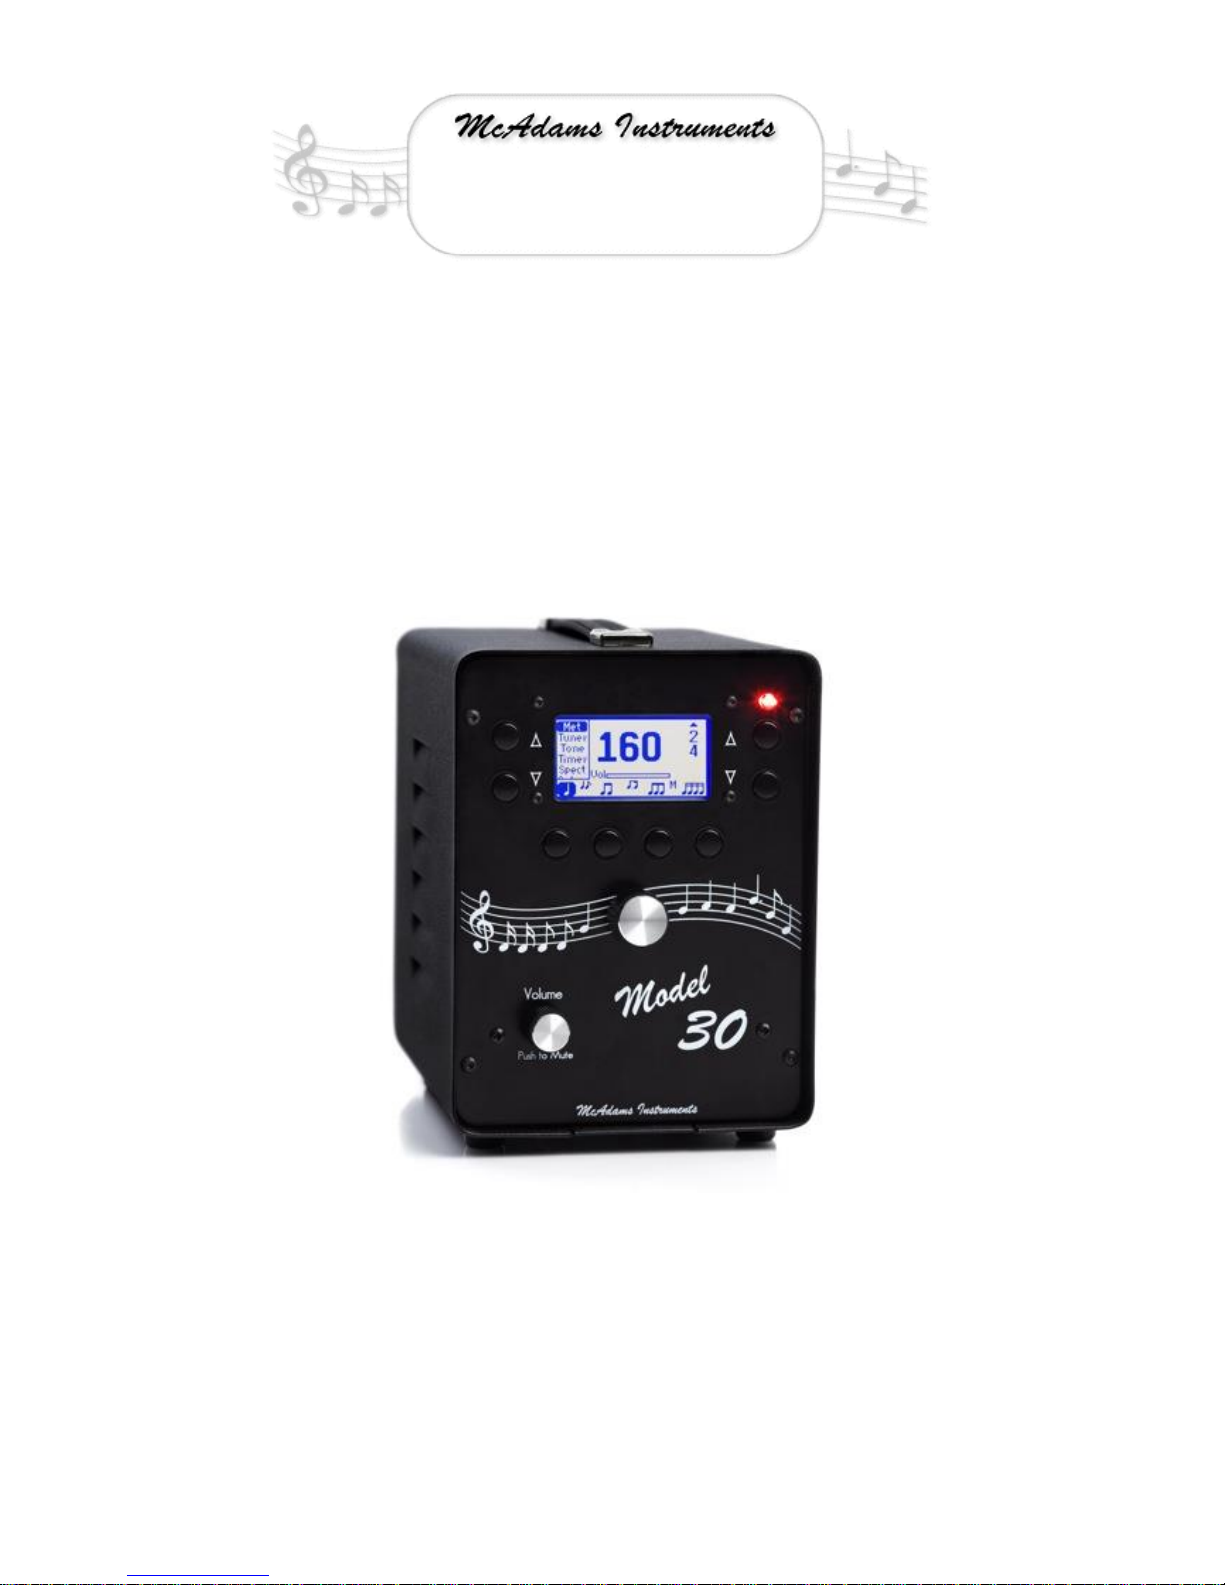
Model 30 Metronome/Tuner
Rev. 8
For metronome firmware revision 1.33
Copyright 2012, McAdams Instruments. All rights reserved.
Page 2

Preliminary Manual for the Model 30 Metronome/Tuner Rev. 08
McAdams Instruments – 18 June 2012 Page 2 of 19
TABLE OF CONTENTS
1. Overview 4
2. Safety Warnings 4
2.1 It is LOUD 4
2.2 Electrical Safety 5
2.3 It is heavy 5
3. Metronome 5
3.1 Rate 5
3.1.1 Adjust the Rate 5
3.1.2 “Tap” the Rate 5
3.1.3 Set the Rate Digitally 5
3.2 Beat Subdivisions 6
3.3 Time Signature and Measure Subdivisions 6
3.3.1 The Display 6
3.3.2 X/4 Meters 7
3.3.3 X/8 Meters 7
3.4 Volume 7
3.5 Mute 7
3.5.1 Standard Mute 7
3.5.2 Metronome Mute 7
4. Tuner 8
4.1 Microphone Level 8
4.2 Pitch Reference 8
4.3 Transposition 9
4.4 Band vs. Strings 9
5. Tone 9
5.1 Note selection 9
5.1.1 Adjust the Note 9
5.1.2 Set the Note Directly 10
5.2 Octave selection 10
5.3 Volume 10
5.4 Pitch Reference 10
5.5 Transposition 10
5.6 Band vs. Strings 10
6. Timer 10
Page 3

Preliminary Manual for the Model 30 Metronome/Tuner Rev. 08
McAdams Instruments – 18 June 2012 Page 3 of 19
6.1 Start 11
6.2 Stop 11
6.3 Reset 11
6.4 Hold 11
7. Spectrum Analyzer 11
7.1 The Display 11
7.1.1 Frequency Cursor 12
7.1.2 Scale Magnification 12
7.2 Tone Quality 12
7.3 Microphone Level 13
7.4 Lo Pitch – Hi Pitch 13
8. Options (Optns) 13
8.1 Adjust Pitch By 13
8.2 Transposition 13
9. Setup 14
9.1 Contrast 14
9.2 Kill the speaker 14
9.3 Front and Back Lights 14
9.4 Adjust Pitch By 14
10. The Output Jack 15
11. Memory functions 15
12. Use of The Remote Control 16
12.1 Why is there a remote receiver on the back? 17
12.2 Operating tips 17
13. Specifications and summary of Functions 18
14. Limited Warranty 19
Page 4
Preliminary Manual for the Model 30 Metronome/Tuner Rev. 08
McAdams Instruments – 18 June 2012 Page 4 of 19
1. OVERVIEW
The Model 30 functions as a metronome, a visual tuner, an audible pitch reference, a stopwatch,
and a spectrum analyser. These modes of operation are described briefly in the following
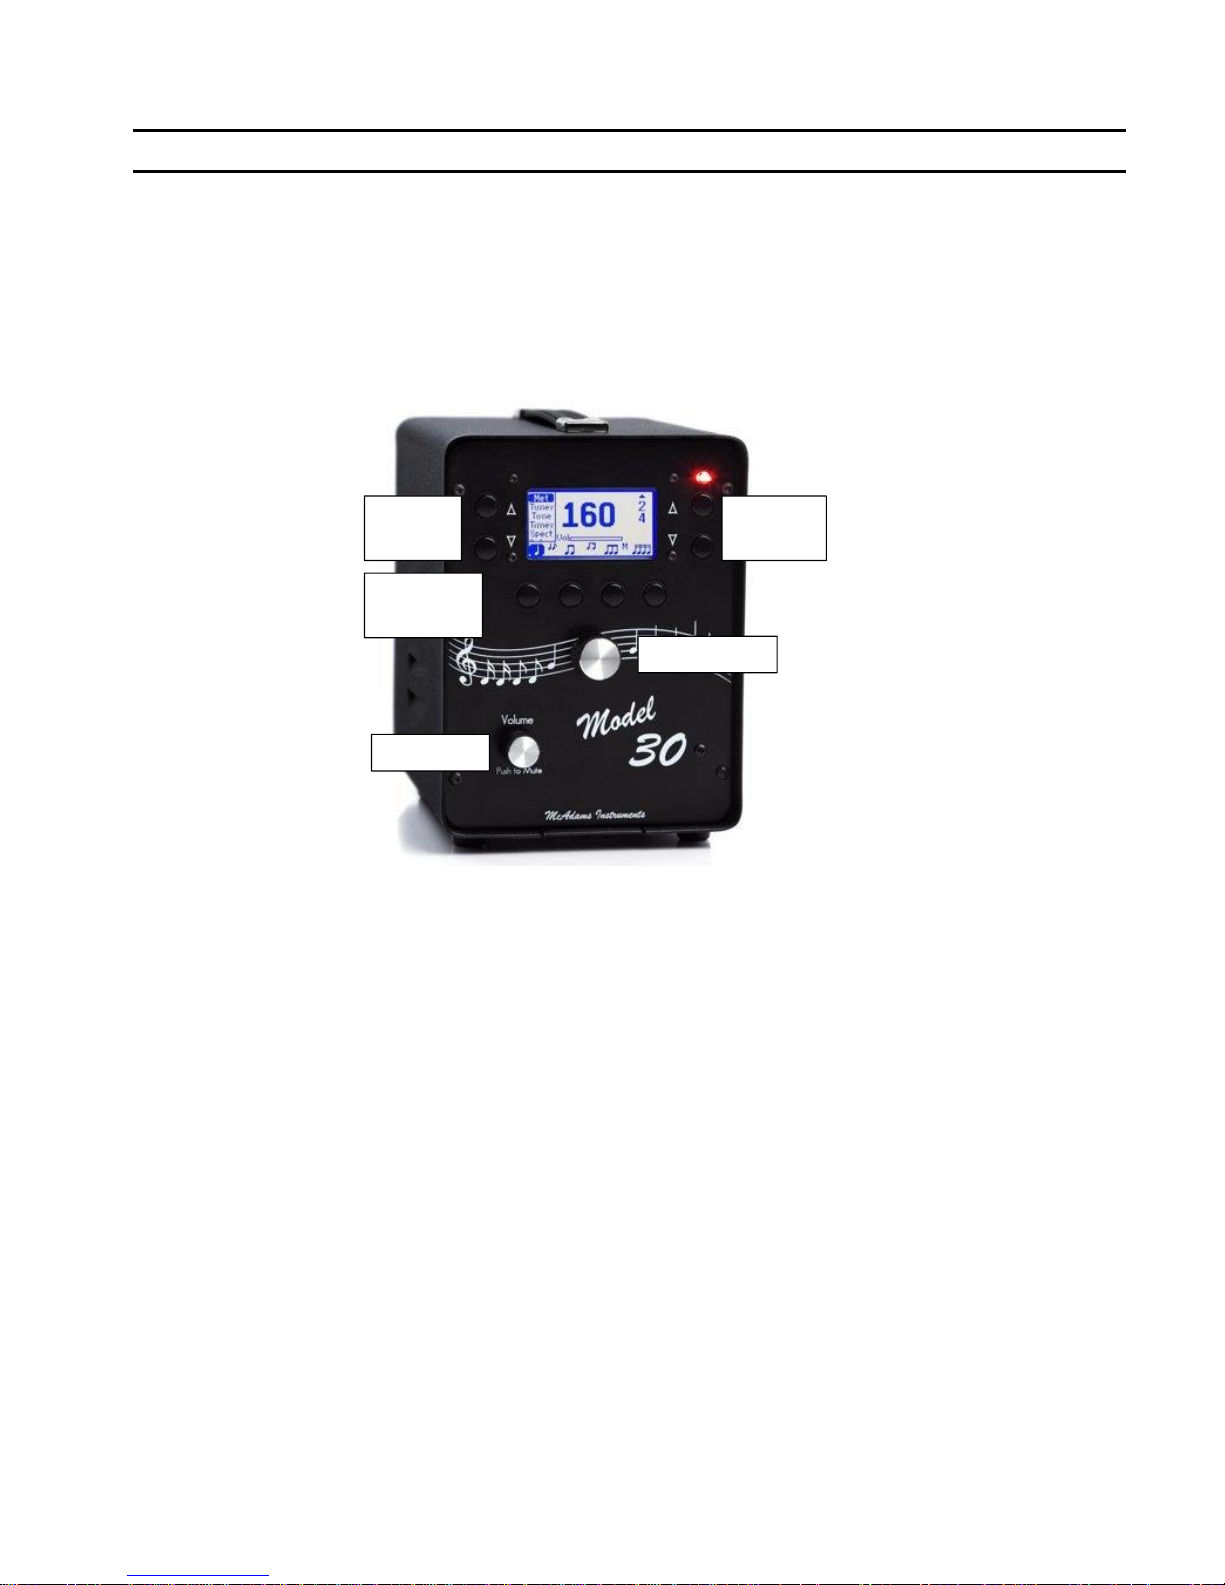
sections. The front panel controls are shown in Figure 1 below.
In general, you use the Mode Select buttons to select the main operating mode of the
instrument, and then the normal functions are controlled with the Feature Select, Function
buttons, and the Main Knob. The operating mode is always displayed in a menu on the left side
of the display.
2. SAFETY WARNINGS
2.1 It can be LOUD
One of the things that makes the Model 30 useful is that it can be very loud. Use caution and
good sense in the placement of the Model 30 and adjustment of the volume control. The
volume an ear is subjected to changes a lot depending on how close you are, placement of other
objects, and the size of the room. If it is uncomfortable, it is too loud and over time can
damage hearing. Respect your own hearing and that of others.
Mode
Select
Function
Buttons
Feature
Select
Main Knob
Volume
Figure 1 - Front Panel Controls
Page 5

Preliminary Manual for the Model 30 Metronome/Tuner Rev. 08
McAdams Instruments – 18 June 2012 Page 5 of 19
2.2 Electrical Safety
Do not remove or defeat the round safety pin on the 3-pin power plug. It is there for your
protection in the event of some kind of failure. Also, avoid using the Model 30 in a wet
environment. If used outdoors or near moisture, only plug it into a properly functioning ground
fault protected outlet. If the power cord or plug gets damaged, throw it away and replace it.
Not observing these precautions could result in a potentially fatal electric shock or fire. These
precautions apply to the Model 30 just as they apply to any appliance you plug into the wall for
power.
2.3 It is heavy
Don’t drop the Model 30 on your foot or throw it at anyone. Use care if you place it on a high
shelf since it could fall and injure someone. The absence of sharp corners is helpful, but it can
still smash a toe. Think.
3. METRONOME
For the Metronome mode, use the Mode Select to scroll up to “Met”, or press the MET button
on the remote control.
3.1 Rate
In the metronome mode, the tempo in beats per minute shows up in the middle of the display.
At the higher rates, not all rates are selectable. The metronome may step by 2 or 4 beats per
minute.
3.1.1 Adjust the Rate
Use the Main Knob or the and buttons on the remote control to adjust the rate up or down.
3.1.2 “Tap” the Rate
“Tap” the Main Knob (press it until it clicks), or “tap” the Tap button on the remote control in
time to make the metronome adjust itself to your tempo.
3.1.3 Set the Rate Digitally
At the bottom of the remote control is a keypad with numbers and note names on the buttons.
Simply enter the desired rate using the keypad. Example: to set 120 beats per minute, press
1/A, then 2/B and finally 0. If you accidentally press a numeric button, just press Clear or wait
a few seconds for the metronome return to normal operation.
Page 6

Preliminary Manual for the Model 30 Metronome/Tuner Rev. 08
McAdams Instruments – 18 June 2012 Page 6 of 19
3.2 Beat Subdivisions
The various beat subdivisions are selected by using the Function buttons. The four main
subdivisions are selected by simply pressing a Function button. The subdivision pattern is
indicated in the display by note icons above the buttons.
Two additional beat subdivisions are shown elevated on the display between the main note
icons and in a smaller font. To select them, press the two buttons that are on either side of the
icon on the display at the same time. You do not have to press or release them at the same
instant as long as both buttons get pressed together.
Each beat subdivision has its own button on the remote control
A blue highlight around an icon means that the pattern is selected and will make sound.
3.3 Time Signature and Measure Subdivisions
Use the Feature Select buttons or the MEA “rocker” switch on the remote control to scrolll
through and choose a time signature. The X/4 time signatures are at the bottom of the list, with
the X/8 time signatures at the top.
If you scroll to a new time signature, the measure subdivision will be turned on (the M icon
between the rightmost Function Buttons will be highlighted) and the metronome will emphasize
the first note of the measure (and in some cases, other notes in the measure as well).
To turn the measure subdivision on or off, press the rightmost two Function Buttons at the same
time, or press the round MEA button on the remote control.
3.3.1 The Display
To the right of the metronome rate you will see the currently selected time signature. If the time
signature has numbers under it, then the numbers indicate a subdivision pattern for the measure.
For instance, in 5/8 the numbers 2-3 indicate that the measure will be subdivided into the pattern
ONE two ONE two three.
To the left of the metronome rate is a small symbol indicating what kind of note the tempo
marking refers to. For instance, if the note before the = sign is a dotted quarter and the tempo is
set to 100, the Model 30 will play 100 dotted quarters per minute, or equivalently, eighth notes
will sound at 300 per minute.
Page 7

Preliminary Manual for the Model 30 Metronome/Tuner Rev. 08
McAdams Instruments – 18 June 2012 Page 7 of 19
3.3.2 X/4 Meters
For time signatures of the form X/4 the tempo display always indicates the number of quarter
notes per minute.
3.3.3 X/8 Meters
For time signatures of the form X/8 the tempo can be based on the dotted-quarter note or the
quarter note. This affects the speed of the eighth notes and the beat subdivisions that are
available.
Use the top Feature Select button to scroll up to one of the X/8 meters. Notice the small icon
between the leftmost Function buttons with an arrow pointing down and to the left. The
currently selected beat is shown in the icon above the left Function button and you switch
between the two selections by pressing the left two Function buttons at the same time.
When the dotted quarter is selected, the eighth notes sound 3 times faster than the indicated rate.
When the quarter is selected, the eighth notes sound two times faster than the indicated tempo.
The left Function button controls sounds on the beat as is usualy for all other metronome modes.
But for X/8 meters, not all beat subdivisions are available. The left Function button will only
cause a beat to sound if the selected note will fit evenly into a measure. For instance, neither the
quarter nor the dotted quarter will fit evenly into a 5/8 measure, so the left function button does
nothing. But in 6/8 time, both the quarter and the dotted quarter fit evenly in the measure, so
either can be turned on to sound a beat.
3.4 Volume
Use the Volume knob or the keys labeled VOL+ and VOL- on the remote control to adjust the
volume up and down. The selected volume level is shown on a bar in the display labeled Vol.
3.5 Mute
3.5.1 Standard Mute
Press the Volume Knob until it clicks or press the MUTE button on the remote control to mute
and unmute the metronome. This works on all of the modes that make sound.
3.5.2 Metronome Mute
The metronome is special in that it has two types of mute. The standard mute described above
is one of them. When muted, the sound stops but the metronome continues to function silently
with no interruption to the lights or the beat. He word “Muted” will show on the display.
Page 8

Preliminary Manual for the Model 30 Metronome/Tuner Rev. 08
McAdams Instruments – 18 June 2012 Page 8 of 19
A second type of mute happens when you press STOP on the remote control. In Metronome
Mode, STOP causes the metronome be muted, but the metronome also halts and the blinking
light stops. When you then press START on the remote control (or “unmute it in the standard
way) the metronome resumes and instantly sounds the first beat of the measure. Using this type
of mute, the metronome is synchronized to the pressing of the START key.
When stopped, as opposed to muted, the display will show the word “Stopped”.
4. TUNER
To select the Tuner mode, use the Mode Select to scroll to “Tuner” or press TUNER on the
remote control.
The tuner mode is almost totally automatic. It detects the note you are playing and displays the
note name, its octave, and how sharp or flat you are. The controls are described below.
The tuner looks at the harmonic structure of the sound to tell what note and what octave is being
played. Certain acoustic conditions can occasionally cause difficulties. If the tuner indicates a
note other than an octave (like indicating C when you are playing F) then the tuning will be off.
If you have trouble with this (or with anything else, for that matter), call or email. We want
your feedback and will use it to improve the operation of the instrument.
4.1 Microphone Level
There are two microphone amplification levels. LoMic will probably be used most often when
tuning instruments. To select the microphone amplification level, use the Function buttons,
rotate the Volume knob, or use the VOL+ and VOL- buttons on the remote control. If you
overload the microphone amplifier, the front LED will come on. Avoid overloading since this
can confuse the tuning software.
The microphone is inside of the metronome. It gets its sound through the vents on each side iof
the instrument.
4.2 Pitch Reference
Use the Feature Select buttons to choose a pitch reference other than A=440Hz. Whe you are in
the Tuner mode, the MEA rocker switch on the remote control will also select the pitch
reference. The currently selected pitch reference is displayed in the upper right corner of the
display, just above the tuning meter.
Page 9

Preliminary Manual for the Model 30 Metronome/Tuner Rev. 08
McAdams Instruments – 18 June 2012 Page 9 of 19
4.3 Transposition
You can set the tuner to indicate notes in something other than concert pitch. To do this, see the
section on Options Mode (section 8.2).
If a transposition is in effect, the transposed note will appear in a large font, and the concert
pitch note and octave will appear in a smaller font.
4.4 Band vs. Strings
Use the Function buttons or the BAND and STRING buttons on the remote control to select the
temperament of the notes.
If BAND tuning is selected, A is the reference note and all notes are in exactly even tempered
intervals. Simple.
If STRING is selected, the situation is subtly more complex. The A is the reference note. For
the notes that are not orchestral open strings, the tuning is tempered just like in the BAND
tuning. But the intervals between A, E, G, C, and D are all based on perfect fourths and fifths
corresponding to the way the orchestral strings normally tune. So, E, G, C, and D will be a few
cents different from the tempered notes of the same name.
Octaves are always an exact multiple of two in frequency.
5. TONE
Tone mode plays tuning notes through the speaker. To select the Tone mode, use the Mode
Select to scroll to “Tone” or press TONE on the remote control.
The Tone mode covers 5 octaves from E1 (an octave below the bass clef) to E6 (above the
treble clef). The note being sounded and its octave number are indicated in the center of the
display.
5.1 Note selection
5.1.1 Adjust the Note
Use the Main Knob or the and buttons on the remote to scroll through the entire range of
available notes. Also, see the octave selection in section 5.2.
Page 10

Preliminary Manual for the Model 30 Metronome/Tuner Rev. 08
McAdams Instruments – 18 June 2012 Page 10 of 19
5.1.2 Set the Note Directly
At the bottom of the remote control is a keypad with numbers and note names on the buttons.
Simply press the button having the note you want to hear. The new note will be within an
octave of the note that is currently sounding. Ex: It is sounding A4. Press the button labeled
3/C to sound C5.
The 8/# key moves the note up ½ step, while the 9/b key moves the note down ½ step.
5.2 Octave selection
Use the left two Function buttons or the 8ve rocker switch on the remote control to change the
note by an octave at a time.
5.3 Volume
See section 3.4.
5.4 Pitch Reference
See section 4.2,
5.5 Transposition
See section 4.3.
5.6 Band vs. Strings
See section 4.4.
6. TIMER
The timer is simply a stop watch. It can be used to time anything while the Model 30 is being
used for any other purpose. If you change to another mode, the timer continues to run. To select
the Timer mode, use the Mode Select to scroll to “Timer” or press TIMER on the remote
control.
The Function buttons are labeled Start, Stop, Reset, and Hold. Those same functions appear on
buttons on the remote control. Their function is explained below.
Page 11

Preliminary Manual for the Model 30 Metronome/Tuner Rev. 08
McAdams Instruments – 18 June 2012 Page 11 of 19
6.1 Start
This starts the timer running, or continues normal operation (without starting over from zero)
after pressing Stop or Hold.
6.2 Stop
This stops the timer but does not clear the time to zero.
6.3 Reset
This clears the time to zero (0:00:00).
6.4 Hold
This freezes the display at the time you press the button, but the timer itself continues to run. It
is similar to a lap timer on a normal stopwatch. To resume normal operation press Start or press
Hold again.
7. SPECTRUM ANALYZER
The Spectrum Analyzer mode allows you to view the harmonic structure of a sound. To select
the Spectrum Analyzer mode, use the Mode Select to scroll to “Spect” or press SPECT on the
remote control.
The spectrum analyzer is interesting and can give you insight into why things sound the way
they do, how the notes of a cord fit together, the difference between two sounds, etc. But keep
in mind that it is not a precise measurement. The acoustics of the room, the placement of
people and objects, and many other factors affect the composition of the sound that reaches the
microphone and that can vary from note to note. So, use it and enjoy it, but remember that
measurements are not necessarily precise. NOTE: when you are clapping hands, singing, hitting
gongs, and playing instruments into the Model 30, avoid the temptation to whack the Model 30
itself. This seems obvious and unnecessary to say, but you haven’t seen what I get back for
repair!
7.1 The Display
The horizontal axis of the display corresponds to frequency. The vertical axis corresponds to
loudness. The vertical scale is continuously adjusted so that the tallest peak goes to the top of
the display. Low frequencies are to the left, high frequencies to the right.
A sound will appear on the display as a series of peaks or spikes, the lowest (leftmost) peak
being the fundamental, and the others being the harmonics of the fundamental. The harmonics
Page 12

Preliminary Manual for the Model 30 Metronome/Tuner Rev. 08
McAdams Instruments – 18 June 2012 Page 12 of 19
are normally evenly spaced, with the spacing being the same as the fundamental frequency.
Some percussion instruments like gongs may have harmonics that are not evenly spaced, giving
them a harsh or “clangy” sound.
7.1.1 Frequency Cursor
Just below the graph in the display is a small triangular frequency cursor. You can move it to
the left and right using the Main Knob or the and buttons on the remote. Each click of the
Main Knob will move the cursor one pixel.
The frequency corresponding to the middle of the pixel where the cursor is located is shown in
the upper right corner of the display in Hz (cycles per second). Below the frequency is the
name of the note nearest to that frequency.
Note that the accuracy of the cursor position is limited by he number of pixels on the display.
The notes are crowded together at the low frequency end so some bass notes are skipped. This
means that the frequency and note are only approximate. But they can be very helpful in
identifying which harmonic you are looking at and what frequencies are present in a given
sound.
7.1.2 Scale Magnification
If you press the Main Knob until it clicks, or press the Mute button on the remote control, the
frequency scale around the cursor is magnified by 2.5 times. This lets you see and measure
peaks in more detail. The frequency and note displays for the cursor operate the same as when
not magnified, but they are more accurate. When magnifying, the word “mag” appears in front
of the frequency. To return to the normal scale, press the main knob again.
7.2 Tone Quality
Tone quality is visualized by the relative loudness of the fundamental and its harmonics. Some
instruments have many harmonics, some have fewer, and some sounds may be missing some
harmonics or even the fundamental.
Be aware that the resonances of the metronome cabinet or the room and wave interference from
reflections off of nearby surfaces can cause dramatic changes in the relative levels of the
individual displayed harmonics. So this is not an exact measuring instrument. But it is
interesting to make various vowel sounds or play with different tonal qualities and see the
general nature of the changes between them.
Page 13

Preliminary Manual for the Model 30 Metronome/Tuner Rev. 08
McAdams Instruments – 18 June 2012 Page 13 of 19
7.3 Microphone Level
See section 4.1. But also note that while overloading the microphone in Tuner mode may not
spoil its function, distortions due to overloading the spectrum analyzer will cause the displayed
harmonic structure to bear no resemblance to the harmonic structure of the sound entering the
microphone. The information displayed is useless if the red light is on due to too much sound
level. Absolutely avoid making the red light flash in Spectrum Analyzer mode.
7.4 Lo Pitch – Hi Pitch
Use the panel Function buttons or the MEA “rocker” switch on the remote control to select Lo
Pitch or Hi Pitch.
Lo Pitch is best for lower instruments and the human voice. It covers the range 0 to 1500Hz.
Hi Pitch is best for higher voices and whistles. It covers 0 to 2500Hz. If you play a sound
above the high limit it will not be visible on the spectrum analyzer display. Note: you can easily
whistle a note higher than the spectrum analyzer can show.
8. OPTIONS (OPTNS)
Options include lesser-used functions that are also not available from the remote control.
To select the Options mode, use the Mode Select to scroll to “Optns”. To reach Options mode
quickly you can scroll up from Metronome mode, or scroll down through the other functions.
You can also scroll down from Options mode to quickly reach Metronome mode.
You cannot access Options mode from the remote control.
Once in Options mode, use the Feature Select buttons to select the different options. Each one
is described below.
8.1 Adjust Pitch By
All Model 30’s have variable pitch reference, meaning you can adjust A4 to something other
than 440Hz in either 1Hz or 1 cent steps. See Setup section 9.4 for more details. Changing this
option is not permanent and changes will be forgotten when the Model 30 is turned off unless
you save the state in a memory register (see section 11).
8.2 Transposition
If you want to see note names in something other than concert pitch, use the Function buttons to
select the key of your instrument. If you select something other than C, then both the
transposed and the concert pitch will be displayed. This affects Tuner, Tone, and Spectrum
Analyzer modes.
Page 14

Preliminary Manual for the Model 30 Metronome/Tuner Rev. 08
McAdams Instruments – 18 June 2012 Page 14 of 19
9. SETUP
There are selections that are seldom changed but important in the operation of the Model 30.
These are selected using the Setup Mode. To select the Setup mode, use the Mode Select to
scroll to “Setup”. To reach Setup mode quickly you can scroll up from Metronome mode, or
scroll down through the other functions. You can also scroll down from Setup mode to quickly
reach Metronome mode.
You cannot access Setup mode from the remote control.
Once in Setup mode, use the Feature Select buttons to select the different setup selections. Each
one is described below. All “setup” selections are saved when you leave setup mode and will
be recalled each time the Model 30 is powered ON.
9.1 Contrast
This should already be set properly when you receive your Model 30. But large changes in
temperature may require a change to the contrast control. If improperly set, the display will
have a brownish tint or will appear faded and difficult to read.
Raise or lower the contrast to produce the prettiest display. Setting this control too high is as
bad as setting it too low. When set properly, the display will have bright whites, dark blues, and
be visible over the widest possible angle.
9.2 Kill the speaker
The Model 30 can sense when you have plugged a remote cable into the ¼” phone jack. You
can choose to have it sound the Model 30 speaker along with your external amplifier, or you can
have the Model 30 mute its internal speaker when an external amplifier is connected. Select
Yes or No as appropriate.
9.3 Front and Back Lights
The flashing red lights on the front and back of the Model 30 can be independently disabled in
case you do not want to see one or both of them. Simply use the Function buttons to highlight
the lights that you want to have flash.
9.4 Adjust Pitch By
All Model 30’s have variable pitch reference, meaning you can adjust A4 to something other
than 440Hz.
Page 15

Preliminary Manual for the Model 30 Metronome/Tuner Rev. 08
McAdams Instruments – 18 June 2012 Page 15 of 19
You can set the Model 30 up to adjust the pitch reference in 1Hz steps (like A = 442) or you can
select the pitch reference in 1 cent steps, such as A = 440 + 12 cents. The Model 30 always
powers up with A4=440. You can easily select other tunings for A4 and save them for instant
recall. For more details, see the description of memory registers in section 11.
Use the Function buttons to select the type of tuning you want to use. This affects the Tuner,
Tone, and Spectrum Analyzer modes. It determines how the Model 30 will work when it is
powered up. For more information see the Options section 8.1.
10. THE OUTPUT JACK
There is an output jack on the back of the Model 30 that can be used to connect the metronome
and tone generator to a stereo or public address system. The output jack is not intended to drive
headphones directly.
11. MEMORY FUNCTIONS
Each Operating mode on the Model 30 has 9 memory locations numbered 1 through 9. A
memory location saves everything that you can select for that particular operating mode. For
instance, if you are in Metronome mode, it saves metronome rate, note subdivisions (Function
button selections), time signature, volume level, and mute state.
Each mode has its own memory locations that are separate from those of the other modes. The
only exceptions are the Options mode and the Setup mode. The Options mode does not have
memory locations because the Option selections are stored along with the other operating modes
that they refer to. For instance, the variable pitch reference options are stored along with the
selections for the Tuner and the Tone modes.
The Setup mode has a single dedicated memory location. You cannot manually save or recall
Setup selection. They are stored automatically any time you change them and they are read
automatically any time you turn the Model 30 “ON”.
Saving and recalling from memory can be done only from the remote control. To save
parameters for an operating mode in memory, select the mode, make whatever other selections
you want, press the Save button on the remote, then press the memory number, and finally press
the Enter button on the remote control. The display will say “Saving X” (where X is the
memory location number) when the memory function is successful.
To recall the parameters for an operating mode from memory, select the mode and then press
the Recall button followed by the number of the memory you want to recall. The display will
say “Recalling X” (where X is the memory location number) when the memory function is
successful and the instrument will take on the new state. If the word “Empty” appears, that
Page 16

Preliminary Manual for the Model 30 Metronome/Tuner Rev. 08
McAdams Instruments – 18 June 2012 Page 16 of 19
means that nothing has ever been stored in the memory location. If the memory location is
empty, no parameter changes will be made.
The following table shows what is stored in memory for each of the operating modes.
Memory locations (1-9 for each operating mode)
Operating Mode
What is saved and recalled
Metronome
Metronome rate
Function button selections
Volume level
Mute/Stopped state
Meter (time signature)
What note gets the beat (quarter vs dotted quarter)
Tuner
Microphone amplification
Band vs String
Adjust pitch by Hz or cents
Reference frequency (A = ???)
Transposition
Tone Generator
Selected note to play
Function button selections
Volume level
Mute state
Band vs String
Adjust pitch by Hz or cents
Reference frequency (A = ???)
Transposition
Timer
Nothing to store
Spectrum Analyzer
Low pitch vs High pitch
Microphone amplification
Transposition
Note: Even though a parameter like transposition is stored and recalled for a specific operating
mode, it affects the whole instrument. If you store a Bb transposition for the tuner, when you
recall it, it also affects transposition for the tone generator and the spectrum analyzer.
12. USE OF THE REMOTE CONTROL
The remote control transmitter shines a strong beam of infrared light to communicate with the
Model 30. To operate the remote control, point the red end toward the Model 30 and press the
desired button. You can find infrared receivers on the back of the Model 30 between the light
and the output jack, and on the front panel to the left of the display.
Page 17

Preliminary Manual for the Model 30 Metronome/Tuner Rev. 08
McAdams Instruments – 18 June 2012 Page 17 of 19
Whenever a valid remote control signal is detected, the Model 30 turns on the light nearest to
the receiver that detected it. The front receiver blinks the light on the front, while the rear
receiver blinks the light on the rear of the cabinet. If the lights do not come on, the Model 30 is
not detecting the remote. This could be because of something blocking the infrared beam, the
remote is not pointed the right direction, or because the remote has low batteries. If both
receivers detect the remote signal, then both lights will blink.
12.1 Why is there a remote receiver on the back?
The Model 30 is designed to be on a podium in front of the director. That puts the broad main
beam of sound directed toward the band, with a lower sound level coming back toward the
director.
If the metronome is put across the room from the director, behind the band, then the speaker
needs to point toward the band so the front panel may be pointing away from the director.
There is a receiver is on the back with the speaker so that in this situation there is a receiver
looking straight at the remote for highest sensitivity. Similarly, outdoors the speaker needs to
point at the band, so if the director is on the field with the band, the best range will come from
the rear receiver.
When used indoors, the infrared beam might bounce off of objects in front of or behind the
metronome. Having two receivers makes it more likely that at least one receiver will detect the
remote signal.
If you have any trouble with the remote, please let McAdams Instruments know.
12.2 Operating tips
The remote uses an infrared light beam. The beam has to get straight from the red end of the
remote control to the front or back of the Model 30. Anything that bl ocks that beam may stop
the remote from working. Similarly, objects that reflect infrared (like paper, walls, etc.) can be
used to aid the remote in certain circumstances. For instance, if you are off to the side and
having trouble with the remote, you could put a piece of paper, a book, or some other object
behind the Model 30 to act as a mirror so that the infrared beam can bounce off of the object
and into the rear receiver.
Page 18

Preliminary Manual for the Model 30 Metronome/Tuner Rev. 08
McAdams Instruments – 18 June 2012 Page 18 of 19
13. SPECIFICATIONS AND SUMMARY OF FUNCTIONS
Speaker
Power 200 watts peak
Mechanical 4"x6" oval, heavy duty magnet for high efficiency
Remote Control Infrared, full function
2 receivers, one on front and one on back.
Memory Locations Each operating mode has 9 memory locations
Memory locations store everything the user has selected
Memory can be stored and recalled using the remote control
Tempo Range 30 to 220 beats per minute
Tempo Resolution
30 to 100 1 beat per minute
102 to 180 2 beats per minute
184 to 220 4 beats per minute
Tap Function Tempo can be set by tapping
Tap controls are on the front panel and the remote control
Accuracy
Tempo better than 0.1 %
Tuning Notes better than 0.25 cents
Time Signatures 2/4 through 7/4 and 5/8 through 9/8
Visual Tuner Tuning meter range ±50 cents
Pitch Reference
Hertz mode A = 435 Hz to 446 Hz in 1 Hz steps
Cent Mode A = 440 Hz ± 20 cents in 1 cent steps
Tuning Notes
Range 5 octaves, E1 through E6
Band mode All notes in even tempered intervals
String mode G, A, C, D, and E in perfect intervals for the open strings
(notes other than open strings are in tempered intervals)
Transposition Can indicate written notes for instruments in any key
Page 19

Preliminary Manual for the Model 30 Metronome/Tuner Rev. 08
McAdams Instruments – 18 June 2012 Page 19 of 19
Stop Watch Time up to 9 hr : 59 min : 59 sec Stop watch will run while
other modes (metronome, tuner, etc) are in use.
Spectrum Analyzer View the harmonic structure of sounds
Measure approximate frequency of sounds
Audio Output 1/4" mono phone jack - line level for high impedance amp inputs.
Size & Weight 8.5" H 6.5" W 9.5" L - 6.5 pounds
Power Required 110V 60 Hz, under 50 watts
14. LIMITED WARRANTY
McAdams Instruments warrants the Model 30 Metronomes to be free from defects in material or
workmanship for a period of one year from the date of the original retail purchase. In the event of a
failure during this time that is attributable to faulty workmanship or material, McAdams Instruments
will repair or replace components to the extent deemed necessary to restore said Model 30 metronome
to proper operating condition at no charge for parts or labor.
This warranty does not cover repairs made by any party other than McAdams Instruments or damages
that, in the opinion of McAdams Instruments, are the result of modification, abuse or neglect.
All implied warranties, including warranties of merchantability and fitness for a particular purpose are
hereby limited to the period of one year from the date of the original retail purchase. Some states do not
allow limitations on how long an implied warranty lasts, so the above limitation may not apply to you.
McAdams Instruments assumes no liability in any event arising from the use of whatever technical
information may be supplied to any party.
McAdams Instruments assumes no liability for any damages resulting from delay or loss of use in repair
or for incidental or consequential damages caused by malfunction, defect, or otherwise, and with respect
to breech of any express or implied warranty. Furthermore, to the extent permitted by law, McAdams
Instruments assumes no liability for any damages or bodily injury that may result from the use or misuse
of its products by the purchaser or others. Some states do not allow the exclusion or limitation of
incidental or consequential damages, so the above limitations may not apply to you.
McAdams Instruments reserves the right to discontinue models at any time, or to change specifications,
price, or design without notice and without incurring any obligation.
This warranty gives you specific legal rights and you may also have other rights that vary from state to
state.
This warranty is given in lieu of all other express warranties.
 Loading...