

Page 1
LEDPARPACK
USER MANUAL
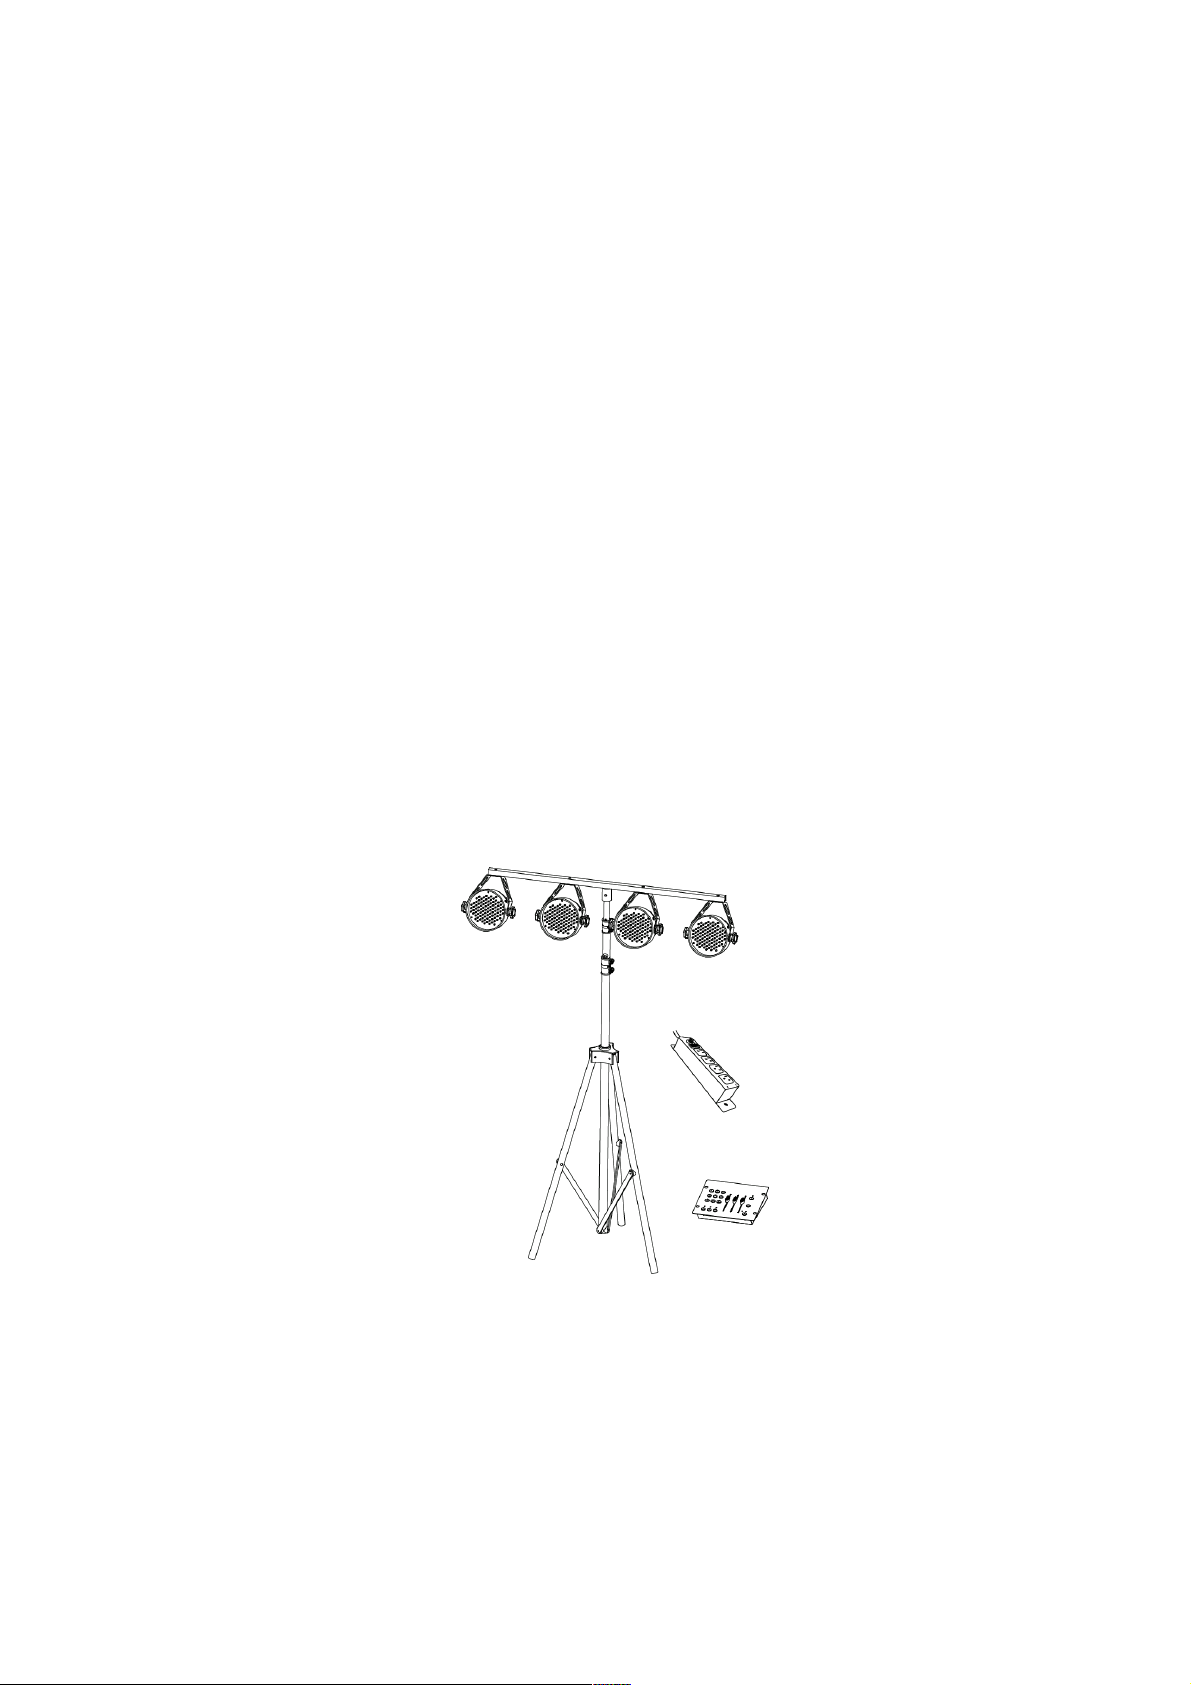
I. WHAT INCLUDED IN THE MASTER BOX
4pcs LEDPAR96 LED Lighting Fixtures
1pc LEDC Easy Preprogrammed Controller
1pc PC4 4-outlet power center
1pc LTS06 Tripod Stand
4pcs 1M DMX cable
1pc 10M DMX cable
II. SPECIFICATIONS
LEDPAR96 LED Lighting Fixtures
5 DMX channels
LED Bulbs: Red x 32, Green x 35, Blue x 30
Power Input: 120V 60Hz
Power: 12W
Weight: 2.8Kg
LEDC Easy Preprogrammed Controller
Power input: DC 9v-12v.500ma
DMX Out: 3pin female XLR
III. PRODUCT VIEW
IV. MOUNTING
1) Set the four Par lights on the tripod stand
2) Set the PC4 power center on the tripod stand
3) Plug the Par lights in PC4
4) Connect Par lights to DMX Controller or LEDC Easy Preprogrammed Controller
Page 2

OPERATING INSTRUCTION
Mode setting
0=OFF 1=ON X=0FF or ON
DIPSWITCH CHART
FUNCTION
123456789
10
_
XXXXXXXXX0AUTO MODE
XXXXXXXXX0MASTER MODE
1000000001SLAVE MODE
SET DMX ADDRESS
1
DMX MODE
1) AUTO Mode
Set the dip switch #10 to OFF, LED PAR Light enters AUTO Mode, running the built-in
programs automatically; the other dip switches 1-9 control the speed of the programs.
2) MASTER/SLAVE Mode
Master: set the dipswitch #10 of one LED PAR Light to OFF; the other dip switches 1-9
control the speed of the programs.
Slave: set all the dip switch #1 & #10 to ON, #2-9 dip switches to OFF
3) LEDC control
One LEDC can control only 4 LED PAR Lights at most. To use LEDC with LEDPAR96,
connect the system using DMX cable, then set address for the LEDPAR96. Each LED
PAR CAN takes up 5 DMX channels. So, set start channel for the first LED PAR Light to
1st channel, second LED PAR Light to 6th channel, third LED PAR Light to 11th channel,
fourth LED PAR Light to 16th.
EASY LEDPAR DMX SWITCH GUIDE:
Light# = DMX Channel/Dipswitch Setting
1 = 1/switch 1 ON
2 = 6/switches 2&3 ON
3 = 11/switches 1,2&4 ON
4 = 16/seich 5 ON
4) DMX Mode
Set the dipswitch #10 to ON, LED PAR Light enters DMX Mode; the other 1-9 dip
switches are for addressing.
Page 3

5) DMX dip switch:
On Off 1 2 3 4 5 6 7 8 9 10
Switch
1
2
4
8
16
32
64
128
Value 256
512
 Loading...