

Page 1
User
User
User
User Manual
Manual
Manual
Manual
L
EDBRITEPACK
L
EDBRITEPACK
L
L EDBRITEPACK
EDBRITEPACK
Page 2

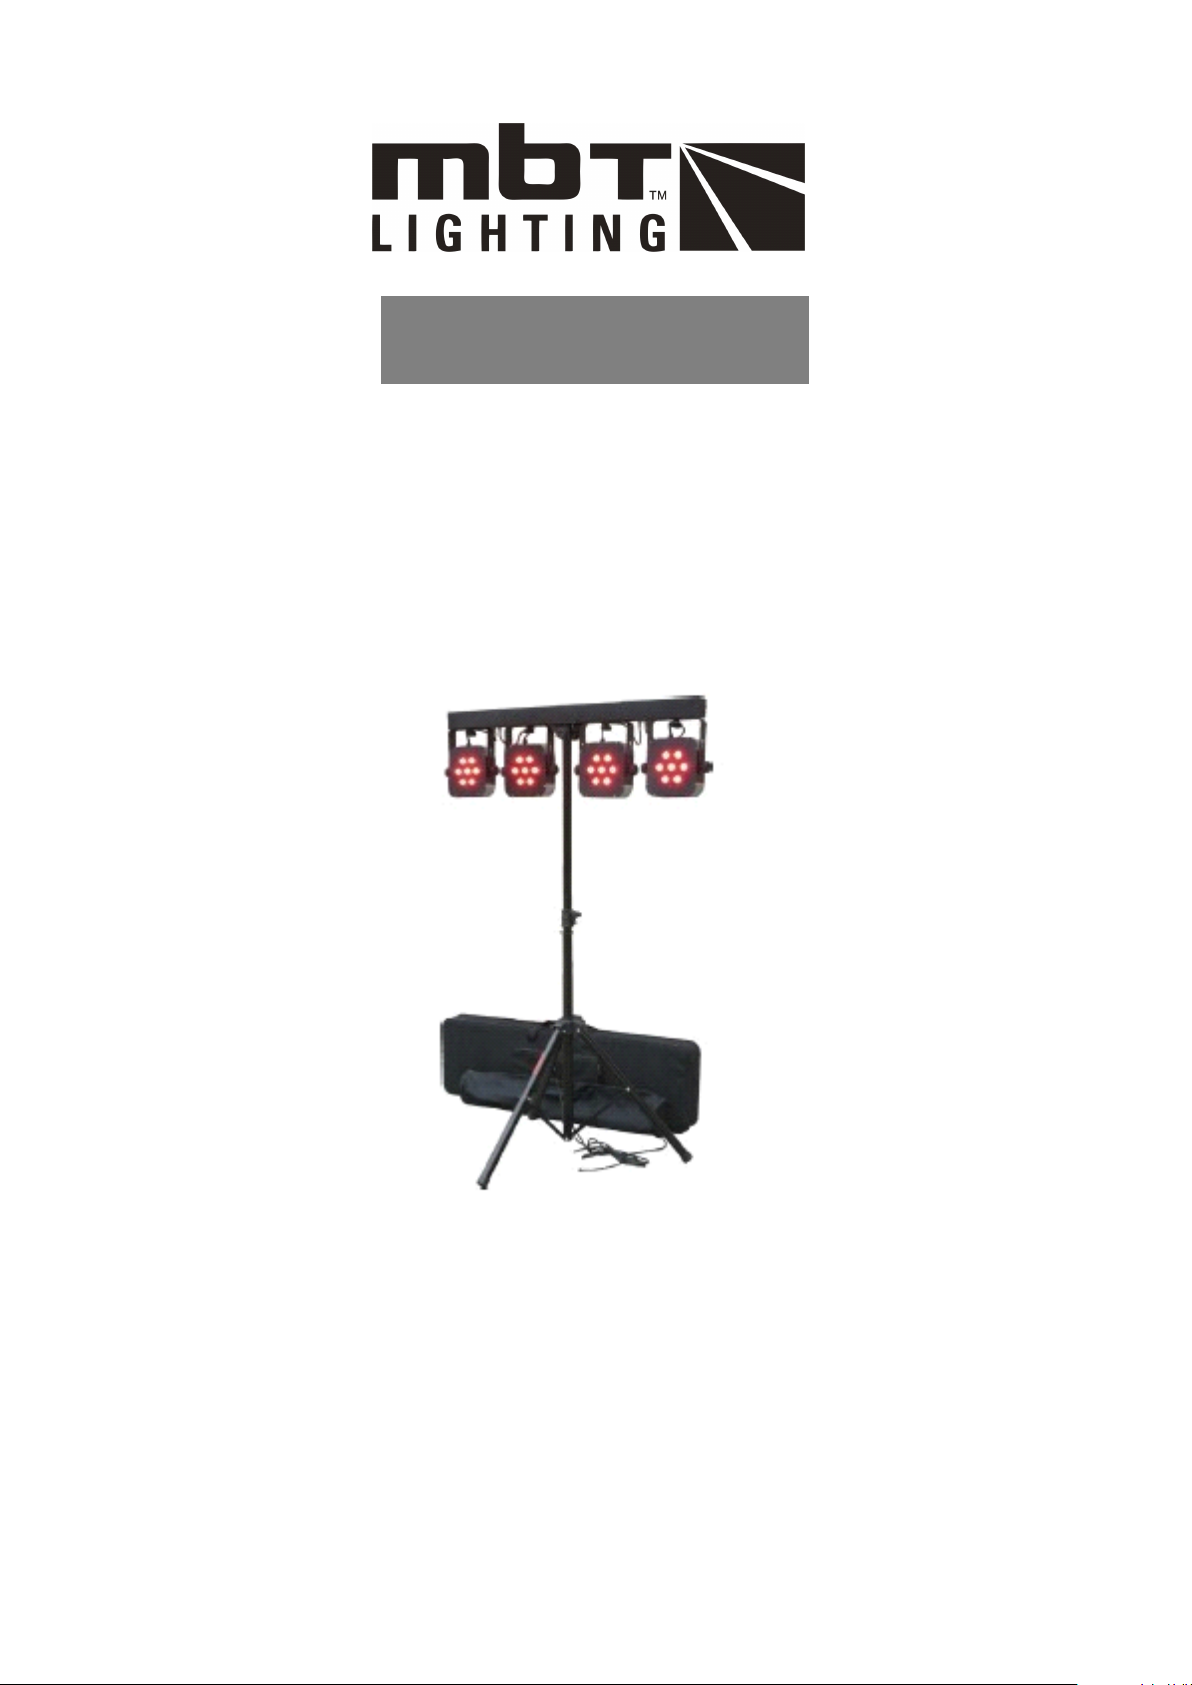
Unpacking: Thank you for purchasing the LEDBRITEPACK. Every LEDBRITEPACK has been
thoroughly tested and has been shipped in perfect operating condition. Carefully check the
shipping carton for damage that may have occurred during shipping. If the carton appears to be
damaged, carefully inspect your fixture for any damage and be sure all equipment necessary to
operate the unit has arrived intact. In the event damage has been found or parts are missing, please
contact our toll free customer support number for further instructions. Please do not return this
unit to your dealer without contacting customer support first.
Introduction: The LEDBRITEPACK is a three channel or five channel or eight channel or twelve
channel or fourteeen channel The fixture can operate in three different operating modes; DMX
contorl, sound-active, or in a Master/Slave configuration. The LEDBRITEPACK comes with several
built in programs that can be used, while operating as a dimmer unit or when used in
multiples linked in a master/slave configuration. For best results use fog or special effects smoke
to enhance the beams projections.
Warning! To prevent or reduce the risk of electrical hock or fire, do not expose this unit to rain or
moisture.
Warning! This may cause severe eye damage. Avoid looking directly into the light source at all
times!
- 1 -
Page 3

Features of LEDBRITEPACK
• RGB Color Mixing
• Color Strobe Effect
• Color Mix Effect
• LED Chases (Adjustable Speeds)
• Electronic Dimming 0-100%
• Built in Microphone
• DMX-512 protocol
• 3 Operating Modes - Sound Active, Show Mode, or DMX Control
• DMX-512 Protocol Compatible (Uses five, fourteen , DMX Channels)
• Digital Display for Address and Function Setting
• Each fixture can be operate independently.
- 2 -
Page 4

On-Board System Menu
The LEDBRITEPACK comes
functions of each command in the system menu. Please read the next section thoroughly!
To access the main menu press the ESC button. Press the UP or DOWN buttons until you reach
function you wish to change. When you reach the function you wish to change press the ENTER
button. When a function is selected use the UP or Down buttons to change the function settings.
Once your changes are made press the ENTER button,
representing a number between 1-9. Press the UP or DOWN buttons to set the chase speed.
Colo - This menu will let you select your desired colour mode
1.
Press the ESC button and UP button or DOWN button until “CoLo” is displayed, press ENTER.
2.Either “CoL X”, “X” representing a number between 1-9 or “AtF ” will be displayed. Press the UP or DOWN
buttons to select either a static color or “AtF ” mode. If you select “AtF ”,and press ENTER and it will be set
Red brightness., the green brightness and blue brightness.
Chnd - This menu will let you select your desired DMX Channel mode.
1. Press the ESC button and UP button or DOWN button until “Chnd” is displayed, press ENTER.
with an easy to navigate system menu. This next section will detail the
Addr - DMX Address Setting via control board and
moter sstting
1. Press the ESC button and UP button or DOWN button
until “Addr” is displayed, press ENTER.
2. “Axxx” will now be displayed, “x” represents the
displayed address. Press the UP or DOWN buttons to
find your desired address.
Auto - This menu will let you select your desired
auto mode
1. Press the ESC button and UP button or DOWN button
until “Auto” is displayed, press ENTER.
2. “Autx” will now be displayed, You can confirm auto
modes by UP or DOWN.
3. Then press ENTER, “sp x” will be displayed , “x”
representing a number between 1-9. Press the UP or
DOWN buttons to set the auto speed.that ,
soun - This menu will let you select your desired
sound mode
1 . Press the MENU button until “Soun” is displayed,
press ENTER.
2 .“Soux” will now be displayed, You can confirm three
modes by UP or DOWN for sound mode. “ x”
representing a number between 1-3. Then press the
ENTER.
3 . “sp x” will be displayed , “x” representing a number
between 1-9. Press the UP or DOWN buttons to set the
sound speed.that ,
ChAS - This menu will let you select your desired
chase mode
1. Press the ESC button and UP button or DOWN button
until “ChAS” is displayed, press ENTER.
2. “C x” will now be displayed, You can confirm chase
modes by UP or DOWN.
3. Then press ENTER, “sp x” will be displayed , “x”
the
- 3 -
Page 5

2. “X Ch” will now be displayed, “X” represents the displayed DMX channel mode. Press the UP or DOWN buttons
to find your desired Channel mode.
SLav- This menu will let you select your desired Master/slave mode
Press the MENU button until “SLav” is displayed, press ENTER.
VER - This will display the software version
Press the MENU button until “VER” is displayed. Press the ENTER button and the software vesion will be
displayed.
On-footcontroller System Menu
The LEDBRITEPACK comes
section will detail the functions of each command in the system menu. Please read the next section
thoroughly!
To access the auto mode press the “AUTO” button. Press the “SOUND” button set your function for
sound mode . Press the COLOR button set your function for color mode .Press the BLACKOUT
button the LED is all dark, and then press it more , the fixture will run ;
with an easy to navigate system menu for footcontroller. This next
BUTTON
FUNCTION
AUTO Press it to auto mode,then press to change auto mode
SOUND Press it to sound mode,then press to change sound mode
COLOR Press it to color mode,then press to change color mode
BLACKOUT Press it all LED dark,then press to restore the current state
- 4 -
Page 6

DMX control mode
This function will allow you to control each individual fixtures traits with a standard DMX-512 controller such as the
Elation Show Designer.
Universal DMX Control: This function allows you to use a universal DMX-512 controller such as the Elation DMX
Operator or Elation Show Designer to control head movement, A DMX controller allows you to create unique
programs tailored to your individual needs.
1. The LEDBRITEPACK uses two DMX channel modes . See next for detailed description of the DMX traits.
2. This will allow you to create your own programs.
DMX value and function five channels
channel function
Ch1 red (0%--100%)
Ch2 green (0%--100%)
Ch3 blue (0%--100%)
Ch4 speed (slow to fast)
96 … … 107
108 … … 119
120 … … 131
Ch5
132 … … 143
144 … … 155
156 … … 167
168 … … 179
180 … … 191
192 … … 203
204 … … 215
216 … … 227
228 … … 239
240 … … 251
252 … … 255
value
0 … … 255
0 … … 255
0 … … 255
0 … … 255
0 … … 11
12 … … 23
24 … … 35
36 … … 47
48 … … 59
60 … … 71
72 … … 83
84 … … 95
nop
chase1
chase2
chase3
chase4
chase5
auto 1
auto 2
auto 3
auto 4
auto 5
auto 6
auto 7
auto 8
auto 9
auto 10
auto 11
auto 12
auto 13
auto 14
sound 1
sound 2
- 5 -
Page 7

DMX value and function forteen channels
channel function
Ch1 pot1 red (0%--100%)
Ch2 pot1 green (0%--100%)
Ch3 pot1 blue (0%--100%)
Ch4 pot2 red (0%--100%)
Ch5 pot2 green (0%--100%)
Ch6 pot2 blue (0%--100%)
Ch7 pot3 red (0%--100%)
Ch8 pot3 green (0%--100%)
Ch9 pot3 blue (0%--100%)
Ch10 pot4 red (0%--100%)
Ch11 pot4 green (0%--100%)
Ch12 pot4 blue (0%--100%)
Ch13 speed (slow to fast)
96 … … 107
108 … … 119
Ch14
120 … … 131
132 … … 143
144 … … 155
156 … … 167
168 … … 179
180 … … 191
192 … … 203
204 … … 215
216 … … 227
228 … … 239
240 … … 251
252 … … 255
Note:when the function is nop. The LED can be flash when the function speed value is from 8 to 255.
value
0 … … 255
0 … … 255
0 … … 255
0 … … 255
0 … … 255
0 … … 255
0 … … 255
0 … … 255
0 … … 255
0 … … 255
0 … … 255
0 … … 255
0 … … 255
0 … … 11
12 … … 23
24 … … 35
36 … … 47
48 … … 59
60 … … 71
72 … … 83
84 … … 95
nop
chase1
chase2
chase3
chase4
chase5
auto 1
auto 2
auto 3
auto 4
auto 5
auto 6
auto 7
auto 8
auto 9
auto 10
auto 11
auto 12
auto 13
auto 14
sound 1
sound 2
- 6 -
 Loading...