

Page 1
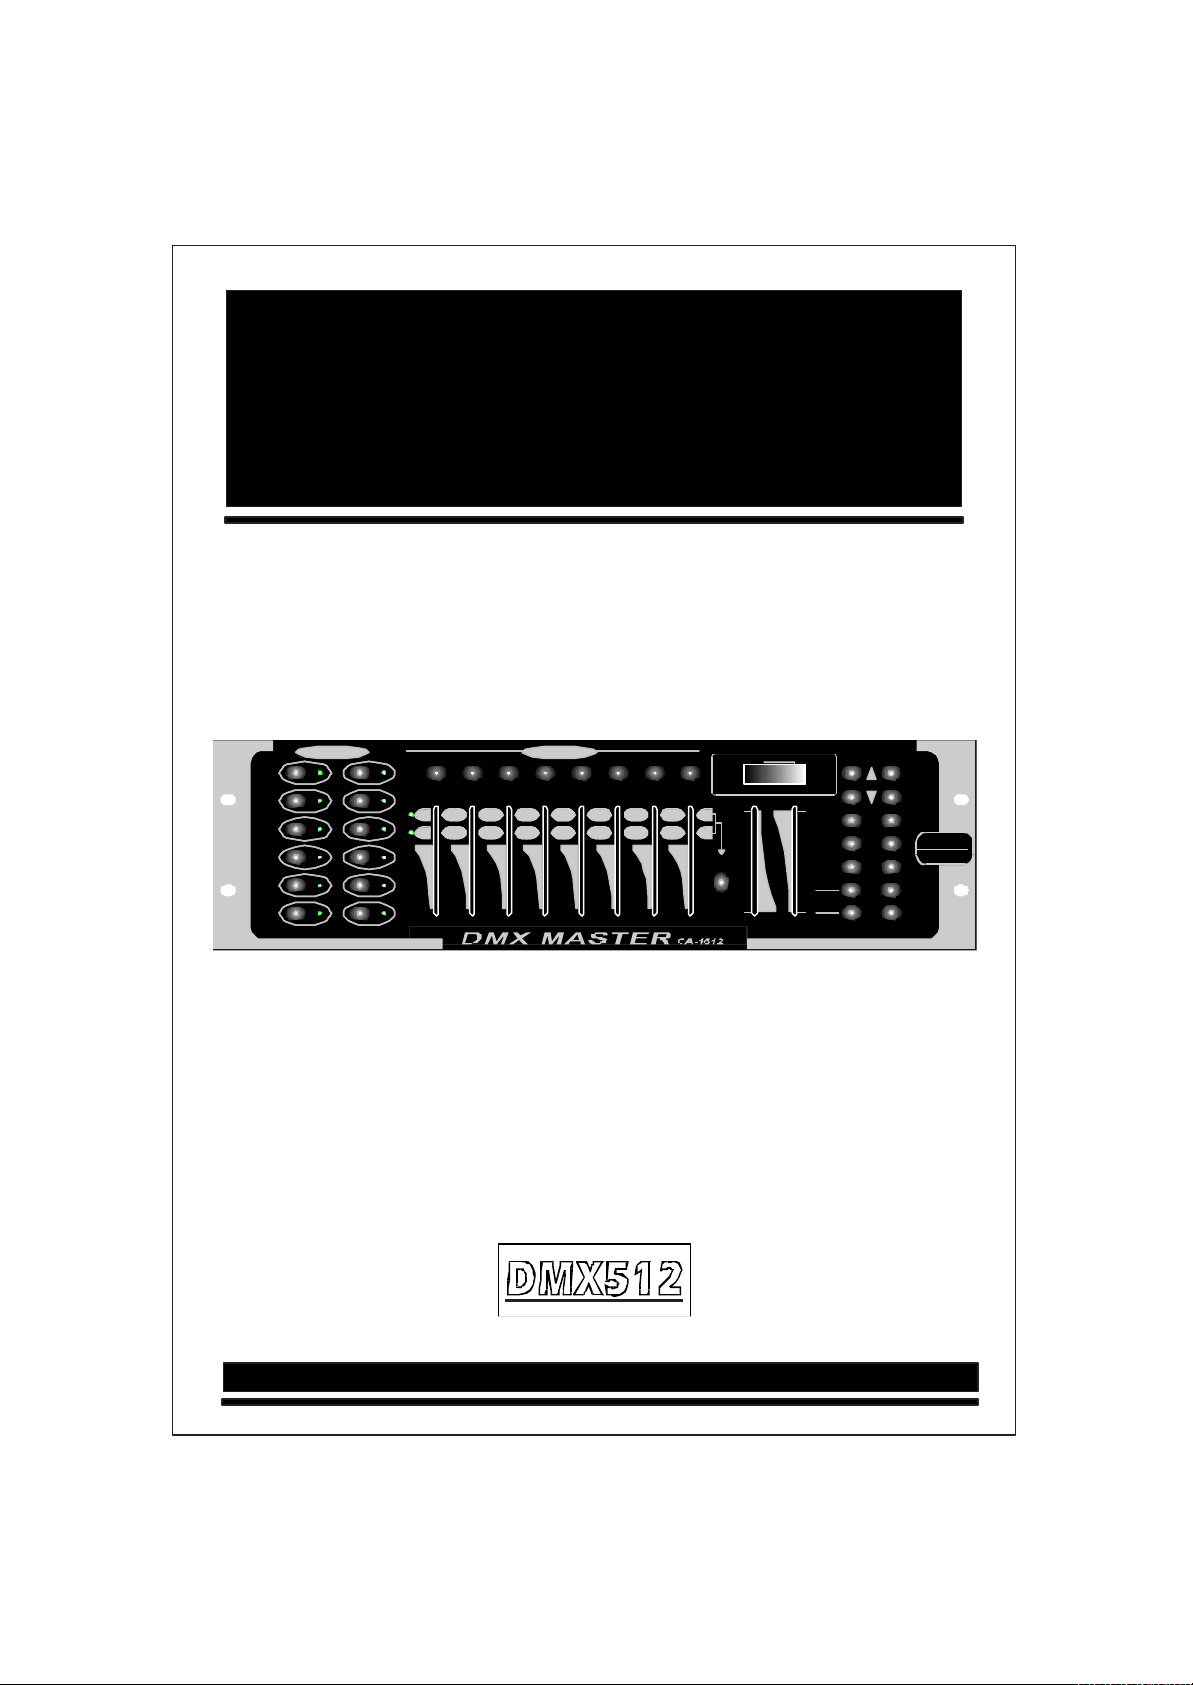
DMXMASTER
SCANNERS
1
2
3
4
5
6
7
8
9
10
11
12
1 2 3 4 5 6 7 8
1 2 3 4 5 6 7 8
9 10 11 12 13 14 15 16
SCENES
PageA
PageB
STEP/TIME
Blackout
Step
Program
ChaseSceneBank
0.1SEC 30S
Page
Select
SPEED
FADETIME
Musictrigger
Autotrigger
010MIN
Program
Midi/Add
Auto/Del
Music
Bank-copy
Tapsync
Display
BANK Chase1
Chase2
Chase3
Chase4
Chase5
Chase6
BLACKOUT
CA-1612UserManual
DMX
512
Pleaseread these instructions carefully before use
Page 2

CONTENTS
1.INTRODUCTION
FUNCTIONS
2.
OPERATION INSTRUCTIONS
3.
4.
TROUBLE SHOOTING
Page 3
1.INTRODUCTION
Thank you for purchasing the DMXMASTER CA-1612.The DMXMASTER
isa standard universal DMX512 controller,controlling up to 192DMX
channels.Following are it's main features:
A.)12 fixtures of up to 16 channels.
B.)30 banks of 8 scenes each for a total 240 scenes.
C.)6 chases each up to 240 scenes.
D.)8 faders adjust the DMX output level from 0~255.
E.)2 faders control chase speed and fade time.
F.)MIDI control through MIDI interface.
G.)Built in Microphone.
H.)Blackout
I.)Specification:
Power input:DC9~12V 300mA min.
DMX Output:3 pin female XLR.
Size:19''x5.25''x3''(inch).
2.FUNCTIONS
1
SCANNERS
1
2
3
4
5
6
7
8
9
10
11
12
1 2 3 4 5 6 7 8
1 2 3 4 5 6 7 8
9 10 11 12 13 14 15 16
2 3 4 5 6
SCENES
PageA
PageB
15
STEP/TIME
Blackout
Step
Program
ChaseSceneBank
0.1SEC 30S
Page
Select
SPEED
14
FADETIME
13
Musictrigger
Autotrigger
10
010MIN
12
Bank-copy
11
Tapsync
Program
8
Midi/Add
9
Auto/Del
Music
Display
BANK Chase1
Chase2
Chase3
Chase4
Chase5
Chase6
BLACKOUT
DMX
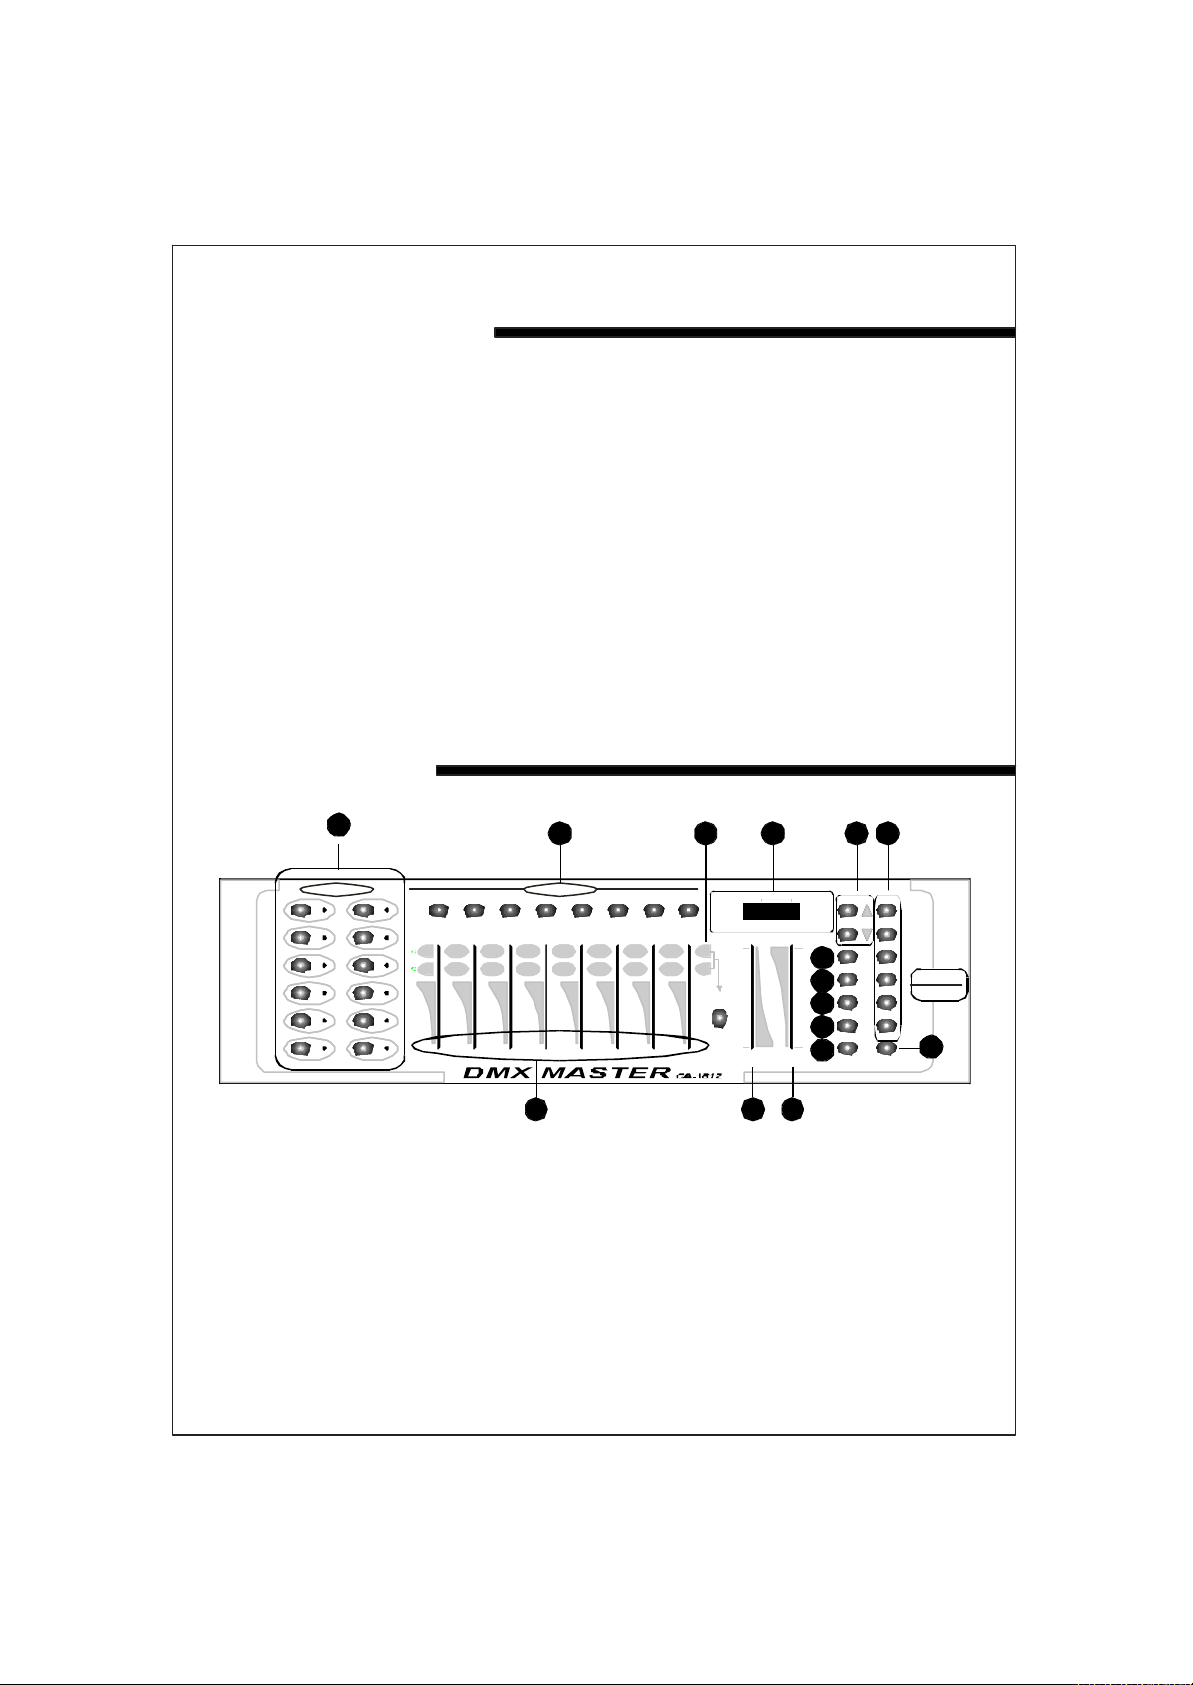
FrontControl Panel
1.):To select any or all of 12 fixtures.
Scanners
2.):To store or run scenes.
Scenes
3.):To select page A for channel 1 to 8,or page B for channel 9
Page Select
to16.
4.):4-digit showing values and settings chosen.
LCD Display
5.)(upand dow n):30 banks are available for selecting.
Bank
6.):To select 1~6 chases.
Chases
▲▼
512
7
Page 4
7.) :Disables all channel outputs.Black out
8.) :To activate the program mode.Display blinks when activated.Program
9.) : To control MIDI operation or activates save function.MIDI/Add
10. ) :To select Auto run in chase mode or delete scenes and/orAuto/Del
chases.
11.) :To trigger sound activation in Chase mode or toMusic/Bank Copy
copy a bank of scenes from one to another in program mode.
12. ) :In Auto Chase mode used to change the rate ofTap SYNC/Display
chase and in program mode change LCD display value.
13. ) : To adjust the Fade Time.Fade Time is the time itFade Time Slider
takes the DMXMaster to completely change from one scene to another.
14.) :To adjust the rate of chase speed in Auto Mode.Speed Slider
15.) :To adjust the output level from 0~255 or the intensityFaders(1~8)
from 0%~100% of each channel.
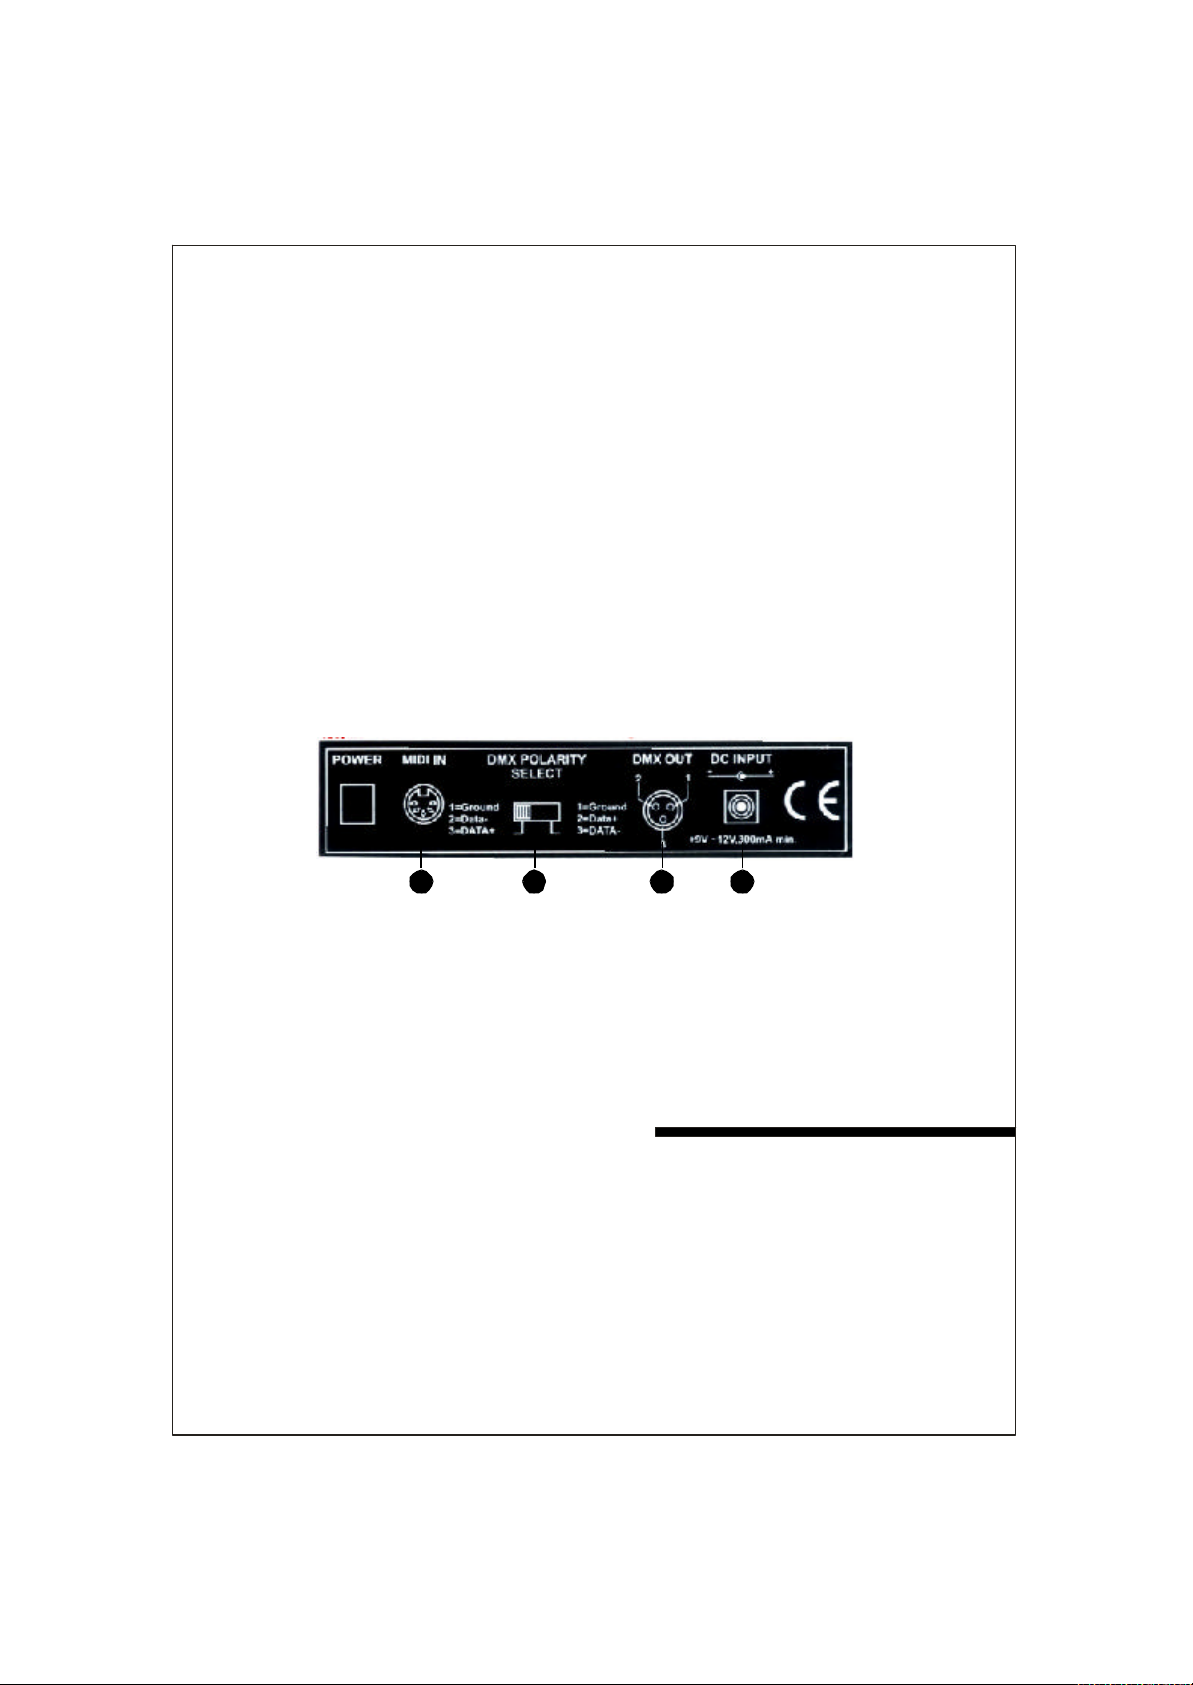
Rear Control Panel
16 17 18 19
16.) To receive MIDI data.MIDI in:
17.) :Make sure the polarity of your fixture and settheDMX Polarity Select
DMX Master to the properpolarity.
18.) :To send DMXsignal to fixtures or packs.DM XOutput
19.) :To supply a DC9~12V power,300mA minimum.DC Input
3.OPERATION INSTRUCTIONS
DMX 512 Addressing
Dip Switch setting:Each Dipswit cheas an address based on binary mode.
Dip Switch No.
Value
Select the address wanted by adding the total of Dip switches on.
1 2 3 4 5 6 7 8 9
1 2 4 8 16 32 64 128 256
Page 5

Dip Switch no.1
is not used with DMX but normally to select some
0
functions,i.e. Master/Slave,Sound activation, etc.
Each of the 12 fixtures is assigned 16 channels.The Dip switches are set
as per the chart below:
Scanners Channels Dip switches on
1 1~16 0 or 1 based on scanner
2 17~32 1,5
3 33~48 1,6
4 49~64 1,5,6
5 65~80 1,7
6 81~96 1,5,7
7 97~112 1,6,7
8 113~128 1,5,6,7
9 129~144 1,8
10 145~160 1,5,8
11 161~176 1,6,8
12 177~192 1,5,6,8
Note:
When addressing your fixtures,follow the starting address in this
instruction not the addressing found in your fixture user manual.
SceneProgramming
1.)Pressand hol
d
button for three seconds to activate programProgram
mode . The LCD next to''Program''blinks,indicating the program has
been started.
2.)Select a fixture to program,by pressing any or all buttons 1 to 12.Scanner
3.)Adjust the faders to the desired output level for all channels(i.e.Color,
Gobo,Pan,Tilt, etc.) of selected fixture or fixtures.Press Page Select
A/B if the fixture has more than 8channels.When selecting from PageA
to B,you have to move sliders to activate channels.
4.)If you have set the fixture to your liking and wish to program another
fixture,press the button you have finished adjusting.Scanner
This will hold the fixture in its final configuration.Select another fixture/s
by pressing the target button and proceed to adjust the fadersScanner
to achieve the settings you desire.
5.)Repeat steps2 and 3 until you have set the fixtures the way you like.
6.)When entire scene is set to your liking,press and release the MIDI/Add
button.
7.)Select the desired bank to store scene using the Up and Down Bank
select button.There are 30 banks you can store up to 8scenes per bank
for a total of 240 scenes.
Page 6

8.)Then pressa Button 1~8 to store the scene.All LEDs blink 3 times.Scene
The LCD will display the bank and scene where your scene was stored.
9.)Repeat steps 2~8 to recordy our desired scenes.
You can copy the settings from one scanner button to another in case you
want to add more fixtures to your show.Just press and hold the scanner
button you want to copy,then press the scanner button you want to copy to.
10.)To exit programming mode press and hold the button for 3Program
seconds.
(When you exit programming,the Blackout LED is on, pressBlackout
button to de-function blackout.)
Scene Editing
This function allows you to make changes in aprevious program med scene .
1.)Press the button for three seconds to enter program mode.Program
2.)Use the Up and Down button to select the bank that stores theBank
scene you wish to edit.
3.)Select the scene you want to edit by pressing its button.Scene
4.)Use the faders to make your desired adjustments.
5.)Press the button then followed by the button thatMIDI/Add Scene
corresponds to the scene you editing to store it tomemory.Note:You
must select the same scene you selected earlier otherwise you may
accidentally record over an existing scene.
Scene Copy
This allows you to copy the setting so fone scene to another.
1.)Press the button for three seconds to enter program mode.Program
2.)Use the Bank Up and Down to locate the bank that stores theButton
Scene to copy.
3.)Select desired Scene you want to copy by pressing the button.Scene
4.)Use the buttons Up and Down to select the bank where you wantBank
To store the copied scene.
5.)Press followed by the Button where you want to copy to.MIDI/Add Scene
Delete Scene
This function will reset all DMX channels in corporated with a scene to 0.
1.)Select the desired scene to delete.
2.)While pressing and holding Auto/Del,press the Scene button(1to8)
you want to delete.
Page 7

Erase All Scenes
This will erase all scenes in all banks.All scenes are reset to 0.
1.)Press and hold down and Down buttons while turningProgram Bank
power off.
2.)Re-connect the power,all scenes should be erased!
Copy Bank
Thisfunction enables you to copy the settings of one bank to another bank.
1.)Press and hold th e Button for three seconds to activate theProgram
programming mode.
2.)Select the bank you want to copy.
C.)Press an d release the button.MIDI/Add
D.)Select the bank into whichyou want to copy to.
F.)press the button. The LCD display will flash shortlyMusic/Bank-Copy
to indicate the copy has been finished.
Delete A Bank
1.)Press and hold th e Button for three seconds to activate the Program
programming mode.
2.)Select the bank to be deleted.Press the andAuto/Del Music/Bank-
Copyat the same time to delete the Bank.The LCD will flash to indicate
the function completion.
Chase Programming
You have to program scenes before you can program chases.
1.)Press and hold the Button for 3seconds to enter programmingProgram
Mode.
2.)Choose any chase(1~6)to be programmed.
3.)Select the desired Scene from any bank.Scenes are run in the order
That they are programmed into the chase.
4.)Press the button,all the LED will flash 3 times.MIDI/Add
5.)Repeat steps 3 and 4 as many as you want.You can record up to 240
Scenes into one chase.
6.)Press and hold the program Button for 3 seconds to exit programming
Mode.
Page 8

Copy a Bank to a Chase
1.)Press and hold the Program Button for three seconds to enter the
programming mode.
2.)Select the bank of scenes you wish to copy.
3.)Select the chase to which you want to copy the bank of scenes.
4.)Press ,and simultaneously.The scenesMusic/Bank-Cop y MIDI/Add
of the bank are copied to the Chase.
5.)Press and hold the Program Button for three seconds to exit programming
mode.
EDITTING CHASES
Addinga Step to aChase
1.) Press and hold Program Button for three seconds to enter the programming
mode.
2.)Select the chase1~6 to which you wish to add a step.
3.)Press and the LCD shows the scene and bank.ThisTAPSYNC/Display
is the bank containing the scene you wish to add.
4.)Press again and the LCD shows the Chase that youTAPSYNC/Display
have selected.
5.)Use th e buttons to scroll through the chase to reach theUp and Down
step after which you wish to add a step.
6.)Press , the LCD will read one step number higher.MIDI/Add
7.)Press the button you wish to add.Scene
8.)Press again to add new step.MIDI/Add
9.)Press and hold the Program Button for three seconds to exit the programming
mode.
Deletin g a Step in a Chase
1.)Press and hold the Button for three seconds to enter theProgram
programming mode.
2.)Select the 1 to 6from which you wish to delete a step.Chase
3.)Pres s and the LCD shows the Chase that you haveTAPSYNC/Display
selected.
4.)Use th e button s to scroll through the chase to reach the stepUp/Down
you wish to delete.
5.)Press and the scene will be deleted.Auto/Del
6.)Press and hold the Program button for three seconds to exit the
programming mode.
Page 9

DeleteChases (All Scenes are still available)
1.)Press and hold the button for three seconds.
2.)Press thebutton that you want to delete.
3.)Press and hold the button and then press and hold the
chase button of the chase to be deleted.The LEDs will flash three times.
4.)Release both buttons and the chase will be deleted.
Chase
Program
Auto/Del
Delete All Chases (All scenes are still available)
1.)Press and hold down theandbuttons whileBankDownAuto/Del
turning power off.
2.)Re-connect the power,all chases should be deleted.
RUNNING SCENES
Manual Run Scenes
1.)When the power is first turned on,theun it is in manual scene mode.
2.)If in Program mode,press and hold the Program button for three
seconds and the program LED will go out.The controller is now in
Manual mode.
3.)Be sure that thebuttons'LEDs are off.Auto&Music
4.)Select the Bank,using the Up and Down Bank buttons that stores the
scenes you wish to run.
5.)Press the Scene Button to run the scenes you selected.
Auto Run Scenes
This function will run a bank of programmed scenes in a sequential loop.
1.)Press once to activate the Auto Run mode.Auto/Del
2.)Use the buttons to select a bank of scenes to run.Up and Down Bank
3.)Now you can use the sliders to adjust the scenes toSpeed and Fade
your liking.The fade setting should never be slower than the speed
setting or the scenes will not becompleted.
5.)You can change banks on the fly by pressing the Up and Down Bank
buttons.
Page 10

Music Run Scenes
1.)Press the button and the corresponding indicatorMusic/Bank-Copy
light will come on in LCD.
2.)Select desired bank that stores the scenes you wish to chase by using
or buttons or you can control via MIDI signals.Up Down
3.)Press once more to exit.Music/Bank-Copy
MIDI Run Scenes
1.)Select bank to run scenes using MIDI whenever it is in Manual,Auto or
Music Run mode.
RUNNING CHASES
Manual Run Chases
This function will enable you to manually step through a selected chase.
1.)Press and hold the button for three seconds to enterProgram
programming mode.
2.)Start a chase by selecting one of the six buttons.Chase
3.)Press the button.Each time you press the button,you willTAPSYNC
step through the chase.
4.)Us e select buttons to scroll through the chases.Bank
5.)Press and hold the button for three seconds to exitProgram
programming mode.
Auto Run Chases
1.)Press any or all of the six button to select the desired chase.Chase
2.) Press and release the button.The corresponding LED will flash.Auto/Del
3.) Adjust the and to your desired settings.The Chase willSpeed Fade Time
run according to your settings.
4.)You can override the speed and fade time by tapping the TAPSYNC/
Display button three times.Then the chase will run based on the time
interval of your taps.
Note:A.)Never adjust Fade time slower than the Speed setting otherwise
your scenes will not be completed before a new step is sent!
B.)If you wish to include all the chases,press button beforeAuto/Del
selecting Chase.
Page 11

Music Run Chases
1.) Chase
Press one of the six buttons to select your desired chase.
2.)Press and release the button.
Music/Bank-Copy
3.)The corresponding LED will flash in the LCD.
4.)Your chase will now run to the sound.
Note:When you exit a chase by pressing the Chase button,the controller
will automatically run the scenes that are in the last bank accessed.To stop
the movement of the lights either use the Blackout button or press Music if
in music mode or the Auto button.
MIDI CHANNEL SETTING
MIDI Running
1.)Press and hold the button.The third and fourth digits of LEDMIDI/Add
Display will blink,indicating MIDI mode.
2.)Use the buttons to select the MIDI channel(1to16)youUp and Down
would like to run.
3.)Press and hold the button once more to end MIDI mode.MIDI/Add
MIDI Channel settings
Note on:Receive Note On signals to execute corresponding function.
BANK NOTE NUMBER FUNCTION
Bank1
Bank2
Bank3
Bank4
Bank5
Bank6
Bank7
Bank8
Bank9
Bank 10
Bank 11
Bank 12
Bank 13
Bank 14
Bank 15
00t o 07 1 to8 o f Bank 1 on or off
08t o 15 1 to8 of Bank 1 on or off
16t o 23 1 to8 of Bank 1 on or off
24t o 31 1 to8 of Bank 1 on or off
32t o 39 1 to8 of Bank 1 on or off
40t o 47 1 to8 of Bank 6 on or off
48t o 55 1 to8 of Bank 7 on or off
56t o 63 1 to8 of Bank 8 on or off
64t o 71 1 to8 of Bank 9 on or off
72t o 79 1 to8 of Bank 10 on or off
80t o 87 1 to8 of Bank 11 on or off
88t o 95 1 to8 of Bank 12 on or off
96t o 103 1 to8 of Bank 1 3 on or off
104 to 111 1 to8 of Bank 1 4 on or off
112 to 119 1 to8 of Bank 1 4 on or off
Chases
BLACKOUT
120 to 125 1 to 6 chases
126
BLACKOUT
The DMX Master receives only MIDI notes and you might have to transpose
your keyboard to find the proper notes.
Page 12

4.TROUBLE SHOOTING
A.)Colors don't respond when faders are moved.
Make sure address is correct.If the XRL cable is more than 30 meters,
check if it is terminated properly.
B.)Mirrors don't respond when faders are moved.
Make sure address is correct.Make sure speed is adjusted,if available,
for faster movement.Not all fixtures have a speed adjustment. If the XRL
cable is more than 30 meters,check if it is terminated properly.
C.)Scenes don't run after record them
Make sure to press MIDI/Add button before pressing Scene button.
LED's should blink after pressing each Scene button.Be sure you are in
the correct Bank that has scenes recorded.
D.)Scenes don't run correctly as recorded them
Made sure all fixtures were recorded.Make sure you are in the correct
bank that has scenes recorded.If the XRL cable is more than 30 meters,
check if it is term inated properly.
E.)Chase don't run after record them
Make sure to press MIDI/Add button after pressing Scene button . LED
should blink after pressing MIDI/Add button.
Be sure you are in the correct Chase that has steps recorded.If in Auto
Mode,did you adjust speed after selecting Auto? Is Fade time to long
for speed selected? If the XRL cable is more than 30 meters,check if it
is terminated properly.
ECD eclaration of Conformity
We declare that our product complies with the following specification and
bears CE mark in accordance with the provision of the Electromagnetic
Compatibility(EMC) Directive 89/336/EEC.
EN55014-1:1993,EN61000-3-2:1995,EN61000-3-3:1995
EN55014-2:1997 CATEGORYII
EN61000-4-2:1995,EN61000-4-3:1995,EN61000-4-4:1995
EN61000-4-5:1995,EN61000-4-6:1995,EN61000-4-11:1994
&
Harmonized Standard
EN60598-1:1993
Safety of household and similar electrical appliances
Part1:General requirements
Following the provisions of the Low Voltage Directive73/23/EEC and
93/68/EEC.
 Loading...