

MBTelehealth SX User Manual

MBTelehealth - SX Series with TRC6 Remote User Guide
SX Series with
TRC6 Remote Control
User Guide
Rev 11May2017
Page 1 of 19

MBTelehealth - SX Series with TRC6 Remote User Guide
OVERVIEW ......................................................3
BASIC NAVIGATION ...............................................4
GENERAL USE ...................................................5
Setup ......................................................................5
Microphone ..................................................................6
Volume .....................................................................6
Site to Site Calls ..............................................................7
Connecting to an MBT Site ............................................................ 7
Connecting to a site outside the MBT Network ............................................ 8
Adding Favorites ................................................................... 8
Far End Control: Site to Site .......................................................... 9
Sharing Presentation: Site to Site ...................................................... 10
Sharing Content: Patient Camera - Site to Site ............................................ 11
Screen Layout: Presentation - Site to Site ............................................... 12
Multi-Site Event Calls (MCU) ....................................................12
Connecting to a Multi Site (MCU) Call ................................................... 12
Screen Layout/Far End: No Presentation - Multi-Site ....................................... 12
Sharing Presentation: Multi-site. . . . . . . . . . . . . . . . . . . . . . . . . . . . . . . . . . . . . . . . . . . . . . . . . . . . . . . . 13
Sharing Content: Patient Camera - Multi-site ............................................. 14
Screen Layout: Presentation - Multi Site ................................................ 15
Receiving and Ending Video Calls ................................................16
DUAL VIDEO ENABLED EQUIPMENT ..................................17
TROUBLESHOOTING ..............................................18
ADDITIONAL TRAINING INFORMATION ................................19
VIDEOCONFERENCING ETIQUETTE ..................................19
Rev 11May2017
Page 2 of 19
MBTelehealth - SX Series with TRC6 Remote User Guide
OVERVIEW
This user guide will provide you with an overview and the knowledge to setup and use the SX series equipment
with the TRC6 remote control.
Main Components
The main components included with the SX Series are the Camera, Codec, Ethernet Cable, Microphone,
Screen/Monitor and Remote. In some instances there may also be a router.
Camera: high quality imaging device which
transmits images to the screen/monitor. The
camera movements are controlled by a wireless
infra-red (IR) remote control that controls a
variety of functions, both on the near and far
end.
Codec: central part of the videoconferencing
equipment. The main task of the codec is the
compression of outgoing video, audio and data, the
decompression of the incoming information and the
transmission of this information between endpoints.
The name codec comes from a combination of the
two words compression and decompression.
Remote: used to place calls, adjust the volume,
navigate screens and select options. It controls
all functions of the videoconferencing equipment,
including moving the camera.
Screen/Monitor: built-in screen/monitor displays
the far end or the near end image and content as
selected by the user.
Rev 11May2017
Page 3 of 19
MBTelehealth - SX Series with TRC6 Remote User Guide
BASIC NAVIGATION
The TRC6 Remote is used to operate your video equipment and the system will not work without it. Here are
some commonly used features:
Basic Features of the TRC6 Remote
Volume control and Camera zoom +/-
OK/Enter
• Arrow keys
• Field selector
• Camera controls
Back
(takes you back one step)
Call
Keypad
Use the Arrow keys to move
1 2
the cursor around the screen
and press OK/Enter to open
the selected menu eld.
Operating Tips
Use the Back button to go
one step back and to exit a
menu.
Microphone mute/
unmute
End Call
3
Use the Back button to display
the onscreen menu options at
any time.
The Home screen should always be displayed prior to connecting to a site; if not, this may mean that a previous
call was not disconnected. If you do not see the Home screen, press End Call on the remote to disconnect prior
to connecting to your site.
Rev 11May2017
Page 4 of 19
MBTelehealth - SX Series with TRC6 Remote User Guide
GENERAL USE
The following sections will provide instructions for using your SX series equipment with the TRC6 remote
control to place and receive videoconference calls.
Setup
Setup and Use the Equipment
Wake the codec by picking up the remote and pressing the OK/Enter button and turn on the video
screen/monitor if required. In a few seconds you will see the home screen.
Camera Controls and Selfview
Before the session starts check the selfview and adjust your camera as required. The selfview displays
an image of your camera view onscreen and shows you what you will be sending to the other site. The
selfview appears as a PIP (Picture-in-Picture). Note: Ensure you move your camera to the correct location
at the start of your event.
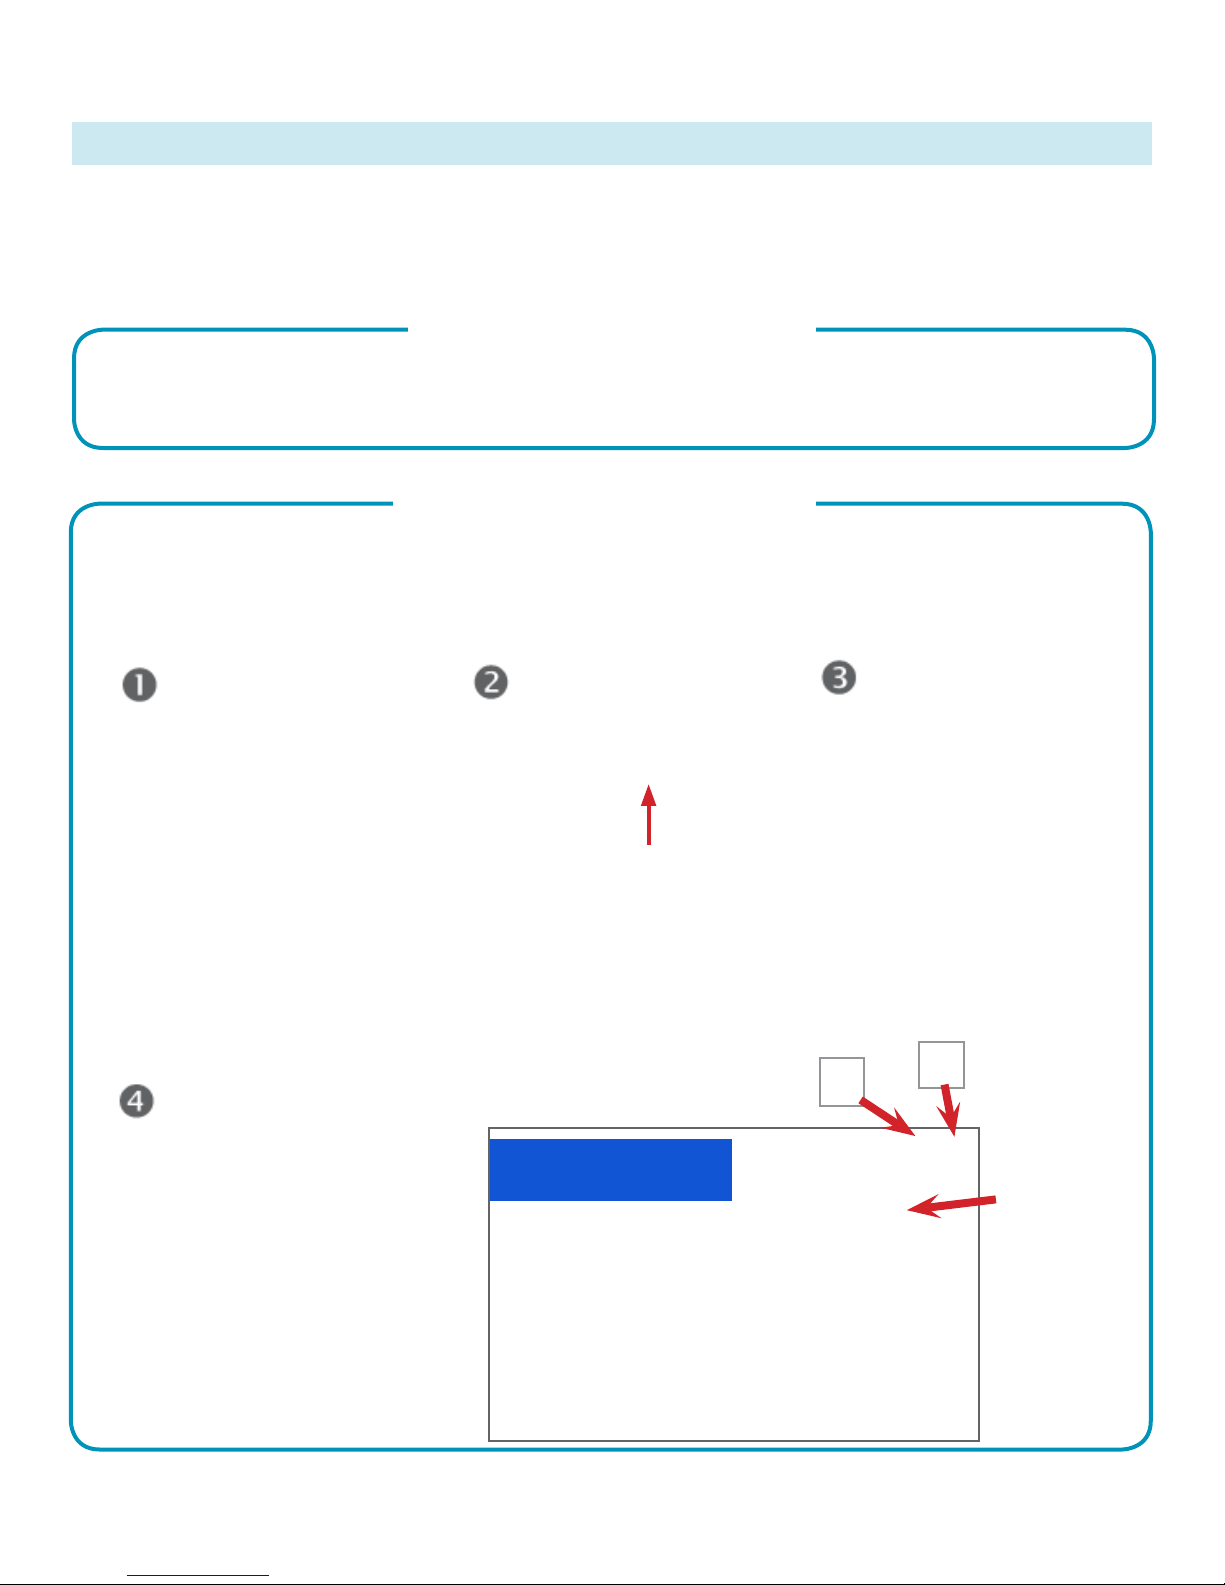
• Arrow over to the Camera
icon in the top right corner and
press OK on the remote.
Press Back to exit the
menu.
• Press OK on the camera icon to
display the camera control options.
• Use the arrows to adjust the pan/
tilt and zoom in and out using the
+/- keys on the remote (as shown
below).
Show/hide selfview
• You can show/hide selfview
or maximize/minimize by
selecting the applicable icon.
• Press the Back button
on the remote to exit the
camera controls.
Maximize/minimize
selfview.
Camera
controls:
pan, tilt and
zoom controls
(use the keys
on the remote).
Rev 11May2017
Page 5 of 19
MBTelehealth - SX Series with TRC6 Remote User Guide
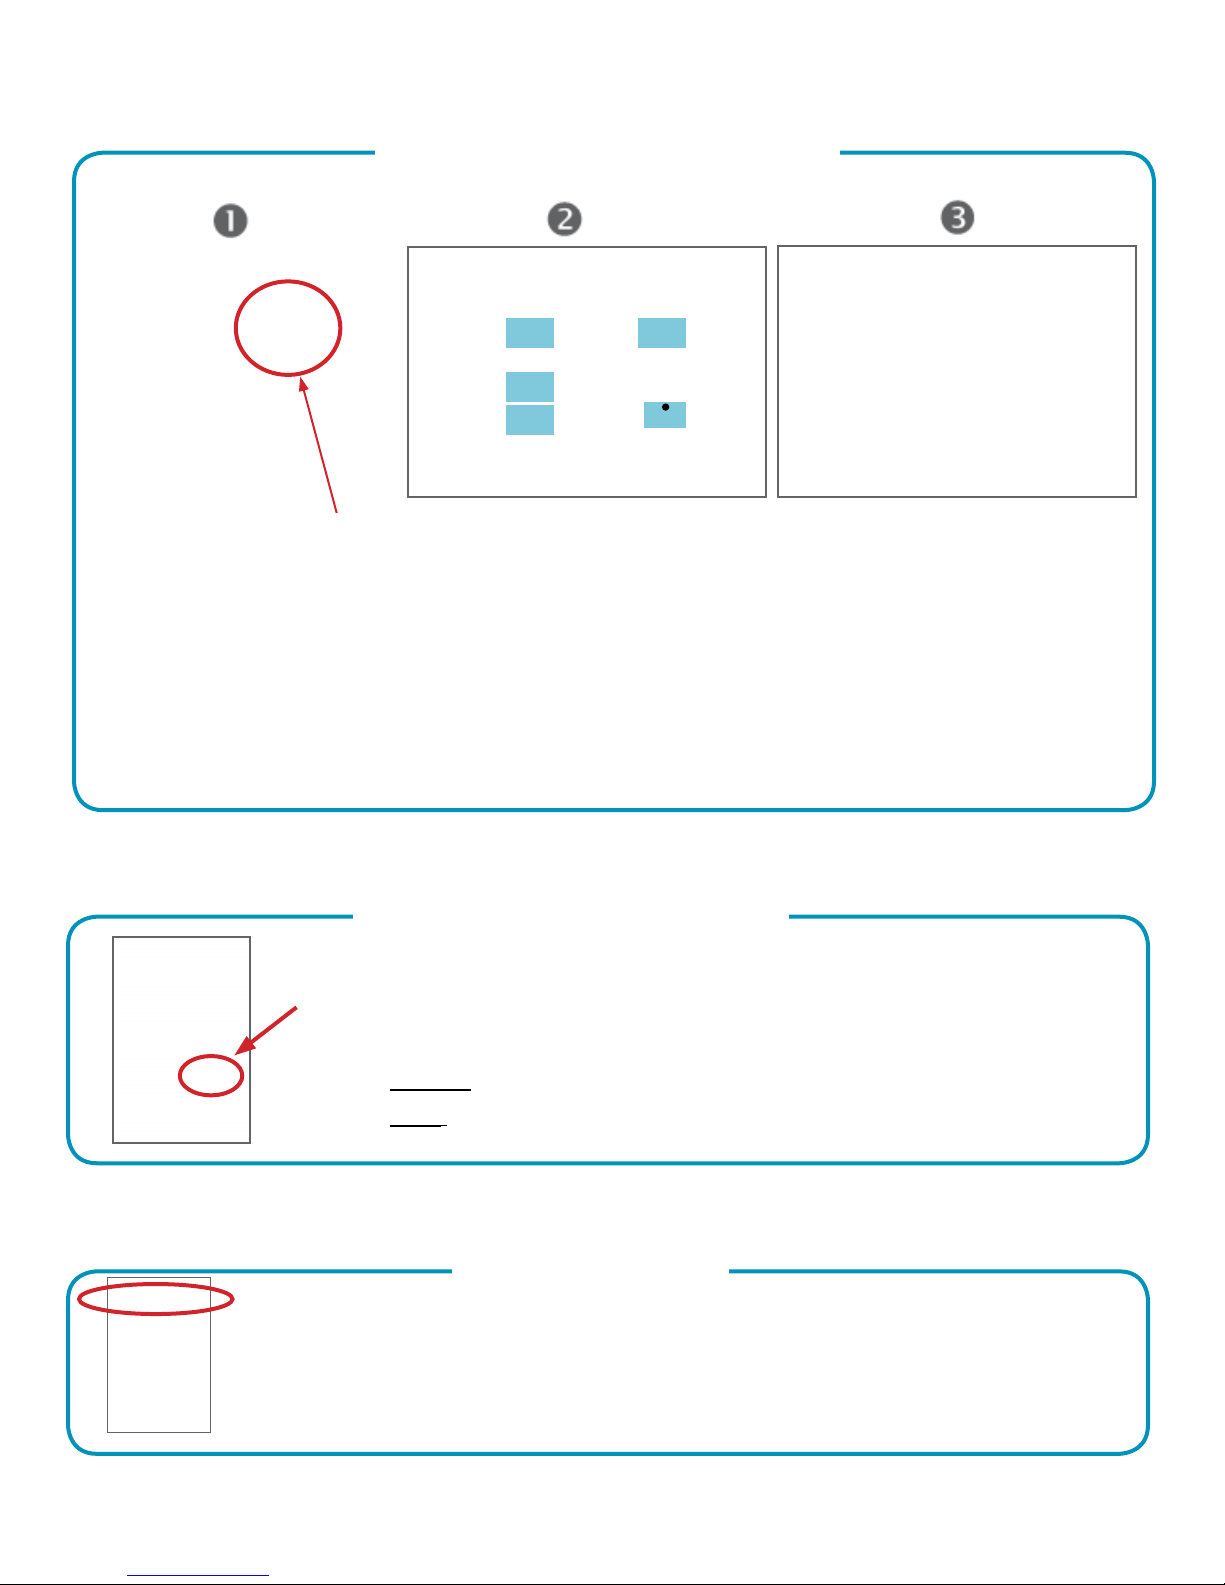
Move the PIP (Picture-in Picture)
V
• Navigate to Layout ( )
in the upper right corner and
press OK.
• The Layout icon will appear
only when relevant.
Microphone
• Arrow down to select the
box to be moved (box will turn
• The image will now assume its
original size.
blue).
• Use the Arrow keys to
move the box to one of the
predened locations.
Note: this same process can
be used to move the selfview
box.
• Press OK when nished.
Mute and Unmute the Microphone
Mute and unmute the microphone. (Note: When you have muted the microphone
you will see the mute icon on the screen.) You can also press the button on the
microphone itself.
Unmute (site can hear you: light on microphone = green)
Mute (site cannot hear you: light on microphone = red,
the mute icon will remain onscreen until unmuted.
Volume
Press and hold the left side (-) of the Volume key to decrease the volume and the right
side (+) to increase the volume.
(Note: When using the camera control menu options, the +/- key is used to zoom the
camera in and out. If you need to change your volume while in the camera control
menu, press the Back button to exit the controls.)
Rev 11May2017
Adjust the Volume
Page 6 of 19
 Loading...