


User Manual
Reflow Batch Oven
Model: X-REFLOW305
schafft Vorsprung
MBR ELECTRONICS • SOLDER TECHNOLOGY
JONASTRASSE 8 • CH-8636 WALD • SWITZERLAND
Internet:www.mbr.ch • E-Mail: info@mbr.ch
Tel: +41(0)55 246 2400 • Fax: +41(0)55 246 2418

Contents PAGES
1. Introduction 3
2. Specifications 4
3. Safety 5
4. Unpacking and Set-Up 5
5. Panel View with Power ON 8
6. Entering a Temperature Profile 8
1 Entering a New Temperature Profile 9
2 Running a Pre-installed Profile 11
7. Running a Temperature Profile 13
8. Cooling Cycle 14
9. Open Circuit Thermocouple Detection 15
10. Warranty Statement 15
2
1. Introduction
Congratulations on your purchase of Batch Reflow Oven Model X-REFLOW305. XREFLOW305 is a uniquely designed full convection Reflow Batch Oven for use in low
volume production such as simulation of a mass-production Reflow Oven, heat resistance
test of components and laboratory experiments where precise and accurate heating is
required. The unit has several unique features, which enhance operation. Full convection
heating with independent control of front and rear heaters, which enable hot air
temperature and time setting in 4 steps and free setting of various profiles for various
PCBs. A large inspection window allows monitoring during operation also applicable with a
microscope. The built-in computer uses closed-loop monitoring to ensure absolute
repeatability of the temperature profiles and has the memory to store 255 profiles allowing
very quick profile changes perfect for low volume assembly. The large backlight display
shows either the specific temperatures or time digitally or graphically. A Nitrogen Gas inlet
is standard.
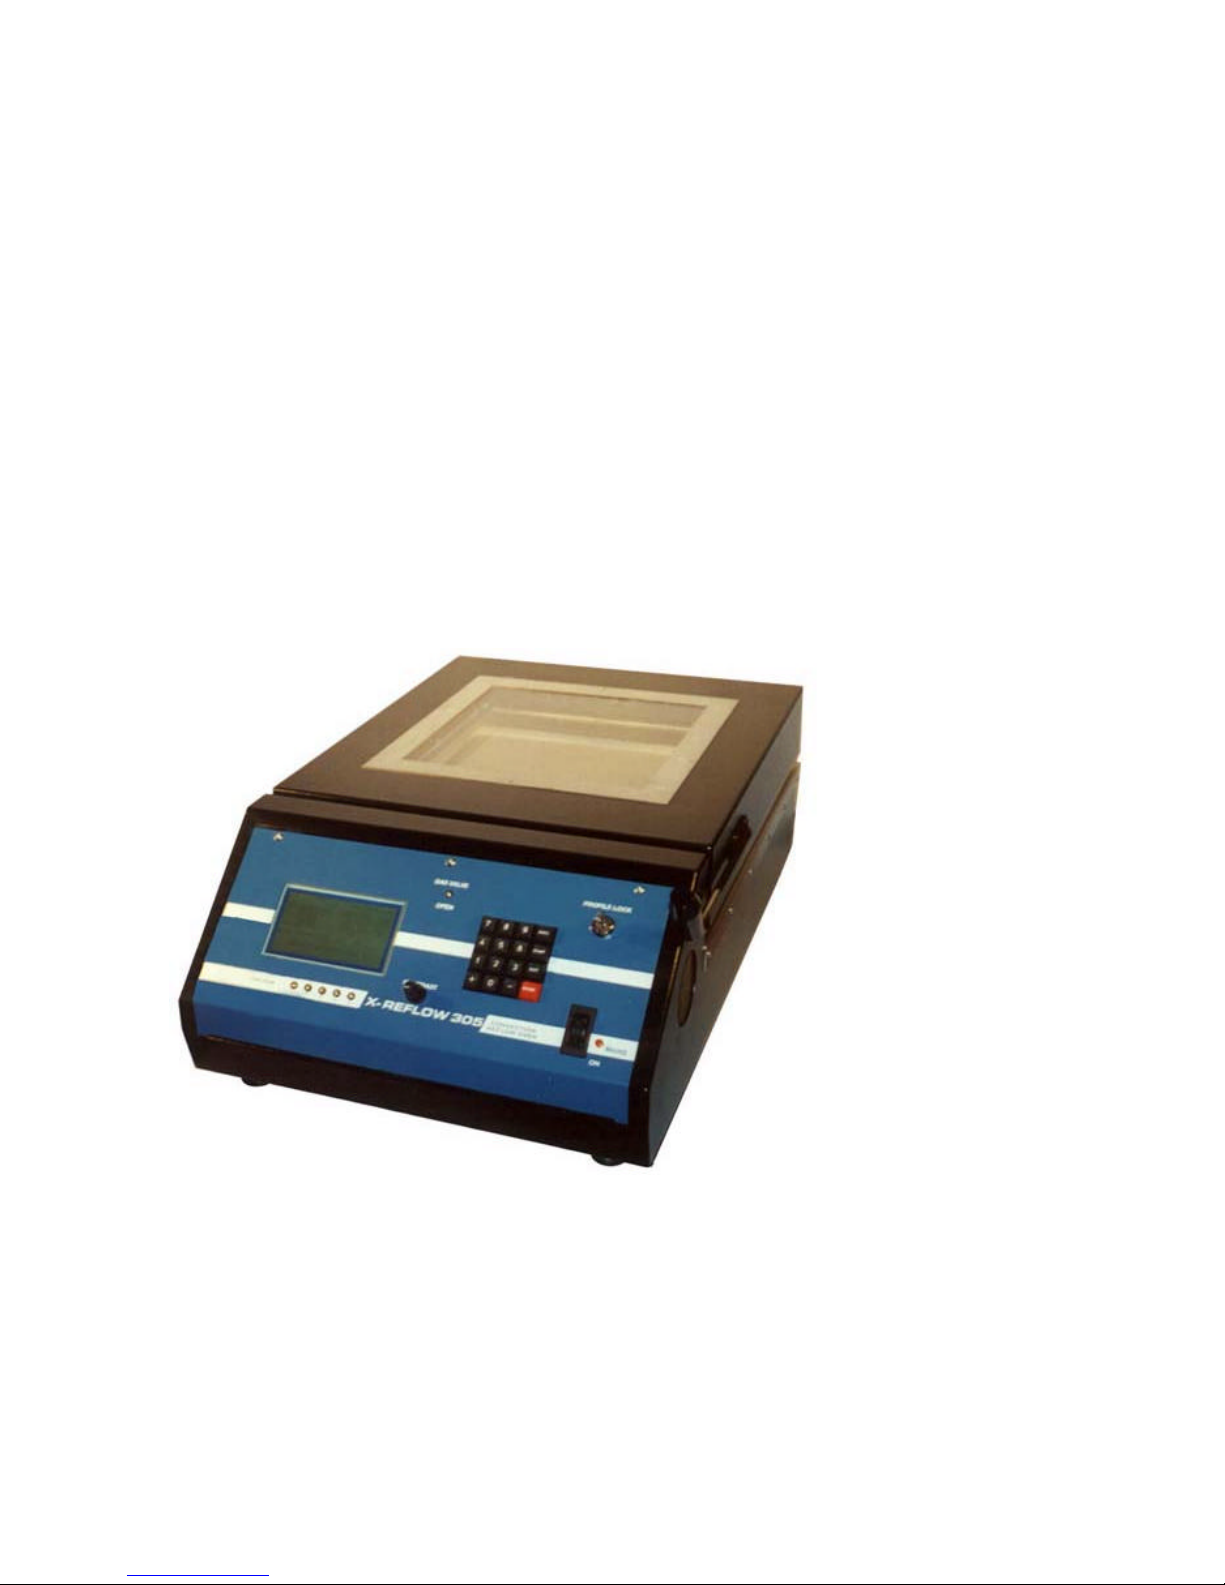
X-REFLOW305 View of the system
3
2. Specifications
Numerical
X-REFLOW305 Specifications
Temperature Profile 4 Steps (Temperature & Time)
Cooling Cycle 1 Step (Temperature only)
Monitoring Window Size
Maximum P.C.B. Size
Nitrogen Gas Connector Standard supply
Profile Memory Capacity 255 profiles
Temperature Control Range
Input Voltage
Heater Capacity
Power Cord 3m(without plug)
External Size/Dimensions
Weight
280 280
305 305 40
150 350 (At Center air over the mesh)
220 240VAC 50Hz or 60Hz. Single phase
4.8KW(2.4KW 2)
510 780 270
35
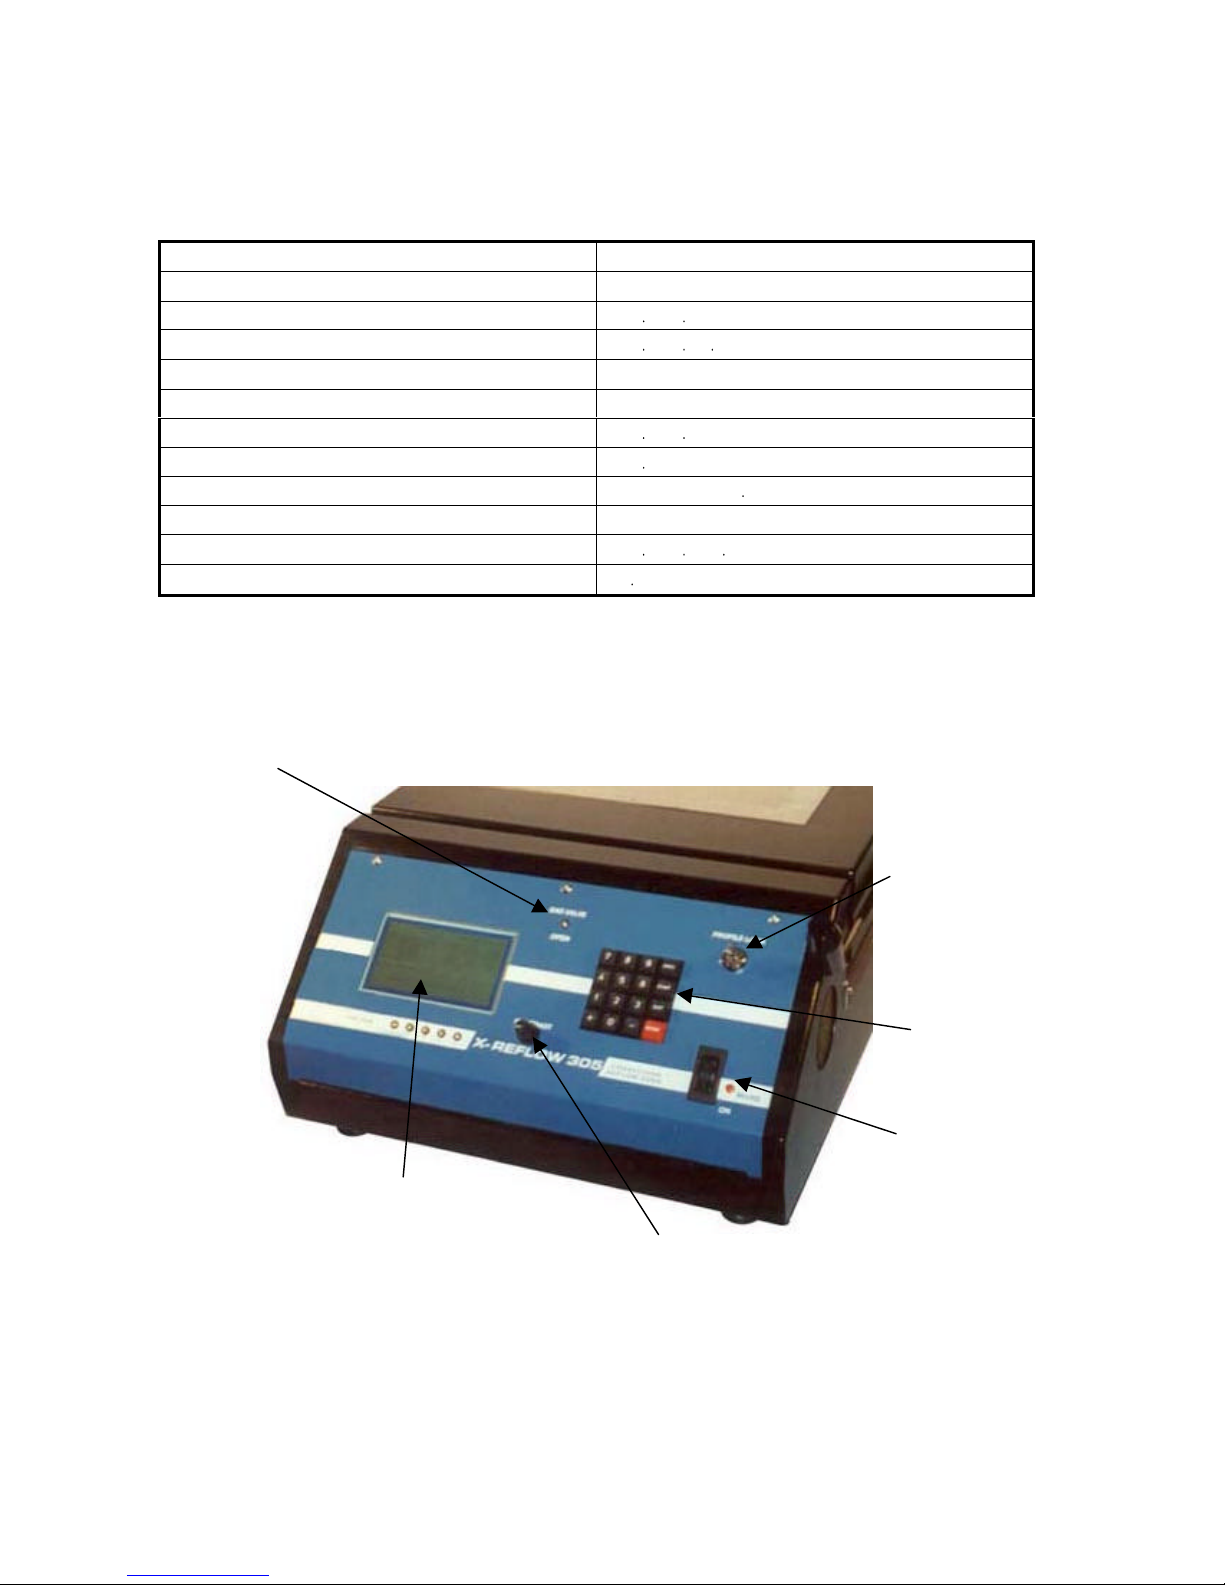
Gas Valve LED
Key Switch
Key
Power Switch
Display
Kontrast Control Knob
X-REFLOW305 Front Panel View
4

3. Safety
l The fumes emitted during soldering are irritants and therefore should be removed. A
pumped vent is located at the rear of the unit and should be ducted accordingly.
l Area close to the hood becomes hot, therefore care should be taken when working a
round this area.
l This oven must be properly grounded.
l Please read this operation manual carefully prior to use.
l Area around the viewing window becomes hot, therefore care should be taken when
working a round this area.
l After ending the cooling cycle, the inside of oven is still hot, therefore care should be
taken when removing and mounting the PCB.
l Be sure to wear the cotton gloves to prevent burns when taking out the PCB from the
oven and placing a new one. The PCB is still hot.
4. Unpacking and Set-Up
1 Connecting to the Power Supply
X-REFLOW305 must be connected to 50/60Hz. 220-240V single-phase 16A power
supply.
2 Operating Frequency
X-REFLOW305 has a changeover switch for 50Hz or 60Hz on the rear panel of the
unit, please set it to match your frequency. As the timing is dependent upon the
operating frequency, failure to set it on the correct value will result in timing errors
during the oven’s cycle. When the oven is first turned ON, the computer samples the
link and the set operating frequency displayed on LCD panel. Be sure to check that it
shows the correct frequency.
5

Circuit Breaker
There is a circuit breaker on the left-hand side of the rear panel, please turn it ON
prior to the operation.
3 Power Switch
There is a power switch on the front panel, please turn ON after turning ON the circuit
breaker.
4 Security Key Switch
A key switch is provided to prevent unauthorized access to the profile parameters and
the profile storage memory. The key must be in place and turned in the clockwise
direction “ON” before starting the oven or changing a profile. The key can only be
removed in the “OFF” position. Two keys are provided. One key is a spare, please
keep it in a safe place.
5 Display Contrast
The display contrast is adjusted by turning the round knob next to the display.
6 Nitrogen connection & Operation Procedure (Please refer to Illus. 1)
I. Attach the Nitrogen source(0.5 1 /2) to the Nitrogen input port on the rear
panel of the oven.
II. Be sure that Nitrogen switch is set in the up position on the rear panel of the
oven.
III. Start the temperature profile running and the Nitrogen valve within the oven
can be heard to activate and Nitrogen is then released into the oven heating
area. The LED (GAS VALVE) on the front panel should light.
Note: The nitrogen valve will open at the beginning of the profile (Preheat 1). To allow
enough time to purge the oven, Preheat 1 should be set for 3 to 4 minutes.
6

IV. Once the temperature profile has completed its running cycle the Nitrogen
Air 60Hz
Switch
Nitrogen 50Hz
ON
OFF
Main Label
valve will turn off automatically and the front panel LED (GAS VALVE) will go
off.
Note: Nitrogen will not enter the heating area with the Nitrogen changeover switch
(Nitrogen/Air) in the down (Air) position.
Nitrogen input port
Fuse holder (1A Fuse) Flex nose = 8 mm
Air/Nitrogen
Circuit
Breaker
Power Cord Main Frequency Switch
Illustration 1 X-REFLOW305 Rear Panel View
7

5. Panel view with Power “ON”
CONVECTION BATCH OVEN
PROFILE NO: XXX
SET TEMPERATURES FRONT REAR
PRE-HEAT 1 XXX XXX
PRE-HEAT 2 XXX XXX
PRE-HEAT 3 XXX XXX
REFLOW XXX XXX
COOLING
TARGET
ACTUAL TEMPERATURE XXX XXX
SECURITY SWITCH NOT ENABLED!
The above display is shown if the oven is switched ON without the security key in place. If
the key is turned ON or is already ON the display will be shown as:
CONVECTION BATCH OVEN
SET TEMPERATURES FRONT REAR
PRE-HEAT 1 150 150
PRE-HEAT 2 150 150
PRE-HEAT 3 150 150
REFLOW 150 150
COOLING
TARGET
XXX
PROFILE NO: NEW
100
TIME
XXXX
XXXX
XXXX
XXXX
TIME
0000
0000
0000
0000
ACTUAL TEMPERATURE OFF OFF
TAIYO ELECTRIC BATCH OVEN
HIGH TEMPERATURE OVEN
* It will display 60Hz if the changeover switch set on 60Hz.
*
50Hz VERSION
PRESS ANY KEY TO START
6. Entering Temperature profile.
In the opening display press any key. The user prompt dialog box changes to:
PRESS ”+” KEY FOR STORED PROFILE
PRESS ”-” KEY FOR NEW PROFILE
Pressing the “+”key enters the procedure for loading a profile from the computer’ memory
(Please refer to Page 10. Running a pre-installed profile).
Pressing the “-“ key allows new profile parameters to be entered using the numeric keys.
8

1 Entering New Temperature profile.
When the “-“key is pressed, the display changes to:
CONVECTION BATCH OVEN
PROFILE NO: NEW
SET TEMPERATURES FRONT REAR TIME
PRE-HEAT 1 #50 150 0000
PRE-HEAT 2 150 150 0000
PRE-HEAT 3 150 150 0000
REFLOW 150 150 0000
COOLING
150
TARGET
ACTUAL TEMPERATURE OFF OFF
ENTER SET TEMPERATURES AND ZONE TIMES
TEMPERATURES MAXIMUM 350 MINIMUM 150
ZONE TIMES MAXIMUM 9999 MINIMUM 0000
”ENTER” SAVE VALUE ”CANCEL” LAST VALUE
With the cursor flashing at the position “#”, pressing the ‘CANCEL’ key at this point
returns to the previous user dialog box.
PRESS ”+” KEY FOR STORED PROFILE
PRESS ”-” KEY FOR NEW PROFILE
IF the “ENTER” key is pressed, the value currently displayed at the cursor position is
saved (The set value of the front heater is saved) and the cursor moves to the rear
heater setting.
Note: If the “CANCEL” Key is now pressed, the cursor moves to the front heater setting.
Entering the 3 digit temperature setting value, the display shows the rear heater
setting and the same value is displayed. If the same value is required for both the
front and rear, pressing the ‘ENTER’ key will set the rear heater to the same set value
as the front heater. If the rear heater needs to be set at a different value from front
heater, enter the value using the numeric keys. When both heater values have been
entered the cursor is positioned at the ’TIME’ zone value. Enter the desired time using
the numeric keys. (Unit of TIME is seconds) Pressing the enter key results in the
present displayed time value being saved. A numeric input will change the time value
set. Pressing the ‘CANCEL’ key will move the cursor to the previous setting if an error
occurs.
9

This process is repeated for all 4 heating zones. The ‘CANCEL’ key is used to go
back to a previous zone if an error is made and re-enter the correct value.
The time zone LED will flash at the bottom of the Panel and showing the zone you are
in while inputting the set values. The LED flashing moves in the following order.
1 PRE-HEAT1
2 PRE-HEAT2
3 PRE-HEAT3
4 REFLOW
5 COOLING TARGET
TIME ZONE
1 2 3 4 5
The cursor is then positioned at the “cooling target” temperature (Cooling Cycle). This
value is the temperature that the oven must fall to before the profile is finished.
When the cooling target (cooling cycle) is entered, the user dialog box changes:
STORE NEW PROFILE
ENTER PROFILE NUMBER 001-255
PRESS ”CANCEL” KEY TO EXIT
The cursor is flashing in the profile number dialog box at the “#” position.
CONVECTION BATCH OVEN
PROFILE NO. #EW
If the ‘CANCEL’ key is pressed, the profile is not saved in the computer memory and
the oven will be ready to run. By pressing ‘START’ key, the oven starts the heating.
If wanting to save the profile in the computer memory, a 3-digit number must be
inputted.
10

If the number entered is already used for a profile stored, the user dialog box changes
to:
PROFILE STORE LOCATION IN USE
PRESS ”EDIT” KEY TO OVERWRITE
PRESS ”CANCEL” KEY TO EXIT
Pressing the “EDIT” key replaces the stored profile with the profile that has just been
created.
If the “CANCEL” key is pressed, the user dialog box returns to the previous display
where the new profile number can be entered.
When the profile has been successfully stored the user dialog box changes to:
PROFILE STORED
PRESS ANY KEY
When pressing any key, the oven is ready to run and the user dialog box on page 13.
7. . is shown.
2 Running a pre-installed profile.
PRESS ”+” KEY FOR STORED PROFILE
PRESS ”-” KEY FOR NEW PROFILE
In the user dialog box shown above, pressing the “+” key will change the user dialog
box to the following:
VIEWING PROFILE STORE
ENTER PROFILE NUMBER 001-255
”+” NEXT PROFILE ”-” PREVIOUS PROFILE
”EDIT” LOAD PROFILE ”CANCEL” EXIT
Pressing the ‘CANCEL’ key returns to the previous user dialog box. If the “+” key is
pressed, the main display shows the stored profile as Memory No.1. If the “+” key is
pressed, the display shows the next profile and this is repeated with a short delay in
between profiles.
Any unused Memory number is skipped. This continues until the last profile memory is
reached; at this point a buzzer sounds to indicate the last profile.
11

The ‘-‘ key is used the same way, but this time the profile memory is displayed in the
reverse order with the buzzer sounding when the newest profile is reached.
There is no cursor, but when a valid profile memory number is entered, the profile can
be called up. If valid profile is displayed, pressing the ‘EDIT’ key loads that profile into
the running profile memory and the oven is ready to run as explained on page 13 7. .
Note: 5 profiles are pre-stored prior to initial operation at profile No.001 to 005. If they
are not needed, you may over write.
If no profile is stored in the memory, the profile parameter display as shown below:
CONVECTION BATCH OVEN
PROFILE NO: ###
SET TEMPERATURES FRONT REAR TIME
PRE-HEAT 1 NIU NIU NIU
PRE-HEAT 2 NIU NIU NIU
PRE-HEAT 3 NIU NIU NIU
REFLOW NIU NIU NIU
COOLING
NIU
TARGET
ACTUAL TEMPERATURE OFF OFF
VIEWING PROFILE STORE
ENTER PROFILE NUMBER 001-255
”+” NEXT PROFILE ”-” PREVIOUS PROFILE
”EDIT” LOAD PROFILE ”CANCEL” EXIT
If the ‘CANCEL’ key is pressed twice, user dialog box shows the following and
pushing either “+” or “-“ key returns to the previous profile.
PRESS ”+” KEY FOR STORED PROFILE
PRESS ”-” KEY FOR NEW PROFILE
12

7. Running a Temperature profile.
1 When either a new or stored profile has been loaded the user dialog box changes to:
PRESS ”START” KEY TO START OVEN
PRESS ”CANCEL” KEY TO EXIT
2 At this point the actual temperature in the center over the mesh (compensate the
measured value at hot air outlet temperature) is displayed. If the temperature is lower
than 123 , the display shows ‘LOW’. If the temperature is higher than 376 , the
display shows ‘HOT’.
Pressing the ‘START’ key starts the oven with the user dialog box changing to:
PRESS ”CANCEL” KEY TO STOP OVEN
PRESS ”+” KEY FOR GRAPHIC DISPLAY
PRESS ”-” KEY FOR TEXT DISPLAY
The oven is now operating following the profile. The time display will decrease until it
reaches “0000”, then the next zone is starts to run. The cursor flashes to indicate the
present zone and the zone LED lights. Flashing of cursor and light of LED are
continuous until the reflow zone timer decreases to “0000” and the oven enters its
cooling cycle.
When the profile is over, the graphic display disappears and only a numeric mode is
shown. The graphic display is automatically reduced even if the cycle time is
extended to show the full scale.
13

8. Cooling Cycle
1 When the profile is completed (4 steps) or cancelled, the cooling cycle is entered and
user dialog box changes to:
OVEN COOLING
PRESS ”CANCEL” KEY TO EXIT
The oven will now wait until both heater temperatures are below the cooling target
temperature or the “CANCEL” key is pressed. The display then flashes and the
buzzer sounds to indicate that the profile is completed.
Pressing any key at this point change user dialog box to:
PRESS ”+” KEY FOR NEW PROFILE
PRESS ”-” KEY FOR SAME PROFILE
I. If the “-“ key is pressed, the user dialog box changes to:
PRESS ”START” KEY TO START OVEN
PRESS ”CANCEL” KEY TO EXIT
In the above display if pressing the “START” key, the oven is now ready to repeat
the profile. If the “CANCEL” key is pressed, user dialog box changes to:
PRESS ”+” KEY FOR STORED PROFILE
PRESS ”-” KEY FOR NEW PROFILE.
II. If the “+” key is pressed, the dialog box returns to:
PRESS ”+” KEY FOR STORED PROFILE
PRESS ”-” KEY FOR NEW PROFILE.
If the “+” Key is pressed, stored profile will be ready to run and if the “-“ key is
pressed, it will be ready to create a new profile.
Note: The security key must be switched ON to run a new profile; otherwise the
“SECURITY KEY NOT PRESENT!” is displayed.
14

9. Open Circuit Thermocouple Detection
If either of the thermocouples is in an open circuit, the profile is cancelled and the user
dialog box changes to:
THERMOCOUPLE OPEN CIRCUIT
PRESS ”CANCEL” KEY
The open circuit thermocouple is identified by the “O:C” displayed in the heater actual
value position. Pressing the “CANCEL” key returns to the display in 6. Entering a
Temperature profile.
Contact your dealer if it is displayed.
10. WARRANTY
• One-year parts and Labor.
• MBR ELECTRONICS cannot accept responsibility for damage to the PCBs processed
in the X-REFLOW305 due to incorrect setting or misuse by the operator. Read
carefully prior to use.
schafft Vorsprung
MBR ELECTRONICS • SOLDER TECHNOLOGY
JONASTRASSE 8 • CH-8636 WALD • SWITZERLAND
Internet:www.mbr.ch • E-Mail: info@mbr.ch
Tel: +41(0)55 246 2400 • Fax: +41(0)55 246 2418
 Loading...