

Page 1

www.mbquart.com
PREMIUM
PVL216 / PVL268 / PVL269
Thank you for choosing MB Quart Premium speakers for your car audio sound
system. With proper installation, you are on the path to experiencing your music in
a way you only imagined possible. Here at MB Quart, we call this “Sound In Every
Detail.”
The Premium series speakers have been designed for the enthusiast looking for
incredible sound and amazing performance. The Premium series speakers feature
the following:
- Convertible Coax/Component Capability
- 40mm Silk Dome Tweeter
- Gold Plated Speaker Terminals
- Active Crossover With Variable Tweeter Attenuation
And Gold Plated Terminals
- Edge Rolled Steel Basket
- Spider Woven Tinsel Leads
- Motor Damping Magnet Cap
- Progressive Long Travel Spider
- Progressive Grill
- High Energy Magnet
- Polypropylene Cone
Page 2
PREMIUM
PVL216 / PVL268 / PVL269
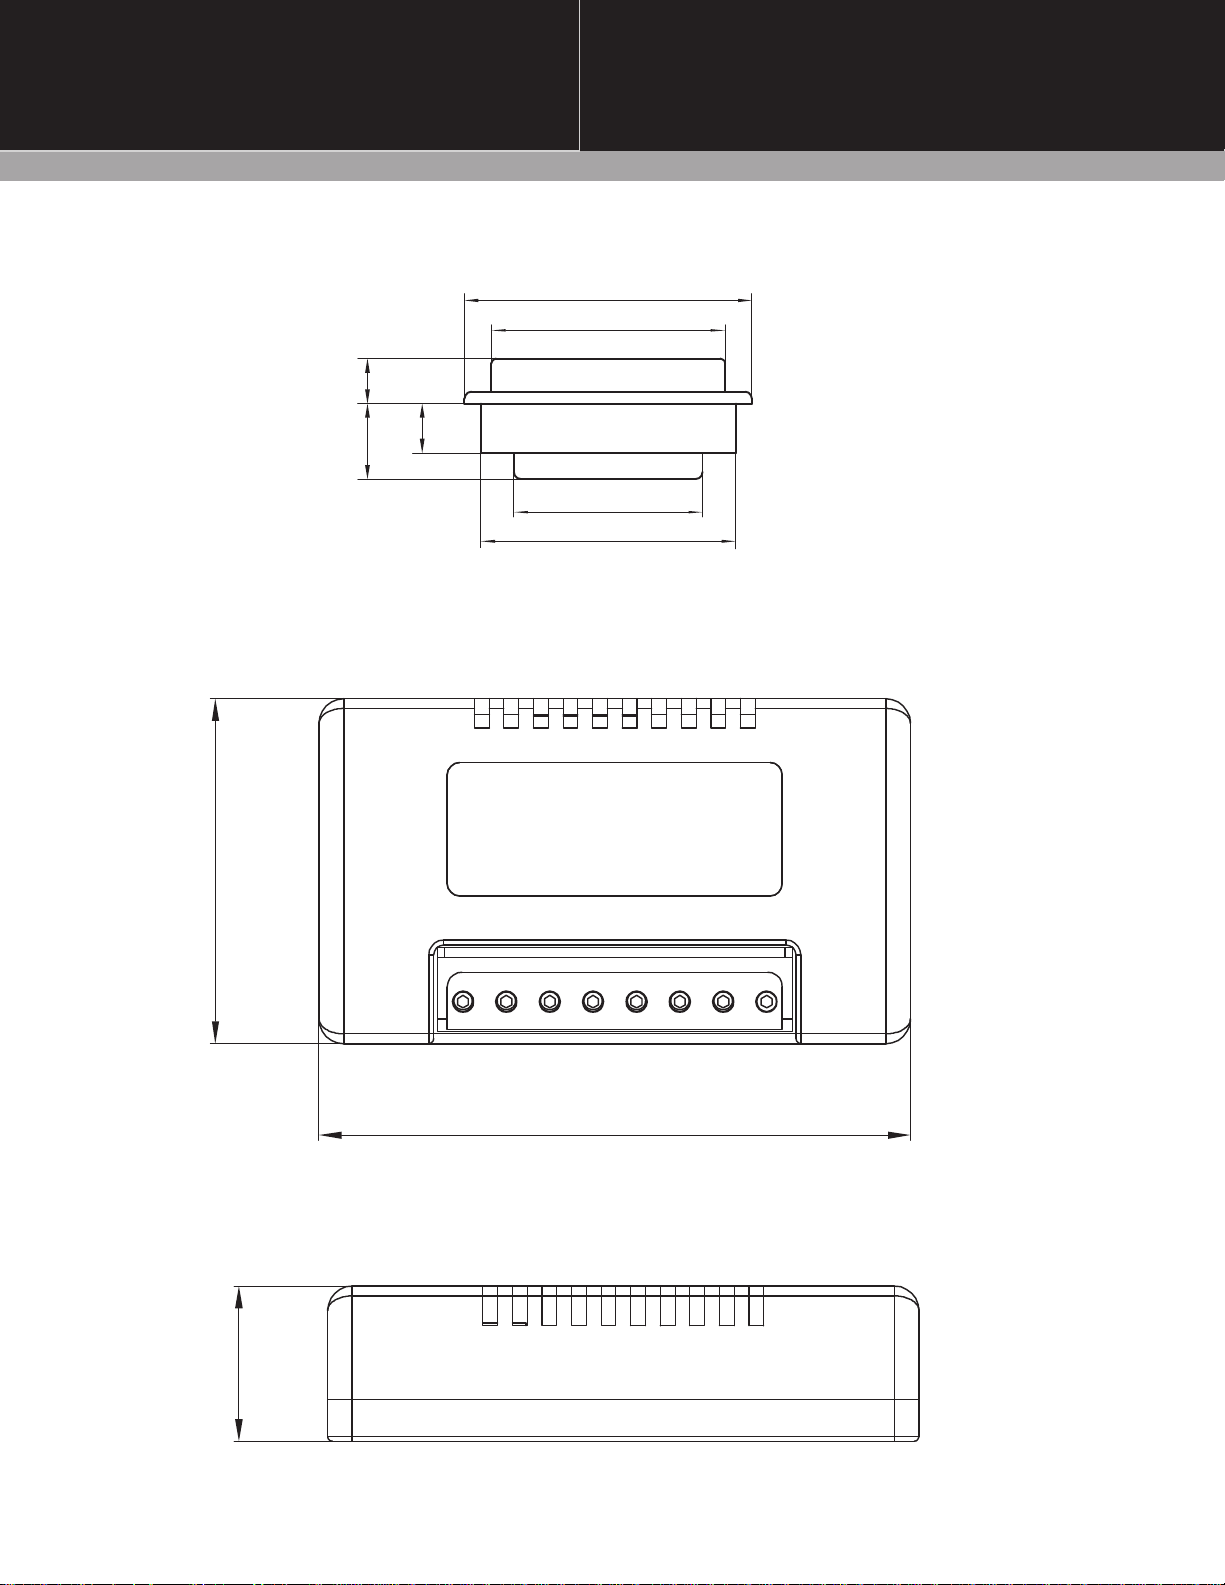
.37”
.41”
.63”
Side View Of PTL-40
2.4”
1.95”
1.58”
2.13”
2.76”
Top View Of PXO
4.72”
1.24”
Side View Of PXO
Page 3
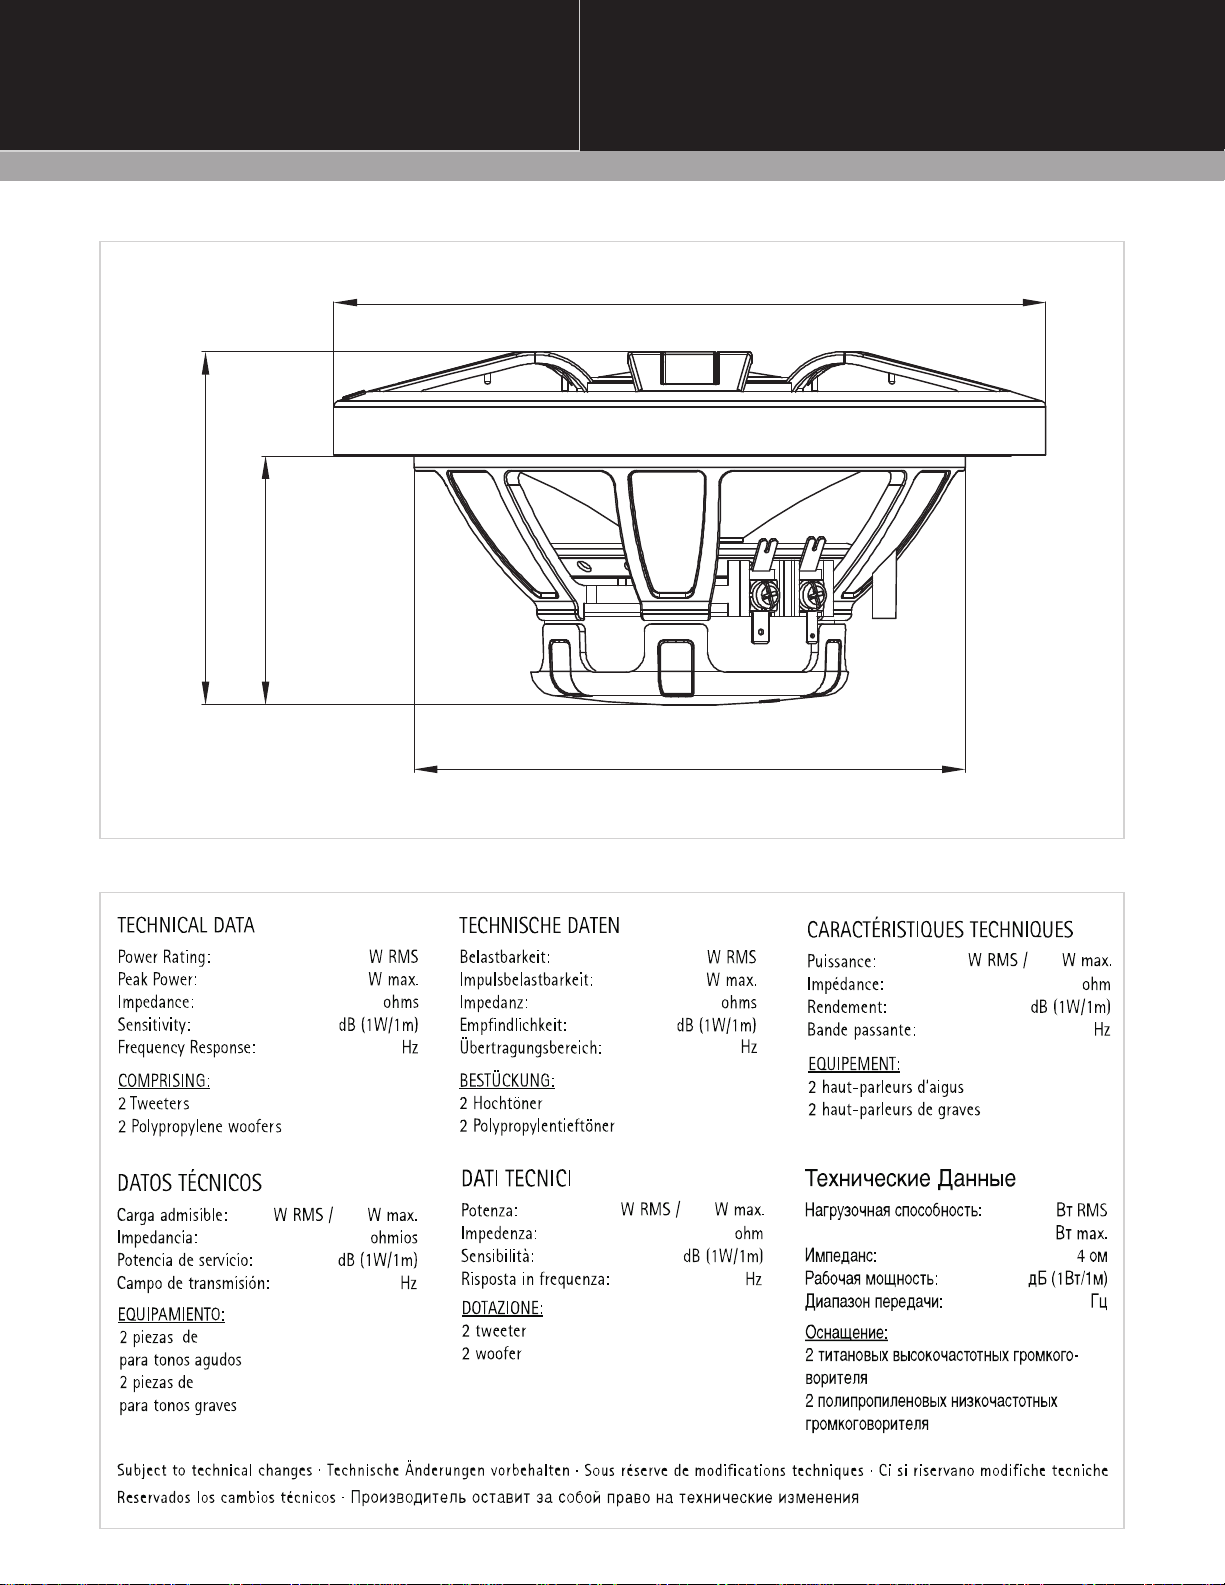
PVL216
3.59”
7.24”
2.53”
2 X-Overs
40mm
16cm
5.61”
70
140
4
87
38 - 32,000
40mm / 1.58”
16cm / 6.5”
70
140
4
87
38 - 32,000
70
70
140
87
38 - 32,000
40mm / 1.58”
16cm / 6.5”
140
87
38 - 32,000
4
4
40mm
16cm
70
140
4
87
38 - 32,000
40mm
16cm
70
140
87
38 - 32,000
40mm
16cm
Page 4

PVL268
8.05”
5.81”
7.36”
2 X-Overs
40mm
5x7” / 6x8”
3.38”
2.38”
5.11”
40
80
4
87
38 - 32,000
40mm / 1.58”
5x7” / 6x8”
40
80
4
87
38 - 32,000
40
40
80
87
38 - 32,000
40mm / 1.58”
5x7” / 6x8”
80
87
38 - 32,000
5x7” / 6x8”
4
4
40mm
40
80
4
87
38 - 32,000
40mm
5x7” / 6x8”
40
80
87
38 - 32,000
40mm
5x7” / 6x8”
Page 5

PVL269
8.05”
5.81”
7.36”
2 X-Overs
40mm
6x9”
3.38”
2.38”
5.11”
50
110
4
88
32 - 32,000
40mm / 1.58”
6x9”
50
110
4
88
32 - 32,000
50
50
110
88
32 - 32,000
40mm / 1.58”
6x9”
110
88
32 - 32,000
6x9”
4
4
40mm
50
110
4
88
32 - 32,000
40mm
6x9”
50
110
88
32 - 32,000
40mm
6x9”
Page 6

PREMIUM
PVL216 / PVL268 / PVL269
We strongly recommend that you have your new Premium series speakers installed by your authorized
MB Quart dealer. The installation professionals employed by your dealer have the necessary tools and
experience to disassemble your vehicle, install your new speakers and reassemble everything properly.
If you prefer to perform your own installation, it is very important that you read the entire manual first.
GETTING STARTED:
- Turn off the audio system.
- Check clearance on both sides of mounting surface to ensure that there are no obstructions
(windows, tracks, wiring etc).
CROSSOVER NETWORK INSTALLATION:
- Locate a dry location for mounting of your Premium Crossover Networks. DO NOT MOUNT IN DOORS!
- Remove the cover of the crossover by squeezing either side. This exposes the mounting holes for securing
the crossover to a flat surface. Prior to pre-drilling pilot holes, ensure that you will not be drilling into wiring,
gas tanks, fuel lines etc.
- Once the crossover is mounted, snap the protective cover back in place.
INPUT
IN+ | IN-
WIRING THE PREMIUM CROSSOVER
INPUT
IN+: Connect positive speaker wire from radio or amplifier.
IN-: Connect negative speaker wire from radio or amplifier.
MID BASS
WF+: Provides positive output to midrange speaker.
WF-: Provides negative output to midrange speaker.
VARI-TWEETER
TW+: Provides positive output to tweeter.
-6dB: Provides negative output to tweeter at -6dB.
-3dB: Provides negative output to tweeter at -3dB.
0dB: Provides negative output to tweeter with no manipulation.
The negative connection under the VARI-TWEETER section allows for varied degrees of tweeter attenuation.
Only connect to one negative terminal with the understanding that 0dB is no manipulation and the loudest
selection for tweeter output, -6dB is the quietist selection for tweeter output and -3dB is in the middle.
MID BASS
WF+ | WF-
VARI-TWEETER
TW+ | -6dB | -3dB | 0dB
Page 7

PREMIUM
PVL216 / PVL268 / PVL269
Wiring Diagram
CLIP INDICATOR
CLIP INDICATOR
AMBER-
AMBER-
SOFT CLIP
SOFT CLIP
GREEN-
GREEN-
PRE CLIP
RED-
PRE CLIP
RED-
HARD CLIP
HARD CLIP
LEVEL
LEVEL
9V
0.2V
9V
0.2V
BASS BOOST
BASS BOOST
0dB
12dB
0dB
12dB
BASS FREQUENCY
MULTIPLIER
FREQUENCY
30Hz
80Hz
X15 X1
HIGH PASS
FILTER SLOPE
6dB 12dB
15Hz
1KHz
CHANNELS 1&2
CHANNELS 3&4
HIGH PASS
LOW PASS
(x1) 20Hz 300Hz
40Hz
4.5KHz
(x15) 300Hz 4.5KHz
CROSSOVER
CROSSOVER
LP-BP LP-BP HP-FULL
DUPE HP-FULL
MONO STEREO
(3&4)
INPUT MODE
PROTECT
POWER
4CH 2CH
VERY IMPORTANT
TINSEL TO
MID BASS
INPUT
IN+ | IN-
NO TINSEL
WIRE
MID BASS
WF+ | WF-
VARI-TWEETER
TW+ | -6dB | -3dB | 0dB
-
+
SELECTABLE
CONNECT “WF” WIRE FROM
CROSSOVER TO THE SPADE
OR SCREW DOWN TERMINAL
WITH TINSEL WIRE TO
MID BASS
(The above illustration shows the positive terminal view.
The negative terminals are opposite.
Be sure to identify the tinsel wire for your mid bass.)
IF THE TWEETER IS MOUNTED AS
A COAXIAL IN THE CENTER OF
THE MID BASS, CONNECT THE
WIRE FROM THE TWEETER TO
THE SCREW CLAMP WITHOUT
TINSEL WIRE. THEN CONNECT
“TW” WIRE FROM CROSSOVER
TO THE SPADE OR SCREW
DOWN WITHOUT TINSEL WIRE
Page 8

PREMIUM
PVL216 / PVL268 / PVL269
Tweeter Mounting Options Separate From Mid Bass (Component)
Flush Mount Method
Mounting Surface
Mounting Brackets
Mounting Bracket Washers
Mounting Bracket Screws
Mounting Surface
Top Mounted Method
Cup Mounting Screws
Surface Angle Mount Method
Cup Mounting Screws
Mounting Surface
Tweeter Mounting In The Center Of The Mid Bass (Coaxial)
Guide Pin
Indents
Bottom View Of
Tweeter Assembly
Guide Pins
Lock Washer
Screw
Grille
Tweeter Assembly
Wires
Tweeter Post
1. Place the tweeter grille onto the
tweeter assembly to prevent
damage to the delicate silk dome
2. Route the red & black tweeter
wires through the opening in the
top of the tweeter assembly
3. Line up the 4 guide pins on the
tweeter post with the 4 indents
on the bottom of the tweeter
assembly
4. Fasten the tweeter post to the
tweeter assembly using the
provided screw and lock washer
Tweeter Post
Assembly
Phase Plug
1. Un-screw the phase plug by turning
counter-clockwise and remove
2. Route the tweeter wires through the
center of the speaker until they come
out the back of the speaker
3. Screw the tweeter post assembly
clockwise until snug
Page 9

PREMIUM
PVL216 / PVL268 / PVL269
Speaker, Tweeter and Crossover Placement Options:
Factory sound systems vary greatly. Some systems have coaxials (tweeter fixed in the center of the midrange) in the
door, while others have factory component (tweeter is separate from midrange) systems. If your system has the factory
component offering then you will want to locate your factory tweeter mounting location and compare it to the diagram
below. Some vehicles already have the tweeter in the ideal location, while others often position the tweeter in the top
corner of the door pane which is less than ideal. A good rule of thumb is to try and mount the tweeter within 8 inches
of the midrange woofer for optimal imaging and tonal balance. When selecting an optimal mounting location, ensure
that you are clear of any obstructions within the door. Cutting or drilling into moving parts or electrical accessory wires
can be very dangerous and costly.
Woofers should typically be installed in the factory locations. Simply ensure that the new woofer will not obstruct the
window or other moving parts in the door.
The Crossover should NEVER be mounted in the shell of the door. This can damage the crossover through vibration
and moisture which is NOT covered under warranty. The Crossover can be mounted in a kick panel, under a seat or in
the trunk as long as the area is not located near any moving parts in the vehicle which could cut or pull the wires
resulting in a short circuit.
All wiring to and from the crossover should avoid all moving parts in the vehicle which could potentially damage the
wiring. Take great care when running wires through the door frame and into the door as wires can easily be cut. A
rubber grommet should be used on both holes and wire loom should be wrapped around the exposed wires as shown
in the diagram below.
Alternate Tweeter
Location
Crossover
Ideal Tweeter
Location
Mid Bass
Route speaker wires
through rubber grommet
between door jam and
door as shown. Use wire
loom to protect the wires.
Page 10

PREMIUM
PVL216 / PVL268 / PVL269
car audio
www.mbquart.com
PART#U1010
 Loading...