

mbeat USB-TR08 Instructions Manual
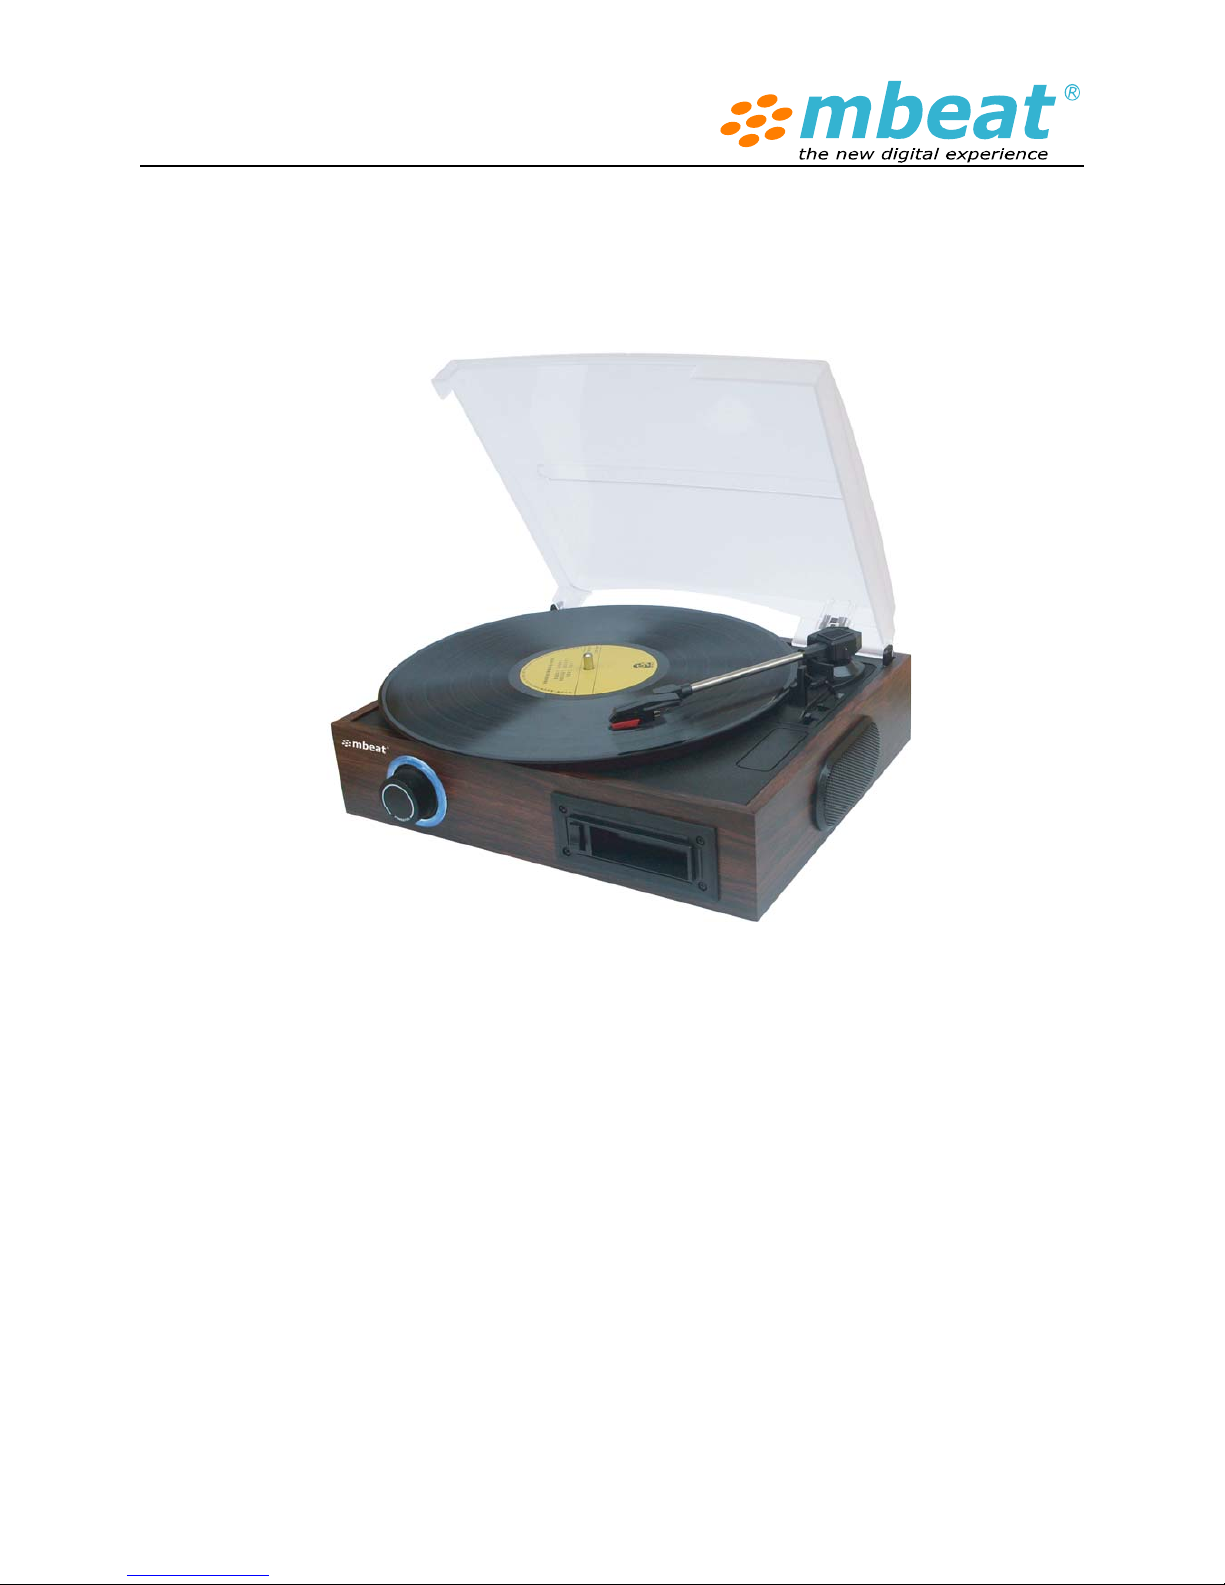
mbeat® USB Turntable and Cassette to Digital Recorder
Model: USB-TR08
Read instructions carefully before use and store in a safe place for future reference. Product color and specification
are subject to change without prior notice. The manufacturer or distributor reserves the right to amend the
instruction manual at anytime to reflect the latest product design changes or limitations
Version: 082010
Product introduction
Initial start up
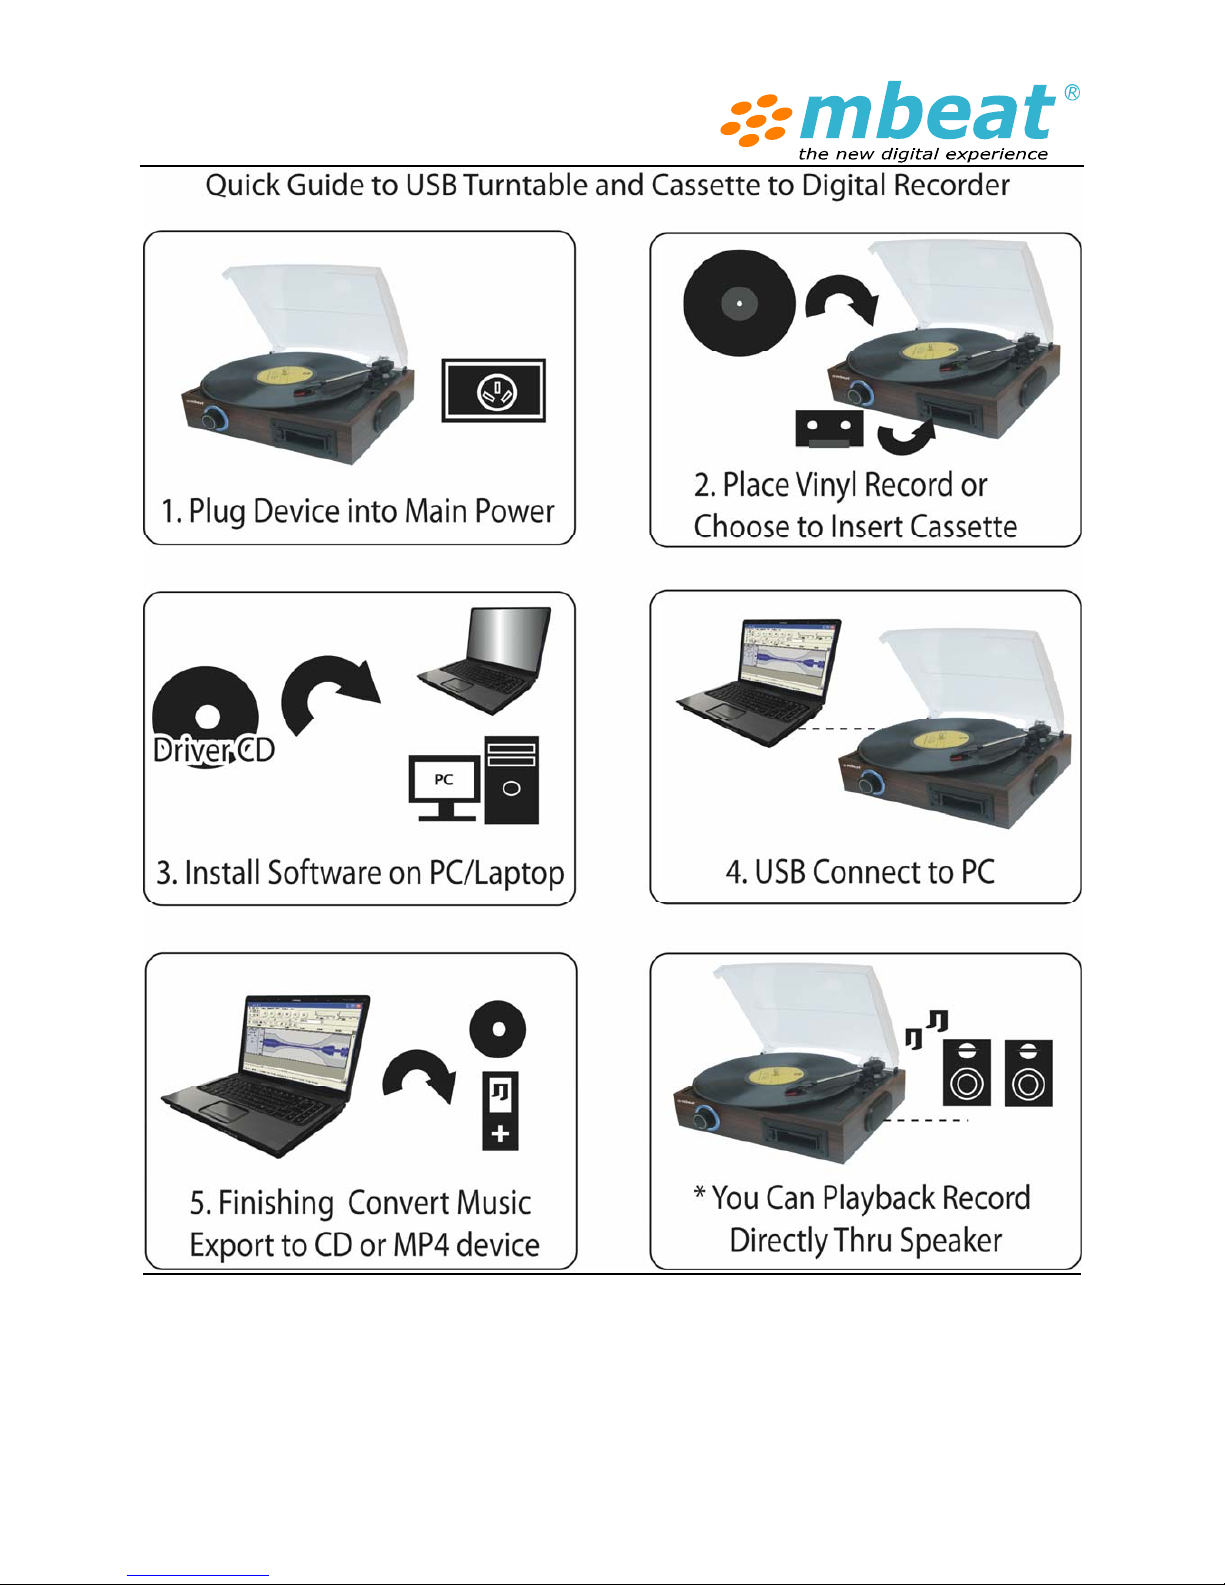
Power on
Ensure that the mains voltage of your home corresponds to the operating voltage of the unit. Your

unit is ready to be connected to a mains voltage of 240V/50Hz.
Amplifier connection
If you want to connect the device to your own powered speaker set or your mixer or amplifier, there
is a set of Aux output (RCA sockets R/L) at rear of the product which allows user to connect the
device to external audio speakers or some mixers.
z Red plug into R/H channel input.
z White plug into L/H channel input.
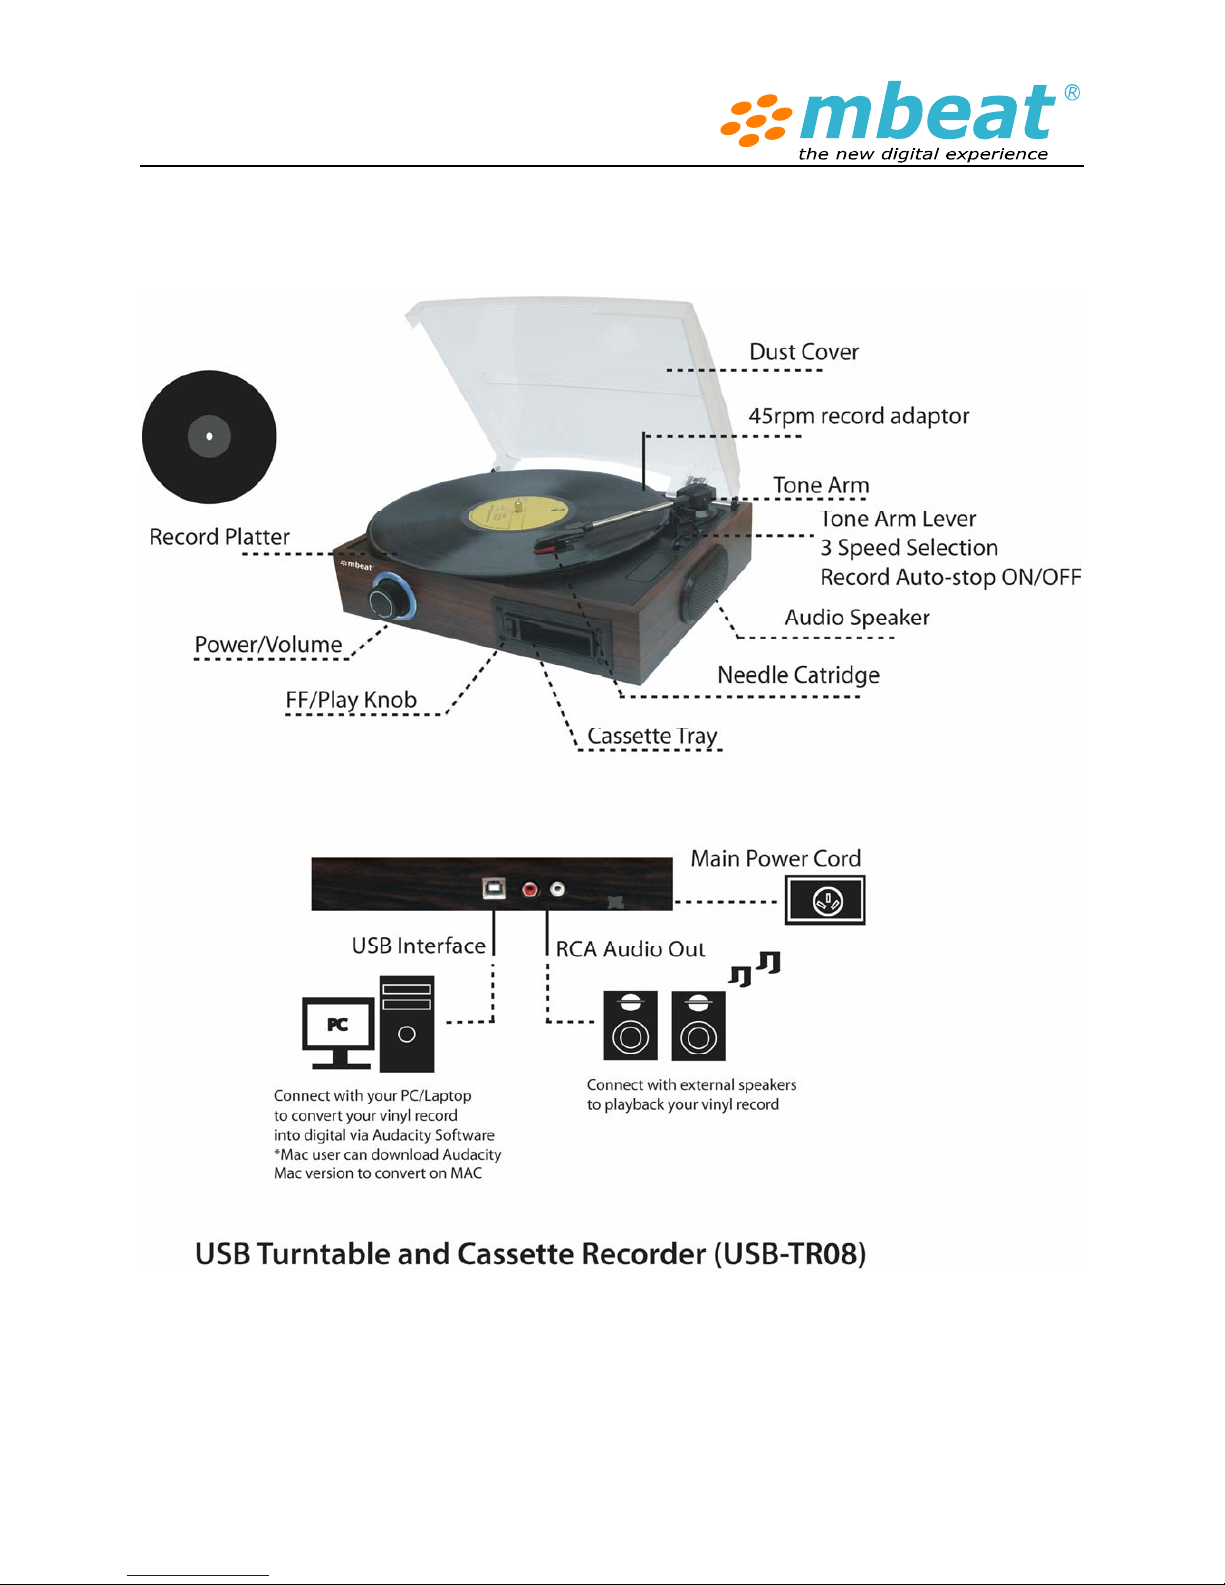
How to use turntable function
Play the record using Turntable Function
1. Place the vinyl record of your choice on the turntable.
2. If it is a 45rpm recorder, DO NOT forget to place the 45rpm adaptor on the record spindle.
3. Choose the desired playing speed using the Speed select switch among 33.3, 45 or 78rpm.
4. Turn on the Rotary Power & Volume Switch.
5. Release the tone arm lock.
6. Push in the arm with your hand lightly.
7. Gently place the tone arm vertically over the first track of the record the turntable will start
turning automatically.
8. Put down the cartridge slowly to the record then the turntable will start to play.
9. When a record comes to the end, the turntable will stop automatically if the Auto-stop
switch is in the ON position. If the switch is in the off position then it will be suitable for
Long Play records.
After use care
1. Take out the record and store it properly
2. Lift up the tone arm and put it on the rest.
3. Replace the protective cap on the stylus and close the tone arm lock.
4. Turn off power and unplug the power cord from mains.
5. Close the plastic dust cover
How to use cassette function
Play the record through cassette
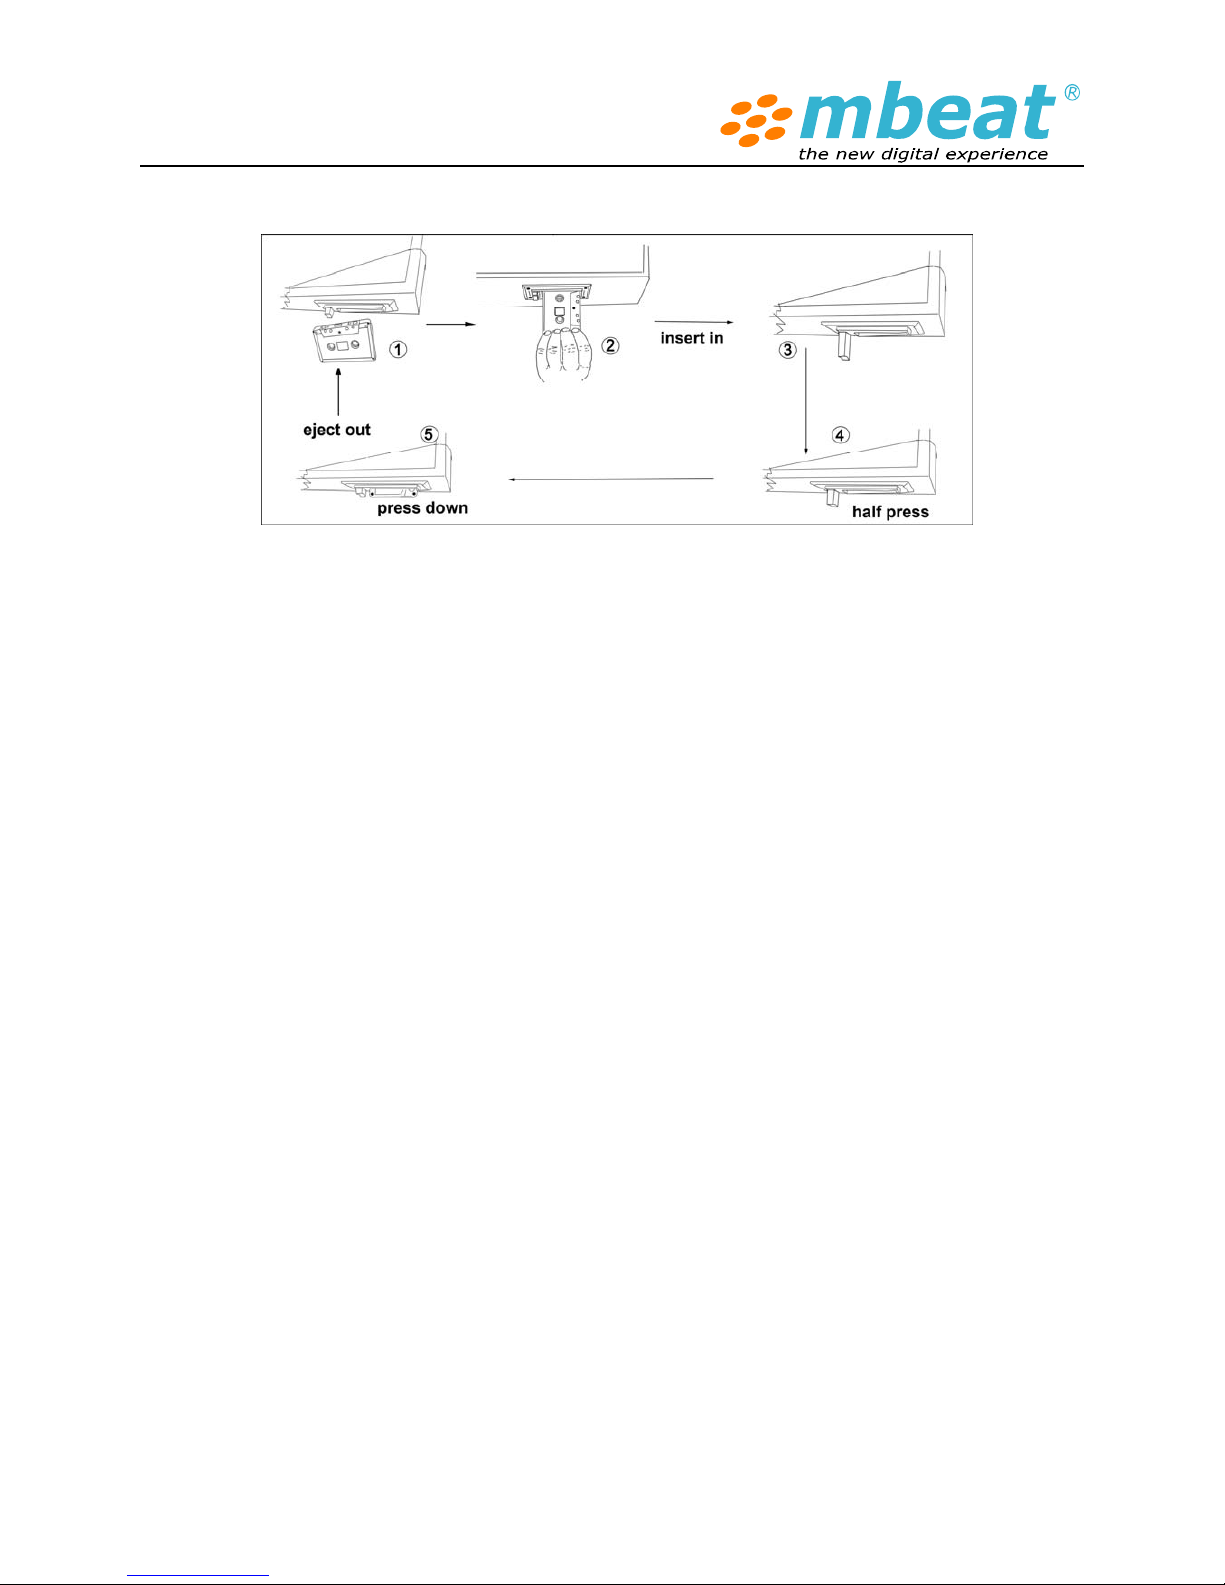
Follow the above instruction figures
1. Plug the power cable to the AC power supply. (240V/50Hz)
2. Insert a pre recorded cassette tape into cassette slot, with the exposed side against the
control button (refer above figure 2). By pushing, the cassette will slide into the cassette
mechanism and the control knob is up. Turn on the power/volume button; the cassette is
starting to play automatically.
Please note: one end of the cassette will remain visible and it is normal.
3. To fast forward the cassette, press the control knob (refer figure 3) half way down (refer
figure 4), the cassette starts to fast forward. To exit this mode, just press down the control
knob slightly
4. To jump over the sound tracks, just slightly press down and hold the knob (refer figure 3)
and release as desired to exit this mode
5. To eject the cassette, firstly to turn off the power/volume button, then press down the knob
completely (refer figure 5)
After use care
1. Take out the cassette after use and store it properly
2. Make sure the cassette roll is not loosen to stuck the device
3. Turn off power and unplug the power cord from mains.
How to use record to digital function
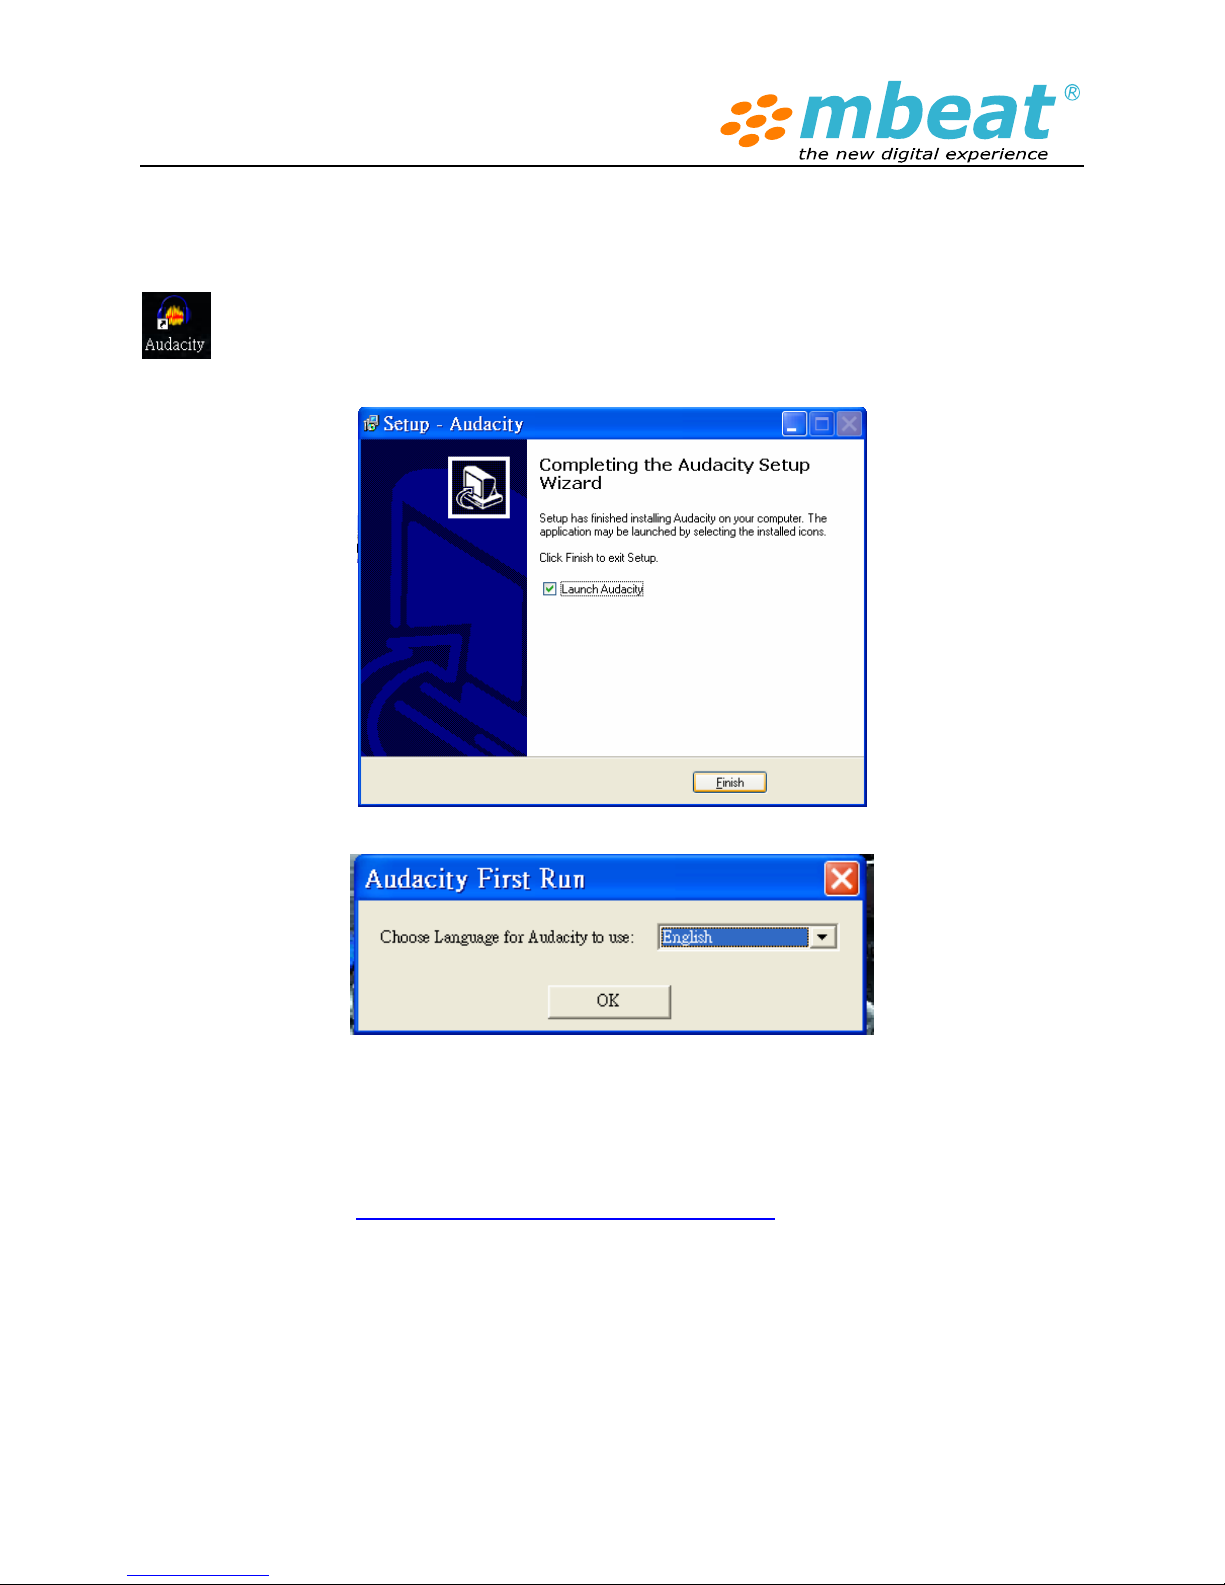
Step 1. Install the “Audacity” audio edit software
Put the CD disk into your computer and run “Aduacity.exe” file to install the software on your
computer. After installation you can launch the software on your desktop, looking for this icon
on your desktop or starter menu on your Windows OS.
When first time to launch the software, select your prefer language as “English”
Follow the on screen instructions to install this audio editing software program. With the software
installed, you can record old music collection into digital and store on your PC.
*If you using Windows 7 OS or MAC OS X, you can also download the free version of the latest
“Audacity” software to install on your computer (Details please refer “Audacity Software Quick Guide”
later). Download link: http://audacity.sourceforge.net/download/
Step 2. To connect your device with your PC
1. Plug your device to an AC outlet and connect the USB port on the recorder to the USB port of
your computer.
2. Turn on the power switch on your device and open the “audacity” program that you have
installed.
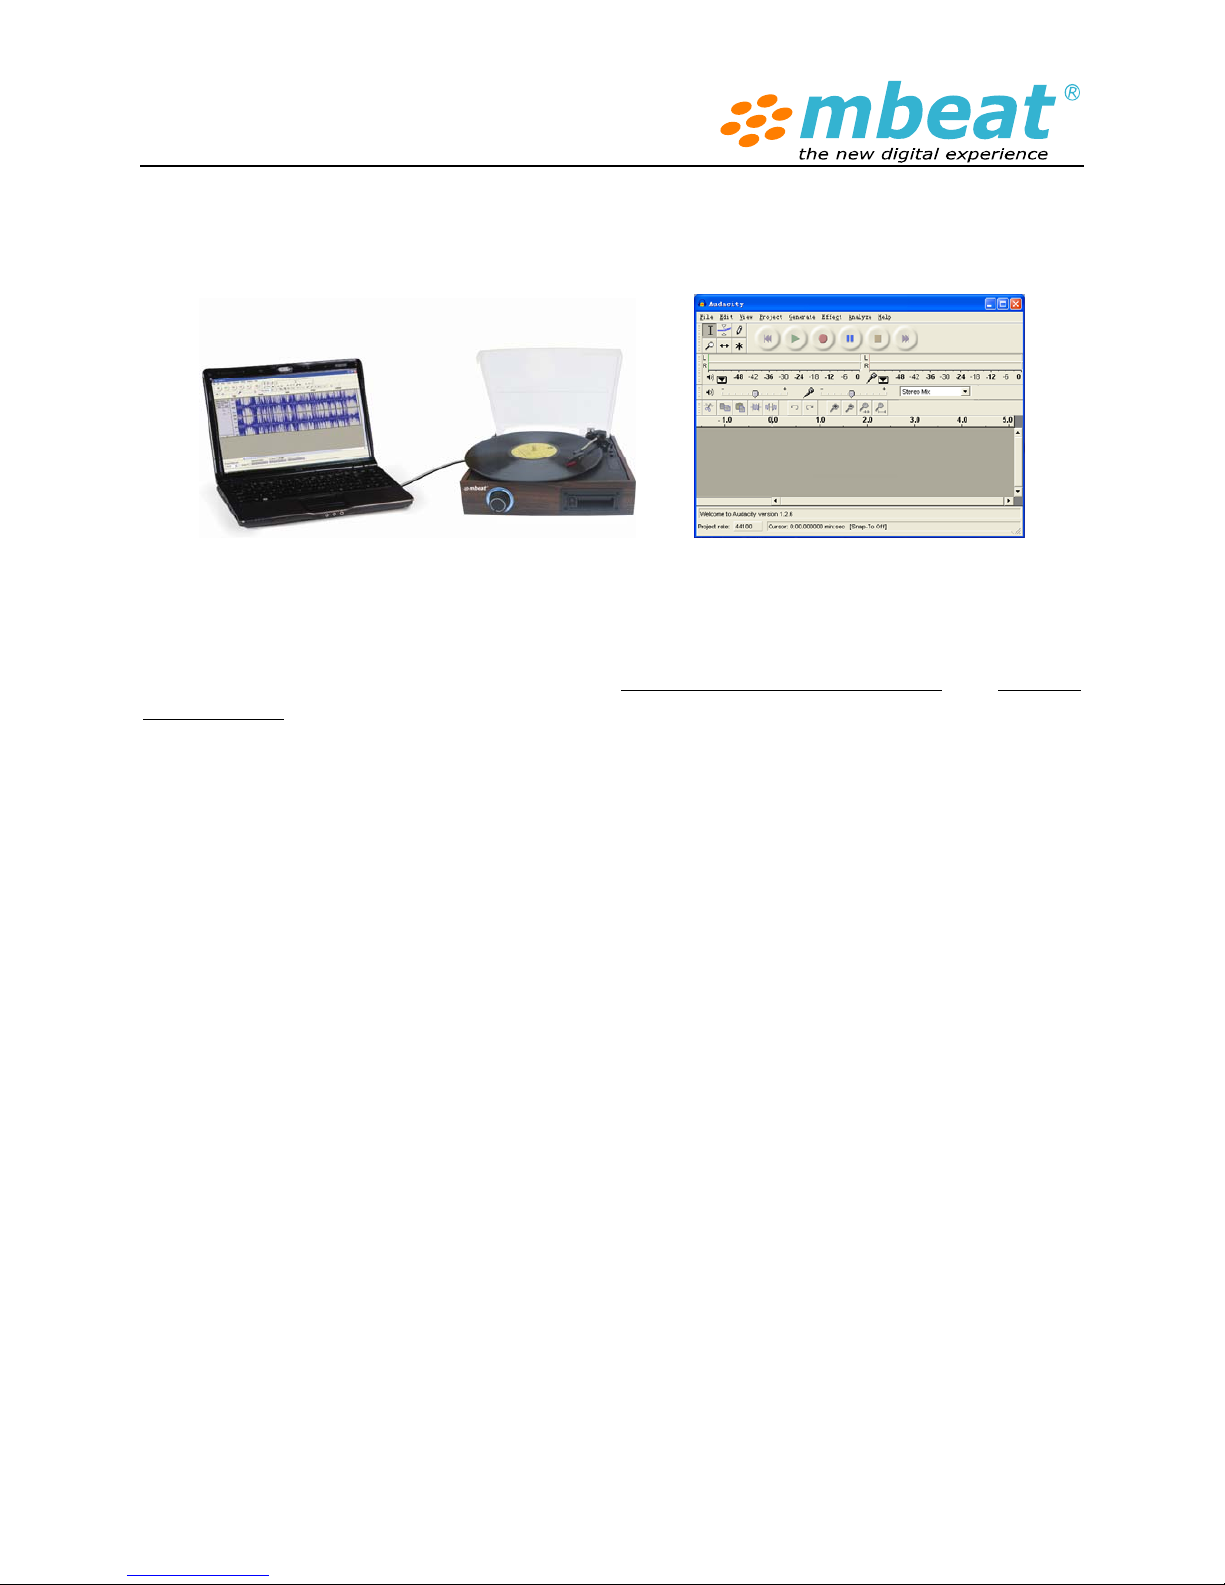
Step 3. How to use Audacity to record your music
mbeat® USB turntable and cassette to digital recorder is able to transfer music from turntable or
cassette to PC with USB connection by using the powerful audio edit software named “Audacity”. For
the detailed software guide please refer to the “Audacity Software Quick Guide” and Audacity
official website as well.
Please note your computer audio configuration may slightly different as our manual
description, please check it carefully and make prompt changes to suit your system.
Some software knowledge is required to operate software in handling more complicated
functionalities (Please read this chapter carefully in order to find the right Audio In and Out
for your device and your PC)
1. Turn on the device, connect the USB cable to the device and computer, no extra driver is
required to drive this device.
2. Your computer should detect a new “USB PnP Audio “device (USB Plug and Play Audio Device)
or it could named like “Generic USB Audio Device”, or whatsoever, they are the same thing, just
depending on how your PC call it.
3. Double click to open up the Audacity program and you will see this similar interface screen on
your computer.
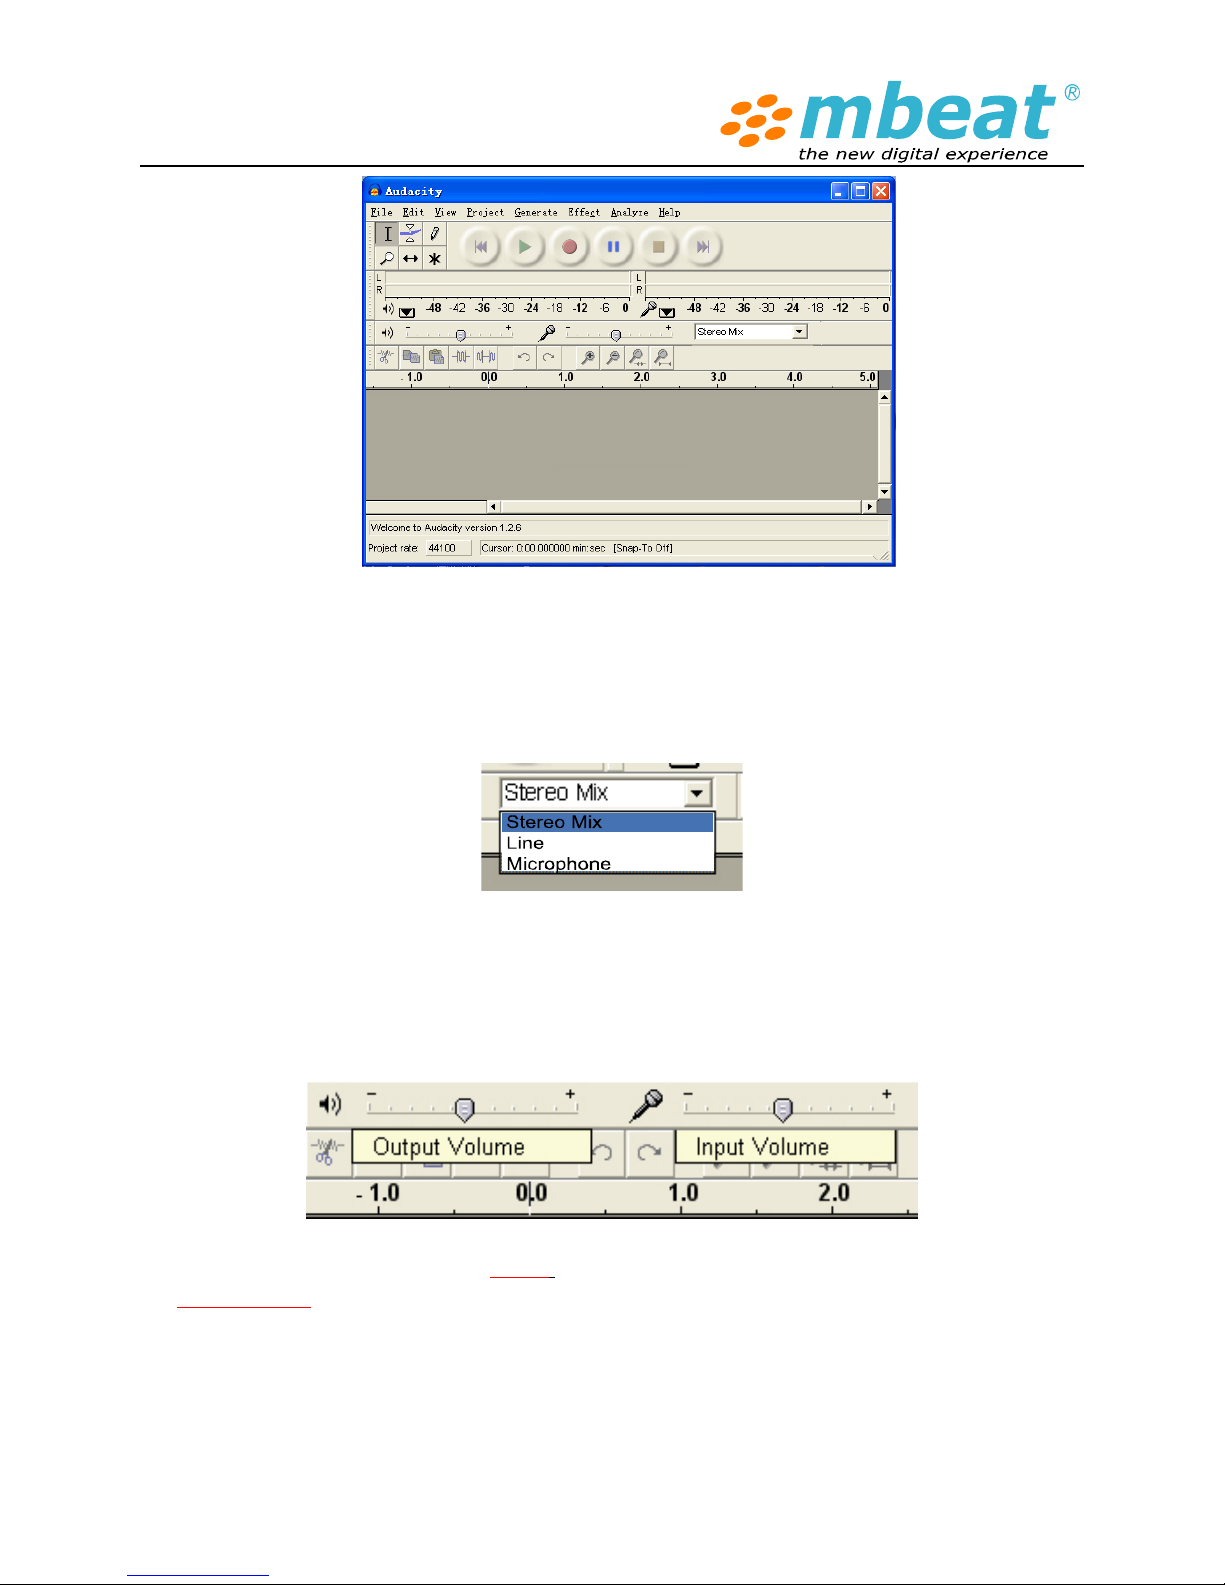
4. Check the Stereo Mix column in the drop down menu and just to keep the default settings, the
software shall be able to auto default the device setting as “Stereo Mix” or “Line”, or remain gray
inactive color according your computer hardware configuration. Those factors are not such key
important and you can set up in “Preference” , under “Edit” menu as well
5. Adjust the output and input volume to get your desire sound volume when you using computer
speaker to play back , please note that this setting will not effect the final recording track volume
level, only effect the computer speaker volume, just works like your Windows OS volume and
microphone controller panel.
6. Very Important is to Select the “Edit” menu on the top bar of the software and then select
“Preference” in the drop down menu, it will lead you to the audio input/output source
settings. (Some users may not right set up the correct Audio I/O , so the PC can not capture
the turntable’s audio signal , thus you can not record )
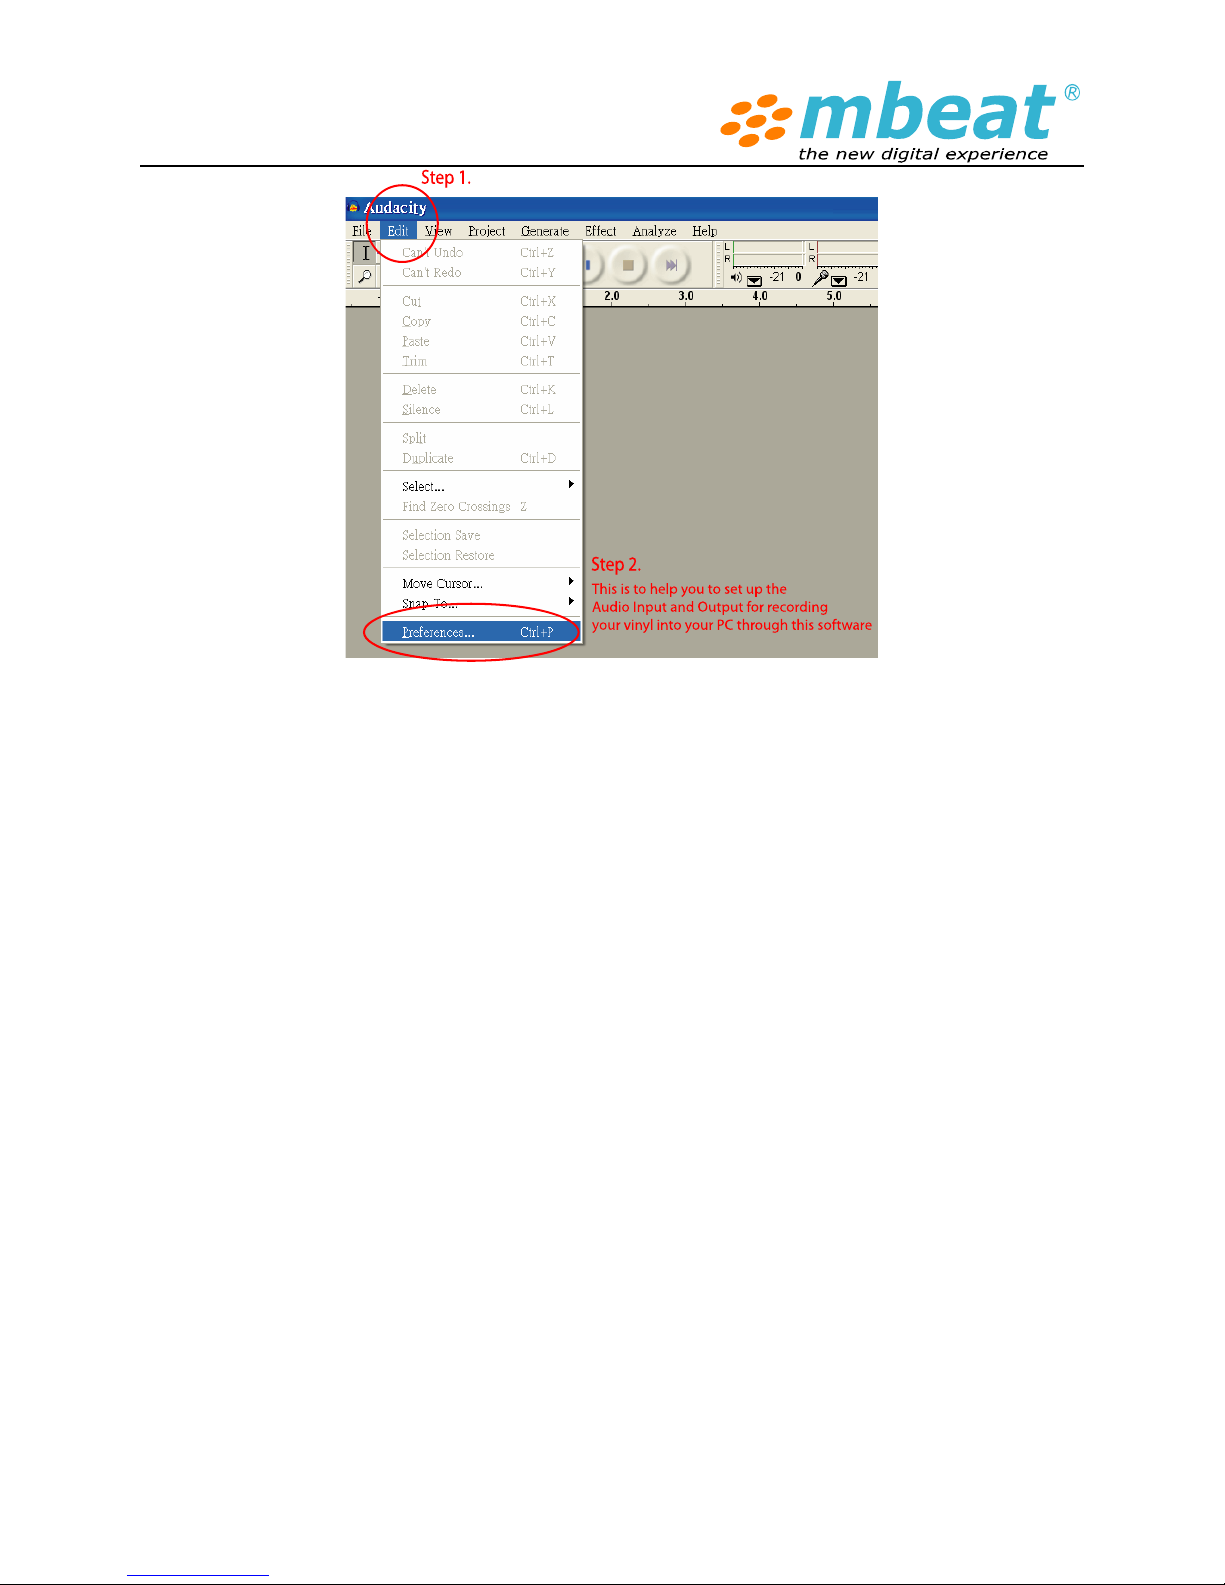
After enter “Preference” section, choose Audio I/O section:
Under Playback drop down menu:
Select “Realtek HD Audio output “ , which means it is your sound card audio output to listen the
music playback through tape recorder while doing the recording internally.
Under recording drop down menu:
Select “USB PnP Audio”, which indicated the audio source from the device when it is plugged
into the computer. Your system may show the name like “Generic USB Audio device”, or “USB
PnP Device”, it does not matter. Important is to find the proper recording source that is match
with this recorder
Please also tick “Software play through (Play new track while you are recording)” this
function enables you to real time monitor the recording track and playback (SEE DETAILS AS
BELOW)
 Loading...