

mbeat USB-TAPE02 User Manual
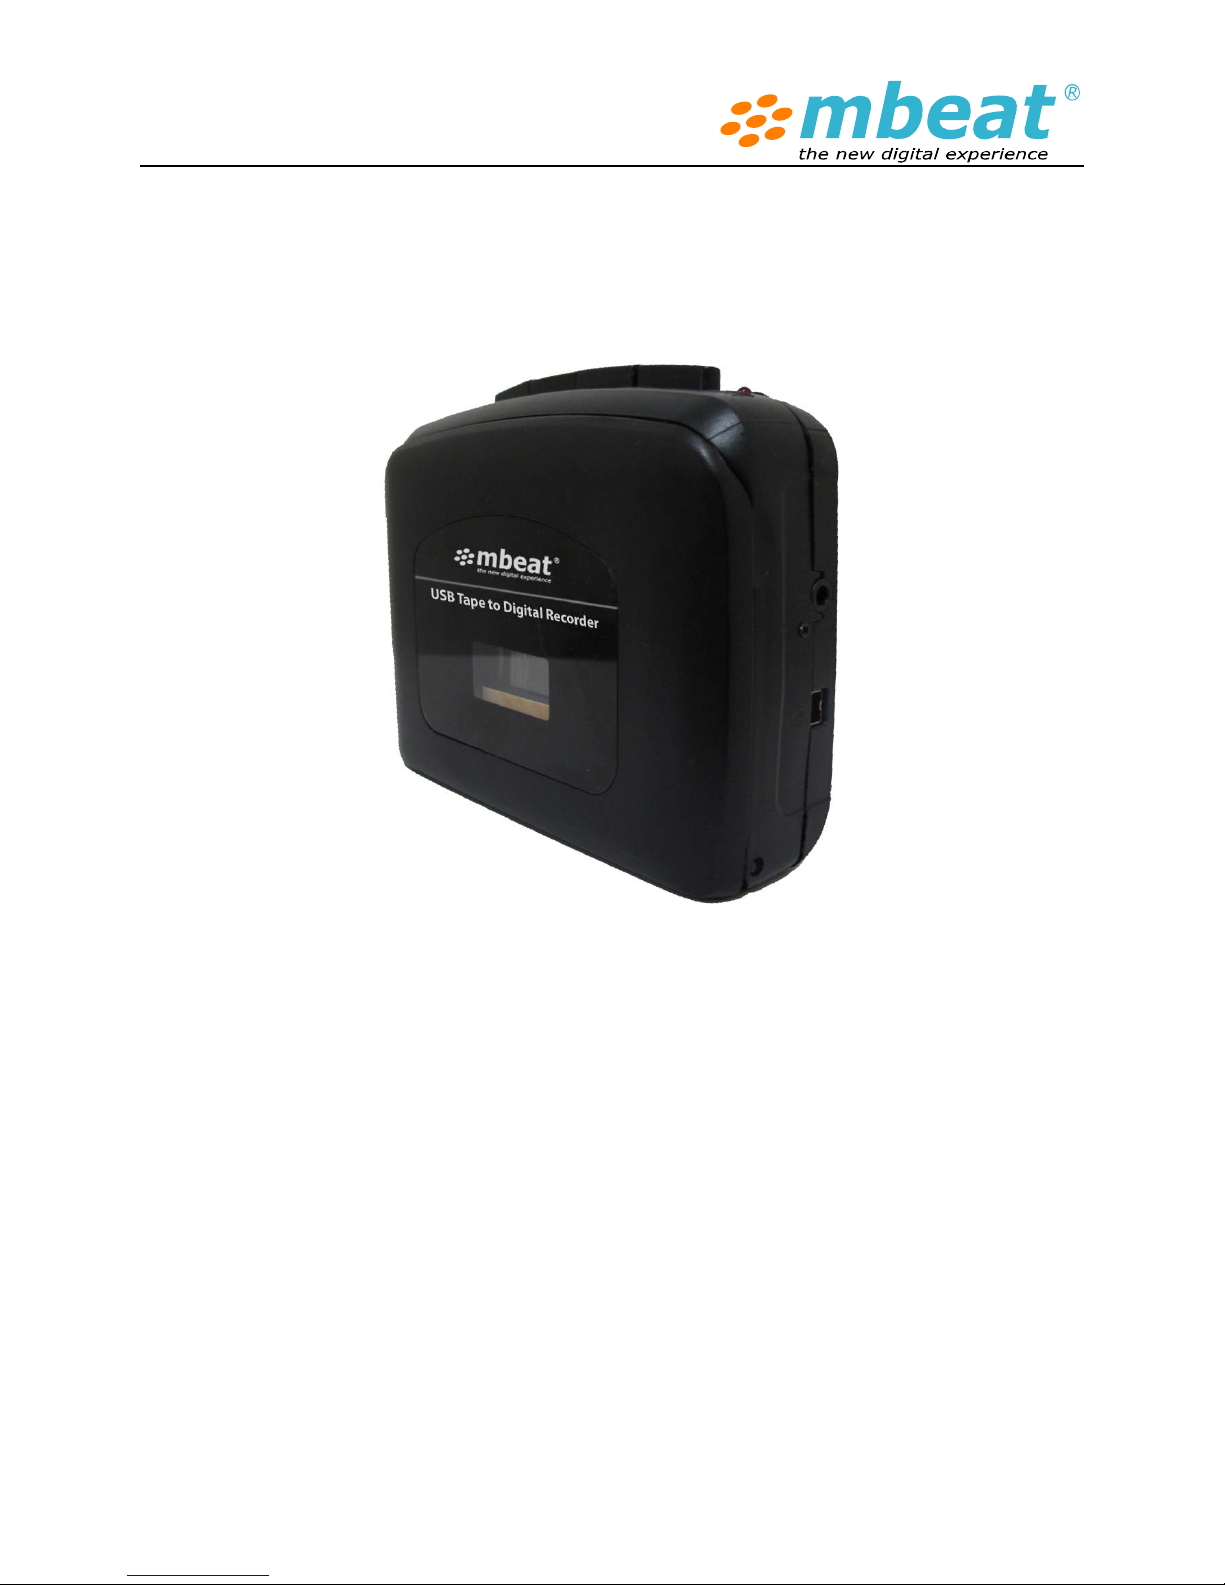
mbeat® USB Tape to Digital Recorder
Model: USB-TAPE02
Read instructions carefully before use and store in a safe place for future reference. Product color and specification
are subject to change without prior notice. The manufacturer or distributor reserves the right to amend the
instruction manual at anytime to reflect the latest product design changes or limitations
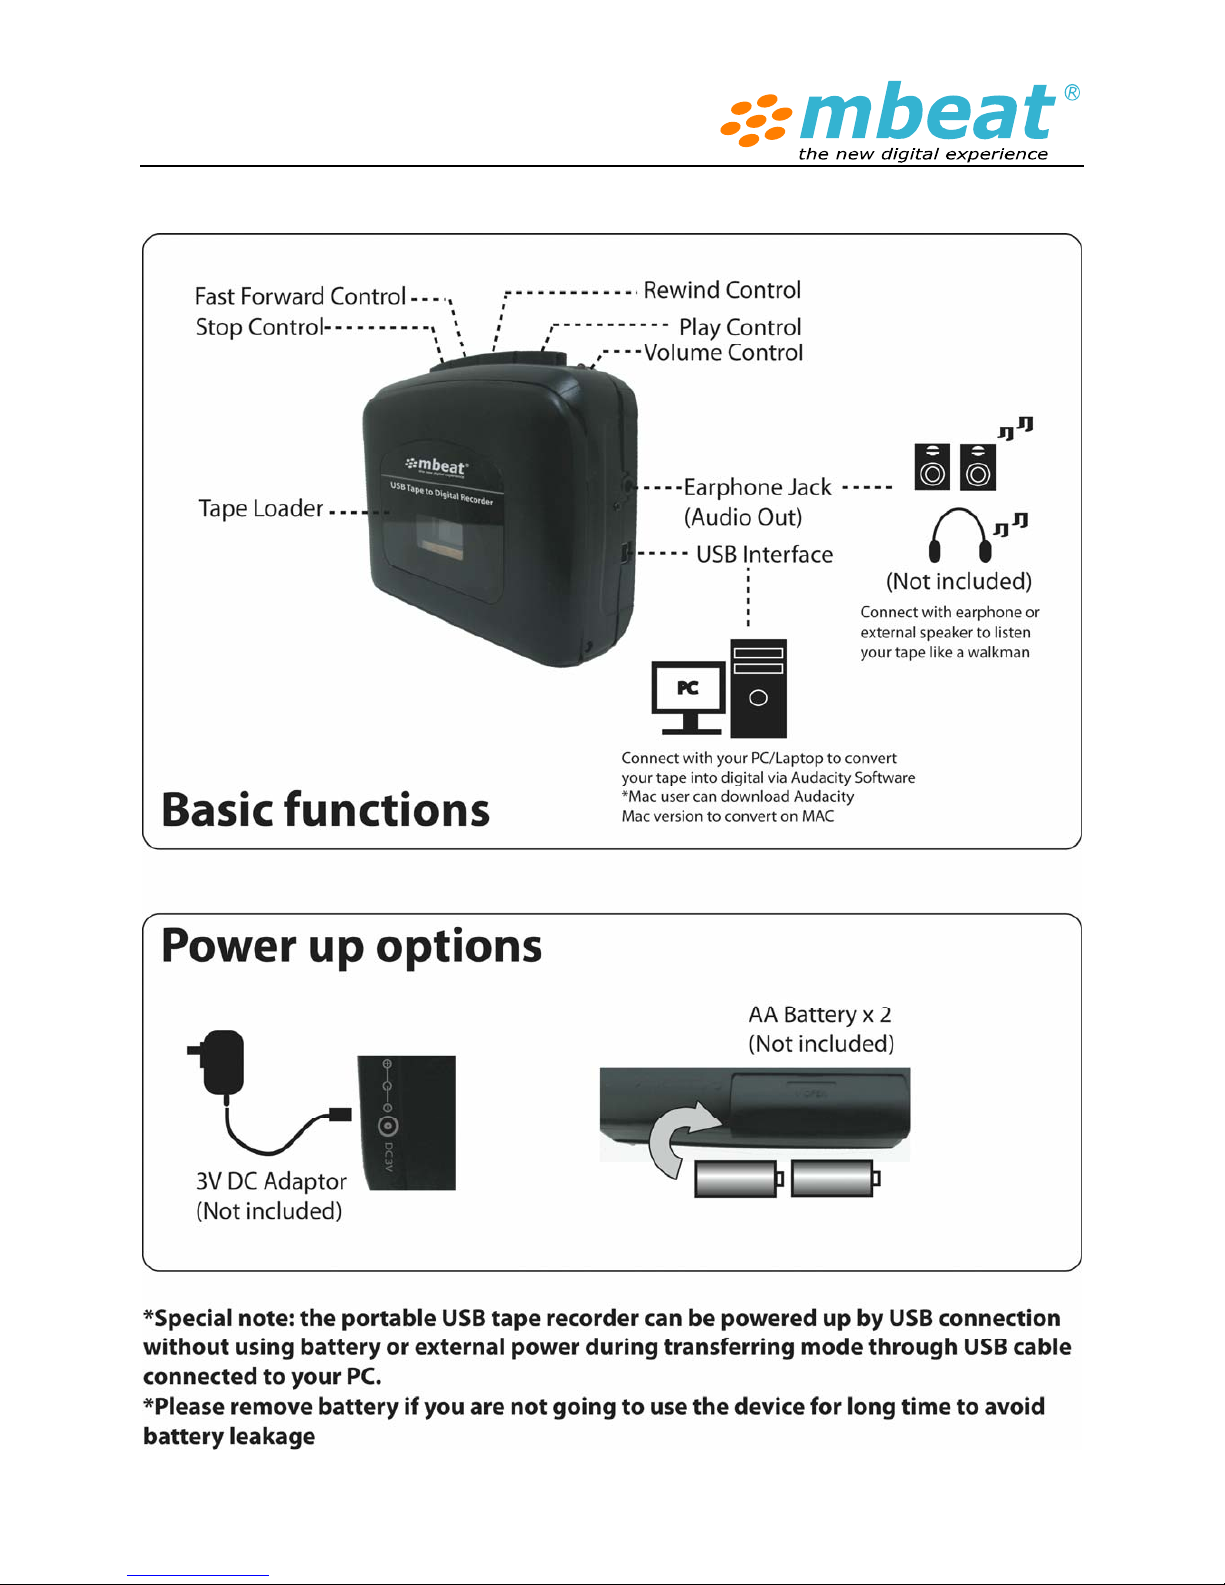
Product introduction
Quick guide for use

Initial start up
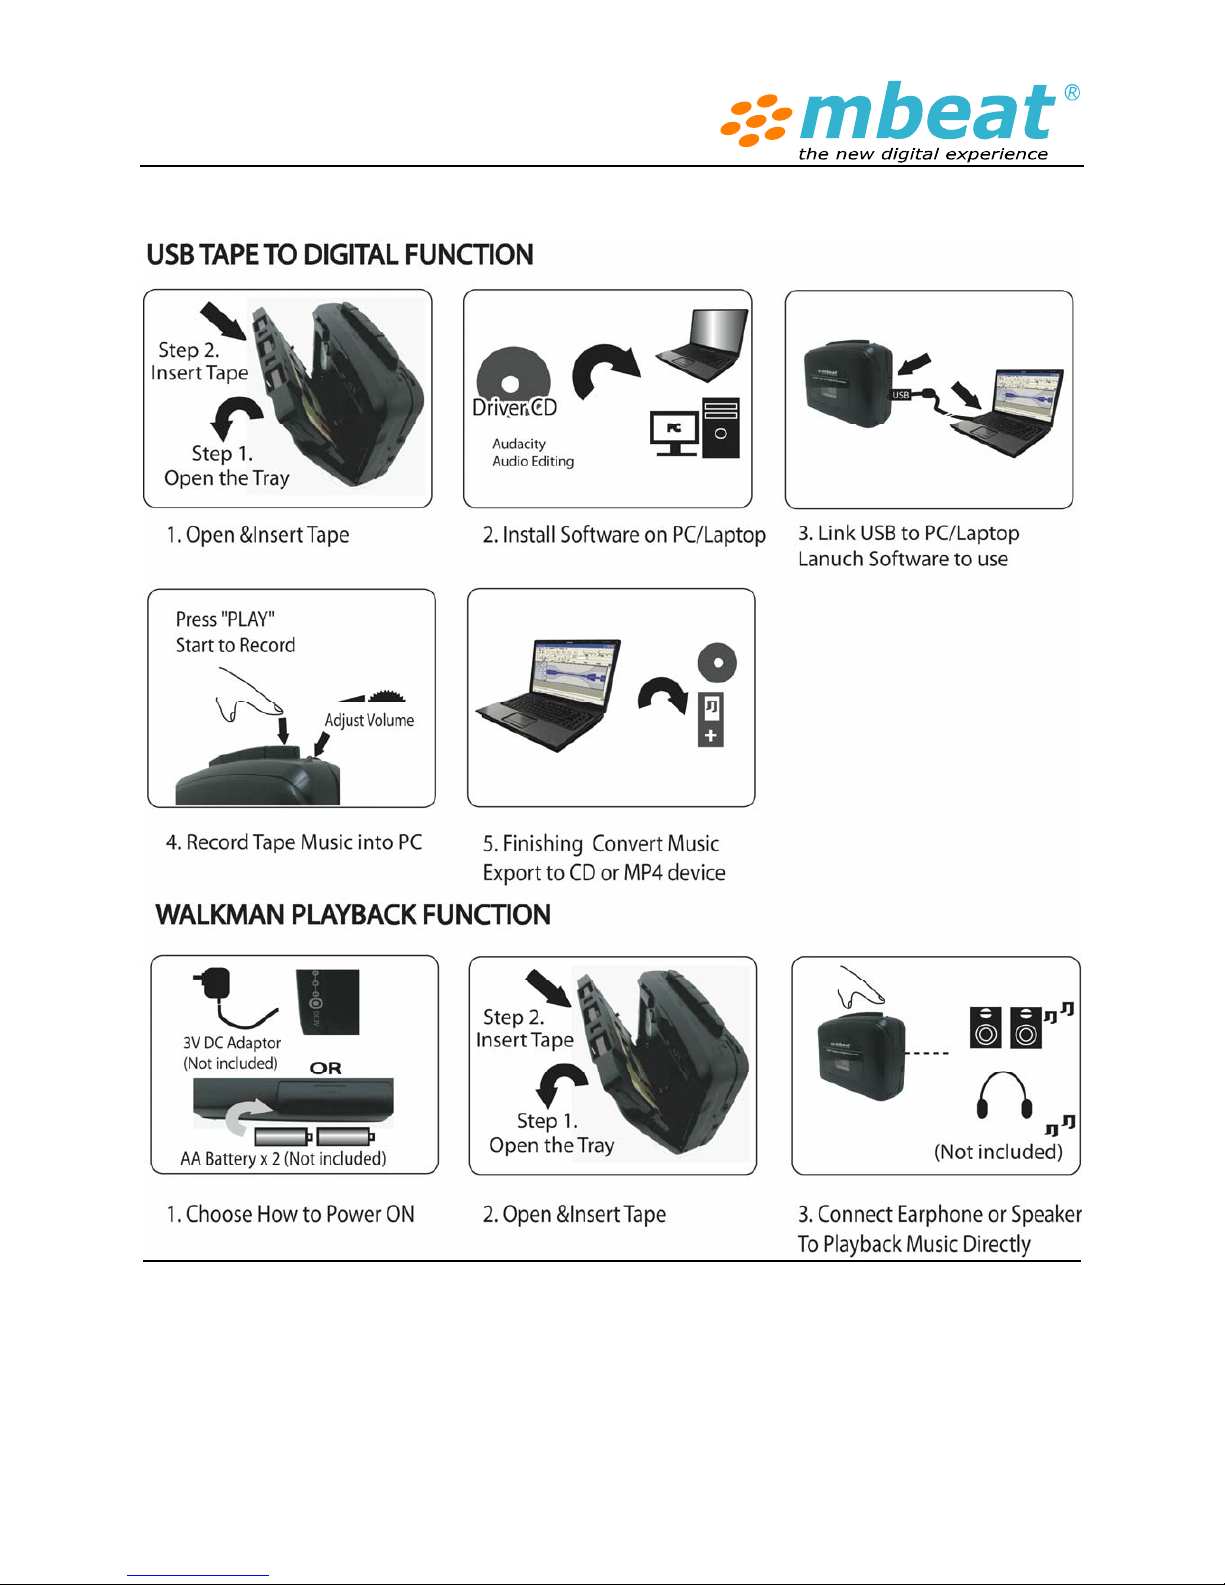
Power on (Play back mode)
You need 2 x AA batteries to power up the device or you can choose a +3V AC/DC power adaptor
with the right size of pin connector to power up the device if you want to listen the music like a
normal walkman.
Power on (USB conversion mode)
If you just need to convert the tape to digital via PC, you do not need to put battery or power, the
USB tape to digital can work with USB power cable directly
Earphone (Audio out) connection
You can connect your earphone plug to the earphone jack or simply connect your speaker audio
line in into the earphone (Audio out) jack to playback music
Play the tape
1. Insert the tape into the tray
2. Put batteries in or connect with external power
3. Press “PLAY” button to playback the music or start to record ( in USB mode)
4. Adjust volume up/down to suit your earphone plug or adjust the volume up/down during
recording ( in USB mode)
5. Press “ FF” to fast forward the tape , press “RW” to rewind the tape, press “ STOP” to stop
playing
6. Plug USB cable into the tape recorder and connect it with PC to start the USB conversion
process after your installed audacity audio editing software on the PC
After use care
1. Remove the tape and remove the batteries
2. Keep manual and driver CD for future reference
3. Place the device in a safe place to avoid direct sunlight and moisture environment
4. Do not drop the device in ground or hard surface
5. Tape head may need to clean up if the playback quality is low in months use
* To clean tape heads, use pure isopropyl alcohol and lint-free swabs. Wipe the metal parts
of the transport with alcohol (DON'T wipe the rollers!) and allow them to dry. Throw the
swab away after use.
To use USB tape to digital function
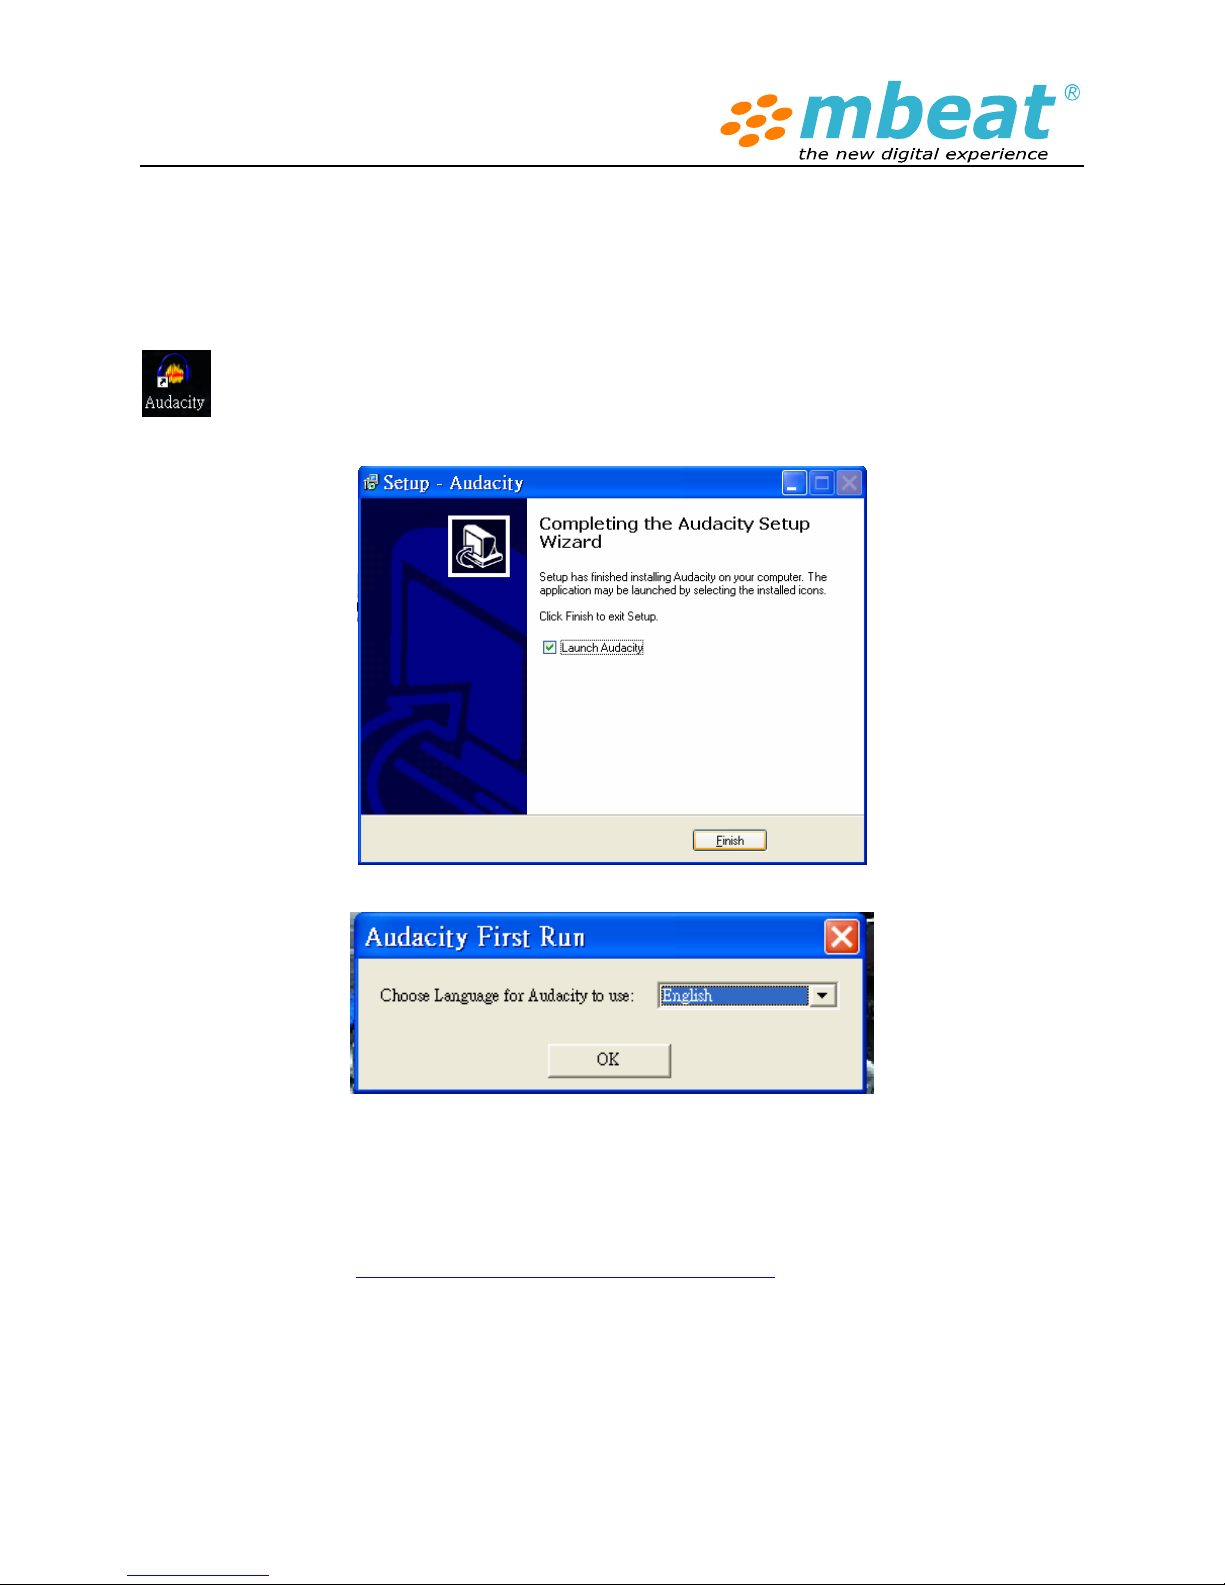
Step 1. Install the “Audacity” audio edit software
Put the CD disk into your computer and run “Aduacity.exe” file to install the software on your
computer. After installation you can launch the software on your desktop, looking for this icon
on your desktop or starter menu on your Windows OS.
When first time to launch the software, select your prefer language as “English”
Follow the on screen instructions to install this audio editing software program. With the software
installed, you can record tape into digital format and store it on your PC.
*If you using Windows 7 OS or MAC OS X, you can also download the free version of the latest
“Audacity” software to install on your computer (Details please refer “Audacity Software Quick Guide”
later). Download link: http://audacity.sourceforge.net/download/
Step 2. To connect your Tape recorder with your PC
1. Plug your USB tape to digital recorder to the USB port of your computer.
2. Open the “audacity” program that you have installed.
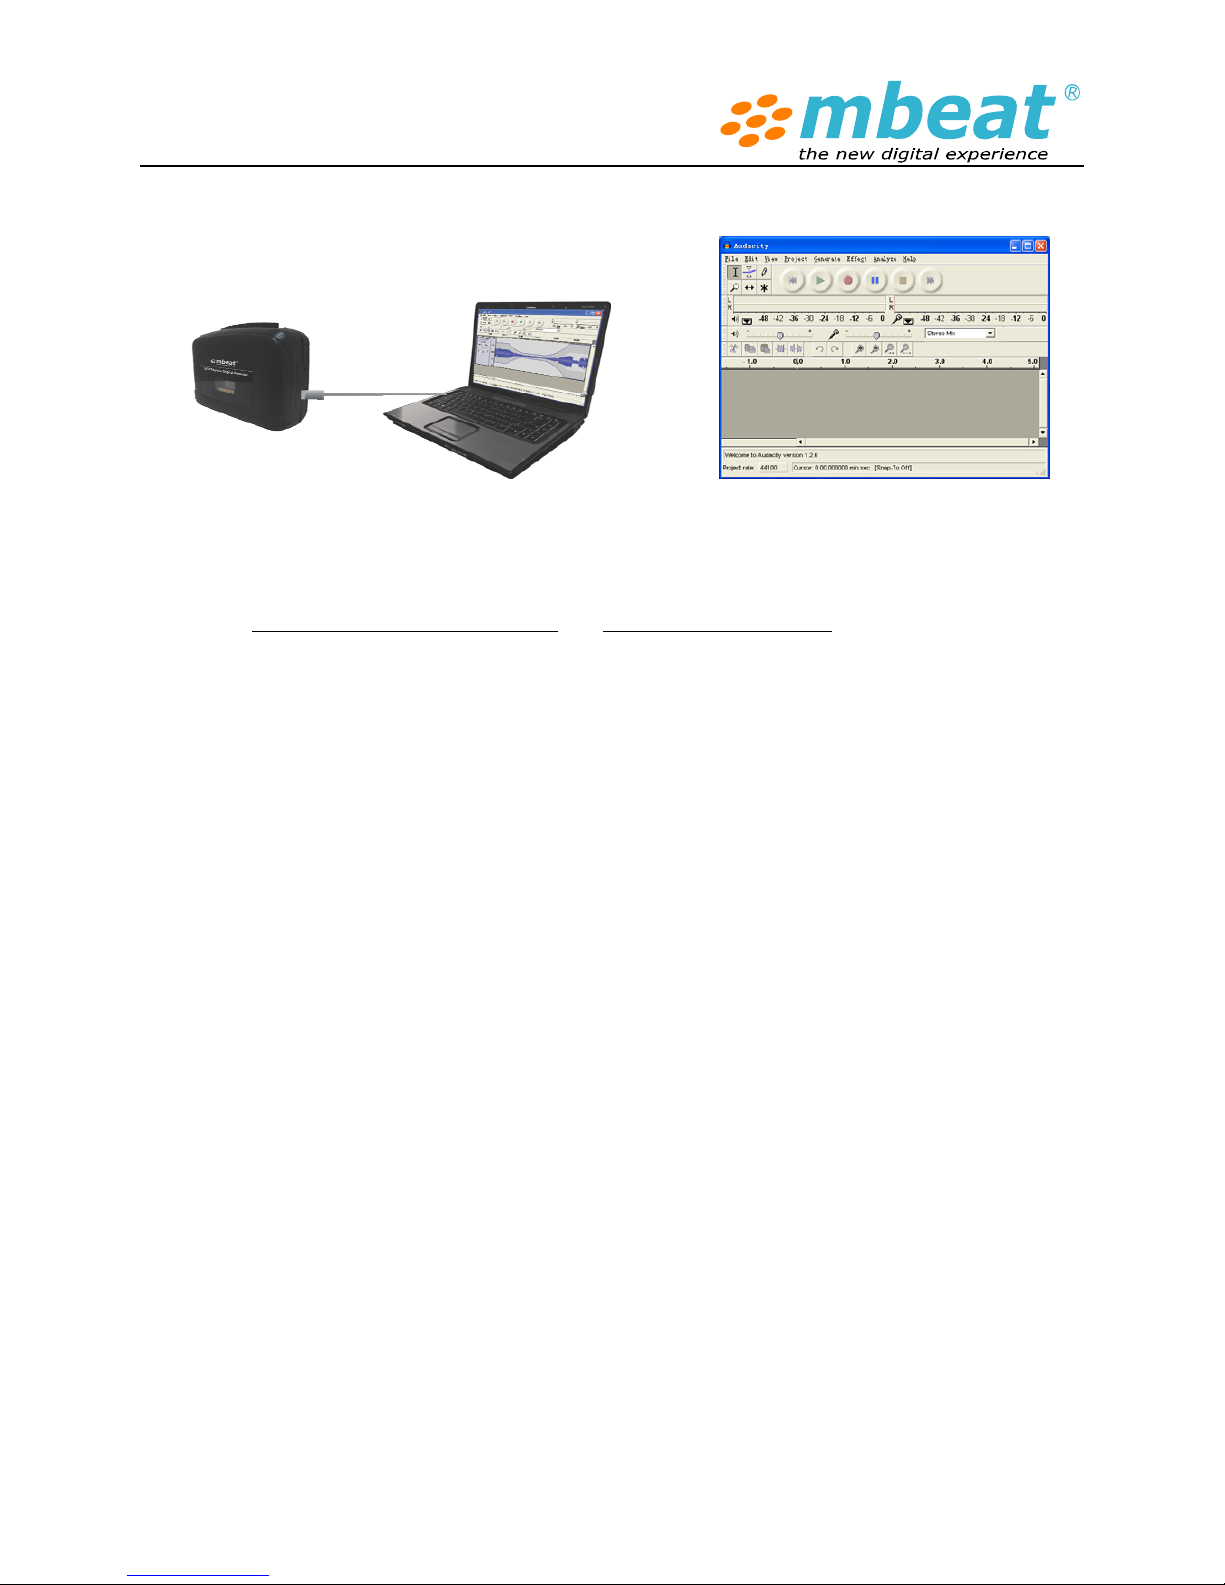
Step 3. How to use Audacity to record your music
mbeat® USB tape to digital recorder is able to transfer music from TAPE to PC with USB connection
by using the powerful audio edit software named “Audacity”. For the detailed software guide please
refer to the “Audacity Software Quick Guide” and Audacity official website as well.
Please note your computer audio configuration may slightly different as our manual
description, please check it carefully and make prompt changes to suit your system.
Some software knowledge is required to operate software in handling more complicated
functionalities (Please read this chapter carefully in order to find the right Audio In and Out
for your tape to digital recorder and your PC)
1. Turn on the USB tape to digital recorder, connect the USB cable to the device and computer, no
extra driver is required to drive the tape recorder
2. Your computer should detect a new “USB PnP Audio “device (USB Plug and Play Audio Device)
or it could named like “Generic USB Audio Device”, or whatsoever, they are the same thing, just
depending on how your PC call it.
3. Double click to open up the Audacity program and you will see this similar interface screen on
your computer.
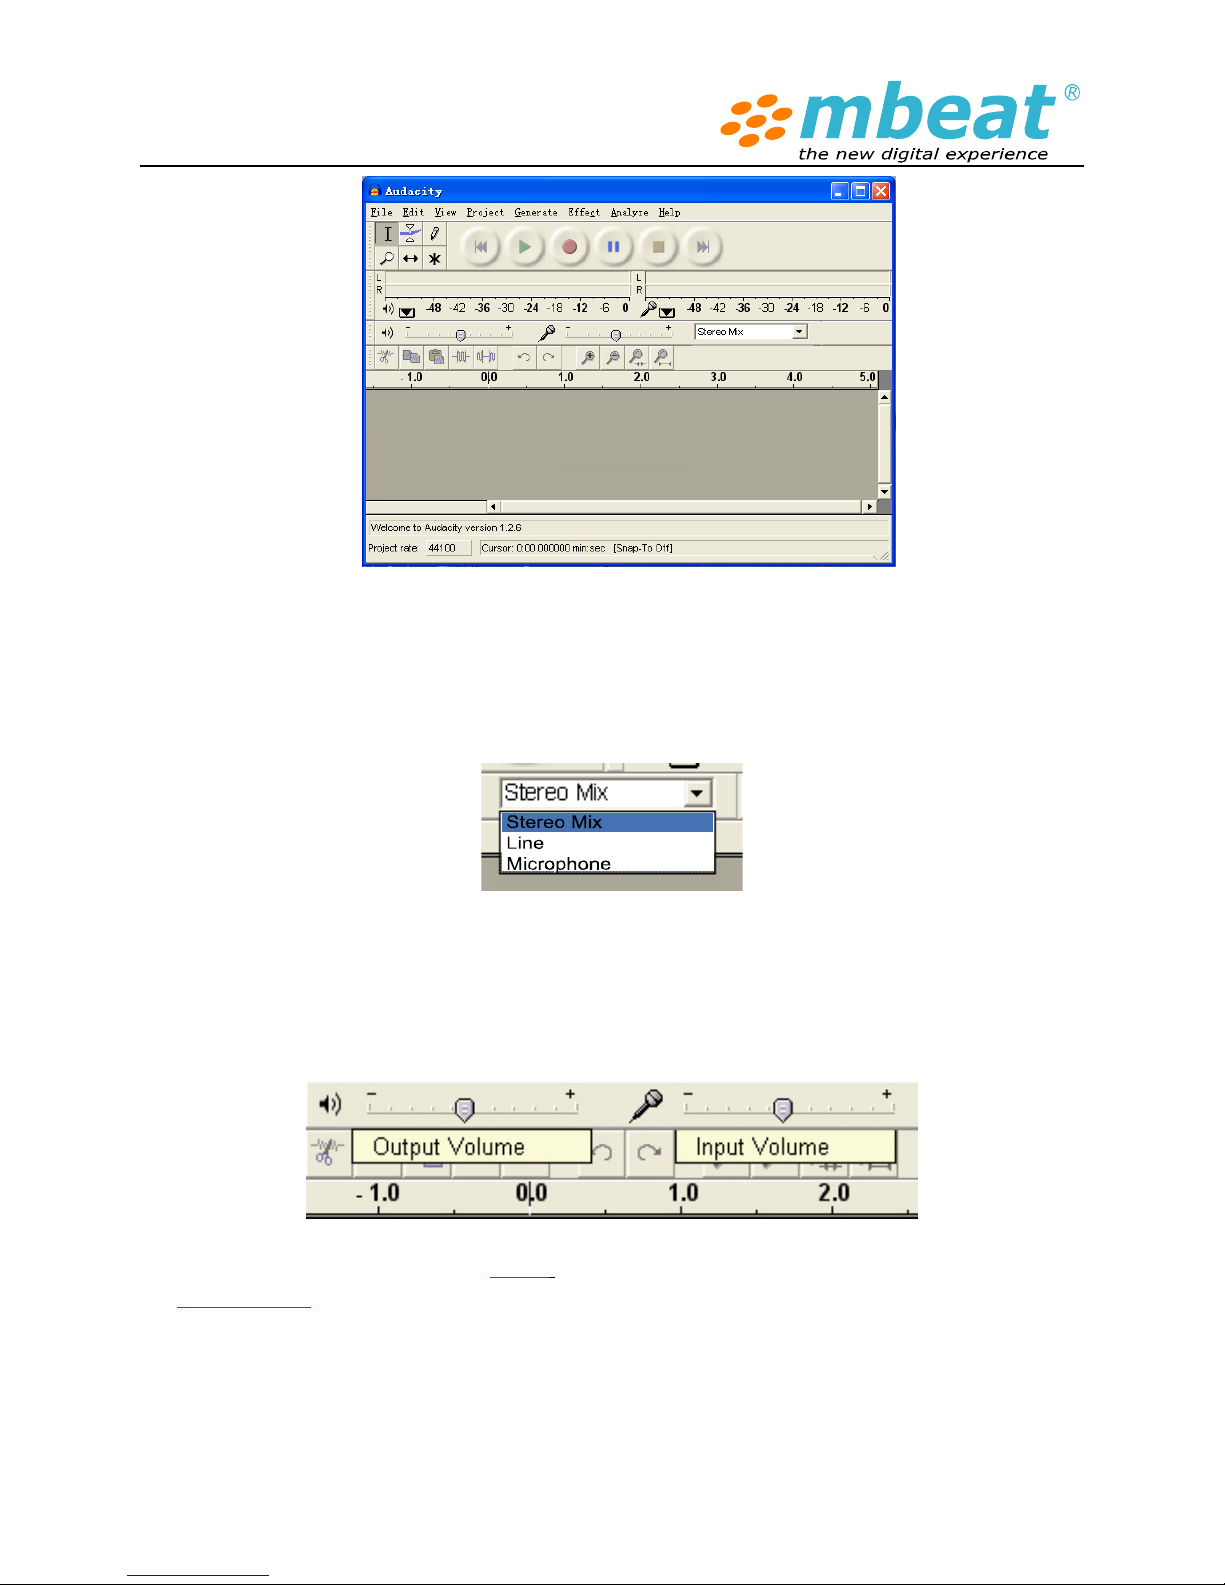
4. Check the Stereo Mix column in the drop down menu and just to keep the default settings, the
software shall be able to auto default the USB tape recorder setting as “Stereo Mix” or “Line”, or
remain gray inactive color according your computer hardware configuration. Those factors are
not such key important and you can set up in “Preference” , under “Edit” menu as well
5. Adjust the output and input volume to get your desire sound volume when you using computer
speaker to play back , please note that this setting will not effect the final recording track volume
level, only effect the computer speaker volume, just works like your Windows OS volume and
microphone controller panel.
6. Very Important is to Select the “Edit” menu on the top bar of the software and then select
“Preference” in the drop down menu, it will lead you to the audio input/output source
settings. (Some users may not right set up the correct Audio I/O , so the PC can not capture
the recorder’s audio signal , thus you can not record )
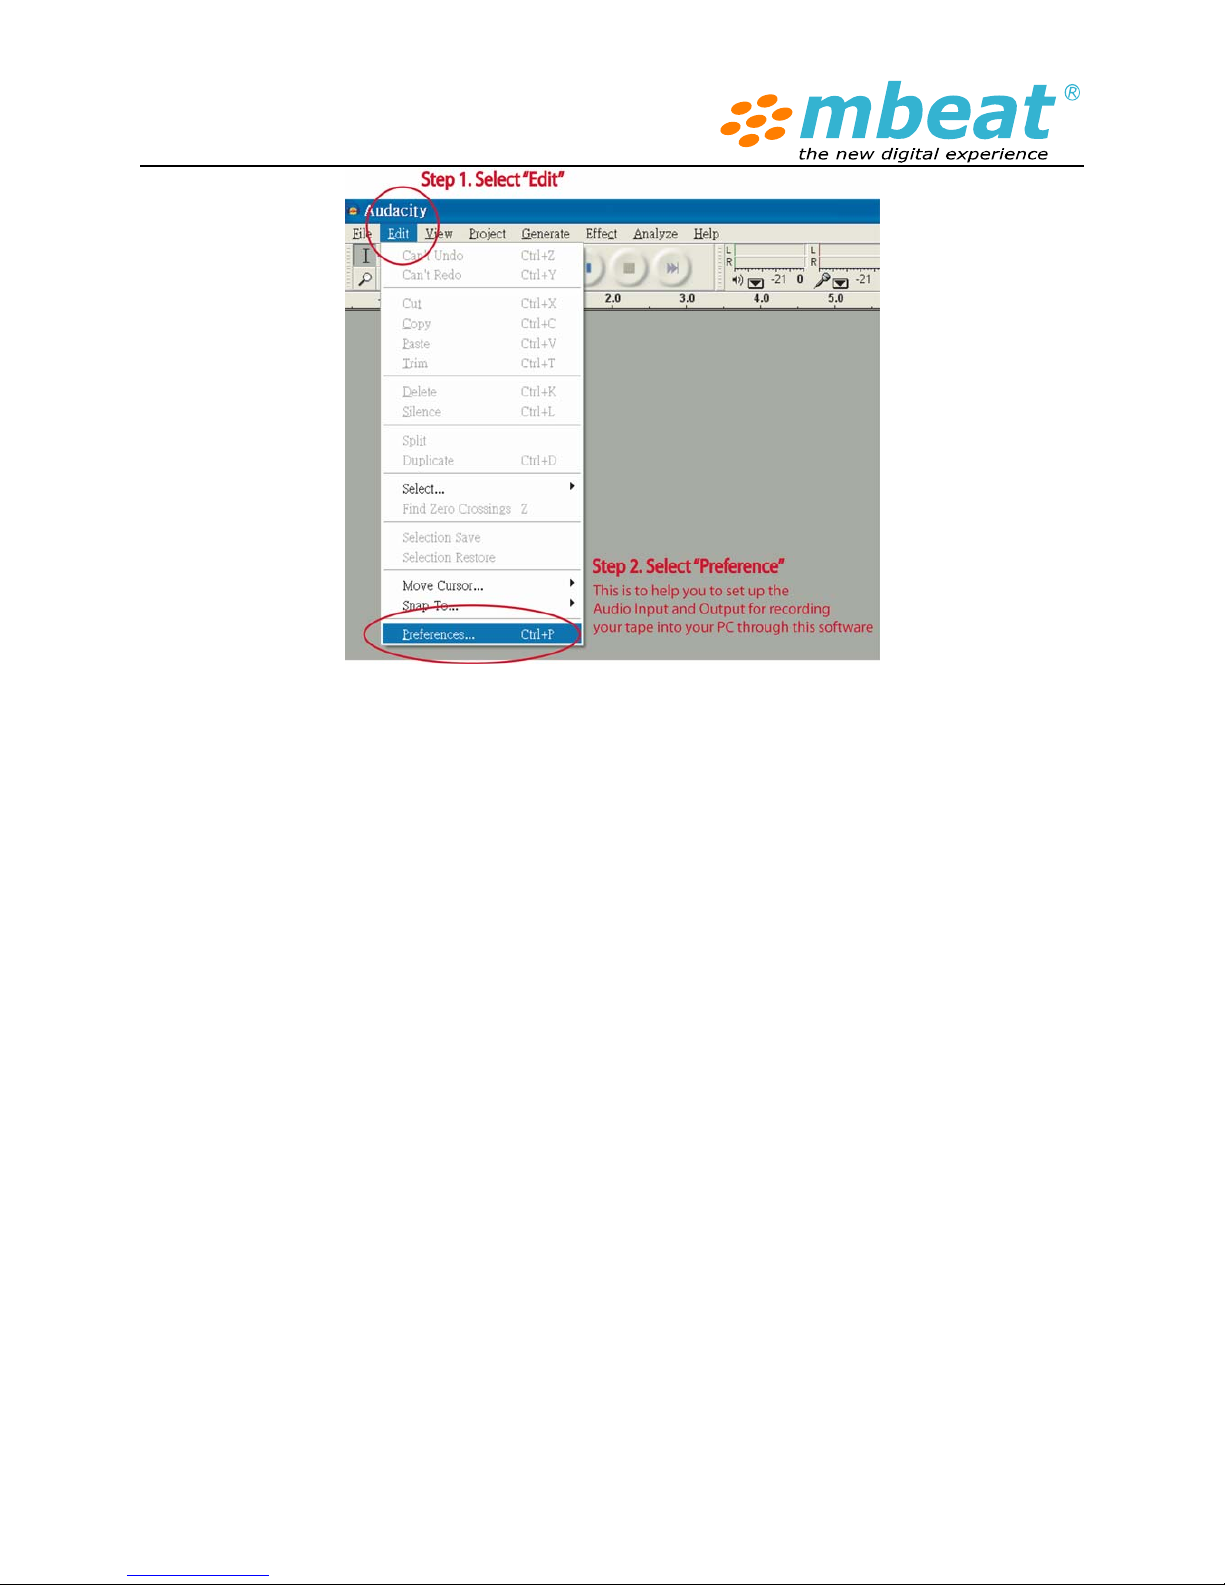
After enter “ Preference” section, choose Audio I/O section:
Under Playback drop down menu:
Select “Realtek HD Audio output “ , which means it is your sound card audio output to listen the
music playback through tape recorder while doing the recording internally.
Under recording drop down menu:
Select “USB PnP Audio”, which indicated the audio source from the tape recorder when it is
plugged into the computer. Your system may show the name like “Generic USB Audio device”,
or “USB PnP Device”, it does not matter. Important is to find the proper recording source that is
match with this USB tape to digital recorder
Please also tick “Software play through (Play new track while you are recording)” this
function enables you to real time monitor the recording track and playback (SEE DETAILS AS
BELOW)
7. When everything is ready, then you can select the RECORD button to start recording
your tape music into digital format.
8. You can turn the USB tape to digital recorder volume down and turn on the computer speaker to
monitor your records.
7. Select the PAUSE button to pause the recording.
 Loading...