

Page 1

WASHER/DRYER USER INSTRUCTIONS
INSTRUCCIONES PARA EL USUARIO
LA LAVADORA/SECADORA
INSTRUCTIONS POUR L’UTILISATEUR
DE LA LAVEUSE/SÉCHEUSE
Table of Contents / Índice / Table des matières
ASSISTANCE OR SERVICE ............................ 1
WASHER/DRYER SAFETY ............................. 2
WASHER USE .................................................. 4
DRYER USE...................................................... 5
WASHER/DRYER CARE ................................. 6
TROUBLESHOOTING WASHER .................... 8
TROUBLESHOOTING DRYER...................... 10
WARRANTY.................................................... 12
AYUDA O SERVICIO TÉCNICO.................... 13
SEGURIDAD DE LA
LAVADORA/SECADORA............................... 13
USO DE LA LAVADORA................................ 16
USO DE LA SECADORA ............................... 17
CUIDADO DE LA
LAVADORA/SECADORA............................... 18
SOLUCIÓN DE PROBLEMAS DE LA
LAVADORA..................................................... 20
SOLUCIÓN DE PROBLEMAS DE LA
SECADORA .................................................... 22
GARANTÍA...................................................... 24
ASSISTANCE OU SERVICE .......................... 25
SÉCURITÉ DE LA
LAVEUSE/SÉCHEUSE................................... 25
UTILISATION DE LA LAVEUSE .................... 28
UTILISATION DE LA SÉCHEUSE................. 29
ENTRETIEN DE LA
LAVEUSE/SÉCHEUSE................................... 30
DÉPANNAGE DE LA LAVEUSE.................... 32
DÉPANNAGE DE LA SÉCHEUSE................. 34
GARANTIE...................................................... 36
Assistance or Service
If you need assistance or service, first see the “Troubleshooting”
section. Additional help is available by calling the Maytag
Services, LLC Customer Assistance at 1-800-688-9900 from
anywhere in the U.S.A., or write:
Maytag Services, LLC
ATTN: CAIR
P.O. Box 2370
Cleveland, TN 37320-2370
Information may also be obtained by visiting our website at
www.maytag.com.
In Canada, for assistance, installation or service, call us at
1-800-807-6777, or write:
Maytag Services, LLC
ATTN: CAIR
P.O. Box 2370
Cleveland, TN 37320-2370
In Canada, visit www.maytag.ca.
Please include a daytime phone number in your correspondence.
®
Center
®
Center
Keep this book and your sales slip together for future
reference. You must provide proof of purchase or installation
date for in-warranty service.
Write down the following information about your appliance to help
you obtain assistance or service if you ever need it. You will need
to know your complete model number and serial number. You can
find this information on the model and serial number label, located
at the top inside dryer door well.
Dealer name____________________________________________________
Serial number __________________________________________________
Address ________________________________________________________
Phone number __________________________________________________
Model number __________________________________________________
Purchase date __________________________________________________
W10117754A
Page 2

WASHER/DRYER SAFETY
Your safety and the safety of others are very important.
We have provided many important safety messages in this manual and on your appliance. Always read and obey all safety
messages.
This is the safety alert symbol.
This symbol alerts you to potential hazards that can kill or hurt you and others.
All safety messages will follow the safety alert symbol and either the word “DANGER” or “WARNING.”
These words mean:
You can be killed or seriously injured if you don't immediately
DANGER
WARNING
All safety messages will tell you what the potential hazard is, tell you how to reduce the chance of injury, and tell you what can
happen if the instructions are not followed.
WARNING: For your safety, the information in this manual must be followed to minimize
the risk of fire or explosion, or to prevent property damage, personal injury, or death.
follow instructions.
can be killed or seriously injured if you don't
You
instructions.
follow
– Do not store or use gasoline or other flammable vapors and liquids in the vicinity of this
or any other appliance.
– WHAT TO DO IF YOU SMELL GAS:
Do not try to light any appliance.
•
Do not touch any electrical switch; do not use any phone in your building.
•
Clear the room, building, or area of all occupants.
•
Immediately call your gas supplier from a neighbor's phone. Follow the gas supplier's
•
instructions.
If you cannot reach your gas supplier, call the fire department.
•
– Installation and service must be performed by a qualified installer, service agency, or
the gas supplier.
2
Page 3

IMPORTANT SAFETY INSTRUCTIONS
To reduce the risk of fire, electric shock, or injury to persons when using the washer/dryer, follow basic
WARNING:
precautions, including the following:
■ Read all instructions before using the washer/dryer.
■ Do not place items exposed to cooking oils in your dryer.
Items contaminated with cooking oils may contribute to a
chemical reaction that could cause a load to catch fire.
■ Do not wash or dry articles that have been previously
cleaned in, washed in, soaked in, or spotted with gasoline,
dry-cleaning solvents, other flammable, or explosive
substances as they give off vapors that could ignite or
explode.
■ Do not add gasoline, dry-cleaning solvents, or other
flammable, or explosive substances to the wash water.
These substances give off vapors that could ignite or
explode.
■ Do not allow children to play on or in the washer/dryer.
Close supervision of children is necessary when the
washer/dryer is used near children.
Before the washer/dryer is removed from service or
■
discarded, remove the doors to the washer/dryer
compartments.
■ Do not reach into the washer/dryer if the tub, agitator or
drum is moving.
■ Do not install or store the washer/dryer where it will be
exposed to the weather.
■ Do not tamper with controls.
■ Clean dryer lint screen before or after each load.
■ Under certain conditions, hydrogen gas may be produced
in a hot water system that has not been used for 2 weeks
or more. HYDROGEN GAS IS EXPLOSIVE. If the hot water
system has not been used for such a period, before using
the washing machine, turn on all hot water faucets and let
the water flow from each for several minutes. This will
release any accumulated hydrogen gas. As the gas is
flammable, do not smoke or use an open flame during
this time.
■ Do not repair or replace any part of the washer/dryer or
attempt any servicing unless specifically recommended in
this Use and Care Guide or in published user-repair
instructions that you understand and have the skills to
carry out.
■ Do not use fabric softeners or products to eliminate static
unless recommended by the manufacturer of the fabric
softener or product.
■ Do not use heat to dry articles containing foam rubber or
similarly textured rubber-like materials.
■ Keep area around the exhaust opening and adjacent
surrounding areas free from the accumulation of lint, dust,
and dirt.
■ The interior of the machine and dryer exhaust vent should
be cleaned periodically by qualified service personnel.
■ See “Electrical Requirements” section for grounding
instructions.
SAVE THESE INSTRUCTIONS
Checking Your Vent
Your dryer must be properly installed and vented to achieve
maximum drying efficiency and shorten drying times. Use the
minimum recommended installation clearances found in the
Installation Instructions. See the Installation Instructions for more
information.
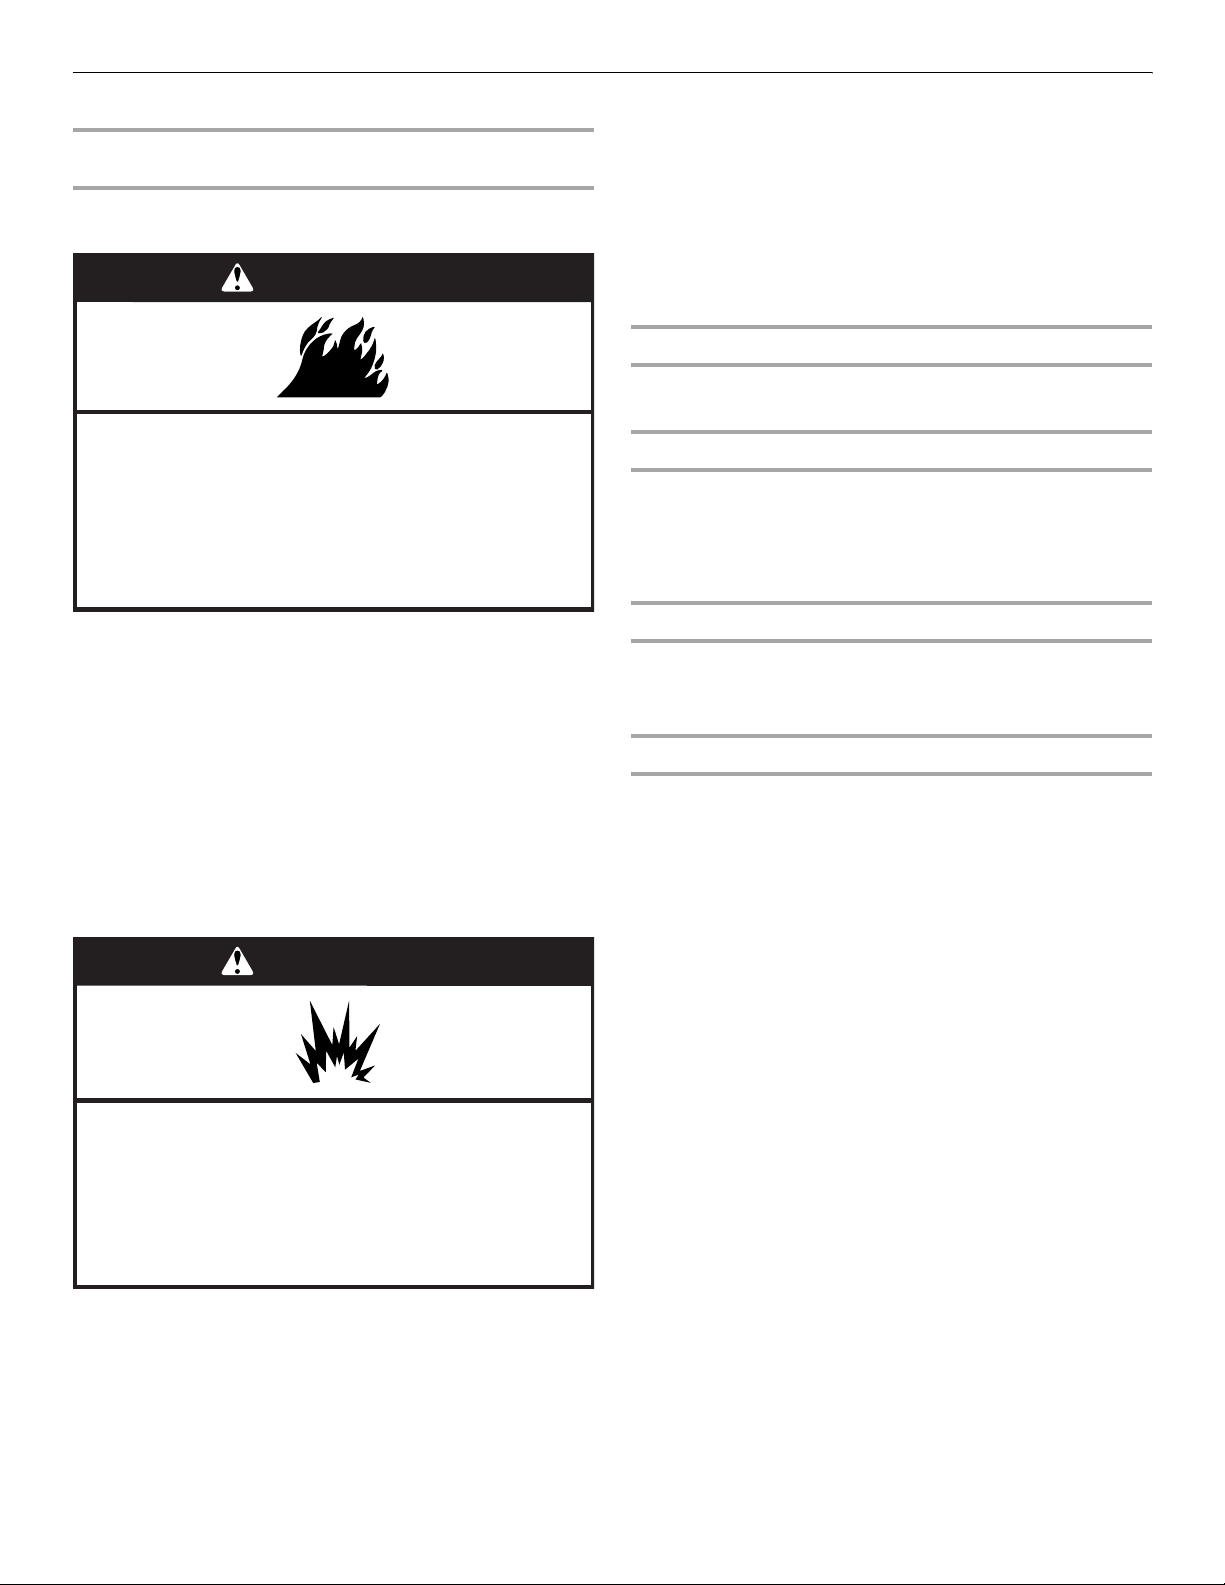
WARNING
Fire Hazard
Use a heavy metal vent.
Do not use a plastic vent.
Do not use a metal foil vent.
Failure to follow these instructions can result in death
or fire.
If the dryer is not properly installed and vented, it will not be
covered under the warranty. Proper venting of your dryer is
important for satisfactory drying results. See the Installation
Instructions for more detail.
NOTE: Service calls caused by improper venting will be paid for
by the customer, whether it was a paid installation or selfinstalled.
1. Do not use plastic vent or metal foil vent. Use 4" (10.2 cm)
metal or flexible metal vent. Do not kink or crush flexible metal
vent. It must be completely extended to allow adequate
exhaust air to flow. Check vent after installation. Refer to the
Installation Instructions for proper length requirements of vent.
4"
10.2 cm
2. Use a 4" (10.2 cm) exhaust hood.
3
Page 4

3. Use the straightest path possible when routing the vent. 4. Use clamps to seal all joints. Do not use duct tape, screws or
Good Better
other fastening devices that extend into the interior of the vent
to secure vent.
5. Clean exhaust vent periodically, depending on use, but at
least every 2 years, or when installing your dryer in a new
location. When cleaning is complete, be sure to follow the
Installation Instructions supplied with your dryer for final
product check.
WASHER USE
Loading
For these suggested full-sized loads, set the LOAD SIZE selector to the highest load size setting.
LARGE CAPACITY WASHERS
Heavy Work Clothes
2pair of pants
3shirts
3 jeans
1 coverall
Mixed Load
2 double sheets
4 pillowcases
6T-shirts
6 pair of shorts
2shirts
2blouses
6 handkerchiefs
Towels
8bath towels
8hand towels
10 washcloths
1 bath mat
Starting Your Washer
WARNING
Fire Hazard
Never place items in the washer that are dampened
with gasoline or other flammable fluids.
No washer can completely remove oil.
Do not dry anything that has ever had any type of oil on
it (including cooking oils).
Doing so can result in death, explosion, or fire.
1. Measure detergent and pour it into the washer. If desired, add
powdered or liquid color safe bleach. Drop a sorted load of
clothes loosely into your washer.
■ Load evenly to maintain washer balance. Mix large and
small items. Items should move easily through the wash
water. Overloading can cause poor cleaning.
2. (OPTIONAL) Add liquid chlorine bleach.
Always measure liquid chlorine bleach. Do not guess. Do not
use more than 1 cup (250 mL) for a full load. Follow
manufacturer’s directions for safe use. Use a cup with a
pouring spout to avoid spilling.
Let the washer fill and begin agitating the load. Add bleach to
the wash cycle so it can be removed in the rinse cycle. Pour
bleach around the agitator, not directly onto the load.
Delicates
2 camisoles
4 slips
6 undergarments
2sets of
sleepwear
1 child’s outfit
■ Follow directions on the care labels. Do not use chlorine
bleach on wool, silk, spandex, acetates, or some flameretardant fabrics.
NOTE: Undiluted bleach will damage any fabric it touches.
The damage appears as rips, holes, tears, or color loss and
may not show up until several washings later.
3. (OPTIONAL) Add liquid fabric softener.
NOTE: Do not spill or drip any fabric softener onto the clothes.
Undiluted fabric softener can stain fabrics. Always dilute fabric
softener with warm water. Too much fabric softener can make
some items (diapers and towels) nonabsorbent. If this
happens, do not use it in every load, or use less of it in each
load.
Style 1: With liquid fabric softener dispenser (on some
models)
■ Use only liquid fabric softener in this dispenser. Pour
measured liquid fabric softener into the dispenser.
Softener is added automatically during the rinse portion of
the cycle. Dilute liquid fabric softener by filling the
dispenser with warm water until liquid reaches the
crossbar in the dispenser opening.
Style 2: Without liquid fabric softener dispenser (on some
models)
■ In the final rinse ONLY, add fabric softener that has been
diluted with ¹⁄₂ to 1 cup (125 to 250 mL) warm water.
4. Close the washer lid. Washer will not agitate or spin with the
lid open.
Permanent
Press
1 double sheet
1 tablecloth
1dress
1blouse
2pair of pants
3shirts
2 pillowcases
Knits
2pair of pants
2blouses
4shirts
4tops
2 dresses
4
Page 5

5. Turn the WATER LEVEL selector to the correct setting for your
wash load and the type of fabric being washed. You may
change the load size or water level selection after the washer
has started filling by turning the selector to a different setting.
6. Set the TEMPERATURE selector to the correct setting for the
type of fabric and soils being washed. Use the warmest water
safe for fabric. Follow garment label instructions.
NOTE: In wash water temperatures colder than 60ºF (15.6ºC),
detergents do not dissolve well. Soils can be difficult to
remove. Some fabrics can retain wear wrinkles and have
increased pilling (the formation of small lint-like balls on the
surface of garments).
DRYER USE
Starting Your Dryer
7. Push in the Cycle Control knob and turn it clockwise to the
wash cycle you want. Reduce the wash time when using a
small load size setting. Pull out the Cycle Control knob to start
the washer.
To stop or restart your washer:
■ To stop the washer at any time, push in the Cycle
Control knob.
■ To restart the washer, close the lid (if open) and pull out the
Cycle Control knob.
WARNING
Explosion Hazard
Keep flammable materials and vapors, such as
gasoline, away from dryer.
Do not dry anything that has ever had anything
flammable on it (even after washing).
Failure to follow these instructions can result in death,
explosion, or fire.
Before using your dryer, wipe the dryer drum with a damp cloth to
remove dust from storing and shipping.
1. Clean lint screen before each load. See “Cleaning the Lint
Screen.”
2. Load clothes loosely into the dryer and close the door. Do not
pack the dryer. Allow space for clothes to tumble freely.
3. Turn the Cycle Control knob to the recommended cycle for the
type of load being dried. Use the Energy Preferred Automatic
Setting to dry most heavy to medium weight fabrics.
4. (OPTIONAL) Your dryer may have an END OF CYCLE SIGNAL.
The signal is helpful when drying items that should be
removed from the dryer as soon as it stops. The End of Cycle
signal is part of the Start button and is selectable. Turn the
Start button to ON or OFF. The signal will sound only if the
selector is set to On.
WARNING
Fire Hazard
No washer can completely remove oil.
Do not dry anything that has ever had any type of oil on
it (including cooking oils).
Items containing foam, rubber, or plastic must be dried
on a clothesline or by using an Air Cycle.
Failure to follow these instructions can result in death
or fire.
5. If desired, add fabric softener sheet. Follow package
instructions.
6. Press the PUSH TO START button.
Stopping and Restarting
You can stop your dryer anytime during a cycle.
To stop your dryer
Open the dryer door or turn the Cycle Control knob to OFF.
NOTE: The Cycle Control knob should point to an Off area when
the dryer is not in use.
To restart your dryer
Close the door. Select a new cycle and temperature (if desired).
Press the PUSH TO START button.
5
Page 6

WASHER/DRYER CARE
Cleaning the Washer/Dryer Location
Keep washer/dryer area clear and free from items that would
obstruct the flow of combustion and ventilation air.
WARNING
Explosion Hazard
Keep flammable materials and vapors, such as
gasoline, away from dryer.
Failure to do so can result in death, explosion, or fire.
Cleaning Your Washer
Cleaning the exterior
Use a soft, damp cloth or sponge to wipe up any spills such as
detergent or bleach. Occasionally wipe the outside of your washer
to keep it looking new.
Cleaning the interior
Clean your washer interior by mixing 1 cup (250 mL) of chlorine
bleach and 2 scoops or caps full of detergent. Pour this into your
washer and run it through a complete cycle using hot water.
Repeat this process if necessary.
NOTE: Remove any hard water deposits using only cleaners
labeled as washer safe.
Cleaning the liquid fabric softener dispenser (on some
models):
1. Remove dispenser by grasping top with both hands and
squeezing, while pushing upward with thumbs.
2. Rinse dispenser under a warm water faucet, then replace it.
NOTE: If your model has a liquid fabric softener dispenser, do not
wash clothes with this dispenser removed. Do not add detergent
or bleach to this dispenser; it is for liquid fabric softener only.
Water Inlet Hoses
Replace inlet hoses after 5 years of use to reduce the risk of hose
failure. Periodically inspect and replace inlet hoses if bulges,
kinks, cuts, wear or leaks are found.
When replacing your inlet hoses, mark the date of replacement on
the label with a permanent marker.
Cleaning the Lint Screen
Clean the lint screen before each load. A screen blocked by lint
can increase drying time.
IMPORTANT:
■ Do not run the dryer with the lint screen loose, damaged,
blocked or missing. Doing so can cause overheating and
damage to both the dryer and fabrics.
■ If lint falls off the screen into the dryer during removal, check
the exhaust hood and remove the lint.
Every Load Cleaning
Style 1:
1. The lint screen is located inside the dryer on the back wall.
Pull out the lint screen and its cover.
2. Separate the cover and the screen by squeezing the screen
and pulling on the cover at the same time.
3. Roll lint off the screen with your fingers. Do not rinse or wash
screen to remove lint. Wet lint is hard to remove.
4. Put the lint screen and cover back together and push firmly
back into place.
Style 2:
1. The lint screen is located inside the dryer in the front door well.
Pull the lint screen straight up.
2. Roll lint off the screen with your fingers. Do not rinse or wash
screen to remove lint. Wet lint is hard to remove.
3. Push the lint screen firmly back into place.
As Needed Cleaning
Laundry detergent and fabric softener residue can build up on the
lint screen. This buildup can cause longer drying times for your
clothes, or cause the dryer to stop before your load is completely
dry. The screen is probably clogged if lint falls off the screen.
Clean the lint screen (as outlined following) every 6 months, or
more frequently if it becomes clogged due to a residue buildup.
1. Roll lint off the screen with your fingers.
2. Wet both sides of lint screen with hot water.
3. Wet a nylon brush with hot water and liquid detergent. Scrub
lint screen with the brush to remove residue buildup.
4. Rinse screen with hot water.
5. Thoroughly dry lint screen with a clean towel. Replace screen
in dryer.
Cleaning the Dryer Interior
To clean dryer drum
1. Apply a nonflammable household cleaner to the stained area
of the drum and rub with a soft cloth until stain is removed.
2. Wipe drum thoroughly with a damp cloth.
3. Tumble a load of clean cloths or towels to dry the drum.
NOTE: Garments that contain unstable dyes, such as denim blue
jeans or brightly colored cotton items, may discolor the dryer
interior. These stains are not harmful to your dryer and will not
stain future loads of clothes. Dry unstable dye items inside out to
avoid dye transfer.
6
Page 7

Removing Accumulated Lint
From Inside the Dryer Cabinet
Lint should be removed every 2 years, or more often, depending
on dryer usage. Cleaning should be done by a qualified person.
From Inside the Exhaust Vent
In Canada
WARNING
Lint should be removed every 2 years, or more often, depending
on dryer usage.
Vacation, Storage and Moving Care
Install and store your washer/dryer where it will not freeze.
Because some water may stay in the hoses, freezing can damage
your washer/dryer. If storing or moving your washer/dryer during
freezing weather, winterize it.
Non-use or vacation care
Operate your washer/dryer only when you are at home. If you will
be on vacation or not using your washer/dryer for an extended
period of time, you should:
■ Unplug washer/dryer or disconnect power.
■ Turn off the water supply to the washer. This helps avoid
accidental flooding (due to a water pressure surge) while you
are away.
To winterize washer/dryer
1. Shut off both water faucets.
2. Disconnect and drain water inlet hoses.
3. Put 1 qt (1 L) of R.V.-type antifreeze in the basket.
4. Run washer on a drain and spin setting for about 30 seconds
to mix the antifreeze and water.
5. Unplug washer/dryer or disconnect power.
To use washer/dryer again
1. Flush water pipes and hoses.
2. Reconnect water inlet hoses.
3. Turn on both water faucets.
4. In the U.S.A.
WARNING
Electrical Shock Hazard
Plug into a grounded 4 prong outlet.
Failure to do so can result in death or electrical shock.
■ Plug in washer/dryer or reconnect power.
5. Run the washer through a complete cycle with 1 cup (250 mL)
of detergent to clean out antifreeze.
To transport the washer/dryer
1. Shut off both water faucets.
2. Disconnect and drain water inlet hoses.
3. If washer/dryer will be moved during freezing weather, put in a
qt (1 L) of R.V.-type antifreeze in the basket. Run washer on a
spin setting for about 30 seconds to mix the antifreeze and
water.
4. Disconnect the drain from the drain system.
5. Unplug washer/dryer or disconnect power. Disconnect wiring
if washer/dryer is direct wired.
6. Disconnect the exhaust vent.
7. Wash lint screen.
8. Make sure leveling legs are secure.
9. Place the inlet hoses into the basket.
10. Drape the power cord and drain hose over edge and into the
basket.
11. Use masking tape to secure the washer lid and dryer door.
Reinstalling your washer/dryer
1. Follow the “Installation Instructions” to locate, level and
connect the washer/dryer.
2. Run the washer through a complete cycle with 1 scoop or
capful of detergent to clean the washer and remove the
antifreeze, if used.
Electrical Shock Hazard
Plug into a grounded 3 prong outlet.
Do not remove ground prong.
Do not use an adapter.
Do not use an extension cord.
Failure to follow these instructions can result in death,
fire, or electrical shock.
■ Plug in washer/dryer or reconnect power.
7
Page 8

TROUBLESHOOTING WASHER
First try the solutions suggested here and possibly avoid the cost of a service call...
Washer and Components
Noisy, vibrating, off-balance
■ Is the floor flexing, sagging or not level? Flooring that flexes
or is uneven can contribute to noise and vibration of the
washer. A ³⁄₄" (1.9 cm) piece of plywood under the washer will
reduce the sounds. See the Installation Instructions.
■ Is the washer/dryer level? The washer/dryer must be level.
See the Installation Instructions.
■ Is the load balanced? Evenly distribute the load in the
washer basket and make sure the height of the load does not
exceed the top row of basket holes.
■ Did you completely remove the yellow shipping strap with
cotter pins? See the Installation Instructions.
■ Are the gears engaging after the drain and before spin, or
is the upper part of agitator clicking during wash? These
are normal washer noises.
■ Is the washer gurgling or humming? When the washer
drains, the pump will make a continuous humming with
periodic gurgling or surging sounds as the final amounts of
water are removed. This is normal.
■ The washer basket moves while washing. This is normal.
Leaking
■ Are the fill hoses tight?
■ Are the fill hose gaskets properly seated? Check both ends
of each hose. See the Installation Instructions.
■ Is the drain hose properly installed? The drain hose should
be secured to the drainpipe or laundry tub. See the Installation
Instructions.
■ Is the sink or drain clogged? Sink and drainpipe must be
able to carry away 17 gal. (64 L) of water per minute. If sink or
drainpipe is clogged or slow, water can back up out of
drainpipe or sink. Check household plumbing (laundry tubs,
faucets, drainpipe, water pipes) for leaks.
■ Is water splashing off the tub ring? Center the tub before
starting the washer.
■ Is water splashing off the load? Evenly distribute the load in
the washer basket and make sure the height of the load does
not exceed the top row of basket holes. The fill or spray rinses
can splash off the load.
Dispenser clogged (on some models)
■ Did you follow the manufacturer’s directions when adding
fabric softener to the dispenser (on some models)?
Measure fabric softener and slowly pour into the dispenser.
Wipe up all spills. Dilute fabric softener in the fabric softener
dispenser.
Washer Operation
Washer won’t run, fill, rinse or agitate; washer stops
WARNING
Electrical Shock Hazard
Plug into a grounded 3 prong outlet.
Do not remove ground prong.
Do not use an adapter.
Do not use an extension cord.
Failure to follow these instructions can result in death,
fire, or electrical shock.
■ Is the power cord plugged into a grounded 3 prong outlet?
Plug power cord into a grounded 3 prong outlet.
■ Are you using an extension cord? Do not use an extension
cord.
■ Is the indicator on the Cycle Control knob properly lined
up with a cycle? Turn the Cycle Control knob to the right
slightly and pull to start.
■ Are the water inlet valve screens clogged? Turn off the
water and remove inlet hoses from the washer. Remove any
accumulated film or particles. Reinstall hoses, turn on water
and check for leaks.
■ Are both the hot and cold water faucets turned on? Tur n
on the water.
■ Is the water inlet hose kinked? Straighten the hoses.
■ Does the water level seem too low, or does the washer
appear to not fill completely? The top of the agitator is much
higher than the highest water level. This is normal and
necessary for clothes to move freely.
■ Has a household fuse blown, or has a circuit breaker
tripped? Replace the fuse, or reset the circuit breaker. If the
problem continues, call an electrician.
■ Is the washer in a normal pause in the cycle? The washer
pauses for about 2 minutes during certain cycles. Allow the
cycle to continue. Some cycles feature periods of agitation
and soak.
■ Is the washer overloaded? Wash smaller loads.
■ Is the lid open? The lid must be closed during operation.
Washer will not agitate or spin with the lid open.
8
Page 9

Washer continues to fill or drain; cycle seems stuck
■ Is the top of drain hose lower than the control knobs on
washer? The top of the drain hose must be at least
39" (99 cm) above the floor. See the Installation Instructions.
■ Does the drain hose fit too tightly in the standpipe, or is it
taped to the standpipe? The drain hose should be loose yet
fit securely. Do not seal the drain hose with tape. The hose
needs an air gap. See the Installation Instructions.
Washer won’t drain or spin; water remains in washer
■ Is the drain hose clogged, or the end of the drain hose
more than 96" (244 cm) above the floor? See the Installation
Instructions.
Clothing Care
Load too wet
■ Did you use the right cycle for the load being washed?
Select a cycle with a higher spin speed (if available).
■ Did you wash an extra-large load? A large unbalanced load
could result in a reduced spin speed and wet clothes at the
end of the cycle. Evenly distribute the load and make sure the
height of the load does not exceed the top row of basket
holes.
Residue or lint on load
■ Did you sort properly? Sort lint givers (towels, chenille) from
lint takers (corduroy, synthetics). Also sort by color.
■ Did you overload the washer? The wash load must be
balanced and not overloaded. Clothes should move freely.
Lint or powdered detergent can be trapped in the load if
overloaded. Wash smaller loads.
■ Did you select the correct water level? The water level
should be correct for the load size. The load should be under
water.
■ Did you use enough detergent? Follow manufacturer’s
directions. Use enough detergent to hold the lint in the water.
■ Did you line dry your clothing? If so, you can expect some
lint on the clothing. The air movement and tumbling of a dryer
removes lint from the load.
■ Was paper or tissue left in the pockets?
■ Is your water colder than 60°F (15.6°C)? Wash water colder
than 60°F (15.6°C) may not completely dissolve the detergent.
■ Did you use the proper cycle time and agitation speed for
the load? Reducing wash time (duration) and agitation speed
are ways to reduce lint.
Load is wrinkled, twisted or tangled
■ Did you unload the washer promptly? Unload the washer as
soon as it stops.
■ Is the lid open? The lid must be closed during operation.
Washer will not agitate or spin with the lid open.
■ Is there excessive sudsing? Always measure detergent.
Follow manufacturer’s directions. If you have very soft water,
you might need to use less detergent.
Wash/Rinse temperature
■ Are the hot and cold water inlet hoses reversed? See
“Connect Inlet Hoses.”
■ Are you washing many loads? As your frequency of loads
washed increases, the water temperature may decrease for
hot and warm temperatures. This is normal.
■ Did you use the right cycle for the load being washed?
Use cycles with shorter wash times and low wash and spin
speeds (if available) to reduce wrinkling, tangling and twisting.
■ Did you overload the washer? The wash load must be
balanced and not overloaded. Loads should move freely
during washing to reduce wrinkling, tangling and twisting.
■ Was the wash water warm enough to relax wrinkles? If
safe for the load, use warm or hot wash water. Use cold rinse
water.
■ Are the hot and cold water hoses reversed? Check to be
sure the hot and cold water hoses are connected to the right
faucets. A hot rinse followed by spin will cause wrinkling. See
the Installation Instructions.
■ Did you wrap items around the agitator? Drop items loosely
into the washer. Do not wrap items around the agitator.
Stains, gray whites, dingy colors
■ Did you properly sort the load? Dye transfer can occur when
mixing whites and colors in a load. Sort dark clothes from
whites and lights.
■ Was the wash temperature too low? Use hot or warm
washes if safe for the load. Make sure your hot water system
is adequate to provide a hot water wash.
■ Did you use enough detergent, or do you have hard
water? Use more detergent for washing heavy soils in cold or
hard water.
■ Are the hot and cold water hoses reversed? Check to be
sure the hot and cold water hoses are connected to the right
faucets. See the Installation Instructions.
■ Did you follow the manufacturer’s directions when adding
detergent and fabric softener? Measure detergent and
fabric softener. Use enough detergent to remove soil and hold
it in suspension. Dilute fabric softener and add to the rinse
portion of a cycle only. Do not drip fabric softener onto
clothes.
■ Is there above average iron (rust) in water? You may ne ed
to install an iron filter.
9
Page 10

Garments damaged
■ Were sharp items removed from pockets before washing?
Empty pockets, zip zippers, snap or hook fasteners before
washing to avoid snagging and tearing of load.
■ Were strings and sashes tied to avoid tangling? Straps and
strings can easily become entangled in the load, causing
strain on seams and tearing.
■ Were items damaged before washing? Mend rips and
broken threads in seams before washing.
TROUBLESHOOTING DRYER
First try the solutions suggested here and possibly avoid the cost of a service call...
Dryer Operation
■ Did you overload the washer? The wash load must be
balanced and not overloaded. Loads should move freely
during washing.
■ Did you add chlorine bleach properly? Do not pour chlorine
bleach directly onto load. Wipe up bleach spills. Undiluted
bleach will damage fabrics. Do not place load items on top of
the bleach dispenser when loading and unloading the washer
(on some models). Do not use more than than the
manufacturer's recommended amount for a full load.
■ Did you follow the manufacturer’s care label instructions?
Dryer will not run
■ Has a household fuse blown, or has a circuit breaker
tripped? There may be 2 fuses or circuit breakers for the
dryer. Check that both fuses are intact and tight, or that both
circuit breakers have not tripped. Replace the fuse or reset the
circuit breaker. If the problem continues, call an electrician.
■ Is the correct power supply available? Electric dryers
require 240 volt power supply. Check with a qualified
electrician.
■ Was a regular fuse used? Use a time-delay fuse.
■ Is the dryer door firmly closed?
■ Was the PUSH TO START DRYER button firmly pressed?
No heat
■ Has a household fuse blown, or has a circuit breaker
tripped? The drum may be turning, but you may not have
heat. Electric dryers use 2 fuses or circuit breakers. Replace
the fuse or reset the circuit breaker. If a problem continues,
call an electrician.
■ For gas dryers, is the valve open on the supply line?
Unusual sounds
■ Has the dryer had a period of non-use? If the dryer hasn’t
been used for a while, there may be a thumping sound during
the first few minutes of operation.
■ Is a coin, button, or paper clip caught between the drum
and front or rear of the dryer? Check the front and rear
edges of the drum for small objects. Clean out pockets before
laundering.
■ Is it a gas dryer? The gas valve clicking is a normal operating
sound.
■ Are the four legs installed, and is the dryer level front to
back and side to side? The dryer may vibrate if not properly
installed. See the Installation Instructions.
■ Is the clothing knotted or balled up? When balled up, the
load will bounce, causing the dryer to vibrate. Separate the
load items and restart the dryer.
Timer does not noticeably advance
■ Is the dryer set to Timed or Air Dry?
The timer moves slowly and continuously for the time setting.
■ Is the dryer set to Automatic Drying?
The timer moves only when the clothing is mostly dry.
10
Page 11
Dryer Results
Clothes are not drying satisfactorily, drying times are too
long, or load is too hot
■ Is the lint screen clogged with lint? Lint screen should be
cleaned before each load.
WARNING
Fire Hazard
Use a heavy metal vent.
Do not use a plastic vent.
Do not use a metal foil vent.
Failure to follow these instructions can result in death
or fire.
■ Is the dryer located in a closet? Closet doors must have
ventilation openings at the top and bottom of the door. A
minimum of 1" (2.5 cm) of airspace is recommended for the
front of the dryer, and, for most installations, the rear of the
dryer requires 5" (12.7 cm). See the Installation Instructions.
■ Has an air dry cycle been selected? Select the right cycle
for the types of garments being dried.
■ Is the load too large and heavy to dry quickly? Separate the
load to tumble freely.
Lint on load
■ Is the lint screen clogged? Lint screen should be cleaned
before each load.
Stains on load or drum
■ Was dryer fabric softener properly used? Add dryer fabric
softener sheets at the beginning of the cycle. Fabric softener
sheets added to a partially dried load can stain your garments.
Drum stains are caused by dyes in clothing (usually blue
jeans). This will not transfer to other clothing.
■ Is the exhaust vent or outside exhaust hood clogged with
lint, restricting air movement? Run the dryer for
5-10 minutes. Hold your hand under the outside exhaust hood
to check air movement. If you do not feel air movement, clean
exhaust system of lint or replace exhaust vent with heavy
metal or flexible metal vent. See the Installation Instructions.
■ Are fabric softener sheets blocking the grille? Use only one
fabric softener sheet, and use it only once.
■ Is the exhaust vent the correct length? Check that the
exhaust vent is not too long or has too many turns. Long
venting will increase drying times. See the Installation
Instructions.
■ Is the exhaust vent diameter the correct size? Use
4" (10.2 cm) diameter vent material.
WARNING
Explosion Hazard
Keep flammable materials and vapors, such as
gasoline, away from dryer.
Place dryer at least 18 inches (46 cm) above the floor
for a garage installation.
Failure to do so can result in death, explosion, or fire.
Loads are wrinkled
■ Was the load removed from dryer at the end of the cycle?
■ Was the dryer overloaded? Dry smaller loads that can
tumble freely.
Odors
■ Have you recently been painting, staining or varnishing in
the area where your dryer is located? If so, ventilate the
area. When the odors or fumes are gone from the area, rewash
and dry the clothing.
■ Is the electric dryer being used for the first time? The new
electric heating element may have an odor. The odor will be
gone after the first cycle.
■ Is the dryer located in a room with temperature below
45ºF (7ºC)? Proper operation of dryer cycles requires
temperatures above 45ºF (7ºC).
11
Page 12

MAYTAG CORPORATION MAJOR APPLIANCE
WARRANTY
ONE YEAR LIMITED WARRANTY
For one year from the date of purchase, when this major appliance is operated and maintained according to instructions attached to or
furnished with the product, Maytag Corporation or Maytag Limited (hereafter “Maytag”) will pay for Factory Specified Parts and repair
labor to correct defects in materials or workmanship. Service must be provided by a Maytag designated service company. This limited
warranty applies only when the major appliance is used in the country in which it was purchased.
ITEMS MAYTAG WILL NOT PAY FOR
1. Service calls to correct the installation of your major appliance, to instruct you how to use your major appliance, to replace or repair
house fuses or to correct house wiring or plumbing.
2. Service calls to repair or replace appliance light bulbs, air filters or water filters. Those consumable parts are excluded from warranty
coverage.
3. Repairs when your major appliance is used for other than normal, single-family household use.
4. Damage resulting from accident, alteration, misuse, abuse, fire, flood, acts of God, improper installation, installation not in
accordance with electrical or plumbing codes, or use of products not approved by Maytag.
5. Any food loss due to refrigerator or freezer product failures.
6. Replacement parts or repair labor costs for units operated outside the United States or Canada.
7. Pickup and delivery. This major appliance is designed to be repaired in the home.
8. Repairs to parts or systems resulting from unauthorized modifications made to the appliance.
9. Expenses for travel and transportation for product service in remote locations.
10. The removal and reinstallation of your appliance if it is installed in an inaccessible location or is not installed in accordance with
published installation instructions.
11. Replacement parts or repair labor costs when the major appliance is used in a country other than the country in which it was
purchased.
DISCLAIMER OF IMPLIED WARRANTIES; LIMITATION OF REMEDIES
CUSTOMER'S SOLE AND EXCLUSIVE REMEDY UNDER THIS LIMITED WARRANTY SHALL BE PRODUCT REPAIR AS PROVIDED
HEREIN. IMPLIED WARRANTIES, INCLUDING WARRANTIES OF MERCHANTABILITY OR FITNESS FOR A PARTICULAR PURPOSE,
ARE LIMITED TO ONE YEAR OR THE SHORTEST PERIOD ALLOWED BY LAW. MAYTAG SHALL NOT BE LIABLE FOR INCIDENTAL
OR CONSEQUENTIAL DAMAGES. SOME STATES AND PROVINCES DO NOT ALLOW THE EXCLUSION OR LIMITATION OF
INCIDENTAL OR CONSEQUENTIAL DAMAGES, OR LIMITATIONS ON THE DURATION OF IMPLIED WARRANTIES OF
MERCHANTABILITY OR FITNESS, SO THESE EXCLUSIONS OR LIMITATIONS MAY NOT APPLY TO YOU. THIS WARRANTY GIVES
YOU SPECIFIC LEGAL RIGHTS AND YOU MAY ALSO HAVE OTHER RIGHTS, WHICH VARY FROM STATE TO STATE OR PROVINCE
TO PROVINCE.
Outside the 50 United States and Canada, this warranty does not apply. Contact your authorized Maytag dealer to determine if another
warranty applies.
If you need service, first see the “Troubleshooting” section of the Use & Care Guide. After checking “Troubleshooting,” additional help
can be found by checking the “Assistance or Service” section or by calling Maytag. In the U.S.A., call 1-800-688-9900. In Canada, call
1-800-807-6777. 9/06
Replacement Parts
If you need to order replacement parts, we recommend that you
only use Factory Specified Parts. These parts will fit right and
work right because they are made with the same precision used
to build every new Maytag
®
appliance.
To locate factory specified replacement parts in your area:
Call the Maytag Services, LLC, Customer Assistance at
1-800-688-9900 or your nearest designated service center. In
Canada, call 1-800-807-6777.
For information on how to contact Maytag Services, LLC, please
see front page of this document
.
12
Page 13

INSTRUCCIONES PARA EL USUARIO LA
LAVADORA/SECADORA
Ayuda o servicio técnico
Si necesita ayuda o servicio técnico, vea primero la sección
“Solución de Problemas”. Puede obtener asistencia adicional
llamando a nuestro Maytag Services, LLC Customer Assistance al
1-800-688-9900 desde cualquier lugar de los EE.UU., o escriba a:
Maytag Services, LLC
ATTN: CAIR
P.O. Box 2370
Cleveland, TN 37320-2370
Favor de incluir un número telefónico de día en su
correspondencia.
Guarde este libro y su comprobante de compra juntos para
referencia futura. Usted deberá proporcionar evidencia de la
compra o una fecha de instalación para obtener servicio bajo
la garantía.
®
Center
SEGURIDAD DE LA LAVADORA/SECADORA
Su seguridad y la seguridad de los demás es muy importante.
Hemos incluido muchos mensajes importantes de seguridad en este manual y en su electrodoméstico. Lea y obedezca siempre
todos los mensajes de seguridad.
Este es el símbolo de advertencia de seguridad.
Este símbolo le llama la atención sobre peligros potenciales que pueden ocasionar la muerte o una lesión a
usted y a los demás.
Todos los mensajes de seguridad irán a continuación del símbolo de advertencia de seguridad y de la palabra
“PELIGRO” o “ADVERTENCIA”. Estas palabras significan:
Escriba la siguiente información acerca de su electrodoméstico
para ayudarle mejor a obtener ayuda o servicio técnico si alguna
vez llegara a necesitarlo. Deberá tener a mano el número
completo del modelo y de la serie. Podrá encontrar esta
información en la etiqueta con el número del modelo y de la serie,
en la cavidad interna superior de la puerta de la secadora.
Nombre del distribuidor _________________________________________
Número de serie ________________________________________________
Dirección_______________________________________________________
Número de teléfono _____________________________________________
Número del modelo _____________________________________________
Fecha de compra _______________________________________________
PELIGRO
ADVERTENCIA
Todos los mensajes de seguridad le dirán el peligro potencial, le dirán cómo reducir las posibilidades de sufrir una lesión y lo que
puede suceder si no se siguen las instrucciones.
Si no sigue las instrucciones de inmediato, usted puede
morir o sufrir una lesión grave.
Si no sigue las instrucciones, usted puede morir o sufrir
una lesión grave.
13
Page 14

ADVERTENCIA: Para su seguridad, la información en este manual debe ser observada
para minimizar el riesgo de incendio o explosión, o para prevenir daños a propiedades,
heridas o la muerte.
– No almacene o use gasolina u otros líquidos y vapores inflamables cerca de éste u otro
aparato electrodoméstico.
– PASOS QUE USTED DEBE SEGUIR SI HUELE A GAS:
No trate de encender ningún aparato electrodoméstico.
•
No toque ningún interruptor eléctrico; no use ningún teléfono en su edificio.
•
Desaloje a todos los ocupantes del cuarto, edificio o área.
•
Llame inmediatamente a su proveedor de gas desde el teléfono de un vecino.
•
Siga las instrucciones de su proveedor de gas.
Si usted no puede comunicarse con su proveedor de gas, llame al departamento
•
de bomberos.
– La instalación y el servicio deben ser efectuados por un instalador calificado, una
agencia de servicio o por el proveedor de gas.
INSTRUCCIONES IMPORTANTES DE SEGURIDAD
A fin de reducir el riesgo de incendio, descarga eléctrica o de daño a las personas que usen
ADVERTENCIA:
la lavadora/secadora, deben seguirse las precauciones básicas, incluidas las siguientes:
■
Lea todas las instrucciones antes de usar la
lavadora/secadora.
■
No coloque los objetos expuestos a aceite para cocinar en
su secadora. Los objetos expuestos a aceites para cocinar
pueden contribuir a una reacción química que podría
causar que la ropa se inflame.
■
No lave o seque artículos que hayan sido previamente
limpiados, lavados, remojados o humedecidos con
gasolina, solventes de limpieza en seco, u otras sustancias
inflamables o explosivas ya que éstas emanan vapores que
podrían encenderse o causar una explosión.
■
No agregue gasolina, solventes para lavar en seco, u otras
sustancias inflamables o explosivas al agua de lavado.
Estas sustancias emanan vapores que podrían encenderse
o causar una explosión.
■
No permita que los niños jueguen encima o dentro de la
lavadora/secadora. Es necesario una supervisión
cuidadosa de los niños cada vez que se use la
lavadora/secadora cerca de ellos.
■
Antes de poner la lavadora/secadora fuera de servicio o
desecharla, quite las puertas a los compartimientos de la
lavadora/secadora.
■
No introduzca las manos en la lavadora/secadora cuando
la tina, el agitador, o el tambor están movimiento.
■
No instale o almacene esta lavadora/secadora donde esté
expuesta al agua o a la intemperie.
■
No trate de jugar con los controles.
■
Limpie el filtro de pelusa antes o después de cada carga
de ropa.
GUARDE ESTAS INSTRUCCIONES
■
En ciertas condiciones, puede generarse gas hidrógeno en
un sistema de agua caliente que no se haya usado por dos
semanas o un período mayor. EL GAS HIDRÓGENO ES
EXPLOSIVO. Si no se ha usado el agua caliente durante
dicho período, antes de usar la lavadora, abra todos los
grifos de agua caliente y deje que corra el agua por varios
minutos. Esto liberará todo el gas hidrógeno que se haya
acumulado. Debido a la inflamabilidad de dicho gas, no fume
ni use una llama abierta durante este lapso.
■
No repare o reemplace ninguna pieza de la
lavadora/secadora ni trate de repararla a menos que esto se
recomiende específicamente en el Manual de Uso y Cuidado
o en instrucciones de reparación publicadas para el usuario
que usted comprenda y sólo si cuenta con la experiencia
necesaria para llevar a cabo dicha reparación.
■
No utilice suavizante de telas o productos para eliminar la
estática de prendas a menos que lo recomiende el
fabricante del suavizante de telas o del producto en uso.
■
No utilice calor para secar prendas que contengan hule
espuma o materiales con textura de hule similar.
■
Mantenga el área alrededor de la abertura de ventilación y
las áreas adyacentes a esta abertura sin pelusa, polvo o
suciedad.
■
La parte interior de la máquina y el ducto de escape se
deben limpiar periódicamente. Esta limpieza la debe llevar a
cabo un reparador calificado.
■
Para obtener información respecto a los requisitos de
conexión a tierra, refiérase a los “Requisitos Eléctricos”.
14
Page 15

Revisión de su ventilación
Su secadora debe de estar instalada y ventilada adecuadamente
para obtener una eficiencia máxima de secado y acortar el tiempo
de secado. Use los espacios mínimos recomendados para la
instalación que se encuentran en las Instrucciones de instalación.
Vea las Instrucciones de instalación para más información.
ADVERTENCIA
Peligro de Incendio
Use un ducto de escape de metal pesado.
No use un ducto de escape de plástico.
No use un ducto de escape de aluminio.
No seguir estas instrucciones puede ocasionar
la muerte o incendio.
La secadora no estará bajo garantía si no está instalada y
ventilada adecuadamente. Es importante contar con una
ventilación adecuada de su secadora para obtener resultados de
secado satisfactorios. Para obtener más información, vea las
Instrucciones de instalación.
NOTA: Las visitas de servicio que resulten necesarias debido a
una ventilación inadecuada irán por cuenta del cliente, ya sea que
se trate de una instalación pagada o una hecha por el cliente
mismo.
1. No utilice un ducto de escape de plástico o de aluminio.
Utilice un ducto de escape de metal o de metal flexible de 4"
(10,2 cm). No tuerza o prense el ducto de escape de metal
flexible. El ducto de escape debe de estar completamente
extendido para permitir el flujo del aire de ventilación. Revise
el ducto de escape después de la instalación. Vea las
Instrucciones de instalación para los requerimientos
necesarios para la longitud del ducto.
4"
10,2 cm
2. Utilice una capota de ventilación de 4" (10,2 cm).
3. Utilice el camino más directo posible al instalar el ducto.
Bien Mejor
4. Utilice abrazaderas para sellar todas las juntas. No use cinta
adhesiva para conductos, tornillos ni otros dispositivos de
fijación que se extiendan dentro del ducto de escape, para
fijar el ducto.
5. Limpie el ducto de escape por lo menos cada 2 años o
periódicamente según el uso que le dé a la secadora o
cuando instale la secadora en un nuevo lugar. Cuando termine
la limpieza revise por última vez el producto, asegurándose de
seguir las Instrucciones de instalación que acompañan a su
secadora.
15
Page 16

USO DE LA LAVADORA
Cómo cargar
Para estas cargas de volumen completo recomendadas, coloque el control de tamaño de carga (LOAD SIZE) a la posición de la carga
más grande.
LAVADORAS DE CAPACIDAD GRANDE
Ropa de trabajo
pesada
2pantalones
3 camisas
3pantalones de
mezclilla
1overol
Carga mixta
2 sábanas
dobles
4 fundas
6 camisetas
6shorts
2 camisas
2blusas
6 pañuelos
Toallas
8 toallas de baño
8 toallas de mano
10 toallas faciales
1 tapete de baño
Puesta en marcha de su lavadora
ADVERTENCIA
Peligro de Incendio
Nunca coloque en la lavadora artículos que estén
humedecidos con gasolina o cualquier otro
líquido inflamable.
Ninguna lavadora puede eliminar completamente
el aceite.
No seque ningún artículo que haya tenido alguna vez
cualquier tipo de aceite (incluyendo aceites de cocina).
No seguir estas instrucciones puede ocasionar
la muerte, explosión o incendio.
1. Mida el detergente y viértalo en la lavadora. Agregue
blanqueador en polvo o blanqueador líquido no decolorante,
si lo desea. Coloque en la lavadora la ropa seleccionada de
modo que quede suelta.
■ Coloque las prendas de manera uniforme para mantener
el equilibrio de la lavadora. Mezcle artículos grandes con
artículos pequeños. Las prendas deben moverse con
facilidad en el agua de lavado. El sobrecargar la lavadora
puede causar una limpieza insatisfactoria.
2. (OPCIONAL) Agregue el blanqueador líquido con cloro.
Mida siempre el blanqueador líquido con cloro. No lo haga al
cálculo. Nunca use más de 250 ml para una carga completa
de ropa. Siga las instrucciones del fabricante para un uso
seguro. Use una taza con un pico vertedor para evitar
derrames.
Deje que la lavadora se llene y comience a agitar la carga.
Agregue el blanqueador durante el ciclo de lavado de modo
que pueda eliminarse durante el ciclo de enjuague. Vierta el
blanqueador alrededor del agitador, no directamente sobre las
prendas.
Artículos delicados
2camisolas
4fondos
6 piezas de ropa
interior
2juegos de
pijamas
1 vestido de niño
■ Siga las indicaciones de cuidado mencionadas en las
etiquetas de las prendas. No use blanqueador líquido con
cloro en artículos de lana, seda, spandex, acetato o
algunas fibras resistentes al fuego.
■ Siempre que emplee blanqueador líquido con cloro en el
remojo, agregue detergente al agua de remojo.
NOTA: El blanqueador sin diluir daña cualquier tejido que
toque. Estos daños lucen como rasgaduras, agujeros, roturas
o decoloraciones y quizás no aparezcan hasta después de
varias lavadas.
3. (OPCIONAL) Agregue el suavizante líquido de telas.
NOTA: No derrame o gotee el suavizante de telas sobre las
prendas. El suavizante de telas sin diluir puede manchar la
tela. Siempre diluya el suavizante de telas con agua tibia. El
exceso de suavizante de telas puede quitar la capacidad de
absorción de algunos productos (pañales y toallas). Si sucede
esto, no lo use o use menos en cada carga.
Estilo 1: Con depósito del suavizante líquido de telas (en
algunos modelos)
■ Use solamente suavizante de telas líquido en este
depósito. Vierta el suavizante líquido de telas en el
depósito. El suavizante se incorpora automáticamente
durante la etapa de enjuague del ciclo. Diluya el
suavizante líquido de telas llenando el depósito con agua
tibia hasta que el líquido llegue a la cruceta en la abertura
del depósito.
Estilo 2: Sin depósito del suavizante líquido de telas (en
algunos modelos)
■ Agregue el suavizante de telas que ha sido diluido con ½ a
1 taza (125 a 250 mL) de agua tibia SOLAMENTE en el
enjuague final.
Planchado permanente
1 sábana de
tamaño matrimonial
1mantel
1vestido
1blusa
2pantalones
3camisas
2 fundas
Tejidos de
punto
2pantalones
2blusas
4 camisas
4tops
2vestidos
16
Page 17

4. Cierre la tapa de la lavadora. La lavadora no agita ni exprime
con la tapa abierta.
5. Gire el selector al ajuste adecuado para la carga y el tipo de
tela que va a lavar. Usted puede cambiar el tamaño de la
carga después de que haya empezado a llenarse la lavadora
girando el selector a un ajuste diferente. Nivel de agua
(WATER LEVEL).
6. Fije el selector temperatura (TEMPERATURE) al ajuste
adecuado para el tipo de tela y suciedad que va a lavar. Use el
agua más caliente que la tela pueda resistir. Siga las
instrucciones de la etiqueta de las prendas.
NOTA: En temperaturas de agua inferiores a 60°F (15,6°C), los
detergentes no se disuelven bien. Además puede ser difícil
quitar la suciedad. Algunas telas pueden retener las arrugas
del uso y aumentar la formación de motitas (la formación de
pequeñas bolitas en la superficie de las prendas).
USO DE LA SECADORA
Puesta en marcha de su secadora
7. Empuje la perilla de control de ciclos y gírela en la dirección
de las manecillas del reloj hasta el ciclo de lavado que desee.
Reduzca el tiempo de lavado cuando use un ajuste para
cargas pequeñas. Jale la perilla del control de ciclos para
poner la lavadora en marcha.
Para detener o volver a poner en marcha su lavadora:
■ Para detener la lavadora en cualquier momento, empuje la
perilla de control de ciclos.
■ Para volver a poner en marcha la lavadora, cierre la tapa
(si está abierta) y jale la perilla de control de ciclos.
ADVERTENCIA
Peligro de Explosión
Mantenga los materiales y vapores inflamables, tales
como la gasolina, alejados de la secadora.
No seque ningún artículo que haya tenido alguna vez
cualquier substancia inflamable (aún después de
lavarlo).
No seguir estas instrucciones puede ocasionar
la muerte, explosión o incendio.
Antes de usar la secadora, limpie el tambor de la misma con un
paño húmedo para quitar el polvo que se acumuló durante el
almacenaje y envío.
1. Limpie el filtro de pelusa antes de cada carga. Vea “Limpieza
del filtro de pelusa”.
2. Coloque la ropa en la secadora de modo suelto y cierre la
puerta. No llene en exceso la secadora. Deje suficiente
espacio para que la ropa rote con libertad.
3. Gire la perilla de Control de ciclos al ciclo recomendado para
el tipo de carga que se va a secar. Use el ajuste Ahorro de
energía (Energy Preferred Automatic Setting) para secar la
mayoría de las telas pesadas y de peso mediano.
4. (OPCIONAL) Su secadora puede tener una Señal de fin de
ciclo (END OF CYCLE SIGNAL). Esta señal es útil cuando se
sequen artículos que deben sacarse de la secadora tan
pronto como se detenga. La señal de fin de ciclo forma parte
del botón Inicio (Start) y se puede seleccionar. Gire el botón
PUSH TO START a Puesta en marcha (ON) u Apagado (OFF).
La señal sonará sólo cuando el selector se fije en ON.
5. Si desea, agregue una hoja de suavizante de telas. Siga las
instrucciones del paquete.
6. Oprima el botón de PUSH TO START.
ADVERTENCIA
Peligro de Incendio
Ninguna lavadora puede eliminar completamente
el aceite.
No seque ningún artículo que haya tenido alguna vez
cualquier tipo de aceite (incluyendo los aceites de
cocina).
Los artículos que contengan espuma, hule o plástico
deben secarse en un tendedero o usando un
Ciclo de Aire.
No seguir estas instrucciones puede ocasionar
la muerte o incendio.
Para detener y volver a poner en marcha
Usted puede detener su secadora en cualquier momento durante
un ciclo.
Para detener su secadora
Abra la puerta de la secadora o gire la perilla de Control de Ciclos
a OFF.
NOTA: La perilla de Control de Ciclos debe apuntar hacia el área
de Apagado cuando la secadora no está en uso.
Para volver a poner en marcha su secadora
Cierre la puerta. Seleccione un nuevo ciclo y temperatura (si lo
desea). Oprima el botón de PUSH TO START.
17
Page 18

CUIDADO DE LA LAVADORA/SECADORA
Limpieza del lugar donde está la lavadora/
secadora
Mantenga el área donde está la lavadora/secadora despejada y
libre de artículos que pudieran obstruir el flujo de aire para la
combustión y la ventilación.
ADVERTENCIA
Peligro de Explosión
Mantenga los materiales y vapores inflamables,
tales como la gasolina, alejados de la secadora.
No seguir estas instrucciones puede ocasionar
la muerte, explosión o incendio.
Cómo limpiar su lavadora
Limpieza externa
Use un paño o una esponja suave y húmeda para limpiar
cualquier derrame, tales como los de detergente o blanqueador,
de la parte exterior de su lavadora. De vez en cuando, limpie el
exterior de su lavadora para que se vea como nueva.
Limpieza del interior
Limpie el interior de su lavadora mezclando 1 taza (250 mL) de
blanqueador con cloro y 2 tazas o tapas (500 mL) de detergente.
Vierta esta mezcla en su lavadora y deje funcionar su lavadora
durante un ciclo completo, utilizando agua caliente. Repita este
proceso si fuera necesario.
NOTA: Quite los depósitos endurecidos de agua usando
solamente productos de limpieza cuya etiqueta indica que
pueden emplearse en lavadoras.
Limpieza del depósito del suavizante líquido de telas (en
algunos modelos):
1. Quite el depósito agarrando la parte superior con las manos y
apretándolo, mientras empuja hacia arriba con los pulgares.
2. Enjuague el depósito debajo del grifo de agua, y luego vuelva
a colocarlo.
NOTA: Si su modelo tiene un depósito de suavizante líquido de
telas, no lave la ropa si lo ha quitado. No agregue detergente o
blanqueador en este depósito ya que es para uso exclusivo del
suavizante líquido de telas.
Mangueras de entrada de agua
Reemplace las mangueras de entrada de agua después de
5 años de uso para reducir el riesgo de fallas. Revise
periódicamente y cambie las mangueras de entrada si se hallan
protuberancias, torceduras, cortes, desgaste o pérdidas de agua.
Cuando reemplace sus mangueras de entrada de agua, anote la
fecha de reposición en la etiqueta con un marcador permanente.
Limpieza del filtro de pelusa
Limpie el filtro de pelusa antes de cada carga. Un filtro obstruido
con pelusa puede aumentar el tiempo de secado.
IMPORTANTE:
■ No ponga a funcionar la secadora con el filtro de pelusa flojo,
dañado, obstruido o sin él. El hacerlo puede causar un
sobrecalentamiento y dañar tanto la secadora como las
prendas.
■ Si al quitar la pelusa del filtro ésta cae dentro de la secadora,
revise la capota de ventilación y quite la pelusa.
Limpieza de cada carga
Estilo 1:
1. El filtro de pelusa está ubicado dentro de la secadora en la
pared posterior. Quite el filtro de pelusa y la cubierta.
2. Separe la cubierta y el filtro apretando el filtro y jalando la
cubierta al mismo tiempo.
3. Quite la pelusa enrollándola con los dedos. No enjuague o
lave el filtro para quitar la pelusa. La pelusa mojada es difícil
de sacar.
4. Vuelva a juntar el filtro y la cubierta y empújelos firmemente
hasta que queden en su lugar.
Estilo 2:
1. El filtro de pelusa está ubicado dentro de la secadora en la
cavidad frontal de la puerta. Jale el filtro de pelusa
directamente hacia arriba.
2. Quite la pelusa enrollándola con los dedos. No enjuague o
lave el filtro para quitar la pelusa. La pelusa mojada es difícil
de sacar.
3. Empuje el filtro firmemente hasta que quede en su lugar.
Limpieza periódica
Los residuos de detergente y suavizante de telas pueden
acumularse en el filtro de pelusa. Esta acumulación puede dar
lugar a períodos más prolongados de secado de su ropa, o
causar que la secadora se detenga antes de que su ropa esté
completamente seca. El filtro está probablemente obstruido si la
pelusa se cae del mismo.
Limpie el filtro de pelusa (como se detalla a continuación) cada
6 meses o con más frecuencia si se obstruye debido a la
acumulación de residuos.
1. Quite la pelusa del filtro enrollándola con sus dedos.
2. Moje ambos lados del filtro de pelusa con agua caliente.
3. Moje un cepillo de nylon con agua caliente y detergente
líquido. Talle el filtro de pelusa con el cepillo para quitar la
acumulación de residuos.
4. Enjuague el filtro con agua caliente.
5. Seque minuciosamente el filtro de pelusa con una toalla
limpia. Vuelva a colocar el filtro en la secadora.
18
Page 19

Limpieza del interior de la secadora
Para limpiar el tambor de la secadora
1. Aplique un limpiador doméstico no inflammable al área
manchada del tambor y frote con un paño suave hasta que
desaparezca la mancha.
2. Limpie el tambor minuciosamente con un paño húmedo.
3. Seque una carga de ropa limpia o toallas para secar el tambor.
NOTA: Las prendas de colores que destiñen tales como
mezclillas o artículos de algodón de colores vivos, pueden teñir el
interior de la secadora. Estas manchas no dañan su secadora ni
mancharán las cargas futuras de ropa. Seque los artículos de
colores que destiñen al revés para evitar la transferencia del tinte.
Para volver a usar la lavadora/secadora
1. Deje correr el agua por los tubos y las mangueras.
2. Vuelva a conectar las mangueras de entrada de agua.
3. Abra ambos grifos de agua.
4. En los EE.UU.
ADVERTENCIA
Eliminación de pelusa acumulada
Del interior del gabinete de la secadora
Según el uso de la secadora, se debe quitar la pelusa cada
2 años, o con más frecuencia. La limpieza deberá efectuarla una
persona calificada.
Del interior del ducto de escape
Según el uso de la secadora, se debe quitar la pelusa cada
2 años, o con más frecuencia.
Cuidado durante las vacaciones, el
almacenamiento y las mudanzas
Instale y almacene su lavadora/secadora en un lugar donde no se
congele. Debido a que queda algo de agua en las mangueras, la
congelación de ésta puede dañar su lavadora/secadora. Si va a
almacenar o a mover su lavadora/secadora durante una
temporada de invierno riguroso, acondiciónela para el invierno.
Cuidado durante las vacaciones o en períodos de desuso
Ponga a funcionar su lavadora/secadora sólo cuando usted esté
en casa. Si va a salir de vacaciones o no va a usar su lavadora/
secadora por un tiempo prolongado, usted deberá:
■ Desenchufar la lavadora/secadora o desconectar el
suministro de energía.
■ Interrumpir el suministro de agua a la lavadora. Esto ayuda a
evitar inundaciones accidentales (debido a aumentos en la
presión del agua) en ausencia suya.
Para acondicionar su centro de lavandería para el invierno
1. Cierre ambos grifos de agua.
2. Desconecte y elimine el agua de las mangueras de admisión
de agua.
3. Vierta un 1 cuarto (1 L) de anticongelante tipo R.V. en la
canasta.
4. Ponga a funcionar la lavadora en un ajuste de desagüe y
exprimido por 30 segundos aproximadamente para mezclar el
anticongelante y el agua.
5. Desenchufe la lavadora/secadora o desconecte el suministro
de energía.
Peligro de Choque Eléctrico
Conecte a un contacto de pared de conexión a tierra de
3 terminales.
No quite la terminal de conexión a tierra.
No use un adaptador.
No use un cable eléctrico de extensión.
No seguir estas instrucciones puede ocasionar
la muerte, incendio o choque eléctrico.
■ Enchufe la lavadora/secadora o reconecte el suministro de
energía.
5. Ponga a funcionar la lavadora por un ciclo completo con
1 taza (250 mL) de detergente para limpiar el anticongelante.
Para transportar la lavadora/secadora
1. Cierre ambos grifos de agua.
2. Desconecte y elimine el agua de las mangueras de admisión
de agua.
3. Si va a mover el centro de lavandería durante una temporada
de invierno riguroso, coloque un cuarto (1 L) de
anticongelante tipo R.V. en la canasta. Ponga a funcionar la
lavadora en un ajuste de exprimido por unos 30 segundos
para mezclar el anticongelante y el agua.
4. Desconecte y elimine el agua del sistema de desagüe.
5. Desenchufe la lavadora/secadora o desconecte la energía.
Desconecte el cableado si la lavadora/secadora tiene
cableado directo.
6. Desconecte el ducto de escape.
7. Lave el filtro de pelusa.
8. Cerciórese de que las patas niveladoras estén seguras.
9. Coloque las mangueras de entrada en la canasta.
10. Cuelgue el cable eléctrico y la manguera de desagüe sobre el
borde y hacia adentro de la canasta.
11. Use cinta adhesiva protectora para asegurar la tapa de la
lavadora y la puerta de la secadora.
Cómo reinstalar su lavadora/secadora
1. Siga las “Instrucciones de instalación” para ubicar, nivelar y
conectar la lavadora/secadora.
2. Ponga a funcionar la lavadora en un ciclo completo con 1 taza
o tapa llena de detergente para limpiar la lavadora y remover
el anticongelante, de haberlo usado.
19
Page 20

SOLUCIÓN DE PROBLEMAS DE LA LAVADORA
En primer lugar, pruebe las soluciones sugeridas aquí y posiblemente se evite el gasto
de una llamada de servicio técnico…
Lavadora y componentes
Ruidosos, vibrantes, desequilibrados
■ ¿Está el piso combado, doblado o desnivelado? Un piso
que está combado o desnivelado puede contribuir a que la
lavadora haga ruido y vibre. Los sonidos se pueden reducir
colocando una madera laminada de ¾" (1,9 cm) debajo de la
lavadora. Vea las Instrucciones de instalación.
■ ¿Está nivelada la lavadora/secadora? La lavadora/secadora
debe estar nivelada. Vea las Instrucciones de instalación.
■ ¿Está balanceada la carga? Distribuya la carga
uniformemente en la canasta de la lavadora y asegúrese de
que la altura de la carga no supere la línea superior de orificios
de la canasta.
■ ¿Ha quitado por completo el fleje amarillo con chavetas?
Vea las Instrucciones de instalación.
■ ¿Están cambiando de velocidad los engranajes después
del desagüe y antes del exprimido, o está la parte superior
del agitador haciendo chasquidos durante el lavado?
Estos ruidos de la lavadora son normales.
■ ¿La lavadora produce un gorgoteo o zumbido? Cuando la
lavadora desagua, la bomba generará un zumbido continuo
con sonidos de gorgoteo periódicos a medida que se quitan
las últimas cantidades de agua. Esto es normal.
■ La canasta de la lavadora se mueve durante el lavado.
Esto es normal.
Pierde agua
■ ¿Están ajustadas las mangueras de llenado?
■ ¿Están debidamente colocadas las empaquetaduras de
las mangueras de llenado? Controle ambos extremos de
cada manguera. Vea las Instrucciones de instalación.
■ ¿Se ha instalado debidamente la manguera de desagüe?
Se debe fijar la manguera de desagüe al tubo de desagüe o a
la tina de lavadero. Vea las Instrucciones de instalación.
■
¿Está obstruido el lavadero o el desagüe?
tubo de desagüe deben tener la capacidad para desplazar
17 galones (64 L) de agua por minuto. Si están obstruidos o
lentos, el agua puede subir y salir por el tubo de desagüe o el
lavadero. Revise la plomería de la casa (tinas de lavadero, grifos,
tubo de desagüe, tuberías de agua) y fíjese si hay fugas de agua.
■ ¿Se está salpicando el agua fuera del aro del tambor?
Centre el tambor antes de poner la lavadora en marcha.
■ ¿Se está salpicando el agua fuera de la carga? Distribuya
la carga uniformemente en la canasta de la lavadora y
asegúrese de que la altura de la carga no supere la línea
superior de orificios de la canasta. El llenado o los enjuagues
por rocío pueden salpicar fuera de la carga.
El lavadero y el
Depósito tapado (en algunos modelos)
■
¿Ha seguido las instrucciones del fabricante cuando agregó
el suavizante de telas en el depósito (en algunos modelos)?
Mida el suavizante de telas y viértalo cuidadosamente en el
depósito. Limpie todos los derrames. Diluya el suavizante de
telas en el depósito del suavizante de telas.
Funcionamiento de la lavadora
La lavadora no se pone en marcha, no llena, no enjuaga
o no agita; la lavadora se detiene
ADVERTENCIA
Peligro de Choque Eléctrico
Conecte a un contacto de pared de conexión a tierra de
3 terminales.
No quite la terminal de conexión a tierra.
No use un adaptador.
No use un cable eléctrico de extensión.
No seguir estas instrucciones puede ocasionar
la muerte, incendio o choque eléctrico.
■ ¿Está el cable eléctrico enchufado en un tomacorriente de
3 terminales con conexión a tierra? Conecte a un contacto
de pared de conexión a tierra de 3 terminales.
■ ¿Está usando un cable eléctrico de extensión? No use un
cable eléctrico de extensión.
■ ¿Está el indicador de la perilla del control de ciclos
debidamente alineado con un ciclo? Gire la perilla de
control de ciclos ligeramente a la derecha y jálela para poner
en marcha.
■ ¿Están obstruidos los filtros de la válvula de entrada del
agua? Cierre el agua y quite las mangueras de entrada de la
lavadora. Saque cualquier película o partículas que se hayan
acumulado. Vuelva a abrir las mangueras, abra el agua y
revise si hay fugas de agua.
■ ¿Están abiertos los grifos del agua caliente y del agua
fría? Abra el agua.
■ ¿Está retorcida la manguera de entrada del agua?
Enderece las mangueras.
■ ¿Parece que el nivel del agua está demasiado bajo, o
parece que la lavadora no se llena por completo? La parte
superior del agitador está mucho más alta que el nivel más
alto del agua. Esto es normal y es necesario para que la ropa
se mueva libremente.
20
Page 21

■ ¿Hay un fusible de la casa fundido o se disparó el
cortacircuitos? Reemplace el fusible o reposicione el
cortacircuitos. Si el problema continúa, llame a un electricista.
■ ¿Está la lavadora en una pausa normal en el ciclo? La
lavadora hace una pausa por unos 2 minutos durante ciertos
ciclos. Deje continuar el ciclo. Algunos ciclos presentan
períodos de agitación y remojo.
■ ¿Está sobrecargada la lavadora? Lave cargas más
pequeñas.
■ ¿Está abierta la tapa? La tapa debe estar cerrada durante el
funcionamiento. La lavadora no agita ni exprime con la tapa
abierta.
La lavadora no desagua ni exprime, el agua queda en la
lavadora
■ ¿Está obstruida la manguera de desagüe, o el extremo de
la manguera de desagüe está a más de 96" (244 cm) por
encima del piso? Vea las Instrucciones de instalación.
■ ¿Está abierta la tapa? La tapa debe estar cerrada durante el
funcionamiento. La lavadora no agita ni exprime con la tapa
abierta.
■ ¿Hay demasiada espuma? Siempre mida el detergente. Siga
las indicaciones del fabricante. Si tiene agua muy suave,
quizás necesite menos detergente.
La lavadora continúa llenando o desaguando, el ciclo
parece estar atascado
■ ¿Está la parte superior de la manguera de desagüe más
baja que las perillas de control en la lavadora? La parte
superior de la manguera de desagüe debe estar a una altura
mínima de 39" (99 cm) del piso. Vea las Instrucciones de
instalación.
■ ¿La manguera de desagüe encaja de manera forzada en el
tubo vertical o está adherida con cinta al tubo vertical? La
manguera de desagüe debe estar floja pero debe encajar
bien. No selle la manguera de desagüe con cinta adhesiva. La
manguera necesita una abertura para el flujo de aire. Vea las
Instrucciones de instalación.
Cuidado de la ropa
Ropa demasiado mojada
■ ¿Ha empleado el ciclo correcto para la carga que está
lavando? Seleccione un ciclo con una velocidad más alta de
exprimido (si está disponible).
■ ¿Ha lavado una carga muy grande? Una gran carga
desequilibrada puede derivar en una menor velocidad de
exprimido y ropa húmeda al final del ciclo. Distribuya la carga
uniformemente y asegúrese de que la altura de la carga no
supere la línea superior de orificios de la canasta.
Residuos o pelusa en la ropa
■ ¿Ha separado la ropa adecuadamente? Separe las prendas
que sueltan pelusa (toallas, felpilla) de las que atraen pelusa
(pana, artículos sintéticos). También separe por color.
■ ¿Ha sobrecargado la lavadora? La carga de lavado debe
estar equilibrada y sin sobrecarga. La ropa debe moverse con
libertad. Si la lavadora está sobrecargada, la pelusa o el
detergente en polvo pueden quedar adheridos a las prendas.
Lave cargas más pequeñas.
■ ¿Ha seleccionado el nivel de agua correcto? El nivel de
agua debe ser el apropiado para el tamaño de la carga. La
carga debe quedar cubierta por agua.
■ ¿Ha usado suficiente detergente? Siga las indicaciones del
fabricante. Use suficiente detergente para mantener la pelusa
en el agua.
■ ¿Ha secado la ropa en el tendedero? Si es así, es posible
que quede algo de pelusa en la ropa. El movimiento del aire y
la rotación de la secadora quitan la pelusa de la carga.
■ ¿Se dejó papel o pañuelo de papel en los bolsillos?
■ ¿Está la temperatura del agua por debajo de los 60°F
(15,6ºC)? El agua de lavado con una temperatura inferior a
60°F (15,6ºC) quizás no disuelva por completo el detergente.
■ ¿Ha usado el tiempo del ciclo y la velocidad de agitación
apropiados para la carga? Otra manera de reducir la
formación de pelusa es reducir el tiempo (la duración) del
lavado y la velocidad de agitación.
Temperatura de Lavado/Enjuague
■ ¿Se han invertido las mangueras de entrada del agua
caliente y del agua fría? Vea “Conexión de las mangueras de
entrada”.
■ ¿Está lavando muchas cargas? A medida que aumente la
frecuencia de lavado de las cargas, es posible que disminuya
la temperatura de agua caliente y tibia. Esto es normal.
La ropa está arrugada, enroscada o enredada
■ ¿Ha descargado la lavadora con rapidez? Descargue la
lavadora tan pronto como se detenga.
■ ¿Ha empleado el ciclo correcto para la carga que está
lavando? Use ciclos con tiempos de lavado más cortos y
bajas velocidades de lavado y exprimido (si están disponibles)
para reducir las posibilidades de que la ropa se arrugue,
enrede o enrosque.
■ ¿Ha sobrecargado la lavadora? La carga de lavado debe
estar equilibrada y sin sobrecarga. Las prendas deben
moverse con facilidad durante el lavado para reducir las
posibilidades de que la ropa se arrugue, enrosque y enrede.
■ ¿Estaba el agua de lavado lo suficientemente tibia para
suavizar las arrugas? Si no va a afectar las prendas, use
agua tibia o caliente para el lavado. Para el enjuague, emplee
agua fría.
■ ¿Se han invertido las mangueras del agua caliente y del
agua fría? Cerciórese de que las mangueras del agua caliente
y del agua fría estén conectadas a las llaves correctas. Un
enjuague caliente seguido de un exprimido producirá arrugas.
Vea las Instrucciones de instalación.
■ ¿Ha enrollado las prendas alrededor del agitador? Ponga
los artículos de manera suelta en la lavadora. No enrolle los
artículos alrededor del agitador.
Manchas, ropa blanca percudida, colores opacos
■ ¿Ha separado la ropa adecuadamente? Siempre que
mezcle ropa blanca y de color en una carga puede ocurrir una
transferencia de tintes. Separe las prendas de color oscuro de
las blancas y claras.
■ ¿Estaba la temperatura del agua demasiado baja? Para
lavar use agua caliente o tibia que no afecte la ropa.
Cerciórese de que el sistema de agua caliente sea el
adecuado para proveer un lavado con agua caliente.
21
Page 22

■ ¿Ha usado suficiente detergente, o tiene agua dura? Use
más detergente cuando lave prendas con suciedad rebelde
en agua dura.
■ ¿Se han invertido las mangueras del agua caliente y del
agua fría? Cerciórese de que las mangueras del agua caliente
y del agua fría estén conectadas a los grifos correctos. Vea las
Instrucciones de instalación.
■ ¿Ha seguido las instrucciones del fabricante cuando
agregó el detergente y el suavizante de telas? Mida el
detergente y el suavizante de telas. Use suficiente detergente
para quitar la suciedad y mantenerla en suspensión. Diluya el
suavizante de telas y agréguelo solamente en la porción de
enjuague del ciclo. No deje escurrir el suavizante de telas
sobre la ropa.
■ ¿Hay hierro (óxido) por encima del promedio en el agua?
Tal vez necesite instalar un filtro de hierro.
SOLUCIÓN DE PROBLEMAS DE LA SECADORA
Prendas dañadas
■ ¿Se han quitado los artículos puntiagudos de los bolsillos
antes del lavado? Vacíe los bolsillos, cierre los zípers, los
broches de presión y los corchetes antes del lavado para
evitar que se enganche y rasgue la carga.
■ ¿Se ataron los cordones y fajas para evitar que se
enreden? Los cordones y fajas pueden enredarse fácilmente
en la carga, forzando las costuras y produciendo roturas.
■ ¿Se dañaron las prendas antes del lavado? Remiende lo
que esté roto y descosido antes del lavado.
■ ¿Ha sobrecargado la lavadora? La carga de lavado debe
estar equilibrada y sin sobrecarga. Las prendas deben
moverse con facilidad durante el lavado.
■ ¿Ha agregado correctamente el blanqueador con cloro?
No vierta el blanqueador con cloro directamente en la carga.
Limpie los derrames del blanqueador. El blanqueador no
diluido daña los tejidos. No coloque los artículos sobre el
depósito del blanqueador cuando ponga o quite la ropa de la
lavadora (en algunos modelos). No use más de la cantidad
recomendada por el fabricante para una carga completa.
■ ¿Ha seguido las instrucciones de la etiqueta de cuidado
proporcionadas por el fabricante?
En primer lugar, pruebe las soluciones sugeridas aquí y posiblemente se evite el gasto
de una llamada de servicio técnico…
Funcionamiento de la secadora
La secadora no funciona
■ ¿Hay un fusible de la casa fundido o se disparó el
cortacircuitos? Es posible que la secadora tenga 2 fusibles o
cortacircuitos. Asegúrese de que ambos fusibles estén
intactos y ajustados, o de que ambos cortacircuitos no se
hayan disparado. Reemplace el fusible o reposicione el
cortacircuitos. Si el problema continúa, llame a un electricista.
■ ¿Es el suministro de energía el correcto? Las secadoras
eléctricas requieren un suministro eléctrico de 240 voltios.
Verifique con un electricista calificado.
■ ¿Se usó un fusible regular? Use un fusible retardador.
■ ¿Está cerrada con firmeza la puerta de la secadora?
■ ¿Se oprimió con firmeza el botón de empuje para poner
en marcha la secadora (PUSH TO START DRYER)?
Sin calor
■ ¿Hay un fusible de la casa fundido o se disparó el
cortacircuitos? El tambor quizás rote pero sin calor. Las
secadoras eléctricas utilizan 2 fusibles o disyuntores
domésticos. Reemplace el fusible o reposicione el
cortacircuitos. Si el problema continúa, llame a un electricista.
■ En el caso de secadoras a gas, ¿está la válvula abierta en
la vía de abastecimiento?
Sonidos raros
■ ¿Ha estado la secadora sin uso por una temporada? Si no
se ha usado la secadora por una temporada, es posible que
se escuche un sonido fuerte durante los primeros minutos de
funcionamiento.
■ ¿Hay una moneda, botón o sujetapapeles entre el tambor
y la parte frontal o trasera de la secadora? Revise los
bordes frontales y traseros del tambor para verificar si hay
objetos pequeños. Limpie los bolsillos antes del lavado.
■ ¿Es una secadora a gas? El chasquido de la válvula de gas
es un sonido de funcionamiento normal.
■ ¿Están las cuatro patas instaladas y está la secadora
nivelada de frente hacia atrás y de lado a lado? La
secadora puede vibrar si no está instalada adecuadamente.
Vea las Instrucciones de instalación.
■ ¿Las prendas están enredadas o hechas un ovillo? Si la
carga está hecha un ovillo, rebotará haciendo vibrar a la
secadora. Separe los artículos de la carga y reinicie la
secadora.
El temporizador no parece avanzar
■ ¿Se ha ajustado la secadora en secado programado o al
aire (Timed or Air Dry)?
El temporizador se mueve lenta y continuamente durante el
ajuste de tiempo.
■ ¿Se ha ajustado la secadora a Secado automático
(Automatic Drying)?
El temporizador solamente se mueve cuando las prendas
están casi secas.
22
Page 23

Resultados de la secadora
Las prendas no se secan satisfactoriamente, los
tiempos de secado son demasiado largos, o la carga
está demasiado caliente
■ ¿Está el filtro de pelusa obstruido con pelusa?
El filtro de pelusa debe ser limpiado antes de cada carga.
ADVERTENCIA
Peligro de Incendio
Use un ducto de escape de metal pesado.
No use un ducto de escape de plástico.
No use un ducto de escape de aluminio.
No seguir estas instrucciones puede ocasionar
la muerte o incendio.
■ ¿Está obstruido con pelusa el ducto de escape o la capota
de ventilación exterior, restringiendo el flujo del aire?
Ponga a funcionar la secadora unos 5 a 10 minutos. Ponga su
mano debajo de la capota de ventilación exterior, para
verificar el movimiento del aire. Si no lo siente, limpie la pelusa
del sistema de ventilación o reemplace el ducto de escape
con uno de metal pesado o de metal flexible. Vea las
Instrucciones de instalación.
■ ¿Están las hojas del suavizante de telas bloqueando la
rejilla? Use únicamente una hoja del suavizante de telas y
úsela una sola vez.
■ ¿Tiene el ducto de escape el largo correcto? Revise el
ducto de escape para verificar que no sea demasiado largo o
no dé demasiadas vueltas. Una ventilación larga aumentará el
tiempo de secado. Vea las Instrucciones de instalación.
■ ¿Es el diámetro del ducto de escape del tamaño correcto?
Use un material de ventilación de 4" (10,2 cm) de diámetro.
■ ¿Está la secadora ubicada en un armario? Las puertas del
armario deben tener aberturas de ventilación en la parte
superior e inferior de la puerta. Se recomienda un espacio
mínimo de 1" (2,5 cm) para el frente de la secadora y, para la
mayoría de las instalaciones, la parte trasera necesita 5"
(12,7 cm). Vea las Instrucciones de instalación.
■ ¿Se ha seleccionado un ciclo de secado al aire?
Seleccione el ciclo correcto para el tipo de prendas que se
estén secando.
■ ¿Está la carga demasiado voluminosa y pesada para
secarse con rapidez? Separe la carga de modo que pueda
rotar libremente.
Pelusa en la ropa
■ ¿Está obstruido el filtro de pelusa? El filtro de pelusa debe
ser limpiado antes de cada carga.
Manchas en la carga o en el tambor
■
¿Se ha empleado adecuadamente el suavizante de telas?
Agregue hojas de suavizante de telas al comienzo del ciclo.
Las hojas del suavizante de telas que se agregan a una carga
parcialmente seca pueden manchar las prendas.
Las manchas en el tambor están causadas por los tintes en
las prendas (habitualmente los pantalones de mezclilla). Esto
no se transferirá a otras prendas.
Ropa arrugada
■ ¿Se ha sacado la ropa de la secadora al final del ciclo?
■ ¿Se ha sobrecargado la secadora? Seque cargas más
pequeñas que puedan rotar con libertad.
Olores
■ ¿Ha estado pintando, tiñendo o barnizando recientemente
el área donde se encuentra la secadora? De ser así, ventile
el área. Cuando los olores o humos se hayan esfumado del
área, vuelva a lavar y secar la ropa.
■ ¿Se está usando la secadora por primera vez? El nuevo
elemento calentador eléctrico puede emitir un olor. El olor
desaparecerá después del primer ciclo.
ADVERTENCIA
Peligro de Explosión
Mantenga los materiales y vapores inflamables, como
la gasolina, lejos de la secadora.
Coloque la secadora a un mínimo de 46 cm sobre
el piso para la instalación en un garaje.
No seguir estas instrucciones puede ocasionar
la muerte, explosión o incendio.
■ ¿Está la secadora ubicada en una habitación cuya
temperatura está debajo de 7ºC (45ºF)? El funcionamiento
apropiado de los ciclos de la secadora requiere temperaturas
superiores a 7ºC (45ºF).
23
Page 24

GARANTÍA DE LOS ELECTRODOMÉSTICOS
PRINCIPALES DE MAYTAG CORPORATION
GARANTÍA LIMITADA DE UN AÑO
Durante un año a partir de la fecha de compra, siempre y cuando se dé a este electrodoméstico principal un uso y mantenimiento de
conformidad con las instrucciones adjuntas o provistas con el producto, Maytag Corporation o Maytag Limited (en lo sucesivo
denominado “Maytag”) se hará cargo del costo de las piezas especificadas de fábrica y del trabajo de reparación para corregir
defectos en los materiales o en la mano de obra. El servicio deberá ser suministrado por una compañía de servicio designada por
Maytag. Esta garantía limitada se aplica sólo cuando el electrodoméstico principal se use en el país en donde se compró.
MAYTAG NO PAGARÁ POR LOS SIGUIENTES ARTÍCULOS
1. Visitas de servicio técnico para corregir la instalación de su electrodoméstico principal, para enseñarle a usar su electrodoméstico
principal, para cambiar o reparar fusibles domésticos o para corregir la instalación eléctrica o de la tubería de la casa.
2. Visitas de servicio técnico para reparar o reemplazar focos para electrodomésticos, filtros de aire o filtros de agua. Esos insumos
están excluidos de la cobertura de la garantía.
3. Reparaciones cuando su electrodoméstico principal se use de un modo diferente al doméstico normal de una familia.
4. Daños causados por accidente, alteración, uso indebido, abuso, incendio, inundación, actos fortuitos, instalación incorrecta,
instalación que no esté de acuerdo con los códigos eléctricos o de plomería, o el empleo de productos no aprobados por Maytag.
5. Cualquier pérdida de comida debido a fallas del refrigerador o del congelador.
6. Piezas de repuesto o gastos de reparación para electrodomésticos que se empleen fuera de los Estados Unidos o Canadá.
7. Recogida y entrega. Este electrodoméstico principal está diseñado para ser reparado en el hogar.
8. Reparaciones de piezas o sistemas como resultado de modificaciones no autorizadas que se hayan efectuado en el
electrodoméstico.
9. Gastos de viaje y transporte para obtener servicio del producto en lugares remotos.
10. La remoción e instalación de su electrodoméstico si estuviera instalado en un lugar inaccesible o si no estuviera instalado de
conformidad con las instrucciones de instalación publicadas.
11. Piezas de repuesto o gastos de reparación cuando el electrodoméstico principal se use en un país diferente del país en donde se
compró.
EXCLUSIÓN DE GARANTÍAS IMPLÍCITAS; LIMITACIÓN DE RECURSOS
EL ÚNICO Y EXCLUSIVO RECURSO DEL CLIENTE SEGÚN LOS TÉRMINOS DE ESTA GARANTÍA LIMITADA SERÁ EL DE REPARAR
EL PRODUCTO SEGÚN SE ESTIPULA EN LA PRESENTE. LAS GARANTÍAS IMPLÍCITAS, INCLUYENDO LAS GARANTÍAS DE
COMERCIABILIDAD O DE CAPACIDAD PARA UN PROPÓSITO PARTICULAR, SERÁN LIMITADAS A UN AÑO O AL PERÍODO MÁS
CORTO PERMITIDO POR LEY. MAYTAG NO SE RESPONSABILIZARÁ POR DAÑOS INCIDENTALES O CONSECUENTES. ALGUNOS
ESTADOS Y PROVINCIAS NO PERMITEN LAS EXCLUSIONES O LIMITACIONES POR DAÑOS INCIDENTALES O CONSECUENTES, O
LIMITACIONES ACERCA DE CUÁNTO DEBE DURAR UNA GARANTÍA IMPLÍCITA DE COMERCIABILIDAD O CAPACIDAD, DE MODO
QUE LAS LIMITACIONES O EXCLUSIONES ARRIBA MENCIONADAS PUEDEN NO APLICARSE EN SU CASO. ESTA GARANTÍA LE
OTORGA DERECHOS LEGALES ESPECÍFICOS Y ES POSIBLE QUE USTED TENGA TAMBIÉN OTROS DERECHOS QUE PUEDEN
VARIAR DE UN ESTADO A OTRO O DE UNA PROVINCIA A OTRA.
Esta garantía no tiene vigor fuera de los cincuenta Estados Unidos y Canadá. Póngase en contacto con el distribuidor autorizado de
Maytag para determinar si corresponde otra garantía.
Si necesita servicio, consulte primero la sección “Solución de problemas” del Manual de uso y cuidado. Después de consultar la
sección “Solución de problemas”, puede encontrar ayuda adicional en la sección “Ayuda o servicio técnico”, o llamando a Maytag. En
EE.UU., llame al 1-800-688-9900. En Canadá, llame al 1-800-807-6777.
Refacciones
Si necesita pedir piezas de repuesto, recomendamos que use
únicamente piezas especificadas de fábrica. Estas piezas
encajarán bien y funcionarán bien ya que están fabricadas con la
misma precisión empleada en la fabricación de cada
electrodoméstico nuevo de Maytag
®
.
9/06
Para conseguir las piezas de repuesto especificadas de
fábrica en su localidad:
Llame al Centro de ayuda al cliente de Maytag Services, LLC al
1-800-688-9900, o a su centro de servicio designado más
cercano. En Canadá, llame al 1-800-807-6777.
Para obtener información sobre cómo ponerse en contacto con
Maytag Services, LLC, sírvase ver la portada de este documento.
24
Page 25

INSTRUCTIONS POUR L’UTILISATEUR
DE LA LAVEUSE/SÉCHEUSE
Assistance ou service
Si vous avez besoin d’asistance ou service, consulter d’abord la
section “Dépannage”. On peut obtenir de l'aide supplémentaire,
et obtenir assistance, installation ou service en téléphonant au
centre d'assistance à la clientèle de Maytag Services, LLC au
1-800-807-6777, ou en écrivant à :
Maytag Services, LLC
ATTN: CAIR
P.O. Box 2370
Cleveland, TN 37320-2370
Dans votre correspondance, veuillez indiquer un numéro de
téléphone où l’on peut vous joindre dans la journée.
Des informations peuvent également être obtenues en visitant
notre site web www.maytag.ca.
SÉCURITÉ DE LA LAVEUSE/SÉCHEUSE
®
Center
Conservez ce manuel et votre reçu de vente ensemble pour
référence ultérieure. Pour le service sous garantie, vous
devez présenter un document prouvant la date d’achat ou
d’installation.
Inscrivez les renseignements suivants au sujet de votre appareil
ménager pour mieux vous aider à obtenir assistance ou service en
cas de besoin. Vous devrez connaître le numéro de modèle et le
numéro de série au complet. Cette information est donnée sur la
plaque signalétique indiquant les numéros de modèle et de série,
située dans le logement supérieur de la porte à l’intérieur de la
sécheuse.
Nom du marchand ______________________________________________
Numéro de série ________________________________________________
Adresse ________________________________________________________
Numéro de téléphone ___________________________________________
Numéro de modèle______________________________________________
Date d’achat____________________________________________________
Votre sécurité et celle des autres est très importante.
Nous donnons de nombreux messages de sécurité importants dans ce manuel et sur votre appareil ménager. Assurez-vous de
toujours lire tous les messages de sécurité et de vous y conformer.
Voici le symbole d’alerte de sécurité.
Ce symbole d’alerte de sécurité vous signale les dangers potentiels de décès et de blessures graves à vous
et à d’autres.
Tous les messages de sécurité suivront le symbole d’alerte de sécurité et le mot “DANGER” ou
“AVERTISSEMENT”. Ces mots signifient :
Risque possible de décès ou de blessure grave si vous ne
DANGER
AVERTISSEMENT
Tous les messages de sécurité vous diront quel est le danger potentiel et vous disent comment réduire le risque de blessure et
ce qui peut se produire en cas de non-respect des instructions.
suivez pas immédiatement les instructions.
Risque possible de décès ou de blessure grave si vous
ne suivez pas les instructions.
25
Page 26

AVERTISSEMENT : Pour votre sécurité, les renseignements dans ce manuel doivent
être observés pour réduire au minimum les risques d’incendie ou d’explosion ou pour
éviter des dommages au produit, des blessures ou un décès.
– Ne pas entreposer ou utiliser de l’essence ou d’autres vapeurs ou liquides
inflammables à proximité de cet appareil ou de tout autre appareil électroménager.
– QUE FAIRE DANS LE CAS D’UNE ODEUR DE GAZ :
Ne pas tenter d’allumer un appareil.
•
Ne pas toucher à un commutateur électrique; ne pas utiliser le téléphone se trouvant
•
sur les lieux.
Évacuer tous les gens de la pièce, de l’édifice ou du quartier.
•
Appeler immédiatement le fournisseur de gaz d’un téléphone voisin. Suivre ses
•
instructions.
À défaut de joindre votre fournisseur de gaz, appeler les pompiers.
•
– L’installation et l’entretien doivent être effectués par un installateur qualifié, une
agence de service ou le fournisseur de gaz.
IMPORTANTES INSTRUCTIONS DE SÉCURITÉ
AVERTISSEMENT :
la laveuse/sécheuse, suivre les précautions fondamentales dont les suivantes :
■
Lire toutes les instructions avant d’utiliser la
laveuse/sécheuse.
■
Ne pas placer des articles exposés aux huiles de cuisson
dans votre sécheuse. Les articles contaminés par des huiles
de cuisson peuvent contribuer à une réaction chimique qui
pourrait causer à la charge de s'enflammer.
■
Ne pas faire laver ou sécher des articles qui ont été nettoyés
ou lavés avec de l’essence ou imbibés d’essence, solvants
de nettoyage à sec, ou autres substances inflammables ou
explosives; ces substances peuvent émettre des vapeurs
susceptibles de s’enflammer ou d’exploser.
■
Ne pas ajouter d’essence, solvant de nettoyage à sec ou
autre produit inflammable ou explosif dans l’eau de lavage.
Ces substances peuvent émettre des vapeurs susceptibles
de s’enflammer ou d’exploser.
■
Ne pas laisser des enfants jouer sur ou à l’intérieur de la
laveuse/sécheuse. Bien surveiller les enfants lorsque la
laveuse/sécheuse est utilisée à proximité d’enfants.
■
Avant de mettre la laveuse/sécheuse au rebut ou hors de
service, enlever la porte ou le couvercle.
■
Ne pas tenter d’atteindre un article à l’intérieur de la cuve de
la laveuse/sécheuse lorsque le tambour, la cuve ou
l’agitateur est en mouvement.
■
Ne pas installer ou remiser cette laveuse/sécheuse à un
endroit où elle serait exposée aux intempéries.
■
Ne pas modifier les organes de commande.
■
Nettoyer le filtre à charpie avant et après chaque charge.
Pour réduire les risques d’incendie, de choc électrique ou de blessures lors de l’utilisation de
■
Dans certaines conditions, de l’hydrogène gazeux peut se
former dans un circuit d’eau chaude qui n’a pas été utilisé
pendant 2 semaines ou plus. LE GAZ HYDROGÈNE EST
EXPLOSIBLE. Si le circuit d’eau chaude n’a pas été utilisé
pendant une telle période, avant d’utiliser la laveuse/
sécheuse, ouvrir tous les robinets d’eau chaude et laisser
l’eau s’écouler pendant plusieurs minutes par chaque
robinet. Ceci permettra l’évacuation de l’hydrogène gazeux
accumulé. Comme ce gaz est inflammable, ne pas fumer
ou utiliser une flamme nue au cours de cette période.
■
Ne pas réparer ou remplacer un composant quelconque de
la laveuse/sécheuse, ni entreprendre une opération de
service, si ce n’est spécifiquement recommandé dans ce
manuel ou dans un manuel d’instructions de réparations
destiné à l’utilisateur; il est alors essentiel que la personne
concernée comprenne ces instructions et soit compétente
pour les exécuter.
■
Ne pas utiliser un produit assouplissant de tissu ou des
produits pour éliminer la statique à moins qu'ils ne soient
recommandés par le fabricant du produit assouplissant de
tissu ou du produit.
■
Ne pas utiliser la chaleur pour faire sécher des articles
fabriqués avec du caoutchouc mousse ou des matériaux
semblables.
■
Ne pas laisser la charpie, la poussière, ou la saleté
s'accumuler autour du système d'évacuation ou autour de
l'appareil.
■
Un nettoyage périodique de l'intérieur de la sécheuse et du
conduit d'évacuation doit être effectué par une personne
qualifiée.
■
Voir “Spécifications électriques” pour les instructions de
liaison à la terre.
CONSERVEZ CES INSTRUCTIONS
26
Page 27

Vérification du conduit d’évacuation
La sécheuse doit être bien installée et munie d’un système
adéquat d’évacuation de l’air pour donner une efficacité maximale
de séchage et un temps de séchage plus court. Utiliser les
dégagements minimums recommandés pour l’installation que
vous trouverez dans vos Instructions d’installation. Voir les
instructions d’installation pour plus de renseignements.
AVERTISSEMENT
1. Ne pas utiliser un conduit d’évacuation en plastique ou en
feuille de métal. Utiliser un conduit de 4" (10,2 cm) en métal
lourd ou flexible. Ne pas déformer ni écraser le conduit
d’évacuation en métal flexible. Il doit être complètement
déployé pour permettre l’évacuation adéquate de l’air. Vérifier
le système d’évacuation après l’installation. Se référer aux
instructions d’installation pour la bonne longueur du conduit
d’évacuation.
4"
10,2 cm
Risque d’incendie
Utiliser un conduit d’évacuation en métal lourd.
Ne pas utiliser un conduit d’évacuation en plastique.
Ne pas utiliser un conduit d’évacuation en feuille
de métal.
Le non-respect de ces instructions peut causer
un décès ou un incendie.
Si la sécheuse n’est pas bien installée et munie d’un système
adéquat d’évacuation de l’air, elle ne sera pas couverte en vertu
de la garantie. Pour obtenir les meilleurs résultats de séchage,
l'évacuation de l'air doit être adéquate. Voir les Instructions
d'installation pour plus de renseignements.
REMARQUE : Les visites de service nécessitées par une
évacuation inadéquate seront aux frais du client peu importe s’il a
fait faire l’installation ou s’il l’a faite lui-même.
2. Utiliser un clapet d’évacuation de 4" (10,2 cm).
3. Utiliser l’acheminement le plus rectiligne possible lors de
l’installation du conduit.
Bon Meilleur
4. Utiliser des brides pour sceller tous les joints. Ne pas utiliser
de ruban adhésif pour conduit, des vis ou autres dispositifs de
fixation qui se prolongent à l'intérieur du conduit pour fixer
celui-ci.
5. Nettoyer périodiquement le conduit d’évacuation, selon
l’utilisation, mais au moins à tous les 2 ans ou lors de
l’installation de la sécheuse à un nouvel endroit. Après le
nettoyage, veuillez suivre les instructions d’installation
fournies avec la sécheuse pour une vérification finale de
l’appareil.
27
Page 28

UTILISATION DE LA LAVEUSE
Chargement
Pour ces exemples de charges complètes de la laveuse, régler le sélecteur de charge (Load Size) au plus haut réglage de charge.
LAVEUSE DE GRANDE CAPACITÉ
Vêtements de
travail lourds
2pantalons
3chemises
3 jeans
1 salopette
Charge mixte
2 draps doubles
4 taies d’oreiller
6t-shirts
6shorts
2chemises
2chemisiers
6 mouchoirs
Serviettes
8 serviettes de bain
8 serviettes à main
10 débarbouillettes
1 tapis de bain
Mise en marche de la laveuse
AVERTISSEMENT
Risque d’incendie
Ne jamais mettre des articles humectés d’essence ou
d’autres fluides inflammables dans la laveuse.
Aucune laveuse ne peut complètement enlever l’huile.
Ne pas faire sécher des articles qui ont été salis par
tout genre d’huile (y compris les huiles de cuisson).
Le non-respect de ces instructions peut causer un
décès, une explosion ou un incendie.
1. Mesurer le détergent et le verser dans la laveuse. Si désiré,
ajouter de la Javel sans danger pour les couleurs, en poudre
ou liquide. Mettre une charge de vêtements triés dans la
laveuse sans la tasser.
■ Charger uniformément pour maintenir l’équilibre de la
laveuse. Mélanger les gros et les petits articles. Les
articles doivent pouvoir se déplacer facilement dans l’eau
de lavage. Une surcharge peut causer un piètre nettoyage.
2. (FACULTATIF) Ajouter l’eau de Javel.
Toujours mesurer l’eau de Javel. Ne pas verser une quantité
approximative. Ne jamais utiliser plus de 1 tasse (250 mL)
pour une charge complète. Suivre les instructions du fabricant
pour une utilisation sans danger. Utiliser une tasse avec un
bec verseur pour éviter de renverser le liquide.
Laisser la laveuse se remplir et commencer l’agitation de la
charge. Ajouter l’eau de Javel au programme de lavage de
sorte qu’elle peut être éliminée au programme de rinçage.
Verser l’eau de Javel autour de l’agitateur et non directement
sur la charge.
■ Suivre le mode d’emploi sur les étiquettes du linge. Ne
pas utiliser d’eau de Javel sur les articles en laine, soie,
spandex, les acétates ou certains tissus ignifuges.
Articles délicats
2 chemisettes
4combinaisons-
jupons
6 sous-vêtements
2 paires depyjamas
1 ensemble pour
enfant
REMARQUE : L’eau de Javel non diluée peut endommager
tous les tissus avec lesquels elle entre en contact. Il résulte
des dégâts comme des déchirures, des trous, des usures ou
des pertes de couleur, qui peuvent ne pas paraître avant
plusieurs lavages subséquents.
3. (FACULTATIF) Ajouter l’assouplissant liquide pour tissu.
REMARQUE : Ne pas renverser ou dégoutter d’assouplissant
de tissu sur les vêtements. Un assouplissant de tissu non
dilué peut causer des taches sur les tissus. Toujours diluer
l’assouplissant de tissu avec de l’eau tiède. Une trop grande
quantité d’assouplissant de tissu peut rendre certains articles
(couches et serviettes) non absorbants. Le cas échéant, ne
pas l’utiliser à chaque charge ou en utiliser moins avec
chaque charge.
Style 1 : Distributeur d’assouplissant liquide pour tissu (sur
certains modèles)
■ Utiliser seulement de l’assouplissant de tissu dans ce
distributeur. Verser une quantité mesurée de
l’assouplissant de tissu liquide dans le distributeur.
L’assouplissant est ajouté automatiquement durant
l’opération de rinçage du programme. Diluer
l’assouplissant de tissu liquide en remplissant le
distributeur d’eau tiède jusqu’à ce que le liquide atteigne
le croisillon dans l’ouverture du distributeur.
Style 2 : Absence de distributeur d’assouplissant de tissu
liquide (sur certains modèles)
■ Ajouter l’assouplissant de tissu dilué avec ½ à 1 tasse
(125 à 250 mL) d’eau tiède au rinçage final SEULEMENT.
4. Rabattre le couvercle de la laveuse. La laveuse n’effectuera
pas d’agitation ni déssorage avec le couvercle ouvert.
5. Tourner le sélecteur WATER LEVEL (niveau d'eau) au bon
réglage pour votre charge de lavage et le type de tissu à laver.
Vous pouvez changer votre sélection de la taille de charge ou
le niveau d'eau après que la laveuse a commencé à se remplir
en tournant le bouton de sélection à un réglage différent.
Pressage
permanent
1 drap double
1 nappe
1robe
1chemisier
2pantalons
3chemises
2 taies d’oreiller
Tr ic ot s
2pantalons
2chemisiers
4chemises
4hauts
2robes
28
Page 29

6. Régler le sélecteur de TEMPÉRATURE au réglage approprié
pour le type de tissu et le niveau de saleté de la charge.
Utiliser l’eau la plus chaude sans danger pour le tissu. Suivre
les instructions sur l’étiquette des vêtements.
REMARQUE : Dans les températures d’eau de lavage
inférieures à 60ºF (15,6ºC), les détergents ne se diluent pas
bien. Les saletés peuvent être difficiles à enlever. Certains
tissus peuvent retenir les faux plis et comporter un
boulochage accru (formation de petites boules de charpie sur
la surface des vêtements).
7. Appuyer sur le bouton de commande de programme et le
tourner dans le sens horaire au programme que vous désirez.
Réduire le temps de lavage lors de l’utilisation d’un réglage
pour petite charge. Retirer le bouton de commande de
programme pour mettre la laveuse en marche.
UTILISATION DE LA SÉCHEUSE
Mise en marche de la sécheuse
Arrêt et remise en marche de la laveuse :
■ Pour arrêter la laveuse à tout moment, appuyer sur le
bouton de commande de programme.
■ Pour remettre la laveuse en marche, rabattre le couvercle
(si ouvert) et tirer sur le bouton de commande de
programme.
AVERTISSEMENT
Risque d'explosion
Garder les matières et les vapeurs inflammables, telle
que l’essence, loin de la sécheuse.
Ne pas faire sécher un article qui a déjà été touché par
un produit inflammable (même après un lavage).
Le non-respect de ces instructions peut causer
un décès, une explosion ou un incendie.
Avant d'utiliser la sécheuse, essuyer le tambour de la sécheuse
avec un linge humide pour enlever la poussière accumulée au
cours de l'entreposage et de l'expédition.
1. Nettoyer le filtre à charpie avant chaque charge. Voir
"Nettoyage du filtre à charpie".
2. Charger les vêtements sans les tasser dans la sécheuse et
fermer la porte. Ne pas surcharger la sécheuse. Prévoir
suffisamment d'espace pour que les vêtements puissent
culbuter librement.
3. Tourner le bouton de commande de programme au
programme recommandé pour le type de charge que vous
séchez. Utiliser le réglage automatique Energy Preferred
(éconergique) pour sécher la plupart des tissus lourds et de
poids moyen.
4. (FACULTATIF) Votre sécheuse peut être munie d’un signal de
fin de programme (END OF CYCLE SIGNAL). Le signal est
utile lorsque vous faites sécher des articles qui doivent être
retirés de la sécheuse aussitôt qu'elle s'arrête. Le signal de fin
de programme fait partie du bouton de mise en marche et
peut être sélectionné. Tourner le bouton Start (mise en
marche) à ON (marche) ou OFF (arrêt). Le signal sera entendu
seulement si le bouton sélecteur est réglé à On.
AVERTISSEMENT
Risque d’incendie
Aucune laveuse ne peut complètement enlever l’huile.
Ne pas faire sécher des articles qui ont été salis par
tout genre d’huile (y compris les huiles de cuisson).
Les articles contenant mousse, caoutchouc ou
plastique doivent être séchés sur une corde à linge
ou par le programme de séchage à l’air.
Le non-respect de ces instructions peut causer
un décès ou un incendie.
5. Ajouter une feuille d'assouplissant de tissus, si désiré. Suivre
les instructions sur l'emballage.
6. Appuyer sur la touche PUSH TO START (enfoncer pour mettre
en marche).
Arrêt et remise en marche
On peut arrêter la sécheuse à tout moment au cours d'un
programme.
Pour arrêter la sécheuse
Ouvrir la porte de la sécheuse ou tourner le bouton de commande
de programme à OFF.
REMARQUE : Le bouton de commande de programme doit
pointer vers une zone d’arrêt Off quand la sécheuse n'est pas
utilisée.
Pour remettre la sécheuse en marche
Fermer la porte. Choisir un nouveau programme et une nouvelle
température (si désiré). Appuyer sur la touche PUSH TO START
(enfoncer pour mettre en marche).
29
Page 30

ENTRETIEN DE LA LAVEUSE/SÉCHEUSE
Nettoyage de l’emplacement de la laveuse/
sécheuse
Éviter de laisser des éléments qui pourraient obstruer le débit de
combustion et empêcher une bonne ventilation autour de la
laveuse/sécheuse.
AVERTISSEMENT
Risque d'explosion
Garder les matières et les vapeurs inflammables, telle
que l’essence, loin de la sécheuse.
Le non-respect de cette instruction peut causer un
décès, une explosion ou un incendie.
Nettoyage de la laveuse
Nettoyage de l'extérieur
Utiliser un linge doux, humide ou une éponge pour essuyer les
renversements de détergent ou d'eau de Javel. Essuyer
occasionnellement les surfaces externes de la laveuse pour
maintenir son apparence d'appareil neuf.
Nettoyage de l'intérieur
Nettoyer l'intérieur de votre laveuse en mélangeant 1 tasse
(250 mL) d'eau de Javel et 2 pelletées ou bouchons pleins de
détergent. Verser ceci dans la laveuse et exécuter un programme
complet à l'eau chaude. Répéter ce processus au besoin.
REMARQUE : Enlever tous les résidus d'eau dure en utilisant
seulement des nettoyants sans danger pour la laveuse.
Nettoyage du distributeur d’assouplissant de tissu liquide (sur
certains modèles) :
1. Retirer le distributeur en prenant le dessus à deux mains et en
le pressant, tout en poussant vers le haut avec les pouces.
2. Rincer le distributeur sous un robinet d'eau tiède, puis le
remettre en place.
REMARQUE : Si votre modèle dispose d’un distributeur
d’assouplissant de tissu liquide, ne pas laver de vêtements
lorsque ce distributeur est retiré. Ne pas ajouter de détergent ou
d’eau de Javel dans ce distributeur; il est destiné à l’assouplissant
de tissu liquide seulement.
Robinets d'arrivée d'eau
Remplacer les tuyaux d’arrivée d’eau après 5 ans d’utilisation
pour réduire le risque de défaillance. Inspecter périodiquement les
tuyaux; les remplacer en cas de renflement, de déformation, de
coupure et d'usure ou si une fuite se manifeste.
Lorsque vous remplacez vos tuyaux d’arrivée d’eau, noter la date
de remplacement au marqueur indélébile sur l’étiquette.
Nettoyage du filtre à charpie
Nettoyer le filtre à charpie avant chaque charge. Un filtre obstrué
de charpie peut augmenter le temps de séchage.
IMPORTANT :
■ Ne pas faire fonctionner la sécheuse avec un filtre à charpie
déplacé, endommagé, bloqué ou manquant. Une telle action
peut causer une surchauffe et des dommages à la sécheuse
et aux tissus.
■ Si de la charpie tombe dans la sécheuse au moment du retrait
du filtre, vérifier le conduit d'évacuation et retirer la charpie.
Nettoyage avant chaque charge
Style 1 :
1. Le filtre à charpie se trouve dans la sécheuse sur la paroi
arrière. Retirer le filtre à charpie et sa protection.
2. Séparer la protection du filtre en appuyant sur le filtre et en
retirant en même temps la protection.
3. Pour enlever la charpie, la faire rouler sous les doigts. Ne pas
rincer ni laver le filtre pour enlever la charpie. La charpie
humide est difficile à enlever.
4. Réassembler et remettre le filtre et sa protection en place en
appuyant fermement.
Style 2 :
1. Le filtre à charpie se trouve dans la partie intérieure de la porte
de la sécheuse. Enlever le filtre à charpie en le tirant vers le
haut.
2. Enlever la charpie du filtre en la roulant avec les doigts. Ne pas
rincer ni laver le filtre pour enlever la charpie. La charpie
mouillée s'enlève difficilement.
3. Remettre le filtre à charpie en le poussant fermement en
place.
Nettoyage au besoin
Les détergents et les assouplissants de tissu peuvent causer une
accumulation de résidus sur le filtre à charpie. Cette accumulation
peut augmenter les durées de séchage ou entraîner un arrêt de la
sécheuse avant que la charge ne soit complètement sèche. Si de
la charpie tombe du filtre, le filtre est probablement obstrué.
Nettoyer le filtre à charpie (tel qu'indiqué ci-après) tous les 6 mois,
ou plus fréquemment, s'il devient obstrué par suite d'une
accumulation de résidus.
1. Enlever la charpie du filtre en la roulant avec les doigts.
2. Mouiller les deux côtés du filtre à charpie avec de l’eau
chaude.
3. Mouiller une brosse en nylon avec de l’eau chaude et du
détergent liquide. Frotter le filtre avec la brosse pour enlever
l’accumulation de résidus.
4. Rincer le filtre à l’eau chaude.
5. Bien sécher le filtre à charpie avec une serviette propre.
Replacer le filtre dans la sécheuse.
30
Page 31

Nettoyage de l’intérieur de la sécheuse
Nettoyage du tambour de la sécheuse
1. Appliquer un nettoyant ménager non inflammable sur la zone
tachée du tambour et frotter avec un linge doux jusqu’à ce
que la tache s’enlève.
2. Essuyer complètement le tambour avec un linge humide.
3. Faire culbuter une charge de linge ou de serviettes propres
pour sécher le tambour.
REMARQUE : Les vêtements contenant des teintures instables,
tels que jeans en denim ou articles en coton de couleur vive,
peuvent décolorer l’intérieur de la sécheuse. Ces taches ne sont
pas nuisibles à votre sécheuse et ne tacheront pas les vêtements
des charges futures. Faire sécher les articles fabriqués d’une
teinture instable en les tournant à l’envers pour empêcher le
transfert de la teinture.
Hivérisation de la laveuse/sécheuse
1. Fermer les deux robinets d'eau.
2. Débrancher et vidanger les tuyaux d'arrivée d'eau.
3. Verser 1 pinte (1 L) d'antigel pour véhicule récréatif dans le
panier.
4. Faire tourner la laveuse au réglage vidange et essorage
pendant 30 secondes environ pour mélanger l'antigel à l'eau.
5. Débrancher la laveuse/sécheuse ou déconnecter la source de
courant électrique.
Remise en marche de la laveuse/sécheuse
1. Vidanger les canalisations d'eau et les tuyaux.
2. Reconnecter les tuyaux d'arrivée d'eau.
3. Ouvrir les deux robinets d'eau.
4. Au Canada
Retrait de la charpie accumulée
À l’intérieur de la sécheuse
La charpie doit être enlevée tous les 2 ans, ou plus souvent, selon
l’utilisation de la sécheuse. Le nettoyage doit être effectué par une
personne qualifiée.
À l’intérieur du conduit d’évacuation
La charpie doit être enlevée tous les 2 ans, ou plus souvent, selon
l’utilisation de la sécheuse.
Précautions à prendre avant les vacances, un
entreposage ou un déménagement
Installer et ranger votre laveuse/sécheuse à l'abri du gel. L'eau qui
peut rester dans les tuyaux peut abîmer votre laveuse/sécheuse
temps de gel. Si la laveuse/sécheuse doit faire l'objet d'un
déménagement ou de remisage au cours d'une période de gel,
préparer l'appareil pour l'hiver.
Entretien en cas de non-utilisation ou de période de
vacances
Faire fonctionner la laveuse/sécheuse seulement lorsqu'on est
présent. Si l'utilisateur doit partir en vacances ou n'utilise pas la
laveuse/sécheuse pendant une période prolongée, il convient
d'exécuter les opérations suivantes :
■ Débrancher la laveuse/sécheuse ou déconnecter la source de
courant électrique.
■ Fermer l'alimentation d'eau de la laveuse. Ceci aide à éviter
les inondations accidentelles (dues à une augmentation de la
pression) quand vous êtes absent.
AVERTISSEMENT
Risque de choc électrique
Brancher sur une prise à 4 alvéoles reliée à la terre.
Le non-respect de cette instruction peut causer
un décès ou un choc électrique.
■ Brancher la laveuse/sécheuse ou reconnecter la source de
courant électrique.
5. Exécuter un programme complet avec une tasse (250 mL) de
détergent pour enlever les restes d'antigel.
Transport de la laveuse/sécheuse
1. Fermer les deux robinets d'eau.
2. Débrancher et vidanger les tuyaux d'arrivée d'eau.
3. Si la laveuse/sécheuse doit être déplacée temps de gel,
mettre une pinte (1 L) d'antigel pour véhicule récréatif dans le
panier. Faire fonctionner la laveuse au réglage essorage
pendant environ 30 secondes pour mélanger l'antigel à l'eau.
4. Déconnecter le tuyau de vidange du système de vidange.
5. Débrancher la laveuse/sécheuse ou déconnecter la source de
courant électrique. Débrancher les câbles en cas de
raccordement direct de la laveuse/sécheuse.
6. Débrancher le conduit d'évacuation.
7. Laver le filtre à charpie.
8. Vérifier que les pieds de nivellement sont bien installés.
9. Placer les tuyaux d'arrivée d'eau dans le panier.
10. Passer le cordon d'alimentation et le tuyau de vidange par le
dessus et les mettre dans le panier.
11. Utiliser du ruban adhésif de masquage pour fixer le couvercle
de la laveuse et la porte de la sécheuse.
Réinstallation de la laveuse/sécheuse
1. Suivre les “Instructions d'installation” pour choisir
l'emplacement, régler l'aplomb de la laveuse/sécheuse et le
raccorder.
2. Faire faire un programme complet à la laveuse avec 1 pelletée
ou bouchon plein de détergent pour nettoyer la laveuse et
enlever l'antigel, si utilisé.
31
Page 32

DÉPANNAGE DE LA LAVEUSE
Essayer d'abord les solutions suggérées ici, ce qui vous évitera peut-être le coût d'une visite de service...
La laveuse et ses composants
Bruit, vibrations, déséquilibre
■ Le plancher est-il souple, affaissé ou pas d'aplomb? Un
plancher souple ou qui n'est pas d'aplomb peut provoquer
bruit et vibrations de la part de la laveuse. Un morceau de
contreplaqué de ¾" (1,9 cm) sous la laveuse réduira les sons.
Voir les Instructions d'installation.
■ La laveuse/sécheuse est-elle d'aplomb? La laveuse/
sécheuse doit être d'aplomb. Voir "Instructions d'installation".
■ La charge est-elle équilibrée? Répartir uniformément la
charge dans le panier de la laveuse et veiller à ce que la
hauteur de la charge n'excède pas la rangée de trous
supérieure du panier.
■ Avez-vous retiré la sangle jaune d'expédition avec les
goupilles fendues? Voir les Instructions d'installation.
■ Les mécanismes s'enclenchent-ils après la vidange et
avant l'essorage, ou la partie supérieure de l'agitateur faitelle du bruit pendant le lavage? Ce sont des bruits normaux
pour la laveuse.
■ La laveuse fait-elle un bruit de gargouillement ou de
bourdonnement? Au moment de la vidange, la pompe émet
un bourdonnement continu avec des sons réguliers de
gargouillement et de déferlement à mesure que les dernières
quantités d'eau sont évacuées. Ceci est normal.
■ Le panier de la laveuse se déplace pendant le lavage. Ceci
est normal.
Fuites d’eau
■ Les tuyaux de remplissage sont-ils serrés?
■ Les joints de tuyaux de remplissage d'eau sont-ils
correctement installés? Vérifier les deux extrémités de
chaque tuyau. Voir "Instructions d'installation".
■ Le tuyau de vidange est-il correctement installé? Le tuyau
de vidange doit être bien fixé au conduit d'évacuation ou à
l'évier de buanderie. Voir "Instructions d'installation".
■ L'évier ou le conduit d'évacuation est-il obstrué? L'évier et
le conduit d'évacuation doivent pouvoir drainer 17 gallons
(64 L) d'eau par minute. Si le débit d'eau est obstrué ou
ralenti, l'eau peut refouler du conduit d'évacuation ou de
l'évier. Vérifier la plomberie du domicile (éviers de buanderie,
robinets, conduit d'évacuation, conduites d'eau) pour voir s'il
y a des fuites.
■ L'eau éclabousse-t-elle hors de l’anneau de la cuve?
Centrer la cuve avant de mettre la laveuse en marche.
■ L'eau éclabousse-t-elle hors de la charge? Répartir
uniformément la charge dans le panier de la laveuse et veiller
à ce que la hauteur de la charge n'excède pas la rangée de
trous supérieure du panier. De l'eau de remplissage ou de
rinçage peut éclabousser hors de la charge.
Distributeur obstrué (sur certains modèles)
■ Avez-vous suivi les directives du fabricant pour l'addition
d'assouplissant de tissu dans le distributeur (sur certains
modèles)? Mesurer la quantité d'assouplissant de tissu et le
verser avec précaution dans le distributeur. Essuyer tout
renversement. Diluer l'assouplissant dans le distributeur
d'assouplissant.
Fonctionnement de la laveuse
La laveuse ne fonctionne pas, ne se remplit pas, ne rince
pas, l'agitateur ne tourne pas; la laveuse s'arrête
AVERTISSEMENT
Risque de choc électrique
Brancher sur une prise à 4 alvéoles reliée à la terre.
Le non-respect de cette instruction peut causer
un décès ou un choc électrique.
■ Le cordon d'alimentation est-il branché dans une prise à
3 alvéoles reliée à la terre? Brancher le cordon
d'alimentation dans une prise à 3 alvéoles reliée à la terre.
■ Utilisez-vous une rallonge? Ne pas utiliser de rallonge.
32
■ L'indicateur sur le bouton de commande de programme
est-il correctement aligné avec un programme? Tourner le
bouton de commande de programme légèrement vers la
droite et le tirer pour mettre en marche.
■ Les tamis de la valve d'arrivée d'eau sont-ils obstrués?
Couper l'arrivée d'eau et retirer les tuyaux d'arrivée d'eau de
la laveuse. Ôter toute pellicule ou particules accumulées.
Réinstaller les tuyaux, ouvrir l'arrivée d'eau et vérifier s'il y a
des fuites.
■ Les deux robinets d'eau (chaude et froide) sont-ils
ouverts? Ouvrir les robinets d'eau.
■ Le tuyau d'arrivée d'eau est-il déformé? Redresser les
tuyaux.
■ Le niveau d'eau semble-t-il trop bas, ou la laveuse ne se
remplit-elle pas complètement? Le sommet de l'agitateur
est beaucoup plus haut que le niveau d'eau le plus élevé. Ceci
est normal et nécessaire au libre mouvement des vêtements.
■ Un fusible est-il grillé ou le disjoncteur s'est-il déclenché?
Remplacer le fusible ou réenclencher le disjoncteur. Si le
problème persiste, appeler un électricien.
■ La laveuse est-elle en pause normale du programme? La
laveuse fait une pause d'environ 2 minutes dans certains
programmes. Laisser le programme se poursuivre. Certains
programmes comprennent des périodes d'agitation et de
trempage.
Page 33

■ La laveuse est-elle surchargée? Laver des charges plus
petites.
■ Le couvercle est-il ouvert? Le couvercle doit être fermé
lorsque la laveuse est en marche. Il n'y aura pas d'agitation ni
d'essorage si le couvercle est ouvert.
La laveuse continue de se remplir ou la vidange se
poursuit, le programme semble bloqué
■ Le dessus du tuyau de vidange est-il plus bas que les
boutons de commande sur la laveuse? Le dessus du tuyau
de vidange doit être au moins à 39" (99 cm) au-dessus du
plancher. Voir les Instructions d'installation.
■ Le tuyau de vidange est-il trop serré dans le conduit
d'évacuation, ou est-il fixé au conduit d'évacuation avec
du ruban adhésif? Le tuyau de vidange doit être lâche mais
bien fixé. Ne pas sceller le tuyau de vidange avec du ruban
adhésif. Le tuyau a besoin d'une ouverture pour l'air. Voir les
Instructions d'installation.
Soin des vêtements
La laveuse n'effectue pas de vidange ni d'essorage,
l'eau reste dans la laveuse
■ Le tuyau de vidange est-il obstrué ou l'extrémité du tuyau
de vidange se trouve-t-elle à plus de 96" (244 cm) audessus du plancher? Voir les Instructions d'installation.
■ Le couvercle est-il ouvert? Le couvercle doit être fermé
lorsque la laveuse est en marche. Il n'y aura pas d'agitation ni
d'essorage si le couvercle est ouvert.
■ Y a-t-il un excès de mousse? Toujours mesurer la quantité
de détergent. Suivre les directives du fabricant. Si l'eau est
très douce, on peut utiliser moins de détergent.
Température de lavage/rinçage
■ Les robinets d'arrivée d'eau chaude et froide ont-ils été
inversés? Voir les Instructions d'installation.
■ Lavez-vous un nombre important de charges? Lorsque
votre fréquence de charges lavées augmente, la température
de l'eau peut baisser lorsqu'on choisit une température
chaude ou tiède. Ceci est normal.
Charge trop mouillée
■ Avez-vous utilisé le bon programme pour la charge à
laver? Choisir un programme avec une vitesse d'essorage
plus élevée (si disponible).
■ Avez-vous lavé une très grosse charge? Une grosse charge
déséquilibrée peut entraîner une réduction de la vitesse
d'essorage et mouiller les vêtements à la fin du programme.
Répartir uniformément la charge et veiller à ce que la hauteur
de la charge n'excède pas la rangée de trous supérieure du
panier.
Résidus ou charpie sur le linge
■ Avez-vous effectué le tri correctement? Trier les articles
causant la charpie (serviettes, chenille) des articles qui
retiennent la charpie (velours côtelé, synthétiques). Trier
également en fonction des couleurs.
■ Avez-vous surchargé la laveuse? La charge de lavage doit
être équilibrée et pas surchargée. Les charges doivent pouvoir
culbuter librement. De la charpie ou du détergent en poudre
peuvent être coincés dans la charge s'il y a surcharge. Laver
des charges plus petites.
■ Avez-vous sélectionné le bon niveau d'eau? Le niveau
d'eau doit être adapté à la taille de la charge. La charge doit
être recouverte d'eau.
■ Avez-vous utilisé suffisamment de détergent? Suivre les
directives du fabricant. Utiliser suffisamment de détergent
pour maintenir la charpie dans l'eau.
■ Avez-vous fait sécher vos vêtements sur un fil à linge? Si
c'est le cas, attendez-vous à trouver de la charpie sur les
vêtements. Le mouvement de l'air et le culbutage d'une
sécheuse suppriment la charpie de la charge.
■ A-t-on laissé du papier ou des mouchoirs en papier dans
les poches?
■ La température de l'eau est-elle inférieure à 60°F (15,6°C)?
Une eau de lavage plus froide que 60°F (15,6°C) peut ne pas
dissoudre complètement le détergent.
■ Avez-vous utilisé la durée de programme et la vitesse
d'agitation appropriées pour la charge? La diminution de la
durée de lavage et de la vitesse d'agitation sont un autre
moyen de réduire la charpie.
La charge est froissée, entortillée ou enchevêtrée
■ Avez-vous déchargé la laveuse immédiatement?
Décharger la laveuse dès qu'elle s'arrête.
■ Avez-vous utilisé le bon programme pour la charge à
laver? Utiliser des programmes comportant des durées de
lavage plus courtes et des vitesses basses pour le lavage et
l'essorage (si disponibles) pour réduire le froissement,
l'entortillement et l'enchevêtrement.
■ Avez-vous surchargé la laveuse? La charge de lavage doit
être équilibrée et pas surchargée. Les charges doivent pouvoir
se déplacer librement durant le lavage pour réduire le
froissement, l'entortillement et l'enchevêtrement.
■ L'eau de lavage était-elle suffisamment chaude pour
réduire le froissement? Si c'est sans danger pour la charge,
utiliser une eau de lavage tiède ou chaude. Utiliser une eau de
rinçage froide.
■ Les robinets d'eau chaude et froide ont-ils été inversés?
Vérifier que les tuyaux d'eau chaude et d'eau froide sont
connectés aux bons robinets. Un rinçage à l'eau chaude suivi
d'un essorage provoquera un froissement. Voir les
Instructions d'installation.
■ Avez-vous enroulé des articles autour de l'agitateur?
Déposer les articles dans la laveuse sans les comprimer. Ne
pas enrouler d'articles autour de l'agitateur.
Taches, blancs grisâtres, couleurs défraîchies
■ Avez-vous bien trié la charge? Le transfert de teinture peut
se produire lors du mélange d'articles blancs et de couleur
dans une même charge. Séparer les articles de teinte foncée
des articles blancs ou clairs.
■ La température de lavage était-elle trop basse? Utiliser les
lavages à l'eau tiède ou chaude si celles-ci sont sans danger
pour la charge. S'assurer que le système d'eau chaude est
adéquat pour fournir un lavage à l'eau chaude.
■ Avez-vous utilisé suffisamment de détergent, ou avez-
vous une eau dure? Utiliser plus de détergent pour laver la
saleté intense à l'eau froide ou dure.
■ Les robinets d'eau chaude et froide ont-ils été inversés?
Vérifier que les tuyaux d'eau chaude et d'eau froide sont
connectés aux bons robinets. Voir les Instructions
d'installation.
33
Page 34

■ Avez-vous suivi les directives du fabricant pour l'addition
de détergent et d'assouplissant? Mesurer la quantité de
détergent et d'assouplissant. Utiliser suffisamment de
détergent pour enlever la saleté et la maintenir en suspension.
Diluer l'assouplissant et l'ajouter seulement à la section de
rinçage d'un programme. Ne pas laisser couler
d'assouplissant sur les vêtements.
■ La présence de fer (rouille) dans l'eau est-elle supérieure à
la moyenne? Vous aurez peut-être besoin d'installer un filtre à
fer.
Endommagement des vêtements
■ Les articles pointus ont-ils été retirés des poches avant le
lavage? Vider les poches, fermer les fermetures à glissière, les
boutons pression et les agrafes avant le lavage pour éviter
d'accrocher et de déchirer la charge.
DÉPANNAGE DE LA SÉCHEUSE
Essayer d’abord les solutions suggérées ici, ce qui vous évitera peut-être le coût d’une visite de service...
Fonctionnement de la sécheuse
■ Les cordons et les ceintures ont-ils été attachés pour
empêcher l'enchevêtrement? Les bretelles et les cordons
peuvent facilement s'emmêler dans la charge, ce qui cause
une déformation des coutures et des déchirements.
■ Les articles étaient-ils endommagés avant le lavage?
Raccommoder les déchirures et repriser les fils cassés des
coutures avant le lavage.
■ Avez-vous surchargé la laveuse? La charge de lavage doit
être équilibrée et pas surchargée. Les charges doivent pouvoir
culbuter librement durant le lavage.
■ Avez-vous correctement ajouté l'eau de Javel? Ne pas
verser l'eau de Javel directement sur la charge. Essuyer tous
les renversements de Javel. De l'eau de Javel non diluée
endommagera les tissus. Ne pas placer des articles de la
charge sur le dessus du distributeur d'eau de Javel lorsque
vous chargez et déchargez la laveuse (sur certains modèles).
La sécheuse ne fonctionne pas
■ Un fusible est-il grillé ou un disjoncteur s'est-il
déclenché? Il peut y avoir 2 fusibles ou disjoncteurs pour la
sécheuse. Vérifier que les deux fusibles sont intacts et serrés
ou que les deux disjoncteurs ne sont pas déclenchés.
Remplacer le fusible ou réenclencher le disjoncteur. Si le
problème persiste, appeler un électricien.
■ Une alimentation électrique correcte est-elle disponible?
Les sécheuses électriques nécessitent une alimentation
électrique de 240 V. Vérifier avec un électricien qualifié.
■ A-t-on utilisé un fusible ordinaire? Utiliser un fusible
temporisé.
■ La porte de la sécheuse est-elle bien fermée?
■ A-t-on bien appuyé sur le bouton PUSH TO START DRYER
(appuyer pour mettre la sécheuse en marche)?
Absence de chaleur
■ Un fusible est-il grillé ou un disjoncteur s'est-il
déclenché? Le tambour peut tourner, mais sans chaleur. Les
sécheuses électriques utilisent 2 fusibles ou disjoncteurs.
Remplacer le fusible ou réenclencher le disjoncteur. Si le
problème persiste, appeler un électricien.
■ Pour les sécheuses à gaz, le robinet de la conduite
d'alimentation est-il ouvert?
Bruits inhabituels
■ La sécheuse est-elle restée hors service pendant un
certain temps? Si la sécheuse n'a pas été utilisée depuis
quelque temps, il est possible qu'elle émette des bruits
saccadés au cours des premières minutes de fonctionnement.
■ Une pièce de monnaie, un bouton ou un trombone sont-ils
coincés entre le tambour et l'avant ou l'arrière de la
sécheuse? Vérifier les bords avant et arrière du tambour pour
voir si de petits objets y sont coincés. Vider les poches avant
de faire la lessive.
■ S'agit-il d'une sécheuse à gaz? Le déclic du robinet de gaz
est un bruit de fonctionnement normal.
■ Les quatre pieds sont-ils installés et la sécheuse est-elle
d'aplomb de l'avant vers l'arrière et transversalement? La
sécheuse peut vibrer si elle n'est pas correctement installée.
Voir les Instructions d'installation.
■ Les vêtements sont-ils emmêlés ou en boule? Une charge
en boule rebondit, ce qui fait vibrer la sécheuse. Séparer les
articles de la charge et remettre la sécheuse en marche.
La minuterie ne progresse pas de façon notable
■ Séchage minuté ou séchage à l'air? La minuterie progresse
lentement et de façon continue au cours de la durée réglée.
■ Séchage automatique? La minuterie ne progresse que
lorsque le linge est pratiquement sec.
34
Page 35

Résultats de la sécheuse
Le séchage des vêtements n'est pas satisfaisant, les
durées de séchage sont trop longues, la charge est trop
chaude
■ Le filtre à charpie est-il obstrué de charpie? Le filtre à
charpie doit être nettoyé avant chaque charge.
AVERTISSEMENT
■ La sécheuse est-elle installée dans un placard? Les portes
du placard doivent comporter des ouvertures d'aération au
sommet et en bas de la porte. Un espace minimum de 1"
(2,5 cm) est nécessaire à l'avant de la sécheuse et, pour la
plupart des installations, un espace de 5" (12,7 cm) est
nécessaire à l'arrière de la sécheuse. Voir les Instructions
d'installation.
■ A-t-on sélectionné un programme de séchage à l'air?
Choisir le bon programme pour les types de vêtements à
sécher.
■ La charge est-elle trop grosse et trop lourde pour sécher
rapidement? Séparer la charge pour qu'elle culbute
librement.
Charpie sur la charge
Risque d’incendie
Utiliser un conduit d’évacuation en métal lourd.
Ne pas utiliser un conduit d’évacuation en plastique.
Ne pas utiliser un conduit d’évacuation en feuille
de métal.
Le non-respect de ces instructions peut causer
un décès ou un incendie.
■ Le conduit d'évacuation ou le clapet d'évacuation à
l'extérieur est-il obstrué de charpie, restreignant le
mouvement de l'air? Faire fonctionner la sécheuse pendant
5 à 10 minutes. Tenir la main sous le clapet d'évacuation à
l'extérieur pour vérifier le mouvement de l'air. Si vous ne
ressentez pas de l'air en mouvement, nettoyer le système
d'évacuation pour ôter la charpie ou remplacer le conduit
d'évacuation par un conduit en métal lourd ou flexible. Voir les
Instructions d’installation.
■ Des feuilles d'assouplissant de tissu bloquent-elles la
grille de sortie? Utiliser seulement une feuille d'assouplissant
par charge et ne l'utiliser qu’une seule fois.
■ Le conduit d'évacuation a-t-il la longueur appropriée?
Vérifier que le conduit d'évacuation n'est pas trop long ou ne
comporte pas trop de changements de direction. Un long
conduit augmentera les durées de séchage. Voir les
Instructions d’installation.
■ Le diamètre du conduit d'évacuation a-t-il la taille
correcte? Utiliser un composant de 4" (10,2 cm) de diamètre.
AVERTISSEMENT
■ Le filtre à charpie est-il obstrué? Le filtre à charpie doit être
nettoyé avant chaque charge.
Taches sur la charge ou sur le tambour
■ L’assouplissant de tissu pour sécheuse a-t-il été utilisé
correctement? Ajouter les feuilles d’assouplissant de tissu au
début du programme. Les feuilles d’assouplissant de tissu
ajoutées à une charge partiellement sèche peuvent tacher les
vêtements.
Les taches sur le tambour sont dues aux teintures contenues
dans les vêtements (les jeans en général). Il n'y aura pas de
transfert sur les autres vêtements.
Charges avec faux plis
■ La charge a-t-elle été retirée de la sécheuse à la fin du
programme?
■ La sécheuse a-t-elle été surchargée? Faire sécher de plus
petites charges qui peuvent culbuter librement.
Odeurs
■ Avez-vous récemment employé peinture, teinture ou
vernis dans la pièce où est installée votre sécheuse? Si
c'est le cas, aérer la pièce. Une fois les odeurs ou émanations
disparues, laver et sécher à nouveau les vêtements.
■ La sécheuse électrique est-elle utilisée pour la première
fois? Le nouvel élément de chauffage électrique peut dégager
une odeur. L'odeur disparaîtra après le premier programme.
Risque d'explosion
Garder les matières et les vapeurs inflammables, telle
que l’essence, loin de la sécheuse.
Placer la sécheuse au moins 46 cm (18 po) au-dessus
du plancher pour une installation dans un garage.
Le non-respect de ces instructions peut causer
un décès, une explosion ou un incendie.
■ La sécheuse se trouve-t-elle dans une pièce où la
température ambiante est inférieure à 45ºF (7ºC)? Le bon
fonctionnement des programmes de la sécheuse nécessite
une température ambiante supérieure à 45°F (7°C).
35
Page 36

GARANTIE DES GROS APPAREILS MÉNAGERS
©
MAYTAG CORPORATION
GARANTIE LIMITÉE DE UN AN
Pendant un an à compter de la date d'achat, lorsque ce gros appareil ménager est utilisé et entretenu conformément aux instructions
jointes à ou fournies avec le produit, Maytag Corporation ou Maytag Limited (ci-après désignées “Maytag”) paiera pour les pièces
spécifiées par l'usine et la main-d'oeuvre pour corriger les vices de matériaux ou de fabrication. Le service doit être fourni par une
compagnie de service désignée par Maytag. Cette garantie limitée s’applique exclusivement lorsque l’appareil est utilisé dans le pays
où il a été acheté.
MAYTAG NE PRENDRA PAS EN CHARGE
1. Les visites de service pour rectifier l'installation du gros appareil ménager, montrer à l'utilisateur comment utiliser l'appareil,
remplacer ou réparer des fusibles ou rectifier le câblage ou la plomberie du domicile.
2. Les visites de service pour réparer ou remplacer les ampoules électriques de l'appareil, les filtres à air ou les filtres à eau. Ces
pièces consomptibles ne sont pas couvertes par la garantie.
3. Les réparations lorsque le gros appareil ménager est utilisé à des fins autres que l'usage unifamilial normal.
4. Les dommages imputables à : accident, modification, usage impropre ou abusif, incendie, inondation, actes de Dieu, installation
fautive ou installation non conforme aux codes d'électricité ou de plomberie, ou l'utilisation de produits non approuvés par Maytag.
5. Toute perte d'aliments due à une défaillance du réfrigérateur ou du congélateur.
6. Le coût des pièces de rechange et de la main-d'œuvre pour les appareils utilisés hors des États-Unis ou du Canada.
7. Le ramassage et la livraison. Ce gros appareil ménager est conçu pour être réparé à domicile.
8. Les réparations aux pièces ou systèmes résultant d'une modification non autorisée faite à l'appareil.
9. Les frais de transport pour le service d'un produit dans les régions éloignées.
10. La dépose et la réinstallation de votre appareil si celui-ci est installé dans un endroit inaccessible ou n'est pas installé
conformément aux instructions d'installation fournies.
11. Le coût des pièces de rechange et de la main-d'œuvre lorsque l’appareil est utilisé dans un pays autre que le pays où il a été
acheté.
CLAUSE D'EXONÉRATION DE RESPONSABILITÉ AU TITRE DES GARANTIES IMPLICITES; LIMITATION DES RECOURS
LE SEUL ET EXCLUSIF RECOURS DU CLIENT DANS LE CADRE DE LA PRÉSENTE GARANTIE LIMITÉE CONSISTE EN LA
RÉPARATION PRÉVUE CI-DESSUS. LES GARANTIES IMPLICITES, Y COMPRIS LES GARANTIES APPLICABLES DE QUALITÉ
MARCHANDE ET D'APTITUDE À UN USAGE PARTICULIER, SONT LIMITÉES À UN AN OU À LA PLUS COURTE PÉRIODE AUTORISÉE
PAR LA LOI. MAYTAG N'ASSUME AUCUNE RESPONSABILITÉ POUR LES DOMMAGES FORTUITS OU INDIRECTS. CERTAINES
JURIDICTIONS NE PERMETTENT PAS L'EXCLUSION OU LA LIMITATION DES DOMMAGES FORTUITS OU INDIRECTS, OU LES
LIMITATIONS DE LA DURÉE DES GARANTIES IMPLICITES DE QUALITÉ MARCHANDE OU D'APTITUDE À UN USAGE PARTICULIER,
DE SORTE QUE CES EXCLUSIONS OU LIMITATIONS PEUVENT NE PAS S'APPLIQUER DANS VOTRE CAS. CETTE GARANTIE VOUS
CONFÈRE DES DROITS JURIDIQUES SPÉCIFIQUES ET VOUS POUVEZ ÉGALEMENT JOUIR D'AUTRES DROITS QUI PEUVENT
VARIER D'UNE JURIDICTION À UNE AUTRE.
À l'extérieur du Canada et des 50 États des États-Unis, cette garantie ne s'applique pas. Contacter votre marchand Maytag autorisé
pour déterminer si une autre garantie s'applique.
Si vous avez besoin de service, voir d'abord la section “Dépannage” du Guide d'utilisation et d'entretien. Après avoir vérifié la section
“Dépannage”, de l'aide supplémentaire peut être trouvée en vérifiant la section “Assistance ou service” ou en appelant Maytag. Aux
É.-U., composer le 1-800-688-9900. Au Canada, composer le 1-800-807-6777. 9/06
Pièces de rechange
Si vous avez besoin de commander des pièces de rechange,
nous vous recommandons d’utiliser seulement des pièces
spécifiées par l'usine. Ces pièces conviendront bien et
fonctionneront bien parce qu’elles sont fabriquées selon les
mêmes spécifications précises utilisées pour fabriquer chaque
nouvel appareil Maytag
®
.
Pour localiser des pièces de rechange spécifiées par l'usine
dans votre région :
Téléphoner au Centre d'assistance à la clientèle de Maytag
Services, LLC, au 1-800-688-9900, ou à votre centre de service
désigné le plus proche. Au Canada, composer le
1-800-807-6777.
Pour des renseignements sur la façon de contacter Maytag
Services, LLC, voir la page de couverture de ce document.
W10117754A
2007
All rights reserved.
Todos los derechos reservados.
Tous droits réservés.
Toutes les autres marques sont des marques de commerce de Maytag Corporation ou de ses compagnies affiliées.
MAYTAG and the “M” Symbol are registered trademarks of Maytag Limited in Canada.
MAYTAG y el símbolo “M” son marcas registradas de Maytag Limited en Canadá.
MAYTAG et le symbole “M” sont des marques déposées de Maytag Limited au Canada.
Todas las otras marcas son marcas de comercio de Maytag Corporation o sus compañías asociadas.
All other marks are trademarks of Maytag Corporation or its related companies.
Printed in U.S.A.
Impreso en EE.UU.
Imprimé aux É.-U.
1/07
 Loading...