

Maytag Stacking kit Instructions Manual
STACKING KIT INSTALLATION INSTRUCTIONS
(MAH6700 washer & MDE6700 dryer only)
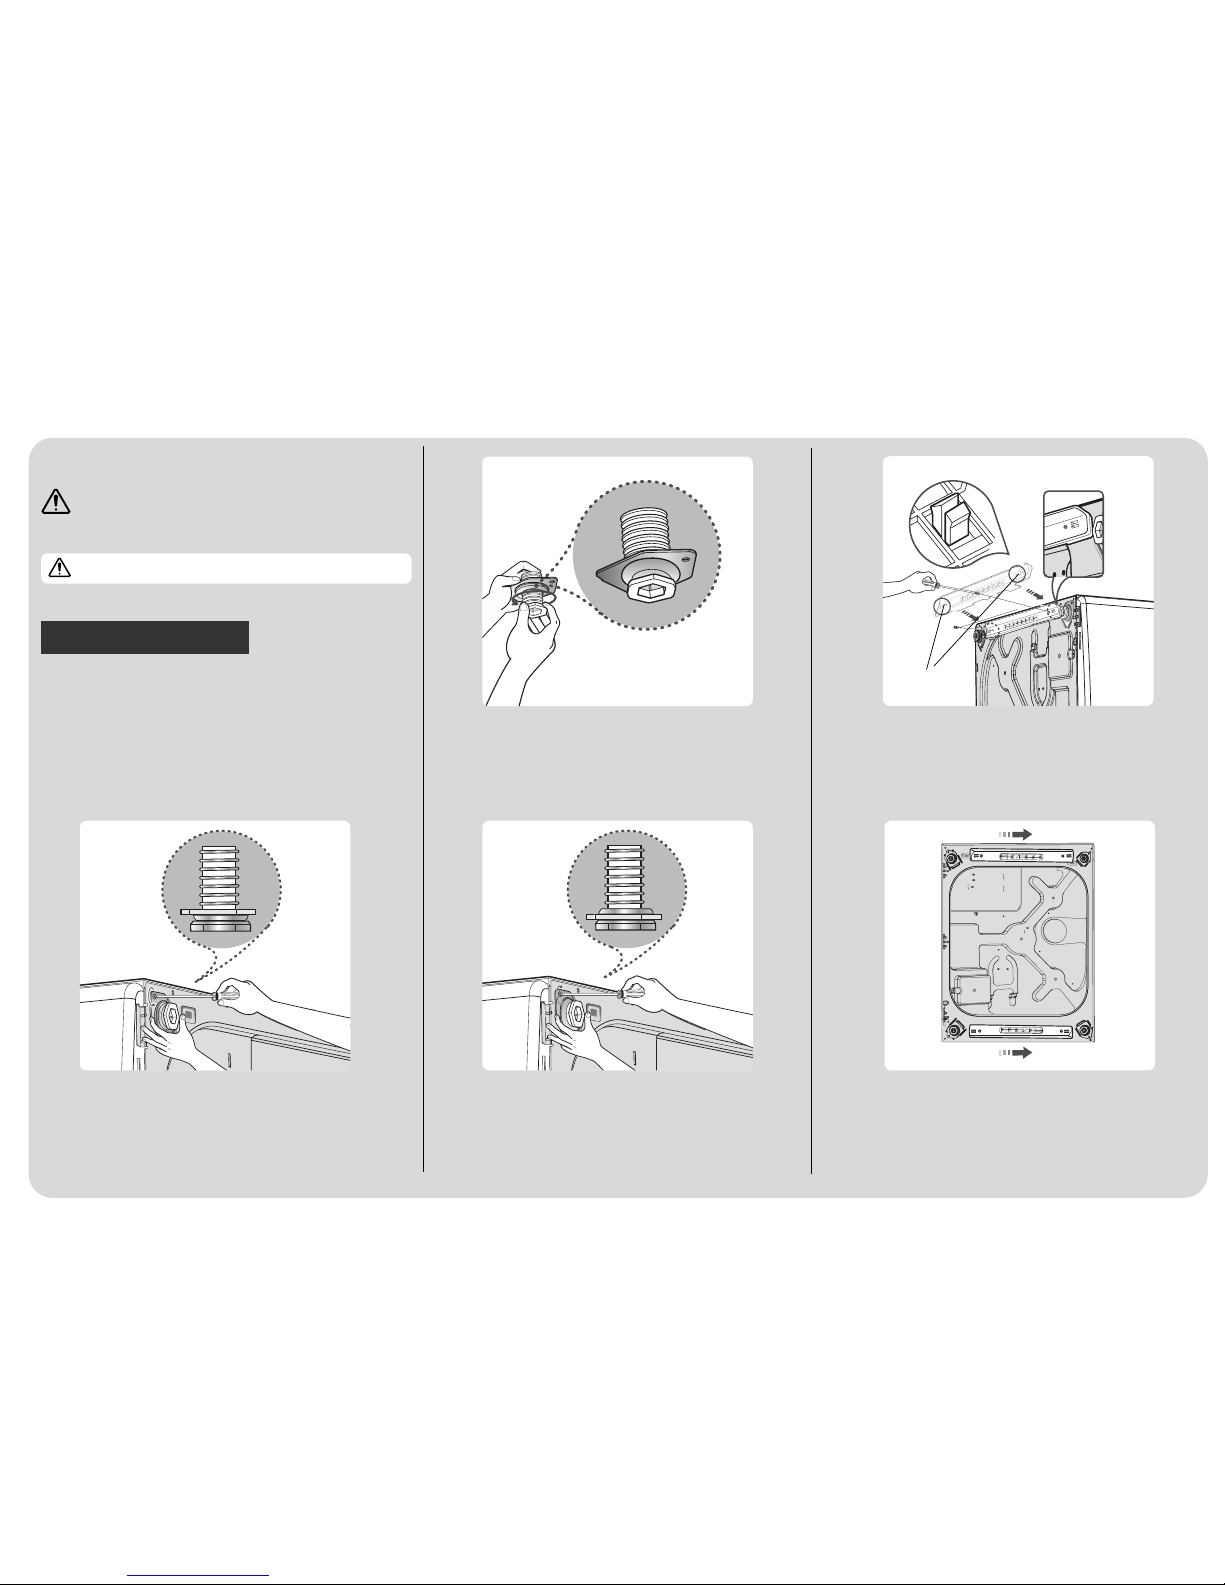
Step 3: Unscrew and disassemble the four leg
assemblies.
Step 4: Disassemble each leg from the bracket. Then flip
the bracket over and remount onto the leg.
Step 1: Place cover (cloth, cardboard, or carpeting) on floor surface
to avoid damage.
Step 2: Lay the dryer on its side (not front or back).
DC68-01052D REV(0.1)
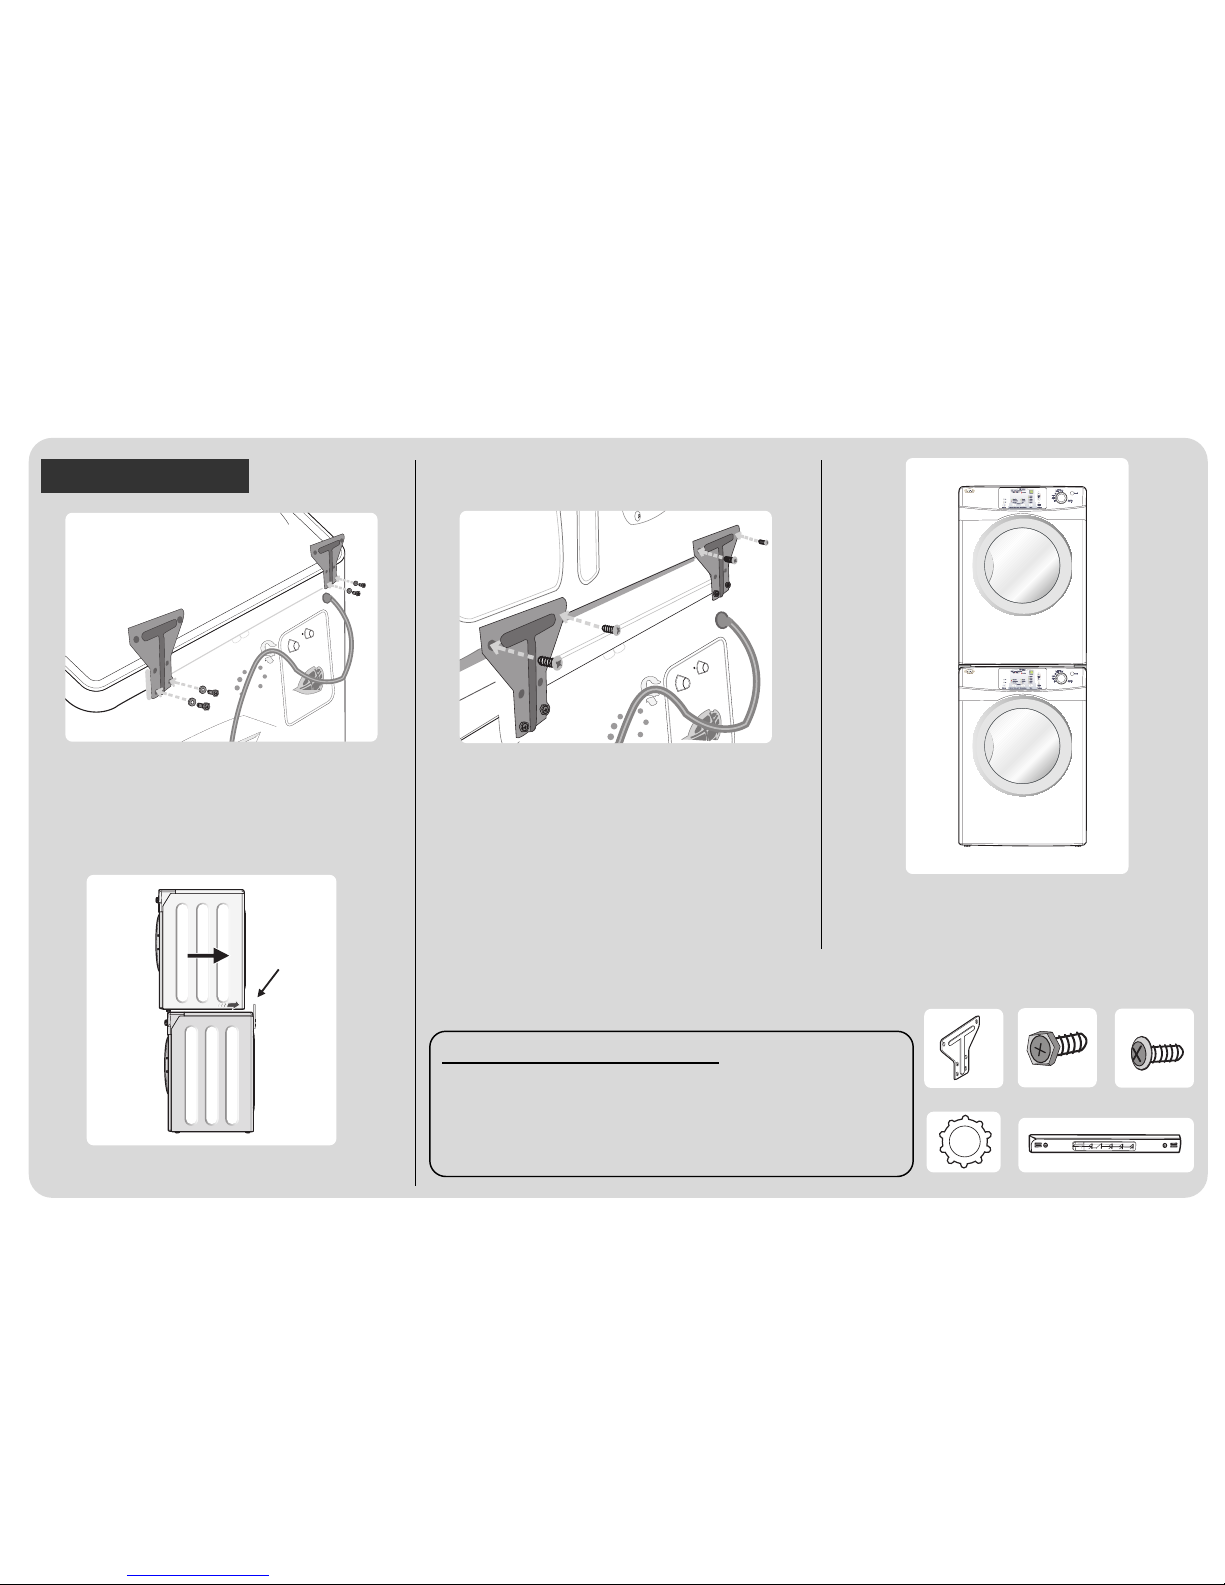
Caution : Two people are required to lift the dryer on to the washer.
WARNING : This kit is not to be used for stacking a gas
dryer. Additional gas hook-up components are required.
Step 6: Snap the Stacking Support Guides into the rectangular holes
in the dryer base and secure each with two(2) Screws Phillips-pan
head (6006-001174).
Hook
Step 7: Bottom view of the dryer after assembling the Stacking
Support Guides to the dryer base.
Dryer
Step 5: Reassemble each leg and bracket into the dryer base.
STOP HERE
STACKING KIT INSTALLATION INSTRUCTIONS
(MAH6700 washer & MDE6700 dryer only)
Step8 : Assemble the Rear Brackets to the washer as
shown above. Use two(2) Screws-Hex
Head(34001382) with washers in each washing machine
top cover tang if there are two holes.
Use one(1) Screw-Hex Head(34001382) with washer in
each top cover tang if there is one hole.
Washer
Step 9: Lift and position dryer into the position on the washer shown.
Step10 : Assemble the Rear Brackets to the dryer as shown
above. Note that four screws must be used to hold the Rear
Brackets to the back of the dryer. Use four(4) Screws-phillips Pan
Head(6006-001174) in the back of the dryer cabinet.Extra screws
are included in the kit for this.
STACKING KIT COMPONENTS:
Stacking Support Guides(2) -34001449
Rear Bracket(2) -34001463
Screws-Hex Head(4) -34001382
Screws Phillips-Pan Head(8) -6006-001174
Washer(4)
Screw-Hex Head
Washer
Stacking Support Guide
Screw Phillips-Pan Head
Rear Bracket
Step 11: Stacked Unit is now ready to be installed. Refer to
detailed installation instructions packed with products.
 Loading...