

Page 1
MAYFAG
Gas Range
Tabl
Important Safety
instructions ............................... 1-4
Surface Cooking ...................... 5-8
Surface Controls
Sealed Gas Burners
Oven Cooking ......................... 7-1 8
Manual Cleon Oven Controls
CHock Baking
Timer Broiling
Manual Clean Oven }(nob Control
Baking Broiling
Self=Clean Oven Controls
CHock Timer
Baking KeepWarm
Cook & Hold Broiling
Dday Bake Oven Racks
Form No. C/05/05 Pall: No. 8113P512 60 @2005 Maytag Appliances Sales Co. Litho U.S.A.
Care & Cleaning ................... t 9-22
Stir-Clean Oven
Cleaning Procedures
Maintenance ......................... 23-24
OvenWhldow & Light
Removal of Gas Appliance
TtoubJeshooting ................... 25-26
Warranty & Service .................... 27
Guide d'ntilisation et
d'entretien ................................... 28
Gnia de Uso y Cuidado ............. 56
Page 2
Consumer: PPeaseread and keep thiS guide for future
reference. Keepsales receipt and/or Canceled check as proof
of purchase,
Model Number
Serial Number
Date of Purchase
]_800-688T2088(U.S. TTYfor hearing or speech impaired}
In our continuing effortto improvethe qualityand performance
of our Cookingproducts, it maybenecessaryto make changes
cian. Do not attempt to adjust, repair, service, or replace
any part of your appliance unless it is specifically recom-
mended in this guide. All other servicing should be
referred to a qualified servicer. Have the installer show
you the location of the gas shut off valve and howto
shut it off in an emergency,
Always disconnect power to appliance before servicing,
if the information in this gnide is not followed
exactly, a fire or explosion may resumtcausing
property damage, personal injunj or death,
Do not store or use gasoline or other flam-
mable vapors and liquids in the vicinity of this
or any applianceo
UFYOU SIVlELL GAS:
Fer service i#fennaden, see page 27.
Warning and Important Safety Instructions appearing in
this guide are not meant to cover all possible conditions
and situations that may occur. Common sense, caution,
and care must be exercised when installing, maintaining,
or operating the appliance.
Always contact the manufacturer about problems or
conditions you do not understand.
Recognize Safety Symbols, Words, Labels
WARNnNG- Hazards or unsafe practices which
COULD result in severe persona! injury or death.
o [}o not try to light any applianceo
o Do not touch any electricam switch.
o Do not use any phone in your buiMing.
o immediately cal| your gas supplier from a
neighbor's phone° Follow the gas snpplier's
instructions.
* If you cannot reach your gas supplier, call
the fire department°
mnstallation and service must be performed by
a qnalified installer, service agency or the #as
su ppmier.
and use in accordance with the manufacturer's
i]3structJons,
Genera instructions
CAUTUON _ Hazards or unsafe piactices which
COULD result in minor' personal injury.
Read and follow aH instructions before using this
appmiance to prevent the potential risk of fire, electric
shock, personal injury or damage to the appliance as a
result of improper usage of the appliance. Use appliance
only for its intended purpose as described in this guide.
To ensure proper and safe operation: Appliance must
be properly installed and grounded by a qualified techni-
TuPAND
PERSONS
INSTALL ANTU-TUP DEWCE
PACKED WUTH RANGE
abnormal usage or by excessive loading of the
oven door, the appliance mest be secured bya
properly insta!led anti.tip device,
Page 3
Tocheckif deviceisproperlyinstalled,lookunderneath
rangewithaflashlightto makesureoneoftherear
levelinglegsisproperlyengagedinthebracketslot.The
anti-tipdevicesecurestherearlevelinglegtothefloor
whenproperlyengaged.Youshouldcheckthedevice
eachtime therangehasbeenmoved.
To Prevent Fire or Smoke
Be sure all packing materials are removed from the
appliance before operating it.
Donotusewaterongreasefires.Usebakingsoda,a
drychemicalorfoam-typeextinguishertosmotherfire
orflame.
Child Safety
NEVER store items of interest to children in cabinets
above an appliance Or.on backguard 0f a range.
items could be seriously injured.
Keep area around appliance clear and free from com-
bustible materials, gasoline, and other flammable vapors
and materials.
If appliance is installed near a window, proper precau-
tions should be taken to prevent curtains from blowing
over burners.
NEVER leave any items on the cooktop. The hot air from
the vent might ignite flammable items and may increase
pressure in closed containers which could cause them
to bursL
Many aerosol-type spray cans are EXPLOSIVE when
exposed to heat and may be highly fiammable. Avoid
their use or storage near an appliance.
Many plastics are vulnerable to heat. Keep plastics away
from parts of the appliance that may become warm or
hot. Do not leave plastic items on the cooktop as they
may melt or soften if left too close to the vent or a
lighted surface burner.
To eliminate the hazard of reaching over hot surface
burners, cabinet storage should not be provided directly
above a unit. If storage is provided, it should be limited
to items which are used infrequently and which can be
safely stored in an area subjected to heat from an
appliance. Temperatures may be unsafe for some items,
such as volatile liquids, cleaners or aerosol sprays.
In Case of Fire
Turn off appliance and ventilating hood to avoid spread-
ing the flame. Extinguish flame then turn on hood to
remove smoke and odor.
Cooktop: Smother fire or flame in a pan with a lid or
cookie sheet.
NEVER pick up or move a flaming pan.
Oven: Smother fire or flame by closing the oven door.
NEVER leave children alone or unsupervised near the
appliance when it is in use or is still hot.
NEVER allow children to sit or stand on any part of the
appliance as they could be injured or burned.
Children must be taught that the appliance and utensils
in it can be hot. Let hot utensils cool in a safe place, out
of reach of small children. Children should be taught
that an appliance is not a toy. Children should not be
allowed to play with controls or other parts of the unit.
About Your Appliance
NEVER use aPpHance door, or drawer, !f equipped, as
lipping of the appliance, damage to the appliance,
and serious !nJur!es.
NEVER use appliance as a space heater to heat or
warm a room to prevent potential hazard to the user and
damage to the appliance. Also, do not use the cooktop
or oven as a storage area for food or cooking utensils.
Do not obstruct the flow of combustion and ventilation
air by blocking the oven vent or air intakes. Restriction
of air flow to the burner prevents proper performance
and increases carbon monoxide emission to unsafe
bveb.
The oven vent is located at the base of the control panel.
Avoid touching oven vent area while oven is on and for
several minutes after oven is turned off. Some parts of
the vent and surrounding area become hot enough to
cause burns. After oven is turned off, do not touch the
oven vent or surrounding areas until they have had
sufficient time to cool.
2
Page 4
Otherpotentiallyhotsurfacesinclude cooktop, areas
facing the cooktop, oven vent, surfaces near the vent
opening, oven door, areas around the oven door and
oven window.
Do not touch a hot oven light bulb with a damp cloth as
the bulb could break Should the bulb break, disconnect
power to the appliance before removing bulb to avoid
ebctrbal shock
Cooking Safety
Always place a pan on a surface burner before turning it
on. Be sure you know which knob controls which
surface burner. Make sure the correct burner isturned
on and that the burner has ignited. When cooking is
completed, turn burner off before removing pan to
prevent exposure to burner flame.
Always adjust surface burner flame so that it does not
extend beyond the bottom edge of the pan. An exces-
sive flame is hazardous, wastes energy and may damage
the appliance, pan or cabinets above the appliance.
NEVER leave a surface cooking operation unattended
especially when using a high heat setting or when deep
fat frying. Boilovers can cause smoking and greasy
spillovers may ignite. Clean up greasy spills as soon as
possible. Do not use high heat for extended cooking
operations.
NEVER heat an unopened container on the surface
burner or in the oven. Pressure build-up may cause
container to burst resulting in serious personal injury or
damage to the appliance.
Use dry, sturdy potholders. Damp potholders may cause
burns from steam. Dish towels or other substitutes
should never be used as potholders because they can
trail across hot surface burners and ignite or get caught
on appliance parts.
Always allow quantities of hot fat used for deep fat
frying cool before attempting to move or handle.
Do not let cooking grease or other fiammabb materials
accumulate in or near the appliance, hood or vent fan.
Clean hood frequently to prevent grease from accumu-
lating on hood or filter. When flaming foods under the
hood turn the fan on.
NEVER wear garments made of fiammabb material or
loose fitting or Iong-sbeved apparel while cooking.
Clothing may ignite or catch utensil handles.
Always place oven racks in the desired positions while
oven is cool Slide oven rack out to add or remove food,
using dry, sturdy potholders. Always avoid reaching into
the oven to add or remove food. If a rack must be moved
while hot, use a dry, sturdy potholder. Always turn the
oven off at the end of cooking.
Use racks only in the oven in which they were shipped/
purchased.
Use care when opening the oven door. Let hot air or
steam escape before moving or replacing food.
PREPARED FOOD WARNUNG: Follow food
manufacturer's instructions. If a plastic frozen food con-
tainer and/or its cover distorts, warps, or is otherwise
damaged during cooking, immediately discard the food
and its container. The food could be contaminated.
NEVER use aluminum foil to cover oven racks or oven
bottom. This could result in risk of personal electric shock,
fire, or damage to the appliance. Use foil only as directed
in this guide.
Utensi Safety
Use pans with flat bottoms and handles that are easily
grasped and stay cook Avoid using unstable, warped,
easily tipped or loose-handled pans. Also avoid using
pans (especially small pans} with heavy handles, as they
could be unstable and easily tip. Pans that are heavy to
move when filled with food may also be hazardous.
Be sure utensil is large enough to properly contain food
and avoid boilovers. Pan size is particularly important in
deep fat frying. Be sure pan will accommodate the volume
of food that is to be added as well as the bubble action of
faL
To minimize burns, ignition of fiammabb materials and
spillage due to unintentional contact with the utensil, do
not extend handles over adjacent surface burners. Always
turn pan handles toward the side or back of the appliance,
not out into the room where they are easily hit or reached
by small children.
Never let a pan boil dry as this could damage the utensil
and the appliance.
Follow the manufacturer's directions when using oven
cooking bags.
Only certain types of glass, glass/ceramic, ceramic or
glazed utensils are suitable for cooktop or oven usage
without breaking due to the sudden change in tempera-
ture. Follow manufacturer's instructions when using glass.
3
Page 5
Thisappliancehasbeentestedforsafeperformance
usingconventionalcookware.Donot useanydevices
oraccessoriesthatarenotspecificallyrecommendedin
thisguide.Donot useeyelidcoversforthesurface
units,stovetopgrills,oradd-onovenconvectionsys-
tems.Theuseofdevicesor accessoriesthatarenot
expresslyrecommendedinthismanualcancreate
serioussafetyhazards,resultin performanceproblems,
andreducethelifeofthecomponentsofthe appliance.
Cmeaning Safety
Turn off all controls and wait for appliance parts to cool
before touching or cleaning them. Do not touch the
burner grates or surrounding areas until they have had
sufficient time to cool.
Clean appliance with caution. Use care to avoid steam
burns if a wet sponge or cloth is used to wipe spills on a
hot surface. Some cleaners can produce noxious fumes
if applied to a hot surface.
Self-Clean Oven (select models[}
oven during the self-,clean cycle:
Clean only parts listed in this guide. Do not clean door
gasket. The door gasket is essential for a good seal.
Care should be taken not to rub, damage, or move the
gasket. Do not use oven cleaners of any kind in or
around any part of the self-clean oven.
Before self-cleaning the oven, remove broiler pan, oven
racks and other utensils and wipe up excessive
spillovers to prevent excessive smoke, flare-ups or
flaming.
It is normal for the cooktop of the range to become hot
during a self-clean cycle. Therefore, touching the
cooktop during a clean cycle should be avoided.
important Safety Notice and
The California Safe Drinking Water and Toxic Enforce-
ment Act of 1986 (Proposition 65} requires the Governor
of California to publish a list of substances known to the
State of California to cause cancer or reproductive harm,
and requires businesses to warn customers of potential
exposures to such substances.
Users of this appliance are hereby warned that the
burning of gas can result in low-level exposure to some
of the listed substances, including benzene, formalde-
hyde and soot, due primarily to the incomplete combus-
tion of natural gas or liquid petroleum (LP} fuels. Prop-
erly adjusted burners will minimize incomplete combus-
tion. Exposure to these substances can also be mini-
mized by properly venting the burners to the outdoors.
Users of this appliance are hereby warned that when
the oven is engaged in the self-clean cycle, there may
be some low-level exposure to some of the listed
substances, including carbon monoxide. Exposure to
these substances can be minimized by properly venting
the oven to the outdoors by opening the windows and/
or door in the room where the appliance is located
during the self-clean cycle.
UMPORTANT NOTUCE REGARDUNG PET BURDS:
Never keep pet birds in the kitchen or in rooms where
the fumes from the kitchen could reach. Birds have a
very sensitive respiratory system. Fumes released during
an oven self-cbaning cycle may be harmful or fatal to
birds. Fumes released due to overheated cooking off, fat,
margarine and overheated non-stick cookware may be
equally harmful
Save These instructions for Future Reference
4
Page 6
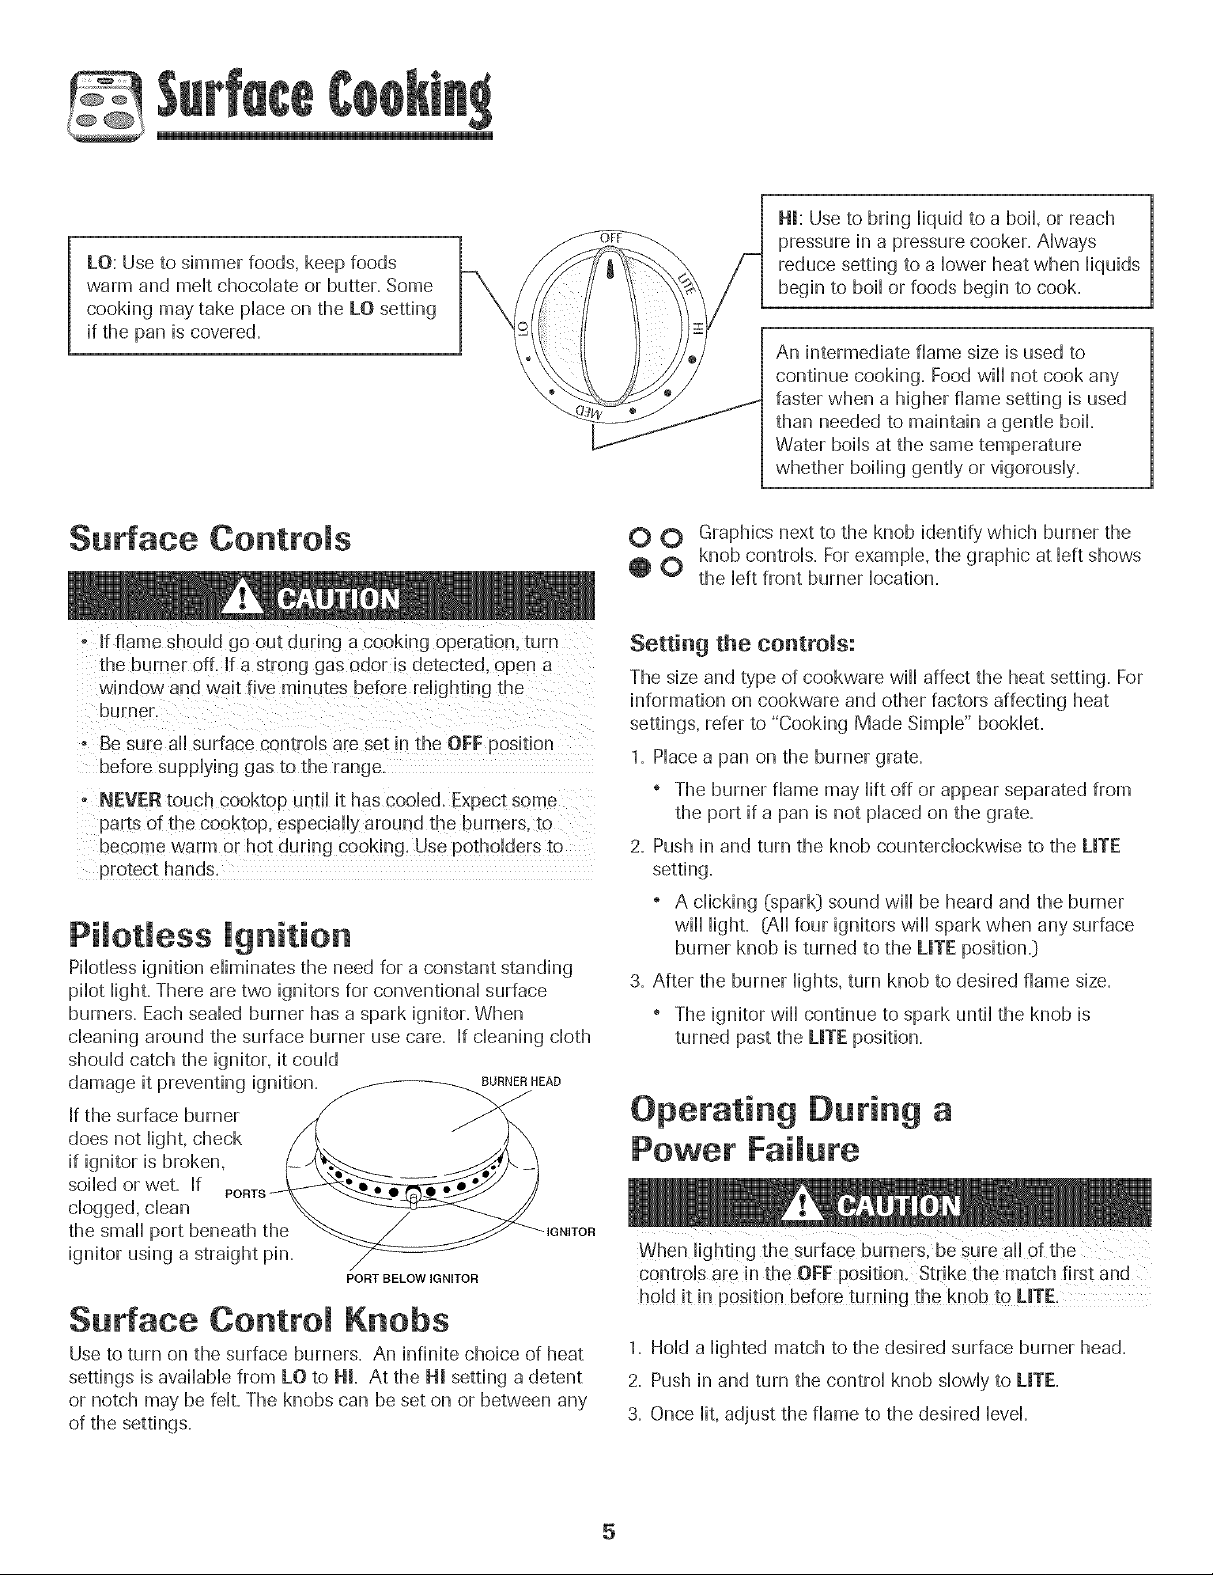
LO: Use to simmer foods, keep foods
warm and malt chocoDte or butter. Some
cooking may take pDce on the LO setting
if the pan is covered.
HI: Use to bring Hiquidto a boil or reach
pressure in a pressure cooker. AHways
reduce setting to a Howerheat when Hiquids
begin to boiHor foods begin to cook.
An intermediate flame size is used to
continue cooking. Food will not cook any
faster when a higher flame setting is used
than needed to maintain agentile boil
Water boiHsat the same temperature
whether boiHinggentHyor vigorousHy.
Surface Controls
- If flame should go out during a cooking operation, turn
[he burner off, If a strong gas odor is detected, open a
window and wait five minutes before reiighting the
burnel
o Besure all surface controls are set in the OFF position
before supplying gas to the range.
- NEVER touch cooktop until it has cooled. Expect some
parts of the cooktop, especiail} around the burners, to
become warm or hot during cooking. Use potholders to
protect hands
Pilotless ignition
Pilotless ignition eliminates the need for a constant standing
pilot light. There are two ignitors for conventional surface
burners. Eachsealed burner has a spark ignitor. When
cleaning around the surface burner use care. If cleaning cloth
should catch the ignitor, it could
damage it preventing ignitiot_ _HEAD
If the surface burner ///
doesnot,ght,check / t, \
ifignitorisbroke,,, (_
soiled or wet. If PORTS__'_'_'_'_'_'_'_'_'_/_ J
clogged, clean _.
the small port beneath tl}e __IGNITOR
ignitor using a straight pit,.
PORT BELOW IGNITOR
Surface Control Knobs
Use to turn on the surface burners. An infinite choice of heat
settings is available from LO to Hi. At the Hi setting a detent
or notch may be felt. The knobs can be set on or between any
of the settings.
0 0 Graphics next to the knob identify which burner the
knob controHs. For exampHe,the graphic at Heftshows
0 0 the left front burner location.
Setting the controls:
The size and type of cookware will affect the heat setting. For
information on cookware and other factors affecting heat
settings, refer to "Cooking Made Simple" booklet.
1. Place a pan on the burner grate.
o The burner flame may lift off or appear separated from
the port if a pan is not placed on the grate.
2. Push in and turn the knob counterclockwise to the LITE
setting.
* A clicking [spark} sound will be heard and the burner
will light. (All four ignitors will spark when any surface
burner knob is turned to the LITE position.}
3. After the burner lights, turn knob to desired flame size.
* The ignitor will continue to spark until the knob is
turned past the LITE position.
Operating [}uring a
Power Failure
controls are in the OFF position, Strike the match first and
hold it inposition bdom turning the knob to LiTE,
1. Hold a lighted match to the desired surface burner head.
2. Push in and turn the control knob slowly to LmTE.
3. Once lit, adjust the flame to the desired level.
5
Page 7
Cooktop
To prevent the cooktop from discoloring or
staining:
CHeancooktop after each use.
Wipe acidic or sugary' spills as soon as the cooktop has
_ cooHedas these spills may discoHorthe
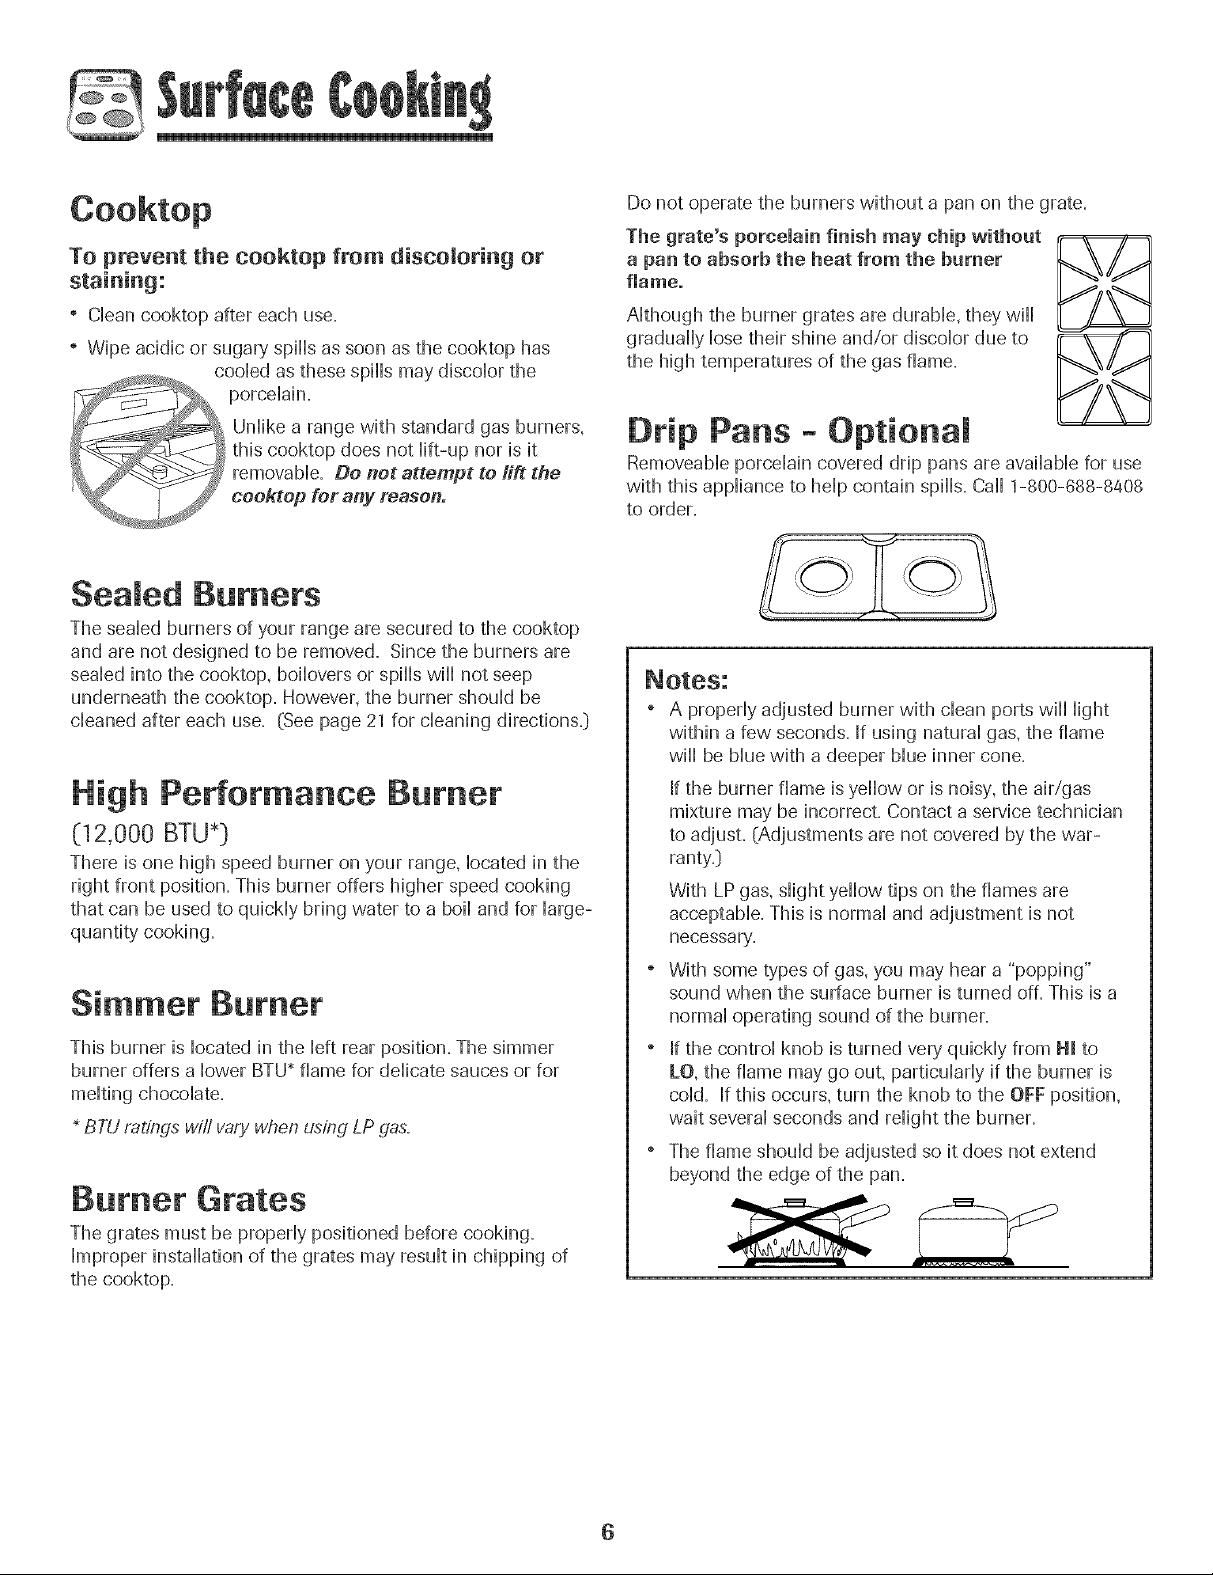
Do not operate the burners without a pan on the grate.
The grate's porcelain finish may chip withoat
a pan to absorb the heat from the burner
flame.
Although the burner grates are durable, they will
gradually lose their shine and!or discolor due to
the high temperatures of the gas flame.
__ UnHikea range with standard gas burners,
this cooktop does not Hilt-up nor is it
removaMe. Do not attempt to lift the
%®_,' eooktop for arty reason°
Seamed Burners
The sealed burners of your range are secured to the cooktop
and are not designed to be removed. Since the burners are
seaHedinto the cooktop, boilovers or spills will not seep
underneath the cooktop. However, the burner should be
cleaned after each use. (See page 21 for cleaning directions._)
High Performance Burner
(12,000 BTU*)
There is one high speed burner on your range, located in the
right front position. This burner offers higher speed cooking
that can be used to quickly bring water to a boil and for large-
quantity' cooking.
Simmer Burner
This burner is located h the [eft rear position= The simmer
burner offers a lower BTU* flame for delicate sauces or for
me[thg chocolate=
BTUratings will varywhen using LP gas.
Burner Grates
The grates must be properly positioned before cooking.
Improper installation of the grates may result in chipping of
the cooktop=
Drip Pans - Optional
Removeab[e porcelain covered drip pans are available for use
with this appliance to help contah spills=Ca[[ 1-800-688-8408
to order,
o A propedy adjusted burner with dean ports will light
within a few seconds. [f using natural gas, the flame
will be blue with a deeper blue inner cone.
[f the burner flame is yellow or is noisy, the air/gas
mixture may be incorrect. Contact a service technician
to adjust. (Adjustments are not covered by the war-
ranty=_)
With LPgas, slight yellow tips on the flames are
acceptable. This is normal and adjustment is not
necessary'.
" With some types of gas, you may hear a "popping"
sound when the surface burner is turned off=This is a
normal operating sound of the burner.
" [f the control knob is turned very'quickly from H[ to
LO, the flame may go out, particularly if the burner is
cold. if this occurs, turn the knob to the OFFposition,
wait several seconds and relight the burner.
" The flame should be adjusted so it does not extend
beyond the edge of the pan=
6
Page 8
©
ManuaJ CJean Oven Control
(select models) A
F
\
\
B C D E
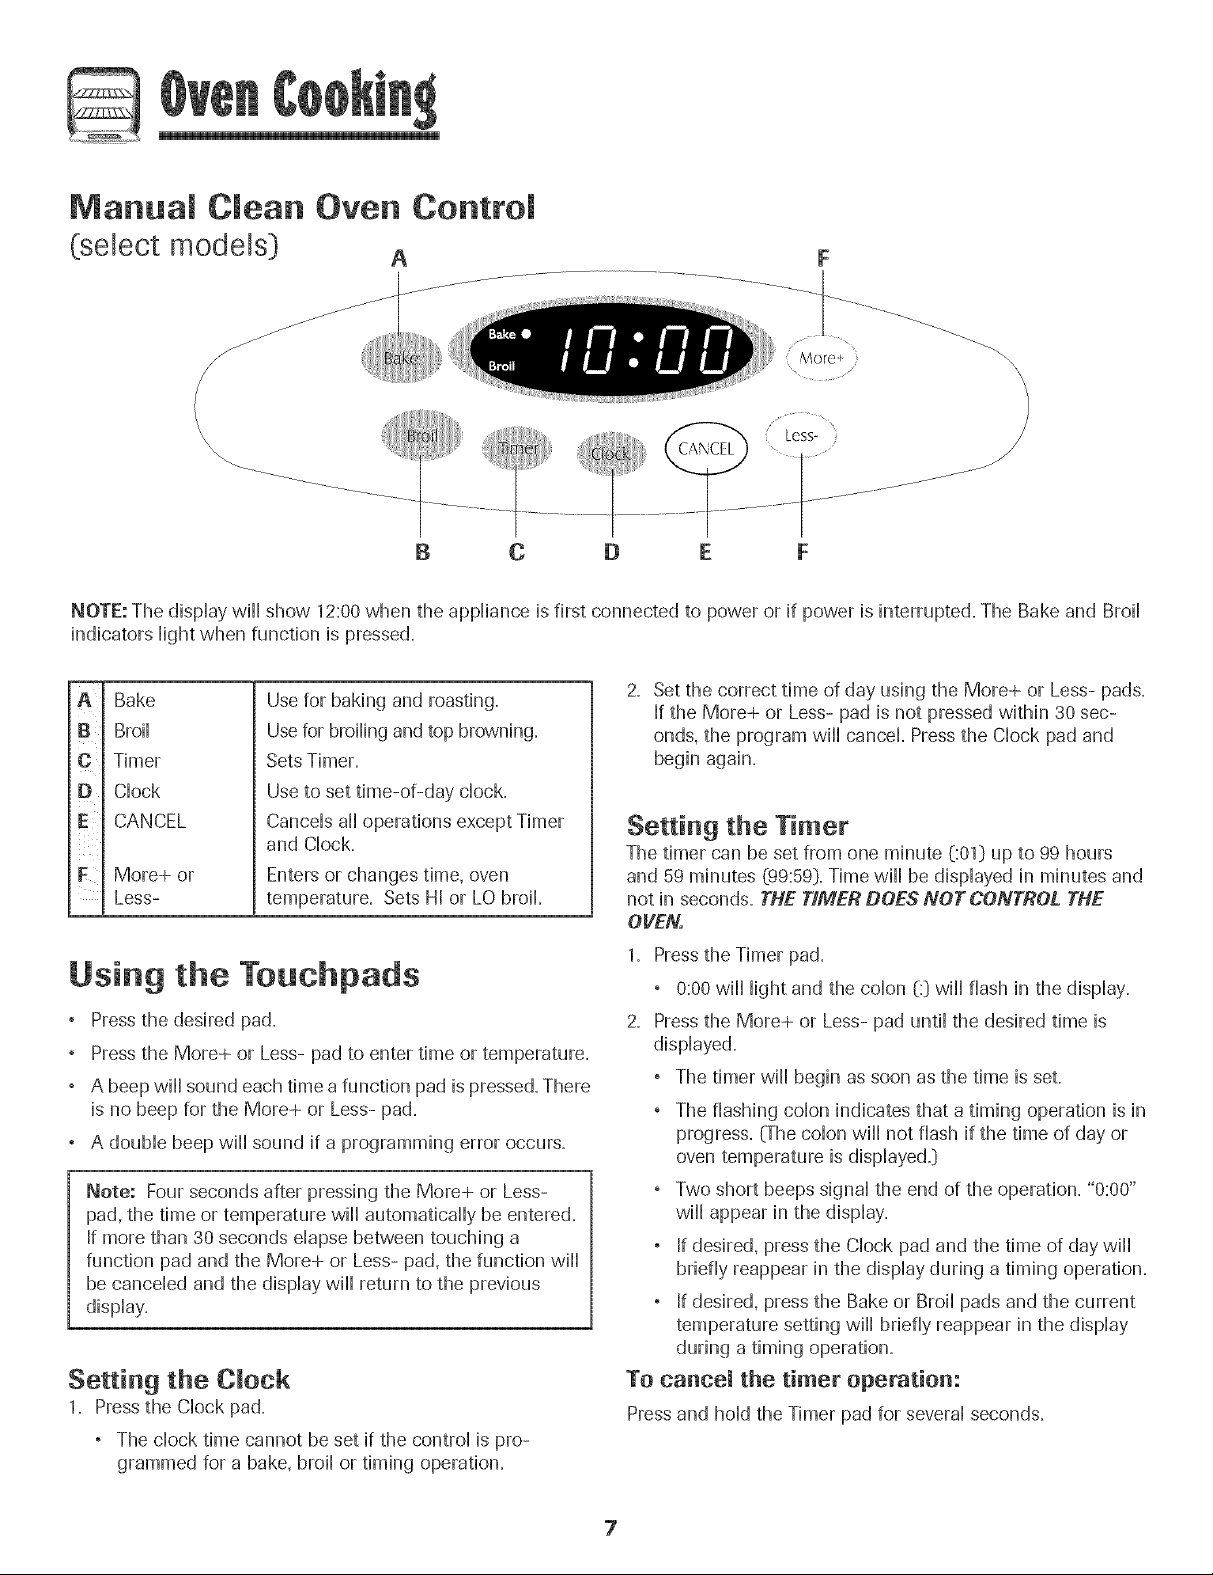
NOTE: The dispiay win show 12:00when the appiiance is first connected to power or if power is interrupted. The Bake and Broi]
indicators Hightwhen function is pressed.
2. Set the correct time of day using the More+ or Less- pads.
If the More+ or Less- pad is not pressed within 30 sec-
onds, the program will cancek Pressthe Clock pad and
begin again.
Settiog the Timer
The timer can be set from one minute 001} up to 99 hours
and 59 minutes @9:59).Time will be displayed in minutes and
not in seconds. THE TIMER DOES NOT CONTROL THE
OVEN.
B
c ¸
[}
E
F
Bake
Broi]
Timer
Clock
CANCEL
More+ or
Less-
Use for baking and roasting.
Use for broiling and top browning.
Sets Timer.
Use to set time-of-day clock.
Cancels all operations except Timer
and Clock.
Enters or changes time, oven
temperature. Sets HI or LO broik
Using the Teuchpads
Pressthe desired pad.
Pressthe More+ or Less- pad to enter time or temperature.
, A beepwin sound each time a function pad ispressed. There
is no beep for the More+ or Less- pad.
, A douMe beep win sound if a programming error occurs.
Note: Four seconds after pressing the More+ or Less-
pad, the time or temperature will automatically be entered.
If more than 30 seconds elapse between touching a
function pad and the More+ or Less- pad, the function will
be canceled and the display will return to the previous
display.
Setting the CJock
1. Pressthe Clock pad.
° The clock time cannot be set if the control is pro-
crammed for a bake, broil or timing operation.
1. Pressthe Timer pad.
° 0:00 wiii light and the coion (:} wiii flash in the display.
2. Pressthe More+ or Less- pad until the desired time is
displayed.
° The timer wiii begin as soon as the time is set.
° The flashing colon indicates that a timing operation is in
progress. (The colon wiii not flash if the time of day or
oven temperature is displayed.}
° Two short beeps signal the end of the operation. "0:00"
wiii appear in the display.
If desired, press the Clock pad and the time of day wiii
briefly reappear in the display during a timing operation.
If desired, press the Bake or Broil pads and the current
temperature setting wiii briefly reappear in the display
during atiming operation.
To cancel the timer operation:
Press and hold the Timer pad for several seconds.
Page 9

G
Baking, Roasting and Broiling
Foradditional baking, roasting and broiling times and tips, see
"Cooking Made Simple" bookiet.
Setting the Controls For Baking or Roasting:
1. Press Bake pad.
, 000 will light and the Bake indicator light will flash in
the display.
, If you press the Bake pad and do not set an oven
temperature within 30 seconds, the program will
automatically cancd and the time of day will reappear
in the display.
2. Press the More+ or Less- pad und] the desired oven
temperature is displayed.
, The oven temperature can be set from 170°to 550° F.
, 350° will appear in the display when either More+ or
Less- pad is pressed once.
, Pressand tap the More+ or Less- pad to change the
oven temperature by 5° increments or press and hold
the More+ or Less- pad to change the oven tempera-
ture by 10° increments.
, 100° or the actual oven temperature, whichever is
higher, wii] appear in the display when the oven turns
OR=
, The temperature in the display will increase in 5°
increments until preset temperature is reached. A single
beep will sound when the oven is preheated.
° Allow 10to 15minutes for the oven to preheat.
° To recall preset temperature during preheat, press the
Bake pad. The temperature will be displayed for three
seconds.
, To change oven temperature during cooking, press
the Bake pad, then press the More+ or Less- pad until
the desired temperature is displayed.
° To change oven temperature during preheat, press
the Bake pad twice, then press the More+ or Less- pad
until the desired temperature is displayed.
3. Place food in the oven. Check food for alonenessat the
minimum cooking time.
4. At the end of cooking, press the Cancel pad to turn the
oven off and remove the food from the oven.
The oven features an automatic shut-off. If the oven is
left on for 12 hours it will automatically turn off and 000
will appear in the display. Press the Cancel pad and the
time of day will reappear in the display.
Setting the Controls For Broiling:
(lower compartment - select models)
For best results, use pan designed for broiling.
1. Place broiler pan on recommended broiling compartment
position shown in the chart below.
2. Press the Broil pad.
° "SEt" will light and the Broil
indicator light will flash in
the display.
3. Press the More+ pad to select HI (bigh} broil or the
Less- pad to set LO (low} broil.
° Select HI broil for normal broiling.
° Select LO broil for low temperature broiling to avoid
excessive browning of longer cooking foods like poultry.
° If you do not select HI or LO Broil within 30 seconds, the
program wiii automatically cancel and the time of day
wiii reappear in the display.
Broiling Chart - Lower Corn artment
LOWEN CONPANTNENT TOTAL COON TINE
FOOD ' DONENESS BROiLiNG POSiTiON I (MINUTES)
Beef Steaks, 1" thick Medium Middle 14 - 20 min.
Weii Done Middle 16 - 24 min.
Hamburger Patties,3/4" thick Well Done Middle 16 - 24 min.
Pork Ham, precooked 1/2" slice Warm Middle 8 - 12 min.
Chops, 1" thick Well Done Middle 18- 25 min.
Poultry Chicken Pieces Well Done Bottom (Lo Broil 450° F)
Seafood Fish filets Flaky Middle 8 - 12 rain.
Fish steaks, 1" thick Flaky Middle 10 - 15 min.
Upper is the top position; middle isthe lower position; bottom isthe bottom of the broiler compartment (remove the rack}.
** This chart is a suggested guide. The times mayvary with the food being cooked.
8
30-45 rain.
Page 10
4. Follow the suggested times in the broil chart below. Meat
shouHdbe turned once about haHfwaythrough cooking
time.
5. After broiHing,press Cancd to turn the oven off and
remove the broiHerpan from the oven. The current time of
day will reappear in the dispHay.
Manual Clean Oven Knob
2. Hace food in the center of oven. Check food for
aloneness at minimum time in recipe. Cook longer if
necessary.
3. Removefood from oven and turn Oven Temp knob to
OFF.
Nete: Foradditional baking, roasting and broiling tips, see
"Cooking Made Simple" booklet.
CseJectmodeJs]
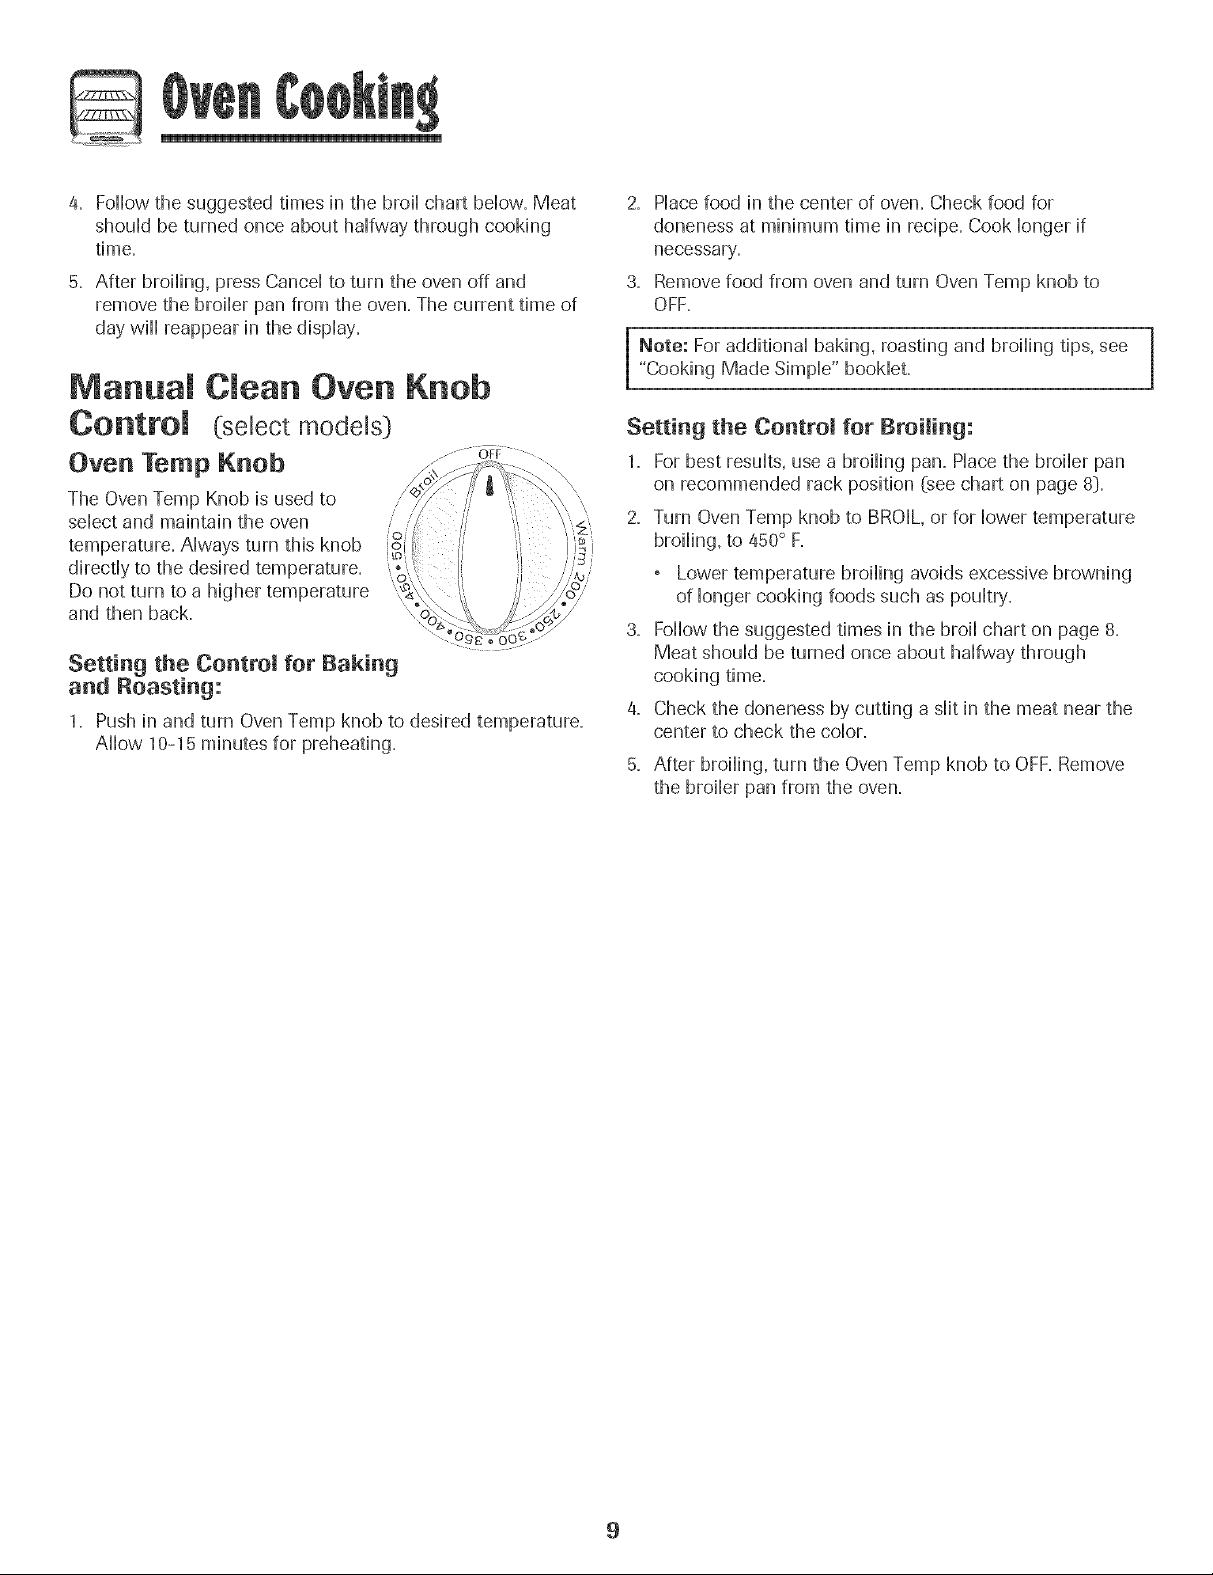
Oven Temp Knob
The Oven Temp Knob is used to
seHectand maintain the oven
temperature. AHwaysturn this knob
directHyto the desired temperature.
Do not turn to a higher temperature
and then back.
Setting the Control for BakiBg
and RoastiBg:
1. Push in and turn Oven Temp knob to desired temperature.
AHow 10-15 minutes for preheating.
Setting the Control for Broiling:
1. For best results, use a broiling pan. Place the broiler pan
on recommended rack position (see chart on page 8].
2. Turn OvenTemp knob to BROIL, or for lower temperature
broiling, to 450° F.
Lower temperature broiling avoids excessive browning
of longer cooking foods such as poultry'.
3. Follow the suggested times in the broil chart on page 8.
Meat should be turned once about halfway through
cooking time.
4. Check the aloneness by cutting a slit in the meat near the
center to check the color.
5. After broiling, turn the Oven Temp knob to OFF.Remove
the broiler pan from the oven.
9
Page 11

@
Oven Contro (select models:)
A B
G H 1 J
The control panel isdesigned for easein programming. Thedisplaywindow on the control shows time ofday, timer and oven functions.
Control panel shown includes model specific features. (Styling may vary depending on modeL}
A
Broil
B
Bake
C
More+ or
Less-
D
Timer
Cook & Hold
Clean
G!
Delay
Clock
Keep Warm
!!4
CANCEL
Using the Touchpads
Pressthe desired pad.
Pressthe More+ or Less- pad to enter time or temperature.
, A beep will sound when any pad is touched.
, A douMe beep will sound if a programming error occurs.
Note: Four seconds after pressing the More+ or Less-
pad, the time or temperature will automatically be entered.
If more than 30seconds elapse between touching a
function pad and the More+ or Less- pad, the function will
be canceled and the display will return to the previous
display.
Use for broiling and top browning.
Use for baking and roasting.
Enters or changes time, oven
temperature. Sets HJor LO broil
Sets Timer.
Bakes for a preset time, then holds food
warm for 1 hour.
Use to set self-clean cycle.
Programs the oven to start baking at
a later time.
Use to set time-of=day clock.
Use to keep cooked food warm in oven.
Cancels all operations except Timer
and Clock.
The clock can be set to display time in a 12-hour or 2a-hour
format. The clock is set at the factory for the 12-hour format.
To change the clock to 24-hour format:
1. Pressand hold the CANCEL and Delay
pads for three seconds.
2. Pressthe More+ or Less = pad to select
12 or 24 hour.
3. Set the time of day following the
directions below.
To set the Clock:
1. Pressthe Clock pad.
, Time of day and the colon flash in the
display.
2. Pressthe More+ or Less- pad to set the
time of day.
, Colon continues flashing.
3. Pressthe Clock pad again or wait four
seconds.
When electrical power is supplied or after a power interrup-
tion, the last clock time before power was interrupted will
flash.
To recall the time of day when another time function is
showing, press the Clock pad.
Clock time cannot be changed when the oven has been
programmed for cook or clean Delayor Cook & Hold.
C D
........... TJlqqer ;
Less- ..................
%..............................._
Less-
10
Page 12
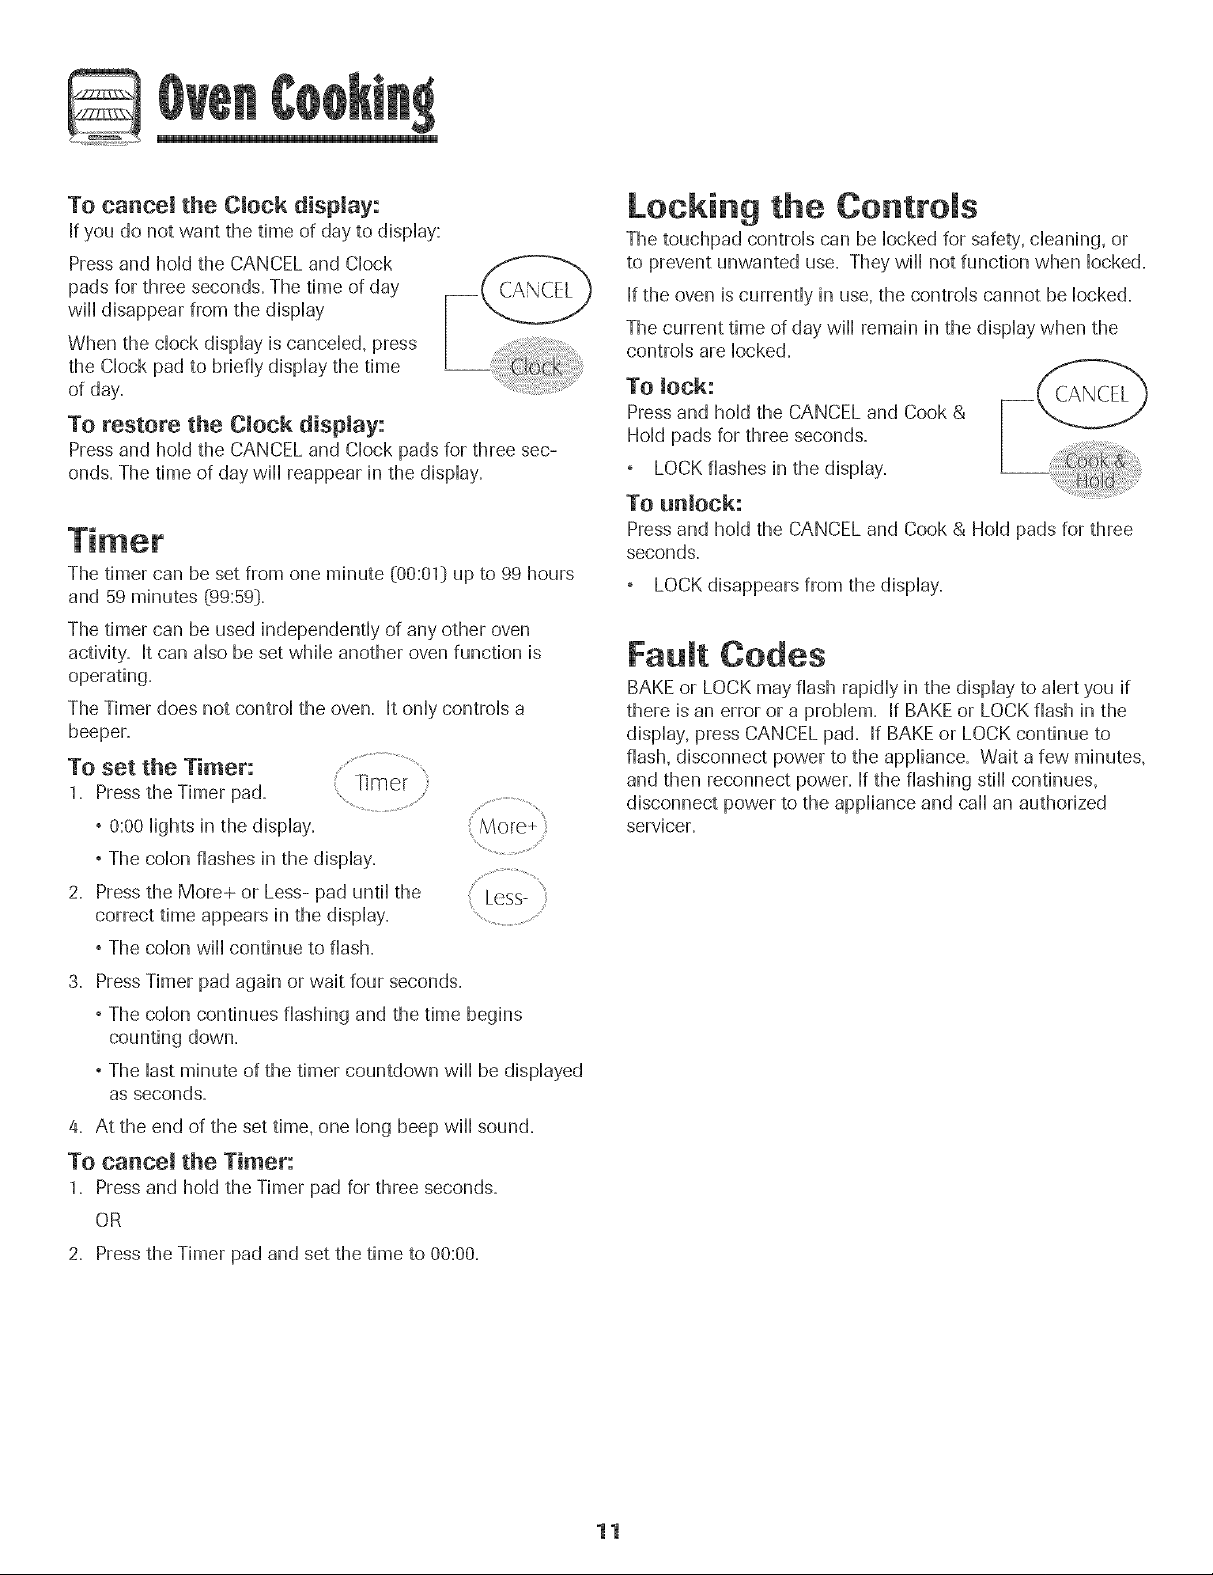
To cance+the Clock dispmay:
If you do not want the time of day to dispHay:
Press and hoM the CANCEL and CHock
pads for three seconds. The time of day
will disappear from the dispHay
When the chockdispHayis cancded, press
the CHockpad to briefly dispHaythe time
of day+
To restore the CJoek display:
Press and hoM the CANCEL and CHockpads for three sec-
onds. The time of day will reappear in the dispHay.
The timer can be set from one minute (00:01} up to 99 hours
and 59 minutes (99:59}.
The timer can be used independently of any other oven
activity. It can also be set while another oven function is
operating.
The Timer does not control the oven. It only controls a
beeper.
To set the Timer:
1. Press the Timer pad. +[_mer
+0:00Hightsin the dispHay.
+The coHonflashes in the display. ....................................
Locking the Controls
The touchpad controls can be locked for safety+cleaning+ or
to prevent unwanted use. They will not function when locked.
If the oven is currently in use, the controls cannot be locked+
The current time of day will remain in the display when the
controls are locked+
To lock:
Press and hold the CANCEL and Cook &
Hold pads for three seconds.
LOCKflashes in the display.
To unlock:
Press and hold the CANCEL and Cook & Hold pads for three
seconds.
LOCKdisappears from the display.
Faumt Codes
BAKE or LOCK may flash rapidly in the display to alert you if
there is an error or a problem. If BAKE or LOCKflash in the
display, press CANCEL pad. If BAKE or LOCK continue to
flash, disconnect power to the appliance. Wait a few minutes,
and then reconnect power. Ifthe flashing still continues,
disconnect power to the appliance and call an authorized
servicer.
2. Press the More+ or Less- pad until the
correct time appears in the display. "....................................
+The colon will continue to flash.
3. PressTimer pad again or wait four seconds.
+The colon continues flashing and the time begins
counting down.
+The last minute of the timer countdown will be displayed
as seconds.
4. At the end of the set time, one long beep will sound.
To cancel the Timer:
1+ Press and hold the Timer pad for three seconds.
OR
2+ Pressthe Timer pad and set the time to 00:00+
11
Page 13

Baking Differences Between Your Old
To set Bake:
1. Press the Bake pad.
, "BAKE" will flash.
, 000 wifl Hightin the dispJay.
2. Sebct the oven temperature. The oven tempera- More+
ture can be set from 170° to 550°. Pressor press ...................................
and hold the More+ or Less- pads...... ....................................
, 350°will[ Hightwhen either pad is first pressed. : Less- :
, Press the More+ pad to increase the temperature.
, Press the Less- pad to decrease the temperature.
3. Press Bake pad again or wait four seconds.
, BAKEwifl stop flashing and Hightin the dispiay.
, 100° or the actua] oven temperature will dispiay. The
temperature will rise in 5° increments und] the preset
temperature is reached.
4. Aiiow the oven to preheat for 8-15 minutes.
, When the set oven temperature is reached, one ]ong
beep will sound.
, To recall the set temperature during preheat, press the
Bake pad.
5. Place food in center of oven, allowing a minimum of two
inches between utensil and oven walls.
!
and New Ovens
It is normal to notice some baking time differences between a
new ovenand an old one. See"Adjusting the OvenTemperature"
on page 15.
Ceek & Held
Cook & Hold allows you to bake for a preset amount of time,
followed by a one-hour Keep Warm cycle.
To set Cook & Held:
1. Pressthe Cook & Hold pad.
2. Select the oven temperature. The oven tempera-
3. Press Cook & Hold again ORwait four seconds.
4. Enter the amount of time you want to bake by pressing the
, "BAKE" and "HOLD" flash.
° 000 lights in the display.
ture can be set from 170° to 550°. Pressor press .......................................
and hold the More+ or Less- pad. ( Less- [
, Pressthe More+ pad to increase the temperature.
, Pressthe Less- pad to decrease the temperature.
° "HOLD" flashes.
° 00:00flashes in the display.
More+ or Less- pad. Bake time can be set from ten
minutes @0:10}to 11hours, 59 minutes {11:59}.
° "BAKE" and "HOLD" light in the display.
° The baking time wiii iight in the display.
° The baking time wiii start counting down.
6. Check cooking progress. Cook longer if needed.
7. When cooking is finished, press CANCEL.
8. Remove food from the oven.
Baking Notes:
° To change the oven temperatare daring cooking,
press the Bake pad, then press the More+ or Less- pad
until you reach the desired temperature.
To change oven temperatare during preheat, press
the Bake pad twice, then press the More+ or Less= pad
until the desired temperature is displayed.
° If you forget to turn off the oven, it will automatically turn
off at the end of 12 hours. If you wish to deactivate this
feature, see page 15.
° Foradditional baking and roasting tips, see "Cooking
Made Simple" booklet.
When the cooking time has elapsed:
° Four beeps wiii sound.
, "BAKE" wiii turn off.
° "HOLD" and "WARM" will light.
° 170°will display.
After one hour in HOLD WARM:
° "End" wiii display.
° The time of day reappears in the display.
To cancel Cook & Hold at any time: (CA_',._CFI"}
Press the CANCEL pad. Remove food from oven.
12
Page 14
De ay Bake
Do not use deUayedbaking for highly perishable foods Such
as dairy products, pork, poultry, or seafood.
When using Delay, the oven begins to cook later in the day.
Set the amount of time that you want to delay before the oven
turns on and how long you want to cook. The oven begins to
heat at the selected time and cooks for the specified length of
time, then keeps food warm for up to one hour.
Delay time can be set from 10 minutes @0:10}to 11hours, 59
minutes (11:59}.
To set a Delayed Baking eyrie:
1. Press the Delay pad.
° "DELAY" flashes.
° 00:00 flashes in the display.
2. Press the More+ or Less- pad to set the
delay time.
While "DELAY" is still flashing:
3. Press the Cook & Hold pad.
° 000 lights in the display.
° "BAKE" and "HOLD" flash.
4.
Press More+ pad to set the baking temperature.
, 00:00 and "HOLD" flash.
When the Delay time has expired:
° "DELAY" will turn off.
° Baking time is displayed.
, "BAKE" and "HOLD" are displayed.
To set a Demay when Cook & Hold has already
been programmed:
1. Pressthe Delay pad.
° "DELAY" flashes.
° 00:00 appears in the display. ..............................
2. Pressthe More+ or Less- pad to set the ............................................
delay time.
After four seconds, "DELAY" wiii Less- '
stay lit to remind you that a delayed
cooking cycle has been set.
When the Delay time has expired and the oven
starts:
° The baking time wiii be displayed.
° "DELAY" wiii turn off.
° "BAKE" and "HOLD" wiii remain iit.
To cancel:
Press the CANCEL pad.
° All timed and untimed cooking functions will be
canceled.
° The time of day wiii reappear in the display.
, "BAKE" stays lit.
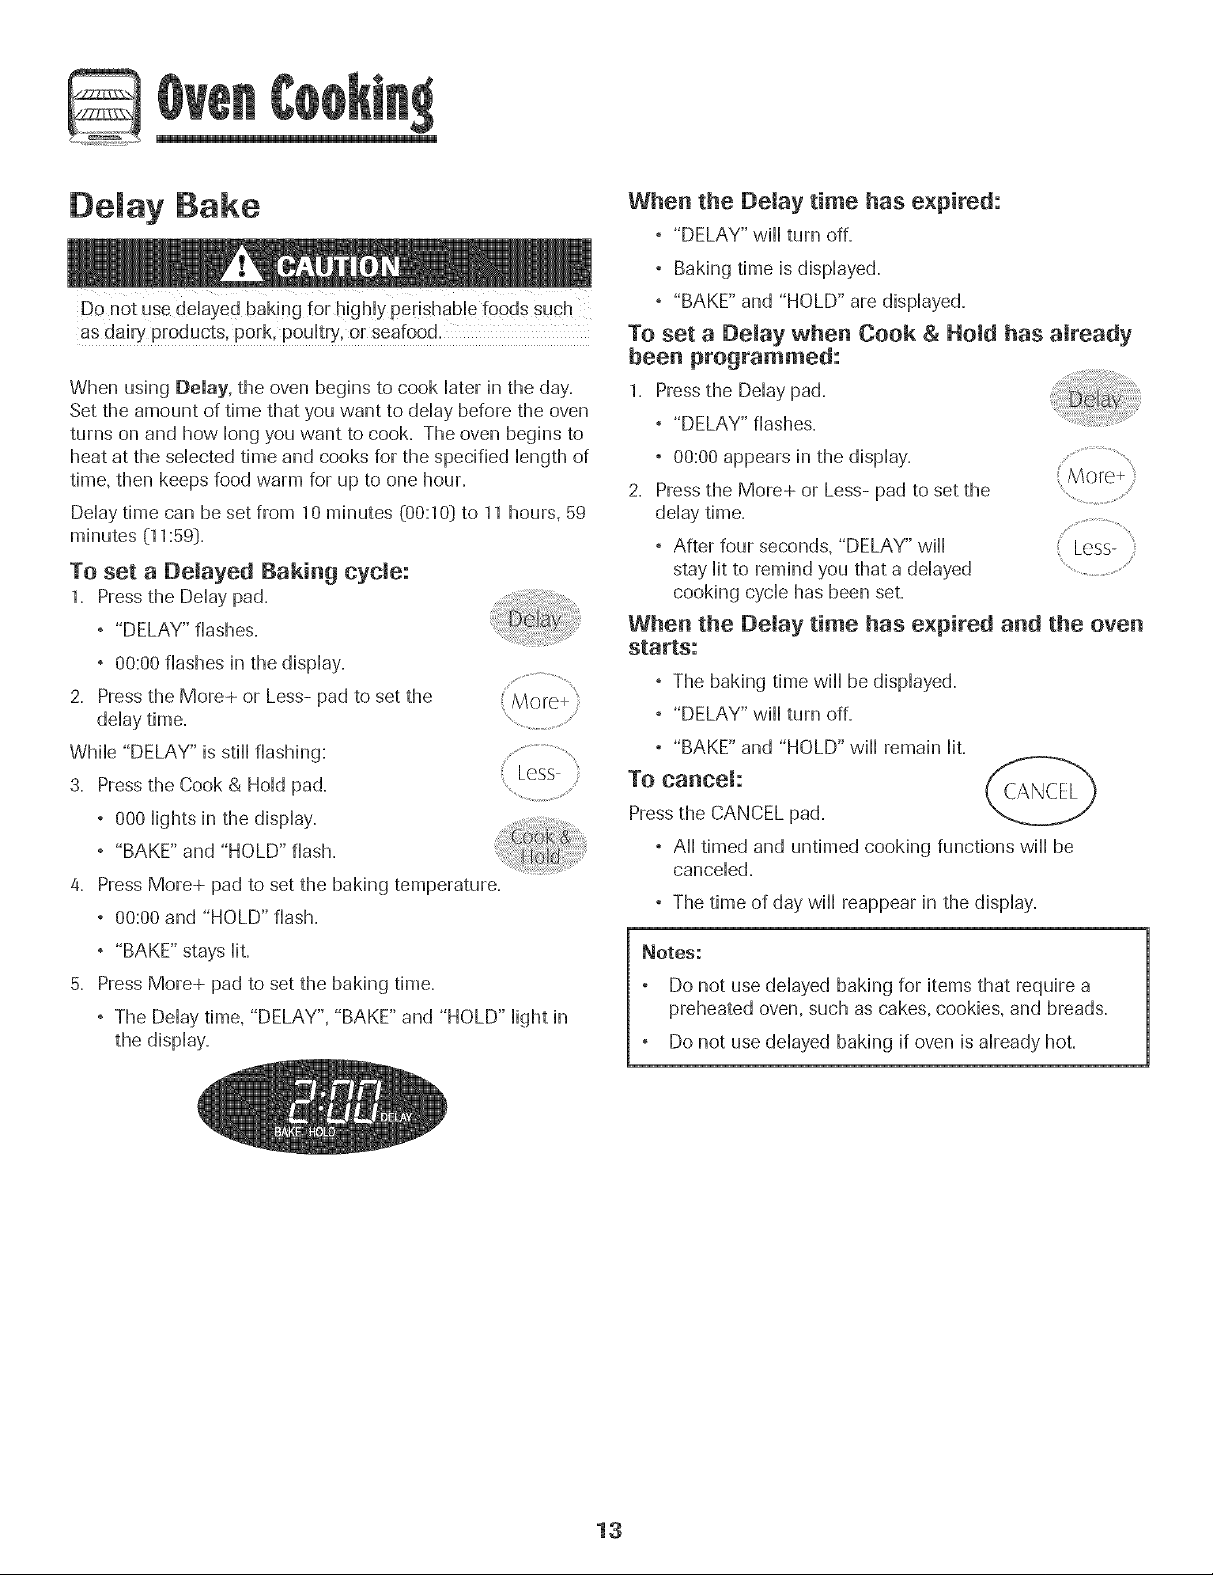
Press More+ pad to set the baking time.
, The Delay time, "DELAY", "BAKE" and "HOLD" light in
the display.
_OteS:
Do not use delayed baking for items that require a
preheated oven, such as cakes, cookies, and breads.
Do not use delayed baking if oven is already hot.
13
Page 15
@
Keep War
For safeHykeephg foods warm or for warmhg broads and
pHates=
TO set Keep Warm:
1= Pressthe Keep Warm pad.
° "WARM" flashes.
,000 appears in the dispHay.
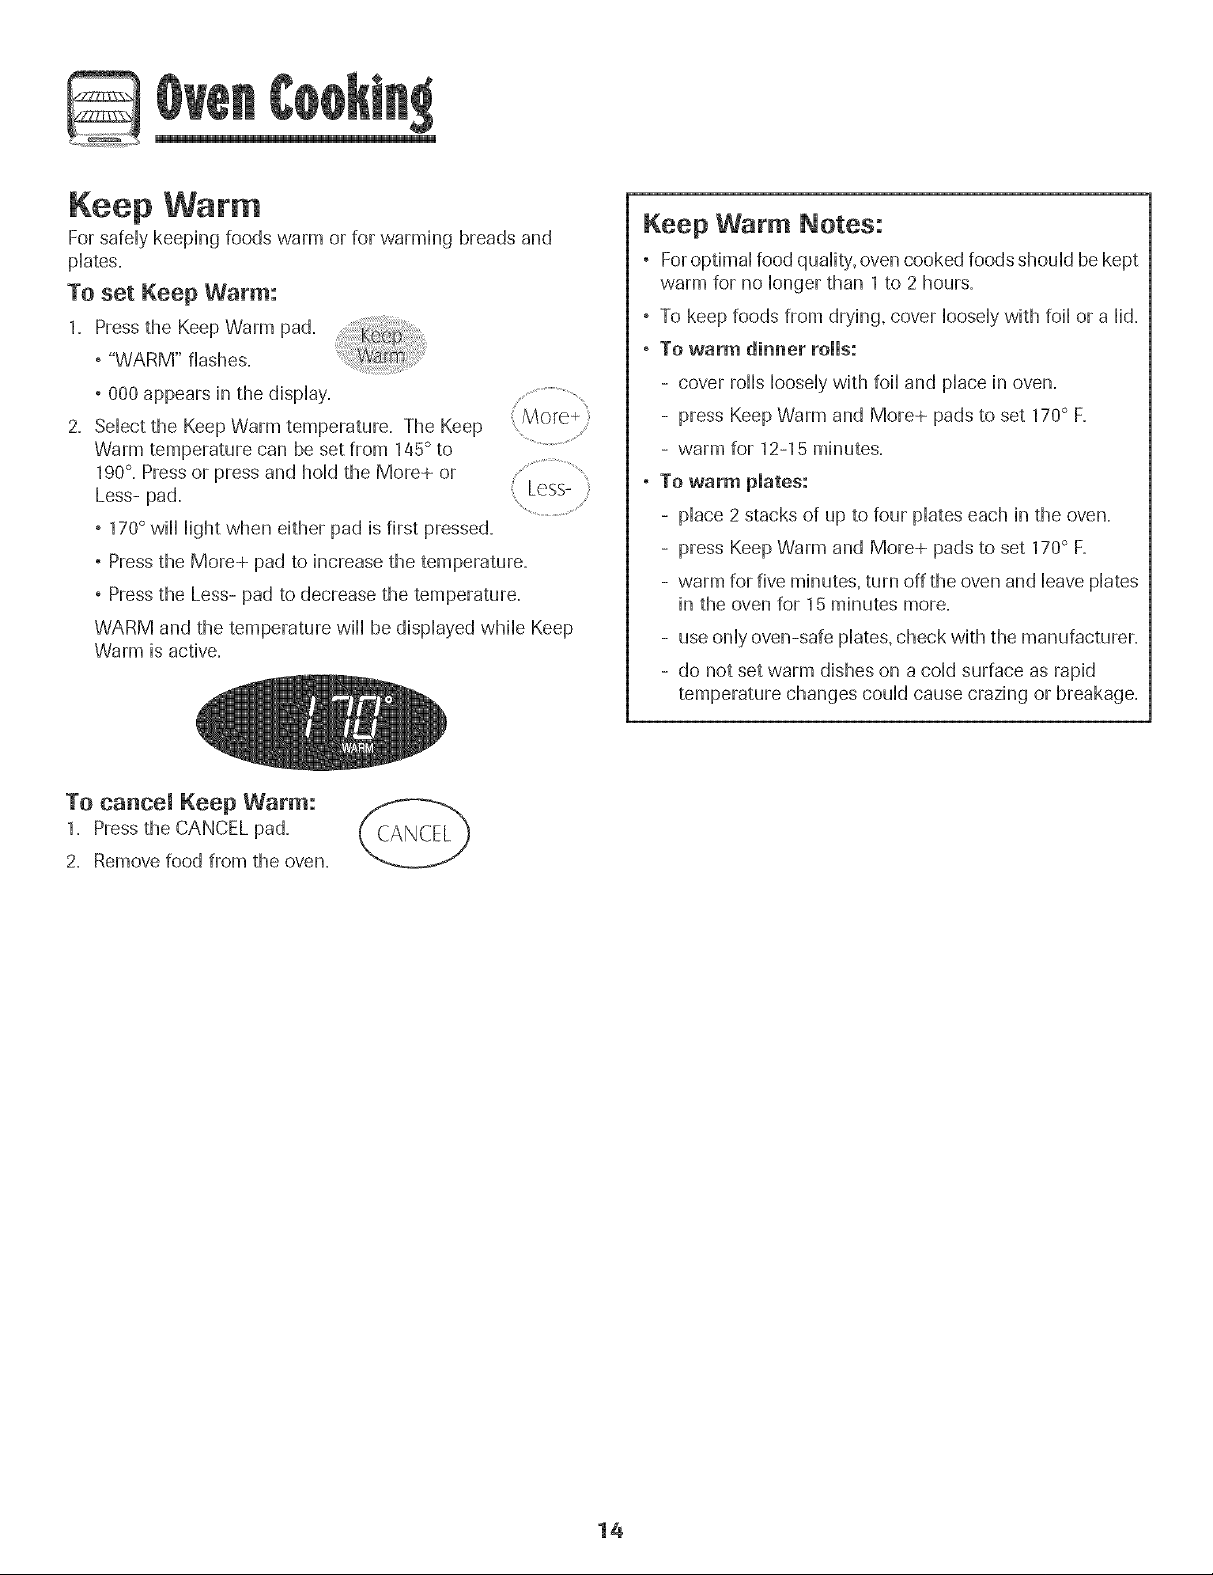
2= SeHectthe Keep Warm temperature. The Keep ..........................................
Warm temperature can beset from 145° to
190°=Pressor press and hoHdthe More+ or
Less- pad. Less-
` 170° wiHHHightwhen either pad is first pressed.
° Press the More+ pad to increase the temperature.
° Press the Less- pad to decrease the temperature.
WARM and the temperature wiHHbe dispHayedwMHeKeep
Warm is active.
.....................................
Keep Warm Notes:
° ForoptimaHfood quaHity,oven cooked foodsshouHdbe kept
warm for no Hongerthan 1 to 2 hours.
° To keep foods from drying, cover HooseHywith foiHor a Hid=
, To warm dinner rolls:
- cover forthsHooseHywith foiHand pHacein oven.
- press KeepWarm and More+ pads to set 170° R
- warm for 12-15 minutes.
, To warm plates:
- pHace2 stacks of up to four pHateseach in the oven.
- press KeepWarm and More+ pads to set 170° R
- warm for five minutes, turn off the oven and HeavepHates
in the oven for 15 minutes more.
- use onHyoven-safe pHates,check with the manufacturer.
- do not set warm dishes on a coHdsurface as rapid
temperature changes couHdcause crazing or breakage.
To cancel Keep Warm:
1= Pressthe CANCEL pad.
2. Removefood from the oven.
14
Page 16
Automatic Shut-Off/Sabbath
Mode
The oven will automatically turn off after 12 hours if you
accidentally leave it on= TMs safety' feature can be turned off=
To cancel the 12-hour shut-off and run the
oven continuously for 72 hours:
1. Set the oven to bake (see page 12D.
2. Press and hold the Clock pad for five seconds.
° SAb will be displayed and flash for five seconds.
° SAb will then be displayed continuously until turned off
or until the 72-hour time limit is reached.
° "BAKE" will also be displayed if a bake cycle is in use
while the oven is in Sabbath Mode.
All other functions EXCEPTBAKE t'Timer, Keep Warm,
Clean, etc._)are locked out during the Sabbath Mode.
To cancel Bake when in Sabbath Mode:
Press CANCEL.
° "BAKE" will turn off in the display.
, No beeps will sound.
To cancel the Sabbath Mode:
1. Press the Clock pad for five seconds.
OR
2. After 72 hours, the Sabbath Mode will end.
° SAb will flash for five seconds.
Adjusting the Oven Temperature
Oven temperatures are carefully tested for accuracy at the
factory. It is normal to notice some baking or browning
differences between anew oven and an old one. As ranges
get older, the oven temperature can shift.
You may adjust the oven temperature if you think the oven is
not baking or browning correctly. To decide how much to
change the temperature, set the temperature 25° higher or
lower than your recipe recommends, then bake. The results
of the "test" should give you an idea of how much to adjust
the temperature.
To adjust the oven temperature:
1= Press Bake.
2. Enter 550° by pressing the More+ pad.
3. Pressand hold the Bake pad for several Mor(_;+
seconds or until 0° appears in the display. '.....................................
If the oven temperature was previously adjusted, the
change will be displayed. Forexample, if the oven tem-
perature was reduced by 15°the display will show "-15 °''-
4. Pressthe More+ or Less- pad to adjust the temperature.
Eachtime a pad is pressed, the temperature changes by
5°- The oven temperature can be increased or decreased
by 5° to 35°-
5. The time of day will automatically reappear in the display.
You do not need to readjust the oven temperature if there
is a power failure or interruption. Broiling and cleaning
temperatures cannot be adjusted.
° The time of day will return to the display.
Sabbath Mode Notes:
, Sabbath Mode can be turned on at any time with or
without the oven on.
, Sabbath Mode cannot be turned on if the touchpads are
locked out or when the door is locked.
° If the oven is baking when Sabbath Mode is set, "BAKE"
will go out at the end of the baking cycle. There will be
no audible beeps.
, When the Sabbath Mode is started, no preheat beep will
sound.
° All prompts, messages and beeps are deactivated when
Sabbath Mode is active.
° Pressing CANCELwill cancel a Bake cycle, however the
control will stay in the Sabbath Mode.
° If power fails, the oven will power up in Sabbath Mode with
72 hours remaining and no cycle active.
15
Page 17
Broiming (select models)
To set Broim:
1. Press the Broii pad.
° "BROIL" flashes.
° SETis dispiayed.
2. Press the More+ pad to set HI broii or press the Less- pad
to set LO broil.
Placefood in the oven. Closeoven door.
5.
6.
Turn meat once about halfway through cooking.
7.
When food is cooked, press the CANCEL
pad. Remove food and broiler pan from the
ove n.
° The time of day wiii reappear in the
display.
° HI or LO wiii be dispiayed.
° Seiect HI broii (550° F}for normai broiiing. Seiect
LO broii (450° F} for How-temperature broiiing of ionger
cooking foods such as pouitry.
3. After four seconds, the oven wiii start.
° "BROIL" wiii remain iiL
4. Foroptimum browning, preheat for 2-3 minutes before
adding food.
Oven Broiling Chart
Beef
Steak, 1" thick
Hamburgers, 3/4" thick
4
4
4
Broil Notes:
° For best results when broiling, use a pan designed for
broiling.
° HI is used for most broiling. Use LO broil when broiling
longer cooking foods. The lower temperature allows
food to cook to the well done stage without excessive
browning.
° Broil times may be longer when the lower broiling
temperature is selected.
° Food should be turned halfway through broiling time.
° Foradditional broiling tips and temperatures, refer to the
"Cooking Made Simple" bookleL
COOK TmME
Medium
Weii Done
Weii Done
15 - 20 minutes
18 - 24 minutes
15 - 18 minutes
Pork
Bacon
Chops, 1"
Ham - precooked slice, 1/2" thick
4
4
4
Weii Done
Weii Done
Warm
6 - 10 minutes
22 - 26 minutes
8 - 12 minutes
Poultry LO Broil
Chicken Pieces 3 or 4 Well Done 30 - 45 minutes
Seafood
Fish Steaks, buttered, 1" thick
Fillets, 1/2" thick
Flaky
Flaky
10 - 15 minutes
8 - 12 minutes
*The top rack position is #5.
Note: This chart is a suggested guide. The times may vary with the food being cooked.
16
Page 18
@
Pilotless ignition
Your range is equipped with piHotHessignition. With this type of
ignition system, the gas automatically shuts off and the eve#
will not operate during a power faihtreo
A lighted match will not light the oven burner. No attempt
should be made to operate the oven daring a power
failure.
Oven Vent
When the oven is in use, the area near the vent may become
hot enough to cause burns. Never block the vent opening.
The oven vent is located below the backgaard vent shield
on year range°
__ I ovE_wNT
plastics near the
vent opening as
heat from the vent
_OCATION Do [lot place
Oven Light
Pressthe oven light switch to turn the oven light on
and off.
Oven Bottom
could distort or
melt the plastic.
Ors#
Oven Racks
Do not attempt to change the rack P0S!ti0nwhen the oven
is hot.
Do nat use the oven for storing food or cookware.
Your oven has two racks.They are designed with alock-stop
edge.
To remove:
1. Pull rack straight out until it
stops at the lock-stop position.
2. Lift up on the front of the rack
and pull out.
To replace:
1. Placerack on the rack support in the oven.
2. Tilt the front end up slightly. Slide rack back until it clears
the lock-stop position.
3. Lower front and slide back into the oven.
Do not cover an entire rack with aiaminam foil or place
foil on the oven bottom. Raking results will be affected
and damage may occar to the oven bottom.
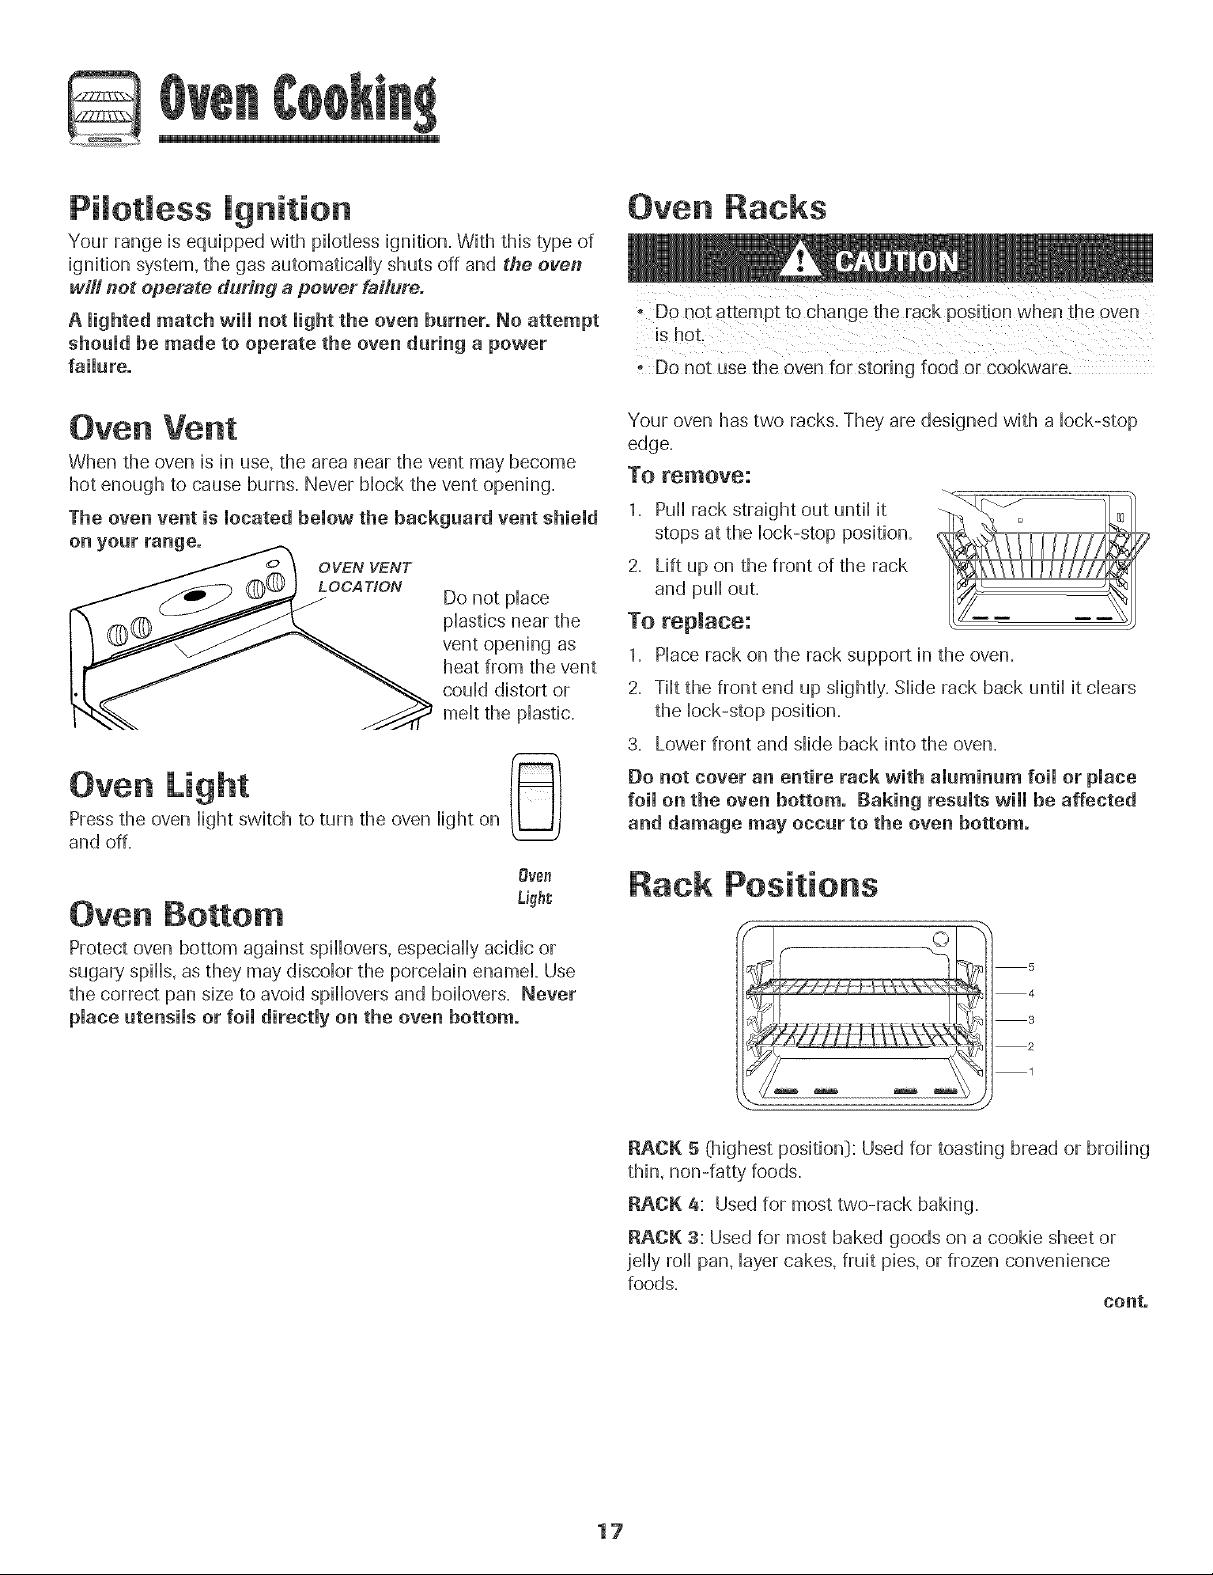
Rack Positions
Protect oven bottom against spillovers, especially acidic or
sugary' spills, as they may discolor the porcelain enamel. Use
the correct pan sizeto avoid spillovers and boilovers. Never
place utensils or foil directly on the oven bottom.
4
3
2
1
RACK 5 (highest position_):Used for toasting bread or broiling
thin, non-fatty foods.
RACK 4: Used for most two-rack baking.
RACK 3: Used for most baked goods on a cookie sheet or
jelly roll pan, layer cakes, fruit pies, or frozen convenience
foods.
canto
17
Page 19
@
RACK 2: Used for roasting smaNcuts of meat, casseroles,
baking loaves of bread, bundt cakes, custard pies or two-rack
baking,
RACK 1: Used for roasting large cuts of meat and poultry,
frozen pies, dessert souffles, angd food cake, or two-rack
baking,
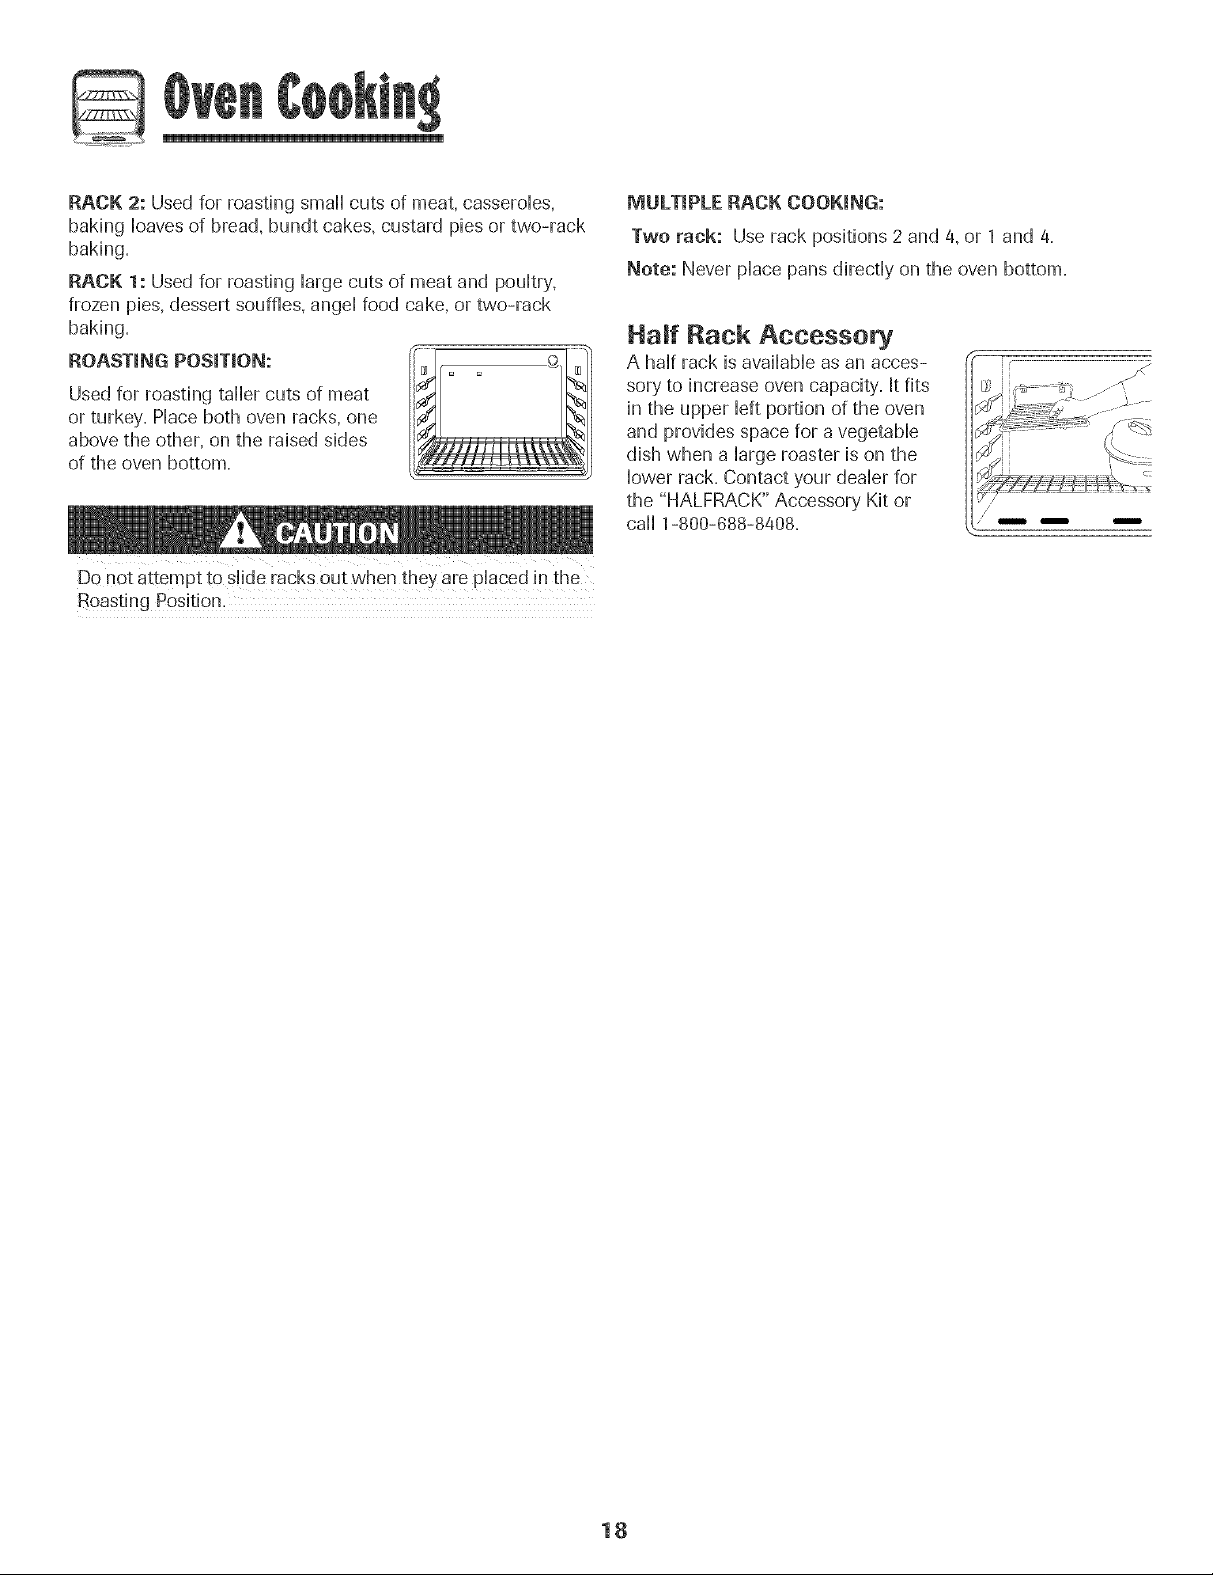
ROASTING POSiTiON: _o
Used for roasting taNercuts of meat
or turkey, Place both oven racks, one
above the other, on the raised sides
of the oven bottom,
Do [lot attempt to sNderacks out when they are placed in the
Boasting Position,
MULTIPLE RACK COOKING:
Two rack: Use rack positions 2and 4, or 1 and 4,
Note: Never place pans directly on the oven bottom,
Haft Rack Accessory
A half rack isavailaMe as an acces-
sory to increase oven capacity', It fits
in the upper Heftportion of the oven
and provides space for a vegetaMe
dish when a large roaster is on the
lower rack, Contact your dealer for
the "HALFRACK" Accessory Kit or
call 1-800-688-8408,
IIS'_/ :¢ .-
18
Page 20
Se f+C ean Oven (select models:)
Note: For manual dean oven, see page 22. [
6. Wipe up sugary and acidic spillovers such as sweet
potatoes, tomato, or milk-based sauces. Porcelain enamel
is acid-resistant, not acid-proof. The porcelain finish may
discolor if acidic spills are not wiped up before a self-
clean cycle.
- it is normal for parts of the range to become hot during a
self-clean cycle.
+ To prevent personal injury and damage to the oven door
do not attempt to open door when "LOCK" is displayed
+ Avoid touching cooktop, door. window or oven vent area
during a clean cycle.
, Do not use cemmercial oven cleaners on the oven finish
or around any part of the oven. The} will damage the
finish oHparts.
The seHf-cHeancycHeuses above-normaHcooking temperatures
to automaticaHHydean the oven interior. Do not force the oven
door or HockHeveropen. This may resuHtin exposure to high
temperatures and be a burn hazard.
It is normaHfor flare-ups, smoking, or flaming to occur during
cHeaningif the oven is heavily soiled. It is better to clean the
oven regularly rather than to wait until there is a heavy build-
up of soil in the oven.
During the cleaning process, the kitchen should bewell
ventilated to get rid of normal odors associated with cleaning.
Before Serf+Cleaning
1. Turn off the oven light before cleaning. The light may burn
out during the clean cycle.
2. Remove broiler pan, all pans, and oven racks from the
oven. The oven racks will discolor and may not slide easily
after a self-clean cycle if they are not removed.
3. Clean oven frame, door frame+area outside of gasket, and
around the opening in the door gasket with a nonabrasive
cleaner such as Bon Ami+or detergent and water. The
self-cleaning process does not
clean these areas. They should be
cleaned to prevent soil from baking
on during the clean cycle. {The
gasket is the seal around the oven
door and window.)
4. To prevent damage, do not clean or
rub the gasket around the oven
door. The gasket is designed to seal in heat during the
clean cycle.
5. Wipe up excess grease or spillovers from the oven bottom.
This prevents excessive smoking, flare-ups or flaming
during the clean cycle.
Note: Oven temperature must be below 400° F to programa clean cycle.
To set Semf+Clean:
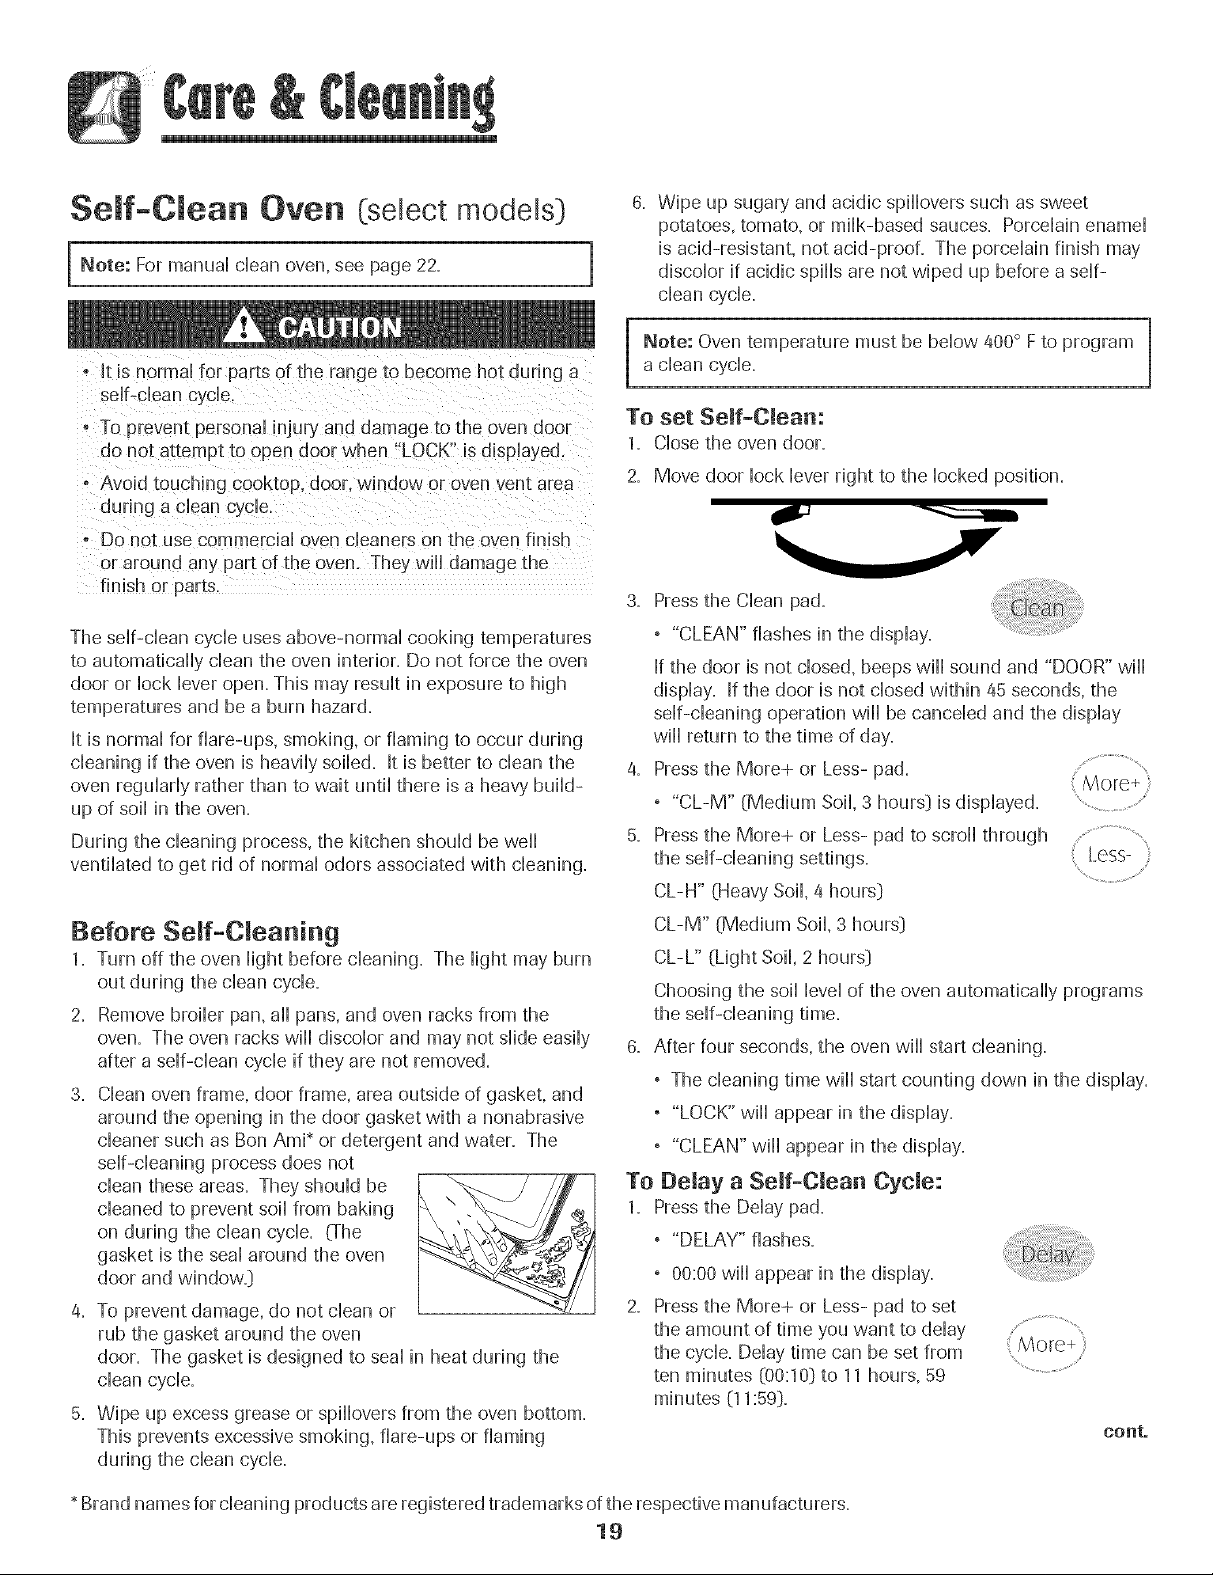
1. Close the oven door.
2. Move door lock lever right to the locked position.
3. Pressthe Clean pad.
, "CLEAN" flashes in the display.
If the door is not closed, beeps will sound and "DOOR" will
display. If the door is not closed within 45 seconds, the
self-cleaning operation will be canceled and the display
will return to the time of day.
4. Pressthe More+ or Less- pad.
, "CL-M" (Medium Soil, 3 hours) is displayed. '...............................
5. Pressthe More+ or Less- pad to scroll through
the self-cleaning settings. :+less-
....,....................
CL-H±_(Heavy Soil, 4 hours)
CL-M" (Medium Soil, 3 hours)
CL-L" (Light Soil+2 hours)
Choosing the soil level of the oven automatically programs
the self-cleaning time.
6. After four seconds, the oven will start cleaning.
, The cleaning time will start counting down in the display.
, "LOCK" will appear in the display.
, "CLEAN" will appear in the display.
To Delay a Self+CJean Cycle:
1. Pressthe Dday pad.
+ "DELAY" flashes.
+ 00:00will appear in the display.
2. Pressthe More+ or Less- pad to set
the amount of time you want to dday
the cycle. Delay time can beset from
ten minutes (00:10)to 11 hours, 59 ..................................
minutes (11:59).
cont.
*Brand names for cleaning products are registered trademarks of the respective manufacturers.
19
Page 21

3. Press the Clean pad.
, "CLEAN" wii[ flash.
4. Press the More+ or Less- pad. .....................
, "CL-M" (Medium Soil, 3 hours}
is displayed.
5. Press the More+ or Less- pad to scroll through the self-
cleaning settings.
CL-H" (Heavy Soil, 4 hours}
CL-M" (Medium Soil 3 hours}
CL-L" (Light Soil 2 hours}
Choosing the soii bvd of the oven automatically programs
the sdf-cbaning time.
6. After four seconds, CLEAN, DELAY and LOCK will appear
in the dispiay to show that the oven is set for addayed
dean operation. The dday time is dispiayed.
If the oven has already been set for a clean
cycle and you wish to set a delay:
1. Press the Dday pad.
, "DELAY" flashes.
, 00:00will appear in the dispiay.
2. Press the More+ or Less- pad to set the
amount of time you want to dday the cycb. '...................................
After four seconds, CLEAN, DELAY and LOCK will appear
in the dispiay to show that the oven is set for adeiayed
dean operation. The delay time is displayed.
Whea the Self-Oteaa cycle starts:
, "DELAY" will turn off.
During the Se_f-C_ean Cycle
When LOCK shows in the display, the door cannot be opened.
To prevent damage to the door, do not force the door open
when LOCK is displayed.
Smoke aad Smemls
You may see some smoke and smell an odor the first few
times the oven is cleaned. This is normal and will lessen in
time.
Smoke may also occur if the oven is heavily soiled or if a
broiler pan was left in the oven.
Sounds
As the oven heats,you may hear sounds of metal parts
expanding and contracting. This is normal and will not
damage the oven.
After Seff-C_eaning
About one hour after the end of the self-dean cycle, LOCK
will turn off. The door can then be opened. Move door lock
lever to the left to unlock.
Some soil may leave a light gray, powdery ash. Remove
it with a damp cloth. If soil remains after wiping, that means
the clean cycle was not long enough. The soil will be re-
moved during the next clean cycb.
mfoven racks were left in the oven and do not slide
smoothly after a clean cycle, wipe racks and rack supports
with a small amount of vegetable oil to make them easier to
move.
Fine lines may appear in the porcelain because it went
through heating and cooling= This is normal and will not
affect performance=
A white discoloration may appear after cleaning if acidic
or sugary foods were not wiped up before the self-clean
cycle, This discoloration is normal and will not affect perfor-
mance.
, The clean time will appear in the display.
To caaeei the Self-Cleaa cyde:
Press the CANCEL pad.
, All words disappear from the display.
, All functions are canceled.
, The time of day appears in the display.
, If the oven door is left open, "DOOR" wiii flash in the
display and a signal will beep until the door is closed
and the Clean pad is pressed again.
, If more than five seconds elapse between pressing the
Clean pad and the More+ or Less- pad, the program will
automatically return to the previous display.
, The oven door will be damaged if the oven door is
forced to open when "LOCK" is still displayed.
2O
Page 22
Cleaning Procedures
or cleaning. This is to avoid damage and possible burn s, , Brand names are registered trademarks of the
, To Prevent staining ar discok_rati0n, dean appliance after each use, respective manufacturers=
!f a PaFt is removed, be sure !t is correct!y replaced. **To order call 1-877-232-8771 USA or
PART PROCEDURE
BroimerPan Never cover insert with alumit_um foil as this prevents the fat from draitdng to the pan below.
and insert ° Place soapy cloth over insert and pan; let soak to loosen soil=
° Wash in warm soapy water. Use scouring pad to remove stubborn soil=
° Broiler pan and insert can be cleaned in dishwasher=
Sealed Gas ° Clean frequently. Allow burner to cool. Clean with soap and plastic scouring pad. Forstubborn soils, use
Burners a non-abrasive cleaner anda cloth. Try to prevent the cleaner from seeping into the gas ports asthis will
affect the flame.If thecleaner doesenter the ports, cleanwith asoft bristle brush or a straight pin especially
the port below the ignitor. Do not enlarge or distort holes.
, Be careful not to get water into burner ports.
° Use care when cleaning the ignitor. If the ignitor iswet or damaged the surface burner will not light.
Burner Grates , Wash grates with warm, soapy water and a nonabrasive, plastic scrubbing pad. For stubborn soils, clean
with asoap-filled, nonabrasive pad or a sponge and Cooktop Cleaning Creme (Part #20000001_).**
° For burned on soils, remove grates, place on newspapers and carefully spray with commercial oven
cleaner. (Do not spray surrounding surfaces.:) Place in plastic bags for several hours or overnight.
Wearing rubber gloves, remove from bags. Wash, rinse, dry and replace on cooktop.
1-800-688-8408 Canada=
Clock and ° To activate "Control Lock" for cleaning, see page 11.
Control Pad ° Wipe with adamp cloth and dry. Do not use abrasive cleaning agents as they may scratch the finish.
Area ° Glass cleaners may be used if sprayed on a cloth first. DO NOT spray directly on controlpad and
display area.
Control Knobs ° Remove knobs in the OFFposition by pulling forward.
° Wash, rinse and dry. Do not use abrasive cleaning agents as they may scratch the finish.
° Turn on each burner to be sure the knobs have been correctly replaced.
Cooktop and Porcelain enamel isglassfused on metal and may crack or chip with misuse. [tis acid resistant, not acid proof.
Control Panel = All spillovers, especially acidic or sugary spillovers, should be wiped up immediately with a dry cloth.
Porcelain Enamel ° When cool, wash with soapywater, rinse and dry=
, Never wipe off a warm or hot surface with a damp cloth. This may cause cracking or chipping.
, Never use oven cleaners, abrasive or caustic cleaning agents on exterior finish of range.
, When cool, wash with warm soapy water, rinse and dry. Never wipe a warm or hot surface with a damp
Storage Drawer, cloth as this may damage the surface and may cause a steam burn.
Lower Broiler ° Forstubborn soil, use mildly abrasive cleaning agents such as baking soda paste or Ban Ami*. Do not use
Door (select abrasive cleaners such as steel wool pads or oven cleaners. These products will scratch or permanently
modems) and damage the surface.
Door Handles - Note; Use a dry towel or cloth te wipe up spills, especially acidic or sugary spills. Surface may
Painted Enamem discolor or dull if soil is tlot immediately removed. This is especially important for white surfaces.
21
Page 23
i
PART PROCEDURE
Oven Window , ?,void using excessive amounts of water which may seep under or behind glass causing staining.
and Door - Glass , Washwith soapand water. Rinsewith dear water and dry. GHasscHeanercan be used if sprayed on a cHoth
first.
, Do not useabrasive materiaHssuch asscouring pads,steeHwooHOFpowdered cHeanersastheywiHHscratch
gHass.
Oven interior Self-Cleam
, FoHHowinstructions on page 19-20 to set a seHf-cHeancycHe=
Manaal Clean:
, CHeanfrequentHyusing miHdabrasive cHeanersand a pHasticpad.
, Do not use metallic scouring pads because they wiHHscratch the surface.
, When using commerciaHoven cHeanersfoHHowthe manufacturer's instructions.
, Wipe up acidic spiHHs(tomato OFmiHkbased foods:) as soon as possibHewith soap and water. If the spiHH
is not wiped up, it may discoHorthe porceHain.
To make cleaning easier, remove the oven door if desired. (See Maintenance section on
page 23.:)
Oven Racks * CHeanwith soapy water.
• Removestubborn soiHwith cHeansingpowder or soap-fiHHedscouring pad. Rinse and dry.
• Racks wiHHpermanentHydiscoHorand may not sHideout smoothHyif Heftin the oven during a seHf-cHean
operation. Ifthis occurs, wipe the rack and embossed rack supports with a small amount ofvegetabHeoiH
to restore ease of movement, then wipe off excess oil
Stainless Steel * gO NOT USEANY CLEANING PRODUCT CONTAINING CHLOftINE BLEACH.
(seHectmodeHs:) * OO NOT USEABRASIVE OR OP,ANGE CLEANERS.
• ALWAYS WIPE WITH THE Gft,AtN WHEN CLEANING.
• Daily Cleaning/Light Soil -- Wipe with one ofthe following - soapywater, white vinegar/water soHution,
FormuHa409 GHassand Surface Cleaner_or a simiHargHasscHeaner- using a sponge or soft cHoth.
Rinse and dry. To poHishand heHpprevent fingerprints, foHHowwith StainHessSteeHMagic Spray_
(Part No. 20000008:)_.
• Moderate/Heavy Soil -- Wipe with one of the foHHowing- Ben Ami, Smart CHeanser,or Soft Scrub_-
using a damp sponge or soft cHoth.Rinse and dry. Stubborn soiHsmay be removed with a damp muHti-
purpose Scotch-Brite _pad; rub evenHywith the grain. Rinse and dry.To restore Husterand remove streaks,
foHHowwith StainHessSteeHMagic Spray_.
• Discoloration -- Using a damp sponge or soft cHoth,wipe with Cameo StainHessSteeHCleaner_.Rinse
immediateHyand dry. To remove streaks and restore Huster,foHHowwith StainHessSteeHMagic Spray_.
* Brand names for cHeaningproducts are registered trademarks of the respective manufacturers.
** To order direct, caHH1-877-232-6771 USA or 1-800-688-8408 Canada.
22
Page 24
Oven Door
- Do net place excessive weight on or stand on an open
oven door. This could cause the range to tip over. break
Do not attempt to open or close door or operate oven until
door is properly replaced.
Never place fingers between hinge and front oven frame.
Hinge arms are spnng mounted. If accidentally hit. the
hinge will slam shut against oven frame and could injure
To remove:
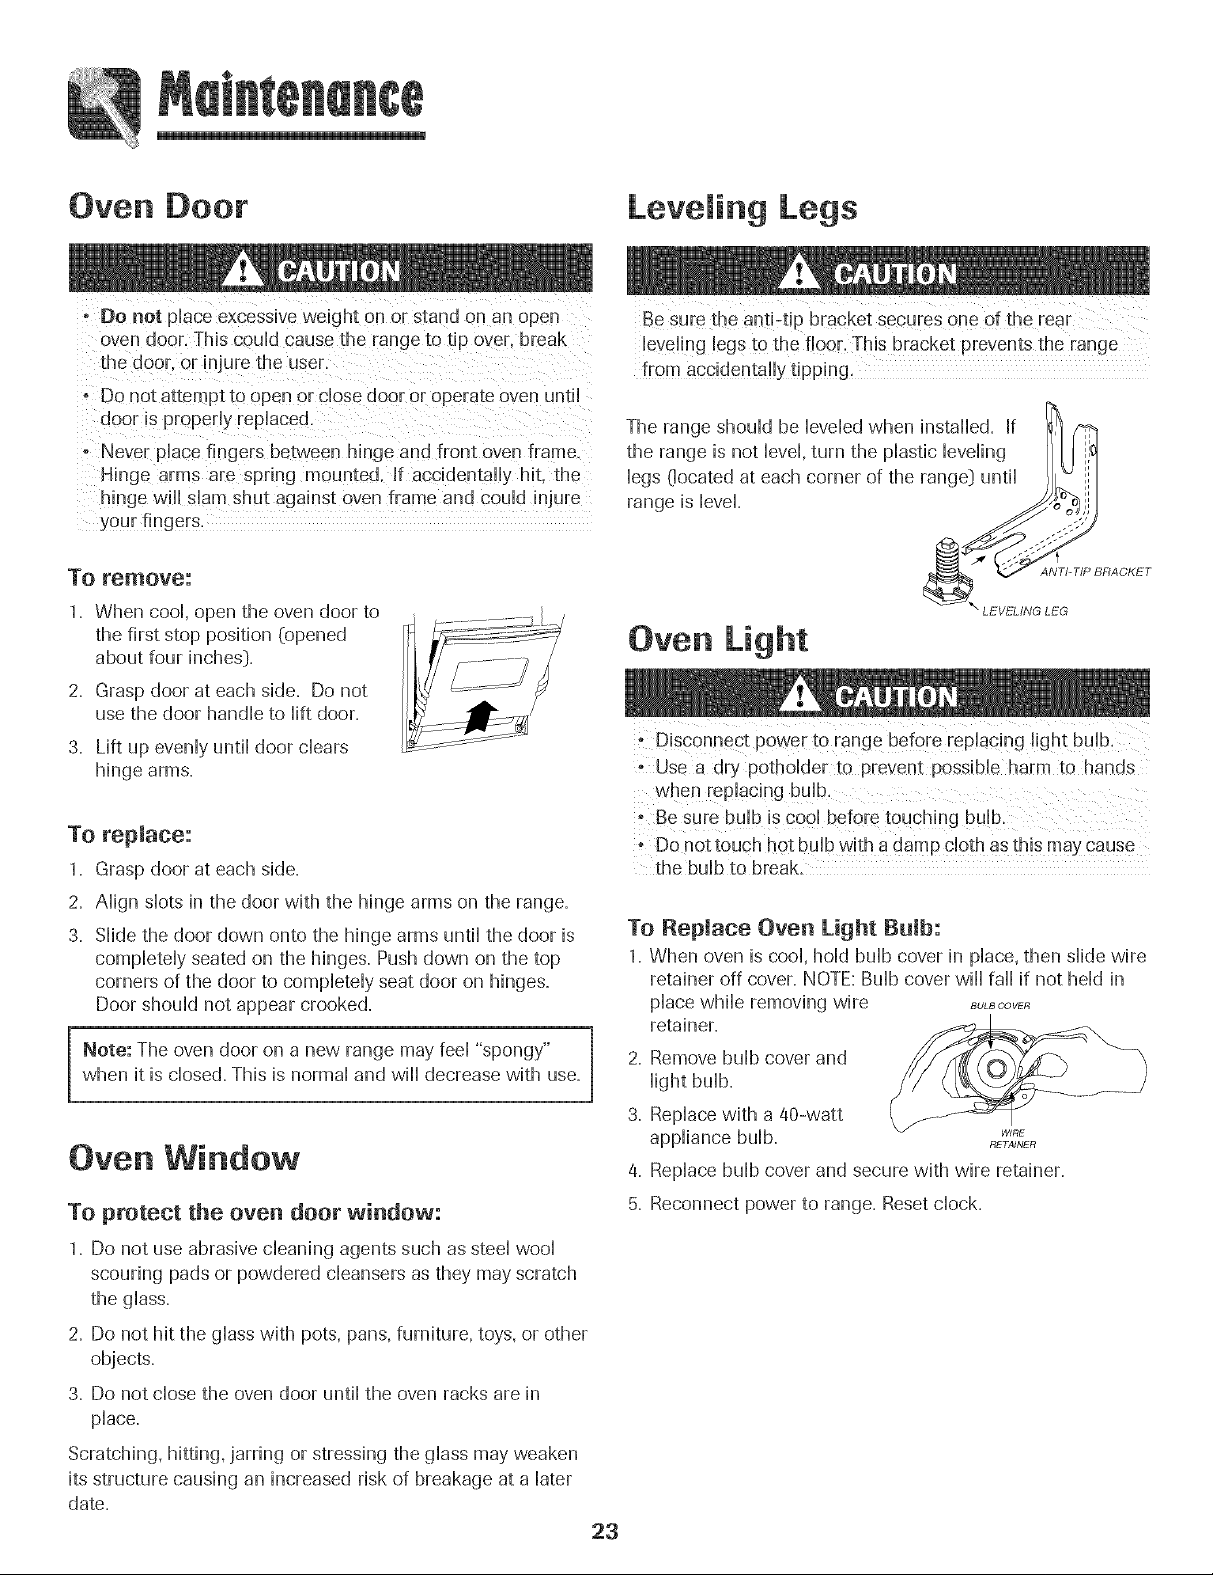
1. When cool, open the oven door to
the first stop position (opened
about four inches}.
2. Grasp door at each side. Do not
use the door handle to lift door.
3. Lift up evenly until door clears
hinge arms.
Leve ing Legs
leveling legs to the floor. This bracket prevents the range
from accidenta!ly tippk/g_
LEVELING LEG
°Use a dry potholder to prevent possible harm to hands
To replace:
1. Grasp door at each side.
2. Align slots in the door with the hinge arms on the range.
3. Slide the door down onto the hinge arms until the door is
completely seated on the hinges. Push down on the top
corners of the door to completely seat door on hinges.
Door should not appear crooked.
Note: The oven door on a new range may feel "spongy"
when it is closed. This is normal and will decrease with use.
Oven Window
To protect the oven door window:
1. Do not use abrasive cleaning agents such as steel wool
scouring pads or powdered cleansers as they may scratch
the glass.
2. Do not hit the glass with pots, pans, furniture, toys, or other
objects.
3. Do not close the oven door until the oven racks are in
place.
o Do nottouch hot bulb with a damp cloth as this may cause
the bulb to break.
To Replace Oven Light Bulb:
1. When oven is cool, hold bulb cover in place, then slide wire
retainer off cover. NOTE:Bulb cover wiii fail if not held in
place while removing wire BULBCOVER
retainer.
2. Remove bulb cover and
light bulb.
3. Replace with a @-watt
appliance bulb. RETAINER
4. Replace bulb cover and secure with wire retainer.
5. Reconnect power to range. Resetclock.
Scratching, hitting, jarring or stressing the glass mayweaken
its structure causing an increased risk of breakage at a later
date.
23
Page 25
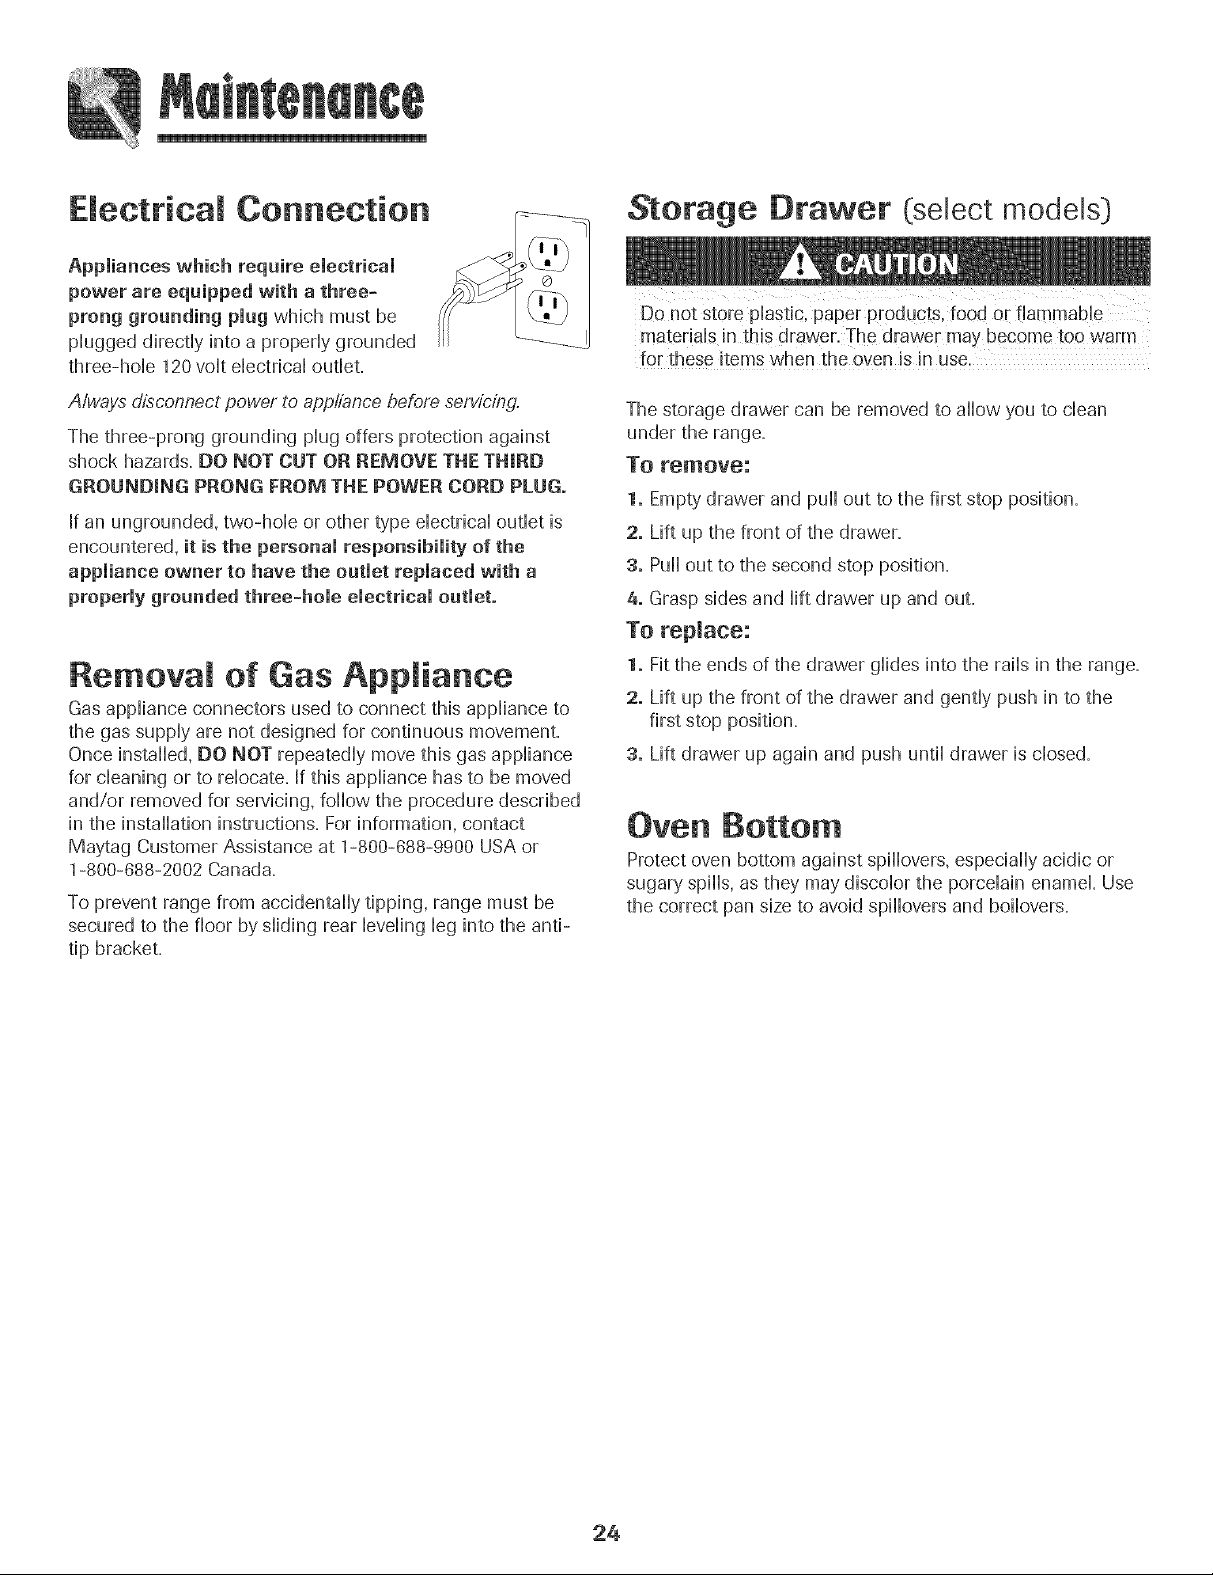
Electrical Connection
Appmiances which require emectricai
power are equipped with a three=
prong grounding plug which must be
pHuggeddirectHyinto a properHygrounded
three-hollo 120vog dectricd outHet.
Storage [}rawer (select models}
Do not store plastic, paper products, food or flammable
for these items when the oven is in use.
Always disconnect power to appliance before servicing.
The three-prong grounding pHugoffers protection against
shock hazards. DO NOT CUT OR REMOVE THE THIRD
GROUNDING PRONG FROM THE POWER CORD PLUG.
If an ungrounded, two-hollo or other type eHectricd outHetis
encountered, it is the personal responsibility of the
appliance owner to have the outlet replaced with a
properly grounded three=hole electrical outlet.
Removal of Gas Appmiance
Gasappliance connectors used to connect this appliance to
the gas supply are not designed for continuous movement.
Once installed, DO NOT repeatedly move this gas appliance
for cleaning or to relocate. If this appliance has to be moved
and/or removed for servicing, follow the procedure described
in the installation instructions. Forinformation, contact
Maytag Customer Assistance at 1-800-888-9900 USAor
1-800-688-2002 Canada.
To prevent range from accidentally tipping, range must be
secured to the floor by sliding rear leveling leg into the anti-
tip bracket.
The storage drawer can be removed to allow you to clean
To remove:
1. Empty drawer and pull out to the first stop position.
2. Lift up the front of the drawer.
3. Pull out to the second stop position.
a. Grasp sides and lift drawer up and out.
To replace:
1. Fit the ends of the drawer glides into the rails in the range.
2. Lift up the front of the drawer and gently push in to the
first stop position.
3. Lift drawer up again and push until drawer is closed.
Oven Bottom
Protect oven bottom against spillovers, especially acidic or
sugary spills, as they may discolor the porcelain enamel. Use
the correct pan size to avoid spillovers and boilovers.
24
Page 26
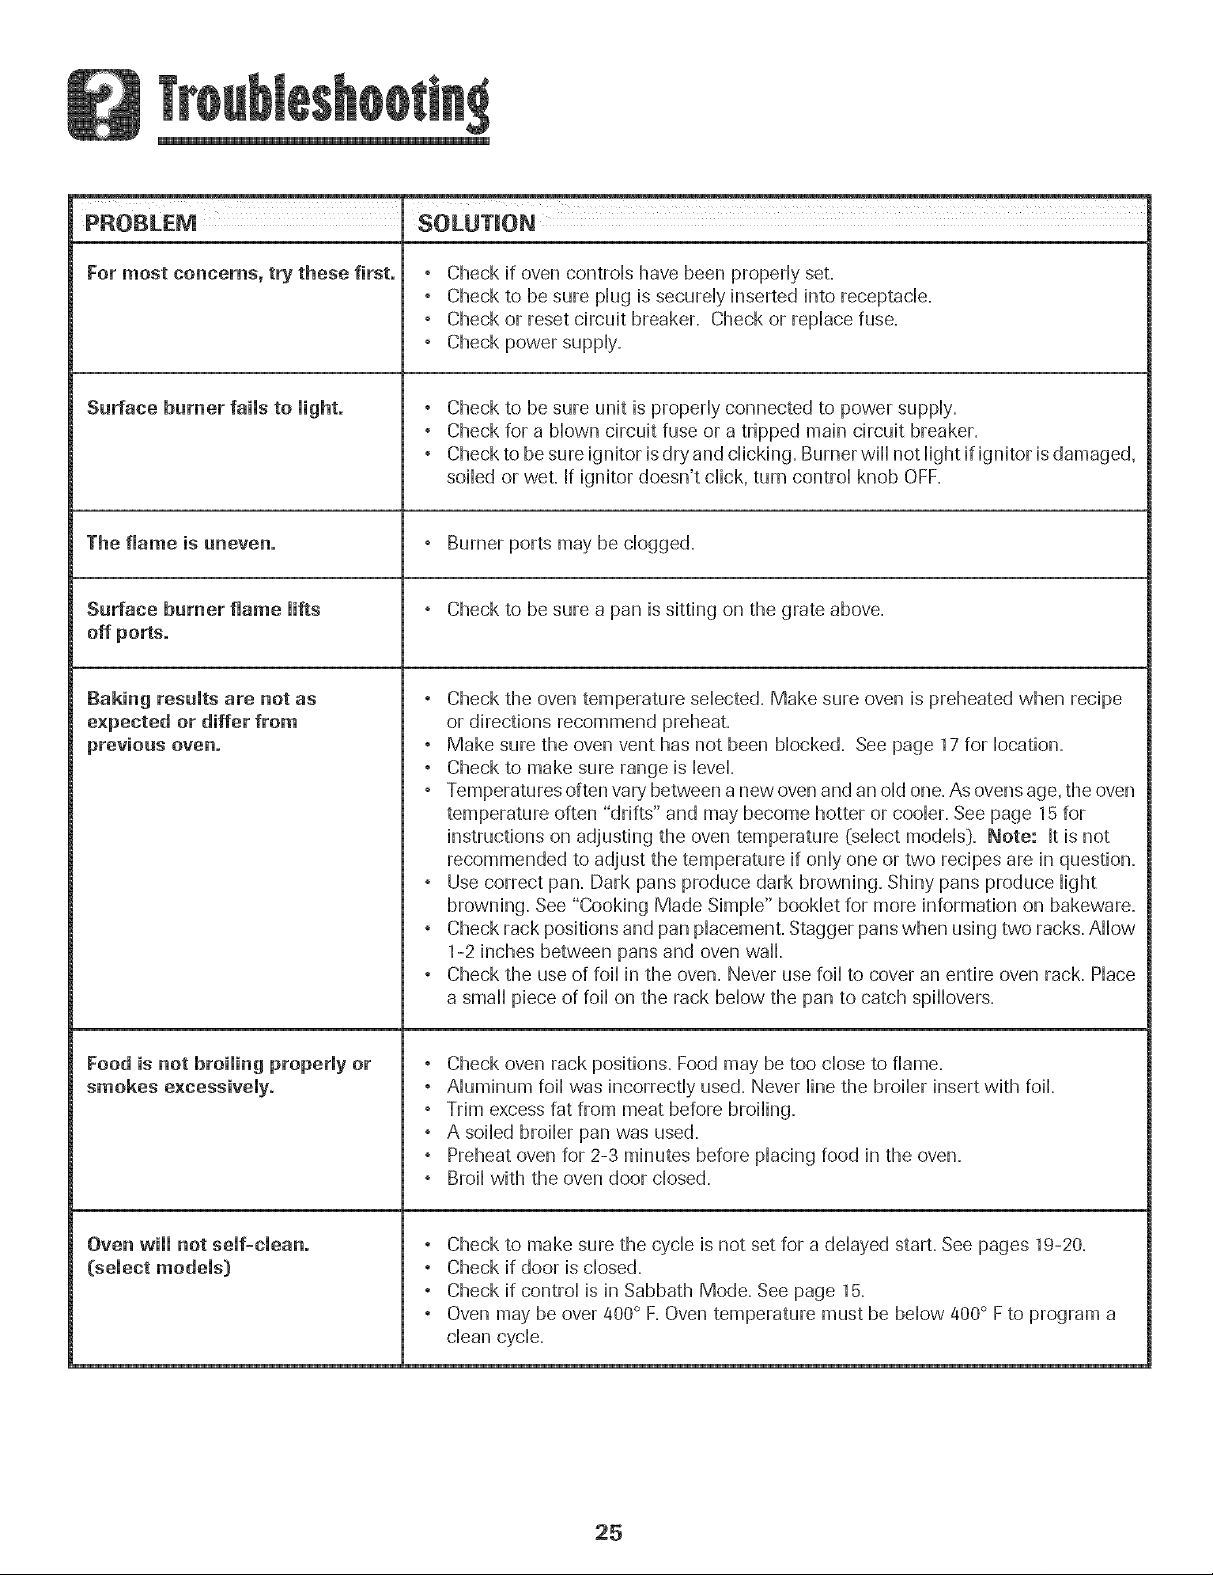
PROBLEM SOLUTION
For most concerns, try these first. , Check if oven controHshave been propedy set.
, Check to be sure pHugis securdy inserted into receptacle.
, Check or reset circuit breaker. Check or repHacefuse.
, Check power suppHy.
Surface burner fails to light. , Check to be sure unit is propedy connected to power suppHy.
, Check for a Mown circuit fuse or a tripped main circuit breaker.
, Check to besure ignitor isdry and cHicHng.Burner will not Hightif ignitor isdamaged,
soiHedor wet. If ignitor doesn't chick,turn controHknob OFF.
The flame is uneven. , Burner ports may be dogged.
Surface burner flame lifts , Check to be sure a pan issitting on the grate above.
off ports.
Baking results are net as , Check the oven temperature selected. Make sure oven is preheated when recipe
expected or differ from or directions recommend preheat.
previous oven. , Make sure the oven vent has not been blocked. See page 17 for location.
, Check to make sure range is level.
, Temperatures often vary' between a new oven and an old one. ,Asovens age,the oven
temperature often "drifts" and may become hotter or cooler. See page 15 for
instructions on adjusting the oven temperature (select models:). Note: It is not
recommended to adjust the temperature if only one or two recipes are in question.
, Use correct pan. Dark pans produce dark browning. Shiny pans produce light
browning. See "Cooking Made Simple" booklet for more information on bakeware.
, Check rack positions and pan placement. Stagger panswhen using two racks. Allow
1-2 inches between pans and oven wall.
, Check the use of foil in the oven. Never use foil to cover an entire oven rack. Place
a small piece of foil on the rack below the pan to catch spillovers.
Food is net broiling properly or , Check oven rack positions. Food may be too close to flame.
smokes excessively. , Aluminum foil was incorrectly used. Never line the broiler insert with foil.
, Trim excess fat from meat before broiling.
, A soiled broiler pan was used.
, Preheat oven for 2-3 minutes before placing food in the oven.
, Broil with the oven door closed.
Oven will not self-clean. , Check to make sure the cycle is not set for a delayed start. See pages 19-20.
(select models) , Check if door is dosed.
, Check if control is in Sabbath Mode. See page 15.
, Oven may be over 400° F.Oven temperature must be below 400° F to program a
clean cycle.
25
Page 27

PROBLEM $OLUTmON
Oven did not dean propermy. ° Longer cleanhg time may be needed_
(select models) , Excessivespillovers, especially sugary and/or acidic foods, were not removed prior
to the self-clean cycle.
Oven door will not anmock after
semf-cmeancycme(semect modems).
Moistare collects on oven
window or steam comes from
oven vent.
There is a strong odor or might
smoke when oven isturned on.
FaamtCodes
(semect modems).
Oven interior is still hot. Allow about one hour for the oven to cool after the
completion of a self-clean cycle. The door can be opened when "LOCK" is
not displayed.
The control and door may be locked. See pages 11and 20 to unlock.
, This is normal when cooking foods high in moisture.
, Excessive moisture was used when cleaning the window.
, This is normal for a new range and wi[[ disappear after a few uses. Initiating a dean
cycle will "burn off" the odors more quickly.
° Turning on a ventilation fan will help remove the smoke and/or odor.
° Excessive food soils on the oven bottom. Usea self-clean cycle.
, BAKE or LOCK may flash rapidly in the display to alert you if there is an error
or a problem. If BAKEor LOCK appear in the display, press the CANCEL pad.
If BAKE or LOCK continue to flash, disconnect power to the appliance.
Wait a few minutes, and then reconnect power. Ifthe flashing still continues,
disconnect power to the appliance and call an authorized servicer.
° If the oven is heavily soiled, excessive flareups may result in a fault code during
cleaning. Pressthe CANCEL pad and allow the oven to cool completely, wipe out
excess soil, then reset the clean cycle. If the fault code reappears, contact an
authorized servicer.
Noises may be heard.
There are no beeps and
"SAb" flashing and then
, The oven makes several low level noises. You may hear the oven relays asthey go on
and off. This is normal.
° As the oven heats and cools, you may hear sounds of metal parts expanding and
contracting. This is normal and will not damage your appliance.
° Oven may be in Sabbath Mode. See page 15.
° Oven is in Sabbath Mode. To cancel, press and hold the Clock pad for five
seconds.
26
Page 28

Gas Range Warranty
Full One Year Warranty -
Parts and Labor
Forerie (1) year from the original retail
purchase oa[e,any part which fails in
norma home use will be repaired or
replacedfree of charge.
PJeasehate: Thisfull warranty'applies
only _Ahen the appliance _slocated in the
United Statesor Canada.Appliances
Iocateoelsewhere are covered by the
limited warrant_esonly, including parts
which fail during the first year.
Canadian Residents
Thls warfare} covers onIy those appliances
installed in Canadathat qavebeen listed
with CanadianStandards Association
unless the appliances are brought into
Canadadue to _ransferof residencefrom
the United Statesto Canada.
Thespecific warrantmsexpressedabove
are the ONLY warrantiesprovided bv the
manubcture_ Thiswarran_ glvesyou
specific,bgal rights, aadyou may alsohave
other rights that vary from state to state.
R_
What is Not Covered By These Warranties:
1= Conditions and damages resuIting from any of the following:
a=Improper instaiIation,deIivery,or maintenance.
b=Any repair, modification, aIteration, or adjustment not authorized bythe
manufacturer or an authorized servicer.
c= Misuse, abuse,accidents, unreasonable use,or acts of God=
d. Incorrect electric current, voltage, or supply=
e=Improper setting of any control=
2= Warranties are void if the original serial numbers havebeen removed,altered, or
cannot be readily determined.
3= Light buibs=
4= Productspurchased for commerciaI or industrial use=
5= The cost of sewice or service call to:
a. Correct instaIIationerrors.
b=Instruct the useron the proper use of the product.
c=Transport the appIiance to the servicer and back.
8= Consequentiaior incidentaI damages sustained by anyperson as a result of any
breachof these warranties.
Somestates do not aiIow the exclusion or Iimitation of consequential or incidental
damages,sothe above exclusion may not apply=
If you Need Service
Firstsee the Troubleshooting section in your Use and Care Guideor calI Maytag
ServicessM,Maytag Customer Assistance at 1-800-888-9900 U.S.A.or
1-800-888-2002 Canada.
To Obtain Warranty Sewice
To locate an authorized service company inyour area contact the dealer from
whom your appliance was purchased or call Maytag ServicessM,Maytag
Customer Assistance. Should you not receive satisfactory warranty service,
call or write:
Maytag ServicessM
Attn: CAIR_ Center
P.O.Box 2370,Cleveland, TN 37320-2370
UoS.1-800=688-9900 and Canada 1-800=688=2002
UoSocustomers using lrTY for deaf, hearing impaired or speech
impaired, call 1-800-688-2080o
Note: When contacting Maytag ServicessM,Maytag CustomerAssistance
about a service problem, please include the following:
a.Your name,address and telephone number.
b.Model number and serial number of your appliance.
c. Name and address of your dealer and date appliance was purchased.
d.A clear description of the problem you are having.
e.Proofof purchase.
Use and Care guides, service manuals and parts information are available from Maytag ServicessM,Maytag Customer Assistance.
22
Page 29

, YFAG
Cuisini_re h gaz
m m m
itll|$|/ll|e
[nstructions de s6curit6
importantes ....................................... 29-33
Cuisson sur [a surface ....................34-35
Commandos de [asurface de cuisson
BrQUeursscefl6s
Cuissen darts le four ....................... 36=46
Commandos du four _ nettoyage manuel
HorHoge Cuisson couran[e
Minuterie Gril
R_guiateur du four _ uettoyage manuel
Cuisson courante Gril
Commandos du four _ autonettoyage
Horloge Minuterie
Cuisson courante Maintien au chaud
Cuisson et maintien Gril
Cuisson courante diff6r6 Grilles du four
Netteyage ............................................ 47-50
Fourautonettoyant
Entretien ............................................... 51-52
Hublot et hmpe du four
D6placement d'un appareil _ gaz
Recherche des pannes ....................... 53-54
Garantie et service apr_s-vente ............. 55
Guia de Use y Cuidade ............................. 56
Page 30

lnstaUatear : Laissezceguide avecI'appareil.
Ceasemmateur: VeuHbzlirele guideet le consewerpaul
consur[ationuEterieure.Conservezlafactured'achatou iecheque
encalssecomrnepreuvede I'achat.
Numerode mod_Je
Num6rode serie
Dated'achat
Sivousavezdes questions,veu[[[eznousappeJer:
Service a la clientele de May[ag
1-800-888-9900 E.-U.
1-800-688-2002 Canada
flundiau vendredL8 h _20 h. heurede rEst]
Internet:http:iiwww.maytag.com
Darts[ecadrede haspratiquesd'am6[iorationconstantede la
qua[it6et de la pedormancede nos produitsde cubson,ues
modificationsde['appareilqul ne sam pasmentbnn6esdansce
guide pourront 6tre introduites.
Repertez=veus _ la page 55 pour plus d'iiffermatiens
cencemant lese_lviceapr6s-vellteo
Lira toutes les instructions avant d'utiliser cat appareil;
observer toutes bs instructions pour eliminer bs risques
d'incendie, choc ebctrique, dommages materiels et corporeb
qua pourrait susciter une utilisation incorrecte de rappareil,
Utiliser rappareil uniquement pour bs fonctions prevues,
d@rites darts ce guide,
Pour ane atilisation ad6quate et en s6curit6, il faut qua
rappareil soit convenabbment instdl6 par un technicien
qudifie, et relic 8 la terre, Ne pas regbr, r@arer ni remplacer
un composant, a mains que ceB ne soit sp@ifiquement
recommande darts ce guide, Toute autre reparation doit 6tre
effectuee par un technicien qualifie, Demander a rinstallateur
de montrer o8 setrouve b robinet d'arret de gazet comment
b farmer en cas d'urgence,
Toujours d@rancher rappareil avant d'y faire de rentretien,
seat pas respect6es _ la iettre, il y a risque d'!acendie
biessures et m6me mamort.
Lesinstructions de s@urite importantes et bs paragraphes
<<avertissemenb>de ce guide ne sont pas destines a couvriH
toutes bs conditions et situations qui pourraient se presenter.
IIfaut faire preuve de ban sans. de prudence et de soin Iors de
rinstallation de rentretien ou du fonctionnement de rappareil
Toujours prendre contact avec b fabricant dans b casde
problemes ou de conditions qui ne seraent pas comprises.
Reconna_tre les etiquettes, paragraphes et
symboUes sur la securit6
POU£Pd_JENTrdsukeren de gravesb!essures0u meme!a
mort.
-Ne pas ranger ni utiliser d'essence eu autre vapeur
eu liquide inflammable _ pre×imit6 de cat appareil
eu _e teat a_tre appareiL
Z QUE FALSESI L'ON SENT UNE ODEUR DE GAZ :
, N'uti!iser a_eun t6!ephene de I'imme_bleo
o Se te_re ehez _n veisi_ ett616phe_er
i_ra6_iatement _ _a cempag_ie _e gaz, S_ivre les
_ireetives _e_n6es par le pr6pes6 de la
ee_pag_ie de gaz,
, S'il est irapessibie de jeindre la eo_pag_ie _e
gaz, t616phe_e_ a_ service des i_ce_dies.
can{lees _ _n installate_r eemp_tent, _ u_e
entreprise _e service eu _ la ce_pag_ie _e gaz,
Une fuite de gaz pourrait surven!r darts le systemeet
POURRAIENTresulter en des blessures mineures.
conformement aux instructions du fabricant.
29
Page 31

,u
instructions g neraJes
o TOUTE CUm$1NIEREPEUT BASCULER
ET PROVOQUER DES BLESSURES°
,, mNSTALLERLA BRIDE
ANTIBASCULEMENT FOURNIE AVEC
CETTECUISINIERE.
o RESPECTERTOUTES LES iNSTRUC-
TiONS [}'iNSTALLATiON.
AVERTJSSEMENT: Peur r_duire Je
risque de basculement de I'appareil _ m'eccasien
d'une utiHsatien anermaie eu d'un chargement
e×cessif de Japorte du feur, il faut que JabrMe
antibascuiement seit cenvenabiement instaii_e,
Utiliser une Bmpe torche pour determiner si la bride
antibascubment est convenabbment instaflee sous la
cuisiniere, L'un des pie@ arriere de reghge de Faplomb doit
etre convenabbment engage darts la fente de la bride,
Lorsque la cuisiniere est convenabbment calee, la bride
antibascubment immoNise b pied arriere contre b sol,
Verifier la parfaite immobflisation de la cuisiniere par la bride
apres chaqae @placement de la cuisiniere,
Pour viter tin incendie ou des
dommages par la fumee
S'assurer que tous bs materiaux de conditionnement sont
retires de Fappareil avant de b mettre en marche,
Garder bs materiaux combustibles, [essence et autres
matieres et vapeurs inflammables bien 61oignesde Fappare&
composants de ['apparei[ susceptibbs de devenir tiedes ou
chauds, Ne pas laisser des articles en plastique sur la table
de cuisson; un article en plastique trop proche de I'event du
four ou d'un bn:deur allume pourrait s'amollir ou fondre,
Pour eliminer lebesoin d'atteindre quelque chose par-dessus
les brQburs de surface, il est preferable qu'il n'y ait aucune
armoire de cuisine directement au-dessus de I'appareil, S'il y
a une armoire, on ne devrait y remiser que des articles peu
frequemment utilises et capables de resister a la chaleur
emise par I'appareil, La temperature pourrait etre excessive
pour certains articles, comme liquides volatils, produits de
nettoyage ou flacons d'aerosol,
En cas d'incendie
[nterrompre [e fonctionnement de ['apparei[ et de [a hotte de
ventilation pour minimiser le risque d'extension des fiammes,
Eteindre les fiammes, pub mettre la hotte en marche pour
evacuer la fumee et Fair vicie,
, Table de caisson : Utfliser un couverde ou une plaque
biscuits pour etouffer bs fiammes d'un feu qui se declare
darts un ustensib de cuisine,
NE JAMAmS saisir ou d@Bcer un ustensib de cuisine
enfiamm&
, Fear : Fermer la porte du four pour etouffer bs fiammes,
Ne pas projeter de [eau sur un feu de graisse, Utiliser du
bicarbonate de sodium ou un extincteur a mousse ou produit
chimique sec pour eteindre bs fiammes,
S curit6 pour enfants
Si Fappareil est instafle pres d'une fenetre, des precautions
appropriees doivent 6tre prises pour @iter que b vent entrdne
bs rideaux au-dessus des brQburs,
NEJAMAIS hisser des articles sur la table de cuisson, L'air
chaud de F@ent peut bs enfiammer et mettre egabment sous
pression des contenants fermes qui pourraient alors exploser,
De nombreux flacons d'aerosol peuvent EXPLOSERIorsqu'on
bs expose a la chabur, et ib peuvent contenir un produit tres
inflammable, Eviterd'utifiser ou remiser un flacon d'aerosol
proximite de [@pare&
De nombreux articles en plastique peuvent etre deteriores par
la chabur, Conserver bs articles en pBstique adistance des
enfantS Peuvent s!nt_resser, Un enfant tentant de grimper
subiEde graves bbssures.
NEJAMAIS iaisser des enfants seuis ou sans supervision
Iorsque I'appareil est en service ou encore chaud,
NF JAMAIS laisser un enfant s'asseoir ou se tenir sur une
partie quelconque de I'appareil, II pourrait se blesser ou se
brQler,
II est important d'enseigner aux enfants que la cuisiniere et les
ustensiles places dessus ou dedans peuvent etre chauds,
Laisser refroidir les ustensiles en un lieu sQr,hors d'atteinte
3O
Page 32

des enfants. [1est important d'enseigner aux enfants qu'un
appareHmdnager n'est pas un jouet, et qu'Hs ne doivent
toucher aucune commande ou autre composant de ['appareH.
brOieur correct et verifier que [e brQieur s'aiiume
effectivement. A [afin de [a periode de cuisson, eteindre [e
brQieur avant de retirer ['ustensHe,pour eviter une exposition
aux fiammes du brQieur.
Fami[iarisation avec ['apparei[
NE JAMAIS utiiiser [a porte du four ou [e tiro[r gecas
fa[re bascuie[ ['apparei[ et entrai'ner dommages mat@eelset NE JAMAJS [aisser un brQieur de surface aiiume sans
corpore[s sedeux, surveillance, particu[ierement avec une puissance de
NE JAMAIS utiiiser [a cuisiniere comme source de chaieur
pour [echauffage de [a piece, afin d'eviter tout risque de
dommages corporeis et de deterioration de ['appareiL Ne pas
remiser des aliments ou ustensiies de cuisine sur [a tame de
cuisson ou darts [e four.
Ne pas obstruer [a circulation de ['air de combustion et de
ventilation au niveau de I'event du four ou des entrees d'air.
Une ddicience de I'alimentation en air des brQleurs degrade la
performance et augmente jusqu';_ un niveau dangereux la
concentration de monoxyde de carbone clans les gaz de
combustion.
L'event du four est situd a [a base du tableau de commande.
Eviter de toucher [evoisinage de ['event du four [orsque [e four
est utiiise et pendant piusieurs minutes apres ['arret du four.
Certains composants de ['event et [azone voisine peuvent
devenir suffisamment chauds pour provoquer des bn3iures.
Apres ['arret du four, ne pas toucher ['event du four ou [a zone
voisine avant que ces composants aient pu se refroidir
suffisamment.
Autres surfaces potentieibment chaudes: tame de cuisson,
zones faisant face a [a tame de cuisson, event du four, zones
voisines de ['event, porte du four et zones voisines de [a porte
et du hubbt.
Ne pas toucher ]'ampoule chaude du four avec un ]inge
humide; ]e choc thermique pourrait ]a briser. Encas de bris de
]'ampoule, ddbrancher ]'apparei] de ]a source d'eiectricite
avant d'eniever ]'ampoule, pour eviter un choc eiectrique.
Cuisson et s6curit
Placer toujours un ustensiie sur un brOleur de surface avant de
I'allumer, Veiller a bien conndtre la correspondance entre les
boutons de commande et les brSleurs, Veiller a allumer le
VeHbr a toujours ajuster correctement [a taHb des fiammes
pour qu'eiies ne d@assent pas sur [a peripherie de ['ustensiie.
Des fiammes de trop grande taiiie sur un brQieur sont
dangereuses, eiies entrainent un gaspiiiage d'energie et eiies
peuvent faire subir des dommages a ['ustensiie, a ['apparei[ ou
['armoire situee au-dessus.
chauffage eievee ou [ors d'une operation de friture. Un
d@ordement pourrait provoquer [a formation de fumee et des
produits gras pourraient s'enfiammer. E[iminer des que
possible [es produits gras renverses. Ne pas utiiiser une
puissance de chauffage eievee pendant une periode
proiongee.
NE JAMAiS faire chauffer un recipient non ouvert darts ]e
four ou sur un brQieur de surface; ]'accumulation de pression
clans ]e recipient pourrait provoquer son eciatement et de
graves dommages materiels ou corporeis.
Utiiiser des maniques robustes et seches. Des maniques
humides peuvent provoquer ]a formation de vapeur bn3iante.
Nejamais utiiiser un torchon a vaisseiie ou autre article textile
[a place de maniques; un tel article pourrait trainer sur un
brQieur et s'enfiammer, ou accrocher un ustensiie ou un
composant de ]'appareiL
Laisser toujours refroidir un recipient d'huiie de friture chaude
avant de tenter de [e depiacer et [e manipuier.
Ne pas [aisser [agraisse de cuisson ou autre materiau
inflammable s'accumuier dans ou pres de ]'apparei], de ]a
hotte ou du ventiiateur de ['event. Nettoyer frequemment [a
hotte pour emp@her route accumulation sur [a hotte eiie-
meme ou sur ]e fiitre. Lors du fiambage d'aiiments sous ]a
hotte, mettre [eventiiateur en marche.
NE JAMAIS porter, Iors de I'utilisation de I'appareil, des
vetements fairs d'un materiau inflammable, ou amples, ou
Iongues manches, De tels vetements peuvent s'enflammer ou
accrocher la poignee d'un ustensile,
Placer toujours ies grilles a ia position appropriee dans ie four
Iorsque le four estfroid, Fairecoulisser lagrille vers I'exterieur
avant d'ajouter ou enlever un plat; utiliser pour cela une
manique robuste et seche, Eviter d'introduire la main dans le
four pour y placer ou retirer un plat, S'ii est necessaire de
31
Page 33

d@lacer une grille Iorsqu'elle est chaude, utiliser une manique
seche, Veiller a toujours arreter le four a la fin d'une pdriode
de cuisson,
N'utiliser lesgrilles que dans le four dans lequel elles ont ete
achetees/expediees,
Quvrir toujours la porte du four tres prudemment, Laisser Fair
chaud ou la vapeur s'echapper avant de retirer/introduire un
plat,
AVERTmSSEMENT: Mets prepares : Respecter ies instruc-
tions du fabricant, Si le contenant ou le couvercle en plastique
d'un mets surgele se deforme ou est endommage durant la
cuisson, jeter immediatement lerecipient et son contenu, Les
aliments pourraient etre contamines,
NF JAMAmS garnir ia sob ou une grille du four avec de ia
feuille d'aluminium, Ceci pourrait susciter un risque de choc
electrique ou d'incendie, ou une autre deterioration de
I'appareil, Utiliser de la feuille d'aluminium uniquement selon
les instructions de ce guide,
Ustensimes et s6curit
Utiliser des ustensiles a fond plat comportant une poignee
qu'on peut facilement saisir et qui reste froide, Eviter d'utiliser
un ustensile instable ou deforme, qui pourrait facilement
basculer, ou dont la poignee est real fixee, Eviter egalement
d'utiliser des ustensiles de petite taille comportant une
poignee Iourde; ces ustensiles sont generalement instables et
peuvent facilement basculer, Un ustensile Iourd Iorsqu'il est
rempli peut egalement 6tre dangereux Iorsdes manipulations,
Veiller a utiliser un ustensile de taille suffisante pour que le
contenu ne risque pas de d@order, Ceci est particulierement
important pour un ustensile rempli d'huile de friture, Verifier
que la taille de I'ustensile est suffisante pour qu'il puisse
recevoir les produits alimentaires a cuire, et absorber
I'augmentation de volume suscitee par I'ebullition de la
graisse,
Seuls certains materiaux en verre, vitroceramique, ceramique,
ou certains ustensiles vitrifies/emailles peuvent etre utilises sur
la table de cuisson ou dans le four sans risque de bris sous
I'effet du choc thermique, Observer les instructions du
fabricant Iors de I'utilisation d'un ustensile en verre,
La securite de fonctionnement de cet appareil a ete testee
I'aide d'ustensiies de cuisine conventionneis. Ne pas utiiiser
un ustensiie ou accessoire qui n'est pas specifiquement
recommande dans ce guide, Ne pas utiiiser de couvre-
br0ieur, grii place sur ia table de cuisson ou systeme de
convection additionnel, L'utiiisation d'un dispositif ou
accessoire qui n'est pas expressement recommande dans ce
guide peut degrader ia securite de i'appareii ou sa perfor-
mance, ou reduire ia iong@ite des composants,
Nettoyage et securit6
Arreter routes les commandes et attendre le refroidissement
de tousles composants avant de les toucher ou d'entre-
prendre ie nettoyage, Ne pas toucher iagrille d'un brQieur ou
la zone voisine avant que ces composants aient pu suffisam-
ment refroidir,
Exercer une grande prudence iors du nettoyage de i'appareii,
Travailler prudemment pour eviter des brSlures par la vapeur
en cas d'utilisation d'un chiffon ou d'une eponge humide Iors
de I'elimination d'un produit renverse sur une surface chaude,
Certains produits de nettoyage peuvent generer des vapeurs
nocives iorsqu'on ies applique sur une surface chaude,
Four autonettoyant
(certains modeles}
dans le [0ur !0rsd'une operation d'aut0nett0yage,
Pour minimiser les risques de brQlure,d'inflammation de
matieres et de renversement par contact non intentionnel avec
un ustensile, ne pas orienter la poignee d'un ustensile vers un
brQleur adjacent; orienter toujours la poignee d'un ustensile
vers le cote ou I'arriere de I'appareil; ne pas laisser non plus la
poignee d'un ustensile d@order a I'avant de I'appareil, o8 un
jeune enfant pourrait facilement la saisir,
Veiller a ne jamais laisser le contenu liquide d'un ustensile
s'@aporer completement; I'ustensile et I'appareil pourraient
subir des dommages,
Appliquer les instructions du fabricant Iors de I'emploi d'un
sachet pour cuisson au four,
Nettoyer uniquement les pieces mentionnees dans ce guide,
Ne pas nettoyer le joint de porte; le joint joue un rob essentiel
quanta I'etancheite, Ne pas frotter, endommager ou d@lacer
le joint, Ne pas utiliser de produit de nettoyage du four dans
le four autonettoyant ou sur les zones voisines,
Avant d'ex@uter une operation d'autonettoyage, retirer la
I@hefrite, les grilles du four et les autres ustensiles, et eliminer
par essuyage tout exces de residus renverses pour eviter la
formation de fumee ou I'inflammation de ces residus,
II est normal que la surface de cuisson devienne chaude
durant une operation d'autonettoyage; par consequent, eviter
de toucher lasurface de cuisson durant I'autonettoyage,
32
Page 34

Avertisse ent et avis
i portant pour la s curit
La Ioi californienne _Safe Drinking Water and Toxic Enforce-
ment Act >>de 1986 (proposition 65)stipule la puNication par
le gouvemeur de la Californie d'une liste de substances que
Fetat de Californie considere comme cancefigenes ou
dangereuses pour le systeme reproducteur, et impose aux
entreprises commerciales [obligation de signaler a leurs
clients les risques d'exposition a de telles substances,
Les utilisateurs de cet appareil peuvent etre exposes a une
faiNe concentration de certaines substances figurant darts la
liste mentionnee ci-dessus, dont benzene, formaldehyde et
suie, du fait de la combustion incomplete du gaz naturel ou du
gaz de petrole liquefie, Pour minimiser la combustion
incomplete, veiller ace que les brQleurs soient parfaitement
regles, Pourminimiser Fexpositiona ces substances, veiller
bien evacuer les gaz de combustion a Fexterieur,
Nous informons les utilisateurs de cet appareil que Drs d'une
operation d'autonettoyage, ils peuvent etre exposes a une
faible concentration de certaines substances figurant darts la
liste mentionnee ci-dessus, dont le monoxyde de carbone,
Pour minimiser [exposition, veiller ace que la piece oQse
trouve le four soit convenaNement aeree durant une operation
d'autonettoyage par Fouverture d'une fenetre ou d'une porte,
AViS iMPORTANT - OISEAUX FAMILIERS : Lesoiseaux ont
un systeme respiratoire tres sensible, Ne pas garder un oiseau
familier darts la cuisine ou darts une piece oQil pourrait etre
expose aux fumees, Lesfumees emises durant une operation
d'autonettoyage peuvent etre dangereuses ou mortelles pour
un oiseau, de meme que les fumees emises Iors du chauffage
excessif de graisse, huile, margarine, et du chauffage excessif
darts un ustensile a revetement antiadhesif,
Conserver ces instructions pour consultation u t rieure
33
Page 35

LO (Basse}: S'utilisepourIe mijotageou Ie
maintiende latemp@atured'un mets,ou pour
Jafusion de chocotatou beurre.LorsqueIeplat
ou t'ustensiteest couvert,un debutde cuisson
peutseproduireavectapuissancede
chauffageLO.
Commandes de Ja
surface de cuisson
- Siun brGleurs'eteint durant uneoperationde cu_ssolt,fermel
I'arriveede gazau brOleur:SI unefore odeur de gazest
perceptible,ouvrir unelenetreet attendrecmq minutesavant
d'allumerae nouveauJebr_leur.
, Avan-_d'ouvrJrI'arriveedegaz_ la cu_sln_ere,verifierque
snaqueboutonae commandeest_ lapositionOFF(Arr@,0.
o BIEJAMAJ$ toucherJasurfacede cuissonavant :lu'ellesesoit
completementretroJdie.CertaJneszonesdela surface.
particulierementauvolsmagedesbr8leurs,peuven[aevenir
tres chaudesdurantune cuisson.Utiliserdesman_ques.
AHumage sans de
Lesystemed'allumagesansflammedeveille /
rendinutileFallmentationpermanente
d'unefiammedeveille.IIy a deux
alIumeurspourIesbrCJIeursde surface
conventionnels.ChaquebrOleurde Ia _.........
tabledecuissonestdoted'un allumeur_etincetles.Procederavec
prudencelotsdu nettoyageauvoisinaged'unbrOleurdeIatablede
cuisson.Si lechiffon utiliseaccrochaitle dispositifd'allumageil
pourraitIedQteriorer,ce qui empecheraitensure I'allumagedu brQleur.
Si un breJIeurde latabledecuissonnes'allumepas,determinersi
I'allumeurestbrise,souilleou mouille.Lecas6cheant,deboucheravec
uneaiguilleou une brocherectiligneI'orificesitu6justeau-dessousde
I'allumeur.
Boutons de co mande de la
surface de cuissor|
Onutilise cesboutonspour commanderI'alIumagedesbr8leursde
surface.Onpeut reglerchaquebouton_ toute positionentreles
positionsextremesLO (Basse}etHJ(Elevee}.Onpeut percevoirune
detentede calagea Iaposition HI.On peutchoisirtoute posRionde
reglageentrelesdeuxpositionsextremes.
HI {Etevee}:S'utilisepour porterun Iiquide
ebullitionou atteindre la bonnepressiondansun
autocuiseur.ReduireensuiteIa puissancede
chauffageapres Ie debut de I'ebullitionou de la
cuissondes aliments.
Unepuissancede chauffage intermediaireest
utiliseepour la poursuitede la cuisson.Les
alimentsne cuisentpasplusrapidementsi on
utilise une puissancedechauffageplus6leveeque
necessairepour le maintiend'unedouce ebullition.
L'eaubouttoujours a Ia marnetemperature,que
I'ebullitionsoit tranquilleouvigoureuse.
O O Ungraphlquepresde chaqueboutonidentifieIe brOleurde
O surface commandepar ce bouton.Parexemple,le
graphiquea gaucheidentlfieJeb_CJleuravant/gauche.
RegJage des commandes :
Lapuissancedechauffagea employerd@end du type et de IataiIIe
de I'ustensiIeutilise.Ontrouvedansla brochureLacuissonsimpli%e
de I'informationsurlesustensilesetautresfacteursaffectantle
regIagedeIapuissancedechauffage.
1. Placerun ustensilesur la grille du brOleur.
• SiaucunustensiIen'estplace sur Iagrille du brOleur,Ies
flammespeuventavoirtendance_ ses@arerdu brOIeur.
2. Appuyeret toumer Ieboutonclanslesensanti-horaire,jusqu'ala
positionLITE [A!lumage},
• OnpeutpercevoirIecliquetiscorrespondant_Iaproduction
des6tinceJles,etJebrOleurs'aHume.(LescuatreaHumeurs
produisentdes6tincellesJorsqu'onplaceleboutonde J'undes
brOieurs_ [apositionLJTE.}
3. ApresI'allumagedu breJleur,reglerIataille desfiammesselonle
desirentournant le bouton de commande.
• L'alhmeur continue_ produiredesetincellesaussJJongtemps
que le boutonest_ la posRionHTE.
UtiJisation durar|t ur|e panne
Avant d'a[iume_un brOieurdesurface,v@ifierquetous[es boutons
de c0mmandesont_ [aposit!O[!OF_{Arrat}.ApproeherEal[urnette
enfiammeedu brO[euravantde faire tourner !ebouton jusqd_ ja
positionLIT£.
1. Approcherune alIumetteenfiamm@edu brOleurautiJiser.
2. Enfonceretfairetoumer Jentementle bouton de commande
]usqu'_ IapositionLITE.
3. Quands'allume,ajusterJesflammesa Jatailledesiree.
34
Page 36

@
Surface de cuisson
Pour 6viter ia formation de taches ou un
changeraent de couleur de la surface de
cuisson :
, Nettoyer la surface de cubson apres chaque utilbadon.
, Enbver bs residus renverses de produits addes ou sucres
des que la surface de cubson a refroidi; ces produits
renverses peuvent faire changer la coubur de
I'email.
I {
qu'en so Jrla raison°
Breleuts scell6s
Les brQburs scelles de la cuisiniere sont fixes sur la surface de
cuisson; ils ne sont pas con_us pour 6tre enbves. Comme bs
brQburs sont scelles, un produit qui deborde d'un ustensib ne
s'infiltrera pas sous la surface de cuisson. Ondevrait
cependant nettoyer bs brQburs apres chaque utilisation. (Voir
bs instructions de nettoyage _ la page 49.}
Br leur de haute
performance (12,000 BTU
Cette cuisiniere est dotee d'un brQbur b haute vitesse, place
I'avant droit. CebrQbur permet une cuisson rapide qui peut
servir 8 faire bouillir rapidement de I'eau ou 8 cuire une grande
Br leur de mijotage
Ce brQbur est situe a la position arriere gauche. II offre une
plus faibb puissance_ pour la cuisson de sauces ddicates ou la
fusion du chocolat.
La puissance thermique (BTU) des brOleursest diff_rente /ors
de I'alimentation au gaz de p_trole Iiqu_fi_,
Grilles de bremeur
Avantune operationde cuisson,verifierque la grille est
correctementplace. Unegrille de brOIeur
incorrectementinstall@peut@aillerI'@_ailde la tabb
de cuisson.
Ne pasfaire fonetionner un breleur sans qa'an
astensile soit pmae_sur magHmme.L'email de magHmme
peut s'_.cailler s'il n'ya aacan astensile capable
d'absorber maehaieur _mise par mebreieur.
Memesi leagrilbs de brObursonttres durabIes,eIIesperdront
progressivementbur lustreet changerontde coubur, du fait des
temperatures6leveesauxquelbs les brOleursles exposent.
Cuvettes de propret - Optioaal
Cuvettesdepropret_par porcelaineremovablesont pas disponible
de cette appareiIpourcontenirdesfiaques.Appel 1-800-688-2002
pour commander.
(
Re_arqBes :
, Un brQbur convenabbment regl6 et dont bs orifices
sont propres s'allume en qudques secondes. Lors de
Falimentation au gaz natural bs flammes sont bbues,
avec un cone interne bbu intense.
Si ies fiammes d'un brQleur sont jaunes ou si ia com-
bustion est bruyante, le ratio air/gaz peut etre incorrect.
Demander _un technicien d'effectuer le reglage. (La
garantie ne couvre pas ce regiage.}
Lots de I'alimentation au gaz de petrole liquefie, ii est
acceptable que I'extremite des flammes soit jaune. Ceci
est normal; aucun reglage n'est necessaire.
, Avec certains types de gaz, on peut percevoir un petit
bruit d'explosion Iors de I'extinction d'un brqleur de
surface. Ceci est normal
° Si on fait passer rapidement le bouton de commande de
ia position Hi {Eievee} 8 ia position LO (Basse}, ies
flammes peuvent s'eteindre, particulierement si le
brqleur est froid. Si ceci se produit, placer le bouton de
commande _ la position OFF (Arre0 et attendre
quelques secondes avant d'allumer de nouveau le
brOleur.
, Ajuster la puissance de chauffage de telle maniere que
les flammes ne debordent pas 8 la peripherie de
I'ustensile.
35
Page 37

Commandes du four nettoyage manuel (certains modeles]
A F
.......... ./
\
\\\\\
Less-
\
\
/
jJ
.....
B C 0
REMARQUE: L'afficheurindique 12:00[orsqueFappareilest branch6[a premierelois ou encasde pannede courant.Lest6moinshmineux
decuissoncouranteet de cuissonaugril s'alhment IorsqueFonappuiesur latouche de fonction correspondante.
Cuissoncourante
Broil
O
M[nuterie
B
Hor[oge
EL
ANNULER
F
Plus+ou
Moins-
S'utiiisepour [acuissoncouranteet le
r0tissage.
S'utiiisepour [acuissonau gri[et [e
rissolagesur pattie sup6rieure.
Programme[aminuterie.
S'uti[isepour programmer['heuredujour.
AnnuIetoutes[esop6rationssaufminuterie
et hor[oge.
S'utiiisepourentrerou changer[adur6e,[a
temperaturedu four. Etabiittegri[
temperature#[ev#eou basse.
Programmation de [a minuterie
La minutedepeut 6treprogramm6ede une minute COOjusqu'_99
heureset 59 minutes(99:59].Ladur6esera affich6een minuteset
nonen secondes,LA MINUTERtEhieCOMMANDE PASLEFOUR.
1. Appuyersur latoucheTimer (Minuterie).
2. Appuyersur More+ ou Less-jusqu'_ ce que la dur6ed6sir6esoit
E F
Mettre _ I'heure_ l'aidedestouchesMore+ ou Less-.Sil'on
n'appuiepassur cestouchesen moinsde 30secondes.[e
programmeest annui& Appuyersur[atouche Clocket
recommencer.
• 0:00s'aHumeet les deux points (:]ciignotent8 ['afficheur.
affich6e.
Utilisation des touches
• Appuyersur latouche d_sir6e.
• Appuyersur More+ (Pius+]ou Less-(Moins-) pour entrer[a
dur6eou [atemp6rature.
• Un bip retentit Iorsque['onappuiesur unetouche defonction. I[
n'ya pasde hip pour [atouche More+ ou[atouche Less-.
• Undouble hip retentiten casd'erreurde programmation.
Remarque : Quatresecondesapr6savoirappuy6sur [estouches
More+ ou Less-,[adur6eou[a temp6ratureseront
automatiquemententr#es.Si plus de 30secondess'6couIent
entre [apressionsur unetouche de fonctionet sur [estouches
More+ ou Less-.[afonctionseraannuBeet I'afficheurreviendra
['affichagepr6c6dent.
R6g[age de Phodoge
1. Appuyersur latouche Clock (Hortoge).
o UhorIogene peutpasetre r(!gBesi [efour estd6j8programm6
pour uneop6rationde cuissoncourante,degril ou une
op6rationminut6e.
• Laminuteriecommence_d6compterd_s que la dur6ea 6t6
programmee.
oLesdeuxpoints qui ciignotent indiquent qu'un d6compteest
en cours.[Lesdeuxpointsneclignotentpassi I'heureou la
temp6raturedu foursont affich_es.)
• Deuxhipscourtssignalentla fin de I'op6ration.0:00parait
I'afficheur.
Si ['onveut,appuyel sur[atoucheClocketi'heuredu jour
r_apparaitbHSvement_ I'afficheurpendantuneoperation
minutSe.
• SiFonveut,appuyersur [estouchesBakeou Broilet le regiage
detemperatureactuelie r_apparaitbrBvement_ I'affichage
pendantuneoperationminutee.
Aan_iatioa de la min_terie :
Appuyersurla toucheTimeret la maintenirainsipendantplusieurs
secondes.
36
Page 38

Cuisson courante, rStissage et
euisson au gril
Pourobtenirdesconseilsetdesdur6esdecuissoncourante,de
rOtissageet decuissonaugril,sereporter_la brochureLacuisson
simpli%e.
Programmation des commandes pour une cuisson
courante ou un rStissage :
1. Appuyersur latoucheBake(Cuissoncourante).
• 000s'aIlumeet let6moinlumineuxdecuissoncouranteclignote
I'afficheur.
• SiI'onappuiesur IatoucheBake,sansprogrammerunetemp-
6raturedufour dansIes30secondessuiwmtes,leprogramme
estautomatiquementannui6et I'heuredu jour r6apparait
I'aMcheur.
2. Appuyersur latoucheMore+ (Plus+]ou Less-(Moins)iusqu'_ce
quela temperatured6sireedufoursoit affich6e.
• LatempSraturepeut6treprogrammeede75_ 285°C070
550°F]=
• 350°paratt_ I'aMcheurIorsqueron appuieunefoissur latouche
More+ ou Less-.
• Appuyer_plus[eursreprisessuria toucheMore+ ou Less-pour
changerIatemp6raturedufour parintervaIIesde3 °C[5 °F]ou
appuyersurIatoucheMore+ ou Less-en maintenantlapression,
pourchangerlatemp6raturedu four par intervallesde6 °C
Oo%
° 100°ou la temp6raturer6efledu four,selonlaquelleestla plus
61ev6e,parattb I'afficheurIorsquelefour se meten marche.
° Latemp6rature8 I'afficheuraugmenteparintervallesde 3 °C
(5°F),iusqu'_ce quelatempdraturepr6programm6esoit atteinte.
Unseulhip retentitIorsquele fouresten coursde pr6chauffage.
o Laisserlefour pr6chaufferpendant10&15minutes.
o Pourrappelerlatemp6raturepr6programm6ependantie
pr6chauffage,appuyersurlatoucheBake.Latemp6raturesera
affich6ependanttroissecondes.
o Pourchanger matempdrature dufour pendant macuissen,
appuyersur Bake,puis sur Iatouche More+ ou Less-iusqu'_ce
que latemperatured6sir6esoitaffichSe.
o Pourchanger matempdrature du four morsdu prdehauffage,
appuyerdeu× fois sur Iatouche Bake,puis sur latouche
More+ ou Less-iusqu'_ce que la temperaturedSsir_esoit
affichSe.
3,
Placerlanourrituredanslefour.V6rMerI'avancementdelacuisson
ladur_eminimaledecuisson.
4.
LorsqueIacuissonestterminde,appuyersurIatouche Cancel
(Annule0pour _teindreIefour,puisretirerla nourrituredu four.
o Lefoursecaractdrisepar un arr_tautoma%ue.S'ilestIaiss#
enmarchependant12heures,il s'arrSteraautomatiquementet
000parattra_ rafficheur.AppuyersurlatoucheCancelet
rheurer@apparaitra_ I'aMcheur.
Programmation des comma_des po_r la
c_isso_ a_ gril : (compartiment inf_rieur -
certains modeles]
Pourde meilleursrSsultats,utiliserI'ustensilepr_vupour cegenrede
CUiSSOn,
1. PlacerIaI_chefrite_ lapositionrecommand_e(voirletableau
ci-dessous]danslecompartimentdecuisson
au griI.
2. Appuyersur IatoucheBroil (Gril}.
o SEts'ailumeetlet6moin Iumineuxde
cuissonaugdl clignote_I'aMcheur.
s_ite oo.
Tablea de c isson aL! grH -
Compartime t i f rie r
TYPE DE VIANDE CUISSON CO_PARTI_ENT INFERIEU_ TOTAL (MINUTES)_*
Beeuf Steaks,_paisseur2,5cm0 po] Cuissonmoyenne Moyen 14- 20rain.
Biencuit Moyen 16- 24rain.
Boeufhachd- steakettes, Biencuit Moyen 14- 18rain.
_paisseur2 cm(_/_po]
Perc Jambon,precuit- tranchede 1,3cm (_/_po] Tiede Moyen 8 - 12rain.
C6telettes,_paisseur2,5cm(1po] Biencuit Moyen 20- 28rain.
VolaiHe PoWetenmorceaux Biencuit Fond Grilran, (232 ° C)
Peisse_ Filets,_paisseur1,3cm(_/_po] Lachairsed6tache Moyen 8 - 12rain.
Dames,_paisseur2,5cm(! po] Lachairsed_tache Moyen 10- 15rain.
Haut= positionsup6rieure;moyen= positioninterm#diairefond= lefondducorn)artimentdecuissonaugril(enleverlagrille].
_ Tempsdecuissonapproximatifs,variablesselonlescaract6ristiquesdechaquepi6cedeviande.
37
[LoBroil450° F]30-45rain,
Page 39

3. AppuyersurIatoucheMore+ pour choisirun griI_ temp6ratureHi
[Ebv@}ousur IatoucheLess-[Moins}pourchoisirun gril
temp@atureLO(Bass@.
+Choisirb r6glageHipour ungriJnormal.
+Choisirb r6glageLOpourun griJ_ temperaturebasso,afin
d'@iterun rissoBgeexcessifdes alimentsn@essitantdes
dur@sde cuissonplusIongues,commeIavoBille.
+SiI'on nechoisitpasIereglageHiou LOenmoinsde30
secondes,le programmeseraautomatiquementannuleet
I'heurer@pparaitra_I'afficheur.
4. UtiliserIestempsdecuissonsugg@@dansletableauci-dessous.
Retournerbs piecesdeviandeverslemilieude la periodede
cuigsorL
5. Apr6sb gril,appuyersurCancelpoureteindreIefour,puisrotifer
laI@hefritedufour. L'heuredujourr6apparak_I'afficheur.
R gu ateur de four nettoyage
(certains mod6bs}
R6gJage du bouton
Le bouton OvenTemp[Temp6rature
fou0 permetdes6bctionner et
maintenirla temperaturedufour. On
doittoujours faire tourner ce bouton
exactementJUSO,U'A Ia pos+tionde
latemp@atured@+r@.Nepasfaire
toumerle boutonau-del8 de Iaposition
d@ir@pour le faire toumer ensuiteversle
sensinverse.
Reglage du four pour une cuisson courante ou
un r6tissage :
1. EnfoncedfairetournerIe bouton OvenTemp[Temperaturefou0,
jusqu'_Iapositioncorrespondant_ la temp6ratured@Jr6e.
Laisserlefour pr@haufferpendant10_ 15minutes.
2. PlacerIanourritureaucentredu four. A I'expiratbn du tempsde
cuissonminimumindiqu6 dansla recette,@aluerle degrede
cuisson.PoursuivreIa cuissonsi c'estn@essaire.
3. Retirerle metsdu four et ramenerle bouton OvenTemp
[Temperaturefou0 _ la positionOFF(Art60.
aufour, IerOtissageou gril dans la brochure_<LaCuisine
= Remarque : Ontrouved'autresconseilsconcemantiacuisson
Simplifi@>_.
R6giage du four pour cuisson au gril
(certains modeles} :
1. Pourobtenir bs meilIeursr@ultats,utiJiserun ustensiJecon_u
pour lacuissonau griL Placerla I@chefrite8la positionre-
command@dartsJegrilledufour. _/oir le tabbau en page37.}
2. PlacerIeboutonOvenTemp[Temperaturefou0 _ Ia position
BROIL[GriI}ou _ Ia position [232° C}450° F pour unecuissonau
griJ_ bassetemperature.
+ Utiliserla temperatureplus bassepour la cuissonau gril pour
@iter un brunissageexcessifou pour un metsn@essitantune
Jonguecuisson@atexemplevolaiJle}.
3. UtiliserJestempsdecuissonsugg@@dansIetableau enpage37.
RetoumerJespi@esdeviandeverslemilieudeJaperiodede
ouJsson,
4. Contr6JerIe degrede cuisson:inciser lapi@edeviande pr@ du
centre pouren observerIa coubur.
5. A lafin de laperiodede cuisson,ramenerleboutonOvenTemp
[Temperaturefou0 _ JapositionOff [Arr6t}. Retirerla J@hefrite
du four.
38
Page 40

Tableau de commande (certains modeles)
A B C D
......... Timer
Less : ..............
E F G H 1 J
Letableaude commandeestcon_upourfaciliter la programmation.Lafen6tre d'affichageindique Fheure,lesfonctions avecminuterieet
fonctions du four.Letableaude commanderepr6sent6comprendcaract@istiquessp6cifiquesau modSle.(Lestylepeutvarier selonle
mo@ley
GrJl
S'utilisepourlacuissonau grilet lerissolage
surpattiesup@ieure.
Cuissoncourante
S'utilisepourlacuissoncouranteetle
r0tissage.
Plus+/moins-
S'utilisepourentrerouchangerladur@,la
temp@aturedufour.Etablitle gril
temperatureELEVEEouBASSE
Minutefie
D
CuJssonet
maJntien
Nettoyage
Programmela mJnuterie.
Pourcuirependantunedur6epr66tablie,avec
maintienauchaudpendantuneheure.
S'utilisepourprogrammerlecycle
d'autonettoyage.
@
t
H
/
m
D6marrage
diff6r6
Horloge
Maintienau
chaud
ANNULER
Programmelefourpourd6buterunecuJsson
plustard.
S'utilisepourprogrammerI'heuredujour.
S'utilisepourmaintenirauchauddanslefour
lesalimentscuits.
Annuletouteslesop6rationssaufminuterieet
horloge.
Utilisation des touches
o Appuyersur latouche d6sir6e.
o Appuyersur More+ (Plus+)ou Less-(Moins-) pour entrerla dur6e
ou la temp6rature.
o Un hip retentitIorsqueI'onappuiesurunetouche.
o Undouble hip retentiten casd'erreurde programmation.
Remarque : quatre secondesapresavoirappuy6sur les
touchesMore+ ou Less-,ladur6e ou latemp@aturesera
automatiquemententr6e.Siplus de 30secondess'6coulententre
la pressionet sur unetouche defonction surlestouchesMore+
ou Less-,[afonctionseraannu[6eet ['afficheurreviendra
I'affichagepr6c6dent.
L'hodogepeut 6tre programm6epour afficher[adur6edansun
formatde 12ou 24 heures.Uhorlogeest programm6een usinepour
un format de 12heures.
Changement de l'horloge _ un format de 24 heures :
1. AppuyersurlestouchesCANCEL(ANNULER)
etDelay(Demarragediff6r6)et maintenirla --_ LAx,JLLL ,)
pressionpendanttrois secondes.
2.
Appuyersur More+ ouLess-pour pro-
grammerun format de 12ou24 heures.
3.
ProgrammerI'heureen suivantles instructions
donn_esci-dessous.
Reglage de l'horloge :
1. Appuyersurla touche Clock (Horloge).
o Uheuredu jour etdeuxpointsclignotent
I'afficheur.
2. AppuyersurMore+ ou Less-pour programmer
I'heuredujour.
o Lesdeux pointscontinuent_ clignoter.
Appuyer_ nouveausur Jatouche Clockou attendrequatre
secondes.
Less-
.....................................
39
suite,.,
Page 41

Lorsquele courant6[ectrlquearriveou apr_sune interruptionde
courant,la demiSreheureavantI'interruptionde courantva
clignoter.
PourrappelerI'heuredujour brsqu'une autrefonctionde dur@
s'affbhe,appuyersur latouche Clock.
L'heurede l'horbge nepout 6tre chang@lorsquele foura 6t6
programm6pour une cuissonou un nettoyagediff6r6ou pour [a
fonctlonde cuissonet maintlen.
Annumation de ['affichage de ['heure :
Si I'onne d6sirepasI'affichagede I'heuredu jour :
Appuyersur lestouches CANCEL(ANNULER)
et C[ock[HorIoge}et lesmaintenirains+
pendanttrois secondes.L'heuredu jour
disparaitde I'afficheur.
Lorsque['affichagede ['heureestannul6,
appuyersur [a touche Clockpour affbher
briSvementI'heuredu jour.
Reaffichage de ['heure :
Appuyersur [estouchesCANCELet C[ocket lesmaintenJrains+
pendanttrois secondes.L'heuredu jour r6apparatt_ I'afficheur.
Annumation de [a minuterie :
1. Appuyer sur [a toucheTimeret [amaintenirainsipendanttrois
secondes.
OU
2. Appuyersur[atoucheTimeret r6glerI'heure_ 00:00.
Verrouimmagedes eommar|des
Lostouches peuvent6tre verrouiii@spourdesraisonsde s@urit6,
nettoyageou pouremp@hertoute utiiisationnon souhait@.EIIesne
pourront6treutiiis@ssJeIIessontverrouiII@s.
Sile four esten cours d'utilisation,les commandesnepeuvent6tre
verrouJll@s.
L'heureactuelb dujour restera_ [afficheur [orsquelescommandes
serontverrouiJl@s.
Appuyersur lestouches CANCELet Cook&
Hold [Cuissonet maintien}et lesmaintenir
ainsipendanttrois secondes.
o Le mot LOCK6/ERROUILLAGE}ciignote
I'afficheur.
D6verrouiiiage :
La minuterie peut 6tre programm@ de une minute (00:00 jusqu'_
99 heures et 59 minutes (99:59},
La minuterie peut 6tre utiIis@ ind@endamment de toute autre
activit6 du four, EIIe peut 6tre aussi programm@ aiors qu'une autre
fonction du four est en cours d'utiIisation,
La minuterienecommandopasb four.Ellenesort qu'_ 6mettredes
bJps.
Programmation de [a minuterie :
1. Appuyer sur la toucheTimer [Minuterie}. ............................................
0:00s'aihme a ['afficheur.
+ ............................
+Les deuxpointscIignotent.
2. Appuyersur[atoucheMore+ ou Less- jusqu'_ce
queI'heurejuste paraissea I'afficheur. ..................
+Les deuxpointscontinuent _ cIignoter. Less-
3. Appuyer_ nouveausur latouche Timerou attendre
quatresecondes.
+Les deuxpointscontinuent 8 cIignoteret le d@omptede la
dur@commence.
+ LadernJ@eminutedu d@ompteseraaffich6esousformede
secondes.
Timer
Appuyersur [estouchesCANCELet Cook& Hold et [esmaintenir
ainsipendanttrois secondes.
o Le mot LOCKdisparaitde I'afficheur.
Codes d'ar|oma[ie
LosrootsBAKE(CUiSSONCOURANTE}ou LOCK(VERROUiLLAGE}
peuventciignoter rapidement_ ['afficheurpour pr@eniren cas
d'erreurou de probI_me.Si to[ est [ecas,appuyersur [atouche
CANCEL.Si bs rootsBAKEou LOCKcontinuentbciignoter,
d6brancher['appareiLAttendre quelquesminutes,puis rebrancher
['appareiLSi Fundesrootscontinue_ciignoter,d6brancher['apparei[
et prendrecontactavecun r@arateurautoris6.
4. A la fin de ladur6e programm6e,un bip long retentit.
40
Page 42

Cuisson courante
Programmatio_ de u_e cuisso_ coura_te :
1. Appuyer sur la touche Bake(CuissoncouranteD.
• Lemot BAKE(CUHSSONCOURANTE)c@note.
• 000cIignote_ t'afficheur.
2. %tectionner tatemperaturedu four.Latemperature
peutetreprogrammeede75 &290°C(170_ 550°F). .................................
Appuyerunefois sur latoucheMore + (PkJs+)ou
Less-(Moins-),ou appuyersur la touche More+ ou Less-
Less- et la maintenirainsi. ..............................
• 175° (350°) s'alIumeIorsqueron appuie la
premierefoissur I'unedestouches.
• Appuyersur la toucheMore+ pour augmenterlatemperature.
• Appuyersur la touche Less- pour diminuerlatemperature.
3. Appuyer_ nouveausur latouche Bakeou attendrequatre
secondes.
• Lemot BAKEs'arretede clignoteret s'aliume_ I'afficheur.
• 38° (100°)ou Iatemperaturereelledu four sera affichee.La
temperatureaugmenterapar intervallede 3 °C [5°F)jusqu'_
ceque latemperaturepreprogrammeesoitatteinte.
4. LaisserIefour prechauffer pendant8 _ 15minutes.
• LorsqueIatemperatureprogrammeepour lefour est atteinte,
un hip long retentit.
• Pourrappelerla temperatureprogrammeependantle
prechauffage,appuyersur la touche Bake.
5. Placerlanourriture au centredu four, en laissantun minimumde
2 pouces(5 cm) entrerustensileetlesparoisdu four.
6. Verifierravancementde la cuisson_ Iadureeminimalede
cuisson.Cuireplus Iongtempsau besoin.
7. LolsqueIacuissonest terminee,appuyersur
latouche CANCEL(ANNULER).
8. Retirerla nourrituredu four.
Diflferences de cuisson entre 'ancien
four et nouveau
II est normalde remarquerqueiquesdifferencesdansIadureede
cuissonentre un four neuf et un four ancien.VoirAjustementde la
temperaturedu four _ la page44.
Remarques gut ]a ouisson oourante
all fOUr :
• Pourchanger ia temp_ratiire du four pendant ia euisson,
appuyersur Bake,puis sur Iatouche More+ ou Less-jusqu'_ce
que latemperaturedesireesoitaffichee.
• Pourchanger matemperature du four morsdu pr_ehauffage,
appuyerdeu× lois sur la toucheBake,puis surla touche
More+ ou Less-jusqu'_ce que la temperaturedesireesoit
affichee.
• Si I'on oublied'arreter le four,iI s'arreteraautomatiquement
apres12heures.Si ['ondesiredesactivercette fonction,voir
page44.
PourdesconseiissupplementairessurIa cuissoncouranteet le
r6tissage,voirlabrochureLacuissonsimplifiee.
C isso et ai tie
Lafonction cuissonet maintienpermetdecure pendantune duree
predeterminee,suiviepar un cyclede maintienau chaudd'une
heure.
P_og_a_atio_ de _afo_ctie_ c_isse_ et _ai_tien :
1. Appuyer sur la toucheCook& Hold(Cuissonet
maintien).
• LesrootsBAKE(CUISSON)et HOLD
(MAINTIEN)clignotent. ................................
• 000s'alhme _ I'afficheur.
2. %tectionner Iatemperaturedu four. Latemperature ...............................
peut etreprogrammeede 75 _ 290°C(170_ 550°F). Less-
Appuyerunefois sur Iatouche More+ ou Less- ou ..................................
appuyersur latouche More+ ou Less- et la maintenirainsL
• Appuyersur la toucheMore+ pouraugmenterla temperature.
• Appuyersur la toucheLess- pour diminuer Iatemperature.
3. Appuyer8 nouveausur Jatouche Cook& HoldOUattendre
quatresecondes.
• Lemot HOLDclignote.
• 00:00c@note_ I'afficheur.
4. EntrerIaduree pendant laqueJleI'ondesireque la cuissonait
lieuen appuyantsur lestouchesMore+ ou Less-. La duree
de cuissonpeut etre programmeededix minutes(00:10)
11heures,59minutes (11:59].
• LesrootsBAKEet HOLDs'allument_ I'affJcheur.
• Ladureede cuissons'alIume_ I'afficheur.
• Ladureede cuissoncommencele compte_ rebours.
41
Page 43

Lorsque la dur6e de cuissou s'est 6coulee :
• O,uatrebipsretentissent.
• Lemot BAKEs'6teint.
4. Appuyersur More+ pour programmerla temp6raturedecuisson.
• 00:00et le mot HOLDclignotent.
• Lemot BAKEresteallure6.
• LosrootsHOLDet WARM(CHAUD}s'allument.
• 75° (170°}parait_ ['afficheur.
Apr_s uue heure de MAINTIEN AU CHAUD :
• Lemot End(Fin)s'affiche.
• L'heuredu jour r6apparait8 I'afficheur.
Auuulatiou de la fouctiou cuissou et maiutieu _ tout
Appuyersur iatouche CANCEL(ANNULEB}.Retirer
moment: _}
la nourriture du four.
Cuisson courante diff6r6e
Nepasuti!iser!acuissondiff@@ pourdesdenr@str@
p@issablescommelos produitslaitiers,le porc,lavolailleou los
fruits de mer.
5. Appuyersur More+ pour programmerB dur@ de cuisson.
• Ladur@ d'attente,bs rootsDELAY,BAKEet HOLDs'allument
Fafficheur.
Lorsque la dur6e d'atteute s'est 8coulee :
• Lemot DELAYs'6teint,
• Ladur@ de cuissonestaffich@.
• LosrootsBAKEet HOLDsont affich@.
Pour programmer uu temps d'attente lorsque la
fouctiou cuissou et maiutieu a d6j_ _t6 programm6e :
1. Appuyer sur JatoucheDelay(D6marragediff6r@.
• Lemot DELAY(ATTENTE}clignote.
• 00:00parait_ I'afficheur.
2. AppuyersurJatoucheMore+ ou Less- pour ......................
programmerIadur6ed'attente.
• Apr6squatre secondes,Iemot DELAYreste
allure6pour rappelerqu'uncyclede cuisson
differeea ete programme, less- :
AvecIafonctJondiff6r6e, Iefour semet _cuire plustard dansla
journ@. Programmerla dur@ d'attented@ir@ avantque Iefour ne
semetteen marcheet la dur@ de cuisson@sir@. Lefour com-
mence_ chauffera J'heures6bctionn@ et cult pour Jadur6e
sp@ifi@.
La dur6ed'attentepeut6tre programme de 10minutes(00:10}
11heures,59 minutes(11:59}.
Programmatiou d'uu cycle de cuissou couraute
diff_r6e :
1. Appuyer sur la touche Delay(D6marragecliff@@.
• Lemot DELAY(ATTENTE[ciignote.
• 00:00clignote _ I'afficheur.
2. Appuyersurla toucheMore + (Plus+)ou Less-
(Moins-[ pourprogrammerladur@ d'attente.
AIorsque le mot DELAYclignotetoujours :
3. Appuyersurla toucheCook& Hold(Cuissonet
maintien}.
• 000s'allume_ I'afficheur.
•Les rootsBAKE(CUiSSONCOURANTE}et HOLD
(MAiNTiEN}c%notent.
More+
Lorsque Jaduree d'atteute s'est ecoulSe
et que Jefour se met eu marche :
• Ladur6ede cuJssonseraaffJch@.
• Lemot DELAYs'6teint.
• LosrootsBAKEet HOLDrestentallum6s.
Appuyersur latouche CANCEL(ANNULER},
AuuuJatiou :
• Touteslesfonctionsde cuissonminut@ et
non minute serontannuI6es.
• L'heuredu jour r@pparait_ I'afficheur.
Remarques :
NepasutiliserIacuissondiff6r@ pour desarticlesqui
n@essitentqueJefour soit pr@hauff6,commeles g_teaux,
Jespetitsbiscuitset lespains.
Nepasutil[serIe cycle decuissonet maintiendiff@6ssile
four estd6j_ chaud.
42
Page 44

Maintien au chaud
Pourmaintenirau chauddansle four des alimentscuits etchauds
ou pour r6chaufferpainset assiettes.
Programmation du maintien au chaud :
1. Appuyersur tatouche KeepWarm
[Maintienau chaud).
• LemotWARM [CHAUDDctignote.
• 000parait_ t'afficheur.
2. %[ectionner [atemp6raturede maintienau chaud.
Cetie-cipeut 6tre rdgi6ede 63 _90 °C [145
190°F).Appuyerune foissur latouche More +
[Pius+Dou Less-[Moins-) ou appuyersur la
touche More+ ou Less- et [a maintenirainsi. ...........................
• 75° (WO°) s'allumeIorsqueI'onappuiela premiSrefois sur
I'unedestouches.
• Appuyersur latouche More+ pouraugmenterlatemperature.
• Appuyersur latouche Less- pour diminuerla temp6rature.
Le motWARM(CHAUD)et Iatemp6ratureserontaffich6spendant
que la fonction maintienau chaud est active.
Remarques sur Ja fonction maintien
au chaud :
o PourobtenirdesquaIit_salimentairesetnutritivesoptimaIes,
lesalimentscuitsau four nedoiventpas6tregardesau chaud
plusde 1_ 2 heures.
o Pouremp6cherlesalimentsde dess6cher,les recouvrirde
papieraiuminium,sansserrer,ou d'un couvercle.
o Pourr_chaufJer des petits pains :
- recouvdrlespetitspainsdepapier aluminiumsansserrer et
lesplaceraufour.
- appuyersur lestouches KeepWarmet More+ pour
programmer75 °C[170°F].
- r6chaufferpendant 12_1_15minutes.
o Pourr_chaiifJer des assiettes :
- placerdeuxpilesde quatreassiettesmaximumdansle four.
- appuyersur lestouches KeepWarmet More+ pour
programmer75 °C070 °F].
- r6chaufferpendant5 minutes,arr6terIefour et laisserles
assiettesaufour pendantencore15minutes.
- n'utiJiserque desassiettespouvantallerau four,_ v6rifier
avecle fabricant.
Annumation du maintien au chaud :
1=Appuyersur latouche CANCEL[ANNULER)=
2=Retirerla nourrituredu four,
- nepasposerdesassiettesti@dessur une surfacefroide,Jes
changementsrapidesdetemp6raturepouvantcasser
I'assietteoula fendilJer.
43
Page 45

Arr t autornatique/Mode
Lefour s'arreteautomatiquementapr_s12heuress'il a 6t6
accidentellementlaissden marche.CettecaracterJstiquedesecurit6
pout6trearretee.
Pour annuJer J'arr_t 12 heures et faire fonctionner Je
four en continu pendant 72 heures :
1. Programmerlefour pour une cuissoncourante[voir page41).
2. Appuyersurla toucheClock [Horloge]et la
maintenirainsipendantcinqsecondes.
• SAbseraafficheetcJignoterapendant
cinqsecondes.
• SAbseraensuiteafficheen continujusqu'_ cequ'on I'arrete
oujusqu'_ ce que la dureelimite de 72heuressoit atteinte.
• Lemot BAKE(CUISSONCOURANTE)seraaussiaffichesi un
cycJede cuissoncouranteesten coursalors que lefour est en
modesabbat.
ToutesIesautresfonctions [Minuterie,Maintien au chaud,
Nettoyage,etc.]sont verrouillees,SAUFBAKE,pendantlemode
sabbat.
AnnuJation de Ja cuisson courante aJors que Je four
est en mode sabbat :
Appuyersur CANCEL[ANNULER).
• Lemot BAKEs'eteint_ I'afficheur.
• Aucun hip sonorene retentit.
AnnuJation du mode sabbat :
1. Appuyer sur la toucheClockpendantcinq secondes.
OU
2. Apres72 heures,le modesabbatsetermine.
• SAbclignote pendantcinq secondes.
• L'heuredu iour revient_ I'afficheur.
Ajustement de la temperature
du four
La precisiondes temperaturesdu foura etesoigneusementv@ifiee
I'usine.lIest normalde remarquerquelquesdiff@encesdansla
cuissonentre un four neuf et un four ancien.Au fur et _ mesureque
lescuisinieressont moinsneuves,latemperaturedu four peut varJer.
II estpossibIed'ajusterlatemperaturedu four si I'onpenseque Ie
four necur pasoune rissolepascorrectement.Pourdeciderde
I'ajustement_apporter,regier Jefour_ unetemperaturede 15°C
(25 °F)pius eleveeou plusbassoque la temperatureindiqueedarts
larecette,puisfairecuire Iapreparation.Lesresuitatsdu _test >_de
cuissondoiventdonner uneideedu hombrede degresduqueJla
temperaturedoit 6tre aiustee.
Ajustement de Jatemp@ature du four :
1. Appuyer sur Ia toucheBake(Cuissoncourante).
2. Entrer285°C[550 °F)en appuyantsur la touche
More + (Plus+).
3. Appuyersurla toucheBake et Ia maintenirainsi
pendantplusieurssecondesoujusqu'_ceque 0°
paraisse_ I'afficheur.
Si Ia temperaturedu four a ete precedemmentajustee,Ie
changementseraaffJch&Parexempie,si la temp@aturedufour
a ete reduitede 8 °C 05 °F),I'affJcheurindiquera-8 (-15].
4. AppuyersurIatoucheMore + (Plus+)ou Less-[Moins-] pour
ajuster latemperature.
A chaquelois que I'onappuiesur unetouche,latemperature
changede3 °C[5 °F).Latemperaturedu four peut 6tre
augmenteeou diminuee de3 _ 20 °C [5 _ 35°F).
5. L'heuredu iour reapparaitautomatiquement8I'afficheur.
IIn'estpasnecessairedereajusterIatemperaturedu four en cas
de panneou d'interruptionde courant.Lestemperaturesde
cuissonau gril etde nettoyagene peuvent6treaiustees.
Remarques sur Je mode sabbat :
• Lemodesabbatpeut6tremis en marche_ tout moment,que
lefoursoit en marcheounon.
• Lemodesabbatne peutpas6tremisen marchesi Ies
commandossont verrouiileesou laporte verrouiIiee.
• Sile four esten modecuissonIorsquele modesabbatest
programme,lemot BAKE(CUISSONCOURANTE]s'eteint _ la
fin du cycledecuisson.IIn'y aura aucunsignalsonoreaudible.
LorsqueJemodesabbata demarre,aucun bip de prechauffage
ne retentit.
Tous Iesmessageset les hips sontdesactivesIorsquelemode
sabbatestactiE
Si I'onappuiesur Iatouche CANCEL,un cyclede cuisson
couranteaufour seraannule.Cependant,Jeprogrammateur
resteraen mode sabbat.
Apresunepannede courant,le four revienten modesabbat
avec72heuresrestanteset aucuncycle actif.
44
Page 46

Cuisson au grim (certains modeles]
Programmation de la cuisson au gril :
1. Appuyersur latouche Broil (Gril].
o Le mot BROIL(GRIL)ciignote.
+ LemotSETUAUDER]est affich6.
2. Appuyersur Iatouche More+ (Pius+]pour programmerun gril
temp6rature61ev6eou surla touche Less-(Moins-] pour
programmerun gril _ temp6raturebasse.
o LesrootsHI (ELEVEE)ou LO (BASSE]serontaffich6s.
o %tectionnerHI broil (GriI_ temp6rature_lev6e)[290°C
[550°F]] pour un gril normal.%lectionner LO broil (GriI
temp6raturebasse][230°C[450 °F]] pour un gril _ temp6ra-
tureinf_rieured'aliments_cuisson plus Ionguecommela
voIaiIIe.
3. AprSsquatresecondes,lefourse meten marche.
o Le mot BROILresteallum6.
Pourun rissolagemaximum,pr6chauffer[efour pendant2 ou3
minutesavantd'ajouterIanourriture.
5.
Placerla nourrituredans[efour. FermerIa portedu four.
6.
Retourner[aviandeune fois _ [a moit[6de Iadur6ede cuisson.
7.
LorsqueI'aiimentest cuit,appuyersur[atouche
CANCEL(ANNULER3.Retirerla nourritureet la
I_chefritedufour.
o L'heuredu jour r6apparait_ ['afficheur.
Remarques sur [a cuisson au grH :
• Pourde mei[[eursr6su[tats[orsdu griLsesewir d'un ustensi[e
pr6vupour cetypede cuisson.
• Legrii au rdglageHI (Eiev6)estutilis6 pour [amajorit6des
op6rationsdecuissonau griL Utiliser[egril au r6giageLO
(Bas)pour la cuissonde metsdevantcuire plus Iongtemps,
afin de leur permettred'6tre biencuitssans rissolageexcessif.
• Lesdur_esde cuissonau gri[peuvent6tre plus Ionguesavec
unetempdraturedegri[ inf6rieure.
• Retoumerlanourriture Iorsque[amoiti6de [adur6epr6vue
pour[acuissonau grii s'est 6coul6e.
• Pourdestemperatureset desconseilssuppldmentairessur [a
cuissonau griLse reporter_ [abrochureLacuissonsimp[i%e.
TabUeaude cuisson au grH du four
I _1
ALI_ENTS DES G_LLES_
B_eu[
Bifteck, 2,5cm [Ipo] d'6paisseur
Hamburgers, 2 cm (3/4 po] d'6paisseur
PoFc
Bacon
COtelettes,2,5cm (1 [o]
Jambon- pr#-cuit tranchede 1,3cm [1/2 po]
Volaille
PouIet en morceaux
J:_its _e me_
Dames de poisson, beurrees, 2+5cm (1 po] d'6paisseur
FiIetes, 1,3cm [1/2 po)
Grillesup6rieure_._laposition n° 5,
Remarq_e :Cetableaun'est qu'unguide de suggestions.Lesdur6espeuventvarier selon raliment_ cuire.
4
4
4
4
4
4
3ou4
4
4
CU_SSON
Cuissonmoyenne
Biencuit
Biencult
Bien cult
Bien cuit
Tiede
Biencult
Lachairsed6tache
Lachairsed6tache
TEMPS DE CUISSON
TOTAL (_[@UTES)
15 - 20 minutes
18 - 24 minutes
15 - 18 minutes
6 - 10 minutes
22 - 26 minutes
8 - 12 minutes
LOBroil -
Gril_ temp6raturebasse
30 - 45 minutes
10 - 15 minutes
8 - 12 minutes
45
Page 47

G
Allumage sans flamme
de veiJJe
Lacuisiniereestdot6ed'un systemed'allumagesansfiamme de
veille.CesystemefermeautomatiquementI'arriveede gazet
emp@chetout ferlctiennemellt du four/ors d'u_e interruption
de/'a/imentatien 6/ectrique.
imne sera pas possibmed'ammumermebr_meurdufour uvec une
ammumette.Ne pas tenter de faire fonctionner mefour morsd'une
interruptionde m'umimentution_mectrique.
1
Event du four
LorsqueIe four fonctionne,Iessurfacesvoisinesde 1'6ventpeuvent
devengassezchaudespour entrainerdes bKJlures+Nejamais
bloquer1'6vent+
USvent est situ6 sous meprotecteur d'_vent du dosseret, sur la
cuisini_re.
EVENT
Nepasmettre de
pIastiquesprosde
I'event,Iachaleur
pouvantIesddormer
ou los faire fondre+
EcJairage du four
Appuyersurle commutateurd'eciairagedu four pour
allumerou 6teindre la lampedu four.
Oven
Light
Fond du four
Prot_gerlefond du four, particuIierementcontre los produitsacides
ou sucr6s qui pourraient8tre renvers6s;cospro-duits font changer
lacouleurde I'email.utimiserun ustensimede tuimmeuppropri_e
pour _viter renvnrsement ou d6bordement.
R6instaHation :
1+ PlacerIagrille sur lossupportsdansle four.
2+ Sou+everlegerementI'avant.Faireglisserlagrille vers I'ardere
au-deI8de la positionde caIage+
3+ AbaisserlagriIIeet la faireglisserdartslefour.
Ne pas recouvrir la totamit_d'une grille uvec de la feuille
d'alum+n+um,n+gamir mefend du +ouravec de la feuille
d'alum+mum. Coo+modifierait los r6sultats de cuisson au four,
et mefenddu four pourra+tsub+rdesdommages°
Positions des grilles
POSITION5 _)ositionla plus
haute): Pourcuissonbreveau
gril-pain grilIe ou aliments
mincescontenantpeu de graisse+
POSITION4 : Pourla pIupartdes
cuissonssurdeuxgrilles+
POSIT+ON3 : PourIa pIupartdes
cuissonsde p_tisseriessur unetOle_ biscuits- g_teaux_etages,
tares auxfruits, metssurge!6s+
POSMON 2 : Pourr6tissagede piecesde viande,mets ensauce,
cuissonde pain,g_teauIegeren couronne(baba:)ou entremets,ou
cuissonsur deux grilles.
POSITION1 : PourIerOtissaged'unegrossepiecede viandeou
volaiile,tartessurgel6es,souffl6sou g_teauxdesanges,ou cuisson
surdeuxgrilles+
POSITIONPOURROTtSSAGE:
UtiIisercettepositionpourla cuisson
d'un grosrOtiou d'unedinde.Placerles
deuxgr+Ilesdu four I'unesurI'autre,en
appuisur lossupportslat6rauxdu fond
du four.
CUISSONSUR PLUSIEURSGRILLES:
Grilles du four
+ Nepastenter de changerla POSitiondesgrilles 10rsquelefour
+ Nepas rangerde nourritureou d'ustensi!edans+efourl
Lefour est dotededeuxgrilles;cosgrilles
pouvoir rextraire+
Deux grimmes:Placerles grilles auxpositions2 et 4 ou 1et4.
Remurque: Nejamais placerle plat directementsur le fonddu four.
NepasessayerdeS0rt!rlosgrilles du four or! losfa!santg!isser
quandoliossonten positionde r0tissage.
Oem+-griHe
Unedemi-griIleestdisponibleenaccessoire+
Elleaugmentela capacit6du four et
s'accroche_ gauche,_ la partiesup_rieure.
Elleestutile pour Iacuisson d'un plat de
legumesIorsqu'ungros rOtisetrouvesur la
grille inferieure.Prendrecontact avecIe
revendeurpourdemanderI'accessoire
HALFRACK(demi-grilIe)oupour commander,
composerle 1-800-688-2002.
46
Page 48

5,
[:our autonettoyant
(certains modeles:)
Remarque : Pourla nettoyagemanuaIvoir le page50.
[[ est normalque certaLnesptecesde [acuisinieredev[ennent
tres cnaudesIorsd'un cyclede nettoyage.
Poureviterque ia portedu four nesubissedesdommages,ne
pas[emer de i'ouvrir[orsquelemot LOCK_'ERROUILLAGE}est
visiblesur['afficheur.
Evlte_de toucher [a porte,ie hubiotet [azonede 1'Ove__t6u four
Iorsdun cycled'autonettoyage
Nepasutlliser de nettoyantpour fourdu commercesurle fini
du four ou surtout autrecomposantdu four. CeiaabTmeraitie
[ini ou [escomposantsdufour.
L'autonettoyageutilisedestemperaturessupOrieures_ celiesde [a
cuissonnormalepour nettoyerautomatiquement['interieurdu four.
Neforcez pas [a porte du four nile levierde verrouillagepour les
ouvrir.Cecipeut provoquerune exposition8 destempOratures
6[evOes,et doncprOsenterun risquede brOiure.
Si [efour esttres sale,il est normalqu'on observela formationde
fumeeou de flammesdurant ie nettoyage.Nettoyer[e four
intervaiiesrOguiiersplutOtque d'attendreune accumuiation
importantede rOsidus.
Durantle processusd'autonettoyage,il convientde bienaerer Ia
cuisinepour 61iminerlesodeursnormalement6raisesdurantle
nettoyage.
EHminer[esrOsidusdegraisseou de produitsrenversOssur la
soleavantIenettoyage.Ceciempechelaformation de flammes
ou de fumOedurant Ienettoyage.
6,
EssuyerIesresidussucrOset acides,commelespatatesdeuces,
Iatomateou Iessaucesabasede hit. La porcelainevitrifiee
possOdeune certainerOsistanceauxcomposesacides,maisqui
n'est pasIimitOe.Ellepeutse dOcotorersi Iesresidusacidesou
sucresne sent pasenJevesavantdecommencer['autonettoyage.
Pregrammatien de l'autonettoyage :
Remarque : LatempOraturedu four doit6tresltLJOeen dessous ]
de 205°C (a00°F}pourprogrammerun cycled'autonettoyage.
1. Fermer[aportedu four.
2. Placer[amanettedeverrouii[age_ [apositionde verrouiliage.
3. Appuyersur latouche Clean(Nettoyage}.
• Lemot CLEAN(NETTOYAGE}clignotea ['afficheur.
Sila porte n'estpasfermOe,deshipsretentissentet le mot DOOR
{PORTE}paratt_ rafficheur. Sila porte n'est pasfermOedansIes
45secondes,[operation d'autonettoyageestannuJ@eet
I'affJcheurrevient_ ['heuredujour.
4. Appuyersur latouche More + (Plus+}ou Less-
(Moins-}. ...........................................
• CL-M (Nettoyage- saietemoyenne}estaffichO. ........... ,
5. Appuyersur latouche More + ou Less- pour voir ............................................
ddiler lesdiffOrentsrOglagesde I'autonettoyage.
Avant I'autonettoyage
1. Eteindrelalampedu fouravant le nettoya% Elierisqueraitsinon,
de griller.
2. Enleverla18chefrite,touslesplats et lesgrilles du four. Lesgrilles
risquentdese dOcoloreret de ne plus glisseraussibienaprOsun
cycled'autonettoyagesion ne lesenlevepas.
3. Nettoyerlecadredu four, lecadrede la porte,lazone_ rextOrleur
du joint etautourde rouverturedarts[ejoint dela porte,_ I'aide
d'un produitde nettoyagenonabrasifcommeBenAmi*ou d'eau
additionneede detergent.Le processusd'autonettoyagene
nettoiepasceszones.Ellesdoiventetrenettoyeespour empOcher
[asalet6de s'incrusterpendantle cycle
de nettoyage.(Lejoint assure
['Otancheiteautour de [aporteet du
hublotdu four.}
4. PourempOchertout dommage,nepas
nettoyerni frotter [ejoint qui se trouve
autour de la portedu four.Cejoint est
co%u pour 6viterles pertesde cha[eurpendantle cycle
d'autonettoyage.
*Leshemsde marquedesproduitsde nettoyagesentdesmarquesdeposdesdesdifferentsfabricants.
CL-H (Nettoyage- saleteimportante,4 heures}
CL-M (Nettoyage- salet6moyenne,3 heures}
CL-L (Nettoyage- salet6legOre,2 heures}
Lechoix du niveaude salet6du four programme
automatiquementladureedu cycled'autonettoyage.
6 Apresquatresecondes,lefour commencele nettoyage.
• LadurOede nettoyagecommenceledOcomptea I'afficheur.
• Lemot LOCK6/ERROUiLLAGE}parait_ rafficheur.
o Le mot CLEANparait_ I'afficheur.
Demarrage diffSre d'u_ cycle d'aute_etteyage :
1. Appuyersur [atouche Delay(DemarragedifferS}.
• Lemot DELAY{ATTENTE}clignote.
00:00paratt8 I'afficheur.
47
1
Less-
s_ite o..
Page 49

2. Appuyersurla toucheMore + ou Less- pour ...............................
programmerIadur6e d'attenteavantque ne
commencelecycle.Ladur6e d'attentepeut6tre ..........................
r6gI6e,de dix minutes[00:10]_ onzeheures,
cinquante-neufminutes (11:59].
3. Appuyersurla toucheClean (Nettoyage].
+ Lemot CLEAN(NETTOYAGE)vaciignoter.
4. Appuyersur[atoucheMore + (P[us+]ou Less- ..........................
[Moins-).
+ CL-M(Nettoyage- salet6moyenne]est affJch&
5. AppuyersurIatoucheMore + ou Less- pourvoir ddiler les
diff6rentsreghgesde J'autonettoyage.
CL-H(Nettoyage- salet_importante,4 heures)
CL-M (Nettoyage- salet6moyenne,3 heures]
CL-L(Nettoyage- salet6 18gere,2 heures)
Lechoixdu niveaude saletedu four programme
automatiquementladuree du cycled'autonettoyage.
6. Apresquatresecondes,lesrootsCLEAN[NETTOYAGE),DELAY
(ATTENTE]et LOCKOiERROUILLAGE)paraissent_ I'afficheur
pour indiquerque [e four est programm6pour une operationde
nettoyagediffer& Letemps d'attenteparatt8 ['afficheur.
Si le four a dej_ 6re programme peur uu cycle de
uetteyage et que l'ou desire etablir uu delai :
1. Appuyer sur la touche Delay(D6marragediff6re).
+ Lemot DELAY(ATTENTE]clignote.
+ 00:00parait_ I'afficheur.
2. Appuyersurla toucheMore + ou Less-pour
programmerIadur6e d6sir6ede I'attenteavantque More+
ned6buteIecycle. '........................
Apresquatresecondes+lesrootsCLEAN,DELAYet LOCK
paraissent_rafficheurpour indiquerque Jefour est programme
pourune op6rationde nettoyagediffer& Letempsd'attente
parait_ I'affJcheur.
Pendant le cycle d'autonettoyage
Lorsquele mot LOCKparait_ I'afficheur,la portene peut 6tre
ouverte.Pour6viterd'endommagerla porte,ne pasforcer la porte
pour I'ouvrirIorsqueLOCKestaffich&
Fumee et odeurs
La premierefois o_ lefour est nettoy&il peut y avoirproduction
d'odeuret de fumee.Ceciest normaletdisparaitra_ I'usage.
Si lefour esttr6s saleou s+la Iechefritea ete Jaisseedans le four, il
peutyavoirproductionde fumee.
Pendantque lefour chauffe,[Ipeutseproduiredes bruitsde m6tal
en dilatationou en contraction.Ceciestnormalet n'ind+quepasque
le four s'abime.
Aprbs le cycle d'autonettoyage
Environuneheureapresla fin du cycle,le motLOCKs'6teint.Ace
moment,laporte peut 6treouverte.Pousserlamanettede la porte
versla gauchepour d6verrouiller.
La samet6peut aveir maiss@un r6sidu gris peudreu×oL'enlever
avecun linge humide.S'iI restede lasaiet& ceJaindiqueque le cycle
de nettoyagen'apas_t6assezlong.Cettesalet6restantesera
enlev6eauprochaincycled'autonettoyage.
Si mesgrimmesont _t_ maiss_es_ m'int_rieurdu four pendant me
cycle d'a_te_ettoyage et q_'elles giisse_t real surleurssup-
ports,lesenduire,ainsJque lessupports,d'unefine couched'huile
vSg_tale.
De fi_es lig_espervert apparaitre da_s la percelai_e parce
q_'elle a s_bi chale_r et refroidisseme_t. Ceciest normal et
n'affecterapasIaperformance.
U_e decomomtio_blanche pe_t appamitre apr_s me_etteyage
si des amime_tsacides e_ s_crSs _'e_t pas _t_ e_lev_s avast
q_e _e comme_ce l'a_te_etteyage. Lad_colorationestnormale
et n'affecterapas la performancedufour.
Lorsque le cycle d'autouettoyage debute :
+ Lemot DELAYs'6teint.
• Ladureede nettoyageparak _ I'afficheur.
Auuulatiou du cycle d'autouettoyage :
_emarqBes:
+ si Iaportedu four n'estpasferrule, le mot DOOR[PORTE)
clignote8 I'afficheuret lefour _metdeshipsjusqu'_ ce que la
portesoitfermeeet que I'onappuie_ nouveausur Clean.
+ S'iI s'ecouleplusde cinqsecondesentre Iemomento_ J'on
appuiesurCleanet celui o_ ['on appuiesur[atouche
More+ ouLess-, I'afficheurretoumeautomatiquement
I'affichageprecedent.
+ Laportedu four setrouveraendommag6esiI'on forceson
ouverturealorsque le mot LOCKestencore affich_.
Appuyersur Iatouche CANCEL[ANNULER}.
+ Tousles rootsdisparaissentdeI'afficheur.
+ ToutesIesfonctionssent annul6es.
+ L'heuredu jour parait8 rafficheur.
48
Page 50

M6thodes de nettoyage
• Avant route manipulatien Quop6ration de nettoyage,v_tifiet que I'appareil eat arr_t_
et qae teas lea cempesaats sent freida, alia d,_viter des dommages eu des brlilures. _ Lesnomsde marquesentdesmarques
' Pour6viterla formationde tachesou un chartement de Couleur,netto er Ia are[Ia r_s ddpos6esdesdiff6rentsfabricants.
chaqueutilisation. _ Pourcommanderdirectement,
oApr_s tout d6montagedecomposants,veiller_ effectuerun remontagecorrect. 1-800-088-8408 Canada.
P_ECE
L_ehefriteet Nejamais couvrir b grfffe depapier d'aiumfnium;cola emp_che b ffmisse de ceuler da1_sb IbeheMte.
sa grille o RecouvrirIa[_chefriteet sagriI[ed'un [ingesavonneux;hisseragir pourd_tacher[esr6sidus.
o Laveravecde I'eausavonneusetilde. UtiIiseruntampon_ r6curer pour 61iminerlessouillurestenaces.
o Onpeutplacerlesdeuxcomposantsde la18chefritedartsun lave-vaisselle.
gr_lears _ gaz oNettoyer%quemment. Laisserle br0Ieur refraidir.Nettoyeravecdu savonet untampon _ r6curerde plastique.Pour
seeii6s dessouillurestenaces,utiliser un produit de nettoyagenon abrasifavecunchiffon. Eviterde laisserIeproduit de
nettoyages'introduiredartsIesorificesde sortiedu gaz;ceci pourraitaffecterla combustiondu gaz.Sile produit de
nettoyagepenStredartslesorifices,nettoyeravecun pinceausoupleou unebroche draite,particuIiSrementI'orifice
situ6 au-dessousde I'aIIumeur.VeilIer_ ne pasddormer ou agrandirIestrous.
oVeiller8 nepas IaisserdeI'eaus'introduireclansles orificesdu br0Ieur.
o Prac6derprudemmentlots du nettoyagede I'alIumeur.LebrCJleurnes'alIumerapassi I'alhmeurestmouilleou
endommag6.
g Y PP P
composerle 1-877-232-0771 E.-U.ou
Grilles des oLaverles grillesavecde I'eausavonneuseti6deet un tampon_ r6curerdeplastique nonabrasif.Pourleasouillures
br_meurs tenaces,nettoyeravecune 6pongeou untampon nonabrasifsavanneuxet la CooktopCleaningCreme
(produitn°20000001_}_.
o Pourlesr6sidusalimentairescarbonis6s,enleverlesgrillespour Iesplacersur du papier-journaI,et pulv6riser
prudemmentun produitcommercialde nettoyagedefour (nepasprojeter le produitsur la surfaceenvironnante).
Placerlesgrillesclansun sachetde plastiquependant phsieurs heuresou pendantune nuit.Porter desgants
decaoutchoucet retirer lesgrillesdu sachet.Laver/rincer/faires6cheret r6installerlesgdlles sur la table de cuisson.
Zone de ma o Pouruti[iser[a fonction Verrouiliagedes commandespour[enettoyage,voir page40.
console de o Laver,rinceret faires6cher.Nepasutiliserun agentde nettoyageabrasifsusceptiblede rayerla finition.
eommandeet o Onpeututiliser un produit de nettoyagedu verre,pulv6ris6d'abord surun chiffon.NEPASprojeterle prod_it
dfrectementsur _estouches de comma_de ou s_r ffafffcheur.
Boatons de o Placerchaquebo_ton_ Iapositiond'ARRET,et retirerchaque bouton en [etirant.
eomma_de o Laver,rinceret fairesdcher.Nepasutiliserun agentde nettoyageabrasifsusceptiblede rayerla finition.
o FairefonctionnerbriTvementchaquebrOIeurpour vTrifierque leboutona 6t6correctementr6installT.
Table de e_isse_ L'emaiIvitrifi_est du verreIi6au metalparfusion. II peutsefissurerou s'_cailIeren casde mauvaiseutilisation,lIest
et tabiea_ de r_sistantauxacides,maispastotaIementinattaquablepar lesacides.Tousles produitsrenvers_s,enparticuIieracides
eomma_de _ ou sucres,doivent6tre essuy_simm_diatementavecun Iingesec.
_maii vitrifi_ o Unefois refroidi,Iaveravecde I'eausavonneuse,rinceret s_cher.
o Nejamaisessuyerunesurfacetiedeou chaudeavec(m linge humide.Cecipourrait la fissurerou I'6caiiler.
o Nejamais utiliserde nettoyantspourfour, d'agentsde nettoyagecaustiquesouabrasifssur lefini exterieurdela
cuisiniTre.
49
saite ooo
Page 51

NETTOYAGE
Panneaux
porte du griJ
inferior et
poign6es
de porte -
_maiJ peint
Hubmotet po_e
du four enverre
Int_rieur du four
. Unefois Iespiecesrefroidies,loslaver_ I'eausavonneusetiede,rincer etsecher.Ne ]amaisessuyerunesurface
tiede ouchaude avecun Iinge hurnide,ceci pouvantendommagerlasurfaceet entrainerune brOlurepar Iavapeur.
. Pourlostaches rebelles,utiJiserdesagentsde nettoyageIegerementabrasifscommeIap_teau bicarbonatede
soudeou BonAmR Nepasutiliserde nettoyantsabrasifs,caustiquesou #nergiquescommeIesnettoyantspour
four ou lostamponsen Iained'acier.Cesproduits raieraientou endommageraientdefagon permanentela surface.
Remarque : Udliser un Iingeou un torchonsec pour essuyer los produits rei_vers_s,surtout s'ils sout addes
ou sucres. £asurface pourrait se d6colorerou se temir si la salet6 n'6tait pas imm_diatement ettlev6e. Ceei
est particufi_remellt importallt darts/e cas de surfaces blanches.
. Eviterd'utilisertrop d'eau,qui risqueraitdes'Jnfikrersousou derriereJeverreetde tacher.
. Laver_ I'eauetau savon.Rinceravecde J'eaupropreet secher.Un produitde nettoyagedu verre pout etre utilJs#en
levaporisantd'abordsurun linge.
. Ne pas utiliserde produitsabrasJfscommetampons_ recurer,lained'acier ou produit de nettoyageenpoudre quJ
rJsqueraJentde rayerleverre.
. Ex6cuter Ies instructions pr6sent_es aux pages 47-48 pour J'autonettoyage du four,
. Nettoyer%quemment avecun tamponde pJastiqueet un produltde nettoyagemoyennementabrasJfl
. Ne pas utiliserun tampon_ r6curerm6tallique,qui formeraitdesrayuressur Iasurface.
. Lotsde I'emploid'un produitcommercialde nettoyagedefour, appliquerIesinstructionsdu fabricant.
. Eliminerdesque possibleIesproduitsacidesrenvers6s(_oroduits_basede Iait ou detomateDaveceauet savon:cos
produitspeuventfairechangerla couleurde I'emaiIlotsd'un contact prolong&
Pourfacimitermenettoyage, oil peat enmevermaporte du roar. [Voir[asection Entretien,page51.]
Grimmesdufour
[certainsmodeles]
. Nettoyeravecde I'eausavonneuse.
. Eliminerlessouillurestenacesavecune poudrede nettoyageou untampon _ r6curersavonneux.Rinceret faJre
s6cher.
, Si Iesgrillessont taisseesdartsIe four pendant te cycle d'autonettoyage,ellessedecolorentet peuventneplustres
bienglisser.Siceci seproduit,appliquerpar essuyageun peud'huilev6getalesurla grille et sessupportsen relief
pourfaciliter le mouvement,et enleverI'excesd'huile.
. NEPAS UTIMSERDEPRODUffS DENETTOYAGECONTENANTDUJAVELBSANT.
. NEPAS UTIUSERDE NETTOYANTS. ORANGE_ OUAB_ASIFSo
. TOUJOURSESSUYE_DANS£ESENSDELA TEXTUREDE L'AC_ERLO_SDU NETTOYAGE.
. Nettoyage jo_mamie_/saiet@l_g@reoEssuyeravecI'un des produitssuivants:eausavonneuse,vinaigreblanc/eau,
produitde nettoyagepour verre et surface Formula409_ou un produitsemblablepour verre- avecun lingo souple
etune eponge.Rincerets_.cher.Pourpolir et enieverIesmarquesdedoigts,faJresuivrepar unevaporJsationde
MagicSpray_pouracierinoxydable[produit n°20000008]_*.
, Saiet_ modSr@e/_.paisse- EssuyeravecI'un desproduits suivants:BonAmi_,SmartCleanse€ou SoftScrub_-
raide d'un lingosoupleou d'une@pongehumide.Rinceret secher.Lestachesrebellespeuventetre enleveesavec
untampon multi-usages Scotch-Brite_humidifi& Rotter uniform4mentdartsIesensdu metal.Rinceret secher.
Pourredonnerdu lustreet retirer Jesrayures,faJresuivrepar unevaporJsationde Magic Spray_pouracier
inoxydable.
. D@eoJoratie_- A raide d'une_pongehumidi%e ou d'un lingo souple,essuyer_I'aidedu nettoyantCameo_pour
acierinoxydable.Rincerimmediatementet secher.Pourenleverles marqueset redonnerdu Justre,faire suivrepar
unevaporisationdeMagic Spray_pour acierinoxydable.
Lesnomsde marquesontdesmarquesdeposeesdesdiff_rentsfabricants.
_ Pourcommanderdirectement,composerle 1-877-232-6771 E.-U.ou 1-800-688-8408 Canada.
50
Page 52

Porte du four
Nepasgdmpersurla porte du four ouver[e,ou lui imposerune
chargeexcessive.Cecipourrat provoquelun bascubmen_de la
cuisiniSre.Eebrisdela pore ou desbbssurespour la personne
concern@.
o Nepastenter d'ouvrir ou former Japorteou d'utiliserle four
avan[que la porte at 6t6convenab_ementr6instaJl6e.
o Nejamab placerbs dolgtsentrela charni_reet le cadreavan[
du Tour Losbrasde charnieresont montessur ressort.Une
chami_repourrat serefermerbrutalemen[contre b cadre du
fouret provoquerde s6rieusesbbssures.
3. Nepasfermer Iaportedu four avantque Iesgrillesne soienten
placedartsIefour.
Toutedegradationdu hublot de verre- rayure,choc,tension, etc. -
peutaffaiblir sa structureet augmenterle risquede bris a unedate
ult6rieure.
Pieds de r6glage de l'aplomb
Vdrifier gue labride antibasculementagrippe convenablement
!:un despie@arri6rede r6glagede I'aplomb,pourque la
Cu!sini6rene puissebasculeracc!dentellement.
Depose de la pore:
1. Apr_s le refroidissementdufour,ouvrir Ia
porte- positionde cuissonau grfl [porte
entrouverted'environ10cm [4 pouces]).
2. Saisirla portede chaquec6t6. Nepas
utiliserIapoign6ede porte pour la
souIever.
3. Souleveruniform@4entpour d6gagerJaportedescharni@res.
1. Saisir la portede chaque cot&
2. Aligner lesfentesavecIesbras de charnieresurla cuisini_re.
3. Fairedescendrelaportepour la positionnercorrectementsur les
charniSres.Poussersur lesangbs sup6rieursde Iaportepour
I'enfoncercompl_tementsur Iescharnieres.IIfaut que la porte
soit parfaitementd'aplomb.
Note: On peutpercevoirune certaine<{61asticit6>>lotsde la
fermeturede laporte du fourd'une cuisiniSreneuve;ceciest
normal;cet effet disparaitprogressivement.
lafermeturede la portedu four d'une cuisini_reneuve;ceci est
[ emarque : Onpeutpercevoirunecertaine<<6iasticite>>Iorsde
normal;cet effet disparaitprogressivement.
Hublot du four
Pour prot6ger le hubiot de la porte du four :
1. Nepasutiliserde produits nettoyantsabrasifscommedes
tampons_ r@ureren lathed'acierou desproduitsde nettoyage
en poudrequi rbqueraient de rayerIeverre.
2. Nepasheurtel Iehubioten verreavecun ustensib, un articb de
mobilier,uniouet, etc.
cuisiniSredolt6tred'aplombunefois install@.Si
_I_ene I'estpas,tourner Iespiedsde r6glagede 3
I'aplomben plastique,_chacundesanglesde Ia
cuisini_re,jusqu'_ce que celb-ci soit d'aplomL _,J
&_IIBASI_EMENT
PIED DE REGLAGE
DE L 7_PLOMB
Lampe du four
Utfliser une manique s_che P0Ur Pr0t6gerlos mains !orsdu
, Nepastoucher I'ampou[eavantqu'e[ieseSoitrefroidie
, Ne,pastoucher ['ampou[echaudeavecun[ingehumide;[eChoc
thermiquepourrait la bnser.
Pour remplacer l'ampoule du four :
1.Apr@ Ierefroidissementdufour,
maintenirb cabochontout en
enlevantla pi@e m6taiIiquequi
la maintienten place.
REMARQUE: Le cabochon
tomberasion ne le maJntbnt
pasen place.
2. Enbverb cabochonet
['ampoule.
3. installeruneampouIede 40watts pour appareilm6nager.
4. R6installerlecabochonet Iefil rn6talliquederetenue.
5. R6tablirI'alimentationde lacuisini6re.R6glerde nouveau
['hor[oge.
CABOCHON
51
Page 53

06placement d'un appareil
Raeeordement leetrique
gaz
Lesraccordsdesappareils_ gazservant_ brancheroct appareJ[
I'alimentationde gaznesont paspr@uspour 6tred@lac6s
continuellement.Unefois I'appareiIinstall&NE PAS Ie d@Iacerde
fa£onr@6t6epourle nettoyerou le changerde place.Si cet
appareildoit 6tre d6menag6et!ou eniev6pour 6trer@ar& suivre la
methoded6critedansIesinstructionsd'instailation.Pourtoute
information,prendrecontactavecleservice&Ia client6iede Maytag
au 1-800-688-9900E.-U.ou 1-800-688-2002au Canada.
IIfaut que Ie piedarri_rede IacuisiniSresoitengagedansla bride
antibasculementpourque lacuisinierene puissebascuier
accidentellement.
Tiroir de remisage
(certains modeles)
Ne pas rangerdanscetiroir desarticlesde p!astiqueou de
papier, desproduits inflammablesou des produitsal!mentaires,
Durant !efonct!onnementdu foug unetemp@atureexcessive
pour cesa+tic!espeut s:6tab!irdans letiroir,
Lesappareils n6cessitantune amimentation
8mectriquecomper{ent unefiche _ trois
hroches raise_ Jaterrequi doit 6tre branch_e
directementdansune prise de 120voJts_ trois
cavit6set correctementraise_ laterre.
Toujoursd4brancherf'appare_lavantd'yfairede
i'entretien.
Lafiche _ trois brochesraise_ Jaterrefoumit uneprotectioncontre
lesdecharges61ectriques.NEPAS COUPERNI ENLEVERLA
BROCHE DE TERRE DU CORDON D'AUMENTATION.
Si laprisene compoReque deux cavit_s,n'estpasraise_ laterre ou
n'estpas appropri6e,mepropri6taire de l'appareil a la responsa+
himit_de faire rempmacermaprise par m_eprise _ trois cavit_s
correcteme_t raise _ materre.
Sole fo t
ProtSgerlasole du four contre lesrenversements(_Darticulierement
pour Iesproduitsacidesousucrose,qui peuventsusciterun
changementdecouJeurde I'_mailvital% UtiJiserun ustensJlede la
taiJJeapproprJ@epour _vitertout renversementoud@bordement.
Letiroir de rein[sagepeut6tre enJev6pour vouspermettrede
nettoyersousla cuisini6re.
D6pose :
1. Vider Ietiroir et le tirer jusqu'_ la positionde lapremierebut6e.
2. SouleverI'avant.
3. Tirerjusqu'a Japosition de lasecondebut6e.
4. SaJsirletiroir par les cOt6setsoulever/tirerpour J'extraire.
R6installation :
1. Ins6rerIesextr6mit6sdesgiJssiSresdu tiroir clanslesrailsde la
cuisJni_re.
2. SouleverI'avantdu tiroir et pousserdoucementjusqu'_ la
positionde la premierebut6e.
3. Souleverde nouveauJetiroir et lepousserpourlerefiner.
52
Page 54

PROBLEME SOLUTION
Pourmapmupartdesprobm_mes
obse_6s, essayer d'abord rues
semutionspossibmes,_ droite.
Un br_leur de surface ne s'aiiume
pus.
Flammes non uniformes. , Orificesdu br0Ieurobstrues.
S_puration entre les flummes et , VeiIier_ piacercorrectementI'ustensilesur IagriIledu br0Ieur.
le breieur.
Resuituts de caisson uu four
diff6rents des attentes eu de eeux
preduits par mefour anterieur,
, V6rifier que lescommandesdufour sent correctementr6gl6es.
° V6rifiersi la fiche estbien ins6r6edartslaprise.
° Inspectedr6armerle disioncteur.Inspectedremplacerlesfusibles.
, ContrOlerlasourced'aIimentationeIectrique.
Verifierque rappareiIestcorrectementraccorde_ lasourced'electricite.
Determinersi I'alimentationelectriqueest interrompue[fusiblegriIiddisjoncteur ouvert).
Verifierque railumeurest secet qu'iIemetdes etinceiIes.Le brOleurnepeuts'aikHTlersi
I'allumeurestendommage,souiileou mouilie.SiI'aIiumeurnegenerepasd'etincelles,ramener
Ieboutonde commande_ Iaposition OFF(ARRET).
Verifierque latemperatureselectionneeestcorrecte. Veiller _ prechaufferlefour si
ceci estdemandedans la recette.
° DeterminersiI'eventdu four estobstrue.Voir sonemplacementpage46.
° S'assurerquela cuisiniereest d'apiomb.
° Les reglagesde temperaturevarientsouvententre unfour neufet Ie four qu'iIremplace.
Onobservesouventune derivedu reglagede temperatured'un four _ mesurequ'iI vieillit:
il peutdevenirplus chaud ou moinschaud.Voir page43les instructionsd'ajustementde
latemperaturedufour (certainsmodeles).REMARQUE:IIn'estpasutiledemodifierlereglage
detemperaturesi Ia variationn'affectequ'une ou deuxrecettes.
° Utiliserleshensustensiles.Lesustensilesfencesdonnentunbrunissementdecouleurfoncee,
lesustensilesbrillants,un brunissementplusclair.Pourd'autresinforpaatimlsau sujet de la
cuissonau four,voir la brochureLa cuissonsimplifiee.
° Verifier lapositiondesgrillesetdesustensiles.Lotsde la repartitionsurdeuxgrilles,nepas
superposerIesplats. Veiller_ hisser un espacede 2,5_ 5cm (1_2 po) entrelesplatset les
paroisdu four.
, ContrOlerrutilisationdefeuilied'atuminiumdansle four. Nejamaisrecouvdrcompietement
unegriliedufouravecdelafeuilled'aluminium.Placerun petitmorceaudefeuiiled'aluminium
sur lagrille sousIeplat pour recupererles matieresrenversees.
Resuituts ineorrects lots dela
caisson au gril, ou_mission
excessive de fumee.
, Determinerla positiondes grilles.Lesalimentspeuventetretrop presdesflammes.
, Utilisationincorrectede feuiile d'aluminium.Nejamais garnir lagrille de lechefriteavec
de Ia feuille d'aluminium.
, EnieverI'excasdegraissesur Iapiecede viande avantlacuissonau gril.
* Utilisationd'une Iechefritesouiilee.
* Prechaufferlefour pendantdeuxa 2 a 3 minutesavantde placer le platdartsle four.
. Portedu four fermeedurant la cuissonau griL
suite, o°
53
Page 55

PP,OBLEME SOLUTION
_mpossibiiit_ d'autonettoyage
du four (ce_ains mod_mes)=
Le four ne se nettoie pas
correctement (certains mod_mes)=
Laportedu four ne se d_verrouiHe
(certains mod_mes_.
Aecumum_tiond'humidit_ sur me
hubmotou vapeur se_ant de m'6vemo
Emission d'une forte odeur ou de
fum6e lots de la raise en marche
du four.
o Determinerque['appareiln'a paseteprogrammepour un autonettoyagediffer& Voir
pages47-48=
° Verifier que [aporteestfermee.
° Verifier si lacommandeesten modesabbat.Voirpage44.
o Lefour estpeutetre8 unetemperaturesuperieure_ 205°C_400°F).Latemperaturedu
four doitetreinferieure_205°C[400°FDpour pouvoirprogrammeruncycled'autonettoya%
° Un tempsde nettoyageplus long peut etre necessaire.
° Onn'apaseiimineavantI'operationd'autonettoyage[esaccumuiatimlsexcessivesderesidus,
particuiierement[esresidusd'aiimentsacidesou sucres=
° L'interieurdu four estencorechaud.Attendreenviron une heureapresrachevementde la
perioded'autonettoyage.IIestpossibled'ouvrirlaporteapresladisparitiondu messageLOCK
(VERROUILLAGE)sur ['afficheur.
° Lescommandesetlaportesentpeut-etreverrouillees.Voirpages40et88pour[edeverrouillage.
° Ceciest normaldurantIacuissond'alimentscontenantbeaucoupd'eau.
° Utilisationexcessived'humidite lots du nettoyagedu hubloL
o Ceciest normal pourune cuisiniereneuveetdisparaitapresquelquesutilisations.
Uncycled'autonettoyage_<br(Jlera7>plus rapidementlesodeurs.
o Laraiseen marched'unventilateuraide_ retirerfumeeet odeurs.
o Presencede saletessur la sole.Preceder_un autonettoya%
Codes d'anomaiie
(certains reod_les)o
o LesrootsBAKEouLOCKpeuventclignoterrapidementbI'afficheurpourprevenird'uneerreur
ou d'unprobl_me.Sile motBAKEou LOCKparait8I'afficheur,appuyersurlatoucheCANCEL.
Si le mot BAKEou LOCKcontinueb clignoter,debrancherI'appareiLAttendrequelques
minutes,puisrebrancherI'appareiLSi le mot continue_ clignoter,debrancherrappareil et
prendrecontactavecun reparateurautorise.
o SiIefouresttr6ssale,lesfiammechespeuventproduireuncoded'anomalieaucoursducycle
d'autonettoyage.Appuyersur Ia toucheCANCELet hisser Iefour refroidir completement,
essuyerlasaleteenexc6spuisreprograminer!'autonettoyage.Silecoded'anomalier6apparait,
prendrecontactavecun r6parateurautorise.
Des bruits se font entendreo
Lefourfait plusieursbruitsfaibles.IIestpossibled'entendrelesrelaisdu fourqui se mettent
en marcheets'arretent.Ceciest normal.
®
AIorsqueIefourse rechauffeetse refroidit,iIestpossibled'entendredesbruitscorrespondant
Iadilatationet_lacontractiondespi_cesmetalliques.Ceciestnormaletn'endommagepas
I'appareiL
Jin'y a _i hip _i affichageo o Lefour estpeut-etre en modesabbat.Voirpage43.
_ SAb ))elig_ete p_is
reste amm_m_.
• Lefour esten modesabbat. Pourannuler,appuyersurla touche Clocket maintener-la
enfonceependantcinq secondes.
54
Page 56

Garantie de Ja cuisini re gaz
Garantie cemplbte d'une an n6e =
Pibces et main-d'oeuvre
DurantJnep6rJoded'un (1) an _ comp-[erdela date
de I'achat_nitJalaud6taiLtoutepLecequi serev61eraJt
ddec_ueusedansdesconditionsnormalesd'usage
rnenagerserarepareeou remp_ac6egratu_tement.
Veuillezrioter : CegarantiecompJetene
s'appliq_)entques, leapparellsetrouveauCanaaa
ou aux Etats-Unis.Losapparellssltu6saJ!Jeursne
_on[couver[sque pariesgarantieslimk6es,y
comprJsdepiecesqutse r_v61eraientddectueusesla
premiereann6e.
I_6sidents canadiens
Legarantiecl-dessuscouvreles appareLIsmstaJk_sau
Cana(]aseuJements'Jlsont 6t6agreesps* JaCSA.
saufs_cosappareJlsont 6tOintroduJtsauCanacla
I'occasiond'unchangemen[de residencedesEtats-
UnisversleCanada.
Losgarantiessp4cifiquesformul4esc-i-dessussontlos
SEULESquerefabrieantaccorde.Cegarantievous
confbrentdesdrot[sjufidiquessp4eifiquesetvous
pouvezddaiementjouird'autresdroits,vanablesd'un
4.tatal'autre,d'uneprovincebuneautre
Ne sent pas couverts par cos garanties :
1, Les dommages ou d6rangements dus _:
a.Miseen service,Iiwaisonou entretJeneffectu6sincorrectement.
b.Touter6paratJon,modification,ait6rationettout regIagenonautorisespar
Iefabricantoupar unprestatairede serviceapres-venteagr6e.
c. Mauvaisemploi,emploJabusif,accidents,usagenonraisonnable,ou
catastrophenaturelle.
d=AlJmentatJonelectrique(tension,intensit6)incorrecte.
e.RegIageincorrectd'unecommande.
2. Lesgarantiesnepeuvent6trehonoreessi losnumerosdes6ried'origineont6t6
enieves,modifi6sounesontpasfacilementJJsibles.
3= Ampoules.
4. Appareiisachet6sauxfinsd'usagecommercialou industrieL
5. LesfraisdevisJted'un prestatairedeserviceoudeservicea_rSs-venteencourus
pour Iesraisonssuivantes:
a.Correctiond'erreursde raiseen service.
b.InitiationdeI'utilisateur_ I'emploideI'appareiI.
c. Transportde I'appareiIjusqu'_ I'entreprisede serviceaprCs-venteet sonretour.
6. Dommagessecondairesouindirectssubispartoute personnesuiteau non-respect
decesgaranties.Certainsetatsou provincesnepermettentpasI'exclusionou la
limitationdesdommagessecondairesou indirects;par consdquentloslimitationsou
exclusionsci-dessuspeuventne pass'appliquer_votrecas.
Si un service apr s-vente est cessaire
IJfa_td'abordconsulterJasectionsurledepannagedu manueld'utillsationet
d'entretJenouappelerMaytagServioesSM/service_ IaclientSledeMa}_agau
1-800-688-9900t_.-U,ou 1-800-688-2002au Canada.
Pour obtenit los prestatio s de gara tie
PourIocaliseruneagenceagrSdedeserviceapr_s-ventedartsvotrer6gion,prenez
contactavecIedetaillantoQvousavezacheteI'appareiI;ouappeJezMaytagServicesSM/
service_Iaclientelede Maytag.Sivousn'obtenezpasun servicesatisfaisantenvertu
de la garantie,veuilIez_crireout_l_phoner_:
MaytagServicessM
,_,I'attentiondu C,_JRCenter
P.O.Box2370,CleveJand,TN37320-2370
E._Uo1_800_688_999eet Canada 1_800_688_2ee2
_e_arq_e : Lotsdetout contactauprSsdeMaytagServices sM,Service_ Ja
client61eMaytaget concemantunprob!Sme,veuillezfournirI'Jnformationsuivante:
a.Vosnora,adresseet numdrodetdl_phone:
b.Numdrode modSleet num6rodeseriedeI'appareiI;
c. Nora et adressedudetaillantavecIa date I'appareiiachete:
d.Descriptionciaireduprobl_meobserve:
e.Preuved'achat.
Lesguidesd'utiIisation,les manuelsdeserviceet Jesrenseignementssur JespiecessontdisponiblesauprSsdeMay'tagServices', service_ JaclientSle.
55
SM
Page 57

Estufa a Gas
instrucciones mu
sobre Seguridad ............................57=61
Cocinando en Ja Estufa ................ 62-63
ControHesSuperiores
Quemadores de GasSellados
Cocinando en emHomo ................64-74
Controles del Homo de Lirapieza ManuaU
ReUoj Hornear
Tempodzador Asar
Periiia del Homo de Limpieza Manual
Hornear Asar
Controles del Homo Autolimpiante
Reloj Tempodzador
Hornear Mantener Cdiente
CocciOny Asar
Mantener Cdiente Diferido
Parrillas dd Homo
Cuidado y Limpieza ...................... 75-78
Horno Autofimpiante
Procedimientos de LirY1L)ieza
Mantenimiento .............................. 79-80
Ventana y Luz del Homo
Retiro de la Estufa a Gas
Localizaci6n y Soluci6n
de Averias .......................................81-82
Garantia y Servicio ..............................83
Page 58

Consumidor: Per favQr lea y consewe esta guia para referencia
futura, Conserve e! recibo de compra y/o e[ cheque cance!ado
come com_
NLimero de Modelo
N_mero de Serie
Fecha de Compra
Lea y siga todas las instrucciones antes de asar este
eieetrodom_stico para evitar eI nesgo potential de incendio.
cheque eiectrbo, bsiOn personal oda_io aI ebctrodom6stbo
come resuitado de su use inapropiado. Utflbe este
ebctrodomestbo sohmente para el propOsito que ha side
destinado segtin se describe en esta guia.
Para asegarar funeionamiento eorreeto y segaro: El
ebctrodom6stico debe sell instalado debidamente y puesto a
tierra poll un tecnico calificado. No intente ajustar, Fepara
presta servicio o reemplazar nmguna pieza de este electro-
Ennuestrocontinueaf_nde mejorarlaCalidadyrendimientode
nuestroselec_rodorn6sticos,puedequesea necesadomodi%ar
Para JnfermacJd# sebre servicie, vet p#g#ta 83.
Lasadvertencias e instrucciones importantes sobre seguridad
que aparecen en esta guia no est_in destinadas a cubrir todas
las posibles circunstancias y situaciones que puedan ocurrir,
Se debe ejercer sentido comOn,precauci6n y cuidado cuando
instale, realice mantenimiento o haga funcionar el artefacto,
Siempre p6ngase en contacto con el fabricante si surgen
problemas osituaciones que usted no comprenda,
Reconozca Rossimbolos, advertencias,
etiquetas de seguridad
Siempre desenchufe el electrodom6stico antes de efectua
alguna reparacion,
Si no se sigue estdctamente la infermaei6n
prepercienada en esta gala, se puede preducir Ltn
incendie e una e×piesidn, eausande da_es materiaies,
lesienes persenales e mertales°
Ne almacene ni use gaselina ni etres vaperes y
liquides inflamables en la veeindad de este
eleetredem_stiee e de euaiquier etre.
QUE HACER Sl PERCIBE OLOR A GAS:
o No trate de encender ning_n a[tefaete.
, Ne teque ning_n interrupter el6etrice.
• Ne use ningen teldfeno en su edificie.
• Uarae inmediatamente a su preveeder de gas
desde el tel_feno de un veeineo Siga las
instrueeienes prepereionadas per el preveeder
de gas.
o Sine puede meca_izara su preveeder de gas,
_lame a_euerpe de be_bereso
- La instalaei_ y reparaeienes debe_ ser efectuadas
per u_ t_c_iee ealifieade, una age_cia de
reparaeienes e el preveeder de gas.
PODRIAN Causar [esi6n personal grave o mortal,
PODRIAN causar lesi6n personal menos grave,
Puede ecurrir un escape de gas en SUsistema y provocar
u_a situaci6n peligrosa, Los escapes de gas no Pueden ser
acuerdo con las inst[ucciones del [abdcante.
57
Page 59

lnstruccienes Generates
o TODAS LAS ESTUFAS SE PUEDEN
VOLCAR Y CAUSAR LESJONES
PERSONALES
° mNSTALEEL DmSPOSffW(}
ANTiVUELCO INCLUIDO CON LA
ESTUFA
o SIGA TODAS LAS mNSTRUCCiONES
DE mNSTALACmON
ADVERTENCIA: Para redueir el desgo de vuelco deU
ebctrodom6stico a eausa de use anormal o debido a
peso e×eesivo en Japuerta deJ homo, es neoesario
asegurarJo mediante un dispositivo antivueleo
debidamente instalado=
Paraverificar si eI disposidvo est,1debidamente instaBdo, mire
debajo de la estufa con una linterna para asegurarse de que
uno de los tornillos niveladores traseros estd debidamente
enganchado en la ranura del soporte, Eldispositivo antivuebo
asegura el tornillo niveBdor trasero al piso cuando estd
debidamente enganchado, Estodebe verificarse carla vez
que la estufa seamovida,
Muchos pl_sticos son vulnerables al calor, Mantenga los
pl_sticos alejados de las piezas de la estufa que puedan estar
tibias o calientes, No deje articulos de pl_stico sobre la
cubierta de la estufa pues se pueden derretir o ablandar si
est_indemasiado cerca del respiradero ode un quemador
superior encendido,
Paraeiiminar ei riesgo de pasar sobre los quemadores
superiores calientes, no se deben guardar art{culos en los
armarios que estSn directamente sobre la estufa, Si tabs
armarios son usados para almacenamiento, debe limitarse a
colocar articulos de use poco frecuente y que pueden
guardarse en forma segura en una _rea que est_ sujeta ai
calor proveniente de la estufa, Las temperaturas pueden no
set apropiadas para algunos articulos, tal come liquidos
vol_itiles,limpiadores o sprays en aerosol,
En Case de lncendie
Apague ei eiectrodomestico y ia campana de ventiiaci6n para
evitar que las llamas se dispersen, Extinga las llamas luego
encienda ia campana para expuisar ei humo y ei oior,
• En la eubierta: Apague ei fuego o ia llama en una sart_n
con una tapa o una bandeja de hornear,
NUNCA levante o mueva una sartdn en llamas,
• En el homo: Apague el fuego o la llama cerrando la puerta
dei homo,
Pata Evitar un it|cot|die e
Da e Causado pet eJ Hume
Asegurese de que se hayan retirado redes los materiabs de
empaque del ebctrodomdstico antes de su use,
Mantenga el drea alrededor del ebctrodomdstico libre y
exenta de materiabs combustibles, gasolina u otros vapores y
materiabs infiamabbs,
Si el ebctrodomestico es instalado cerca de una ventana, se
debe tener cuidado para evitar que Bs cortinas pasen sobre
los quemadores,
NUNCA deje articulos sobre la cubierta de la estufa, Elaire
caliente del respiradero puede encender los articulos
infiamabbs y aumentar la presi6n en los envases cerrados
hasta hacerlos reventar,
Muchos envases de %0 aerosol son EXPLOSIVOScuando son
expuestos al crier y pueden ser altamente infiamabbs, Evite
su use o su almacenamiento cerca del ebctrodom6stico,
No use agua en los incendios de grasa, Use bicarbonate, un
producto quimico seco o un extinguidor dei tipo con espuma
para apagar un incendio o la llama,
Seguridad para Jes Ni es
NUNCA almacene art[cuios de inter6s para !os nih0S en !0S
armar!os que est_n sobre laestufa o en el protecto[ t[asero
de laestufa, LOSn!SoSque se trepan en la puerta de la
sedamente,
NUNCA deje a los niSos solos o sin supervisi6n cuando el
electrodomestico est6en use o este caliente,
NUNCA permita que los niSos se sienten o se paren en
ninguna parte del electrodom6stico pues se pueden lesionar o
quemar,
58
Page 60

Se bs debe ensdiar a los ni_iosque eI ebctrodom6stbo y
los utensiiios que est_n en _Io sobre 61pueden estar
cdientes, Deje enfriar los utensiiios caiientes en un lugar
seguro, fuera deI abance de los ni_iospequdios, Se bs
debe ensdiar a los ni_ios que un ebctrodom6stbo no es un
juguete, No se debe permitir que los ni_iosjueguen con los
controbs u otras pbzas de la estufa,
Seguridad Para Coeinar
Siempre coioque un utensiiio en un quemador superior antes
de encenderio, Asegurese de usar ia periiia correcta que
controia cada quemador superior, AsegSrese de encender ei
quemador correcto y comprobar de que en efecto ei
quemador haya sido encendido, Cuando haya terminado de
cocinar, apague ei quemador antes de retirar ei utensiiio para
evitar exposici6n a ia llama dei quemador,
Siempre ajuste ia llama dei quemador superior de modo que
no se extienda mas all_ del borde inferior del utensilio, Una
llama excesiva es peiigrosa, desperdicia energia y puede
da_iar la estufa, el utensilio o los armarios que est_n sobre la
estufa,
resultar en !a posibUevo!cadura de! eiectrodQm6stico, dafio
aI eUectr0d0m6st!cQy Pesionesgraves,
NUNCA use el electrodom6stico como un calefactor para
calentar o entibiar una habitaci6n a fin de evitar un riesgo
potencial para el usuario y da_iar el electrodom6stico,
Adem_s, no use la cubierta o el homo como una area para
almacenar alimentos o utensilios de cocina,
Ne obstruya el flujo del aire de ventilaci6n y combusti6n
bloqueando el respiradero del homo o las tomas de aire, Sise
restringe el flujo de aire al quemador se evita el rendimiento
correcto y se aumenta la emisi6n de mon6xido de carbono a
niveies peiigrosos,
El respiradero del homo se encuentra en la base del panel de
control,
Evite tocar el area del respiradero del homo cuando el homo
este encendido y durante varios minutos despu6s de que el
homo haya sido apagado, Aigunas piezas dei respiradero y
del area circundante se calientan Io suficiente como para
causar quemaduras, Despues de que ei homo haya sido
apagado, no toque el respiradero ni las _reas circundantes
hasta que elias hayan tenido tiempo suficiente para enfriarse.
Qtras superficies potencialmente calientes incluyen la cubierta
de la estufa, las _ireasdirigidas hacia la cubierta de la estufa,
el respiradero del homo, las superficies cerca de la abertura
del respiradero, la puerta del homo y las areas alrededor de la
puerta y la ventana del homo,
No toque un foco caliente del homo con un patio hOmedo
pues ei foco se puede quebrar, Si se quiebra ei foco,
desconecte la corriente el@trica hacia la estufa antes de sacar
el foco para evitar choque el6ctrico,
NUNQA deje sin supervisi6n ia cubierta de ia estufa cuando
est6 cocinando, especialmente cuando usa un ajuste de calor
alto o cuando est6 usando una freidora, Los reboses pueden
producir humo y los derrames de grasa pueden infiamarse,
Limpie los derrames grasosos tan pronto como sea posible,
NQ use caior alto durante periodos de cocci6n proiongados,
NUNCA caiiente un envase cerrado en ei quemador superior
o en el homo, La acumulaci6n de presi6n puede hacer
explotar el envase causando una lesi6n personal grave o daHio
a la estufa,
Use tomaollas secos y gruesos, Los tomaollas hOmedos
pueden causar quemaduras acausa dei vapor, Las toaiias u
otros sustitutos ,'7odeben set usados como tomaollas porque
eiios pueden quedar coigando atraves de los quemadores
superiores y encenderse o enredarse en ias piezas de ia
estufa,
Siempre deje enfriar iagrasa caiiente que se ha usado en ia
freidora antes de intentar mover o manipuiaria,
NQ permita que se acumule grasa u otros materiales
inflamables en la estufa o cerca de ella, en la campana o en el
ventiiador aspirador, Limpie ia campana extractora con
frecuencia para evitar que ia grasa u otros materiaies
inflamables se acumulen en la campana o en el filtro,
Encienda el ventilador cuando cocine alimentos flameados
debajo la campana,
NUNCA use vestimentas de materiales inflamables, ropa
suelta o de mangas largas cuando est6 cocinando, La
vestimenta se puede encender o enganchar en los mangos de
los utensilios,
59
Page 61

Sbmpre coIoque las parriihs deI homo en la posbi6n deseada
cuando eI homo est6 frio. Desibe la parriih deI homo hacia
afuera para agregar o retirar aiimento, usando tomaoiias secos
y resbtentes. Siempre evite abanzar dentro deI homo para
agregar o retirar aiimentos. Si una parriiia debe ser sacada
cuando est,1todavia caibnte, use un tomaoiias seco. Siempre
apague eI homo @spuds de haber terminado de cocinar.
Use las parriiias soiamente en eI homo en que fueron
enviadas/compradas.
Tenga cuidado cuando abra la puerta deI homo. Deje que
escape eI aire o eIvapor caibnte antes de sacar o volver
colocar el alimento.
ADVERTENCIA SOBRE LOS AUMENTOS PREPARADOS:
Siga las instrucciones del fabricante de los alimentos. Si un
envase de pldstico de alimento congeBdo y/o su tapa se
deforma, se comba o se ddia de dguna otra manera durante
la cocci6n, descarte inmediatamente el alimento y su envase.
Elalimento puede estar contaminado.
NUNCA use pape[ de aiuminio para cubrir una parriiia de[
homo o la parte inferior del homo. El uso incorrecto puede
resultar en un riesgo de choque el@trico, incendio o da_io al
ebctrodom6stico. Usepapel de aluminio solamente como se
indica en esta guia.
Utensilios Apropiados
Use sartenes con rondos pBnos y mangos que sean fdcibs de
tomar y que permanezcan frios. Evite usar sartenes u ollas
inestabbs, combadas que se pueden vobar facilmente u olhs
cuyos mangos est6n sueltos. Adem_is evite usar utensilios
especialmente pequdios o sartenes con mangos pesados
pues ellos pueden ser inestabbs y vobarse fdcilmente. Los
utensilios que son pesados de mover cuando estdn Ibnos con
alimento pueden tambi_n ser un peligro.
Aseg0rese de que el utensilio sea Io suficientemente grande
como para contener en forma debida los dimentos y evitar
derrames. El tama_ioes particuhrmente importante cuando
se utiiizan freidoras. AsegOrese de que e[ utensiiio tiene
capacidad para el volumen de alimentos que seva a agregar
al igual que para la formaci6n de burbujas de la grasa.
Para reducir a un minimo las quemaduras y que los materiales
infiamables y los derrames se enciendan debidos a contacto
no intencional con el utensilio, los mangos no deben
extenderse sobre el quemador superior adyacente. Siempre
gire los mangos de los utensilios hacia el lado o hacia la parte
trasera de la estufa, no hacia la habitaci6n donde puede ser
fdcilmente golpeados o alcanzados por los niffos pequdios.
Nunca deje que un utensiiio hierva hasta quedar seco pues
esto puede da_iar el utensilio y la estufa.
Siga las instrucciones del fabricante cuando use bolsas para
cocinar en el homo.
Solamente ciertos tipos de utensilios de vidrio cer_imico, de
ceramica o glaseados son convenientes para uso en la
cubierta de la estufa o en el homo sin quebrarse debido al
cambio repentino de temperatura. Siga las instrucciones del
fabricante cuando use utensilios devidrio.
Esteelectrodom6stico ha sido probado respecto a su
rendimiento seguro usando utensilios de cocina
convencionales. No use ningun dispositivo o accesorio que
no haya sido especfficamente recomendado en esta guia. No
use tapas para cubrir los quemadores superiores, rejiiias para
la cubierta de la estufa ni agregue sistemas de convecci6n
para hornos. Eluso de dispositivos o accesorios que no son
expresamente recomendados en esta guia, puede crear serios
peligros de seguridad, resultar en problemas de rendimiento y
reducir la vida utii de los componentes de la estufa.
Seguridad de la Limpieza
Apague todos los controies y espere que se enfrien ias piezas
de la estufa antes de tocarlas o limpiarlas. No toque las
rejiiias de los quemadores o ias _reas circundantes hasta que
elias no hayan tenido tiempo suficiente de enfriarse.
Limpie la estufa con cuidado. Tenga cuidado para evitar
quemaduras de vapor si se usa una esponja o un patio mojado
para iimpiar los derrames en una superficie caiiente. Aigunos
iimpiadores pueden producir vapores nocivos cuando se
aplican a una superficie caliente.
Homo Automimpiante
(modelos selectos}
durante e! cicl0 de autoHmpieza_
Limpie solamente las piezas que se indican en esta guia. No
iimpie ia junta de ia puerta. La junta es esenciai para un
sellado herm6tico. No restriegue, da_ie,ni mueva la junta de
la puerta. No use limpiadores de homo de ninguna clase en el
homo ni alrededor de cualquier parte del homo autolimpiante.
6O
Page 62

Antes de la autolimpieza del homo, saque la asadera, las
parrillas dd homo y otros utensilios y limpie los derrames
excesivos para evitar que se produzca demasiado humo,
Ilamaradas o llamas.
Esnormal que la cubierta de la estufa se cdiente durante el
ciclo de autolimpieza. Pot Io tanto, se debe evitar tocar la
cubierta durante un ciclo de autolimpieza.
Aviso y Advertencia
lmportante Sobre Seguridad
La Propuesta 65 de la Ley de 1986 del Estado de California
Sobre Seguridad y Contaminad6n del Agua Potable (California
Safe Drinking Water and Toxic Enforcement Act of 1986_}exige
que el Gobemador de California publique una lista de las
sustancias que segun el estado de California causan c_incer o
da_io al sistema reproductivo y exige que hs empresas
adviertan asus dientes sobre la exposici6n potencid a tales
sustancias.
Se advierte a los usuarios de esta estufa que la combusti6n
del gas puede resultar en exposici6n de bajo nivel a dgunas
de las sustancias publicadas en la lista, induyendo benceno,
formddeh{do y hollin, debido principalmente a la combusti6n
incompleta del gas natural o de los combustibles de petr61eo
licuado. Losquemadores ajustados en forma debida
reducirdn la combusti6n incompleta. La exposici6n a estas
sustancias puede tambi6n set reducida a un minimo
ventilando los quemadores al exterior en forma adecuada.
Se advierte a los usuarios de este electrodomdstico que
cuando el homo est,1funcionando en el cido de autolimpieza,
puede haber exposici6n de bajo nivel a dgunas de las
sustancias indicadas en la lista, induyendo mon6xido de
carbono. La exposici6n a estas sustancias puede set reducida
a un minimo ventilando el homo al exterior en forma
adecuada, abriendo las ventanas y/o la puerta en la habitaci6n
en donde est,1ubicado el electrodomdstico durante el cido de
AVISO mMPORTANTERESPECTOA LOS PAJAROS
DOMESTmCOS:
Nunca mantenga los pdjaros en la cocina o en las
habitaciones donde puedan Ilegar los humos de la cocina. Los
pdjaros tienen un sistema respiratorio muy sensitivo. Los
humos producidos durante el cido de autolimpieza dd homo
pueden set perjudiciales o mortales para los p_ijaros. Los
humos que despide el aceite de cocina recalentado, la grasa,
margarina y los utensilios antiadherentes recalentados pueden
tambi6n set perjudiciales.
Conserve estas lnstrucciones para Referencia Futura
61
Page 63

'LO' (Bajo):Seusaparacalentaralimentosa
fuegolento,mantenerIosalimentoscaiientesy
derretirchocolateo mantequilh. Sepuede
cocinaren el ajuste'LO' siemprequeel
utensilioest6tapado.
Controles Superiores
'Nl' (Alto): Seusa parahacerhewir un %uido o
alcanzarla presi6nadecuadaen una ollaa [
presi6n. Siemprereduzcael ajustea un calor I
m_sbalecuando los [iquidoscomieneena herv+r
o cuandolos alimentoscomiencena cocinarse.
Se usa una llama de tama_o intermedio para
continuar cocinando. Et alimento no secocinar_
m_s raipido cuando se usa un ajuste de Ilama
m_s alto que el necesario para mantener un
hewor suave. El agua hierve a la misma
temperatura si estd hiwiendo suave o
vigorosamente.
• Si ia imma se apaga cuando est6 cocinando, apague e[
quemador. S[ se deteeta un o[or fue+te a gas. aDra una ventana
y espere c+nco mmutos antes de volvo+ a eneender e[ quemador.
- Aseg8rese de que todos [os controies superiores est6n en la
posiciOn +OFF'(Apagado} antes de summLstrar gas a [aestufa.
• NUNOA toque [asuperficie de la estufa hasta que no se haya
enfriado. Se espera de que aigunas de [as piezas de la
superficie, especiatmente airededor de los eiementos+ se
entib+en o caiienten m[entras estd cocinando. Use tomaoilas
para proteger sus manos.
Encendido Sin Pilote
Elencendidosin piIoto eliminala
necesidadde una IuzpiIoto constante+
Existendos encendedoresparaIos
quemadoressuperiorestradicionales+
Cadauno de losquemadores
supedorestiene un encendedorde ..................
chispa. Tengacuidadocuando limpie
airededorde Ios quemadoressupedores. Si el pasode Iimpiezase
enredaraen eIencendedorpuede dariarloe impedir su igniciOn.
Si un quemadorsuperior no enciende,verifique si el encendedor
est_rote, sucio o mojado. Si est_ obstruido,limpieel odficio
peque_odebajo del encendedorusandoun alfiler derecho.
_+........ -_ CABEZAOEL
[NCENO[OO_
O O Lasilustracionescercade Iaperilla identificancuaI esel
quemadorquecontrola esaperilla+Porejempio,la
O ihstraci6n a izqierdamuestrala ubicaciOndel quemador
delanteroizquierdo+
Programaci6n de los Controles:
Eltama_oy el %0 de utensilioafectar_nel ajustede calor+Para
informaciOnsobrelosutensiliosyotrasfactoresqueafectanlos
ajustesde caIor,consulteel folleto "La CocinaF_ciI"+
1. CoIoqueun utensiiiosobrela rejilla del quemador.
+ Lallamadel quemadorpuedetevantarseo parecerseparada
del orificio si no secolocaunutensilioen la rejilla.
2. Oprimay gire la perillaa Iaizquierdaalajuste'UTE' {Encendido}.
, Seoir8un chasquido(chispa}y el quemadorseencender&
(Loscuatro quemadoresproducir_nchispacuandosecolocala
perillade cualquierade losquemadoresenlaposiciOn'UTE'.}
3. Despu6squeel quemadorseha encendido,gire la perillaal
tamai_ode llama deseado.
, Elencendedorcontinuar_produciendochispashastaque la
perfllaseagirada m_sall_de la posiciOn'UTE'.
Funeionamiento durante una
lnterrupei6n de la Energia
Perillas de Control de los
Elementos Superiores
SeutiIizanparaencenderIosquemadoressuperiores+Sedisponede
una seleccidninfinita deajustesde calordesde'LO' a 'Hi' (Bajoa
Aito)+Ene!ajuste+Hi'sepuedesentirun tope o una muesca+Las
periIIaspuedenset ajustadasexactamenteen losajustes
correspondienteso entre cualquierade ellos+
Cuandoseencienden10squemadoressupedores,asegLirosede
que todas lasperi!!asde contro!est6nen ia pos+cion
Primeroenc+endaelfOsforoy mantdnga!oenposic!6nantesde
girar !a peril!a a! ajuste+UTE';
1. Acerque un f6sforoencendidoa la cabezadelquemador
superiordeseado.
2. Oprimay gire la periIla decontrol lentamentea IaposiciOn'UTE'.
3. Cuandola llamaes encendidoajusteal niveldeseado.
62
Page 64

Para evitar que macubierta se descomore o se
• Limpie[acubierta de [aestufa despu6sdecadauso+
+ LimpieIosderramesacidoso azucaradostan prontocomo la
cubiertasehayaenfriadopuesestos derrames
puedendescolorarla porcetana+
A diferenciade unaestufaconquemadoresde
gasest_ndar,estacubiertano se levantani
tampocoes removible. No il_tente /evantarta
cubierta per ningdn motive.
Quemadores Seminaries
Losquemadoresselladosdesu estufaest_naseguradosaIa
cubiertay no hartsidodiseiiadosparasersacados+Debidoa que
losquemadoresest_nselIadosenla cubierta,Iosderrameso
rebosesnoseescurrir_ndebajode Iacubierta de laestufa+Sin
embargo,Iosquemadorespuedenset limpiadosdespu_sde cada
uso+(Veten la pagina77 las instruccionessobrela limpiezay
Quemador de Alto
Rejimmasde ruesQuemadores
LasrejillasdebenestardebidamentecoIocadasantes
de comenzara cocinar+LainstaiaciOnincorrectade
lasrejillaspuederesultaren picadurasde lacubierta+
No use los quemadores sin tener un utensilio en
maparHlla. Emaeabado de poreemanade mas
parrimmaspuede picarse si no e×iste un utensimio
que absorba el careerde mallamademquemador.
AunqueIasparrillas de losquemadoressondurables,
gradualmenteperderSnsu brilloy/o se descolorar_n,
debidoa lasaltastemperaturasde la llamadel gas+
P_at+Hos Protectores - OpdonaR
PIatiIIosprotectoresporcelanaremovableest_nobteniblepot
estoelectrodomesticoparacontenerderramamientos+Llameal
1-800-688-8408parasolicitarlos+
Rendimiento 0 2.000BTU}+
Existeunquemadorde aItorendimientoensu estufa,situadoen la
posiciOnderechadelantera+EstoquemadorofrececocciOnross
r_pidaypuedeset usado paraherviragua conrapidezo para
cocinargrandescantidadesdealimento+
Quemador para Cocinar a
Fuego Lento
Estequemadorseencuentraen Iaposici6nizquierdatrasera+El
quemadorparacocinara fuegolentoofreceuna Hamade menor
intensidad(BTU+inferio0 paracalentarsalsasdelicadaso derretir
chocolate+
+Ftr6.gimennombd deBTUva,ciarbcuandoseusagas/icuado.
Unquemadorajustadode maneracorrectacon orificios
limpiosseencender_dentro de unospocossegundos+Si
est_usandogasnaturalla llamaser_azul con un cono
interiorazuIprofundo.
Si Ia llamadetquemadoresamarillao es ruidosa,la mezcla
de aire/gaspuedeserincorrecta+P6ngaseen contactocon
un t6cnico de servicioparaajustarla+(Losajustesno estSn
cubiertospor la garant[a+}
CongasIicuadosonaceptablesalgunaspuntasamarillasen
lallama. Estoesnormaly no esnecesariohacerningOn
ajuste.
Conalgunostipos de gas,usted puedeoir un "chasquido"
cuandoel quemadorsuperiorseapaga+Esteesun sonido
normaldel funcionamientodel quemador+
Si la perillade control segira muyr_pidamentede 'HI' a 'LO',
lallamapuedeapagarse,part+cularmentesi el quemadorest_
fr[o+Si estoocurre,gire Iaperillaa Iaposici6n'OFF'
(Apagado},esperealgunossegundosy vuelvaencenderel
quemador+
Lallamadebeserajustadademodoque nose extiendam_s
all_ del bordedel utensilio+
63
Page 65

@
Controies del Homo de Limpieza Manual
(modelos selectos: a
F
More+ \X
\
\\
\
Less-
\
\
B C D E F
NOTA:El indicadorvisualdespliega12:00cuandoseconectael ebctrodom6stbo por primeravezo slse interrumpe el suministroel@trbo.
Laslucesindbadoras'Bake'y'Broil' se desplbgan cuando se activala funci6n correspondiente.
a
'Bake'(Hornear}
B
'Broir (Asa0
C
'Timer'(Temporizador:
D
'Clock' (Reloi}
E
'CANCEL'{Cancelar)
F
'More+' o 'Less-'
Mas+ o Menos-}
m
Seusaparahorneary asar.
Seusaparaasara JaparrJJJay dorar los
aJimentos.
Programaeltemporizador.
SeusaparaprogramarJahoradel d[a.
Cancelatodaslasfuncionesa excepciOn
del temporizadorydel reJoi.
Seusanparasebccionar o cambiarel
tiempoy Ia temperaturadel homo.
Seleccionalosajustesdeasado'HI'(Alto}
o 'LO' {Bajo).
Use de las Tedas
o Optima [atecia deseada.
o Optima Iatecla 'More+' o 'Less-' parasebccionare[tbmpo o [a
temperatura.
o Seescuchar4unaseBalsonoracarlavezqueoptima una tecla.No
seescucharaunas@alsonoracuandoseoprJmanlasteclas
'More+' o'Less-'.
o Seescuchar_ndosse_alessonorassi ocurre un error en la
programaciOn.
Biota:Cuatrosegundosdespu6sde oprimirIatecla 'More+' o
'Less-',el tiempoo latemperaturaque sedespliegaseprogramar_
autom4ticamente.Sitranscurrenm4sde30 segundosdespu@de
haberoprimidounatecia defunci6n y Iatecla 'More+' o 'Less=',la
funci6nser_canceladay el indicadorvisualvoIver4al despliegue
anterior.
Programelahoracorrectadel d[ausando lastecias 'More+' o
'Less-'.Si Iatecia 'More+' o 'Less-'nose oprime en 30segundos,
JaprogramaciOndel re!oiser4 cancelada.Optima JatecJa'Clock'
paracomenzardenuevo.
Programaei6n deJ Temporizador
Eltemporizadorpuedeset programadodeun minuto 001)hasta99
horasy 59 minutos [99:59}.Eltbmpo sedesplegar_enminutosy no
en segundos.EL TEMPORIZADORNOCONTROLAELHORNO.
I, Oprimala tecla 'Timer'.
o Enel indicadorvisualdesplegar40:00y losdospuntos [:)
desteliar_nenet indicadorvisual.
Oprimala tecla 'More+' o 'Less-' hastaque sedespJbgueel
tiempo deseado.
o Eltemporizadorcomenzar_a funcionarcuandoseprogrameel
tiempo.
o Losdos puntosdestellantesindicanque un conteodeI
temporizadorest_en progreso.(Losdospuntos no destellansi
el indicadorvisualmuestralahora deJdFao latemperaturadel
horno.}
o AIfinaI deitiempo programado,seescuchaMndoss@aJes
sonoras.Elindicadorvisualdesplegar4"0:00".
o Sias[Io@sea,oprimalatecla 'Clock'durante el
funcionamientodeItemporizadorparadesplegarbrevemente
Jahoradel dia.
o SiasiIodesea,optima latecla 'Bake'o 'Broil' duranteet
funcionambnto deJtemporizadorparadespbgar brevemente
el ajusteactualdetemperatura.
Para cancelar el temporizador:
Prograraaei6n deJ ReJoj
1. OprJmaIatecla 'Clock'.
La horadel reloj nose puedeprogramarsi el control hasido
programadoparahornearo asaro para usarel temporizador.
Oprimay mantengaoprJmidaJatecla'Timer'durantevariossegundos.
64
Page 66

Homeadoo Asado y Asado
a la ParriHa
ParaobtenermayorinformaciOnsobre [ostiempos y [assugerencias
de horneado,asadoy asadoa la parrilla,consukee[foHeto"La
CocinaF_ci[".
Setting the Controls For Baking or Roasting:
1+Optima[atech 'Bake'.
o'000'sedesp[egar_y [aluz !ndicadora'Bake'desteHar8ene[
indicadorvisual
oSioprime[a tecIa'Bake'y no programalatemperaturaen30
segundos,el programasecanceIar_autom_ticamentey la
heradel d[ase desplegar8nuevamenteene[ ind!cadorv[suaL
2. OptimalatecIa'More+'o 'Less-'hastaquelatemperaturadeseada
sedespIiegueenel indicadorvisual
oLatemperaturadel bornepuedeset pmgramadade75°a
285°C070°a 550° F[.
o'175°' [350°] se despiegar_cuandooptimalatecia'More+'
o 'Less-'per primeravez.
oOprima[atecia 'More+' o 'Less-'repetidamenteparacambiar[a
temperaturaenincrementosde3° C [5° F),u opr[malay
mant6ngalaoprimidaparacambiarlatemperaturaenincrementos
de G° C(10° F].
oEnel indicadorvisualsedesptegar_i38° [100°] o latemperatura
tea[de[homosiesqueessuper!ora 38°C (100°F[cuandose
enciendee[homo+
oLatemperaturaaumentar_en incrementosde 3°C[5° F[hasta
flegara [atemperaturaprogramada+Cuandoelbornese haya
precaientado,seescuchar_unaseSalsonora+
oEsperea queel homose precalientedurante10-15minutes+
• Paraverificar[atemperaturaprogramadaduranteel precalenta-
mientode[horno,optima[atecla'Bake'.Latemperaturase
despIegar_durantetressegundos.
• Para cambiar matemperatara de[ home darante el procese
de cecciSn, optima [a tecia'Bake',hego optima'More+' o
'Less-'hastaque sedespliegue[a temperaturadeseada+
• Para cambiar matemperatara demhomo darante 'Preheat',
optima dos veces [atecIa'Bake', [uegooprima'More+' o
'Less-'hastaque sedespiiegue[a temperaturadeseada+
3.
Co[oquee[aIimentoe!enhomo+Verifiquee[ progresode[a
coccidncuandohayatranscurridoe[t[empom(nimorecomendado+
4.
Ai termho de [acocciOn,oprima[atecla'Cancel'paraapagare[
borney retireel aIimentode[homo+
• E[homocuentacon unaflJnciOndeapagadoautom_tico+Si
sedejaencendidodurante12horas,e[ homo seapagar_
automaiticamenteye[indicadolvisualdesplegara'000'+Optima[a
tecIa'Cancel'y [aherade[diasedespIegar8nuevamenteene[
indicadorvisual
Ajuste de los Contro[es para Asar a maParrii[a:
(compartimiento inferior - modelos selectos)
Paraobtenermejoresresuitados,useun utens[[iodiseSado
especiaImenteparaasara [aparriIia+
1+Cotoque[aasaderaen[aposiciOndetcompartimiento
recomendadoparaasara [aparriIIaque semuestraen[atabIa
siguiente.
2+Optimalatecia 'Bl+oi['+
o 'SEt'sedespiegaraiy [a luzindicadora
'Broil'desteIIar8enel indicadorvisual+
eont,
Tab[a para Asar a [a Parri[[a -
Compartimento inferior
TERMiNO DE'_ASADOALAPARRiLLAENEL_ TIEiViPOTOTAL DE_
TiPODECARNE, COCCION COiViPARTiiViENTOINFERiOR* COCCION (MINUTES)**
Came de Res Bistecs,2,5cm (1"]degrosset Medio Centre 14- 20 rain+
Hamburguesas,2cm(s/+,,} Bienhecho Centre 14- 19rain.
degrosset
Cerde RebanadasdeJambOn,precocidas, Tibio Centre 8 - 12rain.
1,3cm(V2"]degrosset
Chuletas,2,5cm [!"} degrossor Bienhecho Centre 18- 25 rain.
Ave Po!IoenPresas Bienhecho Inferior (LOBroil232°C[450°F]
Pesoado FiIetes,1,3cm[+/2"]degrossor Desmenuzado Centre 8- 12rain.
Bistecs,2,5cm 0"] degrossor Desmenuzado Centre 10- 15rain.
Superioresla posici('}nmdsalta, Centreesla posici6nrodsbaja; Fondoes e!fondodel compartimientodelasador[sacarla parrflla].
*' Lostiemposdecocci6nsonaproximadosy puedenvariardependiendodela came.
Bienhecho Centre 16- 24 rain.
30-45 rain.
65
Page 67

3. Oprimalatecla'More+' paraprogramaretasadoen etajuste'HH'
[altoDo'Less-'paraelajuste'LO' (baio).
• Seteccioneetajuste'HH'[atto)paraasadoataparrithnormat.
• Seteccioneetaiuste'LO' [baio) paraasadoa taparriHaa baias
temperaturasparaevitaretdoradoexcesivoen alimentosque
requierenmayorestiemposdecocci6ntalescomolacamede
ave.
• Sino setecciona un ajuste de Asado ['HH'o 'LO'Den 30 segundos,
el programa se cancelarti automSticamente yla hora del d[a se
desplegar_ nuevamente en el indicador visual.
4. Sigalostiempossugeridosen [atablaparaasaralaparrillaquese
incluyeacontinuaci6n. Lacamedebedarsevueitaunavezcuando
est_a mitaddeitiempodecocciOn.
5. Cuandoterminedeasara [aparri[la,oprima[atecla'Cancel'para
apagarel homo y retire e! utensi[iodel homo.La horadel d[a
volver_adespiegarseen el indicadorvisual
PeriHa demHomo de Limpieza
Manua_ (modelos selectos)
PeriHa de RaTemperatura de_ Homo
La perilla'OvenTemp'_Temperaturadei
Homo) se usaparaseleccionary
mantenerlatemperaturade[ homo.
Siempregireestaperi[lajusto HASTA
[atemperaturadeseada.Nogire a una
temperaturam_sa[tay luego retroceda.
Ajuste de! Homo para Homeado y asado:
1. Optimay gire la perilla 'OvenTemp'a latemperaturadeseada.
Espere10a 15minutos parae[precalentamiento.
2. Coloqueel alimentoen e[centrode[homo. Vedfiquesi el
aiimentosecocin6 enel tiempo m[nimoindicado para[areceta.
Cocinepor m_stiempo si esnecesario.
3. Saquee[ alimentodel homoy girela perflla'OvenTemp'a [a
posiciOn"OFF".
horno,asardoy asadoa la parrflla,consulteel folleto "LaCocina
Nora: Parasugerenciasadicionalessobrecomohomeadodel
F_cil".
Ajuste de los Controles para Asado a la
Parrilla:
1. Paraobtenermeioresresukados,useun utensiliodise[_ado
especialmenteparaasara Iaparrilla.Coloquela asaderaenIa
posiciOnde la parrilla recomendado.G_erIa tabla en p_gina65.)
2. Gire Iaperilla 'OvenTemp'a 'Broil' paraasadoa la parrillaa
temperaturasm_sbajas,a 232°C (450° F).
• EIasadoa la parrillaa temperaturasrodsbajasevitael dorado
excesivode los alimentosquesecocinanpor m_stiempo,
tales comolascarriesde ave.
3. SigaIostiempossugeridosenIatabla paraasara laparrilIaen
p_gina67 queseincluyea continuaciOn.Lacamedebedarse
vueltaunavezcuandoestda mitaddeltiempodecocciOn.
4. VerifiqueeIt6rmino de cocciOnhaciendoun corteen la carne
cercade!centro paraverificar el color.
5. Despu6sdeasara la parrilI& coloque ]a perilla'OvenTemp'en la
posiciOn"Off". Saquela asaderadelhorno.
66
Page 68

Panel de Control (modelos selectos)
A B C [}
/
(More +
E
Elpanelde control hasido disefiadoparasu f_ci[ programaci@.Elindicador visualen el panelde controi muestra[a hora de[d[a,el
temponzadory lasfunciones dei horno.Elpanelde control mostradoarribainc[uyelascaracter[sticasespedficasdel modelo. (Elestilo del
panelde controlvar[asegOnelmode[o.}
'Broil'(Asara
laParrilla}
B
'Bake'(Hornea0
C
'More+/Less-'
(M_s+/Menos-}
'Th-ner'_emporizado0
E
'Cook& Hold'(Cocci@
y MantenerCaliet_te}
'Clean' [Limpieza]
'Delay'(Diferido}
H
'Clock'(Reloj)
m
'KeepWarm'
(MantenerCaliente}
illi
'CANCEL'(CANCELAR}
Seusaparaasarala parfillay dorarlos
alimentos.
Seusaparahomeary asar.
Programaocambialahora,la
temperaturadelhorno.Programaasara
laparrilla'HI'o 'LO'.
Programsaltemporizador.
Seusaparahornearduranteuntiempo
seleccionado,luegomantleneel atimento
calbnteduranteunahora.
Seusaparaprogramarunciclode
autolimpieza.
Programaelhomoparacomenzara
hornearo lirnpiarsea unahoraposterior.
Seusaparaprograrnarlahorade!dia.
Seusaparamantenercalienteenet
homoelalimentococinado.
Cancetatodaslasfuncionesaexcepci6n
de!temporizadoryel reloj.
Use de masTedas
o Oprimalatecla deseada.
o Oprima'More+' o 'Less-'para programareltbmpo o la
temperatura.
o Seescuchar_unaseSalsonoracada vezque oprimaunatecla.
o Seescuchar_ndosserialessonorassi ocurre un error en la
programaciOn.
Neta: Cuatrosegundosdespu@de haberoprimidoIa tecia
'More+' o 'Less-'el tiempo o Ia temperaturaser4autom_tica-
menteprogramada.Si transcurrenm4sde30 segundosdespu@
de haberoprimidouna teclade funci6ny antesde oprimir las
teclas'More+' o 'Less-',ia funci6nser4canceladay el Jndicador
visualvolver4aJdespJbgueanterior.
'Cmock' (Reloj}
Elreioi puedeser ajustadopara desplegarlahoraya sea en formato
de 12horaso 24 horas.Elreloj hasidoprogramadoen la f_brica
parael formatode 12horas.
Para cambiar emremoja formate de
24 horas:
1. Optimay mantengaoprimidasIasteclas
'CANCEL'y 'Delay'durantetres segundos.
2. Optima 'More+' o 'Less-' paraprogramarel
formatode 12 horaso 24horas.
3.
Programelahoradel diasiguiendo Bs hlstruccionesindicadas
abajo.
Programaci6n de[ Reioj:
1. Optima latecla 'CIockL
• Lahoradel dia y dos puntosdestellanen el
indbador.
2. Oprima'More+' o 'Less-'paraprogramarla
horadel d[a.
• Losdos puntoscontimian destellando.
3. Oprimalatecla'Clock' nuevamenteo esperecuatro
segundos.
Less-
cont°
67
Page 69

G
Cuandose conectaenerg[ae!@tricaa[ hornoo despu@deuna
interrupci6nde la energfaei6ctrica,Ia Liltimahoradel reloj previaa
la interrupcidndestellar8en ei indicador.
Paradespbgar la horadeIaliacuandoei indicadorest6 mostrando
otrafuncidn detiempo,optima latecB 'Clock'.
La horadeIreloj no puedesercambiadacuandoel hornohasido
programaticpara'DelayCook','Clean'o 'Cook& Hold'.
Para cancelar el despliegue del reloj:
Si nodeseaque el indicadorvisualmuestrelahora del dia:
Oprimay mantengaoprimidaIasteclas
'CANCEL'y'Clock' durantetres segundos.La
horadel d[adesaparecer_del indicador.
Cuandose canceiael desplieguedeIreloj,
oprimaIatecla 'Clock' paradesplegar
brevementeIahoradel d[a.
Para restaurar el despliegue del reloj:
Oprimay mantengaoprimkla IastecBs 'CANCEL'y 'CIock'durante
tres segundos.Lahoradel d[areaparecer8enel indicador.
'Timer' (TemporizadoO
Eltemponzadorpuedeset programatic de un minuto [00:01}hasta
99 horasy59 minutos(99:59}.
Eltemporizadorpuedeset usado independientementedecualquier
otraactividaddel homo.Adem_spuedeser programadocuandootra
funci@ del homoest6en funcionamiento.
Eltemporizadornocontrolael horno.Solamentecontrolauna serial
SOFiora.
Para programar emtemporizador:
1. OprimaIatecla 'Timer' O-emporizador}.
• '0:00'seilumina en el indicadorvisual.
+ Losdospuntosdestetlar_n.
2. OprimaIatecla 'More+' o 'Less-'hastaque e!
tiempo correctoaparezcaen el indicadorvisual
• Losdospuntoscontin_andestellando. Less-
3. Oprimanuevamentelatecla 'Timer'o esperecuatro
segundos.
• LosdospuntoscontinOandestellandoy comienzala cuenta
regresivadel tbmpo.
• El81timominutode Iacuentaregresivadel temporizadorse
desplegar_ensegundos.
4. A! final del tiempo programatic,seescuchar_unaserialsonora
larga.
x
Para canceiar el temporizador:
1. Optimay mantengaoprh_aidala tecla'Timer' durantetres
segundos.
U
2. Optima latecla 'Timer'y coloquelahora a 00:00.
Bloqueo de los Controles
Eltec[adopuedenset bbqueadosparaseguridad,[impiezaoevitar
el uso no autorizado.Nofuncionar_ncuandoest@ bloqueados.
Sie[ homo est_en uso,loscontroiespuedenbloquearse.
La horaactualdel d[apermanecer_en e[ indicadorcuandolos
contro[esest6nbioqueados.
Para bioquear:
Oprimay mantengaoprimidaslasteclas
'CANCEL'y'Cook& Hold'durantetres
segundos.
'LOCK'desteliaenel indicadorvisual
Para desbioquear:
Oprimay mantengaoprimidaslasteclas'CANCEL'y 'Cook& Hold'
durantetres segundos.
' LOCK' desaparecedelindicadorvisual+
C6digos de Ettores
'BAKE'o 'LOCK'puedendestellarr@idamenteparaadvertirb que
hayun error o un problema.Si'BAKE'o 'LOCK'destetlanen el
indicadorvisuai,optima le tecla 'CANCEL'.Si'BAKE'o 'LOCK'
continOandestellando,desconectelacorrienteel@tricahaciael
artefacto.Espereunospocosminutosyvuelvaa conectarla
corrienteel6ctrica.Si Iaspalabrasa0ncontin_andesteilando,
desconecteIacornentee!@tdcahacia el artefactoy Ilamea un
t@nicodeservicioautorizado.
68
Page 70

@
'Bake' (Horneado)
Notas sobre Homeado:
Para programar 'Bake' (Bomeado):
1+ Op@aa[atecia'Bake'.
• 'BAKE'destetiar4+
• '000'destellar4en el indicadorvisual. .....................................
2. Seleccionelatemperaturade[ borne. Latemperatura
detbornepuedeser programadade75° a285°C .....................................
070°a 550° F].Optimau oprimay mantenga ..............................................
oprJmidala tecia 'More+' o 'Less-'. Less- :
• Cuandocualquierade estasdostecJasseoprimeper
prJmeravez,175° (350°] se iJuminarZ
• Optima[atecta 'More+' para aumentarla temperatura+
• Optima[atecta 'Less-' paradisminuir [atemperatura+
3+ Optima[atecia 'Bake' nuevamenteo esperecuatrosegundos+
• 'BAKE'dejar4de desteHary se iluminar4en e[indicadorvisual+
• Para camhiarmatemperatara de[ homo darante emprocese
de cocci6n,optima [atecia'Bake',[uegooptima'More+' o
'Less-'hastaquesedespliegue[a temperaturadeseada+
• Para eamhiar matemperatara demhomo darante 'Preheat',
optima dos veces [atecIa'Bake',[uegooprima'More+' o
'Less-'hastaquesedespiiegue[a temperaturadeseada+
+ SioIvidaapagare[homo,seapagar_autom4ticamentedespues
de transcurrir 12betas+Si deseadesactivarestacaracteffstica,
yea[ap4gina72+
+ ParasugerenciasadicionaIessobrehomeadoyasado,consuite
el folIeto "La CocinaF4ci["+
'Cook & Hold' (:Cocciony
Mantener Ca[iente}
'Cook& HoW [epermitehornearduranteunacantidad determinada
detiempo,seguidode un cic[o 'KeepWarm'deuna hera.
Para programar 'Cook & Hold':
° 38° (100°:)o [atemperatura actualdel hornose desplegar&
Latemperaturase eievar4enincrementosde 5° hastaque se
aicance[atemperaturaprogramada.
4. Espereaque el homo sepreca[ientedurante8-15minutes. 2.
• Cuandoet borne[[egaa [atemperaturaprogramadase
escuchar_unaseffa[sonora[arga.
• Paravedficar[atemperaturaprogramadaduranteel
preca[entamientode[ borne,oprima [atecIa 'Bake'.
5. Co[oqueel aIimentoen e[centrede[borne,dejandoun m[nimode
dospuIgadasentre e[ utensiJioy [asparedesde[ borne.
6. Vedfiqueel progresode la cocciOncuandohayatranscurridoel 3.
tiempo minimorecomendado.Contim_e[acocci6nsies necesario.
7. A[t@minode [acocciOn,optima[atec[a'CANCEL'._
8. Retireel aIimentode[ homo.
Diferencias de[ hemeade entre su home
antiguo y su homo nuevo
Esnormal observaraigunasdiferenciasene[tiempodehorneadode
suhomo antiguoy suhomo nuevo+Vea"Ajustede [a Temperatura
de[Homo"en [ap_gina72+
1+Optima [atecIa 'Cook& Hold'.
+ 'BAKE'y'HOLD'desteIIan+
• '000'se i[uminaen e[indicadorvisual+
Seleccione[atemperaturadei homo.La temperatura
de[homo puedeset programadade75°a 285° C
(170° a550° F}.Optima u optimay mantenga
oprimida[atecia'More+' o 'Less-'.
+ Oprima[atecia 'More+' paraaumentar[a
temperatura.
• Oprima[atecJa'Less-'paradisminuir [atemperatura.
Optima [atecJa'Cook& Hold' nuevamenteOesperecuatro
segundos.
• 'HOLD'desteJJa.
• '00:00'destellaen el indicadorvisual
4.
Programe[acantidadde tiempo durante [acua[ usteddesea
homearoprimiendo [atecla 'More+' o 'Less-',Eltiempode
homeadopuedeprogramarsedesde 10minutes(00:10)hasta
11horas,59 minutes[11:59].
+ 'BAKE'y'HOLD'se iluminanen el indicador visual
• Eltiempo de horneadoseiIuminar_enel indicadorvisual.
• Comenzar4[acuenta regresivadeltiempode horneado.
More+
{iLees-,,
69
Page 71

@
Cuande haya e×pirado el tiempo de cocci6n:
• Seescuchar_incuatrosefialessonoras=
• 'BAKE'seapagar4=
• 'HOLD'y 'WARM'sefluminar4n=
• Enel indicadorsedesplegar475° 070°),
Despues de una hera en 'HOLD WARM' (Mantener
Caliente):
• 'End'sedespIegar&
• Lahera delaliavolver_a desplegarseenel indicador visual=
Para eancemar'Cook & Hold' en cuamquier memento:
OprJmala tecla 'CANCEL',Retireel alimentodel horno=_)
'Delay Bake' (HorneadoDiferido)
NoUSeh0rneadodifeddopara alimentosde COrtaduraci6ntales
comQproductoslacte0s,cerdo,camede ave0 mariscos.
Cuandousa 'Delay', el borne comienzaacocinarm4stardeen el
d[a,Programelacantidaddetiempo que usteddeseadiferir antes
de queseenciendaei homo y cuantotiempo deseacocinarel
aiimento,EIbornecomienzaa calentaren Iahera seleccionaday
cocinaduranteeltiempo especificado,
Eltiempo diferidopuedeprogramarsede 10minutes (00:10)hasta
11horas,59minutes (11:59),
Para pregramar un cicJe de hemeade diferide:
1, OprJmaJatecia 'Delay',
• 'DELAY'destella,
• '00:00'desteliaenel indicadorvisual,
2, OprimaIatecla 'More+' o 'Less-'para programar
eltiempo diferJdo. .....................................
Cuando'DELAY'estdtodav[adesteflando:
5, Optima 'More+' paraprogramarel tiempode horneado,
• EneJindicadorvisualse ilumJnan'DELAY','BAKE',y
'HOLD'.
Cuande el tiempe diferide ha e×pirade:
• 'DELAY'seapagar4,
• Se despiiega el tiempo y Jatemperatura de horneado.
• SedespJiega'BAKE'y 'HOLD',
Para programar un tiempo diferide cuando ya se ha
programatic 'Cook & Hold':
1, Optima la tecla 'Delay',
• 'DELAY'destella,
• '00:00'sedespliegaen el hldicadorvisual,
2, Optima latecla 'More+' o 'Less-' para programar
el tiempo diferido,
• Despu6sde cuatro segundos,'DELAY'
permanecer_iluminadopara recordarJeque se
haprogramaticun ciclo de horneadodiferido,
More÷::
.......•..................¸¸•%¸
Less-
Cuande ha e×pirade el tiempe diferide y el homo
cemienza a funcionar:
• SedespJegar4el tiempoy la temperaturade horneado.
• 'DELAY'seapagar4.
• 'BAKE'y'HOLD'permanecer4nJlumJnados.
Para canceiar:
OprJmaIatecla 'CANCEL',
• Todaslasfuncionesde horneadocontroladasono perel
temporizadorser_ncanceladas=
• Laheradel dia volver4a desplegarseenel indicadorvisual=
Notas."
. No use horneadodiferido para losartfculosque necesitan
precalentamientodel horno,talcome pasteles,galletasy panes.
, No use horneadodiferJdosi el borneya est_caliente.
3= OprJmaIatecJa'Cook&Hold'.
• '000'seiluminaen el indicadorvisual.
• 'BAKE'y 'HOLDdestellan=
4= Optima'More+' paraprogramarla temperatura
de horneado,
• 00:00y'HOLD' desteilan,
• 'BAKE'permaneceihmJnado,
70
Page 72

G
'Keep Warm' (Mantener Caliente)
Paramantenercalientesenforma seguraalimentoscalienteso para
calentarpanesyphtos+
Para programar 'Keep Warm':
1. Optimalatecla 'KeepWarm'.
+ 'WARM'desteila.
+ '000'sedespliegaenel indicadorvisual.
2. SeteccioneIatemperaturade 'KeepWarm'.La
temperaturapara 'KeepWarn/puede ser
programadade63°a 90°C[145°a 190° F)+Opdma
u optimay mantengaoprimidala tecla'More+' o ( Less-
'Less-'.
+ Cuandocuaiquierade estasdosteclasseoprime
por primeravez+75° (170°}seiiuminar&
+ Optimalatecla 'More+' para aumentarla temperatura.
+ Oprimalatecla 'Less-' paradisminuir latemperatura.
'WARM'y iatemperaturasedesplegar_nenel indicadorcuando
el ciclo'KeepWarm' est6activo.
Notas sebre +Keep Warm':
, ParacaIidad6pthna de losalimentos,losalimentoscocinados
en el homo debensermantenidoscalientespor no rossde 1a
2 horas.
, Paraevitarque losalimentossesequen,cObraloslevemente
con papelde aluminioo unatapa.
, Para camentarpanecimmos:
- cubra ievementelospanecilloscon papelde aluminio y
col6quelosenei homo+
- oprimaiastecias'KeepWarm'y 'More+' para programar
75°C (175° F].
- calientedurante 12a 15minutos+
+ Para camentarplate+:
- coloque2pilasdecuatro platoscarlaunaen el homo+
- oprimaiastecias'KeepWarm'y 'More+' para pmgramar
75°C (170° F].
- calientelosp+atosdurante cinco minutos,apagueel homoy
deje los platosen e! hornodurante 15minutosm_s.
- usesolamenteplatosresistentesal horno,verifiqueconel
fabricante.
- nocoloquelos platoscalientessobreuna superficiefr[a
puesetcambior_pidodetemperaturapuedecausarfisuras
superficialeso rotura.
Para ca_ceJar 'Keep Warm':
1. Oprimalatecla 'CANCEL'.
2. Retireel alimentodel homo.
71
Page 73

@
Cierre Auto tico/Mode Ajuste de [a te peratura de[
Elhomoseapagar_autom4ticamentedespu6sde 12horassi usted
1odeiaaccidentaimenteencendido=Estacaracteffsticade seguridad
puedeset desactivada=
Para cancemar e[ cierre autom_tiee de 12 heras y
dejar que e[ herae fuacieae ceatiauameate duraate
72 horas:
1= Programeel hornopara hornear(verp%ina 69)=
2= Optimay mantengaoprimida[atecia 'Clock'
durantecinco segundos=
• 'SAb'sedespiegar4ydesteliar_durantecinco segundos=
• 'SAb'sedesptegar_continuamentehastaquese desactiveo
hastaque transcurrae[ffmitede72horas=
• 'BAKE'tambi6nse despIegar_siseestausandoun ciclo de
horneadocuandoel hornoest4en ModoSab4tico=
Todas[asotrasfunciones EXCEPTO'BAKE'('Timer','KeepWarm',
'Clean',etc=)est_nbIoqueadasduranteel Modo Sab4tico=
Para canceiar 'Bake' cuando e[ Medo Sab_tice est_
activo:
OprJma'CANCEL'=
• 'BAKE'seapagar4en e[indicadorvisual
• Nose oir4 ningunasefia[sonora=
Para cancemar e[ Modo Sab_tico:
1= OprJma[atecia 'Clock' durantecinco segundos=
O
2= Despu6sde 72horas,e[ modosab_ticoterminar&
• 'SAb'desteilar4durantecincosegundos=
• Lahora de[dia reaparecer4en el indicadorvisual
La exactitudde lastemperaturasdel homoescuidadosamente
probadaen [af_brica=Esnorma[notaraigunadiferenciaentre la
temperaturade homeado, entreun homonuevoy un homo antiguo=
Conel correrdel tiempo,[atemperaturadel horno puedecambiar=
Ustedpuedeajustar[atemperaturadel homo,si consideraquesu
horno noest_ horneandoo dorandoenforma correcta. Paradecidir
cuantodebecambiar[atemperatura,programelatemperaturade[
homoa 15° C (25° F) m4saita o m4sbajaque latemperatura
indicadaensus recetas,luego hornee=LosresuItadosdela
"prueba"puedendarIeuna ideade cuantoajustar[atemperatura.
Ajuste de [a temperatura de[ home:
1=Optima 'Bake'.
2= Programe280° (550°) oprimiendo[atecIa
'More+'.
3, Optimay mantengaoprimida[atecia'Bake'
durantevariossegundoso hastaque0°aparezca
en el indicadorvisua[.
Si ia temperaturade[homo hasido prev[amenteajustada,e!
cambioaparecer4enel [ndicadorvisual Poteiemp[o,si [a
temperaturade[ hornofue reducidaen 8° C (15°F)e(indicador
mostrar4- 8° (-15°)=
OprimaJatecJa'More+' o 'Less-'para ajustarJatemperatura=
Cadavezquese oprimeuna tecJa,Jatemperaturacambiaen3° C
(5° F)=Latemperaturade[ homo puedeseraumentadao
disminuidaen 3°a 20° C (5°a 35° F)=
LahoradeJdia reaparecer4autom4ticamenteenel indicador
visual
Nonecesitareajustar[a temperaturadei hornosi hayuna falJao
interrupci6nde energ[aeJ6ctrica=Lastemperaturasdeasar a [a
parrJJJay Jimpiezano puedenset ajustadas=
/
More+
Notas Sobre e[ Mode Sab tico:
• ElModoSab_ticopuedeseractivadoen cuaIquiermomento,
est6o no e(horno encendido=
• ElModoSab4ticonosepuedeactivarsi [astecJasest4n
bJoqueadaso cuando[apuertaest4bloqueada=
• SieJhomo est4homeandocuando el ModoSab4ticoes
programado,'BAKE'se apagar4cuandosecanceJee[
horneado=Nose emitir_nsefialessonoras=
• Cuandocomienzae[modo sab_tico,noseemitir_ [a sefia[
sonorade precaJentamiento.
o La mayonade [asadvertenciasy mensajesy todas[assefiales
sonorasest4ndesactivadascuandoe[Modo Sab4ticoest4
activo.
o Siopaline[atecIa'CANCEL'secanceJar4un cic[o'bake', sin
embargoe[ control permanecer4en ModoSab4tico.
o SifaIIa[acorrienteeiectrica,cuandovuelva[aenerg[ae[ horno
seactivar4enModo Sab_ticocon72 horasrestantesy ning0n
cic[oactivo.
72
Page 74

'Broiling' (Asar a la Pardila}
(modebs sebctos)
Para programar 'Broim':
1. Oprima[atecia 'Broil'.
• 'BROIL'destetta.
• 'SET'se desptiegaenetindicador.
2. Optima[atecIa'More+' para programarasara [aparritia'Hi' u
oprima[a tecia 'Less-'paraprogramarasar[aparritia'LO'.
• Enel indicadorvisuatsedespiegar_'Hi'o 'LO'.
• Selecciones'Hi broir 285°C (550° F}paraasadoa [aparriila
normat.Seteccione'LObroir 230° C (450° F} paraasara [a
parrillacontemperaturabajaalimentosque debenser
cocinadospot m_stiempo,tal como lacame de ave.
3. Despu@de cuatrosegundos,e[homo comenzar_a funcionar.
• 'BROIL'continuar_iluminado.
4. Paraun dorado6ptimo, precalienteel homodurante2 a 3 minutos
antesde coJocarel alimento.
5. Coloqueelalimentoenel horno. CierreIapuertadel horno.
6. D6vuelta a la cameuna vezaproximadamentea mitadde la
cocci@.
Cuandoe!alimentoest6cocinado,oprima [a
tecla 'CANCEL'.Retireel alimentoy la asadera
del homo.
o La horadel d[avolver4adesplegarseen el
indicadorvisual.
Netas Sobce Asade a UaParciHa:
• Paramejoresresuitadoscuandoasea Ia parriila,useuna
asaderadiseiiadaparaasara la parrilla.
• 'Hi'seusaparalamayor[adelosasadosa la parrilla. Use'LO
broir cuandoasea IaparrilIaaiimentosque necesitancocciOn
proiongada. Latemperaturainferiorpermiteque el alimento
se cocinehastaquedar bienasadosin dorarsedemasiado.
• Lostbmpos de asadoa Iaparrilia puedenser m_slargos
cuandose seleccionalatemperaturarodsbajade asara la
parrilla.
• EIaIimentodebeset dadovueltacuandoest_ a mitaddel
tiempo de asar.
• Parasugerenciasy temperaturasadicionalessobreasara la
parrilla,consulteel folleto "La CocinaF_cil".
Tab_a de Asar a _a ParrHRa de_ Home
POSICiON DE TERNHNO DE TIEMPO TOTAL DE
ALIMENTOS LA PARRILLA _ COCCWON COCC_ON {t_INUTOS}
Came de Res
Biftec,2,5cm (1"} 4 minutos
4 minutos
Hamburguesas,1,9cm (3/4") degrosor 4 minutos
Came de Cerdo
Tocino 4 Bienasado
Chuletas,2,5cm {1"} 4 Bienasado
Jamdn- Rebanadasprecocidas,1,3cm 0/2"] degrosor 4 Tibio
Came de Ave
Presasde polio 3 o 4 Bbn asado
MaHscos
Bistecsde pescado,con mantequilIa,2,5cm (1"}de grosor 4 Desmenuzado
Fiietesdepescado,1,3cm 0/2"} degrosor 4 Desmenuzado
La posici6nde la parrillasuperiores#5.
Nota: EstatablaessOlounagu[a. Lostiempospuedenvariarcon eltipo de alimentoqueseest8cocinando.
A medio asar 15 - 20
Bien asado 18 - 24
Bien asado 15 - 18
6 - 10 minutos
22 - 26 minutos
8 - 12 minutos
'LO Broir
30 - 45 minutos
10 - 15 minutos
8 - 12 minutos
73
Page 75

O
Encendido sin Piioto
Suestufaest8equipadacon un sistemade encendidosinpiioto.
Conestetipo de encendido,el gas seapagaautomSticamentey e/
berne no epemr_ duranteu#a interrupcidn dela cerriente
el#ctric&
Un f6sforo eaceadido no eacender_ el qaemador dei homo°
No se debe intentar encender el homo durante aria
interrupci6nde la corriente emSctrica.
Respiradero de[ Homo
Cuandoel hornoest_en uso,el _reacercadel respiraderopuede
caientarseIosuficiente comeparacausarquemaduras=Nunca
bIoqueelaaberturadel respiradero=
Elrespiradero dei homo se encuentra debajo dei respamdo
protectorde su estufao
RESPIRADERO
cercade laabertura
del respiraderopues
el calor que sale
puededeformaro
NocoloquepI_sticos
derretirel pI_stico=
'Oven Light' (Luz del Homo)
Optimala tecla 'OvenLight'paraencendero apagarla luz
del homo=
Ove#
Fondo de[ Homo
Proteiaelfondode[homocontra derrames,especia[mentederrames
_cidoso azucarados,pues puedendescoiorar[aporceIanaes-
maItada=Use el tamaiio norrento de utensimioparaevitar
Light
Para reinstaiar [a parriHa:
1=Coloquela parriIla enel soportede [aparriiiaen el homo=
2= hlcIinelevementehaciaarriba el extremodelantero;desIicela
parrilIahaciaatr_shastaque pasesobre los topesde enganche=
3= Bajeelfrente de la parriIlaydesIiceIahaciaadentrodel homo=
No cabra una parriiiacompieta non papnmde aiuminio ni
nomoqaepapemde amaminioen mapare inferior demhomo. Se
afectar_in mosresumtadosdemhomeado y se puededa_ar ma
parte inferior dei homo°
Posiciones de [a Parrilia
PARRi[[A 5 (posiciOnmasaitaD:
Seusapara tostarpano asara la
pardilaalimentosdelgadosno
grasosos=
PARRmL[LA4: Usadapara [a
mayoffadel horneadocondos
parri[[as=
PARRILLA3:Seusaparahorneara[imentosen unabandeja
de horneargalIetasoun moNepara foliode mermeIada,para
paste[es,paysdefrutas o aIimentoscongeIados.
PARRILLA2: Usadapara asarcortesde came pequeffos,cacerolas,
hornearpan,pastelen moidedetubo, fianesu horneadocon dos
parriIIas.
PARRILLA1: Usadoparaasarcortesde camegrandesy
camede ave,pastelesconge[ados,suf[6s,
pastelesponjosou horneadocon dos
parriIIas.
POS_C_ON PARA HORNEAR:
Usadopara asarcortesm_saltosde camede
reso de pavo.Co[oqueambasparri[[asde[horno,unasobre[aotra,
en [assalientes[ateraIesde [aparteinferiorde[homo.
HORNEADO CON VAR[AS PARR&LAS:
Parri[[as de[ Homo
No[ntenteCambiar[aposicidnde [asparriilascuando e! homo
NOUSe el hornoparaguardar alimentosni utensi[ios,
Suhornotiene dospardiias. Hartsidodisehadasconun topede
engancheen el horde.
[aparri[[ahaciaafuera=
Dos parrimmas:Use[asposiciones2y 4,o 1y 4=
Nora: Nuncaco[oquelosutensi[iosde cocinadirectamenteen el
fondode[homo=
NQ[ntentedeslizaHasparrillasde[homo cuandoest_nco[ocadas
Accesorio de [a Media Parri[[a
Sedispone,comoaccesorio,deuna mediaparril[a paraaumentar[a
capacidadde[horno. Seinstaiaen [aseccidn superiordel [ado
izquierdode[ hornoy ofreceespaciopara una
platode verdurascuandose haco[ocadouna
asaderagrandeen [aparrilia inferior. POngase
en contactoconsudistribuidor paraobtenerel
accesodo"HALFRACK"o paraso[icitar,[lamea[
1-800-688-8408.
74
Page 76

Homo Automimpiante
(modelos selectos)
Nota: Parala limpiezamanual,vet p%+na78.
• Esnormalque las piezasdel homosecalientenduranteelciclo
deautoI+mpieza.
+ A fin de evitaruna lesi0npersonalydario a la puer_adel homo
no[ra[e de aDrirla puer[acuandoest6desplegadala palabra
:'LOCK"(BloqueadaJ.
• Evitetocar la puerta,la venmnao el areadel respiraderode+
homoduranteun c_ctode limp_eza.
, Nousehmpladuresdehomoscomercmlesenel acabadodel
homoni alrededorde mngunap+ezadel homo puespuede
da_arel acabadoo tasp+ezas.
Limpieel excesodegrasao derramesde la parteinferiordeI
homo. Estoevita humo excesivooIlamaradasduranteel ciclo de
limpieza.
LimpieIosderramesazucaradoso dcidostaIescomo papaduice
{camote},tomateso salsasabasede leche.La porcelana
esmaltadaesresistenteaI_cidopero no a pruebade_cidos. El
acabadode porcelanapuededescoIorarsesi Iosderramesdcidos
o azucaradosnoson Iimpiadosantesde un cicio de autoIimpieza.
Nora: Latemperaturadel hornodebeser inferior a 205°C
(400° F}para programarun ciclo de limpieza.
Para programar 'Self-Clean' (Autolimpieza):
1. Cierrela puertadel horno.
Elciclo de autolimpiezausatemperaturassuperioresalas 2.
temperaturasnormalesde cocci6npara limpiarautomSticamenteel
interiordel horno.Nofuerce IapuertadeI horno ni la palancade 3.
bloqueoparaabrirla.EstopuedecausarexposiciOna las
temperaturasaltasy constituir un riesgode quemadura.asnormales
para limpiarautomdticamentetodo el interiordel homo.
Esnormalque ocurranIlamaradas,humoo llamasdurantela limpieza
si el homoest_demasiadosucio.Esme}orIimpiarel homo
regularmenteenvezde esperarhastaquese hayaacumulado
demasiadasuciedad. 4.
Duranteel procesode Iimpieza,lacocinadebeestarbien ventilada
para eliminarlosoloresnormalesasociadosconlalimpieza.
Antes de Auto +mp+eza
1. Apague IaIuzdet homo antesde la Iimpieza.Laluzdel horno
puedefundirse duranteel cicio de limpieza.
2. Retirelaasadera,todos losutensiliosy las parriIIasdel homo+Las
parrillasdel homosedescolorar_ny no sedeslizar_nf_ciImente
despuesde unciclo de autoIimpiezas+no sonretiradasdeIhomo+
3. Limpieel marcodel homo,el marcode Iapuerta,el _reafuera de
lajunta de la puertay alrededorde laaberturaen lajunta de la
puerta,con un agentede Iimpiezano
abrasivotal como 'BonAmP ocon
detergenteyagua.Etprocesode
autolimpiezano limpiaestas_reas.
Eliasdebenser Iimpiadasparaevitar
que Ia suciedadse horneedurantee!
ciclo de autolimpieza. (Lajunta es el
selloalrededorde la puertay ventana
del homo.)
4. ParaevitardarionoIimpieni frote Iajunta situadaalrededorde la
puertadel horno.Lajunta est_diseriadaparasellar
herm6ticamenteel calorduranteel ciclo de limpieza.
+Losnombresde losproductosson marcasregistradasde sus respectivosfabricantes.
\
75
Muevala palancade bioqueodela puertaa la derechaa la
posici6nbloqueada.
Optimalatecla 'Clean'.
, 'CLEAN'desteliaenel indicadorvisual
Sila puertano secierra,seoir_ unaserialsonoray Iapalabta
'DOOR'se desplegar_en el indicadorvisual Si la puertanoes
cerradadentro de 45segundos,la operaciOnde autolimpieza
ser_canceladay et indicador volver_a desplegarla horadel d[a.
Oprimalatecla 'More+' o 'Less-'. ...............................
, Sedespliega'CL-M (SuciedadModerada,
3 horas).
Oprimalatecla 'More+' o 'Less-'para desplazarlos : Less- },
ajustesdeautotimpieza.
'CL-H'(Suciedad]ntensa,4horas)
'CL-M' (SuciedadModerada,3horas)
'CL-L' (Suciedadleve,2horas)
AIseleccionare!niveldesuciedaddel homose programa
autom_ticamenteel tiempo de limpieza.
Despu6sdecuatro segundos,elhomo comenzar8a Iimpiar.
, Eltiempo de limpiezacomenzar_la cuentaregresivaen el
indicador.
, 'LOCK'se desp[egar_enel indicadorvisual
, 'CLEAN'sedespiegar_ene[indicadorvisual
Para diferir un ciclo de autoiimpieza:
1, Optimalatecla 'Delay',
, 'DELAY'destella.
, '00:00'sedesplegar_enel indicadorvisual.
cont,
Page 77

2. Optimalatecla 'More+' o 'Less-'para programarla
cantidadde tiempo queusted deseadiferir e[cicto+
Ettiempodiferidopuedeset programadode 10
minutes[00:10]a 11horas,59 minutes[11:59).
3+ Optimalatecla 'Clean'+
• "CLEAN"destellarS+
4+ OptimaIatecla ['More+' o 'Less-'.
• 'CL-M' [SuciedadModerada,3 horas}se +:More+
despliegaenel indicador.
5. OptimaIatecia 'More+' o 'Less-'paradesplazarlosajustesde
autolimpieza.
'CL-H'[SuciedadIntensa,4 horas)
'CL-M' [SuciedadModerada,3 betas)
'CL-L' (SuciedadIeve,2horas)
AI seleccionarelnivelde suciedadde!homose programa
autom_ticamenteel tiempo de Iimpieza.
6. Despu6sdecuatrosegundos,'CLEAN','DELAY'y 'LOCK'se
desplegarSnene! indicadorvisualparaindicarque el borne esta
programadoparaun ciclo de Iimpiezadiferido. Eltiempodiferido
tambi6nsedespliegaen el indicadorvisual.
Si el homo ya ha side programado para un oiclo de
limpieza y usted desea programar un tiempo
diferido:
1. OprimalatecIa 'Delay'.
• 'DELAY'destella.
• '00:00'se desplegar_enel indicadorvisual.
2. OprimaIatecla 'More+' o 'Less-'para programar
la cantidaddetiempo queusted deseadiferir el ........................
ciclo.
l_urante el dole de autolimpieza
Cuandoaparece'LOCK'enel indicador,Ia puerta no se puedeabrir+
ParaevitardaSoa la puerta,nofuerce la puertapara abrirlacuando
la palabra'LOCK'est8desplegadaenel indicadorvisual.
Humo y Oiores
Ustedpuedevet humoy sentirolor lasprimerasvecesque el homo
esIimpiado+Estoesnormal y disminuir_conel tiempo+
Tambi6npuedeocurrir humosi el hornoest_demasiadosucioo si
seha dejadounaasaderaenel homo+
Sonidos
A medidaque el bornese calienta,usted puedeoir sonidosde
piezasmet_licasquese expandenycontraen+Estoesnormaly no
da_ar_el homo+
l:lespu s del title cte
autolimpieza
Aproximadamenteunahera despu6sdeIfin deIciclo de Iimpieza,
'LOCK'desaparecer& Lapuertaahorapuedeset abierta+MuevaIa
palancade bioqueode la puertaa la izquierdaparadesbloquearta+
Algunasucieelad puede quedar come una mereceniza gris ripe
polvo. Retfrelaconun paf_oh0medo+Si la suciedadpermanece
despu6sde Iimpiarla,significaque e! ciclode IimpiezanorueIo
suficientementelargo. Lasuciedadser_eliminada duranteel
proximociclo de Iimpieza+
Slmasparrillasdemhomofueron dejadasenel homoyno +e
desmizansuavemente despu6s de un title de mimpieza,Iimpie
lasparrillasy lossoportesde lasparrillasconuna pequeSacantidad
de aceitevegetalpara hacerlasdeslizarcon m_sfacilidad+
P_ede_ aparecer mf_easdemgadase_ maporeema_aampasar per
ciemosde came_tamie_toy e_friamie_to. Estoesnormaly no
afectar_e! rendimiento+
IJ_a deseemoraei6_hma_cap_ede apareeer desp_6s demeicle
de mimpiezasi mesamime_tos_cidos e az_earades _e fuere_
mimpiadosa_tes del _1_1ode aulemimpieza. EstadescoloraciOnes
normaly no afectar8el rendimiento+
Despu6sdecuatrosegundos,'CLEAN','DELAY'y 'LOCK'se
desplegaranen el indicadorvisualparaindicarque el borne est4
programadoparaunaciclo de Iimpiezadiferido.Eltiempo
diferidotambi6n sedespliegaen el indicadorvisual.
Cuando comienza el title de autolimpieza:
• 'DELAY'se apagar&
• Eltlempode Iimpiezasedesplegar_enel indicadorvisual.
Para canoelar el oiolo de autolimpieza:
Oprimala tecla 'CANCEL'. (]'_AIX CTI"_
• Elindicadorvisualquedaen blanco.
• TodasIasfuncionesson canceladas.
• Lahera deldfasedespliegaen el indicadorvisual.
NOtaS:
• Sisedejaabierta la puertadel borne,Iapalabra'DOOR'
destellar_enel indicadorvisualy se escuchar_t+naseSal
sonorahastaque la puertasea cerraday la tecla'Clean'sea
oprimidanuevamente+
• Sitranscurrenm_sde cincosegundosdespu6sde oprimir Ia
tecla 'Clean'y antesde oprimirIasteclas'More+' o 'Less-',el
pregramavolver_autom_ticamenteaIdespliegueprevio+
• Lapuertadel homo se dafiar8 si se fuerzaparaabrirla cuando
la palabra'LOCK'contintTadesplegadaenel indicador+
76
Page 78

Procedi ientos de Limpieza
fr[asantes de tecarJo e mimpiarmo.De este mode se evitar_ dn_o y
posibiesqaemadaras. * Losnombresde Iosproductossonmarcasregistradas
Paraevita[rnanchaso dec0!oraciSnIimpiee!hOmOdesPU6Sdecarlause. de susrespectivosfabricantes.
, Siseretiraalgunapieza,aseg_resede qua seareinsta[adaenforma correcta, al 1-800-688-8408Canada.
PIEZA PROCEDIMIENTO DEUM PIEZA
Asadera e Nunca cubra e! inserte con papel de aiuminie puns este evita qua la gmsa se escurra a ta bandeja inferior.
Inserto , Co[oqueunpatioenjabonadosobree[ insertoy Iabandeja;dejeremojarparasoItarIasuciedad=
, Laveen aguajabonosatibia. Useunaesponjadefregar paraquitar la suciedadpersistente.
, La bandeiade asary el insertopuedenset Invadesenel lavavajillas.
_*Parahacerpedidos,llamaaI 1-877-232-6771EE.UU.o
quemadores de
Gas Seiiados
Rejiiias de los
Quemadores
Area dnmRnmojy
de masTedas
(JeControl
Cubierta y Panel
de Control -
Esmalte de
Porenlana
, Limpiefrecuentemente. Esperequeel quemadorseenfr[e. Limpiecon unaesponiade fregar de pl_sticoconiabOn.
ParaIasuciedadpersistente,useun limpiadorno abrasivey unpatio.TratedeevitarquaeIIimpiadorseescurrahacia
losorificiosdelgaspunsestoafectar_iIaIlama.SIe!Iimpiadorpenetraenlosorificios,Iimpieconunaescobilladecerdas
suavesoun niftier derecho,especialmenteeIorificio debaiodeIencendedor. No agrandeo distorsionelos aguieros.
, Tengacuidadode qua no entreagua en Iosorificios de Iosquemadores.
, Tengacuidadocuandolimpieel encendedor.Si el encendedorest_h_medoo datiadoel quemadorsuperior
no encender_
, LaveInsrejiliascon aguatibiajabonosay unaesponjade fregarde pi_sticonoabrasiva.Parasuciedadpersistente,
limpieconuna esponjano abrasivae impregnadaconjabdn o con unaesponjay unaCooktopCleaningCreme
(plaza#20000001)**.
, Parasuciedadquemada,saqueInsparrilhs, coioqueperiOdicosy rode cuidadosamentecon un limpiadorde homo
comercial.(Norocie Inssuperficiesvecinas.)ColoqueenbolsasdepI_sticodurantevariashornsotoda lanoche.Usando
guantesde goma,retirede Insbolsas. Lave,enjuague,sequeyvuelvaacolocaren la cubierta de laestufa.
, Paraactivar 'ControlLock'(Bioqueode loscontroles)para[a[impieza,vet p%ina 68.
, Lave,enjuaguey seque. No useagentesde Iimpiezaabrasivespunspueden rayarel acabado.
, Sepuedeusarlimpiavidriossise rocFanen el patio plimero. NO recie direetamenteen elpanei,
, RetireInsperillascuandoestenen Iaposici6n'OFF'tir_ndohs haciaadelante.
, Lave,eni_mgueyseque. No useagentesde limpiezaabrasivespunspueden rayarel acabado.
, Enciendacadaquemadorparaasegurarsede que Insperillasbanside correctamentereinstaladas.
Laporcelanaesmaltadaesviddofundidoen metaly puedeagrietarseo picarsesinoseusacorrectamente.Esresistente
a Ios_cidos,no a pruebade_icidos.TodosIosderrames,especialmentelosderramesazucaradosoacidicos debenset
limpiadosinmediatamenteconun patio seco.
, Cuandoseenfr[e,Iaveconaguajabonosa,enjuaguey seque.
, NuncaIimpie unasuperficietibia o calienteconun patioh_medo.Estopuedecausaragrietamientoo picaduras.
, Nuncauselimpiadoresde homo,agentesde limpiezaabrasivesoc_usticosenel acabadoexteriorde la estufa.
77
Page 79

PmEZA PROCEDIM_ENTO DE LIMPIEZA
PanemesLaterames
Gaveta de
Pue_a de ma
ParrimmaInferior y
Mammijasde ias
Puertas- Esmaite
Pintado
Ventana y Puerta
damHomo- Vidrio
• Cuandoest6fria, Iavecon aguatibiajabonosa,enjuaguey seque.Nunca Iimpieunasuperficietibia o caliente
conun paisah0medopuesestopuededaharIasuperficiey causaruna quemaduraa causadeI vapor.
• Paramanchasrebeldes,useagentesde IimpiezaIevementeabrasivostatcomapastade bicarbonatoo 'BanAm!'*.
NouseIimpiadoresabrasivos,c_usticoso_sperostalcomaesponiasde lanadeacero olimpiadoresde barrios.Estos
productospuedenrayaro dahar permanentementeIasuperficie.
Nota: Use uIla toalla o un patio seco para limpiar los derrames, especialmente los derrames addicos o
azucaradosoLa supefficie se puede descolorar o perder e! brillo si e! dermme tpose limpia inmediatamettte.
Esto es espedah_ente importante en tassuperfides blancas.
• Eviteusarcantidadesexcesivasde aguapuespuedeescurrirsedebajoo detrSsdelvidriocausandomanchas.
• Laveconaguayiab6n. Enjuaguecon agualimpiay seque. Ellimpiadnr devidriopuede usarsesi seroda en un
paisaprimero.
• Nousematerialesabrasivostalescomaesponiasde restregar,limp!adoresenpolvo o esponiasde lanade acero
puespuedenrayarelvidrio.
• Sigalasinstruccionesen lasp_ginas75-76paraprogramarunciclode autolimpieza.
LimpiezalVianaam:
• LimpiefrecL]entementeusandolirnpiadoresabrasivossuavesy unaesponjadepl_stico.
° No useesponjasde fregarmet_licasporquepuedenrayarlasuperficie.
° Cuandoutilicelimpiadoresdehomocomercialessigalasinstruccionesde!fabricante.
° Limpielosderrames_cidos(alimentosa basedetomateso de leche)tan prontocomaseaposibleconaguayjab0n.
Siel derramenoeslimpiadosepuededescolorarlaporcelana.
Parahater m_s f_cimmaiimpieza,saqae mapaer_adamharnn,si In desea. (Verla secci0nMantenimiento.)
Acero Jno×idabme
(modelosselectos)
• Limpiarcon aguaconjab6n.
• Sacar[asmanchasdificiiesconpo[vode limpiezao una esponja[lenaconjab6n. Enjuagueyseque.
• Lasparrillassedesco[orar_npermanentementeypuedennodeslizarseconsuavidadsisondejadasene[hornodurante
unciclo deautolimpieza.Siestosucede,[impie[aparri[[ay lossoportesenrelieveconunapequehacantidaddeaceite
vegetalpara restaurar[a faci[idadde movimiento,[uegolimpie elexcesode aceite.
• NO USENINGUN PBODUCTODELIMPtEZA QUECONTENGABLANQUEADOBA BASEDE CLOBO.
• NO USEUMPIADOBES "ORANGE" Nt LIMPtADOBESABBASIVOS.
° SIEMPBELIMPIE LASSUPEBFtCIESDEACEBOA FAVORDELGBANOo
• EimpiezaDiaria/Suciedad Love - Limpie con uno de lossiguientes-aguaconiabOn,una soluci0nde vinagre
blancocon agua,limpiador parasuperficiesyvidrio Tormula409'*o un limpiaviddossimilar - usandounaesponja
o un paisasuave. Enjuaguey seque. Parapuiir yevitar marcasde los dodos,useel producto 'StainlessSteel
Magic Spray'*(PiezaNo.20000008)**.
• Suciedad Moderada/lntensa - Limpiecon unode lossiguientes- 'BanAmi'*, 'SmartCleanser'*o 'SoftScrub'*-
usandounaesponjah0medao un paisasuave. Enjuaguey seque. Lasmanchasdificilespuedenserquitadascon
una esponjamu[ti-uso'Scotch-Brite'*h0meda;frote a favordei grano. Enjuaguey seque. Pararestaurarel
lustreysacar lasvetas,aplique'StainlessSteelMagic Spray'*.
• gescomoraci6n- Useuna esponjamojadao un pahosuave,limpie con limpiadorde acero'CameoStainlessSteel
Cleaner'*.Enjuagueinmediatamenteyseque.Paraeliminar lasestr/asy restaurarellustre,usedespu6srociador
paraaceroinoxidable'StainlessSteelMagic Spray'*.
*Losnombresde Iosproductosson marcasregistradasde sus respectivosfabricantes=
** Parahacer pedidos,Ilameal 1-877-232-6771EE.UU.o al 1-800-688-8408Canada.
78
Page 80

Puerta del Homo Tornillos Niveladeres
• No coDquepesoexceslvomse pareen D puertadel _orno.
Estopodr[ahacervoDar D estufa,quebrarD pue_tao les_onar
a!usuario.
o No interneabrir o cerrar la pue[ta ni hacerfuncionare_homo
has[aque la puerta no hasidedebidamentereemplazada.
• NuncacoDque los dodosentre la bisagra_ el marcodelan[ero
del homo. Los brazesde articulaci0nsonmontadosa rosette.
SisegolpeaaccidentalmenteDbisa_rasecerrara
bruscamentecontrael marcodel homoy puede les_onarsus
dodos.
Para sacar:
1.Cuandoest6fria,abra Iapuertadothomohastala posiciOntope
de asara la parrilla [abiertaaproximadamente10cm [cuatro
pulgadas)].
2.Suietela puertadecada lade. Nousela _-_=_=:-
manijade [apuertapara [evantaria. lii _/ /---- / /(
3.Levanteuniformementehastaque [apuerta
sesa[gade los brazesde articuiaci6n.
Para vomver a comocar:
1.Sujete[apuertadecada[ado.
2.Alineelasranurasde la puerta con los Dazes dearticulaciOndela
estufa.
3.Des[ice[apuertahacialosbrazesde articuiaci6nhastaqueest6
completamenteasentadaen las bisagras. Empujehaciaabajolas
esquinassuperioresde la puertaparaasentarlacompletamenteen
lasbisagras. Lapuerta no debequedartorcida.
"esponjosa"cuandosecierra. Estoesnormaly disminuir_con el
I Nora: La puertade!borneen unaestufa nuevapuedesentirse
_JSO.
Ventana del Homo
Para proteger maventana de mapuerta demhome:
1. Nouseagentesde Iimpiezaabrasivestalescomeesponjasde
restregarde lanade aceroo limpiadoresenpolvopuesolios
puedenrayarelviddo.
2. Nogolpeeelvidrio con elias,sartenes,muebies,juguetes u otros
objetos.
3. NocierreIapuertadel bornehastaque las parrillasdel homo no
est6nen su lugar.
AIgoipear,rayar,hacervibrar o esforzarelvidrio puededebilitar su
estructuracausandoun mayorriesgode roturaen unafecha
posterior.
Ver[f[ques[e[soporte antivueDoest,1asegurandoa[piso uno de
[0storn[i[0Sniveiad0restraseros. Estesoporteevita que[aestufa
sevueique accidentaimente,
F_
La estufadebeser niveiadacuandose instala. Si Ia ]_1P_
estufanoestd niveDda,girelostornillos niveladores III I ._
de piSsticoubicadosen cadaesquinade laestufa /L_::hastaque quedenivelada. ___9_.c' ,:
__POSI TIVO
_\ ANTIVUELCO
TORNILLO NIVELADOR
Luz del Horno
Desconectela energ[aa la estufaantesde reemplazarelfoco,
Use un t0ma01iasseco para evitar pos!biedafio a sus manes
cuandoest6mempiazandoelDC0,
• AsegOresede queel foco estdfdo antesdetocarlo.
o Notoque e! foc0 caiienteconun patiohOmedopuesestopuede
quebrare!foco,
Para reempiazar el foco dei homo:
1.Cuandoel homoest6if[o, sujetela tapade la bombilIaen suDgar,
luego desliceeI ret6nde alambrefuerade la cubierta.NOTA: La
cubierta de la bombilIasecaer_si no es
sujetaensulugarcuandoest_sacando OUB/ERTADEL
et ret6nde alambre. FOCO
2.Saque la cubierta del foco y el
foco.
3.Coloque un foco de 40 watts
para electrodom6sticos.
4.Vuelvaacolocarlacubiertadela
bombilIayaseg0reiaconelret_n
de aDmbre.
5.Vuelvaa enchufarla estufa.Vuelvaa colocarla heracorrecta.
79
RETEN DE ALAMBRE
Page 81

Retito de maEstufa a Gas
Losconectoresde [aestufaa gasusadosparaconectareste
artefactoatsuministrode gasno estdndise_adospara movimiento
continuo. Unavezinstatados,NOmuevarepetidamenteeste
artefactoa gasparasu Nmpiezao paraubicado enotro Iugar. Si
esteartefactotienegue ser movidoy/o retiradopara reparaciOn+
sigael procedimientodescritoen las instruccionesde instahciOn.
ParainformaciOn,pdngaseen contactoconel Servicioa los Ciientes
MaytagIlamandoal 1-800-688-9900EE.UU.o al 1-800-688-2002
Canad&
Paraevitarque la estufase vuelqueaccidentalmente,sedebe
aseguraral pisocolocandoel tornillo niveladortraserodentrodel
soporteantivuelco.
Gaveta de Ammacenamiento
(modelos selectos)
Cone×i6n Em6cttica
LoseJectrodom6sticos que requieren energia
eJSctricaest_in equipados con un enchufe 8e
ires clavijas con cone×i6n a tierra, el cuaI
debeset enchufadodirectamenteen un
tomacorrientee!6ctricode tres agujeros,para
120voltiosdebidamenteconectadoatierra.
Siempredesenchufeel e,,'eetrodomh,stieoantesde efectuar
reparaciones,
Elenchufede tresclavijascon conexiOnatierra ofreceprotecckSn
contrapeligrosde choqueselectricos.NO CORTEN+E_LIM_NELA
TERCERACLAVUA DECONEXIONA TiERP_gDELENCHUFE
DEECORDONELECTR_CO.
Sisolamentesedispone de untomacorrientesin conexi6na tierra,
de dos agujerosu otrotipo de tomacordenteei6ctrico,eJ
propietario dei emectroSom6sticoes personammente
responsabmede reempmazaremtomacorriente con un
tomacorriente emsctricode tres agujeros debidamente puesto
a tierra°
No guardeproductosdepapelo de pkistice,alirnentosn!
rnaterialesinflarnablesenestagaveta.Lagavetapuede
cale0tatseciernasiadopareestosartieuloscuando se estdusando
el homo.
La gavetade almacenamientopuedeset retiradaparaque usted
puedalimpiapdebajode la estufa.
Para sacar :
1. Vade la gavetaydesi(celahaciaafuerahastala primeraposiciOn
tope+
2. Levantela partedelanterade la gaveta.
3. T(relahastaIasegundaposiciOnde tope.
4. Sujetelosladosy IevanteIagavetapara retirarla.
Para velvet a coiocar:
1. hserte losextremosdeJascorrederasde la gavetaen los rieJes
de laestufa.
2. Levantela partedelanterade la gavetay suavementeempOjelaa
la ppimeraposici6ndetope.
3. Levantelagavetanuevamentey empt_jelahastagueguede
compJetamentecerrada.
Panel inferior del Homo
Protejaei panelinferior del homo contraderrames,especiaImentede
tipo addico o azucarado,pues puedendescolopapla porceJana
esmaltada.Useel utensJliodetamaBocoprectoa fin de evitap
derramesypeboses.
8O
Page 82

PROBLEMA SOLUCmON
Parsmslayoffs de mosprohmemss, Revisesi Ioscontrolesde! horno est_ndebidamenteajustados.
verifiqueprimeromosigsiente. , Verifiquesiel enchufeest_firmementeinseltadoen el tomscorriente.
• Verifiqueo vuelvsa reponerel disyuntor. Verifiqueo reemplaceel fusible.
• Verifiqueel suministrode energfsel6ctrica.
Emquemsdor superior no se , Verifiquesi laestufaest_debidamenteconectadaa Ia fuente dealimentaciOn.
enciende. , Verifique siest,1fundido un fusibledel circuitoo si sedispar6el disyuntorprincipal
• Verifiqueparsasegurarsede que e!encendedorest6secoy que emitachasquidos. El
quemsdornoseencender_si elencendedorestada_sdo,sucioo mojado. Siel encendedor
no produceun chssquido,gire la perillsde control a Is posici6n'OFF'.
Esllama es dispareja. Losorificiosdel quemadorpuedenestsr obstruidos.
Lsllama demquemsdor superior se , Verifiquepsraasegurarsede queel utensilioest4asentadoen la psrrills sobleel quemsdor.
levunta del orifieio.
Losresultsdos del homesdo no son ° VerifiqueIa temperaturadel hornoseleccionsda.Asegtiresede quee! hornoest6
come se esperubsn o son precalentadocuandola recetao instruccionesrecomiendanprecalentamientodel horno.
diferentes a los del homo anterior. , AsegOresedequeelrespiraderodelhomonoest6bloqueado.Vetp%ina 74paralaubicaciOn.
• Verifiqueparsasegurarsede que la estufsest_ nivelsda.
Lsstempersturssa menudovsrfanentreun hornonuevoy unoantiguo. A medidsquepass
eltiempo,Is temperaturadeI homo csmbiay puede hscersem_scsNenteo m_sfrfa. Ver
p%. 72 parsIasinstruccionescomosjustarIstemperaturadel homo (modelosselectos).
NOTA:No se recomiendsajustarlatempersturssi hatenidoproblemasconsolounao dos
recetas.
Useet utensiliocorrecto.Los utensiliososcurosproducendoradooscuro.Losutensilios
brilIantesproducendoradoclaro.Consulteelfolleto "LsCocinsF_cil"paramayorinformsciOn
sobrelosutensiliosde hornear.
• VerifiquelasposicionesdeIasparrilIasy IacolocaciOndelosutensilios.AlternelosutensiNos
cuandouse dos parrillas.Deje2,5-5cm (1-2pulgsdas)entrelosutensiNosy Iss psredesdel
homo.
• Verifiqueel uso de papelde aluminioen el homo. Nuncause papetde aluminioparscubrir
unaparrillscompletsdelhorno.Coloqueunpedszopeque_odepapeldesluminioenlapsrrills
queest_debajodel utensiNoparsrecibirlosderrsmes.
Losamimentosno se ssan a ms ° Verifiquelasposicionesdelasparrillasdel horno. Elalimentopuedeestsrmuyceresde
parrillaen forms debida osale la llama.
demssisdo halO. ElpspeIdeahminio se us6demanersincorrecta.Nuncaforre elinsertodelssadorconpapel
de aluminio.
Recorteelexcesodegrassde lacameantesde ponerlaa assra la parrilla.
• Se us6 uns assderssucia.
Precalienteel hornodursnte 2 s 3 minutosantesde colocarel alimentoen el homo.
• Asea Is psrrilla con la puertadel homocerrads.
81
Page 83

PROBLEMA SOLUCION
Emhomo no se automimpia ° Vedfiqueparaasegurarsede queel cicJonoestdajustadoparaun comienzodiferkJo.Ver
(modelos seiectos]}, p4ginas76-77.
o Vedfiquesi ia puertaestdcerrada.
o Vedfiquesi el control est4en ModeSab4tJco.Vet p%. 72.
o Elhomo puedeestara m4sde 205°C (400°F). LatemperaturadeJbornedebeser inferiora
205° C(400° F] paraprogramarun ciclo de limpieza.
Eihomo no se iimpi6 en , Puedequeseanecesarioun tiempo de limpiezam4siargo.
ferma debida (modeios seientos)o , Losderramesexcesivos,especialmentedealimentosazucaradosy/o 4cidosnofueron
IJmpiadosantesdel ciclo deautolJmpieza.
La puerla del homo no se , ElinteriordeI homo todav[aest_caiiente. Dejeque paseaproximadamenteuna hera
desMoquea despuSs demtitle paraqueel homo se enfr[eantesdeque se completeun ciclo de autolimpieza. Lapuerta
de uutomimpieza[modemossemectos)o puedeserabiertacuandodesaparezcala paiabra'LOCK'del indicadorvisuaI.
o ElcontroJy la puertapuedeestarbloqueada.Verlas p%inas 68y 76parase desbloqueo.
Se junta humedud en iu ventana ° Estoes normalcuando se cocinanalimentoscon alto contenidode humedad.
del homo o sale raper per , Seus0humedadexcesJvacuandoJipapJOJaventana.
ei respiradero dei home°
Hay un emerfuerle o humo mere , Estoesnormalen una estufanuevay desaparecer_despu6sde unosponesuses.
cuando se enciende el home. Ai iniciarun ciclo de autoiimpiezase"quemar_n"loso[oresm4sr4pidamente.
o Sise enciendee[venti[adorayudar_a eiiminarel humo y/o el olor.
o Suciedadexcesivade alimentosen e[panelinferior del homo. Useun cic[odeautolimpieza.
C6digos de Erreres , 'BAKE'o 'LOCK'puedendestellarr4pidamenteen el indicadorparaavisarleque hayun error
(modeios selectos)o o un problema.Si 'BAKE'o'LOCK'aparecenenel indicadorvisual,oprimaIatecla'CANCEL'.
Si'BAKE'o'LOCK'contin0andestellando,desconecteiaenerg[ael6ctricaalelectrodom6stico.
Espereunosponesminutesyvuelvaareconectarlaenerg[ael6ctrica.Sicontimiandestellando,
desconectelaenerg[ael6ctricade!electrodom6sticoyIlamealt6cnJcode servicioautodzado.
o Siel homo est4demasiadosucio,puedenocurrirdemasiadasIlamaradasIocual resultar_en
uncOdigode errorduranteIaIimpieza.Oprimalatecla 'CANCEL'y dejequeel borneseenfrie
completamente,timpieel excesodesuciedady lungevuelvaa programarelciclo delimpieza.
Si el cddigodeerror reaparece,Ilamea un t6cnicoautorizado.
Se eseunhan ruides, , Elhornoemitevariessonidosbajos.Ustedpuedeo[r [osre[6sde[homocuandoseencienden
y seapagan.Estoesnormal.
o Amedidaqueelbornesecaiientayse enfr[a,ustedpuedeo[rsonidosdepiezasmet4licasque
seexpandeny contraen. Estoes normaly noda_ar4suelectrodomestico.
Nose escuchun seiiuies senoras , Elhornopuedeestaren Mode Sab_tico. Vet p%. 72.
y el indicadorvisual no se activao
'Sgb' desteiia y lunge se o E[homoest4en modesab4tico.Paraanulareimodesab4tico,optimay mantengaoprJmida[a
tecla 'Clock' (Relo]]durantecincosegundos.
82
Page 84

Garantia de Estufa a Gas
Garant_a Completa de Un A_o - Piezas
y Mane de Obra
Du anteun (1} a_o desdelafechaoriginalae
compraal por menoRse repararao reemplazar_
gratultamentecualqulerplezaauefalb uuran[esu
usonormalenel hogaE
Note Io siguiente: Estasgarant[ascompletasse
apllcan[_nlcamentecuandoel electrodom_stlcose
encue'}traen los EstadosUnidoso Canada.Los
e_ec[rodom@ticosqueseencuen_renen o[ros
parsesestarancub_ertostinlcamentepor [as
garant[aslimitadas,incluyendolagarant[a Iimltaaa
paralasplezasque fallen durantee_primer aFte
Residentes Canadienses
Lasgarant[asanteriorescubrensolamenteaquellos
e_ecUodomesticosinstaladosenCanadaquehayan
s_docertificadosoaprobadospot/asagenciasQe
prueoascorrespond_entesparacumplimientoconla
NormaNacionaIde Canadaamenosquee_
e_ectrodom@ticohayasidotrado aCanadades@
losEE.UU.debidoa un cambiode residencia.
LaSgarantfasespecfficasexpresadasanteHormen_e
son/asUMCAS garantiasprov£taspot d fabricante
Estasgarant@s/eotozgande!_choslegales
espedficosy ustedpuedetenetademasotros
dereehos@'ew_r,_ndeun estadoaotto.
Lo que No Cubren Estas Garantias:
1=Situacionesy daSosresultantesde cualquierade Iassiguienteseventualidades:
a=hstataciOn,entregao mantenimientoinapropiados=
b. CualquierreparaciOn,modificaciOn,aiteraci6no ajustenoautorizadopot el
fabricanteo potun centrodeservicioautorizado.
c. Maluso,abuso,accidentes,usoirrazonabbo hechosfotuitos.
d. Corrienteei@tdca,voItaieosuministroincorrecto.
e. ProgramaciOnincorrectadecualquieradeloscontroIes.
2. Lasgarant[asquedannulassilosnOmerosdeserb originabshartsidoretirados,
alteradoso no sonfacilmentelegibies.
3, Focos,
4, 9roductos comprados para uso Ùomercialo industrial,
5, EIcosto deI servicio o Ilamada de servicio para:
a, Corregir errores de instaiaci6n,
b, Instruir al usuario sobre eI uso correcto del artefacto,
c, Transporte del artefacto aI establecimiento de servicio y el retorno al cliente,
6, Los da[ios consecuentes o incidentaies sufridos [)orcua[quier persona eomo
resuItadodecualquierincump!imientode estasgarant[as.Enalgunosestadosnose
permiteIaexciusi@o IimitaciOnde Iosdat_osconsecuenteso incidentales,porIo
tanto laexclusiOnanteriorpuedequenose apliqueen sucaso.
Si Necesita Servicio
VeaprimerolasecciOnde IocalizaciOnysoluci0ndeaveriasenlagala deusoy
cuidadoo Ilamea MaytagSewicessr_,Sewicioa losClientesMaytagIlamandoal
1-800-688-9900EEUU.oal 1-800-688-2002Canad&
Para Obtener Sewicio Bajo la Garantia
9araubicarunacompaS[adeseivicioautorizadoensu IocaIidad,pOngaseencontacto
coneIdistribuidordondeadquiri6suebctrodom@ticoollamea MaytagServbes*M,
Servicioa IosClientesMaytag.Si norecibeserviciosatisfactor[obajola garant[a,por
favorIlameo escribaa:
MaytagServicessM
Attn:CAIR Center
9.0. Box2370,Cieveland,TN37320-2370
EE°[fU°1_800_688_9900y Canad_ 1_800_688_2092
Nora: CuandosepongaencontactoconMaytagServices sM,Sel¥icioalos
ClbntesMaytagacercadeun problema,porfavorincluyalasiguienteinformaciOn:
a.Sunombre,direcciOny nOmerodeteldono.
b.LosnOmerosde modeloydeser[ede su ebctrodom@tico;
c. Nombrey direcciOndeIdistribuidorylafechadecompra.
d.Unadescripci6nclaradel probbmaqueestaexperimentando.
e.Pruebade compra,
Lasgu[asdelusuario,manuabsde servicioe informaci6nsobreJaspbzaspuedensolicitarsea MaytagServicess ,Servicioa losClientesMaytag.
Form No. C/05/05 Pair No. 81139512 60 (cb2005Maytag Appliances Sales Co. Litho U.S.A.
M
 Loading...