

Page 1
hq6_ SSIo_D
MAYrAG USER'S GUIDE
®
Gas Range
with
Self-Cleaning Oven
............. 16
................... 17-18
.......... 19-20
i ...............JR!
FOR MAYTAG CUSTOMER ASSISTANCE CALL 1-800-688-9900 US 8111P314-60
1-800-688o2002 CANADA (05-97-00)
Page 2
O IMP()RTANTSAFETYINI;TRUCTIONS
Readall instructions beforeusingthis appliance.
Thank You forpurchasingourcooking
appliance.To helpyouobtainthe maximum in cooking WARNING: If the information in this
satisfaction,we offerthesesuggestions: manual is not followed exactly, a fire or
explosion may result causing property
IE_ Readthis manual beforeusingtheappliance, damage,personalinjury or death.
Reviewall safety andcaution instructions. - Do not store or use gasoline or other
ReviewtheTroubleshootingCharton
pages30and 31if servicebecomesnecessary, vicinity of this or any other appliance.
0E_Includethe modelandserial numbersofyour - WHAT TO DO IF YOU SMELL GAS:
appliancewhenrequestingservice.
• Proofofpurchasesuchas salesreceipt
willbeneededforwarrantyservice.
Youcancontactusat" notuseany phone in your building.
flammable vapors and liquids in the
• Donot try to lightany appliance.
= Do nottouch any electricalswitch; do
= Immediately call your gas supplier
from a neighbor's phone. Follow the
gassupplier's instructions.
• If you cannot reachyour gas supplier,
callthe fire department.
In ourcontinuingeffortto improvethe qualityand - Installation and service must be
performanceofour cookingappliances,it may be performed byaqualifiedinstaller,service
necessaryto makechangesto theappliancewithout agency orthe gas supplier.
revisingthismanual.
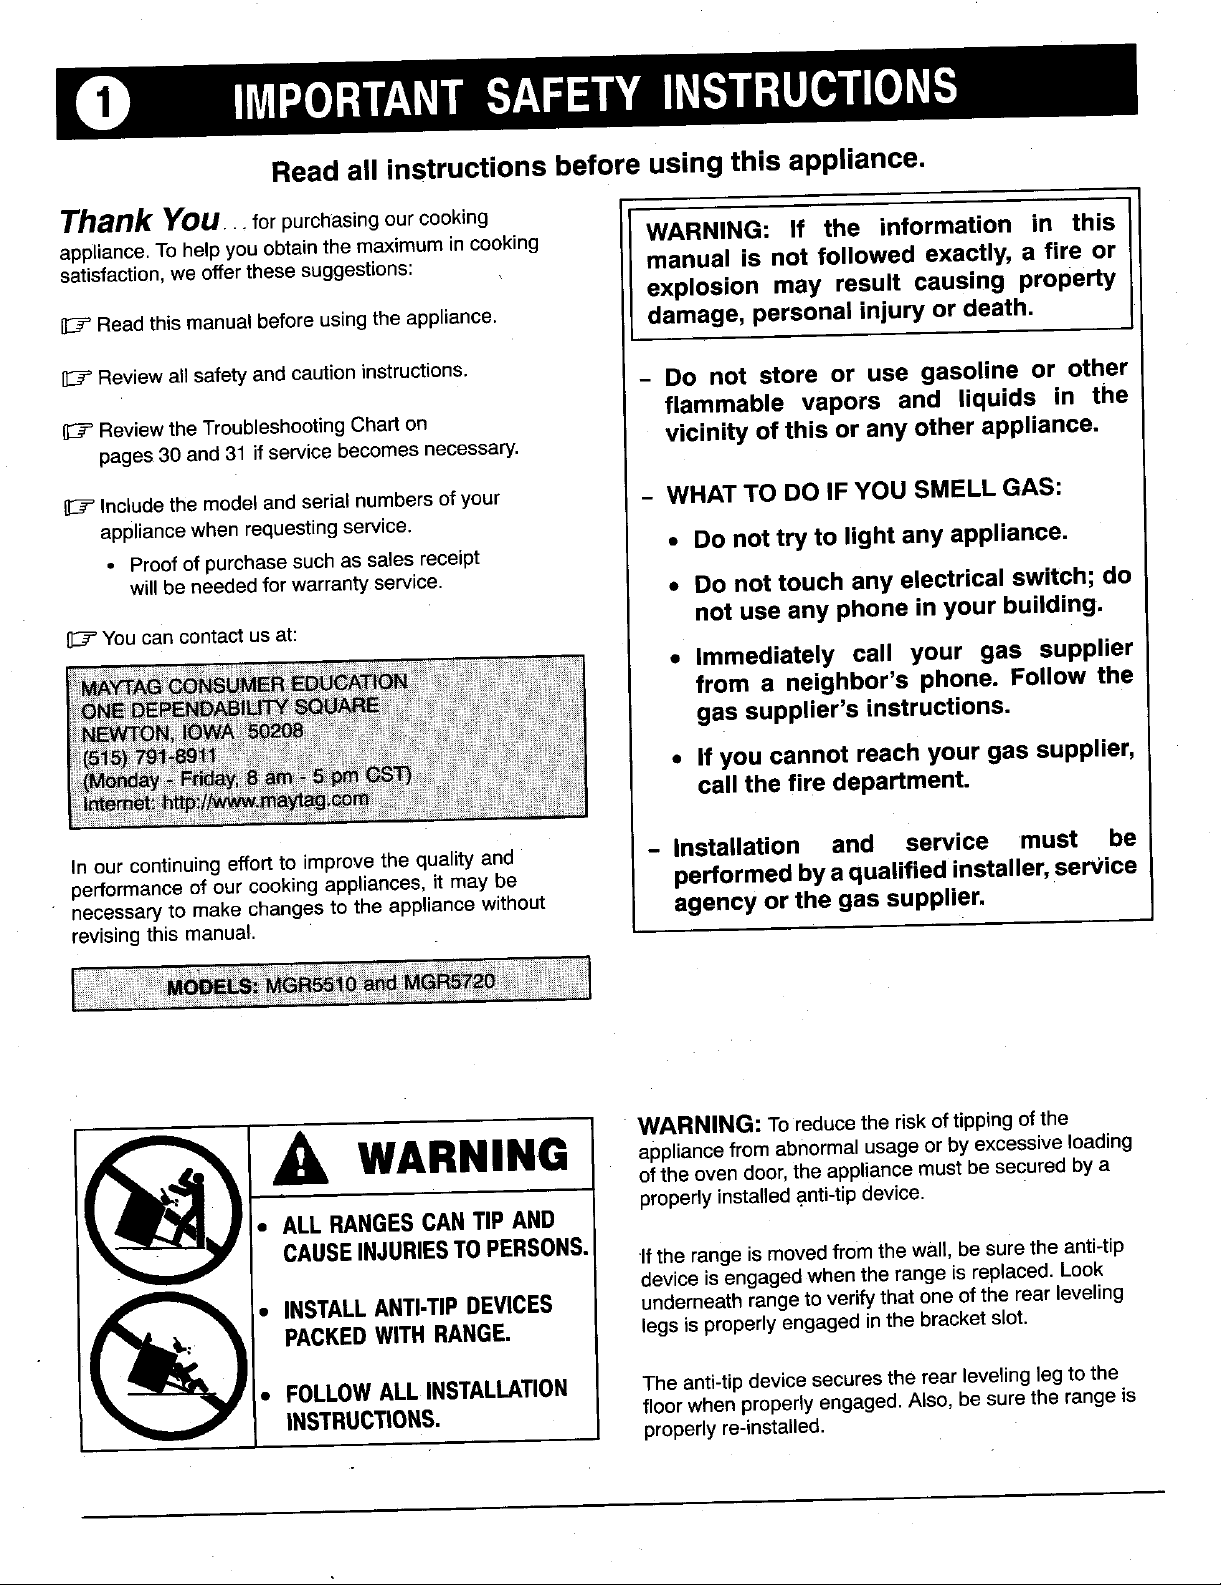
WARNING appliancefromabnormalusageorbyexcessiveloading
• ALLRANGESCANTIPAND properlyinstalledanti-tipdevice.
CAUSEINJURIESTO PERSONS. If the rangeismovedfromthewall,be suretheanti-tip
PACKEDWITH RANGE. legsisproperlyengagedinthebracketslot.
ofthe oven door,theappliancemust besecuredby a
WARNNGoreducetherskoftipngofthe
deviceisengagedwhenthe rangeis replaced.Look
• FOLLOW ALL INSTALLATION Theanti-tipdevicesecurestherearlevelinglegto the
INSTRUCTIONS. floorwhenproperlyengaged.Also,besuretherangeis
• INSTALLANTI-TIPDEVICES underneathrangetoverifythatoneofthe rearleveling
properlyre-installed.
Page 3
IMPORTANTSAFETYIN,C;TRUCTIONS
Thefollowinginstructionsarebasedonsafety Turn offapplianceand ventilatinghood to avoidspreading
considerationsandmust bestrictlyfollowedto eliminate theflame. Extinguishflamethen turnon hood to remove
the potentialrisksoffire, electricshock,or personalinjury, smoke and odor.
Haveyour applianceinstalledand properlygroundedby a Usedry chemicalorfoam-typeextinguisheror baking
qualifiedinstalleraccordingto the installationinstructions, soda to smotherfire orflame. Never usewater on a
Havethe installershow you thelocationofthe gas shutoff greasefire.
valveand howto shutit offin anemergency.
Alwaysdisconnectpowerto appliancebeforeservicing, oven door.
Toensureproper operationand avoidpossibleinjury or Iffire isin apan onthe surfaceburner,coverpan. Never
damageto unitdo not attempt to adjust,repair,service, or attemptto pick upor movea flamingpan.
replaceany part ofyour applianceunlessit isspecifically
recommendedin thisbook.All otherservicingshouldbe
referredto a qualifiedinstalleror servicer.
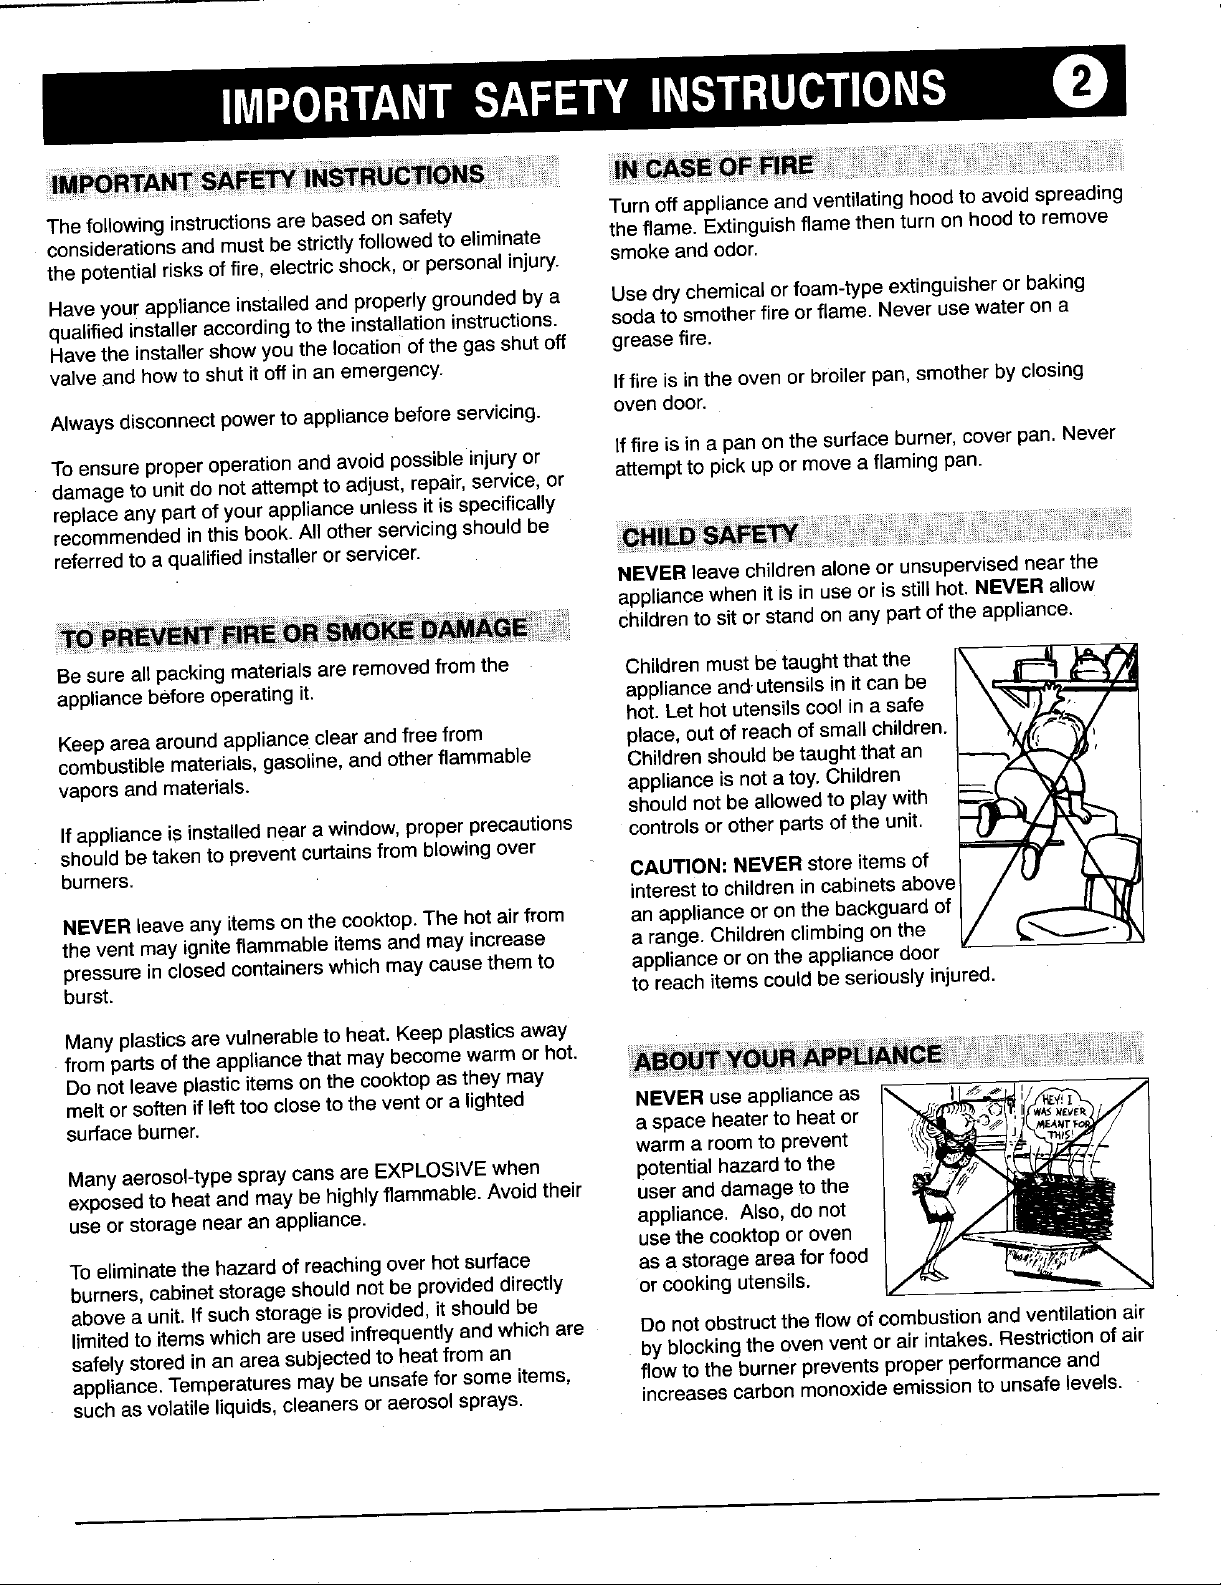
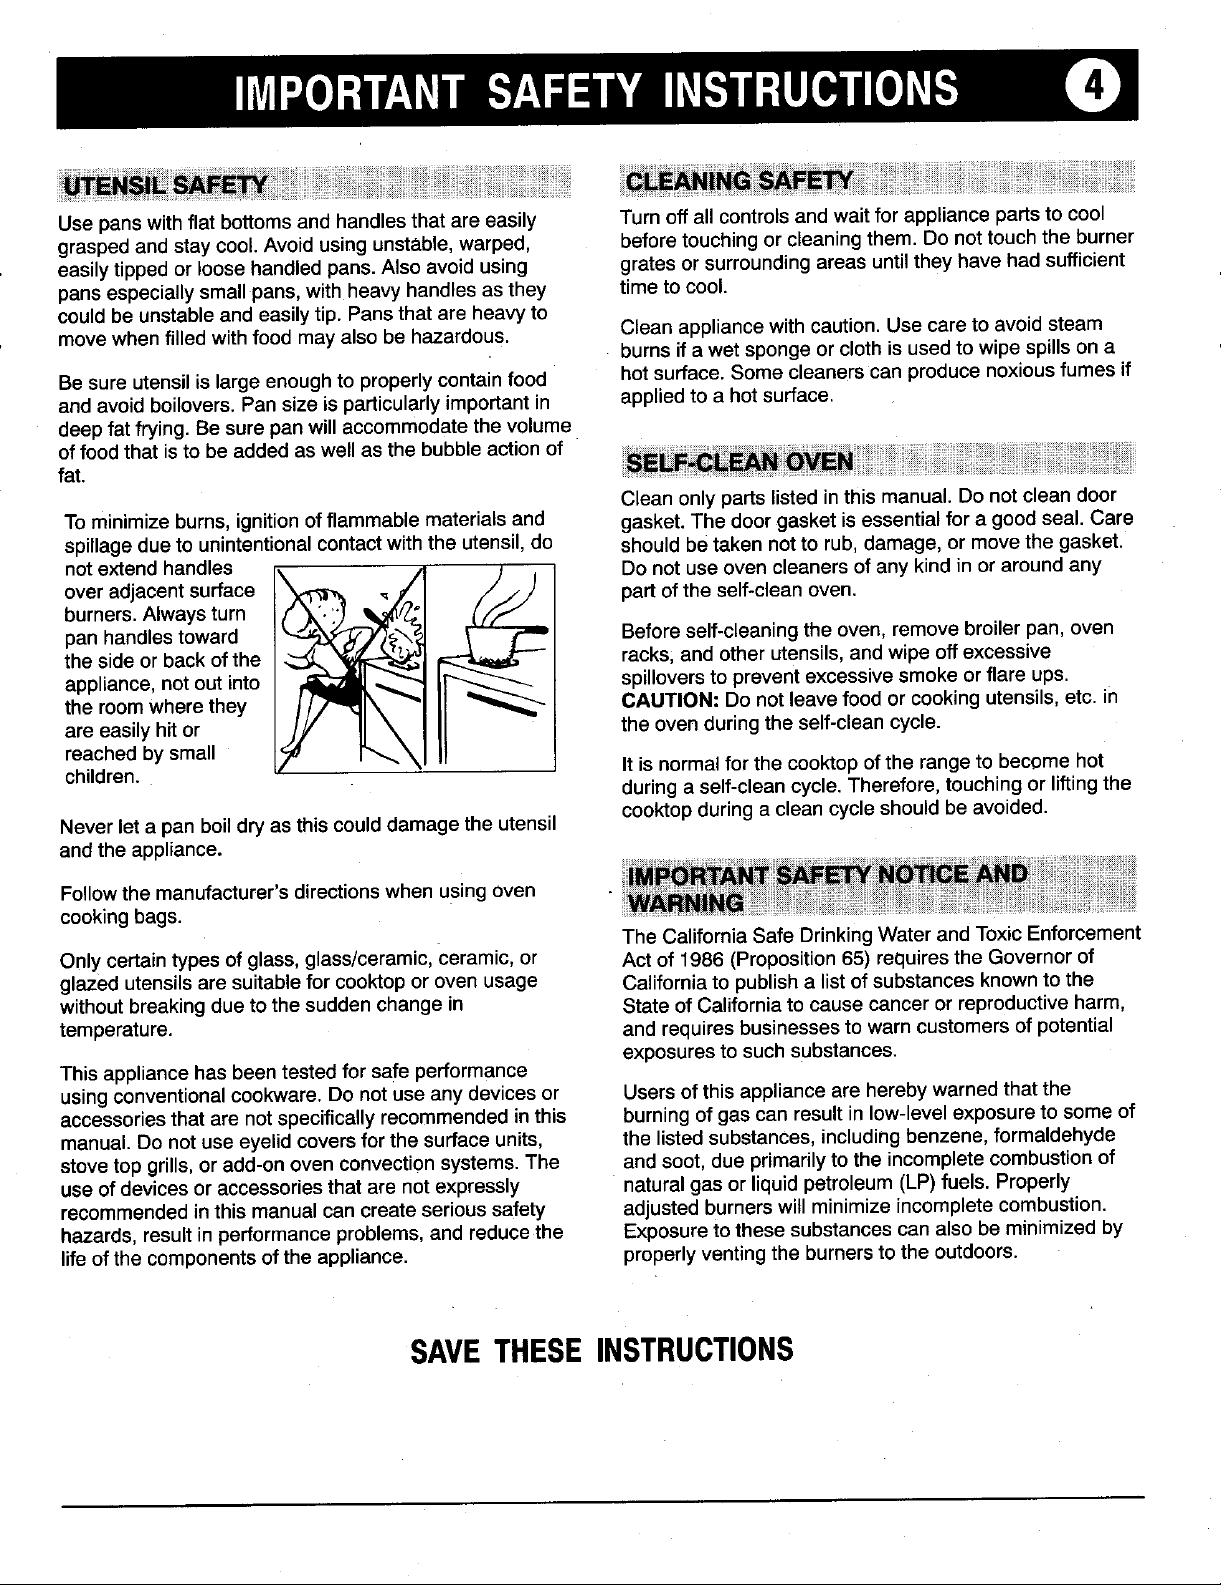
Besure all packingmaterialsareremovedfrom the Childrenmustbetaught thatthe \
appliancebefore operatingit. applianceand.utensilsin it can be
Keepareaaroundappliance clearandfree from place,out of reach of small children.
combustiblematerials,gasoline,and otherflammable Childrenshould betaught thatan
vaporsand materials, applianceis nota toy. Children
Ifapplianceis installednear a window,properprecautions controlsorother partsof the unit.
should betakento preventcurtainsfrom blowingover
burners. CAUTION:NEVERstoreitems of
NEVERleave anyitems onthe cooktop.The hot airfrom an applianceoron the backguardof /
the vent mayigniteflammableitemsand mayincrease a range.Childrenclimbingon the /
pressurein closed containerswhich may causethem to applianceor onthe appliancedoor
burst, to reachitems couldbe seriouslyinjured.
Iffire is in the oven or broilerpan,smother by closing
NEVERleavechildrenaloneor unsupervisednear the
appliancewhenit isinuse or isstill hot. NEVERallow
Childrento sit or standon anypart of the appliance.
\
hot. Lethot utensilscool in a safe
shouldnot beallowedto playwith _=.
interestto childrenin cabinetsabove
Manyplasticsare vulnerableto heat.Keepplasticsaway
frompartsofthe appliancethat may becomewarmorhot.
Donot leave plastic items onthe cooktopasthey may
meltor softenif lefttoo closetothe vent or a lighted NEVERuse applianceas _ I__.,,_J,'/_;_--_
surface burner, a space heaterto heator .___O_4, _:
warma roomto prevent __._,_'._'/__ J
Manyaerosol-typespraycansare EXPLOSIVEwhen potentialhazardto the '_-_'_-_'
exposedto heatand may be highlyflammable.Avoid their useranddamageto the
useor storagenearan appliance, appliance. Also,do not
usethe cooktopor oven
Toeliminatethe hazardof reachingoverhot surface as a storagearea for food
burners,cabinet storageshouldnotbe provided directly orcookingutensils.
abovea unit.If such storage isprovided,it should be
limitedto items whichare usedinfrequentlyandwhich are £)onot obstructtheflow of combustionand ventilationair
safelystoredinan areasubjectedto heatfrom an by blockingthe ovenvent or air intakes.Restrictionof air
appliance.Temperaturesmay be unsafefor some items, flow to the burnerpreventsproperperformanceand
suchasvolatileliquids, cleanersor aerosolsprays, increasescarbonmonoxideemissionto unsafe levels.
//
Page 4
IMPORTANTSAFETYINSTRUCTIONS
Avoidtouchingovenventarea whileovenisonand for NEVERheat an unopenedcontaineronthesurface
severalminutesafterovenisturnedoff.Somepartsofthe burneror inthe oven.Pressurebuild-upmay cause
ventandsurroundingareabecomehotenoughto cause containerto burstresultinginseriouspersonalinjuryor
burns.Afterovenisturnedoff,donottouchtheovenvent damagetotheappliance.
orsurroundingareasuntilthey have hadsufficienttimeto
cool. Usedry,sturdypotholders.Damppotholdersmaycause
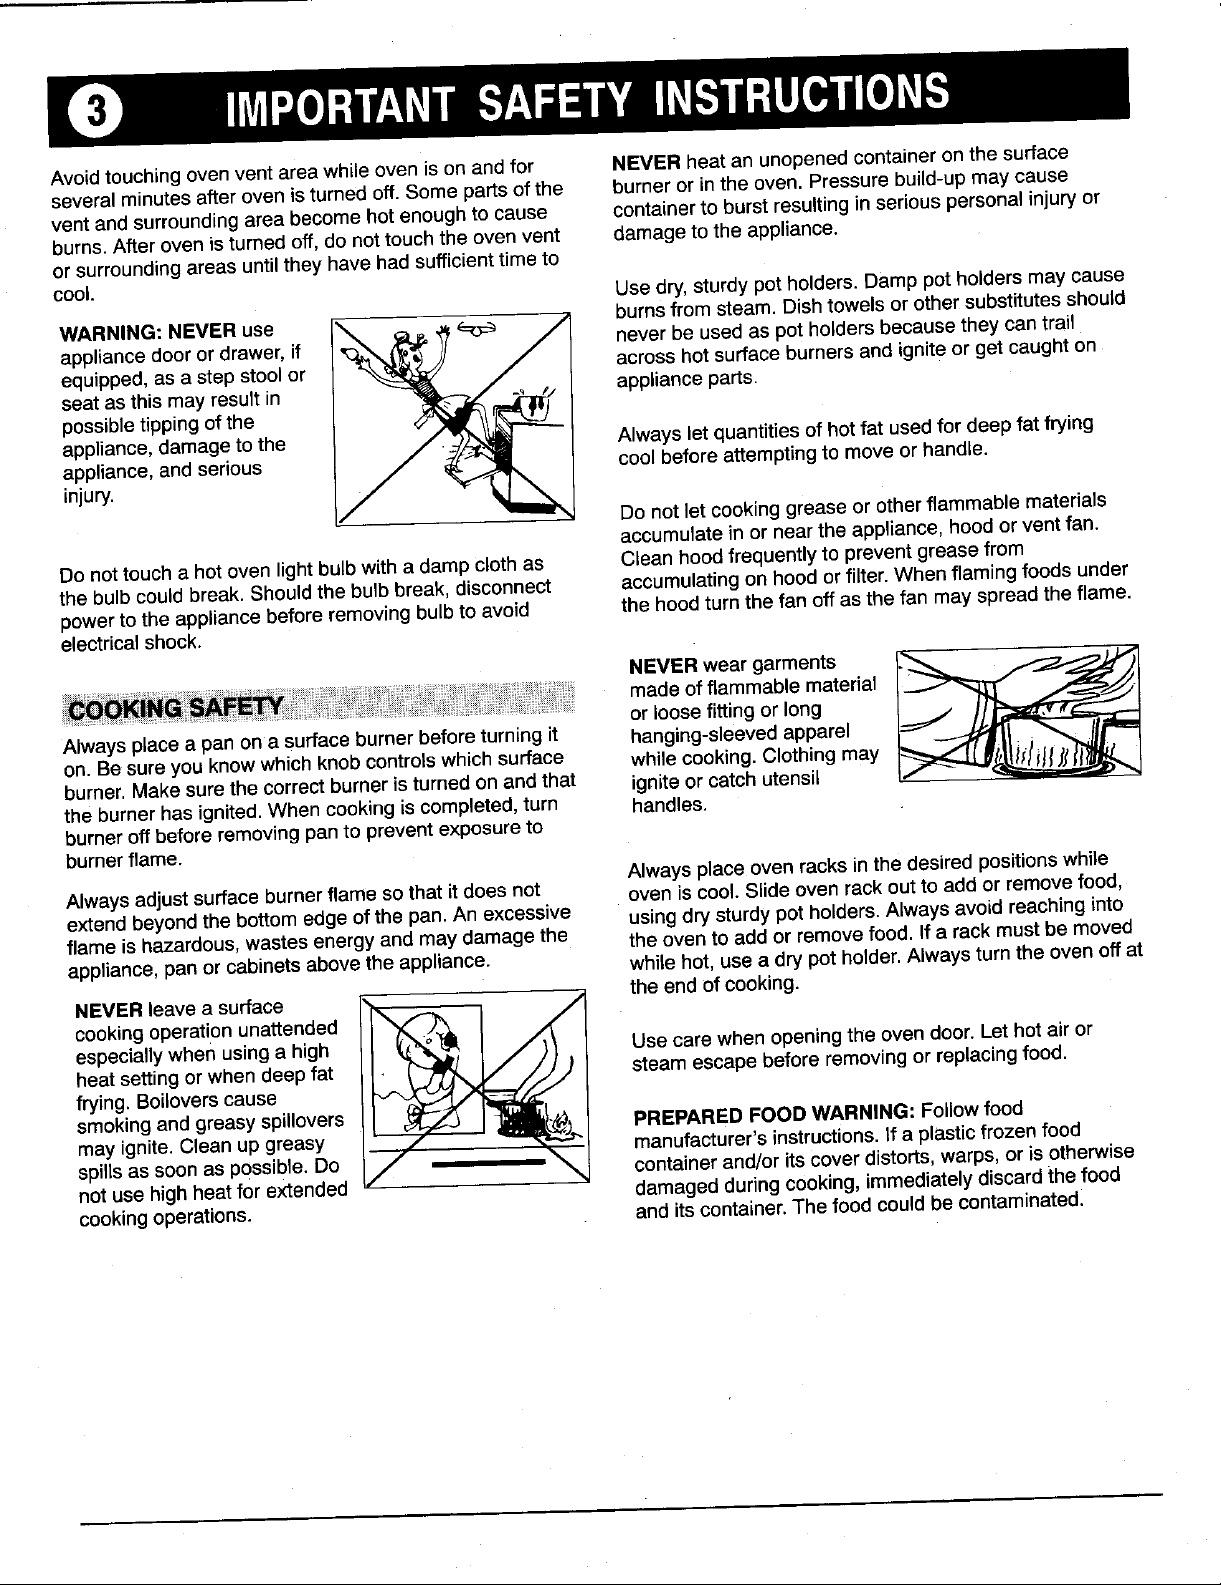
appliancedoorordrawer,if J neverbeusedaspotholdersbecausetheycantrail
equipped,as a stepstoolor acrosshotsurfaceburnersand igniteorgetcaughton
seatasthismayresultin appliancepans.
possibletippingofthe
appliance,damagetothe Alwaysletquantitiesofhotfatusedfordeepfatfrying
appliance,andserious coolbeforeattemptingto moveorhandle.
injury.WARNING:NEVERuse l_ =_:_ .____r_ _\ burnsfrom steam. Dishtowelsorothersubstitutesshould
Do nottouch a hotoven lightbulbwith a dampClothas Clean hood frequentlyto preventgreasefrom
the bulb couldbreak. Shouldthe bulbbreak, disconnect accumulatingon hoodorfilter. Whenflaming foods under
powerto the appliancebeforeremovingbulb to avoid the hoodturnthe fan off as thefan mayspreadthe flame.
electricalshock.
Alwaysplacea panona surfaceburnerbeforeturningit hanging-sleevedapparel
on.Besureyouknowwhichknobcontrolswhichsurface whilecooking.Clothingmay
burner.Makesurethecorrectburneristurnedonandthat igniteor catchutensil
theburnerhasignited.Whencookingis completed,turn handles.
burneroffbeforeremovingpanto preventexposureto
burnerflame.
Alwaysadjustsurfaceburnerflamesothatitdoesnot
extendbeyondthebottomedgeofthe pan.An excessive usingdrysturdypotholders.Alwaysavoidreachinginto
flameishazardous,wastesenergyand maydamagethe the oventoaddorremovefood.Ifa rackmustbemoved
appliance,pan orcabinetsabovethe appliance, whilehot,usea drypotholder.Alwaysturntheovenoffat
cookingoperationunattended
especiallywhen usinga high Usecarewhenopeningthe oven door.Let hot air or
heatsettingor whendeepfat steamescapebeforeremovingor replacingfood.
frying.Boiloverscause
smokingandgreasyspUlovers PREPAREDFOODWARNING"Followfood
mayignite.Cleanup greasy manufacturer'sinstructions.If a plasticfrozenfood
spillsas soonaspossible.Do containerand/oritsCoverdistorts,warps,oris otherwise
Weasuaeeoo0
notusehighheatfor extended damagedduringcooking,immediatelydiscardthefood
cookingoperations, anditscontainer.Thefoodcouldbe contaminated.
Do not letcookinggrease orotherflammablematerials
accumulatein ornearthe appliance,hoodor ventfan.
NEVERweargarments I.'_,,_ __....._=_,-_
madeofflammablematerial
orloosefittingor long
Alwaysplaceovenracksinthedesiredpositionswhile
ovenis cool.Slideovenrackouttoaddor removefood,
Page 5
Usepanswith flatbottomsand handlesthat are easily Turnoff allcontrolsand waitfor appliancepartsto cool
graspedandstay cool.Avoid using unstable,warped, beforetouchingor cleaningthem. Donot touchthe burner
easilytipped orloosehandledpans.Also avoidusing gratesor surroundingareas untiltheyhave hadsufficient
pansespeciallysmallpans, with heavyhandles asthey time to cool.
couldbe unstableand easilytip. Pansthat are heavyto
movewhen filled withfood may alsobe hazardous. Cleanappliancewith caution.Usecare to avoidsteam
Besure utensilis largeenoughto properlycontain food hotsurface.Somecleaners canproducenoxiousfumes if
andavoid boilovers.Pansize isparticularlyimportant in appliedto a hot surface.
deepfat frying.Be sure panwill accommodatethevolume
offoodthat isto be addedas well asthe bubbleaction of
fat.
To minimizeburns, ignitionof flammablematerialsand gasket.The doorgasket isessentialfor a good seal. Care
spillagedueto unintentionalcontactwith theutensil,do should be taken notto rub, damage,or movethe gasket.
notextendhandles j , Do notuse ovencleanersof anykindin or aroundany
burners.Alwaysturn
pan handlestoward Beforeself-cleaningthe oven, remove broiler pan,oven
the side or backofthe " racks,and other utensils,andwipe offexcessive
appliance,notout into spilloversto preventexcessivesmoke orflare ups.
overadjacentsurface ,_-_-._ ,_)/ _ partofthe self-cleanoven.
theroomwherethey CAUTION:Do not leavefood orcookingutensils, etc.in
are easilyhitor theoven duringtheself-cleancycle.
reachedbysmall Itis normalfor the cooktopofthe rangeto becomehot
children, during aself-clean cycle.Therefore,touching orliftingthe
Neverleta panboil dry asthis could damagethe utensil
and theappliance.
burnsif a wetsponge or clothis usedto wipe spillsona
Cleanonlypartslisted in this manual. Donot cleandoor
cooktopduringa cleancycleshould beavoided.
Followthe manufacturer'sdirectionswhen using oven
cookingbags.
Only certaintypes of glass,glass/ceramic,ceramic,or Act of 1986(Proposition65) requiresthe Governorof
glazed utensilsaresuitablefor cooktopor oven usage Californiato publisha listof substancesknownto the
without breakingdue tothe suddenchange in State of Californiato causecanceror reproductiveharm,
temperature, andrequires businessesto warn customersofpotential
Thisappliancehas beentested for safe performance
usingconventionalcookware.Do notuse anydevices or Usersof this applianceare herebywarnedthat the
accessoriesthat are notspecificallyrecommendedin this burningofgas can resultinlow-level exposureto someof
manual.Donot useeyelidcoversfor the surfaceunits, thelistedsubstances,includingbenzene,formaldehyde
stovetop grills,or add-onoven convectionsystems.The andsoot, due primarilyto the incompletecombustionof
useof devicesoraccessoriesthat are not expressly naturalgasor liquid petroleum(LP)fuels. Properly
recommendedin this manualcancreate serioussafety adjustedburnerswill minimizeincompletecombustion.
hazards,resultin performanceproblems,andreducethe Exposureto thesesubstancescan also be minimizedby
life of the componentsofthe appliance, properlyventingthe burnersto the outdoors.
The CaliforniaSafe DrinkingWater andToxicEnforcement
exposuresto suchsubstances.
SAVETHESEINSTRUCTIONS
Page 6
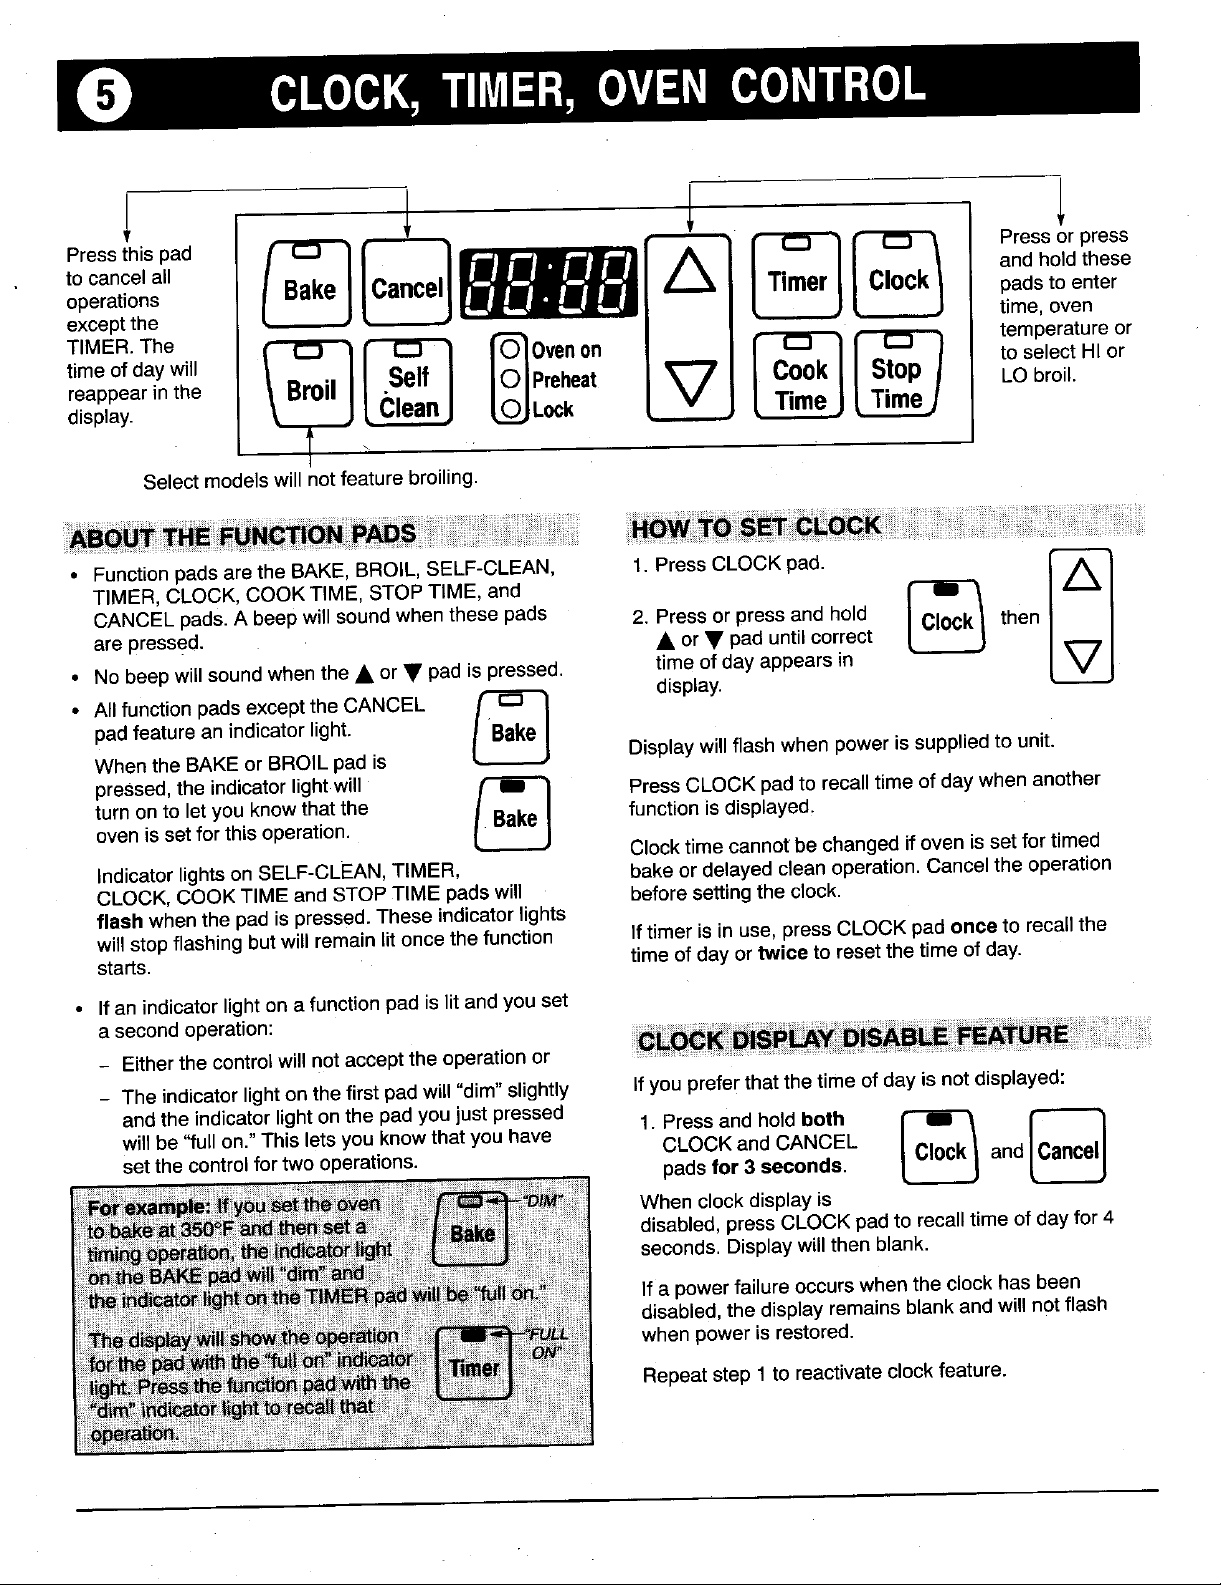
0) CLOCK,TIMER,OVENC()NTROL
tocancelall andhold these
operations padsto enter
exceptthe , time, oven
Pressthis pad I _ • _ Pressor press
timeofdaywill _ to selectHI or
reappearinthe LObroil.
display. L_ Lock , Time J
TIMER.The i fOvenonllPreheat V _ '_tuH_ temperatureor
Selectmodelswillnotfeaturebroiling.
• Functionpadsare the BAKE,BROIL,SELF-CLEAN, 1. PressCLOCKpad.
TIMER, CLOCK,COOK TIME,STOPTIME,and
are pressed. • or• pad until correct
CANCELpads.A beepwillsoundwhen thesepads 2. Pressor press and hold l ClockI then
• Nobeepwillsoundwhen the• or• padis pressed, timeof day appearsin
• AllfunctionpadsexcepttheCANCEL _
padfeature an indicatorlight.
Whenthe BAKEor BROILpad is Displaywill flashwhen poweris suppliedto unit.
pressed,the indicatorlightwill _ PressCLOCKpadto recalltimeof daywhenanother
l.,oj
display.
ovenis setfor this operation.
turnonto letyouknowthat the l Bakej functionisdisplayed.
Indicatorlightson SELF-CLEAN,TIMER, bakeor delayedcleanoperation.Cancelthe operation
CLOCK,COOKTIME andSTOPTiME padswill beforesettingtheclock.
flash whenthe pad ispressed.These indicatorlights
will stop flashingbutwill remain litoncethe function Iftimer is in use,pressCLOCKpadonce to recallthe
starts, time of day ortwice to resetthe time of day.
• If anindicatorlighton afunction pad is litand you set
a secondoperation:
- Eitherthe controlwill not acceptthe operationor
- The indicatorlightonthe first padwill "dim" slightly Ifyou preferthat the timeof day is notdisplayed:
andthe indicator lightonthepad youjust pressed 1. Pressand holdboth _
willbe "fullon."Thisletsyouknowthatyouhave CLOCKandCANCEL
setthecontrolfortwooperations........ padsfor 3 seconds, and
Bn Whenclockdisplayis
_Wi If a powerfailure occurswhenthe clock hasbeen
_or
Clocktime cannotbe changedif oven isset for timed
Lo-,j
disabled,pressCLOCKpadtorecalltimeof dayfor4
seconds.Displaywillthenblank.
disabled,the displayremainsblank andwill notflash
whenpower isrestored.
Repeatstep1toreactivateclockfeature,
Page 7
CLOCK,TIMER,OVENCONTROL
1.PressTIMERpad. _ TheControlL0ck-Outfeaturepreventsthe ovenfrom
• or• pad untilcorrect
timeappearsin display, then Toactivate: _
2. Pressor pressandhold " I'_ l_71 beingturned on.
Thetimerfeaturedoes notoperatethe oven. seconds.
Thetimercanbe set from1 minute[0:01]upto9 hours 2. "OFF"willappearindisplay
and50 minutes[9:50]. whenthisfeatureisactivated.Onlytheclockand
Thetimerwillstart automatically.TheTIMERindicatoron timerfunctionswilloperatewhenControlLock-Out
theTIMER padwill lightwheneverthe timer is in use.One featureis activated.
longbeep and "End"willbe brieflydisplayedto signal the Repeat step 1to deactivate.
endof thetimeroperation,
Tocanceltimer: Pressand hold TIMERpadfor 3
seconds.Timeofday will reappearinthe display.
The 12Hour EnergySaverfeature automaticallyturnsoff • Option 1: Fourbeepsthenone beepevery30 seconds
theovenifitwasaccidentlyleftonfor 12hours.To forthenext 5 minutesoruntilCANCELpadis
deactivatethisfeaturesothe ovenwillNOT turn off pressed.(Defaultoption.)
automaticallyattheendof 12hours: • Option2: Fourbeeps.Therearenootherbeeps.
1.PressandholdCLOCKpad _ • Option3: Fourbeepsthenonebeepeveryminutefor
I ,oerJ
t. Pressandholdboth
STOPTIME and and
CANCELpads for 3
Youhave a choiceof three"end ofcooking"reminder
beepsfor theAutomaticOvenTimerfeature.
2. Press• or• paduntil8:88 l Clockl then Howto selectthe desiredoption:
appearsinthedisplay.
Currenttimeofdaywill 1, Pressandholdboth _
for3 seconds. _ l_7] thenext 12 hoursor untilCANCELpad is pressed.
reappearinthe displayafter COOKTIME andCLOCK
4seconds, padsfor 3 seconds, and
Repeatsteps1and2to reactivatethe12 HourEnergy • A singlebeepwillsound.
Saverfeature.12:00willappearindisplayto indicatethe • Displaywillshowcurrent
EnergySaverfeatureisrestored, option.
2. Press• or•pad to IL-_I
selectthe optionnumber
youwish. Thecurrenttime
of daywill reappearin the
displayafter 4seconds.
Page 8
SURFACECOOKING
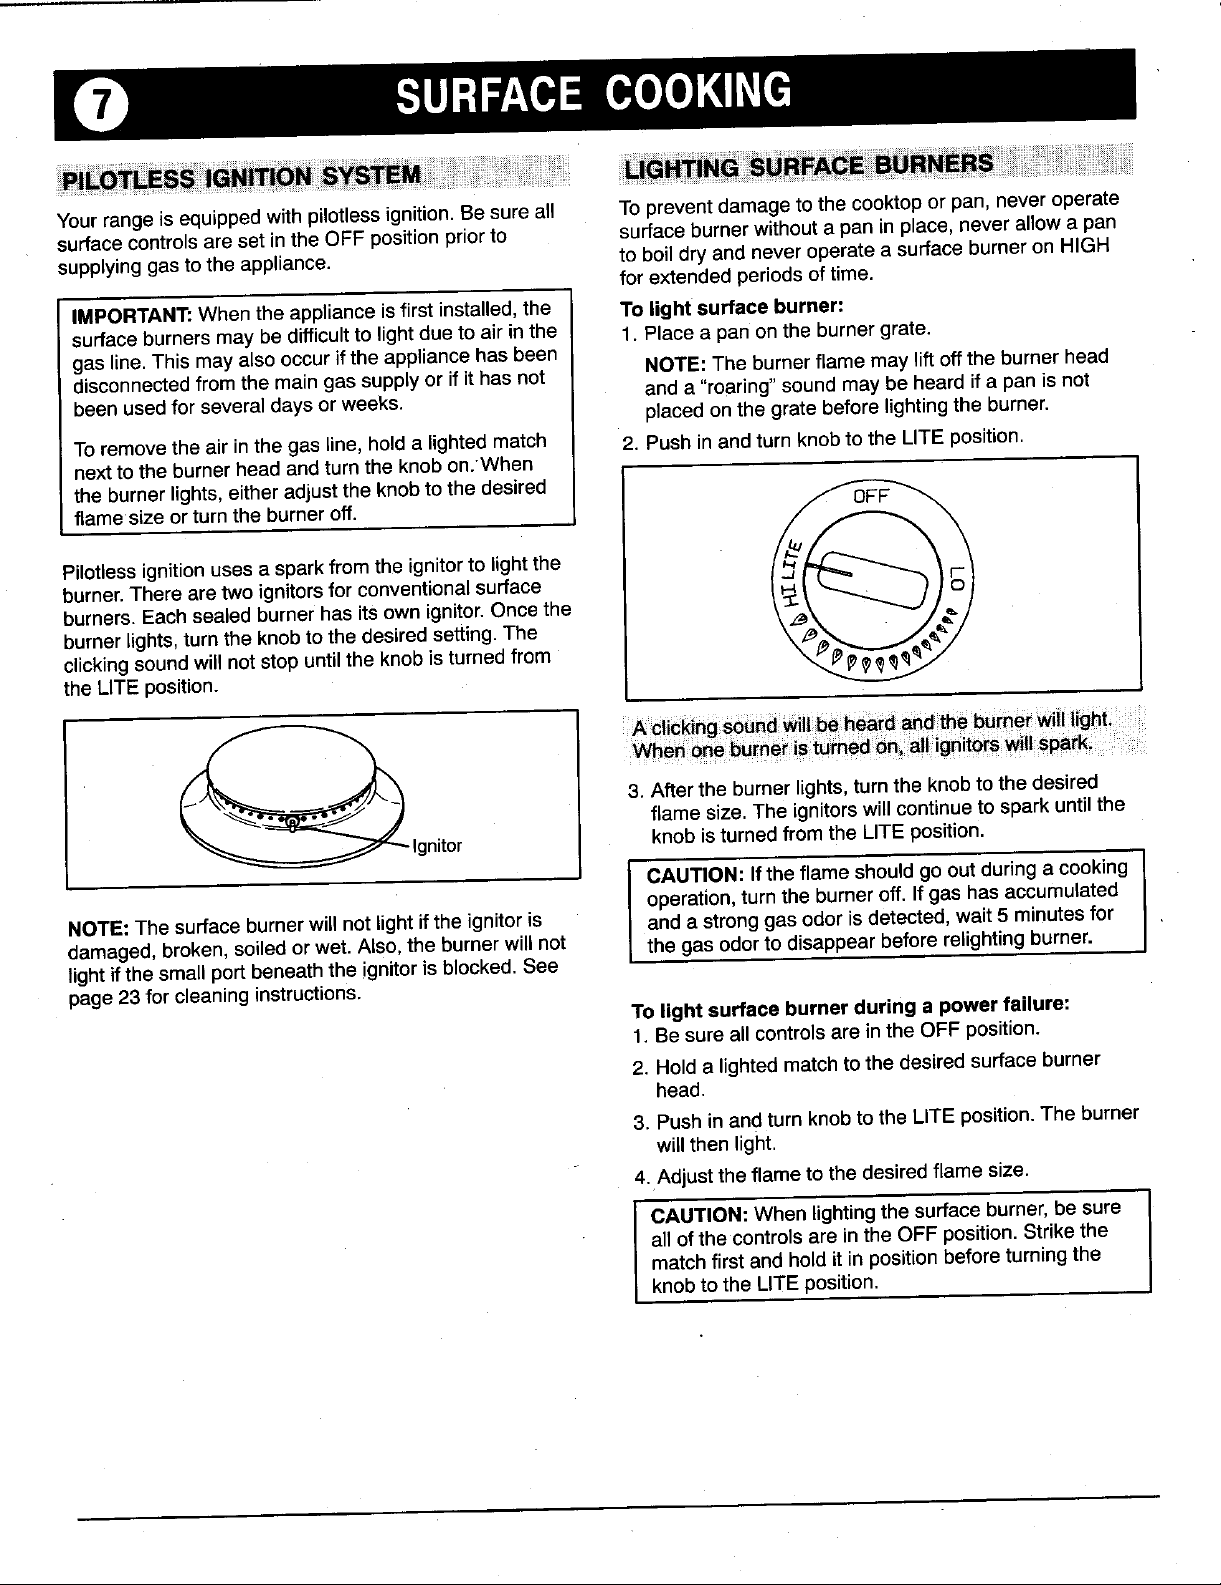
Yourrangeis equippedwith pilotlessignition.Besureall To preventdamageto the cooktopor pan,neveroperate
surfacecontrolsare setinthe OFFpositionpriorto surface burnerwithout a pan inplace,neverallow a pan
supplyinggasto the appliance, to boildry and never operatea surfaceburneron HIGH
for extendedperiodsof time.
IMPORTANT:Whentheapplianceisfirst installed,the Tolightsurfaceburner:
surfaceburnersmaybe difficulttolightduetoairinthe 1. Placea panonthe burnergrate.
gasline.Thismay also occur if the appliancehas been
disconnectedfromthe main gassupplyor if it has not NOTE:The burnerflame may liftoffthe burner head
beenusedfor several daysor weeks, and a "roaring"sound maybe heardif a pan is not
Toremovethe air inthegas line,hold a lightedmatch 2. Push inandturn knobto the LITE position.
nextto the burnerhead andturnthe knobon/When
the burnerlights,eitheradjust the knobto the desired
flamesize or turnthe burneroff.
Pilotlessignition usesa sparkfrom the ignitorto lightthe
burner.There are two ignitors for conventionalsurface
burners.Eachsealedburner hasitsown ignitor.Oncethe
burnerlights,turn the knobto the desiredsetting.The
clickingsoundwill notstop untilthe knobisturnedfrom
the LITEposition.
placedonthe gratebeforelightingthe burner.
WhEn burne_,is_*d On;;alli_it_S WillsPa_
3. Afterthe burnerlights,turnthe knobtothe desired
flamesize. Theignitorswillcontinuetosparkuntilthe
Ignitor knobisturnedfromthe LITEposition.
NOTE:The surfaceburnerwill not lightifthe ignitoris and a stronggas odor isdetected,wait 5 minutesfor
damaged,broken, soiled orwet.Also, the burnerwill not the gas odorto disappear beforerelightingburner.
lightifthesmall port beneaththeignitor isblocked. See
page23for cleaninginstructions.
A _liCk!_g_d wii!be heardand the_rner Wililght;
CAUTION:If theflameshouldgo outduringa cooking
operation,turntheburneroff.If gashasaccumulated
To light surfaceburnerduringa powerfailure:
1. Besureall controlsare inthe OFFposition.
2. Holda lightedmatchto thedesiredsurfaceburner
head.
3. PushinandturnknobtotheLITEposition.The burner
willthen light.
4.Adjust theflame to thedesiredflame size.
CAUTION:When lightingthesurface burner,besure
allofthe controlsare in the OFF position.Strikethe
matchfirstand hold it in positionbeforeturning the
knobto the LITEposition.
Page 9
SURFA(:E COOKING
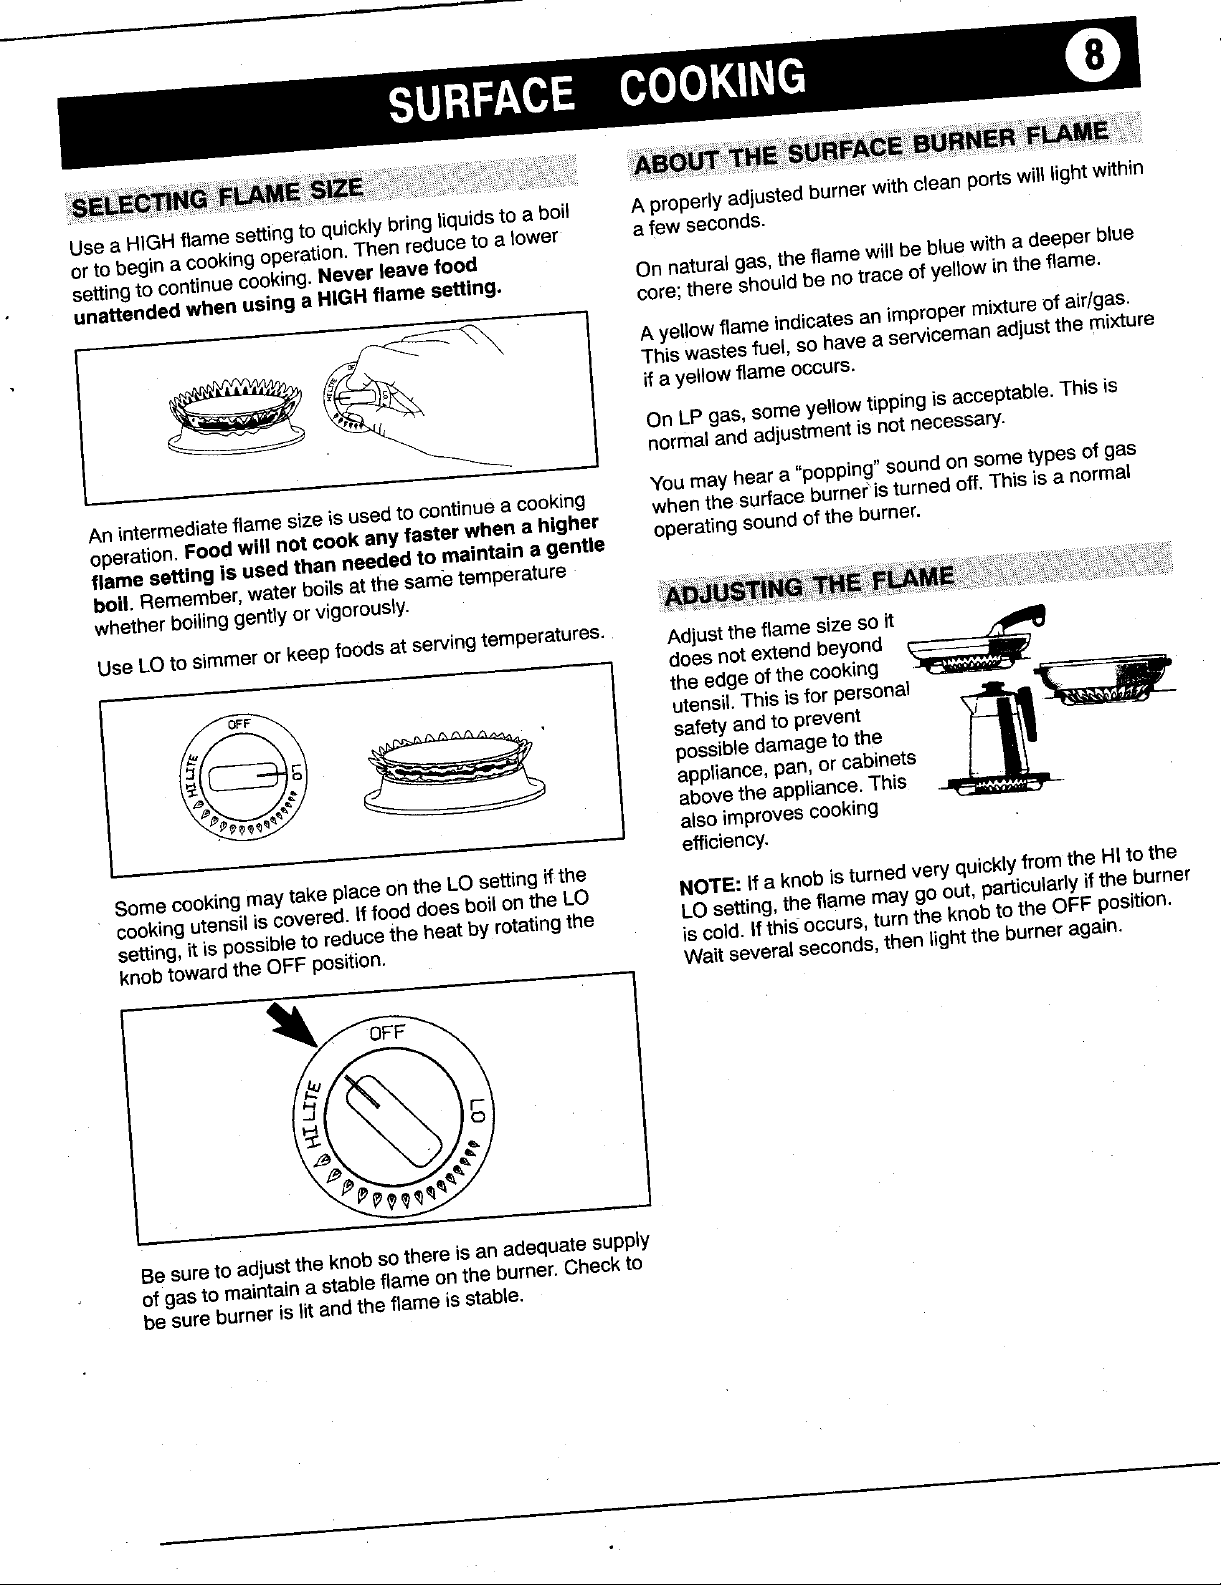
Usea HIGHflamesettingto quicklybringliquidsto a boil A properlyadjustedburnerwithcleanportswilllightwithin
orto begina cookingoperation.Then reduceto a lower a few seconds,
settingto continuecooking,Neverleave food
unattendedwhen usinga HIGHflame setting, On naturalgas,theflame willbe bluewitha deeperblue
____ normaland adjustmentisnotnecessary.
" A yellowflame indicatesan improperm{xtureofair/gas.
core;thereshouldbe notraceof yellowintheflame.
ifa yellowflame occurs.
This wastesfuel,so have a servicemanadjustthe mixture
OnLP gas,some yellow tipping is acceptable.Thisis
An intermediateflamesize is usedto continuea cooking You may heara "popping"soundonsometypesof gas
operation.Foodwill not cook any fasterwhena higher
flame setting is used thanneededto maintaina gentle operatingsoundoftheburner.
boil.Remember,waterboilsatthesametemperature
whetherboilinggentlyorvigorously.
UseLOtosimmerorkeepfoodsatservingtemperatures. Adjusttheflamesizesoit
, utensil.Thisis for personal
_ the edge of thecooking
Somecookingmay take placeon the LOsettingif the
cookingutensil iscovered.If fooddoes boilon the LO NOTE: If a knobis turnedvery quicklyfromthe HIto the
setting,it is possibleto reducethe heat by rotatingthe LOsetting,the flame maygo out, particularlyif the burner
knobtowardthe OFFposition, iscold. Ifthis-occurs,turn the knobto the OFF position.
whenthesurface burneris turned off.This is a normal
doesnotextendbeyond
safetyand to prevent
possibledamageto the
appliance,pan,or cabinets
abovethe appliance.This
alsoimprovescooking
efficiency.
Waitseveralseconds,then lighttheburner again.
Besureto adjustthe knobsothereisan adequatesupply
of gasto maintaina stableflame on theburner,Checkto
besure burneris litand the flame is stable.
Page 10
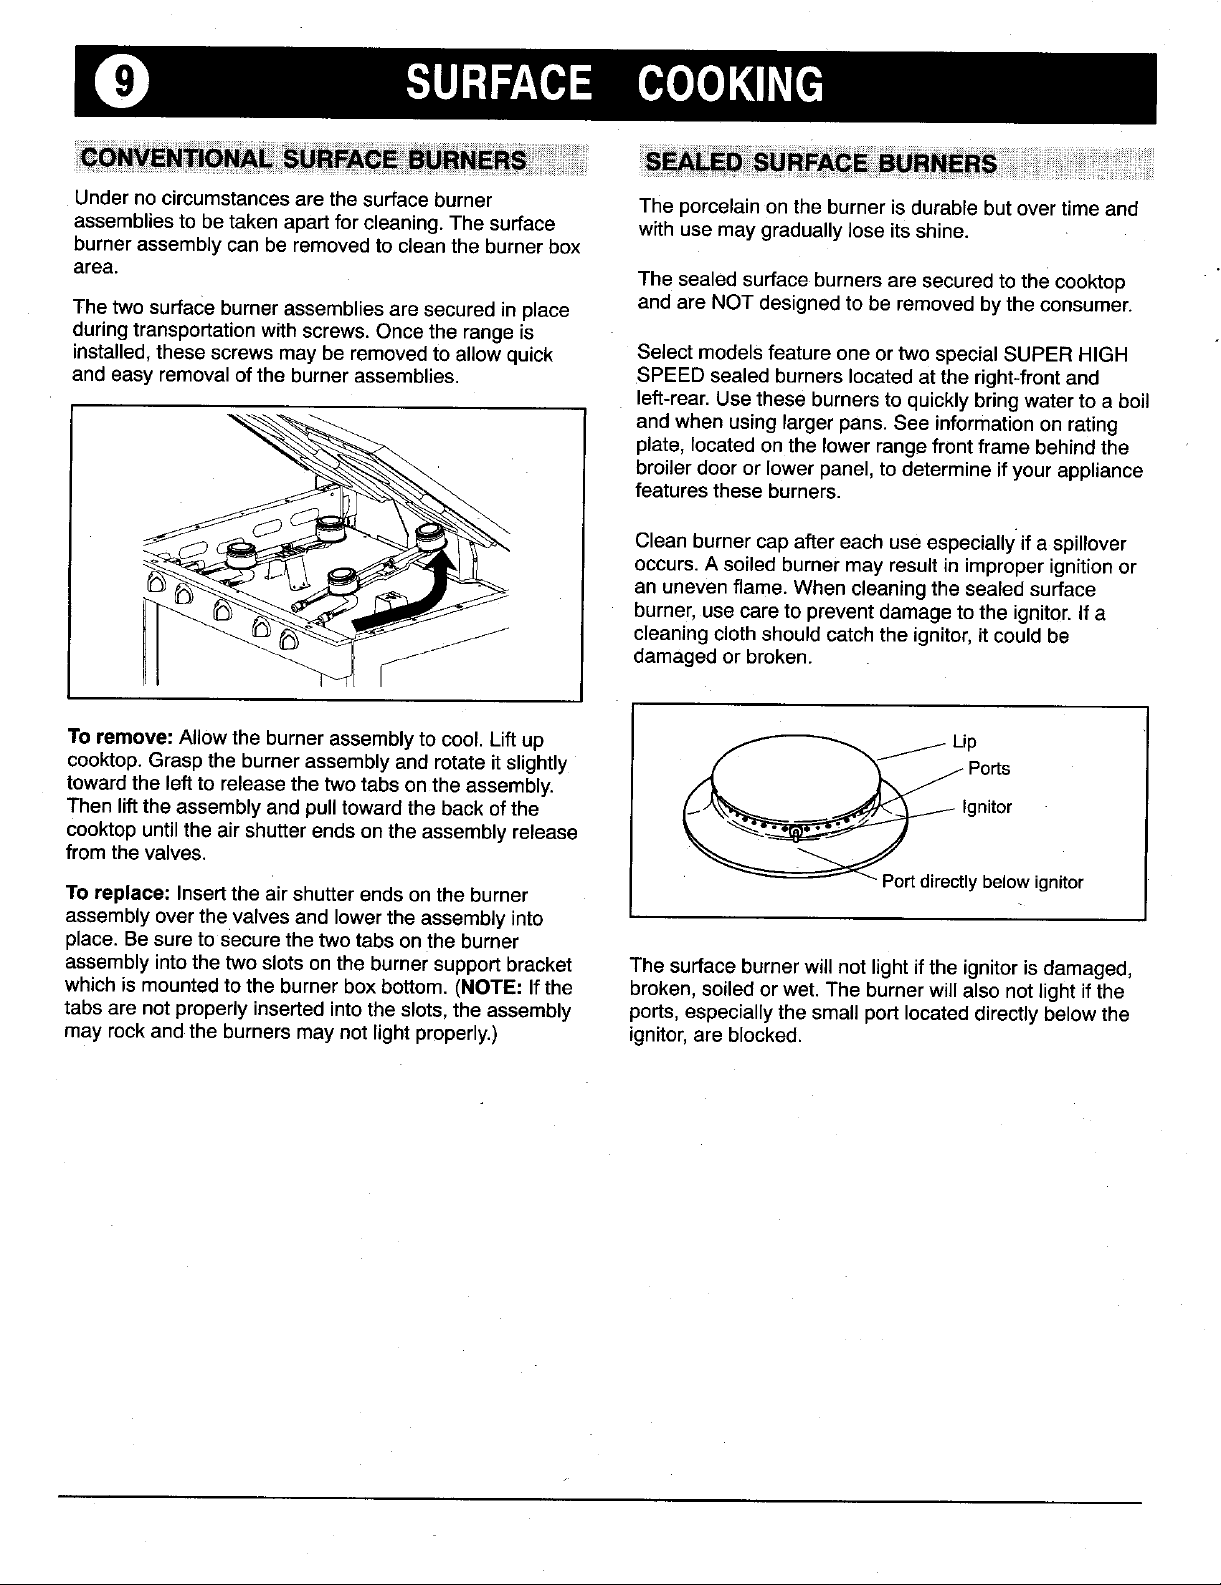
Underno circumstancesarethesurface burner The porcelainon theburner isdurable butover time and
assembliesto be taken apart for cleaning.Thesurface with use maygraduallylose its shine.
burnerassemblycan be removedto cleanthe burnerbox
area. Thesealedsurface burnersare securedtothe cooktop
Thetwo surfaceburnerassembliesare securedin place andareNOTdesignedto be removedbythe consumer.
duringtransportationwith screws.Oncethe rangeis
installed,thesescrews maybe removedto allow quick Select modelsfeature one or two specialSUPERHIGH
and easyremovalofthe burnerassemblies. SPEEDsealedburnerslocatedat the right-frontand
left-rear.Usethese burnersto quicklybringwaterto a boil
plate, locatedonthe lower rangefront framebehindthe
broilerdoor or lower panel,to determineifyour appliance
featuresthese burners.
Cleanburner capaftereach useespeciallyif a spillover
an unevenflame.Whencleaningthe sealedsurface
burner,use careto preventdamageto the ignitor.If a
and whenusing largerpans.See informationonrating
__!_ occurs.A soiledburner mayresultin improperignitionor
To remove: Allowthe burnerassemblyto cool. Liftup _ __ Lip
cooktop.Grasp theburner assemblyand rotateitslightly f _, J Ports
towardthe leftto releasethetwotabs onthe assembly.
Then lifttheassembly andpulltoward the backof the (_/k._ Ignitor
cooktopuntilthe air shutterendson the assemblyrelease
fromthe valves. _ "_PPort direct
Toreplace: Insertthe air shutterends on theburner ly below ignitor
assemblyoverthevalves and lowertheassemblyinto
place. Besureto Securethetwo tabs onthe burner
assemblyintothe two slots on theburner supportbracket Thesurface burnerwill not lightif the ignitoris damaged,
whichis mountedtothe burnerboxbottom. (NOTE:Ifthe broken,soiledor wet. The burnerwill also notlight if the
tabsare not properlyinsertedintothe slots,theassembly ports,especiallythe smallportlocated directlybelow the
mayrockandthe burners maynot lightproperly.) ignitor,are blocked.
i_ cleaningclothshould catchthe ignitor,it couldbe_. damagedorbroken.
Page 11

SURFAI:E COOKING
Cookwarewhich extendsmorethan two inches beyond The pan materialdetermineshow evenlyand quicklyheat
thegrate,restson twogrates,Ortouchesthecooktop may is conductedfrom theheat sourceto the food. Some
causea buildupof heatwhich may resultindamageto widelyused panmaterialsare:
thethe burnergrate, burnerorcooktop.
Cookware,suchas awok witha supportring,which
restrictsair circulationaroundthe burnerwillcause heat
to buildup and may resultin damageto theburner grate,
burneror cooktop. Copper - excellentheatconductor.Discolorseasily,
Foodscookfasterwhen thecookwareis coveredbecause requires constantpolishing.Oftenusedas a bottom
more heat is retained.Lowerthe flame size when coating to improvethe heatingof other pan materials.
cookwareiscovered.
Thecookingperformanceisgreatly affectedbythe type of spotsandproducesunevencookingresults.Ourable,
cookwareused.Propercookwarewill reducecooking attractive,easyto cleanand stainresistant.Willdistribute
times,useless energyand producemore evencooking heatbetter if othermetals (aluminumor copper) are
results.For best resultsuse a heavygauge metalpan combinedor sandwichedtogetheras a bottomcoating.
witha smoothflat bottom,straightsidesand a tightfitting
lid. Cast Iron - slow heat conductor.Cooksevenlyonce
Cookwarewithuneven,warped,or groovedbottomsdo temperatureisreached.Heavy.Needsseasoningto make
notmakegood contactwiththe heatingsurface,will cleaningeasierand to preventstickingandrusting.
reduceheatconductivityand resultin slower,less even
heating, mayonly be usedinthe oven.
To determinetheflatness ofthebottom ofa pan, placethe
edgeof aruleracrossthebottomoftheutensil.Hold itup PorcelainEnamel - g{ass-(ikesubstancefusedtometal.
tothelight.Littleorno lightshouldbevisibleunderthe Heatingcharacteristicsdependonbase material.Easyto
ruler, clean.
Aluminum - excellentheatconductor.Somefoods will
cause itto darkenor pit. Often used as a bottomcoating
to improvetheheatingof other pan materiaJs.
Stainless Steel -slow conductorof heat.Developshot
Glass - slow heatconductor:Easyto clean. Sometypes
Acceptablewater-bathor pressurecannersshouldnot
beoversizedandshouldnot restontwoburner grates.
Theyshouldalsohavefiat bottoms.
When canning,usethe HI settingjust untilthewater
comestoa boilor pressureis reachedin a pressure
canner,then reduceto a settingthat maintainsthe
pressureor a boil.
Prolongeduseof theHi setting,the useofincorrect
canningutensils,orthe use of impropercanning
techniquesmay produceexcessiveheat and resultin
permanentdamageto the appliance.
NOTE:Foradditionalcanninginformationcontactyour
localCountyExtensionOffice.Or,contactAiltrista
ConsumerProductsCompany,marketerof Ballbrand
homecanning productsat 800-240-3340or write:
A_ltristaCorp.,ConsumerAffairsDept.,P.O.Box 2729,
Muncie,IN 47307-0729.
Page 12

(D OVEN USE
Besureoven controlis setinthe OFF positionpriorto The ovenventis locatedat thebase ofthe backguard.
supplyinggasto the appliance. When theoven is inuse,thisarea mayfeel warm or hot to
thetouch. Topreventbakingproblems,do not block the
Yourappliancefeaturespilotlessignition.A glo barwill vent openingin anyway.Also,do not place plasticsnear
lightthe ovenburner.With this typeof ignitionsystem,the theventopeningas heatfromthe vent coulddistortor
ovenwill notoperateduringa powerfailureor if theoven melt theplastic.
isdisconnectedfrom the walloutlet.No attempt should
be madeto operateovenduring a powerfailure.
• Do notlockovendoorduringa cookingoperation.
Thesizeand appearanceof a properlyadjusted oven - Ifthe dooris lockedthe LOCK ('_"_Oven
burnerflame shouldbe as shown: operationindicat°rwillwiillightbecanceled.andthe i _iprekeatl_l
coneincenterissmaller be unlockeduntiltheoven hascooled.
- _,_ I _ Coneapprox.1/2-inch ° NOTE:Select modelsdonot featurebroiling.
The oventemperatureismaintainedby cyclingthe burner programwillautomaticallycancel.Thetime ofday will
onand off.After the oventemperaturehas been set,there reappearin thedisplay.
will be abouta 45 seconddelay before the burnerignites. • Tochangeoventemperatureor broilsettingduring
Thisis normaland nogas escapes duringthis delay, cooking:
Duringthe clean cycle,and someextendedovencooking - Iftemperatureis displayed,press
operations,you may hear a"popping"sound whenthe • or• padto select the new
burnercyclesoff.This is a normaloperatingsoundof the temperature.
burner.
_ lockingmechanismwill engageandthe door cannot
Unlockthe doorthen resetthe __JLock
- If oventemperatureis above 400°F,the internal
• The oven burnercycles onand offto maintainthe oven
temperaturefor baking.The broil burnercyclesonand
offto maintaintemperaturesfor broiling.
operation.
• If youpressBAKE or BROILpadand do not set an
oventemperatureor broilsettingwithin30 seconds,the
- Ifanotherfunctionis displayed,press
BAKEor BROIL padthen press
• or• padto selectnewtemperature.
on
Page 13

• BAKEindicatoron theBAKE padwilllight. INLIGHT ....
1. PressBAKEpad. _/_Eo__I J
• •000 willlight in display.
temperature.
• 350° willlightwhen eitherpad ispressed:
• Oventemperaturecanbe set from170°to 550°.
2. Pressorpressand hold& or , padto selectoven [_1
3. Therewill be a4 seconddelay beforethe oven turns
on.When theoventurns on: I_oven on
• OVENON indicatorwill light, iiiPreheat
• PREHEATindicatorwill light. L__.,ILock
• The preselectedtemperaturewillremainin display.
4.Allow 8 to 15minutesfor the ovento preheat.
• A singlebeepwill indicatethat the oven has [OI 0yenon
preheated. I_lPreheat
• The OVENON indicatorwill remainlit. L._.,ILock
• The PREHEATindicatorwillturnoff.
5. Placefood intheoven. NOTE:Theoventemperaturecanbechanged at
anytime. If thetemperatureis changed,the
PREHEATindicatorwillturn backon untilthe new
temperatureis reached.A beepwillsignal thatthe
newtemperature has beenreached.
IZl
6. Checkcookingprogressat the minimumcooking NOTE:Seepages 13, 14,and 15for additional
time. Cooklongerif needed, informationonbakingand roasting.
7. PressCANCELpad and removefood fromthe oven. _
• The BAKEindicatoron the BAKEpadwillturn off.
• The OVENONindicatorwillturnoff.
• Timeof day willreappearin display, automaticallyturn off at the end of 12 hours. If
[cance,J
NOTE: If youforget to turn off the oven, it will
you wish to deactivatethis energy savingfeature,
see page 6.
l"e]
Page 14

OVEN USE
Ovencharacteristics: Eachoven hasits own personal • Ifusingheat-proofglassware,ordark panssuchas
bakingcharacteristics.Therefore,donotexpectthatyour Baker'sSecret or Wilton reducetheoventemperature
newovenwillperformexactlylikeyourpreviousoven.You by25°F exceptwhenbakingpiesor bread.Usethe
mayfindthatthecookingtimes,oventemperatures,and samebakingtimeas calledforintherecipe.
cookingresultsdiffersomewhatfromyourpreviousrange.
Allowa periodofadjustment. Allow hotair toflow freelythroughthe oven for
Usea reliablerecipeandaccuratelymeasurefresh theovenwillblockairflowand may resultinuneven
ingredients.Carefullyfollow directionsforoven browning.Foroptimumbrowningandevencooking
temperatureandcookingtime. results:
Usethe correctrackposition.Bakingresultsmaybe • Donotcrowdarackwithpans.Neverplacemorethan
affectedifthewrongrackis used.Foroptimumresults, onecookiesheet,one13x9x2-inchcakepanortwo
bakefoods on onerack.Selecta rackpositionthat 9-inchround cakepanson one rack.
locatesthe food inthe centerof the oven.If bakingon two • Staggerpanswhen bakingontwo racks so one pan is
racks, selectrack positions#2 and4, #1 and4 or #2 and
5. notdirectlyover another pan.
• Top browning may be darker if food is located • Allowtwo inches betweenthe panandthe oven walls.
towardthe topof the oven, Checkthecooking progressat the minimumtime
• Bottombrowningmaybe darkeriffoodislocated checkingatintervalsuntilthefoodisdone.Iftheoven
towardthe bottomOftheoven. doorisopenedtoofrequently,heatwillescapetheoven;
• Whenusingtworacksforbaking,allowenoughspace
betweenthe racksfor properaircirculation.Browning If you add additional ingredientsor alter the recipe,
andcookingresultswillbeaffectedifairflowis expectcookingtimesto increaseordecreaseslightly.
blocked.
optimumbakingresults,improperplacementofpansin
recommendedinthe recipe.Ifnecessary,continue
thiscanaffectbakingresultsandwastesenergy.
Cookwarematerial playsanimportantpartin baking
results.Alwaysusethetypeandsizeofpancalledforin
therecipe.Cookingtimesor cookingresultsmaybe Preheatingis necessaryforbaking.A!lowabout8to 15
affectedifthewrongsizeisused. minutesfortheovento preheat.A singlebeepwill
• A shiny metalpan reflectsheatawayfromthefood. preheatforroasting.
Thistypeof pan produceslighterbrowninganda softer Selectinga temperaturehigherthan desiredwillNOT
crust.Useshiny pansfor bakingcakesorcookies, preheatthe oven anyfaster,and may havea negative
• A darkmetal, dull,anodizedor satin-finishpan
absorbsheatand producesdarkerbrowningwitha
crispercrust.Usedarkpansfor pies,piecrusts or
bread.
• Foroptimumbakingresults,bakecookiesandbiscuits undercookware.Tocatch spillovers,placea pieceoffoil,a
ona flat cookiesheet. Ifthe pan has sides,such as a littlelargerthanthe pan,on the rack belowthe pan. Do not
jelly rollpan, browningmay not be even. placefoil onthe oven bottom.
indicatethattheovenispreheated.It isnotnecessaryto
effecton bakingresults.
Do not cover an entire rack with foil or place foil directly
Page 15

OVENUSE
COMMON BAKING PROBLEMS AND WHY THEY HAPPEN
PROBLEM E
Cakes are uneven. • Panstooclose or touchingeach otheror ovenwalls.• Batteruneveninpans.
• Temperaturesettoolowor bakingtimetoo short.• Ovennotlevel.• Underrnixing.
• Toomuchliquid.
Cake high in middle. - Temperaturesettoohigh.• Bakingtimetoolong.• Overmixing.• Toomuchflour.
• Panstouchingeach otheror ovenwails.• Incorrectrackposition,
Cake falls. • Too muchshorteningor sugar.• Toomuchor too little liquid.• Temperatureset too
low. • Oldortoo little bakingpowder.= Pantoo small.• Oven dooropenedfrequently.
• Added incorrecttype of oilto cake mix. • Added additionalingredientsto cake mix or
recipe.
Cakes,cookies, biscuits sealing
don't brown evenly. 1not
rack.
Cakes, cookies, biscuits • Ovennotpreheated.• Panstouchingeachother orovenwalls.• Incorrectrack
too brown on bottom, position.• Incorrectuseofaluminumfoil.• Placed2 cookiesheetsononerack.• Used
glass,dark.stainedwarpedordullfinishmetalpans. (Usea shiny cookiesheet.)
Followcookwaremanufacturer'sinstructionsforoventemperature.Glasswareanddark
cookwaresuchas Ecko'sBaker'sSecretmayrequireloweringtheoventemperatureby
25°F.
POSSIBL CAUSES =
dentedor warped,
ovenon thelower
Excessive shrinkage. • Toolittleleavening.• Overmixing.• Pantoolarge. • Temperaturesettoo high,
• Bakingtimetoolong.• Panstooclosetoeachotherorovenwalls.
=
speed.• Temperaturesettoohigh.
;; = =
Cake.ordo.ein
brown, toothin; shieldwithfoil.
Pies have soaked crusL
Page 16

OVEN USE
Roasting is the method for cooking large, tender cuts of basted naturally, eliminating the need for additional
meat uncovered, without adding moisture. Most meats are basting.
roasted at 325°F. It is not necessary to preheat the oven.
Place the roasting pan on either of the two lowest rack The cooking time is determined by the weight of the meat
positions, and the desired aloneness. For more accurate t'esults, use
Use tender cuts of meat weighing three pounds or more. the thickest part of the meat, It should not touch fat or
Some good choices are: Beef rib, ribeye, top round, high bone.
quality tip and rump roast, pork loin roast, leg of lamb,
veal shoulder roast and cured or smoked hams. Remove the roast from the oven when the thermometer
Season meat, if desired, either before or after roasting.
Rub into the surface of the roast if added before cooking. NOTE,:For more information about food safety, call I
Place the meat fat-side-up on a rack in a shallow roasting cooking information call or write to the National Cattle- ]
pan. Placing the meat on a rack holds it out of the men's Beef Association, 444 North Michigan Avenue,
drippings, thus allowing better heat circulation for even Chicago, Illinois 60611, or call 1-800-368-3138.
cooking. As the fat on top of the roast melts, the meat is
a meat thermometer. Insert it so the tip is inthe centerof
registers the desired internal temperature.
USD_s Meat & Poultry Hotline at 1-800-535-4555. For [
I
Approximate Oven Approximate*
Weight Temperature Internal RoastingTime
Cut of Meat (pounds) in°F Temperature (min. perlb.)
Beef
RibRoast(cut-side-down) 4 to 8 325°F 145°F(medium/rare) 25 - 35
160°F(medium) 30 - 35
Rib EyeRoast 4 to 6 350°F 145°F (medium/rare) 25 - 35
LoinTenderloinRoast 2 to 3 400°F 145°F (medium/rare) 20 - 30
Pork,Fresh
Shou{derBlade Roast,(boneless) 4 to 6 325°F 160°F 35 - 45
ShoulderBlade Roast 4to 6 325°F 160°F 30- 40
Loin BladeorSirloin Roast 3 to 4 325°F 160°F 35 - 40
BonelessPorkLoin 6 to 8 325°F 160°F 25 - 35
Pork,Smoked
Ham,Half(fullycooked)** 5 to 7 325°F 140°F 25 - 35
Ham,Half(cook-before-eating) 5 to 7 325°F 140°F 35 - 45
Poultry
Turkey,unstuffed*** 12to 16 325°F 180°-185°F 18 - 20
16 to 20 325°F 180°-185°F 16- 18
20to 24 325°F 180°-185°F 14- 16
Turkey,Breast 3 to8 325°F 180°F 30- 40
Chicken,Fryer 2 lj2 to 3 1/2 350-375° 180°F 20- 25
Chicken, Roaster _ 4 to 6 350-375°F 180°F 20 - 25
Lamb
Leg (boneless) 2to 3 325°F 160°F 35 - 40
WholeLeg 5 to 7 325°F 160°F 30 - 35
* Cookingtimesare approximateand may varydependingon theshapeof the roast.A meat thermometeristhemostaccurateway
to determinedoneness.
** Add waterand followpackage directions.
*** Stuffedturkeyrequires additional roastingtime. Shieldlegs andbreast with foil topreventoverbrowningand drying of skin.
160°F(medium) 30 - 35
170°F 40 - 45
Page 17

ABOUTYOURRANGE the oven (I)
MATlCOVEN TIMERCONTROL The clock mustbefunctioningandsetat thecorrecttime
ofdayforthisfeaturetooperateproperly.
CAUTION The AutomaticOvenTimerControlis usedto turnthe
ovenonandoff ata presettimeofday. Thisfeaturecan
• Highlyperishablefoodssuchasdairyproducts, beusedforeitherovencookingorself-cleaning.
pork,poultry,seafoodorstuffingarenot • Immediatestart: Oventurnsonimmediatelyand
recommendedfora delayedcookingoperation, automaticallyturnoffat a presettime.
• Bakingis notrecommendedbecausepreheatingis • Delayedstart: Delaysthestartofcookingor cleaning
required, andautomaticallyturnsoffata presettime.
Cooktimecanonlybeset forupto 11hoursand59
minutes(11:59).
• COOKTIME indicatoronthe COOKTIMEpad will
• 0:00 willlightin display, then
flash.
2. Pressor pressand hold• orV padto entercooking
1. PressCOOKTIME pad. _
time.
3. PressBAKEpad.
• 000 willlightindisplay. _ _4. Pressor pressand hold• orV pad to enteroven
temperature.
• BAKe indicatoronBAKE padwilllight. _ then _]
NOTE:Beepswill sound and000 will flashin display
ifthe BAKEpad is not pressedwithin4 seconds.
5. IFYOUWISH TO DELAYTHE STARTOF
COOKING(if not,skipto #6):
• STOPTIME indicatoron STOPTIME padwill
flash, then then
b. Pressorpressand hold• orV pad to entertime
of dayyou wish ovento turn off.
a. PressSTOPTIME pad. [ S_°PeI _ [_
c. PressCLOCKpad.
• Timeofday will reappearin display.
6. Whentheoventurnson, the OVENON indicatorwill _ NOTE:Itisnot necessaryto seta starttime.
light.Theoventemperaturewillappearinthe display. [ ._oo; J ControlwilldeterminewhentoturntheovenPresstheCOOKTIME padto recallthe remaining on basedonthecooktimeyouset.
cooktime.
7. Ovenwillautomaticallyturnoff.Fourbeepswillsound NOTE: Seepage6 ifyouwishto changetheendof
and"End"willlightindisplay.A beepwillsoundevery cookingreminderbeeps.
30secondsforthenext5 minutes.
8. PressCANCELpad and beepswill stop, Remove
foodfromoven.
Lc-,j
Page 18

ABOUTYOURRANGE theoven
1.PressBROILpad. BFtO/L ,; _
• BROILindicatoronthe BROILpad willlight. INDICATOR
• 000willlight in display.
2. Pressthe • padto selectHI (high)broilorthe• pad _ ._- HI
to selectLO (low)broil.
• SelectHI broilfor normalbroiling.
• SelectLO broilfor lowtemperaturebroilingof
longercookingfoodssuchas poultry. _ LO
3. on
Therewillbean 8 seconddelaybeforethe oventurns I_Oven
on.Whenthe oven turnson: I_lPreheat
• The OVEN ON indicatorwilllight. I_Lock
4. Placefoodinthe oven.The oven doorisclosedfor NOTE:Seepage18 forbroilinginstructionsand
broiling, broilingchart.
LIGHT
5.Turnmeatonceabouthalfwaythroughcooking.
6. PressCANCELpad.Removefoodandbroilerpan
fromtheoven.
• TheOVENONindicatorwillturn off. I- .I _ ,,='__,,I
• The BROILindicatoronthe BROILpadWillturn off.
• Timeof daywillreappearin display.
i
r'i"PS"3
k=,o,,j
Page 19

OVEN USE
Broiling is a method of cooking tender meats by direct the broiler insert with aluminum foil as this prevents fat
heat. The cooking time is determined by the distance from draining into pan below.
between the meat and the broil burner, the desired degree
of doneness and the thickness of the meat. Trim excess fat and slash remaining fat to help keep meat
from curling and to reduce smoking and spattering.
Season meat after cooking.
Broiling requires the use of the broiler pan and insert. The
broiler insert must be in place to allow fat and liquid to Place bven rack in the correct rack position when oven is
drain to the pan below to prevent spatters, smoke and cool. For darker browning, place meat closer to the broil
flare-ups. Improper use may cause grease fires, burner. Place meat further down if you wish meat to be
For easier clean up, line the broiler pan with foil and spray See Care and Cleaning Chart on page 21 for instructions
the insert with a non-stick vegetable spray. Do not cover on cleaning the broiler pan and insert.
....., CHRT
TYPE OFMEAT RACK POSITION* DONENESS (MINUTES)**
well done or if excessive smoking or flaring occurs.
TOTAL TIME
BACON #4 WellDone 6to 10
BEEFSTEAKS
1-inchthick #4 Medium 15to 20
#4 WellDone 20to25
CHICKEN LO BROIL
Pieces #3 or#4 Well Done 30 to45
FISH
Fillets #4 Flaky 8 to 12
Steaks, 1-inchthick #4 Flaky 12to 15
GROUNDBEEF PATTIES
3/4-inchthick #4 Well Done 15 to20
HAMSLICE,precooked
12-inch thick #4 Warm 8 to12
PORKCHOPS
1-inchthick #4 Well Done 20 to 25
* Thetop rackpositionis position#5.
** Broilingtimesare approximateand mayvary dependingonthe meat.
, ,,, ,, , ,,, ,,, ,,,, ,, ,, ,,, ,, ,, ,, , ,, , ,, , , , , , , ,
Page 20

(D ABOUTCLEANING self-cleanoven
1. Move door lock lever to locked position.
2. Press SELF-CLEAN pad.
• CLEAN indicator on the SELF-CLEAN pad will
flash.
• 3:00 will light in display.
• tf door is not locked, "dr" will appear in display.
Lock door. then
3..FIFUU
3. Press • or • pad to select clean time.
• You can select from 2 up to 4 hours.
• Oven will automatically clean for 3 hours. Or,
• Select 2 hours for light soil.
• Select 4 hours for heavy soil.
4. IF YOU WISH TO DELAY THE START OF
a. Press STOP TIME pad. I_
b. Press • pad to select the time of day you wish the then
oven to turn off.
• Press CLOCK pad and time of day will reappear
CLF_ANING(,,not, skip to #5): [ "rS_ J _
in display.
• Press STOP TIME pad to recall the time you set.
5. When the oven turns on:
I_ 0yonon
• The OVEN ON indicator will light. I_1 Preheat
• LOCK indicator will light when oven heats to 400 °. Ll_JLock .i LIGHTTURNSONWHEN
• internal lock will engage. Door cannot be unlocked OVENREACHES400°F.
and opened when LOCK indicator is lit.
6. About one hour after the clean cycle ends, the LOCK _'_Ovon on
indicator will turn off. The oven door can be unlocked I_lPreheat
and opened. _ Lock
TO CANCEL CLEAN CYCLE:
1. Press CANCEL pad. _ _-_ Ovenon
i
LcancelJIlPreheat2. If LOCK indicator is NOT lit, unlock and open oven _ Lock,, WHENLIGHTTURNS
door. OFF,UNLOCKAND
If LOCK indicator is lit, allow oven to cool about one OPENDOOR.
hour then unlock and open oven door.
Page 21

SELF-(:LEANOVEN
• It isnormalfor partsof therangeto becomehot
duringa cleancycle.
• Avoid touchingcooktop,door,window,or oven
ventarea duringaclean cycle.
• Topreventdamageto ovendoo_do notattempt
to unlockthe doorwhenthe LOCKindicatoris
displayed.
BEFORECLEANCYCLE DURINGCLEANCYCLE AFTERCLEANCYCLE
• Removepans,broiler pan,and • As oven heats,the LOCKindicator • TheLOCKindicatorwill turn off
ovenracks. Racksmaydiscolor willlightin the display.Atthis aboutone hourafterclean cycle
andnot slide easilyaftercleaning, point,the doorcan not be ends.Thedoor can beunlocked
• Cleanovenframe anddoorframe, maystill be hot.
Theseareasare not exposedto • Topreventdamageto dooror lock • A graypowderyash may remain
cleaningtemperatures;soil may lever,do notforce door open on the ovenbottomor walls. This
bake onduringcleancycle, whenthe LOCKindicatoris isnormal.Use a dampclothto
• Topreventdamage,do notclean
gasketlocatedonoven door. • Ifsoil remains,the cleancycle
Gasketsealsin heat duringthe • Somesmokeand odormay be maynot havebeen long enough.
cleancycle, detectedthe firstfew timesthe
Topreventexcessivesmokeor andwill lessenin time. amountofvegetableoil if racksdo
• notslide easilyafterclean cycle.
flare-ups,wipeupexcessgrease
orspilloversfrom evenbottom. • Smoke may occurif oven is • Clean aroundovenventopening if
• Porcelainisacid resistant,not left in oven. ventedduringcleaning.
acidproof andmay discolorduring • Fine linesmay appear inthe
the cleancycle.To preventor • As oven heats,you may hear porcelain.This isnormaland
reducediscoloration,wipe up soundsof metalpartsexpanding results from theheating and
sugaror acid spills(lemon,milk, and contracting,Thisis normal coolingof the finish.Thiswill not
barbecuesauce,cheese), andwill not damageoven. affectoven performance.
unlockedand opened, andopened.Use careas oven
displayed, removeash.
oven is cleaned.This isnormal • Wipeoven rackswith a small
heavilysoiled or if broilerpanwas there isa depositfromthe fumes
Page 22

CAREAND CLEANINGCHART
• Be sure applianceisoff andall parts are coolbeforehandlingor
Cleaning.Thisisto avoiddamage andpossiblebums.
• If a partis removed be sureit is correctlyreplaced.
• To prevent stainingor discoloration,cleanappliance after each use.
CLEANINGCHART
Broiler pan • Soapandwater Never cover Insert with aluminum foil as this preventsthe fat from
and insert • Plasticor soap drainingto pan below.
filled scouringpad 1. Removefrom oven after use. Coolthen pour offgrease.
• Dishwasher 2. Placesoapy clothoverinsert and pan;let soakto loosensoil.
3. Wash in warm soapy water. Use soap filled Scouringpad to remove
stubbornsoil.
4. Broilerpan and insertcan be cleanedin the dishwasher.
Burnerbox • Soap and water NOTE:Sealed burnercooktopdoesnot liftup.
(conventional • Pasteofbaking 1. Burnerbox,for cooktopswith conventionalburners,is locatedunder
surfaceburners soda andwater lift-upcooktop.
only) • Non-abrasiveplas- 2. Cleanfrequentlytoremovespillovers.Ifsoilis notremovedandisallowed
ticpad or sponge to accumulate,itmay damagethe finish.
• Liquidcleaner 3. To cleanremove gratesand surface burners and cleanwithsoap and
• Glasscleaner water,rinseanddry.
Controlknobs • Soap and water Forease ofcleaning,turnoffknobandremoveby pullingforward:
• Mildliquidsprays 1. Wash,rinse,anddry.Donotuseabrasivecleaningagentsastheymay
• Glasscleaners scratchthefinishandremovethe markings.
2.Turnon eachelementtobesureknobshavebeencorrectlyreplaced.
Drip bowls, • Soapandwater Donot coverdrip bowls withaluminum foil.
chrome ° Plasticscouring NOTE: Bowlscan permanentlydiscolorovertime,ifexposedtoexcessive
(selectmodels) pads heat,or if soilis allowedto bakeon. The discolorationwillnot affectthe
• Mildabrasive cookingperformance.
cleaners 1.Aftereachuse,wash,rinseanddry,
• FlitzMetalPolish 2. If heavilysoiled, gentlyscrubwith plasticscouringpad. If soil is allowed
to burnon, it maybeimpossibleto remove.
3. A non-abrasivemetal polish such as Flitzmay be usedto help remove
blue/goldheat stains.Flitz is availablein many automotive supply and
hardwarestores.These stainsare causedby overheating,and normally
occuroveraperiodoftime.TheYareusuallypermanent.Followpackage
directions.
Page 23

CAREAND CLEANINGCHART
Enamel, painted • Soapand water NOTE:Usedrytowel orclothtowipeupspills,especiallyacid(milk,lemon
• Ovendoor • Mildliquidcleaner juice,fruit,mustard,tomatosauce)orsugaryspills.Surfacemaydiscoloror
• Sidepanels • Glasscleaner dullifsoilisnotimmediatelyremoved:Thisis especiallyimportantforwhite
• Storagedrawer surfaces.
or lowerpanel 1.When cool, wash with warm soapy water, rinse and dry.Never wipe a
warmor hot surfacewith a damp clothas thismaydamage thesurface
and maycausea steamburn.
2. For stubbornsoil, use mildly abrasive cleaningagents such as baking
sodapaste or BonAmi.
3. Donot useabrasive,causticor harshcleaningagentssuchassteel wool
pads or oven cleaners. These products will scratch or permanently
damagethe surface.
Giase • Soap andwater Toprevent stainingof the oven window,avoidusingexcessive
• Ovenwindow • Glasscleaner amountsofwaterwhichmayseepunderorbehindglass.
• Pasteofbaking 1.Washwithsoapandwater.Removestubbornsoilwithpasteof baking
sodaandwater sodaandwater.Rinsewithclearwateranddry.
2. Do not use abrasivematerialssuchas scouringpads, steelwool or
powderedcleaningagents.Theywilldamageglass.
Grates • Soapandwater NOTE:Neveroperateburnerwithouta gratein place.Toprotectthepor-
• Non-abrasive celainfinishonthe gratefromexcessiveheat,neveroperatesurface
plasticpad burnerwithouta cookingutensilon thegrate.It isnormalforgratesto
losetheirshineovera periodoftime.
1. Gratesaremadeof porcelain-coatedsteel.Theycanbe cleanedat the
sinkwithsoapandwaterorinthe dishwasher.
2. Tocleanbakedonsoil,placea dampsoapypapertoweloverthe grate
andlet standfor 30 minutes.Use a non-abrasiveplasticpadto scour
stubbornsoil.
Metalfinishes • Soapandwater 1. Washwithsoapandwaterora glasscleaneranda softcloth.
suchas brushed • Glasscleaner 2. Topreventscratchingor dullingofthefinish,do notusemildlyabrasive,
aluminum,or • Plasticor non- abrasive,orharshcleaners,orcausticcleanerssuchasoven cleaners.
chrome abrasivepador 3. Tocleanbrushedaluminum:Useonlysoapandwaterorasoftclothand
• Backguard sponge glasscleanertopreventscratchingordullingofthefinish.
• Cooktop 4. Tocleanbrushedchrome cooktopordoor:
• Manifoldpanel • Usea pasteof bakingsodaandwateranda softcloth.
• Ovendoor • Rubwiththe grainto preventscratching,dullingorstreakingofthe
• Storagedoor finish.
• Trim parts • Usea soft clothand mineraloil to restorelusteror to remove
fingerprintsorsmudges.
• Cleanwith an automotivechromecleaneror polisher.
Oveninterior Porcelainenamelisacidresistant,notacidproof.Therefore,wheneooll
wipeupsugaryoracidspills(milk,fruit,tomato,etc,)as theyoccur.See
pages19-20forself-cleanoven.
Ovenracks • Soapandwater 1. Cleanwithsoapywater.
• Plasticscouring 2. Removestubbornsoilwithcleansingpowderorsoap-filledscouringpad.
pad Rinseand dry.
• Cleansingpowders Rackswillpermanentlydiscolorandmaynotslidesmoothlyifleftintheoven
• Soap-filled duringa self-cleanoperation. If this occurs,wipe the rack and embossed
scouringpad rack supports with a small amount of vegetable oil to restore ease of
movement,thenwipe off excessoil.
Page 24

CAREANDCLEANINGCHART
Plastic finishes - Soapand water NOTE: To preventstainingor discoloration,wipe up fat, grease or acid
• Doorhandles • Non-abrasive (tomato,lemon,vinegar,milk,fruitjuice,marinade)immediatelywitha dry
• Backguardtrim plasticpador papertowelorcloth.
• Knobs sponge 1.Whencool,cleanwithsoapandwater,rinse,anddry.
• End caps • Glass cleaner 2. Usea glass cleanerand a softcloth.
NOTE: Never use oven cleaners, abrasiveor caustic liquid or powdered
cleansers on plastic finishes. These cleaning agents will scratch or mar
finish.
Porcelain enamel • Soap and water Porcelainenamelis glassfusedon metalandmaycrackorchip withmisuse.
• Cooktop • Pasteofbaking It is acid resistant,not acid proof. All spillovers,especiallyacid or sugar
• Backguard sodaandwater spillovers,shouldbewipedupimmediatelywithadrycloth.Thisisespecially
• Non-abrasive importantaround the vent opening for smoothtop cooktop. Surface may
plasticpad or discolorordull if soil isnot removed.
sponge 1. When cool,washwithsoapywater,rinseand dry.
2. Neverwipeoff awarm or hotsurfacewith a dampcloth.This maycause
crackingand chipping:
3. Neveruseovencleaners,abrasiveorcausticcleaningagentsonexterior
finish of range.
Surfaceburners ° Soapandwater All burners: For ease ofcleaning,cleanburnerseachtimethecooktopis
• Conventional ° Pasteofbaking usedwithwarm soapywater.If a boiloveroccurs,removepantoanother
• Sealed sodaandwater burner;coolburnerandclean.Toremovestubbornsoil,use adry clothand
• Plasticscouring mildlyabrasive cleanser.Use care to prevent cleanerfrom cloggingports.
spongeor pad Burner must be dry before use. NOTE: Yellow tippingor distortion of the
• Mildlyabrasive flamemay occur until the burner iscompletelydry.
cleanser Clean burner ports with a straight pin or small metal paper clip. Do not
enlargeor distort ports. Donot use awoodentoothpickas itmay breakoff
andclogport.Ifportsarecloggedorsoiled,theburnermaynotlight properly
orthe flamemay not beeven.
Conventionalburners: Dryburnersin the ovenset at 170°F.
Sealed burners: Sealed burner can not be removed by the consumer.
When cleaningburner,use careto prevent damage tothe ignitor.Surface
burnerwill not lightproperly if ignitoris damaged,broken,soiled, or wet.
Whencleaningthe ports,besureto cleantheportdirectlybelowthe ignitor.
READTHE MANUFACTURER'SINSTRUCTIONSto be Non-AbrasiveCleaners- Bon Ami,pasteof bakingsoda
sure thecleanercanbe safelyused onthis appliance, and water.
Carefullyfollowmanufacturer'sdirections.
Testa smallinconspicuousareausinga verylight Cleansers- Ajax,BarkeepersFriendlCameo, Comet,
pressureto see ifthe surfacemayscratchor discolor. Soft Scrub.
Thisis particularlyimportantforporcelainenamel,highly Non-Abrasiveor ScratchlessPlasticor Nylon
polishedorshinymetalorplasticsurfaces,andpainted ScouringPadsor Sponges- ChoreBoyPlastic
surfaces. CleaningPuff,ScrungeScrubSponges,orScotch-Brite
GlassCleaners- BonAmi,Cinch,GlassPlus,Windex. NoScratch,CookwareorKitchenSponge.
DishwashingLiquid Detergents- Dawn,Dove,Ivory, AbrasiveScouring Pads - S.O.S.,BrilloSteelWool
Joy. Soap,Scotch-BritePads.
MildLiquid SprayCleaners- Fantastik,Formula409. trademarksoftherespectivemanufacturers.)
MildlyAbrasivePowderor LiquidAll Purpose
(Brandnamesfortheabovecleaningproductsareregistered
Page 25

MAINTENAN(:E
Thecooktopfeaturingconventionalsurfaceburnerslifts Burnergrates must beproperly
upfor easycleaningofthe burnerbox area. positionedbeforecooking.Burnergrates
aredurablebut maygraduallylosetheir
Toraisethe "lift-up" cooktop:When cool,graspthe shinedue to usageandhigh
front edgeof the cooktopand gentlyliftup untilthetwo temperatures.
supportrodsatthe front ofthe cooktopsnapinto place.
Gratesfor the porcelaincooktopare
placeindentedsides togetherso straight
sides areatfront and rear.
square.Wheninstallingsquaregrates,
CAUTION:Do notoperatea surfaceburnerwithouta I
chipwithouta pan to absorbtheintense heatfromthe
burnerflame.
panon thegrate.The porcelainfinishonthegrate may
Tolowerthe top: Holdthe frontedgeofthe cooktopand
carefullypushbackon eachsupportrodto releasethe
notchedsupport.Then gentlylower thetop intoplace.The
supportrodswillslideintothe cooktopframe. CAUTION:Beforereplacingthelightbulb,
DISCONNECTPOWERTO RANGE.Be surethebulb
is cool.Donottouchahotbulbwitha dampclothas
thebulbmaybreak.
Thesealedburnercooktopisdesignedwithtwocontour
wellsto catchandcontainspills.Becauseofthisdesignit To turn on oven light:Pushthe rockerswitchlocatedon
is notnecessaryto lift upthecooktoptoclean the backguard.
underneath.Topreventdamagetothegastubingortop, Toreplaceoven light bulb:
donotattempttoliftor removethecooktop.
1. Disconnectpowerto range.
cover.NOTE;BulbCoverwillfallifnotheldinplace
whileremovingwireretainer.
3. Removebulbcover.
4. Removelightbulband replacewitha 40 wattappliance
bulb.
5. Replacebulbcoverand securewithwire retainer.
2. Holdbulbcoverinplacethenslidewireretaineroff
6. Reconnectpowerto range.Resetclock.
BULBCOVER
\
WIRE
RETAINER
Page 26

Don()tplaceexcessiveweightonan open ovendooror The ovendoor is lockedfor a self-cleanoperationonly.Do
stand onanopen ovendoor as, insomecases, itcould not movethe door lock leverto the right or locked position
causethe rangeto tip over,breakthedoor orcause duringa cookingoperation.Ifthe door is locked,the
seriousinjuryto the user. operationwillautomaticallybecancelledand"door"will
appearin thedisplay.If theoven is hotenough to engage
Whenopeningthe oven door,allowsteam and hot airto the internallock, the ovendoorwillnotopen. Allowthe
escapebeforereachingin ovento check,add or remove
food. door.
Do not attemptto openor closedooruntilthe door is
completelyseated onthe hingearms. Neverturn on the
oven unlessdoor is properlyin place.When baking,be
surethe door iscompletelyclosed.Bakingresultswill be
affectedifthedooris notsecurelyclosed. Protectovenbottomagainstexcessivespilloversespecially
Whenthe rangeisnewthedoormayfeel "spongy"when
youclosethedoor.Thisis normalandwillbecomeless To protectovenbottom:
"spongy"withuse. • Usethe correctsizecookingutensiltoavoidboilovers.
Toremovelift-off door: Openthedoortothe '!stop" • Neverplacecookwareoraluminumfoildirectlyonthe
position(openedabout6 inches)andgraspthe doorwith ovenbottom.
bothhandsat eachside.Donotusethedoorhandletolift • Placea pieceofaluminumfoilthat isslightlylargerthan
the door.Liftupevenlyuntilthedoorclearsthehinge the panontheovenrackdirectlybelowthepan.
arms.
ovento coolfor upto an hour,then unlock andopenthe
acidorsugaryspilloversastheymaydiscolortheporcelain.
Toreplace door:Graspthedoorateachside,alignslots
inthedoorwiththe hingearmsandslidethedoordown
ontothehingearmsuntildoorisseatedonhinges.Push To remove:When cool,removetheovenracks.Slidethe
downon topcornersof doortocompletelyseatdooron towardthefrontoftheoven.
hinges.The doorisnotcompletelyseatedonthehingesif
onesideis higherorifthedoorappearstobe crooked.
CAUTION"Hingearmsare springmountedandwill frontframe.Removeovenbottomfromoven.
slamshutagainsttherangeifaccidentlyhit.Never
placehandor fingersbetweenthe hinges and the To replace:Fitthe frontedgeof the ovenbottomintothe
front oven frame. Youcouldbeinjuredifhingesnaps ovenfrontframe.Lowertherearoftheovenbottomandslide
back. thetwocatchesbackto locktheovenbottomintoplace.
twocatches,ocatedat eachrearcorneroftheovenbottom,
Liftthe rear edgeof theovenbottomslightly,thenslideit
backuntilthefrontedgeoftheovenbottomdearstheoven
Page 27

The two ovenracksareclesignedwith a safety lock-stop It is importantthat air can circulatefreely withinthe oven
positiontokeep the racksfrom accidentlycoming andaroundthe food. Tohelp ensurethis,placefood on
completelyout of theovenwhenpullingthe rack outto the centerof theoven rack.Allowtwo inches betweenthe
add orremovefood. edgeofthe utensil(s)and the ovenwalls.
CAUTION:Do not.attemptto changethe rack positions I For optimum baking resultsof cakes, cookies or biscuits,
whenthe ovenis hot. I useonerack.Positiontheracksothefood isinthecenterof
the oven.Use eitherrack position3 or 2.
Toremove: Be surethe rack iscool. Pullthe rack straight
outuntil it stopsat the lock-stopposition.Tilt the front end Ifcookingon morethan one rack,staggerthe food to
of the rack upand continuepullingthe rackout of the ensure properair flow.
oven.
Toreplace:Place the rack onthe rack supportsandtilt If cookingontworacks, userack positions4 and2 for
thefrontendoftherackupslightly.Slideitbackuntilit cakesandrackpositions4 andI whenusingcookie
clearsthe lock-stopposition.Lowerthe frontandslidethe sheets.Neverplace two cookiesheets ononerack.
rackstraight in. Pullthe rackout tothe lock-stopposition
to be sure it is positionedcorrectlyandthen returnit to its If roastinga largeturkey,place the turkey on rack 1 orthe
normalposition, roastingpositionandthe sidedishes onrack5.
RACK5 Usedfor toastingbread, or for two-rackbaking.
(highestposition)
RACK' Used for most broiling and two-rack baking. I1__
m
jelly rollpan, or frozenconveniencefoods.
RACK3 Used for most baked goods on a cookie sheet or i_ I
RACK2 Usedfor roastingsmailcuts of meat,large
eithertube, bundt,or layer pans)or two-rack
baking.
RACK 1 Usedfor roastinglargecuts of meatand large I
casseroles,bakingloavesofbread,cakes (in _J
poultry,pies,souffles,or angel foodcake, orfor _);_
two-rackbaking. ROASTING
/
ROASTING Usedfor roastingtaller cuts of meat orturkey. POSITION /
POSITION Placebothovenracks,oneabovetheother,on
theraisedsidesoftheovenbottom.
Page 28

MAINTENANCE
Thestoragedraweratthe bottomofthe range issafe and
convenientfor storing metaland glasscookware.DO Followthese proceduresto removeappliancefor cleaning
NOTstoreplastic, paperware,food or flammablematerial orservicing:
in this drawer.Remove drawerto clean under range.
3. Disconnectgas supplytubing to appliance.
. 1. Shut-offgas supply toappliance.
Toremove: Pull drawerout to thefirst stop position.Lift gassupply.(See InstallationInstructionsfor gas leak
upfrontofdrawerand pullto the secondstop position, test method.)
Graspsidesand lift upandout.
Toreplace: Fit the rollerslocatedat theends of the NOTE: A qualifiedservicer shoulddisconnectand
drawerglidesintotherails on therange.Lift updrawer reconnectthegas supply.
frontand gentlypush into firststop position.Liftup
draweragainandcontinueto slidedrawerto theclosed Topreventrangefrom accidentlytipping,rangemust be
position, anti-tipbracketsuppliedwith the range.
4. Sliderangeforwardto disengagerangefrom the anti-tip
bracket.(SeeInstallationInstructionsfor locationof
bracket.)
5, Reverseprocedureto reinstall.If gasline hasbeen
disconnected,checkfor gas leaksafter reConnection.A
2. Disconnectelectricalsupplyto appliance,if equipped.
qualifiedservicershoulddisconnectand reconnectthe
securedtothe floor by slidingrear leveling leginto an
WARNING: Possiblerisksmay resultfrom abnormal
Forproper baking,your andof therisk oftip over,should the appliancenotbe
rangemust be level, reinstalledaccordingto the installationinstructions.
Levelinglegsare located _l J
oneachcorneratthebase f ,-
ofthe range. Levelby
turningthelegs.To
S°mefi°°rsaren°t'eve'II' 1 ''sage'inc'ud'ngexcessivel°ading°fthe°vend°°r
preventrange from
accidentlytipping, rangeshouldbe securedto the floor by
slidinga rearlevelingleg intothe anti-tipbracketsupplied
with the range.
Page 29
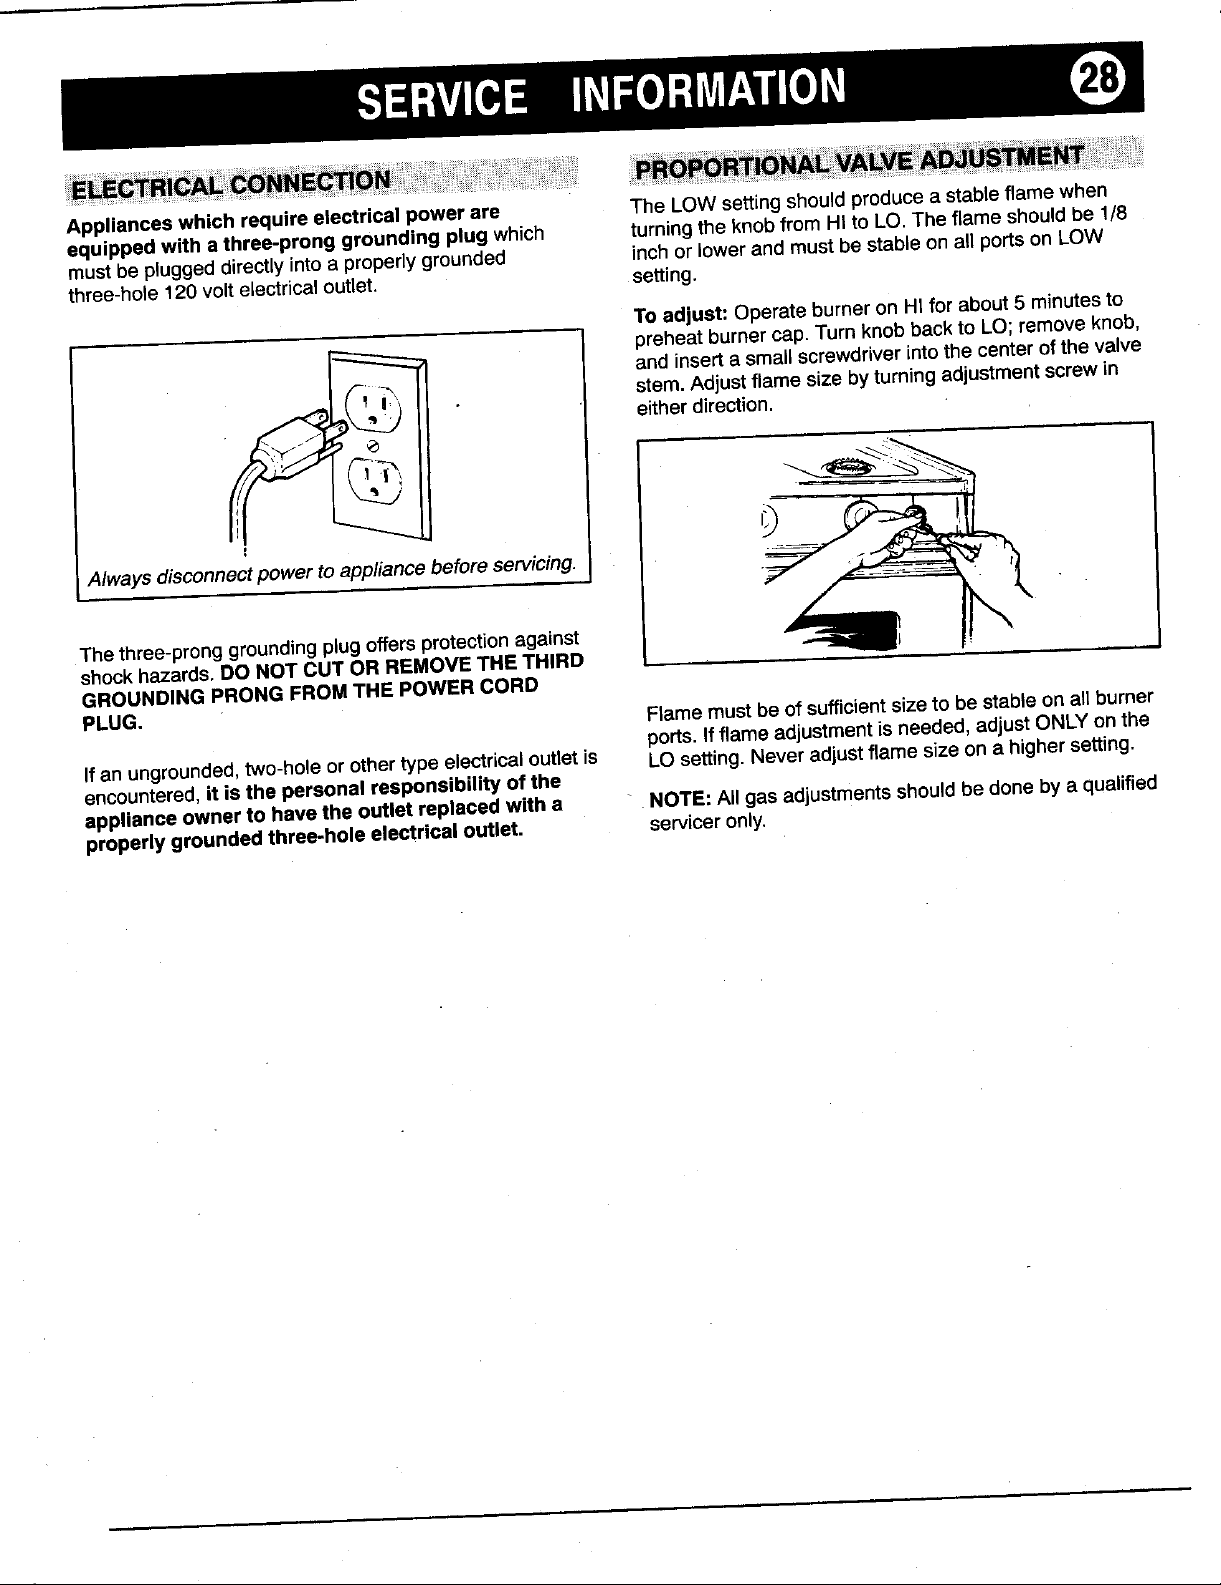
Applianceswhich requireelectricalpowerare The LOWsettingshouldproducea stableflamewhen
equippedwith a three-pronggroundingplug which turningtheknobfromHItoLO.The flameshouldbe 1/8
mustbe pluggeddirectlyintoa properlygrounded inchorlowerandmustbe stableonallportsonLOW
three-hole120voltelectricaloutlet, setting.
Toadjust: OperateburneronHI forabout5 minutesto
preheatburnercap.Turnknobback toLO;removeknob,
and inserta smallscrewdriver intothe center ofthevalve
f-iT,, stem.Adjust flamesizebyturning adjustmentscrew in
,
Alwaysdisconnectpower toappliancebeforeservicing.
Thethree-prOnggroundingplugoffersprotectionagainst
shockhazards. DONOTCUT OR REMOVETHE THIRD ...........
GROUNDINGPRONGFROMTHE POWERCORD
PLUG. Flamemustbeofsufficientsizeto be stableonalJburner
If anungrounded,two-holeorothertype electricaloutletis LOsetting.Neveradjustflame size ona highersetting.
encountered,it is the personal responsibility of the
applianceownerto havethe outletreplaced witha _ NOTE:Allgas adjustmentsshouldbedonebya qualified
properlygroundedthree-holeelectricaloutlet, serviceronly.
_:__ eitherdirection.
ports.Ifflameadjustmentisneeded,adjustONLYonthe
Page 30

SERVIf:E INFORMATI()N
You can adjust the oven temperature if you feel the 1. Contactyour dealeror authorizedservicer. Ifyou do
temperatureis too hot or too cool. not knowthe dealer,consulttheYellow Pagesinyour
telephonedirectoryunderAPPLIANCES,or call us at:
TOadjustthe oven temperature: US 1-800-688-9900
1. PressBAKEpad. _ CANADA 1-800-688-2002
2. Press• paduntil 550°is _ 2. When requestinginformationor service,the following
displayed, then informationwill be needed.
3. Pressandhold BAKE pad on the rangefrontframe.)
for 3 secondsuntil00° b. Yourname,addressand telephonenumber.
appearsin display, c. Dealeror servicer'sname,addressand telephone
4. Pressand holdthe • d. Briefdescriptionof the problem and servicehistory.
or • padto selectthe _ e. Forwarrantyservice,proofof purchasedate (sales
youwish.
temperaturechange _ then receipt)will be needed.
• Theoven temperature 3. If you are notableto satisfactorily resolvethe
can be increasedor decreased complaintwiththe localresponse,call or write to:
by 5° to 35°. MaytagCustomerAssistance
• Ifthe oventemperaturewas previouslyadjusted, P.O.Box 2370
thechangewill be displayed. Cleveland,TN 37320-2370
I;I
[_ number.
a. Model andserialnumbers. (Seerating plate located
%MaytagCustomerService
15°, thedisplaywill show- 15°. CANADA 1-800-688-2002.
I For example:if theoventemperaturewasreducedby j US 1-800-688-9900
4. Ifyoustilldonotreceivesatisfactoryservice,contact
5. Timeofdaywillautomaticallyreappearindisplay, the MajorApplianceConsumerActionProgramby
It isnot necessarytoreadjustthe oventemperatureifthere
is a power failure or interruption. Broiling and cleaning 20 NorthWackerDrive
temperaturescannot beadjusted. Chicago,IL60606
If afault code appearsin the display and continuous complaintswhich have not been resolvedsatisfactorily
beepssound,pressthe CANCELpad. Then, reprogram within a reasonableperiodof time.
thecookingoperation.Ifthe fault code reappearsinthe
display,call anauthorizedservicer.Do notusethe oven
untilthe appliance hasbeen serviced.
NOTE:Ifthe oven isheavily soiled,excessivesmoke and
flaringmay resultin a faultcodeduring a self-cleancycle.
If this occurs,presstheCANCELpadand allowthe oven
to coolfor an hour.
letter.Includethe informationlisted in#2 above.
MajorAppliance ConsumerAction Program
MACAPisan independentagencysponsoredby three
tradeassociationsas a courtof appealsonconsumer
Page 31

Surfaceburnerfails to light a. powersupplynot connected a. connectpower,checkcircuit
b. air in thegas line_ b.see page 7 for instructionson
c. cloggedburner port(s) c. clean portswith straightpin
d. surface control not Completely d. turncontroltotheLITEpositionuntil
turnedto theLITEpositionorturned the burner ignites,then turn control
tooquicklyfrom the LITEposition to desiredflame size
e. powerfailure e. see page 7 to light burnerduring a
f. sealed burner models: Burner will .f. cleananddry burnerhead.lfbroken
not light if the ignitor is damaged, or damaged,call a serviceman.
soiled, wet or if the port directly
belowthe ignitoris blocked.
Burnerflame uneven a. clogged burnerport(s) a. clean portswith straightpin
Surface burnerflame a. air/gas mixturenotproper a. callservicemanto adjustburner
• lifts off port b. no pan inplace b. always place pan on grate before
yellowin color lightingburner.
NOTE: Lifting of flame is normal for NOTE: Be sure installer propedy
sealed burners. Some yellow tipping adjustedrangeat time of installation.
with LP gasis normaland acceptable.
Surface burnerignitor a. controlknobis inthe LITEposition, a. be sureALLsurfaceburnercontrol
productingclickingsound NOTE:The lifeofthe ignition knobsare intheOFFpositionorare
systemmay beshortenedifthe adjustedtothe desiredflame
knobisleft inthe LITEposition, setting
b. surfacecontrolswitchismoistas a b. allowswitchtodrythenrelight
resultofcleaningthe range, burner
c. malfunctioningswitch c. callservicemantocheck
breakeror fuse box
bleedingair fromthe gasline
powerfailure
Oven burnerfails to light a. powersupplynotconnected a. connect power, check circuit
b. powerfailure b. ovenwillnotoperateduringapower
c. ovenincorrectlyset c. See pages5 or 12
d, AutomaticOvenCookingfeature d. See page16
incorrectlyset
Poppingsoundheard when Thisisa normalsoundthatoccurswithsometypesofgaswhenahotburneristurned
burnerextinguishes off.The poppingsoundisnota safetyhazardandwillnotdamagetheappliance.
Clockand/orovenlight a. powersupplynotconnected a. connectpowersupply,checkcircuit
doesnot work breakerorfusebox
b. bulbmaybelooseorburnedout b. tightenorreplacelightbulb
c. malfunctioningswitch,starteror c. call servicemanto check
ballast d. callservicemanto check
d, malfunctioningclock orloose wiring
breakerorfusebox
failure
Page 32

SERVICEINFORMATll)N
Moisturecondensationon a. itisnormalforthewindowtofogdur- a. leavedoor ajarfor one ortwomin-
ovenwindow ingthefirstfewminutesthe ovenis utestoallowmoisturetoescape
on b.Useadampclothtocleanwindowto
b. clothsaturatedwithwaterisusedto preventexcesswaterfromseeping
cleanthewindow betweenthepanelsofglass
Bakingresultsnot a. ovennotpreheated a. preheatoven8 to 15minutes
satisfactory b. incorrectrack position b. see page 26
• foodtakestoolongor c. incorrectuseofaluminumfoil c. seepage13
cookstoo fast d. ovenbottomincorrectlyreplaced d. replaceovenbottomcorrectly
• palebrowning e, doorincorrectlyreplaced e. seepage25
• foodover-doneon outside See ProblemChartonpage14
andunder-doneincenter Seebakingtipson page13
• overbrowning
Ovensmokes excessively a.foodtoocloseto burner a. move broiler pan down one rack
duringa broil operation position
b. meathastoomuchfat b. trimfat
c. sauceappliedtooearlyormarinade c. applysauceduringlastfew minutes
notcompletelydrained of cooking.Ifmeathasbeen
marinated,drainthoroughlybefore
cooking
d.soiledbroilerpan d.alwayscleanbroilerpanandinsert
e. broilerinsertcoveredwithaluminum e. nevercover insertwith foil as this
foil preventsfat from drainingto pan
aftereachuse
below
"F" plus a numberor This iscalleda FAULTCODE.If afaultcodeappearsinthe displayandbeepssound,press
lettersappearin anypadexceptthe CANCELand• or • pads.Ifthefaultcodeand beepscontinue,
display, disconnectpowerto the applianceandcallanauthorizedservicer,
Iftheovenisheavilysoiled,excessiveflare-upsmayresultina faultcodeduringa clean
cycle.Pressanypad exceptthe CANCELand • or • padsand allowoventocoolfor one
hourthenresetthecleancycle.
 Loading...