

Maytag MER5775QAW, MER5775QAS, MER5775QAQ, MER5775QAN, MER5775QAF Owner’s Manual
...
MA A(3
Precision Touch Controm 700
E_ectric Smoothtop
Tabme of Contents
Safety .......................................... 1-3
Surface Cooking ...................... 4°7
Controls
Smoothtop Surface
Warming Center
Oven Cooking ......................... 8=17
Baking
Cook & Hold
Delay
Keep Warm
Favorite
Broiling
Oven Racks
Form No. B/09/04 Pall No. 8113P461 60 ¢}2004 Maytag Appliances Sales Co. Litho U.S.A.
Care & Cleaning ................... 18-21
Sdf-Cban Oven
Charting Procedures
Maintenance ......................... 22-23
Oven Window
Oven Light
Troubleshooting ................... 24=25
Warranty & Service .................... 27
Guide d'utilisation et
d'entretien ................................... 28
Guia de Use y Cuidado ............. 56

installer: Pleaseleavethis manual with this appfiance.
lSonsumer: Please read and keep this manual for future
reference. Keep sabs receipt and/or canceled check as proof
of purchase.
Model Number
Serial Number
Date of Purchase
if _ou have questions, ca!l:
Maytag Customer Assistance
1-800-688-9900 USA
1-800-688-2002 Canada
1-800-688-2080 { U.S. 13_Yfor hearing or speech impaired}
{MonTFrL 8 am-8 pm Eastern TirneJ
Internet: http://w_Jv.maytag.com
tn ourcontinuing effort to improve the quality and performance
of our cooking prod ucts. it may be necessary to make changes
to the appliance without revising this guide.
For so.ice hffermadon, see page 27,
Warning and Important Safety Instructions appearing in
this guide are not meant to cover all possible conditions
and situations that may occur. Common sense, caution,
and care must be exercised when installing, maintaining,
or operating the appliance.
Always contact your dealer, distributor, service agent, or
manufacturer about problems or conditions you do not
understand.
Recognize Safety Symbols, Words, Labels
cian. Do not attempt to adjust, repair, service, or replace
any part of your appliance unless it is specifically recom-
mended in this guide. All other servicing should be
referred to a qualified servicer.
Always disconnect power to appliance before servicing.
To check if device is properly installed, look underneath
range with a flashlight to make sure one of the rear
bveling legs is properly engaged in the bracket sloL The
anti-tip device secures the rear leveling leg to the floor
when properly engaged. You should check this anytime
the range has been moved.
To Prevent Fire or Smoke
Be sure all packing materials are removed from the
appliance before operating iL
Keep area around appliance clear and free from combus-
tibb materiab. FIammabb materials should not be stored
in an oven_
Many plastics are vulnerable to heat. Keep plastics away
from parts of the appliance that may become warm or
hoL
COULD result in severe persona! injury or death,
CAUTUON _ Hazards or unsafe practices which
COULD resuJt in minor persona! injury.
Read and follow aH instructions before using this
appmianee to prevent the potential risk of fire, electric
shock, personal injury or damage to the appliance as a
result of improper usage of the appliance. Use appliance
only for its intended purpose as described in this guide.
To ensure proper and safe operation: Appliance must
be properly instafled and grounded by a qualified techni-
To prevent grease fires, do not let cooking grease or other
flammable materials accumulate in or near the appliance.
in Case of Fire
Use dry chemical or foam-type extinguisher or baking
soda to smother fire or f[ame. Never use water on a
grease f[re.
1_Turn off appliance to avoid spreading the f[ame.
2_N[EV[ERpick up or move a flaming pan.
3_ Smother fire or flame by closing the oven door.
Turn off appliance and ventilating hood to avoid spread-
[ng the flame. Extinguish flame then turn on hood to
remove smoke and odor.
Child Safety
NEVER use aluminum foil to cover an oven rack or oven
bottom. Misuse could result in risk of electric shock, fire,
or damage to the appliance. Use foil only as directed in
this guide.
above an appJJance, Children c!jmbing On the appliance
sedous!y injured,
NEVER leave children alone or unsupervised near the
appliance when it is in use or is still hot. Children should
never be allowed to sit or stand on any part of the appli-
ance as they could be injured or burned.
Children must be taught that the appliance and utensils in
it can be hot. Let hot utensils cool in a safe place, out of
reach of small children. Children should be taught that an
appliance is not a toy. Children should not be allowed to
play with controls or other parts of the appliance.
About Your Appliance
tean!ng or sitting On the door, may resu!t in p0ssib!e
tipping of the appliance, breakage of door, and serious
injuries,
To prevent potential hazard to the user and damage to the
appliance, do not use appliance as a space heater to heat
or warm a room. Also, do not use the oven as a storage
area for food or cooking utensils.
Do not obstruct the flow of air by blocking the oven vent.
DO NOT TOUCH HEATING ELEMENTS OR iNTERiOR
SURFACES OF OVEN. Heating elements may be hot even
though they are dark in color, interior surfaces of any
oven become hot enough to cause burns. During and
after use, do not touch, or let clothing or other flammable
materials contact heating elements or interior surfaces of
oven until they have had sufficient time to cool. Other
surfaces of the appliance may become hot enough to
cause burns - among these surfaces are: oven vent
opening and surface near this opening, oven door, win-
dow of oven door.
Do not touch a hot oven light bulb with a damp cloth as
the bulb could break Should the bulb break, disconnect
power to the appliance before removing bulb to avoid
electrical shock
Cooking Safety
Never heat an unopened food container in the oven.
Pressure build-up may cause container to burst resulting
in serious personal injury or damage to the appliance.
Use dry, sturdy potholders. Damp potholders may cause
burns from steam. Dish towels or other substitutes should
never be used as potholders because they can trail across
hot elements and ignite or get caught on appliance parts.
Wear proper apparel. Loose fitting or long hanging-
sleeved apparel should not be worn while cooking. Cloth-
ing may ignite and cause burns if garment comes in
contact with heating elements.
Always place oven racks in the desired positions while
oven is cool. Slide oven rack out to add or remove food,
using dry, sturdy potholders. Always avoid reaching into
the oven to add or remove food. If a rack must be moved
while hot, use a dry potholder. Do not let potholder contact
hot element in oven.
Use racks only in the oven in which they were shipped/
purchased.
Use care when opening the oven door. Let hot air or steam
escape before removing or replacing food.
PREPARE[} FOOD WARNUNG: Follow food
manufacturer's instructions. If a plastic frozen food con-
tainer and/or its cover distorts, warps, or is otherwise
damaged during cooking, immediately discard the food
and its container. The food could be contaminated.
Do not allow aluminum foil or meat probe to contact
heating element.
Always turn off all controls when cooking is completed.
Lftensil Safety
Follow the manufacturer's directions when using oven
cooking bags.
This appliance has been tested for safe performance
using conventional cookware. Do not use any devices or
accessories that are not specifically recommended in this
guide. Do not use add-on oven convection systems. The
use of devices or accessories that are not expressly
recommended in this guide can create serious safety

hazards,resultinperformanceproblems,andreducethe
lifeofthecomponentsoftheappliance.
Ifpanissmallerthanelement,a portionoftheelement
willbeexposedtodirectcontactandcouldigniteclothing
orpotholder.
Onlycertaintypesofglass,glass!ceramic,ceramic,
earthenware,orotherglazedutensilsaresuitablefor
cooktoporovenservicewithoutbreakingduetothe
suddenchangeintemperature.Followutensil
manufacturer'sinstructionswhenusingglass.
Clean with caution. Use care to avoid steam burns if a wet
sponge or cloth is used to wipe spills on a hot surface.
Some cleaners can produce noxious fumes if applied to a
hot surface.
Clean only parts listed in this guide.
Se f-C ean Oven
Turnpanhandletowardcenterofcooktop,notoutinto
theroomoroveranothersurfaceelemenLThisreduces
theriskofburns,ignitionofflammablematerials,or
spillageifpanisaccidentiybumpedorreachedbysmall
children.
NEVERleavesurfaceunitsunattendedespeciallywhen
usinghighheat.Anunattendedboilovercouldcause
smokingandagreasyspillovercancauseafire.
Thisapplianceisequippedwithdifferentsizesurface
elements.Selectpanswithflatbottomslargeenoughto
coverelement.Fittingpansizetoelementwillimprove
cookingefficiency.
GEASS_CERAMUCSURFACE:NEVERcookonbroken
cooktop.Ifcooktopshouldbreak,cleaningsolutionsand
spiiioversmaypenetratethebrokencooktopandcreatea
riskofelectricshockContactaqualifiedtechnician
immediateiy.
Deep Fat Fryers
Use extreme caution when moving the grease pan or
disposing of hot grease. Allow grease to cool before
attempting to move pan.
Ventimating Hoods
Clean range hood and filters frequently to prevent grease
or other flammable materials from accumulating on hood
or filter and to avoid grease fires.
When flaming foods under the hood, turn the fan on.
Cmeaning Safety
Clean cooktop with caution. Turn off aii controls and wait
for appliance parts to cool before touching or cleaning.
utensils, etc. in the oven during the stir-clean cycle.
Do not clean door gasket. The door gasket is essential for
a good seal Care should be taken not to rub, damage, or
move the gaskeL
Do not use oven cleaners or oven liners of any kind in or
around any part of the self-clean oven.
Before self-cleaning the oven, remove broiler pan, oven
racks and other utensils, and wipe off excessive spillovers
to prevent excessive smoke or flare ups.
important Safety Notice and
The California Safe Drinking Water and Toxic Enforcement
Act of 1986 (Proposition 65} requires the Governor of
California to publish a list of substances known to the
State of California to cause cancer or reproductive harm,
and requires businesses to warn customers of potential
exposures to such substances.
Users of this appliance are hereby warned that when the
oven is engaged in the self-clean cycle, there may be
some low-level exposure to some of the listed substances,
including carbon monoxide. Exposure to these substances
can be minimized by properly venting the oven to the
outdoors by opening the windows and/or door in the room
where the appliance is located during the self-clean cycie.
UMPORTANT NOTUCE REGARDUNG PET BURDS: Never
keep pet birds in the kitchen or in rooms where the fumes
from the kitchen could reach. Birds have a vep! sensitive
respiratory system. Fumes released during an oven self-
cleaning cycle may be harmful or fatal to birds. Fumes
released due to overheated cooking off, fat, margarine and
overheated non-stick cookware may be equally harmful
Save These instructions for Future Reference
3
Surface Controls
Use to turn on the surface elements. An infinite choice of
heat settings is available from Lew to High. The knobs can
be set on or between any of the settings.
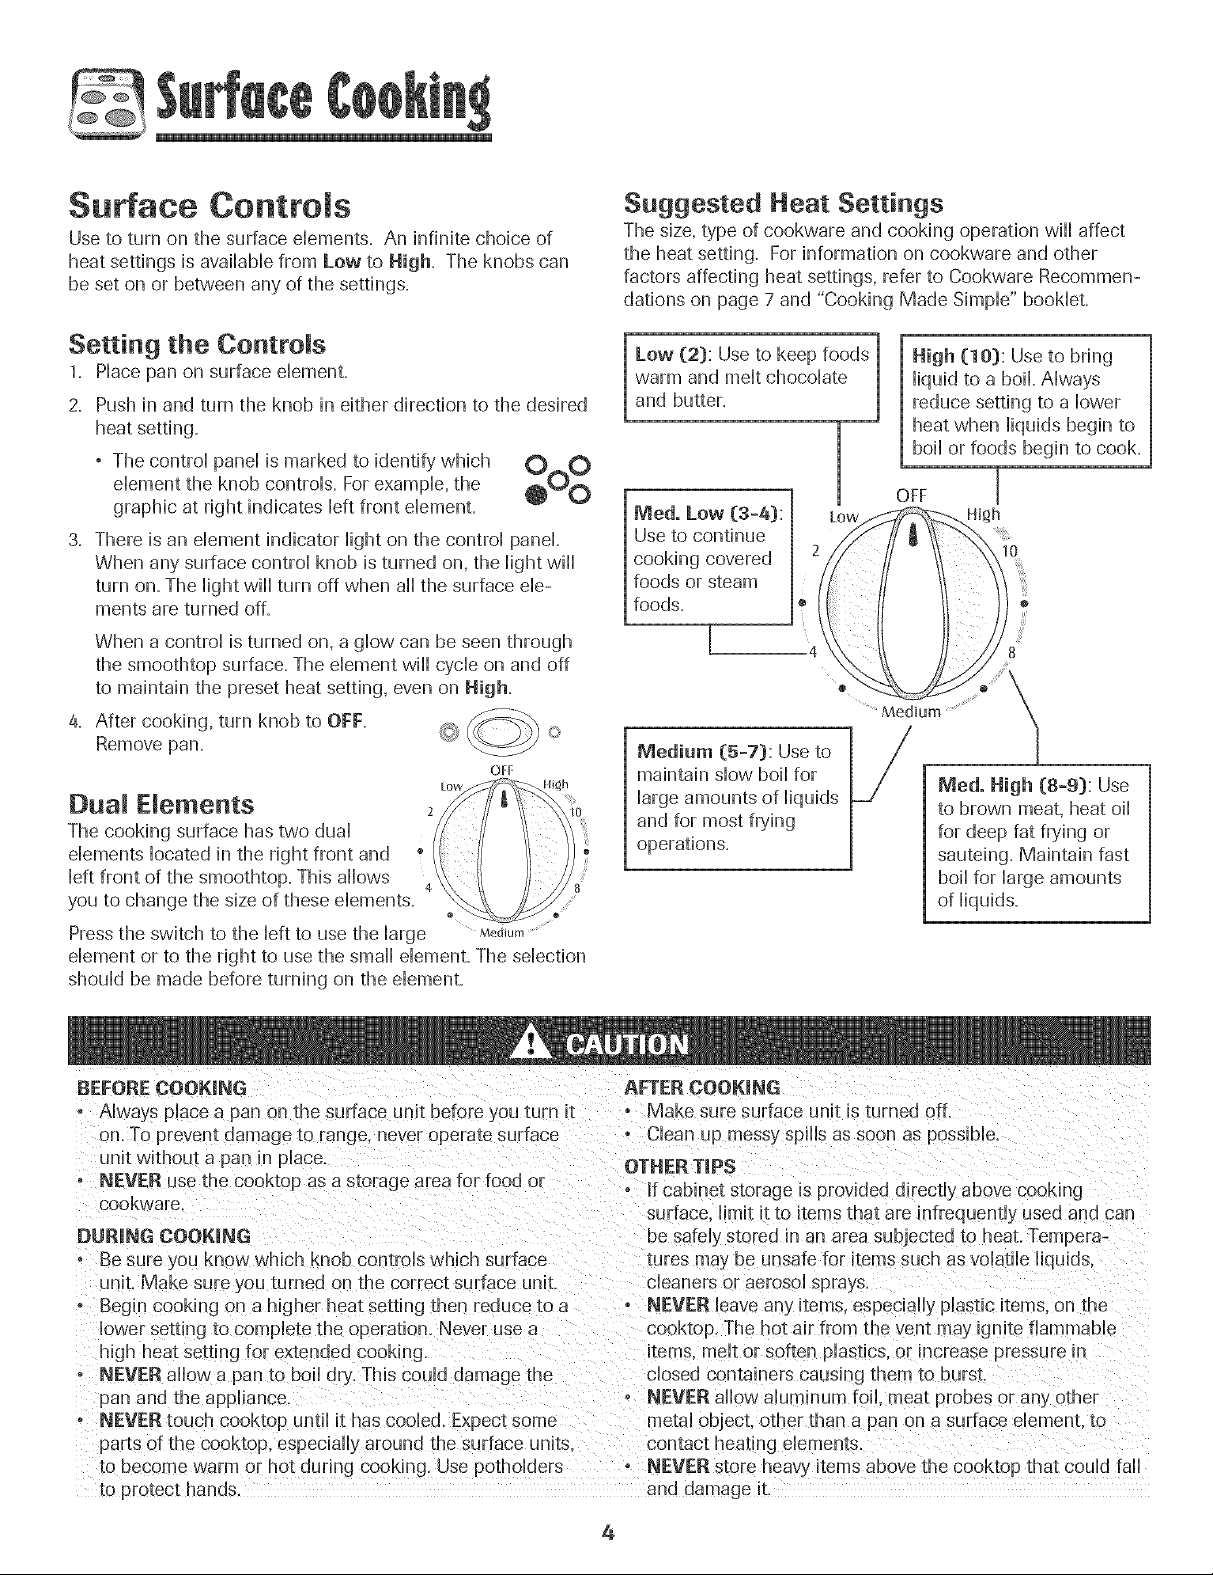
Suggested Heat Settings
The size, type of cookware and cooking operation will affect
the heat setting. For information on cookware and other
factors affecting heat settings, refer to Cookware Recommen-
dations on page 7 and "Cooking Made Simple" booklet.
Setting the ControJs
1. Place pan on surface element.
2. Push in and turn the knob in either direction to the desired
° The control panel is marked to identify which O O
element the knob controls. For example, the _O_---_
graphic at right indicates left front element.
3. There is an element indicator light on the control panel.
When any surface control knob isturned on, the light will
turn on. The light will turn off when all the surface ele-
ments are turned off.
When a control is turned on, a glow can be seen through
the smoothtop surface. The element will cycle on and off
to maintain the preset heat setting, even on High.
4. After cooking, turn knob to OFF.
Remove pan.
O
OFF
Dual Elements 2
The cooking surface has two dual
elements located in the right front and +
left front of the smoothtop. This allows
you to change the size of these elements.
Press the switch to the left to use the large M_d+u,,+
element or to the right to use the small element. The selection
should be made before turning on the element.
.
Medo Low (3-4):
Use to continue
cooking covered
foods or steam
foods.
Medium (5-7): Use to
maintain stow boil for
large amounts of liquids
and for most frying
operations.
High (10): Use to bring
liquid to a boil. Always
reduce setting to a lower
heat when liquids begin to
boil or foods begin to cook.
1
OFF [
.......Medium ...............
Medo High (8=9): Use
to brown meat, heat oil
for deep fat frying or
sauteing. Maintain fast
boil for large amounts
of liquids.
High
I0
@
B
BEFORECOOKING AFTER COOKING
+ Always place a pan on the surface unit before you turn it • Make sure surface unit is turned off.
on. To prevent damage to range, never operate surface o Clean up messy spills as soon as possible.
Jnit without a pan in place.
, NEVER use the cooktop as a storage area for food or
cookware.
DURING COOKING
o Be sure you know which knob controls which surface
unit. Make sure l ou turned on the correct surface unit
. Begin cooking on a higher heat setting :hen reduce to a
lower setting to complete the operation. Never use a
high heat setting for extended cooking.
o NEVER allow a pan to boil dry. This could damage the
pan and the appliance.
• NEVERtouch cooktop until it has cooled. Expect some
parts of the cooktop, especially around the surface units
to become warm or hot during cooking. Use potholders
_oprotect hands.
OTHERTiPS
- if cabinet storage is provided directly above cooking
sutrace, limit it to items that are infrequently used and can
be safely stored in an area subjected to heat. Tempera-
tures may be unsafe for items such asvolatile liquids.
cleaners oHaerosol sprays
• NEVER ]eave any items, especially plastic items, on the
cooktop. The hot air from the vent may ignite flammable
items, melt or soften plastics, ouincrease pressure in
closed containers causing them to burst.
NEVER allow aluminum foil. meat probes or any other
metal object, other than a pan on a surface dement, to
contact heating dements.
NEVER store heav} items above the cooktop that could fail
and damage it.
4

S oothtop Surface
Smoothtop Surface Notes:
. Cooktop may emit mightsmoke and odor the first few
times the cooktop is used. This is normal
. Smoothtop cooktops retain heat for a period of time
after the element is turned off. Turn the dements off
a few minutes before food is compHeteHycooked and use
the retained heat to compHetecooking. When the hot
surface Hightturns off, the cooking area will]be coo]
enough to touch. Because of the way they retain heat, the
smoothtop dements will] not respond to changes in
settings as quickHyas coi] dements.
° In the event of a potentia] boiHover,remove the pan from
the cooking surface.
, Never attempt to miftthe cooktopo
° The smoothtop surface may appear discoHoredwhen it is
hot. This is norma] and will] disappear when the surface
cooHs=
Cooking Areas
The cooking areas on your range are identified by permanent
circHeson the smoothtop surface. For most efficient cooking,
fit the pan size to the dement size.
Pans should not extend more than ,/2 to t-inch beyond
the cooking area.
When a controHis turned on, a gHowcan be seen through the
smoothtop surface. The element will cycle on and off to
maintain the preset heat setting, even on Hi.
For more information on cookware, refer to Cookware
Recommendations on page 7 and "Cooking Made SimpHe"
bookHetincHudedwith your range.
SINGLE WARMING CENTER
ELEMENT
SINGLE
ELEMENT
DUAL
ELEMENT
Hot Surface Light
The Hot Surface indicator Hightis Hocatedon the
controHpanel The HightwiHHbe iHHuminated
when any cooking area is hot. It wiHHremain on,
even after the controH isturned off, untiHthe area has cooHed=
Hef_ Surface
Warming Center
Use the Warming Center to keep hot cooked foods warm, such
as vegetabHes,gravies and oven-safe dinner pHates=
Setting the Control:
OFF
1. Push in and turn the knob. Wanning
temperatures are approximate and
Max
are indicated on the controHas Min,
2-8 and Max. However, the controH Mn
can be set to any position between
Min and Ma×=
2,
When done, turn the control to OFF _ ...............5...................
and remove food. The Hot Surface indicator
Hightwill[go off when theWarming Center surface hascooHed=
Notes:
. Never warm food for longer than one hour _eggs for 30
minutes), as food quaHitymay deteriorate.
° Do not heat coHdfood on the Warming Center.
° Heat settings wiHHvary depending on type and amount
of food. AHwayshoHdfood at proper food temperatures.
USDA recommends food temperatures between
140°-170° F,
Suggested Settings
Setting Type of feed
Min = 2 Breads/Pastries Gravies
CasseroHes Eggs
2 = 5 Dinner Plate with Food Sauces
Soups (Cream} Stews
VegetabHes Meats
5 - Max Fried Foods Hot Beverages
Soups (Liquid)
Warming Center Notes:
° Use onHycookwam and dishes recommended as safe for
oven and cooktop use.
° AHwaysuse oven mitts when removing food from the
Warming Center as cookware and pHateswiHHbe hot.
° AHHfoods shouHdbe covered with a Hidor aHuminumfoiHto
maintain food qua[it},.
° When warming pastries and breads the cover shouHdhave
an opening to aHHowmoisture to escape.
° Do not use pHasticwrap to cover foods. PHasticmay merit
on to the surface and be very difficuHt to dean.
8
5
Tips to Protect the
Smoothtop Surface
C_ea_ing (see page 20 for more information}
, Before first use, clean the cooktop.
, Clean your cooktop daily or after each use. This wiii keep
your cooktop looking good and can prevent damage.
, if a spillover occurs while cooking, immediately clean the
spill from the cooking area while it is hot to prevent a tough
cleaning chore later. Using extreme care, wipe spill with a
clean dry,towel
° Do not allow spills to remain on the cooking area or the
cooktop trim for a long period of time.
° Never use abrasive cleansing powders or scouring pads
which wiii scratch the cooktop.
° Never use chlorine bleach, ammonia or other cleansers not
specifically recommended for use on glass-ceramic.
To Prevent Marks & Scratches
, Do not use glass pans. They may scratch the surface.
, Never place a trivet or wok ring between the surface and
pan. These items can mark or etch the top.
, Do not slide aluminum pans across a hot surface. The pans
may leave marks which need to be removed promptly. (See
Cleaning, page 20.}
, Make sure the surface and the pan bottom are clean before
turning on to prevent scratches.
, To prevent scratching or damage to the glass-ceramic top,
do not leave sugar, salt or fats on the cooking area. Wipe
the cooktop surface with a clean cloth or paper towel
before using.
, Never slide heavy metal pans across the surface since
these may scratch.
To Prevent Stains
, Never use a soiled dish cloth or sponge to clean the
cooktop surface. A film will remain which may cause stains
on the cooking surface after the area is heated.
° Continuously cooking on a soiled surface may/will result in
a permanent stain.
To Prevent Other Damage
° Do not allow plastic, sugar or foods with high sugar content
to melt onto the hot cooktop. Should this happen, clean
immediately. (See Cleaning, page 20.}
° Never let a pan boil dry as this will damage the surface and
pan.
° Never use cooktop as awork surface or cutting board.
° Never cook food directly on the surface.
° Do not use a small pan on a large element. Not only does
this waste energy, but it can also result in spillovers burning
onto the cooking area which requires extra cleaning.
° Do not use non-fiat specialty items that are oversized or
uneven such as round bottom woks, rippled bottom and/or
oversized canners and griddles.
° Do not use foil or foil-type containers. Foil may melt onto
the glass, if metal melts on the cooktop, do not use. Call an
authorized Maytag Servicer.
! ....
Cookware Recommendations
Using the right cookware can prevent many proMems, such
as food taking bnger to cook or achieving inconsistent
resuits, Proper pans will reduce cooking times, use Hess
energy, and cook food more eveniy,
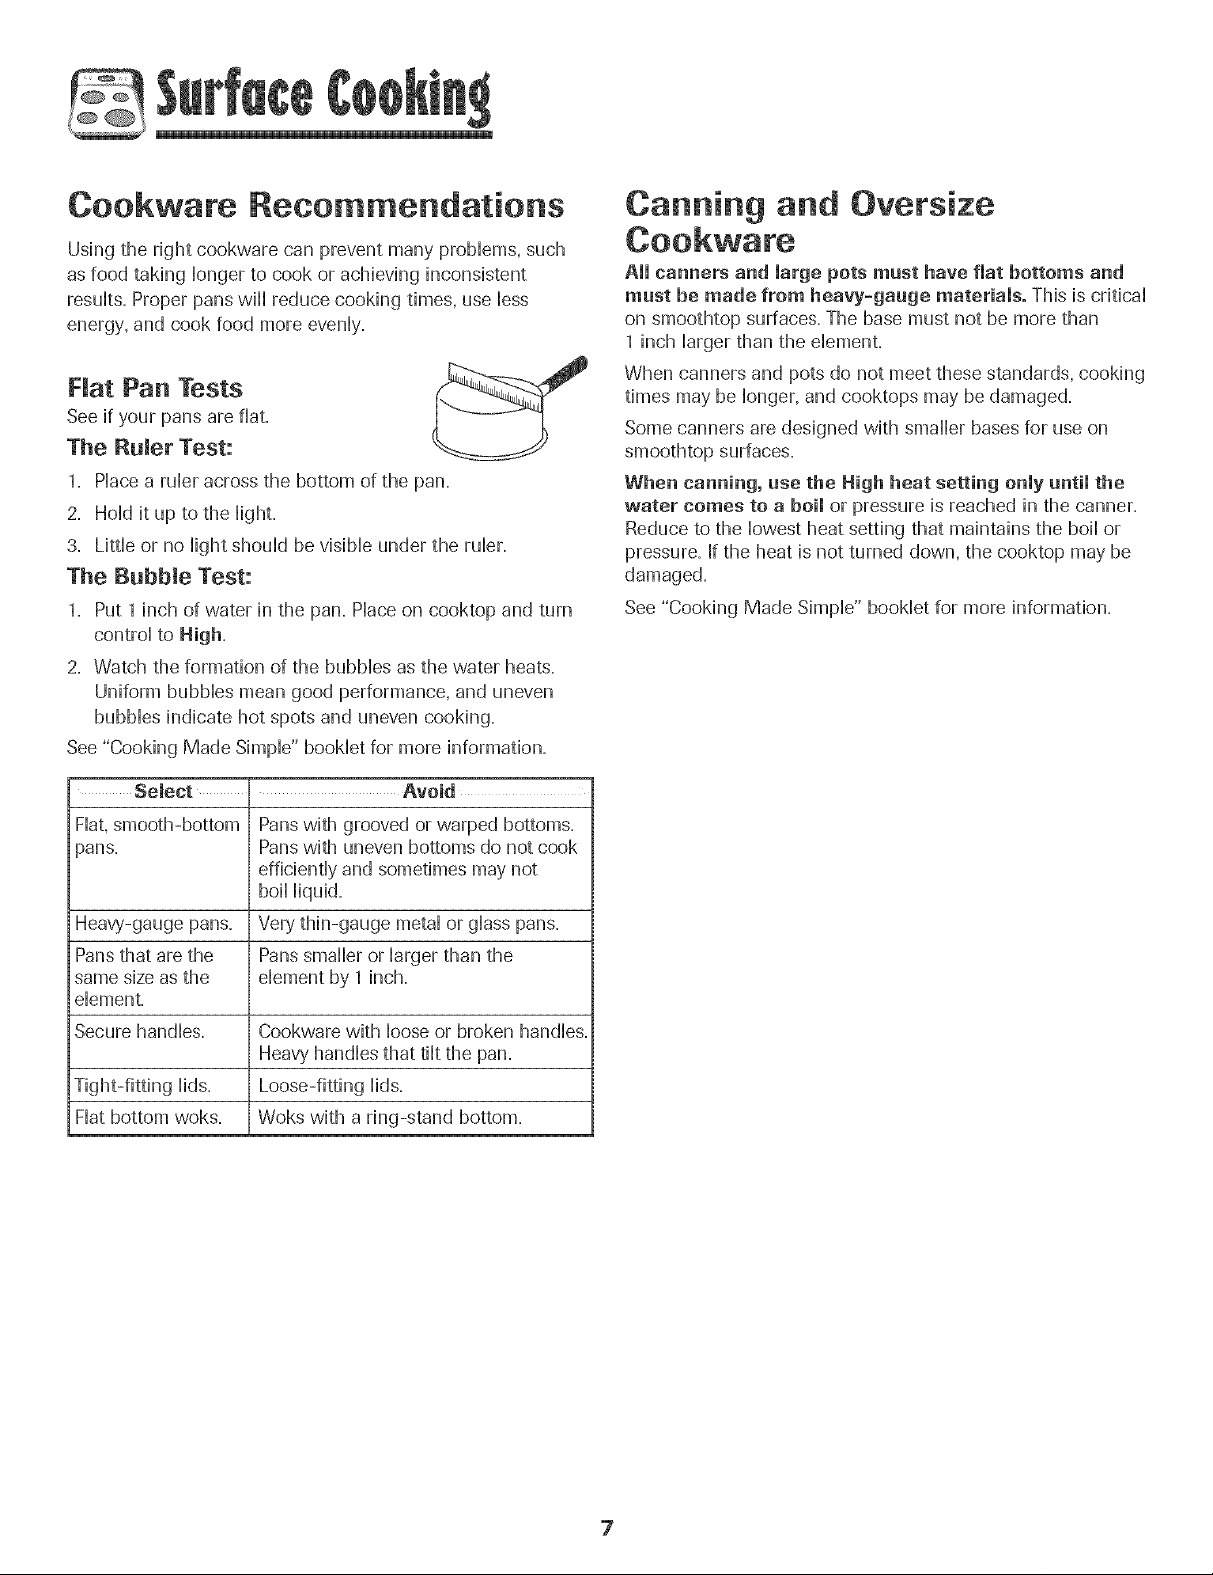
Nat Pan Tests
See if your pans are fiat,
The RumorTest:
1, Hace a rubr across the bottom of the pan,
2, Hoid it up to the Hight,
3, Litde or no Hightshouid be vbiMe under the rubr,
The Babble Test:
1, Put 1 inch of water in the pan, Pbce on cooktop and turn
controi to High,
2, Watch the formation of the bubMes as the water heats,
Uniform bubbbs mean good performance, and uneven
bubMes indicate hot spots and uneven cooking,
See "Cooking Made Simpb" bookbt for more information,
Canning and Oversize
All canners and large pots must have flat bottoms and
must be made from heavy-gauge materials° This is critical
on smoothtop surfaces, The base must not be more than
1 inch larger than the dement,
When canners and pots do not meet these standards, cooking
times may be longer, and cooktops may be damaged,
Some canners are designed with smalbr bases for use on
smoothtop surfaces,
When canning, use the High heat setting only until the
water comes to a boil or pressure is reached in the canner,
Reduce to the lowest heat setting that maintains the boil or
pressure, If the heat is not turned down, the cooktop may be
damaged,
See "Cooking Made Simpb" booklet for more information,
Select Avoid
Flat,smooth-bottom Panswith grooved or warped bottoms,
pans, Panswith uneven bottoms do not cook
efficiently and sometimes may not
Heavy-gauge pans, Very thin-gauge metal or glass pans,
Pansthat are the Panssmaller or larger than the
same size as the element by 1 inch,
dement.
Secure handles. Cookware with loose or broken handles.
Heavy'handles that tilt the pan.
Loose-fitting lids.
Hat bottom woks. Woks with a ring-stand bottom.

C D
E F G
The controi panei isdesigned for easein programming. Thedispiaywindow on the controi shows timeof day,timer and oven functions.
Controi panei shown inciudes modei specific features. (Styiing may vary depending on modek}
A
Broii
Bake
B
c ¸
More+/Less-
Timer
Cook &Hoid
CHean
F
Favorite
H
Clock
Keep Warm
J
CANCEL
Using the Touchpads
Pressthe desired pad.
Press More+ or Less- to enter time or temperature.
, A beep wiii sound when any pad is touched.
° A doubie beep wiii sound if a programming error occurs.
Note: Four seconds after pressing the More+ or Less-
pads, the time or temperature will automatically be
entered. If more than 30 seconds elapse between touch-
ing a function pad and the More+ or Less- pads, the
function will be canceled and the display will return to the
previous display.
Use for broiling andtop browning.
Use for baking and roasting.
Enters or changes time, oven
temperature. Sets HIor LO broil.
Sets Timer.
Bakes for apreset time, then holds food
warm for 1 hour.
Use to set self-clean cycle.
Use to set and save a specific Cook &
Hold procedure.
Use to set time-of-day clock.
Use to keep cooked food warm in oven.
Cancels all operations except Timer
and Clock.
The clock can be set to display time in a 12-hour or 24-hour
format. The clock is set at the factory for the 12-hour fornlat.
To change the clock to 24-honr format:
1. Pressand hold the CANCEL and
Favorite pads for three seconds.
2. Pressthe More+ or Less - pad to
select 12 or 24 hour.
3. Set the time of day following the
directions below.
To set the Clock:
1. Pressthe Clock pad.
, The colon flashes in the display.
2. Press More+ or Less- to set the time of day.
, Colon continues flashing.
3. Pressthe Clock pad again or wait four
seconds. The colon stops flashing.
When electrical power is supplied or after a
power interruption, the last clock time before
power was interrupted wiii flash.
To recall the time of day when another time function is
showing, press the Clock pad.
Clock time cannot be changed when the oven has been
programmed for cook or clean Delay or Cook & Hold.
%......................................."
Less ,:
conto
8

To cancel the CJockdispmay:
If you do not want the time of day to dispHay:
Press and hoHdthe CANCEL and CHock
pads for three seconds. The time of day
wiHHdisappear from the dispHay
When the chock dispHayis cancelled, press
the CHockpad to briefly dispHaythe time
of day.
To restore the CJock display:
Press and hoHdthe CANCEL and CHockpads for three sec-
onds. The time of day wiHHreappear in the dispHay.
The timer can be set from one minute (0:01) up to 99 hours
and 59 minutes (99:59).
The timer can be used independentHyof any other oven
activity'. Itcan aHsobe set whiHeanother oven function is
operating.
The Timer does not controHthe oven. It onHycontroHsa
beeper,
To set the Timer:
1. Press the Timer pad.
° 0:00 Hightsin the dispHay.
° The coHonwiHHflash.
2.
Press the More+ or Less- pad until the L_:'ss-
correct time appears in the dispHay. ........................................
° The coHonwiHHcontinue to flash,
3,
PressTimer pad again or wait four seconds.
° The coHoncontinues flashing and the time begins
counting down.
° The Hastminute of the timer countdown wiHHbe dispHayed
as seconds.
Timer
Locking the Control
and Oven Dooc
The touchpad controls and oven door can be Hockedfor
safety, cleaning, or to prevent unwanted use. They will not
function when locked.
If the oven is currentHyin use, the controHsand door cannot be
Hocked.
The current time of day wiHHremain in the dispHaywhen the
controHsare Hocked.
To lock:
Press and hoHdthe CANCEL and Cook &
HoHdpads for three seconds. (Press
CANCEL pad first.[)
LOCKflashes in the dispHay.
To unlock:
Press and hoHdthe CANCEL and Cook & HoHdpads for three
seconds. (Press CANCEL pad first.)
LOCKdisappears from the dispHay.
Fault Codes
BAKE or LOCK may flash rapidHyin the dispHayto aHertyou if
there is an error or a probHem. If BAKEor LOCKflash in the
dispHay,press CanceHpad. If BAKEor LOCK continue to flash,
disconnect power to the appHiance. Wait a few minutes, and
then reconnect power=If the flashing stiHHcontinues, discon-
nect power to the appHianceand caHHan authorized servicer.
4. At the end of the set time, one Hongbeep wiHHsound.
To cancel the Timec:
1. Press and hoHdthe Timer pad for three seconds.
OR
2, Press the Timer pad and set the time to 0:00,
9
Baking Differences Between Your O_d
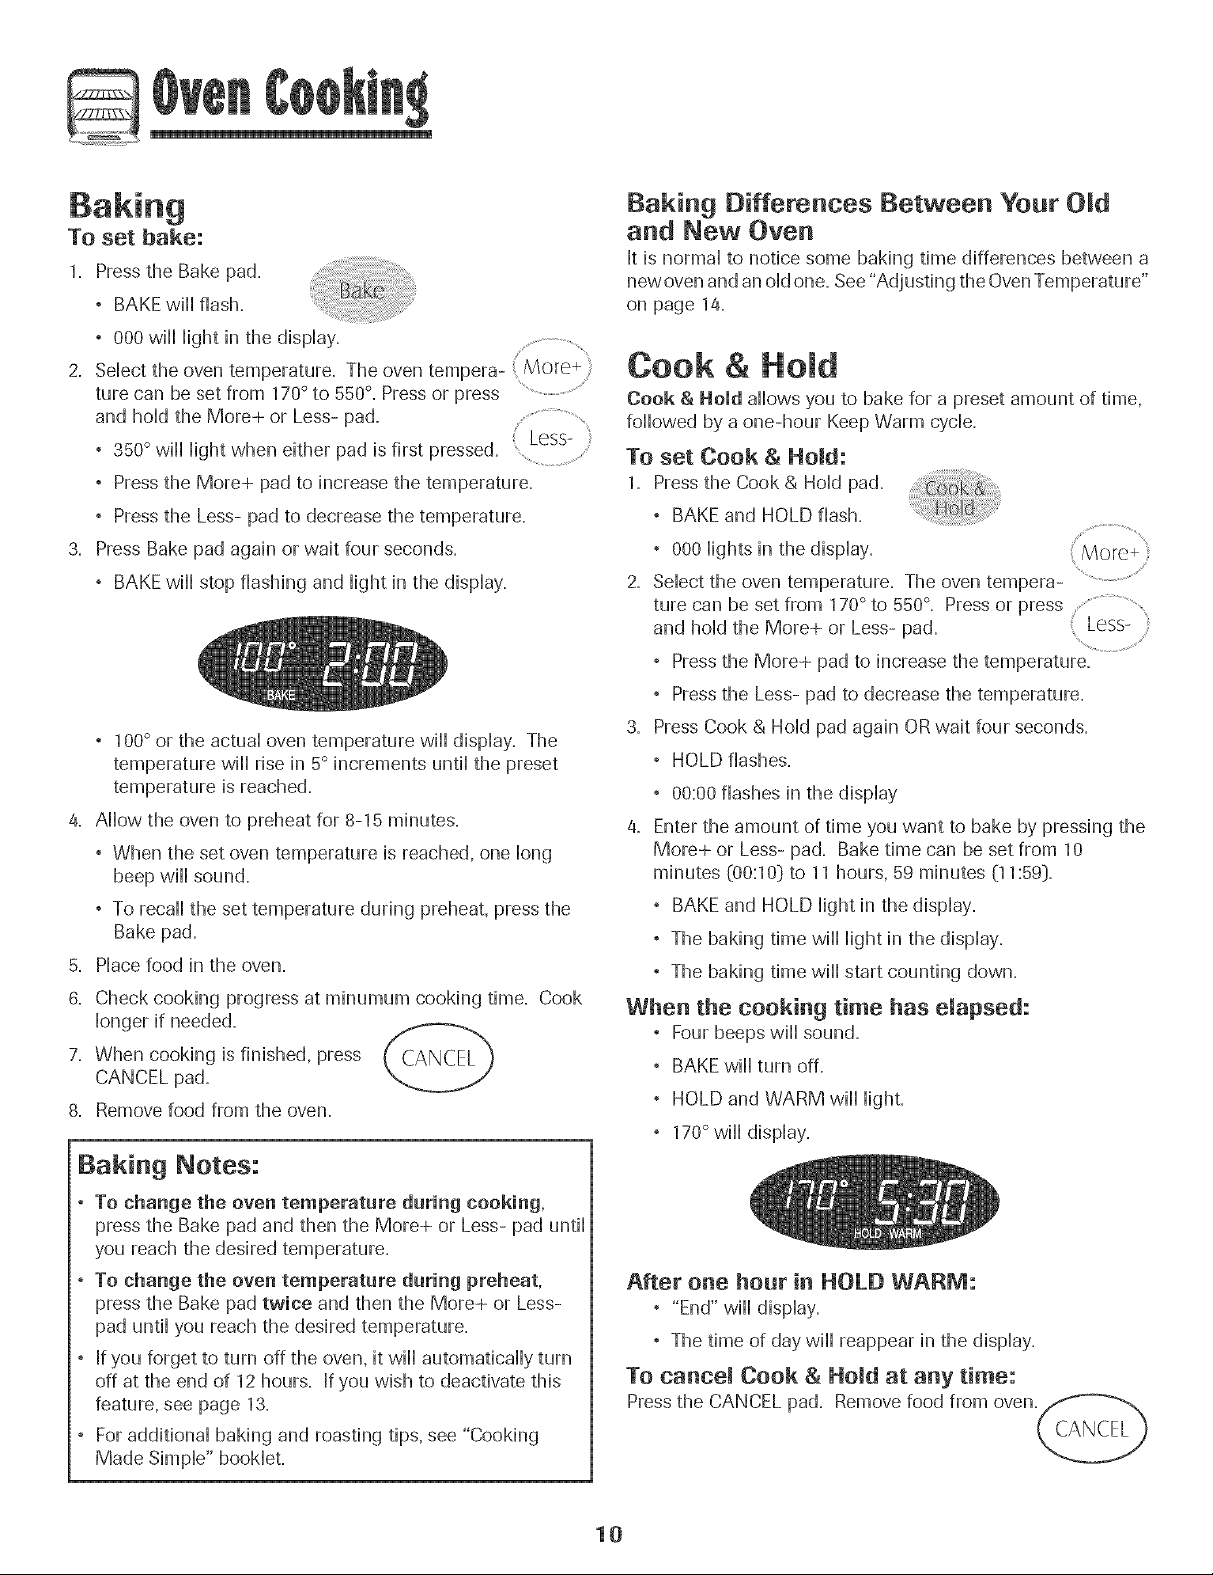
To set bake:
1. Press the Bake pad.
, BAKEwill flash+
, 000 will Hightin the dispiay.
2. Sebct the oven temperature+ The oven tempera- More+
ture can be set from 170° to 550°. Pressor press ......................................
and hold the More+ or Less- pad.
, 350°will light when either pad is first pressed. { Less- [
, Press the More+ pad to increase the temperature.
, Press the Less- pad to decrease the temperature.
3. Press Bake pad again or wait four seconds.
, BAKEwill stop flashing and light in the display.
, 100° or the actua] oven temperature will dispiay. The
temperature will rise in 5° increments und] the preset
temperature is reached.
4. Aiiow the oven to preheat for 8-15 minutes.
, When the set oven temperature is reached, one ]ong
beep will sound.
, To recall]the set temperature during preheat, press the
Bake pad.
5. Piace food in the oven.
8. Check cooking progress at minumum cooking time. Cook
bnger if needed.
7. When cooking is finished, press CANCEL
CANCEL pad.
8. Remove food from the oven.
and New Oven
It is normal to notice some baking time differences between a
new oven and an old one. See"Adjusting the OvenTemperature"
on page 14.
Cook & Hold
Cook & Hold allows you to bake for a preset amount of time,
followed by a one-hour Keep Warm cycb.
TO set Cook & Hold:
1. Pressthe Cook & Hold pad.
2. Select the oven temperature. The oven tempera-
3. Press Cook & Hold pad again ORwait four seconds.
& Enter the amount of time you want to bake by pressing the
When the cooking time has elapsed:
° BAKEand HOLD flash+
° 000lights in the display.
ture can be set from 170° to 550°. Press or press .............................
and hold the More+ or Less- pad. Less-
_ Pressthe More+ pad to increase the temperature.
° Pressthe Less- pad to decrease the temperature+
° HOLD flashes+
° 00:00flashes in the display
More+ or Less- pad. Bake time can be set from 10
minutes @0:10}to 11 hours, 59 minutes (11:59}.
° BAKEand HOLD light in the display.
° The baking time will light in the display.
° The baking time will start counting down.
° Four beeps wiii sound.
° BAKEwill turn off.
° HOLD and WARM will lighL
, 170°will display.
More+
....................
Baking Notes:
, To change the oven temperature daring cooking,
press the Bake pad and then the More+ or Less- pad until
you reach the desired temperature.
, To change the oven temperatare daring preheat,
press the Bake pad twice and then the More+ or Less-
pad until you reach the desired temperature.
, If you forget to turn off the oven, it will automatically turn
off at the end of 12 hours. If you wish to deactivate this
feature, see page 13.
° Foradditional baking and roasting tips, see "Cooking
Made Simple" bookleL
After one hour in HOLD WARM:
° "End" will display+
° The time of day wiii reappear in the display.
To cancel Cook & Hold at any time:
Press the CANCEL pad, Remove food from oven, F_,_
10
De ay Bake
as dairy products, pork, poultry, or seafood.
When using Delay, the oven begins to cook Haterin the day.
Set the amount of time that you want to dday before the oven
turns on and how Hongyou want to cook. The oven begins to
heat at the seHectedtime and cooks for the specified Hengthof
time, then keeps food warm for one hour.
Dday time can be set from 10 minutes (00:10] to 11 hours, 59
minutes (11:59].
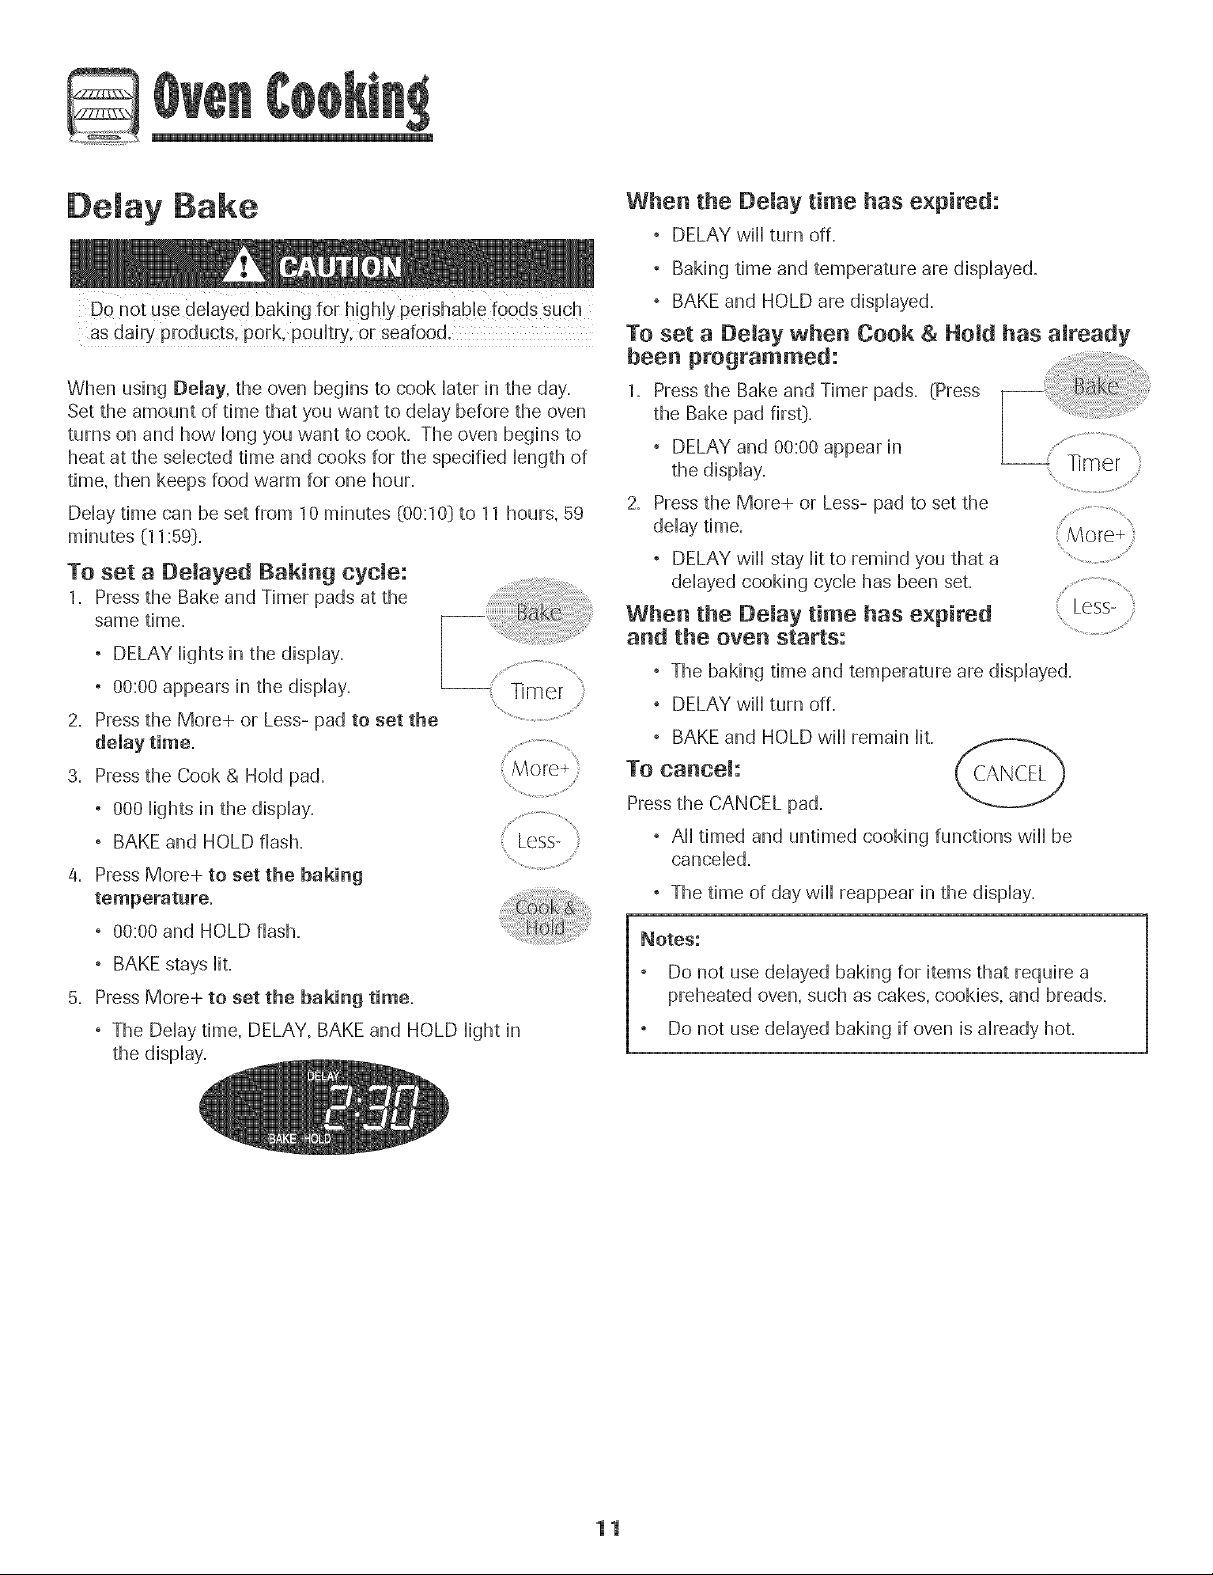
To set a Belayed Baking cycle:
1. Pressthe Bake and Timer pads at the
same time.
, DELAY Hightsin the dispHay.
, 00:00 appears in the dispHay.
2. Pressthe More+ or Less- pad to set the
Timer
When the Belay time has expired:
, DELAY will turn off=
, Baking time and temperature are displayed.
, BAKE and HOLD are displayed.
To set a Belay when Cook & Hold has already
been programmed:
1. Pressthe Bake and Timer pads. (Press
the Bake pad firsO.
, DELAY and 00:00appear in ...............................................Timer
the display.
2. Pressthe More+ or Less- pad to set the
delay time.
, DELAY wi]] stay ]it to remind you that a .........................
delayed cooking cycle has been set. ...............................
When the Belay time has expired : Less-
and the oven starts: ...........................
, The baking time and temperature are displayed.
, DELAY will turn off.
, BAKE and HOLD will remain lit.
3. Press the Cook & HoHdpad.
, 000 Hights in the dispHay.
, BAKE and HOLD flash.
4. Press More+ to set the baking
temperature.
, 00:00 and HOLD flash.
, BAKEstays Hit.
5. PressMore+ to set the baking time,
, The Dday time, DELAY, BAKEand HOLD Hightin
the display.
Less-
To cancel: CANCEL
Press the CANCEL pad.
, All timed and untimed cooking functions will be
canceled.
, The time of day will reappear in the display.
Notes:
Do not use delayed baking for items that require a
preheated oven, such as cakes, cookies, and breads.
Do not use delayed baking if oven is already hot.
11
Keep War
For safeHykeephg foods warm or for warmhg breads and
pHates.
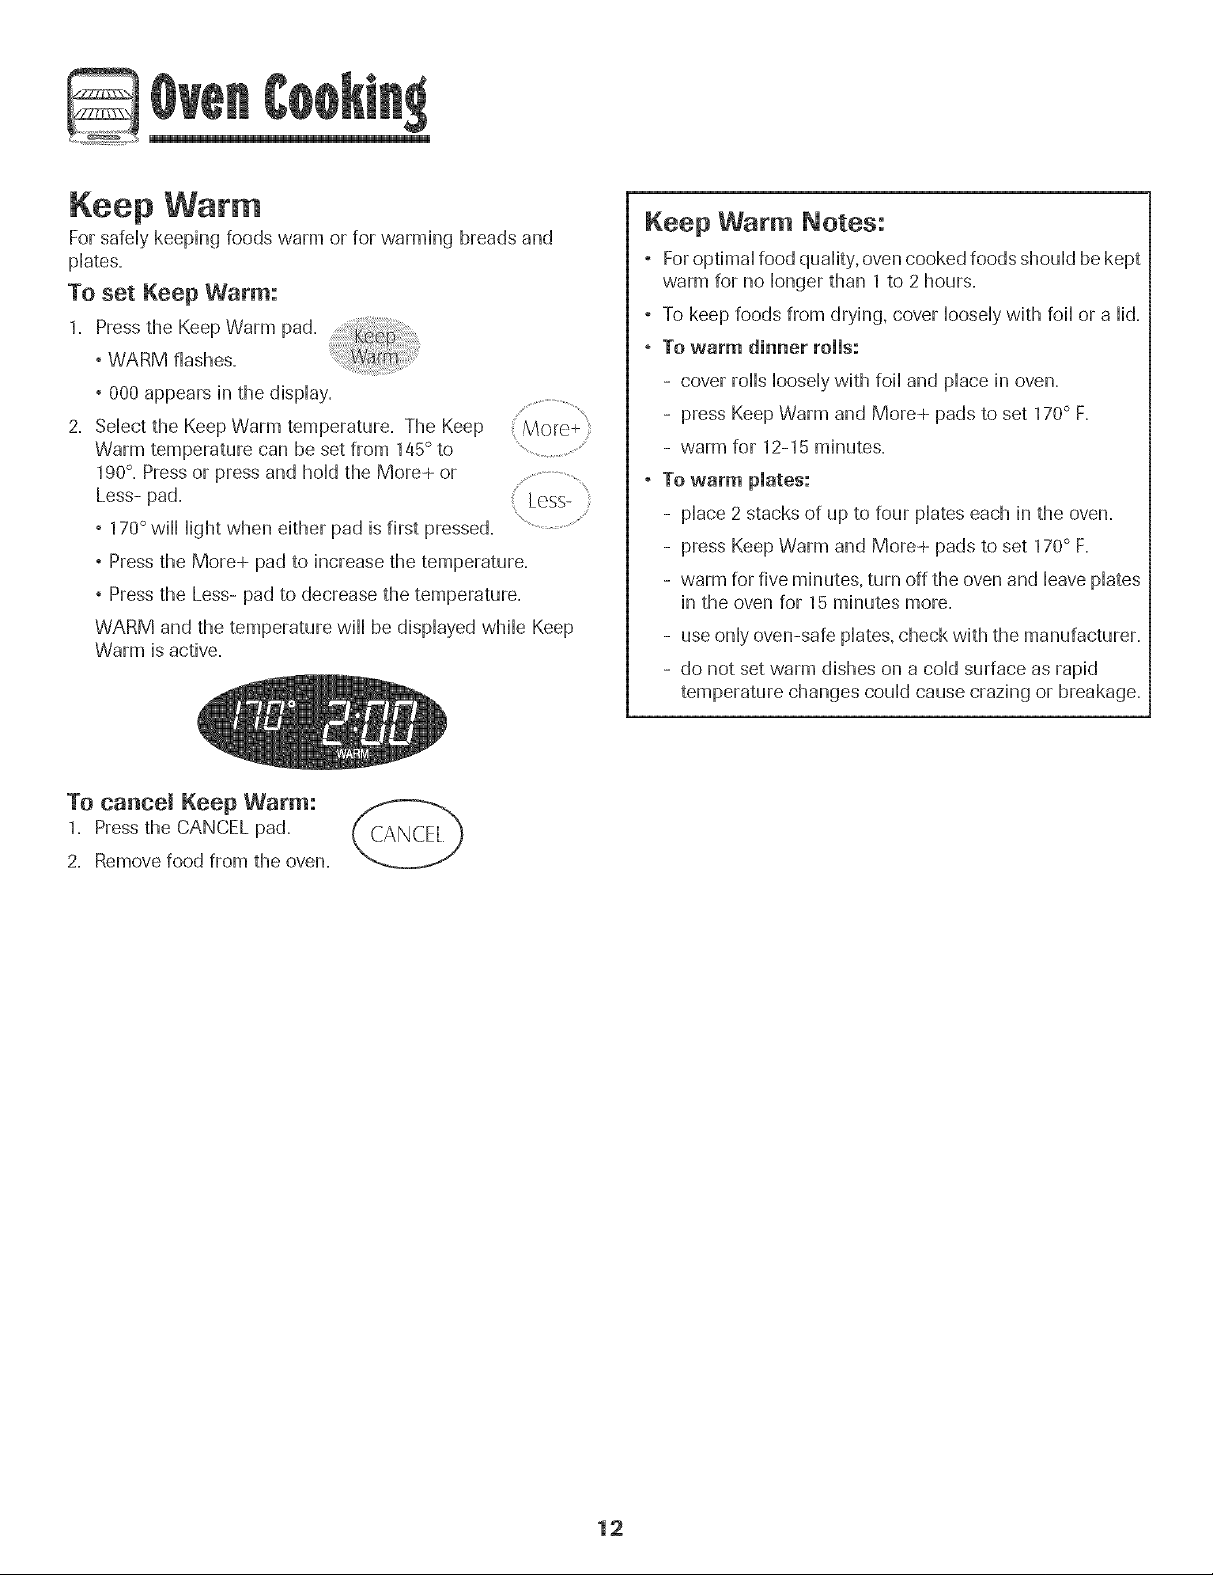
To set Keep Warm:
1. Press the KeepWarm pad.
° WARM flashes. ....
° 000 appears in the dispHay.
2. SeHectthe Keep Warm temperature. The Keep
Warm temperature can be set from 145°to
190°.Press or press and hoHdthe More+ or
Less- pad.
° 170°wiHHHightwhen either pad is first pressed.
, Pressthe More+ pad to increase the temperature.
° Pressthe Less- pad to decrease the temperature.
WARM and the temperature wiHHbe dispHayedwMHeKeep
Warm is active.
Less-
Keep Warm Notes:
° ForoptimaHfood quaHity,ovencooked foods shouHdbe kept
warm for no Hongerthan 1 to 2 hours.
° To keep foods from drying, cover HooseHywith foiHor a Hid.
, To warm dinner rolls:
- cover roHHsHooseHywith foiHand pHacein oven.
- press Keep Warm and More+ pads to set 170° F.
- warm for 12-15 minutes.
, To warm plates:
- pHace2 stacks of up to four pHateseach in the oven.
- press Keep Warm and More+ pads to set 170° F.
- warm for five minutes, turn off the oven and HeavepHates
in the oven for 15 minutes more.
- use onHyoven-safe pHates,check with the manufacturer.
- do not set warm dishes on a coHdsurface as rapid
temperature changes couHdcause crazing or breakage.
To cancem Keep Warm:
1. Press the CANCEL pad.
2. Remove food from the oven.
12
Automatic Shut-Off/Sabbath
Mode
The oven will automatically turn off after 12hours if you
accidentally Heaveit on= This safety feature can be turned off=
TO cancel the 12-hour shut-off and run the
oven continuously for 72 hours:
1=Set the oven to bake (see page 10D=
2. Press and hoHdthe CHockpad for five seconds.
° SAb will be dispHayedand flash for five seconds.
° SAb will then be dispHayedcontinuousHyuntiHturned off
or until the 72-hour time limit is reached.
° BAKEwill also be displayed if a bake cycle is in use
while the oven is in Sabbath Mode.
All other functions EXCEPTBAKE(Timer, Keep Warm,
Clean, etc=_)are locked out during the Sabbath Mode.
To cancel Bake when in Sabbath Mode:
Press CANCEL.
, BAKEwill turn off in the display. CANCEL
, No beeps will sound.
To cancel the Sabbath Mode:
Sabbath Mode Notes:
, Sabbath Mode can be turned on at any time with or
without the oven on=
° Sabbath Mode cannot be turned on if the touchpads are
locked out or when the door is locked.
If the oven is baking when Sabbath Mode isset, BAKE
will go out at the end of the baking cycle. There will be
no audible beeps.
If the oven light is desired while in Sabbath Mode, it
must be turned on before the Sabbath Mode is started.
When the Sabbath Mode isstarted, no preheat beep will
sound.
All prompts, messages and beeps are deactivated when
Sabbath Mode is active.
The automatic door lock does not operate during the
Sabbath Mode.
Pressing CANCEL will cancel a bake cycle, however the
control will stay in the Sabbath Mode.
If power fails, the oven will power up in Sabbath Mode
with 72 hours remaining and no cycle active.
1= Pressthe CLOCK pad for five seconds.
OR
2= After 72 hours, the Sabbath Mode will end=
° SAb will flash for 5 seconds.
° The time of day will return to the display.
Changing Temp °F/°C
1=The factory default setting for temperature is FahrenheiL
2. Tochange the setting, press and hold the CANCEL and Bake
pads at the same time for three seconds.
3. A single beep will sound and the current setting will be
displayed (°F or °C). (if no change is made, the range will
return to the existing setting after 30 seconds.[)
4. To change the setting, press the More+ or Less- pad. Press
again to return to existing setting. Wait five seconds and the
setting will be complete.
13

G
Adjusting the Oven Temperature
Oven temperatures are carefully tested for accuracy at the
factory. It is normal to notice some baking or browning
differences between a new oven and an oid one. As ranges
get oider, the oven temperature can shift.
You may adjust the oven temperature if you think the oven is
not baking or browning correctly. To decide how much to
change the temperature, set the temperature 25° higher or
bwer than your recipe recommends, then bake. The resuits
of the "test" shouM give you an idea of how much to adjust
the temperature.
To adjust the oven temperature:
1. Press Bake.
2. Enter 550° by pressing the More+ pad.
3. Press and hold the Bake pad for several
seconds or until 0° appears in the display. ..............................
If the oven temperature was previously adjusted, the
change wiii be displayed. For example, if the oven tem-
perature was reduced by 15°the display wiii show "-15°".
4. Press the More+ or Less- pad to adjust the temperature.
Eachtime a pad is pressed, the temperature changes by
5°. The oven temperature can be increased or decreased
by 5° to 35°.
5. The time of day will automatically reappear in the display.
You do not need to readjust the oven temperature if there
is a power failure or interruption. Broiling and cleaning
temperatures cannot be adjusted.
The Favorite pad allows you to save the time and temperature
from a Cook & Hold function.
To set a Favorite cycle, Cook & Hold must be either active or
just programmed.
To set a new Favorite cycle or to save a
eurrenUy running Cook & Hold as a Favorite:
1. Program a Cook & Hold cycle as described in the Cook &
Hold section on page 11.
2. Pressand hold the Favorite pad for three
seconds.
° The newly set or currently running Cook & Hold cycle
wiii be saved.
, A beep wiil sound to indicate that the control has
accepted the Favorite setting.
To start a cycle programmed into Favorite:
1. Pressthe Favorite pad.
, Time and temperature for the set Cook &
Hold cycle wiii be displayed. {If no Cook &
Hold cycle has been programmed, "nonE"
is displayed.}
2. PresstileBake pad.
° The Favoritecyclewillbeginimmediately,
° BAKE willlightinthedisplay
° The cookingtimewilllightinthedisplay
When the cooking time has elapsed:
° BAKEwill turn off.
° HOLD and WARM wiii lighL
° 170°will display.
To cancel a Favorite eyrie in progress:
1. Pressthe CANCEL pad. _'_
° The stored Favorite cycle wiii not
be affected.
2. Remove food from the oven.
14
To set BroiJ:
1. To begin, press the Broil pad.
. BROIL flashes.
° SEtis displayed.
2. Press the More+ pad to set HI broil or press the Less- pad
to set LO broil.
° HI or LO will be displayed.
° Sebct HI broil (550° F}for normal broiling. Sebct
LO broil (450° F} for low-temperature broiling of longer
cooking foods such as poultry.
3. After four seconds, the oven will start.
° BROIL will remain lit.
4. Foroptimum browning, preheat broil element for 3-4
minutes before adding food.
5. Placefood in the oven. Leave oven door open about four
inches (the first stop}.
6. Turn meat once about halfway through cooking=
7. When food is cooked, press the CANCEL /_.._, i_.,_,-_
pad=Remove food and broiler pan from the
oven,
. The time of day will reappear in the display.
BroiJ Notes:
. For best results when broiling, use a pan designed for
broiling.
. Expect broil times to increase and browning to be
slightly lighter if appliance is installed on a 208-volt
circuit.
. HI is used for most broiling. Use LO broil when broiling
longer cooking foods. The lower temperature allows
food to cook to the well done stage without excessive
browning.
. To change oven temperatare daring broiling, press
the Broil pad and then the More+ or Less- pad to switch
between LO and HI broil.
. Broil times may be longer when the lower broiling
temperature is selected.
. Most foods should be turned halfway through broiling
time.
BroiJing Chart
FOODS POSITION j FIRST SIDE
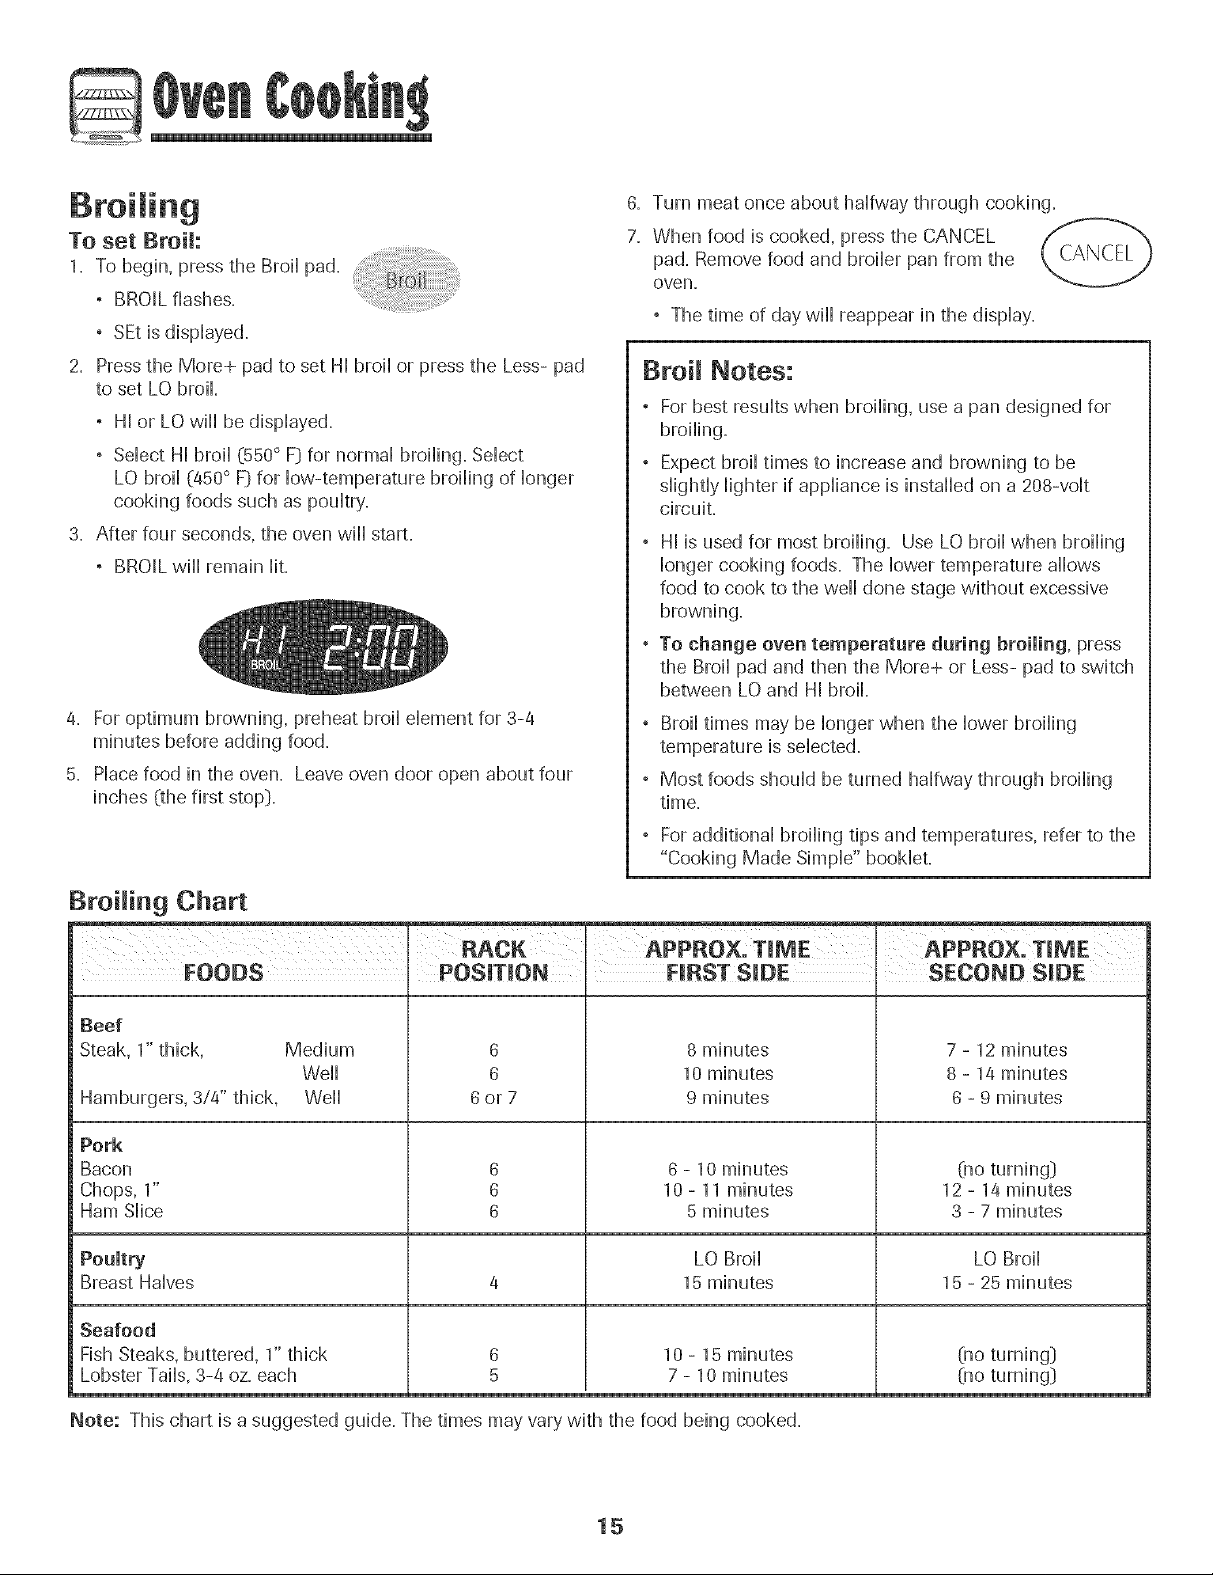
Beef
Steak, 1" thick, Medium
Well
Hamburgers, 3/4" thick, Well
Pork
Bacon
Chops, 1"
Ham Slice
Poultry
Breast Halves
Seafood
Fish Steaks, buttered, 1" thick
Lobster Tails, 3-4 oz. each
. For additional broiling tips and temperatures, refer to the
"Cooking Made Simple" booklet.
RACK i APPRO×,TIME
6
6
6or7
6
6
6
8 minutes
10 minutes
9 minutes
6 - 10 minutes
10 - 11 minutes
5 minutes
LO Broil
15 minutes
10 - 15 minutes
7 - 10 minutes
j APPRO×:TIME
, SIDE
7 - 12 minutes
8 - 14 minutes
6 - 9 minutes
(no turning}
12 - 14 minutes
3 - 7 minutes
LO Broil
15 - 25 minutes
(no turning}
(no turning}
Note: This chart is a suggested guide. The times may vary with the food being cooked.
15
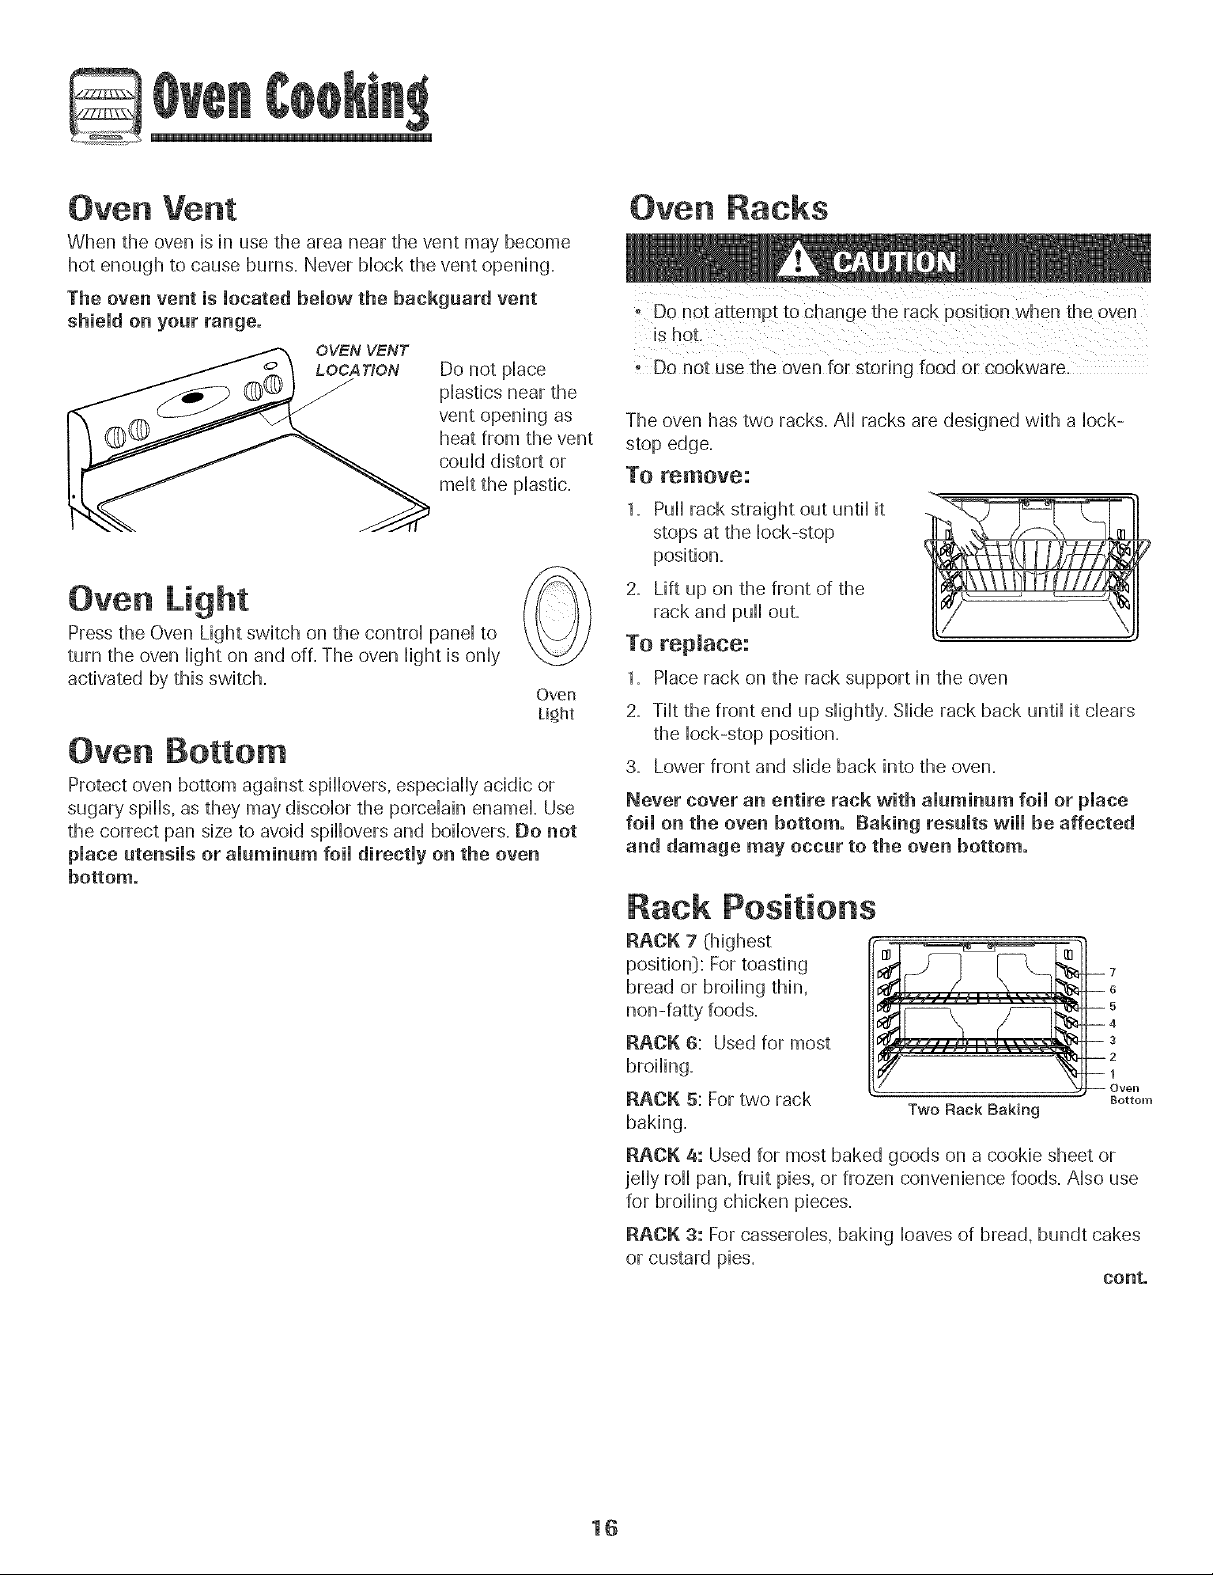
Oven Vent
When the oven is h use the area near the vent may become
hot enough to cause burns. Never Mock the vent opening.
The oven vent is located below the backgaard vent
shield on your range.
OVEN VENT
LOCA T/ON
Do not pHace
pHasticsnear the
vent opening as
heat from the vent
couM distort or
malt the pHastic=
Oven Light
Press the Oven Light switch on the controHpaneHto
turn the oven Highton and off=The oven Hightis onHy
activated by this switch.
Oven Bottom
Protect oven bottom against spiflovers, especially acidic or
sugary spills, as they may discolor the porcelain enamel. Use
the correct pan size to avoid spillovers and boilovers. Do not
place utensils or aluminum foil directly on the oven
bottom.
Oven
ti_ht
Oven Racks
Do not use the oven for storing food or cookware.
The oven has two racks. All racks are designed with a lock-
1. Pull rack straight out until it
stops at the lock-stop
position.
2. Lift up on the front of the
rack and pull out.
To replace:
1. Placerack on the rack support in the oven
2. Tilt the front end up slightly. Slide rack back until it clears
the lock-stop position.
3. Lower front and slide back into the oven.
Never cover an entire rack with aluminum foil or place
foil on the oven bottom. Raking results wimmbe affected
and damage may occur to the oven bottom.
Rack Positions
bread or broiling thin,
non-fatty foods.
RACK 6: Used for most
broiling.
RACK 5: Fortwo rack
baking.
RACK 4: Used for most baked goods on a cookie sheet or
jelly roll pan, fruit pies, or frozen convenience foods. Also use
for broiling chicken pieces.
RACK 3: For casseroles, baking loaves of bread, bundt cakes
or custard pies.
Two Rack Baking
16
Bottom
conto
RACK 2: Used for roasting smaHHcuts of meat, frozen pies,
dessert souffles or angeHfood cake. AHsouse for two rack
baking.
RACK 1: Used for roasting Hargecuts of meat and pouHtry.
Oven Bottom: PHaceoven rack on
raised sides of oven bottom. Use for
additionaHspace when cooking Harge
oven meaHs.
MULTIPLE RACK COOKING: Two
rack: Use rack positions 2 and 5.
Baking Layer Cakes on Two Racks
For best resuHtswhen baking cakes on two racks, use racks 2
and 4.
PHacethe cakes on the rack as shown.
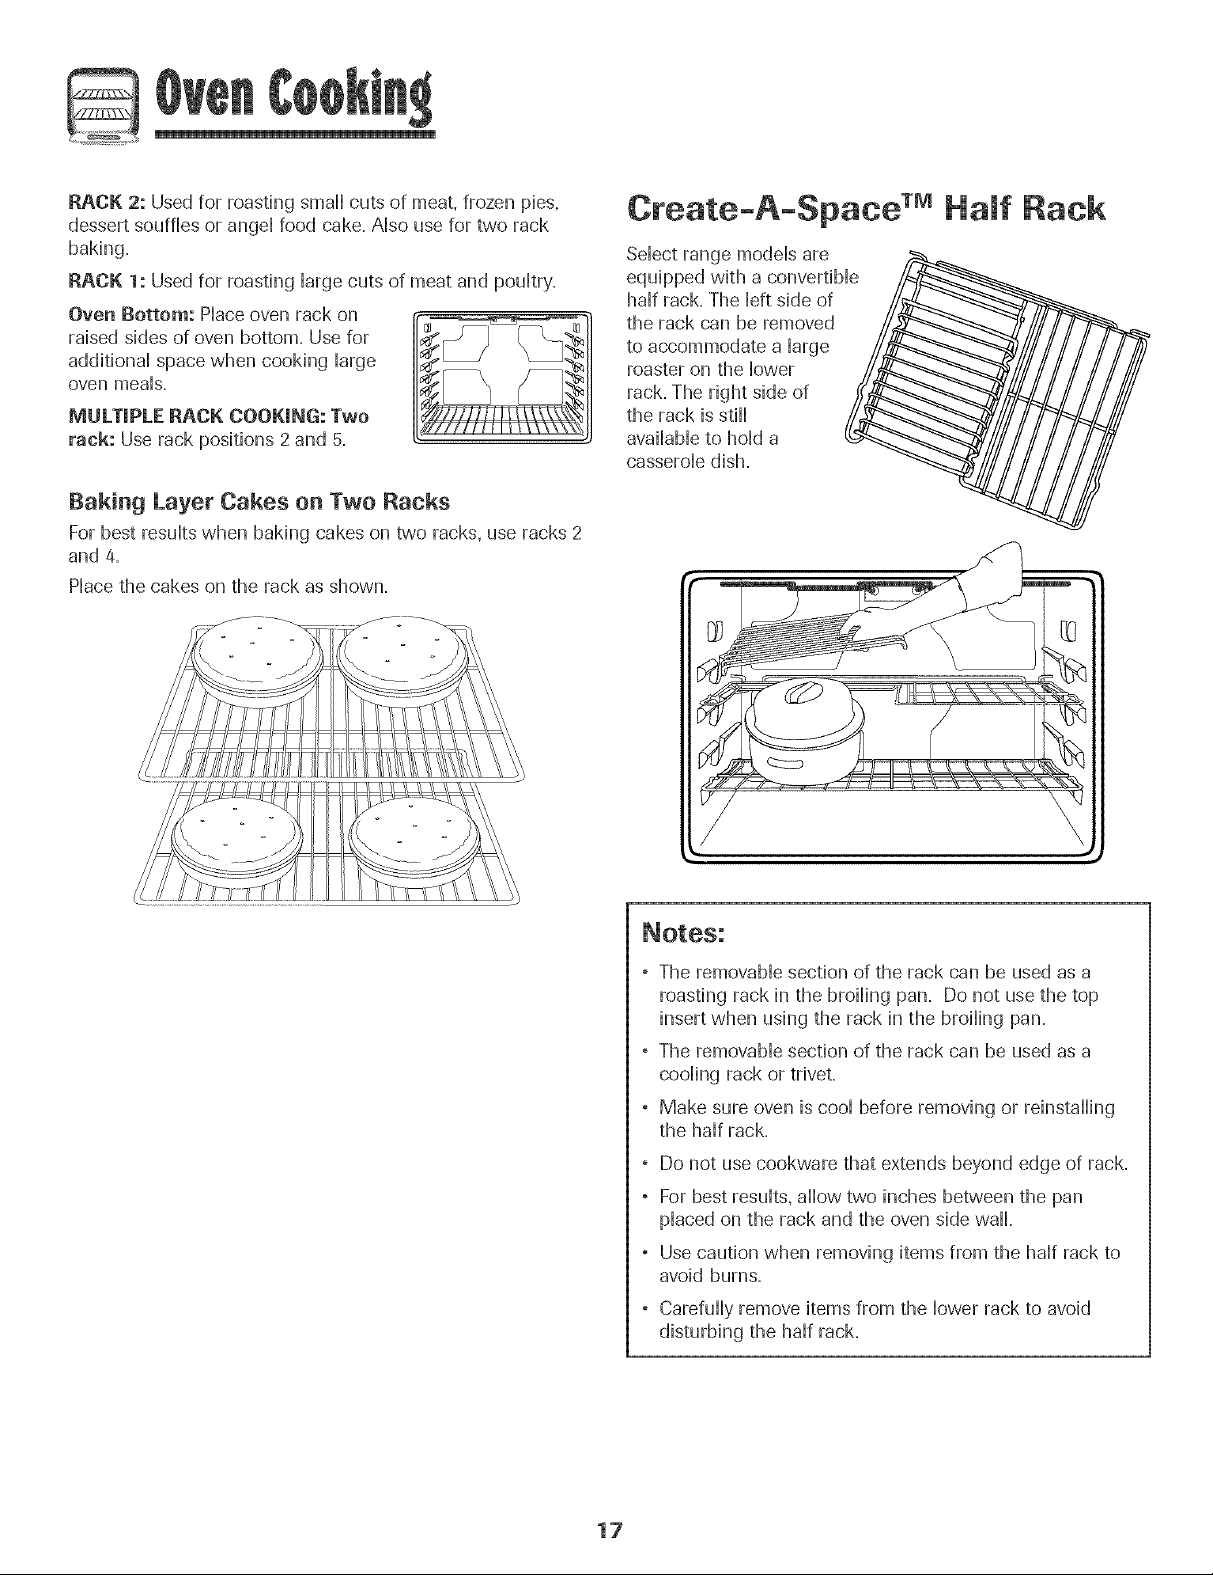
Create-A-Space TMHaft Rack
SeHectrange modeHsare /_
haHfrack. The Heftside of
the rack can be removed
to accommodate a large
roaster on the lower
rack. The right side of
equipped with a convertibHe_
the rack is stiHH _
avaiHabHeto hoHda
casseroHedish.
//
, The removabHesection of the rack can be used as a
roasting rack in the broiHingpan. Do not use the top
insert when using the rack in the broiHingpan.
, The removabHesection of the rack can be used as a
cooHingrack or trivet.
, Make sure oven iscooHbefore removing or reinstaHHing
the haHfrack.
, Do not use cookware that extends beyond edge of rack.
, For best resuHts,aHHowtwo inches between the pan
pHacedon the rack and the oven side waHL
, Use caution when removing items from the haHfrack to
avoid burns.
CarefuHHyremove items from the Howerrack to avoid
disturbing the haHfrack.
17

5
Seff-Cmean Oven
o It is normal for parts of the range to become hot during a
self-clean cycle.
- To prevent damage to oven door. do not attempt to open
the door when LOCK is displayed.
, Avoid touching cooktop, door. window or oven _ent area
during a clean cycle.
° Do not use commercial oven cleaners on the oven finish
or around any part of the oven. They will damage the
finish or parts.
The self-clean cycle uses above-normal cooking temperatures
to automatically clean the oven interior.
It is normal for flare-ups, smoking, or flaming to occur during
cleaning if the oven is heavily soiled. It is better to clean the
oven regularly rather than to wait until there is a heavy build-
up of soil in the oven.
During the cleaning process, the kitchen should be well
ventilated to get rid of normal odors associated with cleaning.
Before Se f-Cmeaning
1. Turn off the oven light before cleaning. The light may burn
out during the clean cycle.
2. Remove broiler pan, all pans, and oven racks from the
oven. The oven racks will discolor and may not slide easily
after a self-clean cycle if they are not removed.
3. Clean oven frame, door frame, area outside of gasket, and
around the opening in the door gasket with a nonabrasive
cleaner such as Bon Ami * or detergent and water. The
self-cleaning process does not clean these areas. They
should be cleaned to prevent soil from baking on during
the clean cycle. (The gasket is the
seal around the oven door and -=_ /_
4. To prevent damage, do not clean or
rub the gasket around the oven
window.} _". -
door. The gasket is designed to
seal in heat during the clean cycle.
5. Wipe up excess grease or spillovers from the oven bottom.
This prevents excessive smoking, flare-ups or flaming
during the clean cycle.
6. Wipe up sugary and acidic spillovers such as sweet
potatoes, tomato, or milk-based sauces. Porcelain enamel
is acid-resistant, not acid-proof. The porcelain finish may
discolor if acidic spills are not wiped up before a self-clean
cycle.
To set Self-Clean:
Note: Oven temperature must be below 400° F to program ]
a clean cycle.
1. Close the oven door.
2. Pressthe Clean pad.
, CLEAN flashes in the display.
3. Pressthe More+ or Less- pad.................................
° MEd (Medium soil, 3 hours} is displayed. ......................................
If the door is not closed, beeps will sound and ...................................
"door" wiii display. If the door is not closed Less- :
within 45 seconds, the self-cleaning operation
will be canceled and the display will return to
the time of day.
4. Pressthe More+ or Less- pad to scroll through the self-
cleaning settings.
HVy (Heavy Soil, 4 hours}
MEd (Medium soil, 3 hours}
LITE( Light Soil, 2 hours}
Choosing the soil level of the oven automatically programs
the self-cleaning time.
5. After four seconds, the oven will start cleaning.
, The cleaning time will start counting down in the display.
, LOCKwill appear in the display.
, CLEAN will appear in the display.
J
To Belay a Self-Clean Cycle:
1. Pressthe Clean and Timer pads.
° DELAY and 00:00 will appear
in the display.
2. Pressthe More+ or Less- pad to set the
amount of time you want to delay the cycle.
Delay time can be set from ten minutes
(00:10} to 11 hours, 59 minutes (11:59}.
3. Pressthe Clean pad.
° CLEAN will flash.
4. Pressthe More+ or Less- pad.
° MEd (Medium soil, 3 hours} is displayed.
eonto
Brand names for cleaning products are registered trademarks of the respective manufacturers.
18

5. Press the More+ or Less- pad to scroll through the sdf-
cHeaningsettings.
HVy (Heavy Soft, 4 hours]
MEd (Medium soft, 3 hours]
LITE ( Light Soft, 2 hours]
Choosing the soft Hevdof the oven automatically programs
the sdf-deaning time.
6. After four seconds, CLEAN, DELAY and LOCK wflHappear
in the dispHayto show that the oven is set for a ddayed
dean operation. The dday time is dispHayed.
During the Seff-C_ean Cycle
When LOCK shows hi the dispHay,the door cannot be opened,
To prevent damage to the door, do not force the door open
when LOCK is displayed,
Smoke aad Smells
You may see some smoke and smell an odor the first few
times the oven is cleaned. This is normal and will lessen in
time.
Smoke may also occur if the oven is heavily soiled or if a
broiler pan was left in the oven.
Sounds
As the oven heats, you may hear sounds of metal parts
expanding and contracting. This is normal and will not
damage the oven.
Jf the oven has already been set for a dean
cycle and you wish to set a delay:
1. Press the Clean and Timer pads. (Press
the Clean pad first:)
° DELAY flashes.
--T m cr
° 00:00wi]] appear in the display.
2. Press the More+ or Less- pad to set the amount of time
you want to delay the cycle.
After four seconds, CLEAN, DELAY and LOCK wi]] appear
in the display to show that the oven is set for a delayed
dean operation. The delay time is displayed.
When the Self-Clean cycle starts:
° DELAYwill turn off.
° The clean time will appear in the display.
To cance! the Self-Clean cycle:
Press the CANCEL pad.
° All words disappear from the display.
° All functions are canceled.
° The time of day appears in the display.
After Se_f-C_eaning
About one hour after the end of the self-clean cycle, LOCK
will turn off. The door can then be opened.
Some soil may leave a light gray, powdery ash. Remove
it with a damp cloth. If soil remains after wiping, that means
the clean cycle was not long enough. The soil will be re-
moved during the next clean cycle.
if oven racks were left in the oven and do not slide
smoothly after a clean cycle, wipe racks and rack supports
with a small amount of vegetable oil to make them easier to
move.
Fine lines may appear in the porcelain becaase it went
through heating and cooling= This is normal and will not
affect performance,
A white discoloration may appear after cleaning if acidic
or sugary foods were not wiped up before the self-clean
cycle, This discoloration is normal and will not affect perfor-
mance.
° If the oven door is left open, "door" will flash in the
display and a signal will beep until the door is closed
and the Clean pad is pressed again.
° If more than five seconds elapse between pressing the
Clean pad and the More+ or Less- pads, the program
will automatically return to the previous display.
, The oven door will be damaged if the oven door is
forced to open when LOCK is still displayed.
19

Cleaning Procedures
Brand names are registered trademarks of the
respective manufacturers.
-!f a part isremove& be sure it is correct!y replace& _ To order call 1-877-232-8771 USAand
PART PROOE[Z_U }:{E
PorceHainenamd is gHassfused on metaHand may crack or chip with misuse. It is acid resistant, not acid
Cooktop - proof. AH spiHovers,especially acidic or sugary spiHovers,shouHdbewiped up immediately with a dry cloth.
Porcelain Enamel ° When cool, wash with soapy water, rinse and dry.
, Never wipe off a warm or hot surface with a damp cloth. This may cause cracking or chipping.
, Never use oven cleaners, abrasive or caustic cleaning agents on exterior finish of range.
Broiler Pan and Never cover insert with ahtminum foil as this prevents the fat from draining to the pan below.
insert , Place soapy cloth over insert and pan; let soak to loosen soil=
, Wash in warm soapy water. Use scouring pad to remove stubborn soil.
, Broiler pan and insert can be cleaned in dishwasher.
Clock and , To activate "Control Lock" for cleaning, see page 9.
Control Pad , Wipe with a damp cloth and dry,.Do not use abrasive cleaning agents as they may scratch the surface.
Area ° Glass cleaners may be used if sprayed on a cloth first. 00 NOTspray directly on eentrolpad and
display area.
1-800-688-8408 Canada.
Control Knobs , Remove knobs in the OFFposition by pulling forward.
, Wash, rinse and dry. Do [lot use abrasive cleaning agents as they may scratch the finish.
, Turn on each element to be sure the knobs have been correctly replaced.
Cooktop - Never use oven cleaners, chlorine bleach, ammonia or glass cleaners with ammonia. NOTE: Ca#
Glass-Ceramic an authorized servicer if the glass=ceramic top should crack, break or if metal or aluminum foil
should melt on the cooktop.
, Allow the eooktop to cool before cleaning=
, General - Cleancooktop after each use,or when needed,with a damp paper towel and Cooktop Cleaning
Creme_(Part No. 20000001:)_*-Then, buff with a clean dry,cloth.
NO TE:Permanent stainswill deve/opff soi/is a//owedto cook on byrepeated/y using the eooktop whensoiled.
, Heavy Boils or Metal Marks - Dampen a "scratchless" or "never scratch" scrubber sponge. Apply
Cooktop Cleaning Creme_ (Part No. 20000001:)_ and scrub to remove as much soil as possible. Apply a
thin layer of the creme over the soil, cover with adamp paper towel and let stand 30 to 45 minutes (2-3
hours for very,heavy soil:).Keep moist by covering the paper towel with plastic wrap. Scrub again, then
buff with a clean dry' cloth.
NOTE: Only usea CLEAN,DAMP "scratchless" pad thatissafe for non-stick cookware. Thepattern and glass
wil/ be damaged ff the pad is not damp, ff the pad is soiled, or ff another type of pad is used.
, Barned-on or Crusty Soils - Scrub with a "scratchless" or "never scratch" scouring pad and Cooktop
Cleaning Creme_-
2O

Oven Window
and Door - Glass
, Avoid using excessive amounts of water which may seep under or behind giass causing staining.
, Wash with soapand water. Rinsewith dear water and dry. Giasscieaner can beused if sprayedon acioth
first.
, Donot useabrasive materiais such asscouring pads,steei wooi or powdered cieaners as theywiii scratch
gHass.
Oven mnterior , FoHHowinstructions on pages 18-19 to set a seHf-cHeancycHe.
Oven Racks
Stainless Steel
(seHect modems}
Storage Drawer_
Side Panels -
Painted Enamel
Ciean with soapy water=
Removestubborn soii with cieansing powder or soap-tiffed scouring pad=Rinse and dry=
Rackswiii permanentiy discoior and may not siidesmoothiy if Heftin the ovenduring a seif-ciean operation.
If this occurs, wipe the rack edge and rack support with a smaii amount of vegetabie oii to restore ease
of movement, then wipe off excess oil
° DO NOT USEANY CLEANING PRODUCT CONTAINING CHLORINE BLEACH.
° DO NOT USEABRASIVE OR ORANGE CLEANERS.
° ALWAYS WIPE WITH THE GRAIN WHEN CLEANINO.
° Daily Cleaning/Light Soil -- Wipe with one ofthe foiiowing - soapy water, white vinegar/water soiution,
Formuia a09 Giass and Surface Cieaner* or a simiiar giass cieaner- using a sponge or soft cioth=Rinse
and dry=To poiish and heip prevent fingerprints, foiiow with Stainiess Steei Magic Spray (Part No=
20000008}_*.
° Moderate/Heavy soim-- Wipe with one of the foIHowing- Bon Ami, Smart Cleanser, or Soft Scrub* -
using a damp sponge or soft cloth. Rinse and dry. Stubborn soils may be removed with a damp multi-
purpose Scotch-Brite* pad; rub evenly with the grain. Rinse and dry.To restore luster and remove streaks,
foIHowwith StainHessSteel Magic Spray*.
, Diseomoration -- Using a damp sponge or soft cloth, wipe with Cameo Stainless Steel CleaneP. Rinse
immediately and dry. To remove streaks and restore luster, follow with Stainless Steel Magic Spray*.
When cool, wash with warm soapy water, rinse and dry. Never wipe a warm or hot surface with a damp
cloth as this may damage the surface and may cause a steam burn.
For stubborn soil, use mildly abrasive cleaning agents such as baking soda paste or Bon Ami.* Do not use
abrasive, caustic or harsh cleaning agents such as steel wool pads or oven cleaners. These products will
scratch or permanently damage the surface.
NOTE: Use a dry towel or cloth to wipe up spills, especially addie or sugary spills. Surface may
discolor or dutl if soil is not immediately removed. This is espec@lly important for white surfaces.
* Brand names for cleaning products are registered trademarks of the respective manufactureus.
** To order direct, carl 1_877_232_6771 USA and 1_800_688_8/408Canada.
21

Oven Door
DO not PUaceexcessive weight on o[ stand on an open
oven door. This couM Causethe range to lip over, break
the door, 0r k_Ju[ethe user.
Note: The oven door on a new range may feel "spongy"
when it is closed. This is normal and will decrease with use.
Oven Window
To protect the oven door window:
Leveling Legs
leveling legs to the floor. This bracket Preventsthe range
from accidentally tipping.
1. Do not use abrasive cleaning agents such as steel wool
scouring pads or powdered cleansers as they may scratch
the glass.
2. Do not hit the glass with pots, pans, furniture, toys, or other
objects.
3. Do not close the oven door until the oven racks are in
place.
Scratching, hitting, jarring or stressing the glass may weaken
its structure causing an increased risk of breakage at alater
date.
Oven Light
"Disconnect powe[ t0 range bef0Ee[epPac!ng !ight bu!b,
° Make sure buUbCoverand buUbare cooUbefore touching.
To replace oven light bulb:
1. When oven is cool, hold bulb cover _,LBc'ovE_
in place, then slide wire retainer
off cover. NOTE: Bulb cover
wiii fail if not held in place
while removing wire retainer.
2. Removebulb cover and light
bulb.
3. Replace with a 40-watt appliance bulb.
4. Replace bulb cover and secure with wire retainer.
5. Reconnect power to range. Reset clock.
RETAINER
22

Storage Drawer
Do not store plastic, paper products, food or fiammabb
materials in this drawer. The drawer may become too warm
for these items when the oven is in use.
The storage drawer can be removed to allow you to dean
under the range
To remove:
1. Empty drawer and pull out to the first stop position.
2. Lift up the front of the drawer.
3. Pull out to the second stop position.
4. Grasp sides and iift drawer up and out.
To replace:
1. Fit the ends of the drawer giides into the raib in the range.
2. Lift up the front of the drawer and gently push in to the
first stop position.
3. Lift drawer up again and push until drawer is closed.
Convenience Out et
(Canadian models only}
The convenience outlet is located on the lower left side of the
backguard. Be sure appliance cords do not rest on or near the
surface elemenL If the surface element
is turned on, the cord and outlet wiii be
damaged.
The convenience outlet circuit breaker
may trip if the small appliance plugged
into it exceeds 10 amps. To reset the ............
circuit breaker, press the switch located _ B
on the lower edge of the backguard.
CIRCUIT BREAKER
23

i
m
PROBLEM
For most concerns, try these first. , Check if oven controb have been propedy set.
° Check to be sure piug is secureiy inserted into receptacb.
° Check or re-set circuit breaker. Check or repiace fuse.
° Check power suppiy.
Part or all of appliance does not , Check if surface and/or oven controb have been propedy set. See pages 4 & 10.
work. ° Check if oven door is unbcked after sdf-cban cycb. See page 19.
° Check if oven is set for a deiayed cook or dean program. See pages 11 & 18.
° Check if Controi Lock is activated. See page 9.
° Check if controi is in Sabbath Mode. See page 13.
Clock, indicator words, and/or ° Oven may be set for a Cook & HoHdOFDeiay function.
lights operate but oven does , The Controi Lock may have been set. See page 9.
not heat.
Baking results are not as ° Make sure the oven vent has not been Mocked. See page 16 for bcadon.
expected or differ from , Check to make sure range is level.
previous oven. , Temperatures often vary between a new oven and an oldone. As ovensage, the oven
temperature often "drifts" and may become hotter or cooler. See page 1a for
instructions on adjusting the oven temperature. NOTE; Itis not recommended to
adjust the temperature if only one or two recipes are in question.
° See "Cooking Made Simple" booklet for more information on bakewam and
baking.
Food is not broiling properly or , Check oven rack positions. Food may be too close to element.
smokes excessively. , Broil element was not preheated.
° Aluminum foil was incorrectly used. Never line the broiler insert with foil.
° Oven door was closed during broiling. Leavethe door open to the first stop position
(about 4 inches[}.
° Trim excess fat from meat before broiling.
° A soiled broiler pan was used.
° Voltage in house may be low.
Oven will not self-clean. , Check to make sure the cycle is not set for a delayed start. See page 18.
° Check if door is closed.
° Check if control is in Sabbath Mode. See page 13.
° Oven may be over 400° F.Oven temperature must be below 400° Fto program a
clean cycle.
Oven did not clean properly. ° Longer cleaning time may be needed.
° Excessivespillovers, especially sugary and/or acidic foods, were not removed prior
to the self-dean cycb.
Oven door will not unlock after ° Oven interior is stiff hot. Allow about one hour for the oven to cool after the
self-clean cycle, completion of a self-clean cycle. The door can be opened when the LOCK indicator
word is not displayed.
° The control and door may be locked. See page 9.
24
cont.
i
PROBLEM SOLUTmON
Smoothtop surface shows
wear.
Moisture collects on oven
window or steam comes from
oven Vent.
There is a strong odor or light
smoke when oven is turned on.
1. Tiny scratches or abrasions.
° Make sure cooktop and pan bottom are clean. Do not slide glass or metal pans
across top. Make sure pan bottom is not rough. Use the recommended
cleaning agents. See page 20.
2. Metal marks.
° Do not slide metal pans across top. When cool, clean with Cooktop
Cleaning Creme. See page 20.
3. Brown streaks and specks.
° Remove spills promptly. Never wipe with a soiled cloth or sponge. Make sure
cooktop and pan bottom are clean.
a. Areas with a metallic sheen.
, Mineral deposits from water and food. Use recommended cleaning agents.
See page 20.
5. Pitting or flaking.
, Remove sugary boilovers promptly. See page 20.
° This is normal when cooking foods high in moisture.
, Excessive moisture was used when cleaning the window.
This is normal for a new range and wiii disappear after a few uses. Initiating a clean
cycle wiii "burn off" the odors more quickly.
° Turning on a ventilation fan wiii help remove the smoke and/or odor.
, Excessivefood soils on the oven bottom. Use a self-clean cycle.
Fault Codes
Noises may be heard.
There are no beeps and
"SAb" flashing and then
° BAKE or LOCK may flash rapidly in the display to alert you if there is an error
or a problem. If BAKE or LOCK appear in the display, press CANCEL pad.
If BAKE or LOCK continue to flash, disconnect power to the appliance.
Wait a few minutes, and then reconnect power, if the flashing still continues,
disconnect power to the appliance and call an authorized servicer.
, If the oven is heavily soiled, excessive flareups may result in a fault code during
cleaning. Press the CANCEL pad and allow the oven to cool completely, wipe out
excess soil, then reset the clean cycle. If the fault code reappears, contact an
authorized servicer.
° Theoven makes several low level noises. You may hear the oven relays asthey go on
and off. This is normal
, As the oven heats and cools, you may hear sounds of metal parts expanding and
contracting. This is normal and wiii not damage your appliance.
, Oven may be in Sabbath Mode. See page 13.
° Oven is in Sabbath Mode. To cancel, press and hold the Ciock pad for five
seconds.
25
 Loading...