

Page 1
ORDER # 33001238
AUTOMATIC DRYER D-8
Page 2
TABLE OF CONTENTS
Page
Consumer Publications .............................................................................................. Inside Front Cover
For Future Reference ......................................................................................................................... 1
Safety Instructions ......................................................................................................................... !-3
Exhausting The Dryer ....................................................................................................................... 3
Energy Saving Tips .......................................................................................................................... 3
Reversing The Door .......................................................................................................................... 3
Operating Instructions ................................................................................................................... 4-5
• Select the Cycle ............................................................................................................ 4-5
• Start the Dryer .................................................................................................................. 5
Using The Dryer ........................................................................................................................... 6-7
• Check the Lint Filter ........................................................................................................... 6
• Load the Dryer .................................................................................................................. 6
• What Cannot Be Dried ...................................................................................................... 6
Caring For The Dryer ....................................................................................................................... 7
Before You Call For Service ............................................................................................................... 7
Warranty ..................................................................................................................................... 10
CONSUMER PUBLICATIONS
For additional information on laundering and purchasing other major appliances, order the following
booklets from Maytag at the prices indicated. Please send your name, address, booklet title, form number
and payment to: Maytag, Consumer Education Department, One Dependability Square, Newton, IA
50208. Allow 4-6 weeks for delivery.
The Facts of the Laundry -- 18 ! YG ............................................................ 50¢
Stain Removal Guide- 19YG .................................................................. 50¢
Choosing the Right Detergent -- 184YG ..................................................... 50¢
Energy Saving Tips -- 392YG ................................................................... 50¢
Appliance Buying Guides .......................................................................... 50¢
Washer -- 211YG; Dryer -- 212YG; Dishwasher -- 213YG;
Electric Range -- 214YG; Gas Range -- 215YG;
Refrigerator -- 276YG
Page 3
FOR FUTURE REFERENCE
Congratulations on your choice of a Maytag
dryerJ Your satisfaction is very important to us. On
the following pages you wil! find information
related to proper use and care of your new
appliance. The MAYTAG LAUNDERING GUIDE
contains additional tips on proper washing and
drying techniques. By following these instructions
carefully, you will be able to achieve excellent
results with your dryer.
Should you have any questions about using your
Maytag dryer, please contact us. Be sure to
provide the model and serial numbers.
MAYTAG
CONSUMER EDUCATION
ONE DEPENDABILITY SQUARE
NEWTON, IOWA 50208
(515) 791-8911
(Mon.-Fri., 8am-5pm CST)
NOTE: For service and warranty information see
pages 7 & 10.
For future reference we suggest you retain this
manual after recording the model number and
serial number of this automatic dryer in the spaces
provided. This information can be found on the
data plate located in the lower right corner of the
door opening.
Model Number
Serial Number
WARNING:Foryour safety the
information in this manuaM_tlustbe
followed to minimize the risk of fire
or explosionor to preventproperty
damage, personal iniuryor death°
o Do not store or usegasomlneor
otherflammable vapors and _iquids
in the vicinity of this_r any othe_
appliance°
....WHATTODO mFYOU SMELLGAS
®Donot try to light any appliance°
®Donot touch any electricaN
switch; do not useany phone in
your buigding0
®Clearthe raom, building or area
of aft occupants°
®Immediately callyour gas
supplier from a neighbor's
phone°Followthe gas suppfier'$
instructions°
®Rfyoucannotreachyour gas
supplier, callthe fire department°
Installation and service must be
performedby a qualified instaffer,
service agency or the gas supplier°
_mportant Safety Notice & Warning
The California Safe Drinking Water and Toxic Enforcement Act of 1986 (Proposition 65) requires the
Governor of California to publish a list of substances known to the State of California to cause cancer or
reproductive harm, and requires businesses to warn customers of potential exposures to such substances.
Users of this appliance are hereby warned that the burning of gas can result in low-level exposure to some
of the listed substances, including benzene, formaldehyde and soot, due primarily to the incomplete
combustion of natural gas or liquid petroleum (LP) fuels. Exhaust ducts should be kept free of obstructions
and properly exhausted dryers will minimize exposure.
PAGE 1
Page 4

IMPORTANT PERSONAL SAFETY INSTRUCTIONS
Wamin_ _-oTo _educe the risk of fire, enectric
shock or iniury to persons when using your
_ppMiance, follow basic precautions, including the
_oHowing:
1. Read all instructions before using the
appliance°
2. To avoid the possibility of fire or explosion:
a. Do not dry items that have been previously
cleaned in, washed in, soaked in, or
spotted with gasoline, dry-cleaning
solvents, other flammable or explosive
substances as they give off vapors that
could ignite or explode. Any material on
which you have used a cleaning solvent,
or which is saturated with flammable
liquids or solids, should not be placed in
the dryer, until all traces of these
flammable liquids or solids and their fumes
have been removed. There are many
highly flammable items used in homes,
such as: acetone, denatured alcohol,
gasoline, kerosene, some liquid household
cleaners, some spot removers, turpentine,
waxes and wax removers.
b.
Items containing foam rubber (may be
labeled latex foam) or similarly textured
rubber-like materials must not be dried on
a heat setting. Foam rubber materials
when heated, can under certain
circumstance produce fire by spontaneous
combustion.
.
Do not allow children to play on or in the
appliance. Close supervision of children is
necessary when the appliance is used near
children.
4. Before the appliance is removed from service
or discarded, remove the door to the drying
compartment.
5. Do not reach into the appliance if the drum is
moving.
6. Do not install or store this appliance where it
will be exposed to the weather.
7. Do not tamper with controls.
8. Do not repair or replace any part of the
appliance or attempt any servicing unless
specifically recommended in published user-
repair instructions that you understand and
have the skills to carry out.
9. Do not use fabric softeners or products to
eliminate static unless recommended by the
manufacturer of the fabric softener or
product.
10. Clean the lint screen before or after each
load.
11.
Keep the area around the exhaust opening
and surrounding areas free from lint
accumulation, dust and dirt.
12.
The interior of the dryer and exhaust duct
should be cleaned periodically by qualified
service personnel.
13.
This appliance must be properly grounded.
Never plug the appliance cord into a
receptacle which is not grounded adequately
and in accordance with local and national
codes. See installation instructions for
grounding this appliance.
WARN_NC_
Do not pJaceinto your dryer items that have been
spotted or soaked with vegetabb oi! or cooking
oil Even after being washed, these items may
contain significant amounts of theseoi_s.The
remaining olt can ignite spontaneousiyo The
potentiaJfor spontaneous ignition increases when
the itemscontaining vegetable oil or cooking oi!
are exposed to heat° Heat sources, such as your
clothes dryer; can warm these items, allowing an
oxidation reaction in theoil to accuroOxidation
creates heat° Hfthis heat cannot escape, the iter_as
can become hot enough to catch tire° Pilhsg,
stacking or storing these kinds of items may
prevent he_t from escaping and can _:reatea _ire
hazard°
Aftwashed and unwashed fabrics that contain
vegetabb oi_or cooking oiacan be dangerous°
Washing these items in hot water with e×tr_
detergent w_Hreduce, but will not eaiminate, the
hazard° Always use _he"_'od down" cyclebr
these items to reduce the items' _emperatureo
Never remove these itemsfromthe clothes dryer
hot or ir_terrupt the drying cycle until the items
have run through the "cool down" cycle. Never
pib or sta_k these items when _heya_ hot°
PAGE 2
Page 5
Appliances with the (_ symbol on the data plate
have been listed with Underwriters' Laboratories,
Inc. Those with a CSA Monogram on the data
plate have been certified by the CSA Testing
Laboratories as complying with Canadian
Standards Association requirements. Gas dryers
with an AGA symbol on the data plate have been
design certified with the American Gas
Association; those with a CGA symbol on the
data plate have been approved by the Canadian
Gas Association. Nevertheless, as with any
equipment using electricity and having moving
parts, there are potential hazards. To use this
appliance safely, the operator should become
familiar with the instructions for operation of the
Appliance and always exercise care when
using it.
EXHAUSTING THE DRYER
A proper exhaust system is critical for good
drying results. Restricted airflow affects dryer
performance and results in longer drying times.
Exhaust ductwork guidelines:
• Use 4" diameter rigid metal exhaust duct. Do
not use smaller duct. Minimize the length of
duct and the number of elbows. Secure joints
with duct tape. Do not use screws.
° Never use plastic or nonmetal flexible duct. This
can kink, cause lint buildup and reduce airflow
which creates service problems.
• If flexible duct must be used, use only the type
with a stiff sheet metal wall. Do not kink or
crush the duct. Do not use flexible duct with a
thin foil wall.
• Clean out previously used exhaust duct.
Replace kinked or crushed sections. Be sure
exhaust vent hood flap opens and closes freely.
• Refer to the installation instructions for
additional dryer exhaust information.
loads of heavy, hard-to-dry items with
lightweight ones.
• Properly select and check exhaust venting. Four
inch rigid metal ducting is recommended to
prevent lint collection and improve dryer
operation. Periodically check the ductwork for
any obstructions that could reduce the airflow
and efficiency.
• Remove items from the dryer as soon as
tumbling stops for best results and efficiency.
This reduces wrinkling and ironing.
REVERSING THE DOOR
The dryer door is designed with flexibility in mind.
It can be mounted on the dryer front so as to open
from left to right, or reversed and open from right
to left. This provides flexibility for the dryer located
in a cramped area or for the person preferring a
different door swing. Simply follow the steps as
listed.
Remove hinge hole covers and cover from
latch. These will be re-used.
2) Rest door on knee for support.
3) Remove 4 screws holding hinges to front
panel.
4) Turn door upside down.
5) Support on knee.
6) Insert screw in the small round hole first and
start by hand.
7) Tighten screw to position door.
8) Insert top screw of other hinge and tighten.
9) Insert and tighten remaining screws.
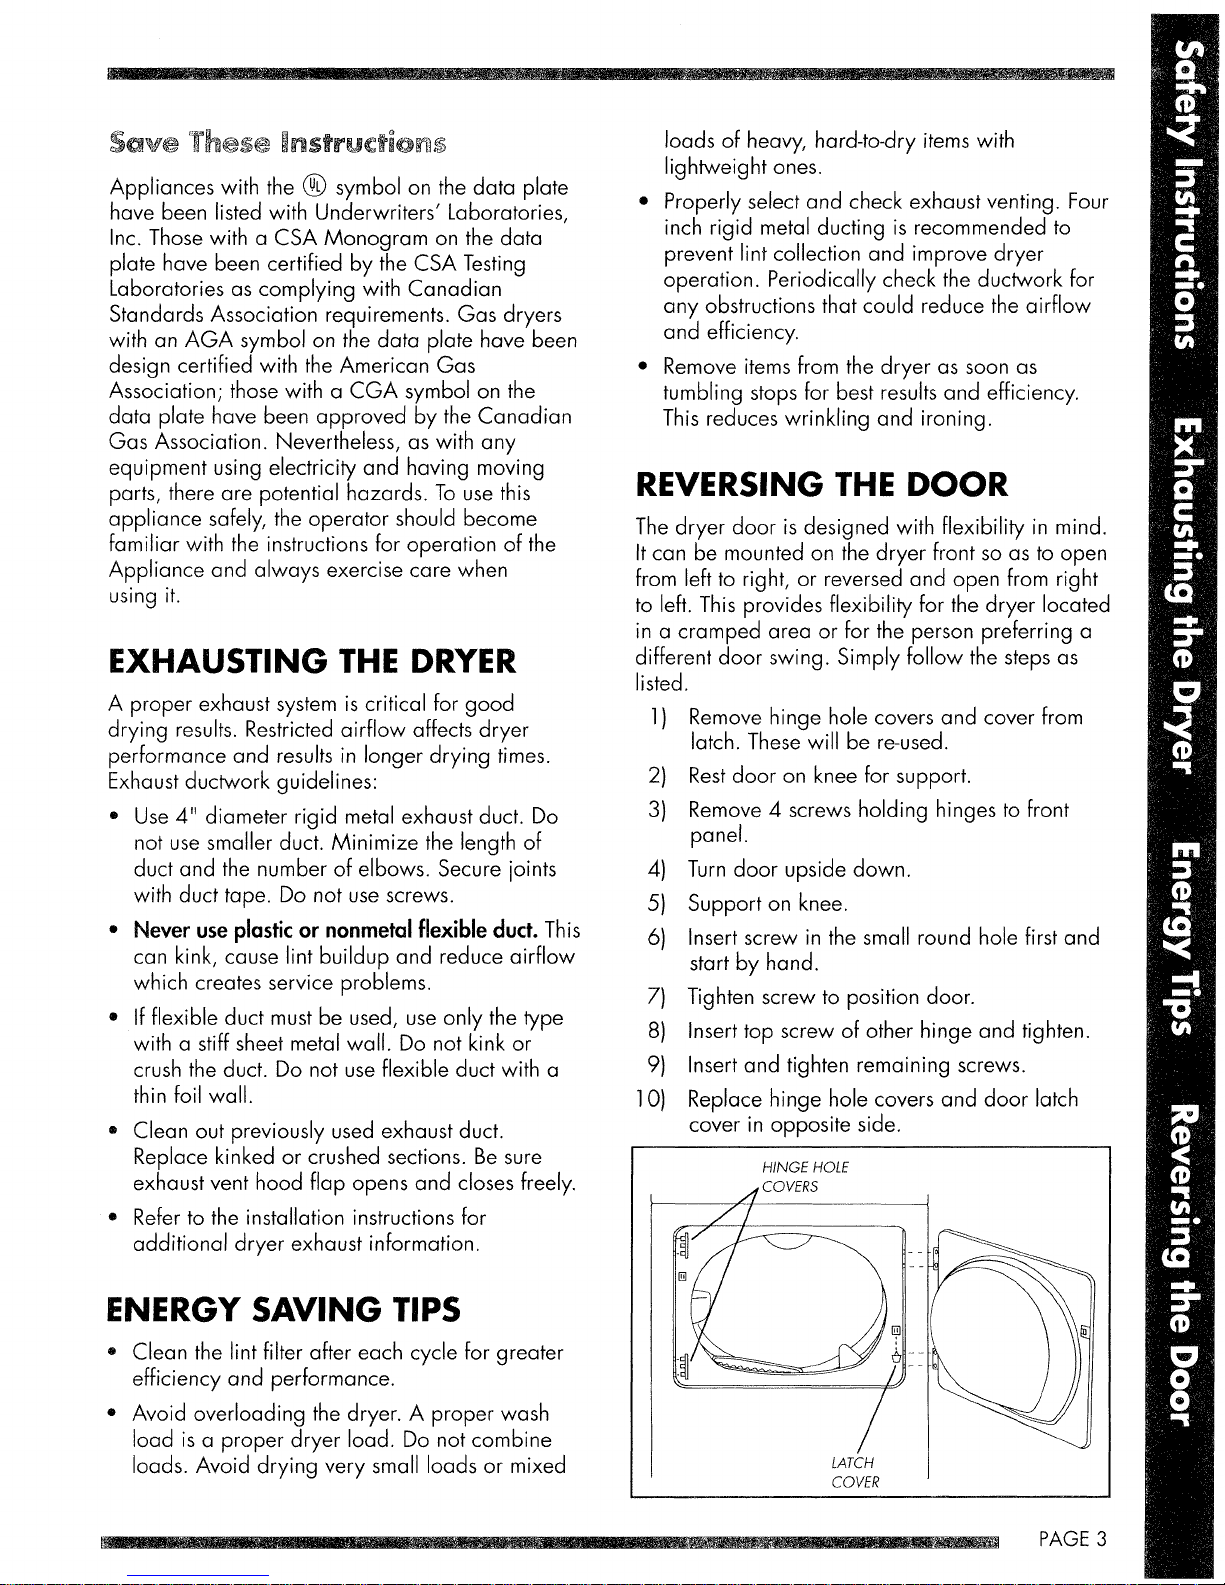
10) Replace hinge hole covers and door latch
cover in opposite side.
HINGE HOLE
ENERGY SAVING TIPS
• Clean the lint filter after each cycle for greater
efficiency and performance.
• Avoid overloading the dryer. A proper wash
load is a proper dryer load. Do not combine
loads. Avoid drying very small loads or mixed
LATCH
COVER
PAGE 3
Page 6
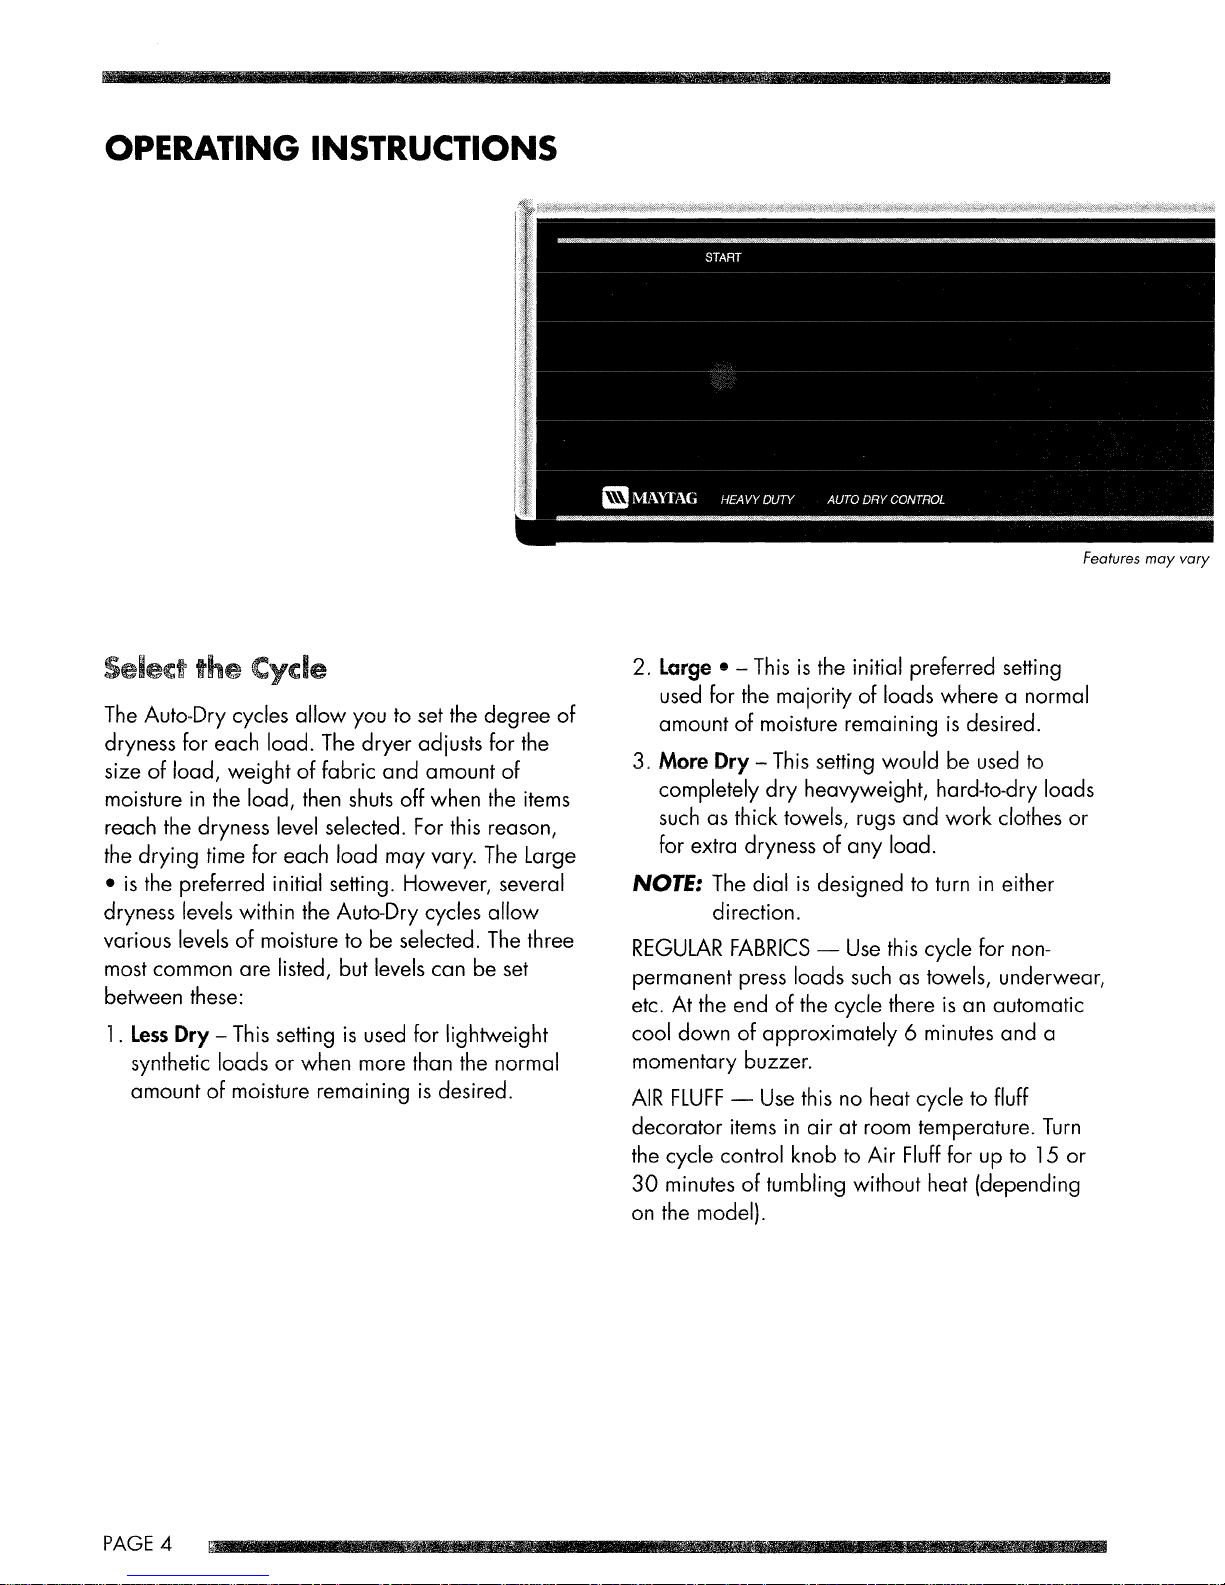
OPERATING INSTRUCTIONS
The Auto-Dry cycles allow you to set the degree of
dryness for each load. The dryer adjusts for the
size of load, weight of fabric and amount of
moisture in the load, then shuts off when the items
reach the dryness level selected. For this reason,
the drying time for each load may vary. The Large
• is the preferred initial setting. However, several
dryness levels within the Auto-Dry cycles allow
various levels of moisture to be selected. The three
most common are listed, but levels can be set
between these:
1. Less Dry - This setting is used for lightweight
synthetic loads or when more than the normal
amount of moisture remaining is desired.
Features may vary
2. Large • - This is the initial preferred setting
used for the majority of loads where a normal
amount of moisture remaining is desired.
3. More Dry - This setting would be used to
completely dry heavyweight, hard-to-dry loads
such as thick towels, rugs and work clothes or
for extra dryness of any load.
NOTE: The dial is designed to turn in either
direction.
REGULAR FABRICS -- Use this cycle for non-
permanent press loads such as towels, underwear,
etc. At the end of the cycle there is an automatic
cool down of approximately 6 minutes and a
momentary buzzer.
AIR FLUFF -- Use this no heat cycle to fluff
decorator items in air at room temperature. Turn
the cycle control knob to Air Fluff for up to 15 or
30 minutes of tumbling without heat (depending
on the model).
PAGE 4
Page 7
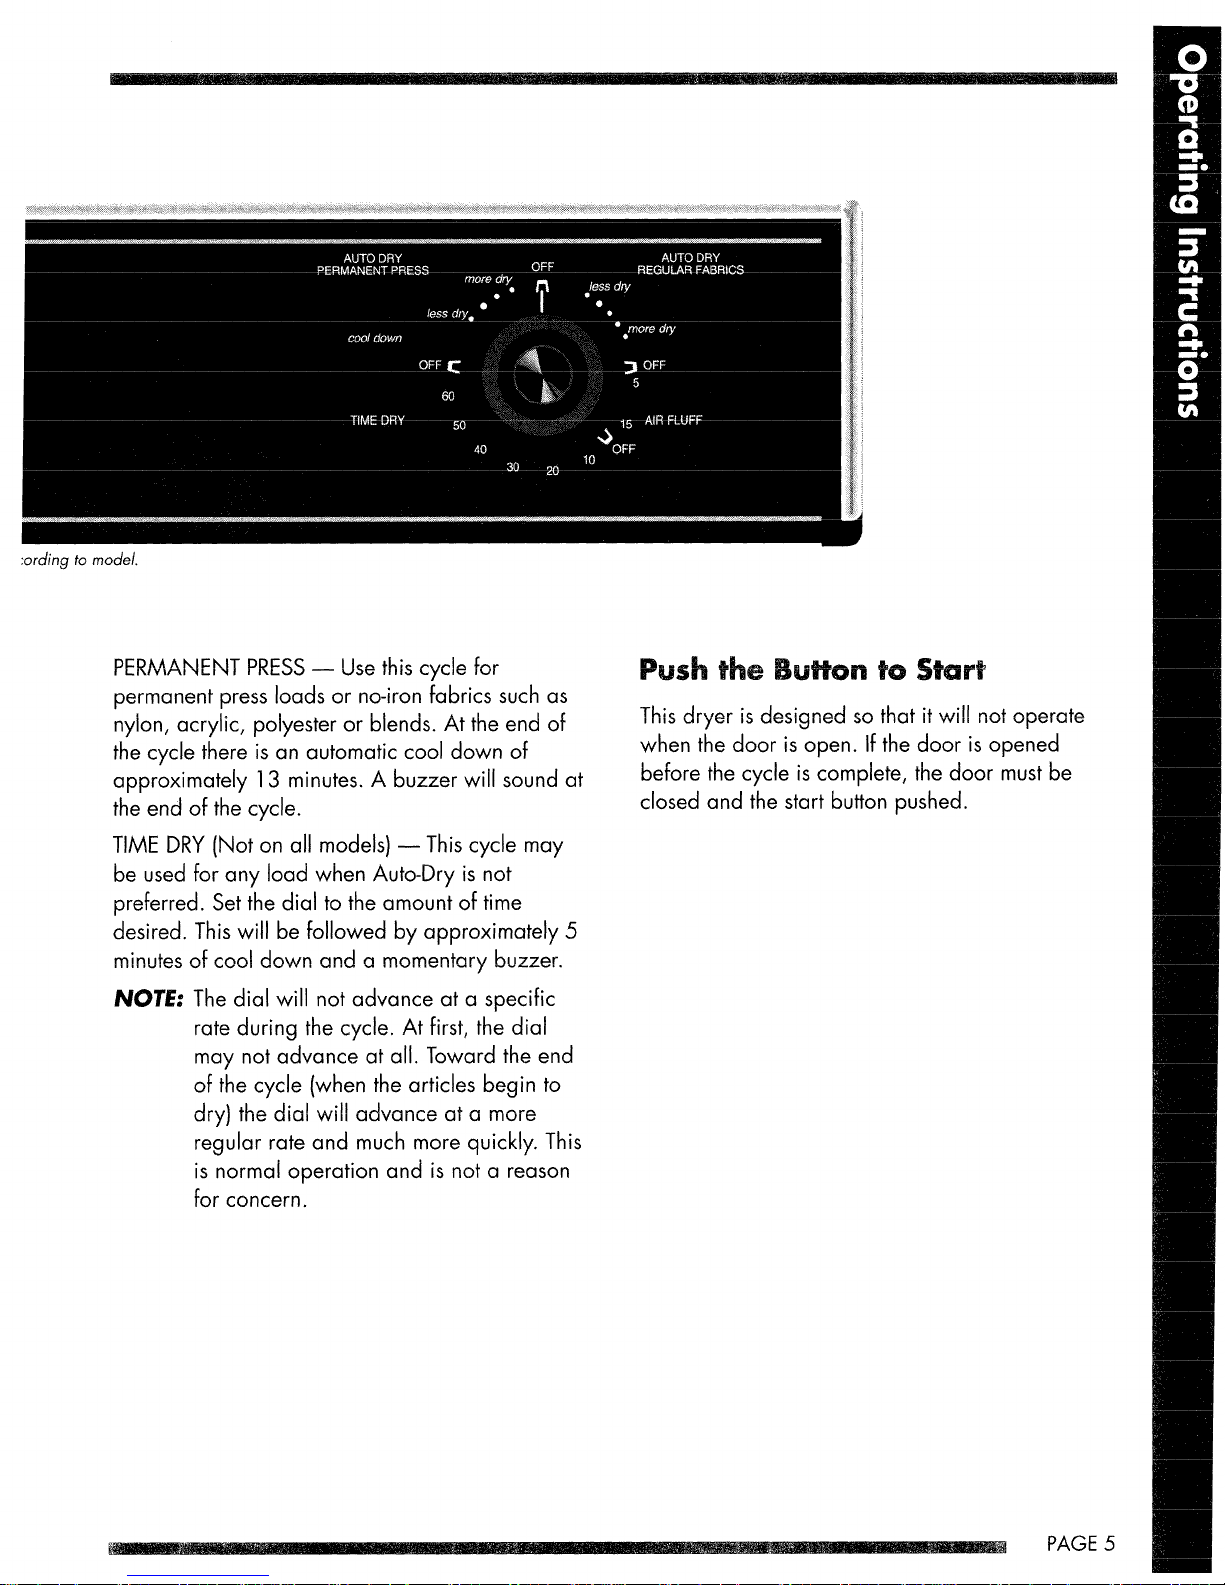
:ording to model.
PERMANENT PRESS-- Use this cycle for
permanent press loads or no-iron fabrics such as
nylon, acrylic, polyester or blends. At the end of
the cycle there is an automatic cool down of
approximately 13 minutes. A buzzer will sound at
the end of the cycle.
TIME DRY (Not on all models) _ This cycle may
be used for any load when Auto-Dry is not
preferred. Set the dial to the amount of time
desired. This will be followed by approximately 5
minutes of cool down and a momentary buzzer.
NOTE: The dial will not advance at a specific
rate during the cycle. At first, the dial
may not advance at all. Toward the end
of the cycle (when the articles begin to
dry) the dial will advance at a more
regular rate and much more quickly. This
is normal operation and is not a reason
for concern.
Push the Button to Start
This dryer is designed so that it wi!! not operate
when the door is open. If the door is opened
before the cycle is complete, the door must be
closed and the start button pushed.
PAGE 5
Page 8
USING THE DRYER
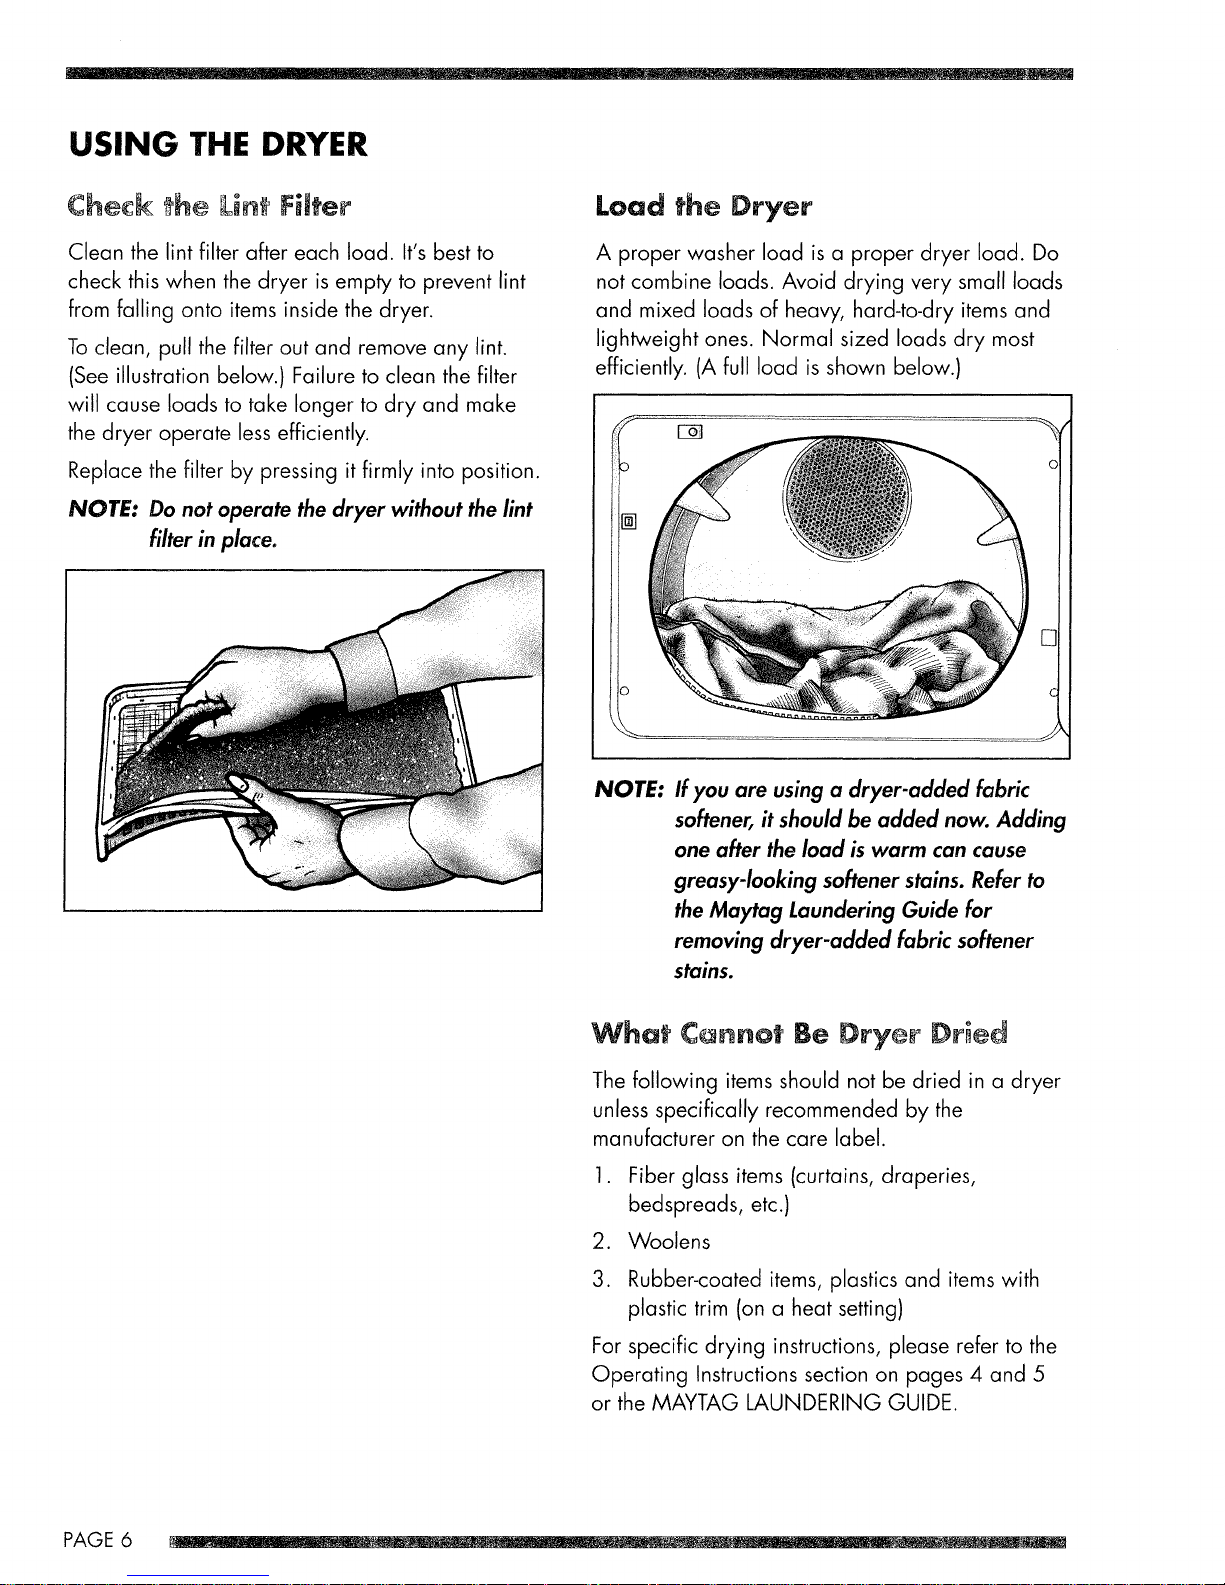
Che :k she int FiJte
Clean the lint filter after each load. It's best to
check this when the dryer is empty to prevent lint
from falling onto items inside the dryer.
To clean, pull the filter out and remove any lint.
(See illustration below.) Failure to clean the filter
will cause loads to take longer to dry and make
the dryer operate less efficiently.
Replace the filter by pressing it firmly into position.
NOTE: Do not operate the dryer without the lint
filter in place.
Load the Dryer
A proper washer load is a proper dryer load. Do
not combine loads. Avoid drying very small loads
and mixed loads of heavy, hard-to-dry items and
lightweight ones. Normal sized loads dry most
efficiently. (A full load is shown below.)
NOTE: If you are using a dryer-added fabric
softener, it should be added now. Adding
one after the load is warm can cause
greasy-looking softener stains. Refer to
the Maytag Laundering Guide for
removing dryer-added fabric softener
stains.
Wha ¢ nnot Be Dryer Dried
The following items should not be dried in a dryer
unless specifically recommended by the
manufacturer on the care label.
1. Fiber glass items (curtains, draperies,
bedspreads, etc.)
2. Woolens
3. Rubber-coated items, plastics and items with
plastic trim (on a heat setting)
For specific drying instructions, please refer to the
Operating Instructions section on pages 4 and 5
or the MAYTAG LAUNDERING GUIDE.
PAGE 6
Page 9

CARING FOR THE DRYER
• Plug the cord into a live outlet.
• Check the fuse or reset the circuit breaker.
Clean the control panel with a soft damp cloth. Do
not use any abrasive powders or cleaning pads.
Cab r ÷
Simply wipe off any marks with soap and water,
followed with an appliance wax if desired.
If the tumbler becomes stained by a crayon, ink
pen or other item inadvertently left in a garment,
clean the tumbler with an all purpose cleaner
such as: Fantastik, Soft Scrub or Formula 409 ®*.
Then tumble old towels or rags to remove any
excess stain.
_xh_J_s_ _ys_em Cleaning
While the lint filter will catch most of the lint from
the load, some will get through and may buildup
in the ductwork. It is important to completely
inspect and clean all lint accumulation from the
interior of the ductwork once a year to maintain
drying performance. The exhaust hood at the
outside of the home should be cleaned more
frequently to ensure the damper opens and closes
freely.
Refer to the Installation Instructions for more details
on proper exhausting.
• Check the fuse or reset the circuit breaker.
• Select a heat setting; not air-fluff.
• On a gas dryer, check that the gas supply is on.
• Clean the lint screen and exhaust duct if the
heat shuts off early.
• Push in only one temperature button.
Doe_n'_ _ry dothe_ properUy
• Select a heat setting; not air-fluff.
• On a gas dryer, check that the gas supply is on.
• Clean the lint screen and the exhaust system.
• Be sure the exhaust hood damper opens and
closes freely.
• Push only one temperature button in.
• Do not overload. One washer load equals one
dryer load.
• Exhaust duct is too long, smaller than 4 inch
diameter, uses too many elbows or is made of
plastic flexible material. Replace with metal.
• Sort heavy items from lightweight items.
• Washer spin cycle may not be extracting water
properly.
• Check to see if there are any foreign objects
such as coins, buttons, or nails which could
damage clothes as well as the dryer. Remove
promptly.
*Brand names are "trademarks of the respective
manufacturers.
BEFORE YOU CALL FOR
SERVICE
Check these points if the
dryer...
• Opening the door during operation stops the
dryer. Close the door, select a cycle and press
the start button.
• The dial will not advance at a specific rate
during the cycle. At first, the dial may not
advance at all. Toward the end of the cycle
(when the articles begin to dry) the dial wil!
advance at a more regular rate and much more
quickly. This is normal operation and is not a
reason for concern.
Nolrk°: Forfurther assistance contact your
May_ag de_er or taft M_ytag Customer
Service:
g.So 1°800-688°9900
C_ado I_800-68_o2002
PAGE 7
Page 10

NOTES
PAGE 8 i ...... mira
Page 11

NOTES
" PAGE 9
Page 12

AUTOMATIC DRYER WARRANTY
Full One Year Warranty
For one(l) year from the date of original retail purchase, any part which fails in normal home use will be repaired or replaced
free of charge.
Limited Parts Warranty
After the first year from date of original retail purchase, through the time periods listed below, the designated parts which fail
in normal home use will be repaired or replaced free of charge for the part itself, with the owner paying all other costs,
including labor.
Second Year
All Parts
Third Through Fifth Year
All partsof the solid statecontrols(if soequipped).
Additional Limited Warranty Against Rust
Should any of the parts listed below rust during the five year period starting from the date of retail purchase, repair or
replacement will be made free of charge during the first year. After the first and through the fifth year, repair or replacement
will be made free of charge for the part itself, with the owner paying all other costs, including labor. Parts covered by this
warranty are the exterior cabinet, including door, tumbler and tumbler front and back.
This full warranty and the limited warranties apply when the appliance is located in the United States or Canada. Appliances
located elsewhere are covered by the limited warranties only, which includes parts which fail during the first year.
Canadian Residents
Thiswarrantycovers onlythoseappliances installedin Canada that have beenlistedwith Canadian StandardsAssociation
unlesstheappliancesare brought into Canada due to transferof residencefrom the UnitedStatesto Canada.
This Warranty gives you specific legal rights, and you may also have other rights which vary from state to state.
TO RECEIVE WARRANTY SERVICE
First: To locate an authorized service company in your area, contact the Maytag dealer from whom your appliance was
purchased or call Maytag Customer Service:
US 1-800-688-9900
CANADA 1-800-688-2002
or check in your telephone directory yellow pages.
Second: Should you not receive satisfactory warranty service from the dealer or authorized service firm, or need further
assistance, call or write:
Maytag Customer Service
P.O. Box 2370
Cleveland, TN 37311
US 1_800-688-9900
CANADA 1-800-688-2002
When contacting Customer Service be sure to provide the model and serial number of your appliance, the name and
address of the dealer from whom you purchased the appliance, and the date of purchase.
Should you still have a problem, write to: Major Appliance ConsumerAction Panel,20 NorthWacker Drive, Chicago, Illinois60606.
MACAPis an industry,sponsoredbut independentgroup of consumerexpertswho receiveand acton complaintsfrom appliance owners.
NOTE: When writing about an unsolvedserviceproblem,pleaseincludethe following information:
(a) Yourname,address,and telephonenumber;
(b) Model numberand serialnumber (foundon the lower right cornerof the door recess)of your appliance;
(c) Name and addressof your dealer anddate theappliancewas bought;
(d) A clear descriptionof the problemyou are having.
,_L'I_? MAYTAG • One Dependability Square • Newton, Iowa 50208
FormNo. 196TM-0594 PartNo. 3-157900 MP Printed in U.S.A.
Page 13

ORDER # 33001238
AUTOMATIC DRYER D-8
Page 14

TABLE OF CONTENTS
Page
Consumer Publications .............................................................................................. Inside Front Cover
For Future Reference ......................................................................................................................... 1
Safety Instructions ......................................................................................................................... !-3
Exhausting The Dryer ....................................................................................................................... 3
Energy Saving Tips .......................................................................................................................... 3
Reversing The Door .......................................................................................................................... 3
Operating Instructions ................................................................................................................... 4-5
• Select the Cycle ............................................................................................................ 4-5
• Start the Dryer .................................................................................................................. 5
Using The Dryer ........................................................................................................................... 6-7
• Check the Lint Filter ........................................................................................................... 6
• Load the Dryer .................................................................................................................. 6
• What Cannot Be Dried ...................................................................................................... 6
Caring For The Dryer ....................................................................................................................... 7
Before You Call For Service ............................................................................................................... 7
Warranty ..................................................................................................................................... 10
CONSUMER PUBLICATIONS
For additional information on laundering and purchasing other major appliances, order the following
booklets from Maytag at the prices indicated. Please send your name, address, booklet title, form number
and payment to: Maytag, Consumer Education Department, One Dependability Square, Newton, IA
50208. Allow 4-6 weeks for delivery.
The Facts of the Laundry -- 18 ! YG ............................................................ 50¢
Stain Removal Guide- 19YG .................................................................. 50¢
Choosing the Right Detergent -- 184YG ..................................................... 50¢
Energy Saving Tips -- 392YG ................................................................... 50¢
Appliance Buying Guides .......................................................................... 50¢
Washer -- 211YG; Dryer -- 212YG; Dishwasher -- 213YG;
Electric Range -- 214YG; Gas Range -- 215YG;
Refrigerator -- 276YG
Page 15

FOR FUTURE REFERENCE
Congratulations on your choice of a Maytag
dryerJ Your satisfaction is very important to us. On
the following pages you wil! find information
related to proper use and care of your new
appliance. The MAYTAG LAUNDERING GUIDE
contains additional tips on proper washing and
drying techniques. By following these instructions
carefully, you will be able to achieve excellent
results with your dryer.
Should you have any questions about using your
Maytag dryer, please contact us. Be sure to
provide the model and serial numbers.
MAYTAG
CONSUMER EDUCATION
ONE DEPENDABILITY SQUARE
NEWTON, IOWA 50208
(515) 791-8911
(Mon.-Fri., 8am-5pm CST)
NOTE: For service and warranty information see
pages 7 & 10.
For future reference we suggest you retain this
manual after recording the model number and
serial number of this automatic dryer in the spaces
provided. This information can be found on the
data plate located in the lower right corner of the
door opening.
Model Number
Serial Number
WARNING:Foryour safety the
information in this manuaM_tlustbe
followed to minimize the risk of fire
or explosionor to preventproperty
damage, personal iniuryor death°
o Do not store or usegasomlneor
otherflammable vapors and _iquids
in the vicinity of this_r any othe_
appliance°
....WHATTODO mFYOU SMELLGAS
®Donot try to light any appliance°
®Donot touch any electricaN
switch; do not useany phone in
your buigding0
®Clearthe raom, building or area
of aft occupants°
®Immediately callyour gas
supplier from a neighbor's
phone°Followthe gas suppfier'$
instructions°
®Rfyoucannotreachyour gas
supplier, callthe fire department°
Installation and service must be
performedby a qualified instaffer,
service agency or the gas supplier°
_mportant Safety Notice & Warning
The California Safe Drinking Water and Toxic Enforcement Act of 1986 (Proposition 65) requires the
Governor of California to publish a list of substances known to the State of California to cause cancer or
reproductive harm, and requires businesses to warn customers of potential exposures to such substances.
Users of this appliance are hereby warned that the burning of gas can result in low-level exposure to some
of the listed substances, including benzene, formaldehyde and soot, due primarily to the incomplete
combustion of natural gas or liquid petroleum (LP) fuels. Exhaust ducts should be kept free of obstructions
and properly exhausted dryers will minimize exposure.
PAGE 1
Page 16

IMPORTANT PERSONAL SAFETY INSTRUCTIONS
Wamin_ _-oTo _educe the risk of fire, enectric
shock or iniury to persons when using your
_ppMiance, follow basic precautions, including the
_oHowing:
1. Read all instructions before using the
appliance°
2. To avoid the possibility of fire or explosion:
a. Do not dry items that have been previously
cleaned in, washed in, soaked in, or
spotted with gasoline, dry-cleaning
solvents, other flammable or explosive
substances as they give off vapors that
could ignite or explode. Any material on
which you have used a cleaning solvent,
or which is saturated with flammable
liquids or solids, should not be placed in
the dryer, until all traces of these
flammable liquids or solids and their fumes
have been removed. There are many
highly flammable items used in homes,
such as: acetone, denatured alcohol,
gasoline, kerosene, some liquid household
cleaners, some spot removers, turpentine,
waxes and wax removers.
b.
Items containing foam rubber (may be
labeled latex foam) or similarly textured
rubber-like materials must not be dried on
a heat setting. Foam rubber materials
when heated, can under certain
circumstance produce fire by spontaneous
combustion.
.
Do not allow children to play on or in the
appliance. Close supervision of children is
necessary when the appliance is used near
children.
4. Before the appliance is removed from service
or discarded, remove the door to the drying
compartment.
5. Do not reach into the appliance if the drum is
moving.
6. Do not install or store this appliance where it
will be exposed to the weather.
7. Do not tamper with controls.
8. Do not repair or replace any part of the
appliance or attempt any servicing unless
specifically recommended in published user-
repair instructions that you understand and
have the skills to carry out.
9. Do not use fabric softeners or products to
eliminate static unless recommended by the
manufacturer of the fabric softener or
product.
10. Clean the lint screen before or after each
load.
11.
Keep the area around the exhaust opening
and surrounding areas free from lint
accumulation, dust and dirt.
12.
The interior of the dryer and exhaust duct
should be cleaned periodically by qualified
service personnel.
13.
This appliance must be properly grounded.
Never plug the appliance cord into a
receptacle which is not grounded adequately
and in accordance with local and national
codes. See installation instructions for
grounding this appliance.
WARN_NC_
Do not pJaceinto your dryer items that have been
spotted or soaked with vegetabb oi! or cooking
oil Even after being washed, these items may
contain significant amounts of theseoi_s.The
remaining olt can ignite spontaneousiyo The
potentiaJfor spontaneous ignition increases when
the itemscontaining vegetable oil or cooking oi!
are exposed to heat° Heat sources, such as your
clothes dryer; can warm these items, allowing an
oxidation reaction in theoil to accuroOxidation
creates heat° Hfthis heat cannot escape, the iter_as
can become hot enough to catch tire° Pilhsg,
stacking or storing these kinds of items may
prevent he_t from escaping and can _:reatea _ire
hazard°
Aftwashed and unwashed fabrics that contain
vegetabb oi_or cooking oiacan be dangerous°
Washing these items in hot water with e×tr_
detergent w_Hreduce, but will not eaiminate, the
hazard° Always use _he"_'od down" cyclebr
these items to reduce the items' _emperatureo
Never remove these itemsfromthe clothes dryer
hot or ir_terrupt the drying cycle until the items
have run through the "cool down" cycle. Never
pib or sta_k these items when _heya_ hot°
PAGE 2
Page 17

Appliances with the (_ symbol on the data plate
have been listed with Underwriters' Laboratories,
Inc. Those with a CSA Monogram on the data
plate have been certified by the CSA Testing
Laboratories as complying with Canadian
Standards Association requirements. Gas dryers
with an AGA symbol on the data plate have been
design certified with the American Gas
Association; those with a CGA symbol on the
data plate have been approved by the Canadian
Gas Association. Nevertheless, as with any
equipment using electricity and having moving
parts, there are potential hazards. To use this
appliance safely, the operator should become
familiar with the instructions for operation of the
Appliance and always exercise care when
using it.
EXHAUSTING THE DRYER
A proper exhaust system is critical for good
drying results. Restricted airflow affects dryer
performance and results in longer drying times.
Exhaust ductwork guidelines:
• Use 4" diameter rigid metal exhaust duct. Do
not use smaller duct. Minimize the length of
duct and the number of elbows. Secure joints
with duct tape. Do not use screws.
° Never use plastic or nonmetal flexible duct. This
can kink, cause lint buildup and reduce airflow
which creates service problems.
• If flexible duct must be used, use only the type
with a stiff sheet metal wall. Do not kink or
crush the duct. Do not use flexible duct with a
thin foil wall.
• Clean out previously used exhaust duct.
Replace kinked or crushed sections. Be sure
exhaust vent hood flap opens and closes freely.
• Refer to the installation instructions for
additional dryer exhaust information.
loads of heavy, hard-to-dry items with
lightweight ones.
• Properly select and check exhaust venting. Four
inch rigid metal ducting is recommended to
prevent lint collection and improve dryer
operation. Periodically check the ductwork for
any obstructions that could reduce the airflow
and efficiency.
• Remove items from the dryer as soon as
tumbling stops for best results and efficiency.
This reduces wrinkling and ironing.
REVERSING THE DOOR
The dryer door is designed with flexibility in mind.
It can be mounted on the dryer front so as to open
from left to right, or reversed and open from right
to left. This provides flexibility for the dryer located
in a cramped area or for the person preferring a
different door swing. Simply follow the steps as
listed.
Remove hinge hole covers and cover from
latch. These will be re-used.
2) Rest door on knee for support.
3) Remove 4 screws holding hinges to front
panel.
4) Turn door upside down.
5) Support on knee.
6) Insert screw in the small round hole first and
start by hand.
7) Tighten screw to position door.
8) Insert top screw of other hinge and tighten.
9) Insert and tighten remaining screws.
10) Replace hinge hole covers and door latch
cover in opposite side.
HINGE HOLE
ENERGY SAVING TIPS
• Clean the lint filter after each cycle for greater
efficiency and performance.
• Avoid overloading the dryer. A proper wash
load is a proper dryer load. Do not combine
loads. Avoid drying very small loads or mixed
LATCH
COVER
PAGE 3
Page 18

OPERATING INSTRUCTIONS
The Auto-Dry cycles allow you to set the degree of
dryness for each load. The dryer adjusts for the
size of load, weight of fabric and amount of
moisture in the load, then shuts off when the items
reach the dryness level selected. For this reason,
the drying time for each load may vary. The Large
• is the preferred initial setting. However, several
dryness levels within the Auto-Dry cycles allow
various levels of moisture to be selected. The three
most common are listed, but levels can be set
between these:
1. Less Dry - This setting is used for lightweight
synthetic loads or when more than the normal
amount of moisture remaining is desired.
Features may vary
2. Large • - This is the initial preferred setting
used for the majority of loads where a normal
amount of moisture remaining is desired.
3. More Dry - This setting would be used to
completely dry heavyweight, hard-to-dry loads
such as thick towels, rugs and work clothes or
for extra dryness of any load.
NOTE: The dial is designed to turn in either
direction.
REGULAR FABRICS -- Use this cycle for non-
permanent press loads such as towels, underwear,
etc. At the end of the cycle there is an automatic
cool down of approximately 6 minutes and a
momentary buzzer.
AIR FLUFF -- Use this no heat cycle to fluff
decorator items in air at room temperature. Turn
the cycle control knob to Air Fluff for up to 15 or
30 minutes of tumbling without heat (depending
on the model).
PAGE 4
Page 19

:ording to model.
PERMANENT PRESS-- Use this cycle for
permanent press loads or no-iron fabrics such as
nylon, acrylic, polyester or blends. At the end of
the cycle there is an automatic cool down of
approximately 13 minutes. A buzzer will sound at
the end of the cycle.
TIME DRY (Not on all models) _ This cycle may
be used for any load when Auto-Dry is not
preferred. Set the dial to the amount of time
desired. This will be followed by approximately 5
minutes of cool down and a momentary buzzer.
NOTE: The dial will not advance at a specific
rate during the cycle. At first, the dial
may not advance at all. Toward the end
of the cycle (when the articles begin to
dry) the dial will advance at a more
regular rate and much more quickly. This
is normal operation and is not a reason
for concern.
Push the Button to Start
This dryer is designed so that it wi!! not operate
when the door is open. If the door is opened
before the cycle is complete, the door must be
closed and the start button pushed.
PAGE 5
Page 20

USING THE DRYER
Che :k she int FiJte
Clean the lint filter after each load. It's best to
check this when the dryer is empty to prevent lint
from falling onto items inside the dryer.
To clean, pull the filter out and remove any lint.
(See illustration below.) Failure to clean the filter
will cause loads to take longer to dry and make
the dryer operate less efficiently.
Replace the filter by pressing it firmly into position.
NOTE: Do not operate the dryer without the lint
filter in place.
Load the Dryer
A proper washer load is a proper dryer load. Do
not combine loads. Avoid drying very small loads
and mixed loads of heavy, hard-to-dry items and
lightweight ones. Normal sized loads dry most
efficiently. (A full load is shown below.)
NOTE: If you are using a dryer-added fabric
softener, it should be added now. Adding
one after the load is warm can cause
greasy-looking softener stains. Refer to
the Maytag Laundering Guide for
removing dryer-added fabric softener
stains.
Wha ¢ nnot Be Dryer Dried
The following items should not be dried in a dryer
unless specifically recommended by the
manufacturer on the care label.
1. Fiber glass items (curtains, draperies,
bedspreads, etc.)
2. Woolens
3. Rubber-coated items, plastics and items with
plastic trim (on a heat setting)
For specific drying instructions, please refer to the
Operating Instructions section on pages 4 and 5
or the MAYTAG LAUNDERING GUIDE.
PAGE 6
Page 21

CARING FOR THE DRYER
• Plug the cord into a live outlet.
• Check the fuse or reset the circuit breaker.
Clean the control panel with a soft damp cloth. Do
not use any abrasive powders or cleaning pads.
Cab r ÷
Simply wipe off any marks with soap and water,
followed with an appliance wax if desired.
If the tumbler becomes stained by a crayon, ink
pen or other item inadvertently left in a garment,
clean the tumbler with an all purpose cleaner
such as: Fantastik, Soft Scrub or Formula 409 ®*.
Then tumble old towels or rags to remove any
excess stain.
_xh_J_s_ _ys_em Cleaning
While the lint filter will catch most of the lint from
the load, some will get through and may buildup
in the ductwork. It is important to completely
inspect and clean all lint accumulation from the
interior of the ductwork once a year to maintain
drying performance. The exhaust hood at the
outside of the home should be cleaned more
frequently to ensure the damper opens and closes
freely.
Refer to the Installation Instructions for more details
on proper exhausting.
• Check the fuse or reset the circuit breaker.
• Select a heat setting; not air-fluff.
• On a gas dryer, check that the gas supply is on.
• Clean the lint screen and exhaust duct if the
heat shuts off early.
• Push in only one temperature button.
Doe_n'_ _ry dothe_ properUy
• Select a heat setting; not air-fluff.
• On a gas dryer, check that the gas supply is on.
• Clean the lint screen and the exhaust system.
• Be sure the exhaust hood damper opens and
closes freely.
• Push only one temperature button in.
• Do not overload. One washer load equals one
dryer load.
• Exhaust duct is too long, smaller than 4 inch
diameter, uses too many elbows or is made of
plastic flexible material. Replace with metal.
• Sort heavy items from lightweight items.
• Washer spin cycle may not be extracting water
properly.
• Check to see if there are any foreign objects
such as coins, buttons, or nails which could
damage clothes as well as the dryer. Remove
promptly.
*Brand names are "trademarks of the respective
manufacturers.
BEFORE YOU CALL FOR
SERVICE
Check these points if the
dryer...
• Opening the door during operation stops the
dryer. Close the door, select a cycle and press
the start button.
• The dial will not advance at a specific rate
during the cycle. At first, the dial may not
advance at all. Toward the end of the cycle
(when the articles begin to dry) the dial wil!
advance at a more regular rate and much more
quickly. This is normal operation and is not a
reason for concern.
Nolrk°: Forfurther assistance contact your
May_ag de_er or taft M_ytag Customer
Service:
g.So 1°800-688°9900
C_ado I_800-68_o2002
PAGE 7
Page 22

NOTES
PAGE 8 i ...... mira
Page 23

NOTES
" PAGE 9
Page 24

AUTOMATIC DRYER WARRANTY
Full One Year Warranty
For one(l) year from the date of original retail purchase, any part which fails in normal home use will be repaired or replaced
free of charge.
Limited Parts Warranty
After the first year from date of original retail purchase, through the time periods listed below, the designated parts which fail
in normal home use will be repaired or replaced free of charge for the part itself, with the owner paying all other costs,
including labor.
Second Year
All Parts
Third Through Fifth Year
All partsof the solid statecontrols(if soequipped).
Additional Limited Warranty Against Rust
Should any of the parts listed below rust during the five year period starting from the date of retail purchase, repair or
replacement will be made free of charge during the first year. After the first and through the fifth year, repair or replacement
will be made free of charge for the part itself, with the owner paying all other costs, including labor. Parts covered by this
warranty are the exterior cabinet, including door, tumbler and tumbler front and back.
This full warranty and the limited warranties apply when the appliance is located in the United States or Canada. Appliances
located elsewhere are covered by the limited warranties only, which includes parts which fail during the first year.
Canadian Residents
Thiswarrantycovers onlythoseappliances installedin Canada that have beenlistedwith Canadian StandardsAssociation
unlesstheappliancesare brought into Canada due to transferof residencefrom the UnitedStatesto Canada.
This Warranty gives you specific legal rights, and you may also have other rights which vary from state to state.
TO RECEIVE WARRANTY SERVICE
First: To locate an authorized service company in your area, contact the Maytag dealer from whom your appliance was
purchased or call Maytag Customer Service:
US 1-800-688-9900
CANADA 1-800-688-2002
or check in your telephone directory yellow pages.
Second: Should you not receive satisfactory warranty service from the dealer or authorized service firm, or need further
assistance, call or write:
Maytag Customer Service
P.O. Box 2370
Cleveland, TN 37311
US 1_800-688-9900
CANADA 1-800-688-2002
When contacting Customer Service be sure to provide the model and serial number of your appliance, the name and
address of the dealer from whom you purchased the appliance, and the date of purchase.
Should you still have a problem, write to: Major Appliance ConsumerAction Panel,20 NorthWacker Drive, Chicago, Illinois60606.
MACAPis an industry,sponsoredbut independentgroup of consumerexpertswho receiveand acton complaintsfrom appliance owners.
NOTE: When writing about an unsolvedserviceproblem,pleaseincludethe following information:
(a) Yourname,address,and telephonenumber;
(b) Model numberand serialnumber (foundon the lower right cornerof the door recess)of your appliance;
(c) Name and addressof your dealer anddate theappliancewas bought;
(d) A clear descriptionof the problemyou are having.
,_L'I_? MAYTAG • One Dependability Square • Newton, Iowa 50208
FormNo. 196TM-0594 PartNo. 3-157900 MP Printed in U.S.A.
 Loading...