

Page 1
TABLE OF CONTENTS
Page
For Future Reference ...................................................................... 1
Important Safety Instructions ............................................................... 2 3
Oven Control Panel ........................................................................ 4_5
• Electronic Clock and Oven Control ........................................................ 475
• Setting the Clock and Timer .............................................................. 5
Using Your Oven ........................................................................... 6_
• Baking and Roasting .................................................................... 6 7
• Broiling ............................................................................... 7
• Programmed Oven Operations ............................................................ 8
• Lower Oven Operation (select models) ..................................................... 9
Cleaning .................................................................................. 9-12
• Self-Clean Oven ........................................................................ 9 10
• Cleaning Lower Oven (select models) ...................................................... 10
• Wail Oven Cleaning Chart ............................................................... 11-1"2
Maintenance .............................................................................. 1'2
• Light Replacement ..................................................................... 12
• Adjusting Oven Temperature ............................................................. 12
Before You Call for Service ................................................................. 13
Warranty .............................................................................. Back Cover
Page 2
FOR FUTURE REFERENCE
Congratulations on your choice of a May-tag electric wail For future referent, e, keep this maunal in a convenient
oven. As you use your new wall oven we know you will location. Record the model number, serial nnmber and
appreciate the many featnres that provide excellent purchase date of this electric wall oven in the spaces
performanee, ease of cleaning, convenience and provided. (This inlormation can be found on the data
dependability, plate located on the frame around the oven.)
Read this manual. New features have dramatically ModelNumber
changed today's cooking appliances and the way we
cook. It is therefore very important to understand how
your new electric wall oven operates. On the fi_llowing
pages yon will {_ndinformation regarding its operation. Serial Number
By follo_qng these instructions carei\_lly, )*m will be
able to fully enjoy and properly maintain your new
Maytag wall oven. PurchaseDate
Save time and money'. Please take a momeut to
review the enclosed booklet, "Cooking Made
Simple." _A,]mther you need assistat/ee in selecting the
right bakeware or reviewing the "dos and don'ts" of
baking, roasting and broiling, the answers are contained
i, this booklet. If something goes wrong, check the
"Before You Call for Service" section of this mamlal. It
is designed to solve common problems you may
enconnten
Should you have an)' quest ons about using your Maytag
wall oven, call or write us. Be sure to provide the model
and serial numbers of your wall oven.
BE SURE YOU READ THE SAFETY
INSTRUCTIONS ON PAGES 2-3 BEFORE
YOU START TO USE THIS WALL OVEN.
NOTE: For instructions on operating the microwave (Model CCE6800), refer to the Microwave User_ Guide
packed w4th that model.
PAG
Page 3
IMPORTANT SAFETY INSTRUCTIONS
Read all instructions before using CAFTION: Do not store items of interest to children
this appliance, in cabinets above an appliance. Children climbing on
the appliance door to reach items could be seriously
The following instructions are based on safety injured.
considerations and must be strictly followed to reduce
the potential risks of fire, electric shock, or personal About Your Appliance
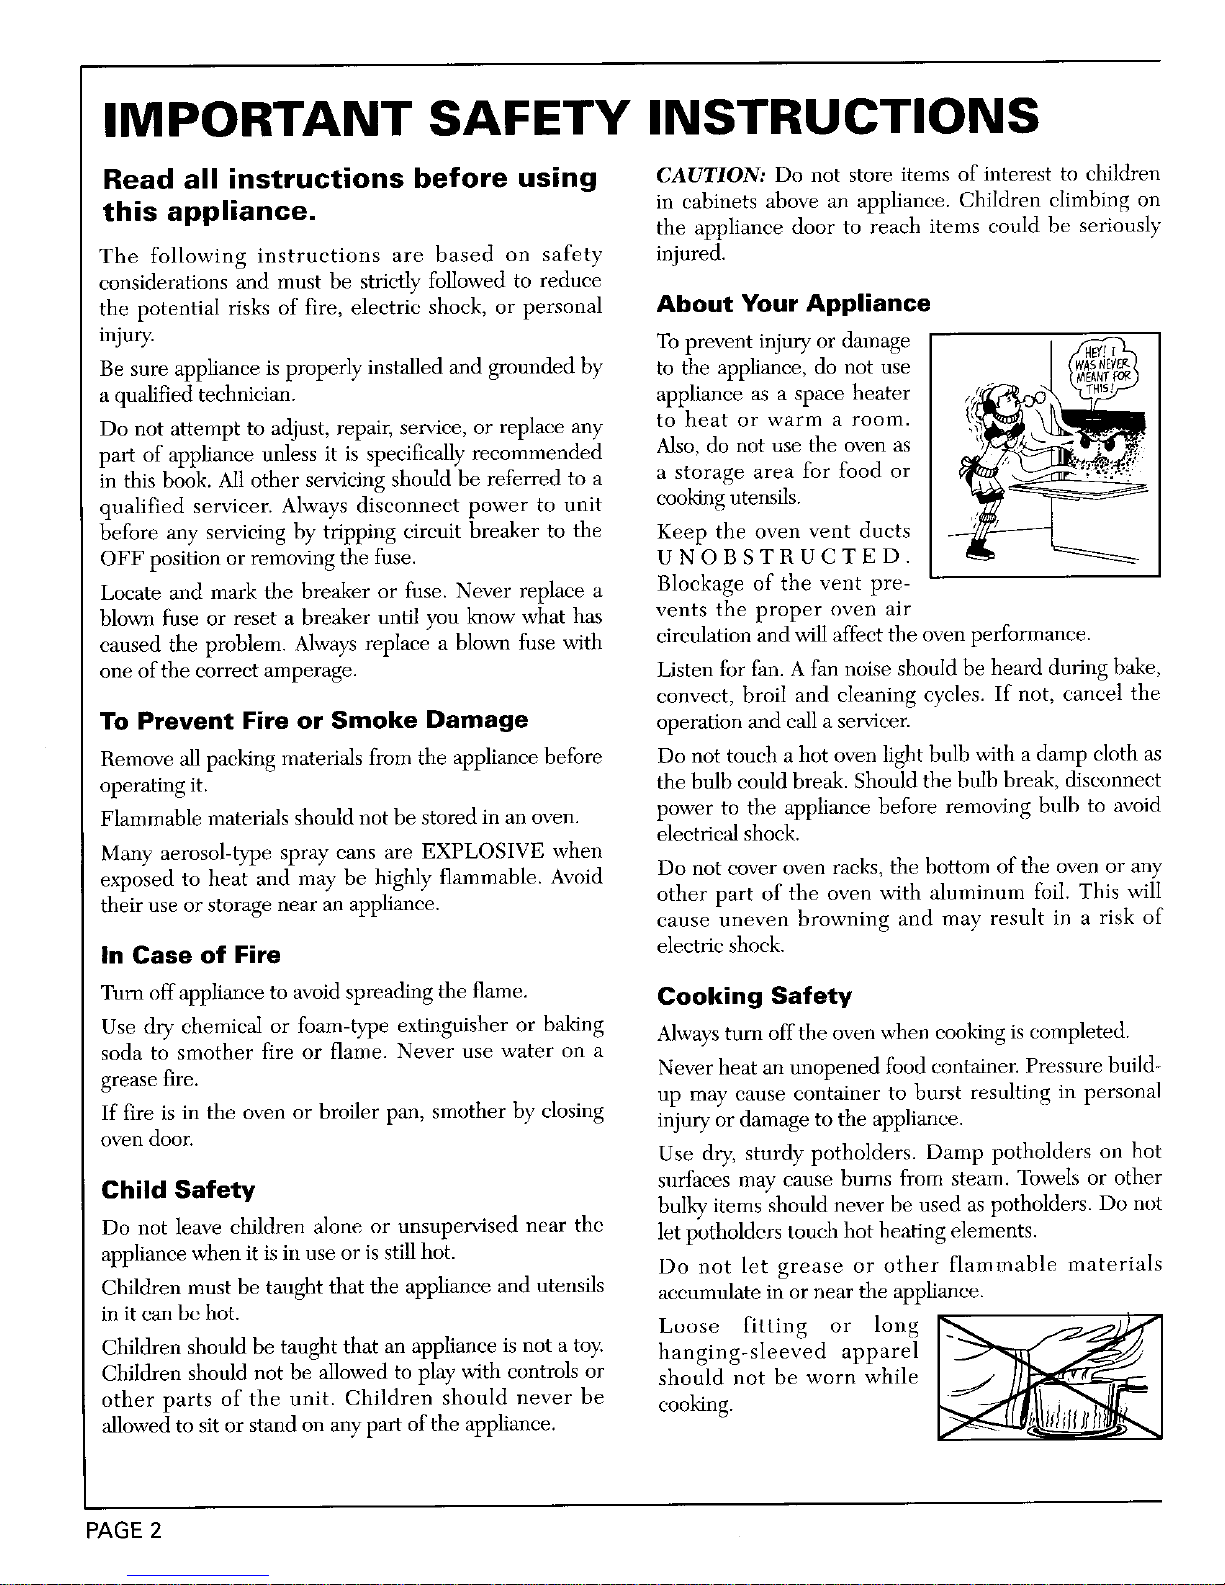
injury. To prevent injury or damage
Be sure appliance is properly installed and grounded by to the appliance, do not use
a qualified technician, appliance as a space heater
Do not attempt to adjust, repair, service, or replace any to heat or warm a room.
part of appliance unless it is specifically" recommended Also, do not use the oven as
in this book. All other servicing should be referred to a a storage area for food or
qualified servicer. Always disconnect power to unit cooking utensils.
before any servicing by tripping circuit breaker to the Keep the oven vent ducts
OFF position or removing the fuse. U N O B S T R U C T E D.
Locate and mark the breaker or fuse. Never replace a Blockage of the vent pre-
blown fuse or reset a breaker until you know what has vents the proper oven air
caused the problem. Always replace a blown fuse with circulation and will affect the oven performance.
one of the correct amperage. Listen for fan. A fan noise should be heard during bake,
eonveet, broil aud cleaning cycles. If not, cancel the
To Prevent Fire or Smoke Damage operation and call a servicer.
Remove 'allpacking materials from the appliance before Do not touch a hot oven light bulb with a damp cloth as
operating it. the bulb could break. Should the bulb break, disconnect
Flammable materials should not be stored in an oven. power to flm appliance before removing bulb to avoid
electrical shoek.
Many aerosol-type spray cans are EXPLOSIVE when
exposed to heat and may be highly flammable. Avoid Do not cover oven racks, the bottom of the oven or any
their use or storage near an appliance, other part of the oven with aluminum foih This will
cause uneven browning and may result in a risk of
In Case of Fire electric shock.
Turn offappliance to avoid spreading the flame. Cooking Safety
Use dry chemical or foam-type extinguisher or baking Always turn off the oven when cooking is completed.
soda to smother fire or flame. Never use water on a
grease fire. Never heat an unopened food contaiuer. Pressure build-
up may cause container to burst resulting in personal
If fire is in the oven or broiler pan, smother by closing injury or damage to the appliance.
oven door. Use dry, sturdy potholders. Damp potholders on hot
Child Safety surfaces may cause burns from steam. Towels or other
bulky items should never be used as potholders. Do not
Do not leave children alone or unsupervised near the let potholders touch hot heating elements.
applianee when it is in use or is still hot. Do not let grease or other flammable materials
Children must be taught that the appliance and utensils accumulate in or near the appliance.
in it can be hot. Loose fitting or loug _.-_2_
Children should be taught that an appliance is not a toy. hanging-sleeved apparel
Children should not be allowed to phLvwith controls or should not be worn while
ether parts of the unit. Children should never be cooking.
_lowed to sit or stand on any part of the appliance.
PAGE 2
Page 4
Always place oven racks in the desired positions while Cleaning Safety ....
oven is cool. If a rack nulst be moved while hot, use a Turn off all controls and wait for appliance pa_s to cool
dry potholder and avoid touching hot element in oven. before touching or cleaning them.
Use care when opening the oven door. Let hot air or Clean only parts listed in this manual.
steam escape before removing or replacing food.
Do not clean door gasket. The door gasket is essential
PREPARED FOOD WARNING: Follow food for a good seal. Care should be taken not to rub,
manufacturer's instructions. If a plastic frozen food damage or move the gasket.
container and/or its cover distorts, warps, or is otherwise
damaged during cooking, immediately discard the food Self-Clean Oven
and its container. The food could be contaminated.
Do not use oven cleaners of any kind in or around any
DoNOTTO C.T.EOVENELEMENTS,AREASpartoftheselfcleauoven
NEAR THE ELEMENTS OR THE INTERIOR
SURFACES OF OVEN. Elements may be hot even Before self-cleaning the oven, remove broiler pan, oven
though they are dark in color. The interior surfaces of racks, and other utensils, and wipe off excessive
the oven may become hot ei_ough to cause burns, spillovers to prevent excessive smoke or flare-ups.
During and after use, do not touch or let clothing or CAUTION: DO NOT LEAVE FOOD OR COOKING
other flammable materials contact heating elemeuts, UTENSILS, ETC., IN THE OVEN DURING THE
areas near elements or interior surfaces of oven until SELF-CLEAN CYCLE.
they 1-1avehad sufficient time to cool. Other surfaces of
the appliance may become hot enough to cause bums. Important Safety Notice and Warning
Among these areas are the oven vent opening and the The California Safe Drinking Water and Toxic
surfaces near opening, oven door, and oven window. Enforcement Act of 1986 (Proposition 65) requires the
Do not allow aluminum foil or any other metal object to Governor of California to publish a list of substances
contact heating elements, known to the State of California to cause cancer or
reproductive harm, and requires businesses to warn
Utensil Safety customers of potential exposures to such substances.
Be sure utensil is large enough to properly contain food Users of this appliance are hereby warned that when
and avoid spillovers, the oven is engaged in the self-clean cycle there may be
somelowlevelexposureto someofthelisted
Follow the manufacturer's directions when using oven
substances, including carbon monoxide. Exposure to ...................
cooking bags. these substances can be minimized by properly venting
Only certain types of glass, glass/ceramic, ceramic, or the oven to the outdoors during the self-clean cycle by
glazed utensils are suitable for oven usage without opening the windows and/or door in the room where
breaking due tn the sudden change in temperature, appliance is located.
This appliance has been tested for safe performance
using conventional cookware. Do not use any devices or
accessories that are not specifically recommended in
this manual. Do not use add-on oven convection
systems. The use of devices or accessories that are not
expressly recommended in this manual can create
serious safety hazards, result in performance problems,
and reduce the life of the components of the appliance.
SAVE THESE INSTRUCTIONS
PAGE 3
Page 5
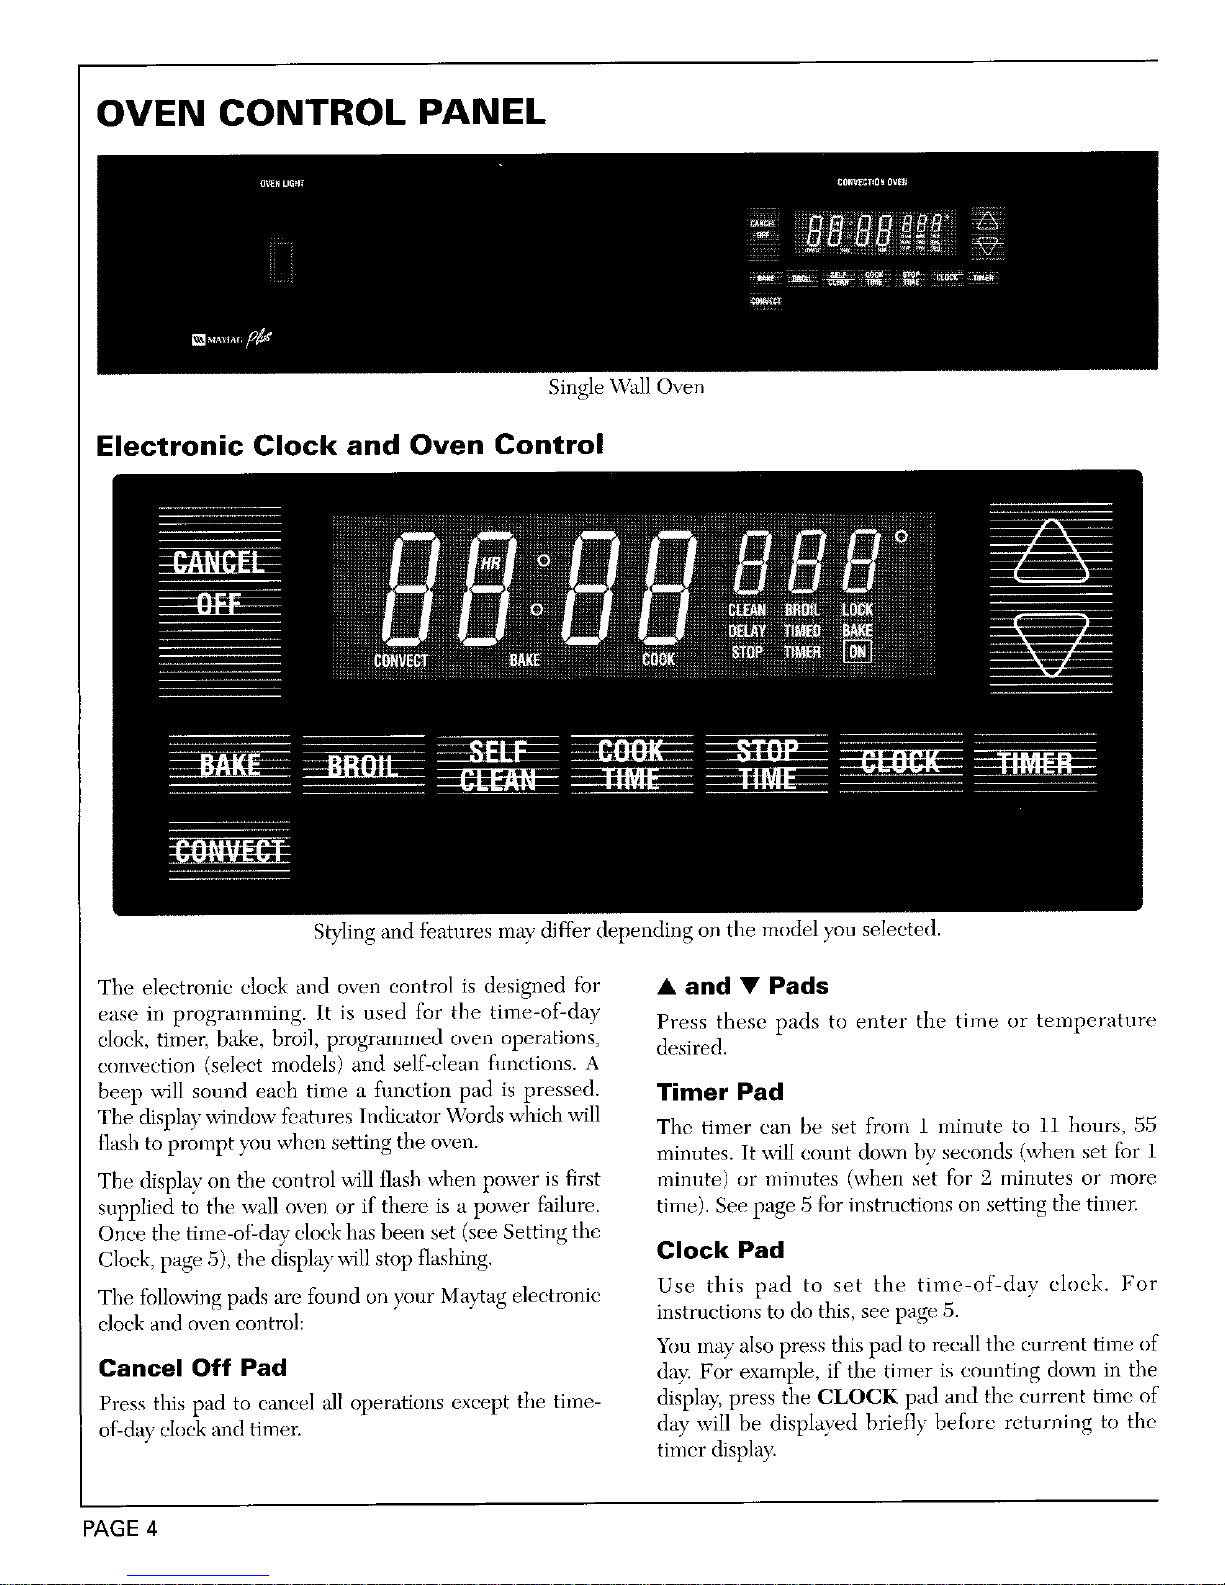
OVEN CONTROL PANEL
Single Wall Oven
Electronic Clock and Oven Control
Styling and features may dit}br depending on the model you selected.
The electronic clock and oven control is designed fbr • and • Pads
ease in programming. It is used for the time-of-day Press these pads to enter the time or temperature
clock, timer, bake, broil, programlned oven operations, desired.
convection (select models) and self-clean functions. A
beep will sound each time a fimetion pad is pressed. Timer Pad
The display w_ndow fcatures Indicator Words which will The timer can be set from 1 minute to 1i hours, 55
tlash to prompt you when setting the oven. minutes. It x_411count down by seconds (when set for 1
The display on the control _ill tlash when power is first minute) or minutes (when set for 2 mimltes or more
supplied to the wall oven or if there is a power i:ailure, time). See page 5 for instructions on setting the timer.
Once the time-oi:-day clock has been set (see Setting the
Clock, page 5), the display will stop flashing. Clock Pad
The following pads are found on your Maytageleetronic Use this pad to set the time-of-day clock. For
clock and oven control: instructions to do this, see page 5.
You inay also press this pad to recall the current time of
Cancel Off Pad day: For example, if tile timer is counting down in the
Press this pad to cancel all operations except the time- display, press the CLOCK pad and the current time of
of-day clock and timer, day will be displayed briefly before returning to the
timer display.
PAGE 4
Page 6

Cook Time/Stop Time Pads
These pads are used to program the oven to start and To set the timer:
stop automatically, either immediately or at a later time.
1. Press the TIMER pad once. The Indicator Word
For detailed information on using Programmed Oven TIMER will flash and "OHR:O0" appears in the
Operations, see page 8. display.
Self Clean Pad The timer can be set from 1 minute up to 11 hours
This pad is pressed to set the oven for a self:dean cycle, and 55 minutes.
See pages 9-10 for detailed information on the self- 2. Set the desired time using the • and • pads. (If
clean feature, more than 15 seconds elapses between pressing the
TIMER pad and the • pad, the TIMER pad must
BroU Pad be pressed again.)
Use this pad to select broil. See page 7 for more broiling
information.
Bake Pad
The oven temperature is set by pressing this pad and
the • or • pad. Additional baking and roasting
information can be found on page 6.
Convect Pad (select models)
Press this pad to select convection baking and roasting.
Set the oven temperature by pressing the • or • pad.
See page 6 for more information on convection cooking.
Setting the Clock and Timer
Clock
To set the time-of-day clock:
1. Press the CLOCK pad once. The Indicator Word
TIME will flash in the display.
"2.Set the correct time of day using the • and • pads.
(If inore than 15 seconds elapses between pressing
the CLOCK pad and the • and • pads, the
CLOCK pad must be pressed again.)
NOTE: Four seconds later the time of day will
automatically be entered.
To cancel timer:
To change time of day set on the clock: Repeat
steps 1 and 2 above. 1. Press and hold TIMER pad for three seconds.
Tile clock time cannot be changed when the oven is set OR
for a programmed oven operation or self-clean 2. a. Press TIMER pad and
operation. Cancel the operation to set the clock, b. Press and hold • pad until time is returned to
Press the CLOCK pad to recall the time of day when "00". _........
auother function is displayed. _--
Timer ;_
The timer can be used independently of any"other oven
actMty and eau be set while another oven function is
operating. The timer does not control the oven.
PAGE
Page 7

USING YOUR OVEN
Every oven has its own characteristics. You may find Oven Racks
that the cooking times va_ slightly from your old oven. One fiat rack and one offset rack are packaged with
This is normal, your oven. The use of the ofl;et rack is indicated in the
For safety"reasons, when opening the oven door, allow list below with an "o" after the rack number.
steam and hot air to escape before reaching into the NOTE: Convection models have a second flat rack to
oven to remove food. be used for three rack baking. Double ovens have an
additional offset rack packaged in the lower oven.
Baking and Roasting To remove rack, pull forward to the "stop" position; lift
up on the front of the rack and pull ont. Do not
(For additionaI baking, roasting and convection tips, attempt to ehange the rack positions when the
retbr to "Cooking Made Simple" booklet.) oven is hot.
Do not cover an entire oven rack or oven bottom with
Setting the Oven Controls to Bake or aluminmn foil. This will restrict air flow. Never place
Roast and Convection Bake or Roast pans directly on the oven bottom.
(select models): Rack Positions
1. Place racks on proper rack positions. Rack Position #40 (offset rack on #4--highest
2. Press the BAKE pad or CONVECT pad (select position):
models). Indicator Words BAKE or CONVECT Most broiling.
BAKE will flash and three dashes will be shown in Rack Position #3:
the display. Most baked goods on cookie sheets, cakes (sheet and
3. Press either the • or • pad once and 350°E will layer).
appear in the display- when in the bake mode. When Rack Position #30 (offset rack on #3):
in the convert mode 325°F. will appear (select Most baked goods on cookie sheets, frozen
models). Press the • or • pad until the desired convenience foods, fresh fi'uit pie, cream pie, layer
oven temperature is displayed. (If more than fifteen cakes, main dish souffle.
seconds elapses between pressing a pad and pressing Rack Position #2:
the • or • pad, the display will return to the Roasting small cuts of meat, cakes (tube, bundt or
previous display:) layer), frozen fruit pie, pie shell, large casseroles.
The Indicator Words ON and either BAKE or Rack Position #20 (offset raek on #2):
CONVECT BAKE will appear in the display. After Roasting small cuts of meat, loaves of bread, angel
tbod cake.
four seconds the oven will begin to heat and the
temperature display will rise in 5 degree increments Rack Position #1 (lowest position):
Large cuts of meat and large poultry, angel food cake,
while the oven is preheating. A beep will sound to loaves of bread, custard pie, dessert souffle.
indicate that the oven has preheated (allow 7-I1
minutes for preheating). The ON Indicator Word Multiple Rack Cooking:
Two racks, use #2o and #4. Three racks, use #1, #3o,
will go off. BAKE or CONVECT BAKE and the and #4 (convection models only; see diagram below).
selected temperature will remain in the display.
NOTE: The Indicator Word ON will cycle on and off
with the element.
To recall temperature set during preheat: Press
the BAKE or CONVECT pad (select models), rack)
Desired temperature will be briefly displayed, then it _ffsetrack)
will automatically return to on-going program.
To change temperature set: Press the BAKE or flatra_k)
CONVECT pad (select models) and • or • pad for
the new desired temperature.
4. Press CANCEL OFF pad to turn oven off at the
Three-Rack Convection Cooking (select models)
end of baking.
PAGE 6
Page 8

Oven Light
The oven light automatically, comes on whenever the 4. Allow element to preheat 2 3 minutes. After broil
oven door is opened. When door is closed, push the element is red, place the broiler pan on the
Oven Light s_xdtchto turn oven light on or off. recommended rack position. Broil with tire oven
door open to the broil stop position (about four
Oven Fan(s) inches).
A cooling fhn will operate during 'all cooking modes. 5. Press CANCEL OFF pad to turn oven off when
The fan may' also ctmtinue to operate after the oven is food is cooked.
turned off until the oven has cooled dmvn. 6. Broil times may need to be increased if the wall oven
A convection t_an(select models) is used to circulate hot is installed on a "208volt circuit.
air in the oven when the convection feature is selected. NOTE: To broil in the lower oven of a double o_en,
The convection fan automatically tunas on whenever the turn OVEN SET knob to BROIL setting and OVEN
. CONVECT pad is pressed and will turn off when TEMP knob to BROIL. After cooking operation turn
comect is cancelled. NOTE: The convection fan will both the OVEN SET and OVEN TEMP knobs to
automatically stop whenever the oven door is opened. OFF.
Broiling Broiling Chart
For best results, use the broiler pan and inselt supplied Chart time is based on a preheated broil element using
wifll your wall oven. the Hi setting.
(For additional broiling tips, refer to "Cooking Made
Simple" booklet.)
Setting the Oven Controls to Broil: BEEF
I. Place oven rack on the rack position suggested in the Steak (1") 40
Medium 7
chart. Distance from broiling element depends on
fbods being prepared. Rack position 40 (offset rack
in position #4) is usually recommended unless Hamburgers (3/4") 4o
Medimn 5 3-4
otbem_ise stated. Well 6 4_5
'2. Press BROIL pad. Indicator \Vt_rd BROIL will flash PORK
and display, will show three dashes. Bacon 40 2 1-2
3. Press • or • pad for the HI broil setting. Chops (1/2") 4o 7 5-6
Chops (1") 3 10-11 9-10
The oven has a variable broil feature which means Ham Slice 40 4 2-3
that a lower temperature can be selected. Press the
POULTRY
• pad if a lower temperature is desired. Breast Halves (Bone-in) 3 11-12 9-11.
Use HI broil for most broil operations. Use a lower SEAFOOD
temperature when broiling delicate items and Fish Steaks, Buttered (1") 4o 8-10 (no
thicker meats to the well-done stage to prevent turning)
excessive hrowning. (If more than fii}een seconds MISCELLANEOUS
elapses between touching the BROIL pad and Hot Dogs 40 9 2
pressing the • or • pad, the display will return to Toast 40 ] 1
the pre_qons display. ) °,'_n "o" after the rack number ira' ,lies that tl,e offset rack should be used.
The Indicator Words BROIL and ON _411come on Note: This chart is a suggested l u de..... Ilet nes _9 vmywnth f°°dbe %"
and remain in the display along with the selected cooked.
broil temperature. If a lower temperature broil is
selected, the Indicator Word ON _dll cyele with the
element.
PAGE
Page 9

Programmed Oven Operations
The Programmed Oven Operations feature is used to 5. At the end of programmed Cook Time, oven will
turn the oven off at a preset time of day or delay the shut off automatically, four heeps will be heard and
start and then turn off the oven. NOTE: This featnre the word "'End" will appear in the display: The beeps
not available on lower oven of a double wall oven. will continue at one beep per minute for one hour or
until the CANCEL OFF pad is pressed.
This feature will not operate unless the clock is
functioning and is set to the correct time of day. To set oven to start at future time and shut off
automatically:
Programmed Oven Operations are not recomnmnded
for baked items that require a preheated oven, such as 1M. Follow preceding steps 1-4.
cakes, cookies orbreads. 5. Press STOP TIME pad. Indicator Words STOP
TIME will flash. Display- will show the calculated
To reeaU tlme function programmed: Press the
stop time based on current time of day and cook
appropriate time pad. time.
To eaneel the lime funetion only: Hokl COOK 6. Press • pad to enter desired stop time. (A stop time
TIME pad for four seconds. This will only cancel cook can only be accepted for later in the dav.
tinm and stop time, not programmed bake mode.
To set oven to start immediately and shut off Example'. If at 10 o clock you set the oven for
automatically: 350 ° and 2 hours and 30 minutes cooking time,
1. Press BAKE pad or CONVECT pad (select the calculated stop 15me would be "12:30." The
display would show:
models). Indicator Word(s) BAKE or CONVECT
BAKE will flash and three dashes will be shown in
the display.
2. Press • or • pad(s) until desired oven temperature
appears in the display. The Indicator Words ON and • ,
If you want the stop time to be 1 o clock, press
BAKE or CONVECT BAKE will appear in the •'pad until 1'00 appears in the display The
display. The temperature shox_l will he 100° or the displaywould show_.
actnal temperature of the oven, whichever is higher. __.
(If more than fifteen seconds elapse between _j_]_
pressing a function pad and pressing the • or •
pad, the oven is not set and the display will return to
previous display.) After four seconds, the display will return to
3. Press COOK TIME pad. Indicator Words COOK current time of'day and show:
TIME will flash and display will show "0HR:00". _ -- W
4. Press • pad to enter cooking hours and minutes.
(Ilours are to lefit of colon and minutes to right of
colon.) Allowable range is i0 minutes to I1 hours
and 55 minutes.
7. At the end of the delayed period, the DELAY
Indicator Word will go ot}_the ON Indicator Word
will appear and the oven will begin to heat.
8. At the end of programmed Cook Time, the oven will
shnt off automatically; four beeps will be heard and
"End" will appear in the display. If the oven is not
cancelled, "End" will remain in the disp] W and there
will be one beep eveU mimlte for one hour or until
the CANCEL OFF pad is pressed.
PAGE 8
Page 10

Lower Oven Operation CLEANING
(select models) Self-Clean Oven
A self-clean oven uses above normal temperatures to
LOWEROVEN
OFF OFF
BROIL
o
500.
BAKE BROIL 450" WARM
400": "200
o /
350 "360 0 250_"
VENSET OVENTEMP
automatically clean the entire oven. Tim high
temperatures cause tbod soil to bum off completely or
reduce it to a gray' ash which is easily wiped up with a
damp cloth when the cycle is complete and tile oven has
cooled. NOTE; Self-cleaning is not possible on lower
oven of a double wall oven.
While the cleaning process occurs, a device in the oven
vent helps consume normal amounts of smoke. The oven
is vented throngh an opening under the control panel.
During the cleaning process some vapors and moisture
Oven Set Knob may he seen coming from under the control panel.
• This knob controls the oven operation. To operate the If the oven is heavily soiled, some smoke, odor and
oven, turn to desired setting and turn OVEN TEMP occasional flare-ups may be detected during the cleaning
Knob to desired temperature setting, process. This is normal.
The settings on the OVEN SET knob are: It is better to clean the oven regularly than to wait
OFF The oven _dll not operate when knob is on until there is a heavy build-up of soil in the oven.
this setting. Keep knob on this position It is normal for the oven door and window to become hot
when oven is not in use. dnring a clean cvcle.. Therefi)re avoid touching these
BAKE Use {br baking or roasting, areas during a clean cycle.
BROIL Use for top browning or oxen broiling of During the cleaning process, the kitchen should be well
fnods, ventilated to help eliminate nonua] odors associated with
cleaning.
Oven Temp Knob
DO NOT USE COMMERCIAL OVEN CLEANERS.
• Use to set oven temperature. Be sure the indicator
mark is in line with the exact temperatnre desired. DO NOT USE ALUMINUM FOIL Oil OTHER
This knob is used with all oven operation settings LINERS IN TIlE OVEN.
noted on the OVEN SET Knob.
Preparing for the Self-Clean Cycle
Oven Indicator Light 1. Remove oven racks, broiler pan and any other
• Indicates when oven is turned to an operating utensils from oven. The oven racks will discolor, lose
position. Light will glow until the desired temperature shininess, and become difficult to slide in and out if"
is reached. It will cycle on and off as this temperature left in the oven dnring the cleaning process. To clean
is maintained during cooking, oven racks, see Cleaning Chart, page 11.
Setting Oven Controls to Bake and _0TE_ if tl_g
Roast in Lower Oven:
1. Place racks on proper rack positions.
2. Turn OVEN TEMP knob to desired temperature.
3. Turn OVEN SET knob to BAKE setting. When the
Oven Indicator Light cycles off, the oven is
preheated to the selected temperatnre. Place the 2. Clean spatters and spills from those areas which will
food in the oven. The Oven Indicator Light will cycle not be cleaned during the self-cleaning process:
on and off throughout the baking process.
• center front of oven and door near opening in
4. After haking, turn both OVEN TEMP and OVEN door gasket.
SET Knobs to OFF position.
PAGE 9
Page 11

• porcelain oven door liner (area outside the door and cycle with the elements to maintain the clean
gasket), temperatnre.
• oven front frame.
NOTE: DO NOT CLEAN serial plate located on
the oven front.
To clean these areas, use hot water and detergent,
nonabrasive cleansers or soap-filled steel wool pads.
Rinse thoroughly, being careful not to use an
excessive amount of water that would dampen the
door gasket. Soil left in these areas will be more 5. When the clean function has been completed, the
difficult to remove after the self-cleaning process Indicator Words CLEAN and ON will go off. The
since the high heat will bake on any soil that is Indieator Word LOCK and the cooling fan will
present. DO NOT USE COMMERCIAL OVEN remain on until the oven has cuoled down and the
CLEANERS TO CLEAN THESE AREAS. door has unlocked.
3. DO NOT ATTEMPT TO CLEAN, RUB OR APPLY
WATER TO GASKET ON OVEN DOOR. The To Cancel Self-Clean Cycle
gasket is essential for a g(xKt door seal. Rubbing or 1. Press CANCEL OFF pad. The oven door will be
cleaning will damage the gasket and may affect the locked while the LOCK Indicator Word remains in
seal. the display. Depending on the length of time the
4. Wipe up exeess grease and food spillovers which oven had been self-cleaning it may take up to 45
have not baked on the bottom of the oven to prevent minutes fur the oven to cool down, the door to
excessive smoking during the clean cycle. For ease of unlock and cooling fan to turn off.
cleaning, the heating element can be lifted slightly:
5. Wipe up acid spillovers such as tomato or milk-based Cleaning the Lower Oven
sauces and sngary spillovers. Porcelain enamel is acid (select models)
resistant, not acid proof. The porcelain finish may
discolor if acid spills are not wipedup. Since the upper oven is self-cleaning, its nse is
suggested fbr foods that have a tendency to spatter or
Setting the Controls for the Self-Clean spill over. The lower oven's porcelain wails and door are
Cycle the same high quadity porcelain as the upper oven and
can be wiped clean with soap and water, if food is not
1. Close the oven door. allowed to bake on a second time.
2. Press the SELF CLEAN pad. Indicator Words Heavy spattering and spillovers will require cleaning
CLEAN TIME will flash and display will show with mild abrasive cleansers such as Bar Keepers
HR: " If oven door is left open, the word Friend or Ben Ami. Household ammonia may' be used
"door" will flash in the display and a signal will
to loosen soil. Pour 1/'2cup in a glass dish, place dish in
continuously beep until the door is closed, a cold oven on an oven rack and close the door. Remove
3. Press • or • pad to select cleaning time. The first after 12 hours.
touch will give you 3 hours of cleaning time. The To remove difficult soils, use a commercial oven
cleaning time can be varied depending on the cleaner. Follow manufacturer's directions. Do not spray
amount of soil. Set "'2:00" for light soil or "4:00" for electrical controls, temperature sensing bulb, door
heavy soil. gasket or exterior of the oven. Remove oven racks
NOTE; If more than fifteen seconds elapse between belbre spraying with oven cleaner. To clean racks and
touching SELF CLEAN pad and touching • or • other areas of the oven, see Cleaning Chart, page 11.
pad, the oven is not set and time of day will
automatically return to the display.
4. After 4 seconds the display will return to time of day
and the Indicator Words HR and TIME will go off.
The LOCK Indicator Word and the cooling fan will
come on when the oven door locks. The Indicator
Word CLEAN will remain lit and ON will appear
PAGE 10
Page 12

WALL OVEN CLEANING CHART
Cleaning Agents*
Many- different cleaning agents are recommended for the various parts of tim wall oven. Read product labels for
specific recommendations. The following brand names may help you to make an appropriate selection:
1. Mild abrasive cleaners such as Bon Ami, Soft Scrub, Smart Scrub, Baldng Soda,
2. Mild liquid spr_s such as Fantastik and FmTnula 409.
3. Glass cleaners such as Windex and Glass Plus.
4. Non-abrasive plastic mesh and nylon scouring pads such as Tufty.
DO NOT USE abrasive cleansing powders such as Comet, soap-filled scouring pads like S.O.S. or Brillo, commercia/
oven cleaners, or an automatic dishwasher except when indleated.
Be certain all wall oven parts arc cool before removing any" part or eleanlng the unit to avoid damage. Any
parts that are removed for cleaning should be replaced correctly;
*Brandhainesofcleaningagentsare trademarksoftheresix_ctivemanl#ac'ttwer_.
Soap and water Soaking makes cleaning easier.
Plastic or soap-fiUed
scouring pad
Dishwasher
Soap mad water Remove knobs by pulling forward. Wash. rinse, dry with
Mild liquid sprays soft cloth. Do not soak knobs in water. Do not use
Glass cleaners abrasive cleaning agents.
Dishwasher
Soap and water Wipe with paper towels dampened with soapy water or
Glass Cleaners glass cleaner. Do not spray any cleaning solutions
directly onto the display window or use large amounts
of soap and water. Do NOT scrub with soap-filled
scouring pads or abrasive c]eaners.
Soap and water Avoid using excessive amounts of water which may seep
Glass cleaners under or behind glass.
Soap and water Do not use metallic scouring pads because they will
Mild abrasive cleaners and scratch the snrlace.
plastic pads _,\_en using commercial oven cleaners follow the
Commereia[ oven cleaner manufacturer's instructions.
Wipe up acid spills lemon, tomato or milk based foods
as soon as oven is cool with soap and water. If the spill
is not wiped up, it may discolor the porcelain.
Soap and water Do not use oven cleaner or abrasive agents.
Mild abrasive cleaners Polish with a soft cloth,
Do not use an excessive amonnt 0f water.
Soap and water If racks are left in oven during a self-clean wed they will
Plastie scouring pads discolor and may become difficult to slide. A thin coat
Cleansing powders of vegetable oil on the rack edges win make sliding
Soap-filled scouring pads easmr.
Continuedonr_extpog_
PAG E 11
Page 13

Wall Oven Cleaning Chart (continued)
Never use oven cleaner on a self-clean oven.
Do not dean or rub door gasket.
Wipe up acid spills (lemon, tomato or milk based {oods)
as soon as oven is cool with soap and water. If the spill
is not wiped up, it may diseolor the poreel_dn.
To remove oeeasionaI spillovers between eleanings, use a
soap-filled seouriug pad or mild eleanser; rinse well.
MAINTENANCE
Light Replacement Adjusting Oven Temperature
Before replacing huIb, disconnect power to oven at The oven temperature can he adjusted if all oven
the main fuse or circuit breaker panel. Be sure that temperatures are too low or too high and the length of
the entire oven earl)" including the light bulb is cool time to cook ALL foods is too long or too short. Do
before attempting to remove. NOT adjust the teinperature if only one or two items
To Replace Light Bulb are not baking properly.
NOTE: Temperature adjustment not possihIe on
l. Carefully unscrew the glass light lens. lower o_en of a double wall oven.
2. To obtain firm grasp on the bulb, wear protective
rubber gloves. Remove by turning bulb to the left. TO Adjust
Do not touch a hot oven light bulb with a damp 1. Press the BAKE pad.
cloth as bulb will break. NOTE: If the bulh does '2. Press and hoht the • pad until 500 ° or higher
break and you _4sh to remove it, be certain power appears in the display.
snpply is disconnected and wear protective gloves.
3 Press and hokt the BAKE pad fi_r six seconds nnti]
You inay contact a qualil3ed Maytag Serxqcer.
00 appears m the dlspla?.
3. Replace bulb with a 40 watt oven-rated appliance
bulb. Bulb with hrass base is recommended to 4. Press the • or • pad(s) to enter the desired ott_et
prevent fusing ofbulh into socket, temperature. (Allowable range is 35° to +35°.)
Four seconds later, the display will return to
4. Replace bulb cover and reconnect power to oven. current time of dav.
Reset clock. NOTE: Do not change the temperature setting more
than 10° hefure checking the oven.
To check, we recommend baking two 9" yellow layer
cakes using a purchased box mix. If the oven
temperature is still too low or too high repeat the
procedure described ahove.
PAGE 12
Page 14

BEFORE YOU CALL FOR SERVICE
Check these points if...
Part or all of your wall oven does not operate • _37asthe eorreet electric voltage available? (See
• Is the wall oven plug loose or disconnected from the Broiling section, page 7.)
electrical outlet (if not wired direct to the electrical
supply) ? Oven light does not operate
• Are any house fuses blown or circuit breakers * Is the bnlb loose orbumed ont?
tripped? • Is the light switch in the On position?
• Has the power supply to the home been interrupted? • Oven light does not work during self-cleaning process.
• Are the oven controls properly set? Oven will not self-clean
• Is the oven set for a programmed operation?
• Is the self-clean control set properly? (See Self-Clean
Food not baking correctly instructions, pages 9 i0.)
• Are the oven racks properly placed ff_rbaking? (See • Is the oven set for a programmed oven operation?
Back Positions, page 6.) Oven door will not unlock
• Have yon used alumimml fbil correctly'?
• Was the oven preheated as recommended? • Has the self-clean cycle been finished for at least one
hour?
• Are the controls for bake operations properly set? • Electric current coming into oven may be off.
I
• Is there 1 to 2 inches of space between pans and the
oven walls? Are the wall oven and oven racks level? "F" plus a number appears in the display
• \Vas good bakeware of the proper size used? Were the • These are fanlt codes. If a fanlt code appears in the
pans placed correctly in the oven? (See "Cooking display and a continuous beep sonnds, press the
Made Simple" booklet.) Cancel Off pad. If the fault code reappears,
• Are you using a tested recipe from a reliable source? disconnect power to the wall oven and call a qualitled
The oven thermostat on your new wall oven may be service technician.
more accurate than the one un your okt wall oven.
• Was the oven vent covered or blocked on the wall Fan sound
oven surface? • A fan _x411turn on when the oven is operated to cool
• Did yon eheck the food at the minimum cooking time the clock controls. This is normal. It may continne to
to avoid overeouking? run even al}er the oven is turned off.
For Convection (select models)-
Convection fan not operating during convection
• Did you reduce oven temperature by 25°F.? eooklng (select models)
Food does not broil properly • Are the controls for convection set properly? (See
• Are the controls for broiling set properly? (See page 6,)
Broiling section, page 7.)
• Was the proper rack position used? (See Broiling For further assistance contact your Maytag dealer
section, page 7.) or call May*lag Customer Service:
• Did yon allow time for the broil element to preheat? U.S. 1-800-688-9900
• Was the broiler pan received with the wall oven used? CANADA 1-800-688-2002
• Was aluminum foil used on the broiler pan insert,
blocking the slits for fat drainage?
PAGE 13
Page 15

WALL OVEN WARRANTY
Full One Year Warranty
For one (1) year from the date of original retail purchase, any part which fails in normal home use will be
repaired or replaced free of charge.
Limited Warranty
Second Year
After the first ,,,ear from the date of original retail purchase, through the second year, parts which fail in
normal home use will be repaired or replaced free of charge for the part itself, with the ow_ler paying all
other costs, including labor, mileage and transportation.
Third Through Fifth Year
After the second year from the date of original retail purchase, through the fifth year, all of the following
components which ihil in normal home use will be repaired or replaced free of charge for the part itselt;
with the owner paying all other costs, including labor, mileage and transportation.
These components include:
All Electronic Clocks: On electric or gas wall ovens.
Electric Heating Elements: Includes the Oven Bake Element and Oven Broil Element in Electric
Wall Ovens.
Canadian Residents
This warranty covers only those wall ovens installed in Canada that have been listed with Canadian Standards
Association nnless the wall ovens are brought into Canada due to transt_r of residence from the United States to
Canada.
Limited Parts Warranty Outside United States and Canada
For appliances located outside the United States and Canada, the ONLY warranty provided with the appliance is
as follows: For two (2) years from the date of original retail purchase, any part which fails in normal home use will
be repaired or replaced free of charge for the part itself, with the owner paying all other costs, including labor,
mileage and transportation.
The specific warranties expressed above are the ONLY warranties provided by the manufaetnrer. This Warranty
gives yon specific legal rights, and you may also have other rights which vary,from state to state.
To Receive Warranty Service
To locate an authorized service eompany in your area contact the Mayiag dealer from wl_om },our appliance was
purchased; or call Maytag Customer Service. Should yon not receive satisfactory warranty set,Ace, please call or write:
Maytag Customer Assistance
cA_Maytag Cnstomer Service
RO. Box 2370
Cleveland, TN 37320-'2370
US 1-800-688-9900
CANADA 1-800-688-2002
When contacting Maytag Customer Service be sure to provide the model and serial numbers of your appliance, the
name and address of the dealer from whom you pnrchased the appliance and the date of purchase.
Should you still have a problem, x_ite to: Major Appliance Consumer Action Program, 20 North Wacker Drive, Chicago,
Illinois 60606. MACAP isan industD'sponsored but independent group of consumer experts who receive and act on complaints
from appliance owners.
NOTE: When writing about an ullsolvedsee¢iceproblem, please include the fbllo'Mnginformation:
(a) Yourname, address and telephone number;
(b) Model nnmber and serial number (found on the data plate) of your appliance;
(c) Name and address ofyour dealer and date the appliance wasbought;
(d) A clear description ofthe problem you are ha_ing.
MAYTAG • One Dependability Square • Newton, Iowa 50208
Form No. 015CM-0196 Part No. 210497A MP kitho U.S.A.
 Loading...