

Page 1
FOR FUTURE REFERENCE
Congrabdations on your choice of a Maytag gas range.
On the following pages yon will find information
regarding the operation of your new range. By following
these instructions carefully, yon will be able to fully
TABLE OF CONTENTS enjoyand maintain your range. Please take a moment to
Page as well. Whether you need assistance in selecting the
Important Safety Instruetions ............. 1-3 baking, the answers are contained in this booklet.
Electronic Clock ......................... 4 gas range, call or write us. Be sure to provide the model
• Setting the Clock and Timer ............ 4 and serial numbers of your range.
Surface Cooking ......................... 5-6
• Cooktop ............................ 5
• Burner Grates ....................... 5
• Sealed Burners ....................... 5
• Pilotless Ignition ..................... 5-6
Using Your Oven ......................... 7-8 For future referenee, we suggest you retain this manual
• Baking and Boasting .................. 7-8 after recording the model number and serial number of
• Broiling ............................. 8 this gas range in the spaces provided. This information
Range Cleaning Chart .................... 9-10 around tile broiler drawer,
• Removing Range for Cleaning and ModelNumber
Servicing .......................... 10
review the enclosed booklet, "Cooking Made Simple"
right cookware or reviewing the dos and don'ts of
Should you have any questions about using your Maytag
can be found on the data plate located on the ficame
Maintenance ............................ 11
• Electrical Connection ................. 11
• Proportional Valve Adjustment .......... i 1
• Leveling Legs ........................ 11
• Lift-Off Oven Door ................... 11
• Light Replacement ................... 11
Before You Call for Service ............... 12
Warranty ................................ 13
Serial Number
BE SURE YOU READ THE SAFETY
YOU START TO USE THIS RANGE.
INSTRUCTIONS ON PAGES 1-3 BEFORE
Page 2

IMPORTANT SAFETY INSTRUCTIONS
Read all instructions before using Have your appliance installed and properly grounded by
this appliance, a qualified installer according to the installation
The following instructions are based on safety the gas shut off valve and how to shut it off in an
considerations and must be strictly followed to reduce emergency.
the potential risks of fire, electric shock, or personal
injury. Always disconnect power to appliance before smMeing.
WARNING: If the information in this in this book. All other servicing should be referred to a
manual is not followed exactly, a fire qua]ii)ed servicer.
or explosion may result causing
property damage, personal injury or
death, t/emove packing materials from the appliance before
-Do not store or use gasoline or other Keep area around appliance clear and free from
flammable vapors and liquids in the combustible materials, gasoline, and other flammable
vicinity of this or any other appliance, vapors and mateJials.
-WHAT TO DO IF YOU SMELL GAS: If appliance is installed near a window, proper
• DO not try to light any appliance, blowing over burners.
• Do not touch any electrical switch; Do not leave any items on the eooktop. The hot air from
do not use any phone in your the vent may ignite flammable items and may increase
building, pressure in closed containers which m_' cause them to
• Immediately call your gas supplier
from a neighbor's phone. Follow the Many aerosol-type spray cans are EXPLOSIVE when
gas supplier's instructions, their nse or storage near an appliance.
• If you cannot reach your gas Do not leave plastic items on tbe co&top as flmy may
supplier,call the fire department, melt or soften if left too close to the vent or a lighted
-Installation and service must be surfaeebnrner.
performed by a qualified installer, To eliminate the hazard of reaching over hot surface
service agency or the gas supplier, burners, cabinet storage should not be provided directly
instructions. Have the installer show you the location of
Do not attempt to adjust, repair, service, or replace any
part of appliance unless it is specifically recommended
To Prevent Fire or Smoke Damage
operating it.
precautions should be taken to prevent curtains from
burst.
exposed to heat and may be highly flammable. Avoid
above a unit. If such storage is provided, it should be
limited to items which are used infrequently and which
appliance. Temperatures may,be unsafe for some items,
such as volatile liquids, cleaners or aerosol sprays.
I • ALL RANGES CAN
g l WARNING are safely stored in an _u'ea subjected to heat from an
I DEVICES PACKED greasefire.
TIP In Case of Fire
• INJURY TO
PERSONS COULD spreading the flame.
• INSTALL ANTI-TIP
WITH RANGE If fire is in the oven or broiler pan, smotber by closing
• SEE INSTALLATION oven door.
INSTRUCTIONS If fire is in a pan on the surface burner, cover pan.
) RESULT Use dD, chemical or foam-type extinguisher or baking
Turu off appliance and ventilating hood to avoid
soda to smother fire or flame. Never use water on a
Never attempt to pick up or move a flaming pan.
PAGE 1
Page 3
Child Safety when the range is replaced. Look underneath range to
Do not leave children alone or unsupervised near the verify that one of the rear leveling legs is properly
appliance when it is in use or is still hot. engaged in the bracket slot. The anti-tip device secures
Children must be taught that the appliance and utensils Mso, be sure the range is properly re-installed.
in or on it can be hot.
Children should be taught that an appliance is not a toy, the bulb could break. Should the bulb break, cliseonneet
Children should not be allowed _-- ___ _ power to the applianee before removing bulb to avoid
to play with controls or other - electrical shock.
parts of the unit. Children should
never be allowed to sit or stand Cooking Safety
on any part of the appliance. Always plaee a pan on a su_aee burner before turning it
CAUTION: Do not store items on. Be sure you know whieh knob controls which
of interest to children in cabinets r-¢_ _a/ |_t ,-_-, i surlZaceburner. Make sure the correct burner is turned
backguard of a range. Children completed, turn burner off before removing pan to
climbing on the appliance or the prevent exposure to burner flame.
above an appliance or on the _ on and that the burner has ignited. When cooking is
appliance door to reach items Always adjust suriZaee burner flame so that it does not
could be seriously injured, extend beyond the bottmn edge of the pan. An excessive
About Your Appliance flame is hazardous, wastes energy" and may damage the
Do not use appliance appliance, pan or cabinets above the appliance.
the rear leveling leg to the floor when properly engaged.
Do not touch a hot oven light bulb with a damp cloth as
heat or warm a room. _ ing operations unattended
Also, do not use the at high heat settings or
eooktop or oven as a when deep fat frying .....
storage area for food Boilovers eause smoking
or cooking utensils, and greasy spillovers may
e eevlaccoo'
Do not obstruct the
flow of combustion and ventilation air by blocking the Never heat an unopened food container. Pressure
oven vent or air intakes. Restrietion of air flow to the build-up may cause container to burst resulting in
burner prevents proper performance and increases personal iujury or damage to the appliance,
carbon monoxide emission to unsafe levels. Use dry, sturdy potholders. Damp potholders on hot
Avoid touching oven vent area while oven is on and for substitutes should never be used as potholders because
several minutes after oven is turned off. Some parts of they can trail across hot surface burners and ignite or
the vent and surrounding area become hot enough to get caught on appliance parts.
cause bums.
an appliance as a step
stool to cabinets above. Do not let grease or other flammable materials
CA UTION:Donotuse __._,[ move or handle.
Misuse of appliance "_ accumulate in or near the appliance, hood or vent fan.
stepping, leaning or
doors or drawers, such as J_ accumulating on hood or filter.
sitting on the door or Loose fitting or long
drawer, may result in possible tipping of the appliance, hanging-sleeved apparel I __ _ I
breakage of door, and serious injuries, should not be worn while
WAIlNINC,: To reduce the risk of tipping of the cooking. Clothing may ignite
appliance from abnormal usage or by excessive loading or catch utensil handles.
of the oven door, the appliance must be secured by a
properly installed anti-tip device. If the range is moved
from the wall, be sure the anti-tip device is engaged
ignite, f
surfaces may eanse burns from steam. Towels or other
Always let quantities of hot fat cool before attempting to
Clean hood frequently to prevent grease from
PAGE 2
Page 4

Always place oven racks in the desired positions while Cleaning Safety
oven is cool. If a rack must be moved while hot, use a Turn off all controls and wait for appliance parts to cool
dry potholder. Always turn the oven off at the end of before touching or cleaning them. Do not touch the
cooking, burner grates or surrounding areas until they have had
Use care when opening the oven door. Let hot air or sufficient time to cool.
steam escape before removing or replacing food. Clean appliance with caution. Use care to avoid steam
PREPARED FOOD WARNING: Follow food burns if a wet sponge or cloth is used to wipe spills on a
manufacturer's instructions. If a plastic frozen food hot surface. Some cleaners can produce noxious fumes
container and/or its cover distorts, warps, or is otherwise if applied to a hot surface.
damaged during cooking, immediately discard the food
and its container. The food could be contaminated. Self-Clean Oven (select models)
Clean only parts listed in this booklet. Do not clean
Utensil Safety door gasket. The door gasket is essential for a good seal.
Use pans with flat bottoms and handles that are easily Care should be taken not to rub, damage, or move the
grasped and stay cool. Avoid using unstable or loose gasket. Do not use oven cleaners of any kind in or
handled pans. around any part of the self-clean oven.
Be sure utensil is large enough to properly contain food Before self-cleaning the oven, remove broiler pan, oven
and avoid boilovers. Pan size is particularly important in racks, and other utensils, and wipe off excessive
deep fat frying, spillovers to prevent excessive smoke or flare-ups.
To minimize burns, ignition of flammable materials and CAUTION: Do not leave food or cooking utensils, etc.,
spillage due to unintentional contact with the utensil, do in the oven during the self-clean cycle.
not extend handles over adjacent surface burners. It is normal for the cook'top of the range to become hot
Always turn pan handles toward the side or back of the during a self-clean cycle. Therefore, touching the
appliance, not out into the room where they are easily cooktop during a clean cycle should be avoided.
hit or reached by small children.
Never let a pan boil dry as this could damage the utensil Important Safety Notice and Warning
and the appliance. The California Safe Drinking Water and Toxic
Follow the manufacturer's directions when using oven Enforcement Act of 1986 (Proposition 65) requires the
cooking bags. Governor of California to publish a list of substances
Only certain types of glass, glass/ceramic, ceramic, or reproductive harm, and requires businesses to warn
glazed utensils are suitable for eooktop or oven usage customers of potential exposures to such substances.
without breaking due to the sudden change in
temperature. Users of this appliance are hereby warned that the
This appliance has been tested for safe performance of the listed substances, including benzene,
using conventional cookware. Do not use any devices or formaldehyde and soot, due primarily to the incomplete
accessories that are not specifically recommended in combustion of natural gas or liquid petroleum (LP)
this manual. Do uot use eyelid covers for the surface fuels. Properly adjusted burners will minimize
units, stove top grills, or add-on oven convection incomplete combustion. Exposure to these substances
systems. The use of devices or accessories that are not can be minimized by properly venting the burners to
expressly recommended in this manual can create the outdoors.
serious safety hazards, result in performance problems,
and reduce the life of the components of the appliance.
known to the State of California to cause cancer or
burning of gas can result in low-level exposure to some
SAVE THESE INSTRUCTIONS
PAGE 3
Page 5
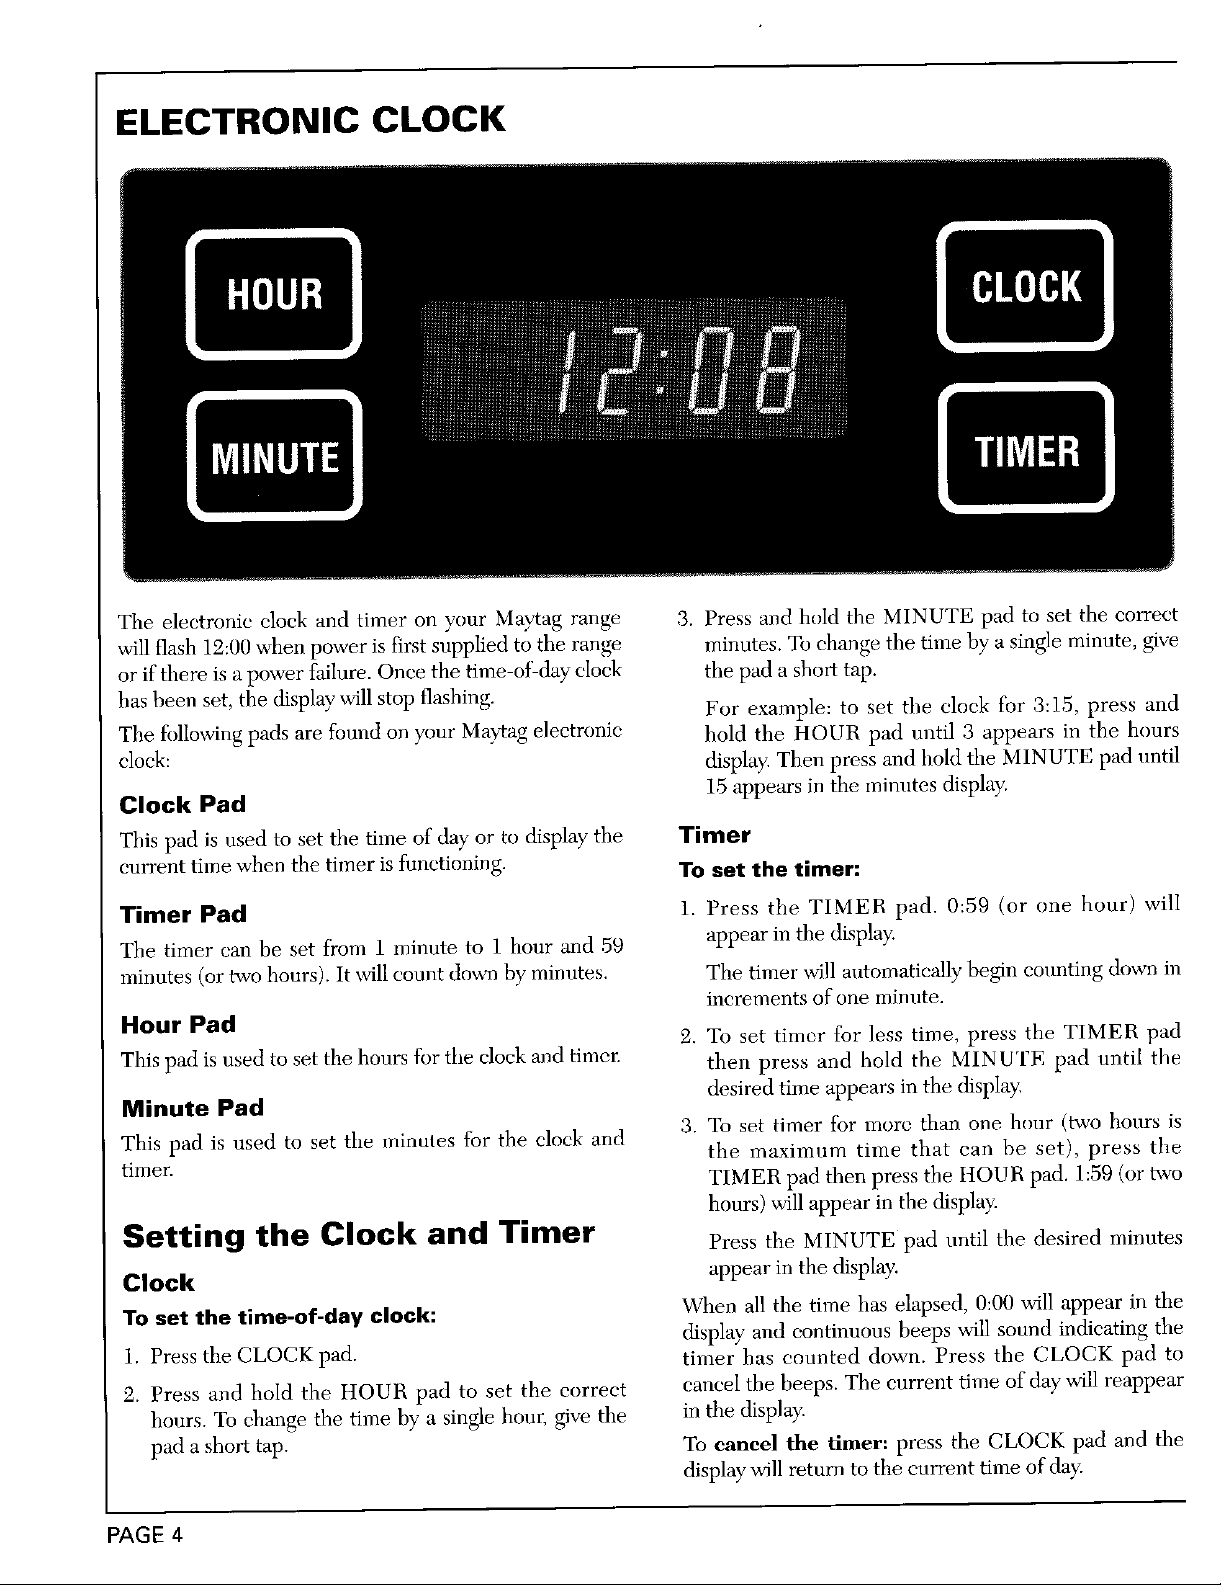
ELECTRONIC CLOCK
The electronic clock and timer on your Maytag range 3. Press and hold the MINUTE pad to set the correct
will flash 12:00 when power is first supplied to the range minutes. To change the time by a single minute, give
or if there is a power failure. Once the time-oGday clock the pad a short tap.
has been set, the display will stop flashing. For example: to set the clock for 8:I5, press and
Tile folloMng pads are found on ),our Maytag electronic hold the HOUR pad until 3 appears in the hours
clock: display. Then press and hold the MINUTE pad until
Clock Pad 15 appears in the ininutes display.
This pad is used to set tile time of day or to display the Timer
current time when the timer is functioning. To set the timer:
Timer Pad 1. Press the TIMEB pad. 0:59 (or one hour) will
The timer call be set from 1 minute to 1 hour and 59 appear in the display.
minutes (or two hours). It will count do_ by minutes. The timer will automatically begin counting down in
increments of one minute.
Hour Pad
2. To set timer for less time, press tile TIMER pad
This pad is used to set the hours for the clock mid timer, then press and hold the MINUTE pad until the
Minute Pad desired time appears in the display.
This pad is used to set the minutes for the clock and 3. To set timer for more than one hour (two hours is
timer. TIMER pad then press the FLOUR pad. l:59 (or two
the maximum time that can be set), press the
hours) will appear in the display:
Setting the Clock and Timer Press the MINUTE pad nntil the desired minntes
Clock appear in the display.
To set the time-of-day clock: When all the time has elapsed, 0:00 will appear in the
display and continuous beeps will sound indicating the
1. Press the CLOCK pad. timer has counted down. Press the CLOCK pad to
2. Press and hold the HOUR pall to set the correct cancel the beeps. The current time of day will reappear
hours. To change the time by a single hour, give the in the display.
pad a short tap. To cancel the timer: press the CLOCK pad and the
display"will retm'n _othe current time of day;
PAGE 4
Page 6
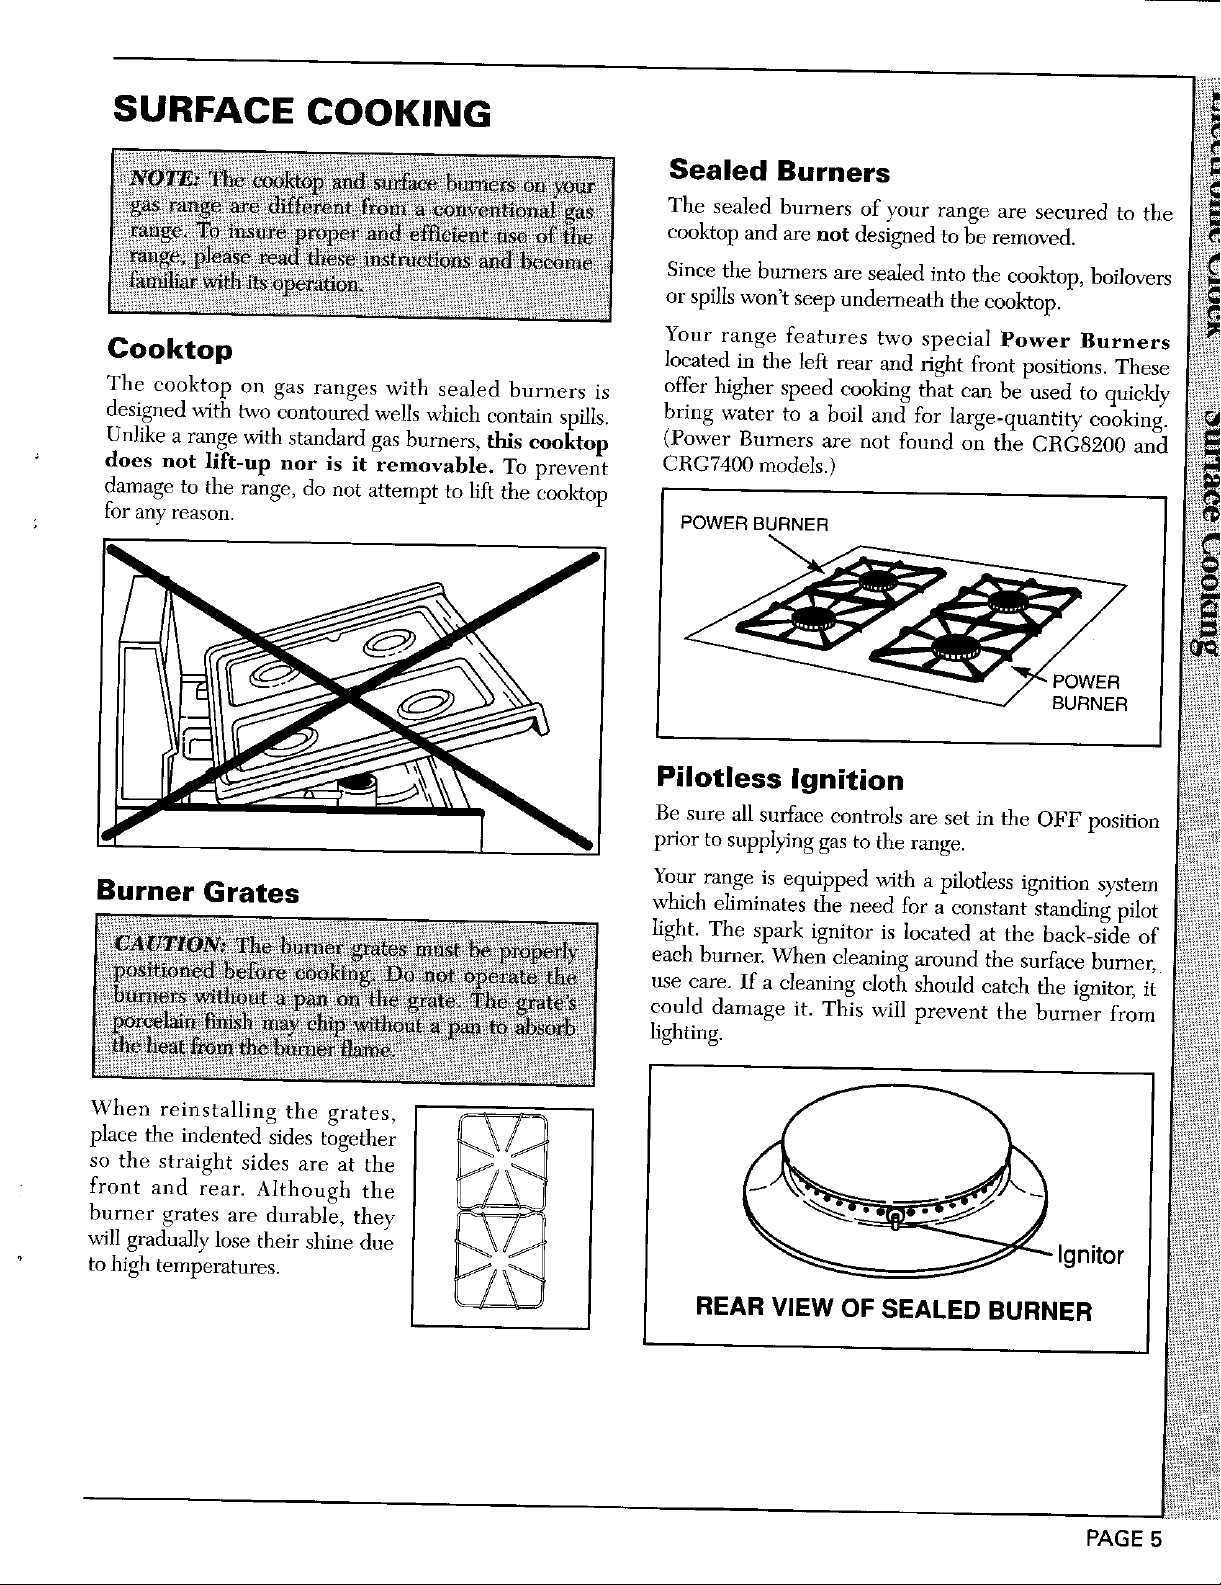
SURFACE COOKING
Sealed Burners
The sealed burners of your range are secured to the
eooktop and are not designed to be removed.
Since the burners are sealed into the cooL'top, boilovers
or spills won't seep underneath the eooktop.
Your range features two special Power Burners
Cooktop located in the left rear and right front positions. These
The eooktop on gas ranges with sealed burners is offer higher speed cooking that can be used to quickly
designed with two contoured wells which contain spills, bring water to a boil and for large-quantity cooking.
Unlike a range with standard gas burners, this eooktop (Power Burners are not found on the CRG8200 and
does not llft-up nor is it removable. To prevent CBG7400 models.)
for any reason. POWERBURNER
POWER
Pilotless Ignition
Be snre all surface controls are set in the OFF position
prior to supplying gas to the range.
Your range is equipped with a pilotless ignition system
Burner Grates which eliminates the need for a constant standing pilot
light. The spark ignitor is located at the back-side of
each burneJ: When cleaning around the surface burner,
use care. If a cleaning cloth should catch the ignitor, it
could damage it. This will prevent the burner from
lighting.
place the indented sides together
so the straight sides are at the
front and rear. Although the
burner grates are durable, they
will gradually lose their shine due Ignitor
to high temperatures. _!_'f _
REARVIEWOFSEALEDBURNER
When reinstalling the grates' [ __"1(_
PAGE
Page 7
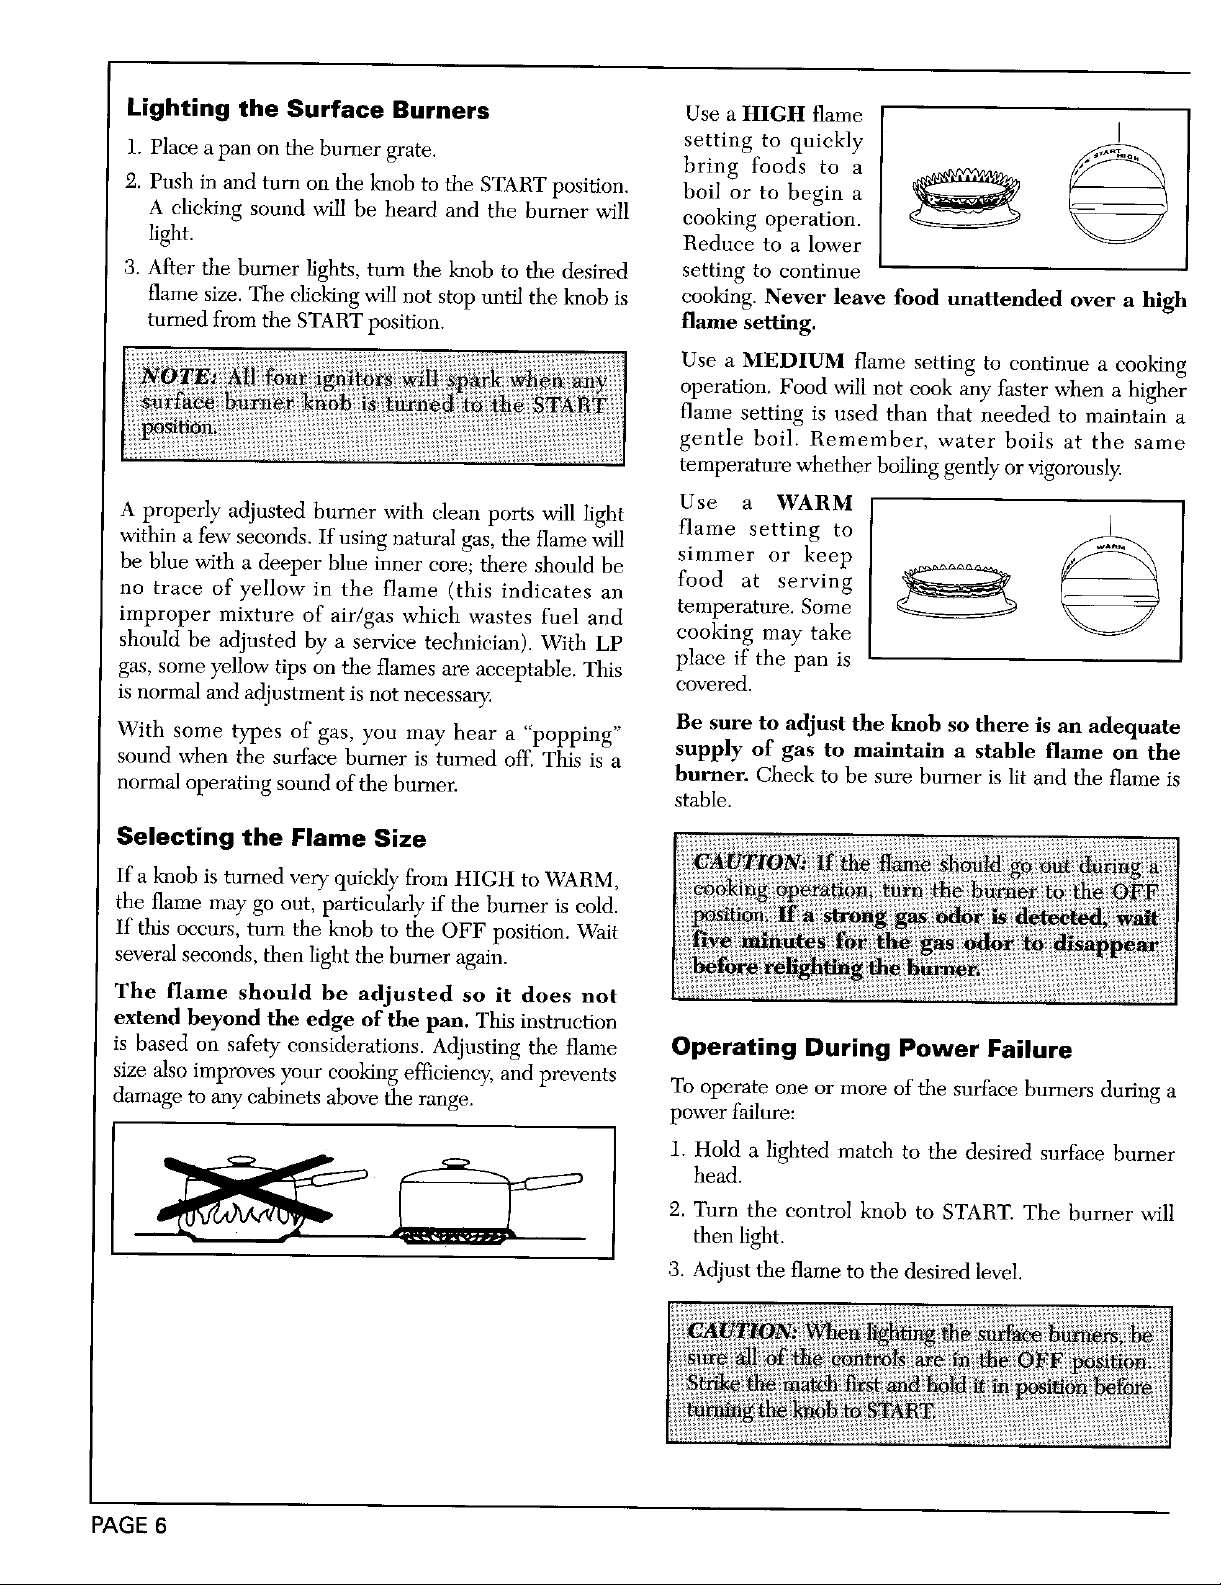
Lighting the Surface Burners Use a HIGH flame
/
1. Place a pan on the burner grate, setting to quickly
2. Push in and turn on the knob to the START position, boil or to begin a
A clicking sound will be heard and the burner will cooking operation.
light. Reduce to a lower
3. After the burner lights, turn the knob to the desired setting to continue
flame size. The clicking will not stop until the knob is cooking. Never leave food unattended over a high
turned from the START position, flame setting.
A properly adjusted burner with clean ports will light flame setting to I
within a few seconds. If using natural gas, the flame will
be blue with a deeper blue inner core; there should be food at serving
no trace of yellow in the flame (this indicates an
improper mixture of air/gas which wastes fuel and temperature. Some
should be adjusted by a service technician). With LP cooking may take
gas, some yellow tips on the flames are acceptable. This covered.
is normal and adjustment is not necessary.
With some types of gas, you may hear a "popping" Be sure to adjust the knob so there is an adequate
sound when the surface burner is turned off. This is a supply of gas to maintain a stable flame on the
normal operating sound of the burner, stable.
bring foods to a ._¢¢_0_.
%¢
Use a MEDIUM flame setting to continue a cooking
operation. Food will not cook any faster when a higher
flame setting is used than that needed to maintain a
gentle boil. Remember, water boils at the same
temperature whether boiling gently or vigorously.
Use a WARM
simmer or keep
place if the pan is
burner. Check to be sure burner is lit and the flame is
Selecting the Flame Size
If a knob is turned very quickly from HIGH to WARM,
the flame may go out, particularly if the burner is cold.
If this occurs, tuna the knob to the OFF position. Wait
several seconds, then light the burner again.
The flame should be adjusted so it does not
extend beyond the edge of the pan, This instruction
is based on safety considerations. Adjusting the flame Operating During Power Failure
size also improves your cooking efficiency, and prevents To operate one or more of the surface burners during a
damage to any cabinets above the range, power failure:
1. Hold a lighted match to the desired surface burner
head.
2. Turn the control knob to START. The burner will
then light.
3. Adjust the flame to the desired level.
PAGE 6
Page 8
USING YOUR OVEN
Every oven has its own characteristics. You may find Oven Racks
that the cooking times and temperatures vary. slightly The oven racks are designed with a lock-stop edge to
from your old oven, This is normal, keep the racks from coming completely out of the oven
Your Maytag range is equipped with pilotless ignition, when there is food placed on them.
With this type of ignition system, the oven will not To remove: Be sure the rack is cool. Pull the rank
operate during a power failure or if the range is straight out until it stops. Tilt the front end of the rack
disconnected from the wall outlet. No attempt up and continue pulling it out.
should be made to operate the oven during a power To replace: Tilt tile front end of the rack up and place
failure, it between the rack supports. Slide it back until it clears
When opening the oven door, allow steam and hot air to the lock-stop position. Lower the front and slide the
escape before reaching into the oven to check, add or rack straight in.
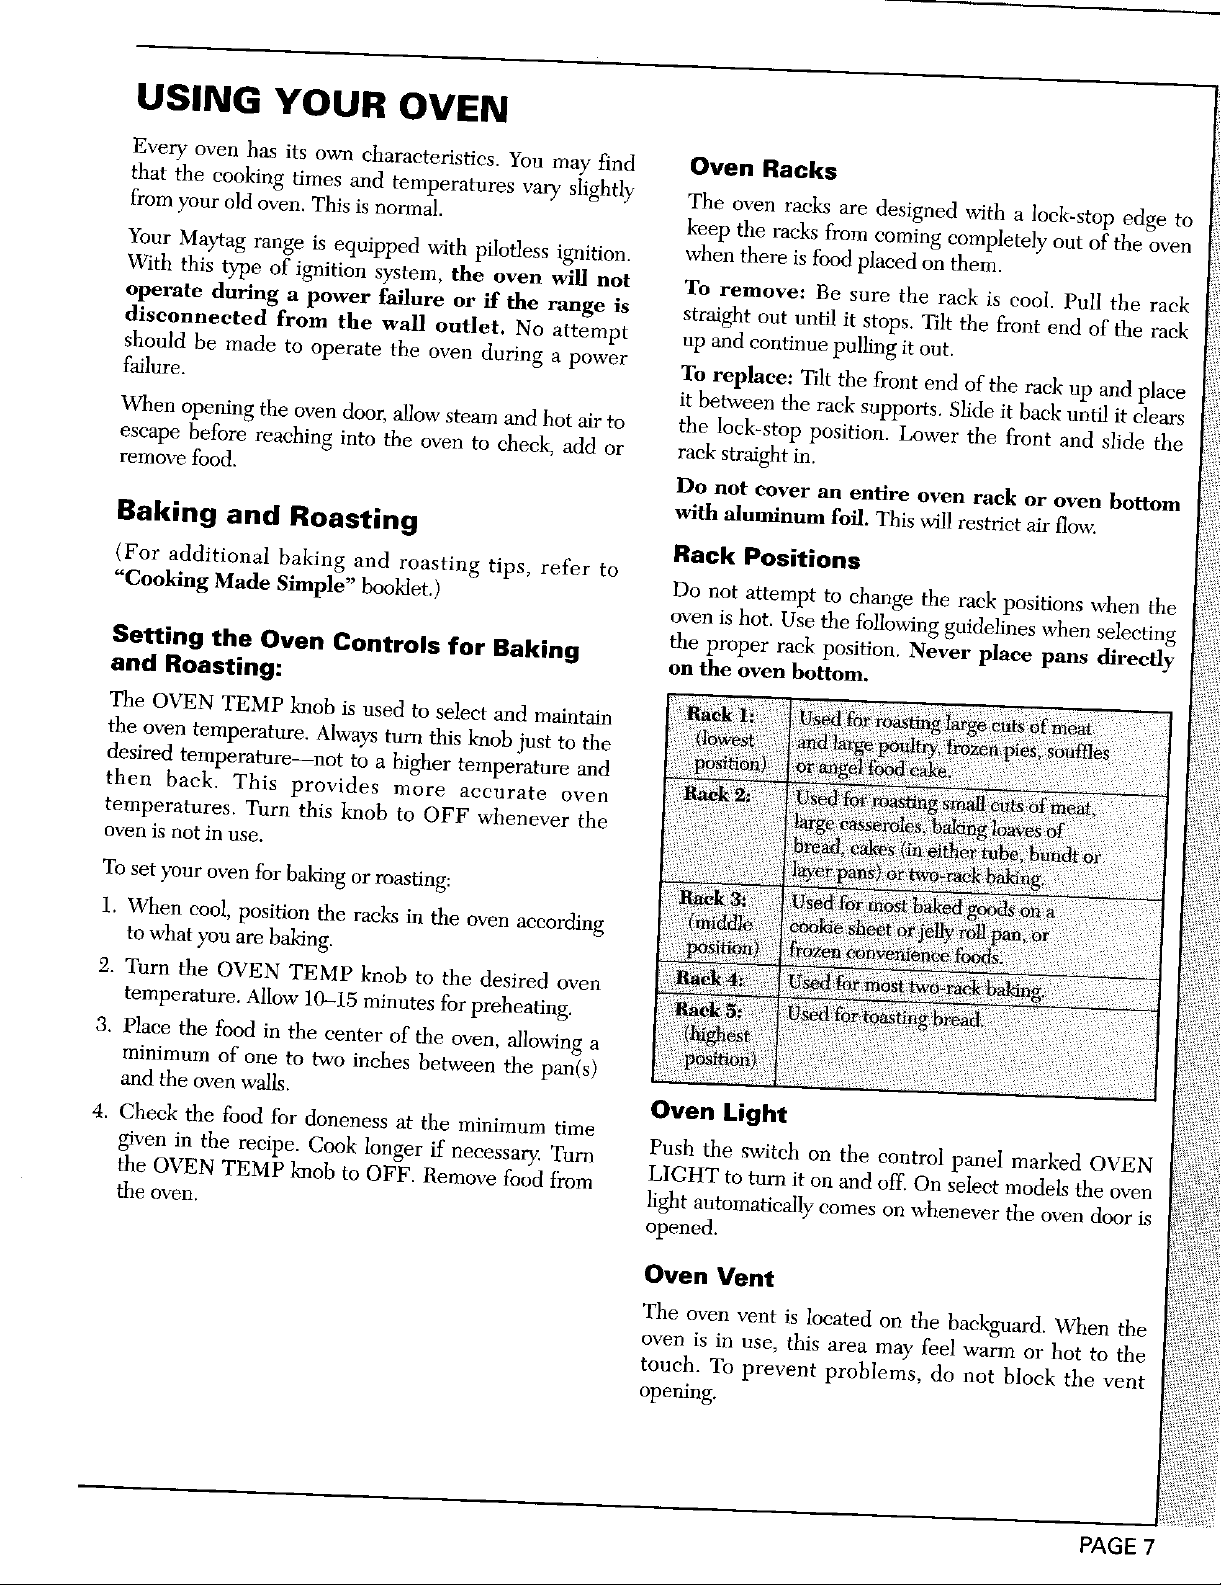
remove food. Do not cover an entire oven rack or oven bottom
with aluminum foil. This will restrict air flow.
Baking and Roasting
(For additional baking and roasting tips, refer to
"Cooking Made Simple" booklet.) Do not attempt to change the rack positions when the
Setting the Oven Controls for Baking on the oven bottom.
and Roasting:
The OVEN TEMP knob is used to select and maintain
the oven temperature. Always turn this knob just to the
desired temperature--not to a higher temperature and
then back. This provides more accurate oven
temperatures. Turn this knob to OFF whenever the
oven is not in use.
Rack Positions
oven is hot. Use the following guidelines when selecting
the proper rack position. Never place pans directly
To set your oven for baking or roasting:
1. When cool, position the racks in the oven according
to what you are baking.
2. Turn the OVEN TEMP knob to the desired oven
temperature. Allow 10-15 minutes for preheating.
3. Place the food in the center of the oven, allowing a
minimum of one to two inches between the pan(s)
and the oven walls. Oven Light
4. Check the food for doneness at the minimum time
given in the recipe. Cook longer if necessary. Turn
the OVEN TEMP knob to OFF. Remove food fi'om LIGHT to turn it on and off. On select models the oven
the oven. opened.
Push the switch on the control panel marked OVEN
light automatically comes on whenever the oven door is
Oven Vent
The oven vent is located on the baekgqmrd. When the
oven is in use, this area may feel warm or hot to the
touch. To prevent problems, do not block the vent
opening.
PAGE 7
Page 9
Oven Bottom
To protect the oven bottom against spillovers, use the Setting the Controls for Broiling:
correct pan size. The oven bottom can be removed for
cleaning ifspillovers occur. 1. Before broiling, trim excess fat to prevent excessive
To remove: When cool, remove the oven racks. Slide of the meat to prevent curling during cooking.
the two catches, located at each rear comer of the oven
bottom, toward the front of the oven. Lift the rear edge
of the oven bottom slightly; then slide it back until the 3. Place the broiler pan on the recommended rack
front edge of tile oven bottom clears the oven front position shown in the broiling chart. Generally for a
flame. Remove the oven bottom from the oven. brown exterior and rare interior, the meat should be
To replace: Fit the front edge of the oven bottom into you want the meat well done.
the front frame. Lower the rear of the oven bottom and
slide the catches back to lock the oven bottom into 4. Follow the suggested times in the broiling chart.
place. Meat should be turned once about halfway
" r 2 use the following chart as a guide when broiling foods.
spattering or smoking. Cut slashes in the outer edges
"2.Turn the OVEN TEMP knob to Broil.
dose to the burner. Place the pan further doum if
through its cooking time.
the center to check the color.
Broiling Chart
5. Check the doneness by cutting a slit in the meat near
Broiling
For best results, use the broiler pan and insert supplied
with your range.
(For additional broiling tips, refer to "Cooking Made
Simple" booklet.)
Broiler Drawer
To remove: Pull the drawer out to the first stop
position. Lift up the front of the drawer and pull it to
the second stop position. Grasp the sides and lift up and
out to remove.
To replace: Fit the ends of the drawer glides into the
rails. Lift np the drawer front and gently push in to the
first position. Lift up the drawer again and continue to
slide it to the closed position.
PAGE 8
Page 10
RANGE CLEANING CHART
Cleaning Agents*
Many different cleaning agents are recommended for the various parts of the ranges. Read product labels for
specific recommendations. The following brand names may help you to make an appropriate selection:
l. Mild abrasive cleaners such as Bon Ami, Soft Scrub, Smart Scrub, Baking Soda.
2. Mild liquid sprays such as Fantastik, Formula 409.
3. Glass cleaners such as Windex and Glass Plus.
4. Non-abrasive plastic and nylon scouring pads.
DO NOT USE abrasive cleansing powders such as Comet, soap-filled scouring pads like S.O.S. or Brillo, commercial
oven cleaners, or an automatic dishwasher detergent except when indicated.
Be certain all range parts are cool before removing any part or cleaning the unit to avoid damage. Any
parts that are removed for cleaning should be replaced correctly:
°Brand names of cleaning agents are trademarks of the respective manufacturers.
will
Continued on next page
PAGE 9
Page 11

Range Cleaning Chart (continued)
Removing Range for Cleaning and
Servicing
When necessary, follow these procedures to remove 5, Reverse procedure to reinstall. If gas line has been
appliance for cleaning or servicing: disconnected, cheek for gas leaks after reeonneetion.
(See Installation Instructions for gas leak test
1. Shut offthe gas supply to the appliance, method.)
2. Disconnect the electrical supply to the appliance.
3, Disconnect gas supply tubing to appliance,
4. Slide range forward to disengage range from the
anti-tip bracket. (See Installation Instructions for
location of bracket.)
PAGE 10
Page 12
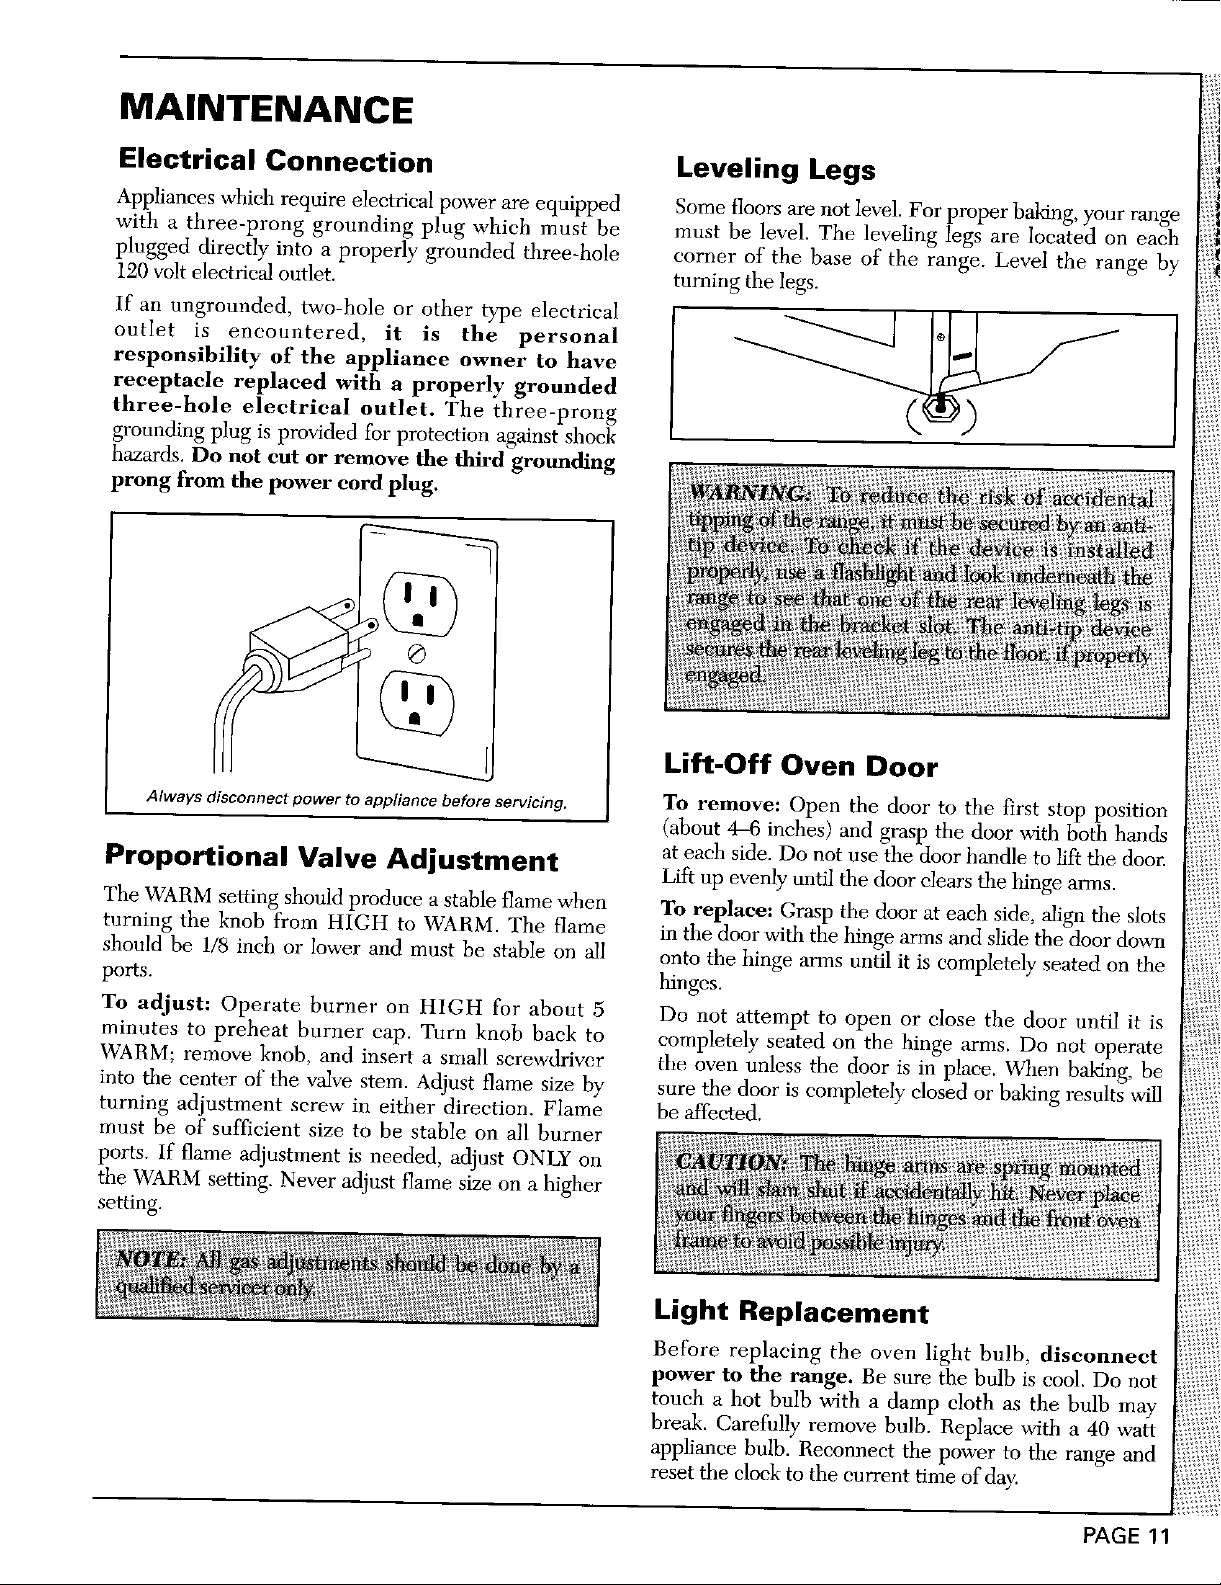
MAINTENANCE
Electrical Connection Leveling Legs
Appliances which require electrical power are equipped Some floors are not level. For proper baldng, your range
with a three-prong grounding plug which must be must be level. The leveling legs are located on each
plugged directly into a properly grounded three-hole corner of the base of the range. Level the range by
120 volt electrical outlet, turning the legs,
If an ungrounded, two-hole or other type electrical _ll[l-
outlet is encountered, it is the personal
responsibility of the appliance owner to have
receptacle replaced with a properly grounded
three-hole electrical outlet. The three-prong ((_)
grounding plug is provided for protection against shock
hazards. Do not cut or remove the third grounding
prong from the power cord plug.
Lift-Off Oven Door
Always disconnect power to appliance before servicing. TO remove: Open the door to the first stop position
(about 4_6 inches) and grasp the door with both hands
Proportional Valve Adjustment at each side. Do not use the door handle to lift tim door.
The WARM setting should produce a stable flame when To replace: Grasp the door at each side, align the slots
turning the knob from HIGH to WARM. The flame in the door with tim hinge arms and slide the door down
should be 1/8 inch or lower and must be stable on 'all onto the hinge arms until it is completely seated on the
ports, hinges.
To adjust: Operate burner on HIGH for about 5 Do not attempt to open or close the door until it is
minutes to preheat burner cap. Turn knob back to completely seated on the hinge arms. Do not operate
WARM; remove knob, and insert a slnall screwdriver the oven unless the door is in place. When baking, be
into tile center of the valve stem. Adjust flame size by sure the door is completely closed or baking results will
turning adjustment screw in either direction. Flame be affected.
must be of sufficient size to be stable on all burner
ports. If flame adjustment is needed, adjust ONLY on
the WARM setting. Never adjust flame size on a higher
setting.
Lift up evenly until the door dears tile hinge arms.
Light Replacement
Before replacing the oven light bulb, disconnect
power to the range. Be sure the bulb is cool Do not
touch a hot bulb with a damp cloth as the bulb may
break. Carefully" remove bulb. Replace with a 40 watt
appliance bulb. Reconnect the power to the range and
reset the clock to the current time of day.
PAGE 11
Page 13

normal home nse will be
To Receive Warranty Service
To locate an authorized service company in your area contact the Maytag dealer from whom ),our appliance was purchased; or c_dl
Maytag Customer Service. Should you not receive satistCaetory warranty service, call or write:
Maytag Customer Assistance
% Maytag Customer Service
RO, Box 2370
Cleveland, TN 37320-2370
US 1-800-688-9900
CANADA 1-800-688-2002
When contacting Maytag Customer Service be sure to provide the model and serial number of your appliance, the name and
address of tile dealer from whom you purchased the appliaame and the date of purchase.
Should you still hol_e a problem, write to: Maj_r Appliance Consumer Action Program, '20 Nortl_ Waeker Drive, Chicago, Illinois 60606.
MACAP is an indust_ sponsored but independent group of consumer ex_pertswho receive mad act on complaints from appliance owners.
NOTE: When writing about artunsolved service problem, please include the following information:
(a) Your name, address and telephone number;
(b) Model nuraher and serial number (found on the data plate) of your applialme;
(c) Name and address of your dealer and date the appliance was bought;
(d) A clear description ofttle problem you are having.
PAGE 13
Page 14

Common Baking Problems and Causes
If you have carefully followed the basic instructions and still experienee poor results, these suggestions
may be helpful.
Cause Problem Cause
Slow baking Baking or roasting time too Too little leavening.
or roasting, short. Overmixing.
Temperature too low. Pan too large,
Oven out of calibration. Oven temperature too high.
Old oven out of calibration. Baking time too long.
Incorrect use of 'aluminum foil. Pans too close to each other or
Oven not preheated. , oven wall.
Oven door opened frequently. Improper measurement of
Too many pails on racks, sugar, baking powder, liquid
Pans touching each other or or fat.
oven walls. Old baking powder.
Batter uneven in pans. Oven temperature too high.
Oven temperature too low or Baking time too long.
baking time too short.
Range not level. Too much liquid.
Undermixing. Oven temperature too low.
......... Baking time too short.
Too much liquid.
Temperature too high. Not enough shortening.
Baking time too long. Too much baking powder.
Overmixing. Overmixing.
Too much flour. Oven temperature too high.
Pans touching each other or
oven walls. Batter overmixed.
......... Oven temperature too high.
Too much shortening or sugar.
Too much or too little liquid. Too much leavening.
Temperature too low. Temperature too high.
Old or too little baking powder. Pan too small.
I
Pan too small. Oven temperature too high.
Oven door opened frequently. Pans touching each other or
Oven not preheated. ' oven wall.
Pans darkened, dented or Edges of crust too thin.
Undermixing.
warped. Using shiny metal pans.
Cakes don't brown Oven temperature too low.
Overmixing. Temperature too low at start of
Too much liquid, baking.
Incorrect pan size or too little Filling too juicy.
batter in pan. Using shiny metal pans.
Oven door opened too often.
Oven not preheated.
Pans touching each other or
on the bottom, oven wails.
Using glass, darkened, warped
or dull finish metal pans.
Incorrect rack position.
Incorrect use of aluminum foil.
............... I
PAGE 13
Page 15

Roasting Place the meat fat-side-up on a rack in a shallow
roasting pan. Placing the meat on a rack holds it
Boasting is the method for cooking large, tender out of the drippings, thus allowing better heat
cuts of meat uncovered, without adding circulation for even cooking. As the fat on top of
moisture, the roast melts, the meat is basted naturally;
General Tips eliminating the need for additional basting.
Most meats are roasted at 325°F. It is not The cooking time is determined by the weight of
necessary to preheat the oven. Place the roasting the meat and the desired doneness. For more
pan on a rack which has been placed in either of accurate results, use a meat thermometer. Insert
the two lowest rack positions, it so the tip is in the center of the thickest part of
Use tender cuts of meat weighing three pounds
or more. Some good choices are: beef rib, Remove the roast from the oven when the
ribeye, top round, high quality tip and rump
roast, pork leg and loin roast, veal and lamb leg, the doneness wanted. As the meat stands, the
shoulder roast and cured and smoked hams. temperature will rise.
Season meat, if desired, either before or after
roasting. Rub into the surface of the roast if
added before cooking.
Roasting Chart (Thawed Meats Only)
Approximate Oven Approximate
Weight Temperature in °F Internal Roasting Time
Cut of Meat (pounds) (not preheated) Temperature (min. per pound)*
Beef
Rib Roast (cut side down) 4 to 8 325 ° 140° (rare) 25-30
Rib Eye Roast 4 to 6 325° 140° (rare) 25-30
Loin Tenderloin Roast 2 to 3 400 ° 140° (rare) 20-25
Top Sirloin Roast 3 to 6 325 ° 140 ° (rare) 2,5 30
Pork
Shoulder Blade Roast, Boneless 4 to 6 325 ° 160 ° 35-45
Shoulder Blade Roast 4 to 6 325 ° 160 ° 30-40
Loin Blade or Sirloin Roast 3 to 4 325 ° 160° 35-45
Ham, Half (fully cooked) 5 to 7 325 ° 140° 25-35
Ham, Half (cook-before-eating) 5 to 7 275 ° 160 ° 35- 45
Lamb
Shoulder Roast, Boneless 3-1/2 to 5 325 ° 160° (medium) 35-40
Leg, Whole 5 to 7 325 ° 160° (medium) 30-35
Veal
Rib Roast 3 to 5 325 ° 170 ° 40-45
Shoulder, Boneless 4 to 6 325° 170° 40- 45
Poultry
Turkey, unstuffed °° 12 to 16 325 ° 180°-185 ° 18-20
Turkey, Breast 3 to 8 325 ° 180° 30- 40
Chicken, Fryer 2-1/2 to 3-1/2 375 ° 185° 20-24
Chicken, Roaster 4 to 6 375 ° 185° 20-25
16 to 20 325° 180°-185 ° 16-18
20 to 24 325 ° 180°-185 ° 14-16
the meat. It should not touch fat or bone.
thermometer registers approximately 5°F below
160° (medium) 30-35
160° (medium) 30-35
160° (medium) 30-35
170° (well) 40-45
170° (well) 35-40
°Times are approximate and may vary depending on the type of range used.
**Stuffed turkeys take longer to cook; refer to cookbooks for approximate time.
PAGE 14
Page 16

Broiling The distance from the heat source depends on
the thickness of the meat. Thin cuts (3/4 to 1
Broiling is a method of cooking used for tender inch) should be placed 2-3 inches from the heat;
steaks, chops, hamburgers, chicken, fish, and
some fruits and vegetables. The food is placed thicker cuts should be placed 3-5 inches from
directly under the burner. The degree of the heat. Broil until the top of the meat is
doneness is determined by the distance between browned. It should be approximately half cooked
the meat and the burner, and the length of by the time the top is browned.
broiling time. If you plan to season the meat, it is better to do
General Tips so after the surface has browned. Salt tends to
delay browning which can result in overcooking.
Broiling requires the use of the broiler pan and Salting before cooking also draws the juices out
insert supplied with your range. It is designed to
drain excess liquid and fat away from the cooking of the meat, causing dryness.
surface to prevent spatters, smoke and fire. Never leave a soiled broiler pan in the oven after
For easier clean-up, line the broiler pan (bottom broiling. Drippings might become hot enough to
piece) with aluminum foil and spray the insert ignite if exposed directly to the burner.
with a non-stick vegetable coating. Do not cover
the broiler pan insert with aluminum foil as this Setting the Controls
prevents fat from draining into the pan below. 1. Before broiling, trim excess fat to prevent
The broiler can be preheated, however, do not excessive spattering or smoking. Cut slashes in
preheat the broiler pan. the outer edges of the meat to prevent curling
To prevent excessive spattering and smoking, during cooking.
trim excess fat from the meat. Increasing the 2. Turn the OVEN TEMP knob to Broil.
distance between the meat and the heat source
will also help. 3. Place the broiler pan on the recommended
rack position shown in the broiling chart. If
the food is placed too close to the burner,
overbrowning and smoking may occur.
Broiling Chart Generally for a brown exterior
Until you become more familiar with your new range, and rare interior, the meat
use the following chart as a guide when broiling foods, should be close to the burner.
Food Thickness Position Doneness 1st Side 2rid Side you want the meat well done.
Quantity &/or Approx. Minutes/Side
Place the pan further down if
Bacon thick slice middle well 4-5 1-2 4. Follow the suggested times in
Beef Patties 3/4'thick middle rare 3-4 2-3 the broiling chart. Meat should
middle medimn 5-6 3-4 be turned once about halfway
middle well 5-6 4-5
Steaks i" thick bottom rare 3-4 3-4 through its cooking time.
bottom medium 5-7 4-6 5. Check the doneness by cutting
bottom well 7-8 6-7
1½"thick bottom rare 7-8 5-6 a slit in the meat near the
bottom medium 8-10 6-8 center to cheek the color.
bottom well 10-11 8-9
Chicken Breast Halves bottom well 8-9 7-8
Fish Fillets 1" thick middle 5-6 3-5
Ham Slices ½" thick middle 5-6 4-5
(precooked)
Pork Chops (450°) 1" thick bottom well 12-14 8-9
Weiners/Sausage middle 2-4 2-3
(precooked)
1 "
thick middle 4-5 3-5
PAGE 15
Page 17

CARE AND CLEANING
Gas Burners and Cooktop Manual Clean Oven
Clean the surface burners as necessary with You may clean the porcelain enamel oven
warm soapy water. Remove any stubborn soil by interior of your Maytag range using a
soaking the burner, then scouring it with a commercial oven cleaner. Be sure to follow all
powdered cleanser or a soap-filled scouring pad. the package instructions and avoid getting the
Clean the gas ports with a straight pin. Do not range.
enlarge or distort the ports. Do not use a Your oven may also be cleaned with warm sudsy
wooden toothpick since it may break off and clog water, mild abrasive cleaners and plastic scouring
the port. pads. Do not use metallic scouring pads because
Do not clean the burners with any of the or hot surface with a damp cloth as cracking and
following caustic cleaners: commercial oven chipping may result.
cleaner, dishwasher detergent, or metal polishes. For more information on cleaning your
These will damage the finish. Do not clean the Maytag range, refer to the cleaning chart
burners in the dishwasher, on pages 17-18.
The burner and burner tube must be dry before
use. They can be dried in an oven set on Warm.
Porcelain Cooktop
oven cleaner on any of the other suKaces of the
they can scratch the surface. Never wipe a warm
The cooktop on your range is designed with two
contoured wells which contain spills until they
can be wiped up.
All spillovers, especially acidic spillovers, should
be wiped up as soon as possible with a dry cloth.
To prevent possible cracking or chipping of the
porcelain, never wipe a warm or hot surface with
a damp cloth. Once the surface is cool, clean
with warm, sudsy water.
Do not use abrasive or caustic cleaning agents on
the porcelain finish for they will permanently
damage the finish.
Lift Up Cooktop
Your Maytag range features an "upswept"
cooktop that can be lifted up for convenient
access to the area under the cooktop. The top is
hinged and can be raised but not removed.
To lift upswept eooktop: When cool, grasp
the front edge of the cooktop and gently lift up
until the two automatic prop rods at the front of
the cooktop snap into place.
To lower the eooktop: Hold the front edge of
the cooktop and carefully push back on each
prop rod to release the notched support. Then
gently lower the top into place. The prop rods
will slide into the range frame.
PAGE 16
Page 18

RANGE CLEANING CHART
Cleaning Agents*
Many different cleaning agents are recommended for the various parts ofthe ranges. The followingbrand
names mayhelp you to make an appropriate selection:
1. Mild abrasive cleaners such as Bon Ami, Soft Scrub, Bar Keepers Friend, Cameo.
2. Mild liquid sprayssuch as Fantastik, Formula 409.
g. Glass cleaner such as Windex, GlassPlus.
4. Plastic and nylon scouring pads.
DO NOT USE abrasive cleansing powders such asComet or Zud, soap-filled scouring pads like S.O.S. or
Brillo,commercial oven cleaners, or an automatic dishwasher except when indicated.
Be certain all range parts are cool before handling to avoid damage.
°Brand names of cleaning agents are trademarks of the respective manufacturers.
Part Cleaning Agents Tips and Precautions
Baked Enamel: Soap and water Wash, rinse, dry with soft cloth.
Side Panels Mild liquid sprays Do not use oven cleaner or abrasive agents.
Control Panel Glass cleaners
Broiler Drawer
Broiler Pan and Insert Soap and water Pretreat the broiler pan and insert with a non-stick
Plastic or soap-filled scouring vegetable coating such as Pare or Mazola to make
pads cleaning easier.
Dishwasher Soaking makes cleaning easier.
Burner Box Soap and water To clean, remove surface burners.
Burner Grates Soap and water
Control Knobs Soap and water Wash, rinse, dry with soft cloth.
Gas Surface Burners Soap and water Scrubbing may be necessary to remove burned-on
Mild abrasive cleaners
Plastic scouring pads
Mild liquid sprays
Soap-filled scouring pads
Dishwasher
Mild liquid sprays For ease of cleaning, remove knobs by pulling
Glass cleaners forward.
Mild abrasive cleaners soil.
Abrasive cleansing powders Clean ports with a straight pin. Do not use wooden
Plastic scouring pads toothpick as it may break off and clog the port.
Soap-filled scouring pads Burner and tube must be dry before use.
Do not wash in dishwasher.
Metal Finishes and Trim Soap and water Do not use oven cleaner or abrasive agents.
Mild abrasive cleaners Remove stubborn soil with a paste of mild abrasive
cleaner and water.
Polish with a soft cloth.
Continued on next page
PAGE 17
Page 19

Range Cleaning Chart (continued)
Part Cleaning Agents Tips and Precautions
Oven Interior
Manual Clean Soap and water Do not use metallic scouring pads because they will
Oven Racks Soap and water If racks become difficult to slide, a thin coat of
Oven Window Soap and water Avoid using excessive amounts of water which may
Plastic Finishes: Soap and water Do not use abrasive cleansers.
Door Handle Mild liquid sprays
Control Panel Trim
Endcaps
Manifold Panel
Porcelain Enamel Top and Soap and water Wipe up all spillovers immediately with a dry cloth -
Back Panel Mild abrasive cleaners especially acid spills (milk, fruits, tomato, etc.).
Mild abrasive cleaners and scratch the surface.
plastic pads When using commercial oven cleaners follow the
Commercial oven cleaner manufacturer's instructions.
Plastic scouring pads vegetable oil on the underside of the rack will
Cleansing powders make sliding easier.
Soap-filled scouring pads
Glass cleaners seep under or behind glass.
Mild liquid sprays Never wipe a warm or hot surface with a damp
cloth as cracking and chipping may result.
PAGE 18
Page 20

MAINTENANCE
Electrical Connection WARNING: To reduce the_skofaeeidental
Appliances which require electrical power are
equipped with a three-prong grounding plug
which must be plugged directly into a properly
grounded three-hole 120 volt electrical outlet, bracket slot.
If an ungrounded, two-hole or other type
electrical outlet is encountered, it is the
personal responsibility of the appliance
owner to have receptacle replaced with a
properly grounded three hole electrical Light Replacement
outlet. Tile three-prong grounding plug is Before replacing the light bulb, disconnect the
provided for protection against shock hazards, power to the range. Be sure the bulb is cool.
Do not cut or remove the third grounding Do not touch a hot bulb with a clamp cloth as the
prong from the power cord plug. bulb may break.
To Replace Oven Light
Very carefully unscrew the lens cover with a dry
_'"/_'"-_-_x'l potholder to prevent possible harm to hands,
__ potholder. Replace with a 40 watt appliance
_ bulb. Reconnect the power to the range and
..... reset the clock to the current time-of-day.
_ then very carefully remove the bulb with a dry
Always disconnect power to appliance before servicing.
-- 0
Leveling Legs
Some floors are not level. For proper baking,
your range must be level. The leveling legs are
located on each corner of the base of the range. Oven Door
Level the range by turning the legs.
Do not place excessive weight on an open oven
door or stand on an open oven door as, in some
cases, it could damage the door, cause the range
to tip over and possibly injure the user.
When opening the oven door, allow steam and
hot air to escape before reaching into the oven to
check, add or remove food.
PAGE 19
Page 21

To Remove Lift-Off Door Removing Range for Cleaning
Open the door to the first stop position (opened and Servicing
about 4-6 inches) and grasp the door with both
hands at each side. Do not use the door handle When necessary, follow these procedures to
to lift the door. Lift up evenly until the door remove the appliance for cleaning or servicing:
dears the hinge arms. 1. Shut off the gas supply to the appliance.
2. Disconnect the electrical supply to the
appliance.
3. Disconnect the gas supply tubing to the
appliance.
range from the anti-tip bracket. (See the
Installation Instructions for location of the
bracket.)
4. Slide the range forward to disengage the
5. Reverse the procedure to reinstall. If the gas
line has been disconnected, check for gas
leaks after reconnection. (See the Installation
Instructions for the gas leak test method.)
Broiler Drawer
Store a clean broiler pan and insert in the broiler
drawer.
CAUTION: The hinge arms are spring
To Remove the Drawer
Pull the drawer out to the first stop position. Lift
up the front of the drawer and pull it to the
snaps back. and out to remove the drawer.
To Replace Door To Replace the Drawer
Grasp the door at each side, align the slots in the Fit the ends of the drawer glides onto the rails.
door with the hinge arms and slide the door Lift up the drawer front and gently push in to
down onto the hinge arms until it is completely the first stop position. Lift up the drawer again
seated on the hinges, and continue to slide the drawer to the dosed
Do not attempt to open or close the door until position.
the door is completely seated on the hinge arms.
Never turn the oven on unless the door is
properly in place. When baking, be sure the door
is completely closed. Your baking results will be
affected if the door is not securely closed.
second stop position. Grasp the sides and lift up
PAGE20
Page 22

BEFORE YOU CALL FOR SERVICE
Check these points if... • Are the controls for bake operations
Part or all of your gas range does not properly set?
operate • Are the range and oven racks level?
• Is the range plug loose or disconnected from • Was good cookware/bakeware of the proper
the electrical outlet (if not wired direct to size used?
the electrical supply)? • Are you using a tested recipe from a reliable
• Is the gas supply connected or turned on? source? The oven thermostat on your new
• Are any house fuses blown or circuit your old range.
breakers tripped? • Is there 1-2 inches of space between pans
• Has the power or gas supply to the home and the oven sides?
been interrupted? • Is the oven bottom positioned correctly?
• Are the oven controls properly set? • Was the oven vent covered or blocked on
• Was the electronic control (select models) the range surface?
correctly set?
• Is the oven set for delay start? (select Food does not broil properly
models) • Are the controls for broiling set properly?
Surface burner fails to light or is unstable
• Are any burner ports clogged? Broiling section)
• Is the burner properly positioned? • Was the broiler pan provided with the range
• Is the range plug disconnected from the used?
electrical outlet (if not wired direct to the • Was aluminum foil used on the broiler pan
electrical supply)? insert, blocking the slits for fat drainage?
range may be more accurate than the one on
(see Broiling section)
• Was the proper rack position used? (see
Food not baking correctly Oven light does not operate
• Are the oven racks properly placed for • Is the bulb loose or burned out?
baking? (see Baking Chart) • Is the light switch in the On position?
• Have you used aluminum foil correctly?
• Was the oven preheated as recommended?
CONSUMER PUBLICATIONS
For more information, order the following booklets from Maytag at the prices indicated. Send your name,
address, booklet title, form number and payment to: Consumer Education Dept., Maytag Company, One
Dependability Square, Newton, IA 509.08. Allow 4-6 weeks for delivery.
Cooking Made Simple - 272YG ............................................................................................... 50¢
Taking the Lid Off Cooktop Choices - 298YG ........................................................................ 50¢
Before You Call (avoiding unnecessary service calls) - 206YG .............................................. 50¢
Appliance Buying Guides ......................................................................................................... 50¢ EACH
Washer -- 211YG
Dryer -- 212YG
Dishwasher -- 213YG
Electric Range -- 214YG
Gas Range -- 215YG
PAGE 21
Page 23

RANGE WARRANTY
Full One Year Warranty
For one (1) year from the date of original retail purchase, any part which fails in normal home use will be repaired or
replaced free of charge.
Limited Warranty
After the first year from the date of original retail purchase, through the second year, parts which fail in normal home
use will be repaired or replaced free of charge for the part itself, with the owner paving all other costs, including labor.,
when the appliance is located in the United States or Canada.
After the second year from the date of original retail purchase, through the fifth year, solid disc electric heating
elements, sealed gas burners, smooth top heating elements and glass cooking surface (if range so equipped) which fail
in normal home use will be repaired or replaced free of charge for the part itself, with the owner paying all other costs,
including labor, when the appliance is located in the United States or Canada.
Canadian Residents
This warranty covers only those appliances installed in Canada that have been listed with Canadian Standards Association
unless the appliances are brought into Canada due to transfer of residence from the United States to Canada.
Limited Parts Warranty Outside The United States Or Canada
For two (2) years from the date of original retail purchase, any part which fails in normal home use will be repaired or
replaced free of charge for the part itsel£, with the owner paving all other costs, including labor, when the appliance is located
outside the United States or Canada.
This Warranty gives you specific legal rights, and you may also have other rights which vary from state to state.
To Receive Warranty Service
First: Call or write the MAYTAG dealer from whom your appliance was purchased or the authorized service firm designated
by the dealer.
If you have moved from the selling dealer's service area call or write any authorized MAYTAG dealer or authorized
service firm at your new location. Cheek the telephone directory yellow pages to identi_ the dealer or service firm
in your area.
Second: Should your contact with the dealer or the service firm fail to satisfactorily resolve the problem, contact the manager of
the dealership or the manager of the service firm for assistance.
Third: Should you not receive satisfactory warranty service from one of the above or need help in identifying an authorized
service firm write:
MAYCOR Appliance Parts and Service Company
A division of Maytag Corporation
RO. Box 2370
Cleveland, TN 37311
Arrangements for warranty service will be made. If the problem is urgent, call MAYCOR at (615) 472-3333.
When contacting MAYCOR be sure to include the model and serial number of your appliance, the name and address of
the dealer from whom you purchased the appliance and the date of purchase.
Should you still have a problem, write to: Major Appliance Consumer Action Panel, 20 North Wacker Drive, Chicago,
Illinois 60606. MACAP is an industry sponsored but independent group of consumer experts who receive and act on
complaints from appliance owners. '_,
NOTE: When writing about an unsolved service problem, please include the following information:
(a) Your name, address and telephone number;
(b) Model number and serial number (found on the data plate located on the frame around the storage drawer) of
your appliance;
(c) Name and address of your dealer and date the appliance was bought;
(d) A clear description of the problem you are having;
MAYTAG COMPANY • Newton, Iowa 50208
Form No.851FE Part No. 8111P010-60 MP kitho U.S.A.
Page 24

Tableof Contents
SurfaceCooking .........................................................................3-5
ProperCookware..............................................................3-5
HeatSettings........................................................................5
UsingYour Oven.........................................................................6-7
General"_ps.........................................................................6
BakingPans..........................................................................7
RackPositions......................................................................7
Pan Positions .......................................................................7
CommonBaking Problems and Causes..................................8-9
Roas'_ing...................................................................................10-_1
RoastingT_ps.....................................................................10
RoastingChart ...................................................................11
Convection Bakingand Roasting...............................................12
GeneralConvection"_ps ..................................................13
Broiling ....................................................................................14-15
Broiling "_ps..................................................................14-15
Other PublicetionsAvailableFrom Maytag .............................15
Page 25

Surface
Cooking
Regardless of the Proper pans will reduce cooking times,use less en-
cooking surface used- " ergy and cook food more evenly. Optimum cook-
coil elements, ceramic ing performance can be achieved when heavy
glass, standard gas sides and tight fitting lids are used. When selecting
burners or sealed gas cookware consider construction, material and size.
burners - good results
depend on several Flat Bottom Construction
factors. Cookware
construction, size and the pan is not flat, heat is not transferred as well
material; plus proper and food will cook unevenly and take longer. To
heat setting or flame determine the flatness of the bottom of a pan, try
size are critical for one of these tests:
good results. CookingTest: Putan inch of water into the pan. Place
ProperCookware
gauge, flat, smooth bottom, metal pans with straight
Heat transfers primarily by conduction (contact). If
it on the cooktop and turn the control to High. As
the water heats, observe the bubble formation. If
the bubbles are uniform across the bottom of the
pan, it will perform satisfactorily. Uneven bubbre for-
mation indicates poor pan/cooktop contact which
causes hot spots and uneven cooking.
Ruler Test: Place the edge of a ruler across the
bottom of the pan. HoJd it upto the light. Little or
no right should be visible under the ruler.
3
Page 26

PanMaterial
The pan material determines how evenly and quickly
heat is transferred from the heat source to the pan
bottom. Some widely used pan materials are:
?
a
Page 27

Pan Size
On electric cooktops, match the size of When canning, use the High setting
the pan to the coil element or indicated just until the water comes to a boil or
cooking area.ldeally, the pan should not pressure is reached in the pressure
extend more than 1/2-1" over the cook- canner, then reduce to the lowest heat
ing area on ceramic glass cook-tops and setting that maintains the boil or pres-
notmorethan2"beyondtheelementon sure. If the heat is not turned down,
coil eooktops. Avoid using small pans the cooktop may be damaged.
on large elements to reduce energy loss
and for safety reasons. For more information on canning pro-
cedures, contact your local county Ex-
On gas cooktops, adjust the burner tension Office.
flame soit does not extend beyond the
edge of the pan. This is for safety Heat Settings
reasons and also to save energy.
Do not useoversized pans or pans that increaseto a higher one later if needed.
rest across two elements or burners. There are many factors that affect the
Thesemay transfer heatto the porcelain choice of the heat setting.
cooktop which causes cracking or chip-
ping. Likewise, on ceramic glass
cooktopsoversized pans (more than 1"
beyondindicatedcookingarea)lengthen
cookingtimes.
Itis better to select a lower settingand
Home Canning
Recommendations
Acceptablewater-bath or pressure can-
ners should not be oversized and
should have flat bottoms. When can-
nersdo not meet these standards, cook-
ing times may be extended and Keepinmindthatfooddeesnotcook
cooktops may be damaged. For best anyfasteratahighersettingorflame
results, use a canner not more than 1" size than that which maintains a
larger than the cooking area on a co- gentle boil. Water boils at the same
ramic glass surface and not more than temperature, whether boiling vigor-
2" larger than a coil element or gas ouslyor gently. If too high a setting
burner, is used, food may burn on the bot-
tom before it is completely cooked.
5
Page 28

UsingYour
Oven
Delicious baking and As ranges and wall ovens get older, it is not uncom-
roasting results mon for the oven temperature to shift. It is normal
depend on the recipe, to notice some cooking time differences between a
type of pan used and new oven and an old one. Compare your recipes
the rack and pan
_ositions. Use tested recipes from dependable cookbooks.
PanPositions Do not cover the entire oven rack or oven bottom
with tested recipes for proper recommendations,
Follow directions carefully and usefresh ingredients,
Measure and mix as instructed and use the recom-
mended pan size.
Preheatthe oven ifcalledfor inthe recipe or on the
packagedirections. Preheating isNOT necessary for
roasting. Selecting a temperature higher than the
desired temperature will not preheat the oven any
faster. In fact, this may have a negative effect on
baking results.
with aluminum foil orplaceit directly undera pan. If
needed to catch spill-overs from baked items, place
a piece of foil cut a little larger than the pan on the
rack below the pan.However, foil will reduce air flow
and may cause poor baking results. In a gas oven,
placing foil on the oven bottom may cause perma-
nent damage to the porcelain enamel,
Page 29

Most recipes provide minimum and Frozen pies in foil pans should be
maximum baking times such as "bake placed on pans with dark or dull fin-
35-45 minutes." Check the baking ishes for baking. The shiny foil pan
progress at the minimum time. DO reflects heat away from the pie de-
NOT open the door until the minimum creasing browning while the dark pan
time haselapsed. Ifthe doorisopened helps absorb the heat and improves
too frequently, heat will escape, which bottom browning.
can affect baking results.
RackPositions
BakingPans The correct rack position depends on
Always use the pansize recommended the kind of food and the browning
in the recipe. Many pans havethe mea- desired. As ageneral rule, center the
surements marked on them. If there rack in the middle ofthe oven. Iffood
are no measurements, measure inside is placed on a rack toward the top of
width and length of the pan. the oven, top browning may be too
dark. If food is placed on a rack lo-
cated nearthe bottom of the oven, the
food may be too dark on the bottom.
Refer to the User's Guide for specific
rack positions,
PanPositions
When baking foods in one pan, place
pan in the center of the oven rack.
When baking in more than one pan,
allow one to two inches between the
pans and the edge of the pan(s) and
the oven walls.
If bakingon more than one rack,stag-
ger the pans so one pan isnot directly
over another pan.
Do notcrowd a rackwith pans. Never
place more than one 9x13-inch or
larger pan on one rack.
@
Do notplace pansdirectly onthe oven
Cookiesbaked in panswith shortsides bottom.
all around may result in lighter top
browning or uneventop browning. For
best results select cookie sheets with-
out sides.
Page 30

Page 31

Page 32

Roasting is the Preheating is not necessary,
method for cooking Placethe oven rack in either of the two lowest rack
large, tender cuts of positions.
meat uncovered,
without adding Use open pan roasting for tender cuts of meat,
moisture, try on the slotted portion of the two-piece broiler
weighing three pounds or more. Place meat or poul-
pan included with the oven. Do not add water to
the pan.
Place meat fat-side-up to allow self-basting of the
meat during roasting,
Cooking time for roasting is determined by the
weight of the meat and the desired doneness. Use
ameat thermometer for best results. Insert the ther-
mometer sothe tip end is in the center of the thick-
est part ofthe meat. It should not touch fat or bone.
Refer to the Roasting Chart on page 11for best re-
suits,
Remove the roast from the oven when the thermom-
eter registers approximately 5° below the aloneness
desired. Cooking will continue after the meat is re-
moved from the oven.
10
Less tender cuts of meat need to be roasted in a
covered pan or in an oven cooking bag,
Page 33

CutofMeat
Beef
Rib Roast (cut-sidedown)
Rib Eye Roast
Tenderloin Roast
Pork, Fresh
Shoulder B)ade Roast (boneless)
Shoulder Blade Roast
Loin Blade or Sirloin Roast
Boneless Pork Loin
Pork, Smoked
Ham Half (fully cooked boneless)*,
Ham Half (cook-before-eating)
Poultry
Turkey, unstuffed...
Turkey Breast
Chicken Fryer
Chicken Roaster
Lamb
Leg (boneless)
Whole Leg
• Cookingtimesa_e_oximat¢ trodmayvaWdependi_gon the s_ of the ;_st.
,.Add waterandfollow pacl_gedireceons.NotrecommendedforConvectionRoasting.
,°,Stuffed turkeyrequiresadditionalroastinB time. Shieldlegsand breastwithfoil to preventoverbrowninSrand
dlying ofskin. _1
Page 34

Convection
Baking and
._ich Method Works Bestfor .....Roasting
In a convection oven, Baking
a fan circulates hot • Convection baking is good for Jargequantities of
air evenly over, under baked foods such as cookies, biscuits, muffins,
and around the food. brownies, cupcakes, sweet rolls and bread.
As e result, foods are
evenly cooked and • Foods such as layer cakes or quick breads have a
browned - often in more even top when baked with the regular con-
shorter cooking times
at lower tempera- Roasting
tures and with the
flexibility of using • Convection roasting, in most cases, takes less
more racks at one
time. Meats are generally dark brown on the outside
ventional baking method.
time and is good for large tender cuts of meat.
Use uncovered roasting pans with low sides.
and tender and juicy inside,
• Less tender cuts of meat are best roasted with
the regular conventional method. The regular
conventional method is also best when an oven
cooking bag or covered dish is required.
Page 35

Baking:
Reduce the oven temperature by 25°
for convection baking. Times will be
similar to or a few minutes lees than
recipe recommendations.
For multi-rack baking, it may be nec-
essary to remove the pan on the bot-
tom rack and/or top rack 1-2 minutes
before the set time to prevent
overbrowning.
Cookie sheets should be made of
shiny metal without sides.
Three Rack Baking - For optimal
browning, place cookie sheets or rec- Roasting:
tangular (9"x13") pans lengthwise,
front to back on the oven racks. Ar- Do not reduce oven temperature by
range pans so they are directly over 25°for convection roasting. However
each other. Stacking pans one above roasting times can be reduced up to
the other centers the food in front of 25% when using convection heat,
the convection fanwhich improves air
circulation and browning. If pans are Referto the Roasting Chart on page
too long to place front- to-back, cen- 11 for best results,
ter the pans side-to-side on the racks,
Four RackBaking - (This is based on
the use of rack positions 2, 3, 4 and 5
with the lowest position being#1--rec- Do not cover meat.
ommended only on30 inch width ov-
ens.) Stagger the pans on the racks Since the breast meat and drumsticks
so that one pan is NOT directly over
another pan. For example, on rack 2 thigh areas, place a "foil shield" over I
place the pan within one inch of the these areas after desired brownees is
left wall of the oven, on rack 3 place reached to prevent overbrowning,
the pan within one inch of the right
wall and so on,
Do not use a roasting pan with high
sides.
on aturkey cook more quickly than the i
Page 36

Broiling
Broiling is used for When broiling in an electric oven, preheat 3-4 min-
tender cuts of meat or utes for optimal browning.
marinated meats, fish
and some fruits and For best results, steaks and chops should be at least
vegetables. The food
is placed directly under Before broiling, trim excess fat to prevent exces-
the top element or sivespattering orsmoking. Cut srashesin the outer
under the gas flame, edges of the fat to prevent curling during cooking.
The desired doneness
is determined by the Season meat after cooking. Salt tends to draw
distance between the juices out of the meat and delay browning.
food and the heat Use the broiler pen supplied with your oven. It is
source and the cooking designed to drain excess liquid and fat away from
time. the cooking surface to prevent spatters and smoke.
3/4" thick. Thinner cuts should be panbroiled.
Do not cover the broiler insert with aluminum foil.
This prevents fat from draining into the pan bot-
tom. However, for easier clean-up, line the broiler
pan (bottom portion) with foil and spray the insert
with non-stick vegetable coating.
14
The rack position selected for broiling depends on
the thickness of the meat and the desired doneness.
Thin cuts (3/4to 1inch) should be placed 2-3inches
from the heat; thicker cuts should be placed 3-6
inches from the heat,
Page 37

Generally for a brown exterior and
rare interior, the meat should be close
to the element or flame. If you want
the meat well done, place the broiler
pan farther from the element or flame.
Increasing the distance between the
meat and the heat source will de-
crease spattering and smoking.
When broiling in an electric oven, the
door should be opened to the broil
stop position (about 4"). When broil-
ing with e gas oven, the door should
be closed.
If the food requires turning, broil until
the top side is brown. Turn only once
during broiling. Meat should be ap-
proximately half cooked by the time
the top is browned.
Consult the User's Guide for spe-
cific broiling times and rack posi-
tions.
 Loading...