

Page 1

USER'S GUIDE
AND COOKING GUIDE
Over-The-Range Microwave Oven
Model CMV1100AA
© ©
-- © 3
----_ __
Readtheseinstructionscarefullybefore usingyour microwaveoven.
Partno.8112p170-60MCSp/n74005586A/08/00
SAVE THESE INSTRUCTIONS
Page 2
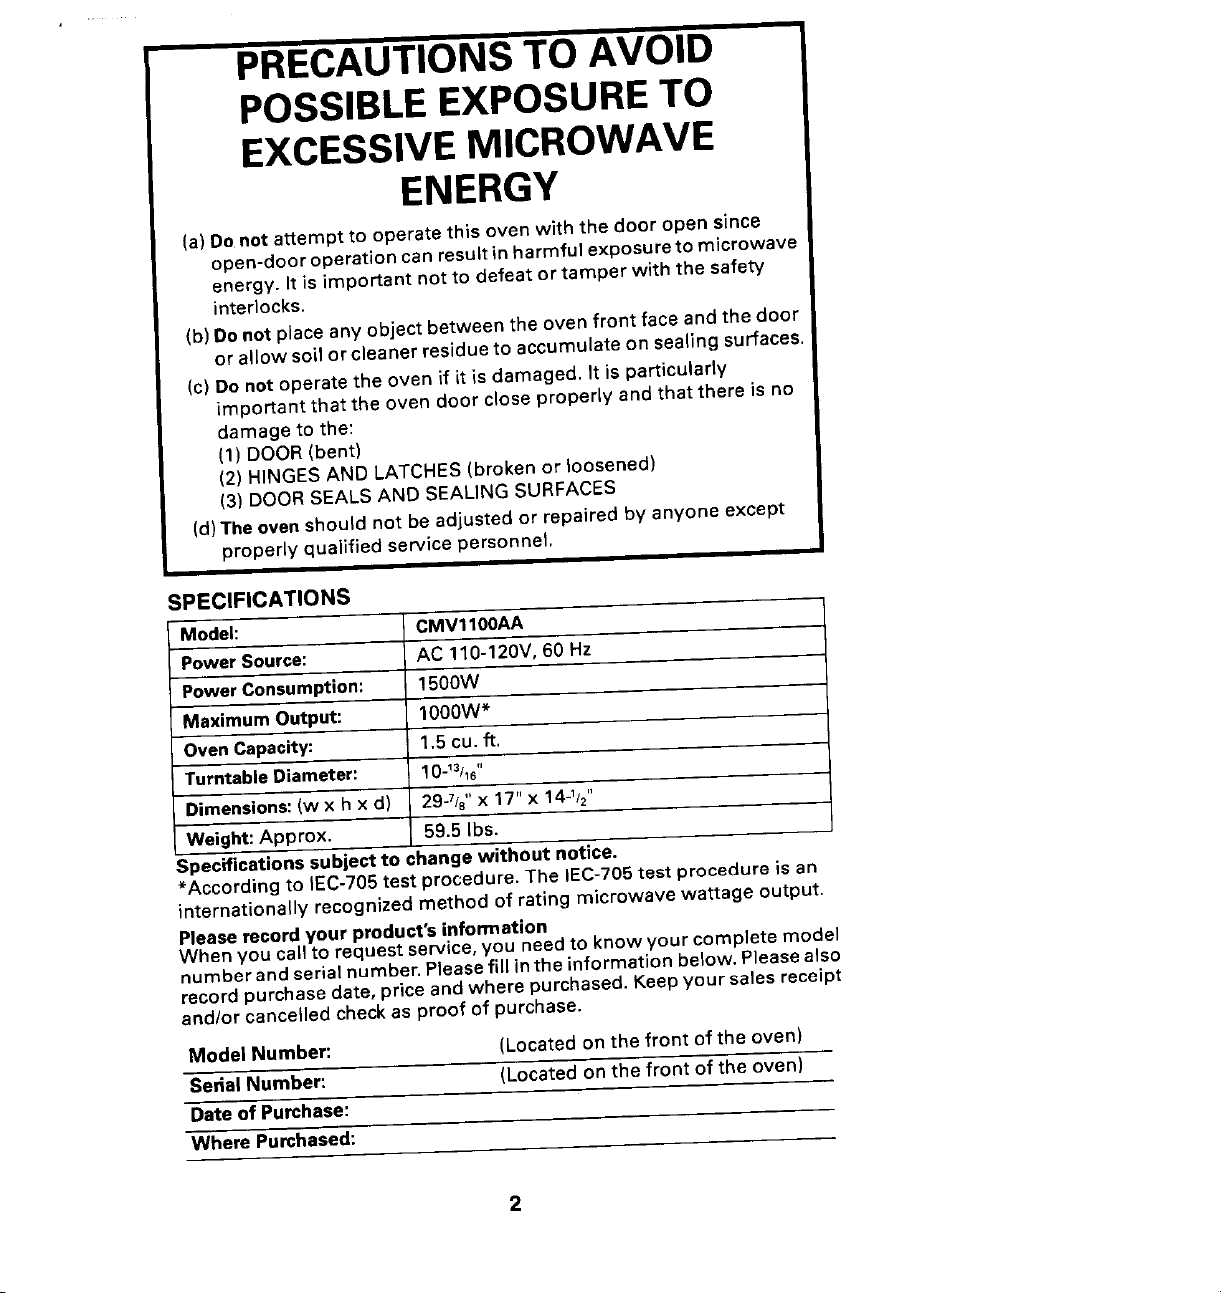
PRECAUTIONSTO AVOID
POSSIBLEEXPOSURETO
EXCESSIVEMICROWAVE
ENERGY
(a) Do not attempt to operate this oven with the door open since
open-door oloerationcan resultin harmful exposure to microwave
energy. It is important not to defeat or tamper with the safety
interlocks,
(b) Donot place any object between the oven front face and the door
or allow soil or cleaner residue to accumulate on sealing surfaces.
(c) Do notoperate the oven if it is damaged. It is particularly
important that the oven door close properly and that there is no
damage to the:
(1) DOOR (bent)
(2) HINGES AND LATCHES (broken or loosened)
(3) DOOR SEALS AND SEALING SURFACES
(d)The oven should not be adjusted or repaired by anyone except
properly qualified service personnel.
SPECIFICATIONS
Model: CMV1IOOAA
PowerSource: AC 110-120V, 60 Hz
Power Consumption: 1500W
Maximum Output: 1000W*
OvenCapacity: 1.5 cu. ft.
Turntable Diameter: 10-_3/ls"
Dimensions:(w x h x d) 29-7/s'' x 17" x 14-1/2''
Weight: Approx. 59,5 Ibs.
Specifications subject to change without notice.
*According to IEC-705test procedure. The iEC-705test procedure is an
internationally recognized method of rating microwave wattage output.
Pleaserecord your product's information
When you call to request service, you need to know your complete model
number and serial number. Please fill in the information below. Please also
record purchase date, price and where purchased. Keep your sales receipt
and/or cancelled check as proof of purchase.
Model Number: (Located on the front of the oven)
Serial Number: (Located on the front of the oven)
Date of Purchase:
Where Purchased:
Page 3
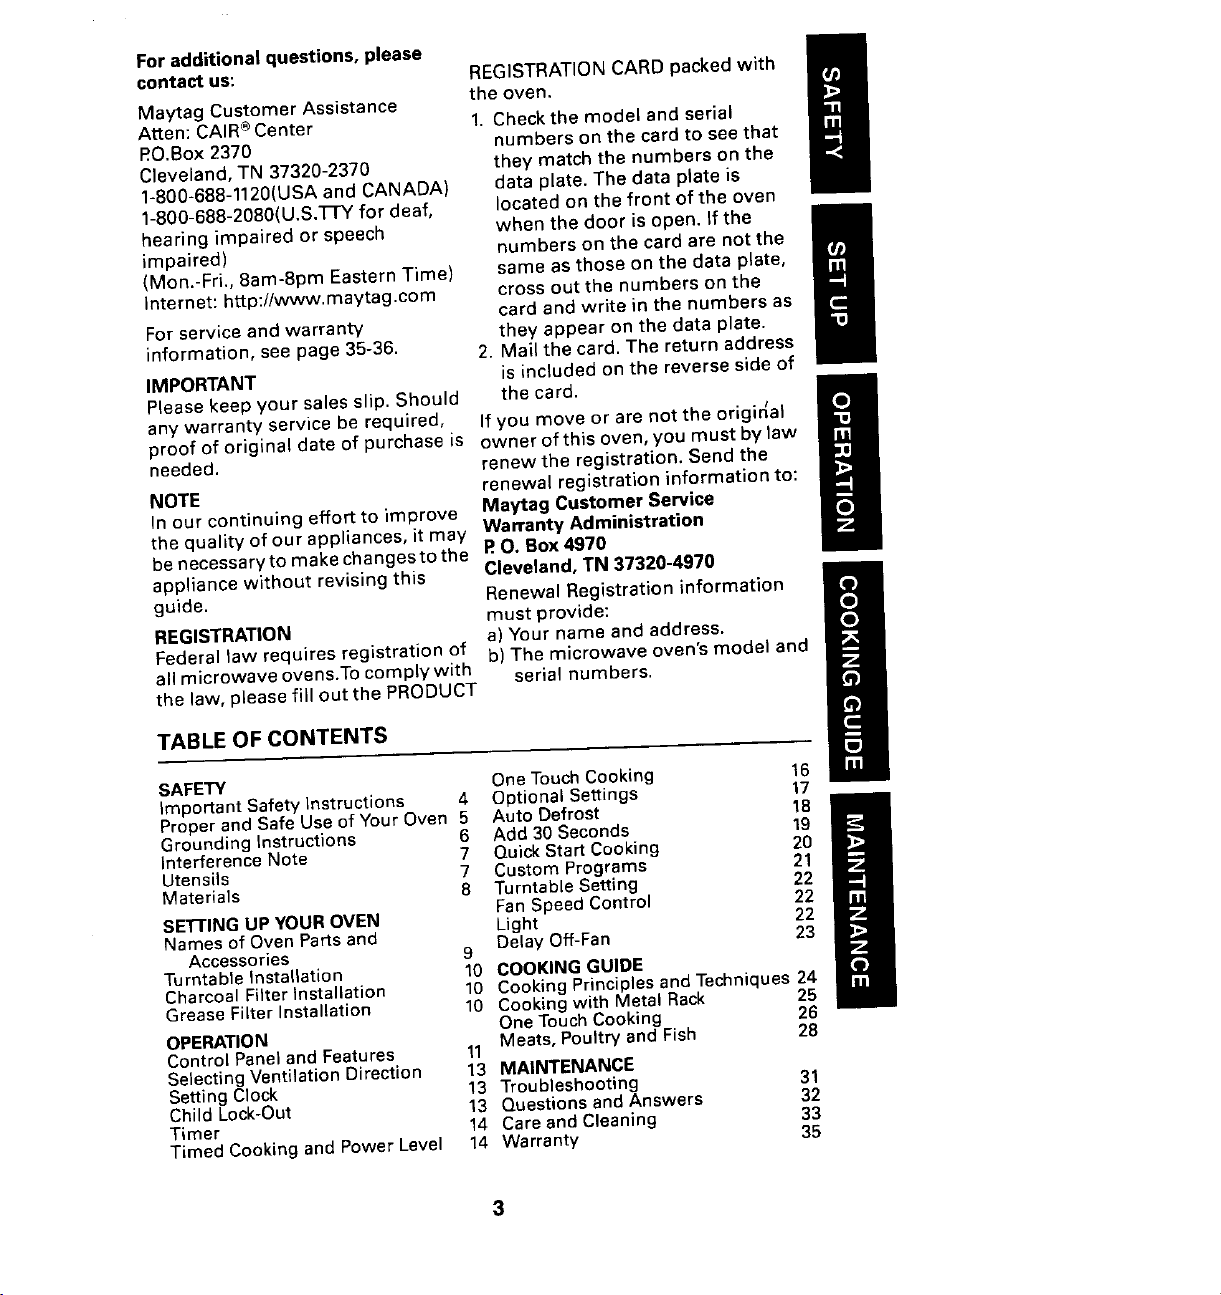
Foradditional questions, please
contact us: REGISTRATIONCARD packed with
Maytag Customer Assistance the oven.
At-ten: CAIReCenter 1. Checkthe model and serial
P.O.Box2370 numbers on the card to see that
Cleveland, TN 37320-2370 they match the numbers on the
1-800-688-1120(USA and CANADA) data plate• The data plate is
1-800-688-2080(U.S.TFY for deaf, located on the front of the oven
hearing impaired or speech when the door is open. If the
impaired) numbers on the card are not the
(Mon,-Fri., 8am-8pm Eastern Time) same as those on the data plate,
Internet: http://www.maytag.com cross out the numbers on the
card and write in the numbers as
For service and warranty they appear on the data plate•
information, see page 35-36. 2. Mail the card. The return address
IMPORTANT is included on the reverse side of
Please keep your sales slip. Should the card.
any warranty service be required, If you move or are not the original
• • I
proof of original date of purchase is owner of this oven, you must by law
needed, renew the registration, Send the
NOTE renewal registration information to:
In our continuing effort to improve Maytag Customer Service
the quality of our appliances, it may Warranty Administration
be necessary to make changesto the P"O. Box4970
appliance without revising this Cleveland, TN 37320-4970
guide. Renewal Registration information
must provide:
REGISTRATION a) Your name and address.
Federal law requires registration of b) The microwave oven's model and
all microwave ovens.To comply with serial numbers.
the law, please fill out the PRODUCT
TABLE OF CONTENTS
SAFETY One TouchCooking 16
Important Safety Instructions 4 Optional Settings 17
Proper and Safe Useof Your Oven 5 Auto Defrost 18
Grounding Instructions 6 Add 30Seconds 19
Interference Note 7 Quick StartCooking 20
Utensils 7 Custom Programs 21
Materials 8 TurntableSetting 22
FanSpeed Control 22
SE'rrlNG UP YOUROVEN Light 22
Names of Oven Parts and Delay Off-Fan 23
Accessories 9
Turntable Installation 10 COOKINGGUIDE
Charcoal Filter Installation 10 Cooking Principles and Techniques 24
GreaseFilter Installation 10 Cooking with Metal Rack 25
OPERATION
One TouchCooking 26
Control Panel and Features 11 Meats, Poultry and Fish 28
Selecting Ventilation Direction 13 MAINTENANCE
Setting Clock 13 Troubleshooting 31
Child Lock-Out 13 Questions and Answers 32
Timer 14 Careand Cleaning 33
Timed Cooking and Power Level 14 Warranty 35
Page 4
SAFETY
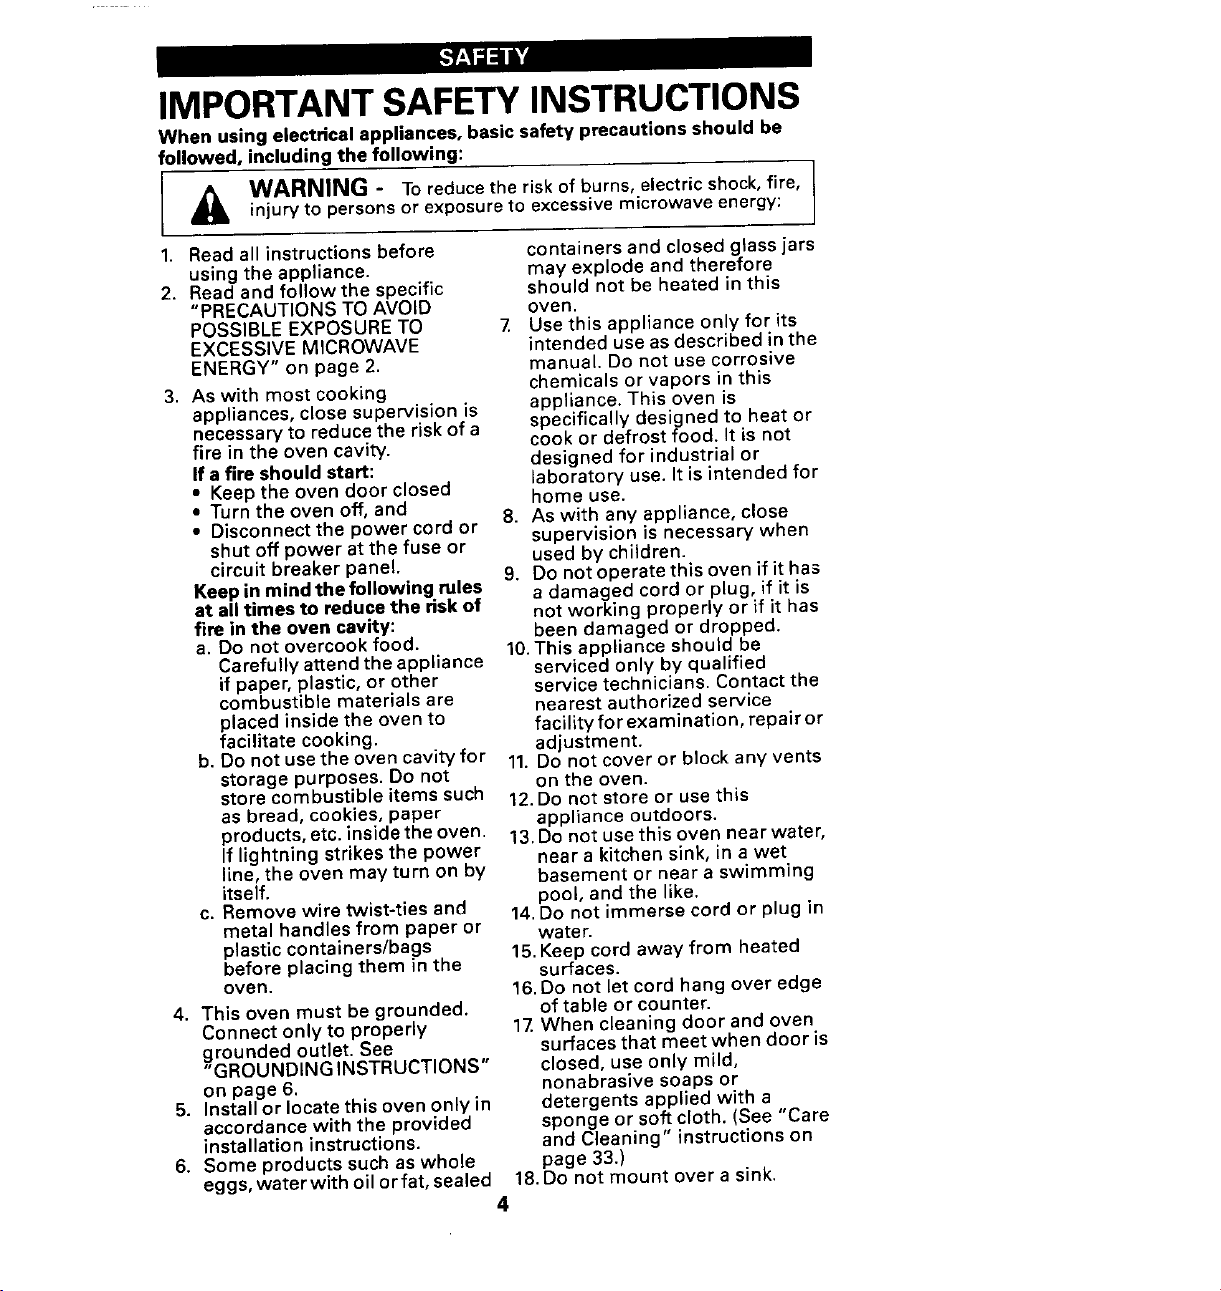
IMPORTANTSAFETYINSTRUCTIONS
When using electrical appliances, basic safety precautions should be
followed, including the following:
I A WARNING" Toreducethe risk of burns, electric shock,fire,
1. Read all instructions before containers and closed glassjars
2. Read and followthe specific should not be heated in this
3. As with most cooking chemicals or vapors in this
4, This oven must be grounded, of table or counter.
5. Install or locate this oven only in detergents applied with a
6. Some products such as whole page 33.)
injuryto personsor exposureto excessivemicrowaveenergy:
using the appliance, may explode and therefore
"PRECAUTIONS TO AVOID oven.
POSSIBLE EXPOSURETO 7, Use this appliance only for its
EXCESSIVE MICROWAVE intended use asdescribed in the
ENERGY" on page 2. manual. Do not use corrosive
appliances, close supervision is appliance, This oven is
necessary to reduce the risk of a cook or defrost food. It is not
fire in the oven cavity, designed for industrial or
If a fire should start: _aboratory use. It is intended for
• Keep the oven door closed home use.
• Turnthe oven off, and 8. As with any appliance, close
• Disconnectthe power cord or supervision is necessary when
shut off power at the fuse or used by children.
circuit breaker panel. 9. Do not operate this oven if it has
Keep in mindthe following rules a damaged cord or plug, if it is
at all times to reduce the riskof not working properly or if it has
fire in the oven cavity: been damaged or dropped.
a. Do not overcook food. 10.This appliance should be
Carefully attend the appliance serviced only by qualified
if paper, plastic, or other service technicians. Contact the
combustible materials are nearest authorized service
placed inside the oven to facility for examination, repair or
facilitate cooking, adjustment.
b. Do not use the oven cavity for 11. Do not cover or block any vents
storage purposes. Do not on the oven.
store combustible items such 12.Do not store or use this
as bread, cookies, paper appliance outdoors.
products,etc. insidethe oven. 13.Do not usethis oven near water,
If lightning strikes the power near a kitchen sink, in a wet
line, the oven may turn on by basement or near a swimming
itself, pool, and the like.
c. Remove wire twist-ties and 14.Do not immerse cord or plug in
metal handles from paper or water.
plastic containers/bags 15.Keep cord away from heated
before placing them in the surfaces.
oven. 16.Do not let cord hang over edge
Connect only to properly 17.When cleaning door and oven
grounded outlet. See surfaces that meet when door is
"GROUNDING INSTRUCTIONS" closed, use only mild,
on page 6. nonabrasive soaps or
accordance with the provided sponge or soft cloth. (See "Care
installation instructions, and Cleaning" instructions on
eggs, waterwithoilorfat, sealed 18.Do not mount over a sink.
specifically designed to heat or
4
Page 5
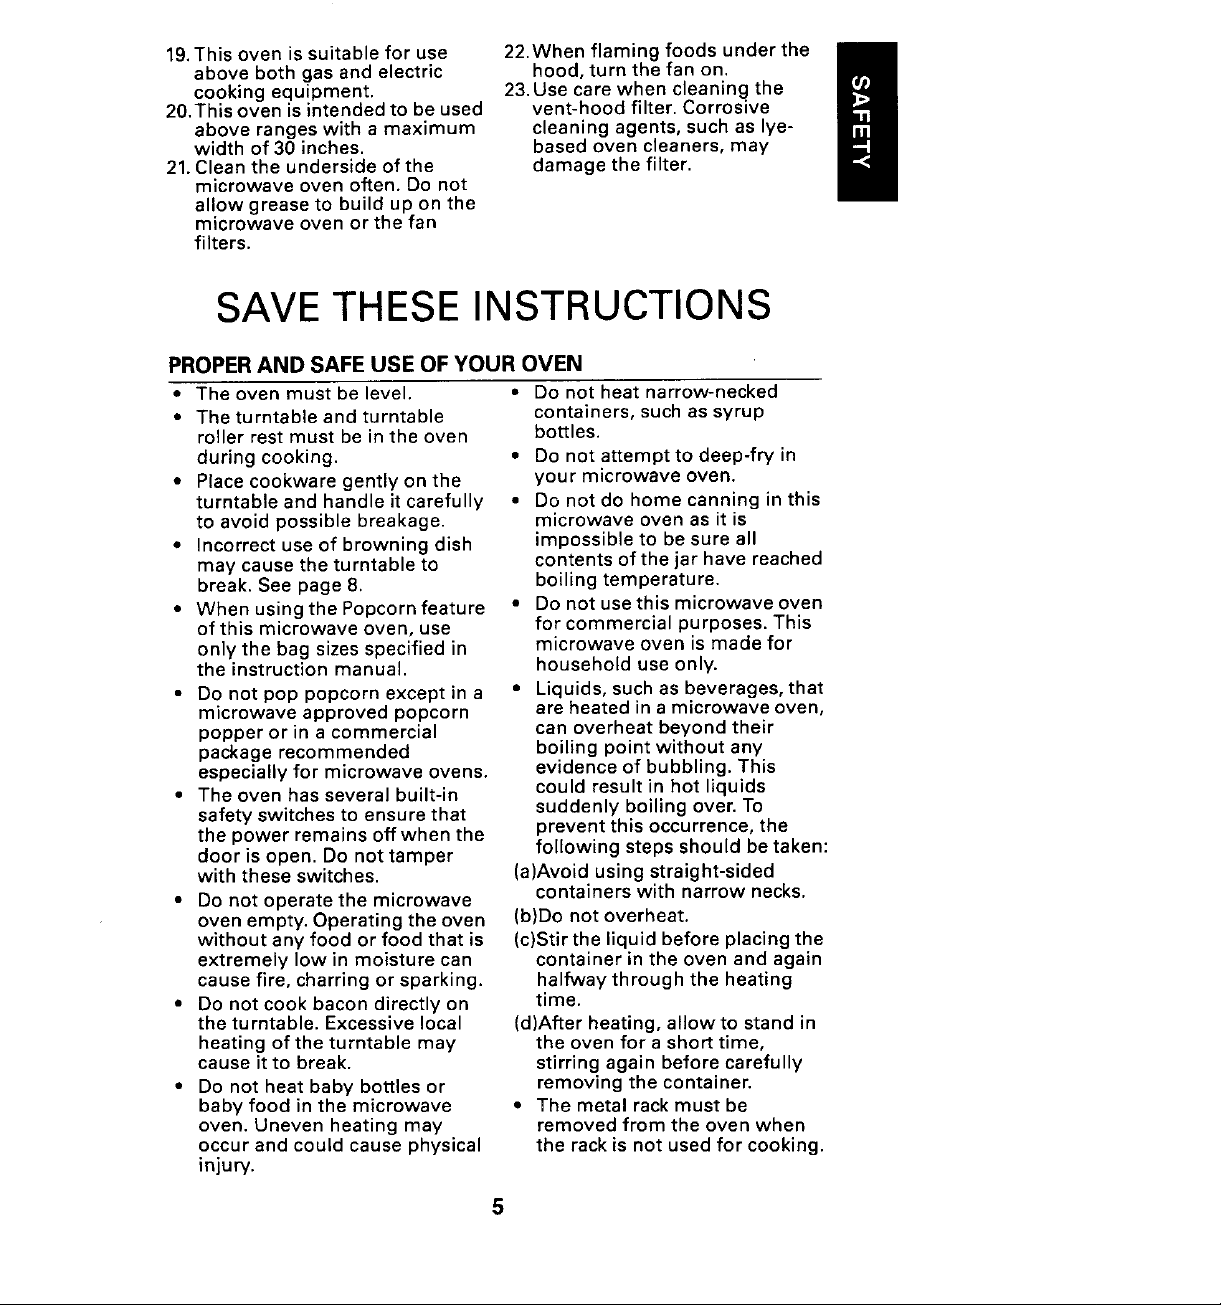
19.This oven is suitable for use 22.When flaming foods under the
above both gas and electric hood, turn the fan on.
cooking equipment. 23.Use care when cleaning the
20.This oven is intended to be used vent-hood filter. Corrosive
above ranges with a maximum cleaning agents, such as lye-
width of 30 inches, based oven cleaners, may
21.Clean the underside of the damage the filter.
microwave oven often. Do not
allow grease to build up on the
microwave oven or the fan
filters.
SAVETHESEINSTRUCTIONS
PROPERANDSAFEUSEOFYOUROVEN
• The oven must be level. • Do not heat narrow-necked
• The turntable and turntable containers, such as syrup
roller rest must be in the oven bottles.
during cooking. • Do not attempt to deep-fry in
• Place cookware gently on the your microwave oven.
turntable and handle it carefully • Do not do home canning in this
to avoid possible breakage, microwave oven as it is
• Incorrect use of browning dish impossible to be sure all
may cause the turntable to contents of the jar have reached
break. See page 8. boiling temperature.
• When using the Popcorn feature • Do not use this microwave oven
of this microwave oven, use for commercial purposes. This
only the bag sizes specified in microwave oven is made for
the instruction manual, household use only.
• Do not pop popcorn except in a • Liquids, such as beverages, that
microwave approved popcorn are heated in a microwave oven,
popper or in acommercial can overheat beyond their
package recommended boiling point without any
especially for microwave ovens, evidence of bubbling. This
• The oven has several built-in could result in hot liquids
safety switches to ensure that suddenly boiling over. To
the power remains off when the prevent this occurrence, the
door is open. Do not tamper following steps should be taken:
with these switches. (a)Avoid using straight-sided
• Do not operate the microwave containers with narrow necks.
oven empty. Operating the oven (b)Do not overheat.
without any food or food that is (c)Stir the liquid before placing the
extremely low in moisture can container in the oven and again
cause fire, charring or sparking, halfway through the heating
• Do not cook bacon directly on time.
the turntable. Excessive local (d)After heating, allow to stand in
heating of the turntable may the oven for a short time,
cause it to break, stirring again before carefully
• Do not heat baby bottles or removing the container.
baby food in the microwave • The metal rack must be
oven. Uneven heating may removed from the oven when
occur and could cause physical the rack is not used for cooking.
injury.
5
Page 6
GROUNDING INSTRUCTIONS
This appliance must be grounded. In the event
_ DANGER ofan electrical shortcircuit, grounding
Electric Shock Hazard the riskof electric shockby providing an escape
• Touching someofthe wire for the electric current. This appliance is
internal components equipped with a cord that has a grounding wire
can cause serious with a grounding plug. The plug must be
personal injury or plugged into an outlet that is properly installed
death. Do not and grounded.
disassemble
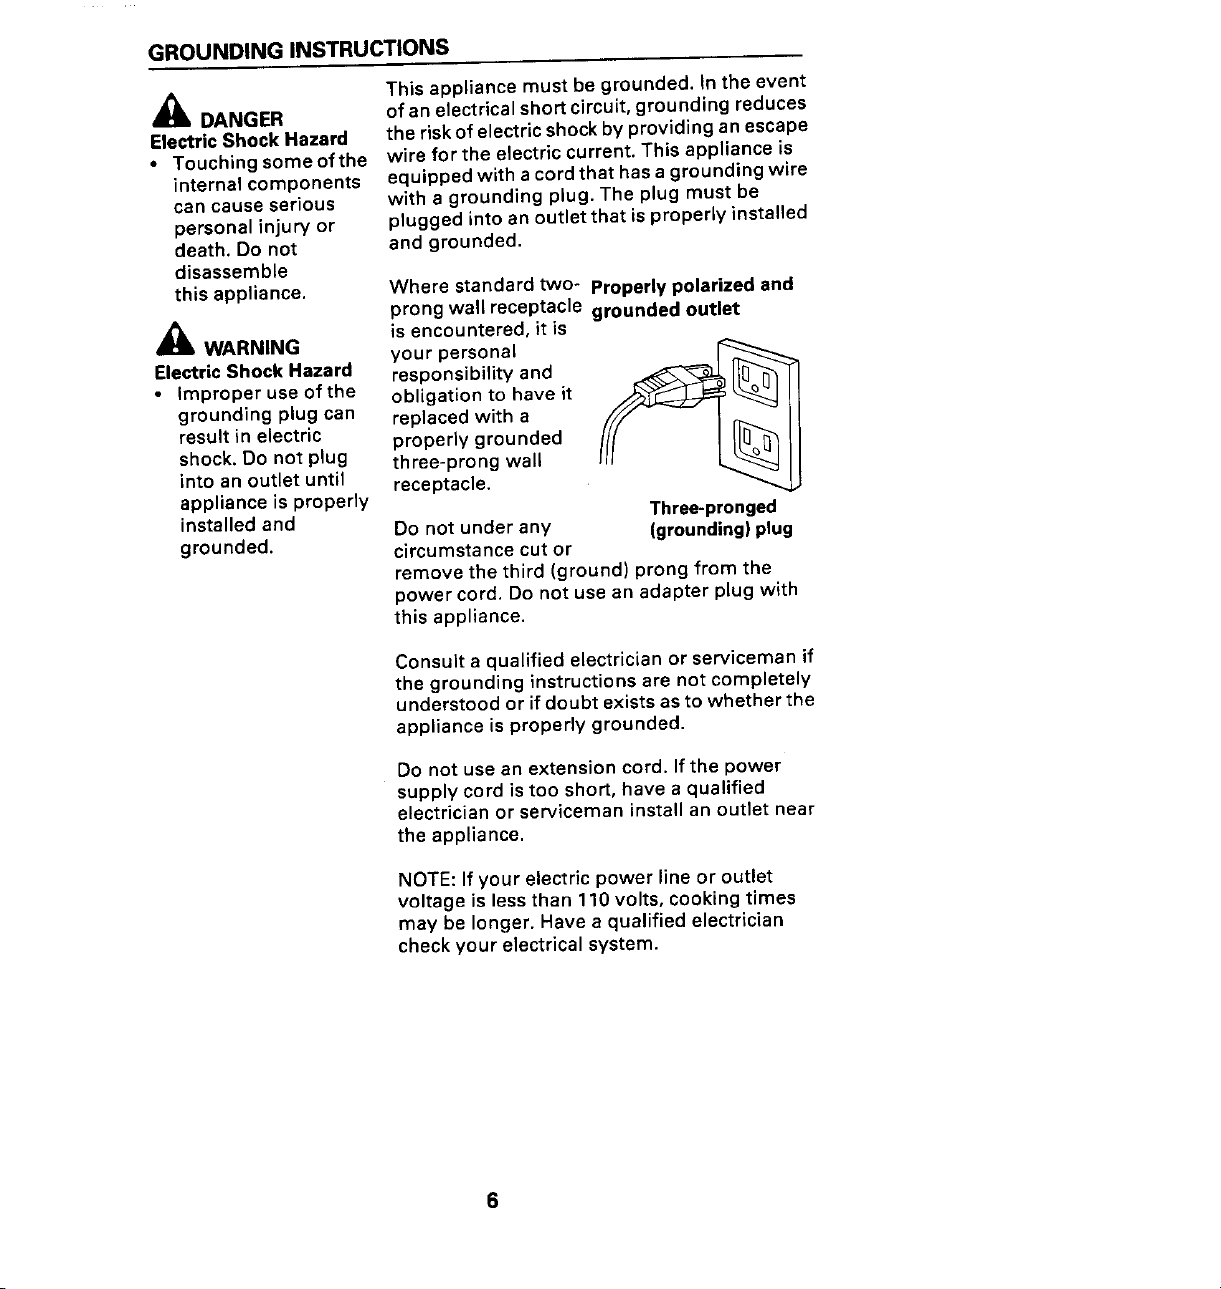
this appliance. Where standard two- Properly polarized and
prong wall receptacle grounded outlet
WARNING your personal
ElectricShock Hazard responsibility and
• Improper use of the obligation to have it
grounding plug can replaced with a
result in electric properly grounded
shock.Do not plug three-prong wall
into an outlet until receptacle.
appliance is properly Three-pronged
installed and Do not under any {grounding)plug
grounded, circumstance cut or
is encountered, it is
remove the third (ground) prong from the
power cord. Do not use an adapter plug with
this appliance.
Consult a qualified electrician or serviceman if
the grounding instructions are not completely
understood or if doubt exists as to whether the
appliance is properly grounded.
reduces
Do not use an extension cord. If the power
supply cord is too short, have a qualified
electrician or serviceman install an outlet near
the appliance,
NOTE: If your electric power line or outlet
voltage is less than 110 volts, cooking times
may be longer. Have a qualified electrician
check your electrical system.
Page 7

INTERFERENCE NOTE
Microwave ovens generate radio frequency energy during operation and
if not installed properly may cause interference to radio and television
reception. You can determine if this unit iscausing interference byturning
it on and off while the interference is occurring. If interference occurs, it
may be corrected by one or more ofthe following measures:
• clean door and seal surfaces of the ovens:
• reorient the television or radio receiving antenna:
• relocate the oven with respect to the television or radio receiver.
• plug the oven into a different outlet so that it and the television or
radio receiver are on different circuits.
Ifthe interference persists,you may want to consult an experienced radio/
television technician for additional suggestions.
UTENSILS
See following page for further instructions on
CAUTION
Personal Injury Hazard below to see if the utensil is safefor use in a
• Tightly-closed microwave oven.
utensils could
explode. Closed Utensil Test:
containers should be 1. Fill a microwave-safe container with 1 cup
opened and plastic of coldwater (250 mL) along withthe utensil
pouches pierced, in question.
"materials can use in microwave oven or
to be avoided in microwave oven." Do the test
2. Cookon maximum power (P100) for 1
minute.
3. Carefully feel the utensil.
Ifthe empty utensil iswarm, do notuse itfor
microwave cooking.
Do not exceed1 minute testing time.
you
CAUTION:
1. Do not use plastic containers for testing.
2. Some containers and dishware may be
warm (or hot) in only one area. Do not usea
container that becomes warm anywhere.
Page 8
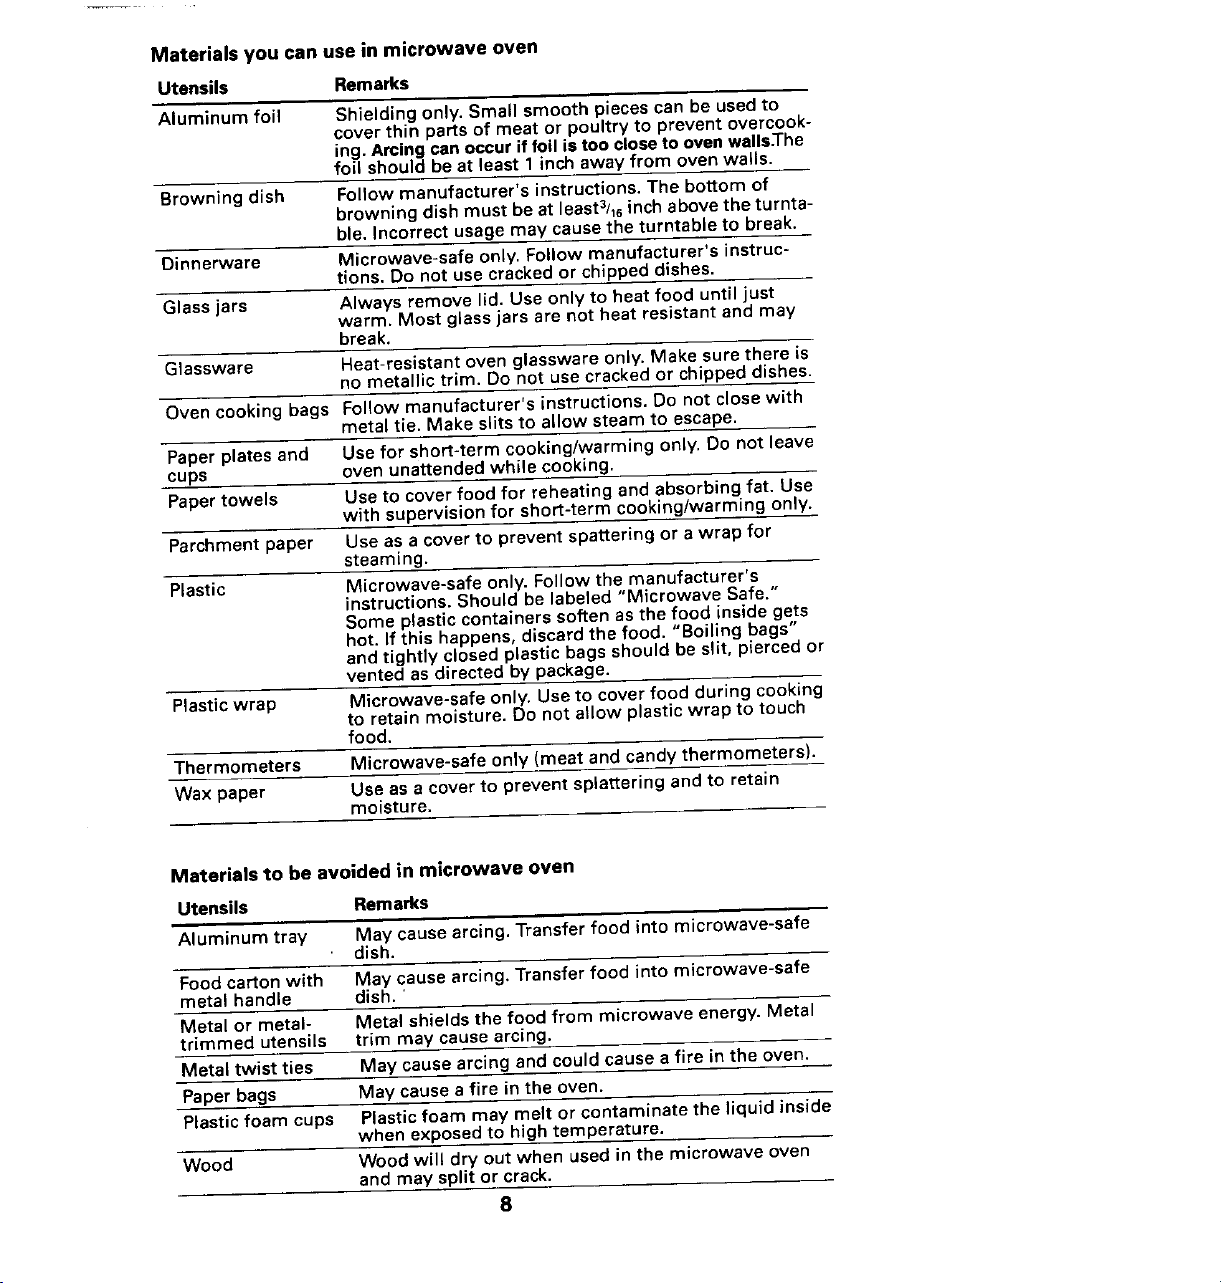
Materials you can use in microwave oven
Utensils Remarks
Aluminum foil Shielding only. Small smooth piecescan be usedto
Browningdish Follow manufacturer's instructions.The bottom of
Dinnerware Microwave-safeonly. Follow manufacturer's instruc-
Glassjars Always remove lid. Useonly to heat food until just
Glassware Heat-resistant oven glassware only. Make sure there is
Oven cooking bags Follow manufacturer's instructions. Do not close with
Paper plates and Use for short-term cooking/warming only. Do not leave
cups oven unattended while cooking.
Papertowels Use to cover food for reheating and absorbing fat. Use
Parchment paper Use as a cover to prevent spattering or a wrap for
Plastic Microwave-safe only. Follow the manufacturer's
Plastic wrap Microwave-safe only. Use to cover food during cooking
Thermometers Microwave-safe only(meat and candy thermometers).
Wax paper Use asa cover to prevent splattering and to retain
cover thin partsof meat or poultry to prevent overcook-
ing.Arcingcanoccurif foil istoocloseto ovenwells.-rhe
foil shouldbe at least 1inchawayfrom ovenwalls,
browningdish must be at least3/16inchabovetheturnta-
ble. Incorrectusagemay causethe turntable to break.
tions. Do not usecrackedor chippeddishes.
warm. Most glass jars are not heat resistant and may
break.
no metallic trim. Do not usecracked or chipped dishes.
metal tie. Make slits to allow steam to escape.
with supervision for short-term cooking/warming only.
steaming.
instructions. Should be labeled "Microwave Safe."
Some plastic containers soften asthe food inside gets
hot. If this happens, discard the food. "Boiling bags"
and tightly closed plastic bags should be slit, pierced or
vented as directed by package.
to retain moisture. Do not allow plastic wrap to touch
food.
moisture.
Materials to be avoided in microwave oven
Utensils Remarks
Aluminum tray May causearcing. Transfer food into microwave-safe
Foodcarton with May causearcing. Transfer food into microwave-safe
metal handle dish.'
Metal or metal- Metal shields the food from microwave energy. Metal
trimmed utensils trim may cause arcing.
Metal twist ties May cause arcingand couldcauseafire in the oven.
Paperbags May cause a fire in the oven.
Plastic foam cups Plasticfoam may melt or contaminate the liquid inside
Wood Wood will dry out when used in the microwave oven
dish.
when exposed to high temperature.
and may split or crack.
8
Page 9

SET UP
NAMES OF OVEN PARTS AND ACCESSORIES
Remove the oven and all materials from the carton.
Your oven comes with the following materials and accessories:
Turntable 1 Grease filter 2
Turntable roller rest 1 Charcoal filter 2
Instruction Manual 1 Damper assembly 1
Installation Instructions 1 Hardware package 1
Upper cabinet template 1 Metal rack 1
Wall template 1
Door Interior light Control panel
Door release button
• Press the button to open door.
• When you open the door during the
Safet f interlock system the program will not be canceled. Close
Shuts off oven power if door is the door and touch STARTtoresume
opened during operation cooking.
cooking process, cooking will stop but
(_ atthe same time or larger dishes.
__l l Jo'o' /tL__O _i////lll/t_Metal rack 'V
Grease filters
Do not run the fan Cooktoplight
without greasefilters.
When cooking two orthree dishes
9
Page 10
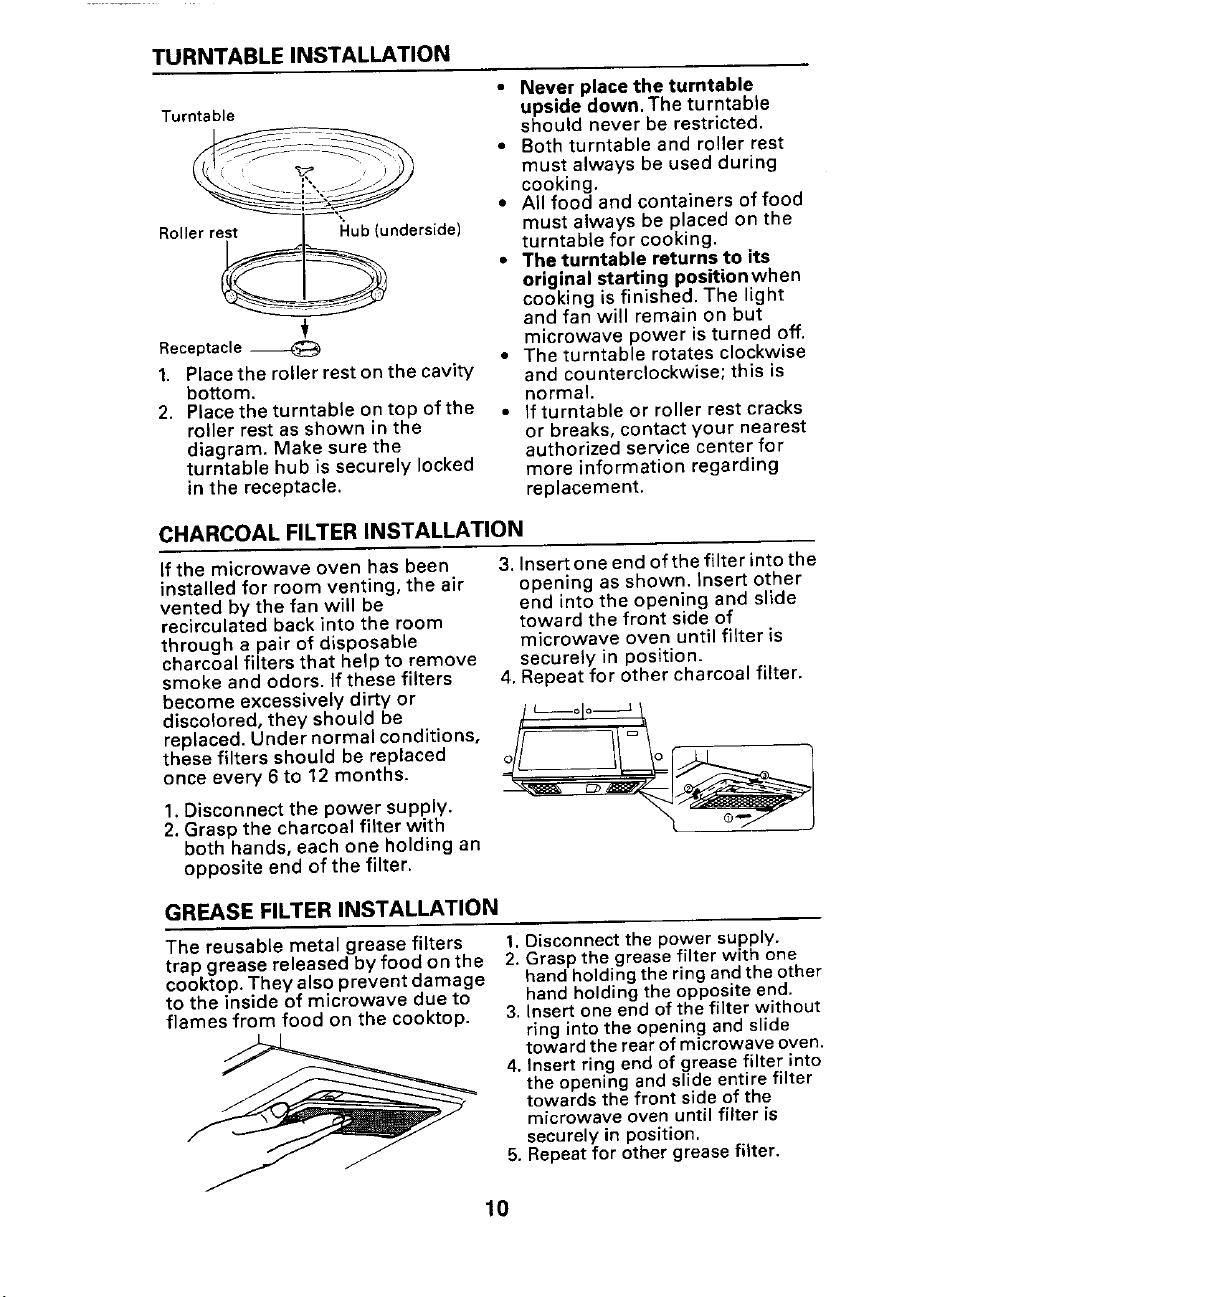
TURNTABLE INSTALLATION
Turntable upside down. The turntable
• • All food and containers of food
Roll rside) must always be placed on the
_-_ _. • Theturntable returns to its
Receptacle _ microwave power is turned off.
1. Place the roller rest on the cavity and counterclockwise; this is
bottom, normal.
2. Place the turntable on top of the • If turntable or roller rest cracks
roller rest as shown in the or breaks, contact your nearest
diagram. Make sure the authorized service center for
turntable hub is securely locked more information regarding
in the receptacle, replacement.
CHARCOAL FILTER INSTALLATION
If the microwave oven has been 3. Insert one end of the filter into the
installed for room venting, the air opening as shown, insert other
vented by the fan will be end into the opening and slide
recirculated back into the room toward the front side of
through a pair of disposable microwave oven until filter is
charcoal filters that help to remove securely in position.
smoke and odors. If these filters 4. Repeat for other charcoal filter.
become excessively dirty or
discolored, they should be __L___o[o _
these filters should be replaced
replaced. Under normal conditions, _/_ 1
once every 6 to 12 months.
• Never place the turntable
• Both turntable and roller rest
must always be used during
cooking.
should never be restricted.
original starting positionwhen
cooking is finished, The light
turntable for cooking.
and fan will remain on but
• The turntable rotates clockwise
1. Disconnect the power supply. -_,_a_ _ _'_-'__12.Grasp the charcoal filter with
both hands, each one holding an
opposite end of the filter.
GREASE FILTER INSTALLATION
The reusable metal grease filters 1,Disconnectthe powersupply.
trap grease released by food on the 2. Graspthe greasefilterwith one
cooktop. They also prevent damage handholdingthering andthe other
to the inside of microwave due to hand holdingthe oppositeend.
flames from food on the cooktop. 3, Insert oneend of the filter without
toward the rear of microwave oven.
4. Insert ring end of greasefilter into
the opening and slide entire filter
towards the front side of the
microwave oven until filter is
securely in position.
5. Repeatfor other grease filter.
ring into the opening and slide
10
Page 11
)PERATION
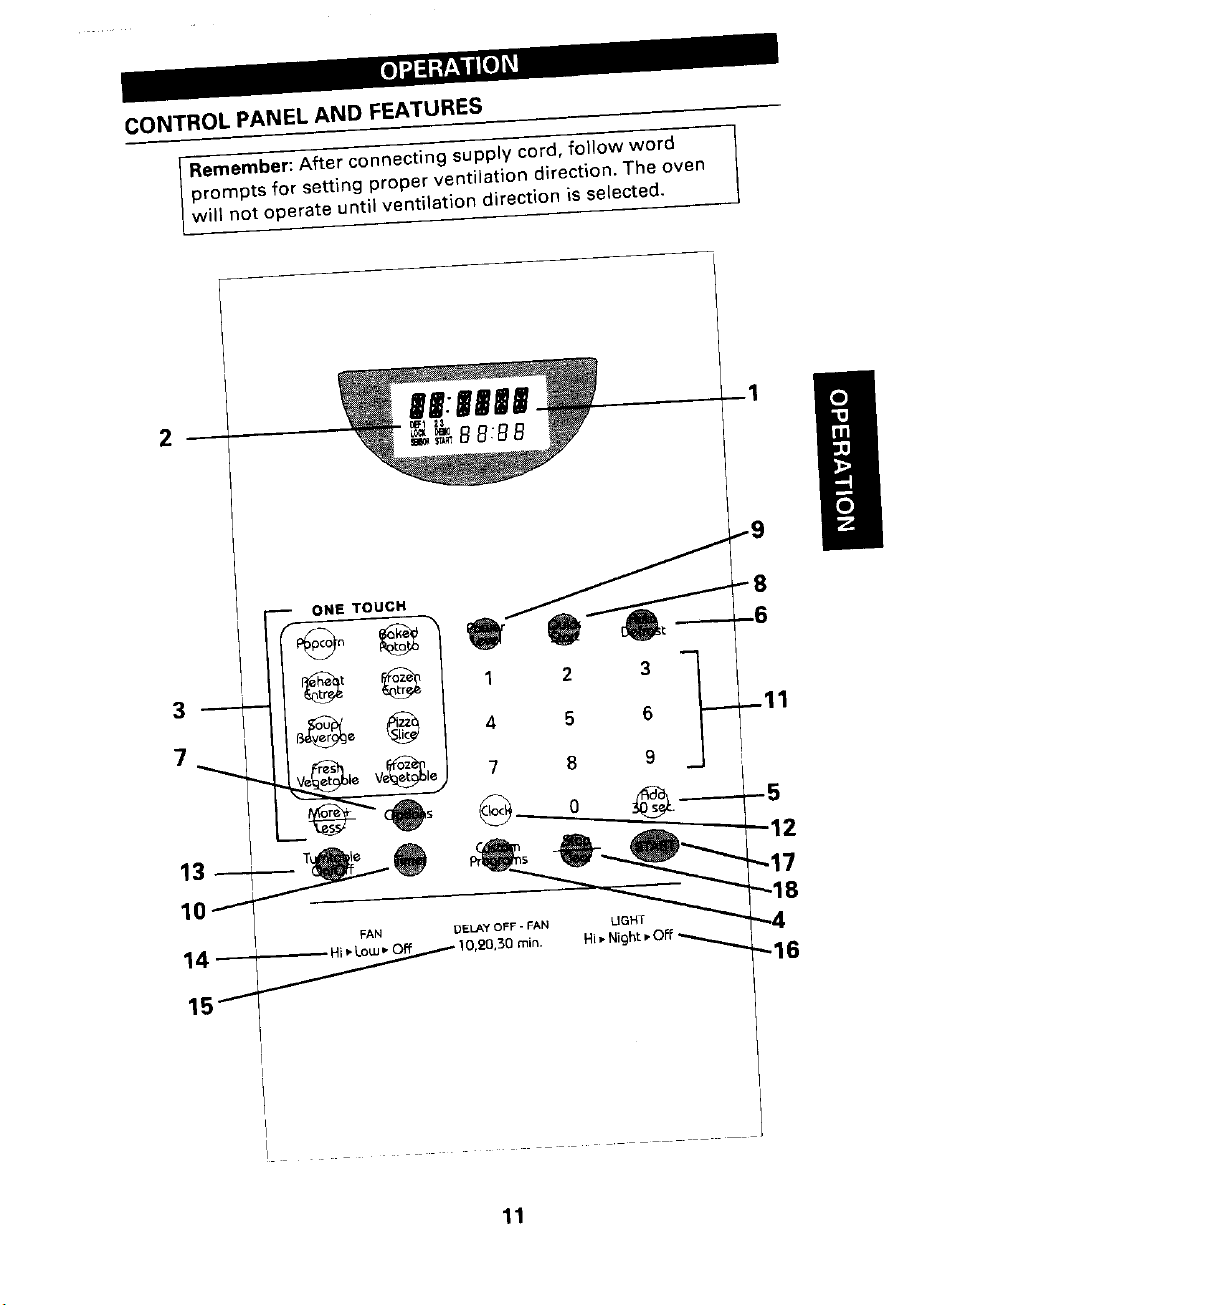
CONTROLPANELAND FEATURES
Remember: After connecting supply cord, follow word {
prompts for setting proper ventilation direction. The oven
will not operate until ventilation direction is selected.
ONETOUCN ._'_ -- 8
i
1
15"-"
11
Page 12

CONTROL PANEL AND FEATURES (CONT.)
(1) DisplsyWindow (7) Options(page 17)
Upper line: Countsdown Allows you to customize the
cooking time in minutes and/or following oven feature settings:
seconds. Shows clock time word prompt on/off, clockon/
when oven is not in use. The off, beep on/off, word speed,
word prompt scrolls to guide language selection, weight
you when setting the clock and selection and turbo exhaust for
at every operation stage, room venting.
Lower line: Shows power level (8) Quick Start (page 20)
when using Timed Cooking. Used with a number key, this
Shows Timer time when this feature allows for the
feature is selected, immediate start of one of 10
(2.] Indicators preset times from 30 seconds to
Indicators light or flash in the 9 minutes.
display window. (9) Power Level (page 14)
1/21 3: Lights to indicate (10)Timer (page 14)
current cooking stage.
DEF: Lights during Auto (11)Number keys
Defrost. (12)Clock (page 13)
LOCK:Lights to indicate the (13)Turntable On/Off (page 22)
Child Lock-Out feature is set, To turn turntable on or off.
START: Flashes to prompt you (14)FAN (page 22)
to press START. To increase or decrease fan
(3) One Touchkeypads(page 16) speed.
Popcorn
Reheat Entree (15)DELAY OFF-FAN (page 23)
Soup/Beverage To turn off fan automatically at
Fresh Vegetable your selected time.
Baked Potato (16)LIGHT (page 22)
Frozen Entree To turn the regular light or night
Pizza Site light on and off.
Frozen Vegetable (17)START
More/Less • To start cooking.
Adds or reduces cooking time -To set and cancel child lock-
for One Touch menu keypads, out.
Custom
(4)
(5) Add 30 sec. (page 19) pressed before cooking starts.
(6) Auto Defrost (page 18) Pressonce to stop oven during
Provides two options. Press cooking. Presstwice to stop
once to set Quick Defrost, twice and clear all entries.
to set Defrost.
Defrost: Provides more Beep Sound
thorough defrosting results. A beep sounds when a
Quick Defrost: Provides faster keypad ispressed,to confirm
defrosting results. This option your key entry.
isexcellent for thawing items
such as ground meat for use in
spaghetti sauce or for taco
meat,
Programs (page 21) (18)Stop/Clear
Clears all previous settings if
12
Page 13

SELECTING VENTILATION DIRECTION
After connecting power supply cord, you must select proper ventilation
direction. If your microwave oven has been installed for room venting, press
number 1. If your oven has been installed for roof or wall venting, press
number 2. This is to be sure that exhaust air is vented correctly,
Example: To set for room ventilation:
iStep Procedure KeypadI
I IPlug in. Press 1 to select room venting
1 Press Vent way
;Press any key except 1 and 2 to
2 fix the room venting direction,
Example: 3
Note: • If you do not select a ventilation direction, you can not use the oven.
1 Room Venting
2 Roofor Wa Vent ng
• When you reset the ventilation direction or after a power interruption,
unplug the oven from the AC outlet and plug it in again and then reset
the proper ventilation direction.
SETTING CLOCK
To set the correct time of day, follow the steps below.
Exam )le: To set 3:15:
Step i Procedure Keypad
1
Press Clock
2 day.
Press 3¢ 1 and 5 to enter time of ___
!Press Clock
3 The clock begins operation.
Note: • If the clock (or display) shows any abnormality, unplug the oven from
the AC outlet. Plug it in again and then reset the clock.
• When your oven is plugged in for the first time or after a power
interruption, reset the clock.
• This is a 12-hour clock.
• You can use the oven without setting the clock.
• The clock display can be turned off. See page 17 (Optional Settings) for
more details.
CHILD LOCK-OUT
The oven has a safety feature which prevents use by children. This feature
locks the operation of the oven until canceled.
To set:
;Step Procedure Keypad
Press START and hold for 4 seconds.
1 LOCK appears in the display.
To cancel:
iStep Procedure Keypad
Press START and hold for 4 seconds.
1 LOCK disappears from the display.
13
Page 14

TIMER
You can set and use the Timer function independently, or while a cooking
program is in progress.The Timer will be displayed on the lower line of
the display. Timer can be set from 0 to 99 minutes 99 seconds.
Example:To set timer for 3 minutes:
Step Procedure Keypad
1 PressTimer. _Timer _
2 Press3, 0 and 0 to set 3 minutes. _@@
3 Thetimer startscounting andoven will TAR
beep for 7 secondswhen time is up.
Note: • To clear a Timer setting, press Stop/Clear.If you are using both
Timer and cooking, press Timer. Timer on the lower line of the
display flashes for 5 seconds. Press STOP/CLEAR while Timer on
the lower line of display flashes. The Timer will stop but the oven
continues cooking to the end.
• To stop beeps of Timer, touch Timer.
• Timer will not beep if the oven beeps atthe same time to indicate
another oven operation (the end of a cooking, for example).
• If you do not enter a time for 10 seconds after step 1,the setting
is cleared with a beep.
• If cooking completes while you are setting the Timer, all settings
are cleared. Restart from step 1.
• If no key is touched for 5 seconds after the last key entry at step 2
above, the timer automatically starts.
TIMED COOKING AND POWER LEVEL
This basicmicrowave cooking method allows you to cook food for a
desired time. The oven can be programmed up to 99 minutes 99 seconds
of cooking. Inaddition to the P100(maximum) power level, you can select
different microwave power from 10 levels, P0 to Pg0(0-90% of total power
level).
Multi-stage Cooking:
You can program the oven for up to 3 stages of cooking in sequence. Each
stagecan be programmed with adifferent time setting and power level.To
program 2-stage or 3-stagecooking, go through steps 1-2 on page 15.
Steps 1-2 should be followed for each stage of cookingthat is
programmed. After the time and power levels have been entered for all
stages,press START. The oven will cook in accordancewith thetime and
power sequencesthat were entered.
Delay Start Cooking:
You candelay the time that you would like the cooking to start.
Cooking can bedelayed upto 99 minutes and 99 seconds,To delay
cooking, follow procedure for multistage cooking, but for stage1 use
power level P0.
14
Page 15

Example: To cook at power level P80 for 40 seconds:
Step Procedure Keypad
Enter 40 seconds by pressing 4 and 0.
Press Power Level until P80 appears in
the display.
Power level Press
P100(100%) once
P90(90%) twice
P80(80%) 3 times
P70(70%)Medium High 4 times (" Power _
P60(60%) 5times
P50(50%)Medium 6 times
P40(40%) 7times
P30(30%)MadLow/Defrost 8 times
P20(20%) 9times
P10(10%) 10times
P0 (0%) 11times
Press START. (_.START_
LLevel J
Note: • If no power level is entered, the power level will always be P100
POWER LEVEL SE'I-rlNG GUIDE
P100 • Cooking poultry,vegetables, P50 Medium
P80 • Reheating precooked or P30 Mad Low/Defrost
P70 Medium High P20 • Softening chocolate.
P60 • Cooking scrambled eggs. P10 • Softening cream cheese, butter.
(100%).
• Foods with high moisture content should be cooked on PIO0
power.
• To check the power level while Timer is operating, press Power
Level.
• To change power level during cooking, Press Power Level. Power
level on the lower line of the display flashes for 3 seconds. During
this time, press Power Level repeatedly until your desired power
level appears.
and most casseroles. • Cooking custards and pasta.
• Boiling water. • Cooking rump roast, ham, veal,
• Preheating a browning dish. lamb.
P90 • Reheating rice and pasta. P40 • Cooking less tender cuts of meet
in liquid or slow-cooking dishes.
• Completing the cooking cycle of
lesstender roasts.
prepared food quickly. • Completing the cooking cycleof
• Cooking fish. casseroles, stews, sauces.
• Time defrosting.
• Cooking cheesedishes. • Clarifying butter.
• Heating breads, rolls, pancakes,
tacos, tortillas, Frenchtoast.
• Baking cakes. • Keeping casseroleswarm.
15
Page 16

ONE TOUCH COOKING
One Touch Cooking allows you to reheat or cook food automatically
without entering power level ortime. Choosethe appropriate keypad and
press 1 - 4times, depending on the serving sizeor weight, and press
START.
Example:To heat 2 servings of soup:
Step Procedure Keypad
1
PressSoup/Beverage twice.
2 The time counts down in the display. STAR
PressSTART. (T)
One Touch Cooking Serving Sizes:
FoodKeypad
once 2times 3times 4 times
PressFoodKeypad
REHEATENTREE 1serving 2servings 3 servings
FROZENENTREE 6oz 9oz 15oz 20oz
SOUP/BEVERAGE 1 serving 2 servings 3 servings
PIZZASLICE
POPCORN 3.5oz 3.0oz 1.75oz
BAKEDPOTATO 1 potato 2 potatoes 3potatoes
FRESHVEGETABLE 4 oz 8 oz 12oz
FROZENVEGETABLE 5 oz 10oz 16oz
MORE/LESS TIME ADJUSTMENT
The More +/Less - keypad allows preset fine adjustments in One Touch
microwaving by either increasing or decreasing the preprogrammed
cookingtime.
You can changethe cookingtime by pressingMore/Less key once or
twice.
To increase the time by 4-20%, press More/Less once, and press
START.
To decrease the time by 8-20%, pressMore/Less twice, and press
START.
Note: Choosethe serving size/weight closestto the actual weight. Example
- for an 8 oz. entreeto reheat, pressthefood keypadtwice (for a 9 oz.
serving) and usethe more/less keypadto reducethe cookingtime for
your 8 oz. serving.
(6oz) (9oz) (12oz)
(8 oz) (16oz) (24oz)
1slice 2slices 3 slices
(3 oz) (6 oz) (9 oz)
(6oz) (12oz) (18oz)
16
Page 17

OPTIONALSETTINGS
The Options key allows you to customize oven feature settings as shown
below.:
Optional Features PressOptions Press number pads to
Word Prompt on/off 1-ON
The Word Prompt may be once 2-OFF
turned on or off*. *Promptwordsmaybe
Clockon/off 1-ON
The clock displaycan be twice 2-OFF
turned off and back on.
Beep on/off 1-ON
The beep sound may be 3times 2-OFF
turned off and backon.
Word Speed Setting 1-HIGH
The word speed can be 4times 2-MEDIUM (default setting)
changed to your preference. 3-LOW
Language Selection 1-ENGLISH (default setting)
You can serectfrom English, 5 times 2-ESPANOL
Spanish or French for display. 3-FRAN(_AIS
Weight Selection 1-LB(default setting)
The weight selection can be 6 times 2-KG
changed to your preference.
Turbo Exhaust 1-YES (Exhaustfan operates
To increase air speed of at highest speed.)
exhaust fan for room 2-NO (Exhaustfan speedwill
ventilation. This option only 7 times not change.)
appears on display when
Room Venting is selected.
Example: To select Spanish for Word Prompt display:
Step Procedure Keypad
Press the Options key 5 times until
1 1-ENGLISH ption
language choice prompt appears: _O s_
2-ESPANOL
3-FRANCAIS
Press 2 to select Spanish.
pad select
shortened.
Note: When first plugged in, the oven will automatically display English in
the Word Prompt display.
17
Page 18

AUTO DEFROST
Auto Defrostallowsyou toeasily defrost food two ways. Power levels and
times are automatically determined when the food weight isentered.
PressAuto Defrosttwice for DEFROST.PressAuto Defrostonce for QUICK
DEFROST.
DEFROST:Usefor morethorough defrostingof larger,densefrozenfoods,
Idealfor itemssuchas roasts,whole chickenand steak,
QUICK DEFROST:Use to assistin the separation of frozen pieces of
chicken, ground meats, or fish that need preparation prior to cooking.
Excellentfor defrostingground meatfor usein spaghettisauceortaco meat.
Example:To thoroughly defrosta 2.5 Ib whole chicken:
Step Procedure Keypad
PressAuto Defrosttwice to select
Defrostcourse.
1 Press Defrostcourse I DAe_rt°st)
2 Weight must be converted to pounds
3 Total defrosttime appearsin the START
Defrosting Techniques:
• Remove freezer paper, plastic wrap or foil wrap. Place food in a
microwave-safe dish.
• To prevent thin parts and edges from becoming too warm.and cooking
beforecenter of food is defrosted,shieldwith small pieces of aluminum
foil,
• Becausesome foods will still be icy inthe center, it isnecessary to have
standing time after defrosting the food in the oven. Foodshould be
taken out of the oven to complete defrosting. A longer standingtime
might be required for denserfoods such as roasts.
• Timed Defrosting: Use power level P30 (Medium Low). For most frozen
foods, allow approximately 5 minutes per pound. To speed up the
defrosting of densefoods over 1 Ib, you may start on P100for 2
minutes. Then reduce to the power level P30 and enter remaining time,
once QUICKDEFROST
twice DEFROST
Enter the weight of food.
and tenths (0.1)ofa pound. _
Example: 2 lb. 8 oz. =2.5 Ibs
ConversionChart:
Ounces Tenthsofa Pound
7 -2 O.1
3-4 0.2
5 0.3
6- 7 0.4
8 0.5
9 - 10 0.6
11- 12 0.7
13 0.8
14- 15 0.9
PressSTART. _
display,
18
Page 19

Note: • Maximum weight for defrosting is 5.9 Ibs. If weight is entered at
more than 5.9 Ibs, a beep sounds to alert you to enter correct
weight.
• If START is pressed without entering aweight, the control will
default to 1.0 lb.
• Beeptonesounds5timesdudngthedefrostlngcycleto signalthatfood
shouldberearrangedto improvedefrostingperformance.After turning
or rearranging, close door and press START. The oven continues
the defrosting cycle to the end if you do not open the door.
• Food should be removed from styrofoam packages before
defrosting.
DEFROSTING CHART
Item During Defrosting
GroundMeat (Beef,PouLtry) Turnover•Removedefrostedportions. _1
Steaks/Chops/RibsRoastsWholeTurnover andrearrange.Shieldwarm or
Chicken/MeatPiecessuchas defrostedportions with small piecesof
ChickenPieces,Liver,Stew aluminumfoil. Breakapartpiecesand remove
Meat,Bacon,Fishor Seafood anymeat,poultry, or fishthat is almost
thawed.
Someicecrystals should remain.Rinse
chickenpieces,Cornishhensandfish fillets in
coldwater to separateafter defrosting.
ADD 30 SECONDS
This feature provides 2 functions:
• Allows you to cookfor only 30 seconds on P100 (maximum power),
• Allows you to extend a cooking time by 30 seconds without pressing
START, You can repeat this option up to 3 times during Timed Cooking.
Example:To set 30-second cooking:
Step Procedure Keypad
U
1 PressAdd 30sec. once.
PressSTART.
2Thedisplayshowstimecountdown. (START)
Note: This feature cannot be used during One Touch Cooking or Auto
Defrost by weight.
19
Page 20

QUICK START COOKING
Atime-savingfeature,thissimplifiedcontrolletsyouquicklysetandstart
microwave cooking without pressing START.
Example: To set Quick Start cooking for 2 minutes:
Step Procedure Keypad
1 Press Quick Start.
Press 2.
The display shows time counting
down.
2
Press Cooking time
O 30 seconds
1- 9 1- 9 minutes
Note:Thisfeatureonly cooksat highestpowerlevel (P100).
QUICK START REHEATING AND COOKING CHART
Reheating Amount Time Special Notes
Meat 2 cups 3 - 4 rain. Place in microwave-safe dish.
Chili, stews Cover. Stir halfway through
cooking time.
Hamburgers, 1 serving 1/2- 1 rain. Place on microwave-safe plate.
meat loaf slices 2servings 1 - 2 rain. Coverwith paper towel.
Poultry 2 1 - 2 rain. Heat on microwave-safe plate,
Chicken pieces 4 2 - 3 rain. Cover with wax paper. If fried,
Chicken, turkey, 3 - 5oz 1 - 2 min. Heat on microwave-safe plate.
sliced Coverwith wax paper,
Seafood 6 1/2oz 3- 5 rain. Pierce pouch and place on
Shrimp, crab, or microwave-safe plate.
scallopsin Flex pouchto mix halfway
sauce, frozen through cooking time.
Co()ked dce, 1 cup (250 mL) 1 - 2 min. Heat in microwave-safe
pasta 2cups (500 mL) 2 - 3 rain. casserole, covered with plastic
Canned 8 oz 1 - 2 rain Use microwave-safe casserole,
vegetables 15 oz 2 - 3 min. covered. Stir once.
Turnover once,
cover with paper towel.
wrap.
Cooking Amount Time Special Notes
Mashed 4 servings 3 - 5 rain. Follow package directions.
potatoes Reduceliquid by 1 tbsp (15 mL),
instant
Pudding and 31/4oz 4 - 6 rain. Follow package directions.
piefilling mix Stir once.
Cereals 1/4cup (50 mL) 1- 2 rain. Add 3/4 CUp(175 mL) of water.
Cream of Wheat Cookuncovered. Stir once. Let
(regular) stand for 1 minute.
20
Page 21

CUSTOM PROGRAMS
Forfood or recipesprepared most often, you can easily customize a
program using your own sequences or cooking stages (power levels/
cookingtimes). You can set 3 different custom programs (No. 1, No. 2 and
No. 3). Each program may have 1 - 3 cookingstages.
Forexample, you frequently cook 1 cup long-grain rice,For Stage 1you
use 100% power for 5 minutes to bring water to a boil. You then add rice,
salt and butterand for Stage 2 you use 30% power for 20 minutes to cook
rice, To set these 2cooking sequences in the first Custom Program (No. 1):
Stage 1 for 5 minutes at P100 (100% _ower)
Stage 2 for 20 minutes at P30 (30% =ower)
PressCustomProgramsonce.
1 No.1 appears in the display.
Press5, 0and 0 to enter 5 minutes.
3 PressPower Levelonce to selectPlO0.
Press2, 0, 0and 0to enter 20 minutes.
4
2 _@@ /
PressPowerLevel repeatedlyuntil P30
5 appearsin display.
PressCustomProgramsonce.
6 The CustomProgram No,1 is now _DCus!om_
programmed into the microwave
memory.
To use a Custom Program:
Onceprogrammingiscompleted,you
cancall up any of your Custom
1 Programs(No. 1,No. 2 or No. 3) by
pressing theCustom Programskeypad
once, twice or 3 times.
2 PressSTART (START_
To delete a Custom Program:
Callup theCustomPrograms (No. 1,
1 No. 2or No. 3)you want to delete by
pressingCustomPrograms.
2 Presso andthen Cust°m Pr°grams" __
Note: • For custom programming, only Timed Cooking can be used.
• Formore details, see page 14for multi-stage cooking.
21
Page 22

TURNTABLE SETTING
The turntable plays an important part in even heat distribution in your
microwave oven. The turntable, however, may be turned off to
accommodate large dishes. Press Turntable On/Off once to turn turntable
off and twice to turn turntable back on. It is better to keep the turntable on
for optimum results.
Press Turntable setting
once OFF
2 times ON
Note: • Even if you change the turntable setting to off mode, your
turntable will turn back ON when cooking is over.
• This feature can only be set with Timed Cooking. You cannot turn
off the turntable when using One Touch Cooking or Auto Defrost
by weight.
• Each time you press Turntable On/Off, the setting will change to
either ON or OFF.
• When your turntable is selected to off mode, rotate or rearrange
the dish halfway through cooking for best results.
FAN SPEED CONTROL
This feature allows you to vent air from around the cooktop. Press once to
set HIGH speed, 2 times to set LOW speed or 3 times to turn the fan off.
Press Fan speed
once HIGH
2 times LOW
3 times OFF
Automatic Fan:
When the oven senses too much heat rising from the cooktop below it, the
fan automatically turns on at LOW speed to protect the microwave oven.
The fan automatically turns off when the internal parts are cool and back
to a safe level. When the fan is in automatic operation,')(" flashes in the
display.
LIGHT
There are two light settings: regular and night light.
Press Cooktop Light
once Regular Light
2 times Night Light
3 times OFF
Note: The light turns off automatically after 3 hours.
22
Page 23

DELAY OFF-FAN
Delay off allows you to turn the fan off automatically at a selectedtime up
to 30 minutes, After you haveselected the time, delay offtime disappears
from the display,
Press Delayofftime
once 10minutes
2 times 20minutes
3 times 30minutes
Note: • To check remaining time, press DELAY OFF-FAN The remaining
time appears in the display for 3 seconds.
• To change the remaining time, pressDELAY OFF-FANwhile the
display shows remaining delay off time. You may change to the
original 10, 20 or 30 minute choiceby pressing 1-3 times.
• If fan is not operating then pressDELAY OFF-FAN, fan will
operate at HIGH speed.
• When automatic fan is operating, the fan may not turn off
automatically until the internal parts are cool and backto a safe
temperature level.
• To clear delay off mode or to change fan speed during delay off
mode, simply press FAN key 1- 3timesto selectyour desired
setting.
23
Page 24

:OOKING GUIDE
COOKINGPRINCIPLESAND TECHNIQUES
The advantages of microwave Reheating: Cooked food reheats
cooking are speed and efficiency, extremely well by using a low level
For warming, heating, and of microwave energy. Place denser
defrosting, nothing compares. Here foods near the outer edge of the
are a few tips that will make dish when reheating.
microwaving easier and more Covering:Most foods will cook and
enjoyable, reheat better when covered. Pierce
Microwave Cooking Principles plasticwrap to vent steam.
Because microwave cooking Stirring: Stir foods to help cook/
requires only one-quarter to one- reheat more quickly and evenly.
third the time of conventional TurningOver: To promote even
cooking, cooking principles cooking, turn larger solid items
become even more important, such as roasts or baked potatoes
Quantity time.
In microwave cooking, the cooking Shielding: Use small, smooth strips
time is dependent on the amount of of aluminum foil to prevent
food in the oven. If you double the corners, thin or bony areas from
recipe, plan on doubling the overcooking.
cooking time. Standing Time: Foods continue
Density cooking even after removal from
Dense foods, such as potatoes, the oven. Standing time is
need more cooking time, as they
take longer for microwave energy complete cookingdefrosting.
to penetrate and for the heat tobe Converting Recipes
conducted through them. Microwave recipes will likely call for
Shape and Size lessliquid and cooking time.
Cut food into uniform shapes and Microwave Thermometers
sizesfor even cooking in the Amicrowave-safethermometercan
microwave. When cooking irregular be used to achieve the best results.
shapes (suchas chicken pieces), Insert the thermometer carefully
place the thicker parts to the outer and properly into the food.
edge of the dish.
Moisture, Sugar and Fat The guide belowgives suggested
Food high in moisture, sugar or fat thermometerreadingsformeatand
cook faster. Add a minimum of poultry. Keep in mind that standing
liquid to moisten foods. Excessive time is essential for most food to
amounts of water slow cooking, reach its proper temperature.
Starting Temperature
Frozen or refrigerated foods take standing time.
longer to microwave than food at
room temperature. Guideto InternalTemperatures
Delicate Ingredients 145°F(63°C). Rarebeef
Delicate foods such as eggs, 150°F(66°C). Vegetables,hotdrinks,
cheese,mayonnaise, etc., cook very soups,casseroles
quickly,andshould be watched 160°F(71°C). Mediumbeef,lamb,
carefully, veal,pork
Microwave Cooking Techniques 170oF(77oC).Well-donebeef,lamb,
Arranging:Arrange food in a pork
circularpattern, with denser,thicker 170°F(77°C). Wholefish
items at the edge of the dish. 185°F(85°C). Well-done,
Piercing: Pierce the membrane of poultrypiecesor
foods such aseggs, oysters, snails, roastedbird
sausages, livers, clams and whole
vegetables, so they do not burst.
Pierce poucheswhen using cook-in-
the-bag food items.
over halfway through the cooking
necessary to allow foods to
Internal temperatures should be
measured after 5-10 minutes of
24
Page 25

COOKING WITH METAL RACK
The meta( rackgivesyou extra spacewhen cooking more than one
dishat the same time. Set the metal rackonthe hooks(ocatedon the
inside walls of the oven.
NOTE:The Turntable may be turned offto accommodate large dishes,See
Turntable setting on page 22.
Metal Rack Installation
1, Placethe Metal Rackin guides onthe sidewall of oven caviWas shown,
2. Place food into the oven following instructions below,
3. Set the desired cooking time and power level.
IL
¢
Tipsfor food placement:
• Ptace deticate quick cooking food on the bottom tray and tonger
cooking food on the metal rack.
• Placetwo foods with similar cookingtimes on the metal rack and
one with a shorter cooking time on the bottom tray.
• If all foods require the same cooking time, reversethe location of
dishes in the oven halfway through cooking time.
• Rotatethe dishes, rearrange or stirfood halfway through cooking
for best results.
• Use plastic wrap to cover foods.
• Do not store the metal rack in the oven.
• Do not letfood container or racktouch the top of the oven cavity.
• Do not use browning dish or metal container when using this
rack,
• Only Timed Cookingcan be usedwhen cooking with metal rack.
Do not use rackfor One Touchcooking or defrosting.
25
Page 26

ONE TOUCH COOKING
COOKING/REHEATING TIPS
REHEAT ENTREE 3) Never usea brown paper bag for
• Special packaging to "crisp" popping corn,
foodssuch as pizzas,Frenchfries 4) After popping, open bag
and pocket-type sandwiches carefully as popcorn and steam
should becooked according to are extremely hot.
the manufacturer's instructions. BAKEDPOTATO
• If entree contains a sauce that • Arrange multiple potatoes in a
may bubble over (such as pot circular pattern with heavier
pies or macaroni and cheese), ends pointing toward the outer
place container on a microwave- edge of the turntable.
safe plate to catch spills. • Do not place potato in the center
SOUP/BEVERAGE of oven when cooking.
• When cooking canned soups, FRESHVEGETABLES
remove soup from can andplace • Placein a bowl or dish. Add
in a microwave-safe dish. Add 1tablespoon water per serving.
milk or water asdirected on can. Cover.
Cover. • Weight shown is for washed,
POPCORN prepared vegetables.
• Do not usethis featu reif popcorn FROZEN VEGETABLES
bag size is not 3.5 oz, 3.0 oz or
1.75 oz. Remove frozenvegetablesfrom
• Do not leave the oven package. Piercethe pouch and
unattended when popping place in a microwave-safe
popcorn, casserole or dish.
• Supervise children closely.
Caution:
1) Pop only one bag at a time.
2) Do not reheat unpopped kernels
or reuse bag. Overcooking can
result in an oven fire.
One Touch Cooking/Reheating Guide
• Frozenvegetablesin a pouch:
Item/Amount PressKeypad SpecialNotes Starting
Casserole/entree, Coverwith plasticwrapor
lasagna, casserolelid.Stirafterreheating.
macaroniand Foodsthat cannotbestirred(Ex.
cheeseorother lasagna)shouldbe allowedto
similartypes, standcoveredfora few minutes
REHEAT afterreheating, Refrig-
Plateoffood, 1-3 servings)Arrangelessdensefoodsinthe
pastain sauce, centerof plate.To reheat2to 3
meatloafdinner, servings,placeonlarge plate.
turkeydinneror Coverwith plasticwrap.Allow to
othersimilar standcoveredfore fewminutes
types, after reheating.
ENTREE erated.
Temp.
26
Page 27

Item/Amount PressKeypad Special Notes Starting
Frozen entrees, Follow package directions for
such as lasagna, FROZEN removing or venting cover,
macaroni and ENTREE piercing pouch, replacing foil, Frozen
cheese or other (6, 9, 15,20 oz) covering with plastic wrap, etc.
similar types.
Coffee/Tea No cover. Stir after heating.
1serving (8 oz)
SOUP/
Soup BEVERAGE Cover. Stir after heating. Room/
1serving (8 oz) (1- 3 servings)I Refridge.
Milk No cover. Stir after heating.
1serving (8 oz) For hot chocolate, etc.
Cooked pizza Place on paper towel or paper
1slice (3 oz) plate or leave in uncovered
PIZZA SLICE Room/
(1 - 3 slices) CAUTION: Becareful when eating Refridge.
Popcorn POPCORN Unfold the bag and placein oven Room
(3.5 oz, according to directions.
3.0 oz,
1.75oz)
Potatoes, Pierce skin with fork. Place on a Room
white, baking BAKED paper towel. Turn over halfway
1potato (6 oz) POTATO through cooking.
(1 - 3potatoes) Let stand 3 -5 minutes after
Lcardboard box, point toward
I center.
pizza.The pizzasurfaceand sauce
can be very hot.
cooking.
Temp.
Artichokes, I Wash. Prepare and cut into slices,
beans, broccoli, I cubes, wedges, or julienne strips.
Brussel sprouts, Place in a microwave-safe bowl
cabbage, carrots, or dish.
corn, cauliflower, FRESH Add I tablespoon water per Room/
eggplant, VEGETABLES serving.
mushrooms, (4, 8, 12 oz) Cover. Refridge.
onion, okra, peas, After cooking, let vegetables
spinach, squash, stand covered, for approximately
zucchini, or a 2 minutes.
mixture of these.
Broccoli, Brussels Follow package directions for Frozen
sprouts, carrots, adding water, piercing pouch,
corn, cauliflower, FROZEN cooking in a dish, venting
green beans, VEGETABLES! package, etc.
peas, spinach, or (5, 10, 16 oz)
a mixture of
these.
27
Page 28

TIMED COOKING - MEATS, POULTRY AND FISH
PREPARATION CHECKING DONENESS
• Use a microwave-safe dish. Beef:The color of the meat, on the
• Defrostfrozen food completely, inside, indicates doneness. Rare
• Wash poultry and fish in cool roast should be red inside. Medium
water, is pink and gray indicates well
• Arrange small items in a single done.
layer in dish, avoid overlapping Pork:Cooked pork meat should be
edges of food. gray with clear juice.
• Placethick sections toward edge Poultry:Juices should beclear
of the dish. yellow when cooked. Legs should
• Use a rack in the dish to elevate move freely.
meat out of the juices. FishandSeafood:Should be opaque
• Use spices and seasonings as in color and flake easily.
desired.
• Add salt after cooking, if To check internal temperature of
necessary, various meats and poultry, use a
• Aluminum foil can be used to microwave or conventional meat
cover thin parts of meat or thermometer after removing meat
poultry wings and legs to from the oven. Insert the
prevent overcooking, thermometer, avoiding bone or fat.
• Foil should be applied toward the Lower temperatures are found in
end of cooking time. the center of the roast or in the
• Place meat fat side down to start muscle close to a large bone, Never
cooking. Turn fat side up half usea conventionalmeat
way through cooking time. thermometerinthe microwaveoven.
COOKING (Seepg. 24).
• Usewax paper or plasticwrap to
stop splattering. Return undercooked food to oven
• Turn over or rearrange meat, for a short period of time at the
poultry and fish halfway through recommended power level. Let
cooking time. Cover roasts and whole poultry
stand as recommended in chart,
during stand time.
Food Power Time Time
Beef Placeina shallowdish
4 ozeach and coverlooselywith
Hamburgers, wax paper.Turnover
refrigerated 2 P100 2 - 4rain. 2 rain. halfwaythrough
4 P10O 4 - 6 rain. 2 rain. cooking.
Hamburgers,frozen
2 P100 4 -6 rain. 3rain. Defrostfrozenpatties
4 P100 7 -9 rain. 3 min, just enoughto easily
Roasts,tender Coverwith wax paper.
lib P50 10-13rain. 10-15min, Shield halfway through
Cooking Standing SpecialNotes
separate.Turn over
halfwaythrough
cooking.
cooking andturn roast
overif necessary.Stand
tentedwith foil.
28
Page 29

Food Power Cooking Standing
Beef Arrange in dish. Cover
Meat loaf, 11/2Ib P50 15 -20 rain. 5 rain. with wax paper.
Pod( Place in a shallow dish.
Chops, loin 1/2inch Cover loosely with wax
thick, 7 oz each 1 P1OO 3- 5 min. 2 min. paper.
2 P100 6 - 8 rain. 3 rain. Turn over halfway
4 P100 9- 11 min. 3 rain. through cooking.
Pork roast, Cover with wax paper.
1 Ib P50 12-15rain. 10-15rain. Shield halfway through
Ham, slice 1 inch Coverwith wax paper.
thick, 1 Ib P100 7 - 9 min. 5 min. Turn over halfway
Sausage links, Score or pierce before
Wieners, fresh cooking.
1- 2 oz each 2 P1O0 1/2- 2 rain. 1 rain. Cover with wax paper.
4 P10O 1- 3 rain. 1 rain. Turn over once.
Bacon, slices Cook on bacon rack and
2 P100 11/2-2 min. 1rain. cover with a paper
4 P100 21/2- 4 min. 1 rain. towel, or place bacon
Time Time Special Notes
cooking and turn roast
over if necessary.
Approx. temp. after
standing: 170°F (77°C)*
through cooking.
between two sheets of
paper towel on dish. Do
not turn bacon over,
Lamb Cover loosely with wax
Chops, shoulder paper.
1/2inch thick 1 P100 2- 4 min. 2 rain.
Poultry Place breast-side down
Chickens, whole, on a roasting rack in a
up to 4 Ib dish. Cover with plastic
I Ib P100 6 - 9 min. 10 rain. wrap or wax paper.
Cornish hens Turn over halfway
1Ib P100 5 - 8 min. 10 rain. through cooking. Stand
• Check with conventional thermometer.
2 PI0O 4- 6 rain. 5 rain.
I
tented with foil. When
cooked, internal
temperature should be
185°F(85°C) and juices
should run clear.
29
Page 30

Food Power Cooking Standing Special Notes
Poultry Arrange skin-side up
Chicken pieces, in a baking dish, with
up to 2 Ib meatier portions
1 Ib PlOO 5-8min. l 5rain. towards edge of dish.
Fishand Seafood
Fish fillets, 3/4 Ib PIO0 4 - 6 rain. 3 rain. Arrange in a single
Fish steaks 2, 6 oz each P50 6- 9 rain. 5 rain. layer in dish.
Scallops 1Ib P70 4- 7 min. 3 min. Cover with wax paper.
Shrimp, medium size, PTO 4- 7 rain. 3 rain. Rearrange or stir
shelled and cleaned shrimp or scallops
1 Ib halfway through
Whole fish, PIO0 7- 10 rain. 5 rain. cooking.
stuffed or unstuffed
11/2to 13/4Ib
Time Time
Turn over and
rearrange halfway
through cooking.
Cover with plastic
wrap or lid.
3O
Page 31

MAINTENANCE
TROUBLESHOOTING
Check your problem by using the chart below and try the solutions for
each problem. If the microwave oven still does not work properly, contact
the nearest authorized service center.
TROUBLE POSSIBLE CAUSE POSSIBLE REMEDY
Oven will not start. • Electrical cord for oven is • Plug into the outlet.
Arcing or sparking. • Materials to be avoided in • Check materials and
Food is not cooked, • Materials to be avoided in ° Use microwave-safe
defrosted enough or microwave oven are used. cookware only. (page 8)
overcooked. • Oven ventilation ports are ° Check to see that oven
LOCK appears on • The control is locked. • Press START and hold
display, for 4 seconds to unlock
The oven is not • You may be using Timer. • PressSTOP/CLEAR to
cooking even though cancel the Timer.
the display shows • The door is not securely • Open and close the door.
time counting down. closed.
The turntable will not • You have turned the • SetTURNTABLE ON/OFF
rotate, turntable off. key to on. (page 22)
You do not hear any • You have turned off beep • Reset the setting to beep
tone when keypad is sound, sound on. See the
pressed or end-of- optional settings on
cooking sound, page 17.
not plugged in.
• Door is open. • Close the door and try
• A fuse in your home may be •Rep ace fuse or contact a
blown, qualified electrician.
• The circuit breaker tripped. • Resetcircuit breaker.
• Plug is not inserted into wall ° Fully insert the 3-prong
outlet properly, plug into wall outlet.
microwave oven such as utensils you can use in
metal or foil are used. microwave oven.
• The oven is operated when • Do not operate with oven
empty, empty.
• Spilled food remains in the • Clean cavity with wet
cavity, towel.
restricted, ventilation ports are not
• The cooking time or power • Check the chart.
level is not at recommended (page 15)
setting.
• Food is not turned or stirred. • Turn or stir food.
• Theturntable isnot correctly ° Check that the turntable
in place, is correctly placed on the
again.
• You did not press
START.
(page 8)
restricted.
control panel. (page 13)
receptacle, See turntable
installation on page 10.
31
Page 32

QUESTIONS AND ANSWERS
Q. When the microwave oven is plugged into a wall outlet for the first
time, it does not work properly. What is wrong?
A. The microcomputer used in the microwave oven control may
temporarily become scrambled and fail to function as programmed.
Unplug the oven from thewall outlet and then plug it back inagain. The
microcomputer should then automatically resetfor proper functioning.
Q. Why isthere noise coming from the turntable when the microwave
oven is turned on?
A. This noiseoccurs when the turntable roller restand cavity bottom are
dirty. Clean the turntable roller rest and cavity bottom. Frequent
cleaning of these parts should eliminate or reduce the noise.
O. Why is there noise coming from the microwave oven when reducing
power?
A. When cooking with a power other than P100,the oven cycles on and off
to obtain the lower power level. The clicking noise can be heard when
the oven cycles on and off. This is normal.
Q. Why is there steam coming out of the air exhaust vent?
A. Steam is produced during cooking. The microwave oven has been
made to vent this steam out of the air exhaust vent.
Q. What is wrong when the microwave oven interior light will not glow?
A. There may be several reasons why the interior light will not glow. The
light bulb may have burned out or START may not have been pressed.
Replace the light bulb or press START. Never replace the light bulb by
yourself. Contact an Authorized Service Center.
Q. Why do eggs sometimes pop?
A. The egg yolk may pop because of steam build-up inside the membrane.
Pierce the membrane with a toothpick before cooking it. Never
microwave eggs in the shell since they may explode.
Q. How are boil-overs avoided?
A. Use a larger utensilthan usual for cooking or usea lower power level.
If you open the microwave oven door or touch STOP/CLEAR, the food
will stop boiling.
Q. Why does the beep tone sound when a pad on the control panel is
pressed?
A. The beep tone sounds to assure that the setting is being properly
entered. However, you can turn off the beep tone. See optional settings
on page 17.
Q. Why does the exhaust fan start when the FAN keypad is not pressed?
A. High temperature air from the heating surface below microwave oven
can cause an overheating condition that may damage the oven. The
exhaust fan will start automatically to cool off the microwave oven and
prevent damage to it.
Q. How can you be sure your microwave oven is turned off when the
exhaust fan is operating?
A. When you are operating the microwave, the sound of the exhaust fan
may be louder than the microwave itself. This could possibly prevent
you from knowin.g for sure if the microwave oven is turned off. The
microwave oven is designed to automatically turn off when door is
open.
If for some reason you are not sure the microwave oven is turned off,
turn the exhaust fan off to eliminate the sound and check to see if the
microwave oven is operating. If you are still not satisfied, have the
microwave oven checked.
32
Page 33

CARE AND CLEANING
Wipe the microwave oven inside and outside with a soft cloth and a mild
detergent solution. Then rinse and wipe dry. This should be done on a
weekly basis,more often if needed. Never usecleaning powders or rough
pads.Excessive oilsplatters onthe top of the interior cavity will be difficult
to remove if left for many days.Wipe splatters with a wet paper towel,
especially after cooking chicken or bacon.
Stubborn soils: Boil a cup of water in the oven for 2 minutes. Steam will
soften the soil. To get rid ofodors insidethe oven, boil a cup ofwater with
some lemon juice in it.
REMOVABLEPARTS
The following partsmay beremoved asdescribed.They should bewashed
in warm (not hot) water with a mild detergent and a soft cloth. Once they
are clean, rinse them well and dry with a soft cloth. Never use cleaning
powders, steel wool or rough pads.
• The turntable may be cleaned in the sink. Be careful notto chip or
scratch the edges as this may cause the turntable to break during use.
It may be washed in the dishwasher.
• The turntable roller rest should be cleaned regularly. It may be washed
in the dishwasher.
The metal grease filters should be cleaned once a month or as needed.
Soak grease filters in hot water and a mild detergent. Scrub to remove
embedded dirt and grease. Rinse well and shake to dry. Do not use
ammonia, corrosive cleaning agents such as lye-based oven cleaner. Do
not place in a dishwasher. The filter will turn black or could be damaged.
33
Page 34

SPECIALCARE
For best performance and safety, the inner door panel and the oven front
frame should befree of food or grease buildup. Clean them often with a
mild detergent. Then rinse and wipe dry. Never use cleaning powders or
abrasive pads.
STAINLESSSTEEL/BRUSHED CHROME (SELECTMODELS):
• DO NOT USE ANY CLEANING PRODUCT CONTAINING CHLORINE
BLEACH.
• ALWAYSWIPE WITH THE GRAIN WHEN CLEANING.
• TO PREVENT SCRATCHING,DO NOT USE ABRASIVE OR CAUSTIC
AGENTS.
• DailyCleaning/Light Soil -- Wipe with oneof the following - soapy water,
white vinegar/water solution, Formula 409 Glass and Surface Cleaner*
or a similar multi-surface cleaner - using a sponge or soft cloth. Rinse
and dry. To polish and help prevent fingerprints, follow with Stainless
Steel Magic Spray (Part No.20000008).**
• Moderate/Heavy Soil -- Wipe with one of the following -Bon Ami or Soft
Scrub* - using a damp sponge or soft cloth. Rinse and dry. To restore
luster and remove streaks, follow with Stainless Steel Magic Spray.
•Discoloration -- Using a damp sponge or soft cloth, wipe with Cameo
Stainless Steel Cleaner*. Rinse immediately and dry. Topolish and help
prevent fingerprints, follow with Stainless Steel Magic Spray.
After cleaning the control panel, press STOP/CLEAR to clear any entries
that might have been entered accidentally while cleaning the panel.
THECHILD LOCK- OUTfeature can be activated to clean the control panel.
(page 13.)
COOKTOP LIGHT replacement
To replacethe cooktop light bulb,follow instructionsbelow:
1. Disconnect the power.
2. Remove the screw and carefully remove the cover.
3. Replacewith a 40-watt incandescent bulb available from your
authorized dealer. High intensity 40-watt bulbs,which are available in
supermarkets and hardware stores, may also be used.
4. Replace the cover and put the screw back in.
5. Plug in oven or reconnect power.
Caution:
Besure the power isdisconnected at the house circuit breaker or unplug
the power supply cord.
When light is damaged, contact your Authorized Service center.
*Brand names and registered trademarks of the respective manufacturer.
**To order,call 1-800-688-8408.
34
Page 35

MICROWAVE OVEN WARRANTY
Full One Year Warranty
Forone (1)year from the date oforiginal retail purchase,any part which
fails in normal home use will be repaired or replaced free of charge.
Limited Parts Warranty
After the first year from the date of original retail purchase through the
fifth year, the following parts which fail in normal home use will be
repaired or replaced free of charge for the part itself, with the owner
paying all other costs, including labor, when the appliance is located in
the United States or Canada: (1)Touch pad end microprocessor, (2)
Magnetron tube, (3) High voltage transformer, (4)High voltage capacitor
(5) High voltage rectifier.
Limited Parts Warranty Outside the United States or Canada
Forone (1) year from the date of original retailpurchase, any part which
fails in normal home use will be repaired or replaced free of charge for
the part itself,with the owner paying all other costs, including labor,
when the appliance is located outside the United States or Canada.
Canadian Residents
This warranty covers only those appliances installed in Canada that
have been listed with Canadian Standards Association unless the
appliances are brought into Canada due to transfer of residence from
the United States to Canada.
What is Not Covered by These Warranties
1. Conditions and damages 4. Products purchased for
resulting from any of the commercial or industrial use.
following: 5.The cost of service or service call
a. Improper installation, delivery to:
or maintenance, a. Correct installation errors.
b. Any repair, modification, b. Instruct the user on the proper
alteration, or adjustment not use of the product.
authorized by the manufacturer c. Transport the appliance to the
or an authorized servicer, servicer.
c. Misuse, abuse, accidents or 6. Consequential or incidental
unreasonable use. damages sustained by any
d. Incorrect electric current, person as a result of any breach
voltage or supply, of these warranties.
e. Improper setting of any control.
2.Warranties are void if the original Some states do not allow the
serial numbers have been exclusion or limitation of
removed, altered, or cannot be consequential or incidental
readily determined, damages, sothe above exclusion
3. Light bulbs, may not apply.
35
Page 36

MICROWAVE OVEN WARRANTY(CONT.)
If You Need Service
• Call the dealer from whom your appliance was purchased or call
Maytag Appliances Sales Company, Maytag Customer Assistanceat 1
800-688-1120, USA and Canada or 1-423-472-3333 to locate an
authorized servicer.
• Be sure to retain proof of purchase to verify warranty status. Referto
WARRANTY (above) for further information on owner's
responsibilities for warranty service.
• If the dealer or servicecompany cannot resolve the problem, write to
Maytag Appliances SalesCompany, Attn: CAIR®Center, P.O.Box2370
Cleveland, TN 37320-2370, or call 1-800-688-1120 or 1-423472-3333.
U.S. customers using TTY for deaf, hearing impaired or speech
impaired, call 1-800-688-2080.
NOTE: When writing or calling about a service problem, please includ_
the following information:
a. Your name, address and telephone number;
b. Model number and serial number;
c. Name and address of your dealer or servicer;
d. A clear description of the problem you are having;
e. Proof of purchase (sales receipt).
• User's guides, service manuals and parts catalogs are available from
Maytag Appliances Sales Company, Maytag Customer Assistance.
36
 Loading...