

Page 1
TOP-LOADING HIGH EFFICIENCY
LOW-WATER WASHER
USE AND CARE GUIDE
GUIDE D’UTILISATION ET D’ENTRETIEN
DU LAVE-LINGE HAUTE EFFICACITE
A FAIBLE CONSOMMATION D’EAU
AVEC CHARGEMENT PAR LE DESSUS
LAVADORA DE CARGA SUPERIOR Y ALTO RENDIMIENTO,
CON NIVEL BAJO DE AGUA
MANUAL DE USO Y CUIDADO
W10475873A 3LMVWC400YW
Designed to use only
HE High Efciency detergents.
Conçue pour l’utilisation d’un détergent haute
efcacité seulement.
Diseñada para utilizar solamente
detergentes de Alto rendimiento (HE).
Page 2

Table of Contents
WASHER SAFETY .................................................................3
SPECIFICATIONS .................................................................3
WHAT’S NEW UNDER THE LID ..........................................4
CONTROL PANEL AND FEATURES ......................................5
Table des matières
SECURITE DU LAVE-LINGE .............................................. 18
CARACTERISTIQUES ........................................................ 18
QUOI DE NEUF SOUS LE COUVERCLE? .......................... 19
TABLEAU DE COMMANDE ET CARACTERISTIQUES ....... 20
Índice
SEGURIDAD DE LA LAVADORA .......................................36
ESPECIFICACIONES ...........................................................36
¿QUÉ HAY DE NUEVO DEBAJO DE LA TAPA? ..................37
PANEL DE CONTROL Y CARACTERÍSTICAS ......................38
CYCLE GUIDE ......................................................................7
USING YOUR WASHER .......................................................8
WASHER MAINTENANCE ..................................................11
TROUBLESHOOTING .......................................................13
GUIDE DE PROGRAMMES ............................................... 21
UTILISATION DU LAVE-LINGE ........................................ 23
ENTRETIEN DU LAVE-LINGE ............................................ 26
DEPANNAGE .................................................................... 29
GUIÁ DE CICLOS ..............................................................39
USO DE SU LAVADORA ....................................................41
MANTENIMIENTO DE LA LAVADORA ..............................44
SOLUCIÓN DE PROBLEMAS .............................................46
2
Page 3
WASHER SAFETY
SPECIFICATIONS
These units are sold in multiple regions with different
requirements for measuring capacity. Below are a few
of the valid forms of measure posted on this product:
Dry Linen Capacity: A weight measure that reects a maximum
load size that can be loaded into the washer.
IEC Capacity: The capacity measure that represents the maximum
capacity of dry linens and textiles which the manufacturer
declares can be treated in a specic cycle.
Dry Linen Capacity
10,5 kg (23 lb)
IEC Capacity
7,5 kg (16,5 lb)
3
Page 4
WHAT’S NEW UNDER THE LID?
Cleaning with Less Water
Washplate
Washplate
Traditional agitator-style
washer
The most striking difference in your new washer is the low-water
washplate wash system. The washer automatically adjusts the
water level to the load size—no water level selector is needed.
Washer with low-water
washplate wash system
Automatic Load Size Sensing
Once you start the cycle, the lid will lock, and the washer will
begin the sensing process to determine the correct water level for
the load. This may take several minutes before water is added. You
will nd a step-by-step description in the “Cycle Status Lights”
section.
You will hear the motor turn the basket in short pulses to
thoroughly wet the load. This low-water wash method uses
less water and energy compared to a traditional agitator-style
washer.
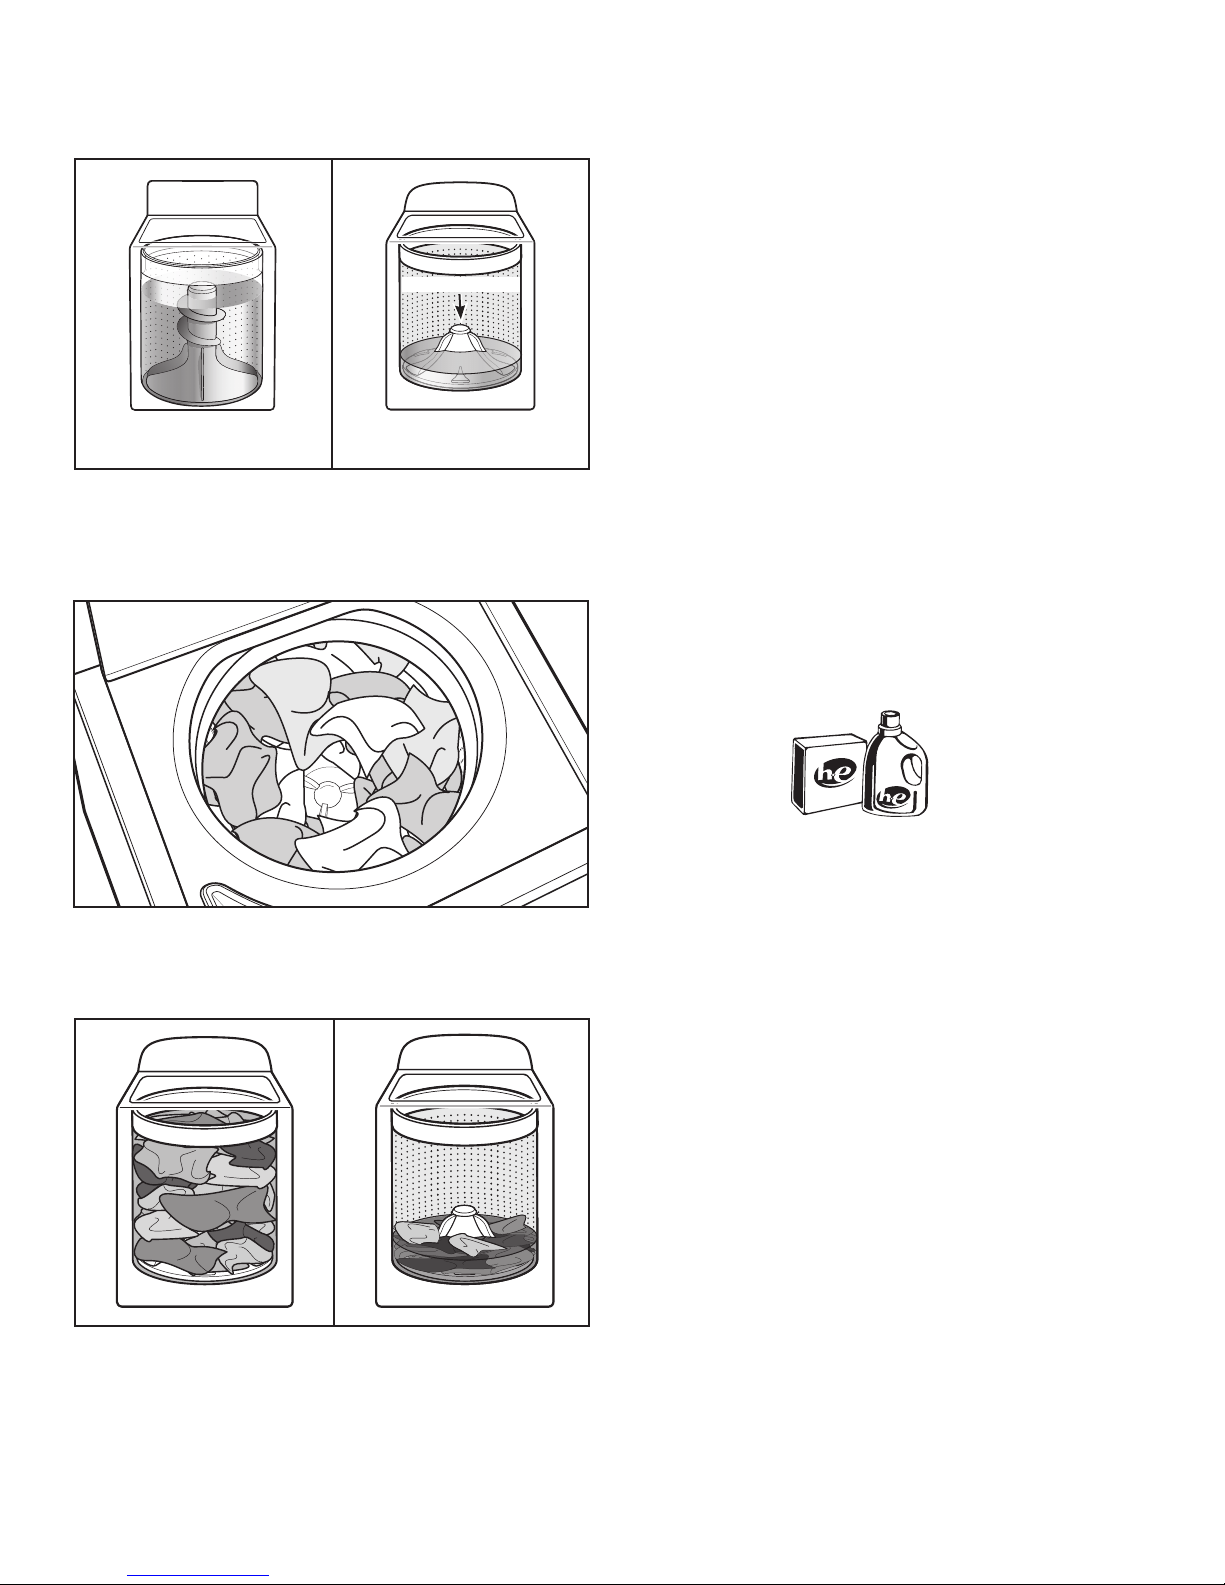
Choosing the Right Detergent
Use only High Efciency detergents. The package will be
marked “HE” or “High Efciency.” Low-water washing creates
excessive sudsing with a regular non-HE detergent. Using regular
detergent will likely result in longer cycle times and reduced
rinsing performance. It may also result in component failures and
noticeable mold or mildew. HE detergents are made to produce
the right amount of suds for the best performance. Follow the
manufacturer’s instructions to determine the amount of detergent
to use.
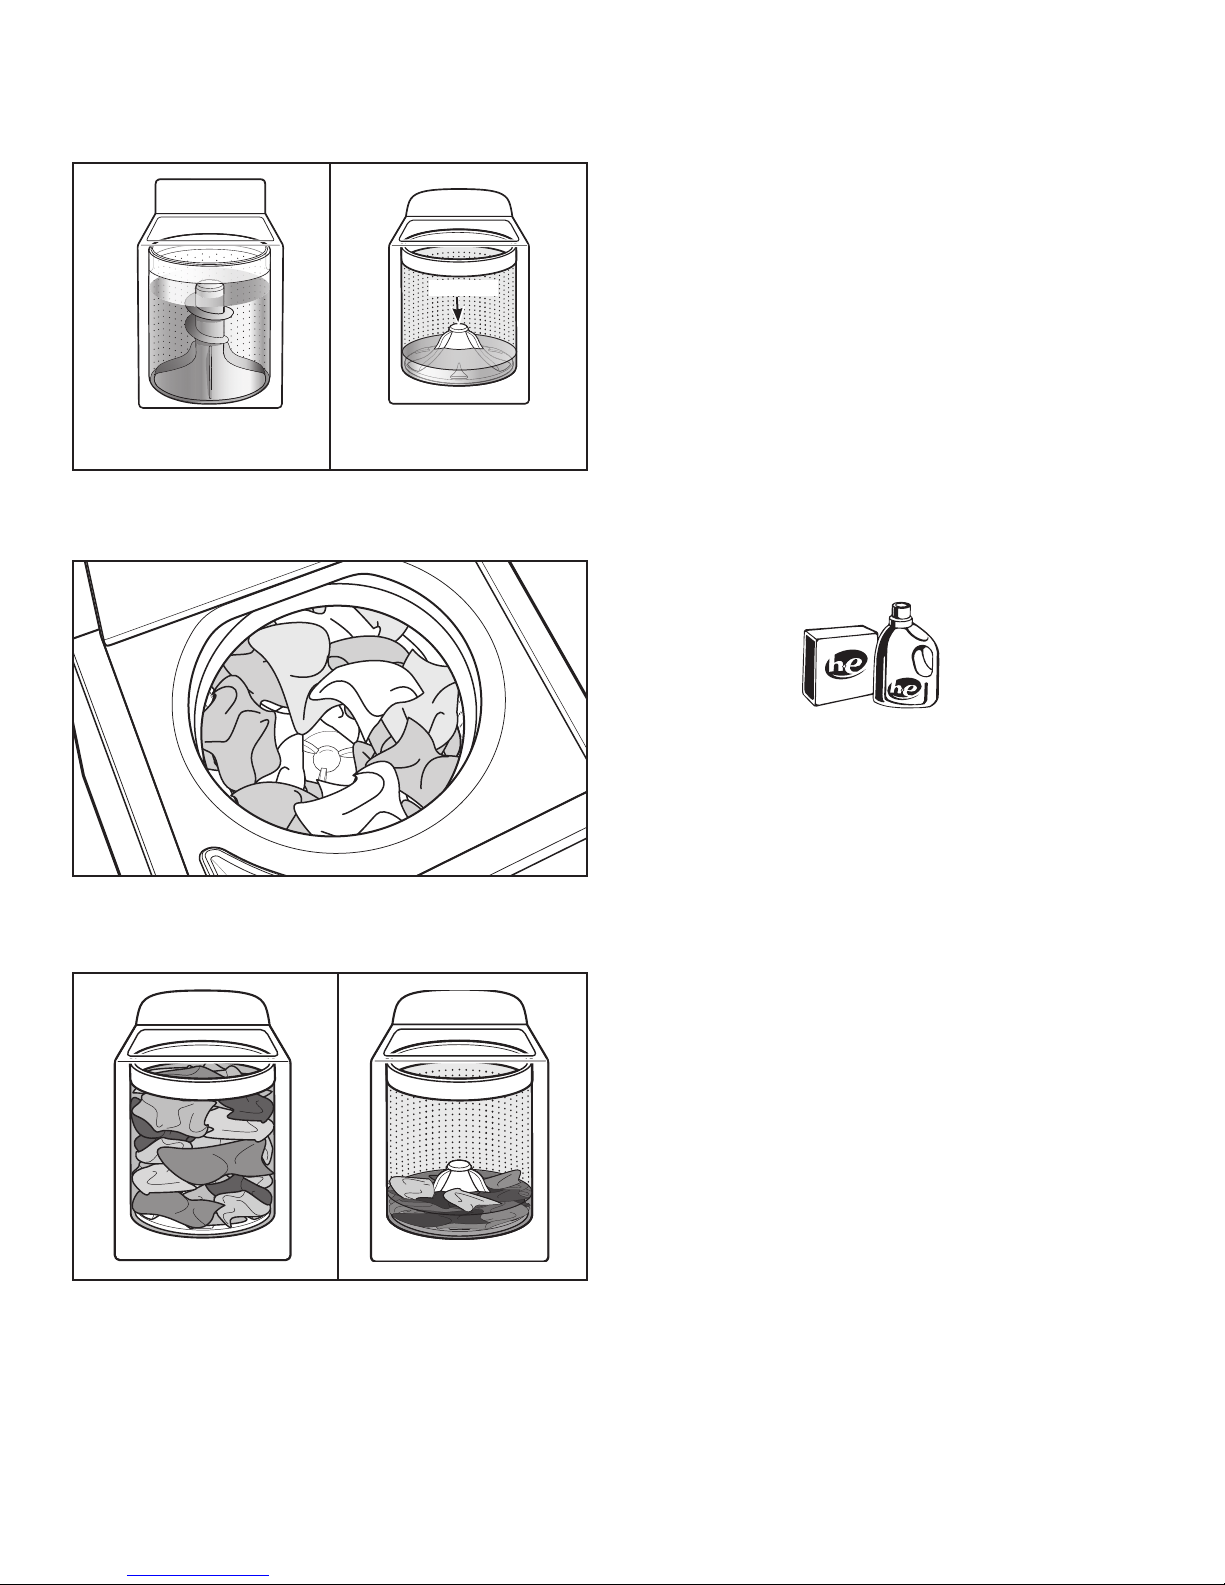
Load garments in loose heaps evenly around the washplate.
Do not load garments directly over the center of the washplate;
when loaded, the center of the washplate should be visible.
As the washer dampens and moves the load, the level of the
garments will settle in the basket. This is normal, and does not
indicate that more garments should be added.
IMPORTANT: You will not see a washer basket full of water as
with your past agitator-style washer. It is normal for some of the
load to be above the water line.
Use only High Efciency (HE) detergent.
Concentrated Cleaning
Low-water cleaning means concentrated cleaning. Rather than
diluting detergent as done in an agitator-style washer, this washer
delivers the detergent directly to the soils.
Normal Sounds You Can Expect
At different stages of the wash cycle, you may hear sounds and
noises that are different from those of your previous washer. For
example, you may hear a clicking and hum at the beginning of
the cycle, as the lid lock goes through a self-test. There will be
different kinds of humming and whirring sounds as the washplate
moves the load. And sometimes, you may hear nothing at all, as
the washer determines the correct water level for your load or
allows time for clothes to soak.
4
Page 5
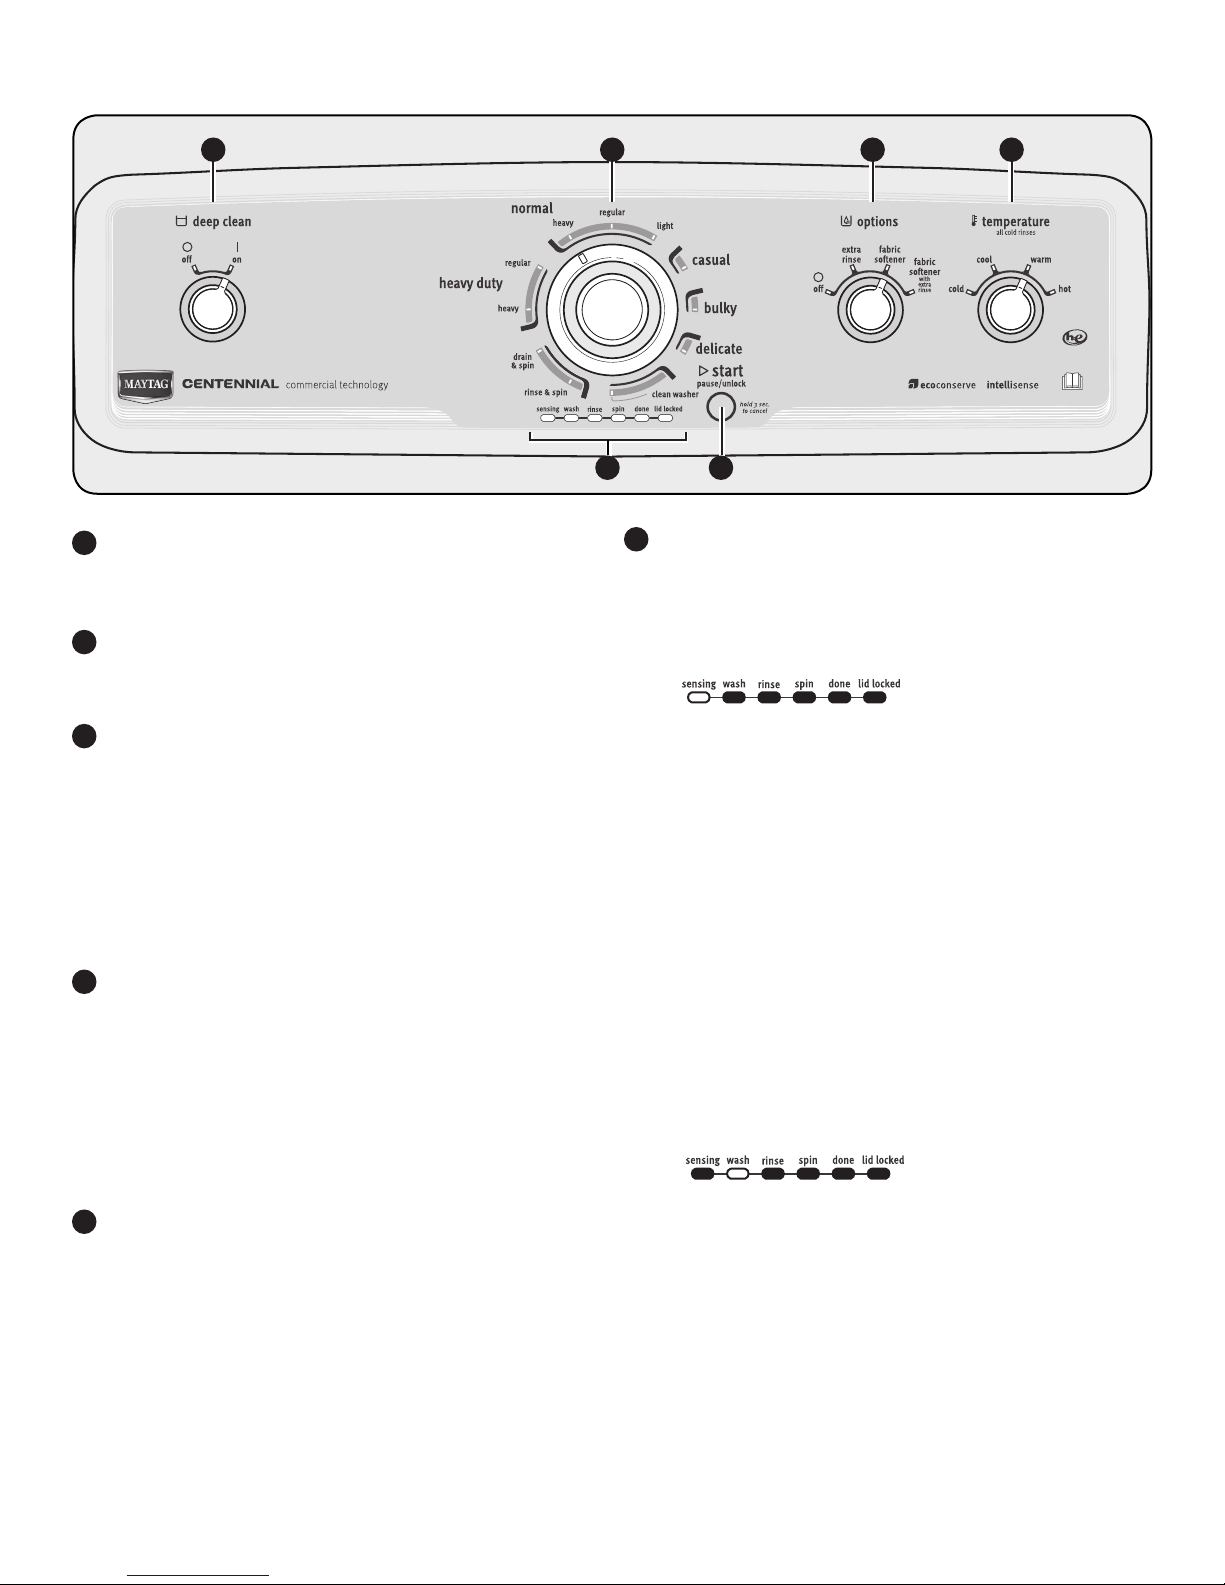
CONTROL PANEL AND FEATURES
1 3 4
DEEP CLEAN
1
This option provides enhanced cleaning action for tough
stains. It will add additional agitation and soak time to the
cycle.
2
WASH CYCLE KNOB
Use the Wash Cycle knob to select available cycles on your
washer. Turn the knob to select a cycle for your laundry load.
See “Cycle Guide” for detailed descriptions.
3
OPTIONS
The following options may be added to most cycles.
EXTRA RINSE
This option can be used to automatically add a second
rinse to most cycles.
FABRIC SOFTENER
This option must be selected if using fabric softener.
FABRIC SOFTENER with Extra Rinse
This option combines both the Fabric Softener and Extra
Rinse options.
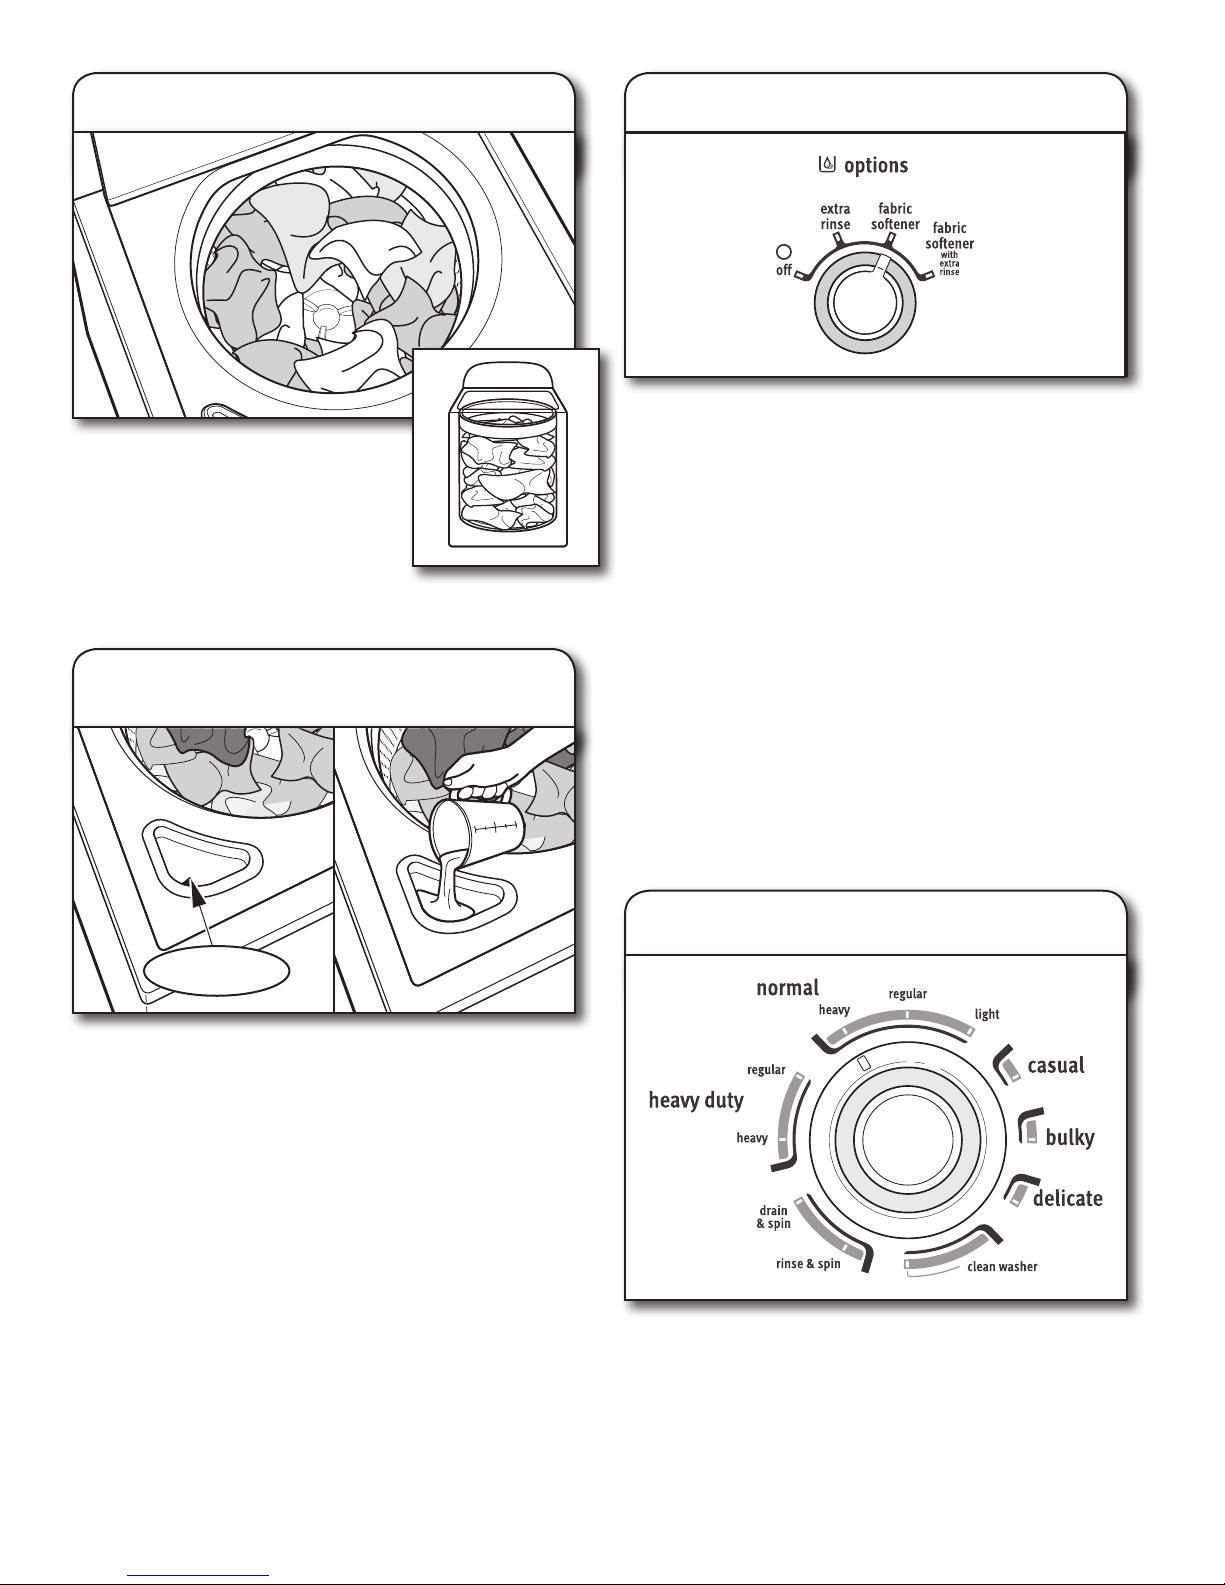
TEMPERATURE
4
Temperature Control senses and maintains uniform water
temperatures by regulating incoming hot and cold water.
Select a wash temperature based on the type of fabric and soils
being washed. For best results and following the garment label
instructions, use the warmest wash water safe for your fabric.
• Warm and hot water will be cooler than what your previous
washer provided.
• Even in a cool water wash, some warm water may be added
to the washer to maintain a minimum temperature.
5
START/PAUSE/UNLOCK BUTTON
Press to start the selected cycle; press again to pause the
cycle and unlock the lid. Press and hold 3 sec to cancel a
cycle.
NOTE: If the washer is spinning, it may take several minutes
to unlock the lid. Press and hold 3 sec to cancel a cycle.
2
6
6
5
CYCLE STATUS LIGHTS
The Cycle Status Lights show the progress of a cycle. At each
stage of the process, you may notice sounds or pauses that are
different from traditional washers.
SENSING
When the START/Pause/Unlock button is pressed, the washer
will rst perform a self-test on the lid lock mechanism. You
will hear a click, the basket will make a slight turn, and the
lid will unlock briey before locking again.
Once the lid has locked the second time, the washer will
use short, slow spins to estimate the load size. These sensing
spins may take 2 to 3 minutes before water is added to the
load and you may hear the hum of these spins. If the sensing
light is on, then washer is working properly. You will hear
the motor turn the basket in short pulses to thoroughly wet
the load. The washer will then move the load briey, pause
to allow water to soak in to the load, and resume adding
water. This process may repeat until the correct amount of
water has been added for the load. You may also hear water
owing through the dispenser, adding detergent to the load.
NOTE: Avoid opening lid during sensing. The sensing
process will start over when the washer is restarted. The
sensing light may also come on during the Wash portion
of the cycle. This is normal.
WASH
You will hear the motor and washplate moving the load.
Unlike traditional washers, the load is not covered with
water. Low-water cleaning means concentrated cleaning.
Rather than diluting detergent as done in an agitator-style
washer, this washer delivers the detergent directly to the
soils. The motor sounds may change at different stages in
the cycle. The wash time is determined by the selected soil
level.
5
Page 6

RINSE
LID LOCKED
You will hear sounds similar to the wash cycle as the washer
rinses and moves the load. Fabric softener will be added if
the Fabric Softener Added-Yes option was selected. Some
cycles will use a spray rinse.
SPIN
The washer spins the load at increasing speeds for proper
water removal, based on the selected cycle and spin speed.
DONE
Once the cycle is complete, this light will come on.
Remove the load promptly for best results.
To allow for proper load sensing and spinning, the lid
will lock and the Lid Locked light will turn on. This light
indicates that the lid is locked and cannot be opened.
If you need to open the lid, press
START/Pause/Unlock. The lid will unlock
once the washer movement has stopped.
This may take several minutes if the load
was spinning at high speed. Press START/
Pause/Unlock again to resume the cycle.
Avoid opening the lid during sensing. The
sensing process will start over when the washer is
restarted.
6
Page 7
CYCLE GUIDE
For best fabric care, choose the cycle that best ts the load being washed.
Not all cycles and options are available on all models.
Items to wash: Cycle: Temperature*: Spin
Heavily soiled fabrics
Sturdy fabrics, colorfast
items, towels, jeans
Large items such as
sheets, small comforters,
jackets
Cottons, linens, sheets, and
mixed garment loads
Light weight cotton and
cotton blends
No-iron fabrics, cottons,
perm press, synthetics
Large items such as sheets,
sleeping bags, small
comforters, jackets, and
small washable rugs
Heavy Duty
Heavy
Heavy Duty
Regular
Normal
Heavy
Normal
Regular
Normal
Light
Casual
Bulky
Hot
Warm
Cool
Cold
Hot
Warm
Cool
Cold
Hot
Warm
Cool
Cold
Hot
Warm
Cool
Cold
Hot
Warm
Cool
Cold
Hot
Warm
Cool
Cold
Hot
Warm
Cool
Cold
Speed**:
High
High
High
High
High
Low
High
Cycle Details:
Provides maximum wash time and action for tough stains
and soils. Use this cycle for heavily soiled or sturdy items.
Water-level sensing process may take longer for some items
than for others because they will absorb more water than
other fabric types.
Use this cycle for heavily soiled or sturdy items. Water-level
sensing process may take longer for some items than for
others because they will absorb more water than other fabric
types.
Use this cycle for heavily soiled cottons and mixed fabric
loads. This cycle features a spray rinse.
Use this cycle for normally soiled cottons and mixed fabric
loads. This cycle features a spray rinse.
Use this cycle for light weight cottons that are lightly soiled.
This cycle features a spray rinse.
Use this cycle to wash loads of no-iron fabrics such as sport
shirts, blouses, casual business clothes, permanent press, and
blends.
Use this cycle to wash large items such as jackets and small
comforters. The washer will ll with enough water to wet
down the load before the wash portion of the cycle begins,
and uses a higher water level than other cycles. Do not tightly
pack basket.
Machine-wash silks,
hand-washed fabrics
Swimsuits and items
requiring rinsing without
detergent
Dripping wet item or
hand-washed items
No clothes in washer *** Clean
* All rinses are cold.
** Spin speed is integrated into the cycle and can not be selected.
*** Deep Clean option not available with these cycles.
Delicate Low
***Rinse
& Spin
***Drain
& Spin
Washer
Hot
Warm
Cool
Cold
Cold
N/A
High
High
Use this cycle to wash lightly soiled garments indicating
“Machine Washable Silks” or “Gentle” cycle on the care
label. Place small items in mesh garment bags before
washing. This cycle uses a higher, preset water level.
Combines a rinse and high speed spin for loads requiring
an additional rinse cycle or to complete a load after power
interruption. This cycle uses a higher, preset water level. Also
use for loads that require rinsing only.
This cycle uses a spin to shorten drying times for heavy fabrics
or special-care items washed by hand. Use this cycle to drain
washer after cancelling a cycle or completing a cycle after a
power failure.
Use this cycle every 30 washes to keep the inside of your
washer fresh and clean. This cycle uses a higher water level.
Use with liquid chlorine bleach to thoroughly clean the
inside of your washer. This cycle should not be interrupted.
See “Washer Care.”
IMPORTANT: Do not place garments or other items in the
washer during the Clean Washer cycle. Use this cycle with
an empty wash tub.
7
Page 8
USING YOUR WASHER
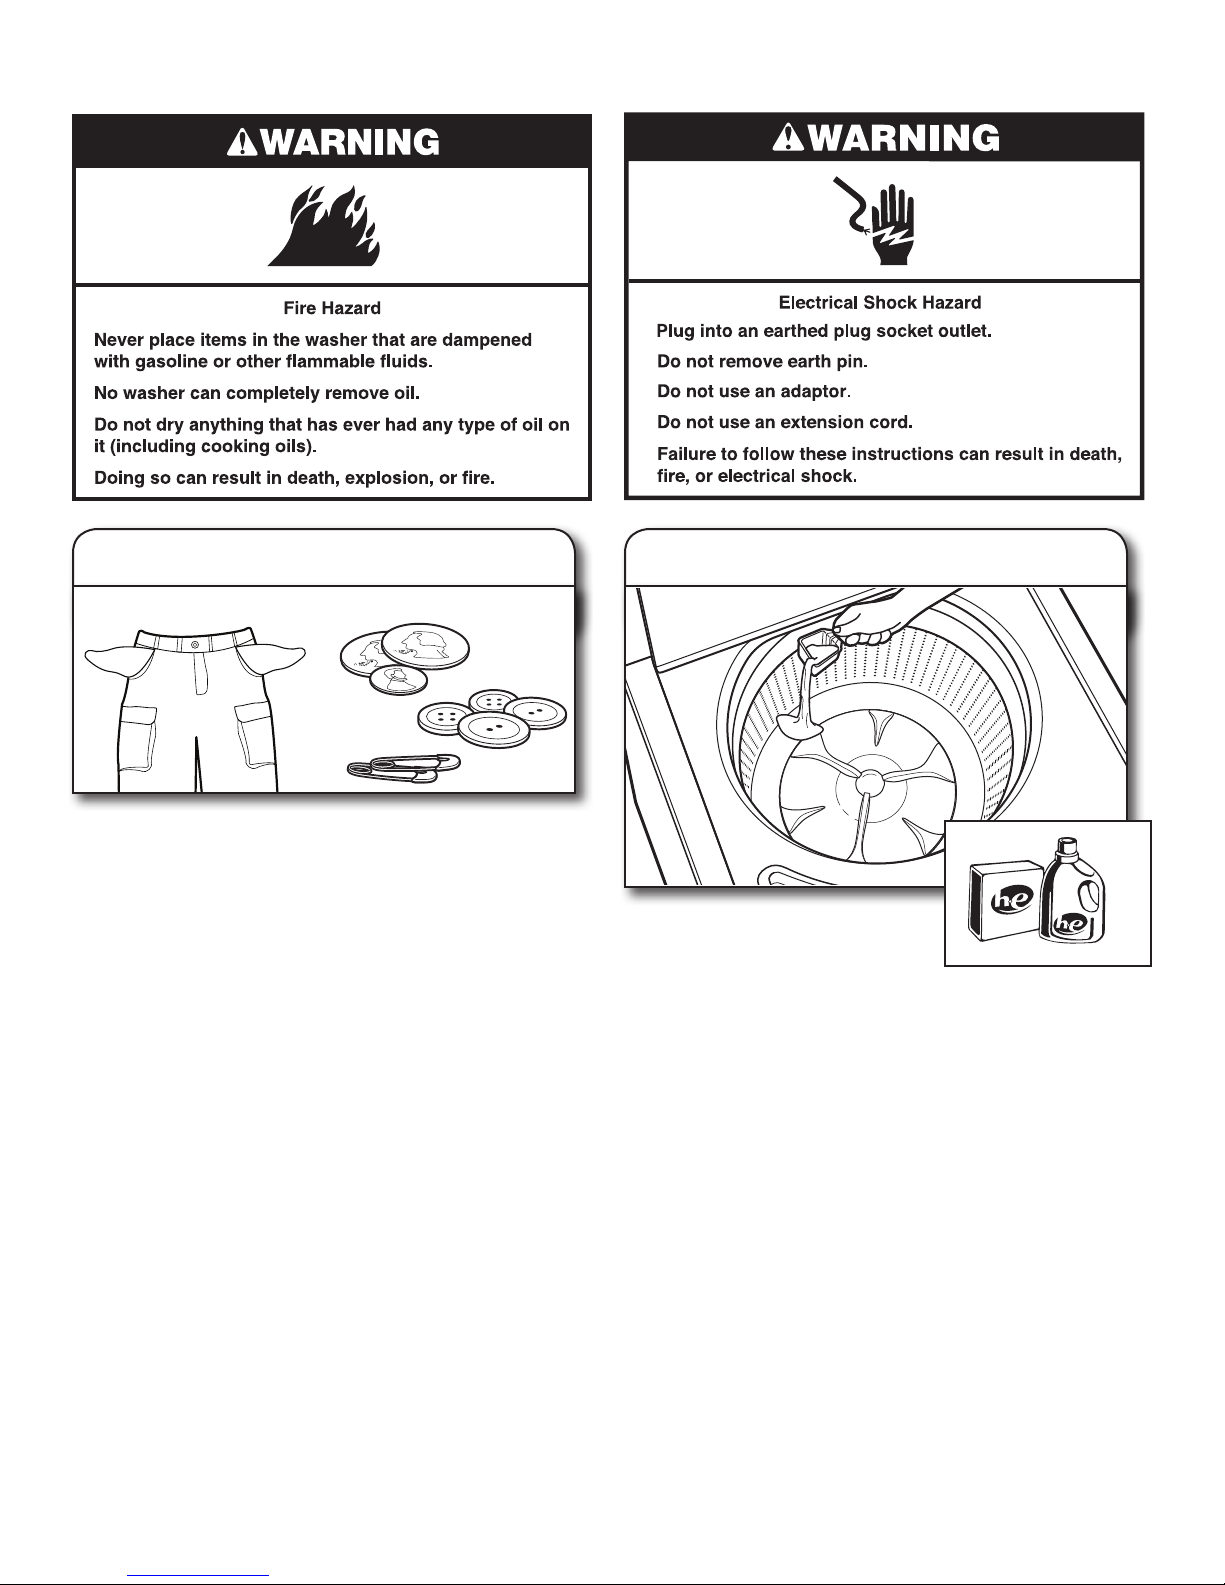
1. Sort and prepare your laundry
• Empty pockets. Loose change, buttons, or any small object
can pass under the washplate and become trapped, causing
unexpected sounds.
• Sort items by recommended cycle, water temperature, and
colorfastness.
• Separate heavily soiled items from lightly soiled.
• Separate delicate items from sturdy fabrics.
• Do not dry garments if stains remain after washing, because
heat can set stains into fabric.
• Treat stains promptly.
• Close zippers, fasten hooks, tie strings and sashes, and remove
non-washable trim and ornaments.
• Mend rips and tears to avoid further damage to items during
washing.
Helpful Tips:
• When washing water-proof or water-resistant items, load
evenly. See “Cycle Guide” for tips and more information on
using the Bulky cycle.
• Use mesh garment bags to help avoid tangling when washing
delicate or small items.
• Turn knits inside out to avoid pilling. Separate lint-takers from
lint-givers. Synthetics, knits, and corduroy fabrics will pick up
lint from towels, rugs, and chenille fabrics.
Always read and follow fabric care label instructions to avoid
damage to your garments.
2. Add HE detergent
Add a measured amount of HE
detergent into the basket.
IMPORTANT: Use only High Efciency
detergents. The package will be marked
“HE” or “High Efciency.” Low-water washing creates excessive
sudsing with a regular non-HE detergent. Using regular
detergent will likely result in longer cycle times and reduced
rinsing performance. It may also result in component failures
and noticeable mold or mildew. HE detergents are made to
produce the right amount of suds for the best performance.
Follow the manufacturer’s instructions to determine the amount
of detergent to use.
Using Oxi or color-safe bleach:
If using an Oxi or color-safe bleach laundry boost product, add
to the bottom of the washer basket before adding clothes.
8
Page 9
3. Load laundry into washer
Load garments in loose heaps evenly
around the washplate. Do not load
garments directly over the center of the
washplate; when loaded, the center of
the washplate should be visible. Try
mixing different sized garments to
reduce tangling.
IMPORTANT: Garments need to move freely for best cleaning
and to reduce wrinkling and tangling.
4. Add liquid chlorine bleach
to dispenser, if desired
5. Add fabric softener, if desired
This washer has been designed to allow the use of a fabric
softener dispenser ball, which you will need to purchase. Always
follow the manufactures instructions for correct instructions on
how to use the dispenser ball. Then select the Fabric Softener
option. The fabric softener dispenser ball will release the fabric
softener during the rinse cycle.
IMPORTANT: Fabric Softener option must be selected to ensure
proper distribution at correct time in cycle. Do not overll or
dilute.
NOTE: Fabric softener dispenser ball may not be available in all
regions. Please check with your dealer regarding availability.
Adding Liquid Fabric Softener Manually to Wash Load
During the nal rinse, wait until the washer has completed lling,
press the START/Pause/Unlock button to pause the washer. Lift
the lid and add the measured recommended amount of liquid
fabric softener. Do not allow liquid fabric softener to spill, splash,
drip, or run into the basket or on load. Do not use more than the
recommended amount. Close the lid and press the START/Pause/
Unlock button again to start the washer.
IMPORTANT: Fabric Softener Added option must be selected to
ensure proper distribution of the fabric softener during the rinse
portion of the cycle.
Liquid
Liquid
Chlorine Bleach
Chlorine Bleach
Do not overll, dilute, or use more than 236 mL (1 cup) . Do
not use color-safe bleach or Oxi products in the same cycle
with liquid chlorine bleach.
6. Select cycle
Turn cycle knob to choose your wash cycle.
9
Page 10
7. Select wash temperature
Once you select a cycle, select the desire wash temperature by
turning the Temperature knob to the desired setting.
Always read and follow fabric care label instructions to avoid
damage to your garments.
Wash Temp Suggested Fabrics
Hot
Some cold water is added to save
energy. This will be cooler than
your hot water heater setting.
Warm
Some cold water will be added, so
this will be cooler than what your
previous washer provided.
Whites and pastels
Durable garments
Heavy soils
Bright colors
Moderate to light soils
9. Press START/Pause/Unlock to begin
wash cycle
Press the START/Pause/Unlock button to start the wash cycle.
Filling is delayed for several minutes while load balance is
sensed. When the cycle has nished, the DONE indicator will
light. Promptly remove garments after cycle has completed
to avoid odor, reduce wrinkling, and rusting of metal hooks,
zippers, and snaps.
Unlocking the lid to add garments
If you need to open the lid to add 1 or 2 missed garments:
Press START/Pause/Unlock; the lid will unlock once the washer
movement has stopped. This may take several minutes if the
load was spinning at high speed. Then close lid and press
START/Pause/Unlock again to restart the cycle.
If lid is left open for more than 10 minutes the water will pump
out automatically.
Delay in water ll
Filling is delayed for 2 to 3 minutes to check for load unbalance.
You will hear the hum of the spin prior to lling. This is normal
operation.
Cool
Warm water is added to assist in
soil removal and to help dissolve
detergents.
Cold
Warm water may be added to assist
in soil removal and to help dissolve
detergents.
Colors that bleed
or fade
Light soils
Dark colors that
bleed or fade
Light soils
8. Select cycle options, if desired
If you would like to add Deep Clean, Extra Rinse or other
Options, turn knob to select or set to ON.
NOTE: Not all options are available with each cycle. Refer
to the cycle guide for further information.
10
Page 11
WASHER MAINTENANCE
WATER INLET HOSES
Replace inlet hoses after 5 years of use to reduce the risk of
hose failure. Periodically inspect and replace inlet hoses if
bulges, kinks, cuts, wear, or leaks are found.
When replacing your inlet hoses, mark the date of replacement
on the label with a permanent marker.
WASHER CARE
Recommendations to Help Keep Your Washer Clean and
Performing at its Best
1. Always use High Efciency (HE) detergents and follow the
HE detergent manufacturer’s instructions regarding the
amount of HE detergent to use. Never use more than the
recommended amount because that may increase the rate
at which detergent and soil residue accumulate inside your
washer, which in turn may result in undesirable odor.
2. Use warm and hot wash water settings sometimes (not
exclusively cold water washes), because they do a better
job of controlling the rate at which soils and detergent
accumulate.
3. Always leave the washer lid open between uses to help dry
out the washer and prevent the buildup of odor-causing
residue.
Cleaning Your Top Loading Washer
Read these instructions completely before beginning the
routine cleaning processes recommended below. This Washer
Maintenance Procedure should be performed, at a minimum,
once per month or every 30 wash cycles, whichever occurs
sooner, to control the rate at which soils and detergent may
otherwise accumulate in your washer.
WASHER CARE (cont.)
NOTE: For best results, do not interrupt cycle. If cycle
must be interrupted, press POWER/CANCEL. (For models
with no POWER/CANCEL button, press and hold START/
Pause/Unlock for three seconds). After the Clean Washer
cycle has stopped, run a RINSE & SPIN cycle to rinse cleaner
from washer.
Description of Clean Washer Cycle Operation:
1. This cycle will ll to a water level higher than in normal
wash cycles to provide rinsing at a level above the water line
for normal wash cycle.
2. During this cycle, there will be some agitation and spinning
to increase the removal of soils.
After this cycle is complete, leave the lid open to allow
for better ventilation and drying of the washer interior.
Cleaning the Dispensers
After a period of using your washer, you may nd some residue
buildup in the washer’s dispensers. To remove residue from
the dispensers, wipe them with a damp cloth and towel dry.
Do not attempt to remove the dispensers or trim for cleaning.
The dispensers and trim are not removable. If your model has
a dispenser drawer, however, remove the drawer and clean
it before or after you run the Clean Washer cycle. Use an allpurpose surface cleaner, if needed.
Cleaning the Outside of the Washer
Use a soft, damp cloth or sponge to wipe away any spills.
Use only mild soaps or cleaners when cleaning external washer
surfaces.
IMPORTANT: To avoid damaging the washer’s nish, do not
use abrasive products.
Cleaning the Inside of the Washer
To keep your washer odor-free, follow the usage instructions
provided above, and use this recommended monthly cleaning
procedure:
Clean Washer Cycle
This washer has a special cycle that uses higher water volumes
in combination with liquid chlorine bleach to clean the inside
of the washer.
Begin procedure
1. Chlorine Bleach Procedure:
a. Open the washer lid and remove any clothing
or items.
b. Add 236 mL (1 cup) of liquid chlorine bleach
to the bleach compartment.
NOTE: Use of more liquid chlorine bleach than is
recommended above could cause washer damage
over time.
c. Close the washer lid.
d. Do not add any detergent or other chemical
to the washer when following this procedure.
e. Select the CLEAN WASHER cycle.
f. Press the
cycle. The Clean Washer Cycle Operation is described
below.
START/Pause/Unlock
button to begin the
NON-USE AND VACATION CARE
Operate your washer only when you are home.
If moving, or not using your washer for a period of time,
follow these steps:
1. Unplug or disconnect power to washer.
2. Turn off water supply to washer, to avoid ooding due
to water pressure surge.
WINTER STORAGE CARE
IMPORTANT: To avoid damage, install and store washer
where it will not freeze. Because some water may stay in
hoses, freezing can damage washer. If storing or moving
during freezing weather, winterize your washer.
To winterize washer:
1. Shut off both water faucets; disconnect and drain water
inlet hoses.
2. Put 1 L (1 qt.) of R.V.-type antifreeze in basket and run
washer on RINSE & SPIN cycle for about 30 seconds to
mix antifreeze and remaining water.
3. Unplug washer or disconnect power.
11
Page 12
TRANSPORTING YOUR WASHER
REINSTALLING/USING WASHER AGAIN
1. Shut off both water faucets. Disconnect and drain water
inlet hoses.
2. If washer will be moved during freezing weather, follow
WINTER STORAGE CARE directions before moving.
3. Disconnect drain from drain system and drain any
remaining water into a pan or bucket. Disconnect drain
hose from back of washer.
4. Unplug power cord.
5. Place inlet hoses and drain hose inside washer basket.
6. Drape power cord over edge and into washer basket.
7. Place packing tray from original shipping materials
back inside washer. If you do not have packing tray,
place heavy blankets or towels into basket opening.
Close lid and place tape over lid and down front of
washer. Keep lid taped until washer is placed in new
location.
To reinstall washer after non-use, vacation, winter storage, or
moving:
1. Refer to “Installation Instructions” to locate, level, and
connect washer.
2. Before using again, run washer through the following
recommended procedure:
To use washer again:
1. Flush water pipes and hoses. Reconnect water inlet hoses.
Turn on both water faucets.
2. Plug in washer or reconnect power.
3. Run washer through BULKY cycle to clean washer and
remove antifreeze, if used. Use only HE High Efciency
detergent. Use 1/2 the manufacturer’s recommended
amount for a medium-size load.
12
Page 13
TROUBLESHOOTING
First try the solutions suggested here to possibly avoid the cost of a service call.
If you experience
Vibration or Off-Balance
Check the following for
proper installation or
see “Using Your Washer”
section.
Noises
Clicking or metallic
noises
Gurgling or humming It is normal to hear the pump making a continuous humming sound
Humming You may hear the hum of the sensing spins after you have started the
Feet may not be in contact with the
oor and locked.
Washer may not be level.
Load could be unbalanced.
Objects caught in washer
drain system.
Washer may be draining water.
The sensing light is on.
Possible Causes
Front and rear feet must be in rm contact with oor, and washer
must be level to operate properly. Jam nuts must be tight against
the bottom of the cabinet. See “Installation Instructions”.
Check oor for exing or sagging. If ooring is uneven, a 19 mm
(3/4") piece of plywood under your washer will reduce sound.
See “Level the Washer” in Installation Instructions.
Load garments in loose heaps evenly around the washplate.
Do not load garments directly over the center of the washplate.
Adding wet items to washer or adding more water to basket
could unbalance washer.
Wash smaller loads to reduce imbalance.
Do not tightly pack. Avoid washing single items.
Use Bulky cycle for oversized, non-absorbent items such as
jackets and small comforters.
Empty pockets before washing. Loose items such as coins could fall
between basket and tub or may block pump. It may be necessary to
call for service to remove items.
It is normal to hear metal items on clothing such as metal snaps,
buckles, or zippers touch against the stainless steel basket.
with periodic gurgling or surging as nal amounts of water are
removed during the spin/drain cycles.
washer. This is normal. Sensing spins will take several minutes before
water is added to the washer.
Solution
Water Leaks
Check the following for
proper installation:
Washer not performing as expected
Not enough water
in washer
Washer not level. Water may splash off basket if washer is not level.
Fill hoses not attached tightly. Tighten ll-hose connection.
Fill hose washers.
Drain hose connection. Pull drain hose from washer cabinet and properly secure it to
Check household plumbing for leaks
or clogged sink or drain.
Washer not loaded as
recommended.
Load not completely covered
in water.
Check that load is not unbalanced or tightly packed.
Make sure all four ll hose at washers are properly seated.
drainpipe or laundry tub.
Do not place tape over drain opening.
Water can backup out of a clogged sink or drainpipe. Check all
household plumbing for leaks (laundry tubs, drain pipe, water
pipes, and faucets.)
Unbalanced loading can cause basket to be out of alignment and
cause water to splash off tub. See “Using Your Washer” for loading
instructions.
This is normal operation for an HE low-water washer. The load will
not be completely under water. The washer senses load sizes and adds
correct amount of water for optimal cleaning. See “What’s New under
the Lid.”
IMPORTANT: Do not add more water to washer. Adding water lifts
the garments off the washplate, resulting in less effective cleaning.
13
Page 14
TROUBLESHOOTING
First try the solutions suggested here to possibly avoid the cost of a service call.
If you experience
Washer not performing as expected (cont.)
Washer won’t run
or ll, washer stops
working or wash light
remains on (indicating
that the washer
was unable to ll
appropriately)
Check for proper water supply. Both hoses must be attached and have water owing to inlet valve.
Check proper electrical supply.
Normal washer operation.
Washer may be tightly packed. Remove several items, rearrange load evenly around the
Not using HE detergent or using too
much HE detergent.
Possible Causes
Solution
Both hot and cold water faucets must be turned on.
Check that inlet valve screens have not become clogged.
Check for any kinks in inlet hoses, which can restrict water ow.
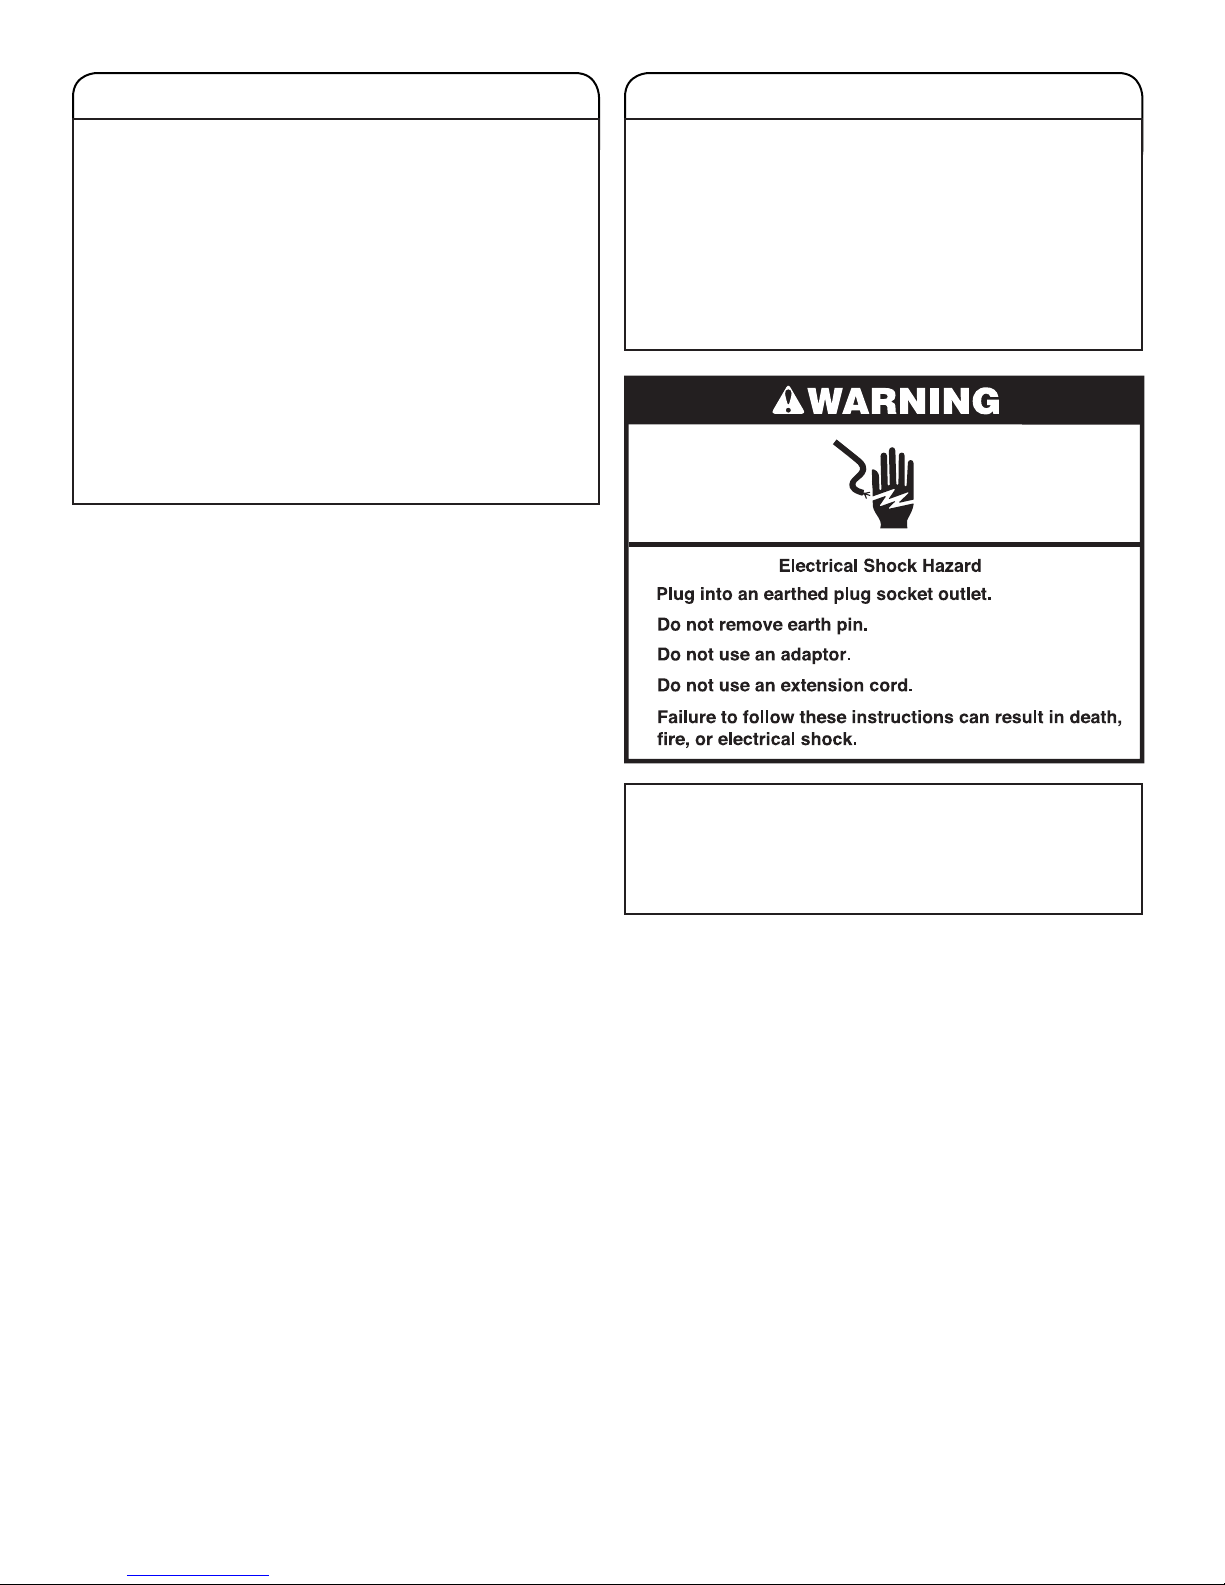
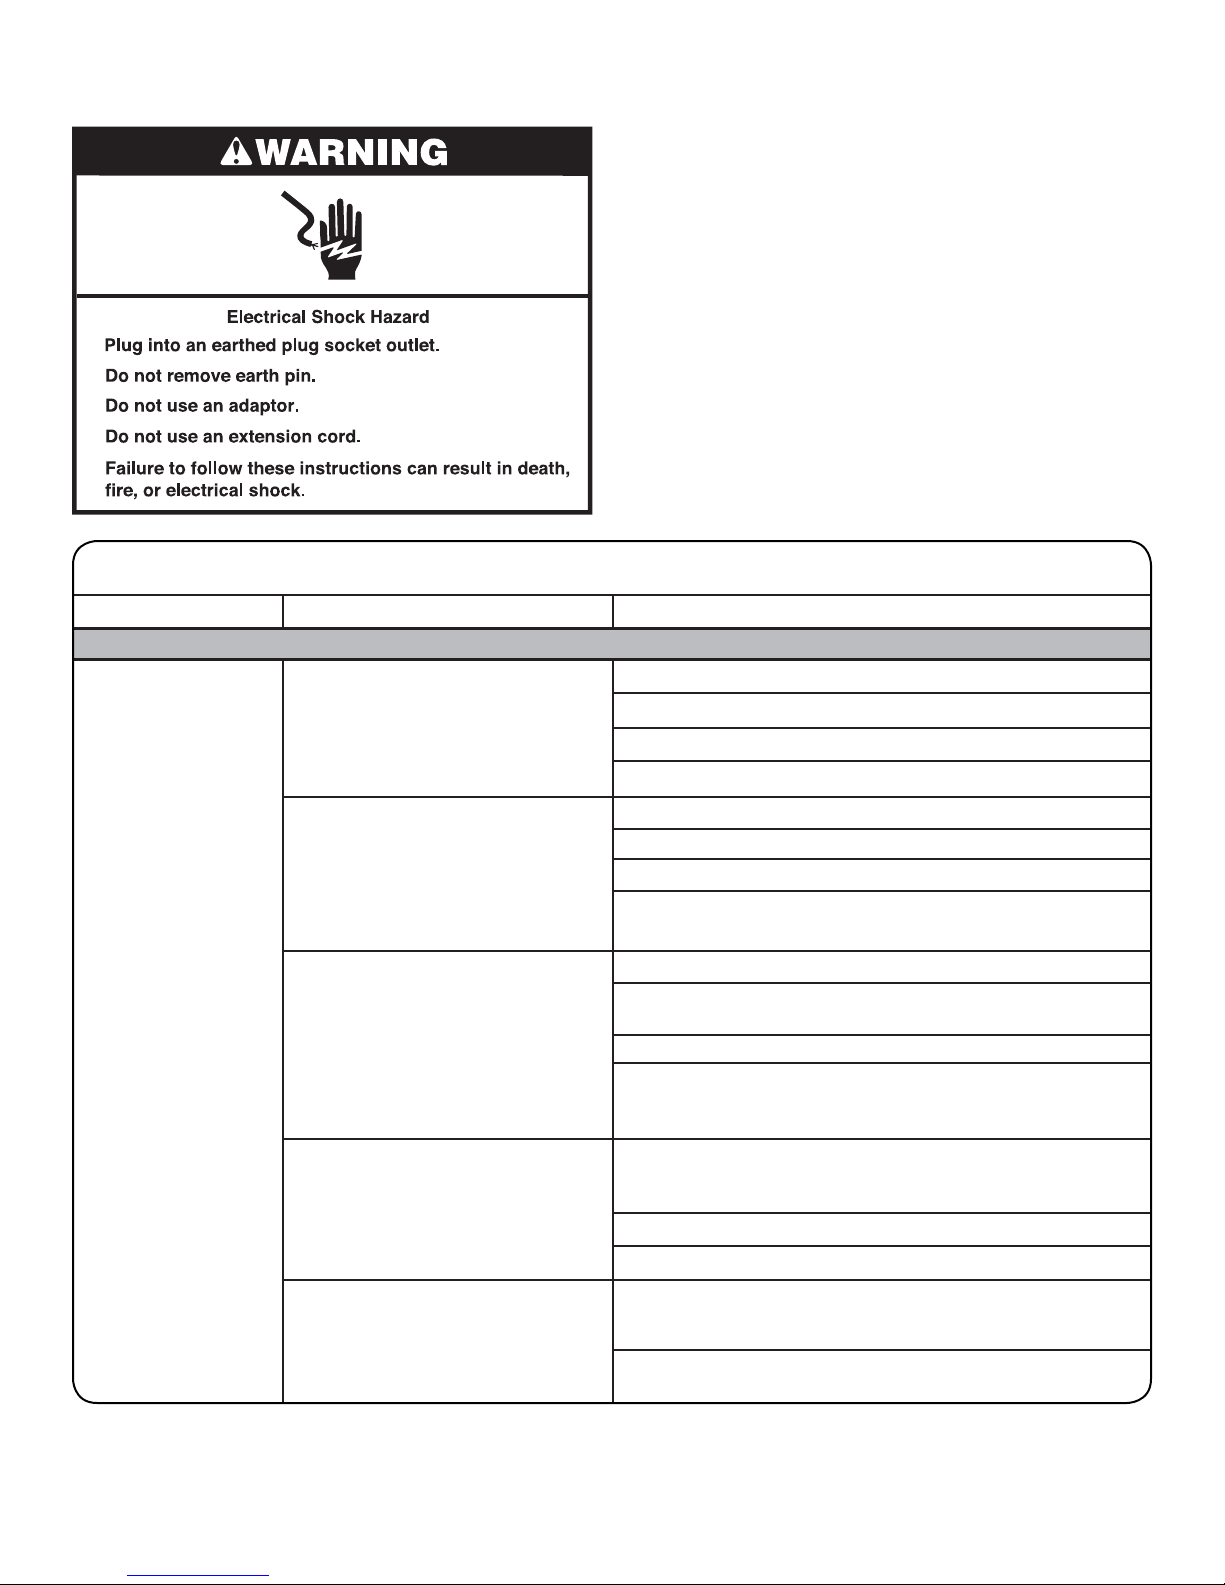
Plug power cord into an earthed outlet.
Do not use an extension cord.
Ensure there is power to outlet.
Reset a tripped circuit breaker. Replace any blown fuses.
NOTE: If problems continue, contact an electrician.
Lid must be closed for washer to run.
Washer will pause during certain phases of cycle. Do not
interrupt cycle.
Washer may be stopped to reduce suds.
The washer senses the dry load with short spins that may take
2 to 3 minutes before water is added. You may hear the hum of
the spins. This is normal.
washplate. Do not load garments directly over the center
of the washplate. Close lid and press START/Pause/Unlock.
Add only 1 or 2 additional garments after washer is started.
Do not add more water to the washer.
Only use HE detergent. Suds from regular detergents can slow
or stop the washer. Always measure detergent and follow
detergent directions based on your load requirements.
To remove suds, cancel cycle. Select RINSE & SPIN. Press START/
Pause/Unlock. Do not add more detergent.
14
Page 15
TROUBLESHOOTING
First try the solutions suggested here to possibly avoid the cost of a service call.
If you experience
Washer not performing as expected (cont.)
Washer not draining/
spinning, loads are still
wet, or spin light remains
on (indicating that the
washer was unable to
pump out water within
10 minutes)
Dry spots on load
after cycle
Incorrect or wrong wash
or rinse
temperatures
Load not rinsed Check for proper water supply.
Empty pockets and use garment bags for
small items.
Using a cycle with a low spin speed. Cycles with lower spin speeds remove less water than cycles with
The washer may be tightly packed or
unbalanced.
Check plumbing for correct
drain hose installation. Drain hose
extends into standpipe farther than
114 mm (4.5").
Too much detergent causing suds to
slow or stop draining and spinning.
High speed spins extract more
moisture than traditional top-load
washers.
Check for proper water supply. Make sure hot and cold inlet hoses are not reversed.
Energy-saving controlled
wash temperatures.
Not using HE detergent or using too
much HE detergent.
Washer may be tightly packed. The washer is less efcient at rinsing when tightly packed.
Possible causes
Solution
Small items may have been caught in pump or between basket
and tub, which can slow draining.
high spin speeds. Use the recommended cycle/speed spin for your
garment. To remove extra water in the load, select DRAIN & SPIN.
Load may need to be rearranged to allow even distribution of the
load in the basket.
Tightly packed or unbalanced loads may not allow the washer to
spin correctly, leaving the load wetter than normal. Evenly arrange
the wet load for balanced spinning. Select the Drain & Spin cycle
to remove excess water. See “Using Your Washer” for loading
recommendations.
Check drain hose for proper installation. Use drain hose form and
securely attach to drainpipe or tub. Do not tape over drain opening.
Lower drain hose if the end is higher than 1.25 m (4') above the oor.
Remove any clogs from drain hose.
Use only HE detergent. Always measure and follow detergent
directions for your load. To remove extra suds, select RINSE &
SPIN. Do not add detergent.
The high spin speeds combined with air ow during the nal spin
can cause items near the top of the load to develop dry spots
during the nal spin. This is normal.
Both hoses must be attached to both washer and faucet, and have
both hot and cold water owing to inlet valve.
Check that inlet valve screens are not clogged.
Remove any kinks in hoses.
HE Energy Efcent washers use cooler wash and rinse water
temperatures than traditional top-load washer. This includes
cooler hot and warm washes.
Make sure hot and cold inlet hoses are not reversed.
Both hoses must be attached and have water owing to the inlet
valve.
Both hot and cold water faucets must be on.
Inlet valve screens on washer may be clogged.
Remove any kinks in the inlet hose.
The suds from regular detergent can keep washer from operating
correctly.
Use only HE detergent. Be sure to measure correctly.
Always measure detergent and follow detergent directions based
on load size and soil level.
Load garments in loose heaps evenly around the washplate. Do
not load garments directly over the center of the washplate.
Use cycle designed for the fabrics being washed.
Add only 1 or 2 additional garments after washer is started.
15
Page 16
TROUBLESHOOTING
First try the solutions suggested here to possibly avoid the cost of a service call.
If you experience
Washer not performing as expected (cont.)
Sand, pet hair, lint, etc.
on load after washing
Load is tangling Washer not loaded as recommended. See “Using Your Washer” section.
Not cleaning or
removing stains
operation
Heavy sand, pet hair, lint, and
detergent or bleach residues
may require additional rinsing.
Wash load not completely
covered in water.
Added more water to washer.
Washer not loaded as recommended.
Adding detergent on top of load. Add detergent, oxi products and color-safe bleach to the bottom of
Not washing like colors together.
Not using HE detergent or using too
much HE detergent.
Not using correct cycle for fabric type.
Not using dispenser or fabric softener
dispenser ball.
Not selecting Fabric Softener option. Always select the Fabric Softener option when adding fabric
Clogged dispenser. Use only liquid chlorine bleach in the bleach dispenser.Incorrect dispenser
Possible Causes
Add an Extra Rinse to the selected cycle.
Select a cycle with a slower wash action and spin speed, however
items will be wetter than those using a higher speed spin. See the
“Cycle Guide” to match your load with the best cycle.
Load garments in loose heaps evenly around the washplate. Do
not load garments directly over the center of the washplate.
Reduce tangling by mixing types of load items. Use the
recommended cycle for the type of garments being washed.
Washer senses load size and adds correct amount of water. This is
normal and necessary for clothes to move.
Do not add more water to washer. Adding water lifts the garments
off the washplate, resulting in less effective cleaning.
Washer is less efcient at cleaning when tightly packed.
Load garments in loose heaps evenly around the washplate. Do
not load garments directly over the center of the washplate.
Add only 1 or 2 additional garments after washer is started.
the basket before adding the load items.
Wash like colors together and remove promptly after the cycle is
complete to avoid dye transfer.
The suds from regular detergent can keep washer from
operating correctly.
Use only HE detergent. Be sure to measure correctly.
Always measure detergent and follow manufacturer’s directions
based on load size and soil level.
Use a higher soil level cycle option and warmer wash
temperature to improve cleaning.
Use Heavy Duty Heavy and Heavy Duty Regular cycle for tough
cleaning. See the “Cycle Guide” to match your load with the best
cycle.
Use dispenser for chlorine bleach and fabric softener dispenser
ball for fabric softener to avoid staining.
Load dispenser before starting a cycle.
Do not add products directly onto load.
softener. Cycles that use spray rinsing will add additional water for
proper fabric softener dispensing when the option is selected.
Solution
16
Page 17
TROUBLESHOOTING
First try the solutions suggested here to possibly avoid the cost of a service call.
If you experience
Washer not performing as expected (cont.)
Fabric Damage
Odors
Sharp items were in pockets during
wash cycle.
Strings and straps could have tangled.
Items may have been damaged before
washing.
Fabric damage can occur if washer is
tightly packed.
Liquid chlorine bleach may have been
added incorrectly.
Garment care instructions may not have
been followed.
Monthly maintenance not done as
recommended.
Not using HE detergent or using too
much HE detergent.
Possible Causes
Solution
Empty pockets, zip zippers, and snap or hook fasteners before
washing to avoid snags and tears.
Tie all strings and straps before starting wash load.
Mend rips and broken threads in seams before washing.
Load garments in loose heaps evenly around the washplate. Do
not load garments directly over the center of the washplate.
Use cycle designed for the fabrics being washed.
Add only 1 or 2 additional garments after washer is started.
Do not pour liquid chlorine bleach directly onto load. Wipe up
bleach spills.
Undiluted bleach will damage fabrics. Do not use more than
recommended by manufacturer.
Do not place load items on top of bleach dispenser when loading
and unloading washer.
Always read and follow garment manufacturer’s care label
instructions. See the “Cycle Guide” to match your load with the
best cycle.
Run the Clean Washer cycle after every 30 washes. See “Washer
Care” in Washer Maintenance.
Unload washer as soon as cycle is complete.
Use only HE detergent. Be sure to measure correctly. Always
follow the manufacturer’s directions.
See “Washer Care” section.
Lid locked light is
ashing
The lid is not closed. Close the lid. The washer will not start or ll with the lid open.
A cycle was stopped or paused
using the Start/Pause/Unlock button.
The washer may still be spinning. The lid will not unlock until
the basket has stopped spinning. This may take several minutes if
washing large loads or heavy fabrics.
17
Page 18
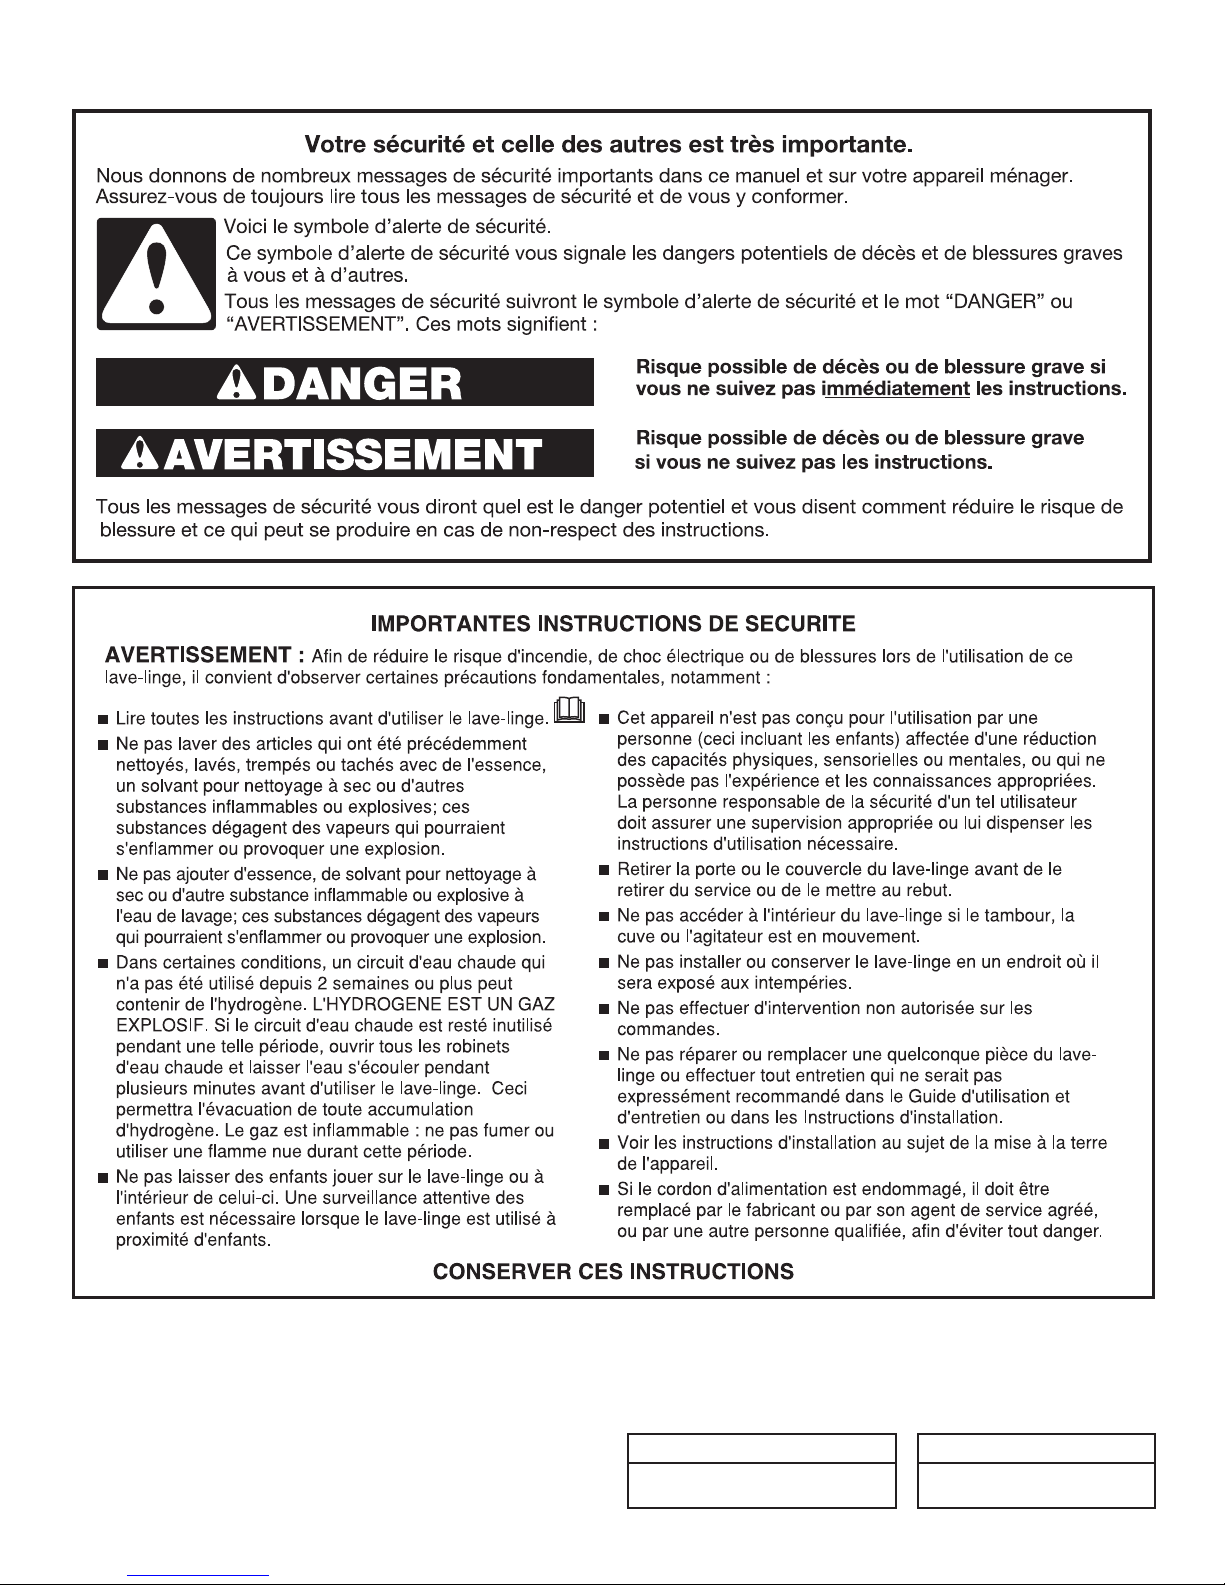
SECURITE DU LAVE-LINGE
CARACTERISTIQUES
Ces appareils sont vendus dans diverses régions aux critères
de capacité de mesure différents. Vous trouverez ci-dessous
quelques-unes des formes de mesures valables indiquées sur
ce produit :
Capacité linge de maison sec : Un poids reétant la taille de charge
maximale pouvant être placée dans le lave-linge.
18
Capacité IEC : Mesure de capacité représentant la capacité
maximale de linge de maison sec et de textiles pour lesquels le
fabricant conseille un programme spécique de traitement.
Capacité linge de maison sec
10,5 kg (23 lb) 7,5 kg (16,5 lb)
Capacité IEC
Page 19
QUOI DE NEUF SOUS LE COUVERCLE?
Nettoyer avec moins d’eau
Plateau de lavage
Lave-linge de type agitateur
traditionnel
La nouveauté la plus remarquable de ce nouveau lave-linge est
son système de lavage à faible consommation d’eau avec plateau
de lavage. Le lave-linge ajuste automatiquement leniveau d’eau
en fonction de la taille de la charge - nul besoin de sélecteur de
niveau d’eau.
Lave-linge à faible consommation
d’eau avec plateau de lavage
Détection automatique
de taille de charge
Une fois que l’on démarre le programme, le couvercle se
verrouille et le lave-linge entame un processus de détection
pour déterminer le niveau d’eau approprié à la charge. Cela peut
prendre plusieurs minutes avant que l’eau ne soit ajoutée. Voir
la description pas-à-pas dans la section “Témoins lumineux
de programme”.
Vous entendrez le moteur faire tourner le panier par de brefs
mouvements d’impulsion pour bien imbiber la charge. Cette
méthode de lavage avec faible consommation d’eau utilise moins
d’eau et d’énergie qu’un lave-linge traditionnel de type agitateur.
Choix du détergent approprié
Utiliser uniquement des détergents Haute efcacité. L’emballage
portera la mention “HE” ou “High Efciency”(haute efcacité). Un
lavage avec faible consommation d’eau produit un excès de mousse
avec un détergent non HE ordinaire. Il est probable que l’utilisation
d’un détergent ordinaire prolongera la durée des programmes et
réduira la performance de rinçage. Ceci peut aussi entraîner des
défaillances des composants et une moisissure perceptible. Les
détergents HE sont conçus pour produire la quantité de mousse
adéquate pour le meilleur rendement. Suivre les recommandations
du fabricant pour déterminer la quantité de détergent à utiliser.
Charger les vêtements sans les tasser et de façon uniformele long
du plateau de lavage. Ne pas placer les vêtementsdirectement au
centre du plateau de lavage – celui-ci doitêtre visible une fois les
vêtements à l'intérieur..
À mesure que le lave-linge imbibe et déplace la charge,
les vêtements se tassent dans le panier. Ceci est normal et
ne signie pas que l'on doive rajouter des vêtements.
IMPORTANT : Le panier du lave-linge ne sera pas rempli d’eau,
comme avec votre précédent lave-linge de type agitateur. Il est
normal qu’une partie de la charge dépasse du niveau d’eau.
Utiliser uniquement un détergent Haute efcacité (HE).
Nettoyage concentré
Le système de lavage à faible consommation d’eau signie un
lavage concentré. Plutôt que de diluer du détergent comme dans
un lave-linge de type agitateur, ce lave-linge libère le détergent
directement sur les endroits souillés.
Sons normaux prévisibles
Au cours des différents stades du programme de lavage, vous
entendrez peut-être des bruits que votre lave-linge précédent ne
produisait pas. Par exemple, vous entendrez peut-être un cliquetis
et un bourdonnement au début du programme lorsque le système
de verrouillage du couvercle effectue un test automatique. On
entendra différents bourdonnements et bruits de frottements
rythmiques à mesure que l’impulseur déplace la charge. Parfois, il
est possible que le lave-linge soit complètement silencieux, lorsqu’il
détermine le niveau d’eau adéquat ou qu’il laisse tremper les
vêtements.
19
Page 20
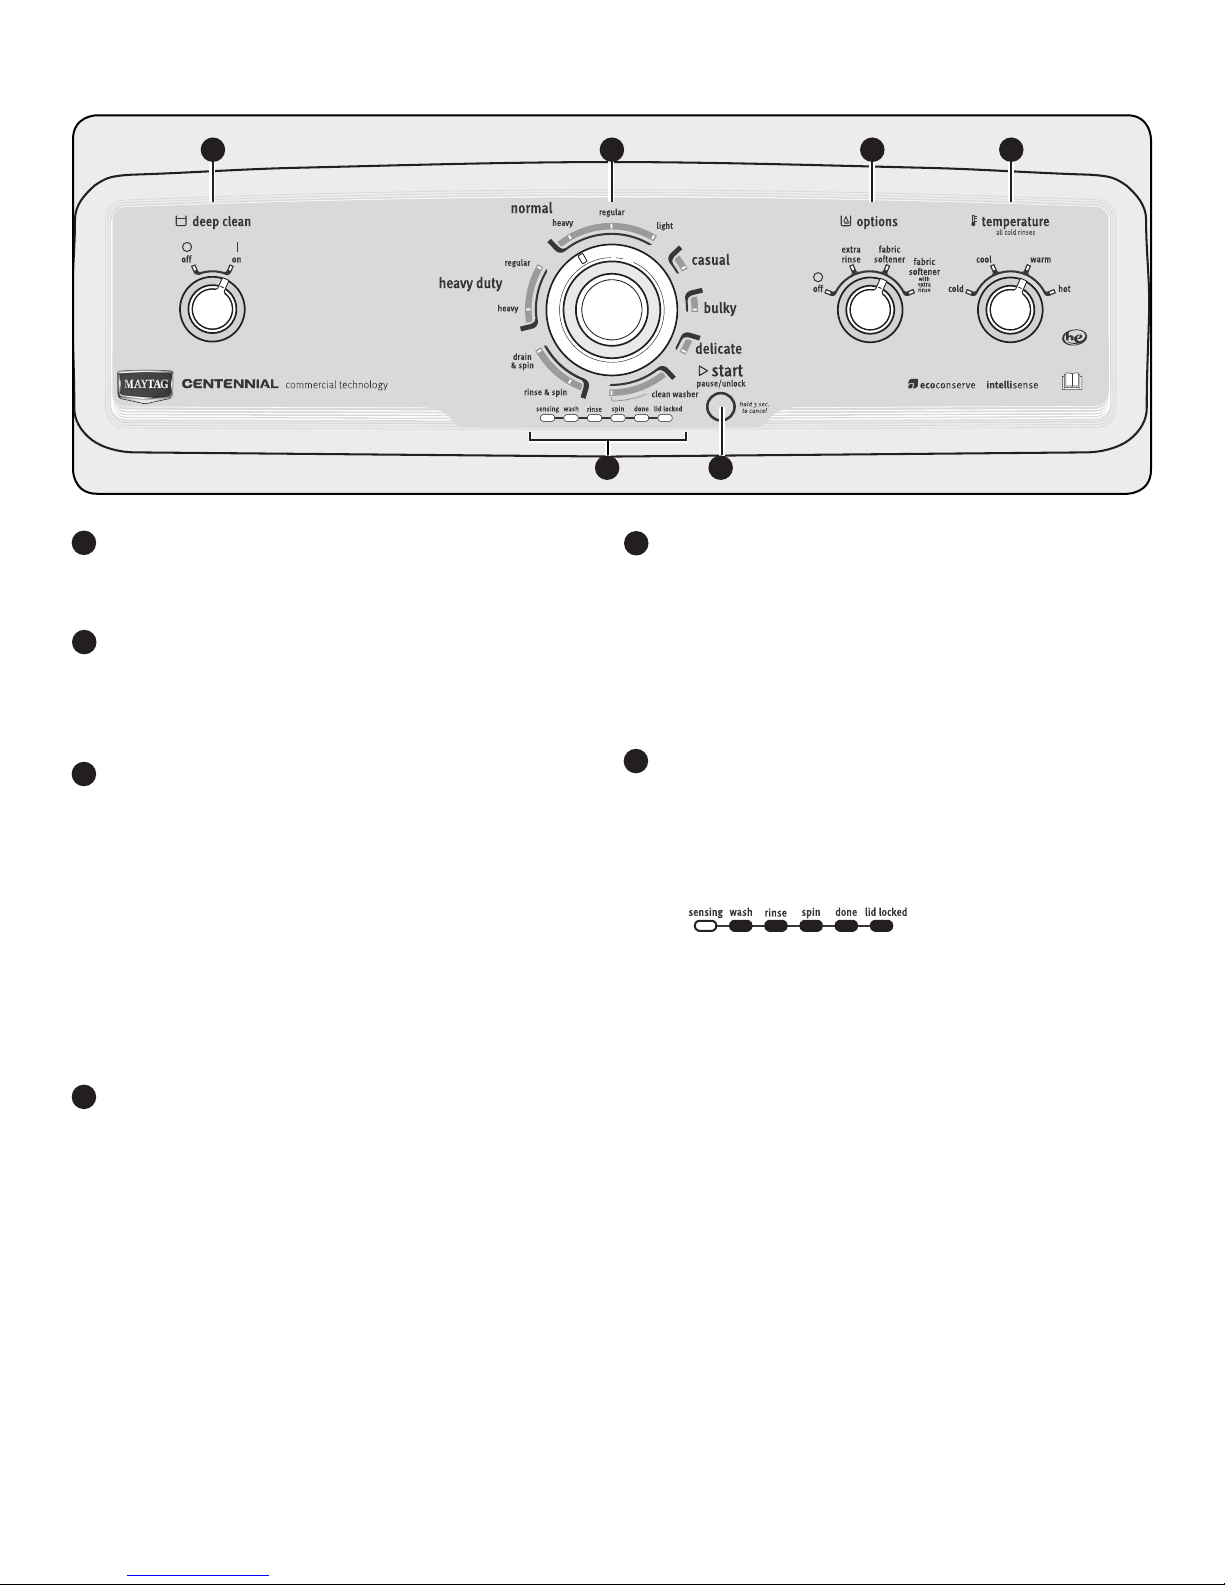
TABLEAU DE COMMANDE ET CARACTERISTIQUES
1 3 4
DEEP CLEAN (nettoyage en profondeur)
1
Cette option fournit une action de nettoyage améliorée pour
les taches tenaces. Ceci prolonge la durée d’agitation et de
trempage du programme.
2
BOUTON DE PROGRAMME DE LAVAGE
Utiliser le bouton de programme de lavage pour sélectionner
les programmes disponibles sur le lave-linge. Tourner le bouton
pour sélectionner un programme correspondant à la charge
de linge. Voir “Guide de programmes” pour des descriptions
détaillées.
3
OPTIONS
Il est possible d’ajouter les options suivantes à la plupart
des programmes.
EXTRA RINSE (rinçage supplémentaire)
On peut utiliser cette option pour ajouter automatiquement
un second rinçage à la plupart des programmes.
FABRIC SOFTENER (ajout d’assouplissant)
Cette option doit être sélectionnée si l’on utilise de
l’assouplissant pour tissu.
FABRIC SOFTENER with Extra Rinse (assouplissant pour
tissu avec rinçage supplémentaire
Cette option combine les options Fabric Softener
(assouplissant pour tissu) et Extra Rinse (rinçage
supplémentaire).
4
TEMPERATURE
La fonction de contrôle de température détecte et maintient
une température uniforme de l’eau en régulant le débit
d’arrivée d’eau chaude et d’eau froide.
Sélectionner une température de lavage en fonction du type
de tissu et de saleté à laver. Pour des résultats optimaux,
suivre les instructions sur l’étiquette du vêtement et utiliser la
température d’eau de lavage la plus chaude possible qui reste
sans danger pour le tissu.
• Les températures de l’eau tiède et de l’eau chaude seront
inférieures à celles de votre précédent lave-linge.
• Même avec un lavage à l’eau froide, il est possible que de
l’eau tiède soit ajoutée au lave-linge pour maintenir une
température minimale.
2
6
5
5
START/PAUSE/UNLOCK BUTTON
(bouton mise en marche/pause/déverrouillage)
Appuyer sur ce bouton pour démarrer le programme
sélectionné, puis appuyer de nouveau pour suspendre
le programme et déverrouiller le couvercle. Appuyer pendant
3 secondes pour annuler un programme.
REMARQUE : Si le lave-linge tourne, le couvercle peut
mettre quelques minutes à se déverrouiller. déverrouiller.
Appuyer pendant 3 secondes sur ce bouton pour annuler un
programme.
TEMOINS LUMINEUX DES PROGRAMMES
6
Les témoins lumineux indiquent la progression du
programme. A chaque étape du processus, il est possible
que l’on remarque des pauses ou des sons différents de
ceux des lave-linges ordinaires.
SENSING (détection)
Lorsqu’on appuie sur le bouton START/Pause/Unlock (mise
en marche/pause/déverrouillage), le lave-linge effectue
un test automatique sur le mécanisme de verrouillage du
couvercle. On entend un déclic, le panier effectue un léger
tour, et le couvercle se déverrouille brièvement avant de se
verrouiller à nouveau.
Une fois le couvercle verrouillé pour la deuxième fois,
le lave-linge utilise des essorages lents et courts pour estimer
le volume de la charge. Ces essorages de détection peuvent
prendre 2 à 3 minutes avant que de l’eau ne soit ajoutée à la
charge et les essorages peuvent émettre un bourdonnement.
Si le témoin lumineux de détection est allumé, cela signie
que le lave-linge fonctionne correctement. On entend le
moteur qui fait tourner le panier par de courtes impulsions
pour mouiller l’intégralité de la charge. Le lave-linge
déplace ensuite brièvement la charge, fait une pause pour
permettre à l’eau de tremper la charge, et continue à ajouter
de l’eau. Ce processus peut se répéter jusqu’à ce que la
quantité d’eau correcte ait été ajoutée à la charge. Il est
aussi possible que l’on entende de l’eau couler dans le
distributeur, ajoutant le détergent à la charge.
REMARQUE : Eviter d’ouvrir le couvercle durant la
détection. Le processus de détection recommencera une
fois le lave-linge remis en marche. Le témoin de détection
peut également s’allumer lors de l’étape de lavage du
programme. Ceci est normal.
20
Page 21

WASH (lavage)
DONE (terminé)
On entend le moteur et le plateau de lavage déplacer
la charge. Contrairement aux laveuses ordinaires, la
charge n'est pas complètement submergée dans l'eau. Un
nettoyage avec faible niveau d’eau signie un nettoyage
concentré. Plutôt que de diluer du détergent comme
dans une laveuse de type agitateur, cette laveuse libère le
détergent uniquement sur les endroits souillés. Les bruits
émis par le moteur peuvent changer lors des différentes
étapes du programme. La durée de lavage est déterminée
par le niveau de saleté sélectionné.
RINSE (rinçage)
On entend des sons similaires à ceux entendus lors
du programme de lavage à mesure que le lave-linge
rince et déplace la charge. L’assouplissant pour tissu sera
distribué si l’option Fabric Softener - Yes (assouplissant
pour tissu - Oui) a été sélectionnée. Certains programmes
utilisent un rinçage par vaporisation.
SPIN (essorage)
Le lave-linge essore la charge à des vitesses augmentant
graduellement pour une bonne extraction de l’eau,
en fonction du programme et de la vitesse d'essorage
sélectionnés.
Une fois le programme terminé, ce témoin s’allume.
Retirer la charge rapidement pour un résultat optimal.
LID LOCKED (couvercle verrouillé)
Pour permettre une bonne détection de la charge et un
bon essorage, le couvercle se verrouille et le témoin de
verrouillage du couvercle s’allume. Ce témoin lumineux
indique que le couvercle est verrouillé et qu’il ne peut
être ouvert.
Si l’on doit ouvrir le couvercle, appuyer
sur START/Pause/Unlock (mise en marche/
pause/déverrouillage). Le couvercle se
déverrouille une fois que le mouvement
du lave-linge a cessé. Il se peut que
cela prenne plusieurs minutes si le
lave-linge essorait la charge à grande
vitesse. Appuyer de nouveau sur START/Pause/Unlock
(mise en marche/pause/déverrouillage) pour poursuivre
le programme. Eviter d’ouvrir le couvercle durant la
détection. Le processus de détection recommencera une
fois le lave-linge est remis en marche.
GUIDE DE PROGRAMMES
Pour un meilleur soin des tissus, choisir le programme qui convient le mieux à la charge à laver.
Certains programmes et options ne sont pas disponibles sur certains modèles.
Articles à laver : Programme : Température* :
Tissus très sales
Tissus résistants, articles
grand-teint, serviettes,
jeans
Articles de grande taille
tels que les draps, les
petits duvets, les vestes
Charges de vêtements
en coton, lin, draps et
charges mixtes
Articles légers en
coton et mélanges de
coton
Heavy Duty
Heavy
(service très
intense)
Heavy Duty
Regular
(service
intense
ordinaire)
Normal Heavy
(service intense
normal)
Normal Regular
(service
ordinaire
normal)
Normal Light
(service léger
normal)
Hot (chaude)
Warm (tiède)
Cool (fraîche)
Cold (froide)
Hot (chaude)
Warm (tiède)
Cool (fraîche)
Cold (froide)
Hot (chaude)
Warm (tiède)
Cool (fraîche)
Cold (froide)
Hot (chaude)
Warm (tiède)
Cool (fraîche)
Cold (froide)
Hot (chaude)
Warm (tiède)
Cool (fraîche)
Cold (froide)
Vitesse
d’essorage** :
High
(elevée)
High
(elevée)
High
(elevée)
High
(elevée)
High
(elevée)
Détails du programme :
Utilise le temps de lavage maximal et l’action la plus
intense pour éliminer les taches et saletés les plus
difciles. Utiliser ce programme pour les articles très
sales ou robustes. Le processus de détection du niveau
d’eau peut ne pas prendre le même temps pour tous
les articles car certains tissus absorbent plus d’eau que
d’autres.
Utiliser ce programme pour les articles très sales ou
robustes. Le processus de détection du niveau d’eau
peut ne pas prendre le même temps pour tous les
articles car certains tissus absorbent plus d’eau que
d’autres.
Utiliser ce programme pour les articles en coton et les
charges mixtes très sales. Ce programme comporte un
rinçage par vaporisation.
Utiliser ce programme pour les articles en coton et
les charges de tissus mixtes présentant un degré de
saleté normal. Ce programme comporte un rinçage par
vaporisation.
Utiliser ce programme pour les articles légers en coton
présentant un faible degré de saleté. Ce programme
comporte un rinçage par vaporisation.
* Tous les rinçages se font à l’eau froide.
** La vitesse d’essorage fait partie intégrante du programme et ne peut pas être sélectionnée.
21
Page 22

GUIDE DE PROGRAMMES (SUITE)
Pour un meilleur soin des tissus, choisir le programme qui convient le mieux à la charge à laver.
Certains programmes et options ne sont pas disponibles sur certains modèles.
Articles à laver : Programme : Température* : Vitesse
d’essorage** :
Articles non repassables,
articles en coton, à
pressage permanent,
tissus synthétiques
Articles de grande taille
tels que les draps, les
sacs de couchage,, les
petits duvets, les vestes
et les petits tapis lavables
Articles en soie lavables
en machine, tissus lavés
à la main
Maillots et articles
nécessitant un rinçage
sans détergent
Articles lavés à la
main ou articles très
humides
Casual
(tout-aller)
Bulky
(articles
volumineux)
Delicate
(articles
délicats)
***Rinse & Spin
(***Rinçage et )
essorage
***Drain & Spin
(***Vidange et )
essorage
Hot (chaude)
Warm (tiède)
Cool (fraîche)
Cold (froide)
Hot (chaude)
Warm (tiède)
Cool (fraîche)
Cold (froide)
Hot (chaude)
Warm (tiède)
Cool (fraîche)
Cold (froide)
Cold (froide) High
N/A
Low
(faible)
High
(elevée)
Low
(faible)
(elevée)
High
(elevée)
Détails du programme :
Utiliser ce programme pour laver des charges de
vêtements qui ne se repassent pas tels que chemises de
sport, chemisiers, vêtements de travail tout-aller, articles
à pressage permanent et mélanges de tissus.
Utiliser ce programme pour laver de gros articles tels
que des vestes et de petites couettes. Le lave-linge se
remplit de sufsamment d’eau pour mouiller la charge
avant que la portion de lavage du programme ne
commence. Elle utilise aussi un niveau d’eau plus élevé
que les autres programmes. Ne pas trop tasser le linge
dans le panier.
Utiliser ce programme pour laver des vêtements
légèrement sales dont l’étiquette de soin indique “Soie
lavable en machine” ou “Programme délicat”. Placer les
petits articles dans des sacs en let avant le lavage. Ce
programme utilise un niveau d’eau plus élevé (préréglé).
Combine un rinçage et un essorage pour les charges
nécessitant un programme de rinçage supplémentaire
ou pour nir de prendre soin d’une charge après une
coupure de courant.
d’eau prédéterminé plus haut. Utiliser également pour
les charges nécessitant uniquement un rinçage.
Ce programme utilise un essorage pour réduire les
durées de séchage pour les tissus lourds ou articles
lavés à la main nécessitant un soin spécial. Utiliser
ce programme pour vidanger le lave-linge après avoir
annulé un programme ou terminé un programme après
une coupure de courant.
Ce programme utilise un niveau
Pas de vêtements dans
le lave-linge
* Tous les rinçages se font à l’eau froide.
** La vitesse d’essorage fait partie intégrante du programme et ne peut pas être sélectionnée.
*** L’option Deep Clean (nettoyage en profondeur) n’est pas disponible avec ces programmes.
***Clean
Washer
(***Nettoyage
du lave-linge)
Utiliser ce programme à l’issue de chaque série de 30
lavages pour que l’intérieur du lave-linge reste frais
et propre. Ce programme utilise un niveau d’eau plus
élevé. Utiliser de l'agent de blanchiment au chlore pour
laver le lave-linge en profondeur. Ce programme ne doit
pas être interrompu. Voir “"Entretien du lave-linge”.
IMPORTANT : Ne pas placer de vêtements ou autres
articles dans le lave-linge pendant le programme
Clean Washer. Utiliser ce programme avec une cuve
de lavage vide.
22
Page 23

UTILISATION DU LAVE-LINGE
1. Trier et préparer le linge
• Retourner les tricots pour éviter le boulochage. Séparer les
articles qui forment les peluches de ceux qui la retiennent. Les
articles synthétiques, tricots et articles en velours retiennent
les peluches provenant des serviettes, des tapis et des tissus
chenille.
Toujours lire et suivre les instructions des étiquettes de soin des
tissus pour éviter d’endommager les vêtements.
• Vider les poches. Des pièces de monnaie, des boutons ou
objets de petite taille sont susceptibles de glisser sous le
plateau de lavage et de s’y coincer, ce qui peut entraîner des
bruits inattendus.
• Trier les articles en fonction du programme et de la
température recommandés, ainsi que la solidité des teintures.
• Séparer les articles très sales des articles peu sales.
• Séparer les articles délicats des tissus résistants.
• Ne pas sécher les vêtements si les taches sont toujours
présentes après le lavage car la chaleur pourrait xer les taches
sur le tissu.
• Traiter les taches sans délai.
• Fermer les fermetures à glissière, attacher les crochets, cordons
et ceintures en tissu, et retirer tout accessoire
et ornement non lavables.
• Réparer les déchirures pour éviter que les articles ne
s’endommagent encore davantage lors du nettoyage.
Conseils utiles :
• Lors du lavage d’articles étanches ou résistants à l’eau, charger
la machine de façon uniforme. Se référer au "Guide de
programmes " pour des conseils et plus de renseignements sur
l'utilisation du programme Bulky (articles volumineux).
• Utiliser des sacs à linge pour aider à empêcher l’emmêlement
lors du lavage d’articles délicats ou de petits articles.
2. Ajouter du détergent HE
Ajouter une mesure de détergent HE
dans le panier.
IMPORTANT : Utiliser uniquement des
détergents Haute efcacité. L’emballage
portera la mention “HE” ou “High Efciency” (haute efcacité).
Un lavage avec faible consommation d’eau produit un excès
de mousse avec un détergent non HE ordinaire. Il est probable
que l’utilisation d’un détergent ordinaire prolongera la durée
des programmes et réduira la performance de rinçage. Ceci
peut aussi entraîner des défaillances des composants et une
moisissure perceptible. Les détergents HE sont conçus pour
produire la quantité de mousse adéquate pour le meilleur
rendement. Suivre les instructions du fabricant pour déterminer
la quantité de détergent à utiliser.
Utilisation d’Oxi ou d’agent de blanchiment sans danger pour
les couleurs :
Si l’on utilise un agent de blanchiment activateur sans danger
pour les couleurs ou Oxi, l’ajouter au fond du panier du lavelinge avant d’ajouter les vêtements.
23
Page 24

3. Charger les vêtements dans
le lave-linge
Charger les vêtements sans les tasser et de
façon uniforme le long de du plateau de
lavage. Ne pas placer la charge directement
sur le centre du plateau de lavage. Lorsque
la charge est dans le lave-linge, le centre
du plateau de lavage doit être visible.
Essayer de mélanger différents types
d’articles pour réduire l’emmêlement.
IMPORTANT : Les articles doivent pouvoir se déplacer
librement pour un nettoyage optimal et pour réduire le
froissement et l’emmêlement.
4. Ajouter de l’agent de
blanchiment liquide au chlore
dans le distributeur, si désiré
Liquid
Liquid
Agent de blanchiment
Chlorine Bleach
Chlorine Bleach
liquide au chlore
5. Ajouter de l’assouplissant pour tissu
dans le distributeur, si désiré
Ce lave-linge est conçu pour permettre l'utilisation d'une boule
distributrice d'assouplissant pour tissu (que l’on doit acheter).
Toujours suivre les instructions du fabricant pour savoir comment
utiliser la boule distributrice de manière appropriée. Puis
sélectionner l'option Fabric Softener (assouplissant pour tissu). La
boule distributrice d'assouplissant pour tissu libère l'assouplissant
pour tissu au cours du programme de rinçage.
IMPORTANT : L’option Fabric Softener (assouplissant pour
tissu) doit être sélectionnée pour que le produit soit distribué
correctement et au moment adéquat du programme. Ne pas
remplir excessivement ni diluer le produit.
REMARQUE : Les boules distributrices d’assouplissant pour tissu
ne sont pas disponibles dans toutes les régions. Consulter votre
revendeur pour s’assurer de leur disponibilité.
Ajouter manuellement à la charge à laver l’assouplissant liquide
pour tissu
Au cours du rinçage nal, attendre le remplissage complet du
lave-linge puis appuyer sur le bouton START/Pause/Unlock (mise
en marche/pause/déverrouillage) pour suspendre le programme
du lave-linge. Soulever le couvercle et verser la mesure
recommandée d’assouplissant pour tissu. Ne pas renverser,
faire éclabousser, égoutter ou couler de l'assouplissant pour
tissu liquide dans le panier ou sur la charge. Ne pas utiliser plus
d'assouplissant pour tissu que la quantité recommandée. Fermer
le couvercle et appuyer de nouveau sur START/Pause/Unlock
(mise en marche/pause/déverrouillage) pour mettre le lave-linge
en marche.
IMPORTANT : L’option Fabric Softener Added (ajout
d’assouplissant pour tissu) doit être sélectionnée pour assurer
la distribution correcte de l’assouplissant pour tissu au cours de
l’étape de rinçage du programme.
Ne pas remplir excessivement le distributeur, diluer le produit
ou utiliser plus d’une 236 mL (1 tasse). Ne pas utiliser d’agent
de blanchiment sans danger pour les couleurs ni de produit Oxi
avec un programme utilisant de l’eau de Javel.
24
Page 25

6. Sélectionner le programme
Wash Temp
(Température de lavage)
Hot (Chaude)
De l’eau froide est ajoutée pour
économiser de l’énergie. Ceci
sera plus froid que le réglage
du chauffe-eau pour l’eau chaude
de votre domicile.
Warm (Tiède)
De l’eau froide sera ajoutée; il est
donc possible que l’eau soit plus
froide que celle que fournissait
votre lave-linge précédente.
Cool (Fraîche)
De l'eau chaude est ajoutée pour
favoriser l’élimination de la saleté et
aider à dissoudre les détergents.
Suggested Fabrics
(Tissus suggérés)
Blancs et couleurs
claires
Vêtements durables
Saleté intense
Couleurs vives
Saleté modérée à
légère
Couleurs qui
déteignent ou
s’atténuent
Saleté légère
Tourner le bouton de programme pour choisir un programme
de lavage.
7. Sélectionner la température
de lavage
Après avoir sélectionné un programme, sélectionner la
température de lavage désirée en tournant le bouton de
température au réglage souhaité.
Toujours lire et suivre les instructions des étiquettes de
soin des tissus pour éviter d’endommager les vêtements.
Cold (Froide)
De l’eau tiède est ajoutée
pour favoriser l’élimination
de la saleté et aider à dissoudre les
détergents.
Couleurs foncées
qui déteignent
ou s’atténuent
Saleté légère
8. Sélectionner les options
de programme, si désiré
Si l’on souhaite ajouter l’option Deep Clean (nettoyage en
profondeur), Extra Rinse (rinçage supplémentaire) ou d’autres
options, tourner le bouton pour sélectionner l’option souhaitée
ou le régler à ON (marche).
REMARQUE : Toutes les options ne sont pas disponibles avec
tous les programmes. Consulter le guide des programmes pour
plus de renseignements.
25
Page 26

9. Appuyer sur START/Pause/Unlock
pour démarrer le programme
de lavage
ENTRETIEN DU LAVE-LINGE
TUYAUX D’ARRIVEE D’EAU
Remplacer les tuyaux d’arrivée d’eau après 5 ans d’utilisation
pour réduire le risque de défaillance intempestive. Inspecter
périodiquement les tuyaux; les remplacer en cas de renement,
de déformation, de coupure et d’usure ou
de fuite.
Lorsque vous remplacez les tuyaux d’arrivée d’eau, noter la date
de remplacement au marqueur indélébile sur l’étiquette.
Appuyer sur le bouton START/Pause/Unlock (mise en
marche/pause/déverrouillage) pour démarrer le programme
de lavage. Le remplissage est retardé de plusieurs minutes
pendant que le niveau d’équilibre de la charge est détecté.
Une fois le programme terminé, le témoin lumineux DONE
(terminé) s’allume. Retirer rapidement les vêtements une fois
le programme terminé pour empêcher la formation d’odeurs,
réduire le froissement et empêcher les crochets métalliques,
fermetures à glissière et boutons-pression de rouiller.
Déverrouiller le couvercle pour ajouter les vêtements
Si l’on doit ouvrir le couvercle pour ajouter 1 ou 2 vêtements
oubliés :
Appuyer sur START/Pause/Unlock (mise en marche/pause/
déverrouillage); le couvercle se déverrouille une fois que le
mouvement du lave-linge a cessé. Il se peut que cela prenne
plusieurs minutes si le lave-linge essorait la charge à grande
vitesse. Fermer ensuite le couvercle et appuyer de nouveau sur
START/Pause/Unlock (mise en marche/pause/déverrouillage)
pour redémarrer le programme.
Si on laisse le couvercle ouvert pendant plus de 10 minutes,
l’eau est pompée et vidangée automatiquement.
Retard dans le remplissage
Le remplissage est retardé de 2 à 3 minutes pendant que la
machine détecte tout déséquilibre éventuel de la charge. Les
essorages émettent un bourdonnement avant le remplissage.
Ceci est normal.
ENTRETIEN DU LAVE-LINGE
Recommandations pour un lave-linge propre et pour un
niveau de performance optimal
1. Toujours utiliser un détergent haute efcacité (HE) et suivre
les instructions du fabricant de détergent pour déterminer
la quantité de détergent HE à utiliser. Ne jamais utiliser plus
que la quantité recommandée de détergent, car ceci peut
augmenter le taux d’accumulation de résidus de détergent
et de souillures à l’intérieur du lave-linge, ce qui pourrait
entraîner la formation d’odeurs indésirables.
2. Exécuter périodiquement des lavages avec de l’eau tiède ou
chaude (et non pas exclusivement des lavages à l’eau froide),
car l’eau chaude permet de contrôler plus efcacement
la vitesse à laquelle les saletés et les résidus de détergent
s’accumulent.
3. Veiller à toujours laisser le couvercle du lave-linge ouvert
entre deux utilisations pour qu’il puisse sécher, et pour éviter
l’accumulation de résidus générateurs d’odeurs.
Nettoyage du lave-linge à chargement par le dessus
Lire complètement ces instructions avant d’entreprendre les
opérations de nettoyage de routine recommandées ci-dessous.
Le processus d’entretien du lave-linge doit être exécuté au
moins une fois par mois ou à intervalles de 30 lavages (selon
la période la plus courte des deux); ceci permettra de contrôler
la vitesse à laquelle les résidus de détergent et les souillures
s’accumulent dans le lave-linge.
Nettoyage de l’intérieur du lave-linge
Pour que l’intérieur du lave-linge reste libre de toute odeur,
suivre les instructions d’utilisation indiquées ci-dessus et
effectuer la procédure de nettoyage mensuelle recommandée
suivante :
Programme de nettoyage du lave-linge
Ce lave-linge est doté d'un programme spécial qui utilise
des volumes d'eau plus élevés combinés à de l'agent de
blanchiment au chlore pour nettoyer l'intérieur du lave-linge.
26
Page 27

ENTRETIEN DU LAVE-LINGE (SUITE)
Début de la procédure
1. Méthode avec de l’agent de blanchiment au chlore :
a. Ouvrir le couvercle du lave-linge et retirer tous les vêtements
ou articles présents dans le lave-linge.
b. Verser 236 mL (1 tasse) d’agent de blanchiment liquide
au chlore dans le distributeur d’agent de blanchiment.
REMARQUE : L’emploi d’une quantité d’agent
de blanchiment liquide au chlore supérieure à ce qui
est recommandé ci-dessus pourrait endommager
le lave-linge avec le temps.
c. Rabattre le couvercle du lave-linge.
d. Ne pas ajouter de détergent ou autre composé chimique
dans le lave-linge lors de l’exécution de cette procédure.
e. Sélectionner le programme CLEAN WASHER (nettoyage
du lave-linge).
f. Appuyer sur le bouton START/Pause/Unlock (mise en
marche/pause/déverrouillage) pour démarrer le programme.
Le fonctionnement du programme de nettoyage du lavelinge est décrit ci-dessous.
REMARQUE : Pour de meilleurs résultats, ne pas interrompre
le programme. Si le programme doit être interrompu, appuyer
sur POWER/CANCEL (mise sous tension/annulation). (Pour les
modèles qui ne sont pas dotés du bouton POWER/CANCEL (mise
sous tension/annulation),, appuyer sans relâcher sur START/
Pause/Unlock (mise en marche/pause/déverrouillage) pendant
3 secondes. Une fois le programme Clean Washer terminé,
effectuer un programme RINSE & SPIN (rinçage et essorage) pour
rincer le nettoyant du lave-linge.
Description de l’utilisation du programme de nettoyage
du lave-linge :
1. Ce programme remplit le lave-linge à un niveau supérieur à
celui des programmes de lavage ordinaires an que le niveau
de l’eau de rinçage soit supérieur à celui d’un programme de
lavage ordinaire.
2. Ce programme comporte une agitation et un essorage pour
améliorer l’élimination des souillures.
Une fois ce programme terminé, laisser le couvercle ouvert
pour permettre une meilleure ventilation et pour que l’intérieur
du lave-linge puisse sécher.
Nettoyage des distributeurs
Après avoir utilisé le lave-linge pendant longtemps, on
peut parfois constater une accumulation de résidus dans
les distributeurs du lave-linge. Pour éliminer les résidus des
distributeurs, les essuyer avec un chiffon humide et les sécher
avec une serviette. Ne pas tenter de retirer les distributeurs ou la
garniture pour le nettoyage. Les distributeurs et la garniture ne
peuvent pas être retirés. Cependant, si votre modèle comporte
un tiroir distributeur, retirer le tiroir et le nettoyer avant ou après
avoir effectué le programme de nettoyage du lave-linge. Si
nécessaire, utiliser un nettoyant tout-usage.
Nettoyage de l’extérieur du lave-linge
Utiliser une éponge ou un chiffon doux et humide pour essuyer
les renversements éventuels. Utiliser uniquement des savons ou
nettoyants doux pour nettoyer la surface externe du
lave-linge.
IMPORTANT : An d’éviter d’endommager le revêtement
du lave-linge, ne pas utiliser de produits abrasifs.
NON-UTILISATION ET ENTRETIEN
EN PERIODE DE VACANCES
Faire fonctionner le lave-linge seulement lorsqu’on est présent.
En cas de déménagement ou si l’on n’utilise pas le lave-linge
pendant longtemps, suivre les étapes suivantes :
1. Débrancher le lave-linge ou déconnecter la source de courant
électrique.
2. Fermer l’alimentation de l'eau au lave-linge pour éviter toute
inondation due à une surpression.
ENTRETIEN POUR ENTREPOSAGE HIVERNAL
IMPORTANT : Pour éviter tout dommage, installer et remiser
le lave-linge à l’abri du gel. L’eau qui peut rester dans les tuyaux
risque d’abîmer le lave-linge en temps de gel. Si le lave-linge
doit faire l’objet d’un déménagement ou d’entreposage au cours
d’une période de gel, hivériser le lave-linge.
Hivérisation du lave-linge :
1. Fermer les deux robinets d’eau; déconnecter et vidanger
les tuyaux d’arrivée d’eau.
2. Placer 1 L (1 pte) d’antigel pour véhicule récréatif dans le
panier et faire fonctionner le lave-linge sur un programme
RINSE & SPIN (rinçage et essorage) pendant environ 30
secondes pour mélanger l’antigel et l’eau restante.
3. Débrancher le lave-linge ou déconnecter la source de courant
électrique.
27
Page 28

TRANSPORT DU LAVE-LINGE
1. Fermer les deux robinets d’eau. Débrancher et vidanger
les tuyaux d’arrivée d’eau.
2. Si l’on déplace le lave-linge pendant une période de gel,
suivre les instructions de la section ENTRETIEN POUR
ENTREPOSAGE HIVERNAL avant de le déplacer.
3. Déconnecter le tuyau d’évacuation du système de vidange et
vider l’eau qui reste dans un bac ou un seau. Déconnecter le
tuyau d’évacuation de l’arrière du lave-linge.
4. Débrancher le cordon d’alimentation.
5. Placer les tuyaux d’arrivée d’eau et le tuyau d’évacuation
dans le panier du lave-linge.
6. Faire passer le cordon d’alimentation par dessus le bord
et le mettre dans le panier du lave-linge.
7. Replacer le support d’emballage de l’appareil à l’intérieur du
lave-linge. Si vous ne possédez plus le support d’emballage
de l’appareil, placer des couvertures lourdes ou des serviettes
dans l’ouverture du panier. Fermer le couvercle et placer du
ruban adhésif sur le couvercle et jusqu’à la partie inférieure
avant du lave-linge. Laisser le couvercle fermé par l’adhésif
jusqu’à ce que le lave-linge soit installé à son nouvel
emplacement.
REINSTALLATION/REUTILISATION
DU LAVE-LINGE
Pour réinstaller le lave-linge en cas de non-utilisation,
d’entreposage pour l’hiver, de déménagement ou en période
de vacances :
1. Consulter les instructions d’installation pour choisir
l’emplacement, régler l’aplomb du lave-linge et le raccorder.
2. Avant de réutiliser le lave-linge, exécuter la procédure
recommandée suivante :
Pour réutiliser le lave-linge :
1. Vidanger les canalisations d’eau et les tuyaux. Reconnecter
les tuyaux d’arrivée d’eau. Ouvrir les deux robinets d’eau.
2. Brancher le lave-linge ou reconnecter la source de courant
électrique.
3. Faire exécuter au lave-linge le programme BULKY (Articles
volumineux) pour nettoyer le lave-linge et éliminer l’antigel,
le cas échéant. Utiliser uniquement du détergent haute
efcacité HE. Utiliser la moitié de la quantité de détergent
recommandée par le fabricant pour une charge de taille
moyenne.
28
Page 29

DEPANNAGE
Essayer d’abord les solutions suggérées ici pour éviter le coût d’une intervention de dépannage.
Si les phénomènes
suivants se produisent
Vibrations ou déséquilibre
Vérier ce qui suit pour
que l’installation soit
correcte ou voir la
section “Utilisation
du lave-linge”.
Bruits
Cliquetis ou bruits
métalliques
Causes possibles
Les pieds ne sont peut-être pas
en contact avec le plancher ou
verrouillés.
Le lave-linge n’est peut-être
pas d’aplomb.
La charge est peut-être
déséquilibrée.
Des objets sont coincés dans le
système de vidange du lave-linge.
Solution
Les pieds avant et arrière doivent être en contact ferme avec le
plancher et le lave- linge doit être d’aplomb pour fonctionner
correctement. Les contre-écrous doivent être bien serrés contre
le bas de la caisse. Voir “Instructions d’Installation”.
Contrôler la stabilité du plancher. Si le plancher est irrégulier,
un morceau de contreplaqué de 19 mm (3/4") placé sous le
lave-linge permettra de réduire le bruit.
Voir “Réglage de l’aplomb du lave-linge” dans les Instructions
d’installation.
Charger les vêtements sans les tasser et de façon uniforme
le long du plateau de lavage. Le fait d’ajouter des articles mouillés
ou de rajouter de l’eau dans le panier pourrait déséquilibrer le
lave-linge.
Laver des charges de plus petite taille pour réduire le déséquilibre.
Ne pas trop tasser le linge. Éviter de laver un article seul.
Utiliser le programme Bulky Items (articles volumineux) pour les
articles surdimensionnés, non absorbants tels que les vestes
ou les petites couettes.
Vider les poches avant le nettoyage. Les articles mobiles tels des
pièces de monnaie sont susceptibles de tomber entre le panier
et la cuve; ils peuvent aussi obstruer la pompe. Un appel pour
intervention de dépannage s’avéra peut-être nécessaire pour
retirer ces objets.
Gargouillement
ou bourdonnement
Bourdonnement
Fuites d’eau
Vérier ce qui suit pour
que l’installation soit
correcte :
Il est normal d’entendre des articles métalliques faisant partie des
vêtements comme les boutons-pression métalliques, boucles ou
fermetures à glissière toucher le panier en acier inoxydable.
Le lave-linge est peut-être en train
d’évacuer de l’eau.
Le témoin lumineux de détection
est allumé.
Le lave-linge n’est pas d’aplomb. Il est possible que de l’eau éclabousse en dehors du panier si
Les tuyaux de remplissage ne sont
pas solidement xés.
Rondelles d’étanchéité
des tuyaux de remplissage.
Raccord du tuyau de vidange.
Il est normal d’entendre la pompe produire un bourdonnement
continu accompagné de gargouillements ou de bruits de pompage
périodiques lorsque l’eau restante est vidée lors des programmes
d’essorage et de vidange.
Les essorages de détection peuvent émettre un bourdonnement
après le démarrage du lave-linge. Ceci est normal. Les essorages
de détection peuvent prendre plusieurs minutes avant que l’eau
ne soit admise dans le lave-linge.
le lave-linge n’est pas d’aplomb. Vérier que la charge n’est
pas déséquilibrée ou trop tassée.
Serrer le raccord du tuyau de remplissage.
S’assurer que les quatre rondelles d’étanchéité plates du tuyau
de remplissage sont correctement installées.
Tirer le tuyau de vidange de la caisse du lave-linge et le xer
correctement dans le tuyau de rejet à l’égout ou l’évier de
buanderie.
29
Page 30

DEPANNAGE
Essayer d’abord les solutions suggérées ici pour éviter le coût d’une intervention de dépannage.
Si les phénomènes
Causes possibles
suivants se produisent
Fuites d’eau (suite)
Vérier ce qui suit pour
que l’installation soit correcte : (suite)
Le lave-linge ne fonctionne pas comme prévu
Quantité d’eau
insufsante dans
le lave-linge
Vérier la plomberie du domicile pour
vérier qu'il n'y a pas de fuites ou que
l'évier ou le tuyau de vidange n'est
pas obstrué.
Le lave-linge n’a pas été chargé tel que
recommandé.
La charge n’est pas complètement
submergée dans l’eau.
Solution
L'eau peut refouler de l'évier ou du tuyau de rejet à l'égout s'ils
sont obstrués. Vérier toute la plomberie du domicile (éviers de
buanderie, conduit d'évacuation, conduites d'eau et robinets)
pour vérier qu'il n'y a pas de fuites.
Une charge déséquilibrée peut entraîner une déviation du panier
et de l’eau pourrait alors éclabousser en dehors de la cuve.
Voir “Utilisation du lave-linge” pour des instructions sur
le chargement.
Ceci correspond à un fonctionnement normal pour un
lave-linge HE à faible consommation d’eau. La charge ne sera
pas complètement submergée. Le lave-linge détecte la taille de
la charge et ajoute la bonne quantité d’eau pour un nettoyage
optimal. Voir “Quoi de neuf sous le couvercle”.
IMPORTANT : Ne pas ajouter d’eau dans le lave-linge. De l’eau
supplémentaire éloignerait le linge du plateau de lavage en
le soulevant, ce qui réduirait la performance de nettoyage.
Si les phénomènes
Causes possibles
suivants se produisent
Le lave-linge ne fonctionne pas comme prévu (suite)
Le lave-linge ne
fonctionne pas ou ne se
remplit pas; il cesse de
fonctionner ou le témoin
lumineux de lavage reste
allumé (indiquant que le
lave-linge n’a pas pu se
remplir correctement)
Vérier que le lave-linge est
correctement alimenté en eau.
Vérier que l’alimentation électrique
au lave-linge est correcte.
30
Solution
Les deux tuyaux doivent être xés et l’eau doit pénétrer dans
la valve d’arrivée.
Les robinets d’eau chaude et d’eau froide doivent être ouverts tous
les deux.
Vérier que les tamis des valves d’arrivée ne sont pas obstrués.
Vérier que les tuyaux d’arrivée d’eau ne sont pas déformés;
ceci peut réduire le débit.
Brancher le cordon d’alimentation sur une prise reliée à la terre.
Ne pas utiliser de câble de rallonge.
Vérier que la prise est alimentée.
Remettre un disjoncteur qui serait ouvert en marche. Remplacer
tout fusible grillé.
REMARQUE : Si le problème persiste, appeler un électricien.
Page 31

DEPANNAGE
Essayer d’abord les solutions suggérées ici pour éviter le coût d’une intervention de dépannage.
Si les phénomènes
Causes possibles
suivants se produisent
Le lave-linge ne fonctionne pas comme prévu (suite)
Le lave-linge ne
fonctionne pas ou ne se
remplit pas; il cesse de
fonctionner ou le témoin
lumineux de lavage reste
allumé (indiquant que
le lave-linge n’a pas pu
se remplir correctement)
(suite)
Le lave-linge ne se
vidange/n’essore pas; les
charges restent mouillées
ou le témoin lumineux
d’essorage reste allumé
(indiquant que le
lave-linge n’était pas
en mesure d’extraire
l’eau [par pompage] en
10 minutes)
Fonctionnement normal
du lave-linge.
Les vêtements sont peut-être tassés
dans le lave-linge.
Détergent HE non utilisé ou
utilisation excessive de détergent HE.
Vider les poches et utiliser des sacs
à linge pour les petits articles.
Utiliser des programmes comportant
une vitesse d’essorage inférieure.
La charge du lave-linge est peut-être
tassée ou déséquilibrée.
Inspecter le circuit de plomberie
pour vérier que le tuyau de vidange
est correctement installé. Le tuyau
de vidange se prolonge dans le tuyau
rigide de rejet à l’égout au-delà de
114 mm (4,5").
Un excès de mousse causé par
l’utilisation d’un détergent ordinaire
ou d’un surplus de détergent peut
ralentir ou arrêter la vidange ou
l’essorage.
Solution
Le couvercle doit être fermé pour que le lave-linge puisse
fonctionner.
Le lave-linge fait des pauses durant certaines phases du
programme. Ne pas interrompre le programme.
Il se peut que le lave-linge s’arrête pour réduire la production
de mousse.
Le lave-linge détecte la charge sèche avec de courts essorages
qui peuvent prendre 2 à 3 minutes avant d’ajouter l’eau. Les
essorages peuvent émettre un bourdonnement. Ceci est
normal.
Retirer plusieurs articles, et ré-agencer la charge de façon
uniforme le long du plateau de lavage. Ne pas placer les
vêtements directement au centre du plateau de lavage. Fermer
le couvercle et appuyer sur START/Pause/Unlock (MISE EN
MARCHE/pause/déverrouillage).
Si l’on souhaite ajouter des vêtements une fois que le lave-linge
a démarré, n’en rajouter qu’un ou deux.
Ne pas ajouter d’eau dans le lave-linge.
Utiliser uniquement un détergent HE. La mousse produite
par des détergents ordinaires peut ralentir ou arrêter le
lave-linge. Toujours mesurer la quantité de détergent et suivre
les instructions gurant sur le détergent en fonction des modalités
de nettoyage de la charge.
Pour éliminer la mousse, annuler le programme. Sélectionner
RINSE & SPIN (Rinçage et essorage). Appuyer sur START/
Pause/Unlock (MISE EN MARCHE/pause/déverrouillage).
Ne pas ajouter de détergent.
Des petits articles sont peut-être coincés dans la pompe
ou entre le panier et la cuve, ce qui peut ralentir la vidange.
Les programmes avec vitesses d’essorage réduites éliminent
moins d’eau que les programmes qui comportent des vitesses
d’essorage supérieures. Utiliser la vitesse d'essorage/le programme
recommandé pour le vêtement. Pour éliminer l’eau restant dans
la charge, sélectionner DRAIN & SPIN (vidange et essorage). On
peut avoir à réarranger la charge pour en assurer une distribution
uniforme dans le panier.
Des charges très tassées ou déséquilibrées peuvent empêcher
le lave-linge d’essorer correctement : les charges ressortent plus
mouillées qu’elles ne devraient l’être. Répartir uniformément la
charge mouillée pour que l’essorage soit équilibré. Sélectionner
le programme DRAIN & SPIN (vidange et essorage) pour enlever
toute eau restée dans la machine. Voir “Utilisation du lave-linge”
pour des recommandations sur la façon de charger le lave-linge.
Vérier que le tuyau de vidange est correctement installé. Utiliser
la bride de retenue pour tuyau de vidange et la xer solidement
au tuyau de rejet à l’égout ou à l’évier de buanderie. Ne pas
placer de ruban adhésif sur l’ouverture du système de vidange.
Abaisser le tuyau de vidange si l’extrémité se trouve à plus de
1,25 m (4’) au-dessus du plancher. Retirer toute obstruction
du tuyau de vidange.
Utiliser uniquement un détergent HE. Toujours mesurer les
quantités et suivre les instructions gurant sur le détergent
en fonction de la charge. Pour éliminer tout excès de mousse,
sélectionner RINSE & SPIN (Rinçage et essorage). Ne pas ajouter
de détergent.
31
Page 32

DEPANNAGE
Essayer d’abord les solutions suggérées ici pour éviter le coût d’une intervention de dépannage.
Si les phénomènes
Causes possibles
suivants se produisent
Le lave-linge ne fonctionne pas comme prévu (suite)
Endroits secs sur la
charge après un
programme
Températures de lavage
ou de rinçage
incorrectes
Charge non rincée Vérier que le lave-linge est
Sable, poils d’animaux,
peluches, etc. sur la
charge après le lavage
La charge est emmêlée Le lave-linge n’a pas été chargé
Un essorage à vitesse élevée extrait
davantage d’humidité que les
lave-linge traditionnel à chargement
par le dessus.
Vérier que le lave-linge est
correctement alimenté en eau.
Températures de lavage contrôlées
pour économies d’énergie.
correctement alimenté en eau.
Détergent HE non utilisé ou utilisation
excessive de détergent HE.
La charge du lave-linge est
peut-être trop tassée.
Des résidus lourds de sable, de
poils d’animaux, des peluches et de
détergent ou d’agent de blanchiment
peuvent nécessiter un rinçage
supplémentaire.
tel que recommandé.
Solution
Un essorage à vitesse élevée associée à une circulation d’air
durant l’essorage nal peut entraîner l’apparition de portions
sèches sur le linge au cours de l’essorage nal. Ceci est normal.
Vérier que les tuyaux d’arrivée d’eau chaude et froide n’ont
pas été inversés.
Les deux tuyaux doivent être raccordés à la fois le lave-linge
et au robinet, et la valve d’arrivée doit recevoir à la fois de l’eau
chaude et de l’eau froide.
Vérier que les tamis des valves d’arrivée ne sont pas obstrués.
Éliminer toute déformation des tuyaux.
Les lave-linge haute HE efcacité utilisent des températures de
lavage et de rinçage inférieures à celles des lave-linge traditionnels
à chargement par le dessus. Cela signie également des
températures de lavage à l’eau chaude et à l’eau tiède.
Vérier que les tuyaux d’arrivée d’eau chaude et froide n’ont pas
été inversés.
Les deux tuyaux doivent être xés et l’eau doit pénétrer dans
la valve d’arrivée.
Les robinets d’eau chaude et d’eau froide doivent être ouverts
tous les deux.
Les tamis de la valve d’arrivée d’eau du lave-linge sont
peut-être obstrués.
Éliminer toute déformation du tuyau d’arrivée.
La mousse produite par un détergent ordinaire peut empêcher
le lave-linge de fonctionner correctement.
Utiliser uniquement un détergent HE. Veiller à mesurer
correctement.
Toujours mesurer la quantité de détergent et suivre
les instructions du détergent en fonction de la taille et du niveau
de saleté de la charge.
Le lave-linge effectuera un rinçage moins performant si la charge
est bien tassée.
Charger les vêtements sans les tasser et de façon uniforme
le long du plateau de lavage. Ne pas placer les vêtements
directement au centre du plateau de lavage.
Utiliser le programme conçu pour les tissus à laver.
Si l’on souhaite ajouter des vêtements une fois que le lave-linge
a démarré, n’en rajouter qu’un ou deux.
Ajouter un rinçage supplémentaire au programme sélectionné.
Voir la section “Utilisation du lave-linge”.
Sélectionner un programme comportant un lavage plus lent et
une vitesse d’essorage inférieure. Noter que les articles seront
plus mouillés que si l’on utilise une vitesse d’essorage supérieure.
Voir “Guide de programmes” pour utiliser le programme qui
correspond le mieux à la charge utilisée.
32
Page 33

DEPANNAGE
Essayer d’abord les solutions suggérées ici pour éviter le coût d’une intervention de dépannage.
Si les phénomènes
Causes possibles
suivants se produisent
Le lave-linge ne fonctionne pas comme prévu (suite)
La charge est emmêlée
(suite)
Ne nettoie ou ne détache
pas
Le lave-linge n’a pas été chargé
tel que recommandé. (suite)
La charge de lavage n’est pas
complètement submergée
dans l’eau.
Davantage d’eau a été ajoutée
au lave-linge.
Le lave-linge n’a pas été chargé tel
que recommandé.
Ajout de détergent sur le dessus
de la charge.
Les couleurs similaires ne sont
pas lavées ensemble.
Solution
Charger les vêtements sans les tasser et de façon uniforme
le long du plateau de lavage. Ne pas placer les vêtements
directement au centre du plateau de lavage.
Réduire l’emmêlement en mêlant plusieurs types d’articles dans
la charge. Utiliser le programme recommandé correspondant aux
types de vêtements à laver.
Le lave-linge détecte la taille de la charge et ajoute la quantité
d’eau adéquate. Ceci est normal et nécessaire au mouvement
des vêtements.
Ne pas ajouter d’eau dans le lave-linge. De l’eau supplémentaire
éloignerait le linge du plateau de lavage en le soulevant, ce qui
réduirait la performance de nettoyage.
Le lave-linge effectue un nettoyage moins performant si la charge
est bien tassé.
Charger les vêtements sans les tasser et de façon uniforme
le long du plateau de lavage. Ne pas placer les vêtements
directement au centre du plateau de lavage.
Si l’on souhaite ajouter des vêtements une fois que
le lave-linge a démarré, n’en rajouter qu’un ou deux.
Ajouter le détergent, les produits Oxi et l’agent de blanchiment
sans danger pour les couleurs au fond du panier avant de charger
les articles.
Laver ensemble les couleurs semblables et les retirer rapidement
une fois le programme terminé pour éviter tout transfert de
teinture.
Détergent HE non utilisé ou utilisation
excessive de détergent HE.
Programme utilisé incorrect par rapport
au type de tissu.
Distributeur ou boule distributrice
d'assouplissant pour tissu non utilisé(e)
Option Fabric Softener (assouplissant
pour tissu) non sélectionnée.
La mousse produite par un détergent ordinaire peut empêcher
le lave-linge de fonctionner correctement.
Utiliser uniquement un détergent HE. Veiller à mesurer
correctement.
Toujours mesurer la quantité de détergent et suivre les
instructions gurant sur le détergent en fonction de la taille
et du niveau de saleté de la charge.
Utiliser une option de programme de niveau de saleté
plus élevée et une température de lavage plus chaude pour
améliorer le nettoyage.
Utiliser le programme Heavy Duty Heavy (service très intense) et
Heavy Duty Regular (service intense ordinaire) pour un nettoyage
puissant. Voir “Guide de programmes” pour utiliser le programme
qui correspond le mieux à la charge utilisée.
Utiliser le distributeur pour agent de blanchiment au chlore et la
boule distributrice d'assouplissant pour tissu pour éviter les taches.
Remplir les distributeurs avant de démarrer un programme.
Ne pas verser de produits directement sur la charge.
Toujours sélectionner l’option Fabric Softener (assouplissant pour
tissu) si l’on souhaite ajouter de l’assouplissant pour tissu. Les
programmes qui utilisent un rinçage par vaporisation ajouteront
de l’eau supplémentaire pour assurer une distribution adéquate
de l’assouplissant pour tissu lorsque l’option est sélectionnée.
33
Page 34

DEPANNAGE
Essayer d’abord les solutions suggérées ici pour éviter le coût d’une intervention de dépannage.
Si les phénomènes
Causes possibles
suivants se produisent
Le lave-linge ne fonctionne pas comme prévu
Le lave-linge ne fonctionne pas comme prévu (suite)
Fonctionnement incorrect
du distributeur
Dommages aux tissus
Odeurs
Le témoin lumineux
Lid Locked (couvercle
verrouillé) clignote
Distributeur obstrué.
Des objets pointus se trouvaient dans
les poches au moment
du programme de lavage.
Les cordons et les ceintures se sont
peut-être emmêlés.
Les articles étaient peut-être
endommagés avant le lavage.
Des dommages au tissu peuvent si
produire si le lave-linge est bien tassé.
Vous n’avez peut-être pas ajouté
l’agent de blanchiment au chlore
liquide correctement.
Les instructions de soin des vêtements
n’ont peut-être pas été suivies.
L’entretien mensuel n’est pas effectué
tel que recommandé.
Détergent HE non utilisé ou utilisation
excessive de détergent HE.
Le couvercle n’est pas verrouillé.
Un programme a été interrompu ou
suspendu à l’aide du bouton Start/
Pause/Unlock (MISE EN MARCHE/
pause/déverrouillage).
Solution
Utiliser seulement un agent de blanchiment au chlore liquide dans
le distributeur d’agent de blanchiment.
Vider les poches, fermer les fermetures à glissière, les boutons
pression et les agrafes avant le lavage pour éviter d’accrocher
et de déchirer le linge.
Attacher tous les cordons et les ceintures avant de démarrer
le nettoyage de la charge.
Raccommoder les déchirures et repriser les ls cassés des
coutures avant le lavage.
Charger les vêtements sans les tasser et de façon uniforme le long
du plateau de lavage. Ne pas placer les vêtements directement
au centre du plateau de lavage.
Utiliser le programme conçu pour les tissus à laver.
Si l’on souhaite ajouter des vêtements une fois que
le lave-linge a démarré, n’en rajouter qu’un ou deux.
Ne pas verser d’agent de blanchiment au chlore liquide
directement sur la charge. Essuyer tous les renversements
d’agent de blanchiment.
Un agent de blanchiment non dilué endommagera les tissus.
Ne pas utiliser plus que la quantité recommandée par
le fabricant.
Ne pas placer d’articles sur le dessus du distributeur d’agent
de blanchiment lorsqu’on charge et décharge le lave-linge.
Toujours lire et suivre les instructions d’entretien du fabricant
indiquées sur l’étiquette du vêtement. Voir le “Guide de
programmes” pour utiliser le programme qui correspond
le mieux à la charge utilisée.
Faire fonctionner le programme Clean Washer après chaque série
de 30 lavages. Voir “Entretien du lave-linge”.
Décharger le lave-linge dès que le programme est terminé.
Utiliser uniquement un détergent HE. Toujours suivre les directives
du fabricant. Veiller à mesurer correctement.
Voir la section “Entretien du lave-linge”.
Rabattre le couvercle. Le lave-linge ne démarrera et ne se
remplira pas si le couvercle est ouvert.
Le lave-linge est peut-être toujours en phase d’essorage. Le
couvercle ne se déverrouillera pas avant que le panier ne cesse
de tourner. Si on lave des charges de grande taille ou des tissus
lourds, ceci peut prendre quelques minutes.
34
Page 35

NOTES
35
Page 36

SEGURIDAD DE LA LAVADORA
ESPECIFICACIONES
Estas unidades se venden en varias regiones con requisitos
diferentes para la capacidad de medir. A continuación se enumeran
algunas de las formas válidas de medición indicadas en este
producto:
Capacidad de carga con artículos secos: Una medida de peso
que reeje el tamaño máximo de carga que se pueda poner en la
lavadora.
36
Capacidad IEC: La medida de capacidad que representa la
capacidad máxima de artículos y telas secas que el fabricante
declara que pueden tratarse en un ciclo especíco.
Capacidad de carga
con artículos secos
10,5 kg (23 lb) 7,5 kg (16,5 lb)
Capacidad IEC (Comisión
electrotécnica internacional)
Page 37

¿QUÉ HAY DE NUEVO DEBAJO DE LA TAPA?
Limpieza con menos agua
Placa de lavado
Lavadora de estilo
tradicional con agitador
La mayor diferencia en su nueva lavadora es el sistema de
placa de lavado y bajo nivel de agua. La lavadora regula
automáticamente el nivel del agua de acuerdo al tamaño
de la carga; no se necesita un selector de nivel de agua.
Lavadora con sistema de
placa de lavado
y bajo nivel de agua
Detección automática
del tamaño de la carga
Una vez que ponga en marcha el ciclo, la tapa se asegurará
y la lavadora comenzará el proceso de detección para
determinar el nivel de agua adecuado para la carga. Esto puede
tomar varios minutos antes de que comience a llenarse de agua.
Encontrará una descripción paso a paso en la sección “Luces de
estado del ciclo”.
Escuchará el motor haciendo girar la canasta con impulsos
cortos para mojar la carga por completo. Este método de
lavado con bajo nivel de agua usa menos agua y energía, en
comparación con el estilo tradicional de lavadora con agitador.
Selección del detergente adecuado
Use solamente detergentes de alto rendimiento. El paquete
tendrá la indicación “HE” o “High Efciency” (Alto rendimiento).
El lavado con poca agua crea espuma en exceso con un
detergente regular que no sea HE. El uso de un detergente común
probablemente derive en tiempos de ciclo más prolongados y
menor rendimiento de enjuague. También puede ocasionar fallas
en los componentes y moho evidente. Los detergentes de alto
rendimiento (HE) están hechos para producir la cantidad adecuada
de espuma para el mejor rendimiento. Siga las instrucciones del
fabricante para determinar la cantidad de detergente que debe usar.
Cargue las prendas de modo uniforme en montones ojos
alrededor de la placa de lavado. No cargue las prendas
directamente sobre el centro de la placa de lavado; cuando se
carga la lavadora, el centro de la placa de lavado debe ser visible.
A medida que la lavadora moja y mueve la carga, las prendas
se acomodan en la canasta y el nivel de las mismas se
asentará. Esto es normal y no indica que se deban agregar
más prendas.
IMPORTANTE: No verá una canasta llena de agua como en su
lavadora anterior de estilo tradicional con agitador. Es normal que
parte de la carga quede por encima del nivel de agua.
Use solamente un detergente de Alto rendimiento (HE).
Limpieza concentrada
Una limpieza con bajo nivel de agua signica una limpieza
concentrada. En lugar de diluir el detergente como lo hace
una lavadora con agitador, esta lavadora coloca el detergente
directamente sobre la suciedad.
Sonidos comunes que puede esperar
En diferentes etapas del ciclo de lavado, podrá escuchar sonidos y
ruidos que son diferentes a los de su lavadora anterior. Por ejemplo,
podrá escuchar un chasquido y un zumbido al comienzo del
ciclo, cuando el seguro de la tapa realiza una autovericación. Se
escucharán distintos tipos de zumbidos y runruneos mientras la
placa de lavado mueve la carga. Algunas veces no escuchará nada,
ya que la lavadora determina el nivel de agua adecuado para su
cargao deja la ropa en remojo por un tiempo.
37
Page 38

PANEL DE CONTROL Y CARACTERÍSTICAS
1 3 4
DEEP CLEAN ) (Limpieza intensa)
1
Esta opción provee una acción de limpieza mejorada para las
manchas rebeldes. Agregará agitación y tiempo de remojo
adicional al ciclo.
2
PERILLA DE CICLOS DE LAVADO
Use la perilla de ciclos de lavado para seleccionar entre
los ciclos disponibles en su lavadora. Gire la perilla de
ciclos de lavado para seleccionar un ciclo para su carga.
Consulte “Guía de ciclos” para ver descripciones detalladas
de los ciclos.
OPTIONS (Opciones)
3
Se pueden agregar las siguientes opciones a la mayoría de
los ciclos.
EXTRA RINSE (Enjuague adicional)
Esta opción se puede usar para agregar automáticamente
un segundo enjuague a la mayoría de los ciclos.
FABRIC SOFTENER (Suavizante de telas)
Esta opción deberá jarse si va a usar suavizante de telas.
FABRIC SOFTENER WITH EXTRA RINSE (Suavizante de
telas con enjuague adicional)
Esta opción combina las opciones de Fabric Softener
(Suavizante de telas) y Extra Rinse (Enjuague adicional).
4
TEMPERATURE (Temperatura)
El control de Temperature (Temperatura) detecta y mantiene
temperaturas de agua uniformes, regulando el agua fría
y caliente que entra.
Seleccione una temperatura de lavado según el tipo de
tela que esté lavando y el nivel de suciedad. Para obtener
los mejores resultados y siguiendo las instrucciones de las
etiquetas de las prendas, use el agua de lavado más caliente
que las telas puedan resistir.
• El agua tibia y caliente puede tener una temperatura menor
a la que su lavadora anterior proveía.
• Aun en un lavado con agua Cool (Fresca), quizás se agregue
un poco de agua tibia a la lavadora para mantener una
temperatura mínima.
2
6
5
5
BOTÓN DE START/PAUSE/UNLOCK
(Inicio/Pausa/Desbloqueo)
Presiónelo para iniciar el ciclo seleccionado; presiónelo
nuevamente para hacer una pausa en el ciclo y desbloquear
la tapa. Presione y sostenga por 3 segundos para anular un
ciclo.
NOTA: Si la lavadora está exprimiendo, puede tomar
varios minutos para que se desbloquee la tapa. Presione
y sostenga por 3 segundos para anular un ciclo.
6
LUCES DEL ESTADO DEL CICLO
Las luces de estado muestran el progreso de un ciclo.
Es posible que note sonidos o pausas en cada etapa
del proceso, los cuales son diferentes de las lavadoras
tradicionales.
SENSING (Detección)
Cuando se presione el botón de START/Pause/Unlock
(Inicio/Pausa/Desbloqueo), la lavadora hará primero una
autovericación en el mecanismo de bloqueo de la tapa.
Escuchará un chasquido, la canasta hará un giro ligero y
la tapa se desbloqueará brevemente antes de bloquearse de
nuevo. Una vez que la tapa se ha bloqueado por segunda
vez, la lavadora hará giros cortos y lentos para calcular
el tamaño de la carga. Estos giros de detección pueden
tomar de 2 a 3 minutos antes de que se agregue agua a
la carga, y es posible que escuche el zumbido de estos
giros. Si la luz de detección está encendida, la lavadora
está funcionando adecuadamente. Escuchará el motor
haciendo girar la canasta con impulsos cortos para mojar
la carga por completo. La lavadora moverá entonces la
carga brevemente, hará una pausa para permitir que el agua
empape la carga y continuará agregando agua. Este proceso
puede repetirse hasta que se haya agregando la cantidad
de agua correcta para la carga. Es posible que escuche
también el agua que uye a través del depósito, agregando
detergente a la carga.
NOTA: Evite abrir la tapa durante la detección. El proceso
de detección comenzará nuevamente cuando se vuelva
a poner en marcha la lavadora. Es posible que la luz
de detección se encienda durante el período de Lavado
(Wash) del ciclo. Esto es normal.
38
Page 39

WASH (Lavado)
DONE (Listo)
Escuchará la placa de lavado y el motor moviendo la
carga. A diferencia de las lavadoras tradicionales, la carga
no estará cubierta de agua. Una limpieza con bajo nivel
de agua signica una limpieza concentrada. En lugar
de diluir el detergente, como lo hace una lavadora con
agitador, esta lavadora aplica el detergente directamente
sobre la suciedad. Los sonidos del motor pueden cambiar
en las diferentes etapas del ciclo. El tiempo de lavado está
determinado por el nivel de suciedad seleccionado.
RINSE (Enjuague)
Escuchará sonidos similares a los del ciclo de lavado a
medida que la lavadora enjuaga y mueve la carga. Se
agregará suavizante de telas si se ha seleccionado Yes (Sí)
en la opción Fabric Softener Added (Suavizante de telas
agregado). En algunos ciclos se usa un enjuague
por rociado.
SPIN (Exprimido)
La lavadora exprime la carga a velocidades cada vez
mayores para la remoción adecuada del agua, según
el ciclo seleccionado y la velocidad de exprimido.
Una vez que se haya terminado el ciclo, se encenderá
esta luz. Saque la carga de inmediato para obtener los
mejores resultados.
LID LOCKED (Tapa bloqueada)
Para permitir una detección adecuada de la carga, la tapa
se bloqueará y se encenderá la luz de Tapa bloqueada
(Lid Locked). Esta luz indica que la tapa está asegurada
y no se puede abrir.
Si necesita abrir la tapa, presione
START/ Pause/Unlock (Inicio/Pausa/
Desbloqueo). La tapa se desbloqueará
una vez que se haya detenido el
movimiento de la lavadora. Esto puede
tomar varios minutos si la carga estaba
exprimiéndose a alta velocidad. Oprima
START/ Pause/Unlock (Inicio/Pausa/Desbloqueo)
nuevamente para reanudar el ciclo. Evite abrir la
tapa durante la detección. El proceso de detección
comenzará cuando la lavadora reinicie la marcha.
GUÍA DE CICLOS
Para lograr el mejor cuidado de las telas, elija el ciclo que sea el más adecuado para la carga que va a lavar. No todos los ciclos y opciones
están disponibles en todos los modelos.
Artículos a lavar: Ciclo: Temperatura*:
Telas con suciedad
profunda
Telas resistentes, prendas
que no destiñen, toallas y
pantalones de mezclilla
Artículos grandes como
sábanas, edredones
pequeños y chaquetas
Prendas de algodón, lino,
sábanas y cargas
de prendas mixtas
Algodón ligero y
mezclas de algodón
Telas inarrugables, de
algodón, planchado
permanente y telas
sintéticas
Heavy Duty
Heavy
(Muy intenso)
Heavy Duty
Regular
(Intenso
común)
Normal Heavy
(Normal
Intenso)
Normal
Regular
(Normal
Común)
Normal
Light
(Normal
Ligero)
Casual
(Informal)
Hot (Caliente)
Warm (Tibia)
Cool (Fresca)
Cold (Fría)
Hot (Caliente)
Warm (Tibia)
Cool (Fresca)
Cold (Fría)
Hot (Caliente)
Warm (Tibia)
Cool (Fresca)
Cold (Fría)
Hot (Caliente)
Warm (Tibia)
Cool (Fresca)
Cold (Fría)
Hot (Caliente)
Warm (Tibia)
Cool (Fresca)
Cold (Fría)
Hot (Caliente)
Warm (Tibia)
Cool (Fresca)
Cold (Fría)
Velocidad
de
exprimido**:
High
(Alta)
High
(Alta)
High
(Alta)
High
(Alta)
High
(Alta)
Low
(Baja)
Detalles de los ciclos:
Proporciona el tiempo y la acción máxima de lavado
para remover las manchas y la suciedad rebelde. Use
este ciclo para artículos resistentes o con suciedad
profunda. El proceso de detección de agua puede tomar
más tiempo para algunos artículos que para otros, ya que
algunos tipos de telas absorben más agua que otros.
Use este ciclo para artículos resistentes o con suciedad
profunda. El proceso de detección de agua puede tomar
más tiempo para algunos artículos que para otros, ya que
algunos tipos de telas absorben más agua que otros.
Use este ciclo para las prendas de algodón con suciedad
profunda y cargas de telas mixtas. Este ciclo presenta un
enjuague con rociado.
Use este ciclo para las prendas de algodón y cargas de
telas mixtas con suciedad normal. Este ciclo presenta un
enjuague con rociado.
Use este ciclo para prendas de algodón livianas que
tengan suciedad ligera. Este ciclo usa enjuagues con
rocío.
Use este ciclo para lavar cargas con telas inarrugables
como camisas deportivas, blusas, ropa de ocina
informal, bras de planchado permanente y mezclas.
* Todos los enjuagues usan agua fría.
** La velocidad del exprimido está integrada en el ciclo y no se puede seleccionar.
39
Page 40

GUÍA DE CICLOS
Para lograr el mejor cuidado de las telas, elija el ciclo que sea el más adecuado para la carga que va a lavar.
No todos los ciclos y opciones están disponibles en todos los modelos.
Artículos a lavar: Ciclo: Temperatura*:
Artículos grandes como
sábanas, bolsas para
dormir, edredones
pequeños, chaquetas
y alfombras pequeñas
lavables
Seda lavable
a máquina, telas de
lavado a mano
Trajes de baño y artículos
que deban enjuagarse sin
detergente
Artículos lavables
a mano o artículos
empapados
Ninguna prenda en la
lavadora
Bulky
(Artículos
voluminosos)
Delicate
(Ropa
delicada)
***Rinse &
Spin
(***Enjuague
y exprimido )
*** Drain &
Spin
(*** Desagüe
y exprimido )
*** Clean
Washer
(*** Limpiar
la lavadora)
Hot (Caliente)
Warm (Tibia)
Cool (Fresca)
Cold (Fría)
Hot (Caliente)
Warm (Tibia)
Cool (Fresca)
Cold (Fría)
Cold (Fría)
N/A
Velocidad
de
exprimido**:
High
(Alta)
Low
(Baja)
High
(Alta)
High
(Alta)
Detalles de los ciclos:
Use este ciclo para lavar artículos grandes como pueden
ser chaquetas y edredones pequeños. Esta lavadora se
llenará con suciente agua para mojar la carga antes de
que comience la etapa de lavado del ciclo y usa un nivel
de agua más alto que otros ciclos. No sobrecargue la
canasta.
Use este ciclo para lavar prendas con suciedad ligera cuya
etiqueta de cuidado indique que se use el ciclo “Sedas
lavables a máquina” o “Delicado”. Coloque los artículos
pequeños en bolsas de malla para prendas antes de lavarlos.
Este ciclo usa un nivel de agua prejado más alto.
Combina un enjuague y exprimido para las cargas que
requieran un ciclo de enjuague adicional o para terminar
de lavar una carga después de un corte de corriente.
Este ciclo usa un nivel de agua prejado más alto.
Úselo también para las cargas que solamente necesitan
enjuagarse.
Este ciclo usa un exprimido para acortar los tiempos
de secado de las telas pesadas o para los artículos de
cuidado especial que se laven a mano. Use este ciclo
para desaguar la lavadora después de anular un ciclo
o para completar un ciclo después de un corte de
corriente.
Use este ciclo cada 30 lavados para mantener el interior
de su lavadora fresco y limpio. Este ciclo usa un nivel
de agua más alto. Use blanqueador líquido con cloro
para limpiar profundamente el interior de la lavadora.
Este ciclo no debe interrumpirse. Vea “Cuidado de la
lavadora” en “Mantenimiento de la lavadora”.
IMPORTANTE: No coloque prendas ni otros artículos en
la lavadora durante el ciclo de Clean Washer (Limpiar la
lavadora). Use este ciclo con una tina de lavado vacía.
* Todos los enjuagues usan agua fría.
** La velocidad del exprimido está integrada en el ciclo y no se puede seleccionar.
*** La opción de Deep Clean (Limpieza intensa) no está disponible con estos ciclos.
40
Page 41

USO DE SU LAVADORA
1. Separe y prepare su ropa
USO DE SU LAVADORA
2. Agregue detergente HE
(Alto rendimiento)
• Vacíe los bolsillos. Las monedas, los botones o cualquier
objeto pequeño suelto pueden pasar por debajo de la placa
de lavado y atascarse, provocando sonidos no esperados.
• Separe los artículos según el ciclo recomendado, la
temperatura del agua y la resistencia a perder el color.
• Separe los artículos con mucha suciedad de los que tienen
poca suciedad.
• Separe los artículos delicados de las telas resistentes.
• No seque los artículos si aún hay manchas después del
lavado ya que el calor puede hacer las manchas permanentes.
• Trate las manchas inmediatamente.
• Cierre los zípers, abroche los ganchos, ate los cordones
y las fajas, y quite los adornos y ornamentos que no sean
lavables.
• Remiende lo que esté roto y desgarrado para evitar más
daños a los artículos durante el lavado.
Consejos útiles:
• Cuando lave artículos a prueba de agua o resistentes
al agua, colóquelos de modo parejo. Consulte “Guía de ciclos”
para obtener consejos y más información acerca del ciclo
Bulky (Artículos voluminosos).
• Use bolsas de malla para prendas, para ayudar a evitar
los enredos cuando lave artículos delicados o pequeños.
• Vuelva al revés las prendas de tejido para evitar que se formen
motitas. Separe las prendas que sueltan pelusa de las que la
atraen. A las prendas de telas sintéticas, los tejidos, y la pana
se les pegará la pelusa de las toallas, los tapetes y la felpilla.
Siempre lea y siga las instrucciones de la etiqueta
de cuidado de las telas para evitar daños a sus prendas.
Agregue una cantidad medida de
detergente HE enla canasta.
IMPORTANTE: Use solamente
detergentes de alto rendimiento. El paquete tendrá la indicación
“HE” o “High Efciency” (Alto rendimiento). El lavado con poca
agua crea espuma en exceso con un detergente común que no
sea HE. El uso de un detergente común probablemente derive
en tiempos de ciclo más prolongados y menor rendimiento de
enjuague. También puede ocasionar fallas en los componentes
y moho evidente. Los detergentes HE (Alto rendimiento) están
hechos para producir la cantidad adecuada de espuma para el
mejor rendimiento. Siga las instrucciones del fabricante para
determinar la cantidad de detergente que debe usar.
Al usar Oxi o blanqueador no decolorante:
Si va a usar un producto para realzar el lavado, como Oxi
o blanqueador no decolorante, agréguelo al fondo de la
canasta de lavado antes de agregar las prendas.
41
Page 42

3. Cargue las prendas en la lavadora
Cargue las prendas de modo uniforme
en montones ojos alrededor la placa de
lavado. No cargue las prendas
directamente sobre el centro de la placa
de lavado; cuando cargue, la placa de
lavado deberá estar visible. Pruebe mezclar
artículos de distintos tamaños para que
éstos se enreden menos.
IMPORTANTE: Para obtener una mejor limpieza y para reducir
la formación de arrugas y enredos, los artículos deben moverse
libremente.
4. Agregue blanqueador líquido
con cloro al depósito, si lo desea
Liquid
Blanqueador líquido
Chlorine Bleach
con cloro
5. Agregue suavizante de telas,
si lo desea
Esta lavadora ha sido diseñada para permitir el uso de una
bola distribuidora de suavizante de telas, la cual usted deberá
comprar. Siga siempre las instrucciones del fabricante acerca
de las indicaciones correctas para usar la bola distribuidora.
Luego seleccione la opción Fabric Softener (Suavizante de
telas). La bola distribuidora de suavizante de telas liberará dicho
suavizante durante el ciclo de enjuague.
IMPORTANTE: La opción de Fabric Softener (Suavizante de telas)
se debe seleccionar para asegurar la distribución apropiada en el
momento oportuno durante el ciclo. No sobrellene ni lo diluya.
NOTA: La bola para suavizante de telas puede no estar
disponible en todas las regiones. Verique con su distribuidor
para saber si está disponible.
Cómo agregar manualmente el suavizante de telas líquido a la
carga de lavado
Durante el último enjuague, espere hasta que la lavadora se
haya llenado por completo, presione el botón START/ Pause/
Unlock (Inicio/Pausa/Desbloqueo) para hacer una pausa en
la lavadora. Levante la tapa y agregue la cantidad medida
recomendada de suavizante de telas líquido. No permita que
el suavizante de telas líquido se derrame, salpique, gotee o
corra dentro de la canasta ni sobre la carga. No utilice más de
la cantidad recomendada. Cierre la tapa y presione el botón de
START/ Pause/Unlock (Inicio/Pausa/Desbloqueo) nuevamente
para poner en marcha la lavadora.
IMPORTANTE: La opción Fabric Softener Added (Suavizante
de telas agregado) debe estar seleccionada, para asegurar la
distribución adecuada del suavizante de telas durante la etapa
de enjuague del ciclo.
No sobrellene, diluya ni utilice más de 236 ml (1 taza). No
utilice blanqueador no decolorante ni productos Oxi en el
mismo ciclo con blanqueador líquido con cloro.
42
6. Seleccione un ciclo
Gire la perilla de los ciclos para elegir su ciclo de lavado.
Page 43

7. Seleccione la TEMPERATURE
(Temperatura) de lavado
8. Seleccione las opciones del ciclo,
si lo desea
Una vez que haya seleccionado un ciclo, seleccione la
temperatura de lavado deseada girando la perilla de Temperature
(Temperatura) hacia el ajuste deseado.
Siempre lea y siga las instrucciones en las etiquetas
de cuidado de las telas para evitar daños a sus prendas.
Wash Temp
(Temperatura de lavado)
Hot (Caliente)
Se agrega un poco de agua fría
para ahorrar energía. El aguaestará
más fría que la del ajustede agua
caliente de su calentador de agua.
Warm (Tibia)
Se agregará un poco de agua fría,
de modo que el agua estará más fría
que el agua provista por su lavadora
anterior.
Cool (Fresca)
Se agrega agua tibia para ayudar a
remover la suciedad y disolver
el detergente.
Cold (Fría)
Tal vez seagregue agua tibia
para ayudar con la remoción de
suciedad y para ayudar a disolver
el detergente.
Suggested Fabrics
(Telas sugeridas)
Ropa blanca y de
color pastel
Prendas durables
Suciedad profunda
Colores vivos
Suciedad entre
moderada y ligera
Colores que destiñen
o se opacan
Suciedad ligera
Colores oscuros que
destiñen o que se
opacan
Suciedad ligera
Si usted desea agregar Deep Clean (Limpieza intensa), Extra
Rinse (Enjuague adicional) u otras Options (Opciones), gire la
perilla para seleccionar o fíjela en ON (Encendido).
NOTA: No todas las opciones están disponibles con cada ciclo.
Consulte la guía de ciclos para obtener información adicional.
9. Presione START/Pause/Unlock
(INICIO/Pausa/Desbloqueo) para
comenzar el ciclo de lavado
Presione el botón de START/Pause/Unlock (INICIO/Pausa/
Desbloqueo) para comenzar el ciclo de lavado. El llenado se
retrasa por varios minutos mientras se detecta el equilibrio de la
carga. Cuando se haya terminado el ciclo, se encenderá la luz
indicadora de DONE (Listo). Saque las prendas inmediatamente
después de que se haya terminado el ciclo para evitar olores,
reducir la formación de arrugas y evitar que se herrumbren los
ganchos de metal, zípers y broches a presión.
Cómo desbloquear la tapa para agregar prendas
Si usted necesita abrir la tapa para agregar 1 ó 2 prendas que
se le hayan olvidado:
Presione START/Pause/Unlock (INICIO/Pausa/Desbloqueo),
la tapa se desbloqueará una vez que la lavadora haya dejado
de moverse. Esto puede tomar varios minutos si la carga estaba
exprimiéndose a alta velocidad. Luego cierre la tapa y presione
nuevamente START/Pause/Unlock (INICIO/Pausa/Desbloqueo)
para volver a comenzar el ciclo.
Si se deja la tapa abierta por más de 10 minutos, el agua será
bombeada hacia fuera automáticamente.
Retraso en el llenado de agua
El llenado se retrasa de 2 a 3 minutos, para revisar si la carga
está desequilibrada. Escuchará el zumbido de los giros antes
del llenado. Esto es el funcionamiento normal.
43
Page 44

MANTENIMIENTO DE LA LAVADORA
MANGUERAS DE ENTRADA DE AGUA
Reemplace las mangueras de entrada después de 5 años
de uso para reducir el riesgo de que fallen. Inspeccione
periódicamente y cambie las mangueras si se hallan
protuberancias, torceduras, cortes, desgaste o pérdidas
de agua.
Cuando reemplace sus mangueras de entrada de agua,
anote la fecha de reposición en la etiqueta con un marcador
permanente.
NOTA: Esta lavadora no incluye mangueras de entrada.
Para obtener más información, vea las “Instrucciones de
instalación”.
CUIDADO DE LA LAVADORA
Recomendaciones para ayudar a que su lavadora limpie
y rinda de la mejor manera
1. Use siempre detergentes de Alto rendimiento (HE) y siga
las instrucciones del fabricante de detergente HE acerca de
la cantidad de detergente HE a usar. Nunca use más de la
cantidad recomendada, ya que puede acelerar la acumulación
de residuos de detergente y suciedad en la lavadora, lo que
puede causar un olor no deseado.
2. Use a veces lavados con agua tibia o caliente (no solamente
lavados con agua fría), ya que los mismos pueden hacer un
mejor trabajo al controlar el ritmo en el cual se acumulan la
suciedad y el detergente.
3. Deje siempre la tapa de la lavadora abierta entre un uso
y otro, para ayudar a que se termine de secar la lavadora
y evitar la acumulación de residuos causantes de olores.
Limpieza de la lavadora de carga superior
Lea estas instrucciones completamente antes de comenzar el
proceso de limpieza de rutina que se recomienda a continuación.
El procedimiento de mantenimiento de la lavadora deberá
efectuarse una vez al mes o cada 30 ciclos de lavado como
mínimo, lo primero que ocurra, para controlar el ritmo en el cual
puedan acumularse la suciedad y el detergente en la lavadora.
Cómo limpiar el interior de la lavadora
Para mantener la lavadora libre de olores, siga las instrucciones
de uso detalladas arriba y utilice este procedimiento mensual de
limpieza que recomendamos a continuación:
Ciclo de Clean Washer (Limpiar la lavadora)
Esta lavadora tiene un ciclo especial que utiliza un mayor
volumen de agua, junto con el limpiador para lavadora
blanqueador líquido con cloro, para limpiar el interior de
su lavadora.
CUIDADO DE LA LAVADORA (cont.)
Comience el procedimiento
1. Procedimiento de blanqueador con cloro:
a. Abra la tapa de la lavadora y saque la ropa o artículos
de la misma.
b. Agregue 236 mL (1 taza) de blanqueador líquido con
cloro al depósito del blanqueador.
NOTA: El usar más blanqueador líquido con cloro de lo
recomendado anteriormente puede ocasionar daños en
la lavadora con el paso del tiempo.
c. Cierre la tapa de la lavadora.
d. No agregue detergente ni ningún otro producto químico
a la lavadora cuando siga este procedimiento.
e. Seleccione el ciclo de CLEAN WASHER (Limpiar la
lavadora).
f. Presione el botón de START/Pause/Unlock (Inicio/Pausa/
Desbloqueo) para comenzar el ciclo. A continuación se
describe cómo funciona el ciclo de CLEAN WASHER
(Limpiar la lavadora).
NOTA: Para obtener los mejores resultados, no interrumpa el
ciclo. Si es necesario interrumpir el ciclo, presione POWER/
CANCEL (Encendido/Anulación). (Para los modelos sin botón
de POWER/CANCEL [Encendido/Anulación], presione y
sostenga START/Pause/Unlock [Inicio/Pausa/Desbloqueo]
durante tres segundos). Después de que se detenga el ciclo
de CLEAN WASHER (Limpiar la lavadora), ponga en marcha
un ciclo de RINSE & SPIN (Enjuague y exprimido) para
enjuagar el limpiador de la lavadora.
Descripción del funcionamiento del ciclo de CLEAN WASHER
(Limpiar la lavadora):
1. Este ciclo llenará la lavadora de agua hasta un nivel más alto
que los ciclos normales de lavado para enjuagar arriba de la
línea de agua de un ciclo normal.
2. Durante este ciclo, habrá períodos de agitación y exprimido
para eliminar mejor la suciedad.
Una vez que haya nalizado el ciclo, deje la tapa abierta para
que haya una mejor ventilación y secado del interior de la
lavadora.
Limpieza de los depósitos
Después de usar la lavadora durante cierto tiempo, es posible
que encuentre acumulación de residuos en los depósitos de la
misma. Para quitar los restos de los depósitos, límpielos con
un paño húmedo y seque con una toalla. No intente sacar los
depósitos ni el borde para la limpieza. Los depósitos y el borde
no se pueden sacar. Si su modelo tiene un cajón de depósito, sin
embargo, saque el cajón y límpielo antes o después de poner en
marcha el ciclo de CLEAN WASHER (Limpiar la lavadora). Use
un limpiador multiuso para supercies, si es necesario.
Cómo limpiar el exterior de la lavadora
Use un paño suave y húmedo o una esponja para limpiar
cualquier derrame. Utilice sólo limpiadores o jabones suaves
para limpiar las supercies externas de la lavadora.
IMPORTANTE: Para evitar dañar el acabado de la lavadora,
no use productos abrasivos.
44
Page 45

CUIDADO DURANTE LA FALTA
DE USO Y LAS VACACIONES
Ponga a funcionar su lavadora únicamente cuando esté en casa.
Si va a mudarse o no va a usar la lavadora durante cierto período,
siga esos pasos:
1. Desenchufe la lavadora o desconecte el suministro
de energía a la misma.
2. Cierre el suministro de agua a la lavadora para evitar
inundaciones debidas a aumentos en la presión del agua.
CUIDADO PARA EL ALMACENAMIENTO
DURANTE EL INVIERNO
IMPORTANTE: Para evitar daños, instale y guarde la
lavadora en un lugar donde no se congele. Debido a que
queda un poco de agua en las mangueras, el congelamiento
de la misma podría dañar la lavadora. Si va a almacenar
o mover su lavadora durante una temporada de invierno
riguroso, acondiciónela para el invierno.
Para acondicionar la lavadora para el invierno:
1. Cierre ambos grifos de agua, desconecte y escurra
el agua de las mangueras de llenado.
2. Vierta un 1 L (1 cuarto) de anticongelante tipo
R.V. en la canasta y ponga a funcionar la lavadora
en un ciclo de RINSE & SPIN (Enjuague y exprimido)
durante unos 30 segundos para mezclar el anticongelante
con el agua restante.
3. Desenchufe la lavadora o desconecte el suministro
de energía.
CÓMO REINSTALAR
O USAR LA LAVADORA NUEVAMENTE
Para reinstalar la lavadora después de la falta de uso, vacaciones,
almacenamiento durante el invierno o mudanza:
1. Consulte las Instrucciones de instalación para ubicar, nivelar
y conectar la lavadora.
2. Antes de usar la lavadora nuevamente, póngala a funcionar
siguiendo el procedimiento recomendado a continuación:
Para volver a usar la lavadora:
1. Deje correr el agua por los tubos y las mangueras. Vuelva
a conectar las mangueras de entrada de agua. Abra ambos
grifos de agua.
TRANSPORTE DE LA LAVADORA
1. Cierre ambos grifos de agua. Desconecte y elimine
el agua de las mangueras de entrada de agua.
2. Si se va a trasladar la lavadora durante una temporada
de invierno riguroso, siga las instrucciones descritas
en CUIDADO PARA EL ALMACENAMIENTO DURANTE
EL INVIERNO antes de la mudanza.
3. Desconecte el desagüe del sistema de desagüe y drene
el agua restante en una olla o cubeta. Desconecte la
manguera de desagüe de la parte posterior de la lavadora.
4. Desenchufe el cable eléctrico.
5. Ponga las mangueras de entrada y la manguera
de desagüe en el interior de la canasta de la lavadora.
6. Pase el cable eléctrico sobre el borde y colóquelo dentro
de la canasta de la lavadora.
7. Coloque la bandeja de empaque de los materiales de
envío originales nuevamente en el interior de la lavadora.
Si no cuenta con la bandeja de empaque, coloque frazadas
o toallas pesadas en la abertura de la canasta. Cierre la
tapa y coloque cinta sobre la misma hacia el frente de la
lavadora. Mantenga la tapa pegada con cinta adhesiva
hasta que se coloque la lavadora en su nuevo lugar.
2. Enchufe la lavadora o reconecte el suministro de energía.
3. Ponga a funcionar la lavadora en el ciclo de BULKY
(Artículos voluminosos) para limpiarla y para quitar el
anticongelante, de haberlo usado. Use solamente
un detergente HE (Alto rendimiento). Use la mitad
de la cantidad recomendada por el fabricante para
una carga de tamaño mediano.
45
Page 46

SOLUCIÓN DE PROBLEMAS
Pruebe primero las soluciones aquí sugeridas y posiblemente se evite el costo de una visita de servicio técnico.
Si experimenta lo siguiente
Vibración o desequilibrio
Verique lo siguiente
para la instalación
adecuada o vea la
sección “Uso de la
lavadora”.
Ruidos
Chasquidos o ruidos
metálicos
Gorgoteo o zumbido
Zumbido
Fugas de agua
Causas posibles
Es posible que las patas no estén
haciendo contacto con el piso y
no estén aseguradas.
Es posible que la lavadora no esté
nivelada.
La carga podría estar desequilibrada. Cargue los artículos secos de modo uniforme en montones
Objetos atrapados en el sistema
de desagüe de la lavadora.
La lavadora puede estar
desaguándose.
Está encendida la luz de detección.
Las patas frontales y posteriores deberán hacer contacto rme
con el piso y la lavadora deberá estar nivelada para funcionar
adecuadamente. Las tuercas adoras deberán estar rmes
contra la parte inferior de la carcasa. Vea "Instrucciones de
instalación".
Revise si el piso está irregular o hundido. Si el piso no está parejo,
el colocar una pieza de madera de 19 mm (3/4") debajo de la
lavadora reducirá el sonido.
Vea “Nivelación de la lavadora” en las Instrucciones de
instalación.
ojos alrededor de la placa de lavado. No cargue las prendas
directamente sobre el centro de la placa de lavado. El agregar
artículos mojados o agregar más agua a la canasta podría causar
un desequilibrio en la lavadora.
Lave cargas más pequeñas para reducir el desequilibrio.
No cargue de manera apretada. Evite lavar un solo artículo.
Use el ciclo de Bulky (Artículos voluminosos) para los artículos de
tamaño grande no absorbentes, tales como edredones pequeños y
chaquetas.
Vacíe los bolsillos antes del lavado. Los artículos sueltos, tales
como monedas, podrían caer entre la canasta y la tina o bloquear
la bomba. Tal vez sea necesario solicitar servicio técnico para
quitar los artículos.
Es normal escuchar el ruido de los artículos de metal en las
prendas, tales como broches a presión de metal, hebillas o cierres
cuando tocan la canasta de acero inoxidable.
Es normal escuchar que la bomba haga un sonido continuo de
zumbido, con gorgoteos periódicos o repentinos, a medida que
salen los últimos restos de agua durante los ciclos de Drain/Spin
(Desagüe/ Exprimido).
Puede ser que escuche el zumbido de los giros de detección
después de haber puesto en marcha la lavadora. Esto es normal.
Los giros de detección tomarán varios minutos antes de que se
agregue agua a la lavadora.
Solución
Verique que lo
siguiente esté instalado
adecuadamente:
La lavadora no está nivelada. Es posible se salpique agua de la canasta si la lavadora no está
Las mangueras de llenado no están
bien sujetas.
Arandelas de la manguera de llenado
Conexión de la manguera de desagüe
Revise la plomería de la casa para ver
si hay fugas o si el fregadero o
el desagüe está obstruido.
No se ha cargado la lavadora según lo
recomendado.
46
nivelada. Verique que la carga no esté desequilibrada ni se haya
cargado apretada.
Apriete la conexión de la manguera de llenado.
Cerciórese de que estén debidamente colocadas las cuatro
arandelas planas de las mangueras de llenado.
Jale la manguera de desagüe de la carcasa de la lavadora
y asegúrela correctamente al tubo vertical o a la tina de lavadero.
No coloque cinta adhesiva sobre la abertura del desagüe.
Es posible que el agua se salga de un lavadero o tubo vertical
bloqueado. Revise toda la plomería de la casa y fíjese si hay
fugas de agua (tinas de lavadero, tubo de desagüe, tubos de agua
y grifos).
Una carga desequilibrada puede hacer que la canasta quede
desalineada y que salpique agua fuera de la tina. Vea “Uso de
la lavadora” para obtener instrucciones sobre cómo cargar.
Page 47

SOLUCIÓN DE PROBLEMAS
Pruebe primero las soluciones aquí sugeridas y posiblemente se evite el costo de una visita de servicio técnico.
Si experimenta lo siguiente
La lavadora no funciona como se esperaba
No hay suciente
agua en la lavadora
La lavadora no funciona
o no llena, la lavadora
se detiene o la luz del
lavado permanece
encendida (lo que
indica que la lavadora
no pudo llenarse
apropiadamente)
La carga no está completamente
cubierta en agua.
Verique si hay el suministro
adecuado de agua.
Verique que el suministro eléctrico
sea el adecuado.
Funcionamiento normal de
la lavadora.
Puede ser que la lavadora se haya
cargado de manera apretada.
Causas posibles
Solución
Este es el funcionamiento normal para una lavadora de HE (Alto
rendimiento) con nivel bajo de agua. La carga no estará sumergida
en agua. La lavadora detecta los tamaños de las cargas y agrega la
cantidad correcta de agua para la limpieza óptima. Vea “Qué hay de
nuevo debajo de la tapa”.
IMPORTANTE: No agregue más agua a la lavadora. Si se agrega agua,
ésta levantará y separará las prendas de la placa de lavado, lo que
ocasionará una acción de limpieza menos ecaz.
Deberán sujetarse ambas mangueras y tener ujo de agua
a la válvula de llenado.
Los grifos de agua fría y caliente deben estar abiertos.
Revise que los ltros de la válvula de entrada no se hayan
obstruido.
Revise si hay torceduras en las mangueras de entrada, las
cuales pueden restringir el ujo de agua.
Conecte el cable eléctrico a un contacto de pared de conexión
a tierra.
No use un cable eléctrico de extensión.
Cerciórese de que haya suministro eléctrico en el contacto.
Reposicione el cortacircuitos si se ha disparado. Reemplace
los fusibles que se hayan quemado.
NOTA: Si los problemas continúan, contacte a un electricista.
La tapa deberá estar cerrada para que funcione la lavadora.
La lavadora hará una pausa durante ciertas fases del ciclo.
No interrumpa el ciclo.
Es posible que la lavadora se haya detenido para reducir la espuma.
La lavadora detecta la carga seca con giros breves que pueden
tomar de 2 a 3 minutos antes de que se agregue el agua. Es posible
que escuche el zumbido de los giros. Esto es normal.
Saque varios artículos y vuelva a arreglar la carga uniformemente
en la placa de lavado. No cargue las prendas directamente
sobre el centro de la placa de lavado. Cierre la tapa y presione
START/Pause/Unlock (Inicio/Pausa/Desbloqueo).
Agregue solamente 1 ó 2 artículos adicionales después de que
la lavadora haya comenzado.
No agregue más agua a la lavadora.
47
Page 48

SOLUCIÓN DE PROBLEMAS
Pruebe primero las soluciones aquí sugeridas y posiblemente se evite el costo de una visita de servicio técnico.
Si experimenta lo siguiente
La lavadora no funciona como se esperaba (cont.)
La lavadora no funciona
o no llena, la lavadora
se detiene o la luz del
lavado permanece
encendida (lo que
indica que la lavadora
no pudo llenarse
apropiadamente) (cont.)
La lavadora no desagua/
exprime, las cargas
todavía están mojadas
o la luz de exprimido
permanece encendida
(lo que indica que la
lavadora no pudo drenar
el agua en menos de 10
minutos)
Partes secas en la carga
después del ciclo
Temperaturas
incorrectas o
equivocadas de
lavado o enjuague
No se está usando detergente de
Alto rendimiento (HE) o se está
usando demasiado del mismo.
Vacíe los bolsillos y use bolsas para
prendas para los artículos pequeños.
Use un ciclo con una velocidad baja
de exprimido.
Puede ser que la lavadora se haya
cargado de manera apretada o
desequilibrada.
Revise la plomería para ver si está
instalada correctamente la manguera
de desagüe. La manguera de desagüe
se extiende dentro del tubo vertical
más de 114 mm (4,5").
Se ha agregado demasiado
detergente, ocasionando espuma
excesiva que enlentece o detiene
el desagüe y el exprimido.
Los exprimidos a alta velocidad
quitan mayor humedad que en las
lavadoras tradicionales de carga
superior.
Verique si hay el suministro
adecuado de agua.
Temperaturas de lavado con control
de ahorro de energía.
Causas posibles
Solución
Use solamente un detergente HE (Alto rendimiento). La espuma
que producen los detergentes comunes puede enlentecer la
lavadora o detenerla. Mida siempre el detergente y siga las
instrucciones del mismo según los requisitos de la carga.
Para quitar la espuma, anule el ciclo. Seleccione RINSE & SPIN
(Enjuague y exprimido). Presione START/Pause/Unlock (Inicio/
Pausa/Desbloqueo). No agregue más detergente.
Es posible que los artículos pequeños hayan quedado
atrapados en la bomba o entre la canasta y la tina, lo que puede
enlentecer el desagüe.
Los ciclos con velocidades de exprimido más bajas quitan menos
agua que los ciclos con velocidades de exprimido más altas. Use
el ciclo/la velocidad de exprimido recomendado para la prenda.
Para remover el agua adicional de la carga, seleccione Drain &
Spin (Desagüe y exprimido). Tal vez deba reacomodarse la carga
para permitir una distribución uniforme de la carga en la canasta.
El cargar apretadamente o las cargas desequilibradas
no permitirán que la lavadora exprima correctamente, dejando la
carga más mojada de lo normal. Distribuya la carga mojada de
modo uniforme para que pueda girar en equilibrio. Seleccione el
ciclo de Drain & Spin (Desagüe y exprimido) para sacar el agua en
exceso. Vea “Uso de la lavadora” para obtener recomendaciones
sobre cómo cargar.
Revise la manguera de desagüe para ver si está instalada
correctamente. Use el molde de la manguera de desagüe y
sujételo bien al tubo vertical o a la tina. No ponga cinta adhesiva
sobre la abertura del desagüe. Baje la manguera de desagüe si el
extremo está a más de 1,25 m (4’) por encima del piso. Quite lo
que esté obstruyendo la manguera de desagüe.
Use solamente un detergente de HE (Alto rendimiento). Mida
siempre el detergente y siga las instrucciones del mismo según
los requisitos de la carga. Para quitar el exceso de espuma,
seleccione RINSE & SPIN (Enjuague y exprimido). No
agregue detergente.
Las altas velocidades de exprimido, combinadas con el ujo
de aire durante el exprimido nal, pueden hacer que partes de
los artículos que están cerca de la parte superior de la carga se
sequen durante el exprimido nal. Esto es normal.
Cerciórese de que no estén invertidas las mangueras de
entrada de agua caliente y agua fría.
Ambas mangueras deberán sujetarse a la lavadora y al grifo, y
deberán tener ujo de agua caliente y fría a la válvula de entrada.
Revise que los ltros de la válvula de entrada no estén
obstruidos.
Enderece las torceduras que pueda haber en las mangueras.
Las lavadoras con clasicación de ahorro de energía usan
temperaturas de agua y enjuague más frías que las lavadoras
tradicionales de carga superior. Esto incluye lavados con agua
no tan tibia ni tan caliente.
48
Page 49

SOLUCIÓN DE PROBLEMAS
Pruebe primero las soluciones aquí sugeridas y posiblemente se evite el costo de una visita de servicio técnico.
Si experimenta lo siguiente
La lavadora no funciona como se esperaba (cont.)
La carga no está
enjuagada
Hay arena, pelo de
mascotas, pelusa, etc.
en la carga después
del lavado
Verique que haya el suministro
adecuado de agua.
No se está usando detergente HE
(Alto rendimiento) o se está usando
demasiado del mismo.
La lavadora puede estar cargada de
manera apretada.
La arena, el pelo de mascotas, la
pelusa o los restos de detergente
o blanqueador excesivos pueden
requerir enjuague adicional.
Causas posibles
Solución
Cerciórese de que no estén invertidas las mangueras
de entrada de agua caliente y agua fría.
Deberán sujetarse ambas mangueras y tener ujo de agua
a la válvula de entrada.
Deberán estar abiertos los grifos de agua fría y caliente.
Es posible que estén obstruidos los ltros de la válvula de
entrada en la lavadora.
Enderece las torceduras que pueda haber en la manguera
de entrada.
Es posible que la espuma ocasionada por un detergente común
impida que la lavadora funcione correctamente.
Use solamente un detergente de HE (Alto rendimiento). Cerciórese
de medirlo correctamente.
Mida siempre el detergente y siga las instrucciones del mismo
según el tamaño de la carga y el nivel de suciedad.
La lavadora es menos ecaz en el enjuague cuando la carga
está apretada.
Cargue las prendas de modo uniforme en montones ojos
alrededor de la placa de lavado. No cargue las prendas
directamente sobre el centro de la placa de lavado.
Use el ciclo diseñado para las telas que se van a lavar.
Agregue solamente 1 ó 2 artículos después de que la lavadora haya
comenzado.
Agregue un Extra Rinse (Enjuague adicional) al ciclo
seleccionado.
La carga está enredada No se ha cargado la lavadora
No limpia ni quita
las manchas
según lo recomendado.
La carga de lavado no está
completamente cubierta
de agua.
Se ha agregado más agua
a la lavadora.
No se ha cargado la lavadora según
lo recomendado.
Vea la sección “Uso de la lavadora”.
Seleccione un ciclo con una acción de lavado y velocidad de
exprimido más lenta; sin embargo, los artículos estarán más
mojados que aquéllos que usan un exprimido a velocidad más
alta. Consulte la “Guía de ciclos” para elegir el mejor ciclo para
su carga.
Cargue las prendas de modo uniforme en montones ojos
alrededor de la pared de la canasta. No cargue las prendas
directamente sobre el centro de la placa de lavado.
Reduzca los enredos mezclando diferentes tipos de artículos
en la carga. Use el ciclo recomendado para el tipo de prendas
que se van a lavar.
La lavadora detecta el tamaño de la carga y agrega la cantidad
correcta de agua. Esto es normal y es necesario para que la
ropa se mueva.
No agregue más agua a la lavadora. Si se agrega agua, ésta
levantará y separará las prendas de la placa de lavado, lo que
ocasionará una acción de limpieza menos ecaz.
La lavadora es menos ecaz en la limpieza cuando la carga
está apretada.
Cargue las prendas de modo uniforme en montones ojos
alrededor de la placa de lavado. No cargue las prendas
directamente sobre el centro de la placa de lavado.
Agregue solamente 1 ó 2 artículos después de que haya
comenzado la lavadora.
49
Page 50

SOLUCIÓN DE PROBLEMAS
Pruebe primero las soluciones aquí sugeridas y posiblemente se evite el costo de una visita de servicio técnico.
Si experimenta lo siguiente
La lavadora no funciona como se esperaba (cont.)
No limpia ni quita
las manchas (cont.)
Se ha agregado el detergente sobre
la carga.
No está lavando los colores
similares juntos.
No se está usando detergente HE
(Alto rendimiento) o se está usando
demasiado del mismo.
No está usando el ciclo
correcto para el tipo de tela.
No está usando el depósito ni la bola
distribuidora de suavizante de telas.
No se está seleccionando la opción
Fabric Softener (Suavizante de telas).
Causas posibles
Solución
Agregue el detergente, los productos Oxi y el blanqueador no
decolorante al fondo de la canasta antes de poner las prendas en
la misma.
Lave los colores similares juntos y quite la carga inmediatamente
después de que se termine el ciclo, para evitar la transferencia
de tinte.
Es posible que la espuma ocasionada por un detergente común
impida que la lavadora funcione correctamente.
Use solamente un detergente HE (Alto rendimiento). Cerciórese
de medirlo correctamente.
Mida siempre el detergente y siga las instrucciones del
fabricante según el tamaño de la carga y el nivel de suciedad.
Use una opción de ciclo con nivel de suciedad más alto y
temperatura de lavado más caliente para mejorar la limpieza.
Use el ciclo Heavy Duty Heavy (Muy intenso) o Heavy Duty
Regular (Intenso común) para una limpieza intensa. Consulte la
“Guía de ciclos” para elegir el mejor ciclo para su carga.
Use el depósito para el blanqueador con cloro y la bola
distribuidora de suavizante de telas con dicho suavizante, para
evitar que se formen manchas.
Cargue los depósitos antes de comenzar un ciclo.
No agregue productos directamente a la carga.
Siempre seleccione la opción Fabric Softener (Suavizante de
telas) cuando vaya a agregar suavizante de telas. Los ciclos que
usan un enjuague por rocío agregarán agua adicional para la
distribución adecuada del suavizante de telas, siempre que se
haya seleccionado esta opción.
Funcionamiento
incorrecto del depósito
Daños en las telas
El depósito está obstruido.
Había objetos losos en los bolsillos
durante el ciclo de lavado.
Es posible que se hayan enredado
los cordones y las fajas.
Los artículos pueden haberse dañado
antes del lavado.
Si la carga está apretada, las telas
pueden dañarse.
El blanqueador líquido con cloro
puede haberse agregado
incorrectamente.
Tal vez no se hayan seguido las
instrucciones de las etiquetas
de las prendas.
Use solamente blanqueador con cloro líquido en el depósito para
el blanqueador.
Vacíe los bolsillos, cierre los zípers, los broches de presión y los
corchetes antes del lavado para evitar enganches y rasgaduras.
Ate todos los cordones y las fajas antes de comenzar a lavar
la carga.
Remiende lo que esté roto y descosido antes del lavado.
Cargue las prendas de modo uniforme en montones ojos
alrededor de la pared de la canasta. No cargue las prendas
directamente sobre el centro de la placa de lavado.
Use el ciclo diseñado para las telas que se van a lavar.
Agregue solamente 1 ó 2 artículos después de que la lavadora
haya comenzado.
No vierta el blanqueador líquido con cloro directamente
en la carga. Limpie los derrames del blanqueador.
El blanqueador no diluido daña los tejidos. No use más
de lo recomendado por el fabricante.
No coloque los artículos sobre el depósito del blanqueador
cuando ponga o quite la ropa de la lavadora.
Lea y siga siempre las instrucciones de la etiqueta de cuidado
proporcionadas por el fabricante de la prenda. Consulte la “Guía
de ciclos” para elegir el mejor ciclo para la carga.
50
Page 51

SOLUCIÓN DE PROBLEMAS
Pruebe primero las soluciones aquí sugeridas y posiblemente se evite el costo de una visita de servicio técnico.
Si experimenta lo siguiente
Causas posibles
La lavadora no funciona como se esperaba (cont.)
Olores
No se ha hecho el mantenimiento
mensual según lo recomendado.
No se está usando detergente HE o se
está usando demasiado del mismo.
La luz de Tapa
La tapa no está cerrada. Cierre la tapa. La lavadora no se pondrá en marcha ni se llenará
bloqueada (Lid
Locked) está
destellando
Un ciclo se ha detenido o puesto en
pausa con el botón START/Pause/
Unlock (Inicio/Pausa/ Desbloqueo).
Solución
Ponga en marcha un ciclo Clean Washer (Limpiar la lavadora)
después de 30 lavados. Consulte la sección ”Cuidado de la
lavadora” en Mantenimiento de la lavadora.
Descargue la lavadora en cuanto termine el ciclo.
Use solamente detergente HE (Alto rendimiento). Cerciórese
de medirlo correctamente. Siga siempre las indicaciones del
fabricante.
Vea la sección “"Cuidado de la lavadora”.
con la tapa abierta.
Puede ser que la lavadora aún esté exprimiendo. La tapa no se
desbloqueará hasta que la canasta haya dejado de girar. Esto
puede tomar varios minutos si se están lavando cargas grandes
o telas pesadas.
W10475873A
© 2012 2/12
All rights reserved. Printed in U.S.A.
Tous droits réservés. Imprimé aux USA.
Todos los derechos reservados Impreso en EE.UU.
®Registered trademark/™ Trademark of Maytag Properties LLC or its related companies.
®Marque déposée/™Marque de commerce de Maytag Properties LLC ou de ses compagnies afliées.
® Marca registrada/TM Marca de comercio de Maytag Properties LLC o sus compañías asociadas.
51
Page 52

.ﺔﻣﺪﺨﻟﺍ ﺰﻛﺮﻤﺑ ﻝﺎﺼﺗﻻﺍ ﺮﻴﻈﻧ ﺕﺎﻘﻔﻧ ﻱﺃ ﻊﻓﺩ ﺐﻨﺠﺘﻟ ًﻻ ﻭ ﺃ ﺎﻨﻫ ﺔﺣﺮﺘﻘﻤﻟﺍ ﻝﻮﻠﺤﻟﺍ ﺔﺑﺮﺠﺘﺑ ﻚﻴﻠﻋ
ﻊﻣ ﺔﻟﻮﻤﺤﻟﺍ ﺔﻤﺋﻼﻤﻟ “ﺓﺭﻭﺪﻟﺍ ﻞﻴﻟﺩ” ﻊﺟﺍﺭ .ﺔﻌﻨﺼﻤﻟﺍ ﺔﻛﺮﺸﻟﺎﺑ ﺹﺎﺨﻟﺍ
.ﺓﺭﻭﺩ ﻞﻀﻓﺃ
ﻊﺟﺍﺭ .ﻞﻴﺴﻏ ﺓﺭﻭﺩ
30
ﺭﻭﺮﻣ ﺪﻌﺑ ﺔﻟﺎﺴﻐﻟﺍ ﻒﻴﻈﻨﺗ ﺓﺭﻭﺩ ﻞﻴﻐﺸﺘﺑ ﻢﻗ
.ﺔﻟﺎﺴﻐﻟﺍ ﺔﻧﺎﻴﺻ ﻢﺴﻗ ﻲﻓ “ﺔﻟﺎﺴﻐﻟﺎﺑ ﺔﻳﺎﻨﻌﻟﺍ”
.ﺓﺭﻭﺪﻟﺍ ﻝﺎﻤﺘﻛﺍ ﻝﺎﺣ ﺔﻟﺎﺴﻐﻟﺍ ﺔﻟﻮﻤﺣ ﻍﺍﺮﻓﺈﺑ ﻢﻗ
ﺎﻬﺣﻼﺻﺇﻭ ﻝﺎﻄﻋﻷﺍ ﻑﺎﺸﻜﺘﺳﺍ
ﻝﺎﻄﻋﻷﺍﺔﻠﻤﺘﺤﻤﻟﺍ ﺏﺎﺒﺳﻷﺍﻝﻮﻠﺤﻟﺍ
(
ﻊﺑﺎﺗ) ﻊﻗﻮﺘﻤﻟﺍ ﻮﺤﻨﻟﺍ ﻰﻠﻋ ﺔﻟﺎﺴﻐﻟﺍ ﻞﻴﻐﺸﺗ ﻡﺪﻋ
(
ﻊﺑﺎﺗ) ﺕﺎﺟﻮﺴﻨﻤﻟﺍ ﻒﻠﺗ.ﺲﺑﻼﻤﻟﺎﺑ ﺔﻳﺎﻨﻌﻟﺍ ﺕﺍﺩﺎﺷﺭﺇ ﻉﺎﺒﺗﺍ ﻡﺪﻋ ﺔﻳﺎﻨﻌﻟﺍ ﻖﺼﻠﻣ ﻰﻠﻋ ﺓﺩﻮﺟﻮﻤﻟﺍ ﺕﺎﻤﻴﻠﻌﺘﻟﺍ ﻉﺎﺒﺗﺍﻭ ﺓءﺍﺮﻗ ﻰﻠﻋ ﺎًﻤﺋﺍﺩ ﺹﺮﺣﺍ
ﺔﻬﻳﺮﻜﻟﺍ ﺢﺋﺍﻭﺮﻟﺍ ﻮﻫ ﺎﻤﻛ ﺔﻳﺮﻬﺸﻟﺍ ﺔﻧﺎﻴﺼﻟﺍ ءﺍﺮﺟﺇ ﻡﺪﻋ
.ﻪﺑ ﻰﺻﻮﻣ
ﺱﺎﻴﻗ ﻦﻣ ﺪﻛﺄﺗ .ﻂﻘﻓ ﺓءﺎﻔﻜﻟﺍ ﺔﻴﻟﺎﻋ ﺕﺎﻔﻈﻨﻤﻟﺍ ﻡﺍﺪﺨﺘﺳﺍ ﻰﻠﻋ ﺹﺮﺣﺍ
ﺕﺍﺩﺎﺷﺭﺇ ﻉﺎﺒﺗﺍ ﻰﻠﻋ ﺎًﻤﺋﺍﺩ ﺹﺮﺣﺍﻭ ،ﺢﻴﺤﺻ ﻞﻜﺸﺑ ﺓﺩﺪﺤﻤﻟﺍ ﺮﻳﺩﺎﻘﻤﻟﺍ
.ﺔﻌّﻨﺼﻤﻟﺍ ﺔﻛﺮﺸﻟﺍ
.“ﺔﻟﺎﺴﻐﻟﺎﺑ ﺔﻳﺎﻨﻌﻟﺍ” ﻢﺴﻗ ﻊﺟﺍﺭ
ﺔﻠﺴﻟﺍ ﻒﻗﻮﺘﺗ ﻰﺘﺣ ءﺎﻄﻐﻟﺍ ﻞﻔﻗ ءﺎﻐﻟﺇ ﻢﺘﻳ ﻦﻟﻭ ،ﻥﺍﺭﻭﺪﻟﺍ ﺪﻴﻗ ﺔﻟﺎﺴﻐﻟﺍ ﻥﻮﻜﺗ ﺪﻗ
ﺓﺮﻴﺒﻛ ﺕﻻﻮﻤﺣ ﻞﻴﺴﻏ ﻝﺎﺣ ﻲﻓ ﻖﺋﺎﻗﺩ ﺓﺪﻋ ﻚﻟﺫ ﻕﺮﻐﺘﺴﻳ ﺪﻗ .ﻥﺍﺭﻭﺪﻟﺍ ﻦﻋ
.ﺔﻠﻴﻘﺛ ﺕﺎﺟﻮﺴﻨﻣ ﻭﺃ
ﻭﺃ ﺔﺌﻃﺎﺨﻟﺍ ﺕﺎﻔﻈﻨﻤﻟﺍ ﻡﺍﺪﺨﺘﺳﺍ
.ﺎﻬﻴﻓ ﻑﺍﺮﺳﻹﺍ
ءﺎﻄﻐﻟﺍ ﻞﻔﻗ ﺮﺷﺆﻣ ﺾﻴﻣﻭ.ﻞﻔﻘﻣ ﺮﻴﻏ ءﺎﻄﻐﻟﺍ.ءﺎﻄﻐﻟﺍ ﺢﺘﻓ ءﺎﻨﺛﺃ ءﻞﻤﻟﺍ ﻭﺃ ﻞﻤﻌﻟﺍ ﻲﻓ ﺔﻟﺎﺴﻐﻟﺍ ﺃﺪﺒﺗ ﻦﻟ .ءﺎﻄﻐﻟﺍ ﻖﻠﻏﺃ
ﺎًﺘﻗﺆﻣ ﻭﺃ ﺎًﻴﻠﻛ ﻞﻴﺴﻏ ﺓﺭﻭﺩ ﻒﻗﻮﺗ
ﻑﺎﻘﻳﺇ/ﻞﻴﻐﺸﺘﻟﺍ ءﺪﺑ” ﺭﺯ ﻡﺍﺪﺨﺘﺳﺎﺑ
.“ﻞﻔﻘﻟﺍ ءﺎﻐﻟﺇ/ﺖﻗﺆﻣ
12/1 2012 ©
2
.ﺔﻴﻜﻳﺮﻣﻷﺍ ﺓﺪﺤﺘﻤﻟﺍ ﺕﺎﻳﻻﻮﻟﺍ ﻲﻓ ﻊﺒُﻃ .ﺔﻇﻮﻔﺤﻣ ﻕﻮﻘﺤﻟﺍ ﻊﻴﻤﺟ
.ﺎﻬﻟ ﺔﻌﺑﺎﺘﻟﺍ ﺕﺎﻛﺮﺸﻟﺍﻭ
17
(
LLC
)
ﺓﺩﻭﺪﺤﻤﻟﺍ
(
Maytag Properties
)
ﺰﻴﺗﺮﺑﻭﺮﺑ ﺝﺎﺘﻴﻣ ﺔﻛﺮﺸﻟ ﺔﻳﺭﺎﺠﺗ ﺔﻣﻼﻋ ™/ﺔﻠﺠﺴﻣ ﺔﻳﺭﺎﺠﺗ ﺔﻣﻼﻋ
W10475873A
®
Page 53

.ﺔﻣﺪﺨﻟﺍ ﺰﻛﺮﻤﺑ ﻝﺎﺼﺗﻻﺍ ﺮﻴﻈﻧ ﺕﺎﻘﻔﻧ ﻱﺃ ﻊﻓﺩ ﺐﻨﺠﺘﻟ ًﻻ ﻭ ﺃ ﺎﻨﻫ ﺔﺣﺮﺘﻘﻤﻟﺍ ﻝﻮﻠﺤﻟﺍ ﺔﺑﺮﺠﺘﺑ ﻚﻴﻠﻋ
oxi
ﺕﺎﺠﺘﻨﻣ ﻉﻮﻧ ﻦﻣ ﺕﺎﻔﻈﻨﻤﻟﺍ ﺔﻓﺎﺿﺈﺑ ﻢﻗ
.ﺲﺑﻼﻤﻟﺍ ﻞﻴﻤﺤﺗ ﻞﺒﻗ ﺔﻟﺎﺴﻐﻟﺍ ﺔﻠﺳ ﻞﻔﺳﺃ ﻲﻓ ﻥﺍﻮﻟﻷﺍ ﻰﻠﻋ ﺓﺮﺛﺆﻤﻟﺍ
.ﻍﺎﺒﺻﻷﺍ ﻞﺧﺍﺪﺗ ﺐﻨﺠﺘﻟ ﺓﺭﻭﺪﻟﺍ ﻡﺎﻤﺗﺇ ﺪﻌﺑ ﻊﻳﺮﺳ
ﻞﻤﻌﻟﺍ ﻦﻣ ﺔﻟﺎﺴﻐﻟﺍ ﻊﻨﻤﺗ ﺓﻮﻏﺭ ﻥّﻮﻜﺗ ﻰﻟﺇ ﺔﻳﺩﺎﻌﻟﺍ ﺕﺎﻔﻈﻨﻤﻟﺍ ﻡﺍﺪﺨﺘﺳﺍ ﻱﺩﺆﻳ
.ﺢﻴﺤﺻ ﻞﻜﺸﺑ
ﺮﻳﺩﺎﻘﻤﻟﺍ ﺱﺎﻴﻗ ﻦﻣ ﺪﻛﺄﺗ .ﻂﻘﻓ ﺓءﺎﻔﻜﻟﺍ ﺔﻴﻟﺎﻋ ﺕﺎﻔﻈﻨﻤﻟﺍ ﻡﺍﺪﺨﺘﺳﺍ ﻰﻠﻋ ﺹﺮﺣﺍ
.ﺢﻴﺤﺻ ﻞﻜﺸﺑ ﺓﺩﺪﺤﻤﻟﺍ
ﺔﻌﻨﺼﻤﻟﺍ ﺔﻬﺠﻟﺍ ﺕﺍﺩﺎﺷﺭﺇ ﻉﺎﺒﺗﺍﻭ ﻒﻈﻨﻤﻟﺍ ﺭﺍﺪﻘﻣ ﺱﺎﻴﻘﺑ ﺎًﻤﺋﺍﺩ ﻚﻴﻠﻋ ﺍﺬﻟ
.ﺎﻬﺧﺎﺴﺗﺍ ﺔﺟﺭﺩﻭ ﺲﺑﻼﻤﻟﺍ ﻢﺠﺤﻟ ﺎًﻘﻓﻭ ﺕﺎﻔﻈﻨﻤﻟﺍ ﻡﺍﺪﺨﺘﺳﻻ
ﺓﺭﺍﺮﺣ ﺔﺟﺭﺩﻭ ﻯﻮﺼﻘﻟﺍ ﺥﺎﺴﺗﻻﺍ ﺔﺟﺭﺪﺑ ﺔﺻﺎﺨﻟﺍ ﺓﺭﻭﺪﻟﺍ ﺭﺎﻴﺧ ﺪﻳﺪﺤﺘﺑ ﻢﻗ
.ﻒﻴﻈﻨﺘﻟﺍ ﺔﻴﻠﻤﻋ ﻦﻴﺴﺤﺘﻟ ﺄﻓﺩﺃ ﻞﻴﺴﻏ
ﺔﻳﺩﺎﻌﻟﺍ ﺲﺑﻼﻤﻠﻟ ﺔﻗﺎﺸﻟﺍ ﺔﻣﺪﺨﻟﺍﻭ ﺔﻠﻴﻘﺜﻟﺍ ﺲﺑﻼﻤﻠﻟ ﺔﻗﺎﺸﻟﺍ ﺔﻣﺪﺨﻟﺍ ﺓﺭﻭﺩ ﻡﺪﺨﺘﺳﺍ
ﻲﺘﻟﺍ ﻞﻴﺴﻐﻟﺍ ﺕﺍﺭﻭﺩ ﻞﻀﻓﺃ ﺔﻓﺮﻌﻤﻟ “ﺓﺭﻭﺪﻟﺍ ﻞﻴﻟﺩ” ﻊﺟﺍﺭ .ﻡﺎﺘﻟﺍ ﻒﻴﻈﻨﺘﻠﻟ
.ﻚﺑ ﺔﺻﺎﺨﻟﺍ ﺔﻟﻮﻤﺤﻟﺍ ﺐﺳﺎﻨﺗ
ﺝﺭﺩ ﺓﺮﻛﻭ ﺭﻮﻠﻜﻟﺍ ﻰﻠﻋ ﻱﻮﺘﺤﺗ ﻲﺘﻟﺍ ﺾﻴﻴﺒﺘﻟﺍ ﺓﺩﺎﻤﻟ
.ﻊﻘﺑ ﺩﻮﺟﻭ ﺐﻨﺠﺘﻟ ﺔﺠﺴﻧﻷﺍ ﻢﻌﻨﻣ ﻊﻳﺯﻮﺗ
.ﺓﺭﻭﺪﻟﺍ ءﺪﺑ ﻞﺒﻗ ﻊﻳﺯﻮﺘﻟﺍ ﺝﺍﺭﺩﺃ ﻞﻴﻤﺤﺘﺑ ﻢﻗ
ﻊﻳﺯﻮﺗ ﺝﺭﺩ ﻡﺪﺨﺘﺳﺍ
ﺎﻬﺣﻼﺻﺇﻭ ﻝﺎﻄﻋﻷﺍ ﻑﺎﺸﻜﺘﺳﺍ
(
ﻊﺑﺎﺗ) ﻊﻗﻮﺘﻤﻟﺍ ﻮﺤﻨﻟﺍ ﻰﻠﻋ ﺔﻟﺎﺴﻐﻟﺍ ﻞﻴﻐﺸﺗ ﻡﺪﻋ
.ﺲﺑﻼﻤﻟﺍ ﻕﻮﻓ ﺕﺎﻔﻈﻨﻤﻟﺍ ﺔﻓﺎﺿﺇ ﺮﻴﻏ ﺾﻴﻴﺒﺘﻟﺍ ﺕﺎﺠﺘﻨﻣﻭ
.ﺎﻬﻀﻌﺑ ﻊﻣ ﺔﻬﺑﺎﺸﺘﻤﻟﺍ ﻥﺍﻮﻟﻷﺍ ﻞﺴﻏ ﻡﺪﻋ ﻞﻜﺸﺑ ﺎﻬﺘﻟﺍﺯﺈﺑ ﻢﻗ ﻢﺛ ﺎﻬﻀﻌﺑ ﻊﻣ ﺔﻬﺑﺎﺸﺘﻤﻟﺍ ﻥﺍﻮﻟﻷﺍ ﺕﺍﺫ ﺲﺑﻼﻤﻟﺍ ﻞﺴﻐﺑ ﻢﻗ
ﺓءﺎﻔﻜﻟﺍ ﺔﻴﻟﺎﻋ ﺕﺎﻔﻈﻨﻤﻟﺍ ﻡﺍﺪﺨﺘﺳﺍ ﻡﺪﻋ
ﺔﻴﻟﺎﻋ ﺕﺎﻔﻈﻨﻤﻟﺍ ﻦﻣ ﺮﻴﺜﻜﻟﺍ ﻡﺍﺪﺨﺘﺳﺍ ﻭﺃ
.ﺓءﺎﻔﻜﻟﺍ
ﻉﻮﻨﻟ ﺔﻤﺋﻼﻤﻟﺍ ﺓﺭﻭﺪﻟﺍ ﻡﺍﺪﺨﺘﺳﺍ ﻡﺪﻋ
.ﺕﺎﺟﻮﺴﻨﻤﻟﺍ
ﻊﻳﺯﻮﺗ ﺝﺭﺩ ﻭﺃ ﻊﻳﺯﻮﺗ ﺝﺭﺩ ﻡﺍﺪﺨﺘﺳﺍ ﻡﺪﻋ
.ﺔﺠﺴﻧﻷﺍ ﻢﻌﻨﻣ
ﻝﺎﻄﻋﻷﺍﺔﻠﻤﺘﺤﻤﻟﺍ ﺏﺎﺒﺳﻷﺍﻝﻮﻠﺤﻟﺍ
ﻭﺃ ﻊﻘﺒﻟﺍ ﻒﻴﻈﻨﺗ ﻡﺪﻋ
(
ﻊﺑﺎﺗ) ﺎﻬﺘﻟﺍﺯﺇ
.ﺔﻟﻮﻤﺤﻟﺍ ﻰﻟﺇ ﺮﺷﺎﺒﻣ ﻞﻜﺸﺑ ﺕﺎﺠﺘﻨﻤﻟﺍ ﺔﻓﺎﺿﺇ ﺐﻨﺠﺗ
ﻞﻜﺸﺑ ﺔﺠﺴﻧﻷﺍ ﻢﻌﻨﻣ ﻊﻳﺯﻮﺘﻟ ﺵﺮﻟﺎﺑ ﻒﻄﺸﻟﺍ ﻡﺪﺨﺘﺴﺗ ﻲﺘﻟﺍ ﺕﺍﺭﻭﺪﻟﺍ ﻲﻓ
.“ﻢﻌﻧ” ﺪﻳﺪﺤﺗ ﻝﺎﺣ ﺪﻴﺟ
.ﺾﻴﻴﺒﺘﻟﺍ ﺓﺩﺎﻣ
ﻚﺑﺎﺸﻣ ﻭﺃ ﺔﻴﻧﺪﻌﻤﻟﺍ ﺕﺎﻤﻳﺰﺑﻹﺍﻭ ﻖﻟﺰﻨﻣ ﻡﺎﻣﺯ ﻱﺃﻭ ﺲﺑﻼﻤﻟﺍ ﺏﻮﻴﺟ ﻍﺍﺮﻓﺈﺑ ﻢﻗ
.ﺲﺑﻼﻤﻟﺍ ﻕﺰﻤﺗ ﺐﻨﺠﺘﻟ ﻞﻴﺴﻐﻟﺍ ﻞﺒﻗ ﻝﺎﻔﻗﻷﺍ
ﺎﻬﻠﻴﻤﺤﺘﺑ ﻢﻘﺗ ﻻﻭ ،ﺔﺣﻭﺮﻤﻟﺍ ﻝﻮﺣ ٍﻭﺎﺴﺘﻣﻭ ﻉﺯﻮﻣ ﻞﻜﺸﺑ ﺲﺑﻼﻤﻟﺍ ﻞﻴﻤﺤﺘﺑ ﻢﻗ
.ﺔﺣﻭﺮﻤﻟﺍ ﻂﺳﻭ ﻕﻮﻓ ﺓﺮﺷﺎﺒﻣ
.ﺔﻟﻮﺴﻐﻤﻟﺍ ﺕﺎﺟﻮﺴﻨﻤﻟﺍ ﺔﻴﻋﻮﻧ ﺐﺴﺣ ﺔﺼﺼﺨﻤﻟﺍ ﺓﺭﻭﺪﻟﺍ ﻡﺍﺪﺨﺘﺳﺎﺑ ﻢﻗ
.ﺔﻟﺎﺴﻐﻟﺍ ﻞﻴﻐﺸﺗ ءﺪﺑ ﺪﻌﺑ ﺲﺑﻼﻤﻟﺍ ﻦﻣ ﻂﻘﻓ ﻦﻴﺘﻌﻄﻗ ﻭﺃ ﺔﻌﻄﻗ ﺔﻓﺎﺿﺈﺑ ﻢﻗ
ﺮﺷﺎﺒﻣ ﻞﻜﺸﺑ ﺭﻮﻠﻛ ﻰﻠﻋ ﺔﻳﻮﺘﺤﻤﻟﺍ ﺔﻠﺋﺎﺴﻟﺍ ﺾﻴﻴﺒﺘﻟﺍ ﺓﺩﺎﻣ ﺔﻓﺎﺿﺇ ﺐﻨﺠﺗ
ﺔﺒﻜﺴﻨﻤﻟﺍ ﺾﻴﻴﺒﺘﻟﺍ ﺩﺍﻮﻣ ﺢﺴﻤﺑ ﻢﻗ ﻢﺛ ،ﺲﺑﻼﻤﻟﺍ ﻰﻠﻋ
.
ﺐﻨﺠﺗ ﺍﺬﻟ ،ﺕﺎﺟﻮﺴﻨﻤﻟﺍ ﻒﻠﺗ ﻰﻟﺇ ﺾﻴﻴﺒﺘﻟﺍ ﺩﺍﻮﻤﻟ ﻁﺮﻔﻤﻟﺍ ﻡﺍﺪﺨﺘﺳﻻﺍ ﻱﺩﺆﻳ ﺪﻗ
.ﺔﻌﻨﺼﻤﻟﺍ ﺔﻛﺮﺸﻟﺍ ﻞﺒﻗ ﻦﻣ ﻪﺑ ﻲﺻﻮﻤﻟﺍ ﺭﺪﻘﻟﺍ ﻦﻣ ﺮﺜﻛﺃ ﺩﺍﻮﻤﻟﺍ ﻩﺬﻫ ﻡﺍﺪﺨﺘﺳﺍ
ﺔﻟﺎﺴﻐﻟﺍ ﻞﻴﻤﺤﺗ ﺔﻟﺎﺣ ﻲﻓ ﺾﻴﺒﻤﻟﺍ ﻊﻳﺯﻮﺗ ﺝﺭﺩ ﻕﻮﻓ ﺲﺑﻼﻤﻟﺍ ﻊﺿﻭ ﺐﻨﺠﺗ
.ﺎﻬﻐﻳﺮﻔﺗ ﻭﺃ ﺲﺑﻼﻤﻟﺎﺑ
.“ﻢﻌﻧ – ﺔﺠﺴﻧﻷﺍ ﻢﻌﻨﻣ ﺔﻓﺎﺿﺇ” ﺪﻳﺪﺤﺗ ﻡﺪﻋ ﻩﺎﻴﻤﻟﺍ ﻦﻣ ﺪﻳﺰﻣ ﺔﻓﺎﺿﺇ ﻢﺘﻳ .ﺔﺠﺴﻧﻸﻟ ﻢﻌﻨﻣ ﻡﺍﺪﺨﺘﺳﺍ ﺔﻟﺎﺣ ﻲﻓ “ﻢﻌﻧ” ﺮﺘﺧﺍ
.ﻊﻳﺯﻮﺘﻟﺍ ﺝﺭﺩ ﺩﺍﺪﺴﻧﺍ ﻊﻳﺯﻮﺗ ﺝﺭﺩ ﻊﻣ ﺭﻮﻠﻛ ﻰﻠﻋ ﻱﻮﺘﺤﺗ ﻲﺘﻟﺍ ﺔﻠﺋﺎﺴﻟﺍ ﺾﻴﻴﺒﺘﻟﺍ ﺓﺩﺎﻣ ﻂﻘﻓ ﻡﺪﺨﺘﺳﺍ
.ﻞﻴﺴﻐﻟﺍ ﺓﺭﻭﺩ ءﺎﻨﺛﺃ
.ﺎﻬﻀﻌﺑ ﻊﻣ ﺔﻄﺑﺭﻷﺍﻭ ﻁﻮﻴﺨﻟﺍ ﻚﺑﺎﺸﺗ.ﻞﻴﺴﻐﻟﺍ ﺔﻴﻠﻤﻋ ءﺪﺑ ﻞﺒﻗ ﺔﻄﺑﺭﻷﺍﻭ ﺔﻃﺮﺷﻷﺍ ﻊﻴﻤﺟ ﻂﺑﺮﺑ ﻢﻗ
.ﺎﻬﻠﺴﻏ ﻞﺒﻗ ﻒﻠﺘﻠﻟ ﺲﺑﻼﻤﻟﺍ ﺽﺮﻌﺘﺗ ﺪﻗ.ﻞﻴﺴﻐﻟﺍ ﻞﺒﻗ ﺔﻴﺒﻧﺎﺠﻟﺍ ﻁﻮﻴﺨﻟﺍ ﻲﻓ ﻊﻄﻗ ﻭﺃ ﻕﺰﻤﺗ ﻱﺃ ﺡﻼﺻﺈﺑ ﻢﻗ
ﺔﺌﺒﻌﺗ ﺔﻟﺎﺣ ﻲﻓ ﺕﺎﺟﻮﺴﻨﻤﻟﺍ ﻒﻠﺗ ﺔﻴﻧﺎﻜﻣﺇ
.ﻪﻴﻓ ﻎﻟﺎﺒﻣ ﻞﻜﺸﺑ ﺔﻟﺎﺴﻐﻟﺍ
ﺔﻳﻮﺘﺤﻤﻟﺍ ﺔﻠﺋﺎﺴﻟﺍ ﺾﻴﻴﺒﺘﻟﺍ ﺓﺩﺎﻣ ﺔﻓﺎﺿﺇ
.ﺔﺤﻴﺤﺻ ﺮﻴﻏ ﺔﻘﻳﺮﻄﺑ ﺭﻮﻠﻜﻟﺍ ﻰﻠﻋ
ﻊﻳﺯﻮﺗ ﺝﺭﺩ ﻞﻴﻐﺸﺗ
ﺊﻃﺎﺧ ﻞﻜﺸﺑ
ﺕﺎﺟﻮﺴﻨﻤﻟﺍ ﻒﻠﺗ ﺲﺑﻼﻤﻟﺍ ﺏﻮﻴﺟ ﻲﻓ ﺓﺩﺎﺤﻟﺍ ﺮﺻﺎﻨﻌﻟﺍ ﻙﺮﺗ
16
Page 54

.ﺔﻣﺪﺨﻟﺍ ﺰﻛﺮﻤﺑ ﻝﺎﺼﺗﻻﺍ ﺮﻴﻈﻧ ﺕﺎﻘﻔﻧ ﻱﺃ ﻊﻓﺩ ﺐﻨﺠﺘﻟ ًﻻ ﻭ ﺃ ﺎﻨﻫ ﺔﺣﺮﺘﻘﻤﻟﺍ ﻝﻮﻠﺤﻟﺍ ﺔﺑﺮﺠﺘﺑ ﻚﻴﻠﻋ
.ﻩﺎﻴﻤﻟﺍ ﻝﺎﺧﺩﺇ ﺕﺎﻣﺎﻤﺻ ﻰﻟﺇ ﺎﻬﻘﻓﺪﺗ ﻥﺎﻤﻀﻟ ﻩﺎﻴﻤﻟﺍ ﻲﻣﻮﻃﺮﺧ ﻞﻴﺻﻮﺗ ﻲﻐﺒﻨﻳ
.ﺓﺩﺭﺎﺒﻟﺍ ﻩﺎﻴﻤﻟﺍﻭ ﺔﻨﺧﺎﺴﻟﺍ ﻩﺎﻴﻤﻟﺍ ﺭﻮﺒﻨﺻ ﻞﻴﺻﻮﺗ ﺐﺠﻳ ﺎﻤﻛ
.ﺓﺩﻭﺪﺴﻣ ﻞﺧﺪﻤﻟﺍ ﻡﺎﻤﺻ ﺓﺎﻔﺼﻣ ﻥﻮﻜﺗ ﻥﺃ ﻦﻜﻤﻳ
.ﻝﺎﺧﺩﻹﺍ ﻢﻴﻃﺍﺮﺧ ﻲﻓ ﺕﺍءﺎﻨﺜﻧﺍ ﺔﻳﺃ ﻦﻣ ﺺﻠﺨﺗ
ﻞﻤﻌﻟﺍ ﻦﻣ ﺔﻟﺎﺴﻐﻟﺍ ﻊﻨﻤﺗ ﺓﻮﻏﺭ ﻥّﻮﻜﺗ ﻰﻟﺇ ﺔﻳﺩﺎﻌﻟﺍ ﺕﺎﻔﻈﻨﻤﻟﺍ ﻡﺍﺪﺨﺘﺳﺍ ﻱﺩﺆﻳ
.ﺢﻴﺤﺻ ﻞﻜﺸﺑ
ﺮﻳﺩﺎﻘﻤﻟﺍ ﺱﺎﻴﻗ ﻦﻣ ﺪﻛﺄﺗ .ﻂﻘﻓ ﺓءﺎﻔﻜﻟﺍ ﺔﻴﻟﺎﻋ ﺕﺎﻔﻈﻨﻤﻟﺍ ﻡﺍﺪﺨﺘﺳﺍ ﻰﻠﻋ ﺹﺮﺣﺍ
.ﺢﻴﺤﺻ ﻞﻜﺸﺑ ﺓﺩﺪﺤﻤﻟﺍ
ﺲﺑﻼﻤﻟﺍ ﻢﺠﺤﻟ ﺎًﻘﻓﻭ ﺕﺎﻔﻈﻨﻤﻟﺍ ﻡﺍﺪﺨﺘﺳﺍ ﺕﺍﺩﺎﺷﺭﺇ ﻉﺎﺒﺗﺍﻭ ﺱﺎﻴﻘﺑ ﺎًﻤﺋﺍﺩ ﻢﻗ ﺍﺬﻟ
.ﺎﻬﺧﺎﺴﺗﺍ ﺔﺟﺭﺩﻭ
ﺐﻨﺠﺗ ،ﻞﻴﺴﻐﻟﺍ ﺔﻠﺣ ﺭﺍﺪﺟ ﻝﻮﺣ ٍﻭﺎﺴﺘﻣﻭ ﻉﺯﻮﻣ ﻞﻜﺸﺑ ﺲﺑﻼﻤﻟﺍ ﻞﻴﻤﺤﺘﺑ ﻢﻗ
.ﻞﻴﺴﻐﻟﺍ ﺔﻠﺣ ﺰﻛﺮﻣ ﻲﻓ ًﺓﺮﺷﺎﺒﻣ ﺲﺑﻼﻤﻟﺍ ﻊﺿﻭ
.ﺔﻟﻮﺴﻐﻤﻟﺍ ﺕﺎﺟﻮﺴﻨﻤﻟﺍ ﺔﻴﻋﻮﻧ ﺐﺴﺣ ﺔﺼﺼﺨﻤﻟﺍ ﺓﺭﻭﺪﻟﺍ ﻡﺍﺪﺨﺘﺳﺎﺑ ﻢﻗ
ﺎﻬﺣﻼﺻﺇﻭ ﻝﺎﻄﻋﻷﺍ ﻑﺎﺸﻜﺘﺳﺍ
(
ﻊﺑﺎﺗ) ﻊﻗﻮﺘﻤﻟﺍ ﻮﺤﻨﻟﺍ ﻰﻠﻋ ﺔﻟﺎﺴﻐﻟﺍ ﻞﻴﻐﺸﺗ ﻡﺪﻋ
ﻭﺃ ﺓءﺎﻔﻜﻟﺍ ﺔﻴﻟﺎﻋ ﺕﺎﻔﻈﻨﻤﻟﺍ ﻡﺍﺪﺨﺘﺳﺍ ﻡﺪﻋ
.ﺓءﺎﻔﻜﻟﺍ ﺔﻴﻟﺎﻋ ﺕﺎﻔﻈﻨﻤﻟﺍ ﻦﻣ ﺮﻴﺜﻜﻟﺍ ﻡﺍﺪﺨﺘﺳﺍ
.ﻪﻴﻓ ﻎﻟﺎﺒﻣ ﻞﻜﺸﺑ ﺓﺄﺒﻌﻣ ﺔﻟﺎﺴﻐﻟﺍ ﻥﻮﻜﺗ ﺪﻗ.ﻒﻄﺸﻟﺍ ﻲﻓ ﺓءﺎﻔﻛ ﻞﻗﺃ ﺢﺒﺼﺗ ﺎﻬﻧﺈﻓ ،ﻪﻴﻓ ﻎﻟﺎﺒﻣ ﻞﻜﺸﺑ ﺓﺄﺒﻌﻣ ﺔﻟﺎﺴﻐﻟﺍ ﻥﻮﻜﺗ ﺎﻣﺪﻨﻋ
ﻝﺎﻄﻋﻷﺍﺔﻠﻤﺘﺤﻤﻟﺍ ﺏﺎﺒﺳﻷﺍﻝﻮﻠﺤﻟﺍ
ﻞﻴﺴﻐﻟﺍ ﺔﻟﻮﻤﺣ ﻒﻄﺷ ﻡﺪﻋ.ﻩﺎﻴﻤﻟﺍ ﺭﺪﺼﻤﻟ ﻖﻴﻗﺪﻟﺍ ﺺﺤﻔﻟﺎﺑ ﻢﻗ.ﺎﻬﺳﺎﻜﻌﻧﺍ ﻡﺪﻋ ﻦﻣ ﺪﻛﺄﺘﻠﻟ ﺓﺩﺭﺎﺒﻟﺍﻭ ﺔﻨﺧﺎﺴﻟﺍ ﻩﺎﻴﻤﻟﺍ ﻝﺎﺧﺩﺇ ﻢﻴﻃﺍﺮﺧ ﺺﺤﻔﺑ ﻢﻗ
.ﺔﻟﺎﺴﻐﻟﺍ ﻞﻴﻐﺸﺗ ءﺪﺑ ﺪﻌﺑ ﺲﺑﻼﻤﻟﺍ ﻦﻣ ﻦﻴﺘﻌﻄﻗ ﻭﺃ ﺔﻌﻄﻗ ﺔﻓﺎﺿﺈﺑ ﻢﻗ
.ﺓﺩﺪﺤﻤﻟﺍ ﺓﺭﻭﺪﻟﺍ ﻰﻟﺇ ﺔﻴﻓﺎﺿﺇ ﻒﻄﺷ ﺓﺭﻭﺩ ﻞﻤﻌﺑ ﻢﻗ
.“ﺔﻟﺎﺴﻐﻟﺍ ﻡﺍﺪﺨﺘﺳﺍ” ﻢﺴﻗ ﺔﻌﺟﺍﺮﻣ ﻰﺟﺮﻳ
ﺮﺜﻛﺃ ﺲﺑﻼﻤﻟﺍ ﻥﻮﻜﺘﺳ ،ءﻂﺑﺃ ﻥﺍﺭﻭﺩ ﺔﻋﺮﺳﻭ ﻞﻴﺴﻏ ﺓﺭﻭﺩ ﻡﺍﺪﺨﺘﺳﺍ ﺔﻟﺎﺣ ﻲﻓ
ﺔﻤﺋﻼﻤﻟ “ﺓﺭﻭﺪﻟﺍ ﻞﻴﻟﺩ” ﻊﺟﺍﺭ .ﻰﻠﻋﺃ ﻥﺍﺭﻭﺩ ﺔﻋﺮﺳ ﻡﺍﺪﺨﺘﺳﺍ ﺪﻨﻋ ﺎﻬﻨﻋ ﺎًﺒﻴﻃﺮﺗ
.ﺓﺭﻭﺩ ﻞﻀﻓﺃ ﻊﻣ ﺔﻟﻮﻤﺤﻟﺍ
ﺎﻬﻠﻴﻤﺤﺘﺑ ﻢﻘﺗ ﻻﻭ ،ﺔﺣﻭﺮﻤﻟﺍ ﻝﻮﺣ ٍﻭﺎﺴﺘﻣﻭ ﻉﺯﻮﻣ ﻞﻜﺸﺑ ﺲﺑﻼﻤﻟﺍ ﻞﻴﻤﺤﺘﺑ ﻢﻗ
.ﺔﺣﻭﺮﻤﻟﺍ ﻂﺳﻭ ﻕﻮﻓ ﺓﺮﺷﺎﺒﻣ
ﺓﺭﻭﺪﻟﺍ ﻡﺍﺪﺨﺘﺳﺎﺑ ﻢﻗ ،ﻚﺑﺎﺸﺘﻟﺍ ﺔﻴﻠﻤﻋ ﻦﻣ ﺪﺤﻠﻟ ﺲﺑﻼﻤﻟﺍ ﻦﻣ ﺔﻔﻠﺘﺨﻣ ﺎًﻋﺍﻮﻧﺃ ﻊﺿ
.ﺔﻟﻮﺴﻐﻤﻟﺍ ﺕﺎﺟﻮﺴﻨﻤﻟﺍ ﺔﻴﻋﻮﻧ ﺐﺴﺣ ﺎﻬﺑ ﻰﺻﻮﻤﻟﺍ
.ﺲﺑﻼﻤﻟﺍ ﻚﻳﺮﺤﺘﻟ ﺎًﻳﺭﻭﺮﺿ ﺍًﺮﻣﺃ
.ﺔﻴﻟﺎﻌﻓ ﻞﻗﺃ ﻒﻴﻈﻨﺗ ﻰﻟﺇ ﻱﺩﺆﻳ ﺎﻤﻣ ؛ﺔﺣﻭﺮﻤﻟﺍ ﻦﻋ
ﺎﻬﻠﻴﻤﺤﺘﺑ ﻢﻘﺗ ﻻﻭ ،ﺔﺣﻭﺮﻤﻟﺍ ﻝﻮﺣ ٍﻭﺎﺴﺘﻣﻭ ﻉﺯﻮﻣ ﻞﻜﺸﺑ ﺲﺑﻼﻤﻟﺍ ﻞﻴﻤﺤﺘﺑ ﻢﻗ
.ﺔﺣﻭﺮﻤﻟﺍ ﻂﺳﻭ ﻕﻮﻓ ﺓﺮﺷﺎﺒﻣ
.ﺔﻟﺎﺴﻐﻟﺍ ﻞﻴﻐﺸﺗ ءﺪﺑ ﺪﻌﺑ ﺲﺑﻼﻤﻟﺍ ﻦﻣ ﻂﻘﻓ ﻦﻴﺘﻌﻄﻗ ﻭﺃ ﺔﻌﻄﻗ ﺔﻓﺎﺿﺈﺑ ﻢﻗ
ﺔﻔﻴﺜﻜﻟﺍ ﺔﺑﺮﺗﻷﺍ ﺩﻮﺟﻭ ﺝﺎﺘﺤﻳ ﺪﻗ
ﺮﻌﺷﻭ
ﻒﻴﻈﻨﺘﻟﺍ ﺩﺍﻮﻣ ﺎﻳﺎﻘﺑﻭ ﺔﻔﻴﻟﻷﺍ ﺕﺎﻧﺍﻮﻴﺤﻟﺍ
.ﺔﻴﻓﺎﺿﺇ ﻒﻄﺷ ﺔﻴﻠﻤﻋ ءﺍﺮﺟﺇ ﻰﻟﺇ
.ﻪﺑ ﻲﺻﻮﻤﻟﺍ
.ﺔﻟﺎﺴﻐﻟﺍ ﻰﻟﺇ ﻩﺎﻴﻤﻟﺍ ﻦﻣ ﺪﻳﺰﻤﻟﺍ ﺔﻓﺎﺿﺇ ﺲﺑﻼﻤﻟﺍ ﻊﻓﺭ ﻰﻟﺇ ﻚﻟﺫ ﻱﺩﺆﻳ ﺪﻘﻓ ،ﺔﻟﺎﺴﻐﻟﺍ ﻰﻟﺇ ﻩﺎﻴﻤﻟﺍ ﻦﻣ ﺪﻳﺰﻤﻟﺍ ﺔﻓﺎﺿﺈﺑ ﻢﻘﺗ ﻻ
.ﻪﺑ ﻲﺻﻮﻤﻟﺍ ﺏﻮﻠﺳﻷﺎﺑ ﺔﻟﺎﺴﻐﻟﺍ ﺔﺌﺒﻌﺗ ﻡﺪﻋ.ﻒﻴﻈﻨﺘﻟﺍ ﺔﻴﻠﻤﻋ ﻲﻓ ﺓءﺎﻔﻛ ﻞﻗﺃ ﺢﺒﺼﺗ ،ﻪﻴﻓ ﻎﻟﺎﺒﻣ ﻞﻜﺸﺑ ﺓﺄﺒﻌﻣ ﺔﻟﺎﺴﻐﻟﺍ ﻥﻮﻜﺗ ﺎﻣﺪﻨﻋ
ﺔ َﻟ ﺎ َﺴ ُﻧ ﻭ ﻝﺎﻣﺮﻟﺍ ﺕﺎﺒﺣ ﺩﻮﺟﻭ
ﺕﺎﻧﺍﻮﻴﺤﻟﺍ ﺮﻌﺷﻭ ﺕﺎﺟﻮﺴﻨﻤﻟﺍ
ﺔﻟﻮﻤﺤﻟﺍ ﻲﻓ ﻩﺮﻴﻏﻭ ﺔﻔﻴﻟﻷﺍ
ﻞﻴﺴﻐﻟﺍ ﺪﻌﺑ
ﺲﺑﻼﻤﻟﺍ ﻚﺑﺎﺸﺗ ﺏﻮﻠﺳﻷﺎﺑ ﺔﻟﺎﺴﻐﻟﺍ ﺔﺌﺒﻌﺗ ﻡﺪﻋ
ﺎﻬﺘﻟﺍﺯﺇ ﻭﺃ ﻊﻘﺒﻟﺍ ﻒﻴﻈﻨﺗ ﻡﺪﻋ.ﻩﺎﻴﻤﻟﺍ ﻞﺧﺍﺩ ﺎﻬﻠﻤﻛﺄﺑ ﺔﻟﻮﻤﺤﻟﺍ ﺮﻤﻏ ﻡﺪﻋ ﻚﻟﺫ ﺪﻌﻳﻭ .ﺔﺒﺳﺎﻨﻤﻟﺍ ﻩﺎﻴﻤﻟﺍ ﺔﻴﻤﻛ ﺔﻓﺎﺿﺈﺑ ﻡﻮﻘﺗﻭ ﺔﻟﻮﻤﺤﻟﺍ ﻢﺠﺣ ﺔﻟﺎﺴﻐﻟﺍ ﺮﻌﺸﺘﺴﺗ
15
Page 55

ﺎﻬﺣﻼﺻﺇﻭ ﻝﺎﻄﻋﻷﺍ ﻑﺎﺸﻜﺘﺳﺍ
.ﺔﻣﺪﺨﻟﺍ ﺰﻛﺮﻤﺑ ﻝﺎﺼﺗﻻﺍ ﺮﻴﻈﻧ ﺕﺎﻘﻔﻧ ﻱﺃ ﻊﻓﺩ ﺐﻨﺠﺘﻟ ًﻻ ﻭ ﺃ ﺎﻨﻫ ﺔﺣﺮﺘﻘﻤﻟﺍ ﻝﻮﻠﺤﻟﺍ ﺔﺑﺮﺠﺘﺑ ﻚﻴﻠﻋ
(
ﻊﺑﺎﺗ) ﻊﻗﻮﺘﻤﻟﺍ ﻮﺤﻨﻟﺍ ﻰﻠﻋ ﺔﻟﺎﺴﻐﻟﺍ ﻞﻴﻐﺸﺗ ﻡﺪﻋ
ﻝﺎﻄﻋﻷﺍﺔﻠﻤﺘﺤﻤﻟﺍ ﺏﺎﺒﺳﻷﺍﻝﻮﻠﺤﻟﺍ
ﻕﻼﻏﺈﺑ ﻢﻗ .ﺔﺣﻭﺮﻤﻟﺍ ﻂﺳﻭ ﻕﻮﻓ ﺓﺮﺷﺎﺒﻣ ﺎﻬﻠﻴﻤﺤﺘﺑ ﻢﻘﺗ ﻻﻭ ،ﺔﺣﻭﺮﻤﻟﺍ ﻝﻮﺣ
.ﻞﻔﻘﻟﺍ ءﺎﻐﻟﺇ/ﺖﻗﺆﻣ ﻑﺎﻘﻳﺇ/ﻞﻴﻐﺸﺘﻟﺍ ءﺪﺑ ﺭﺯ ﻰﻠﻋ ﻂﻐﺿﺍ ﻢﺛ ءﺎﻄﻐﻟﺍ
.ﺔﻟﺎﺴﻐﻟﺍ ﻞﻴﻐﺸﺗ ءﺪﺑ ﺪﻌﺑ ﺲﺑﻼﻤﻟﺍ ﻦﻣ ﻦﻴﺘﻌﻄﻗ ﻭﺃ ﺔﻌﻄﻗ ﺔﻓﺎﺿﺈﺑ ﻢﻗ
.ﺔﻟﺎﺴﻐﻟﺍ ﻰﻟﺇ ﻩﺎﻴﻤﻟﺍ ﻦﻣ ﺪﻳﺰﻤﻟﺍ ﺔﻓﺎﺿﺈﺑ ﻢﻘﺗ ﻻ
ﺔﺠﺗﺎﻨﻟﺍ ﺓﻮﻏﺮﻟﺍ ﺐﺒﺴﺘﺗ ﺪﻗ .ﻂﻘﻓ ﺓءﺎﻔﻜﻟﺍ ﺔﻴﻟﺎﻋ ﺕﺎﻔﻈﻨﻤﻟﺍ ﻡﺍﺪﺨﺘﺳﺍ ﻰﻠﻋ ﺹﺮﺣﺍ
ﺱﺎﻴﻗ ﻰﻠﻋ ﺎًﻤﺋﺍﺩ ﺹﺮﺣﺍ .ﺎﻬﻓﺎﻘﻳﺇ ﻭﺃ ﺔﻟﺎﺴﻐﻟﺍ ءﺎﻄﺑﺇ ﻲﻓ ﺔﻳﺩﺎﻌﻟﺍ ﺕﺎﻔﻈﻨﻤﻟﺍ ﻦﻋ
ﺕﺎﺒﻠﻄﺘﻣ ﻰﻠﻋ ﺔﻤﺋﺎﻘﻟﺍﻭ ﻒﻈﻨﻤﻟﺎﺑ ﺔﻘﻠﻌﺘﻤﻟﺍ ﺕﺎﻬﻴﺟﻮﺘﻟﺍ ﻉﺎﺒﺗﺍﻭ ﻒﻈﻨﻤﻟﺍ ﺔﻴﻤﻛ
.ﺔﻟﻮﻤﺤﻟﺍ
ﻰﻠﻋ ﻂﻐﺿﺍ .ﻒﻴﻔﺠﺗﻭ ﻒﻄﺷ ﺩﺪﺣ .ﺓﺭﻭﺪﻟﺍ ءﺎﻐﻟﺈﺑ ﻢﻗ ،ﺓﻮﻏﺮﻟﺍ ﻦﻣ ﺺﻠﺨﺘﻠﻟ
.ﺔﻴﻓﺎﺿﺇ ﺕﺎﻔﻈﻨﻣ ﺔﻓﺎﺿﺇ ﺐﻨﺠﺗ .ﻞﻔﻘﻟﺍ ءﺎﻐﻟﺇ/ﺖﻗﺆﻣ ﻑﺎﻘﻳﺇ/ﻞﻴﻐﺸﺘﻟﺍ ءﺪﺑ
ﻲﺘﻟﺍﻭ ﺽﻮﺤﻟﺍﻭ ﺔﻠﺴﻟﺍ ﻦﻴﺑ ﻭﺃ ﺔﺨﻀﻤﻟﺎﺑ ﺓﺮﻴﻐﺼﻟﺍ ﺲﺑﻼﻤﻟﺍ ﻖﻠﻌﺗ ﻥﺃ ﻦﻜﻤﻳ
.ﻑﺮﺼﻟﺍ ﺔﻴﻠﻤﻋ ءﺎﻄﺑﺇ ﻰﻠﻋ ﻞﻤﻌﺗ
ﻲﺻﻮﻤﻟﺍ ﻥﺍﺭﻭﺪﻟﺍ ﺔﻋﺮﺳ/ﺓﺭﻭﺪﻟﺍ ﻡﺪﺨﺘﺳﺍ .ﺮﺒﻛﺃ ﻥﺍﺭﻭﺩ ﺕﺎﻋﺮﺳ ﺕﺍﺫ ﺕﺍﺭﻭﺪﻟﺍ
ﺭﺎﻴﺧ ﺪﻳﺪﺤﺘﺑ ﻢﻗ ،ﺔﻟﻮﻤﺤﻟﺍ ﻦﻣ ﺓﺪﺋﺍﺰﻟﺍ ﻩﺎﻴﻤﻟﺍ ﺔﻟﺍﺯﻹ .ﻚﺑ ﺔﺻﺎﺨﻟﺍ ﺲﺑﻼﻤﻠﻟ ﺎﻬﺑ
ﻊﻳﺯﻮﺘﻟﺎﺑ ﺡﺎﻤﺴﻠﻟ ﺐﻴﺗﺮﺘﻟﺍ ﺓﺩﺎﻋﻹ ﺔﻟﻮﻤﺤﻟﺍ ﺝﺎﺘﺤﺗ ﺪﻗ .ﻒﻴﻔﺠﺗﻭ ﻒﻳﺮﺼﺗ
.ﺔﻠﺴﻟﺍ ﻞﺧﺍﺩ ﺔﻟﻮﻤﺤﻠﻟ ﻱﻭﺎﺴﺘﻤﻟﺍ
ﻥﺍﺭﻭﺪﻟﺎﺑ ﺔﻟﺎﺴﻐﻠﻟ ﺔﻧﺯﺍﻮﺘﻤﻟﺍ ﺮﻴﻏ ﺕﻻﻮﻤﺤﻟﺍ ﻭﺃ ﺎﻬﻴﻓ ﻎﻟﺎﺒﻤﻟﺍ ﺔﺌﺒﻌﺘﻟﺍ ﺢﻤﺴﺗ ﻻ ﺪﻗ
ﺔﻟﻮﻤﺤﻟﺍ ﺐﻴﺗﺮﺘﺑ ﻢﻗ .ﻲﻌﻴﺒﻄﻟﺍ ﺪﺤﻟﺍ ﻦﻣ ﺮﺜﻛﺃ ﺔﻟﻮﻤﺤﻟﺍ ﺔﻛﺭﺎﺗ ،ﺢﻴﺤﺻ ﻞﻜﺸﺑ
ﻒﻴﻔﺠﺗﻭ ﻒﻳﺮﺼﺗ ﺓﺭﻭﺩ ﺩﺪﺣ .ﻥﺯﺍﻮﺘﻣ ﻞﻜﺸﺑ ﻥﺍﺭﻭﺪﻠﻟ ٍﻭﺎﺴﺘﻣ ﻞﻜﺸﺑ ﺔﻠﺘﺒﻤﻟﺍ
ﺕﺎﻴﺻﻮﺗ ﺔﻓﺮﻌﻤﻟ “ﺔﻟﺎﺴﻐﻟﺍ ﻡﺍﺪﺨﺘﺳﺍ” ﻊﺟﺍﺭ .ﺓﺪﺋﺍﺰﻟﺍ ﻩﺎﻴﻤﻟﺍ ﻦﻣ ﺺﻠﺨﺘﻠﻟ
.ﺔﻟﻮﻤﺤﻟﺍ
ﻡﻮﻃﺮﺧ ﺭﺎﻃﺇ ﻡﺪﺨﺘﺳﺍ .ﺢﻴﺤﺼﻟﺍ ﺐﻴﻛﺮﺘﻠﻟ ﻑﺮﺼﻟﺍ ﻡﻮﻃﺮﺧ ﺺﺤﻔﺑ ﻢﻗ
ﻊﻀﺗ ﻻ .ﺽﻮﺤﻟﺍ ﻭﺃ ﻑﺮﺼﻟﺍ ﺏﻮﺒﻧﺄﺑ ﺢﻴﺤﺻ ﻞﻜﺸﺑ ﻪﻠﻴﺻﻮﺘﺑ ﻢﻗﻭ ﻑﺮﺼﻟﺍ
ﻪﻓﺮﻃ ﻥﺎﻛ ﺍﺫﺇ ﻑﺮﺼﻟﺍ ﻡﻮﻃﺮﺧ ﺾﻔﺨﺑ ﻢﻗ .ﻑﺮﺼﻟﺍ ﺔﺤﺘﻓ ﻕﻮﻓ ﺎًﻄﻳﺮﺷ
4)
1.25
ﺕﺍﺩﺍﺪﺳ ﺔﻳﺃ ﺔﻟﺍﺯﺈﺑ ﻢﻗ
ﻢﺛ .(ﺔﺻﻮﺑ
ﻡ
ـﺑ ﺽﺭﻷﺍ ﺢﻄﺳ ﻯﻮﺘﺴﻣ ﻮﻠﻌﻳ
.ﻑﺮﺼﻟﺍ ﻡﻮﻃﺮﺧ ﻦﻣ
ﻉﺎﺒﺗﺍﻭ ﺱﺎﻴﻘﺑ ﺎًﻤﺋﺍﺩ ﻢﻗ .ﻂﻘﻓ ﺓءﺎﻔﻜﻟﺍ ﺔﻴﻟﺎﻋ ﺕﺎﻔﻈﻨﻤﻟﺍ ﻡﺍﺪﺨﺘﺳﺍ ﻰﻠﻋ ﺹﺮﺣﺍ
ﺩﺪﺣ ،ﺓﺪﺋﺍﺰﻟﺍ ﺓﻮﻏﺮﻟﺍ ﺔﻟﺍﺯﻹ .ﺔﻨﻴﻌﻤﻟﺍ ﺔﻟﻮﻤﺤﻠﻟ ﺕﺎﻔﻈﻨﻤﻟﺍ ﻡﺍﺪﺨﺘﺳﺍ ﺕﺍﺩﺎﺷﺭﺇ
.ﺔﻴﻓﺎﺿﺇ ﺕﺎﻔﻈﻨﻣ ﺔﻓﺎﺿﺇ ﺐﻨﺠﺗ .ﻒﻴﻔﺠﺗﻭ ﻒﻄﺷ
ﺓﺮﻴﺧﻷﺍ ﺓﺭﻭﺪﻟﺍ ﻝﻼﺧ ءﺍﻮﻬﻟﺍ ﻖﻓﺪﺘﺑ ﺔﺑﻮﺤﺼﻤﻟﺍ ﺔﻴﻟﺎﻌﻟﺍ ﻥﺍﺭﻭﺪﻟﺍ ﺔﻋﺮﺳ ﻞﻤﻌﺗ
،ﺓﺮﻴﺧﻷﺍ ﺓﺭﻭﺪﻟﺍ ءﺎﻨﺛﺃ ﻊﻘﺒﻟﺍ ﺔﻟﺍﺯﻹ ﻚﻟﺫﻭ ﺔﻟﻮﻤﺤﻟﺍ ﺔﻤﻗ ﻦﻣ ﺲﺑﻼﻤﻟﺍ ﺏﺍﺮﺘﻗﺍ ﻰﻠﻋ
.ﺎًﻴﻌﻴﺒﻃ ﺍًﺮﻣﺃ ﺍﺬﻫ ﺪﻌﻳﻭ
ﻙﺮﺗ ﺐﺠﻳ ﺎﻤﻛ ،ﺭﻮﺒﻨﺼﻟﺍﻭ ﺔﻟﺎﺴﻐﻟﺍ ﻦﻣ ﻞﻜﺑ ﻦﻴﻣﻮﻃﺮﺨﻟﺍ ﻞﻴﺻﻮﺗ ﻲﻐﺒﻨﻳ
.ﻞﺧﺪﻤﻟﺍ ﻡﺎﻤﺻ ﻰﻟﺇ ﻖﻓﺪﺘﺗ ﺔﻨﺧﺎﺴﻟﺍﻭ ﺓﺩﺭﺎﺒﻟﺍ ﻩﺎﻴﻤﻟﺍ
.ﻞﺧﺪﻤﻟﺍ ﻡﺎﻤﺻ ﺓﺎﻔﺼﻣ ﺩﺍﺪﺴﻧﺍ ﻡﺪﻋ ﻦﻣ ﺪﻛﺄﺗ
.ﻪﻴﻓ ﻎﻟﺎﺒﻣ ﻞﻜﺸﺑ ﺓﺄﺒﻌﻣ ﺔﻟﺎﺴﻐﻟﺍ ﻥﻮﻜﺗ ﺪﻗ ﻱﻭﺎﺴﺘﻟﺎﺑ ﺔﻟﻮﻤﺤﻟﺍ ﺐﻴﺗﺮﺗ ﺪﻋﺃ ﻢﺛ ،ﺲﺑﻼﻤﻟﺍ ﻊﻄﻗ ﻦﻣ ﺪﻳﺪﻌﻟﺍ ﺔﻟﺍﺯﺈﺑ ﻢﻗ
ﻭﺃ ﺓءﺎﻔﻜﻟﺍ ﺔﻴﻟﺎﻋ ﺕﺎﻔﻈﻨﻤﻟﺍ ﻡﺍﺪﺨﺘﺳﺍ ﻡﺪﻋ
.ﺓءﺎﻔﻜﻟﺍ ﺔﻴﻟﺎﻋ ﺕﺎﻔﻈﻨﻤﻟﺍ ﻦﻣ ﺮﻴﺜﻜﻟﺍ ﻡﺍﺪﺨﺘﺳﺍ
ﺱﺎﻴﻛﻷﺍ ﻡﺍﺪﺨﺘﺳﺍ ﻊﻣ ﺏﻮﻴﺠﻟﺍ ﻍﺍﺮﻓﺈﺑ ﻢﻗ
.ﺓﺮﻴﻐﺼﻟﺍ ﺲﺑﻼﻤﻟﺎﺑ ﺔﺻﺎﺨﻟﺍ
.ﻞﻗﺃ ﻥﺍﺭﻭﺩ ﺔﻋﺮﺴﺑ ﻯﺮﺧﺃ ﺓﺭﻭﺩ ﻡﺍﺪﺨﺘﺳﺍ ﻦﻣ ﻞﻗﺃ ﻝﺪﻌﻤﺑ ﻩﺎﻴﻤﻟﺍ ﺝﺍﺮﺧﺇ ﻰﻠﻋ ﻞﻤﻌﺗ ﻞﻗﺃ ﻥﺍﺭﻭﺩ ﺕﺎﻋﺮﺳ ﺕﺍﺫ ﺕﺍﺭﻭﺪﻟﺍ
ﻪﻴﻓ ﻎﻟﺎﺒﻣ ﻞﻜﺸﺑ ﺓﺄﺒﻌﻣ ﺔﻟﺎﺴﻐﻟﺍ ﻥﻮﻜﺗ ﺪﻗ
.ﺔﻧﺯﺍﻮﺘﻣ ﺮﻴﻏ ﻭﺃ
ﻡﻮﻃﺮﺧ ﺖﻴﺒﺜﺘﻟ ﺐﻴﺑﺎﻧﻷﺍ ﻡﺎﻈﻧ ﺺﺤﻓﺍ
ﻡﻮﻃﺮﺧ ﺪﻤﺑ ﻢﻗ .ﺔﺤﻴﺤﺻ ﺔﻘﻳﺮﻄﺑ ﻑﺮﺼﻟﺍ
114
ﻢﻠﻣ
ﻦﻣ ﻝﻮﻃﺃ ﺏﻮﺒﻧﺃ ﻰﻟﺇ ﻑﺮﺼﻟﺍ
4.5)
.(ﺔﺻﻮﺑ
ﺕﺎﻔﻈﻨﻤﻟﺍ ﻡﺍﺪﺨﺘﺳﺍ ﻲﻓ ﻁﺍﺮﻓﻹﺍ ﻱﺩﺆﻳ ﺪﻗ
ﻑﺮﺼﻟﺍ ﻑﺎﻘﻳﺇ ﻰﻠﻋ ﻞﻤﻌﺗ ﺓﻮﻏﺭ ﻥّﻮﻜﺗ ﻰﻟﺇ
.ﻥﺍﺭﻭﺪﻟﺍﻭ
ﺝﺍﺮﺨﺘﺳﺍ ﻰﻠﻋ ﺔﻴﻟﺎﻌﻟﺍ ﻥﺍﺭﻭﺪﻟﺍ ﺔﻋﺮﺳ ﻞﻤﻌﺗ
ﺕﺍﺫ ﺔﻳﺩﺎﻌﻟﺍ ﺕﻻﺎﺴﻐﻟﺍ ﻦﻣ ﺮﺜﻛﺃ ﺔﺑﻮﻃﺮﻟﺍ
.ﺔﻳﻮﻠﻌﻟﺍ ﺔﺌﺒﻌﺘﻟﺍ ﺔﺤﺘﻓ
.ﻩﺎﻴﻤﻟﺍ ﺭﺪﺼﻤﻟ ﻖﻴﻗﺪﻟﺍ ﺺﺤﻔﻟﺎﺑ ﻢﻗ.ﺎﻬﺳﺎﻜﻌﻧﺍ ﻡﺪﻋ ﻦﻣ ﺪﻛﺄﺘﻠﻟ ﺓﺩﺭﺎﺒﻟﺍﻭ ﺔﻨﺧﺎﺴﻟﺍ ﻩﺎﻴﻤﻟﺍ ﻝﺎﺧﺩﺇ ﻢﻴﻃﺍﺮﺧ ﺺﺤﻔﺑ ﻢﻗ
ﻡﻮﻘﺗ ﻻ ﻭﺃ ﻞﻤﻌﺗ ﻻ ﺔﻟﺎﺴﻐﻟﺍ
ﺎﻬﻧﺃ ﻭﺃ ﻩﺎﻴﻤﻟﺍ ءﻞﻣ ﺔﻴﻠﻤﻌﺑ
ﻥﺃ ﻭﺃ ﻞﻤﻌﻟﺍ ﻦﻋ ﻒﻗﻮﺘﺗ
ﺮﻴﺸﻳ) ﺎًﺌﻴﻀﻣ ﻞﻈﻳ ﺮﺷﺆﻤﻟﺍ
ﻰﻠﻋ ﺔﻟﺎﺴﻐﻟﺍ ﺓﺭﺪﻗ ﻡﺪﻋ ﻰﻟﺇ
(
ﻊﺑﺎﺗ) (ﺓﺪﻴﺟ ﺓﺭﻮﺼﺑ ءﻞﻤﻟﺍ
ﺔﻟﺎﺴﻐﻟﺍ ﻥﺍﺭﻭﺩ/ﻒﻳﺮﺼﺗ ﻡﺪﻋ
ﺔﻟﻮﻤﺤﻟﺍ ءﺎﻘﺑ ﻰﻟﺇ ﻱﺩﺆﻳ ﺎﻤﻣ
ﻞﻴﻐﺸﺗ ﺭﺍﺮﻤﺘﺳﺍ ﻭﺃ ﺔﻠﺘﺒﻣ
ﻰﻟﺇ ﺮﻴﺸﻳ ﺎﻤﻣ) ﻥﺍﺭﻭﺪﻟﺍ ﺮﺷﺆﻣ
ﻒﻳﺮﺼﺗ
ﺖﻟﻭﺎﺣ ﺔﻟﺎﺴﻐﻟﺍ ﻥﺃ
ﻦﻜﻟ ﻖﺋﺎﻗﺩ 10 ﺓﺪﻤﻟ ﻩﺎﻴﻤﻟﺍ
(
ﻚﻟﺬﺑ ﻡﺎﻴﻘﻟﺍ ﺎﻬﻴﻠﻋ ﺭﺬﻌﺗ
ﺪﻌﺑ ﺔﻟﻮﻤﺤﻟﺍ ﻲﻓ ﺔﻓﺎﺠﻟﺍ ﻊﻘﺒﻟﺍ
.ﻞﻴﺴﻐﻟﺍ ﺓﺭﻭﺩ ﻡﺎﻤﺗﺇ
ﻲﻓ ﻒﻄﺸﻟﺍ ﻭﺃ ﻞﻴﺴﻐﻟﺍ
.ﺔﺒﺳﺎﻨﻣ ﺮﻴﻏ ﺓﺭﺍﺮﺣ ﺕﺎﺟﺭﺩ
.ﻢﻴﻃﺍﺮﺨﻟﺍ ﻲﻓ ﺕﺍءﺎﻨﺜﻧﺍ ﺔﻳﺃ ﻦﻣ ﺺﻠﺨﺗ
ﻞﻴﺴﻐﻟﺍ ﺔﻴﻠﻤﻋ ﻲﻓ ﺔﻴﻟﺎﻌﻟﺍ ﺓءﺎﻔﻜﻟﺍ ﺕﺍﺫ ﺔﻗﺎﻄﻠﻟ ﺓﺮﻓﻮﻤﻟﺍ ﺕﻻﺎﺴﻐﻟﺍ ﻡﺪﺨﺘﺴﺗ
.ﺔﻳﻮﻠﻌﻟﺍ ﺔﺌﺒﻌﺘﻟﺍ ﺔﺤﺘﻓ ﺕﺍﺫ ﺔﻳﺩﺎﻌﻟﺍ ﺔﻟﺎﺴﻐﻟﺍ ﻲﻓ ﺎﻬﻨﻋ ﺓﺩﻭﺮﺑ ﺮﺜﻛﺃ ﻩﺎﻴﻣ ﻒﻄﺸﻟﺍﻭ
.ﺓﺭﺍﺮﺣﻭ ﺎًﺌﻓﺩ ﺮﺜﻛﻷﺍ ﻞﻴﺴﻐﻟﺍ ﺕﺍﺭﻭﺩ ﻰﻠﻋ ﺍﺬﻫ ﻞﻤﺘﺸﻳﻭ
ﺮﻴﻓﻮﺗ ﻲﻓ ﻞﻴﺴﻐﻟﺍ ﺓﺭﺍﺮﺣ ﺕﺎﺟﺭﺩ ﻢﻜﺤﺘﺗ
.ﺔﻗﺎﻄﻟﺍ
14
Page 56

ﺎﻬﺣﻼﺻﺇﻭ ﻝﺎﻄﻋﻷﺍ ﻑﺎﺸﻜﺘﺳﺍ
.ﺔﻣﺪﺨﻟﺍ ﺰﻛﺮﻤﺑ ﻝﺎﺼﺗﻻﺍ ﺮﻴﻈﻧ ﺕﺎﻘﻔﻧ ﻱﺃ ﻊﻓﺩ ﺐﻨﺠﺘﻟ ًﻻ ﻭ ﺃ ﺎﻨﻫ ﺔﺣﺮﺘﻘﻤﻟﺍ ﻝﻮﻠﺤﻟﺍ ﺔﺑﺮﺠﺘﺑ ﻚﻴﻠﻋ
ﺔﻟﻮﻤﺤﻟﺍ ﻡﺎﺠﺣﺃ ﺔﻟﺎﺴﻐﻟﺍ ﺮﻌﺸﺘﺴﺗ .ﻩﺎﻴﻤﻟﺍ ﻲﻓ ﻞﻣﺎﻜﻟﺎﺑ ﺔﻟﻮﻤﺤﻟﺍ ﺮﻤﻏ ﻢﺘﻳ ﻦﻟ ﻪﻧﺄﺑ
.ﻰﻠﺜﻤﻟﺍ ﻒﻴﻈﻨﺘﻟﺍ ﺔﺟﺭﺩ ﻰﻠﻋ ﻝﻮﺼﺤﻠﻟ ﺔﺒﺳﺎﻨﻤﻟﺍ ﻩﺎﻴﻤﻟﺍ ﺔﻴﻤﻛ ﺔﻓﺎﺿﺈﺑ ﻡﻮﻘﺗﻭ
“.ﺔﻟﺎﺴﻐﻟﺍ ﻩﺬﻫ ﻲﻓ ﺔﻨﻤﻀﻤﻟﺍ ﺓﺪﻳﺪﺠﻟﺍ ﺎﻳﺍﺰﻤﻟﺍ” ﻊﺟﺍﺭ
ﻱﺩﺆﻳ ﺪﻘﻓ ،ﺔﻟﺎﺴﻐﻟﺍ ﻰﻟﺇ ﻩﺎﻴﻤﻟﺍ ﻦﻣ ﺪﻳﺰﻤﻟﺍ ﺔﻓﺎﺿﺈﺑ ﻢﻘﺗ ﻻ
.ﺔﻴﻟﺎﻌﻓ ﻞﻗﺃ ﻒﻴﻈﻨﺗ ﻰﻟﺇ ﻱﺩﺆﻳ ﺎﻤﻣ ؛ﺔﺣﻭﺮﻤﻟﺍ ﻦﻋ ﺲﺑﻼﻤﻟﺍ ﻊﻓﺭ ﻰﻟﺇ ﻚﻟﺫ
:
ﺔﻤﻬﻣ ﺔﻇﻮﺤﻠﻣ
ﺮﻳﺬﺤﺗ
ﺔﻴﺋﺎﺑﺮﻬﻛ ﺔﻣﺪﺼﻟ ﺽﺮﻌﺘﻟﺍ ﺮﻄﺧ
.ﺽﺭﺆﻣ ﺬﺧﺄﻤﺑ ﻞﻴﺻﻮﺘﻟﺎﺑ ﻢﻗ
.ﺾﻳﺭﺄﺘﻟﺍ ﻑﺮﻃ ﺔﻟﺍﺯﺇ ﺐﻨﺠﺗ
.ﺭﺎﻴﺗ ﺊﻳﺎﻬﻣ ﻡﺪﺨﺘﺴﺗ ﻻ
.ﺔﻟﺎﻃﺇ ﻞﺒﻛ ﻡﺪﺨﺘﺴﺗ ﻻ
ﻉﻻﺪﻧﺍ ﻭﺃ ﺓﺎﻓﻮﻟﺍ ﻰﻟﺇ ﺕﺍﺩﺎﺷﺭﻹﺍ ﻩﺬﻫ ﻉﺎﺒﺗﺍ ﻡﺪﻋ ﻱﺩﺆﻳ ﺪﻗ
.ﺔﻴﺋﺎﺑﺮﻬﻛ ﺔﻣﺪﺼﻟ ﺽﺮﻌﺘﻟﺍ ﻭﺃ ﻖﻳﺮﺤﻟﺍ
ﻝﺎﻄﻋﻷﺍﺔﻠﻤﺘﺤﻤﻟﺍ ﺏﺎﺒﺳﻷﺍﻝﻮﻠﺤﻟﺍ
ﻊﻗﻮﺘﻤﻟﺍ ﻮﺤﻨﻟﺍ ﻰﻠﻋ ﺔﻟﺎﺴﻐﻟﺍ ﻞﻴﻐﺸﺗ ﻡﺪﻋ
.ﻩﺎﻴﻤﻟﺍ ﻲﻓ ﺎﻬﻠﻤﻛﺄﺑ ﺔﻟﻮﻤﺤﻟﺍ ﺮﻤﻏ ﻡﺪﻋ ﻢﻠﻌﻟﺍ ﻊﻣ .ﻩﺎﻴﻤﻠﻟ ﺾﻔﺨﻨﻤﻟﺍ ﻙﻼﻬﺘﺳﻻﺍ ﺕﺍﺫ ﺕﻻﺎﺴﻐﻠﻟ ﺎًﻴﻌﻴﺒﻃ ﺍًﺮﻣﺃ ﺍﺬﻫ ﺪﻌﻳ
ﻲﻓ ﺔﻴﻓﺎﻛ ﻩﺎﻴﻣ ﺩﻮﺟﻭ ﻡﺪﻋ
ﺔﻟﺎﺴﻐﻟﺍ
.ﺓﺩﺭﺎﺒﻟﺍ ﻩﺎﻴﻤﻟﺍﻭ ﺔﻨﺧﺎﺴﻟﺍ ﻩﺎﻴﻤﻟﺍ ﺭﻮﺒﻨﺻ ﻞﻴﺻﻮﺗ ﺐﺠﻳ ﺎﻤﻛ
.ﺓﺩﻭﺪﺴﻣ ﻩﺎﻴﻤﻟﺍ ﻝﺎﺧﺩﺇ ﺕﺎﻣﺎﻤﺻ ﺰﺟﺍﻮﺣ ﺖﻧﺎﻛ ﺍﺫﺇ ﺎﻣ ﺪﻛﺄﺗ
ﺪﻴﻴﻘﺗ ﺎﻬﻧﺄﺷ ﻦﻣ ﻲﺘﻟﺍﻭ ﻩﺎﻴﻤﻟﺍ ﻝﺎﺧﺩﺇ ﻢﻴﻃﺍﺮﺧ ﻲﻓ ﺕﺍءﺎﻨﺜﻧﺍ ﺩﻮﺟﻭ ﻡﺪﻋ ﻦﻣ ﺪﻛﺄﺗ
.ﻩﺎﻴﻤﻟﺍ ﻖﻓﺪﺗ
.ﺽﺭﺆﻣ ﺭﺎﻴﺗ ﺬﺧﺄﻤﺑ ﺔﻗﺎﻄﻟﺍ ﻞﺒﻛ ﻞﺻﻭ
.ﺔﻟﺎﻃﺇ ﻞﺒﻛ ﻡﺪﺨﺘﺴﺗ ﻻ
.ﺬﻔﻨﻤﻟﺎﺑ ﺔﻗﺎﻃ ﺩﻮﺟﻭ ﻦﻣ ﺪﻛﺄﺗ
.ﺔﻗﺮﺘﺤﻣ ﺕﺍﺮﻬﺼﻨﻣ ﺔﻳﺃ
.ءﺎﺑﺮﻬﻜﻟﺍ ﻲﻴﻨﻓ ﺪﺣﺄﺑ ﻞﺼﺗﺍ ،ﺔﻠﻜﺸﻤﻟﺍ ﺭﺍﺮﻤﺘﺳﺍ ﻝﺎﺣ ﻲﻓ
ﺐﺒﺴﺘﺗ ﻻ .ﺓﺭﻭﺪﻟﺍ ﻦﻣ ﺔﻨﻴﻌﻣ ﻞﺣﺍﺮﻣ ءﺎﻨﺛﺃ ﺔﺘﻗﺆﻣ ﺓﺮﺘﻔﻟ ﺔﻟﺎﺴﻐﻟﺍ ﻑﺎﻘﻳﺇ ﻢﺘﻳ
ﻕﺮﻐﺘﺴﺗ ﺓﺮﻴﺼﻗ ﻒﻴﻔﺠﺗ ﺕﺍﺭﻭﺩ ﻝﻼﺧ ﻦﻣ ﺔﻓﺎﺠﻟﺍ ﺔﻟﻮﻤﺤﻟﺍ ﺔﻟﺎﺴﻐﻟﺍ ﺮﻌﺸﺘﺴﺗ
،ﺕﺎﻔﻠﻟﺍ ﺰﻳﺯﺃ ﺕﻮﺻ ﻉﺎﻤﺳ ﻚﻨﻜﻤﻳ .ﻩﺎﻴﻤﻟﺍ ﺔﻓﺎﺿﺇ ﻞﺒﻗ ﻖﺋﺎﻗﺩ
ﻝﺍﺪﺒﺘﺳﺎﺑ ﻢﻗﻭ .ﺓﺮﺋﺍﺪﻟﺍ ﻊﻃﺎﻗ ﺔﻟﺎﺣ ﻂﺒﺿ ﺓﺩﺎﻋﺈﺑ ﻢﻗ
:
ﺔﻈﺣﻼﻣ
.ﺓﺭﻭﺪﻟﺍ ﺮﻴﺳ ﺔﻗﺎﻋﺇ ﻲﻓ
.ﺓﻮﻏﺮﻟﺍ ﻦﻣ ﺪﺤﻠﻟ ﺔﻟﺎﺴﻐﻟﺍ ﻒﻗﻮﺘﺗ ﺪﻗ
3
ﻰﻟﺇ 2 ﻦﻣ
.ﺎًﻴﻌﻴﺒﻃ ﺍًﺮﻣﺃ ﺍﺬﻫ ﺪﻌﻳﻭ
.ﻩﺎﻴﻤﻟﺍ ﺭﺪﺼﻤﻟ ﻖﻴﻗﺪﻟﺍ ﺺﺤﻔﻟﺎﺑ ﻢﻗ.ﻩﺎﻴﻤﻟﺍ ﻝﺎﺧﺩﺇ ﺕﺎﻣﺎﻤﺻ ﻰﻟﺇ ﺎﻬﻘﻓﺪﺗ ﻥﺎﻤﻀﻟ ﻩﺎﻴﻤﻟﺍ ﻲﻣﻮﻃﺮﺧ ﻞﻴﺻﻮﺗ ﻲﻐﺒﻨﻳ
ﻰﻠﻋ ﻲﺋﺎﺑﺮﻬﻜﻟﺍ ﺭﺎﻴﺘﻟﺍ ﻞﻴﺻﻮﺗ ﻦﻣ ﻖﻘﺤﺗ
.ﺢﻴﺤﺼﻟﺍ ﻮﺤﻨﻟﺍ
.ﺔﻟﺎﺴﻐﻠﻟ ﻲﻌﻴﺒﻄﻟﺍ ﻞﻴﻐﺸﺘﻟﺍ.ﺔﻟﺎﺴﻐﻟﺍ ﻞﻴﻐﺸﺘﻟ ءﺎﻄﻐﻟﺍ ﻖﻠﻏ ﻲﻐﺒﻨﻳ
ﻡﻮﻘﺗ ﻻ ﻭﺃ ﻞﻤﻌﺗ ﻻ ﺔﻟﺎﺴﻐﻟﺍ
ﺎﻬﻧﺃ ﻭﺃ ﻩﺎﻴﻤﻟﺍ ءﻞﻣ ﺔﻴﻠﻤﻌﺑ
ﻥﺃ ﻭﺃ ﻞﻤﻌﻟﺍ ﻦﻋ ﻒﻗﻮﺘﺗ
ﺮﻴﺸﻳ) ﺎًﺌﻴﻀﻣ ﻞﻈﻳ ﺮﺷﺆﻤﻟﺍ
ﻰﻠﻋ ﺔﻟﺎﺴﻐﻟﺍ ﺓﺭﺪﻗ ﻡﺪﻋ ﻰﻟﺇ
(
ﺓﺪﻴﺟ ﺓﺭﻮﺼﺑ ءﻞﻤﻟﺍ
13
Page 57

.ﺔﻣﺪﺨﻟﺍ ﺰﻛﺮﻤﺑ ﻝﺎﺼﺗﻻﺍ ﺮﻴﻈﻧ ﺕﺎﻘﻔﻧ ﻱﺃ ﻊﻓﺩ ﺐﻨﺠﺘﻟ ًﻻ ﻭ ﺃ ﺎﻨﻫ ﺔﺣﺮﺘﻘﻤﻟﺍ ﻝﻮﻠﺤﻟﺍ ﺔﺑﺮﺠﺘﺑ ﻚﻴﻠﻋ
ﺐﺠﻳ ﺎﻤﻛ ،ﺔﻴﺿﺭﻷﺍ ﻰﻠﻋ ﺎًﻣﺎﻤﺗ ﺓﺰﻜﺗﺮﻣ ﺔﻴﻔﻠﺨﻟﺍﻭ ﺔﻴﻣﺎﻣﻷﺍ ﻡﺍﺪﻗﻷﺍ ﻥﻮﻜﺗ ﻥﺃ ﺐﺠﻳ
،ﺎﻬﺗﺭﺪﻗ ﻞﻣﺎﻜﺑ ﻞﻤﻌﻟﺍ ﻦﻣ ﻦﻜﻤﺘﺗ ﻰﺘﺣ ٍﻮﺘﺴﻣ ﺢﻄﺳ ﻰﻠﻋ ﺔﺘﺒﺜﻣ ﺔﻟﺎﺴﻐﻟﺍ ﻥﻮﻜﺗ ﻥﺃ
ﻦﻣ ﻲﻠﻔﺴﻟﺍ ءﺰﺠﻟﺍ ﻩﺎﺠﺗ ﻖﻠﻐﻟﺍ ﺔﻤﻜﺤﻣ ﺔﻄﻏﺎﻀﻟﺍ ﻞﻴﻣﺍﻮﺼﻟﺍ ﻥﻮﻜﺗ ﻥﺃ ﺐﺠﻳ ﺎﻤﻛ
.“ﺐﻴﻛﺮﺘﻟﺍ ﺕﺎﻤﻴﻠﻌﺗ” ﻊﺟﺍﺭ .ﺔﻟﺎﺴﻐﻟﺍ ﻞﻜﻴﻫ
3/4)
19
ﻢﻣ
ﺔﻟﺎﺴﻐﻟﺍ ﻞﻔﺳﺃ (ﺔﺻﻮﺑ
ﻚﻤﺴﺑ ﺔﻘﻴﻗﺭ ﺔﻴﺒﺸﺧ ﺔﻌﻄﻗ ﻊﺿ ،ﺔﻴﺿﺭﻷﺍ
.ﺔﻟﺎﺴﻐﻟﺍ ﺯﺍﺰﺘﻫﺍ ﺕﻮﺻ ﻦﻣ ﺪﺤﻠﻟ
.ﺐﻴﻛﺮﺘﻟﺍ ﺕﺍﺩﺎﺷﺭﺇ ﻢﺴﻗ ﻲﻓ “ﺔﻟﺎﺴﻐﻟﺍ ءﺍﻮﺘﺳﺍ” ﻊﺟﺍﺭ
ﺔﻟﺎﺴﻐﻟﺍ ﻰﻟﺇ ﺔﻠﺘﺒﻤﻟﺍ ﺲﺑﻼﻤﻟﺍ ﺔﻓﺎﺿﺇ ﻱﺩﺆﻳ ﺪﻘﻓ .ﺔﺣﻭﺮﻤﻟﺍ ﻂﺳﻭ ﻕﻮﻓ ﺓﺮﺷﺎﺒﻣ
.ﺔﻟﺎﺴﻐﻟﺍ ﻥﺯﺍﻮﺗ ﻡﺪﻋ ﻰﻟﺇ ﺔﻠﺴﻟﺍ ﻰﻟﺇ ﻩﺎﻴﻤﻟﺍ ﻦﻣ ﺪﻳﺰﻤﻟﺍ ﺔﻓﺎﺿﺇ ﻭﺃ
.ﻥﺍﺰﺗﻻﺍ ﻡﺪﻋ ﻞﻴﻠﻘﺘﻟ ﻞﻗﺃ ﺕﻻﻮﻤﺣ ﻞﺴﻐﺑ ﻢﻗ
.ﺲﺑﻼﻤﻟﺍ ﻦﻣ ﺓﺪﺣﺍﻭ ﺔﻌﻄﻗ ﻞﺴﻏ ﺐﻨﺠﺗﻭ ،ﻪﻴﻓ ﻎﻟﺎﺒﻣ ﻞﻜﺸﺑ ﺔﻟﺎﺴﻐﻟﺍ ﻸﻤﺗ ﻻ
ﺺﺘﻤﺗ ﻻ ﻲﺘﻟﺍ ﺓﺮﻴﺒﻜﻟﺍ ﻡﺎﺠﺣﻷﺍ ﺕﺍﺫ ﺲﺑﻼﻤﻠﻟ ﺓﺮﻴﺒﻜﻟﺍ ﺕﺎﻴﻤﻜﻟﺍ ﺓﺭﻭﺩ ﻡﺪﺨﺘﺳﺍ
.ﺓﺮﻴﻐﺼﻟﺍ ﺔﻴﻄﻏﻷﺍﻭ ﺕﺍﺮﺘﺴﻟﺍ ﻞﺜﻣ ﻩﺎﻴﻤﻟﺍ
ﻞﺜﻣ ﺔﻜﻜﻔﻤﻟﺍ ﺮﺻﺎﻨﻌﻟﺍ ﻂﻘﺴﺗ ﺪﻘﻓ ،ﻞﻴﺴﻐﻟﺍ ﻞﺒﻗ ﺲﺑﻼﻤﻟﺍ ﺏﻮﻴﺟ ﻍﺍﺮﻓﺈﺑ ﻢﻗ
.ﺔﺨﻀﻤﻟﺍ ﻞﻤﻋ ﺔﻗﺎﻋﺇ ﻲﻓ ﺐﺒﺴﺘﺗ ﺪﻗ ﻭﺃ ﺽﻮﺤﻟﺍﻭ ﺔﻠﺴﻟﺍ ﻦﻴﺑ ﺔﻴﻧﺪﻌﻤﻟﺍ ﺕﻼﻤﻌﻟﺍ
.ﺮﺻﺎﻨﻌﻟﺍ ﻚﻠﺗ ﺔﻟﺍﺯﻹ ﺔﻣﺪﺨﻟﺍ ﺰﻛﺮﻤﺑ ﻝﺎﺼﺗﻻﺍ ﻱﺭﻭﺮﻀﻟﺍ ﻦﻣ ﻥﻮﻜﻳ ﺪﻗ ﺍﺬﻟ
ﻭﺃ ﻢﻳﺰﺑﺇ ﻱﺃﻭ ﺔﻴﻧﺪﻌﻤﻟﺍ ﺭﺍﺭﺯﻷﺍ ﻞﺜﻣ ﺔﻴﻧﺪﻌﻤﻟﺍ ﺮﺻﺎﻨﻌﻟﺍ ﺕﺍﻮﺻﺃ ﻉﺎﻤﺳ ﺪ ﻌ ُﻳ
.ﺎًﻴﻌﻴﺒﻃ ﺍًﺮﻣﺃ ﺲﻠﻧﺎﺘﺳﻻﺍ ﺔﻠﺴﻟﺍ ﻊﻣ ﺎﻬﻛﺎﻜﺘﺣﺍ ءﺎﻨﺛﺃ ﻖﻟﺰﻨﻣ ﻡﺎﻣﺯ
ﺕﺎﻴﻤﻜﻟﺍ ﺝﺍﺮﺧﺇ ﺔﻟﺎﺣ ﻲﻓ ﻚﻟﺫﻭ ﻉﺎﻓﺪﻧﺍ ﺕﺍﻮﺻﺃ ﻭﺃ ﺓﺭﺮﻜﺘﻣ ﺮﻳﺮﺧ ﺕﺍﻮﺻﺃ
.ﻒﻴﻔﺠﺘﻟﺍ/ﻑﺮﺼﻟﺍ ﺕﺍﺭﻭﺩ ءﺎﻨﺛﺃ ﻩﺎﻴﻤﻟﺍ ﻦﻣ ﺔﻴﺋﺎﻬﻨﻟﺍ
ﻩﺎﻴﻤﻟﺍ ﺔﻓﺎﺿﺇ ﻞﺒﻗ ﻖﺋﺎﻗﺩ ﺓﺪﻋ ﺕﺎﻔﻠﻟﺍ ﻩﺬﻫ ﻕﺮﻐﺘﺴﺗ ﺪﻗﻭ .ﺎًﻴﻌﻴﺒﻃ ﺍًﺮﻣﺃ ﺍﺬﻫ
.ﺔﻟﺎﺴﻐﻟﺍ ﻰﻟﺇ
.ﻪﻴﻓ ﻎﻟﺎﺒﻣ ﻞﻜﺸﺑ ﺓﺄﺒﻌﻣ ﺮﻴﻏ ﻭﺃ ﺔﻧﺯﺍﻮﺘﻣ
ﺎﻬﺣﻼﺻﺇﻭ ﻝﺎﻄﻋﻷﺍ ﻑﺎﺸﻜﺘﺳﺍ
ﺽﺭﻷﺎﺑ ﺔﻠﺼﺘﻣ ﺮﻴﻏ ﻡﺍﺪﻗﻷﺍ ﻥﻮﻜﺗ ﺪﻗ
.ﺔﻠﻔﻘﻣ ﻭﺃ
.ﺔﻳﻮﺘﺴﻣ ﺮﻴﻏ ﺔﻟﺎﺴﻐﻟﺍ ﻥﻮﻜﺗ ﺪﻗ ءﺍﻮﺘﺳﺍ ﻡﺪﻋ ﺔﻟﺎﺣ ﻲﻓ .ﺎﻫﺯﺍﺰﺘﻫﺍ ﻭﺃ ﺔﻟﺎﺴﻐﻟﺍ ﺔﻟﺎﻣﺇ ﺐﻨﺠﺘﻟ ﺔﻴﺿﺭﻷﺍ ﺺﺤﻔﺑ ﻢﻗ
.ﺔﻧﺯﺍﻮﺘﻣ ﺮﻴﻏ ﺔﻟﻮﻤﺤﻟﺍ ﻥﻮﻜﺗ ﺪﻗ ﺎﻬﻠﻴﻤﺤﺘﺑ ﻢﻘﺗ ﻻﻭ ،ﺔﺣﻭﺮﻤﻟﺍ ﻝﻮﺣ ٍﻭﺎﺴﺘﻣﻭ ﻉﺯﻮﻣ ﻞﻜﺸﺑ ﺲﺑﻼﻤﻟﺍ ﻞﻴﻤﺤﺘﺑ ﻢﻗ
.ﺔﻟﺎﺴﻐﻟﺎﺑ ﻒﻴﻔﺠﺘﻟﺍ
.ﺔﻟﺎﺴﻐﻟﺍ ءﺍﻮﺘﺳﺍ ﻡﺪﻋ ﺔﻟﻮﻤﺤﻟﺍ ﻥﺃ ﺪﻛﺄﺗ .ﺔﻟﺎﺴﻐﻟﺍ ءﺍﻮﺘﺳﺍ ﻡﺪﻋ ﺔﻟﺎﺣ ﻲﻓ ﺔﻠﺴﻟﺍ ﺝﺭﺎﺧ ﻩﺎﻴﻤﻟﺍ ﺏﺮﺴﺘﺗ ﺪﻗ
.ﻡﺎﻜﺣﺈﺑ ءﻞﻤﻟﺍ ﻢﻴﻃﺍﺮﺧ ﻞﻴﺻﻮﺗ ﻡﺪﻋ.ءﻞﻤﻟﺍ ﻢﻴﻃﺍﺮﺧ ﻞﻴﺻﻮﺗ ﻢﻜﺣﺃ
ﻝﺎﻄﻋﻷﺍﺔﻠﻤﺘﺤﻤﻟﺍ ﺏﺎﺒﺳﻷﺍﻝﻮﻠﺤﻟﺍ
ﻥﺯﺍﻮﺘﻟﺍ ﻡﺪﻋ ﻭﺃ ﺯﺍﺰﺘﻫﻻﺍ
ﺔﻴﻟﺎﺘﻟﺍ ﺕﺍءﺍﺮﺟﻹﺍ ﻦﻣ ﺪﻛﺄﺗ
ﻊﺟﺍﺭ ﻭﺃ ﺢﻴﺤﺼﻟﺍ ﺐﻴﻛﺮﺘﻠﻟ
.“ﺔﻟﺎﺴﻐﻟﺍ ﻡﺍﺪﺨﺘﺳﺍ” ﻢﺴﻗ
ءﺎﺿﻮﻀﻟﺍ
ﻲﻧﺪﻌﻤﻟﺍ ﺞﻴﺠﻀﻟﺍ ﻭﺃ
ﺰﻳﺯﻷﺍ ﻭﺃ ﺮﻳﺮﺨﻟﺍ ﺕﺍﻮﺻﺃ.ﻩﺎﻴﻤﻟﺍ ﻒﻳﺮﺼﺘﺑ ﻡﻮﻘﺗ ﺔﻟﺎﺴﻐﻟﺍ ﻥﻮﻜﺗ ﺪﻗ ﻊﻣ ﺓﺮﻤﺘﺴﻣ ﻦﻴﻨﻃ ﺕﺍﻮﺻﺃ ﺙﺪﺤﺗ ﻲﻫﻭ ﺔﺨﻀﻤﻟﺍ ﺕﻮﺻ ﻉﺎﻤﺳ ﻲﻌﻴﺒﻄﻟﺍ ﻦﻣ
ﺔﻴﻟﺎﺘﻟﺍ ﺕﺍءﺍﺮﺟﻹﺍ ﻦﻣ ﺪﻛﺄﺗ
:
ﺢﻴﺤﺼﻟﺍ ﺐﻴﻛﺮﺘﻠﻟ
ﺮﻘﻨﻟﺍ ﻡﺎﻈﻨﺑ ﻖﻠﻌﺗ ﺪﻗ ﻲﺘﻟﺍ ءﺎﻴﺷﻷﺍ
ﺰﻳﺯﻷﺍ.ﻞﻴﻐﺸﺘﻟﺍ ﻊﺿﻭ ﻲﻓ ﺭﺎﻌﺸﺘﺳﻻﺍ ءﻮﺿ ﺪﻌﻳﻭ .ﺔﻟﺎﺴﻐﻟﺍ ﻞﻴﻐﺸﺗ ءﺪﺑ ﺪﻌﺑ ﺭﺎﻌﺸﺘﺳﻻﺍ ﺕﺎﻔﻟ ﺰﻳﺯﺃ ﺕﻮﺻ ﻊﻤﺴﺗ ﺪﻗ
ﻩﺎﻴﻤﻟﺍ ﺏﺮﺴﺗ
.ﻞﻴﺴﻐﻟﺍ
.ﻑﺮﺼﻟﺍ ﺔﺤﺘﻓ ﻕﻮﻓ ﻂﻳﺮﺷ ﻊﺿﻭ ﺐﻨﺠﺗ
ﻢﻗ ﺍﺬﻟ ،ﻑﺮﺼﻟﺍ ﺏﻮﺒﻧﺃ ﻭﺃ ﻑﺮﺼﻟﺍ ﺽﻮﺣ ﺩﺍﺪﺴﻧﺍ ﺐﺒﺴﺑ ﻩﺎﻴﻤﻟﺍ ﻢﻛﺍﺮﺘﺗ ﺪﻗ
ﻞﻴﺴﻐﻟﺍ ﺽﺍﻮﺣﺃ) ﻞﺜﻣ ﺕﺎﺒﻳﺮﺴﺘﻟﺍ ﻊﻨﻤﻟ ﻞﻣﺎﻜﻟﺎﺑ ﻲﻟﺰﻨﻤﻟﺍ ﻑﺮﺼﻟﺍ ﻡﺎﻈﻧ ﺺﺤﻔﺑ
(
.ﻩﺎﻴﻤﻟﺍ ﺮﻴﺑﺎﻨﺻﻭ ﻩﺎﻴﻤﻟﺍ ﺐﻴﺑﺎﻧﺃﻭ ﻑﺮﺼﻟﺍ ﺏﻮﺒﻧﺃﻭ
.ﻞﻴﻤﺤﺘﻟﺍ ﺕﺎﻤﻴﻠﻌﺗ ﺔﻓﺮﻌﻤﻟ “ﺔﻟﺎﺴﻐﻟﺍ ﻡﺍﺪﺨﺘﺳﺍ” ﻊﺟﺍﺭ .ﺽﻮﺤﻟﺍ ﺝﺭﺎﺧ ﻩﺎﻴﻤﻟﺍ
.ءﻞﻤﻟﺍ ﻢﻴﻃﺍﺮﺧ ﺕﺎﻘﻠﺣ.ءﻞﻤﻟﺍ ﻢﻴﻃﺮﺨﻟ ﺔﻌﺑﺭﻷﺍ ﺔﺤﻄﺴﻤﻟﺍ ﺕﺎﻘﻠﺤﻟﺍ ﻊﻴﻤﺟ ﺖﻴﺒﺜﺗ ﺔﺤﺻ ﻦﻣ ﺪﻛﺄﺗ
.ﻒﻳﺮﺼﺘﻟﺍ ﻡﻮﻃﺮﺧ ﻞﻴﺻﻮﺗ ﺏﻮﺒﻧﺃ ﻲﻓ ﺢﻴﺤﺻ ﻞﻜﺸﺑ ﻪﺘﺒﺛ ﻢﺛ ﺔﻟﺎﺴﻐﻟﺍ ﺔﻳﻭﺎﺣ ﻦﻣ ﻑﺮﺼﻟﺍ ﻡﻮﻃﺮﺧ ﺐﺤﺳﺍ
ﺽﻮﺣ ﻭﺃ ﻒﻳﺮﺼﺘﻟﺍ
ﻦﻣ ﺪﻛﺄﺘﻠﻟ ﺔﻴﻟﺰﻨﻤﻟﺍ ﻑﺮﺼﻟﺍ ﺔﻜﺒﺷ ﺺﺤﻔﺑ ﻢﻗ
ﻭﺃ ﺽﻮﺤﻟﺍ ﺩﺍﺪﺴﻧﺍ ﻭﺃ ﺕﺎﺒﻳﺮﺴﺗ ﺩﻮﺟﻭ ﻡﺪﻋ
.ﻑﺮﺼﻟﺍ ﻡﺎﻈﻧ
.ﻪﺑ ﻲﺻﻮﻤﻟﺍ ﺏﻮﻠﺳﻷﺎﺑ ﺔﻟﺎﺴﻐﻟﺍ ﺔﺌﺒﻌﺗ ﻡﺪﻋ ﺏﺮﺴﺗ ﻲﻟﺎﺘﻟﺎﺑﻭ ﺔﻠﺴﻟﺍ ﺓﺍﺫﺎﺤﻣ ﻡﺪﻋ ﻥﺯﺍﻮﺘﻤﻟﺍ ﺮﻴﻏ ﻞﻴﻤﺤﺘﻟﺍ ﻦﻋ ﺞﺘﻨﻳ ﻥﺃ ﻦﻜﻤﻳ
12
Page 58

ﺪﻳﺪﺟ ﻦﻣ ﺔﻟﺎﺴﻐﻟﺍ ﻡﺍﺪﺨﺘﺳﺍ/ﺐﻴﻛﺮﺗ ﺓﺩﺎﻋﺇ
ﺔﻟﺎﺴﻐﻟﺍ ﻞﻘﻧ
ﻞﺼﻓ ﻲﻓ ﺎﻬﻨﻳﺰﺨﺗ ﻭﺃ ﻡﺍﺪﺨﺘﺳﻻﺍ ﻡﺪﻋ ﻦﻣ ﺓﺮﺘﻓ ﺪﻌﺑ ﺔﻟﺎﺴﻐﻟﺍ ﺐﻴﻛﺮﺗ ﺓﺩﺎﻋﻹ
:
ﻲﻠﻳ ﺎﻣ ﻉﺎﺒﺗﺍ ﻰﺟﺮﻳ ،ﺎﻬﻠﻘﻧ ﻭﺃ ءﺎﺘﺸﻟﺍ
ﺔﻟﺎﺴﻐﻟﺍ ﻥﺎﻜﻣ ﺪﻳﺪﺤﺘﻟ “ﺐﻴﻛﺮﺘﻟﺍ ﺕﺎﻤﻴﻠﻌﺗ” ﻰﻟﺇ ﻉﻮﺟﺮﻟﺍ ﻰﺟﺮﻳ
.ﺎﻬﻠﻴﺻﻮﺗﻭ ﺎﻬﺋﺍﻮﺘﺳﺍﻭ
ﻞﺒﻗ ﻚﻟﺫﻭ ﻪﺑ ﻰﺻﻮﻤﻟﺍ ﻲﻟﺎﺘﻟﺍ ءﺍﺮﺟﻹﺍ ﻉﺎﺒﺗﺎﺑ ﺔﻟﺎﺴﻐﻟﺍ ﻞﻴﻐﺸﺗ ﻰﺟﺮﻳ
:
ﻯﺮﺧﺃ ﺓﺮﻣ ﺎﻬﻣﺍﺪﺨﺘﺳﺍ
:
ﻲﻠﻳ ﺎﻤﺑ ﻡﺎﻴﻘﻟﺍ ﻰﺟﺮﻳ ،ﻯﺮﺧﺃ ﺓﺮﻣ ﺔﻟﺎﺴﻐﻟﺍ ﻡﺍﺪﺨﺘﺳﻻ
ﻞﻴﺻﻮﺗ ﺪﻋﺃﻭ ،ﻩﺎﻴﻤﻟﺍ ﻢﻴﻃﺍﺮﺧﻭ ﺐﻴﺑﺎﻧﺃ ﺮﺒﻋ ﻖﻓﺪﺘﺗ ﻩﺎﻴﻤﻟﺍ ﻞﻌﺟﺍ
.ﻩﺎﻴﻤﻟﺍ ﺮﻴﺑﺎﻨﺻ ﻞﻴﻐﺸﺘﺑ ﻢﻗ ﻢﺛ ،ﻩﺎﻴﻤﻟﺍ ﻝﺎﺧﺩﺇ ﻢﻴﻃﺍﺮﺧ
ﺮﻳﺬﺤﺗ
ﺔﻴﺋﺎﺑﺮﻬﻛ ﺔﻣﺪﺼﻟ ﺽﺮﻌﺘﻟﺍ ﺮﻄﺧ
.ﺽﺭﺆﻣ ﺬﺧﺄﻤﺑ ﻞﻴﺻﻮﺘﻟﺎﺑ ﻢﻗ
.ﺾﻳﺭﺄﺘﻟﺍ ﻑﺮﻃ ﺔﻟﺍﺯﺇ ﺐﻨﺠﺗ
.ﺭﺎﻴﺗ ﺊﻳﺎﻬﻣ ﻡﺪﺨﺘﺴﺗ ﻻ
.ﺔﻟﺎﻃﺇ ﻞﺒﻛ ﻡﺪﺨﺘﺴﺗ ﻻ
ﻉﻻﺪﻧﺍ ﻭﺃ ﺓﺎﻓﻮﻟﺍ ﻰﻟﺇ ﺕﺍﺩﺎﺷﺭﻹﺍ ﻩﺬﻫ ﻉﺎﺒﺗﺍ ﻡﺪﻋ ﻱﺩﺆﻳ ﺪﻗ
.ﺔﻴﺋﺎﺑﺮﻬﻛ ﺔﻣﺪﺼﻟ ﺽﺮﻌﺘﻟﺍ ﻭﺃ ﻖﻳﺮﺤﻟﺍ
.ﺎﻬﻔﻳﺮﺼﺗﻭ ﻩﺎﻴﻤﻟﺍ ﻝﺎﺧﺩﺇ ﻢﻴﻃﺍﺮﺧ ﻞﺼﻓﺍﻭ .ﻩﺎﻴﻤﻟﺍ ﻱﺭﻮﺒﻨﺻ ﻖﻠﻏﺃ
ﻉﺎﺒﺗﺍ ﻰﺟﺮﻳ ،ﺓﺩﻭﺮﺒﻟﺍ ﺪﻳﺪﺷ ﺲﻘﻄﻟﺍ ءﺎﻨﺛﺃ ﺔﻟﺎﺴﻐﻟﺍ ﻞﻘﻧ ﻝﺎﺣ ﻲﻓ
.1
.ﺎﻬﻠﻘﻧ ﻞﺒﻗ ءﺎﺘﺸﻟﺍ ﻞﺼﻓ ءﺎﻨﺛﺃ ﻦﻳﺰﺨﺘﻟﺎﺑ ﺔﻳﺎﻨﻌﻟﺎﺑ ﺔﺻﺎﺨﻟﺍ ﺕﺎﻬﻴﺟﻮﺘﻟﺍ
ﺔﻴﻘﺒﺘﻣ ﻩﺎﻴﻣ ﻱﺃ ﻒﻳﺮﺼﺘﺑ ﻢﻗﻭ ﻒﻳﺮﺼﺘﻟﺍ ﻡﺎﻈﻧ ﻦﻋ ﺔﻟﺎﺴﻐﻟﺍ ﻞﺼﻓﺍ
.2
ﻲﻔﻠﺨﻟﺍ ءﺰﺠﻟﺍ ﻦﻣ ﻒﻳﺮﺼﺘﻟﺍ ﻡﻮﻃﺮﺧ ﻞﺼﻔﺑ ﻢﻗﻭ ،ﻮﻟﺩ ﻭﺃ ءﺎﻋﻭ ﻲﻓ
.1
.2
.3
.ﺔﻟﺎﺴﻐﻠﻟ
.ﺔﻗﺎﻄﻟﺍ ﻞﺒﻛ ﻞﺼﻓﺍ
.1
.ﺔﻟﺎﺴﻐﻟﺍ ﺔﻠﺳ ﻞﺧﺍﺩ ﻒﻳﺮﺼﺘﻟﺍ ﻡﻮﻃﺮﺧﻭ ﻩﺎﻴﻤﻟﺍ ﻝﺎﺧﺩﺇ ﻢﻴﻃﺍﺮﺧ ﻊﺿ
.ﺔﻟﺎﺴﻐﻟﺍ ﺔﻠﺳ ﻲﻓﻭ ﺔﻓﺎﺤﻟﺍ ﻰﻠﻋ ﺔﻗﺎﻄﻟﺍ ﻞﺒﻛ ﻲﻨﺜﺑ ﻢﻗ
ﻞﺧﺍﺩ ﻲﻔﻠﺨﻟﺍ ءﺰﺠﻟﺍ ﻲﻓ ﺔﻴﻠﺻﻷﺍ ﻦﺤﺸﻟﺍ ﺩﺍﻮﻣ ﻦﻣ ﺔﺌﺒﻌﺘﻟﺍ ﺓﺪﺣﻭ ﻊﺿ
.4
.5
.6
.7
ﺕﺎﻔﺸﻨﻣ ﻭﺃ ﺕﺎﻴﻧﺎﻄﺑ ﻊﺿ ،ﺔﺌﺒﻌﺗ ﺓﺪﺣﻭ ﻚﻳﺪﻟ ﻦﻜﻳ ﻢﻟ ﺍﺫﺇﻭ ﺔﻟﺎﺴﻐﻟﺍ
ءﺰﺠﻟﺍ ﻞﻔﺳﺃﻭ ﻪﻴﻠﻋ ﺎًﻄﻳﺮﺷ ﻊﺿﻭ ءﺎﻄﻐﻟﺍ ﻖﻠﻏﺃ .ﺔﻠﺴﻟﺍ ﺔﺤﺘﻓ ﻲﻓ ﺔﻠﻴﻘﺛ
ﺔﻟﺎﺴﻐﻟﺍ ﻊﺿﻭ ﻢﺘﻳ ﻥﺃ ﻰﻟﺇ ﻖﻠﻐﻟﺍ ﻢﻜﺤﻣ ﻂﻳﺮﺸﻟﺍ ﻞﻌﺟﺍ .ﺔﻟﺎﺴﻐﻠﻟ ﻲﻣﺎﻣﻷﺍ
.ﺪﻳﺪﺟ ﻥﺎﻜﻣ ﻲﻓ
.ﺔﻗﺎﻄﻟﺍ ﻞﻴﺻﻮﺗ ﺪﻋﺃ ﻭﺃ ﺔﻟﺎﺴﻐﻟﺍ ﻞﻴﺻﻮﺘﺑ ﻢﻗ
ﺎﻬﻔﻴﻈﻨﺘﻟ ﺔﻤﺨﻀﻟﺍ ﺮﺻﺎﻨﻌﻟﺍ ﺓﺭﻭﺩ ﻝﻼﺧ ﻦﻣ ﺔﻟﺎﺴﻐﻟﺍ ﻞﻴﻐﺸﺘﺑ ﻢﻗ
ﻰﻠﻋ ﺹﺮﺣﺍ .ﺎﻬﻣﺍﺪﺨﺘﺳﺍ ﻝﺎﺣ ﻲﻓ ،ﺪﻤﺠﺘﻠﻟ ﺓﺩﺎﻀﻤﻟﺍ ﺩﺍﻮﻤﻟﺍ ﺔﻟﺍﺯﺇﻭ
ﻕﻮﺤﺴﻣ ﺔﻴﻤﻛ ﻒﺼﻧ ﻡﺪﺨﺘﺳﺍﻭ .ﻂﻘﻓ ﺓءﺎﻔﻜﻟﺍ ﺔﻴﻟﺎﻋ ﺕﺎﻔﻈﻨﻤﻟﺍ ﻡﺍﺪﺨﺘﺳﺍ
.ﻢﺠﺤﻟﺍ ﺔﻄﺳﻮﺘﻣ ﺔﻟﻮﻤﺤﻠﻟ ﻊﻴﻨﺼﺘﻟﺍ ﺔﻬﺟ ﻞﺒﻗ ﻦﻣ ﺎﻬﺑ ﻰﺻﻮﻤﻟﺍ ﻞﻴﺴﻐﻟﺍ
.2
.3
11
Page 59

ﺔﻟﺎﺴﻐﻟﺍ ﺔﻧﺎﻴﺻ
(
ﻊﺑﺎﺗ) ﺔﻟﺎﺴﻐﻟﺎﺑ ﺔﻳﺎﻨﻌﻟﺍ
ﺍﺫﺇ .ﺞﺋﺎﺘﻨﻟﺍ ﻞﻀﻓﺃ ﻰﻠﻋ ﻝﻮﺼﺤﻠﻟ ﺓﺭﻭﺪﻟﺍ ﻞﻴﻐﺸﺗ ﻑﺎﻘﻳﺇ ﺐﻨﺠﺗ
:
ﺔﻈﺣﻼﻣ
ﺔﺒﺴﻨﻟﺎﺑ) “ءﺎﻐﻟﺇ/ﺔﻗﺎﻄﻟﺍ” ﺭﺯ ﻰﻠﻋ ﻂﻐﺿﺎﻓ ،ﺓﺭﻭﺪﻟﺍ ﻑﺎﻘﻳﺇ ﺮﻣﻷﺍ ﺐﻠﻄﺗ
ﺭﺍﺮﻤﺘﺳﻻﺍ ﻊﻣ ﻂﻐﺿﺍ ،“ءﺎﻐﻟﺇ/ﺔﻗﺎﻄﻟﺍ” ﺭﺯ ﻰﻠﻋ ﻞﻤﺘﺸﺗ ﻻ ﻲﺘﻟﺍ ﺕﻼﻳﺩﻮﻤﻠﻟ
ﺪﻌﺑﻭ .(ﻥﺍﻮﺛ ﺙﻼﺛ ﺓﺪﻤﻟ “ﻞﻔﻘﻟﺍ ءﺎﻐﻟﺇ/ﺖﻗﺆﻣ ﻑﺎﻘﻳﺇ/ﻞﻴﻐﺸﺘﻟﺍ ءﺪﺑ” ﺭﺯ ﻰﻠﻋ
ﻒﻄﺸﻟ “ﻒﻴﻔﺠﺗ“ﻭ “ﻒﻄﺷ”
ﺓﺭﻭﺩ ﻞﻴﻐﺸﺘﺑ ﻢﻗ ،ﻒﻴﻈﻨﺘﻟﺍ ﺓﺭﻭﺩ ﻒﻗﻮﺗ
.ﺔﻟﺎﺴﻐﻟﺍ ﻦﻣ ﻒﻈﻨﻤﻟﺍ
:
ﺔﻟﺎﺴﻐﻟﺍ ﻒﻴﻈﻨﺗ ﺓﺭﻭﺩ ﺔﻴﻠﻤﻋ ﻒﺻﻭ
ﺔﻳﺩﺎﻌﻟﺍ ﻞﻴﺴﻐﻟﺍ ﺕﺍﺭﻭﺩ ﻦﻣ ﻰﻠﻋﺃ ﻯﻮﺘﺴﻣ ﻰﻟﺇ ﻩﺎﻴﻤﻟﺍ ءﻞﻤﺑ ﺓﺭﻭﺪﻟﺍ ﻩﺬﻫ ﻡﻮﻘﺗ
.ﺔﻳﺩﺎﻌﻟﺍ ﺕﺍﺭﻭﺪﻠﻟ ﻩﺎﻴﻤﻟﺍ ﺏﻮﺴﻨﻣ ﻂﺧ ﻮﻠﻌﻳ ﻯﻮﺘﺴﻣ ﻰﻠﻋ ﻒﻄﺸﻟﺍ ﺽﺮﻐﺑ
ﺺﻠﺨﺘﻠﻟ ﻥﺍﺭﻭﺪﻟﺍﻭ ﺯﺍﺰﺘﻫﻻﺍ ﻦﻣ ﺾﻌﺑ ﻙﺎﻨﻫ ﻥﻮﻜﻳ ،ﺓﺭﻭﺪﻟﺍ ﻩﺬﻫ ءﺎﻨﺛﺃ
.ﺮﺒﻛﺃ ﺓﺭﻮﺼﺑ ﺥﺎﺳﻭﻷﺍ ﻦﻣ
ﻒﻴﻔﺠﺗﻭ ﺔﻳﻮﻬﺗ ﻢﺘﺗ ﺚﻴﺤﺑ ﺎًﺣﻮﺘﻔﻣ ءﺎﻄﻐﻟﺍ ﻙﺮﺗﺍ ،ﺓﺭﻭﺪﻟﺍ ﻩﺬﻫ ءﺎﻬﺘﻧﺍ ﺪﻌﺑ
.ﺪﻴﺟ ﻞﻜﺸﺑ ﺔﻟﺎﺴﻐﻠﻟ ﺔﻴﻠﺧﺍﺪﻟﺍ ءﺍﺰﺟﻷﺍ
ﻊﻳﺯﻮﺘﻟﺍ ﺝﺍﺭﺩﺃ ﻒﻴﻈﻨﺗ
ﺝﺍﺭﺩﺃ ﻲﻓ ﺔﻤﻛﺍﺮﺘﻤﻟﺍ ﺎﻳﺎﻘﺒﻟﺍ ﺾﻌﺑ ﺔﻟﺎﺴﻐﻟﺍ ﻡﺍﺪﺨﺘﺳﺍ ﻦﻣ ﺓﺮﺘﻓ ﺪﻌﺑ ﺪﺠﺗ ﺪﻗ
ﺎﻬﺤﺴﻤﺑ ﻚﻴﻠﻋ ،ﺎﻬﻨﻣ ﺕﺎﻤﻛﺍﺮﺘﻟﺍ ﻩﺬﻫ ﺔﻟﺍﺯﻹﻭ ،ﺔﻟﺎﺴﻐﻟﺎﺑ ﺔﺻﺎﺨﻟﺍ ﻊﻳﺯﻮﺘﻟﺍ
ﺝﺍﺭﺩﺃ ﺝﺍﺮﺧﺇ ﺔﻟﻭﺎﺤﻣ ﺐﻨﺠﺗﻭ .ﺔﻓﺎﺟ ﺔﻔﺸﻨﻣﻭ ﺔﻠﻠﺒﻣ ﺵﺎﻤﻗ ﺔﻌﻄﻗ ﻡﺍﺪﺨﺘﺳﺎﺑ
ﺔﻠﺑﺎﻗ ﺮﻴﻏ ءﺍﺰﺟﻷﺍ ﻩﺬﻫ ﻥﻷ ،ﺎﻬﻔﻴﻈﻨﺘﻟ ﻞﺻﺍﻮﻔﻠﻟ ﺔﻴﻗﺍﻮﻟﺍ ﺮﺻﺎﻨﻌﻟﺍ ﻭﺃ ﻊﻳﺯﻮﺘﻟﺍ
،ﻊﻳﺯﻮﺗ ﺝﺭﺩ ﻰﻠﻋ ﻱﻮﺘﺤﻳ ﺔﻟﺎﺴﻐﻟﺍ ﺯﺍﺮﻃ ﻥﺎﻛ ﺍﺫﺇ ،ﻚﻟﺫ ﻦﻣ ﻢﻏﺮﻟﺎﺑﻭ .ﻚﻔﻠﻟ
ﻡﺍﺪﺨﺘﺳﺎﺑ ﻢﻗ .ﺔﻟﺎﺴﻐﻟﺍ ﻒﻴﻈﻨﺗ ﺓﺭﻭﺩ ﻞﻴﻐﺸﺗ ﺪﻌﺑ ﻭﺃ ﻞﺒﻗ ﻪﻔﻴﻈﻨﺗﻭ ﻪﺟﺍﺮﺧﺈﺑ ﻢﻘﻓ
.ﺮﻣﻷﺍ ﻡﺰﻟ ﺍﺫﺇ ،ﺽﺍﺮﻏﻷﺍ ﻊﻴﻤﺠﻟ ﺢﻄﺳﺃ ﻒﻈﻨﻣ
ﺝﺭﺎﺨﻟﺍ ﻦﻣ ﺔﻟﺎﺴﻐﻟﺍ ﻒﻴﻈﻨﺗ
ﻱﺃ ﺢﺴﻤﻟ ﺔﻠﻠﺒﻣﻭ ﺔﻤﻋﺎﻧ ﺵﺎﻤﻗ ﺔﻌﻄﻗ ﻭﺃ ﺞﻨﻔﺳﺇ ﻡﺍﺪﺨﺘﺳﺍ ﻰﻠﻋ ﺹﺮﺣﺍ
ﺢﻄﺳﻷﺍ ﻒﻴﻈﻨﺗ ﺪﻨﻋ ﻝﺪﺘﻌﻣ ﻥﻮﺑﺎﺻ ﻭﺃ ﺕﺎﻔﻈﻨﻣ ﻂﻘﻓ ﻡﺪﺨﺘﺳﺍﻭ ،ﺏﺎﻜﺴﻧﺍ
.ﺔﻟﺎﺴﻐﻠﻟ ﺔﻴﺟﺭﺎﺨﻟﺍ
:
ﺎًﻌﻨﻣ ﺔﻄﺷﺎﻛ ﺩﺍﻮﻣ ﻰﻠﻋ ﻱﻮﺘﺤﺗ ﺕﺎﺠﺘﻨﻣ ﻡﺍﺪﺨﺘﺳﺍ ﺐﻨﺠﺗ
ﺔﻤﻬﻣ ﺔﻇﻮﺤﻠﻣ
.ﺔﻟﺎﺴﻐﻠﻟ ﺔﻴﺋﺎﻬﻨﻟﺍ ءﻼﻄﻟﺍ ﺔﻘﺒﻄﺑ ﻒﻠﺗ ﺙﻭﺪﺤﻟ
ﺔﻠﻄﻌﻟﺍ ءﺎﻀﻗﻭ ﻡﺍﺪﺨﺘﺳﻻﺍ ﻡﺪﻋ ءﺎﻨﺛﺃ ﺔﻳﺎﻨﻌﻟﺍ
ﻞﻘﻨﺑ ﻡﻮﻘﺗ ﺖﻨﻛ ﺍﺫﺈﻓ ،ﻂﻘﻓ ﻝﺰﻨﻤﻟﺎﺑ ﻙﺩﻮﺟﻭ ﺪﻨﻋ ﺔﻟﺎﺴﻐﻟﺍ ﻞﻴﻐﺸﺗ ﻞﻀﻔﻳ
:
ﺔﻴﻟﺎﺘﻟﺍ ﺕﺍﻮﻄﺨﻟﺍ ﻉﺎﺒﺗﺍ ﻰﺟﺮﻳ ،ﻡﺍﺪﺨﺘﺳﺍ ﻥﻭﺪﺑ ﺔﻴﻨﻣﺯ ﺓﺮﺘﻓ ﺎﻬﻛﺮﺗ ﻭﺃ ﺔﻟﺎﺴﻐﻟﺍ
.ﺔﻟﺎﺴﻐﻟﺍ ﻦﻣ ﺔﻗﺎﻄﻟﺍ ﻞﺒﻛ ﻉﺰﻧﺍ ﻭﺃ ﻞﺼﻓﺍ
ﻦﻋ ﻢﺟﺎﻨﻟﺍ ﻥﺎﻀﻴﻔﻟﺍ ﺐﻨﺠﺘﻟ ﺔﻟﺎﺴﻐﻟﺍ ﻦﻋ ﻩﺎﻴﻤﻟﺍ ﺩﺍﺪﻣﺇ ﺭﺪﺼﻣ ﻞﺼﻓﺍ
.ﻩﺎﻴﻤﻟﺍ ﻂﻐﺿ ﻉﺎﻓﺪﻧﺍ
ءﺎﺘﺸﻟﺍ ﻞﺼﻓ ءﺎﻨﺛﺃ ﻦﻳﺰﺨﺘﻟﺎﺑ ﺔﻳﺎﻨﻌﻟﺍ
:
ﻢﺴﺘﻳ ﻻ ﻥﺎﻜﻣ ﻲﻓ ﺎﻬﻨﻳﺰﺨﺗﻭ ﺔﻟﺎﺴﻐﻟﺍ ﺐﻴﻛﺮﺘﺑ ﻢﻗ
ﻩﺎﻴﻤﻟﺍ ﺕﺎﻴﻤﻛ ﺾﻌﺑ ءﺎﻘﺒﻟ ﺍًﺮﻈﻧﻭ ،ﺎﻬﻓﻼﺗﺇ ﺐﻨﺠﺘﻟ ﻚﻟﺫﻭ ،ﺓﺪﻳﺪﺸﻟﺍ ﺓﺩﻭﺮﺒﻟﺎﺑ
ﻦﻳﺰﺨﺘﺑ ﻡﻮﻘﺗ ﺖﻨﻛ ﺍﺫﺈﻓ .ﺔﻟﺎﺴﻐﻟﺍ ﻒﻠﺗ ﺎﻫﺪﻤﺠﺗ ﻦﻋ ﺞﺘﻨﻳ ﺪﻘﻓ ،ﻢﻴﻃﺍﺮﺨﻟﺍ ﻲﻓ
ﺓﺭﺍﺮﺣ ﺔﺟﺭﺩ ﺮﻴﻓﻮﺘﺑ ﻚﻴﻠﻋ ،ﺓﺩﻭﺮﺒﻟﺍ ﺪﻳﺪﺷ ﺲﻘﻄﻟﺍ ءﺎﻨﺛﺃ ﺎﻬﻠﻘﻧ ﻭﺃ ﺔﻟﺎﺴﻐﻟﺍ
.ءﺎﺘﺸﻟﺍ ﺓﺮﺘﻓ ﻊﻣ ﺐﺳﺎﻨﺘﺗ ﺔﻟﺎﺴﻐﻠﻟ ﺔﺌﻓﺍﺩ
:
ﻲﻟﺎﺘﻟﺍ ﻉﺎﺒﺗﺎﺑ ﻚﻴﻠﻋ ،ءﺎﺘﺸﻟﺍ ﻞﺼﻓ ﻲﻓ ﺔﻟﺎﺴﻐﻟﺍ ﻦﻳﺰﺨﺘﻟ
.ﺎﻬﻔﻳﺮﺼﺗﻭ ﻩﺎﻴﻤﻟﺍ ﻝﺎﺧﺩﺇ ﻢﻴﻃﺍﺮﺧ ﻞﺼﻓﺍﻭ ﻩﺎﻴﻤﻟﺍ ﻱﺭﻮﺒﻨﺻ ﻖﻠﻏﺃ
ﺔﻠﺴﻟﺍ ﻲﻓ
R.V.
ﺪﻤﺠﺘﻠﻟ ﺔﻣﻭﺎﻘﻤﻟﺍ ﺓﺩﺎﻤﻟﺍ ﻦﻣ (ﻥﻮﻟﺎﺟ ﻊﺑﺭ) ﺍًﺪﺣﺍﻭ ﺍًﺮﺘﻟ ﻊﺿ
ﺎًﺒﻳﺮﻘﺗ ﺔﻴﻧﺎﺛ 30 ﺓﺪﻤﻟ ﻒﻴﻔﺠﺗﻭ ﻒﻄﺷ ﺓﺭﻭﺩ ﻰﻠﻋ ﺔﻟﺎﺴﻐﻟﺍ ﻞﻴﻐﺸﺘﺑ ﻢﻗ ﻢﺛ
.ﺔﻴﻘﺒﺘﻤﻟﺍ ﻩﺎﻴﻤﻟﺍﻭ ﺪﻤﺠﺘﻠﻟ ﺔﻣﻭﺎﻘﻤﻟﺍ ﺓﺩﺎﻤﻟﺍ ﻂﻠﺨﻟ ﻚﻟﺫﻭ
.ﻲﺋﺎﺑﺮﻬﻜﻟﺍ ﺭﺎﻴﺘﻟﺍ ﻞﺼﻓﺍ ﻭﺃ ﺔﻟﺎﺴﻐﻟﺍ ﺲﺑﺎﻗ ﻉﺰﻧﺍ
ﺔﻤﻬﻣ ﺔﻇﻮﺤﻠﻣ
ﻩﺎﻴﻤﻟﺍ ﻝﺎﺧﺩﺇ ﻢﻴﻃﺍﺮﺧ
ﻚﻟﺫﻭ ﺎﻬﻣﺍﺪﺨﺘﺳﺍ ﻦﻣ ﺕﺍﻮﻨﺳ 5 ﺪﻌﺑ ﻩﺎﻴﻤﻟﺍ ﻝﺎﺧﺩﺇ ﻢﻴﻃﺍﺮﺧ ﻝﺍﺪﺒﺘﺳﺍ ﻰﺟﺮﻳ
ﻝﺎﺣ ﻲﻓ ﻢﻈﺘﻨﻣ ﻞﻜﺸﺑ ﺎﻬﻟﺍﺪﺒﺘﺳﺍﻭ ﺎﻬﺼﺤﻔﺑ ﻢﻗﻭ ،ﺎﻬﻔﻠﺗ ﺓﺭﻮﻄﺧ ﻦﻣ ﺪﺤﻠﻟ
.ﺕﺍءﻮﺘﻧ ﻭﺃ ﺕﺎﺒﻳﺮﺴﺗ ﻭﺃ ﻰﻠﺑ ﻭﺃ ﻊﻄﻗ ﻭﺃ ﺕﺍءﺎﻨﺜﻧﺍ ﺩﻮﺟﻭ
ﻖﺼﻠﻤﻟﺍ ﻰﻠﻋ ﻝﺍﺪﺒﺘﺳﻻﺍ ﺦﻳﺭﺎﺗ ﺩﺪﺣ ،ﻩﺎﻴﻤﻟﺍ ﻝﺎﺧﺩﺇ ﻢﻴﻃﺍﺮﺧ ﻝﺍﺪﺒﺘﺳﺍ ﺪﻨﻋ
.ﺔﻤﺋﺍﺩ ﺔﻣﻼﻌﺑ
ﺔﻟﺎﺴﻐﻟﺎﺑ ﺔﻳﺎﻨﻌﻟﺍ
.1
ﺓءﺎﻔﻜﺑ ﺎﻬﻠﻴﻐﺸﺗﻭ ﺔﻟﺎﺴﻐﻟﺍ ﺔﻓﺎﻈﻧ ﻰﻠﻋ ﻅﺎﻔﺤﻟﺍ ﻲﻓ ﻙﺪﻋﺎﺴﺗ ﺢﺋﺎﺼﻧ
.2
ﺕﺎﻤﻴﻠﻌﺗ ﻉﺎﺒﺗﺍﻭ
(HE)
ﺓﺩﻮﺠﻟﺍ ﺔﻴﻟﺎﻋ ﺕﺎﻔﻈﻨﻣ ﻡﺍﺪﺨﺘﺳﺍ ﻰﻠﻋ ﺎًﻤﺋﺍﺩ ﺹﺮﺣﺍ
.ﺔﻣﺪﺨﺘﺴﻤﻟﺍ ﻒﻈﻨﻤﻟﺍ ﺔﻴﻤﻜﺑ ﻖﻠﻌﺘﻳ ﺎﻤﻴﻓ ﺕﺎﻔﻈﻨﻤﻟﺍ ﻩﺬﻬﻟ ﺔﻌﻨﺼﻤﻟﺍ ﺔﻬﺠﻟﺍ
ﻝﺪﻌﻣ ﻦﻣ ﺪﻳﺰﺗ ﺪﻘﻓ ؛ﺎﻬﺑ ﻰﺻﻮﻤﻟﺍ ﺔﻴﻤﻜﻟﺍ ﻦﻣ ﺮﺒﻛﺃ ﺔﻴﻤﻛ ﻡﺍﺪﺨﺘﺳﺍ ﺐﻨﺠﺗﻭ
ﻱﺩﺆﻳ ﺪﻗ ﻱﺬﻟﺍﻭ ،ﺔﻟﺎﺴﻐﻟﺍ ﻞﺧﺍﺩ ﺥﺎﺳﻭﻷﺍﻭ ﻞﻴﺴﻐﻟﺍ ﻕﻮﺤﺴﻣ ﺎﻳﺎﻘﺑ ﻢﻛﺍﺮﺗ
.ﺔﻬﻳﺮﻛ ﺔﺤﺋﺍﺭ ﺪﻋﺎﺼﺗ ﻰﻟﺇ ﻩﺭﻭﺪﺑ
ﺮﺧﻵ ﻦﻴﺣ ﻦﻣ ﺔﻨﺧﺎﺳﻭ ﺔﺌﻓﺍﺩ ﻞﻴﺴﻏ ﻩﺎﻴﻣ ﺕﺍﺩﺍﺪﻋﺇ ﻡﺍﺪﺨﺘﺳﺍ ﻰﻠﻋ ﺹﺮﺣﺍ
ﺎﻬﻧﻷ ﻚﻟﺫﻭ (ﺓﺩﺭﺎﺑ ﻩﺎﻴﻤﺑ ﻞﻴﺴﻏ ﺕﺍﺭﻭﺩ ،ﺮﺼﺤﻟﺍ ﻻ ﻝﺎﺜﻤﻟﺍ ﻞﻴﺒﺳ ﻰﻠﻋ
.ﻞﻴﺴﻐﻟﺍ ﻕﻮﺤﺴﻣﻭ ﺥﺎﺳﻭﻷﺍ ﻢﻛﺍﺮﺗ ﻝﺪﻌﻣ ﻲﻓ ﺪﻴﺟ ﻞﻜﺸﺑ ﻢﻜﺤﺘﺗ
ﻡﺍﺪﺨﺘﺳﻻﺍ ﺕﺍﺮﻣ ﻦﻴﺑ ﺎًﺣﻮﺘﻔﻣ ﺔﻟﺎﺴﻐﻟﺍ ءﺎﻄﻏ ﻙﺮﺗ ﻰﻠﻋ ﺎًﻤﺋﺍﺩ ﺹﺮﺣﺍ
ﺙﻭﺪﺤﻟ ﺔﺒﺒﺴﻤﻟﺍ ﺎﻳﺎﻘﺒﻟﺍ ﻢﻛﺍﺮﺗ ﻊﻨﻣﻭ ﺔﻟﺎﺴﻐﻟﺍ ﻒﻴﻔﺠﺗ ﻰﻨﺴﺘﻳ ﻰﺘﺣ ﺎﻬﻀﻌﺑﻭ
.ﺔﻬﻳﺮﻛ ﺔﺤﺋﺍﺭ
ﺔﻳﻮﻠﻌﻟﺍ ﺔﺌﺒﻌﺘﻟﺍ ﺔﺤﺘﻓ ﺕﺍﺫ ﺔﻟﺎﺴﻐﻟﺍ ﻒﻴﻈﻨﺗ
ﺔﻴﻨﻴﺗﻭﺮﻟﺍ ﻒﻴﻈﻨﺘﻟﺍ ﺕﺎﻴﻠﻤﻋ ءﺪﺑ ﻞﺒﻗ ﺔﻠﻣﺎﻛ ﺕﺎﻤﻴﻠﻌﺘﻟﺍ ﻩﺬﻫ ﺓءﺍﺮﻗ ﻰﺟﺮﻳ
ﻞﻗﻷﺍ ﻰﻠﻋ ﺔﻟﺎﺴﻐﻟﺎﺑ ﺹﺎﺨﻟﺍ ﺔﻧﺎﻴﺼﻟﺍ ءﺍﺮﺟﺇ ﺬﻴﻔﻨﺗ ﻲﻐﺒﻨﻳ .ﻩﺎﻧﺩﺃ ﺎﻬﺑ ﻰﺻﻮﻤﻟﺍ
30
ًﻻ ﻭ ﺃ ﺙﺪﺤﻳ ﺎﻤﻬﻳﺃ ،ﻞﻴﺴﻏ ﺓﺭﻭﺩ
ﻞﻛ ﺓﺪﺣﺍﻭ ﺓﺮﻣ ﻭﺃ ﺎًﻳﺮﻬﺷ ﺓﺪﺣﺍﻭ ﺓﺮﻣ
.ﺔﻟﺎﺴﻐﻟﺍ ﻲﻓ ﻞﻴﺴﻐﻟﺍ ﻕﻮﺤﺴﻣ ﺎﻳﺎﻘﺑﻭ ﺥﺎﺳﻭﻷﺍ ﻢﻛﺍﺮﺗ ﻝﺪﻌﻣ ﻲﻓ ﻢﻜﺤﺘﻟﺍ ﺽﺮﻐﺑ
ﻞﺧﺍﺪﻟﺍ ﻦﻣ ﺔﻟﺎﺴﻐﻟﺍ ﻒﻴﻈﻨﺗ
ﻒﻴﻈﻨﺘﻟﺍ ءﺍﺮﺟﺇ ﺬﻴﻔﻨﺗﻭ ﻩﻼﻋﺃ ﺔﺤﺿﻮﻤﻟﺍ ﻡﺍﺪﺨﺘﺳﻻﺍ ﺕﺎﻤﻴﻠﻌﺗ ﻉﺎﺒﺗﺍ ﻰﺟﺮﻳ
ﺔﻬﻳﺮﻜﻟﺍ ﺢﺋﺍﻭﺮﻟﺍ ﻦﻣ ﺔﻴﻟﺎﺧ ﺔﻟﺎﺴﻐﻟﺍ ءﺎﻘﺑﺇ ﻞﺟﺃ ﻦﻣ ﻪﺑ ﻰﺻﻮﻤﻟﺍ ﻱﺮﻬﺸﻟﺍ
:
ﻲﻟﺎﺘﻟﺍ ﻮﺤﻨﻟﺍ ﻰﻠﻋ
ﺔﻟﺎﺴﻐﻟﺍ ﻒﻴﻈﻨﺗ ﺓﺭﻭﺩ
ﻩﺎﻴﻤﻟﺍ ﻦﻣ ﺓﺮﻴﺒﻛ ﺕﺎﻴﻤﻛ ﻊﻣ
ﻡﺪﺨﺘﺴُﺗ ﺔﺻﺎﺧ ﺓﺭﻭﺩ ﻰﻠﻋ ﺔﻟﺎﺴﻐﻟﺍ ﻩﺬﻫ ﻞﻤﺘﺸﺗ
ﻒﻴﻈﻨﺗ ﺽﺮﻐﺑ ﺭﻮﻠﻜﻟﺍ ﻰﻠﻋ ﻱﻮﺘﺤﺗ ﻲﺘﻟﺍ ﺔﻠﺋﺎﺴﻟﺍ ﺾﻴﻴﺒﺘﻟﺍ ﺓﺩﺎﻣ ﻦﻣ ﻂﻴﻠﺧ ﻊﻣ
.1
.2
:
ﻲﻟﺎﺘﻟﺍ ﻮﺤﻨﻟﺍ ﻰﻠﻋ ﺭﻮﻠﻜﻟﺍ ﻰﻠﻋ ﻱﻮﺘﺤﺗ ﻲﺘﻟﺍ ﺾﻴﻴﺒﺘﻟﺍ ﺩﺍﻮﻣ ﻊﺿﻭ
.ﺔﻟﺎﺴﻐﻠﻟ ﻲﻠﺧﺍﺪﻟﺍ ﺭﺍﺪﺠﻟﺍ
ءﺍﺮﺟﻹﺍ ﺃﺪﺑﺍ
.ﺎﻬﻠﺧﺍﺪﺑ ﺓﺩﻮﺟﻮﻣ ءﺎﻴﺷﺃ ﻭﺃ ﺲﺑﻼﻣ ﻱﺃ ﺝﺍﺮﺧﺈﺑ ﻢﻗﻭ ﺔﻟﺎﺴﻐﻟﺍ ءﺎﻄﻏ ﺢﺘﻓﺍ .ﺃ
1)
236
ﻲﺘﻟﺍ ﺔﻠﺋﺎﺴﻟﺍ ﺾﻴﻴﺒﺘﻟﺍ ﺓﺩﺎﻣ ﻦﻣ (ﺏﻮﻛ
ﻞﻣ
ﺔﻓﺎﺿﺈﺑ ﻢﻗ .ﺏ
.ﺎﻬﻟ ﺔﺼﺼﺨﻤﻟﺍ ﺓﺮﻴﺠﺤﻟﺍ ﻲﻓ ﺭﻮﻠﻜﻟﺍ ﻰﻠﻋ ﻱﻮﺘﺤﺗ
:
ﺔﻠﺋﺎﺴﻟﺍ ﺾﻴﻴﺒﺘﻟﺍ ﺓﺩﺎﻣ ﻦﻣ ﺮﺒﻛﺃ ﺔﻴﻤﻛ ﻡﺍﺪﺨﺘﺳﺍ ﻱﺩﺆﻳ ﺪﻗ
ﺔﻈﺣﻼﻣ
ﺙﻭﺪﺣ ﻰﻟﺇ ﻩﻼﻋﺃ ﺎﻬﺑ ﻰﺻﻮﻤﻟﺍ ﻚﻠﺗ ﻦﻋ ﺭﻮﻠﻜﻟﺍ ﻰﻠﻋ ﻱﻮﺘﺤﺗ ﻲﺘﻟﺍ
.ﺖﻗﻮﻟﺍ ﺭﻭﺮﻤﺑ ﺔﻟﺎﺴﻐﻟﺍ ﻒﻠﺗ
.ﺔﻟﺎﺴﻐﻟﺍ ءﺎﻄﻏ ﻖﻠﻏﺃ
ﺔﻴﺋﺎﻴﻤﻴﻜﻟﺍ ﺩﺍﻮﻤﻟﺍ ﻦﻣ ﻩﺮﻴﻏ ﻭﺃ ﻞﻴﺴﻏ ﻕﻮﺤﺴﻣ ﻱﺃ ﺔﻓﺎﺿﺇ ﺐﻨﺠﺗ .ﺩ
.ءﺍﺮﺟﻹﺍ ﺍﺬﻫ ﺬﻴﻔﻨﺗ ﺪﻨﻋ ﺔﻟﺎﺴﻐﻟﺍ ﻰﻟﺇ
.1
.2
“ﻞﻔﻘﻟﺍ ءﺎﻐﻟﺇ/ﺖﻗﺆﻣ ﻑﺎﻘﻳﺇ/ﻞﻴﻐﺸﺘﻟﺍ ءﺪﺑ” ﺭﺯ ﻰﻠﻋ ﻂﻐﺿﺍ .ﻭ
.ﺔﻟﺎﺴﻐﻟﺍ ﻒﻴﻈﻨﺗ ﺓﺭﻭﺩ ﺩﺪﺣ . ـﻫ
.ﺔﻟﺎﺴﻐﻟﺍ ﻒﻴﻈﻨﺗ ﺓﺭﻭﺩ ﻞﻴﻐﺸﺘﻟ ﻒﺻﻭ ﻲﻠﻳ ﺎﻤﻴﻓ .ﺓﺭﻭﺪﻟﺍ ءﺪﺒﻟ
.3
.1
.2
)
.3
.1
.ﺝ
10
Page 60

/ﺖﻗﺆﻣ ﻑﺎﻘﻳﺇ/ﻞﻴﻐﺸﺘﻟﺍ ءﺪﺑ” ﻰﻠﻋ ﻂﻐﻀﻟﺍ
.9
ﻞﻴﺴﻐﻟﺍ ﺓﺭﻭﺩ ءﺪﺒﻟ “ﻞﻔﻘﻟﺍ ءﺎﻐﻟﺇ
ﻞﻴﻐﺸﺘﻟﺍ ءﺪﺑ
ﻞﻔﻘﻟﺍ ءﺎﻐﻟﺇ/ﺖﻗﺆﻣ ﻑﺎﻘﻳﺇ
ﻊﻣ ﻂﻐﺿﺍ
ﺓﺪﻤﻟ ﺭﺍﺮﻤﺘﺳﻻﺍ
3
ءﺎﻐﻟﻺﻟ ِﻥﺍﻮﺛ
ﺓﺭﻭﺩ ءﺪﺒﻟ “ﻞﻔﻗ ءﺎﻐﻟﺇ/ﺖﻗﺆﻣ ﻑﺎﻘﻳﺇ /ﻞﻴﻐﺸﺘﻟﺍ ءﺪﺑ” ﺭﺯ ﻰﻠﻋ ﻂﻐﺿﺍ
.ﺔﻟﻮﻤﺤﻟﺍ ﻥﺯﺍﻮﺗ ﺭﺎﻌﺸﺘﺳﺍ ﻦﻴﺤﻟ ٍﻥﺍﻮﺛ ﺓﺪﻋ ءﻞﻤﻟﺍ ﺔﻴﻠﻤﻋ ﻕﺮﻐﺘﺴﺗﻭ ،ﻞﻴﺴﻐﻟﺍ
ﺪﻌﺑ ﺲﺑﻼﻤﻟﺍ ﺔﻟﺍﺯﺈﺑ ﻢﻗ .“ﺓﺭﻭﺪﻟﺍ ﻝﺎﻤﺘﻛﺍ” ﺮﺷﺆﻣ ءﻲﻀﻳ ،ﺎﻬﻟﺎﻤﺘﻛﺍ ﻝﺎﺣ ﻲﻓﻭ
ﺕﺎﻓﺎﻄﺨﻟﺍ ﺃﺪﺻﻭ ﺪﻌﺠﺘﻟﺍﻭ ﺔﻬﻳﺮﻜﻟﺍ ﺢﺋﺍﻭﺮﻟﺍ ﻦﻣ ﺪﺤﻠﻟ ﺍًﺭﻮﻓ ﺓﺭﻭﺪﻟﺍ ﻝﺎﻤﺘﻛﺍ
.ﺔﻴﻧﺪﻌﻤﻟﺍ ﺕﺎﻤﻳﺰﺑﻹﺍﻭ ﻖﻟﺰﻨﻤﻟﺍ ﻡﺎﻣﺰﻟﺍﻭ ﺔﻴﻧﺪﻌﻤﻟﺍ
ﺲﺑﻼﻣ ﺔﻓﺎﺿﻹ ءﺎﻄﻐﻟﺍ ﻞﻔﻗ ءﺎﻐﻟﺇ
:
ﺲﺑﻼﻤﻟﺍ ﻦﻣ ﻦﻴﺘﻌﻄﻗ ﻭﺃ ﺔﻌﻄﻗ ﺔﻓﺎﺿﻹ ءﺎﻄﻐﻟﺍ ﺢﺘﻔﻟ ﺔﺟﺎﺤﺑ ﺖﻨﻛ ﺍﺫﺇ
ﻞﻔﻗ ءﺎﻐﻟﺇ ﻢﺘﻴﺳ ؛“ﻞﻔﻘﻟﺍ ءﺎﻐﻟﺇ/ﺖﻗﺆﻣ ﻑﺎﻘﻳﺇ/ﻞﻴﻐﺸﺘﻟﺍ ءﺪﺑ” ﻰﻠﻋ ﻂﻐﺿﺍ
ﺮﻣﻷﺍ ﺍﺬﻫ ﻕﺮﻐﺘﺴﻳ ﺪﻗﻭ ،ﺔﻛﺮﺤﻟﺍ ﻦﻋ ﺔﻟﺎﺴﻐﻟﺍ ﻒﻗﻮﺗ ﺩﺮﺠﻤﺑ ءﺎﻄﻐﻟﺍ
ءﺎﻄﻐﻟﺍ ﻕﻼﻏﺈﺑ ﻢﻗ ﻢﺛ ،ﺔﻴﻟﺎﻋ ﺔﻋﺮﺴﺑ ﺔﻟﻮﻤﺤﻟﺍ ﻥﺍﺭﻭﺩ ﺪﻨﻋ ﻖﺋﺎﻗﺩ ﺓﺪﻋ
“ﻞﻔﻘﻟﺍ ءﺎﻐﻟﺇ/ﺖﻗﺆﻣ ﻑﺎﻘﻳﺇ/ﻞﻴﻐﺸﺘﻟﺍ ءﺪﺑ” ﻰﻠﻋ ﻯﺮﺧﺃ ﺓﺮﻣ ﻂﻐﺿﺍﻭ
.ﺓﺭﻭﺪﻟﺍ ﻞﻴﻐﺸﺗ ﺓﺩﺎﻋﻹ
ﻦﻣ ﺮﺜﻛﻷ ﺎًﺣﻮﺘﻔﻣ ءﺎﻄﻐﻟﺍ ﻙﺮﺗ ﻝﺎﺣ ﻲﻓ ﺎًﻴﺋﺎﻘﻠﺗ ﻩﺎﻴﻤﻟﺍ ﻒﻳﺮﺼﺗ ﻢﺘﻴﺳ
10
.ﻖﺋﺎﻗﺩ
ﻩﺎﻴﻤﻟﺍ ءﻞﻣ ﻲﻓ ﺮﺧﺄﺘﻟﺍ
ﻥﺯﺍﻮﺗ ﻡﺪﻋ ﻦﻣ ﻖﻘﺤﺘﻠﻟ ﻖﺋﺎﻗﺩ 3 ﻰﻟﺇ 2 ﻦﻴﺑ ﺎﻣ ءﻞﻤﻟﺍ ﺔﻴﻠﻤﻋ ﻕﺮﻐﺘﺴﺗ
ﺔﻟﺎﺴﻐﻟﺍ ءﻞﻣ ﻞﺒﻗ ﺕﺎﻔﻠﻟﺍ ﺰﻳﺯﺃ ﺕﻮﺻ ﻉﺎﻤﺳ ﻰﻟﺇ ﺔﻓﺎﺿﻹﺎﺑ .ﺔﻟﻮﻤﺤﻟﺍ
.ﺎًﻴﻌﻴﺒﻃ ﺍًﺮﻣﺃ ﺍﺬﻫ ﺪﻌﻳﻭ .ءﺎﻤﻟﺎﺑ
ﻞﻴﺴﻐﻟﺍ ﺓﺭﺍﺮﺣ ﺔﺟﺭﺩ ﺪﻳﺪﺤﺗ
ﺓﺭﺍﺮﺤﻟﺍ ﺔﺟﺭﺩ
ﺓﺩﺭﺎﺒﻟﺍ ﻩﺎﻴﻤﻟﺎﺑ ﻒﻄﺸﻟﺍ ﺕﺍﺭﻭﺩ ﻊﻴﻤﺟ
ﺓﺮﺗﺎﻓ
ﺓﺩﺭﺎﺑ
ﺔﺌﻓﺍﺩ
ﺔﻨﺧﺎﺳ
.7
ﻂﺒﺿ ﻝﻼﺧ ﻦﻣ ﺔﺑﻮﻠﻄﻤﻟﺍ ﻞﻴﺴﻐﻟﺍ ﺓﺭﺍﺮﺣ ﺔﺟﺭﺩ ﺩﺪﺣ ،ﺓﺭﻭﺩ ﺪﻳﺪﺤﺗ ﺩﺮﺠﻤﺑ
.ﻚﺘﻟﻮﻤﺤﻟ ﻢﺋﻼﻤﻟﺍ ﺩﺍﺪﻋﻹﺍ ﻰﻠﻋ ﺓﺭﺍﺮﺤﻟﺍ ﺔﺟﺭﺩ ﺡﺎﺘﻔﻣ
ﺔﻳﺎﻨﻌﻟﺍ ﻖﺼﻠﻣ ﻰﻠﻋ ﺓﺩﻮﺟﻮﻤﻟﺍ ﺕﺎﻤﻴﻠﻌﺘﻟﺍ ﻉﺎﺒﺗﺍﻭ ﺓءﺍﺮﻗ ﻰﻠﻋ ﺎًﻤﺋﺍﺩ ﺹﺮﺣﺍ
.ﻚﺴﺑﻼﻤﺑ ﻒﻠﺘﻟﺍ ﻕﺎﺤﻟﻹ ﺎًﻌﻨﻣ ﺞﻴﺴﻨﻟﺎﺑ
ﻞﻴﺴﻐﻟﺍ ﺓﺭﻭﺩ ﺓﺭﺍﺮﺣ ﺔﺟﺭﺩﺔﺣﺮﺘﻘﻤﻟﺍ ﺔﺸﻤﻗﻷﺍ
ﺔﻨﺧﺎﺳ
ﺾﻴﺑﻷﺍ ﻥﻮﻠﻟﺍ ﺕﺍﺫ ﺔﺸﻤﻗﻷﺍ
ﺔﺤﺗﺎﻔﻟﺍ ﻥﺍﻮﻟﻷﺍﻭ
ﺔﻨﻴﺘﻤﻟﺍ ﺔﺸﻤﻗﻷﺍ
ﺓﺩﺭﺎﺒﻟﺍ ﻩﺎﻴﻤﻟﺍ ﺕﺎﻴﻤﻛ ﺾﻌﺑ ﺔﻓﺎﺿﺇ ﻢﺘﻳ
ﺓﺩﻭﺮﺑ ﺮﺜﻛﺃ ﻥﻮﻜﺗﻭ ،ﺔﻗﺎﻄﻟﺍ ﺮﻴﻓﻮﺘﻟ
.ﺔﻨﺧﺎﺴﻟﺍ ﻩﺎﻴﻤﻟﺍ ﻥﺎﺨﺳ ﺩﺍﺪﻋﺇ ﻦﻋ
ﺔﺒﻌﺼﻟﺍ ﺥﺎﺳﻭﻷﺍ
ﺔﺌﻓﺍﺩ
ﺔﻴﻫﺍﺰﻟﺍ ﻥﺍﻮﻟﻷﺍ
ﺥﺎﺳﻭﻸﻟ ﺔﻟﺪﺘﻌﻣ ﺓﺭﺍﺮﺣ ﺔﺟﺭﺩ
ﺔﻔﻴﻔﺨﻟﺍ
ﻩﺎﻴﻤﻟﺍ ﺕﺎﻴﻤﻛ ﺾﻌﺑ ﺔﻓﺎﺿﺇ ﻢﺘﻳ
ﻦﻣ ﺓﺩﻭﺮﺑ ﺮﺜﻛﺃ ﻥﻮﻜﺘﺳ ﺍﺬﻟ ،ﺓﺩﺭﺎﺒﻟﺍ
.ﺎًﻘﺒﺴﻣ ﺔﻟﺎﺴﻐﻟﺍ ﻲﻓ ﺓﺩﻮﺟﻮﻤﻟﺍ ﻩﺎﻴﻤﻟﺍ
ﺓﺮﺗﺎﻓ
ﺖﻬﺒﺗ ﻭﺃ ﺎﻬﻀﻌﺒﺑ ﻂﻠﺘﺨﺗ ﻲﺘﻟﺍ ﻥﺍﻮﻟﻷﺍ
ﺔﻔﻴﻔﺨﻟﺍ ﺥﺎﺳﻭﻷﺍ
ﻰﻠﻋ ﺓﺪﻋﺎﺴﻤﻠﻟ ﺔﺌﻓﺍﺩ ﻩﺎﻴﻣ ﺔﻓﺎﺿﺇ ﻢﺘﻳ
.ﺕﺎﻔﻈﻨﻤﻟﺍ ﻥﺎﺑﻭﺫﻭ ﺥﺎﺳﻭﻷﺍ ﺔﻟﺍﺯﺇ
ﺓﺩﺭﺎﺑ
ﺔﺟﺭﺩ ﺪﻘﻔﺗ ﺪﻗ ﻲﺘﻟﺍ ﺔﻨﻛﺍﺪﻟﺍ ﻥﺍﻮﻟﻷﺍ
ﺖﻬﺒﺗ ﻭﺃ ﺎﻬﻧﻮﻟ
ﺔﻔﻴﻔﺨﻟﺍ ﺥﺎﺳﻭﻷﺍ
ﻚﻟﺫ ﻲﻓ ﺔﺒﻏﺮﻟﺍ ﺪﻨﻋ ،ﺓﺭﻭﺪﻟﺍ ﺕﺍﺭﺎﻴﺧ ﺪﻳﺪﺤﺗ
ﺕﺍﺭﺎﻴﺨﻟﺍ
ﻑﺎﻘﻳﺇ
ﻒﻄﺷ
ﻲﻓﺎﺿﺇ
ﻢﻌﻨﻣ
ﺔﺠﺴﻧﻷﺍ
ﻰﻠﻋ ﺪﻋﺎﺴﺗ ﺔﺌﻓﺍﺩ ﻩﺎﻴﻣ ﺔﻓﺎﺿﺇ ﻦﻜﻤﻳ
ﺕﺎﻔﻈﻨﻣ ﻥﺎﺑﻭﺫﻭ ﺥﺎﺳﻭﻷﺍ ﺔﻟﺍﺯﺇ
ﻖﻴﻤﻌﻟﺍ ﻒﻴﻈﻨﺘﻟﺍ
ﻢﻌﻨﻣ
ﺔﺠﺴﻧﻷﺍ
ﻒﻄﺷ
ﻲﻓﺎﺿﺇ
ﻑﺎﻘﻳﺇ
.ﻞﻴﺴﻐﻟﺍ
.8
ﻞﻴﻐﺸﺗ
،“ﻲﻓﺎﺿﺇ ﻒﻄﺷ ﻭﺃ/ﻭ ﻖﻴﻤﻌﻟﺍ ﻒﻴﻈﻨﺘﻟﺍ” ﺭﺎﻴﺧ ﺔﻓﺎﺿﺇ ﻲﻓ ﺐﻏﺮﺗ ﺖﻨﻛ ﺍﺫﺇ
.“ﻞﻴﻐﺸﺘﻟﺍ” ﻊﺿﻭ ﻰﻠﻋ ﺔﻴﺻﺎﺨﻟﺍ ﻩﺬﻬﺑ ﺹﺎﺨﻟﺍ ﺡﺎﺘﻔﻤﻟﺍ ﺭﺩﺃ ﻭﺃ ﺔﻴﺻﺎﺨﻟﺍ ﺩﺪﺣ
:
ﻉﻮﺟﺮﻟﺍ ﻰﺟﺮﻳ .ﺕﺍﺭﻭﺪﻟﺍ ﺾﻌﺑ ﻲﻓ ﺕﺍﺭﺎﻴﺨﻟﺍ ﺾﻌﺑ ﺮﻓﺍﻮﺘﺗ ﻻ
ﺔﻈﺣﻼﻣ
.ﺕﺎﻣﻮﻠﻌﻤﻟﺍ ﻦﻣ ﺪﻳﺰﻣ ﻰﻠﻋ ﻝﻮﺼﺤﻠﻟ ﺓﺭﻭﺪﻟﺍ ﻞﻴﻟﺩ ﻰﻟﺇ
9
9
Page 61

ﻚﻟﺫ ﻲﻓ ﺔﺒﻏﺮﻟﺍ ﺪﻨﻋ ،ﺔﺠﺴﻧﺃ ﻢﻌﻨﻣ ﺔﻓﺎﺿﺇ
ﺕﺍﺭﺎﻴﺨﻟﺍ
.5
ﺔﻟﺎﺴﻐﻟﺍ ﻞﺧﺍﺩ ﻞﻴﺴﻐﻟﺍ ﻞﻴﻤﺤﺗ
.3
ﻒﻄﺷ
ﻲﻓﺎﺿﺇ
ﻑﺎﻘﻳﺇ
ﻢﻌﻨﻣ
ﺔﺠﺴﻧﻷﺍ
ﻢﻌﻨﻣ
ﺔﺠﺴﻧﻷﺍ
ﻒﻄﺷ
ﻲﻓﺎﺿﺇ
ﻱﺬﻟﺍﻭ ،ﺔﺠﺴﻧﺃ ﻢﻌﻨﻣ ﻊﻳﺯﻮﺗ ﺝﺭﺩ ﻡﺪﺨﺘﺴﺗ ﺚﻴﺤﺑ ﺔﻟﺎﺴﻐﻟﺍ ﻩﺬﻫ ﻢﻴﻤﺼﺗ ﻢﺗ
ﺔﻌﻨﺼﻤﻟﺍ ﺔﻬﺠﻟﺍ ﺕﺎﻤﻴﻠﻌﺗ ﻉﺎﺒﺗﺍ ﻰﻠﻋ ﺎًﻤﺋﺍﺩ ﺹﺮﺣﺍ ،ﺍﺬﻟ ،ﻪﺋﺍﺮﺸﻟ ﺝﺎﺘﺤﺘﺳ
ﺭﺎﻴﺧ ﺩﺪﺣ ﻢﺛ ،ﺢﻴﺤﺻ ﻮﺤﻧ ﻰﻠﻋ ﻊﻳﺯﻮﺘﻟﺍ ﺝﺭﺩ ﻡﺍﺪﺨﺘﺳﺍ ﺔﻴﻔﻴﻜﺑ ﻖﻠﻌﺘﻳ ﺎﻤﻴﻓ
ﻢﻌﻨﻣ ﺝﺍﺮﺧﺇ ﻰﻠﻋ ﺔﺠﺴﻧﻷﺍ ﻢﻌﻨﻣ ﻊﻳﺯﻮﺗ ﺝﺭﺩ ﻞﻤﻌﻳ .“ﺔﺠﺴﻧﻷﺍ ﻢﻌﻨﻣ”
.ﻒﻄﺸﻟﺍ ﺓﺭﻭﺩ ءﺎﻨﺛﺃ ﺔﺠﺴﻧﻷﺍ
:
ﺪﻴﺠﻟﺍ ﻊﻳﺯﻮﺘﻟﺍ ﻥﺎﻤﻀﻟ ﺔﺠﺴﻧﻷﺍ ﻢﻌﻨﻣ ﺭﺎﻴﺧ ﺪﻳﺪﺤﺗ ﻦﻴﻌﺘﻳ
ﺔﻤﻬﻣ ﺔﻇﻮﺤﻠﻣ
ﺩﺍﻮﻤﻟﺍ ﻦﻣ ﺮﻴﺜﻜﻟﺍ ﺔﻓﺎﺿﺈﺑ ﻢﻘﺗ ﻻ .ﺓﺭﻭﺪﻟﺍ ءﺎﻨﺛﺃ ﻢﻌﻨﻤﻠﻟ ﺐﺳﺎﻨﻤﻟﺍ ﺖﻗﻮﻟﺍ ﻲﻓﻭ
.ﺎﻬﻔﻴﻔﺨﺗ ﻭﺃ
ﺎًﻳﻭﺪﻳ ﻞﻴﺴﻐﻟﺍ ﺔﻟﻮﻤﺤﻟ ﻞﺋﺎﺴﻟﺍ ﺔﺠﺴﻧﻷﺍ ﻢﻌﻨﻣ ﺔﻓﺎﺿﺇ
ﻰﻠﻋ ﻂﻐﺿﺍ ﻢﺛ ﺔﻟﺎﺴﻐﻟﺍ ءﻞﻣ ﻞﻤﺘﻜﻳ ﻥﺃ ﻰﻟﺇ ﺮﻈﺘﻧﺍ ،ﻲﺋﺎﻬﻨﻟﺍ ﻒﻄﺸﻟﺍ ءﺎﻨﺛﺃ ﻲﻓ
.ﺎًﺘﻗﺆﻣ ﺔﻟﺎﺴﻐﻟﺍ ﻞﻴﻐﺸﺗ ﻑﺎﻘﻳﻹ “ﻞﻔﻘﻟﺍ ءﺎﻐﻟﺇ/ﺖﻗﺆﻣ ﻑﺎﻘﻳﺇ/ﻞﻴﻐﺸﺘﻟﺍ ءﺪﺑ” ﺭﺯ
ﺔﺠﺴﻧﻷﺍ ﻢﻌّﻨﻣ ﻦﻣ ﻪﺑ ﻰﺻﻮﻤﻟﺍ ﺩﺪﺤﻤﻟﺍ ﺭﺍﺪﻘﻤﻟﺍ ﻒﺿﺃ ﻢﺛ ءﺎﻄﻐﻟﺍ ﻊﻓﺮﺑ ﻢﻗ
ﻰﻠﻋ ﻭﺃ ﺔﻠﺴﻟﺍ ﻲﻓ ﻩﺮ ّﻄﻘﺗ ﻭﺃ ﻪﺑﺮﺴﺗ ﻭﺃ ﺔﺠﺴﻧﻷﺍ ﻢﻌّﻨﻣ ﺐﻜﺳ ﺐﻨﺠﺗ .ﻞﺋﺎﺴﻟﺍ
ﻢﻗ .ﻪﺑ ﻰﺻﻮﻤﻟﺍ ﺭﺍﺪﻘﻤﻟﺍ ﻦﻣ ﺮﺒﻛﺃ ﺭﺍﺪﻘﻣ ﻡﺍﺪﺨﺘﺳﺍ ﺐﻨﺠﺗﻭ ،ﺲﺑﻼﻤﻟﺍ ﺔﻟﻮﻤﺣ
/ﺖﻗﺆﻣ ﻑﺎﻘﻳﺇ/ﻞﻴﻐﺸﺘﻟﺍ ءﺪﺑ” ﺭﺯ ﻰﻠﻋ ﻯﺮﺧﺃ ﺓﺮﻣ ﻂﻐﺿﺍﻭ ءﺎﻄﻐﻟﺍ ﻕﻼﻏﺈﺑ
.ﺔﻟﺎﺴﻐﻟﺍ ﻞﻴﻐﺸﺗ ءﺪﺒﻟ “ﻞﻔﻘﻟﺍ ءﺎﻐﻟﺇ
:
ﻥﺎﻤﻀﻟ ﺔﺠﺴﻧﻷﺍ ﻢﻌﻨﻣ ﺔﻓﺎﺿﺇ ﺭﺎﻴﺧ ﺪﻳﺪﺤﺗ ﻦﻴﻌﺘﻳ
ﺔﻤﻬﻣ ﺔﻇﻮﺤﻠﻣ
.ﺓﺭﻭﺪﻟﺎﺑ ﻒﻄﺸﻟﺍ ءﺰﺟ ﻲﻓ ﺔﺠﺴﻧﻷﺍ ﻢﻌﻨﻤﻟ ﺪﻴﺠﻟﺍ ﻊﻳﺯﻮﺘﻟﺍ
ٍﻭﺎﺴﺘﻣﻭ ﻉﺯﻮﻣ ﻞﻜﺸﺑ ﺲﺑﻼﻤﻟﺍ ﻞﻴﻤﺤﺘﺑ ﻢﻗ
ﻒﺼﺘﻨﻣ ﻕﻮﻓ ﺎﻬﻠﻴﻤﺤﺗ ﺐﻨﺠﺗﻭ ،ﺔﺣﻭﺮﻤﻟﺍ ﻝﻮﺣ
ﻒﺼﺘﻨﻣ ﻥﻮﻜﻳ ﻥﺃ ﻲﻐﺒﻨﻳ ﺚﻴﺣ ؛ﺓﺮﺷﺎﺒﻣ ﺔﺣﻭﺮﻤﻟﺍ
ﻊﺿﻭ ﻝﻭﺎﺣ ،ﻞﻴﻤﺤﺘﻟﺍ ءﺎﻨﺛﺃ ﺎًﺤﺿﺍﻭ ﺔﺣﻭﺮﻤﻟﺍ
ﻚﺑﺎﺸﺗ ﻦﻣ ﻞﻴﻠﻘﺘﻠﻟ ﺲﺑﻼﻤﻟﺍ ﻦﻣ ﺔﻔﻠﺘﺨﻣ ﻡﺎﺠﺣﺃ
ﻝﻮﺼﺤﻠﻟ ﻚﻟﺫﻭ ﺔﻛﺮﺤﻟﺍ ﺓﺮﺣ ﺲﺑﻼﻤﻟﺍ ﻥﻮﻜﺗ ﻥﺃ ﻞﻀﻔﻳ
.ﺎﻬﻜﺑﺎﺸﺗﻭ ﺎﻫﺪﻴﻌﺠﺗ ﻦﻣ ﺪﺤﻟﺍﻭ ﻞﻀﻓﺃ ﺔﻓﺎﻈﻧ ﻰﻠﻋ
ﻰﻠﻋ ﻱﻮﺘﺤﺗ ﺔﻠﺋﺎﺳ ﺾﻴﻴﺒﺗ ﺓﺩﺎﻣ ﺔﻓﺎﺿﺇ
ﻚﻟﺫ ﻲﻓ ﺖﺒﻏﺭ ﺍﺫﺇ ،ﻉﺯﻮﻤﻠﻟ ﺭﻮﻠﻜﻟﺍ
.ﺎﻫﺪﻴﻘﻌﺗﻭ ﺲﺑﻼﻤﻟﺍ
:
ﺔﻤﻬﻣ ﺔﻇﻮﺤﻠﻣ
.4
ﺔﻗﺎﺸﻟﺍ ﺔﻣﺪﺨﻟﺍ
ﺔﻠﻴﻘﺛ ﺲﺑﻼﻣ
.6
ﺲﺑﻼﻤﻟﺍ
ﺔﻳﺩﺎﻌﻟﺍ
ﺔﻴﻤﻛ
ﺓﺮﻴﺒﻛ
ﺲﺑﻼﻤﻟﺍ
ﺔﻘﻴﻗﺮﻟﺍ
ﺔﻳﺩﺎﻋ
ﺔﻳﺩﺎﻋ
ﻒﻳﺮﺼﺗ
ﻒﻴﻔﺠﺗﻭ
ﺔﻠﻴﻘﺛ ﺲﺑﻼﻣ
ﻒﻴﻔﺠﺗﻭ ﻒﻄﺷ
ﺓﺭﻭﺪﻟﺍ ﺪﻳﺪﺤﺗ
ﺔﻳﺩﺎﻋ
ﺔﻔﻴﻔﺧ
ﺔﻟﺎﺴﻐﻟﺍ ﻒﻴﻈﻨﺗ
.ﺎﻫﺪﻳﺮﺗ ﻲﺘﻟﺍ ﻞﻴﺴﻐﻟﺍ ﺓﺭﻭﺩ ﺭﺎﻴﺘﺧﻻ ﺓﺭﻭﺪﻟﺍ ﺪﻳﺪﺤﺗ ﺡﺎﺘﻔﻣ ﺭﺩﺃ
ﺔﻠﺋﺎﺴﻟﺍ ﺾﻴﻴﺒﺘﻟﺍ ﺓﺩﺎﻣ
ﺭﻮﻠﻜﻟﺍ ﻰﻠﻋ ﺔﻳﻮﺘﺤﻤﻟﺍ
ﻦﻣ ﺮﺜﻛﺃ ﻡﺍﺪﺨﺘﺳﺍ ﻭﺃ ﺎﻬﻔﻴﻔﺨﺗ ﻭﺃ ﺾﻴﻴﺒﺘﻟﺍ ﺩﺍﻮﻣ ﻦﻣ ﺮﻴﺜﻜﻟﺍ ﺔﻓﺎﺿﺇ ﺐﻨﺠﺗ
1)
Oxi
ﺕﺎﺠﺘﻨﻣ ﻭﺃ
ﻞﻣ
ﻥﺍﻮﻟﻷﺍ ﻰﻠﻋ ﺓﺮﺛﺆﻣ ﺮﻴﻏ ﺾﻴﻴﺒﺗ ﺩﺍﻮﻣ ﺔﻓﺎﺿﺇ ﺐﻨﺠﺗ .(ﺏﻮﻛ
ﺔﻠﺋﺎﺴﻟﺍ ﺾﻴﻴﺒﺘﻟﺍ ﺓﺩﺎﻣ ﺎﻬﻴﻟﺇ ﻑﺎﻀﻤﻟﺍ ﺓﺭﻭﺪﻟﺍ ﺲﻔﻧ ﻲﻓ
.ﺭﻮﻠﻜﻟﺍ ﻰﻠﻋ ﺔﻳﻮﺘﺤﻤﻟﺍ
236
8
8
Page 62

ﺔﻟﺎﺴﻐﻟﺍ ﻡﺍﺪﺨﺘﺳﺍ
ﺮﻳﺬﺤﺗ
ﺔﻴﺋﺎﺑﺮﻬﻛ ﺔﻣﺪﺼﻟ ﺽﺮﻌﺘﻟﺍ ﺮﻄﺧ
.ﺽﺭﺆﻣ ﺬﺧﺄﻤﺑ ﻞﻴﺻﻮﺘﻟﺎﺑ ﻢﻗ
.ﺾﻳﺭﺄﺘﻟﺍ ﻑﺮﻃ ﺔﻟﺍﺯﺇ ﺐﻨﺠﺗ
.ﺭﺎﻴﺗ ﺊﻳﺎﻬﻣ ﻡﺪﺨﺘﺴﺗ ﻻ
.ﺔﻟﺎﻃﺇ ﻞﺒﻛ ﻡﺪﺨﺘﺴﺗ ﻻ
ﻖﻳﺮﺤﻟﺍ ﻉﻻﺪﻧﺍ ﻭﺃ ﺓﺎﻓﻮﻟﺍ ﻰﻟﺇ ﺕﺍﺩﺎﺷﺭﻹﺍ ﻩﺬﻫ ﻉﺎﺒﺗﺍ ﻡﺪﻋ ﻱﺩﺆﻳ ﺪﻗ
.ﺔﻴﺋﺎﺑﺮﻬﻛ ﺔﻣﺪﺼﻟ ﺽﺮﻌﺘﻟﺍ ﻭﺃ
ﺓءﺎﻔﻜﻟﺍ ﻲﻟﺎﻋ ﻒﻈﻨﻣ ﺔﻓﺎﺿﺇ
.2
ﺮﻳﺬﺤﺗ
ﻖﻳﺮﺤﻟﺍ ﺏﻮﺸﻧ ﺮﻄﺧ
ﻞﺋﺍﻮﺴﻟﺍ ﻦﻣ ﻩﺮﻴﻏ ﻭﺃ ﻦﻳﺰﻨﺒﻟﺎﺑ ﺔﻠﻠﺒﻤﻟﺍ ﺲﺑﻼﻤﻟﺍ ﻊﺿﻭ ﺮ ﻈ ﺤ ُﻳ
.ﺔﻟﺎﺴﻐﻟﺍ ﻲﻓ ﻝﺎﻌﺘﺷﻼﻟ ﺔﻠﺑﺎﻘﻟﺍ
.ﺎًﻣﺎﻤﺗ ﺖﻳﺰﻟﺍ ﻊﻘﺑ ﺔﻟﺍﺯﺇ ﺎﻬﻨﻜﻤﻳ ﺎﻬﻋﻮﻧ ﻥﺎﻛ ﺎﻤﻬﻣ ﺔﻟﺎﺴﻏ ﺪﺟﻮﺗ ﻻ
ﻲﻓ ﺎﻤﺑ) ﺕﻮﻳﺰﻟﺍ ﻦﻣ ﻉﻮﻧ ﻰﻠﻋ ﻱﻮﺘﺤﻳ ءﻲﺷ ﻱﺃ ﺍًﺪﺑﺃ ﻒﻔﺠﺗ ﻻ
.(ﺦﺒﻄﻟﺍ ﺕﻮﻳﺯ ﻚﻟﺫ
.ﻖﻳﺮﺣ ﺙﻭﺪﺣ ﻭﺃ ﺭﺎﺠﻔﻧﻻﺍ ﻭﺃ ﺓﺎﻓﻮﻟﺍ ﻲﻓ ﻚﻟﺫ ﺐﺒﺴﺘﻳ ﺪﻗ
ﺎﻫﺩﺍﺪﻋﺇﻭ ﻞﻴﺴﻐﻟﺍ ﺲﺑﻼﻣ ﺯﺮﻓ
.1
ﻲﻟﺎﻋ ﻒﻈﻨﻤﻟﺍ ﻦﻣ ﻦﻴﻌﻣ ﺭﺪﻗ ﺔﻓﺎﺿﺈﺑ ﻢﻗ
.ﺔﻠﺴﻟﺍ ﻲﻓ ﺓءﺎﻔﻜﻟﺍ
:
،ﻂﻘﻓ ﺓءﺎﻔﻜﻟﺍ ﺔﻴﻟﺎﻋ ﺕﺎﻔﻈﻨﻤﻟﺍ ﻡﺍﺪﺨﺘﺳﺍ ﻰﻠﻋ ﺹﺮﺣﺍ
ﺔﻴﻠﻤﻋ ﻦﻋ ﺞﺘﻨﻳﻭ ،ﺓﻮﺒﻌﻟﺍ ﻰﻠﻋ “ﺓءﺎﻔﻜﻟﺍ ﺔﻴﻟﺎﻋ” ﻭﺃ
ﻡﺍﺪﺨﺘﺳﺍ ﺪﻨﻋ ﻚﻟﺫﻭ ﺔﻔﻴﺜﻛ ﺓﻮﻏﺭ ﻩﺎﻴﻤﻟﺍ ﻦﻣ ﺔﻠﻴﻠﻗ ﺕﺎﻴﻤﻛ ﻚﻠﻬﺘﺴﺗ ﻲﺘﻟﺍ ﻞﻴﺴﻐﻟﺍ
ﻡﺍﺪﺨﺘﺳﺍ ﻱﺩﺆﻳ ﻥﺃ ﻞﻤﺘﺤﻤﻟﺍ ﻦﻣﻭ ،ﺍﺬﻫ .ﺓﺩﻮﺠﻟﺍﻭ ﺓءﺎﻔﻜﻟﺍ ﻢﻳﺪﻋ ﻱﺩﺎﻋ ﻒﻈﻨﻣ
ءﺍﺩﻷﺍ ﻯﻮﺘﺴﻣ ﻲﻓ ﺽﺎﻔﺨﻧﺍﻭ ﺓﺭﻭﺪﻟﺍ ﺓﺪﻣ ﺔﻟﺎﻃﺇ ﻰﻟﺇ ﺕﺎﻔﻈﻨﻤﻟﺍ ﻦﻣ ﻉﻮﻨﻟﺍ ﺍﺬﻫ
ﺔﻘﺒﻃ ﻥّﻮﻜﺗﻭ ﺕﺎﻧﻮﻜﻤﻠﻟ ﻝﺎﻄﻋﺃ ﺙﻭﺪﺣ ﻰﻟﺇ ﻱﺩﺆﺗ ﺪﻗ ﺎﻬﻧﺃ ﺎﻤﻛ ،ﻒﻄﺸﻟﺍ ءﺎﻨﺛﺃ
ﺕﺎﻔﻈﻨﻤﻟﺍ ﻊﻴﻨﺼﺗ ﻲﻓ ﻲﻋﻭﺭ ﺪﻗ ﻪﻧﺃ ﻰﻟﺇ ﺓﺭﺎﺷﻹﺍ ﺭﺪﺠﺗ .ﺮﻈﻨﻠﻟ ﺔﺘﻔﻠﻣ ﻦﻔﻌﺗ
ﻯﻮﺘﺴﻤﻟﺍ ﻰﻠﻋ ﻝﻮﺼﺤﻠﻟ ﺓﻮﻏﺮﻟﺍ ﻦﻣ ﺐﺳﺎﻨﻤﻟﺍ ﺭﺪﻘﻟﺍ ﺝﺎﺘﻧﺇ ﺓءﺎﻔﻜﻟﺍ ﺔﻴﻟﺎﻋ
ﺭﺍﺪﻘﻣ ﺪﻳﺪﺤﺘﻟ ﺔﻌّﻨﺼﻤﻟﺍ ﺔﻛﺮﺸﻟﺍ ﺕﺎﻤﻴﻠﻌﺗ ﻉﺎﺒﺗﺍ ﻰﺟﺮﻳ .ءﺍﺩﻸﻟ ﻞﺜﻣﻷﺍ
:
ﻥﺍﻮﻟﻷﺍ ﻰﻠﻋ ﺓﺮﺛﺆﻣ ﺮﻴﻏ ﺾﻴﻴﺒﺗ ﺩﺍﻮﻣ ﻭﺃ
Oxi
،ﻥﺍﻮﻟﻷﺍ ﻰﻠﻋ ﺓﺮﺛﺆﻣ ﺮﻴﻏ ﺾﻴﻴﺒﺗ ﺩﺍﻮﻣ ﻭﺃ
.ﺲﺑﻼﻤﻟﺍ ﺔﻓﺎﺿﺇ ﻞﺒﻗ ﺔﻟﺎﺴﻐﻟﺍ ﺔﻠﺴﻟ ﻲﻠﻔﺴﻟﺍ ءﺰﺠﻟﺍ ﻲﻓ ﻒﻈﻨﻤﻟﺍ ﺔﻓﺎﺿﺈﺑ ﻢﻗ
7
ﻒﻈﻨﻣ ﻡﺍﺪﺨﺘﺳﺍ ﺔﻟﺎﺣ ﻲﻓ
ﺔﻤﻬﻣ ﺔﻇﻮﺤﻠﻣ
“HE”
ﺔﻣﻼﻋ ﺪﺠﺘﺳﻭ
.ﻡﺪﺨﺘﺴﻤﻟﺍ ﻒﻈﻨﻤﻟﺍ
Oxi
ﻒﻈﻨﻣ ﻡﺍﺪﺨﺘﺳﺍ
ﻡﺎﺴﺟﺃ ﻱﺃ ﻭﺃ ﺔﺘﺑﺎﺜﻟﺍ ﺮﻴﻏ ﺭﺍﺭﺯﻷﺍ ﻦﻣ ﺺﻠﺨﺗ .ﺲﺑﻼﻤﻟﺍ ﺏﻮﻴﺟ ﻍﺍﺮﻓﺈﺑ ﻢﻗ •
ﻲﻓ ﺐﺒﺴﺘﻳ ﺪﻗ ﺎﻤﻣ ﺎﻬﺑ ﻖﻠﻌﺗﻭ ﺔﺣﻭﺮﻤﻟﺍ ﺖﺤﺗ ﻂﻘﺴﺗ ﺪﻗ ﺓﺮﻴﻐﺻ ﻯﺮﺧﺃ
.ﺔﺌﺟﺎﻔﻣ ﺕﺍﻮﺻﺃ ﺭﻭﺪﺻ
ﺓﺭﺍﺮﺣ ﺔﺟﺭﺩﻭ ﺎﻬﻣﺍﺪﺨﺘﺳﺎﺑ ﻰﺻﻮﻤﻟﺍ ﺓﺭﻭﺪﻟﺍ ﻉﻮﻨﻟ ﺎًﻘﻓﻭ ﺲﺑﻼﻤﻟﺍ ﺯﺮﻔﺑ ﻢﻗ
.ﻥﺍﻮﻟﻷﺍ ﺕﺎﺒﺛﻭ ﻩﺎﻴﻤﻟﺍ
.ﺥﺎﺴﺗﻻﺍ ﺔﻔﻴﻔﺧ ﺲﺑﻼﻤﻟﺍ ﻦﻋ ﺥﺎﺴﺗﻻﺍ ﺓﺪﻳﺪﺷ ﺲﺑﻼﻤﻟﺍ ﻞﺼﻓﺍ
.ﺔﻠﻴﻘﺜﻟﺍ ﺲﺑﻼﻤﻟﺍ ﻦﻋ ﺔﻔﻴﻔﺨﻟﺍ ﺲﺑﻼﻤﻟﺍ ﻞﺼﻓﺍ •
ﻚﻟﺫﻭ ﻞﻴﺴﻐﻟﺍ ﺪﻌﺑ ﻊﻘﺒﻟﺍ ﺩﻮﺟﻭ ﺭﺍﺮﻤﺘﺳﺍ ﻝﺎﺣ ﻲﻓ ﺲﺑﻼﻤﻟﺍ ﻒﻴﻔﺠﺗ ﺐﻨﺠﺗ •
.ﺞﻴﺴﻨﻟﺍ ﻰﻠﻋ ﻊﻘﺒﻟﺍ ﺖﻴﺒﺜﺗ ﻲﻓ ﺐﺒﺴﺘﺗ ﺪﻗ ﺓﺭﺍﺮﺤﻟﺍ ﻥﻷ
.ﺭﻮﻔﻟﺍ ﻰﻠﻋ ﻊﻘﺒﻟﺍ ﺔﺠﻟﺎﻌﻤﺑ ﻢﻗ
ﺔﻣﺰﺣﻷﺍﻭ ﻁﻮﻴﺨﻟﺍ ﻂﺑﺭﺍﻭ ﻚﺑﺎﺸﻤﻟﺍ ﻂﺑﺭ ﻢﻜﺣﺃﻭ ﻖﻟﺰﻨﻣ ﻡﺎﻣﺯ ﻱﺃ ﻖﻠﻏﺃ •
.ﻞﻴﺴﻐﻠﻟ ﺔﻠﺑﺎﻘﻟﺍ ﺮﻴﻏ ﻲﻠﺤﻟﺍ ﻝﺯﺃﻭ
ﻦﻣ ﺪﻳﺰﻤﻠﻟ ﺲﺑﻼﻤﻟﺍ ﺽﺮﻌﺘﺗ ﻻ ﻰﺘﺣ ؛ﻕﺰﻤﺗ ﻭﺃ ﻊﻄﻗ ﻱﺃ ﺡﻼﺻﺈﺑ ﻢﻗ
.ﻞﻴﺴﻐﻟﺍ ءﺎﻨﺛﺃ ﺭﺮﻀﻟﺍ
:
ﺓﺪﻴﻔﻣ ﺢﺋﺎﺼﻧ
.ٍﻭﺎﺴﺘﻣ ﻞﻜﺸﺑ ﺎﻬﻌﺿﻭ ﻰﺟﺮﻳ ؛ءﺎﻤﻠﻟ ﺔﻣﻭﺎﻘﻣ ﻭﺃ ﺓﺩﺎﻀﻣ ﺲﺑﻼﻣ ﻞﺴﻏ ﺪﻨﻋ •
ﺕﺎﻣﻮﻠﻌﻤﻟﺍ ﻦﻣ ﺪﻳﺰﻤﻟﺍﻭ ﺕﺍﺩﺎﺷﺭﻹﺍ ﻰﻠﻋ ﻝﻮﺼﺤﻠﻟ “ﺓﺭﻭﺪﻟﺍ ﻞﻴﻟﺩ” ﻊﺟﺍﺭ
.ﺓﺮﻴﺒﻜﻟﺍ ﺕﺎﻴﻤﻜﻟﺍ ﺓﺭﻭﺩ ﻡﺍﺪﺨﺘﺳﺍ ﻝﻮﺣ
ﺔﻴﻜﺒﺸﻟﺍ ﺲﺑﻼﻤﻟﺍ ﺱﺎﻴﻛﺃ ﻲﻓ ﺓﺮﻴﻐﺼﻟﺍ ﻭﺃ ﺔﻘﻴﻗﺮﻟﺍ ﺲﺑﻼﻤﻟﺍ ﻊﺿﻭ ﻰﺟﺮﻳ
.ﻞﻴﺴﻐﻟﺍ ءﺎﻨﺛﺃ ﺎﻬﻜﺑﺎﺸﺗ ﺐﻨﺠﺘﻟ ﻚﻟﺫﻭ
ﻕﻮﻓ ﺲﺑﻼﻤﻟﺍ ﺱﺪﻜﺗ ﺐﻨﺠﺘﻟ ﻲﻠﺧﺍﺪﻟﺍ ﺎﻬﺒﻧﺎﺟ ﻰﻠﻋ ﺲﺑﻼﻤﻟﺍ ﺐﻠﻘﺑ ﻢﻗ
ﻕﺎﺼﺘﻟﺍ ﻞﻬﺴﻳ ﻲﺘﻟﺍ ﺲﺑﻼﻤﻟﺍ ﻦﻋ ﺮﺑﻮﻟﺍ ﺕﺍﺫ ﺲﺑﻼﻤﻟﺍ ﻞﺼﻔﺑ ﻢﻗ .ﺎﻬﻀﻌﺑ
ﺔﻴﻋﺎﻨﺼﻟﺍ ﻑﺎﻴﻟﻷﺍ ﻦﻣ ﺔﻋﻮﻨﺼﻤﻟﺍ ﺲﺑﻼﻤﻟﺍ ﻥﻷ ﻚﻟﺫﻭ .ﺎﻬﺑ ﺮﺑﻮﻟﺍ
ﺮﺑﻮﻟﺍ ﻂﻘﺘﻠﺗ ﻑﻮﺳ ﺔﻴﻨﻄﻘﻟﺍ ﺓﺮﻴﺼﻘﻟﺍ
ﺔﻳﺎﻨﻌﻟﺍ ﻖﺼﻠﻣ ﻰﻠﻋ ﺓﺩﻮﺟﻮﻤﻟﺍ ﺕﺎﻤﻴﻠﻌﺘﻟﺍ ﻉﺎﺒﺗﺍﻭ ﺓءﺍﺮﻗ ﻰﻠﻋ ﺎًﻤﺋﺍﺩ ﺹﺮﺣﺍ
ﻞﻳﻭﺍﺮﺴﻟﺍ ﺔﺸﻤﻗﺃﻭ ﺔﻛﺎﺤﻤﻟﺍ ﺲﺑﻼﻤﻟﺍﻭ
.ﺔﻟﻭﺰﻐﻤﻟﺍ ﺕﺎﺟﻮﺴﻨﻤﻟﺍﻭ ﺩﺎﺠﺴﻟﺍﻭ ﻒﺷﺎﻨﻤﻟﺍ ﻦﻣ
.ﻚﺴﺑﻼﻤﺑ ﻒﻠﺘﻟﺍ ﻕﺎﺤﻟﻹ ﺎًﻌﻨﻣ ﺞﻴﺴﻨﻟﺎﺑ
•
•
•
•
•
•
Page 63

ﺓﺭﻭﺪﻟﺍ ﻞﻴﻟﺩ
.ﺎﻬﻠﺴﻏ ﺩﺍﺮﻤﻟﺍ ﺔﻟﻮﻤﺤﻠﻟ ﺔﺒﺳﺎﻨﻤﻟﺍ ﺓﺭﻭﺪﻟﺍ ﺭﺎﻴﺘﺧﺍ ﻰﺟﺮﻳ ،ﺲﺑﻼﻤﻠﻟ ﻰﻠﺜﻤﻟﺍ ﺔﻳﺎﻨﻌﻟﺍ ﻰﻠﻋ ﻝﻮﺼﺤﻠﻟ
.ﺕﺍﺯﺍﺮﻄﻟﺍ ﺾﻌﺑ ﻲﻓ ﺓﺮﻓﻮﺘﻣ ﺖﺴﻴﻟ ﺕﺍﺭﺎﻴﺨﻟﺍﻭ ﺕﺍﺭﻭﺪﻟﺍ ﻉﺍﻮﻧﺃ ﺾﻌﺑ ﻥﺄﺑ ﻢﻠﻌﻟﺍ ﻰﺟﺮﻳ
:
ﺓﺭﻭﺪﻟﺍ ﻞﻴﺻﺎﻔﺗ
ﺔﻴﻠﻤﻋ ﻕﺮﻐﺘﺴﺗ ﺪﻗ ،ﺥﺎﺴﺗﻻﺍ ﺓﺪﻳﺪﺷ ﺲﺑﻼﻤﻟﺍ ﻊﻣ ﺓﺭﻭﺪﻟﺍ ﻩﺬﻫ ﻡﺪﺨﺘﺴُﺗﻭ
ﺍًﺮﻈﻧ ﺎﻫﺮﻴﻏ ﻥﻭﺩ ﺲﺑﻼﻤﻟﺍ ﺾﻌﺒﻟ ﻝﻮﻃﺃ ﺓﺪﻣ ﻩﺎﻴﻤﻟﺍ ﻯﻮﺘﺴﻣ ﺭﺎﻌﺸﺘﺳﺍ
.ﺎﻫﺮﻴﻏ ﻦﻣ ﺮﺒﻛﺃ ﻩﺎﻴﻣ ﺔﻴﻤﻜﻟ ﺔﺠﺴﻧﻷﺍ ﺾﻌﺑ ﺹﺎﺼﺘﻣﻻ
ﺹﺎﺼﺘﻣﻻ ﺍًﺮﻈﻧ ﺎﻫﺮﻴﻏ ﻥﻭﺩ ﺲﺑﻼﻤﻟﺍ ﺾﻌﺒﻟ ﻝﻮﻃﺃ ﺓﺪﻣ ﻩﺎﻴﻤﻟﺍ ﻯﻮﺘﺴﻣ
ﻡﺎﻈﻧ ﺓﺭﻭﺪﻟﺍ ﻩﺬﻫ ﻡﺪﺨﺘﺴﺗ ﻭ ،ﺎﻫﺮﻴﻏ ﻦﻣ ﺮﺒﻛﺃ ﻩﺎﻴﻣ ﺔﻴﻤﻜﻟ ﺔﺠﺴﻧﻷﺍ ﺾﻌﺑ
.ﺵﺮﻟﺎﺑ ﻒﻄﺸﻟﺍ
.ﺵﺮﻟﺎﺑ ﻒﻄﺸﻟﺎﺑ ﺓﺭﻭﺪﻟﺍ ﻩﺬﻫ ﺰﻴﻤﺘﺗ .ﺞﻴﺴﻨﻟﺍ
.ﺵﺮﻟﺎﺑ ﻒﻄﺸﻟﺎﺑ ﺓﺭﻭﺪﻟﺍ ﻩﺬﻫ ﺰﻴﻤﺘﺗ .ﺞﻴﺴﻨﻟﺍ
.ﺵﺮﻟﺎﺑ ﻒﻄﺸﻟﺍ ﺓﺭﻭﺪﻟﺍ ﻩﺬﻫ ﻡﺪﺨﺘﺴﺗ
ﻞﺜﻣ ﺪﻌﺠﺘﻠﻟ ﺔﻣﻭﺎﻘﻤﻟﺍ ﺕﺎﺟﻮﺴﻨﻤﻟﺍ ﻞﻴﺴﻐﻟ ﺓﺭﻭﺪﻟﺍ ﻩﺬﻫ ﻡﺪﺨﺘﺴُﺗ
ﺕﺎﺟﻮﺴﻨﻤﻟﺍ ﻭﺃ ﺔﻴﻤﺳﺮﻟﺍ ﺮﻴﻏ ﻞﻤﻌﻟﺍ ﺲﺑﻼﻣﻭ ﺕﺍﺯﻮﻠﺒﻟﺍﻭ ﺔﻴﺿﺎﻳﺮﻟﺍ
.ﺔﻃﻮﻠﺨﻤﻟﺍ
ﺲﺑﻼﻤﻟﺍ ﺔﻟﻮﻤﺣ ﺐﻴﻃﺮﺘﻟ ﻲﻓﺎﻜﻟﺍ ﺭﺪﻘﻟﺎﺑ ﻩﺎﻴﻤﻟﺍ ءﻞﻤﺑ ﺔﻟﺎﺴﻐﻟﺍ ﻡﻮﻘﺗ .ﺓﺮﻴﻐﺼﻟﺍ
ﺏﻮﺴﻨﻣ ﻮﻠﻌﻳ ﻩﺎﻴﻣ ﺏﻮﺴﻨﻣ ﻡﺪﺨﺘﺴﺗ ﺎﻬﻧﺃ ﺎﻤﻛ ﺓﺭﻭﺪﻟﺍ ﻩﺬﻫ ﻲﻓ ﻞﻴﺴﻐﻟﺍ ءﺪﺑ ﻞﺒﻗ
.ﻪﻴﻓ ﻎﻟﺎﺒﻣ ﻞﻜﺸﺑ ﺔﻠﺴﻟﺍ ﻸﻤﺗ ﻻ .ﻯﺮﺧﻷﺍ ﺕﺍﺭﻭﺪﻟﺍ
(ﺔﻟﺎﺴﻐﻟﺍ ﻲﻓ ﻞﻴﺴﻐﻠﻟ ﺔﻠﺑﺎﻘﻟﺍ ﺮﻳﺮﺤﻟﺍ ﺲﺑﻼﻤﻟﺍ)
ﺲﺑﻼﻤﻟﺍ ﻊﻄﻗ ﻊﺿﻭ ﻰﺟﺮﻳ .ﺔﻳﺎﻨﻌﻟﺍ ﻖﺼﻠﻣ ﻰﻠﻋ (ﻒﻴﻄﻟ)
“Machine Washable Silks”
“Gentle”
ﻡﺪﺨﺘﺴﺗ .ﻞﻴﺴﻐﻟﺍ ﻲﻓ ءﺪﺒﻟﺍ ﻞﺒﻗ ﺎﻬﻟ ﺔﺼﺼﺨﻤﻟﺍ ﺲﺑﻼﻤﻟﺍ ﺱﺎﻴﻛﺃ ﻲﻓ ﺓﺮﻴﻐﺼﻟﺍ
.ﺎًﻘﺒﺴﻣ ﺩﺪﺤﻣﻭ ﻰﻠﻋﺃ ﻩﺎﻴﻣ ﺏﻮﺴﻨﻣ ﺓﺭﻭﺪﻟﺍ ﻩﺬﻫ
ﺭﺎﻴﺘﻟﺍ ﻉﺎﻄﻘﻧﺍ ﺪﻌﺑ ﻞﻴﺴﻐﻟﺍ ﺔﻟﻮﻤﺣ ﻝﺎﻤﻜﺘﺳﺍ ﻭﺃ ﺔﻴﻓﺎﺿﺇ ﻒﻄﺷ ﺓﺭﻭﺩ ﺐﻠﻄﺘﺗ
ﺎﻤﻛ .ﺎًﻘﺒﺴﻣ ﺩﺪﺤﻣﻭ ﻰﻠﻋﺃ ﻩﺎﻴﻣ ﺏﻮﺴﻨﻣ ﺓﺭﻭﺪﻟﺍ ﻩﺬﻫ ﻡﺪﺨﺘﺴﺗ ،ﻲﺋﺎﺑﺮﻬﻜﻟﺍ
.ﻂﻘﻓ ﻒﻄﺸﻟﺍ ﺐﻠﻄﺘﺗ ﻲﺘﻟﺍ ﻞﻴﺴﻐﻟﺍ ﺕﻻﻮﻤﺣ ﻊﻣ ﺎًﻀﻳﺃ ﺓﺭﻭﺪﻟﺍ ﻩﺬﻫ ﻡﺪﺨﺘﺴﺗ
ﻢﺘﻳﻭ ﺔﺻﺎﺧ ﺔﻳﺎﻨﻋ ﺝﺎﺘﺤﺗ ﻲﺘﻟﺍ ﺲﺑﻼﻤﻟﺍ ﻭﺃ ﺔﻠﻴﻘﺜﻟﺍ ﺔﺸﻤﻗﻷﺍ ﻦﻣ ﺔﻋﻮﻨﺼﻤﻟﺍ
ﻭﺃ ﺓﺭﻭﺩ ءﺎﻐﻟﺇ ﺪﻌﺑ ﺔﻟﺎﺴﻐﻟﺍ ﻒﻳﺮﺼﺘﻟ ﺓﺭﻭﺪﻟﺍ ﻩﺬﻫ ﻡﺪﺨﺘﺴﺗﻭ .ﺎًﻳﻭﺪﻳ ﺎﻬﻠﺴﻏ
.ﻲﺋﺎﺑﺮﻬﻜﻟﺍ ﺭﺎﻴﺘﻟﺍ ﻉﺎﻄﻘﻧﺍ ﺪﻌﺑ ﺎﻬﻟﺎﻤﻜﺘﺳﺍ
ﺔﻟﺎﺴﻐﻟﺍ ﺔﻓﺎﻈﻧ ﻰﻠﻋ ﻅﺎﻔﺤﻠﻟ ﻞﻴﺴﻏ ﺓﺭﻭﺩ 30 ءﺍﺮﺟﺇ ﺪﻌﺑ ﺓﺭﻭﺪﻟﺍ ﻩﺬﻫ ﻡﺪﺨﺘﺴﺗ
ﺓﺭﻭﺪﻟﺍ ﻩﺬﻫ ﻡﺪﺨﺘﺴﺗ .ﻰﻠﻋﺃ ﻩﺎﻴﻣ ﺏﻮﺴﻨﻣ ﺓﺭﻭﺪﻟﺍ ﻩﺬﻫ ﻡﺪﺨﺘﺴﺗ ﺎﻤﻛ .ﻞﺧﺍﺪﻟﺍ ﻦﻣ
ﻦﻣ ﺔﻟﺎﺴﻐﻟﺍ ﻒﻴﻈﻨﺘﻟ ﺭﻮﻠﻜﻟﺍ ﻰﻠﻋ ﻱﻮﺘﺤﺗ ﻲﺘﻟﺍ ﺔﻠﺋﺎﺴﻟﺍ ﺾﻴﻴﺒﺘﻟﺍ ﺓﺩﺎﻣ ﻊﻣ
.“ﺔﻟﺎﺴﻐﻟﺎﺑ ﺔﻳﺎﻨﻌﻟﺍ” ﻊﺟﺍﺭ .ﺓﺭﻭﺪﻟﺍ ﻩﺬﻫ ﻑﺎﻘﻳﺇ ﻢﺘﻳ ﻻﺃ ﻲﻐﺒﻨﻳ .ﺎًﻣﺎﻤﺗ ﻞﺧﺍﺪﻟﺍ
ﺔﻟﺎﺴﻐﻟﺍ ﻲﻓ ﻯﺮﺧﻷﺍ ﺕﺎﺟﻮﺴﻨﻤﻟﺍ ﻭﺃ ﺲﺑﻼﻤﻟﺍ ﻊﺿﻭ ﺐﻨﺠﺗ :ﺔﻤﻬﻣ ﺔﻇﻮﺤﻠﻣ
.ﻍﺭﺎﻓ ﻞﻴﺴﻏ ﺽﻮﺣ ﻊﻣ ﺓﺭﻭﺪﻟﺍ ﻩﺬﻫ ﻡﺪﺨﺘﺴﺗ .ﺔﻟﺎﺴﻐﻟﺍ ﻒﻴﻈﻨﺗ ﺓﺭﻭﺩ ءﺎﻨﺛﺃ
ﺔﻋﺮﺳ
**
:
ﻥﺍﺭﻭﺪﻟﺍ
ﺔﻌﻔﺗﺮﻣ ،ﺔﺒﻌﺼﻟﺍ ﺥﺎﺳﻭﻷﺍﻭ ﻊﻘﺒﻟﺍ ﻦﻣ ﺺﻠﺨﺘﻠﻟ ﻞﻴﺴﻐﻟﺍ ﺓﺭﻭﺩ ﺖﻗﻮﻟ ﻝﺪﻌﻣ ﻰﻠﻋﺃ ﺮﻓﻮﺗ
*
:
ﺓﺭﺍﺮﺤﻟﺍ
ﺔﻨﺧﺎﺳ
ﺔﺌﻓﺍﺩ
:
ﺓﺭﻭﺪﻟﺍ ﺔﺟﺭﺩ
ﺔﻠﻴﻘﺛ - ﺔﻗﺎﺸﻟﺍ
ﺩﺍﺮﻤﻟﺍ ﺲﺑﻼﻤﻟﺍ ﻉﻮﻧﺃ
:
ﺎﻬﻠﺴﻏ
ﺥﺎﺴﺗﻻﺍ ﺓﺪﻳﺪﺷ ﺕﺎﺟﻮﺴﻨﻤﻟﺍ ﺔﻣﺪﺨﻟﺍ
ﺓﺮﺗﺎﻓ
ﺓﺩﺭﺎﺑ
ﺔﻌﻔﺗﺮﻣ ﺭﺎﻌﺸﺘﺳﺍ ﺔﻴﻠﻤﻋ ﻕﺮﻐﺘﺴﺗ ﺪﻗ ،ﺥﺎﺴﺗﻻﺍ ﺓﺪﻳﺪﺷ ﺲﺑﻼﻤﻟﺍ ﻊﻣ ﺓﺭﻭﺪﻟﺍ ﻩﺬﻫ ﻡﺪﺨﺘﺴﺗ
ﺔﻨﺧﺎﺳ
ﺔﺌﻓﺍﺩ
ﺔﻣﺪﺨﻟﺍ
ﺔﻳﺩﺎﻋ - ﺔﻗﺎﺸﻟﺍ
ﺓﺮﺗﺎﻓ
ﺲﺑﻼﻤﻟﺍﻭ ﺔﻠﻴﻘﺜﻟﺍ ﺔﺠﺴﻧﻷﺍ
ﻒﺷﺎﻨﻤﻟﺍﻭ ﺔﺘﺑﺎﺜﻟﺍ ﻥﺍﻮﻟﻷﺍ ﺕﺍﺫ
ﺰﻨﻴﺠﻟﺍﻭ
ﺓﺩﺭﺎﺑ
ﺔﻌﻔﺗﺮﻣ ﺔﻄﻠﺘﺨﻣ ﺲﺑﻼﻤﻠﻟﻭ ﺥﺎﺴﺗﻻﺍ ﺓﺪﻳﺪﺷ ﺔﻴﻨﻄﻘﻟﺍ ﺲﺑﻼﻤﻟﺍ ﻊﻣ ﺓﺭﻭﺪﻟﺍ ﻩﺬﻫ ﻡﺪﺨﺘﺴﺗ
ﺔﻨﺧﺎﺳ
ﺔﺌﻓﺍﺩ
ﻱﺩﺎﻋ
ﻞﻴﻘﺛ
ﺕﺍءﻼﻤﻟﺍ :ﻞﺜﻣ ﺓﺮﻴﺒﻜﻟﺍ ﻊﻄﻘﻟﺍ
ﺕﺍﺮﺘﺴﻟﺍﻭ ﺓﺮﻴﻐﺼﻟﺍ ﺔﻴﻄﻏﻷﺍﻭ
ﺓﺮﺗﺎﻓ
ﺓﺩﺭﺎﺑ
ﺔﻌﻔﺗﺮﻣ ﺔﻄﻠﺘﺨﻣ ﺲﺑﻼﻤﻠﻟﻭ ﺥﺎﺴﺗﻻﺍ ﺔﻳﺩﺎﻋ ﺔﻴﻨﻄﻘﻟﺍ ﺲﺑﻼﻤﻟﺍ ﻊﻣ ﺓﺭﻭﺪﻟﺍ ﻩﺬﻫ ﻡﺪﺨﺘﺴﺗ
ﺔﻨﺧﺎﺳ
ﺔﺌﻓﺍﺩ
ﻱﺩﺎﻋ
ﻢﻈﺘﻨﻣ
ﺓﺮﺗﺎﻓ
ﺔﻴﻧﺎﺘﻜﻟﺍ ﺲﺑﻼﻤﻟﺍﻭ ﺕﺎﻴﻨﻄﻘﻟﺍ
ﺲﺑﻼﻤﻟﺍﻭ ﺕﺍءﻼﻤﻟﺍﻭ
ﺔﻄﻠﺘﺨﻤﻟﺍ
ﺓﺩﺭﺎﺑ
ﺔﻌﻔﺗﺮﻣ .ﺥﺎﺴﺗﻻﺍ ﺔﻔﻴﻔﺧﻭ ﻥﺯﻮﻟﺍ ﺔﻔﻴﻔﺧ ﺔﻴﻨﻄﻘﻟﺍ ﺲﺑﻼﻤﻟﺍ ﻊﻣ ﺓﺭﻭﺪﻟﺍ ﻩﺬﻫ ﻡﺪﺨﺘﺴﺗ
ﺔﻨﺧﺎﺳ
ﺔﺌﻓﺍﺩ
ﺔﻳﺩﺎﻋ
ﺔﻔﻴﻔﺧ
ﺓﺮﺗﺎﻓ
ﺔﻔﻴﻔﺧ ﺔﻴﻨﻄﻘﻟﺍ ﺕﺎﺟﻮﺴﻨﻤﻟﺍ
ﺔﻴﻨﻄﻘﻟﺍ ﺕﺎﺟﻮﺴﻨﻤﻟﺍﻭ ﻥﺯﻮﻟﺍ
ﺔﻃﻮﻠﺨﻤﻟﺍ
ﺓﺩﺭﺎﺑ
ﺔﻀﻔﺨﻨﻣ ﻥﺎﺼﻤﻘﻟﺍ
ﺔﻨﺧﺎﺳ
ﺔﺌﻓﺍﺩ
ﺲﺑﻼﻤﻟﺍ
ﺔﻳﺩﺎﻌﻟﺍ
ﺓﺮﺗﺎﻓ
ﺓﺩﺭﺎﺑ
ﺔﻌﻔﺗﺮﻣ ﺔﻔﺤﻟﻷﺍﻭ ﺕﺍﺮﺘﺴﻟﺍ ﻞﺜﻣ ﺔﻤﺨﻀﻟﺍ ﺮﺻﺎﻨﻌﻟﺍ ﻞﺴﻐﻟ ﺓﺭﻭﺪﻟﺍ ﻩﺬﻫ ﻡﺪﺨﺘﺴﺗ
ﺓﺮﻴﺒﻛ ﺔﻴﻤﻛﺔﻨﺧﺎﺳ
ﺔﺌﻓﺍﺩ
ﺓﺮﺗﺎﻓ
ﺓﺩﺭﺎﺑ
ﺔﻀﻔﺨﻨﻣ ﺓﺭﻭﺩ ﻲﻓ ﺎﻬﻴﻟﺇ ﺭﺎﺸﻤﻟﺍ ﺥﺎﺴﺗﻻﺍ ﺔﻔﻴﻔﺧ ﺲﺑﻼﻤﻟﺍ ﻞﺴﻐﻟ ﺓﺭﻭﺪﻟﺍ ﻩﺬﻫ ﻡﺪﺨﺘﺴُﺗ
ﺔﻨﺧﺎﺳ
ﺔﺌﻓﺍﺩ
ﻭﺃ
ﺓﺮﺗﺎﻓ
ﺲﺑﻼﻤﻟﺍ
ﺔﻘﻴﻗﺮﻟﺍ
ﺪﻌﺠﺘﻠﻟ ﺔﻣﻭﺎﻘﻣ ﺕﺎﺟﻮﺴﻨﻣ
ﺕﺎﺿﺎﻴﺑﻭ ﺔﻴﻨﻄﻗ ﺕﺎﺟﻮﺴﻨﻣﻭ
ﻦﻣ ﺔﻋﻮﻨﺼﻣ ﺕﺎﺟﻮﺴﻨﻣﻭ
ﺔﻴﻋﺎﻨﺻ ﻑﺎﻴﻟﺃ
ﺕﺍءﻼﻤﻟﺍ ﻞﺜﻣ ﺓﺮﻴﺒﻜﻟﺍ ﺮﺻﺎﻨﻌﻟﺍ
ﺔﻔﺤﻟﻷﺍﻭ ﻡﻮﻨﻟﺍ ﺐﺋﺎﻘﺣﻭ
ﺩﺎﺠﺴﻟﺍﻭ ﺕﺍﺮﺘﺴﻟﺍﻭ ﺓﺮﻴﻐﺼﻟﺍ
ﻞﻴﺴﻐﻠﻟ ﻞﺑﺎﻘﻟﺍ ﺮﻴﻐﺼﻟﺍ
ﻪﻠﺴﻏ ﺐﺠﻳ ﻱﺬﻟﺍ ﺮﻳﺮﺤﻟﺍ
ﺔﺠﺴﻧﻷﺍ ،ﺔﻟﺎﺴﻐﻟﺍ ﻞﺧﺍﺩ
ﺎًﻳﻭﺪﻳ ﺎﻬﻠﺴﻏ ﻢﺘﻳ ﻲﺘﻟﺍ
ﺓﺩﺭﺎﺑ
ﺓﺩﺭﺎﺑﺔﻌﻔﺗﺮﻣ ﻲﺘﻟﺍ ﺕﻻﻮﻤﺤﻠﻟ ﺔﻴﻟﺎﻋ ﺔﻋﺮﺴﺑ ﻒﻴﻔﺠﺘﻟﺍﻭ ﻒﻄﺸﻟﺍ ﻦﻴﺑ ﺓﺭﻭﺪﻟﺍ ﻩﺬﻫ ﻊﻤﺠﺗ
ﻒﻄﺷ
ﻒﻴﻔﺠﺗﻭ
***
ﺮﻓﺍﻮﺘﻣ ﺮﻴﻏﺔﻌﻔﺗﺮﻣ ﺲﺑﻼﻤﻟﺍ ﻒﻴﻔﺠﺗ ﺖﻗﻭ ﻞﻴﻠﻘﺘﻟ ﺓﺪﺣﺍﻭ ﻥﺍﺭﻭﺩ ﺔﻔﻟ ﺓﺭﻭﺪﻟﺍ ﻩﺬﻫ ﻲﻓ ﻡﺪﺨﺘﺴُﺗ
ﻒﻳﺮﺼﺗ
ﻒﻴﻔﺠﺗﻭ
***
ﺲﺑﻼﻤﻟﺍﻭ ﺔﺣﺎﺒﺴﻟﺍ ﺲﺑﻼﻣ
ﻥﻭﺪﺑ ﺎ ًﻔ ﻄ ﺷ ﺐﻠﻄﺘﺗ ﻲﺘﻟﺍ
ﺕﺎﻔﻈﻨﻤﻟﺍ ﻝﺎﻤﻌﺘﺳﺍ
ﻭﺃ ﺔﻋﻮﻘﻨﻤﻟﺍ ﺲﺑﻼﻤﻟﺍ
ﺎًﻳﻭﺪﻳ ﺔﻟﻮﺴﻐﻤﻟﺍ
ﺔﻟﺎﺴﻐﻟﺍ ﻲﻓ ﺲﺑﻼﻣ ﺪﺟﻮﺗ ﻻ ﻒﻴﻈﻨﺗ
ﺔﻟﺎﺴﻐﻟﺍ
***
.ﺓﺩﺭﺎﺒﻟﺍ ﻩﺎﻴﻤﻟﺎﺑ ﻒﻄﺸﻟﺍ ﺕﺍﺭﻭﺩ ﻊﻴﻤﺟ ﻢﺘﺗ *
.ﺎﻫﺪﻳﺪﺤﺗ ﻦﻜﻤﻳ ﻻﻭ ﺓﺭﻭﺪﻟﺎﺑ ﺔﻨﻤﻀﺘﻣ ﻥﺍﺭﻭﺪﻟﺍ ﺔﻋﺮﺳ **
.ﺕﺍﺭﻭﺪﻟﺍ ﻩﺬﻫ ﻊﻣ ﻖﻴﻤﻌﻟﺍ ﻒﻴﻈﻨﺘﻟﺍ ﺭﺎﻴﺧ ﺮﻓﺍﻮﺘﻳ ﻻ ***
6
Page 64

ﻡﺎﻈﻧ
ﺭﺎﻌﺸﺘﺳﻻﺍ
ﻞﺴﻏ ﻞﻔﻘﻣ ءﺎﻄﻐﻟﺍﻒﻄﺷ ﻒﻴﻔﺠﺗ
ﻞﻔﻘﻣ ءﺎﻄﻐﻟﺍ
ﻝﺎﻤﺘﻛﺍ
ﺓﺭﻭﺪﻟﺍ
ﻡﺎﻈﻧ
ﺭﺎﻌﺸﺘﺳﻻﺍ
ﻞﺴﻏ ﻞﻔﻘﻣ ءﺎﻄﻐﻟﺍﻒﻄﺷ ﻒﻴﻔﺠﺗ
ﻝﺎﻤﺘﻛﺍ
ﺓﺭﻭﺪﻟﺍ
ﻒﻄﺷ
ﻢﺘﻳ ،ﺔﻟﻮﻤﺤﻟﺍ ﺭﺎﻌﺸﺘﺳﺍﻭ ﻥﺍﺭﻭﺩ ﺔﻋﺮﺴﻟ ﺐﺳﺎﻨﻣ ﻝﺪﻌﻣ ﻰﻠﻋ ﻝﻮﺼﺤﻠﻟ
ﺮﺷﺆﻤﻟﺍ ﺍﺬﻫ ﺮﻴﺸﻳ .ءﺎﻄﻐﻟﺍ ﻞﻔﻗ ﺮﺷﺆﻣ ءﻲﻀﻳ ﺎﻫﺪﻨﻋﻭ ،ءﺎﻄﻐﻟﺍ ﻕﻼﻏﺇ
.ﻞﻴﻐﺸﺘﻟﺍ ءﺎﻨﺛﺃ ﺢﺘﻔﻟﺍ ﻰﻠﻋ ﺓﺭﺪﻘﻟﺍ ﻡﺪﻋﻭ ءﺎﻄﻐﻟﺍ ﻞﻔﻗ ﻰﻟﺇ
ﺭﺯ ﻰﻠﻋ ﻂﻐﺿﺍ ،ءﺎﻄﻐﻟﺍ ﺢﺘﻔﻟ ﺔﺟﺎﺤﺑ ﺖﻨﻛ ﺍﺫﺇﻭ
ﻞﻴﻐﺸﺘﻟﺍ ءﺪﺑ
ﻞﻔﻘﻟﺍ ءﺎﻐﻟﺇ/ﺖﻗﺆﻣ ﻒﻗﻮﺗ
ﻊﻣ ﻂﻐﺿﺍ
ﺭﺍﺮﻤﺘﺳﻻﺍ
ٍﻥﺍﻮﺛ 3 ﺓﺪﻤﻟ
ءﺎﻐﻟﻺﻟ
ﻞﻔﻗ ءﺎﻐﻟﺇ ﻢﺘﻴﺳ ،“ﻞﻔﻘﻟﺍ ءﺎﻐﻟﺇ/ﺖﻗﺆﻣ ﻑﺎﻘﻳﺇ/ءﺪﺑ”
ﻕﺮﻐﺘﺴﻳ ﺪﻗﻭ ،ﺔﻟﺎﺴﻐﻟﺍ ﺔﻛﺮﺣ ﻒ ُﻗ ﻮ ﺗ ﺪﻌﺑ ءﺎﻄﻐﻟﺍ
ﺔﻋﺮﺴﺑ ﺔﻟﻮﻤﺤﻟﺍ ﻥﺍﺭﻭﺩ ﺪﻨﻋ ﻖﺋﺎﻗﺩ ﺓﺪﻋ ﺮﻣﻷﺍ ﺍﺬﻫ
ءﺪﺑ” ﺭﺯ ﻰﻠﻋ ﻂﻐﺿﺍ ﺓﺭﻭﺪﻟﺍ ﻑﺎﻨﺌﺘﺳﻻﻭ ،ﺔﻴﻟﺎﻋ
ﺢﺘﻓ ﺐﻨﺠﺗ .“ﻞﻔﻘﻟﺍ ءﺎﻐﻟﺇ/ﺖﻗﺆﻣ ﻑﺎﻘﻳﺇ/ﻞﻴﻐﺸﺘﻟﺍ
ﺪﻨﻋ ﺃﺪﺒﺗ ﻲﺘﻟﺍ ﺭﺎﻌﺸﺘﺳﻻﺍ ﺔﻴﻠﻤﻋ ءﺎﻨﺛﺃ ءﺎﻄﻐﻟﺍ
.ﺔﻟﺎﺴﻐﻟﺍ ﻞﻴﻐﺸﺗ ﺓﺩﺎﻋﺇ
ﺔﻠﺣﺮﻣ ﻲﻓ ﻊﻤﺴﺗ ﻲﺘﻟﺍ ﺕﺍﻮﺻﻸﻟ ﻪﻬﺑﺎﺸﻣ ﺕﺍﻮﺻﺃ ﻉﺎﻤﺳ ﻦﻣ ﻦﻜﻤﺘﺘﺳ
ﺔﻓﺎﺿﺇ ﻢﺘﻳﻭ ،ﺲﺑﻼﻤﻟﺍ ﺔﻟﻮﻤﺣ ﻚﻳﺮﺤﺗﻭ ﻒﻄﺷ ﺕﺍﻮﺻﺃ ﻲﻫﻭ ﻞﻴﺴﻐﻟﺍ
ﻙﺎﻨﻫ .“ﻢﻌﻧ-ﺔﺠﺴﻧﻷﺍ ﻢﻌﻨُﻣ ﺔﻓﺎﺿﺇ” ﺭﺎﻴﺨﻟﺍ ﺪﻳﺪﺤﺗ ﺪﻨﻋ ﺔﺠﺴﻧﻸﻟ ﻢﻌﻨُﻣ
،ﺵﺮﻟﺎﺑ ﻒﻄﺸﻟﺍ ﻡﺎﻈﻨﺑ ﻞﻤﻌﺗ ﻲﺘﻟﺍ ﺕﺍﺭﻭﺪﻟﺍ ﺾﻌﺑ
ﻡﺎﻈﻧ
ﺭﺎﻌﺸﺘﺳﻻﺍ
ﻞﺴﻏ ﻞﻔﻘﻣ ءﺎﻄﻐﻟﺍﻒﻄﺷ ﻒﻴﻔﺠﺗ
ﻝﺎﻤﺘﻛﺍ
ﺓﺭﻭﺪﻟﺍ
ﻒﻴﻔﺠﺗ
ﻦﻣ ﻩﺎﻴﻤﻟﺍ ﺔﻟﺍﺯﻹ ﺓﺪﻳﺍﺰﺘﻣ ﺕﺎﻋﺮﺴﺑ ﻞﻴﺴﻐﻟﺍ ﺔﻟﻮﻤﺣ ﻒﻴﻔﺠﺘﺑ ﺔﻟﺎﺴﻐﻟﺍ ﻡﻮﻘﺗ
.ﺎﻬﻟ ﺓﺩﺪﺤﻤﻟﺍ ﻥﺍﺭﻭﺪﻟﺍ ﺔﻋﺮﺳﻭ ﺓﺭﻭﺪﻟﺍ ﻉﻮﻧ ﺐﺴﺣ ﻰﻠﻋ ﺲﺑﻼﻤﻟﺍ
ﻡﺎﻈﻧ
ﺭﺎﻌﺸﺘﺳﻻﺍ
ﻞﺴﻏ ﻞﻔﻘﻣ ءﺎﻄﻐﻟﺍﻒﻄﺷ ﻒﻴﻔﺠﺗ
ﺓﺭﻭﺪﻟﺍ ﻝﺎﻤﺘﻛﺍ
ﻝﺎﻤﺘﻛﺍ
ﺓﺭﻭﺪﻟﺍ
ﺎﻫﺪﻌﺑ ﺔﻟﻮﻤﺤﻟﺍ ﺔﻟﺍﺯﺇ ﻰﺟﺮﻳﻭ ،ﺮﺷﺆﻤﻟﺍ ﺍﺬﻫ ءﻲﻀﻳ ﺓﺭﻭﺪﻟﺍ ﻝﺎﻤﺘﻛﺍ ﺭﻮﻓ
.ﺞﺋﺎﺘﻨﻟﺍ ﻞﻀﻓﺃ ﻰﻠﻋ ﻝﻮﺼﺤﻠﻟ ﺍًﺭﻮﻓ
5
Page 65

ﺔﻨﻤﻀﻤﻟﺍ ﺎﻳﺍﺰﻤﻟﺍﻭ ﻢﻜﺤﺘﻟﺍ ﺔﺣﻮﻟ
ﺔﻨﻤﻀﻤﻟﺍ ﺎﻳﺍﺰﻤﻟﺍﻭ ﻢﻜﺤﺘﻟﺍ ﺔﺣﻮﻟ
4
2
1
4
ﺔﻨﺧﺎﺳ
ﺔﺒﻌﺻ
ﺔﻌﻔﺗﺮﻣ
ﺔﻀﻔﺨﻨﻣ
ﻥﺍﺭﻭﺩ ﺪﺟﻮﻳ ﻻ
ﺔﻄﺳﻮﺘﻣ
ﺔﻔﻴﻔﺧ
ﺔﺌﻓﺍﺩ
ﺓﺮﺗﺎﻓ
ﺓﺩﺭﺎﺑ
ﺔﺟﺭﺩ
ﺓﺭﺍﺮﺤﻟﺍ
ﺔﺟﺭﺩ
ﺥﺎﺴﺗﻻﺍ
ﺔﻋﺮﺳ
ﻥﺍﺭﻭﺪﻟﺍ
ﻒﻄﺷ
ﻲﻓﺎﺿﺇ
ﺖﻗﺆﻣ ﻑﺎﻘﻳﺇ
ﻞﻔﻘﻟﺍ ءﺎﻐﻟﺇ
ﻞﻴﻐﺸﺘﻟﺍ ءﺪﺑ
ﺔﻳﺩﺎﻋ
ﻒﻄﺷ
ﻒﻴﻔﺠﺗﻭ
ﻒﻴﻔﺠﺗﻭ ﻒﻳﺮﺼﺗ
ﺔﻣﺪﺨﻟﺍ
ﺔﻗﺎﺸﻟﺍ
ﻒﻴﻈﻨﺗ
ﺔﻟﺎﺴﻐﻟﺍ
ﻡﺎﻈﻧ
ﺭﺎﻌﺸﺘﺳﻻﺍ
ﻞﺴﻏ
ﻒﻄﺷ
ﻒﻴﻔﺠﺗ
ﻝﺎﻤﺘﻛﺍ
ﺓﺭﻭﺪﻟﺍ
ﺔﻗﺎﻄﻟﺍ
ﺩﺍﺪﻌﺘﺳﻻﺍ
ﻢﻌﻨﻣ
ﺔﺠﺴﻧﻷﺍ
3
5
3
ﻢﺨﺿ
ءﺎﻐﻟﺇ
ﺪﻌﺠﺘﻟﺎﺑ ﻢﻜﺤﺘﻟﺍ
ﻞﻴﺴﻏ
ﻱﻭﺪﻳ
ﺕﻻﱢﺪﻌ ُﻣ
ءﺎﻄﻐﻟﺍ ﻞﻔﻗ
ﺔﺌﻴﺒﻟﺍ ﻰﻠﻋ ﻅﺎﻔﺤﻟﺍ
ﺔﻳﺭﺎﺠﺘﻟﺍ ﺔﻴﻨﻘﺘﻟﺍ ﺝﺎﺘﻳﺎﻣ MCT
ﻲﻛﺬﻟﺍ ﺭﺎﻌﺸﺘﺳﻻﺍ
ﺔﻨﻤﻀﻤﻟﺍ ﺎﻳﺍﺰﻤﻟﺍﻭ ﻢﻜﺤﺘﻟﺍ ﺔﺣﻮﻟ
6
2
5
1 3 4
ﻖﻴﻤﻌﻟﺍ ﻒﻴﻈﻨﺘﻟﺍ
ﻑﺎﻘﻳﺇ
ﻞﻴﻐﺸﺗ
ﺔﻗﺎﺸﻟﺍ ﺔﻣﺪﺨﻟﺍ
ﺔﻳﺩﺎﻋ
ﺔﻳﺩﺎﻌﻟﺍ ﺲﺑﻼﻤﻟﺍ
ﺓﺮﻴﺒﻛ ﺔﻴﻤﻛ
ﺔﻘﻴﻗﺮﻟﺍ ﺲﺑﻼﻤﻟﺍ
ﻞﻴﻐﺸﺘﻟﺍ ءﺪﺑ
ﻞﻔﻘﻟﺍ ءﺎﻐﻟﺇ/ﺖﻗﺆﻣ ﻒﻗﻮﺗ
ﺔﻠﻴﻘﺛ ﺲﺑﻼﻣ
ﺔﻳﺩﺎﻋ
ﺔﻳﺩﺎﻋ
ﺔﻠﻴﻘﺛ ﺲﺑﻼﻣ
ﻒﻳﺮﺼﺗ
ﻒﻴﻔﺠﺗﻭ
ﻒﻴﻔﺠﺗﻭ ﻒﻄﺷ
ﺔﻔﻴﻔﺧ
ﺔﻟﺎﺴﻐﻟﺍ ﻒﻴﻈﻨﺗ
ﻡﺎﻈﻧ
ﺭﺎﻌﺸﺘﺳﻻﺍ ﻞﺴﻏ ﻞﻔﻘﻣ ءﺎﻄﻐﻟﺍﻒﻄﺷ ﻒﻴﻔﺠﺗ
ﻝﺎﻤﺘﻛﺍ
ﺓﺭﻭﺪﻟﺍ
ﻊﻣ ﻂﻐﺿﺍ
ﺭﺍﺮﻤﺘﺳﻻﺍ
ٍﻥﺍﻮﺛ 3 ﺓﺪﻤﻟ
.ءﺎﻐﻟﻺﻟ
ﺓﺮﺗﺎﻓ
ﺔﺌﻓﺍﺩ
ﺓﺩﺭﺎﺑ
ﺔﻨﺧﺎﺳ
ﺓﺭﺍﺮﺤﻟﺍ ﺔﺟﺭﺩ
ﺓﺩﺭﺎﺒﻟﺍ ﻩﺎﻴﻤﻟﺎﺑ ﻒﻄﺸﻟﺍ ﺕﺍﺭﻭﺩ ﻊﻴﻤﺟ
ﺕﺍﺭﺎﻴﺨﻟﺍ
ﻒﻄﺷ
ﻲﻓﺎﺿﺇ
ﻢﻌﻨﻣ
ﺔﺠﺴﻧﻷﺍ
ﻢﻌﻨﻣ
ﺔﺠﺴﻧﻷﺍ
ﻒﻄﺷ
ﻲﻓﺎﺿﺇ
ﻑﺎﻘﻳﺇ
1 3 4
ﺔﻳﺩﺎﻋ
ﺔﻳﺩﺎﻋ
ﺔﻠﻴﻘﺛ ﺲﺑﻼﻣ
ﻒﻳﺮﺼﺗ
ﻒﻴﻔﺠﺗﻭ
ﻒﻴﻔﺠﺗﻭ ﻒﻄﺷ
ﺔﻠﻴﻘﺛ ﺲﺑﻼﻣ
ﺭﺎﻌﺸﺘﺳﻻﺍ ﻞﺴﻏ ﻞﻔﻘﻣ ءﺎﻄﻐﻟﺍﻒﻄﺷ ﻒﻴﻔﺠﺗ
ﻖﻴﻤﻌﻟﺍ ﻒﻴﻈﻨﺘﻟﺍ
ﻞﻴﻐﺸﺗ
ﻑﺎﻘﻳﺇ
ﺔﻗﺎﺸﻟﺍ ﺔﻣﺪﺨﻟﺍ
.ﻂﻘﻓ ﺎﻬﻴﻟﺇ ﻉﻮﺟﺮﻠﻟ ﺓﺮﻓﻮﺘﻣ ﺔﻴﺑﺮﻌﻟﺍ ﺔﻐﻠﻟﺎﺑ ﺔﻤﺟﺮﺘﻟﺍ .ﻂﻘﻓ ﺔﻳﺰﻴﻠﺠﻧﻹﺍ ﺔﻐﻠﻟﺎﺑ ﺎﺼﻧ ﺔﻴﻠﻌﻔﻟﺍ ﻢﻜﺤﺘﻟﺍ ﺔﺣﻮﻟ ﺽﺮﻌﺗ
ﺓﺭﻭﺪﻟﺍ ﺔﻟﺎﺣ ءﻮﺿ ﺕﺍﺮﺷﺆﻣ
ﺓﺭﻭﺩ ﻪﻴﻟﺇ ﺖﻠﺻﻭ ﻱﺬﻟﺍ ﻡﺪﻘﺘﻟﺍ ﻯﺪﻣ ﻰﻟﺇ ﺓﺭﻭﺪﻟﺍ ﺔﻟﺎﺣ ءﻮﺿ ﺮﺷﺆﻣ ﺮﻴﺸﻳ
ﺕﺍﻮﺻﺃ ﺩﻮﺟﻭ ﻆﺣﻼﺗ ﻑﻮﺳ ﺓﺭﻭﺪﻟﺍ ﻞﺣﺍﺮﻣ ﻦﻣ ﺔﻠﺣﺮﻣ ﻞﻛ ءﺎﻨﺛﺃ ،ﻞﻴﻐﺸﺘﻟﺍ
.ﺔﻳﺩﺎﻌﻟﺍ ﺕﻻﺎﺴﻐﻟﺍ ﻲﻓ ﻪﻨﻋ ﻒﻠﺘﺨﻣ ﺖﻗﺆﻣ ﻒﻗﻮﺗ ﻭﺃ
ﺭﺎﻌﺸﺘﺳﻻﺍ ﻡﺎﻈﻧ
ﻡﺎﻈﻧ
ﺭﺎﻌﺸﺘﺳﻻﺍ
ﻞﺴﻏ ﻞﻔﻘﻣ ءﺎﻄﻐﻟﺍﻒﻄﺷ ﻒﻴﻔﺠﺗ
ﻑﻮﺳ “ﻞﻔﻘﻟﺍ ءﺎﻐﻟﺇ /ﺖﻗﺆﻣ ﻑﺎﻘﻳﺇ/ﻞﻴﻐﺸﺘﻟﺍ ءﺪﺑ” ﺭﺯ ﻰﻠﻋ ﻂﻐﻀﻟﺍ ﺪﻨﻋ
ءﺪﺒﻟﺍ ﻞﺒﻗ ﻚﻟﺫﻭ ءﺎﻄﻐﻟﺍ ﻞﻔﻗ ﺔﻴﻟﺁ ﻰﻠﻋ ﻲﺗﺍﺫ ﺭﺎﺒﺘﺧﺍ ﻞﻤﻌﺑ ﺔﻟﺎﺴﻐﻟﺍ ﻡﻮﻘﺗ
ﺓﺭﻭﺩ ﺔﻠﺴﻟﺍ ﺭﻭﺪﺘﺳﻭ ﺔﻘﻄﻘﻃ ﺕﻮﺻ ﻊﻤﺴﺘﺳﻭ ،ﻞﻴﺴﻐﻟﺍ ﻞﺣﺍﺮﻣ ﻲﻓ
.ﺓﺰﻴﺟﻭ ﺓﺮﺘﻔﺑ ﺎﻫﺪﻌﺑ ﻪﻠﻔﻗ ﺓﺩﺎﻋﺇ ﻢﺛ ﺏﺎﺒﻟﺍ ﻞﻔﻗ ءﺎﻐﻟﺇ ﻢﺘﻴﺳﻭ ﺔﻄﻴﺴﺑ
ﻒﻴﻔﺠﺗ ﺕﺍﺭﻭﺩ ﺔﻟﺎﺴﻐﻟﺍ ﻡﺪﺨﺘﺴﺗ ،ﺔﻴﻧﺎﺜﻟﺍ ﺓﺮﻤﻟﺍ ﻲﻓ ءﺎﻄﻐﻟﺍ ﻞﻔﻗ ﺩﺮﺠﻤﺑ
ﺭﺎﻌﺸﺘﺳﻻﺍ ﺕﺎﻔﻟ ﻕﺮﻐﺘﺴﺗ ﺪﻗﻭ ،ﺔﻟﻮﻤﺤﻟﺍ ﻢﺠﺣ ﺮﻳﺪﻘﺘﻟ ﺔﺌﻴﻄﺑﻭ ﺓﺮﻴﺼﻗ
3
ﺔﻟﺎﺴﻐﻟﺍ ﻰﻟﺇ ءﺎﻤﻟﺍ ﺔﻓﺎﺿﺇ ﻞﺒﻗ ﻖﺋﺎﻗﺩ
ﻰﻟﺇ 2 ﻦﻴﺑ ﺎﻣ ﺡﻭﺍﺮﺘﺗ ﺓﺪﻣ ﻩﺬﻫ
،ﺭﺎﻌﺸﺘﺳﻻﺍ ﺮﺷﺆﻣ ﺓءﺎﺿﺇ ﻝﺎﺣ ﻲﻓ .ﺕﺎﻔﻠﻟﺍ ﻩﺬﻫ ﻦﻴﻨﻃ ﺕﻮﺻ ﻊﻤﺴﺗ ﺪﻗﻭ
ﻊﻤﺴﺗ ﻑﻮﺳﻭ ،ﺢﻴﺤﺼﻟﺍ ﻮﺤﻨﻟﺍ ﻰﻠﻋ ﻞﻤﻌﺗ ﺔﻟﺎﺴﻐﻟﺍ ﻥﺃ ﻰﻠﻋ ﻝﺪﻳ ﻚﻟﺫ ﻥﺈﻓ
ﺐﻴﻃﺮﺘﻟ ﺓﺮﻴﺼﻗ ﺕﺎﻀﺒﻧ ﻞﻜﺷ ﻲﻓ ﺔﻠﺴﻟﺍ ﺮﻳﺪﻳ ﻮﻫﻭ ﻙﺮﺤﻤﻟﺍ ﺕﻮﺻ
ﺓﺮﻴﺼﻗ ﺓﺮﺘﻔﻟ ﺔﻟﻮﻤﺤﻟﺍ ﻚﻳﺮﺤﺘﺑ ﺔﻟﺎﺴﻐﻟﺍ ﻡﻮﻘﺘﺳ ﺎﻫﺪﻌﺑ ،ﺎًﻣﺎﻤﺗ ﺔﻟﻮﻤﺤﻟﺍ
ﻢﺘﻳ ﺪﻗ .ﻩﺎﻴﻤﻟﺍ ﺔﻓﺎﺿﺇ ﻑﺎﻨﺌﺘﺳﺍﻭ ﻩﺎﻴﻤﻟﺍ ﻲﻓ ﺔﻟﻮﻤﺤﻟﺍ ﻊﻘﻨﻟ ﺎًﺘﻗﺆﻣ ﻒﻗﻮﺘﺗ ﻢﺛ
،ﺔﻟﻮﻤﺤﻠﻟ ﻩﺎﻴﻤﻟﺍ ﻦﻣ ﻲﻓﺎﻜﻟﺍ ﺭﺪﻘﻟﺍ ﺔﻓﺎﺿﺇ ﻢﺘﻳ ﻥﺃ ﻰﻟﺇ ﺔﻴﻠﻤﻌﻟﺍ ﻩﺬﻫ ﺭﺍﺮﻜﺗ
ﻒﻈﻨﻤﻟﺍ ﺔﻓﺎﺿﺇﻭ ﻉﺯﻮﻤﻟﺍ ﻝﻼﺧ ﻦﻣ ﻩﺎﻴﻤﻟﺍ ﻖﻓﺪﺗ ﻉﺎﻤﺳ ﺎًﻀﻳﺃ ﻚﻨﻜﻤﻳﻭ
ﺪﻨﻋ ﺃﺪﺒﺗ ﻲﺘﻟﺍ ﺭﺎﻌﺸﺘﺳﻻﺍ ﺔﻴﻠﻤﻋ ءﺎﻨﺛﺃ ءﺎﻄﻐﻟﺍ ﺢﺘﻓ ﺐﻨﺠﺗ
ﺎًﻀﻳﺃ ﺭﺎﻌﺸﺘﺳﻻﺍ ﺮﺷﺆﻣ ءﻲﻀﻳ ﻥﺃ ﻦﻜﻤﻤﻟﺍ ﻦﻣ .ﺔﻟﺎﺴﻐﻟﺍ ﻞﻴﻐﺸﺗ ﺓﺩﺎﻋﺇ
.ﺎًﻴﻌﻴﺒﻃ ﺍًﺮﻣﺃ ﺍﺬﻫ ﺪﻌﻳﻭ .ﺓﺭﻭﺪﻟﺍ ﻲﻓ ﻞﻴﺴﻐﻟﺍﻭ ﻊﻘﻨﻟﺍ ﻲﺘﻠﺣﺮﻣ ءﺎﻨﺛﺃ
ﻡﺎﻈﻧ
ﺭﺎﻌﺸﺘﺳﻻﺍ
ﻞﺴﻏ ﻞﻔﻘﻣ ءﺎﻄﻐﻟﺍﻒﻄﺷ ﻒﻴﻔﺠﺗ
ﺔﻟﻮﻤﺣ ﻚﻳﺮﺤﺘﺑ ﺎﻤﻬﻣﺎﻴﻗ ءﺎﻨﺛﺃ ﺔﺣﻭﺮﻤﻟﺍﻭ ﻙﺮﺤﻤﻟﺍ ﺕﻮﺻ ﻊﻤﺴﺗ ﻑﻮﺳ
ﺮﻴﻏ ﺲﺑﻼﻤﻟﺍ ﺔﻟﻮﻤﺣ ﻥﻮﻜﺗ ،ﺔﻳﺩﺎﻌﻟﺍ ﺕﻻﺎﺴﻐﻟﺍ ﺲﻜﻋ ﻰﻠﻋﻭ ،ﺲﺑﻼﻤﻟﺍ
ﻒﻴﻈﻨﺘﻟﺍ ﻰﻟﺇ ﺾﻔﺨﻨﻣ ﻩﺎﻴﻣ ﺏﻮﺴﻨﻣ ﻲﻓ ﻒﻴﻈﻨﺘﻟﺍ ﺮﻴﺸﻳ .ﻩﺎﻴﻤﻟﺎﺑ ﺓﺎﻄﻐﻣ
ﻲﺘﻟﺍ ﺔﻟﺎﺴﻐﻟﺍ ﻲﻓ ﻝﺎﺤﻟﺍ ﻮﻫ ﺎﻤﻛ ،ﻒﻈﻨﻤﻟﺍ ﻒﻴﻔﺨﺗ ﻦﻣ ًﻻﺪﺒﻓ .ﺰﻛﺮﻤﻟﺍ
.ﺓﺮﺷﺎﺒﻣ ﺥﺎﺳﻭﻷﺍ ﻰﻠﻋ ﻒﻈﻨﻤﻟﺍ ﺔﻟﺎﺴﻐﻟﺍ ﻩﺬﻫ ﻉﺯﻮﺗ ،ﺽﺎﻀﺨﻟﺎﺑ ﻞﻤﻌﺗ
ﺓﺭﻭﺪﻟﺍ ﻞﺣﺍﺮﻣ ﻦﻣ ﺔﻠﺣﺮﻣ ﻞﻛ ﻲﻓ ﻙﺮﺤﻤﻟﺍ ﺕﺍﻮﺻﺃ ﻒﻠﺘﺨﺗ ﺪﻗﻭ
.ﺲﺑﻼﻤﻟﺍ ﺥﺎﺴﺗﺍ ﺔﺟﺭﺪﻟ ﺎًﻘﻓﻭ ﺓﺭﻭﺪﻟﺍ ﺖﻗﻭ ﺪﻳﺪﺤﺗ ﻢﺘﻳﻭ ،ﺔﻔﻠﺘﺨﻤﻟﺍ
.ﺔﻟﻮﻤﺤﻟﺍ ﻰﻟﺇ
ﻝﺎﻤﺘﻛﺍ
ﺓﺭﻭﺪﻟﺍ
:ﺔﻈﺣﻼﻣ
ﻞﺴﻏ
ﻝﺎﻤﺘﻛﺍ
ﺓﺭﻭﺪﻟﺍ
2
ﺔﻳﺩﺎﻋ
ﺔﻔﻴﻔﺧ
ﺔﻳﺩﺎﻌﻟﺍ ﺲﺑﻼﻤﻟﺍ
ﻡﺎﻈﻧ
ﻝﺎﻤﺘﻛﺍ
ﺓﺭﻭﺪﻟﺍ
ﺔﻟﺎﺴﻐﻟﺍ ﻒﻴﻈﻨﺗ
ﺓﺮﻴﺒﻛ ﺔﻴﻤﻛ
ﺔﻘﻴﻗﺮﻟﺍ ﺲﺑﻼﻤﻟﺍ
ﻞﻴﻐﺸﺘﻟﺍ ءﺪﺑ
ﻞﻔﻘﻟﺍ ءﺎﻐﻟﺇ/ﺖﻗﺆﻣ ﻒﻗﻮﺗ
6
5
6
ﺓﺭﺍﺮﺤﻟﺍ ﺔﺟﺭﺩ
ﺓﺩﺭﺎﺒﻟﺍ ﻩﺎﻴﻤﻟﺎﺑ ﻒﻄﺸﻟﺍ ﺕﺍﺭﻭﺩ ﻊﻴﻤﺟ
ﺓﺮﺗﺎﻓ
ﺓﺩﺭﺎﺑ
ﻖﻴﻤﻌﻟﺍ ﻒﻴﻈﻨﺘﻟﺍ
ﻊﻣ ﻂﻐﺿﺍ
ﺭﺍﺮﻤﺘﺳﻻﺍ
ٍﻥﺍﻮﺛ 3 ﺓﺪﻤﻟ
.ءﺎﻐﻟﻺﻟ
ﻑﺎﻘﻳﺇ
ﻒﻄﺷ
ﻲﻓﺎﺿﺇ
ﺕﺍﺭﺎﻴﺨﻟﺍ
ﺔﺠﺴﻧﻷﺍ
ﻢﻌﻨﻣ
ﻢﻌﻨﻣ
ﺔﺠﺴﻧﻷﺍ
ﻒﻄﺷ
ﻲﻓﺎﺿﺇ
ﺔﺌﻓﺍﺩ
ﺔﻨﺧﺎﺳ
1
،ﺔﺒﻌﺼﻟﺍ ﻊﻘﺒﻟﺍ ﻦﻣ ﺺﻠﺨﺘﻠﻟ ﻰﻠﺜﻤﻟﺍ ﻒﻴﻈﻨﺘﻟﺍ ﺔﻴﻠﻤﻋ ﺭﺎﻴﺨﻟﺍ ﺍﺬﻫ ﺮﻓﻮﻳ
.ﺓﺭﻭﺪﻠﻟ ﻊﻘﻨﻟﺍﻭ ﻊﻄﻘﺘﻤﻟﺍ ﻚﻳﺮﺤﺘﻠﻟ ﻯﺮﺧﺃ ﺓﺪﻣ ﺔﻓﺎﺿﺈﺑ ﻡﻮﻘﻴﺳﻭ
ﻞﻴﺴﻐﻟﺍ ﺓﺭﻭﺩ ﺡﺎﺘﻔﻣ
2
.ﺔﻟﺎﺴﻐﻟﺍ ﻲﻓ ﺓﺮﻓﻮﺘﻤﻟﺍ ﺕﺍﺭﻭﺪﻟﺍ ﺪﻳﺪﺤﺘﻟ ﻞﻴﺴﻐﻟﺍ ﺓﺭﻭﺩ ﺡﺎﺘﻔﻣ ﻡﺪﺨﺘﺳﺍ
“ﺓﺭﻭﺪﻟﺍ ﻞﻴﻟﺩ” ﻊﺟﺍﺭ .ﻞﻴﺴﻐﻟﺍ ﺔﻟﻮﻤﺤﻟ ﺓﺭﻭﺩ ﺪﻳﺪﺤﺘﻟ ﺡﺎﺘﻔﻤﻟﺍ ﺭﺩﺃ
.ﻞﻴﺴﻐﻟﺍ ﺕﺍﺭﻭﺪﻟ ﻲﻠﻴﺼﻔﺘﻟﺍ ﻒﺻﻮﻟﺍ ﺔﻓﺮﻌﻤﻟ
ﺕﺍﺭﺎﻴﺨﻟﺍ
3
.ﺕﺍﺭﻭﺪﻟﺍ ﻢﻈﻌﻤﻟ ﺔﻴﻟﺎﺘﻟﺍ ﺕﺍﺭﺎﻴﺨﻟﺍ ﺔﻓﺎﺿﺇ ﻢﺘﺗ ﺪﻗ
ﻲﻓﺎﺿﺇ ﻒﻄﺷ
ﻢﻈﻌﻤﻟ ﻯﺮﺧﺃ ﻒﻄﺷ ﺓﺭﻭﺩ ﺔﻓﺎﺿﻹ ﺭﺎﻴﺨﻟﺍ ﺍﺬﻫ ﻡﺍﺪﺨﺘﺳﺍ ﻦﻜﻤﻳ
.ﺎًﻴﺋﺎﻘﻠﺗ ﺕﺍﺭﻭﺪﻟﺍ
ﺔﺠﺴﻧﻷﺍ ﻢﻌﻨﻣ
.ﺔﺠﺴﻧﺃ ﻢﻌﻨﻣ ﻡﺍﺪﺨﺘﺳﺍ ﻝﺎﺣ ﻲﻓ ﺭﺎﻴﺨﻟﺍ ﺍﺬﻫ ﺪﻳﺪﺤﺗ ﻦﻴﻌﺘﻳ
“ﻲﻓﺎﺿﺇ ﻒﻄﺷ” ﻊﻣ “ﺔﺠﺴﻧﻷﺍ ﻢﻌﻨﻣ” ﺭﺎﻴﺧ
ﺔﺠﺴﻧﻷﺍ ﻢﻌﻨﻣ ﺔﻓﺎﺿﺇ ﺕﺍﺭﺎﻴﺧ ﻦﻣ ﻞﻛ ﻦﻴﺑ ﺭﺎﻴﺨﻟﺍ ﺍﺬﻫ ﻊﻤﺠﻳ
.ﻲﻓﺎﺿﻹﺍ ﻒﻄﺸﻟﺍ ﻡﺍﺪﺨﺘﺳﺍﻭ
4
•
•
5
3
4
ﺓﺭﺍﺮﺤﻟﺍ ﺔﺟﺭﺩ
ﺓﺭﺍﺮﺣ ﺔﺟﺭﺩ ﺭﺎﻌﺸﺘﺳﺍ ﻰﻠﻋ ﺓﺭﺍﺮﺤﻟﺍ ﺔﺟﺭﺩ ﻲﻓ ﻢﻜﺤﺘﻟﺍ ﺔﻴﺻﺎﺧ ﻞﻤﻌﺗ
.ﺓﺩﺭﺎﺒﻟﺍﻭ ﺔﻨﺧﺎﺴﻟﺍ ﻩﺎﻴﻤﻟﺍ ﻝﻮﺧﺩ ﻂﺒﺿ ﻖﻳﺮﻃ ﻦﻋ ﺎﻬﻴﻠﻋ ﻅﺎﻔﺤﻟﺍﻭ ءﺎﻤﻟﺍ
ﻝﻮﺼﺤﻠﻟ .ﺥﺎﺴﺗﻻﺍ ﺔﺟﺭﺩﻭ ﺔﺸﻤﻗﻷﺍ ﻉﻮﻧ ﺐﺴﺣ ﻞﻴﺴﻐﻟﺍ ﺓﺭﺍﺮﺣ ﺔﺟﺭﺩ ﺩﺪﺣ
ﻖﺼﻠﻣ ﻰﻠﻋ ﺓﺩﻮﺟﻮﻤﻟﺍ ﺕﺎﻤﻴﻠﻌﺘﻟﺍ ﻉﺎﺒﺗﺍ ﻰﻠﻋ ﺹﺮﺣﺍ ﺞﺋﺎﺘﻨﻟﺍ ﻞﻀﻓﺃ ﻰﻠﻋ
ﻲﺘﻟﺍ ﺔﺟﺭﺪﻟﺍ ﻚﻠﺗ ﻦﻣ ﻞﻗﺃ ﺔﻨﺧﺎﺴﻟﺍﻭ ﺔﺌﻓﺍﺪﻟﺍ ﻩﺎﻴﻤﻟﺍ ﺓﺭﺍﺮﺣ ﺔﺟﺭﺩ ﻥﻮﻜﺗ
ﺔﻟﺎﺴﻐﻠﻟ ﺔﺌﻓﺍﺪﻟﺍ ﻩﺎﻴﻤﻟﺍ ﻦﻣ ﻞﻴﻠﻗ ﺔﻓﺎﺿﺇ ﻢﺘﻳ ،ﺮﺗﺎﻔﻟﺍ ءﺎﻤﻟﺍ ﻡﺍﺪﺨﺘﺳﺍ ﺪﻨﻋ ﻰﺘﺣ
ﻯﺮﺧﺃ ﺓﺮﻣ ﻂﻐﺿﺍ ﻢﺛ ،ﺓﺩﺪﺤﻤﻟﺍ ﻞﻴﻐﺸﺘﻟﺍ ﺓﺭﻭﺩ ءﺪﺒﻟ ﺭﺰﻟﺍ ﺍﺬﻫ ﻰﻠﻋ ﻂﻐﺿﺍ
ﺓﺪﻤﻟ ﺭﺍﺮﻤﺘﺳﻻﺍ ﻊﻣ ﻂﻐﺿﺍ .ءﺎﻄﻐﻟﺍ ﻞﻔﻗ ءﺎﻐﻟﺇﻭ ﺎًﺘﻗﺆﻣ ﺓﺭﻭﺪﻟﺍ ﻑﺎﻘﻳﻹ
ﻞﻔﻗ ءﺎﻐﻟﺇ ﻕﺮﻐﺘﺴﻳ ﺪﻗ ،ﺲﺑﻼﻤﻟﺍ ﻒﻴﻔﺠﺘﺑ ﺔﻟﺎﺴﻐﻟﺍ ﻡﺎﻴﻗ ﺪﻨﻋ
.ﺓﺭﻭﺪﻟﺍ ءﺎﻐﻟﻹ ﻥﺍﻮﺛ 3 ﺓﺪﻤﻟ ﺭﺍﺮﻤﺘﺳﻻﺍ ﻊﻣ ﻂﻐﺿﺍ .ﻖﺋﺎﻗﺩ ﺓﺪﻋ ءﺎﻄﻐﻟﺍ
.ﺔﺸﻤﻗﻷﺍ ﻰﻠﻋ ﻅﺎﻔﺤﻠﻟ ﺎًﺌﻓﺩ ﺮﺜﻛﻷﺍ ﻩﺎﻴﻤﻟﺍ ﻡﺪﺨﺘﺳﺍﻭ ،ﺲﺑﻼﻤﻟﺍ
“ﻞﻔﻘﻟﺍ ءﺎﻐﻟﺇ/ﺖﻗﺆﻣ ﻑﺎﻘﻳﺇ/ﻞﻴﻐﺸﺘﻟﺍ ءﺪﺑ”ﺭﺯ
.ﺔﻘﺑﺎﺴﻟﺍ ﻚﺘﻟﺎﺴﻏ ﺎﻬﺑ ﻞﻤﻌﺗ ﺖﻧﺎﻛ
.ﺓﺭﺍﺮﺣ ﺔﺟﺭﺩ ﻞﻗﺃ ﻰﻠﻋ ﻅﺎﻔﺤﻠﻟ
.ﺓﺭﻭﺪﻟﺍ ءﺎﻐﻟﻹ ﻥﺍﻮﺛ
:
ﺔﻈﺣﻼﻣ
Page 66

؟ﺔﻟﺎﺴﻐﻟﺍ ﻲﻓ ﺔﻨﻤﻀﻤﻟﺍ ﺓﺪﻳﺪﺠﻟﺍ ﺎﻳﺍﺰﻤﻟﺍ ﻲﻫ ﺎﻣ
ﺎًﻴﺋﺎﻘﻠﺗ ﺔﻟﻮﻤﺤﻟﺍ ﻢﺠﺣ ﺭﺎﻌﺸﺘﺳﺍ
ﺪﻳﺪﺤﺘﻟ ﺭﺎﻌﺸﺘﺳﻻﺍ ﺔﻴﻠﻤﻋ ﺔﻟﺎﺴﻐﻟﺍ ﺃﺪﺒﺗﻭ ءﺎﻄﻐﻟﺍ ﻞﻔﻘﻴﺳ ،ﺓﺭﻭﺪﻟﺍ ءﺪﺑ ﺩﺮﺠﻤﺑ
ﻞﺒﻗ ﻖﺋﺎﻗﺩ ﺓﺪﻋ ﻚﻟﺫ ﻕﺮﻐﺘﺴﻳ ﺪﻗﻭ ،ﺔﻟﻮﻤﺤﻠﻟ ﻢﺋﻼﻤﻟﺍ ﻩﺎﻴﻤﻟﺍ ﺏﻮﺴﻨﻣ ﻯﻮﺘﺴﻣ
ءﻮﺿ ﺮﺷﺆﻣ” ﻢﺴﻗ ﻲﻓ ﺎًﻴﻠﻴﺼﻔﺗ ﺎ ًﻔ ﺻ ﻭ ﺪﺠﺘﺳ .ﺔﻟﺎﺴﻐﻟﺍ ﻰﻟﺇ ﻩﺎﻴﻤﻟﺍ ﺔﻓﺎﺿﺇ
.“ﺓﺭﻭﺪﻟﺍ ﺔﻟﺎﺣ
ﺓﺮﻴﺼﻗ ﺕﺎﻀﺒﻧ ﻞﻜﺷ ﻲﻓ ﺔﻠﺴﻟﺍ ﺮﻳﺪﻳ ﻮﻫﻭ ﻙﺮﺤﻤﻟﺍ ﺕﻮﺻ ﻊﻤﺴﺗ ﻑﻮﺳﻭ
ﺔﻠﻴﻠﻗ ﺕﺎﻴﻤﻛ ﻚﻠﻬﺘﺴﺗ ﻩﺬﻫ ﻞﻴﺴﻐﻟﺍ ﺔﻘﻳﺮﻃ ﻥﺄﺑ ﺎًﻤﻠﻋ ،ﺎًﻣﺎﻤﺗ ﺔﻟﻮﻤﺤﻟﺍ ﺐﻴﻃﺮﺘﻟ
.ﻱﺪﻴﻠﻘﺘﻟﺍ ﺽﺎﻀﺨﻟﺎﺑ ﻞﻤﻌﺗ ﻲﺘﻟﺍ ﺔﻟﺎﺴﻐﻟﺎﺑ ﺔﻧﺭﺎﻘﻣ ﺔﻗﺎﻄﻟﺍﻭ ﻩﺎﻴﻤﻟﺍ ﻦﻣ
ﻞﺜﻣﻷﺍ ﻒﻈﻨﻤﻟﺍ ﺭﺎﻴﺘﺧﺍ
“HE”
ﻭﺃ
ﻰﻟﺇ ﺕﺎﻔﻈﻨﻤﻟﺍ ﻦﻣ ﻉﻮﻨﻟﺍ ﺍﺬﻫ ﻡﺍﺪﺨﺘﺳﺍ ﻱﺩﺆﻳ ﻥﺃ ﻞﻤﺘﺤﻤﻟﺍ ﻦﻣﻭ ،ﺍﺬﻫ .ﺓﺩﻮﺠﻟﺍﻭ
ﺔﻣﻼﻋ ﺪﺠﺘﺳﻭ ،ﻂﻘﻓ ﺓءﺎﻔﻜﻟﺍ ﺔﻴﻟﺎﻋ ﺕﺎﻔﻈﻨﻤﻟﺍ ﻡﺍﺪﺨﺘﺳﺍ ﻰﻠﻋ ﺹﺮﺣﺍ
ﺕﺎﻴﻤﻛ ﻚﻠﻬﺘﺴﺗ ﻲﺘﻟﺍ ﻞﻴﺴﻐﻟﺍ ﺔﻴﻠﻤﻋ ﻦﻋ ﺞﺘﻨﻳﻭ ،ﺓﻮﺒﻌﻟﺍ ﻰﻠﻋ “ﺓءﺎﻔﻜﻟﺍ ﺔﻴﻟﺎﻋ”
ﺓءﺎﻔﻜﻟﺍ ﻢﻳﺪﻋ ﻱﺩﺎﻋ ﻒﻈﻨﻣ ﻡﺍﺪﺨﺘﺳﺍ ﺪﻨﻋ ﻚﻟﺫﻭ ﺔﻔﻴﺜﻛ ﺓﻮﻏﺭ ﻩﺎﻴﻤﻟﺍ ﻦﻣ ﺔﻠﻴﻠﻗ
ﺪﻗ ﺎﻬﻧﺃ ﺎﻤﻛ ،ﻒﻄﺸﻟﺍ ءﺎﻨﺛﺃ ءﺍﺩﻷﺍ ﻯﻮﺘﺴﻣ ﻲﻓ ﺽﺎﻔﺨﻧﺍﻭ ﺓﺭﻭﺪﻟﺍ ﺓﺪﻣ ﺔﻟﺎﻃﺇ
ﺭﺪﺠﺗ .ﺮﻈﻨﻠﻟ ﺔﺘﻔﻠﻣ ﻦﻔﻌﺗ ﺔﻘﺒﻃ ﻥّﻮﻜﺗﻭ ﺕﺎﻧﻮﻜﻤﻠﻟ ﻝﺎﻄﻋﺃ ﺙﻭﺪﺣ ﻰﻟﺇ ﻱﺩﺆﺗ
ﺭﺪﻘﻟﺍ ﺝﺎﺘﻧﺇ ﺓءﺎﻔﻜﻟﺍ ﺔﻴﻟﺎﻋ ﺕﺎﻔﻈﻨﻤﻟﺍ ﻊﻴﻨﺼﺗ ﻲﻓ ﻲﻋﻭﺭ ﺪﻗ ﻪﻧﺃ ﻰﻟﺇ ﺓﺭﺎﺷﻹﺍ
ﻉﺎﺒﺗﺍ ﻰﺟﺮﻳ .ءﺍﺩﻸﻟ ﻞﺜﻣﻷﺍ ﻯﻮﺘﺴﻤﻟﺍ ﻰﻠﻋ ﻝﻮﺼﺤﻠﻟ ﺓﻮﻏﺮﻟﺍ ﻦﻣ ﺐﺳﺎﻨﻤﻟﺍ
.ﻡﺪﺨﺘﺴﻤﻟﺍ ﻒﻈﻨﻤﻟﺍ ﺭﺍﺪﻘﻣ ﺪﻳﺪﺤﺘﻟ ﺔﻌّﻨﺼﻤﻟﺍ ﺔﻛﺮﺸﻟﺍ ﺕﺎﻤﻴﻠﻌﺗ
ﻩﺎﻴﻤﻟﺍ ﻦﻣ ﺔﻠﻴﻠﻗ ﺕﺎﻴﻤﻛ ﻡﺍﺪﺨﺘﺳﺎﺑ ﻒﻴﻈﻨﺘﻟﺍ
Washplate
ﺔﺣﻭﺮﻤﻟﺍ
ﻲﺘﻟﺍ ﺔﺣﻭﺮﻤﻟﺍ ﻡﺎﻈﻨﺑ ﺔﻟﺎﺴﻏ
ﻩﺎﻴﻤﻟﺍ ﻦﻣ ﺔﻠﻴﻠﻗ ﺕﺎﻴﻤﻛ ﻚﻠﻬﺘﺴﺗ
ﺩﻭﺰﻣ ﻞﻴﺴﻏ ﻡﺎﻈﻧ ﻰﻠﻋ ﺎﻬﺋﺍﻮﺘﺣﺍ ﻮﻫ ﺓﺪﻳﺪﺠﻟﺍ ﺔﻟﺎﺴﻐﻟﺍ ﻩﺬﻫ ﺰﻴﻤﻳ ﺎﻣ ﻢﻫﺃ ﻥﺇ
ﻂﺒﺿ ﻰﻠﻋ ﺔﻟﺎﺴﻐﻟﺍ ﺪﻋﺎﺴﻳ ﺚﻴﺣ ،ﻩﺎﻴﻤﻟﺍ ﻦﻣ ﺔﻠﻴﻠﻗ ﺕﺎﻴﻤﻛ ﻚﻠﻬﺘﺴﺗ ﺔﺣﻭﺮﻤﺑ
ﺩﺪﺤﻣ ﻱﺃ ﺩﻮﺟﻭ ﺮﻣﻷﺍ ﺐﻠﻄﺘﻳ ﻻ - ﺔﻟﻮﻤﺤﻟﺍ ﻢﺠﺣ ﺐﺴﺣ ﺎًﻴﺋﺎﻘﻠﺗ ﻩﺎﻴﻤﻟﺍ ﻯﻮﺘﺴﻣ
ﺽﺎﻀﺨﻟﺍ ﻡﺎﻈﻨﺑ ﺔﻟﺎﺴﻏ
ﻱﺪﻴﻠﻘﺘﻟﺍ
.ﻩﺎﻴﻤﻟﺍ ﻯﻮﺘﺴﻤﻟ
.ﻂﻘﻓ ﺓءﺎﻔﻜﻟﺍ ﺔﻴﻟﺎﻋ ﺕﺎﻔﻈﻨﻤﻟﺍ ﻡﺍﺪﺨﺘﺳﺍ ﻰﻠﻋ ﺹﺮﺣﺍ
ﺰﻛﺮﻤﻟﺍ ﻒﻴﻈﻨﺘﻟﺍ
ﻦﻣ ًﻻﺪﺒﻓ .ﺰﻛﺮﻤﻟﺍ ﻒﻴﻈﻨﺘﻟﺍ ﻰﻟﺇ ﺾﻔﺨﻨﻣ ﻩﺎﻴﻣ ﺏﻮﺴﻨﻣ ﻲﻓ ﻒﻴﻈﻨﺘﻟﺍ ﺮﻴﺸﻳ
ﻉﺯﻮﺗ ،ﺽﺎﻀﺨﻟﺎﺑ ﻞﻤﻌﺗ ﻲﺘﻟﺍ ﺔﻟﺎﺴﻐﻟﺍ ﻲﻓ ﻝﺎﺤﻟﺍ ﻮﻫ ﺎﻤﻛ ،ﻒﻈﻨﻤﻟﺍ ﻒﻴﻔﺨﺗ
.ﺓﺮﺷﺎﺒﻣ ﺥﺎﺳﻭﻷﺍ ﻰﻠﻋ ﻒﻈﻨﻤﻟﺍ ﺔﻟﺎﺴﻐﻟﺍ ﻩﺬﻫ
ﺎﻬﻋﺎﻤﺳ ﻊﻗﻮﺘﻤﻟﺍ ﺔﻳﺩﺎﻌﻟﺍ ﺕﺍﻮﺻﻷﺍ
ﻒﻠﺘﺨﺗ ﻞﻴﺴﻐﻟﺍ ﺓﺭﻭﺩ ﻦﻣ ﺔﻔﻠﺘﺨﻣ ﻞﺣﺍﺮﻣ ءﺎﻨﺛﺃ ءﺎﺿﻮﺿ ﻭﺃ ﺎًﺗﺍﻮﺻﺃ ﻊﻤﺴﺗ ﺪﻗ
ﺪﻨﻋ ﻦﻴﻨﻃ ﻭﺃ ﺮﻘﻧ ﺕﻮﺻ ﻊﻤﺴﺗ ﺪﻗ ،ﻝﺎﺜﻤﻟﺍ ﻞﻴﺒﺳ ﻰﻠﻋ .ﺔﻘﺑﺎﺴﻟﺍ ﻚﺘﻟﺎﺴﻏ ﻦﻋ
ﺭﺪﺼﺗ ﺪﻗ .ءﺎﻄﻐﻟﺍ ﻞﻔﻘﻟ ﻲﺗﺍﺫ ﺭﺎﺒﺘﺧﺍ ﺔﻴﻠﻤﻋ ءﺍﺮﺟﺇ ﻢﺘﻳ ﺚﻴﺣ ،ﻞﻴﻐﺸﺘﻟﺍ ﺓﺭﻭﺩ ءﺪﺑ
.ﺔﻟﻮﻤﺤﻟﺍ ﻚﻳﺮﺤﺘﺑ ﺔﺣﻭﺮﻤﻟﺍ ﻡﺎﻴﻗ ءﺎﻨﺛﺃ ﺔﻔﻠﺘﺨﻣ ﺰﻳﺯﺃﻭ ﻦﻴﻨﻃ ﺕﺍﻮﺻﺃ ﺎًﻀﻳﺃ
ﺔﻟﺎﺴﻐﻟﺍ ﺩﺪﺤﺗ ﺚﻴﺣ ،ﻕﻼﻃﻹﺍ ﻰﻠﻋ ﺕﺍﻮﺻﺃ ﻱﺃ ﺔﻟﺎﺴﻐﻟﺍ ﺭﺪﺼﺗ ﻻ ﺪﻗ ﺎًﻧﺎﻴﺣﺃﻭ
ﺔﻠﺣﺮﻣ ﻲﻓ ﺲﺑﻼﻤﻟﺍ ﻙﺮﺘﺗ ﻭﺃ ﻚﺴﺑﻼﻣ ﺔﻟﻮﻤﺤﻟ ﻢﺋﻼﻤﻟﺍ ﻩﺎﻴﻤﻟﺍ ﺏﻮﺴﻨﻣ ﻯﻮﺘﺴﻣ
.ﺓﺮﺘﻔﻟ ﻊﻘﻨﻟﺍ
ﺎﻬﻠﻴﻤﺤﺗ ﺐﻨﺠﺗﻭ ،ﺔﺣﻭﺮﻤﻟﺍ ﻝﻮﺣ ٍﻭﺎﺴﺘﻣﻭ ﻉﺯﻮﻣ ﻞﻜﺸﺑ ﺲﺑﻼﻤﻟﺍ ﻞﻴﻤﺤﺘﺑ ﻢﻗ
ﺔﺣﻭﺮﻤﻟﺍ ﻒﺼﺘﻨﻣ ﻥﻮﻜﻳ ﻥﺃ ﻲﻐﺒﻨﻳ ﺚﻴﺣ ؛ﺓﺮﺷﺎﺒﻣ ﺔﺣﻭﺮﻤﻟﺍ ﻒﺼﺘﻨﻣ ﻕﻮﻓ
.ﻞﻴﻤﺤﺘﻟﺍ ءﺎﻨﺛﺃ ﺎًﺤﺿﺍﻭ
3
ﺲﺑﻼﻤﻟﺍ ﻯﻮﺘﺴﻣ ﺮﻘﺘﺴﻴﺳ ،ﺎﻬﻜﻳﺮﺤﺗﻭ ﺔﻟﻮﻤﺤﻟﺍ ﺐﻴﻃﺮﺘﺑ ﺔﻟﺎﺴﻐﻟﺍ ﻡﺎﻴﻗ ءﺎﻨﺛﺃ
ﻦﻣ ﺪﻳﺰﻤﻟﺍ ﺔﻓﺎﺿﺇ ﺓﺭﻭﺮﺿ ﻰﻟﺇ ﺮﻴﺸﻳ ﻻﻭ ﺎًﻴﻌﻴﺒﻃ ﺍًﺮﻣﺃ ﺍﺬﻫ ﺪﻌﻳﻭ ؛ﺔﻠﺴﻟﺍ ﻲﻓ
.ﺲﺑﻼﻤﻟﺍ
:
ﻮﻫ ﺎﻤﻛ ﻩﺎﻴﻤﻟﺎﺑ ﺔﻟﺎﺴﻐﻟﺍ ﺔﻠﺳ ءﻼﺘﻣﺍ ﺔﻈﺣﻼﻣ ﻚﻨﻜﻤﻳ ﻻ
ﻲﻌﻴﺒﻄﻟﺍ ﻦﻤﻓ .ﺽﺎﻀﺨﻟﺎﺑ ﻞﻤﻌﺗ ﻲﺘﻟﺍ ﺕﻻﺎﺴﻐﻟﺍ ﻦﻣ ﻖﺑﺎﺴﻟﺍ ﻉﻮﻨﻟﺍ ﻊﻣ ﻝﺎﺤﻟﺍ
.ﻩﺎﻴﻤﻟﺍ ﺏﻮﺴﻨﻣ ﻂﺧ ﻮﻠﻌﻳ ﻯﻮﺘﺴﻣ ﻲﻓ ﺔﻟﻮﻤﺤﻟﺍ ﺾﻌﺑ ﻥﻮﻜﺗ ﻥﺃ
ﺔﻤﻬﻣ ﺔﻇﻮﺤﻠﻣ
Page 67

ﺔﻟﺎﺴﻐﻟﺍ ﻡﺍﺪﺨﺘﺳﺍ ﺪﻨﻋ ﺔﻣﻼﺴﻟﺍ
ﺍًﺪﺟ ﻡﺎﻫ ﺮﻣﺃ ﻦﻳﺮﺧﻵﺍ ﺔﻣﻼﺳﻭ ﻚﺘﻣﻼﺳ ﻥﺇ
.ﺎﻬﺑ ﻡﺍﺰﺘﻟﻻﺍﻭ ﺔﻣﻼﺴﻟﺍ ﻞﺋﺎﺳﺭ ﺓءﺍﺮﻗ ﻰﻠﻋ ﺎًﻤﺋﺍﺩ ﺹﺮﺣﺍ ﺍﺬﻟ .ﻞﻴﻟﺪﻟﺍ ﺍﺬﻫ ﻲﻓ ﺯﺎﻬﺠﻟﺎﺑ ﺔﺻﺎﺨﻟﺍ ﺔﻤﻬﻤﻟﺍ ﺔﻣﻼﺴﻟﺍ ﻞﺋﺎﺳﺭ ﻦﻣ ﺪﻳﺪﻌﻟﺍ ﺎﻨﻌﺿﻭ ﺪﻘﻟ
.ﺔﻣﻼﺴﻟﺍ ﻪﻴﺒﻨﺗ ﺰﻣﺭ ﻮﻫ ﺍﺬﻫ
.ﻦﻳﺮﺧﻶﻟﻭ ﻚﻟ ﻯﺫﻷﺍ ﺐﺒﺴﺗ ﻭﺃ ﺓﺎﻓﻭ ﺕﻻﺎﺣ ﺙﻭﺪﺣ ﻲﻓ ﺐﺒﺴﺘﺗ ﻥﺃ ﻦﻜﻤﻳ ﻲﺘﻟﺍ ﺔﻠﻤﺘﺤﻤﻟﺍ ﺮﻃﺎﺨﻤﻟﺍ ﻰﻟﺇ ﺰﻣﺮﻟﺍ ﺍﺬﻫ ﻚﻬﺒﻨﻳ
.(ﺮﻳﺬﺤﺗ) “
WARNING
” ﻭﺃ (ﺮﻄﺧ) “
DANGER
” ﺔﻤﻠﻛ ﺖﻧﺎﻛ ءﺍﻮﺳ ﺔﻣﻼﺴﻟﺍ ﻪﻴﺒﻨﺗ ﺰﻣﺭ ﺐﻘﻋ ﺔﻣﻼﺴﻟﺍ ﻞﺋﺎﺳﺭ ﻞﻛ ﺮﻬﻈﺗ
:
ﻲﻠﻳ ﺎﻣ ﻥﺎﺘﻤﻠﻜﻟﺍ ﻥﺎﺗﺎﻫ ﻲﻨﻌﺗﻭ
ﺮﻄﺧ
ﻡﺪﻋ ﺔﻟﺎﺣ ﻲﻓ ﺭﻮﻔﻟﺍ ﻰﻠﻋ ﺔﻐﻟﺎﺒﻟﺍ ﺔﺑﺎﺻﻹﺍ ﻭﺃ ﺓﺎﻓﻮﻠﻟ ﺽﺮﻌﺘﺗ ﺪﻗ
.ﺕﺍﺩﺎﺷﺭﻺﻟ ﻚﻋﺎﺒﺗﺍ
ﺮﻳﺬﺤﺗ
ﻚﻋﺎﺒﺗﺍ ﻡﺪﻋ ﺔﻟﺎﺣ ﻲﻓ ﺔﻐﻟﺎﺒﻟﺍ ﺔﺑﺎﺻﻹﺍ ﻭﺃ ﺓﺎﻓﻮﻠﻟ ﺽﺮﻌﺘﺗ ﺪﻗ
.ﺕﺍﺩﺎﺷﺭﻺﻟ
ﺪﻗ ﺎﻣ ﻰﻠﻋ ﻚﻟﺪﺗ ﺎﻤﻛ ،ﺔﺑﺎﺻﻺﻟ ﺽﺮﻌﺘﻟﺍ ﻝﺎﻤﺘﺣﺍ ﻦﻣ ﺪﺤﻟﺍ ﺔﻴﻔﻴﻛ ﻰﻠﻋ ﻚﻟﺪﺗﻭ ،ﺔﻠﻤﺘﺤﻤﻟﺍ ﺮﻃﺎﺨﻤﻟﺎﺑ ﺔﻣﻼﺴﻟﺍ ﻞﺋﺎﺳﺭ ﻊﻴﻤﺟ ﻙﺮﺒﺨﺗ
.ﺕﺍﺩﺎﺷﺭﻹﺍ ﻉﺎﺒﺗﺍ ﻡﺪﻋ ﺔﻟﺎﺣ ﻲﻓ ﺙﺪﺤﻳ
ﺔﻣﻼﺴﻠﻟ ﺔﻣﺎﻫ ﺕﺍﺩﺎﺷﺭﺇ
ﻦﻤﻀﺘﺗ ﻲﺘﻟﺍ ﺔﻴﺳﺎﺳﻷﺍ ﺕﺎﻃﺎﻴﺘﺣﻻﺍ ﻩﺬﻫ ﻊﺒﺗﺍ ،ﺔﻟﺎﺴﻐﻟﺍ ﻝﺎﻤﻌﺘﺳﺍ ﺪﻨﻋ ﺩﺍﺮﻓﻷﺍ ﺔﺑﺎﺻﺇ ﻭﺃ ﺔﻴﺋﺎﺑﺮﻬﻛ ﺕﺎﻣﺪﺻ ﻉﻮﻗﻭ ﻭﺃ ﻖﻳﺮﺣ ﺏﻮﺸﻧ ﺮﻄﺧ ﻦﻣ ﺪﺤﻠﻟ
:
ﺮﻳﺬﺤﺗ
:
ﻲﻠﻳ ﺎﻣ
.ﺔﻟﺎﺴﻐﻟﺍ ﻝﺎﻤﻌﺘﺳﺍ ﻞﺒﻗ ﺕﺍﺩﺎﺷﺭﻹﺍ ﻊﻴﻤﺟ ﺓءﺍﺮﻗ ﻰﻠﻋ ﺹﺮﺣﺍ
�
ﻰﻠﻋ ﻱﻮﺘﺤﺗ ﻭﺃ ﺎﻬﻌﻘﻧ ﻭﺃ ﺎﻬﻠﺴﻏ ﻭﺃ ﺎﻬﻔﻴﻈﻨﺗ ﻖﺒﺳ ﺲﺑﻼﻣ ﻞﺴﻐﺑ ﻢﻘﺗ ﻻ
�
ﺔﻠﺑﺎﻗ ﻯﺮﺧﺃ ﺩﺍﻮﻣ ﻱﺃ ﻭﺃ ﻑﺎﺠﻟﺍ ﻒﻴﻈﻨﺘﻟﺍ ﻖﻴﺣﺎﺴﻣ ﻭﺃ ﻦﻳﺰﻨﺑ ﻊﻘﺑ
ﻥﺃ ﻦﻜﻤﻳ ﺓﺮﺨﺑﺃ ﺎﻬﻨﻣ ﺚﻌﺒﻨﻳ ﺪﻗ ﺚﻴﺣ ،ﺓﺮﺠﻔﺘﻣ ﺩﺍﻮﻣ ﻭﺃ ﻝﺎﻌﺘﺷﻼﻟ
.ﺮﺠﻔﻨﺗ ﻭﺃ ﻞﻌﺘﺸﺗ
ﺩﺍﻮﻣ ﻱﺃ ﻭﺃ ،ﻑﺎﺠﻟﺍ ﻒﻴﻈﻨﺘﻟﺍ ﻖﻴﺣﺎﺴﻣ ﻭﺃ ﻦﻴﻟﻭﺯﺎﺠﻟﺍ ﺔﻓﺎﺿﺈﺑ ﻢﻘﺗ ﻻ
�
ﺪﻗ ﺚﻴﺣ ،ﻞﻴﺴﻐﻟﺍ ﻩﺎﻴﻣ ﻰﻟﺇ ﺓﺮﺠﻔﺘﻤﻟﺍ ﺩﺍﻮﻤﻟﺍ ﻭﺃ ﻝﺎﻌﺘﺷﻼﻟ ﺔﻠﺑﺎﻗ ﻯﺮﺧﺃ
.ﺮﺠﻔﻨﺗ ﻭﺃ ﻞﻌﺘﺸﺗ ﻥﺃ ﻦﻜﻤُﻳ ﺓﺮﺨﺑﺃ ﺎﻬﻨﻣ ﺚﻌﺒﻨﺗ
ءﺎﻤﻟﺍ ﻡﺎﻈﻧ ﻲﻓ ،ﺔﻨﻴﻌﻣ ﻑﻭﺮﻇ ﻞﻇ ﻲﻓ ،ﻦﻴﺟﻭﺭﺪﻴﻬﻟﺍ ﺯﺎﻏ ﺪﻟﻮﺘﻳ ﺪﻗ
�
ﻊﻣ .ﺮﺜﻛﺃ ﻭﺃ ﻦﻴﻋﻮﺒﺳﺃ ﺓﺪﻤﻟ ﻪﻣﺍﺪﺨﺘﺳﺍ ﻡﺪﻋ ﺔﻟﺎﺣ ﻲﻓ ﻚﻟﺫﻭ ﻦﺧﺎﺴﻟﺍ
ﻡﺪﻋ ﻝﺎﺣ ﻲﻓﻭ ،ﺓﺮﺠﻔﺘﻤﻟﺍ ﺕﺍﺯﺎﻐﻟﺍ ﻦﻣ ﻦﻴﺟﻭﺭﺪﻴﻬﻟﺍ ﺯﺎﻏ ﻥﺃ ﻢﻠﻌﻟﺍ
ﺮﻴﺑﺎﻨﺻ ﻞﻛ ﻞﻴﻐﺸﺘﺑ ﺢﺼﻨُﻳ ،ﺓﺪﻤﻟﺍ ﻩﺬﻫ ﻲﻓ ﻦﺧﺎﺴﻟﺍ ءﺎﻤﻟﺍ ﻡﺎﻈﻧ ﻡﺍﺪﺨﺘﺳﺍ
ﻦﻣ ﻖﻓﺪﺘﻳ ءﺎﻤﻟﺍ ﻙﺮﺗﺍﻭ ،ﺔﻟﺎﺴﻐﻟﺍ ﻡﺍﺪﺨﺘﺳﺍ ﻲﻓ ءﺪﺒﻟﺍ ﻞﺒﻗ ﺔﻨﺧﺎﺴﻟﺍ ﻩﺎﻴﻤﻟﺍ
ﻦﻣ ﺕﺎﻤﻛﺍﺮﺗ ﺔﻳﺃ ﺔﻟﺍﺯﺇ ﻰﻟﺇ ﻚﻟﺫ ﻱﺩﺆﻴﺳ ﺚﻴﺣ ،ﻖﺋﺎﻗﺩ ﺓﺪﻌﻟ ﺭﻮﺒﻨﺻ ﻞﻛ
ﻑﻮﺸﻜﻣ ﺐﻬﻟ ﻱﺃ ﻡﺍﺪﺨﺘﺳﺍ ﻭﺃ ﻦﻴﺧﺪﺘﻟﺍ ﺮﻈﺤُﻳ ﺎﻤﻛ .ﻦﻴﺟﻭﺭﺪﻴﻬﻟﺍ ﺯﺎﻏ
.ﻝﺎﻌﺘﺷﻼﻟ ﻞﺑﺎﻗ ﻦﻴﺟﻭﺭﺪﻬﻟﺍ ﺯﺎﻏ ﻥﺇ ﺚﻴﺣ ،ﺖﻗﻮﻟﺍ ﺍﺬﻫ ﻝﻼﺧ
ﺔﺒﻗﺍﺮﻣ ﻰﻠﻋ ﺹﺮﺣﺍﻭ .ﺎﻬﻠﺧﺍﺩ ﻭﺃ ﺔﻟﺎﺴﻐﻟﺍ ﻕﻮﻓ
ﺐﻌﻠﻟﺎﺑ ﻝﺎﻔﻃﻸﻟ ﺢﻤﺴﺗ ﻻ
�
.ﻢﻬﻨﻣ ﺏﺮﻘﻟﺎﺑ ﺔﻟﺎﺴﻐﻟﺍ ﻝﺎﻤﻌﺘﺳﺍ ﺪﻨﻋ ﺎًﻤﺋﺍﺩ ﻝﺎﻔﻃﻷﺍ
.ءﺎﻄﻐﻟﺍ ﻭﺃ ﺏﺎﺒﻟﺍ ﻚﻔﺑ ﻢﻗ ،ﺎﻬﻨﻣ ﺺﻠﺨﺘﻟﺍ ﻭﺃ ﺔﻣﺪﺨﻟﺍ ﻦﻣ ﺔﻟﺎﺴﻐﻟﺍ ﺔﻟﺍﺯﺇ ﻞﺒﻗ
�
ﻲﻓ ﺽﺎﻀﺨﻟﺍ ﻭﺃ ﺽﻮﺤﻟﺍ ﻭﺃ ﺔﻠﺤﻟﺍ ﺖﻧﺎﻛ ﺍﺫﺇ ،ﺔﻟﺎﺴﻐﻟﺍ ﻞﺧﺍﺩ ﻚﻳﺪﻳ ﻊﻀﺗ ﻻ
�
.ﺔﻛﺮﺣ ﺔﻟﺎﺣ
.ﺲﻘﻄﻟﺍ ﻞﻣﺍﻮﻌﻟ ﻪﻴﻓ ﺽﺮﻌﺘﺗ ﻥﺎﻜﻣ ﻲﻓ ﺎﻬﻨﻳﺰﺨﺗ ﻭﺃ ﺔﻟﺎﺴﻐﻟﺍ ﺐﻴﻛﺮﺘﺑ ﻢﻘﺗ ﻻ
�
.ﻢﻜﺤﺘﻟﺍ ﺢﻴﺗﺎﻔﻤﺑ ﺚﺒﻌﺗ ﻻ
�
ﻝﺎﻤﻋﺃ ﻱﺃ ءﺍﺮﺟﺇ ﻝﻭﺎﺤﺗ ﻭﺃ ﺎﻬﻟﺍﺪﺒﺘﺳﺍ ﻭﺃ ﺔﻟﺎﺴﻐﻟﺎﺑ ﺔﻌﻄﻗ ﻱﺃ ﺡﻼﺻﺈﺑ ﻢﻘﺗ ﻻ
�
ﻲﻓ ﻚﻟﺫ ﺩﺭﻭ ﺍﺫﺇ ﻭﺃ ﻞﻴﻟﺪﻟﺍ ﺍﺬﻫ ﻲﻓ ﺍًﺪﻳﺪﺤﺗﻭ ﻚﻟﺬﺑ ﺔﻴﺻﻮﺘﻟﺍ ﻢﺘﺗ ﻢﻟ ﺎﻣ ،ﺔﻧﺎﻴﺻ
ﻪﻳﺪﻟﻭ ﻡﺪﺨﺘﺴﻤﻟﺍ ﺎﻬﺑ ﻡﻮﻘﻳ ﻥﺃ ﻦﻜﻤﻳ ﻲﺘﻟﺍ ﺓﺭﻮﺸﻨﻤﻟﺍ ﺕﺎﺣﻼﺻﻹﺍ ﺕﺍﺩﺎﺷﺭﺇ
.ﺎﻫﺬﻴﻔﻨﺘﻟ ﺔﻣﺯﻼﻟﺍ ﺕﺍﺭﺎﻬﻤﻟﺍ
ﺔﻌﺑﺎﺘﻟﺍ ﺐﻴﻛﺮﺘﻟﺍ ﺕﺍﺩﺎﺷﺭﺇ ﻲﻓ ﺓﺩﻮﺟﻮﻤﻟﺍ “ﺔﻴﺋﺎﺑﺮﻬﻜﻟﺍ ﺕﺎﺒﻠﻄﺘﻤﻟﺍ” ﻊﺟﺍﺭ
�
.ﺾﻳﺭﺄﺘﻟﺍ ﺕﺍﺩﺎﺷﺭﻹ
ﺕﺍﺩﺎﺷﺭﻹﺍ ﻩﺬﻬﺑ ﻅﺎﻔﺘﺣﻻﺍ ﻰﺟﺮﻳ
ﺕﺎﻔﺻﺍﻮﻤﻟﺍ
ﺔﻟﺎﺴﻐﻟﺍ ﻡﺍﺪﺨﺘﺳﺍ ﺪﻨﻋ ﺔﻣﻼﺴﻟﺍ
ﺍًﺪﺟ ﻡﺎﻫ ﺮﻣﺃ ﻦﻳﺮﺧﻵﺍ ﺔﻣﻼﺳﻭ ﻚﺘﻣﻼﺳ ﻥﺇ
.ﺎﻬﺑ ﻡﺍﺰﺘﻟﻻﺍﻭ ﺔﻣﻼﺴﻟﺍ ﻞﺋﺎﺳﺭ ﺓءﺍﺮﻗ ﻰﻠﻋ ﺎًﻤﺋﺍﺩ ﺹﺮﺣﺍ ﺍﺬﻟ .ﻞﻴﻟﺪﻟﺍ ﺍﺬﻫ ﻲﻓ ﺯﺎﻬﺠﻟﺎﺑ ﺔﺻﺎﺨﻟﺍ ﺔﻤﻬﻤﻟﺍ ﺔﻣﻼﺴﻟﺍ ﻞﺋﺎﺳﺭ ﻦﻣ ﺪﻳﺪﻌﻟﺍ ﺎﻨﻌﺿﻭ ﺪﻘﻟ
.ﻦﻳﺮﺧﻶﻟﻭ ﻚﻟ ﻯﺫﻷﺍ ﺐﺒﺴﺗ ﻭﺃ ﺓﺎﻓﻭ ﺕﻻﺎﺣ ﺙﻭﺪﺣ ﻲﻓ ﺐﺒﺴﺘﺗ ﻥﺃ ﻦﻜﻤﻳ ﻲﺘﻟﺍ ﺔﻠﻤﺘﺤﻤﻟﺍ ﺮﻃﺎﺨﻤﻟﺍ ﻰﻟﺇ ﺰﻣﺮﻟﺍ ﺍﺬﻫ ﻚﻬﺒﻨﻳ
.(ﺮﻳﺬﺤﺗ) “
ﻡﺪﻋ ﺔﻟﺎﺣ ﻲﻓ ﺭﻮﻔﻟﺍ ﻰﻠﻋ ﺔﻐﻟﺎﺒﻟﺍ ﺔﺑﺎﺻﻹﺍ ﻭﺃ ﺓﺎﻓﻮﻠﻟ ﺽﺮﻌﺘﺗ ﺪﻗ
WARNING
” ﻭﺃ (ﺮﻄﺧ) “
ﻚﻋﺎﺒﺗﺍ ﻡﺪﻋ ﺔﻟﺎﺣ ﻲﻓ ﺔﻐﻟﺎﺒﻟﺍ ﺔﺑﺎﺻﻹﺍ ﻭﺃ ﺓﺎﻓﻮﻠﻟ ﺽﺮﻌﺘﺗ ﺪﻗ
ﺪﻗ ﺎﻣ ﻰﻠﻋ ﻚﻟﺪﺗ ﺎﻤﻛ ،ﺔﺑﺎﺻﻺﻟ ﺽﺮﻌﺘﻟﺍ ﻝﺎﻤﺘﺣﺍ ﻦﻣ ﺪﺤﻟﺍ ﺔﻴﻔﻴﻛ ﻰﻠﻋ ﻚﻟﺪﺗﻭ ،ﺔﻠﻤﺘﺤﻤﻟﺍ ﺮﻃﺎﺨﻤﻟﺎﺑ ﺔﻣﻼﺴﻟﺍ ﻞﺋﺎﺳﺭ ﻊﻴﻤﺟ ﻙﺮﺒﺨﺗ
DANGER
” ﺔﻤﻠﻛ ﺖﻧﺎﻛ ءﺍﻮﺳ ﺔﻣﻼﺴﻟﺍ ﻪﻴﺒﻨﺗ ﺰﻣﺭ ﺐﻘﻋ ﺔﻣﻼﺴﻟﺍ ﻞﺋﺎﺳﺭ ﻞﻛ ﺮﻬﻈﺗ
.ﺕﺍﺩﺎﺷﺭﻺﻟ ﻚﻋﺎﺒﺗﺍ
.ﺕﺍﺩﺎﺷﺭﻺﻟ
.ﺔﻣﻼﺴﻟﺍ ﻪﻴﺒﻨﺗ ﺰﻣﺭ ﻮﻫ ﺍﺬﻫ
:
ﻲﻠﻳ ﺎﻣ ﻥﺎﺘﻤﻠﻜﻟﺍ ﻥﺎﺗﺎﻫ ﻲﻨﻌﺗﻭ
ﺮﻄﺧ
ﺮﻳﺬﺤﺗ
.ﺕﺍﺩﺎﺷﺭﻹﺍ ﻉﺎﺒﺗﺍ ﻡﺪﻋ ﺔﻟﺎﺣ ﻲﻓ ﺙﺪﺤﻳ
:
ﺞﺘﻨﻤﻟﺍ ﺍﺬﻫ ﻰﻠﻋ ﺔﻘﺼﻠﻤﻟﺍ
(
ﻞﻃﺭ
16.5)
IEC
ﻢﺠﺣ
7.5 (
ﻢﺠﻛ
ﺔﻓﺎﺠﻟﺍ ﺕﺎﺿﺎﻴﺒﻟﺍ ﻢﺠﺣ
ﻞﻃﺭ
23)
ﻢﺠﻛ
10.5
ﺪﻳﺪﺤﺗ ﺕﺎﺒﻠﻄﺘﻣ ﻒﻠﺘﺨﺗ ﺚﻴﺣ ﺓﺩﺪﻌﺘﻣ ﻖﻃﺎﻨﻣ ﻲﻓ ﺕﺎﺠﺘﻨﻤﻟﺍ ﻩﺬﻫ ﻊﻴﺑ ﻢﺘﻳ
ﺔﺤﻴﺤﺼﻟﺍ ﺕﺎﺳﺎﻴﻘﻟﺍ ﻝﺎﻜﺷﺃ ﺾﻌﺑ ﻲﻠﻳ ﺎﻤﻴﻓﻭ .ﻖﻃﺎﻨﻤﻟﺍ ﻩﺬﻫ ﻑﻼﺘﺧﺎﺑ ﻢﺠﺤﻟﺍ
ﺞﺘﻨﻤﻟﺍ ﺎﻫﺮﻓﻮﻳ ﻲﺘﻟﺍ ﺔﻌﺴﻠﻟ ﻰﻧﺩﻷﺍ ﺪﺤﻟﺍ ﺲﻜﻌﻳ ﻥﺯﻭ :ﺔﻓﺎﺠﻟﺍ ﺕﺎﺿﺎﻴﺒﻟﺍ ﻢﺠﺣ
.ﺩﺍﺮﻴﺘﺳﻻﺍ ﺔﻔﻳﺮﻌﺗ ﺪﻳﺪﺤﺘﻟ ﺎﻬﺘﻓﺮﻌﻣ ﻡﺰﻠﻳ ﻲﺘﻟﺍﻭ ﺔﻓﺎﺠﻟﺍ ﺕﺎﺿﺎﻴﺒﻠﻟ
ﺔﻓﺎﺠﻟﺍ ﺕﺎﺿﺎﻴﺒﻟﺍ ﻡﺎﺠﺣﻷ ﻰﺼﻗﻷﺍ ﺪﺤﻟﺍ ﻞﺜﻤﺗ ﻲﺘﻟﺍ ﺔﻌﺴﻟﺍ ﺮﻳﺪﻘﺗ
.ﺓﺪﺣﺍﻭ ﺓﺭﻭﺩ ﻲﻓ ﺔﻌﻨﺼﻤﻟﺍ ﺔﻛﺮﺸﻟﺍ ﻞﺒﻗ ﻦﻣ ﺓﺩﺪﺤﻤﻟﺍﻭ ﺕﺎﺟﻮﺴﻨﻤﻟﺍﻭ
:
IEC
ﻢﺠﺣ
2
Page 68

ﺔﻴﻟﺎﻋ ﺓءﺎﻔﻜﺑ ﺰﻴﻤﺘﺗ ﺔﻳﻮﻠﻋ ﺔﺌﺒﻌﺗ ﺔﺤﺘﻓ ﺕﺍﺫ ﺔﻟﺎﺴﻏ
ﻩﺎﻴﻤﻠﻟ ﺾﻔﺨﻨﻣ ﻙﻼﻬﺘﺳﺍﻭ
ﺔﻳﺎﻨﻌﻟﺍﻭ ﻡﺍﺪﺨﺘﺳﻻﺍ ﻞﻴﻟﺩ
ﺕﺎﻳﻮﺘﺤﻤﻟﺍ ﻝﻭﺪﺟ
6 ........................................................................... ﺓﺭﻭﺪﻟﺍ ﻞﻴﻟﺩ
7 ....................................................................ﺔﻟﺎﺴﻐﻟﺍ ﻡﺍﺪﺨﺘﺳﺍ
10 .................................................................... ﺔﻟﺎﺴﻐﻟﺍ ﺔﻧﺎﻴﺻ
12 .............................................. ﺎﻬﺣﻼﺻﺇﻭ ﻝﺎﻄﻋﻷﺍ ﻑﺎﺸﻜﺘﺳﺍ
2 .................................................ﺔﻟﺎﺴﻐﻟﺍ ﻡﺍﺪﺨﺘﺳﺍ ﺪﻨﻋ ﺔﻣﻼﺴﻟﺍ
2 ........................................................................... ﺕﺎﻔﺻﺍﻮﻤﻟﺍ
3 .............................ﺔﻟﺎﺴﻐﻟﺍ ﻲﻓ ﺔﻨﻤﻀﻤﻟﺍ ﺓﺪﻳﺪﺠﻟﺍ ﺎﻳﺍﺰﻤﻟﺍ ﻲﻫ ﺎﻣ
4 ............................................... ﺔﻨﻤﻀﻤﻟﺍ ﺎﻳﺍﺰﻤﻟﺍﻭ ﻢﻜﺤﺘﻟﺍ ﺔﺣﻮﻟ
ﺔﻴﻟﺎﻋ ﺕﺎﻔﻈﻨﻤﻟﺍ ﻡﺪﺨﺘﺴﺗ ﺚﻴﺤﺑ ﺔﻟﺎﺴﻐﻟﺍ ﻩﺬﻫ ﻢﻴﻤﺼﺗ ﻢﺗ
(HE)
.ﻂﻘﻓ
ﺓءﺎﻔﻜﻟﺍ
W10475873A
 Loading...