

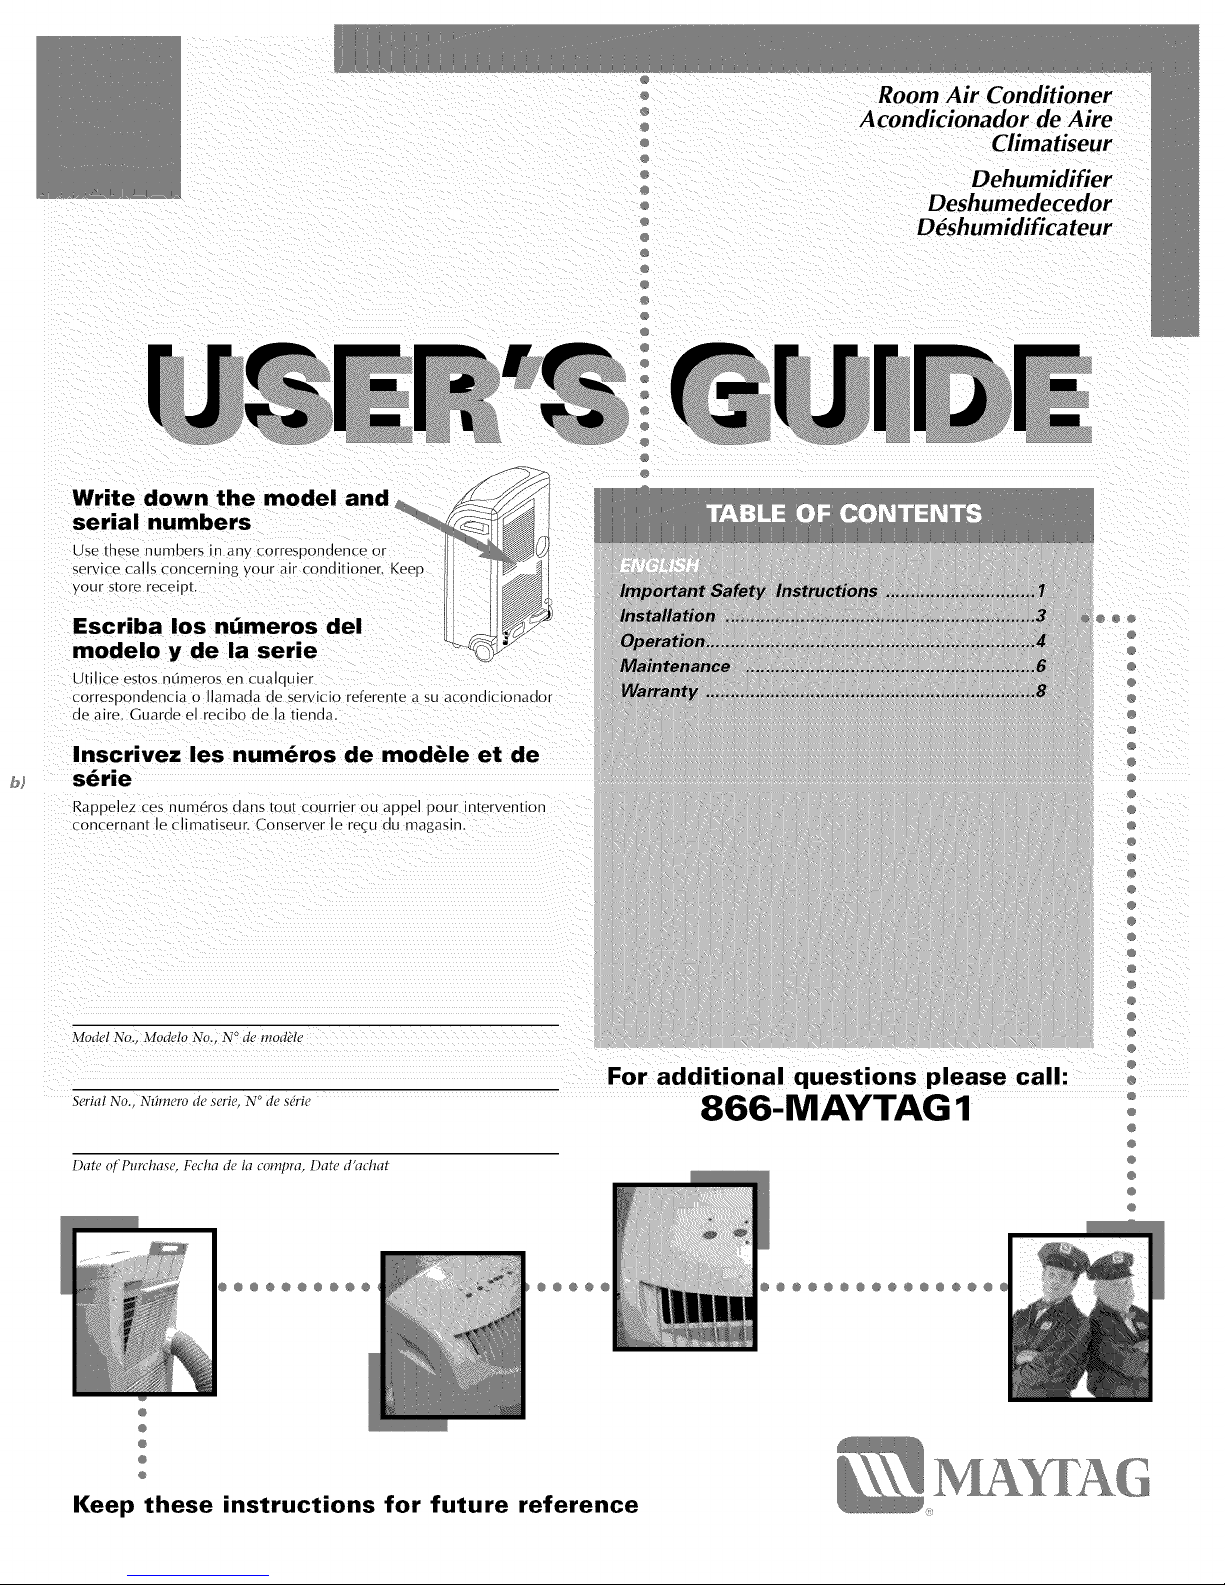
Maytag 23-11-2234N-001 User Manual
Write down the model and
serial numbers
Use these numbers in anv correspondence or
service calls concerning your air conditioner. Keep
our store receipt.
Escriba los nL_meros del
modelo y de la serie
UtiJice estos n umeros en cuaJc Llier
correspondencia o liamada de servicio referente a su acondicionador
de aire. Guarde el recibo de la tienda.
Room Air Conditioner
Acondicionador de Aire
Climatiseur
Dehumidifier
Deshumedecedor
D6shumidificateur
@
@
@
@
@
Inscrivez les num_ros de modble et de
serie
Rappelez ces num6ros dans tout courrier ou appel pour intervention
concernant [e climatiseur. Conserver [e rec:u du magasin.
Model No.. Modelo No.. N ° de mod?le
Serial No., N_hnero de serie, N ° de ,s&i_
Date of'Pun'hase, Fecha de la compra, Date d'achat
@@@@@@@@@ @@@@@ @@@@@@@@@@@@@@@
For additional questions please call:
866-MAYTAG 1 @
@
@
@
@
@
@
@
@
@
@
@
Keep these instructions for future reference

2
Important Safety Instructions ooooooooooooooooooooooo
Electrical Shock Hazard _l_
• Plug unit only into grounded electrical outlet.
• Do not use an extension cord or plug adapter with this unit.
RECOMMENDED CIRCUIT
WIRE SIZES
(As installed per building code) :
PROTECTOR SIZE
15 AMP
20 AMP
30 AMP
WIRE GAUGE
#14 MINIMUM
#12 MINIMUM
#10 MINIMUM
©
250V
20A
©
250V
15A
Power Supply:
115V, 60HZ
AC Only 1-Phase
Outlet Requirement:
3-Prong Grounding Type
125V, 15Amp
Minimum Wire Size:
#14 (A.W.G.) 3-Wire
Use CopperWire Only
Circuit Protector:
15 AmpTime Delay Fuse
or
Circuit Breaker
M
©
250V
30A
• Do not operate unit with filter removed.
• Failure to follow these precautions could result in electrical shock, fire
or personal injury.
• Do not alter cord or plug end. Do not remove warning label on cord.
A
Important Grounding Requirements
Your unit will operate on any 115 volt, 3-pronged (grounded), 60 Hz
circuit. A separate line is not required, but it is advisable not to overload
the circuit with heavy duty appliances such as washing machines, etc.
For your safety, this unit is equipped with a 3-pronged, grounding plug
and must be plugged into a properly grounded outlet. If your outlet is
not of the proper type, it is your responsibility to have the outlet and
wiring changed to the correct type. Do not cut off the third (grounding)
prong. Do not use an adapter.
For Your Safety
Do not store or use gasoline or other flammable vapors and
liquids in the vicinity of this or any other appliance. The fumes
can create a fire hazard or explosion.
Do not introduce objects in the air discharge area. This could
cause permanent damage to your unit.
Do not pour liquids on the air conditioner as this could cause a
malfunction. With the unit unplugged, use a damp cloth for
cleaning your unit. This unit does not require water or ice to be
added.
• Avoid using strong solvents to clean the air conditioner.
• Clean the air conditioner filter every two weeks to avoid
overheating caused by air obstruction. Do not operate without filter.
C) Three-prong grounding plug.
Do not alter plug end.
(_) Grounded three-prong wall
receptacle
(_) Single outlet grounding wall
receptacle
• Do not obstruct the air intake area of your air conditioner, as this
could cause overheating, thus activating the units security switch
and shutting off the unit.
• Do not block air circulation to exhaust tube, when in use.
• Do not block air flow inside with blinds, curtains, or furniture.
3

Before Getting Started°°°°°°°°°°°°°°°°°°°°°°°°°°°°°°°
BEF@RE STA TZNG Y@UR UNiT
Important information
• Read the instruction manual before operating the unit for the first time. It contains important information on
operation, safety, maintenance, service and warranty.
• Keep this instruction manual for future reference.
• Do not start a damaged unit.
• The assembly and connection of the unit must be carried out according to the instructions. If they are not followed
you run the risk of voiding the warranty.
1. The power cord is located in the rear of the unit.
2. Do not allow contact between the unit and water.
3. Do not cover the air discharge and air intake louvers of the unit.
4. Proper venting of the air to the exterior is required at all times.
After turning off the system wait at least 3 minutes before restarting it.
The unit has casters to ease movement. If it is necessary to tilt the unit, it must first be emptied of water in the internal tank using the drain
valve at the bottom of the unit.
See the section When tlwnsporting the unit or Storing the unit for the season.
I_1 Description of Parts on the Portable Cooling Unit
Air Outlet
Front Panel
Control
Panel
Handle
Caster
Air Intake
Exhaust Port
Serial Plate
Power Cord
Drain Valve
4
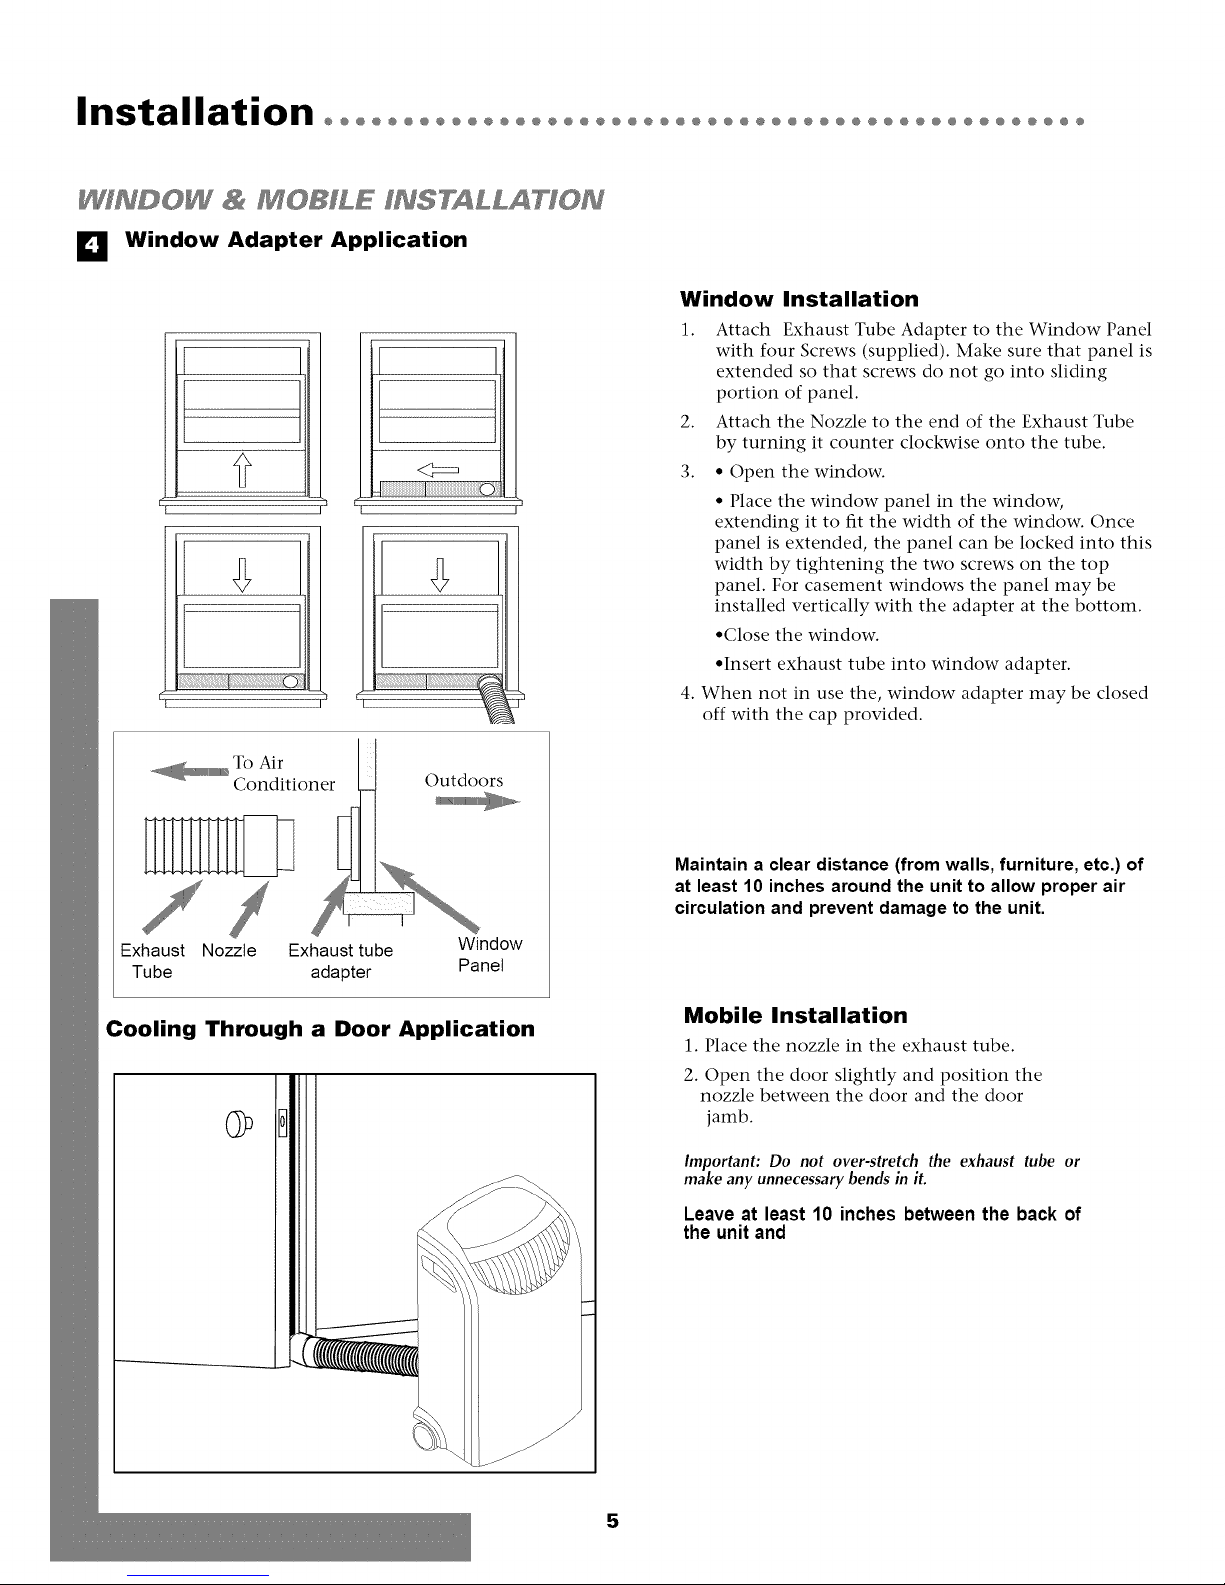
Installation°°°°°°°°°°°°°°°°°°°°°°°°°°°°°°°°°°°°°°°°°°°°°°°°
INDO & MOBI&E INSTALLATZON
El Window Adapter Application
Window Installation
].
Attach Exhaust Tube Adapter to the Window Panel
with four Screws (supplied). Make sure that panel is
extended so that screws do not go into sliding
portion of panel.
Attach the Nozzle to the end of the Exhaust Tube
1
[ ]
2.
by turning it counter clockwise onto the tube.
3.
• Open the window.
• Place the window panel in the window,
extending it to fit the width of the window. Once
panel is extended, the panel can be locked into this
width by tightening the two screws on the top
panel. For casement windows the panel may be
installed vertically with the adapter at the bottom.
•Close the window.
•Insert exhaust tube into window adapter.
4. When not in use the, window adapter may be closed
off with the cap provided.
._ To Air
Exhaust Nozzle Exhaust tube Window
Tube adapter Panel
Cooling Through a Door Application
Conditioner Outdoors
Maintain a clear distance (from walls, furniture, etc.) of
at least 10 inches around the unit to allow proper air
circulation and prevent damage to the unit.
Mobile Installation
1. Place tile nozzle in tile exhaust tube.
2. Open the door slightly and position the
nozzle between the door and the door
jamb.
Important: Do not over-stretch the exhaust tube or
make any unnecessary bends in it.
Leave at least 10 inches between the back of
the unit and
5
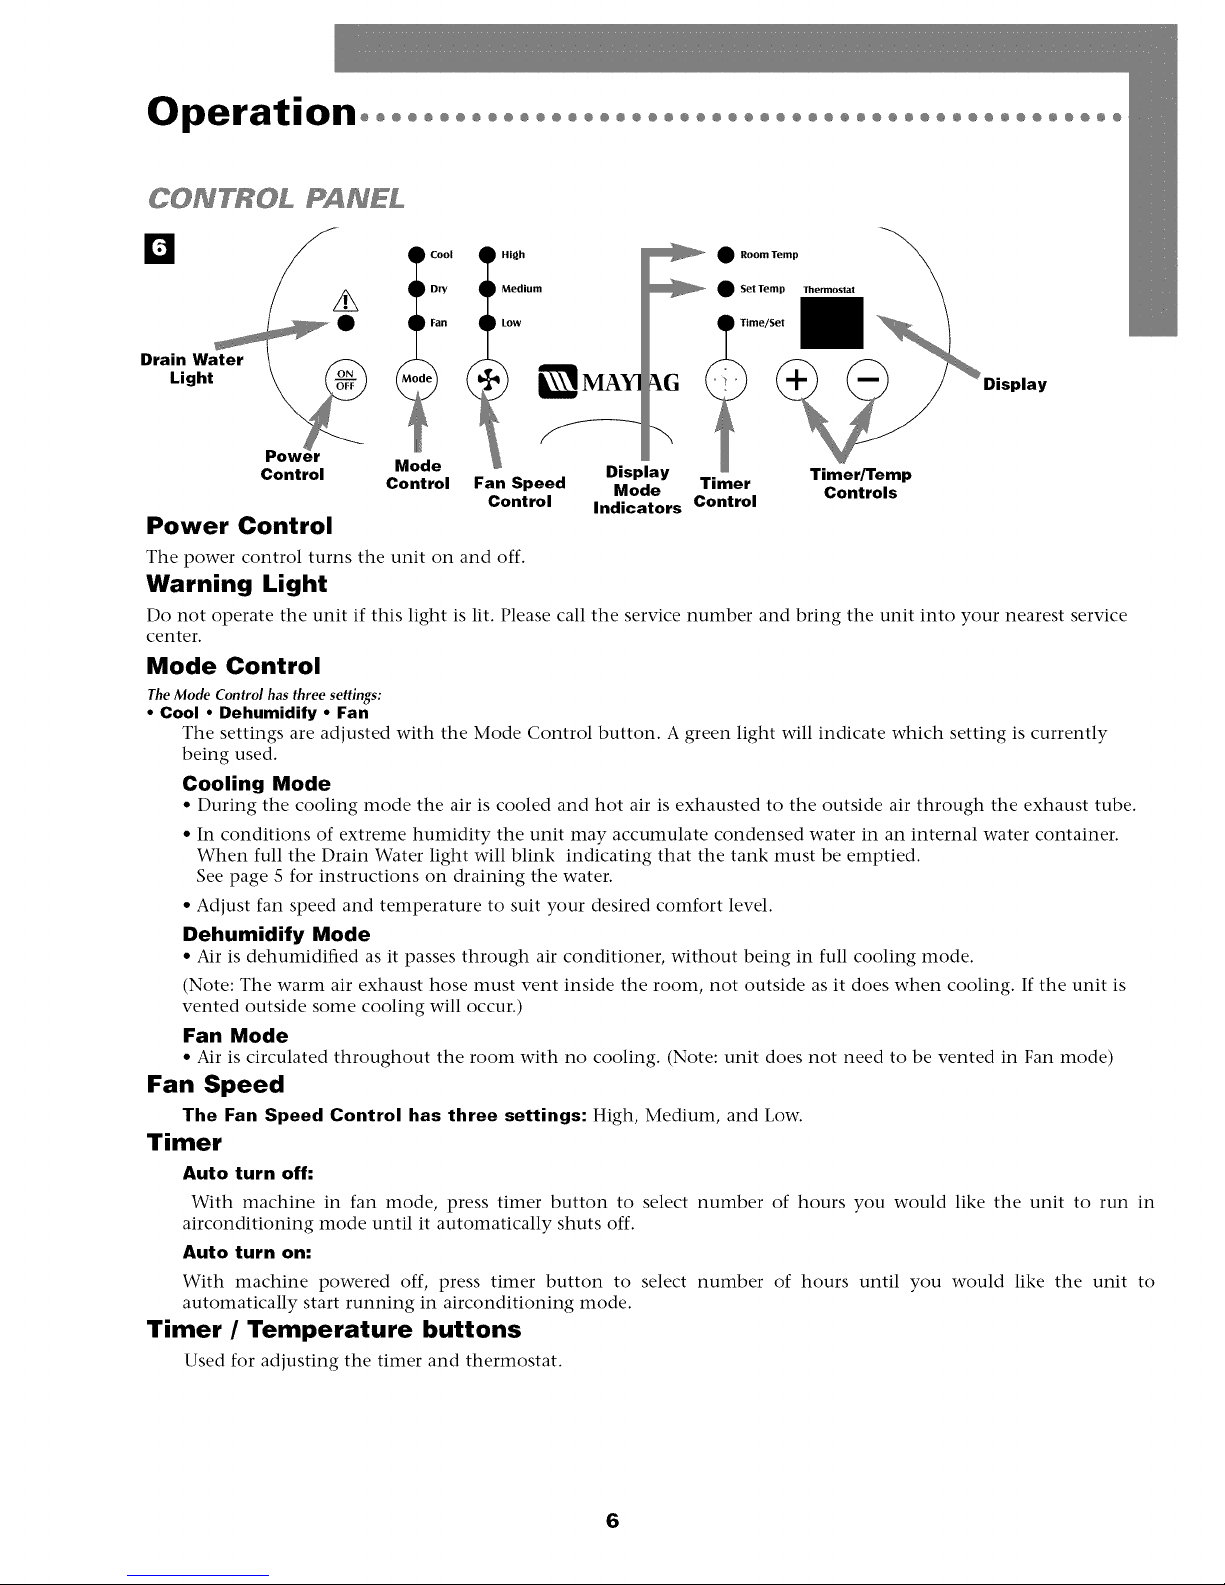
Operation°°°°°°°°°°°°°°°°°°°°°°°°°°°°°°°°°°°°°°°°°°°°°°°°
CONTROL PANEL
High
Medium
Low
_ • RoomTemp
_ SetTemp
Time/Set
Thermostat
<
Control
Power Control
The power control turns the unit on and off.
Warning Light
Do not operate the unit if this light is lit. Please call the service number and bring the unit into your nearest service
center.
Mode Control
The Mode Control has three settings:
• Cool • Dehumidify • Fan
Tile settings are adjusted with tile Mode Control button. A green light will indicate which setting is currently
being used.
Cooling Mode
• During tile cooling mode tile air is cooled and hot air is exhausted to tile outside air through the exhaust tube.
• In conditions of extreme humidity the unit may accumulate condensed water in an internal water container.
When full the Drain Water light will blink indicating that the tank must be emptied.
See page S for instructions on draining the water.
• Adjust fan speed and temperature to suit your desired comfort level.
Dehumidify Mode
• Air is dehumidified as it passes through air conditioner, without being in full cooling mode.
(Note: The warm air exhaust hose must vent inside the room, not outside as it does when cooling. If the unit is
vented outside some cooling will occur.)
Fan Mode
• Air is circulated throughout the room with no cooling. (Note: unit does not need to be vented in Fan mode)
Fan Speed
The Fan Speed Control has three settings: High, Medium, and Low.
Timer
Auto turn off:
With machine in fan mode, press timer button to select number of hours you would like the unit to run in
airconditioning mode until it automatically shuts off.
Auto turn on:
With machine powered off, press timer button to select number of hours until you would like the unit to
automatically start running in airconditioning mode.
Timer / Temperature buttons
Used for adjusting the timer and thermostat.
Mode
Control
Fan Speed Mode Timer Controls
Control Indicators Control
Display Timer/Temp
6
Maintenance oooooooooooooooooooooooooooooooooooooooooooooo
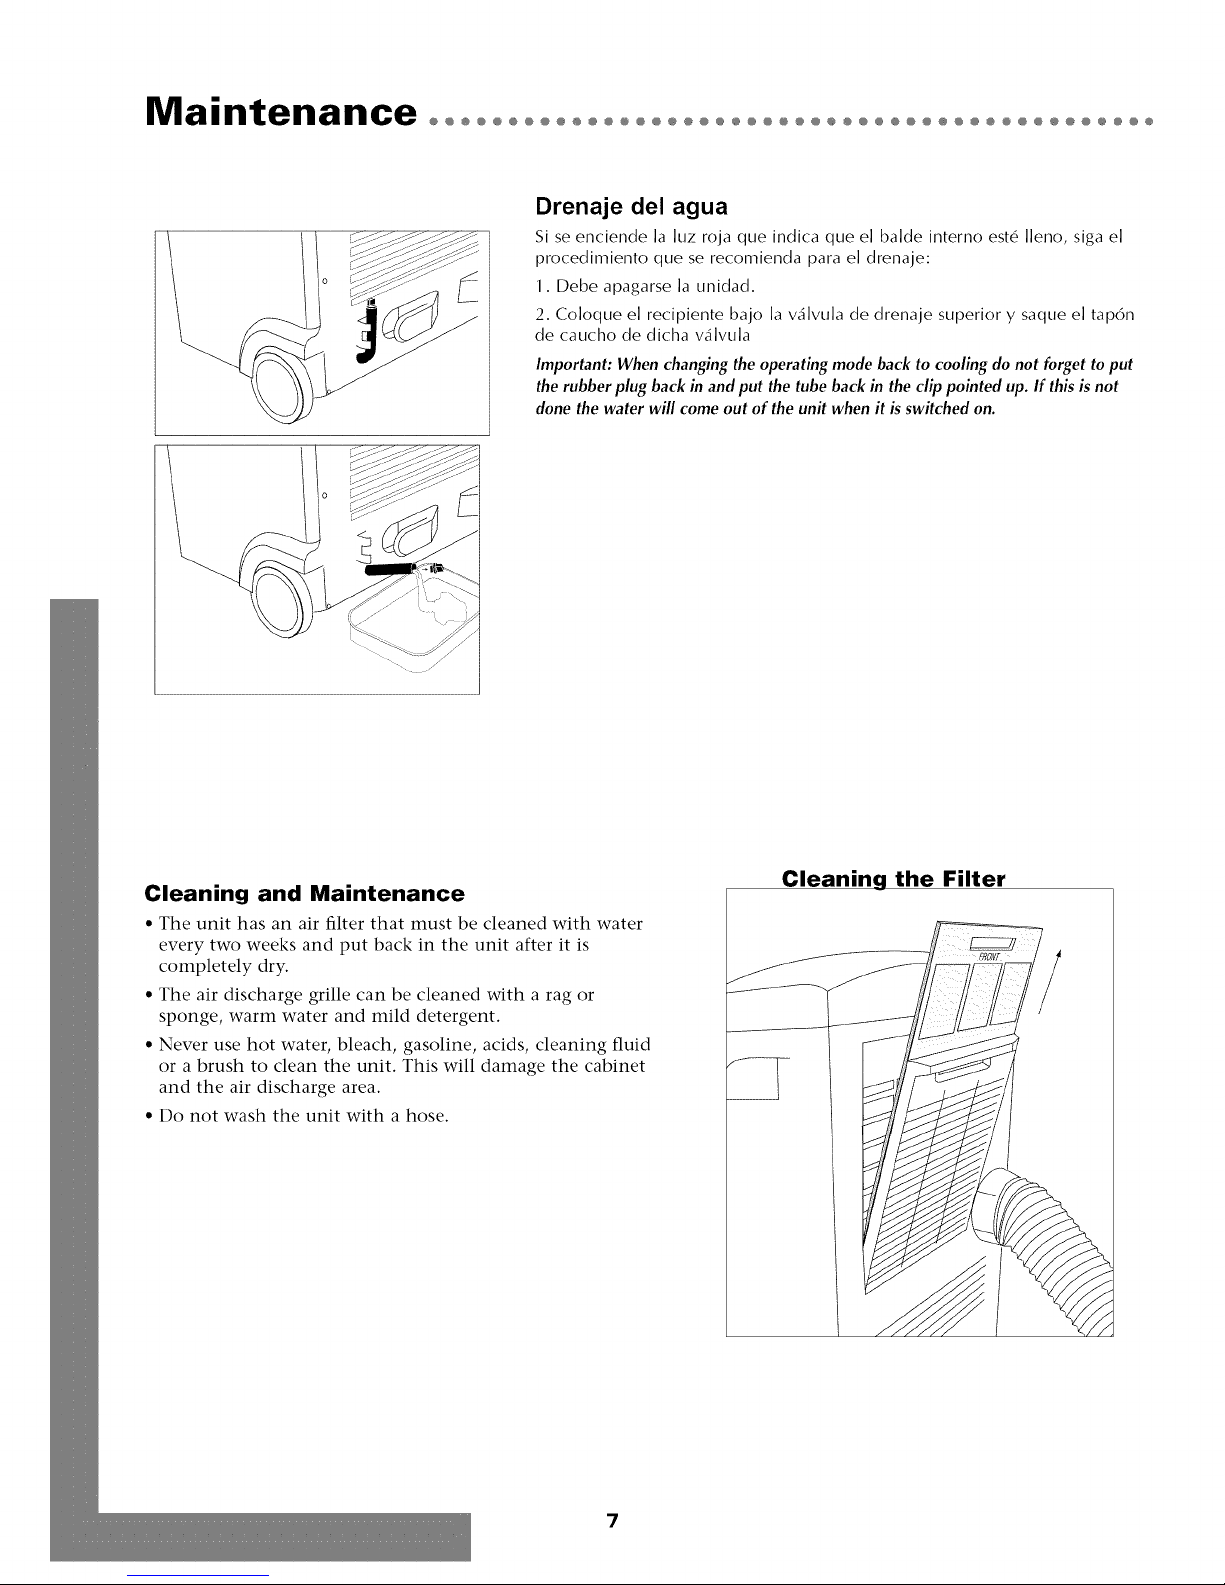
Drenaje del agua
Si se enciende ]a ]uz roja que indica que el balde intemo est6 ]]eno, siga el
procedimiento que se recomienda para el drenaje:
1. Debe apagarse la unidad.
2. Coloque el recipiente bajo la va'lwAa de drenaje superior y saque el tap6n
de caucho de dicha va'lwAa
Important: When changing the operating mode back to cooling do not forget to put
the rubber plug back in and put the tube back in the clip pointed up. If this isnot
done the water will come out of the unit when it is switched on.
Cleaning and Maintenance
• The unit has an air filter that must be cleaned with water
every two weeks and put back in the unit after it is
completely dry.
• The air discharge grille can be cleaned with a rag or
sponge, warm water and mild detergent.
• Never use hot water, bleach, gasoline, acids, cleaning fluid
or a brush to clean the unit. This will damage the cabinet
and the air discharge area.
• Do not wash the unit with a hose.
Cleaning the Filter
7
 Loading...