

Maysound Remote User Manual
Brugervejledning User Guide
Remote Control

Dansk
Brugervejledning Side 16 -29
English
User Guide Page 2 -15
Remote User Guide v. 1.0
© 2007 Maysound ApS. All rights reserved.

English
4
English
5
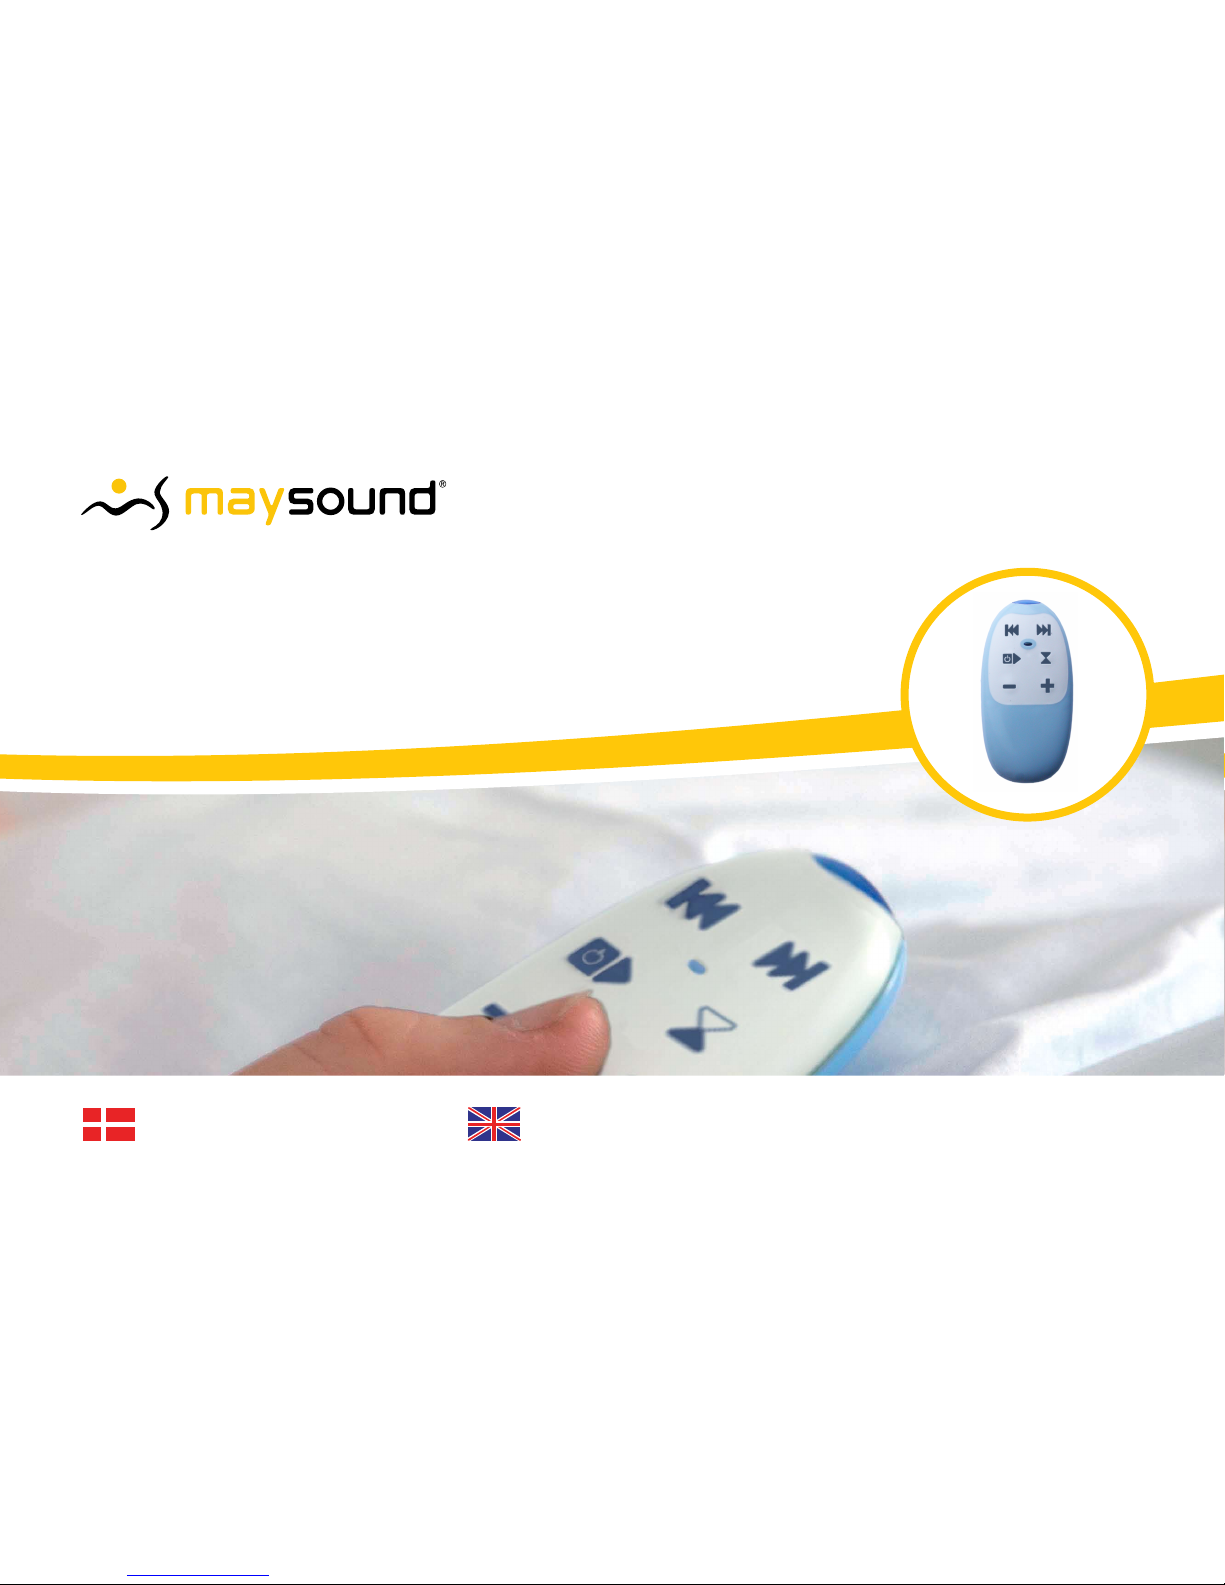
Maysound Remote Control
Dear customer,
Congratulations on your new Maysound Remote Control.
To make it as easy as possible for you to start using your Maysound Remote Control,
we recommend that you read this User Guide thoroughly.
If you have any subsequent questions or problems, please do not hesitate to contact
Maysound ApS at: www.maysound.com/support
The information in this User Guide is subject to change without prior notice.
Maysound ApS shall not be liable for damages due to technical inaccuracies,
typographical errors or missing information in this User Guide, or for damage or
indirect defects attributable to the use of this material. This User Guide contains
information which is protected by copyright.
No parts of this User Guide may be photo copied or reproduced without prior
consent from Maysound ApS.
Product names in this User Guide may be trademarks and/or registered trademarks
of the respective companies.
Yours faithfully,
Maysound™
All information is this User Guide was correct at the time of publication. As we continuously update and improve
our products, the information in this User Guide may have been changed subsequently.
Visit www.maysound.com/support for further information about updates.
Copyright © 2007. All rights reserved, Printed and published by Maysound ApS

English
6
English
7
Table of contents
1. Introduction
Scope of delivery, setting up/removing pairing 5
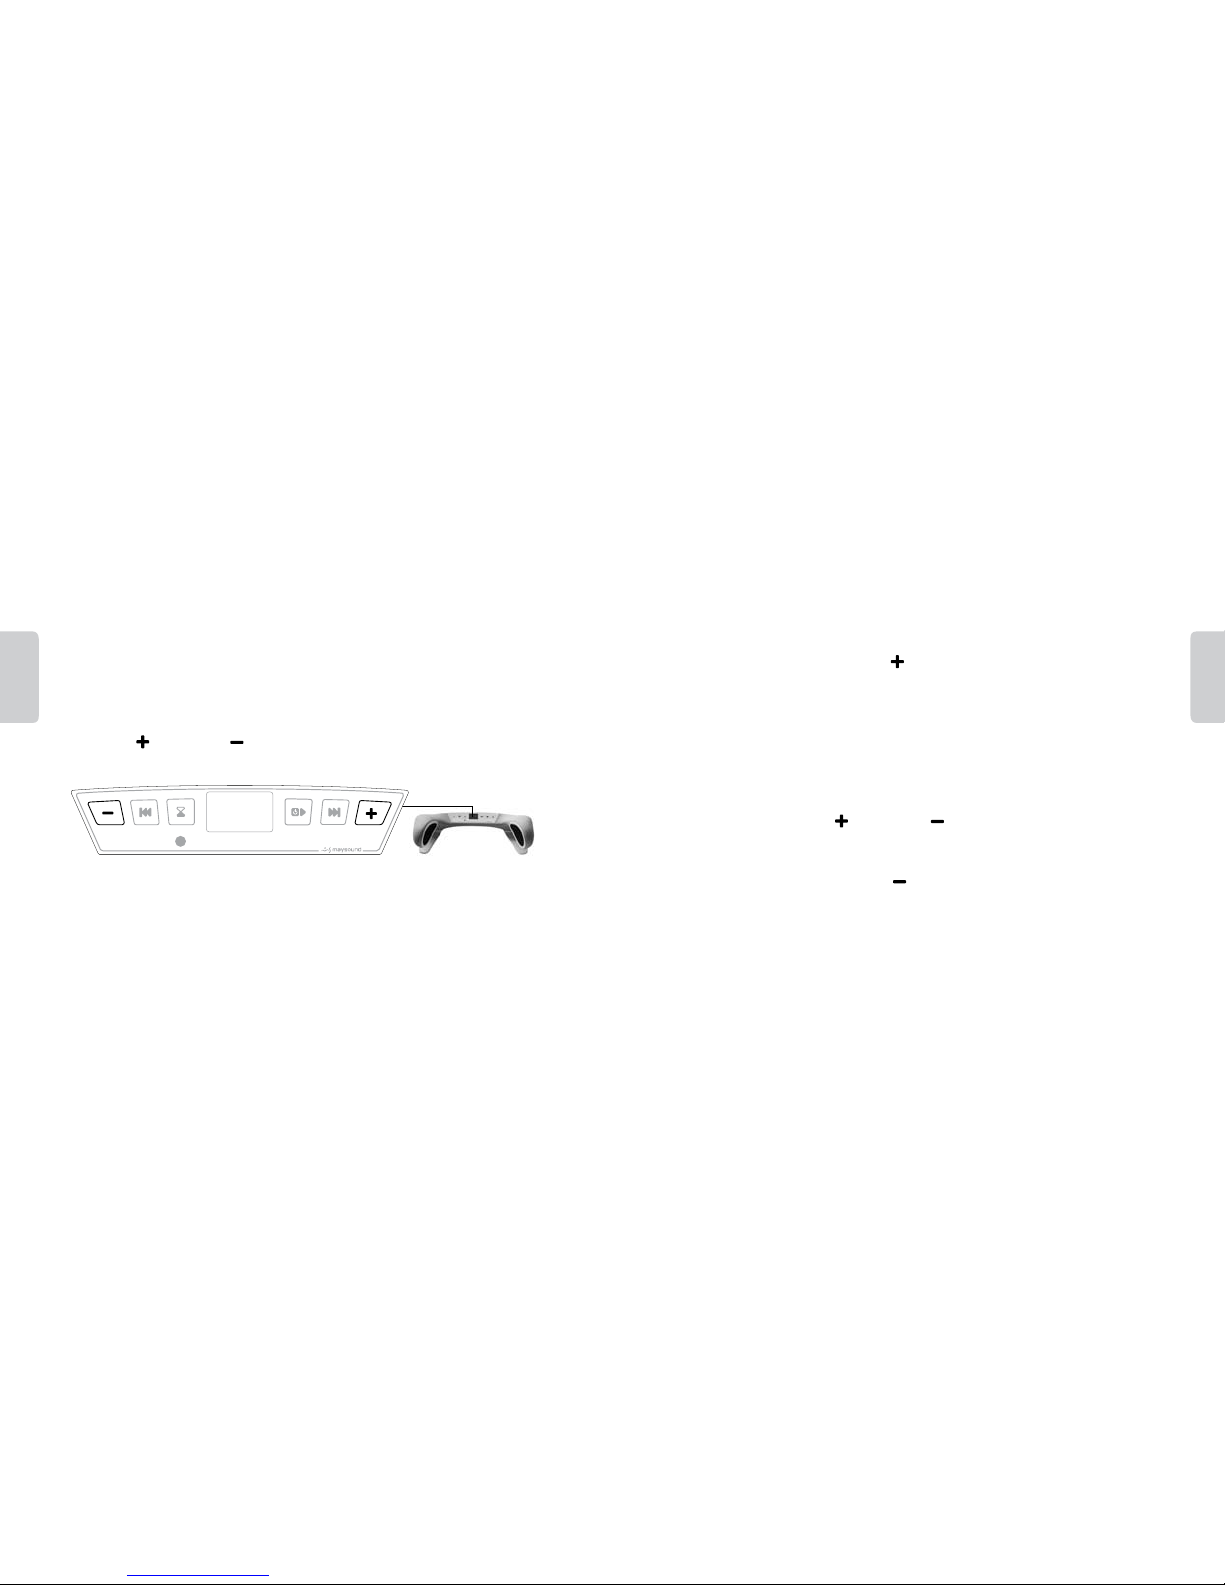
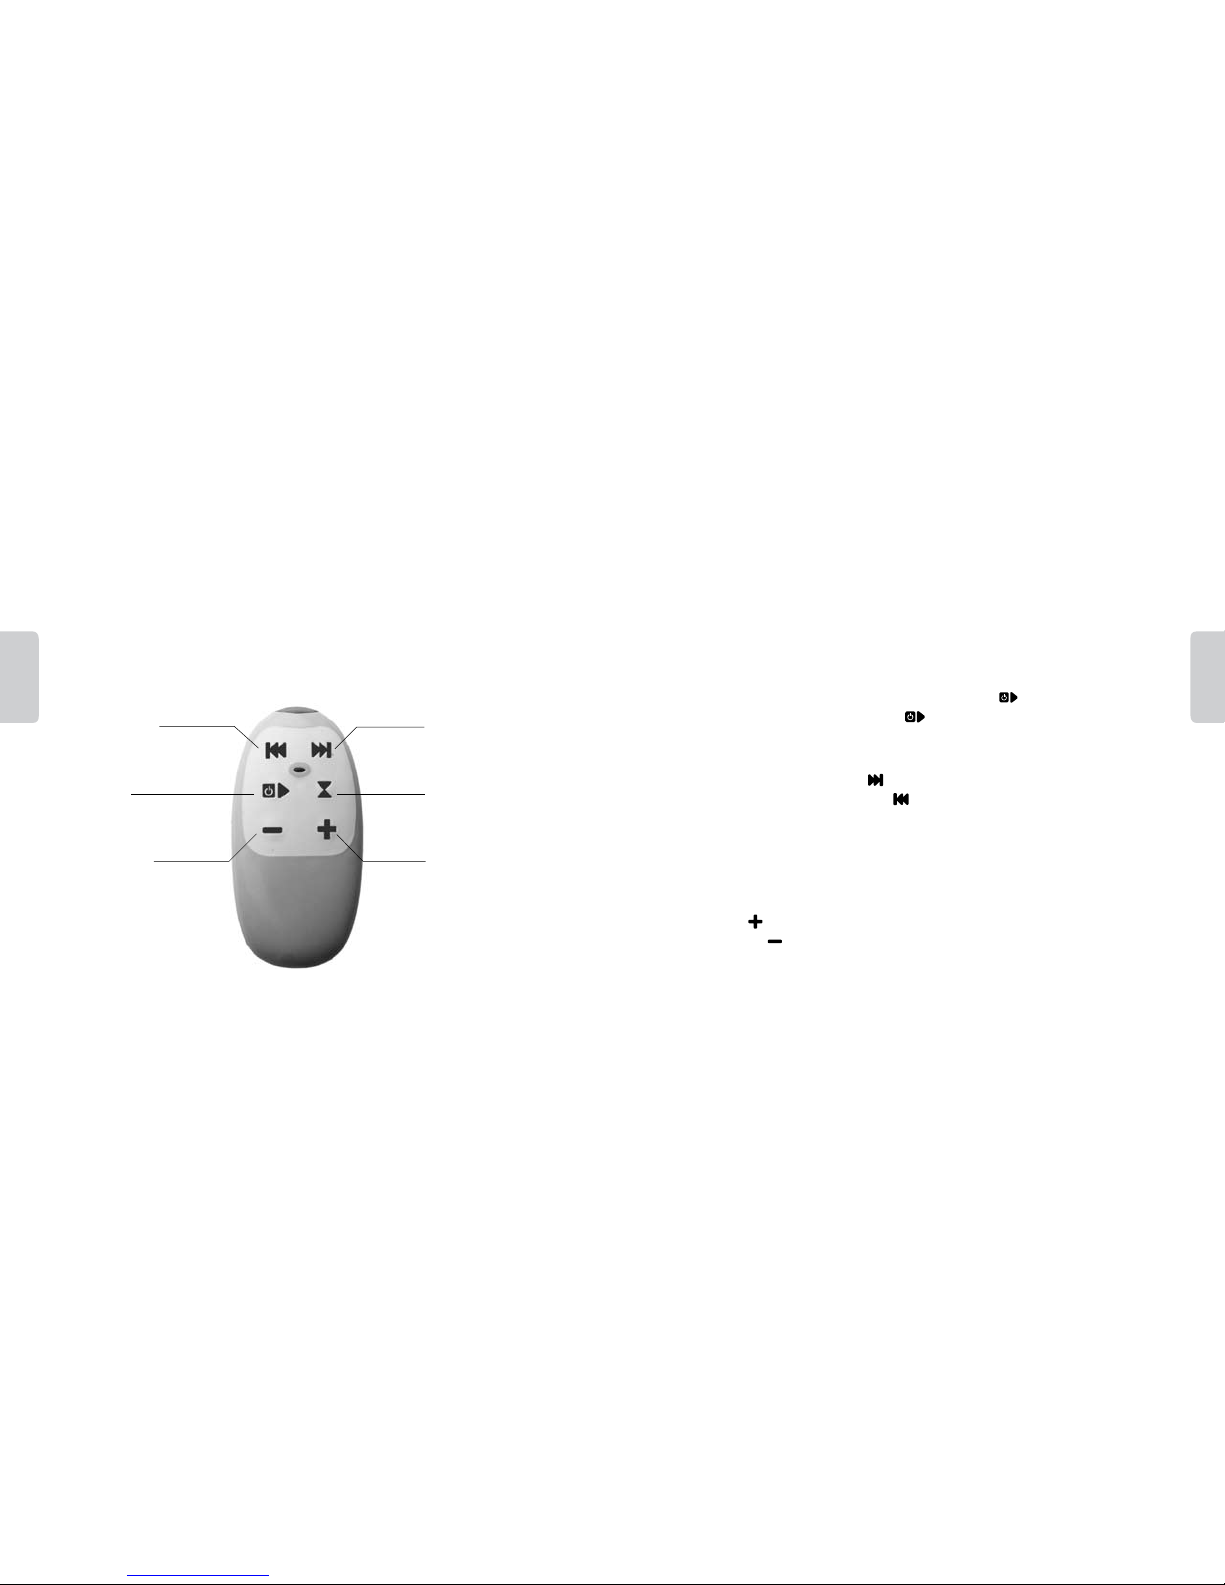
2. Getting to know your remote control
Key overview 8
3. Getting started
Switching on/o, changing track, volume, timer, battery life 9
4. Safety and cleaning
Safety information, treatment, repair, cleaning 11
5. Handling, approvals and disposal
Handling 13
Scope of delivery
Please check that the accessories/scope of delivery correspond to the description/
illustrations below. If any of the accessories are not included in the delivery, please
contact your local Maysound dealer immediately.
Maysound Remote Control
Maysound Strap
1. Introduction
English
8
English
9
Set up pairing between remote control and Maysound Music Player
Follow the step-by-step instructions below to pair your remote control with your
player. TIP: You can pair up to ten (10) remote controls with one player.
1. Press the key and the key on the music player, at the same time,
to activate the pairing process.
2. Follow the instructions on the player screen.
3. Press any key on the player to cancel the pairing (return from the pairing menu).
4. You will be prompted to press the key on your remote control to pair it with
the player. (The player will automatically exit the pairing menu if you do not press
the remote control within 30 seconds).
5. Your remote control is now ready for use together with the player.
Remove pairing between remote control and Maysound Music Player
1. On the player, press the key and the key at the same time to activate the
pairing process. Follow the instructions on the player screen.
2. You will be prompted to press the key on your remote control to remove the
pairing with the player.
English
10
English
11
2. Getting to know your remote control
The remote control has the same keys as your Maysound Music Player.
Previous track
Go to the previous track
(one track per press).
Start/Stop
Pressing the key for two seconds
will switch o the player.
Volume up
Pressing the key will turn
up the volume.
Volume down
Pressing the key will turn
down the volume.
Next track
Go to the next track
(one track per press).
Timer Set the player to
switch o/on after 0, 15,
30, 45, 60, 120 minutes.
3. Getting started
1. Switching the player on/o
Switch on your Maysound Music Player by pressing the Start/Stop key.
Switch o by pressing and holding the Start/Stop key for two seconds.
2. Switching tracks
Go to the next track by pressing
Go to the previous track by pressing
3. Adjusting the volume
You can use the keys to adjust the volume (20 steps). While adjusting the volume,
the selected volume is displayed with large numbers on the display. After four
seconds, the display returns to standard.
Volume up
Volume down
 Loading...