

Page 1
1 | P a g e
INFLATABLE EVENT SHELTER (MP9522) USER
GUIDE
Please read this user guide before attempting to set up your Event Shelter.
Follow the user guide carefully and keep for future reference.
A copy of the user guide is also available on our website
www.maypoleltd.com
Page 2

2 | P a g e
INFLATABLE EVENT SHELTER (MP9522) USER
GUIDE
WARNING – GENERAL SAFETY
• Not to be used in strong winds and extreme weather conditions.
• If using stepladders or a platform to set up the Event Shelter you will be working
at height & should carefully follow the stepladder / platform manufacturer’s safety
instructions. You should not attempt to set up this Event Shelter from the ladder
but only to use the ladder if required to assist people on the ground.
CARE OF YOUR EVENT SHELTER
• Allow material to dry completely before storing in the storage bag provided.
• Remove dirt with a soft sponge and warm water. DO NOT use detergent.
• DO NOT expose to sparks, flames or other sources of ignition.
• NOTE – during certain conditions moisture maybe visible on the inside of the
material. This is the natural build up of condensation and should not be mistaken
for leaking.
CONTENTS
Event Shelter x 1
Steel Pegs x 20
Guy Ropes x 8
Hand Pump x 1
Carry Bag x 1
BEFORE USE
Choose a clear site that is flat. Remove any sharp objects from the pitching area which
could be dangerous or potentially damage the fabric or puncture the air tubes.
Page 3
3 | P a g e
INFLATABLE EVENT SHELTER (MP9522) USER
GUIDE
PITCHING INSTRUCTIONS
Remove the shelter from the carry bag and place flat on the ground.
There are 2 valves on the event shelter. Locate the first valve and unscrew the top cap.
Locate the second valve and make sure both the top & bottom caps are fully tightened.
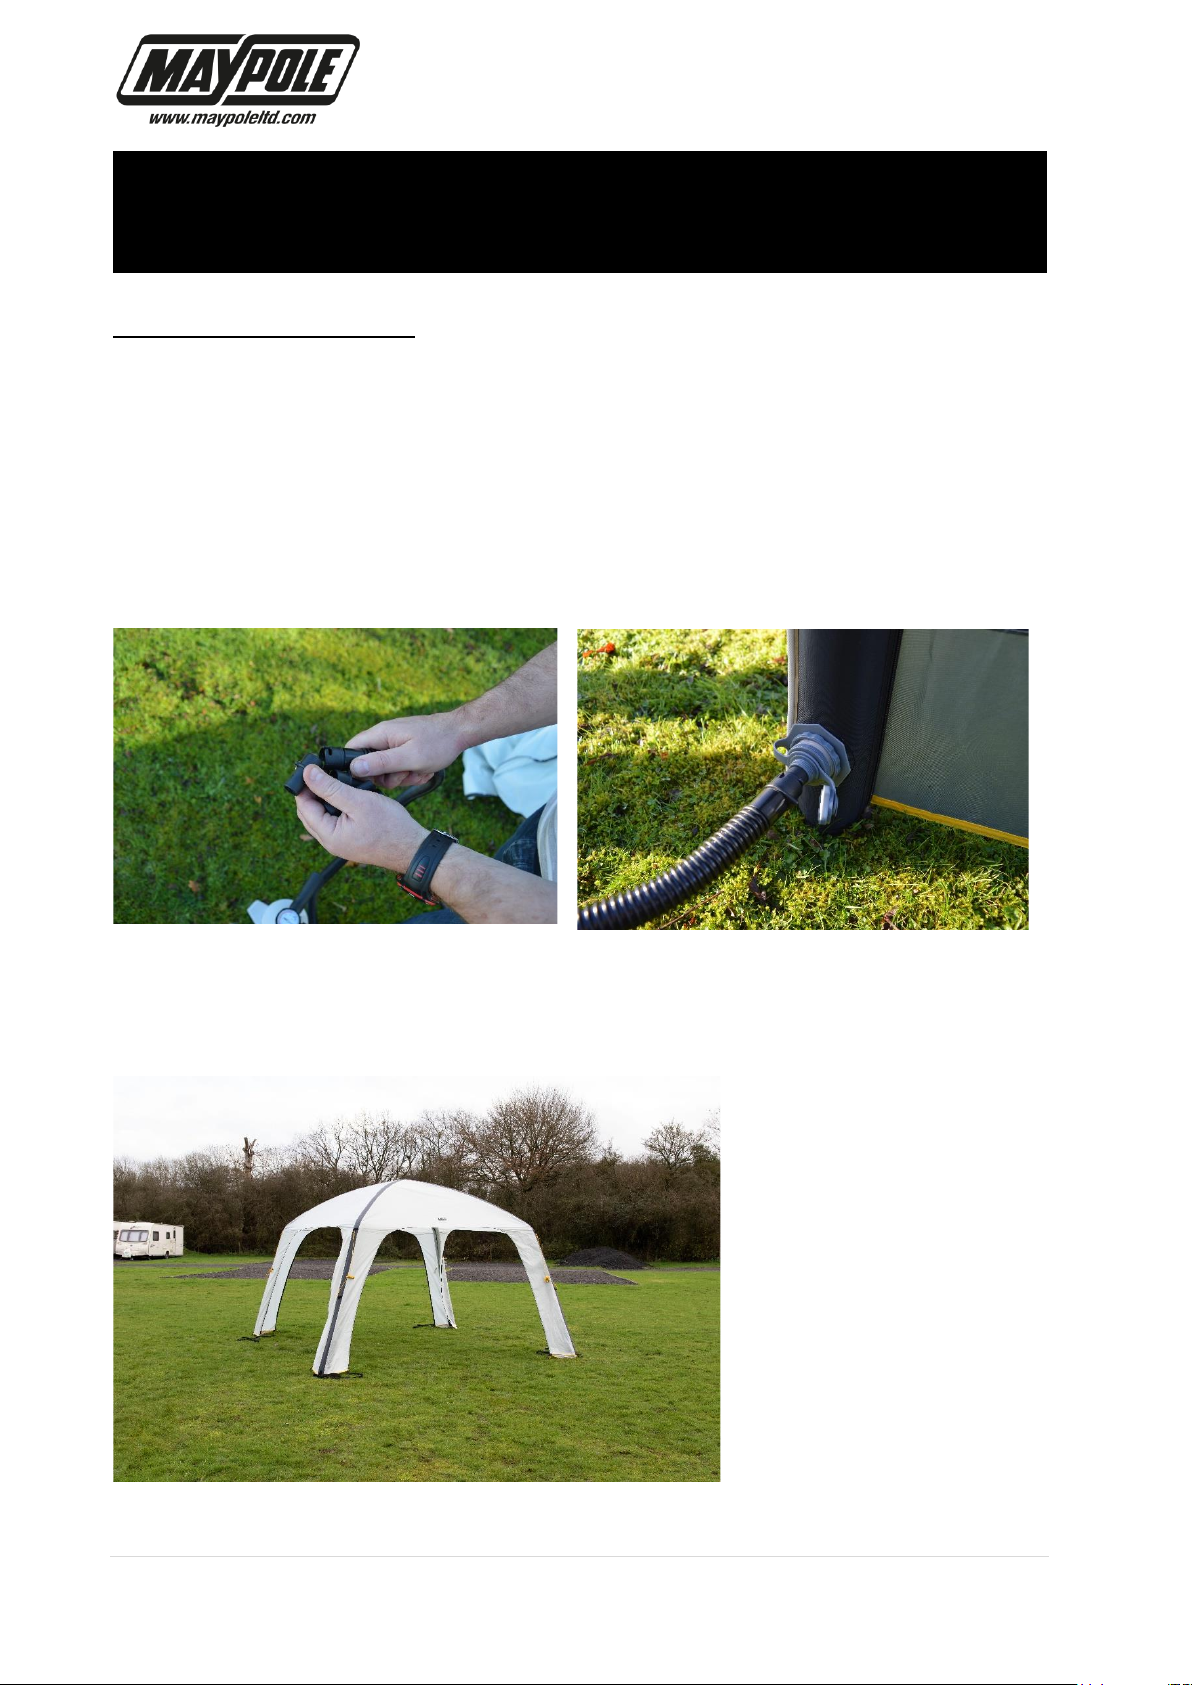
Connect the large adaptor (FIG 1) to the hand pump. Insert the adaptor into the top cap
on the valve (FIG 2). Inflate the air beam to approx.6-7 PSI. Remove the adaptor from
the valve and securely tighten the top cap.
FIG 1 FIG 2
Once all of the air beams are fully inflated the event shelter should be able to support
itself and naturally take the below shape (FIG 3).
FIG 3
Page 4
4 | P a g e
INFLATABLE EVENT SHELTER (MP9522) USER
GUIDE
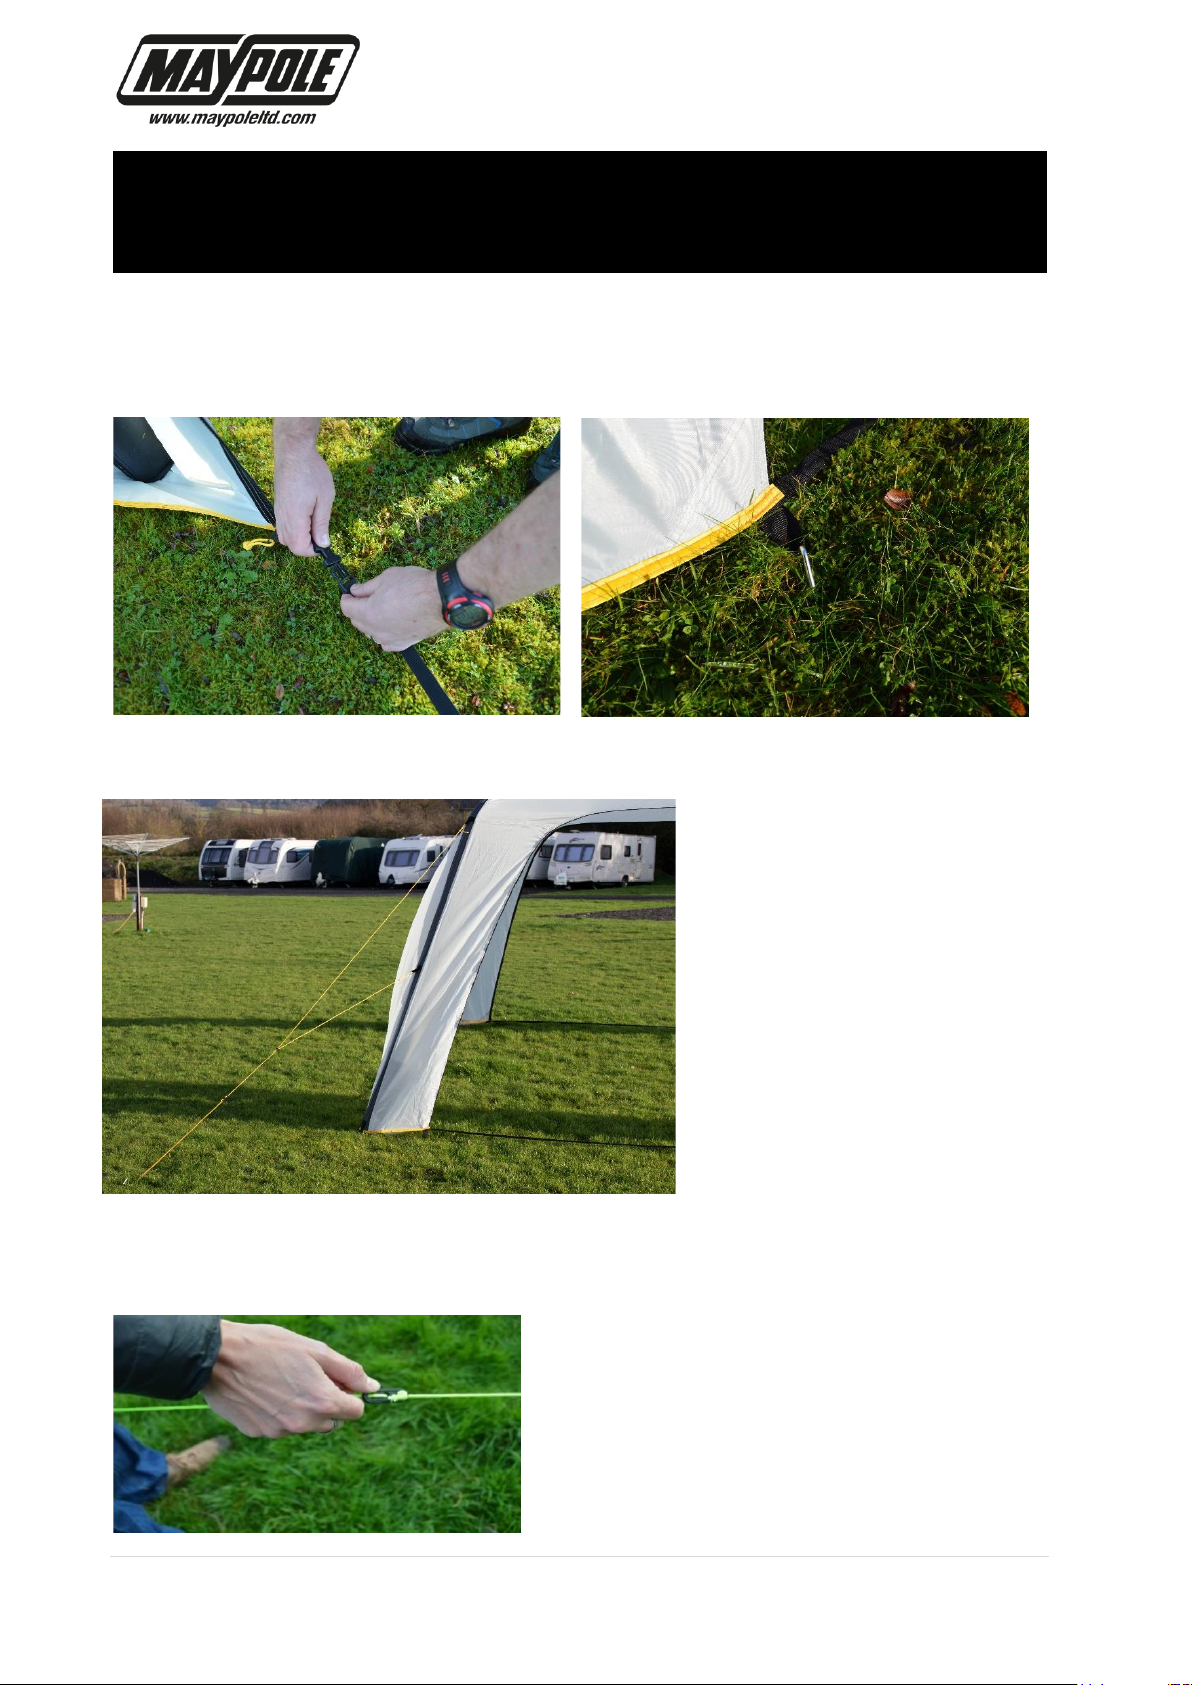
Buckle together the sizing straps between each leg to achieve the correct spacing (FIG
4). Peg down each leg at the base (FIG 5).
FIG 4 FIG 5
Peg down the triangular guy ropes attached to each leg (FIG 6)
FIG 6
It is recommended each peg is driven fully into the ground at an angle of 45 Degrees
away from the pegging point. Tension each guy rope using the guy adjusters (FIG 7).
FIG 7
Page 5
5 | P a g e
INFLATABLE EVENT SHELTER (MP9522) USER
GUIDE
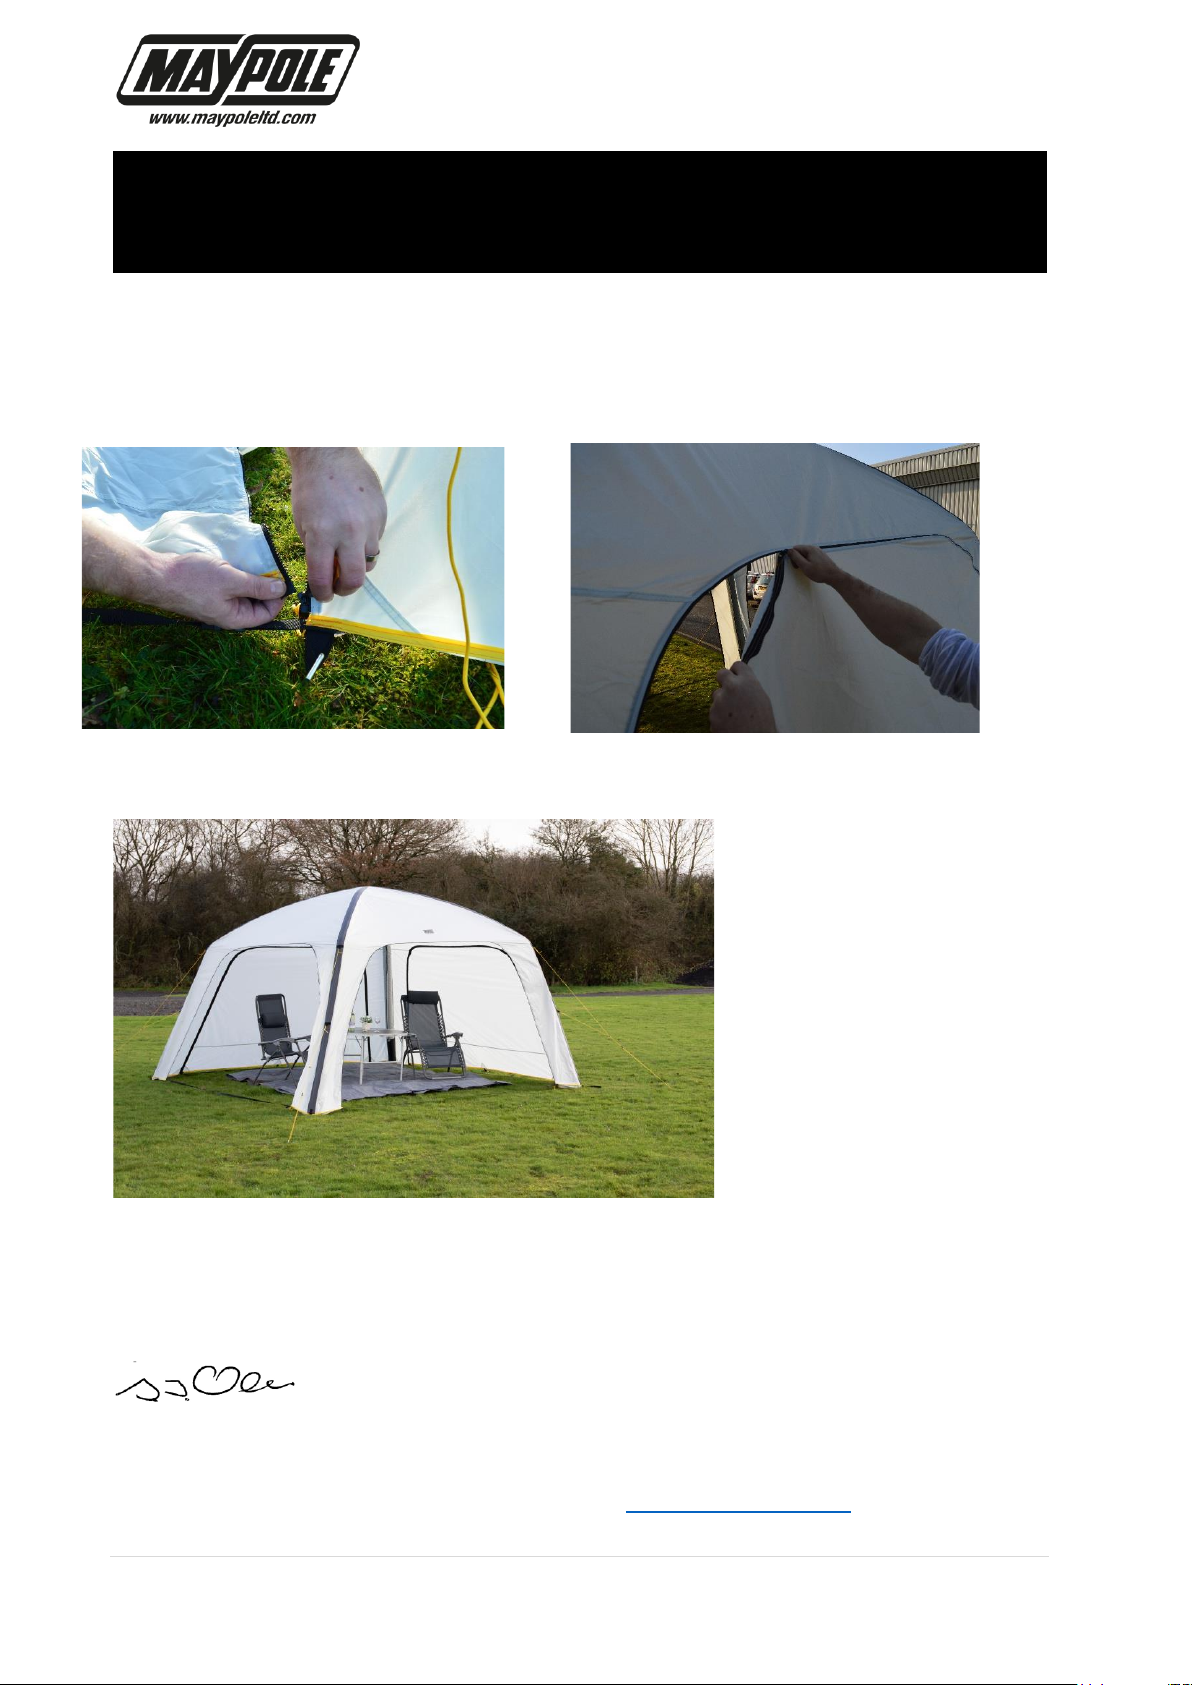
Sides panels are available and sold separately in packs of 2 (MP9523). Each side panel
can be attached by inserting the zip at the base (FIG 8). Fully zip each side panel (FIG
9). FIG 10 shows the side panels attached.
FIG 8 FIG 9
FIG 10
To deflate the event shelter unscrew the bottom cap on both valves.
WARNING – be aware of sudden loud noise caused by air escaping when
deflating.
Technical Manager Maypole Ltd November 2020
Email: [email protected] Web: www.maypoleltd.com
 Loading...