

Page 1

OPERATION MANUAL
NRT202
FOR
DATA TERMINAL
Page 2

NOMAD
O
PERATING INSTRUCTIONS
-
NRT202
2
of
AGE
P
2
1. IMPORTANT INFORMATION................................................................
2. INTRODUCTION
3. SETTING UP A TERMINA
3.1
ENTERING A NODE NUMBER
3.2
CHANGING OPERATING MODES
4. THE LCD SCREEN
4.1
STARTUP MESSAGE
4.2
STANDBY MODE
4.3
PAGING FACILITY
4.4
FEEDBACK
4.5
MULTI-USER
5. ENTERING DATA
5.1
NORMAL MODE
5.2
MULTI-USER MODE
6. BARCODE ENTRIES
6.1
WARNING TONES
6.2
BARCODE TYPES
6.3
MAKING AN ENTRY
6.4
KEYPAD ENTRIES
6.5
BARCODE ONLY MODE
6.6
SUN SHIELD
................................................................
L FOR FIRST USE
................................
................................................................
................................................................................................
................................
................................................................................................
................................................................................................
..................................................................................................................................7
................................................................................................................................
................................
................................................................................................
................................
................................
................................................................................................
................................................................................................
................................
................................
................................................................................................
................................................................................................
................................................................
................................................................
................................
................................
................................................................
................................
................................
................................
................................
................................
................................
................................
....................................................11
...............................
...................
......
................................
..............................
...............
..................
.........................
.......................
.................
..........................
....................
............
.....................10
.....................10
..................11
...........12
..............................12
...
3
3
4
4
5
5
5
6
7
8
8
8
9
9
7. ERROR MESSAGES
7.1
CLOCK NOT SET
7.2
FLAT BATTERY
7.3
MEMORY FULL
8. CHARGING
9. MAINTAINENCE AND CARE................................................................
9.1
CLEANING
9.2
BATTERIES
9.3
KEYPAD
10.
SPECIFICATION
10.1
C
OMMUNICATION RANGE
.........................................................................................................................13
................................
................................................................
................................................................................................
................................................................
................................................................................................
................................
................................................................................................................................14
................................................................................................
................................................................................................
................................
................................................................................................
................................
................................
................................
...........12
.......................12
.........................12
..........................13
..............................14
.................................14
.....14
.............14
...............15
Page 3

1.
3
of
AGE
NOMAD
O
PERATING INSTRUCTIONS
IMPORTANT INFORMATIO
-
NRT202
N
P
3
FCC ID:
This device complies with part 15 of the FCC rules. Operation is subject to
the following two conditions:
(1) This device may not cause harmful interference, and (2) this device must
accept any interference received, including interference that may cause
undesired operation.
Warning!
approved by Maynetronics Limited, will invalidate the authorisation of this
device. Operation of an unauthorised device is prohibited under Section 302
of the Communications Act of 1934, as amended, and Subpart I of Part 2 of
Chapter 47 of the code of Federal Regulations.
2.
INTRODUCTION
The NRT202 data terminal is a hand-held wireless keypad and display for
entry of numeric data. This terminal provides the primary data entry method
of the NOMAD system.
Data entry is guided by menus displayed on the graphic display.
OOANRT202
Any modification or changes made to this device, unless explicitly
The terminal is powered by rechargeable batteries with a built in charger that
draws DC power from a charging adapter. In an emergency, the
rechargeable battery may be replaced by standard alakaline batteries
providing no attempt is made to charge the unit while fitted with the nonrechargeable battery.
The terminal does not have to be in radio range for data entry to take place.
All data entered is stored in the terminals own memory (the memory is
maintained even if the battery is discharged) and then sent to the NOMAD
system whenever there is a good communication link. To the operator this is
a seamless process. This is a key strength of the NOMAD system essential operation is guaranteed regardless of sporadic radio interference.
Page 4
NOMAD
O
PERATING INSTRUCTIONS
3.
SETTING UP A TERMINA
Before a terminal can be used on the NOMAD network it must be assigned a
node number so that the system can distinguish it from other terminals in the
system. This will also clear the memory of the terminal and inform the
system that all relevant menus should be uploaded into the terminal.
3.1
ENTERING A NODE NUMBER
Every terminal on a given system must be uniquely identified by a node
num
ber. Entering a node number on a terminal also initialises it for use on
the system by clearing the terminals memory and requesting a full update
from the system of all menus.
-
NRT202
L FOR FIRST USE
P
AGE
4
of
4
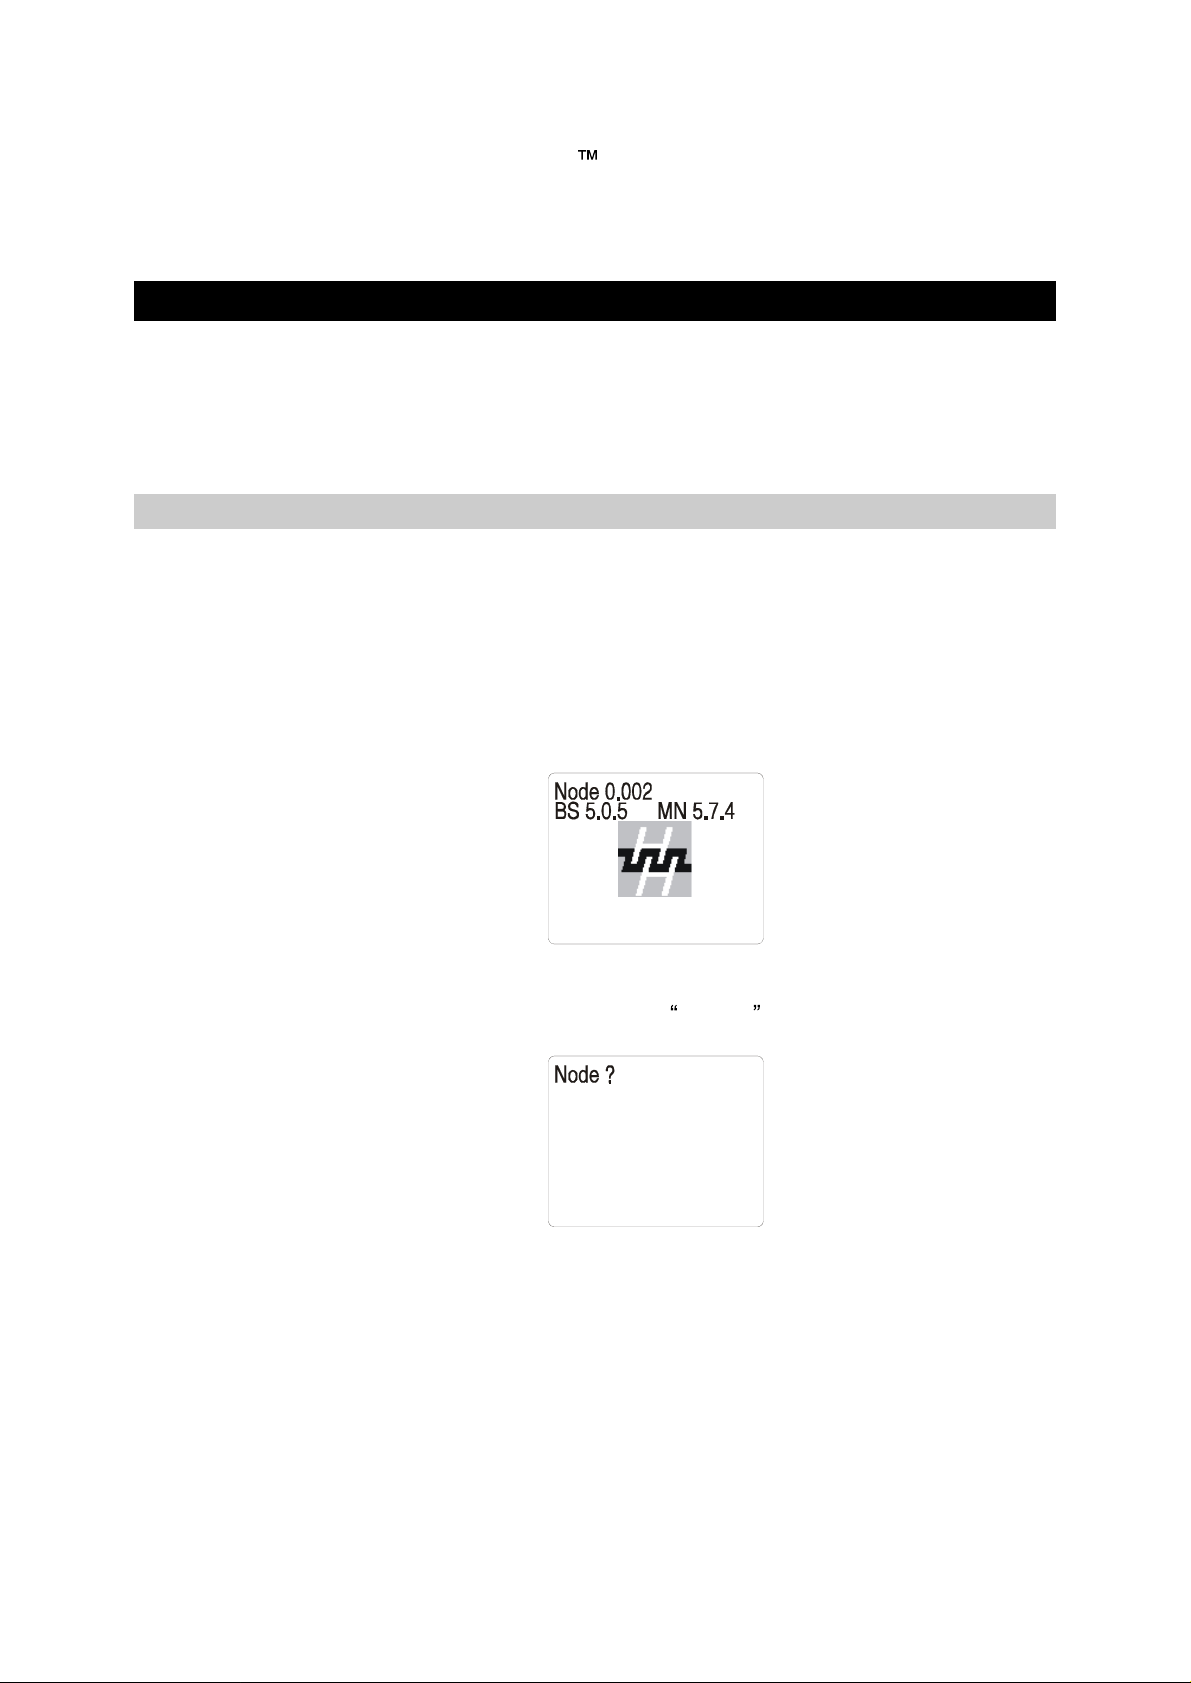
After inserting the batteries or removing the terminal from its charging station
a startup message is displayed.
To set the node number, press the 3 and the 9 keys simultaneously while
this message is displayed. The prompt Node ? will be shown.
The node number is
entered as 5 decimal digits: xyzzz
zzz = the node number.
y = the language.
x = the system number.
The node number itself can be in the range 1 to 231. It is these three digits
that identify the terminal on the system.
Page 5

5
of
AGE
NOMAD
O
PERATING INSTRUCTIONS
The language number can be in the range 0 to 3 and indicates which
language the menus should be. The default system language is 0.
Additional languages (up to three) can be defined in the system setup for
NOMAD and individual nodes then initialised to one of these. This way
employees
Note that to change language the terminal has to re-initialised and its
memory cleared as above. If a language number is entered that hasn t been
defined in the NOMAD system then the default language is used.
The system number can be in the range 0 to 3. The default system number
is 0. Different system numbers can be entered in the Radionet application
and a terminal will only communicate with a system on its own number. This
allows adjacent
of different languages may work on the system side by side.
systems to work independently.
-
NRT202
P
5
After entering the node number as above press the ENT key. The terminal
will then initialise its memory after which the startup message will be
displayed again.
3.2
4.
THE LCD SCREEN
CHANGING OPERATING M
The terminal can be set to be used by an individual or by a group. The
normal mode after initialisation is for individual use.
Multi
-user mode is intended for the situation where a supervisor is entering
in data for several employees. It allows the operator number and time to be
set
for each data entry.
The mode is changed in a similar fashion to setting the node above. During
the startup screen press the 4 and the CLR keys simultaneously. Each
time this is performed the mode will toggle between normal and multi-
ODES
user.
4.1
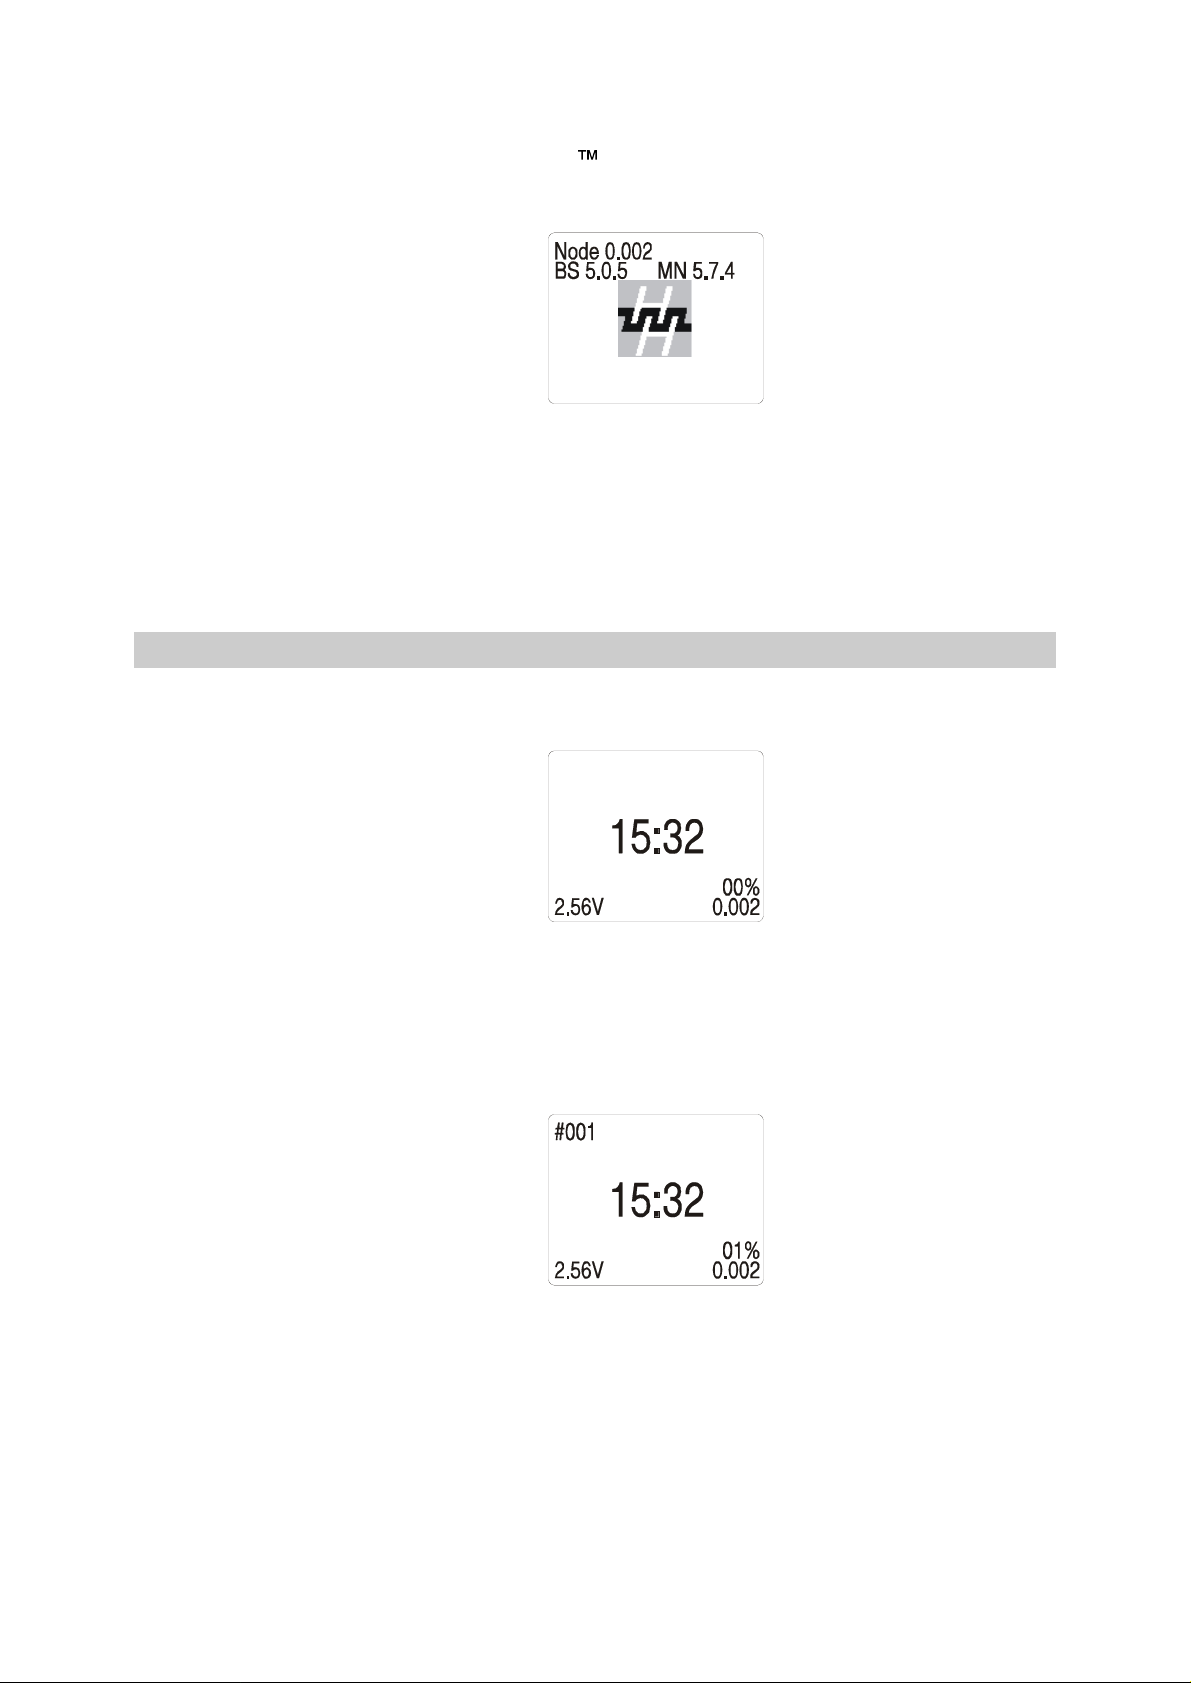
STARTUP MESSAGE
The start-up message indicates the firmware versions for the terminal along
with the system and node numbers.
Page 6
6
of
AGE
NOMAD
O
PERATING INSTRUCTIONS
In the example above the firmware bootstrap is version 5.0.5, the main code
version i
The start-up screen shows for 5 seconds and is shown whenever the
terminal is removed from the charging station or the batteries are inserted.
s 5.7.4, the system number is 0 and the node number is 002.
-
NRT202
P
6
4.2
STANDBY MODE
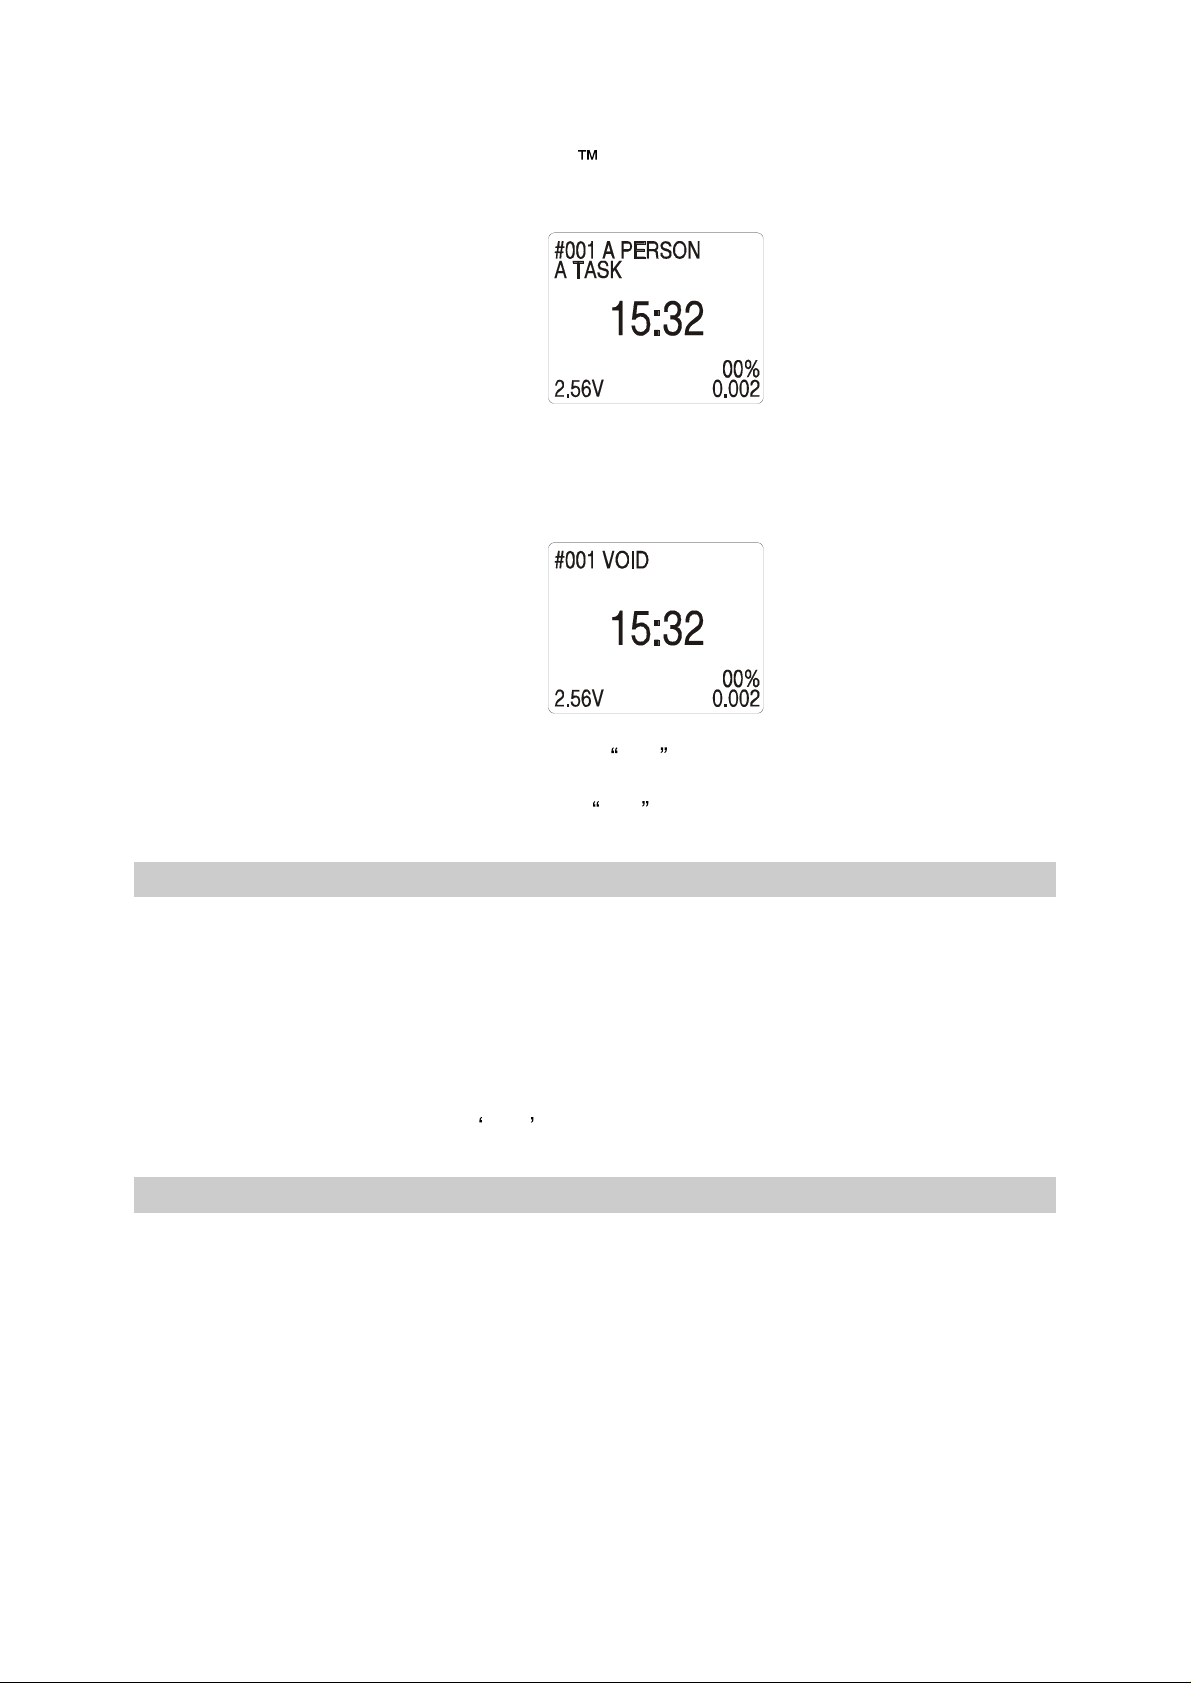
The default display for the terminal takes the general form below,
A typical display after removing a terminal from the charging station. It
shows the time, the node number and the percentage of memory used. It
also shows the operator number and name of the person registered to the
terminal along with the currently selected task for barcode use.
This shows that operator 1 has clocked on. There is one message (01%)
waiting to be sent to the system (the clock on message).
Page 7
7
of
AGE
NOMAD
O
PERATING INSTRUCTIONS
The message has been sent (00%) and confirmation that operator 1 is
recognised in the system is shown by displaying their name. If operator 1
had not been recognised then the following would be displayed.
-
NRT202
P
7
If the battery starts to get low the Batt symbol will alternate with the battery
voltage in the lower left corner. When the battery has insufficient power to
operate the terminal reliably the Batt symbol will be displayed continuously.
4.3
PAGING FACILITY
There is a facility within the NOMAD system to send short text messages to
specific terminals. When such a message is received and the terminal is in
standby mode it will give a series of beeps and the standard display will be
4.4
replaced by
To cancel the message and return to normal standby mode press and hold
the 4 and 6 keys as if about to enter data. This will cancel the page
message. Press the CLR key to return to standby mode.
FEEDBACK
If operator feedback is enabled on the NOMAD system a message is sent to
the operator after each task code (for which feedback has been defined) has
been received by the system. When the terminal receives the message a
double beep will be emitted.
the text message, which will flash on and off.
To
view the feedback message press and hold the up arrow key while in
standby mode. Releasing the up arrow key will return the terminal to
standby mode.
Page 8
4.5
8
of
AGE
NOMAD
O
PERATING INSTRUCTIONS
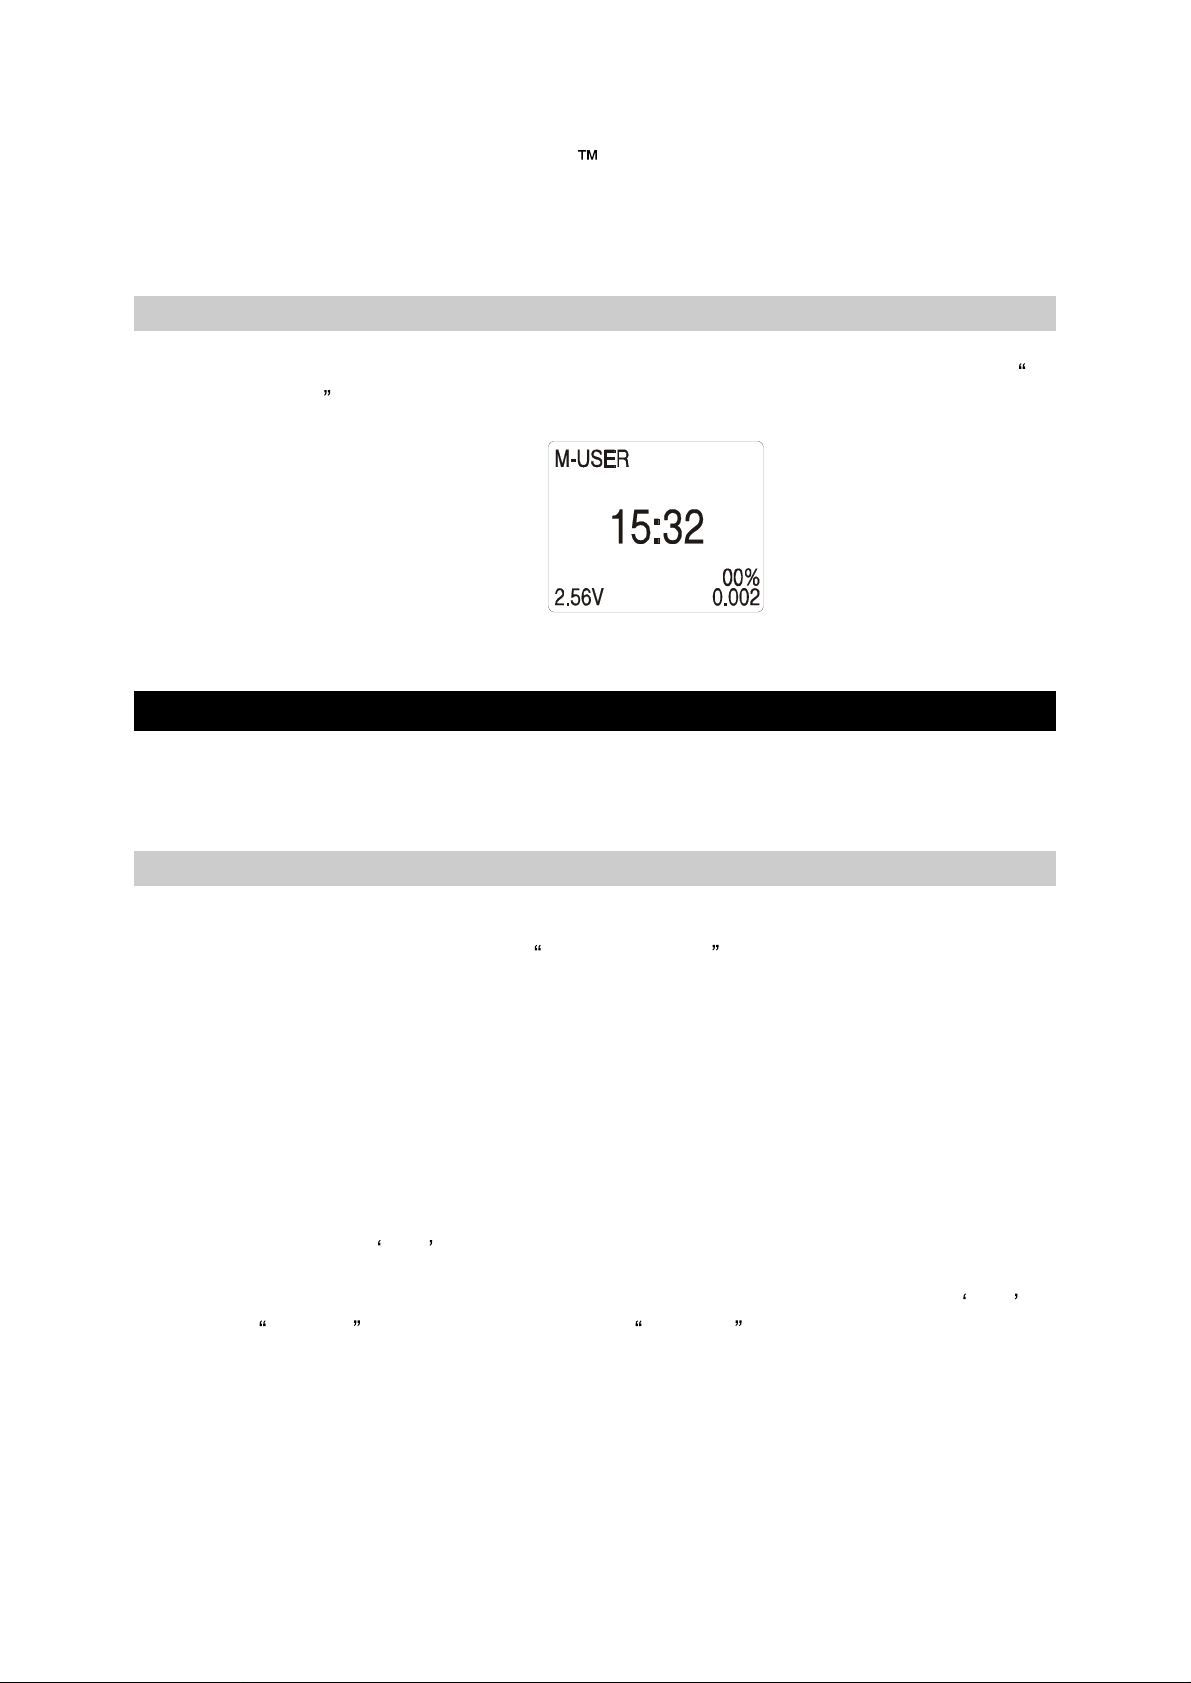
MULTI-USER
If in multi-user mode the operator number/name will be replaced by MUSER
-
NRT202
P
8
5.
5.1
ENTERING DATA
The normal state of the terminal is standby - the keypad is locked against
accidental operation.
NORMAL MODE
To exit the standby mode press and hold the 4 and the 6 keys together. A
prompt inviting the user to Enter Command will be displayed.
Note that all or some of the prompts may have been redefined in the
NOMAD system depending on the language settings.
Key in the number of the task to be entered. As the digits are keyed in a
menu prompt will be displayed if the task code is one that has been defined.
Alternatively, if the task code is not known press and hold up or down arrow
keys to scroll up and down through the available task codes.
Press the ENT key when the desired task code is displayed. Further
pro
mpts may be displayed requesting the user to in turn enter any additional
parameters required by the task code. For example, after pressing ENT for
Clock In the user is prompted for Operator and should enter their works
number.
The number of digits that the terminal will accept will vary depending on the
parameter and the setting made in the NOMAD system.
Page 9

9
of
AGE
NOMAD
O
PERATING INSTRUCTIONS
Note that the terminal will only accept codes other than Clock In (code 0) if
the user has clocked in. Once clocked in the prompt for code 0 will change
to Clock Out . After pressing enter to Clock Out the user will be prompted
to Confirm . This is done by pressing the ENT key again.
-
NRT202
P
9
5.2
6.
MULTI-USER MODE
To exit the standby mode press and hold the 4 and the 6 keys together. A
prompt inviting the user to Enter Operator will be displayed.
Enter the operator number for the task to be entered and press ENT. A
prompt inviting the user to Enter Time will be displayed.
The current time will be display in the lower right corner of the screen. To
accept this press the ENT key, else key in the required time and press the
ENT key.
The rest of the process is as per section 5.1 above.
BARCODE ENTRIES
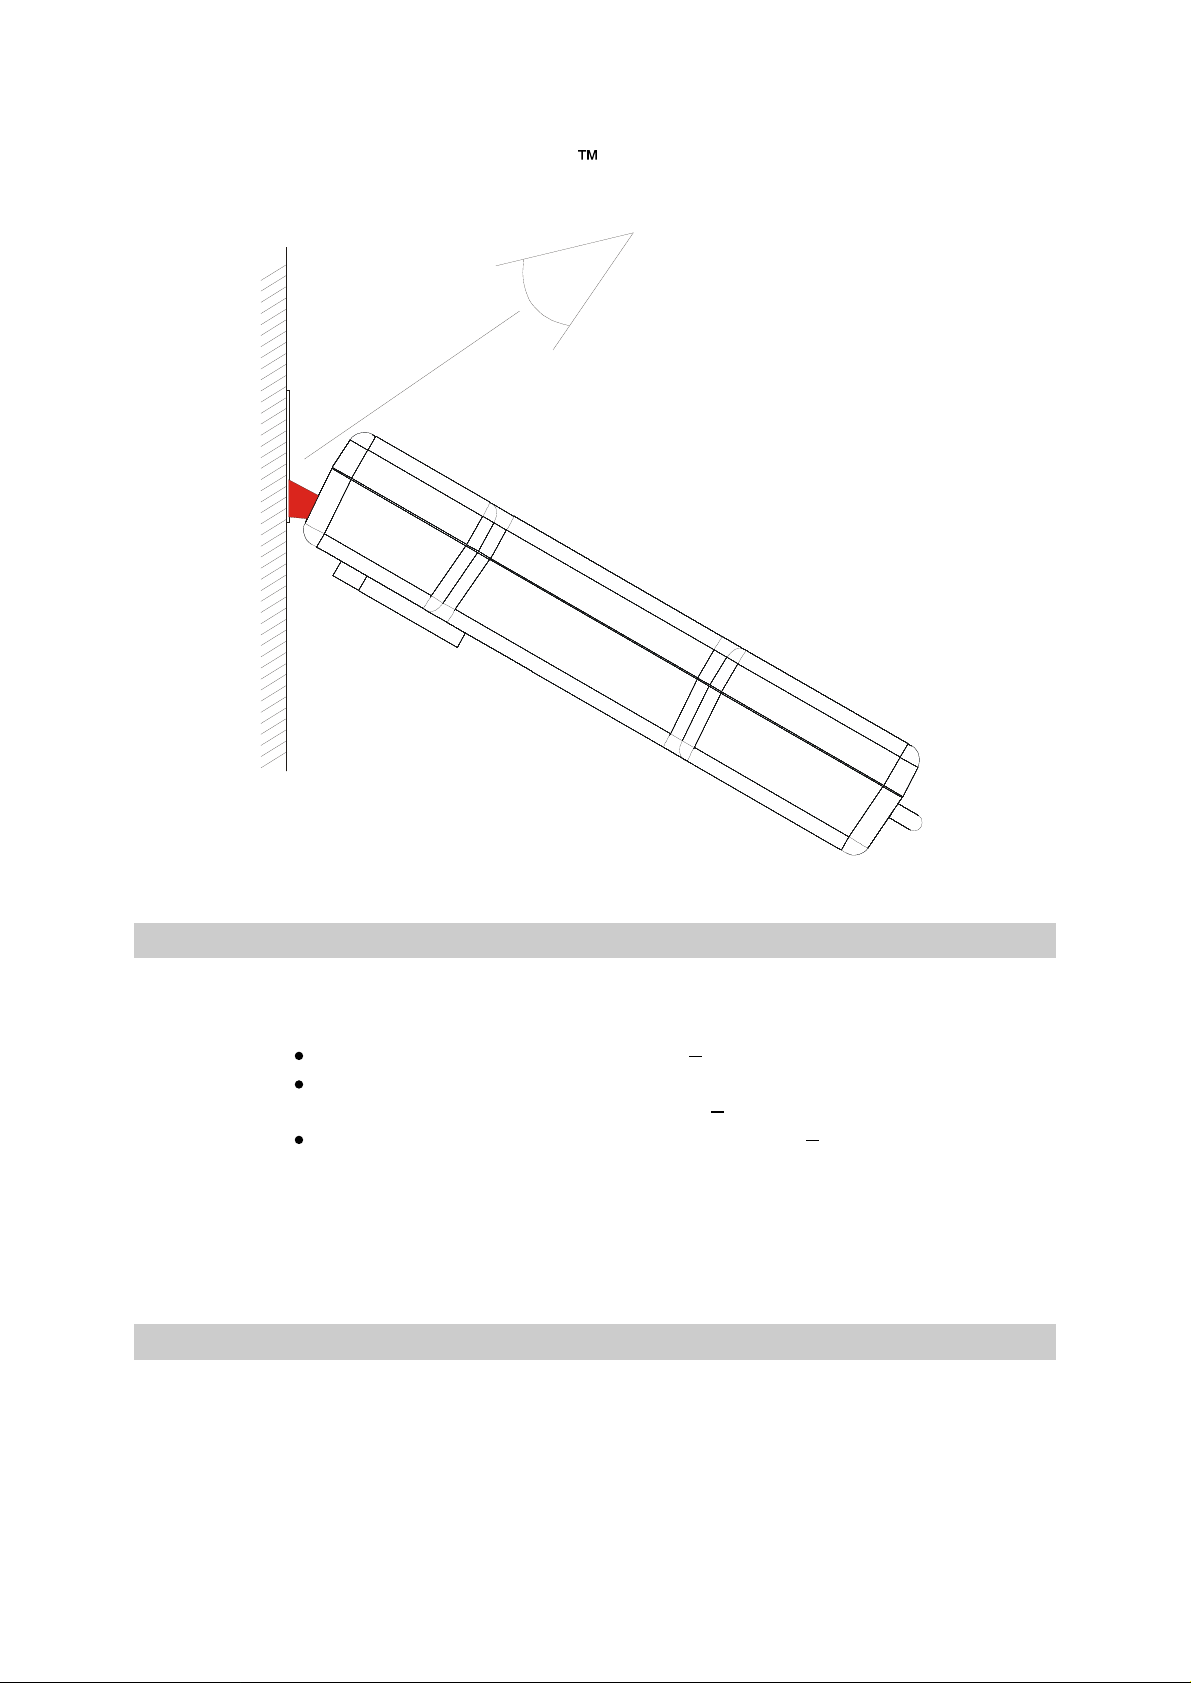
All entries can also be made with the built in barcode scanner. Pressing the
down arrow key will activate the barcode scanner for 5 seconds or until a
valid barcode is found. The terminal should be placed in contact with the
object to which the barcode is fixed so that it can be seen that the red
illumination covers the barcode.
Page 10
NOMAD
O
PERATING INSTRUCTIONS
-
NRT202
10
of
AGE
P
10
6.1
6.2
BARCODE TYPES
WARNING TONES
There are three possible results of scanning a barcode and each produce a
different type of beep from the terminal.
The barcode is read and accepted
The barcode is read correctly but rejected (for example, an attempt to
enter a task before being clocked in)
The terminal was unable to read the barcode
two distinct pitches.
Should the warning tone be heard, the operator should check the scan
window for obstruction and then scan again, taking care to ensure that the
terminal is aimed correctly.
The standard terminal will only recognise barcodes printed by the NOMAD
system on an approved printer
single beep
three distinct beeps.
long waning tone with
Page 11

11
of
AGE
NOMAD
O
PERATING INSTRUCTIONS
The NOMAD system has distinct categories of barcodes so that the terminal
can recognise whether the difference between clocking in operator one or
entering task one. There are two types of task barcode. One is for entering
the task there and then, for instance coffee break. The other is for selecting
a task that will requires further information (such as a row or path number to
indicate the operator s location) that will be entered later.
-
NRT202
P
11
6.3
Categories are
Clock in
Clock out
Enter task
Select task
Row/Path
General
MAKING AN ENTRY
A typical sequence for operator 1 and task number 3, interrupted by task 100
might be as follows.
1.
Scan clock in 001 label (in the canteen/entrance area)
2.
Scan select task 003 label (in the canteen/entrance area)
3.
Scan row label (in the glasshouse)
4.
Scan row label (in the
5.
Scan enter task 100 (in the canteen/entrance area)
6.
Scan row label (in the glasshouse)
In the above sequence, the first scan (clock in) results in an entry in the
terminal. The second scan (select task) does not produce an entry in the
terminal. The third and fourth scans produce entries for task 3 with the row
number scanned. The fifth scan (enter task) produces an entry in the
terminal.
glasshouse)
6.4
The meaning of the task numbers depends on how the system has bee set
up, task 3 might be to debreak.
Note that the selected task remains selected in the terminal even when a
directly entered task (such as coffee) is scanned. In this way the operator
can continue with their selected task by scanning the next row number.
KEYPAD ENTRIES
lea
f a row of fruit and task 100 might be a coffee
Page 12

6.5
12
of
AGE
NOMAD
O
PERATING INSTRUCTIONS
It is also possible to use a combination of keypad entries and barcode
entries. It might be desirable for the operator to use keypad entries for
clocking in/out and selecting tasks and only using the barcode labels for the
rows for instance.
Conversely, some customers might not appreciate the benefits of labelling
every row within a glasshouse yet want greater security over clocking in and
task selection. With this in mind a barcode only mode is available.
BARCODE ONLY MODE
In barcode only mode, it is still possible to enter a row via the keypad but all
other entries, including task selection, must be made via the keypad.
Barcode only mode is indicated on the screen via BC in the top right
corner.
-
NRT202
P
12
To activate/deactivate the barcode only mode the 0 and 2 keys should be
held down while the start-up screen is shown (see section 2).
6.6
SUN SHIELD
For scanning in high ambient light environments, such as the glasshouse,
the barcode labels should be fitted in the optional sun shields. It is also
recommended that the sun shields should be used wherever possible as
they also act as a guide to correctly position the terminal which minimises
time lost to operators not correctly aiming their terminal.
7.
ERROR MESSAGES
7.1
C
LOCK NOT SET
If the internal clock has not acquired the current time from the NOMAD
system then an error message will be displayed CLOCK NOT SET . If this
message is displayed ensure that the terminal is within range of a link unit to
allow the terminal to acquire the time. Once the time is acquired the internal
clock of the terminal will maintain the time until power is lost.
7.2
FLAT BATTERY
Page 13

13
of
AGE
NOMAD
O
PERATING INSTRUCTIONS
If the rechargeable battery is at a level where safe data entry cannot be
guaranteed the terminal will prevent the operator from entering data and a
Flat Battery message will be displayed whenever data entry is attempted.
The terminal should be placed back in its charger and the battery allowed to
charge. Alternatively, the battery could be replaced with a spare fully
charged battery.
-
NRT202
P
13
7.3
8.
DATA WILL NOT BE LOST IF THE BATTERY FULLY DISCHARGES.
MEMORY FULL
If the memory has insufficient space to make another entry the Memory
Full message will be displayed. If this happens ensure that the terminal is in
communicat
and therefore free up memory. While this is happening the % meter in the
lower right corner of the display will be seen to decrement as each message
is sent.
ion range of a link unit to allow the system to extract the data
CHARGING
There is no on/off switch on the terminal. It is intended that it is either in use
or on charge. No harm will be done to the battery if the terminal is left on
charge for indefinite periods.
To charge the terminal place it in the charging station so that it is sitting with
the display showing and ensure that the terminal is slid all the way down in
the charging station. After a second has elapsed the terminal will beep and
the message CHG1 or CHG3 will be displayed. These messages
indicate that the terminal is charging.
The charging cycle and the meaning of the CHG messages is as follows.
CHG1
CHG3
CHG4
A fully discharged battery will take around 7 hours to recharge.
The battery is very discharged and is being slow charged. When
sufficient charge has been put into the battery it will switch to
fast charge.
The battery is being fast charged. When the battery is fully
charged it will switch to trickle charge.
The battery is fully charged and is now being trickle charged to
maintain its charge.
Page 14

9.
9.1
14
of
AGE
NOMAD
O
PERATING INSTRUCTIONS
MAINTAINENCE AND CAR
The NRT202 terminal has been designed to give reliable service in the
intended environment and is largely maintenance free.
CLEANING
Periodically wipe the barcode window and front face of the terminal with a
damp cloth to remove dirt. If necessary a water based cleaner may be used
to remove stubborn deposits.
-
NRT202
E
P
14
DO NOT USE SOLVENT CLEANERS.
9.2
9.3
10.
SPECIFICATION
BATTERIES
With normal use the expected life time of the supplied batteries is 500
charge/discharge cycles, after which they should be replaced. For optimum
performance it is recommended that the batteries be replace annually.
KEYPAD
On no account should the keys of the terminal be pressed with sharp or hard
objects
failure of the keypad.
- including fingernails. Use of such objects may result in premature
Power
Average Consumption
Charging Input
Radio link frequency
Barcode symbology
Environmental protection
9-
2x 1.2V 700mAh NiMH AAA.
25mA
915MHz
Code 39
IP64
15V DC @ 55mA max
Page 15

O
10.1
COMMUNICATION RANGE
Communication range is subject to local environmental conditions. The
NRT202 terminals are designed to have a typical communication distance of
50m from a link unit in a glasshouse.
Communication range will be affected by local conditions and no guarantee
can be made of the actual communication range encountered in an
individual situation.
NOMAD
PERATING INSTRUCTIONS
-
NRT202
15
of
AGE
P
15
It should be noted that during periods of communication blackout the
terminal will continue to function normally (with the exception of feedback
and paging) and any entered data will be automatically transferred when
communication is re-established.
 Loading...