

Page 1
Page 2

Table of Contents
1. Getting Started
............................................................................... ....................................... 3
1.1 Power On/Off ......................................................................................................... 4
1.2 Battery Charging .................................................................................................... 4
1.3 Desktop Screen....................................................................................................... 5
1.4 Internet Access with Wi-Fi Interface...................................................................... 8
1.5 How to Use Micro SD Card ................................................................................. 11
1.6 Familiar with Touch Screen ................................................................................. 12
2. Pre-installed Application
2.1 Internet Browser.................................................................................................... 13
2.2 YouTube ............................................................................................................... 14
2.3 App Market(Pending, to be edited) ....................................................................... 15
2.4 E-mail..................................................................................................................... 16
2.5 File Browser .......................................................................................................... 16
2.6 My Photo................................................................................................................. 21
1
Page 3

2.7 My Video.......................................................... ................................................... 21
2.8 My Music ............................................................................................................. 22
3. Adjust M-260 Settings...................................................................................................... 23
3.1 Wireless controls .................................................................................................. 23
3.2 Sound & display................................................................................................... 24
3.3 Application settings.............................................................................................. 27
3.4 Date and Time ...................................................................................................... 27
3.5 Select Locale ........................................................................................................ 27
3.6 Security & location .............................................................................................. 27
3.7 Install and Uninstall Applications ........................................................................ 28
4. Limited Warranty ................................................................................................................. 31
2
Page 4

1. Getting Started
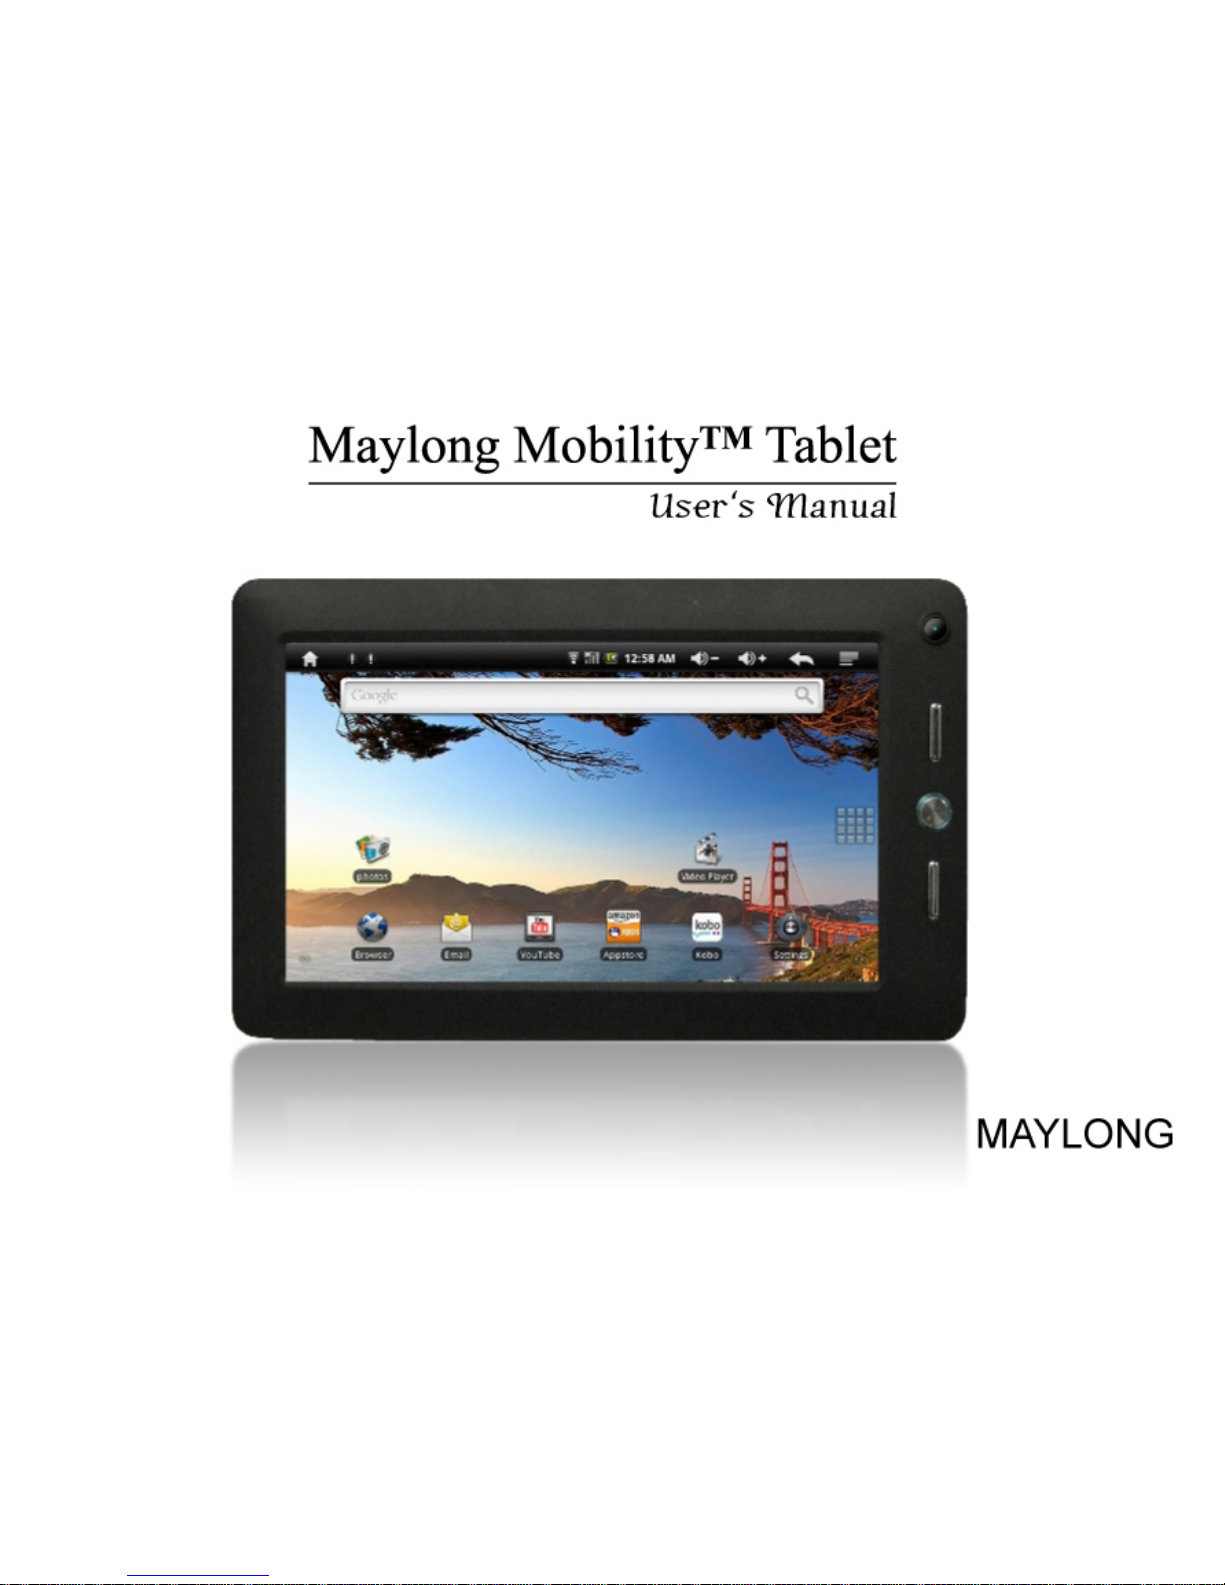
The first thing you probably want to do when you get Maylong M-260 Mobility™ Tablet is to
familiarize yourself with a few basics.
Unpack M-260 box and identify the key items included. You should have:
1. M-260 device: The device includes a touch-sensitive LCD screen, a Micro SD memory card
slot, a network/USB dongle slot, a power switch button, a MENU button, and speaker volume
adjustment buttons etc.
2. A/C home adapter: This is used to charge the M-260. M-260 has a built-in chargeable
battery.
3.
A Stylus.
4. User Manual: You’re holding this in your hands.
3
Page 5

Warning: Don’t use the device in the hot environment.
1.1 Power On/Off
Power On: Press and hold the power switch button for 2 seconds to turn on the M-260.
You may have to charge the M-260 by using the A/C home adapter before the M-260 can
be powered on, if battery power of the M-260 is very low.
Power Off: Press and hold the power button to turn off the M-260. A dialog box with
options may be available for your selection.
1.2 Battery Charging
Maylong M-260 Tablet has a built-in chargeable battery. Please charge the battery using
the A/C adapter included when the battery power indicator on the status bar shows low.
Warning:
It is important to use the A/C home adapter included in the package for charging your
M-260. Please contact Maylong customer service at 1-888-403-9477 for purchasing extra
4
Page 6
A/C home adapter. M-260 may be damaged if you use incompatible A/C adapter to charge
your M-260 Tablet.
1.3 Desktop Screen
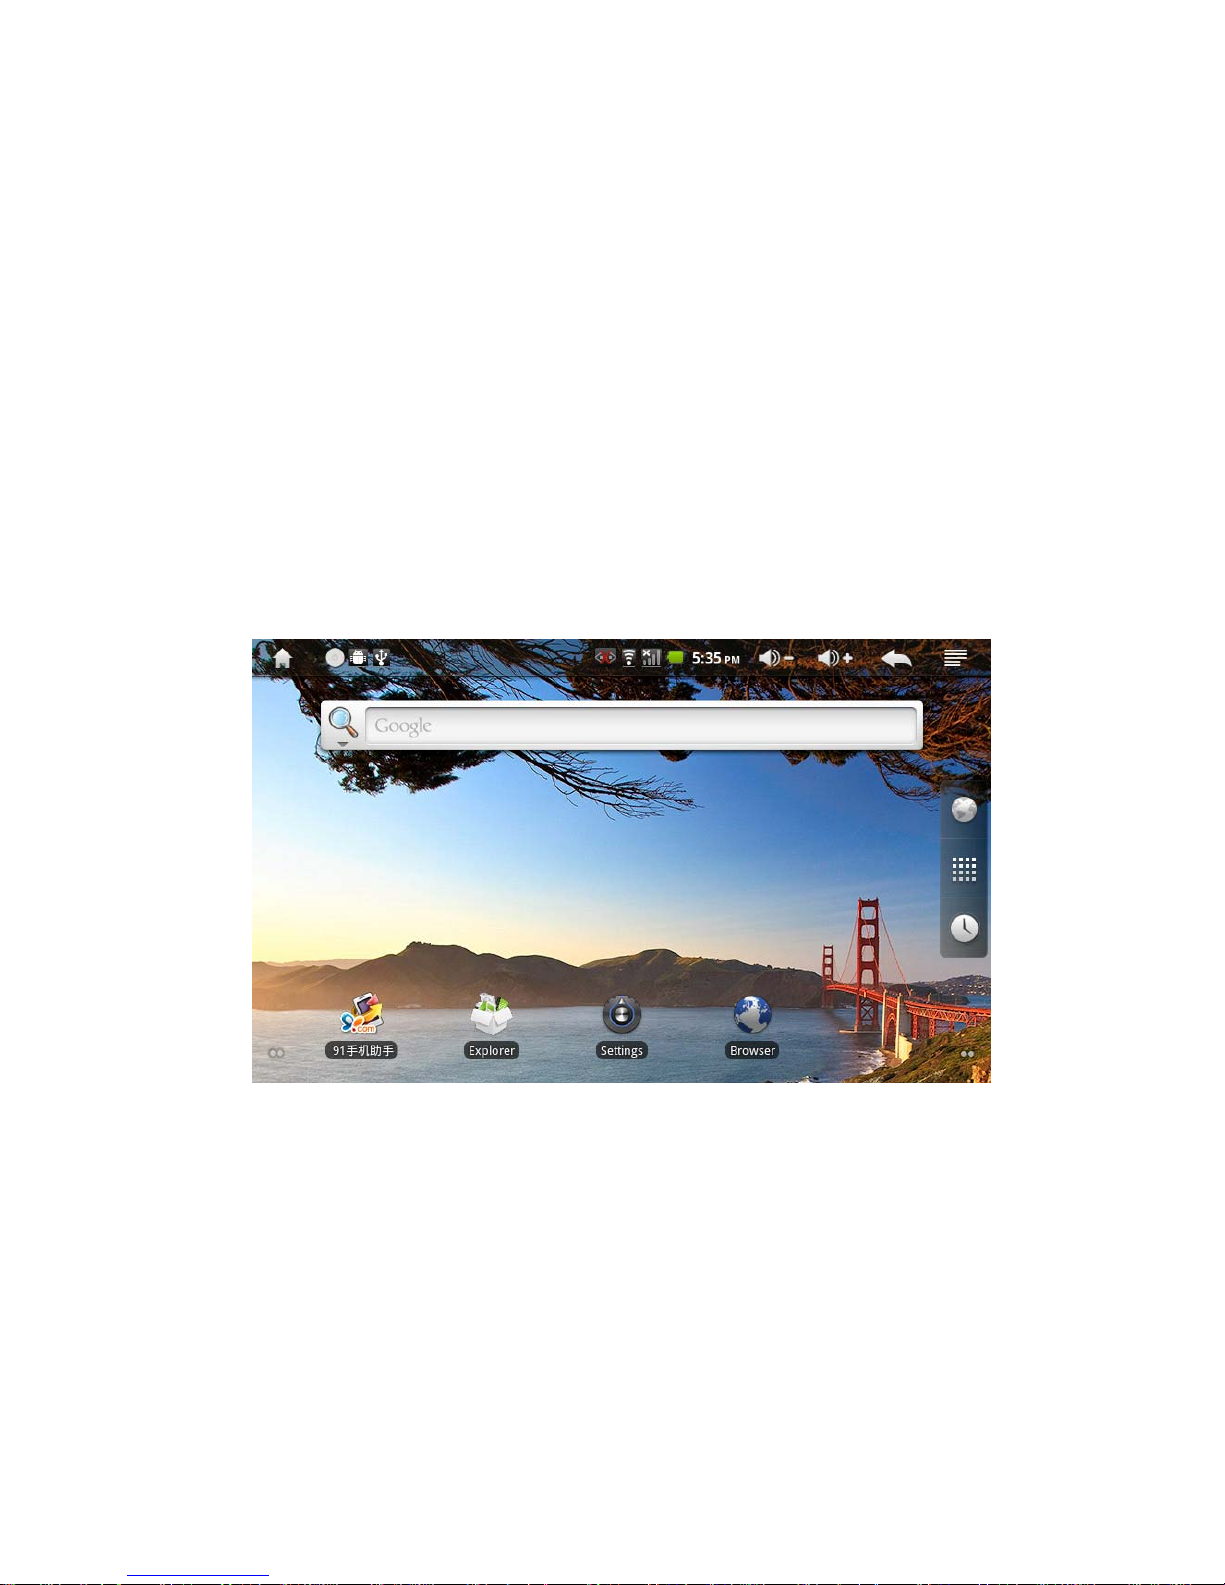
The desktop screen is displayed after M-260 Android operating system is started.
5
Page 7
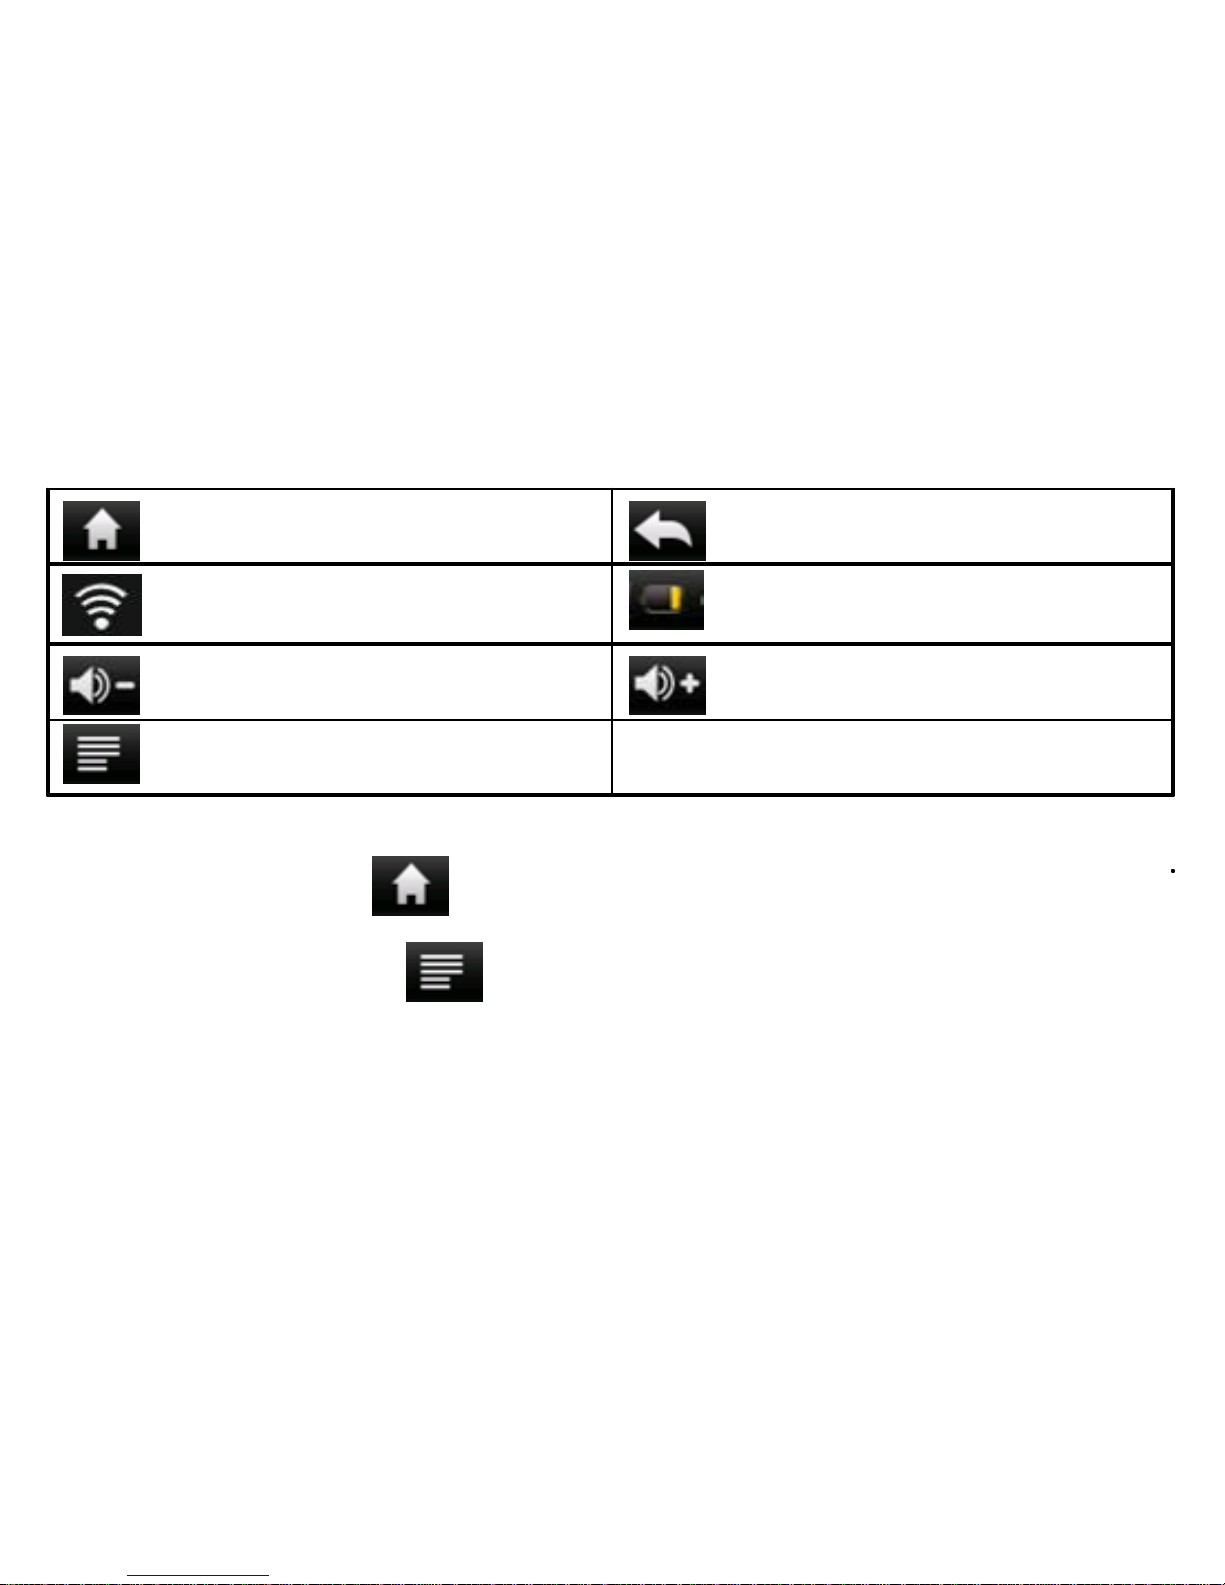
The icons on the top of the desktop screen are named below.
Home Screen
Wi-Fi Signal
Speaker Volume Down
Command Menu
Touch Home Screen icon
Touch Command Menu icon
bottom of the screen.
Last Screen
Battery Status
Speaker Volume Up
from any screen to go back to the Desktop screen.
from some screens to display a command menu on the
6
Page 8
1.4 Internet Access with Wi-Fi Interface
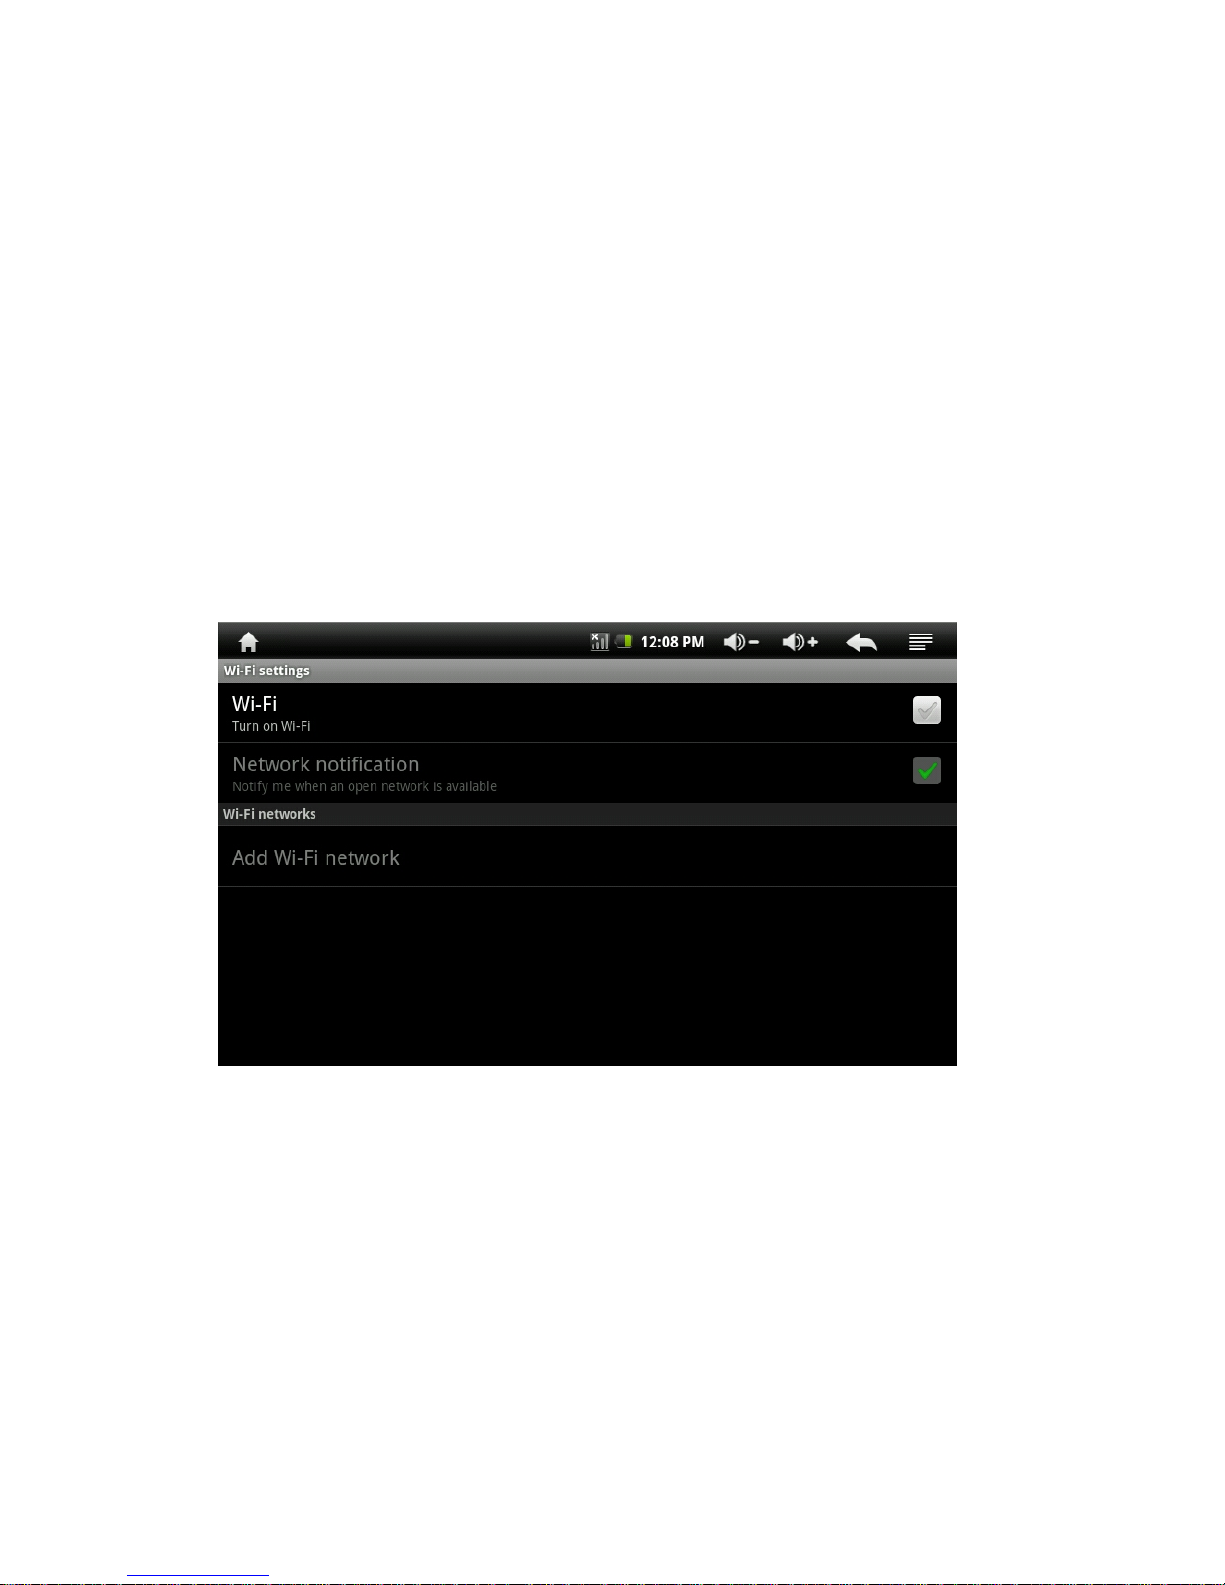
M-260 has a built-in Wi-Fi interface for accessing the internet. To enable Wi-Fi interface,
touch Wi-Fi Settings icon from the Desktop Screen to display the Wi-Fi Settings screen.
7
Page 9
Touch “Turn on Wi-Fi” icon to enable the Wi-Fi interface. After the Wi-Fi interface is
enabled, M-260 will automatically scan and list local Wi-Fi networks that if finds. A lock
image
indicates a secure network that requires a password for access.
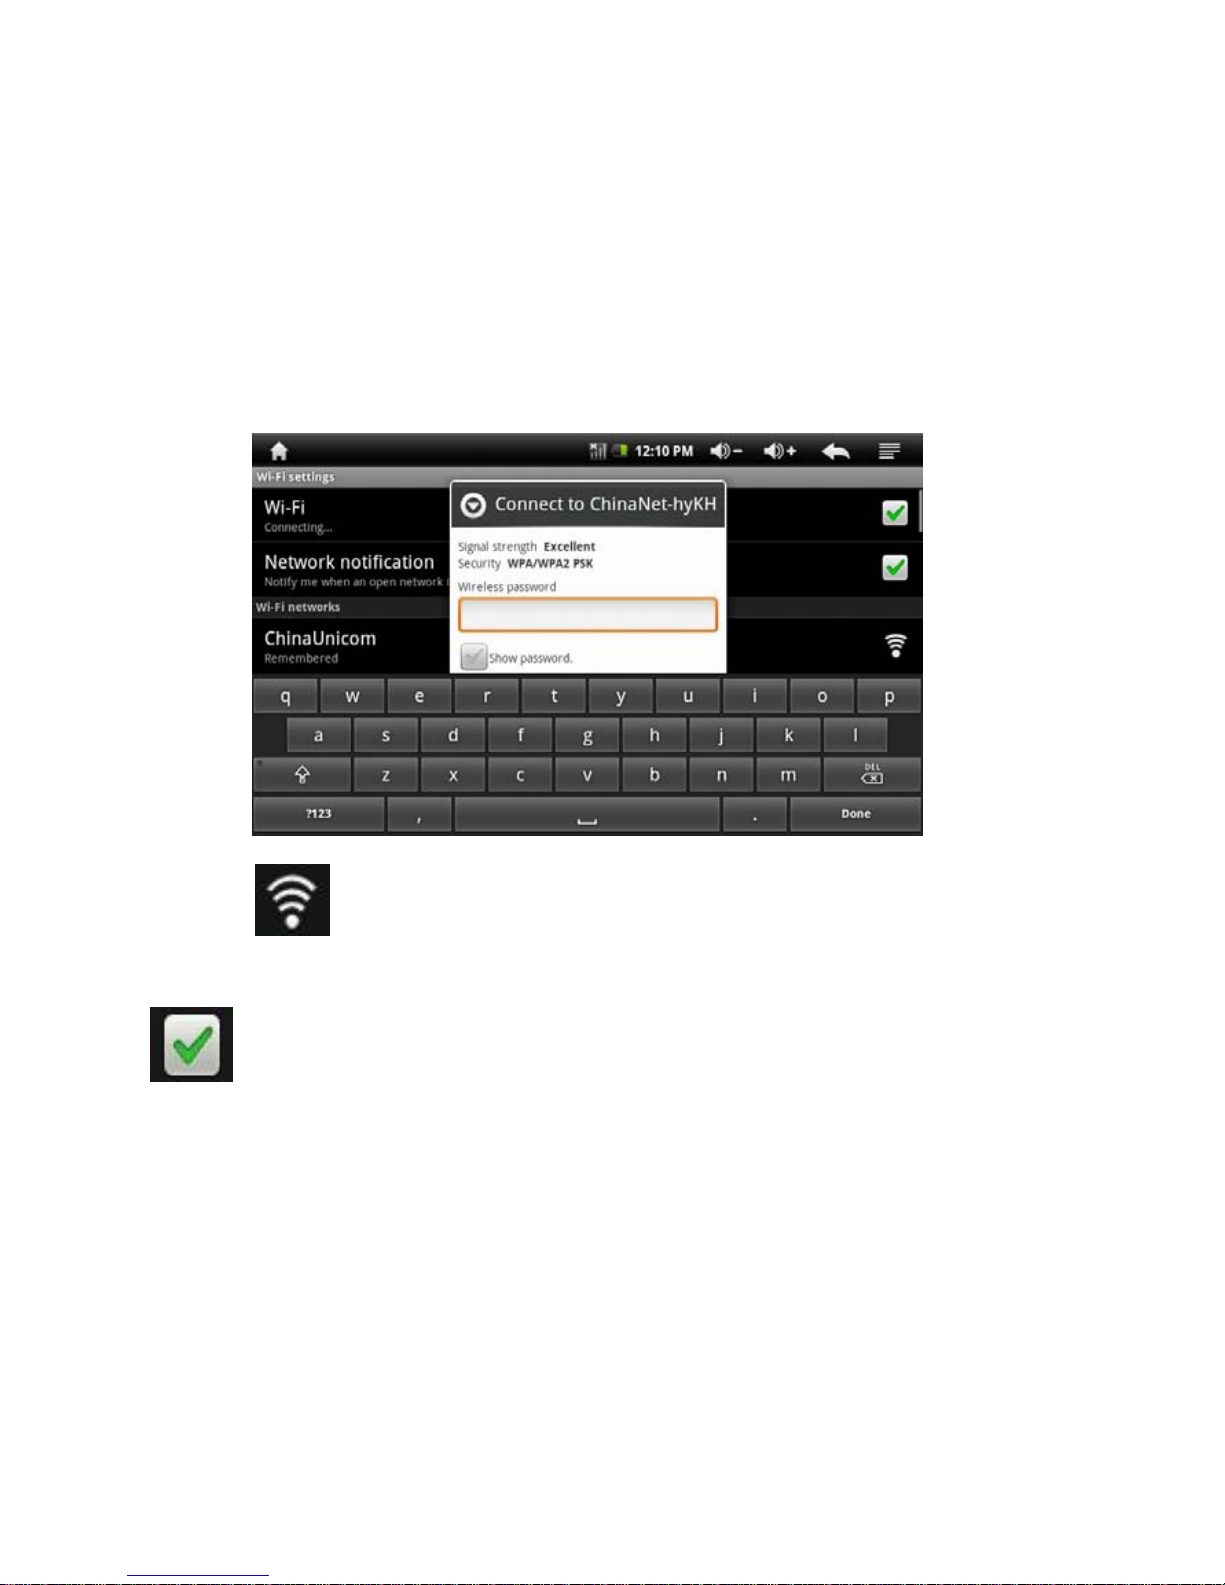
Tap the network that you would like the device to connect to. If a password is required, a
notification screen will appear to allow you to enter the password. Tap the Wireless password
box to access the keyboard and enter the password. Tap “Done” when finished.
8
Page 10
A wireless icon
wireless network.
will appear in the toolbar to indicate that you are connected to the
Touch
icon to disable the Wi-Fi interface. It is recommended that you disable Wi-Fi
9
Page 11

interface if you want to extend the battery usage time when you work with M-260 without
Internet access.
1.5 How to Use Micro SD Card
The Micro SD card is used for transferring files between M-260 and your personal computer,
downloading applications, and playing stored media. There is no Micro SD card included in the
M-260 package. Micro SD card can be purchased from local electronics stores.
Insert SD memory card:
Insert SD card into the SD card slot until a “click” sound is heard. Once the SD card is
10
Page 12
inserted properly, “Preparing SD card” will show on the left top of the screen next to
icon.
Browsing files in SD card:
Touch on the File Browser icon from Desktop screen and then touch icon from
the File Browser screen. The File Browser screen will show all the files & folders under
the root directory of SD card.
Remove SD memory card:
To remove the SD memory card, please close all applications or documents which have
been opened from the SD card. Push the card lightly to eject the SD card.
1.6 Familiar with Touch Screen
11
Page 13
M-260 uses touch screen for you to interface with the device. Using the stylus included in
the package would give you a better experience than using your fingers to operate the
M-260.
If a network/USB dongle is available, you can connect a computer mouse with the dongle
to operate the M-260.
2. Pre-installed Application
M-260 comes with some pre-installed applications. A few M-260 core applications are
introduced below.
2.1 Internet Browser
Access the internet and surf the web. Touch Internet Browser icon
screen to start surfing of the internet.
12
From Desktop
Page 14
2.2 YouTube
View and share popular videos online. Touch YouTube icon
to start YouTube application.
from Desktop screen
Note: Some YouTube video format may not be supported by M-260 YouTube application.
13
Page 15
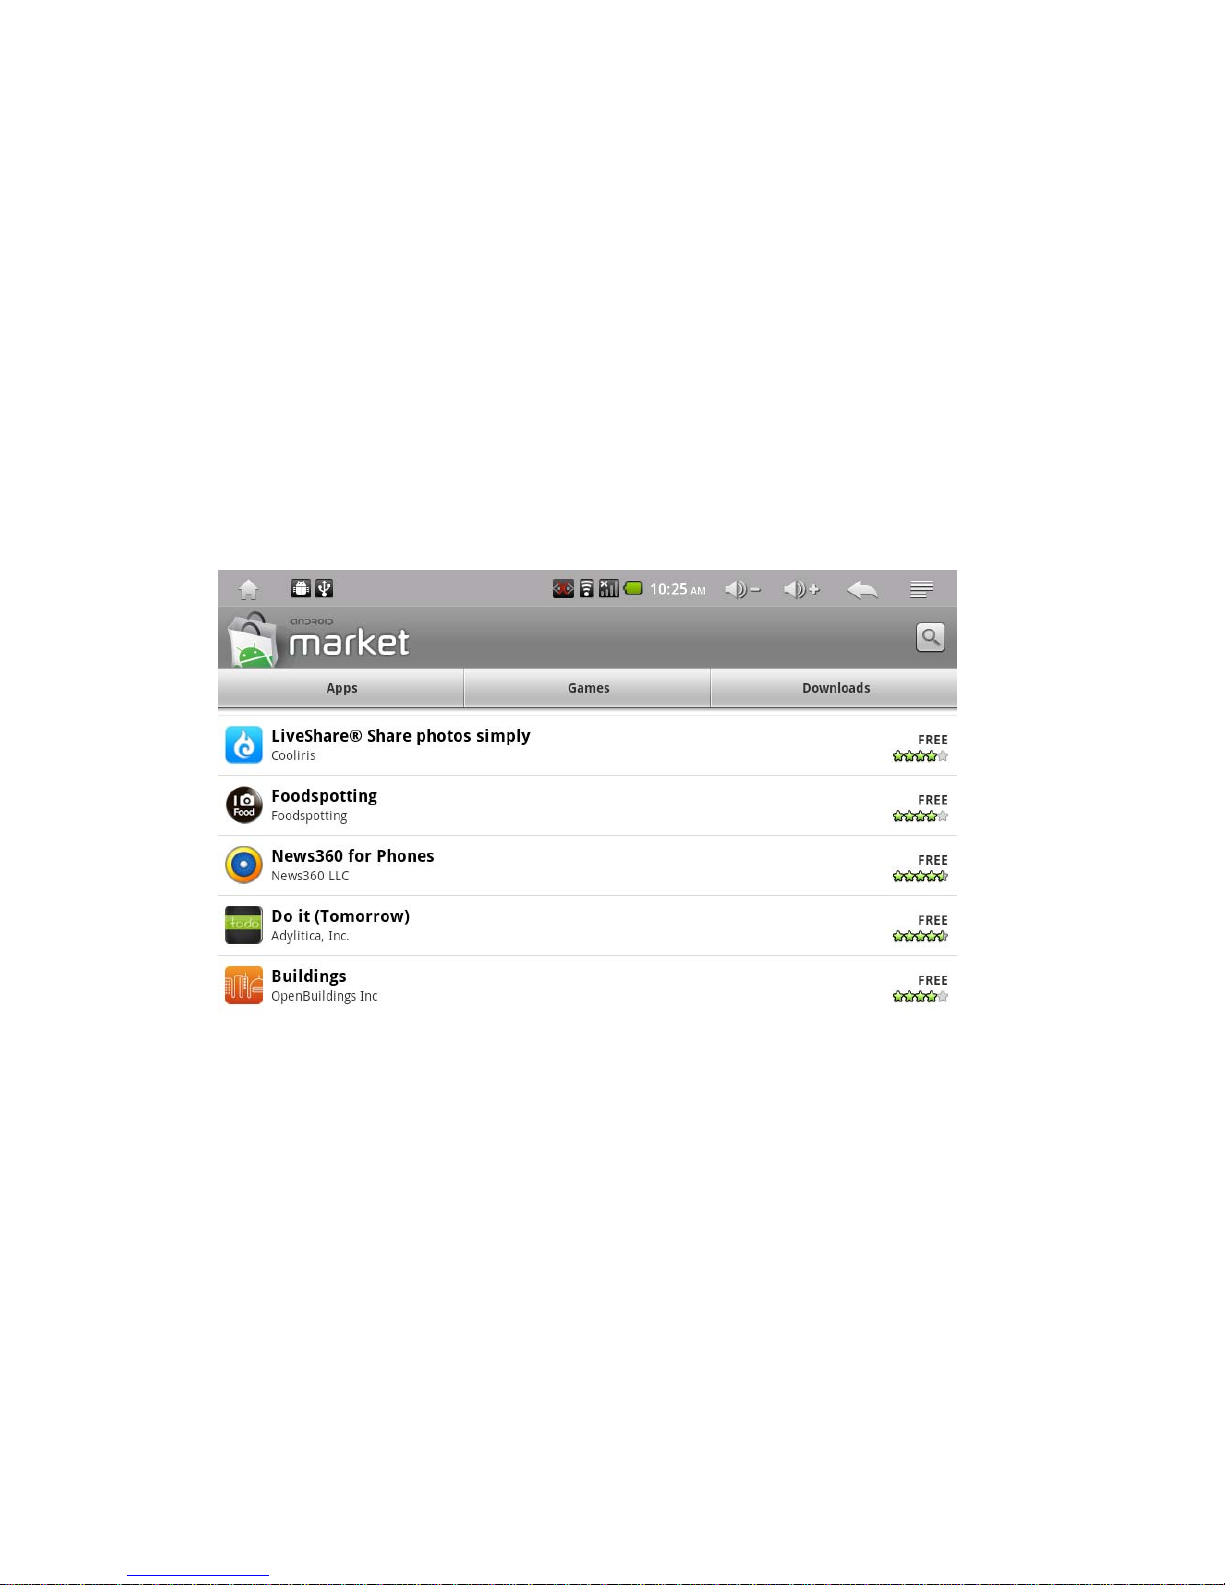
2.3 App Market
Application store: Choose great applications to use on your Tablet.
Note: Not all applications work for Tablet.
14
Page 16
2.4 E-mail
To set up Email, tap Email icon
on the application home screen panel. Enter your
email address and password. Tap Next. This will be your default account unless you add
another email address. After you have more than one account set up, you can select a
different address as the default account.
Note: M-260 uses Google Android operating system which may not support some email
services.
2.5 File Browser
Manage files stored on the SD card or on local memory.
Touch the File Browser icon
to explore the files available in internal memory
disk or SD card. From File Browser screen,
15
Page 17
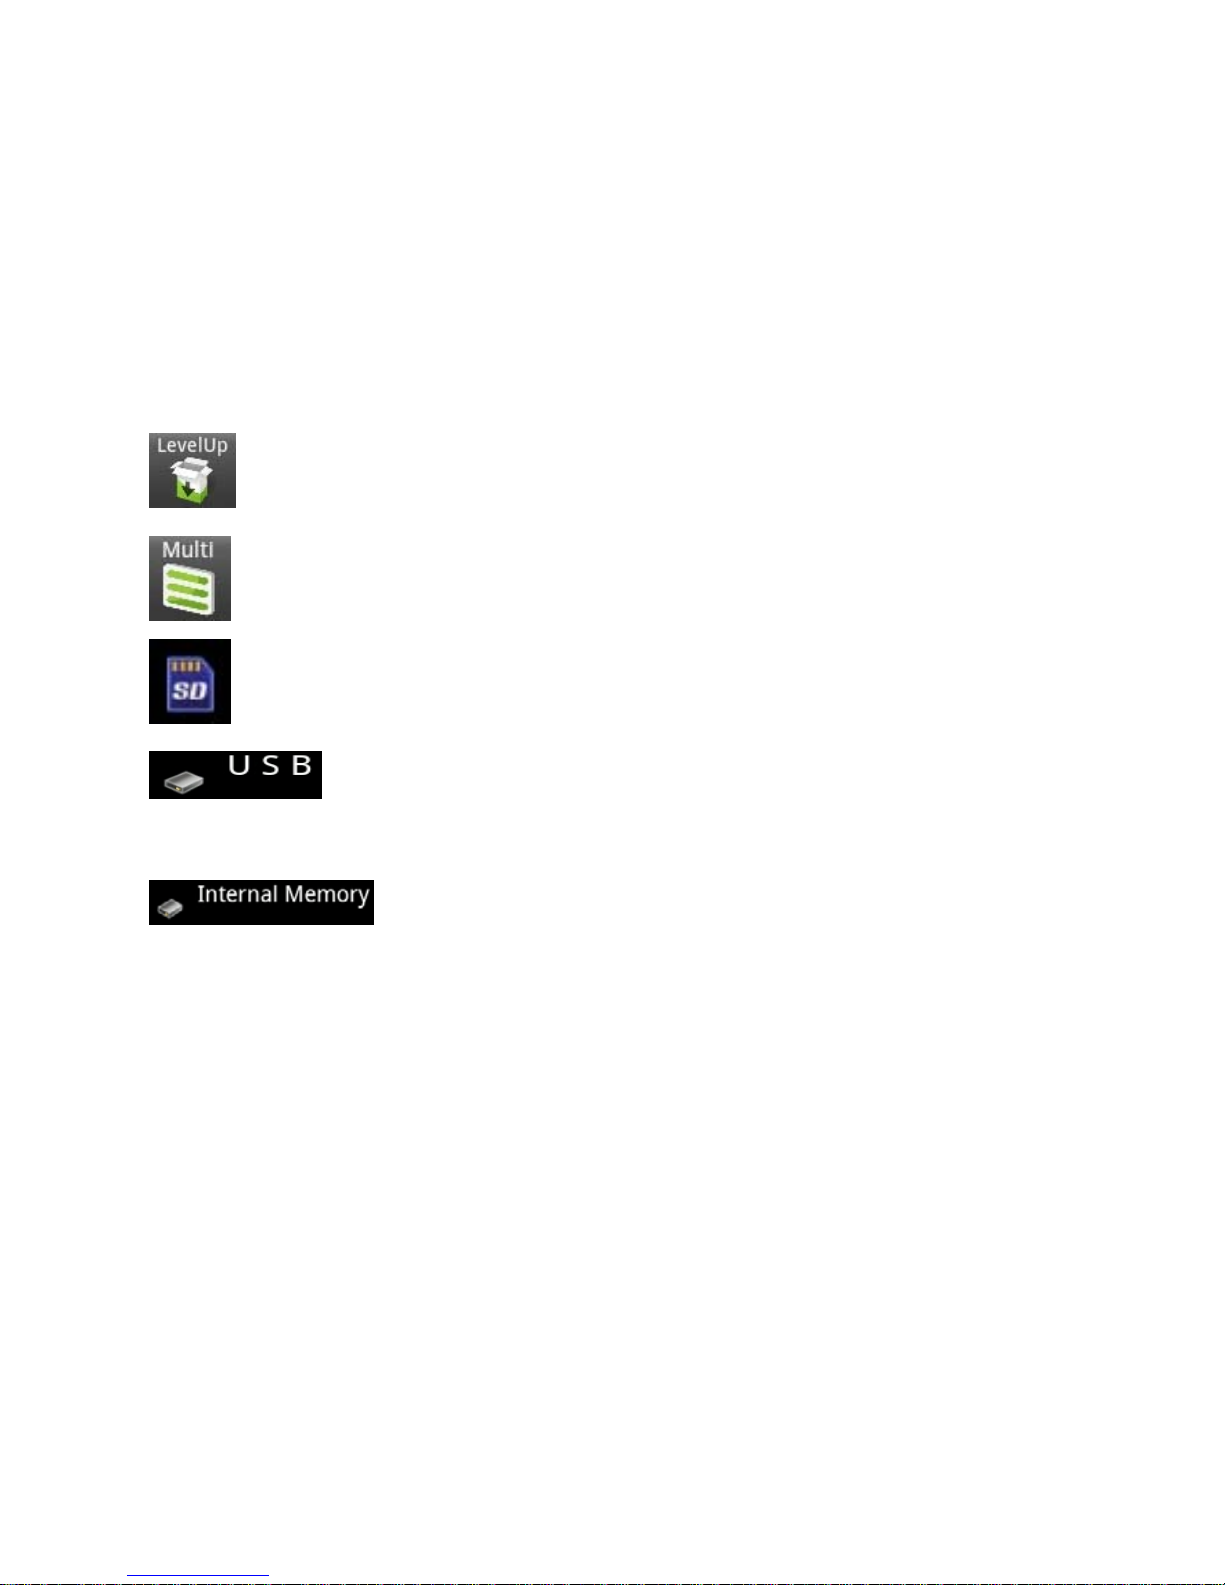
Touch
Touch
Touch
Touch
icon to go up one level in folder directory.
icon to enable selecting multiple files.
icon to access files available in SD card.
icon to access files available in a USB drive that may be connected
with a Network/USB dongle.
Touch
icon to go back to LocalDisk folder in the internal memory disk.
Transfer files between internal memory disk and SD card
16
Page 18
You can transfer files between M-260 internal memory disk and SD card. An example of
copying a file from TF card to internal memory disk is provided below.
1. Make sure a SD card is inserted into the SD card slot properly.
2. Touch SD card icon
card.
from File Browser screen to display the files in the SD
3. Select the file you want to transfer and then touch & hold the file name, a command
window will be displayed.
17
Page 19
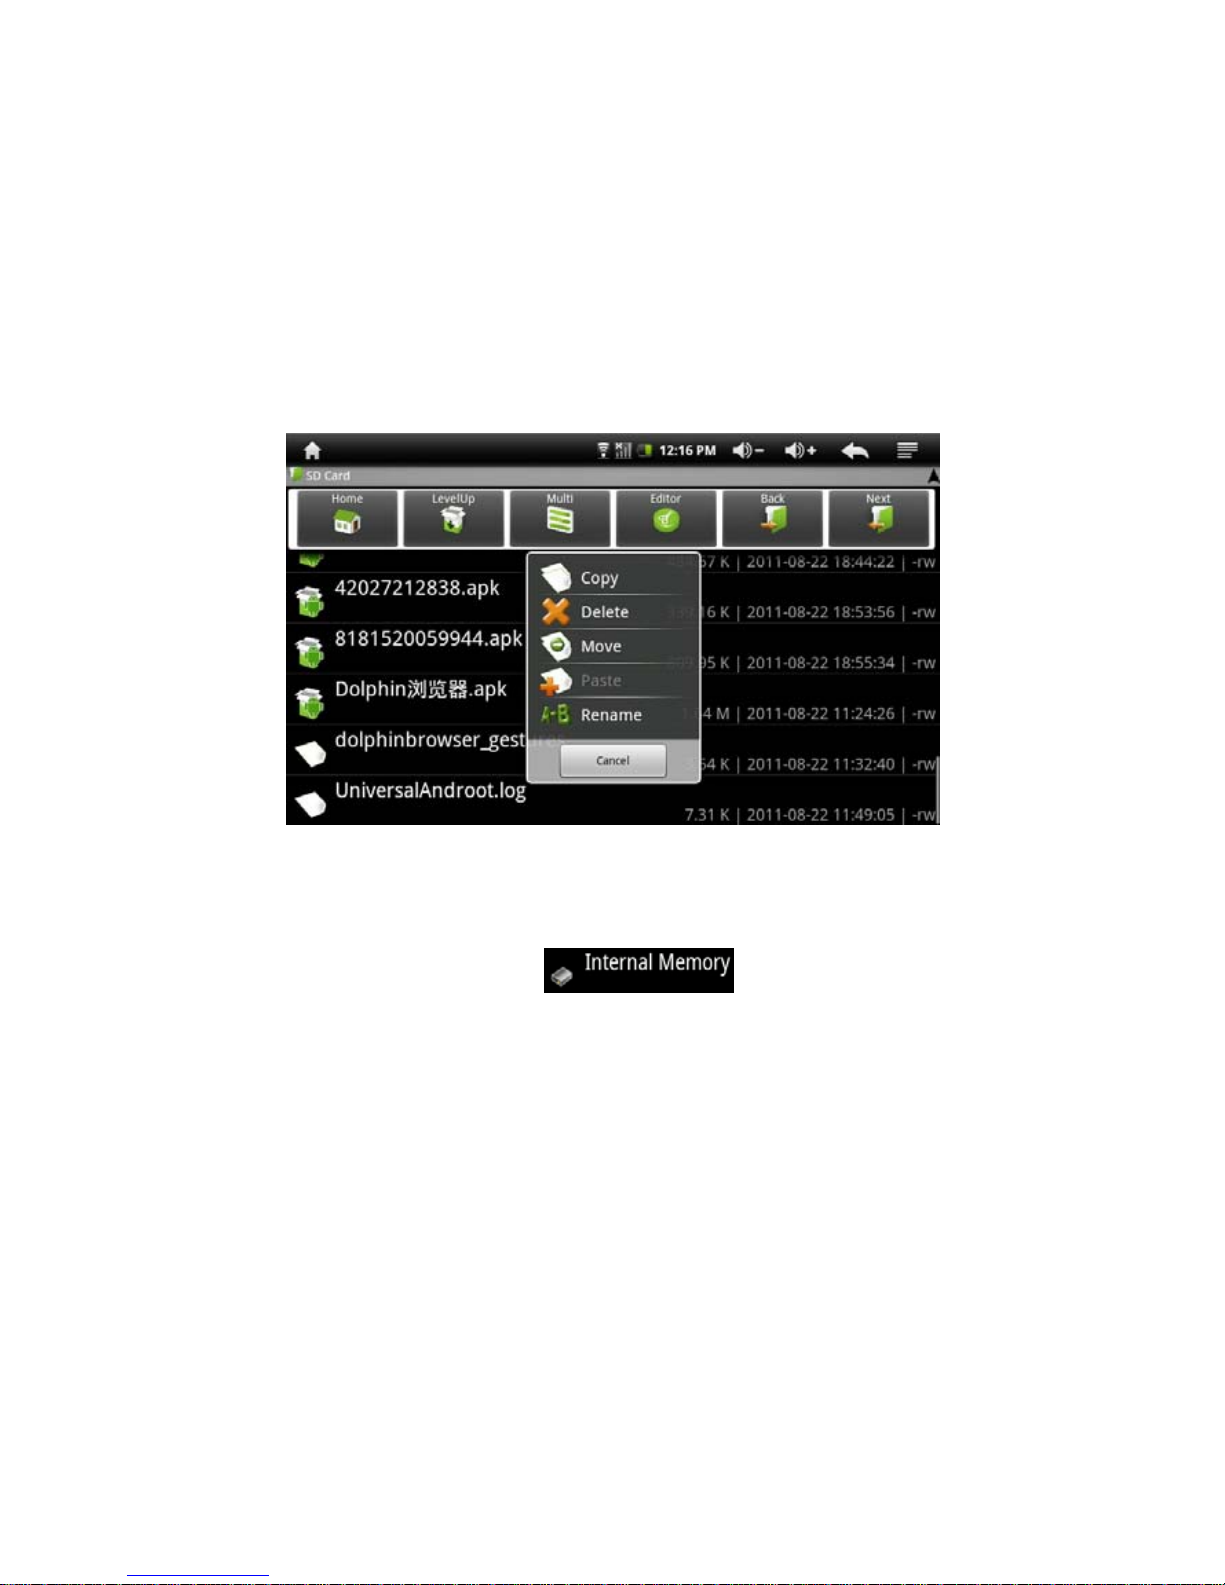
4. Touch Copy command. The command window will be disappeared.
5. Touch internal memory disk icon
to switch to LocalDisk folder.
6. Touch & hold a blank area in the File Browser screen to display the command
window.
18
Page 20
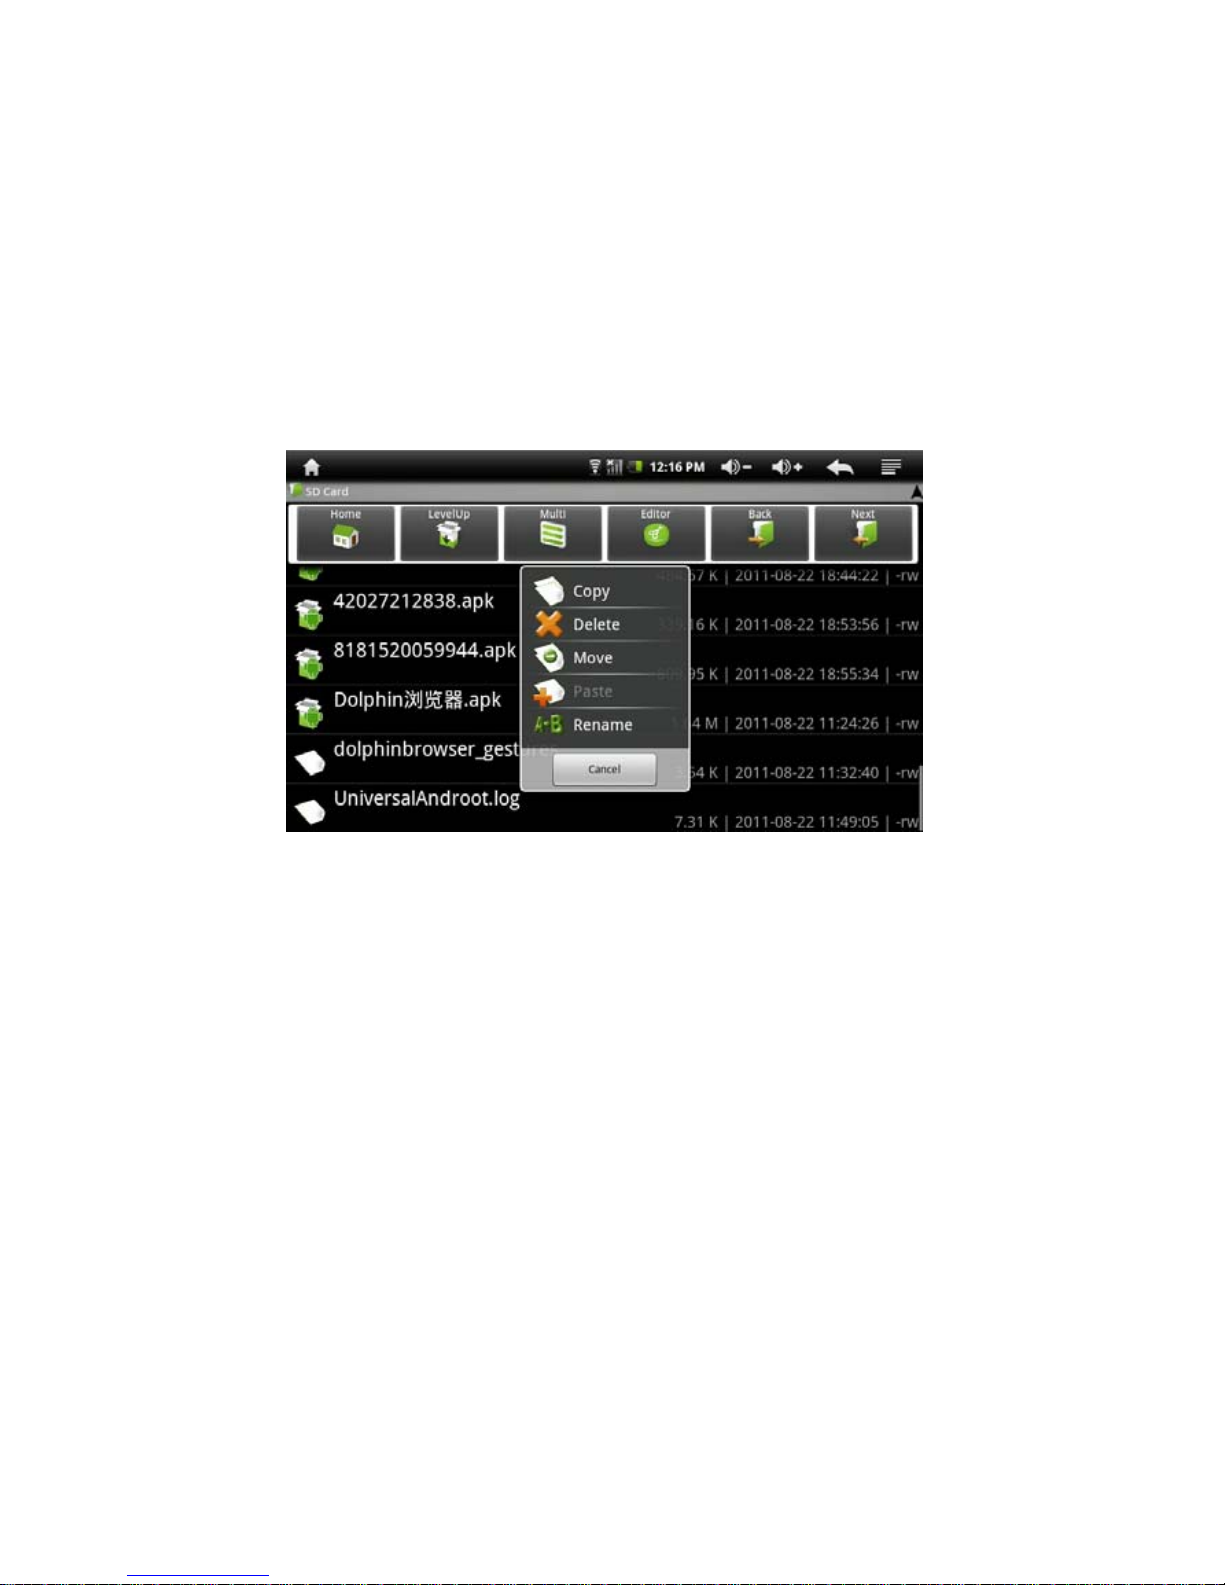
7. Touch Paste command to copy the file from SD card into the internal memory disk.
Delete files from internal memory disk
1. Select the file you want to delete and touch & hold the file to display a command
window.
19
Page 21
2. Touch & hold the command window and move up to see the Delete command
3. Touch Delete command to delete the selected file.
2.6 My Photo
Touch My Photo icon
application.
from Desktop screen to start digital picture viewer
Press MENU button or touch Command Menu icon
to display the command
menu on the bottom of the screen. You can select storage device for the digital pictures by
touching Select Storage Device command from the command menu.
2.7 My Video
Touch My Video icon
from Desktop screen to start the built-in video player.
20
Page 22
Press MENU button or touch Command Menu icon to display the command
menu on the bottom of the screen. You can select storage device for the digital video
content by touching Select Storage Device command from the command menu.
2.8 My Music
Touch My Music icon
from Desktop screen to start the built-in music player.
Press MENU button or touch Command Menu icon
from My Music screen to
display the Command Menu on the bottom of the screen. You can select storage device for
the digital music content.
Speaker volume can be adjusted by pressing the volume adjustment buttons or Speaker
Volume icons.
21
Page 23
3. Adjust M-260 Settings
Touch the Settings icon
from Desktop screen to display the Settings screen. You
can use your fingers or the stylus to touch & hold the screen and then move up or down
the screen to view all setting options available.
3.1 Wireless controls
Settings for M-260 wireless communication can be configured from the Wireless Controls
screen. Wi-Fi interface can be enabled or disabled and Wi-Fi network setting can be
managed from the Wireless Controls screen.
M-260 supports some 3G dongles for mobile data communication. 3G network settings
can be managed if a 3G dongle is connected with your M-260.
22
Page 24
Airplane mode is available with M-260. If Airplane mode is enabled, all M-260 wireless
communication interfaces are disabled. You should see
battery icon once airplane mode is turned on.
3.2 Sound & display
icon shows up next to the
Touch Sound from Settings screen to manage the settings related to sound.
23
Page 25
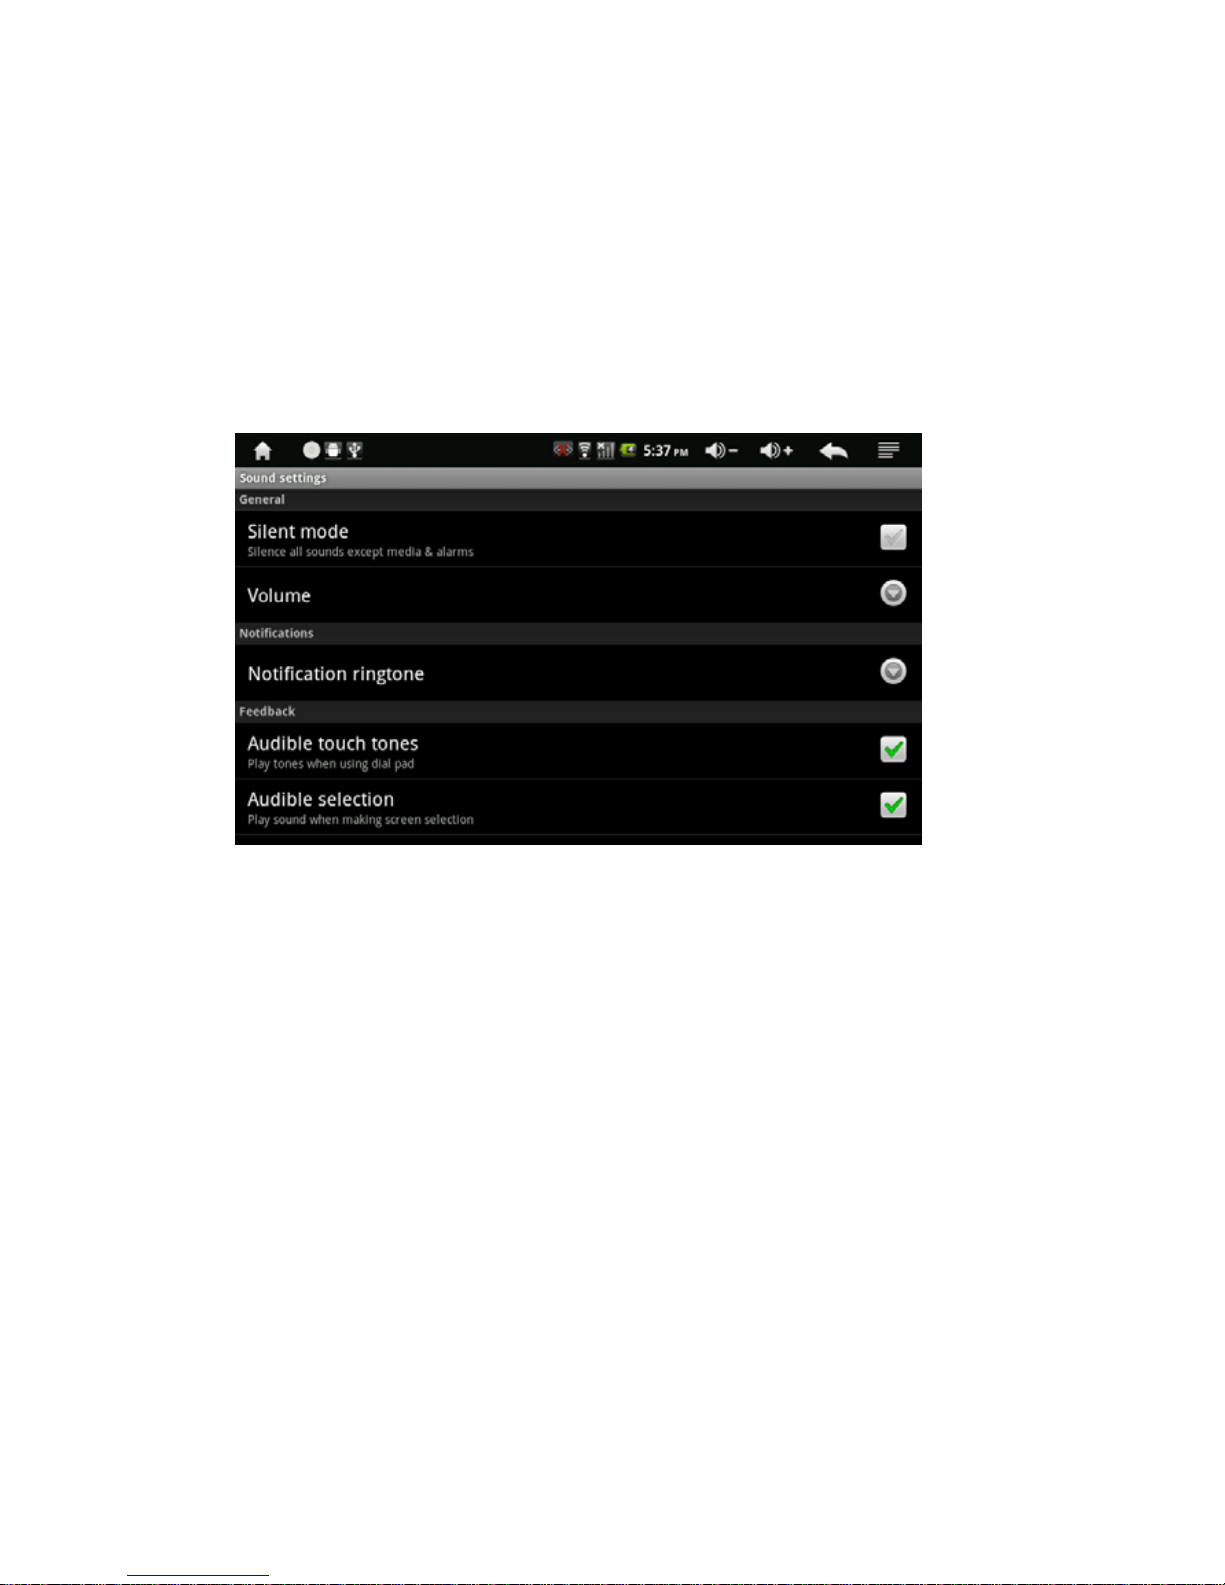
You can personalize the M-260 Sound settings as your preference.
Under display settings, enabling Orientation setting will allow switch of display orientation
(vertical or horizontal) when rotating the M-260 device. When Orientation setting is enabled,
24
Page 26
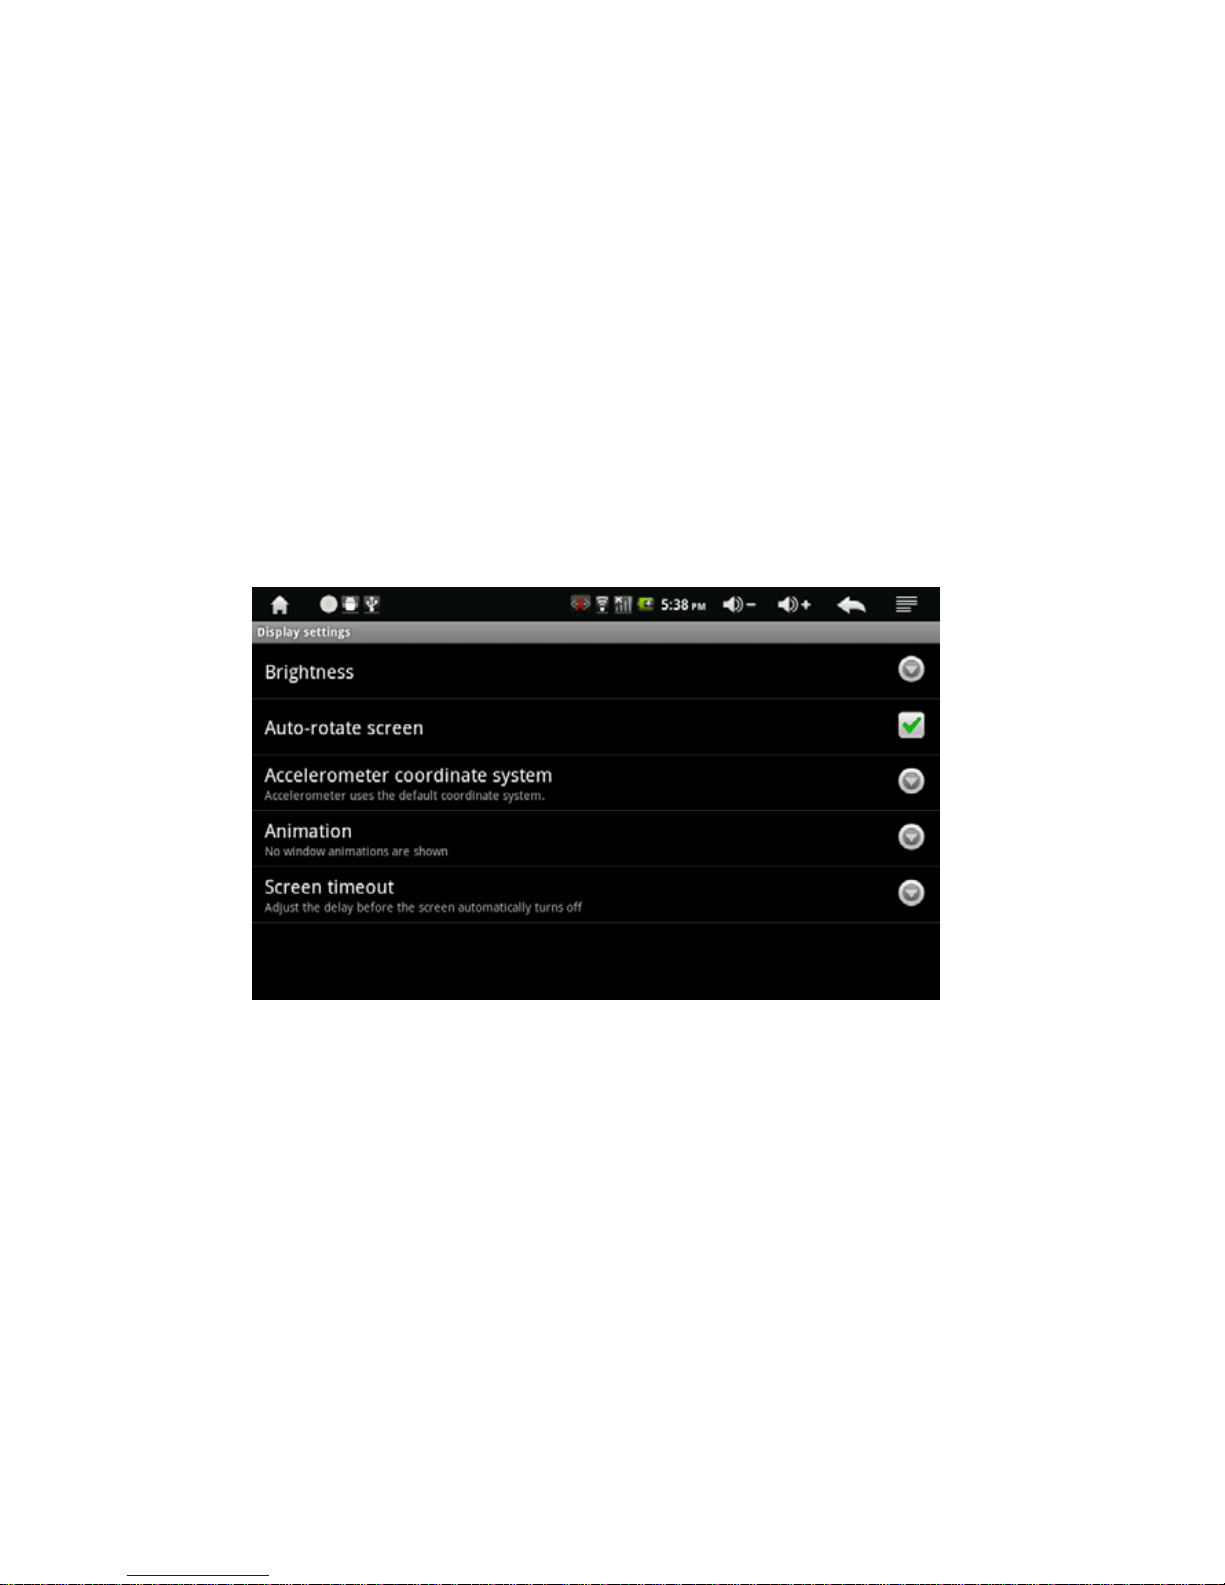
Screen Orientation icon
Otherwise, the Screen Orientation icon
will be displayed on the top of screen.
25
Page 27

3.3 Application settings
You can find all application related settings here. Un-installation of applications is part of
the Application settings.
3.4 Date and Time
Date, time, time zone, and time format can be configured from this setting.
3.5 Select Locale
You can select language for M-260 user interface from this setting.
3.6 Security & location
Security related settings are configured here. Security settings protect access to your
M-260 from unauthorized users.
Note: M-260 does not have GPS included. My Location settings can be ignored.
26
Page 28
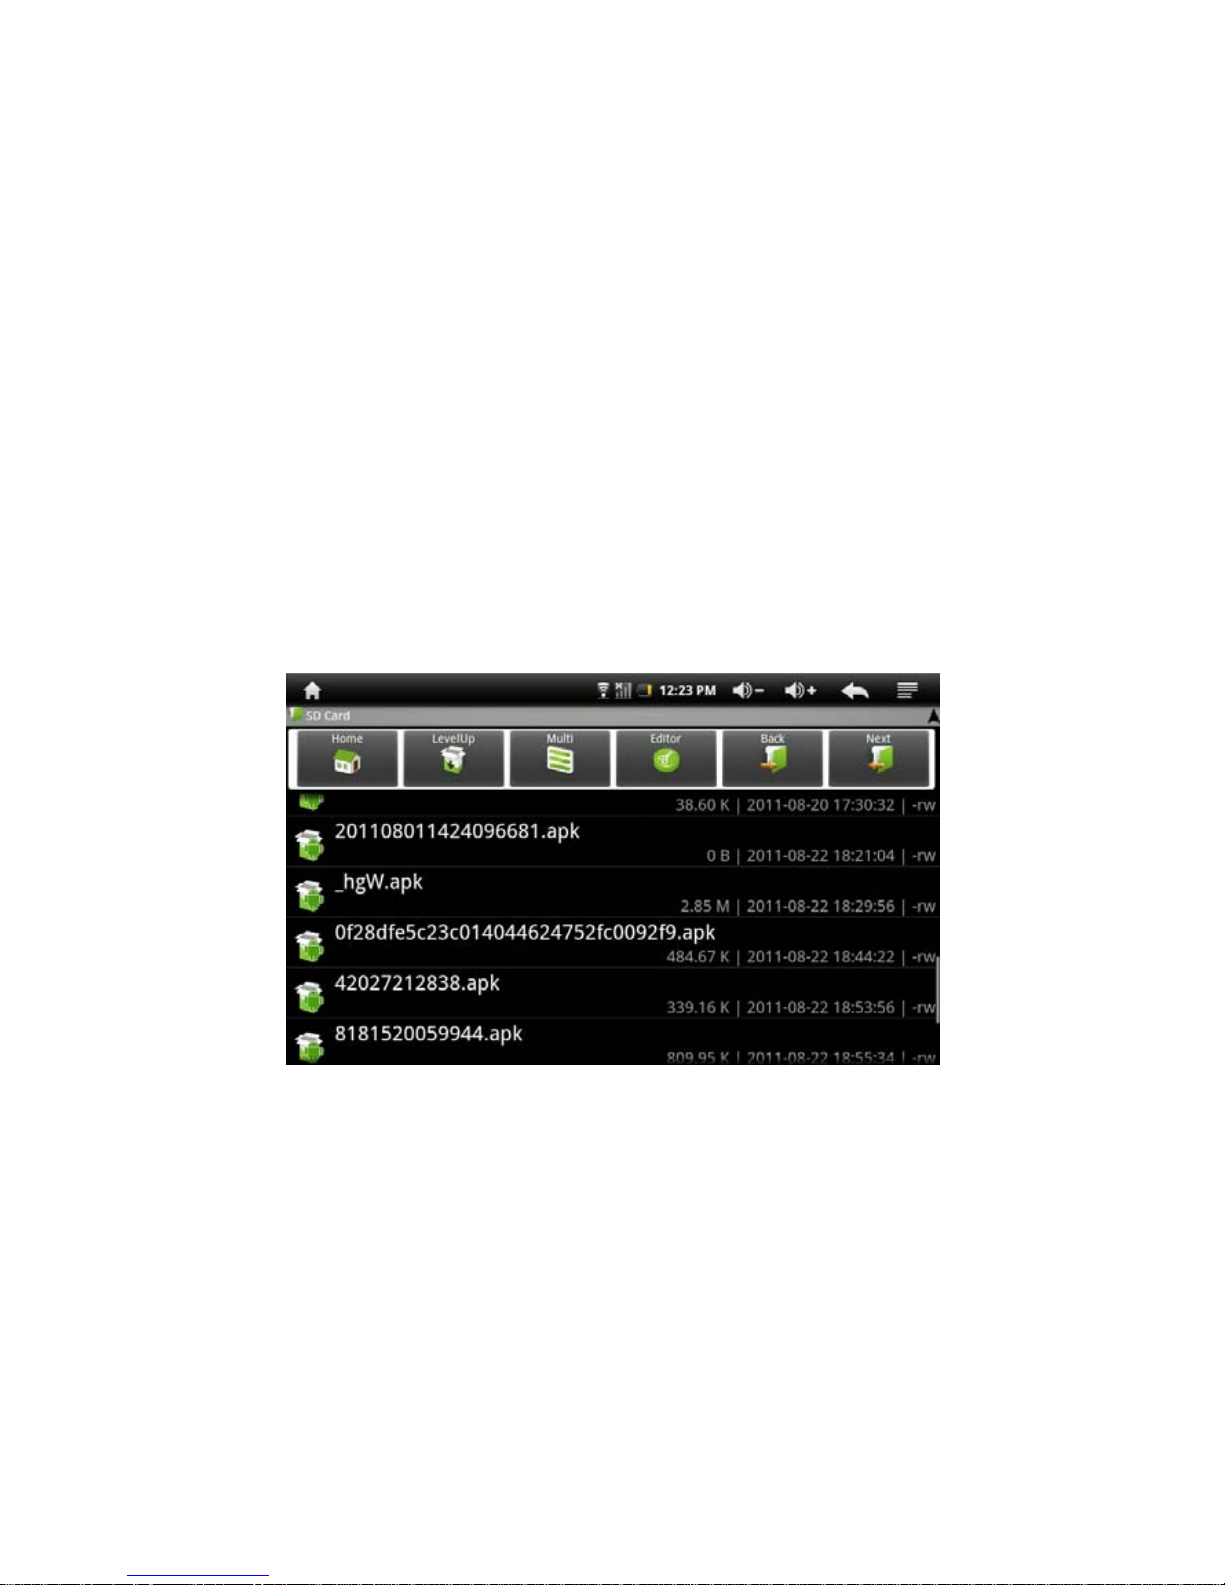
3.7 Install and Uninstall Applications
Install Application
To install third-party applications, touch File Browser icon from Desktop Screen and then
find the APK file from the SD card or internal memory disk. Touch the APK file to start
the installation.
27
Page 29
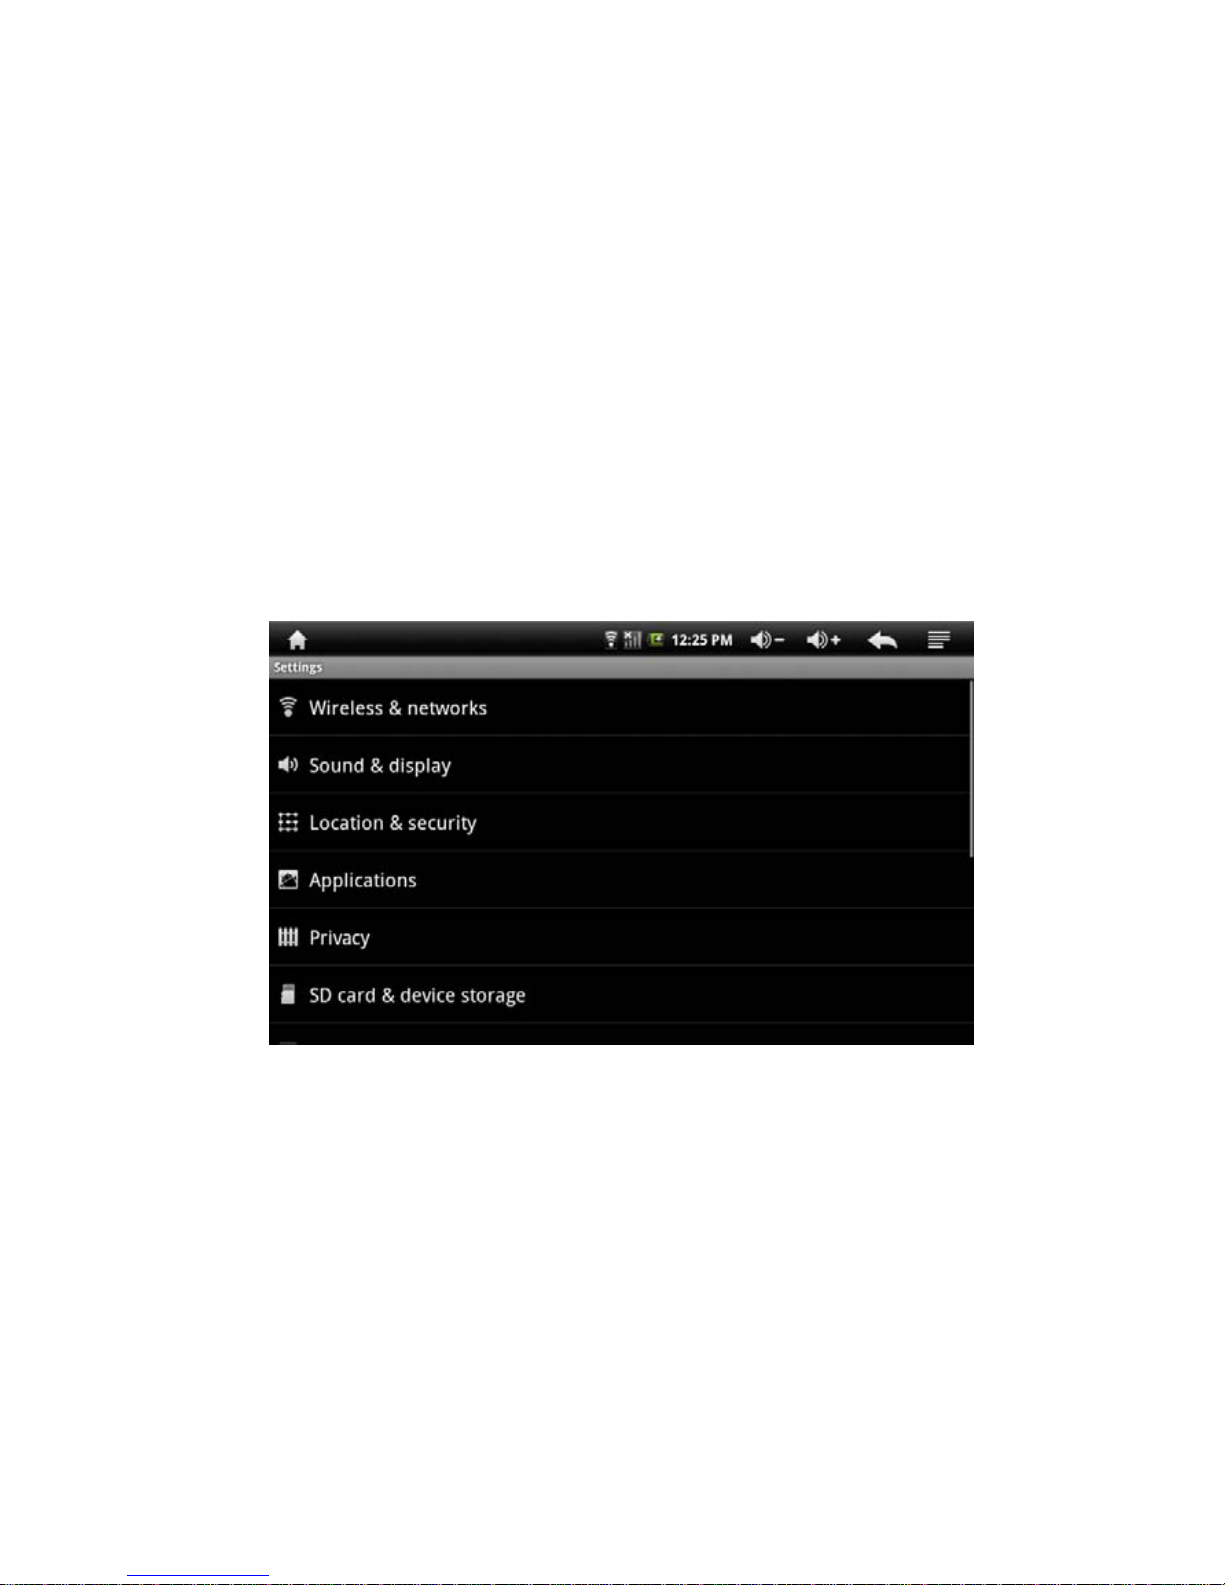
Uninstall Application
To uninstall or remove an application from M-260, touch Settings icon from Desktop
Screen to bring up the Settings screen.
28
Page 30
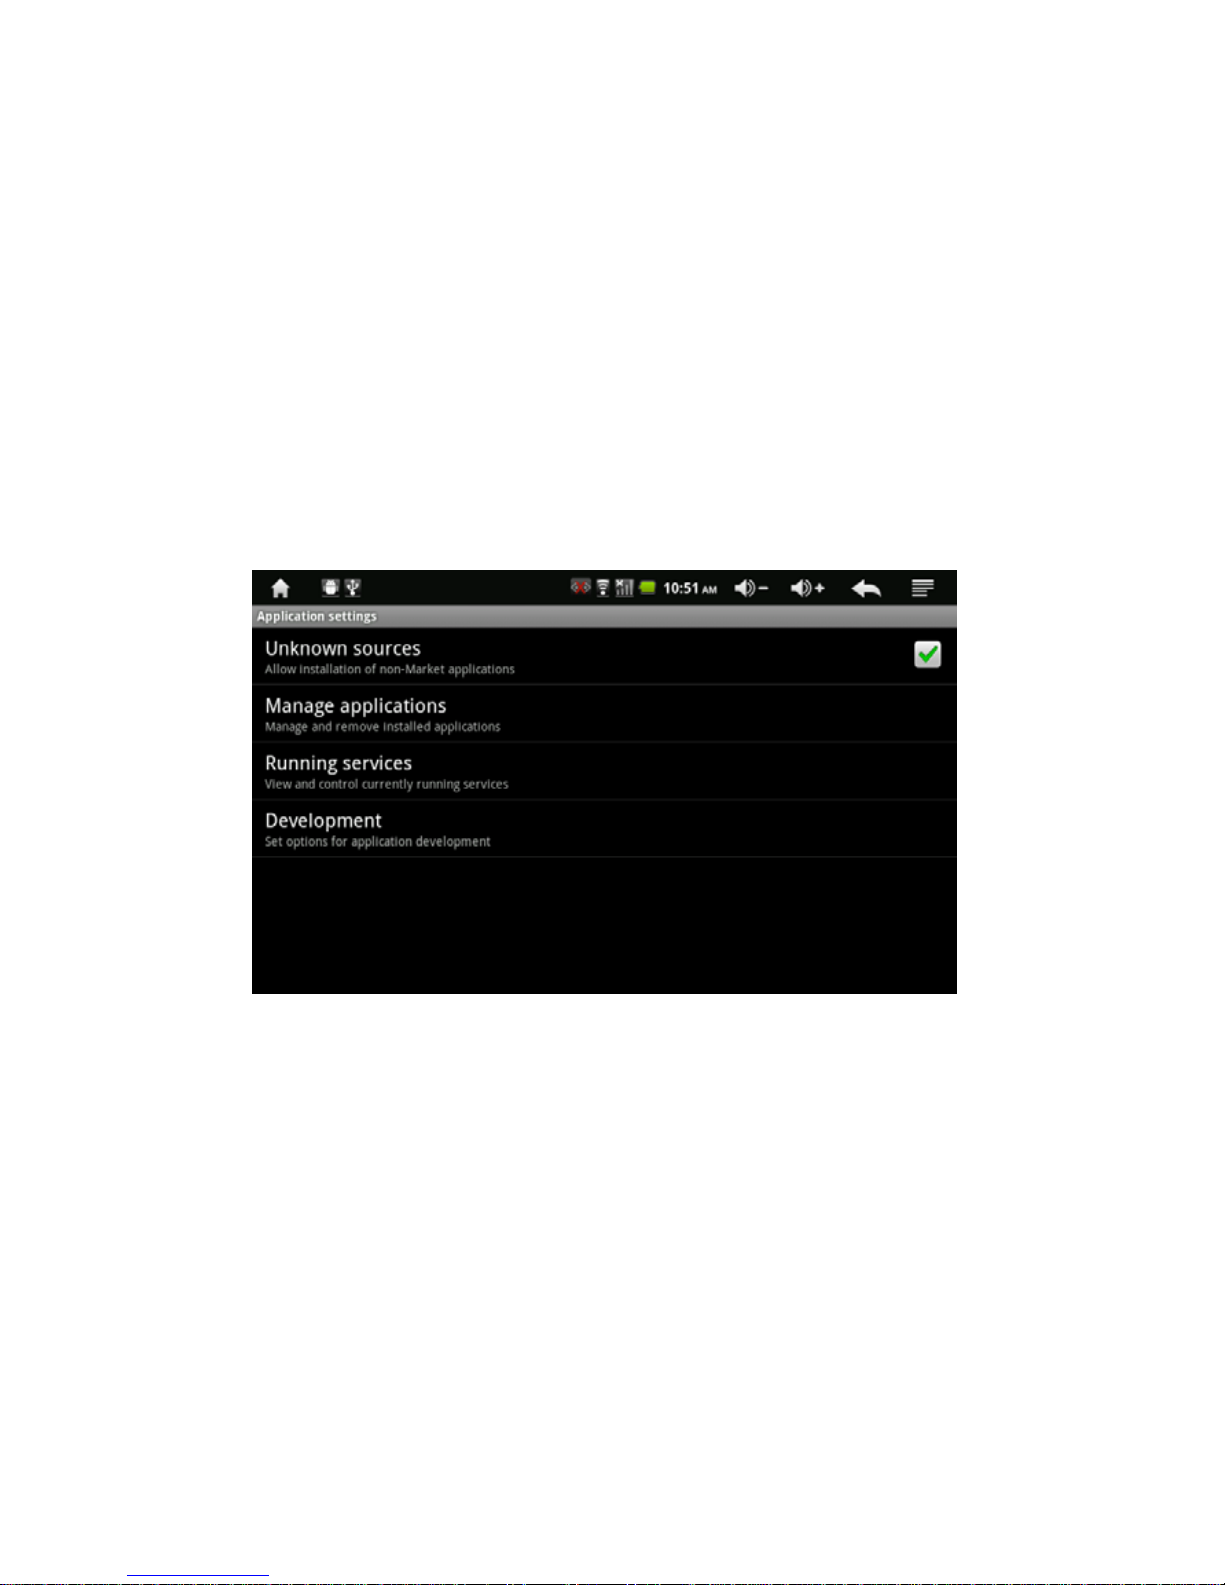
From Settings screen, touch Applications to display the Application Settings screen and
then touch Manage Applications to start the un-installation process.
29
Page 31

4. Limited Warranty
All Maylong products and services are warranted to be free from defects in materials or
workmanship for one year from the date of purchase. Within the one-year period of time,
Maylong Group LLC will, at its sole option, repair or replace any components which fail from
normal use. Such repairs or replacement will be made at no charge to the customer for parts or
labor, provided that the customer shall be responsible for any transportation cost related to the
repairs or replacement.
This warranty does not apply if the product or part thereof, has been damaged or rendered
defective through alteration, improper installation, mishandling, misuse, neglect, accident, or
by removal or defacement of the factory serial number/bar code label(s). The opinion of
Maylong's customer service advisors with respect to this matter shall be final.
THE WARRANTIES AND REMEDIES CONTAINED HEREIN ARE EXCLUSIVE AND IN
30
Page 32

LIEU OF ALL OTHER WARRANTIES, WHETHER EXPRESS, IMPLIED OR
STATUTORY, INCLUDING ANY LIABILITY ARISING UNDER ANY WARRANTY OF
MERCHANTABILITY OR FITNESS FOR A PARTICULAR PURPOSE, STATUTORY OR
OTHERWISE. THIS WARRANTY GIVES YOU SPECIFIC LEGAL RIGHTS, WHICH
MAY VARY FROM STATE TO STATE.
IN NO EVENT SHALL MAYLONG BE LIABLE FOR ANY INCIDENTAL, SPECIAL,
INDIRECT OR CONSEQUENTIAL DAMAGES, WHETHER RESULTING FROM THE
USE, MISUSE OR INABILITY TO USE THE PRODUCT OR FROM DEFECTS IN THE
PRODUCT. SOME STATES DO NOT ALLOW THE EXCLUSION OF INCIDENTAL OR
CONSEQUENTIAL DAMAGES, SO THE ABOVE LIMITATIONS MAY NOT APPLY TO
YOU.
No person or representative is authorized to assume for Maylong any liability other than
expressed herein in connection with the sale of this product. Maylong shall not be liable for
any delay, loss, damage or injury caused by Acts of God, governmental order or regulation,
restraining imposed by governmental action, war, war-like situation, hostilities, governmental
31
Page 33

disposal, mobilization, blockage, embargo, custody, revolution, fire, earthquake, tornado,
explosion, storm, flood, or for any other cause beyond its reasonable control (“Force Majeure”).
Maylong retains the exclusive right to repair or replace the product at its sole discretion. SUCH
REMEDY SHALL BE YOUR SOLE AND EXCLUSIVE REMEDY FOR ANY BREACH OF
WARRANTY.
Warranty Repairs
We have one year limited warranty for the products purchased from our authorized seller and
retailers. Please call our technical support at 1-888- 403-9477. If you have done any
troubleshooting on your own, please be prepared to provide this information to our technical
support representatives. We will also require a proof of purchase that shows date, model
number, and location.
RMA Procedure:
1. Call Maylong customer service at 1-888-403-9477
2. Troubleshoot problem over the phone
32
Page 34

3. Request for RMA number & return instruction. You may be asked to fill out a RMA
form at our Web site.
4. Return product in a secure and durable package to prevent damage during transit
5.
Please make sure to include the following information along with the return package:
You
r name & mailing address
Telephone number
A short description of problem
Model number and serial number (S/N number)
RMA number
6. Please mark your assigned RMA number visibly and clearly on the outside of the box
7. Your claim will be evaluated by our technical specialist. Repair services will be
performed as soon as possible.
Note: Repairs have a 45 day warranty. If the unit sent in is still under its original warranty, then
33
Page 35

the new warranty is 45 days or to the end of the original one year warranty, depending upon
which is longer.
Copyrights
For Dummies, the Dummies Man logo and related trademarks and trade dress are registered
trademarks of Wiley Publishing, Inc. Any use of such trademarks by Maylong Group is
under license. These trademarks may not be used without the express permission of Wiley.
Let’s GO! is a registered trademark of Maylong Group LLC in the United States and/or
other countries.
© 2010 Maylong Group LLC
34
Page 36

FCC WARNING
This device complies with Part 15 of the FCC Rules. Operation is subject to the following two conditions:
(1) this
device may not cause harmful interference, and
(2) this device must accept any interference received, including interference that may cause undesired operation.
NOTE 1: This equipment has been tested and found to comply with the limits for a Class B digital device, pursuant to part
15 of the FCC Rules. These limits are designed to provide reasonable protection against harmful interference in a
residential installation. This equipment generates, uses and can radiate radio frequency energy and, if not installed and used
in accordance with the instructions, may cause harmful interference to radio communications. However, there is no
guarantee that interference will not occur in a particular installation. If this equipment does cause harmful interference to
radio or television reception, which can be determined by turning the equipment off and on, the user is encouraged to try to
correct the interference by one or more of the following measures:
- Reorient or relocate the receiving antenna.
- Increase the separation between the equipment and receiver.
-Connect the equipment into an outlet on a circuit different from that to which the receiver is connected.
-Consult the dealer or an experienced radio/TV technician for help.
NOTE 2: Any changes or modifications not expressly approved by the manufacturer could void the user’s authority to
operate the equipment.
NOTE 3: The manufacturer is not responsible for any radio or TV interference caused by unauthorized modifications
to this equipment. Such modifications could void the user’s authority to operate the equipment.
- No any ad hoc function
35
 Loading...