

Page 1
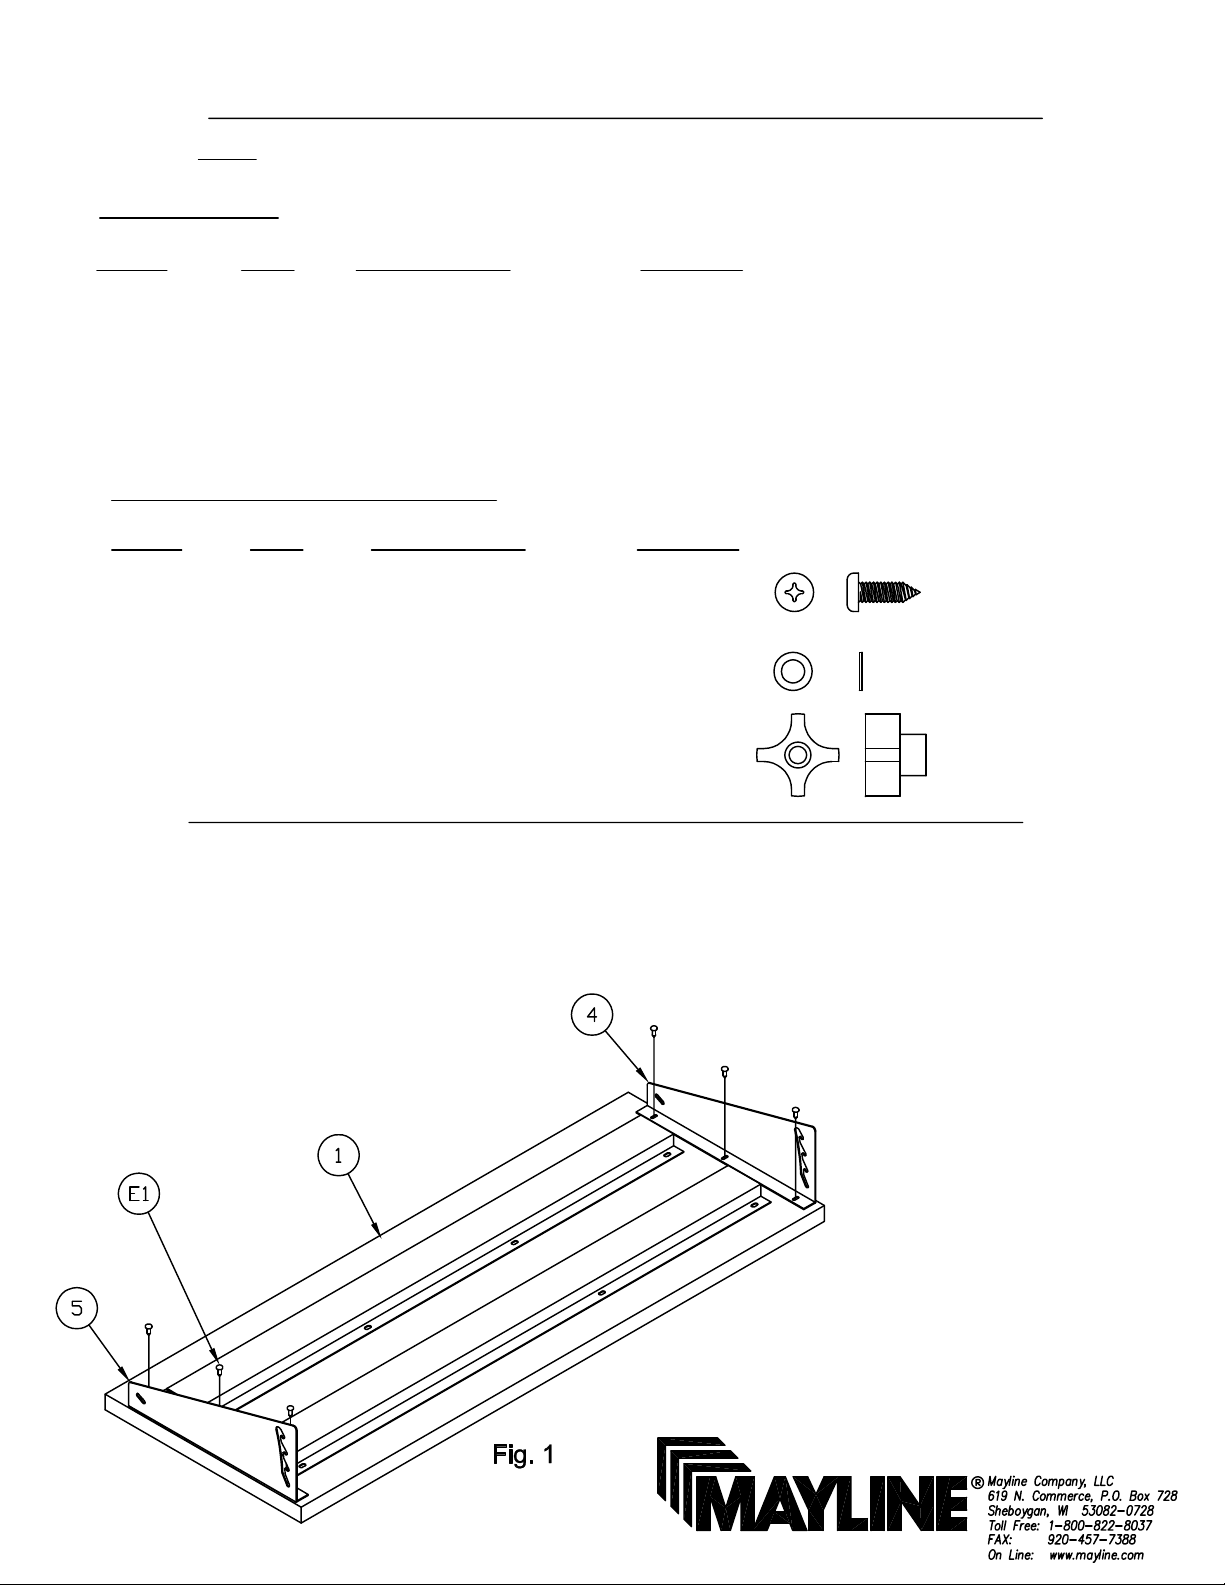
to top (1) as shown using Screws (E1). Do
ASSEMBLY INSTRUCTIONS
TechWorks Tilt Shelf
TM
NOTE: Please count and inspect all pieces before disposing of any carton or packing materials.
COMPONENTS
REF. # QTY. DESCRIPTION PART No.
1 1 TILT SHELF CALL~~**
2 1 R.H. TILT SUPPORT A7132**
3 1 L.H. TILT SUPPORT A7133**
4 1 INNER R.H. SUPPORT B6798**
5 1 INNER L.H. SUPPORT B6797**
6 1 SHELF ANGLE CALL~~**
HARDWARE BAG (PART No. A6699) *for individual item, order that part number
REF. # QTY. DESCRIPTION PART No.
E1 9 #10 X 3/4 SCREW X11*
E2 8 NYLON WASHER W78*
E3 4 KNOB K26*
When ordering components, specific color and/or size information may be required.
Contact a Mayline Customer Service Representative. 1-800-822-8037
** Denotes Color Code
~~Denotes Size
1. Place shelf upside down on
non-scratching surface.
2. Attach Shelf Inner Supports (4 and 5)
not tighten Screws. See Fig. 1.
Page 2
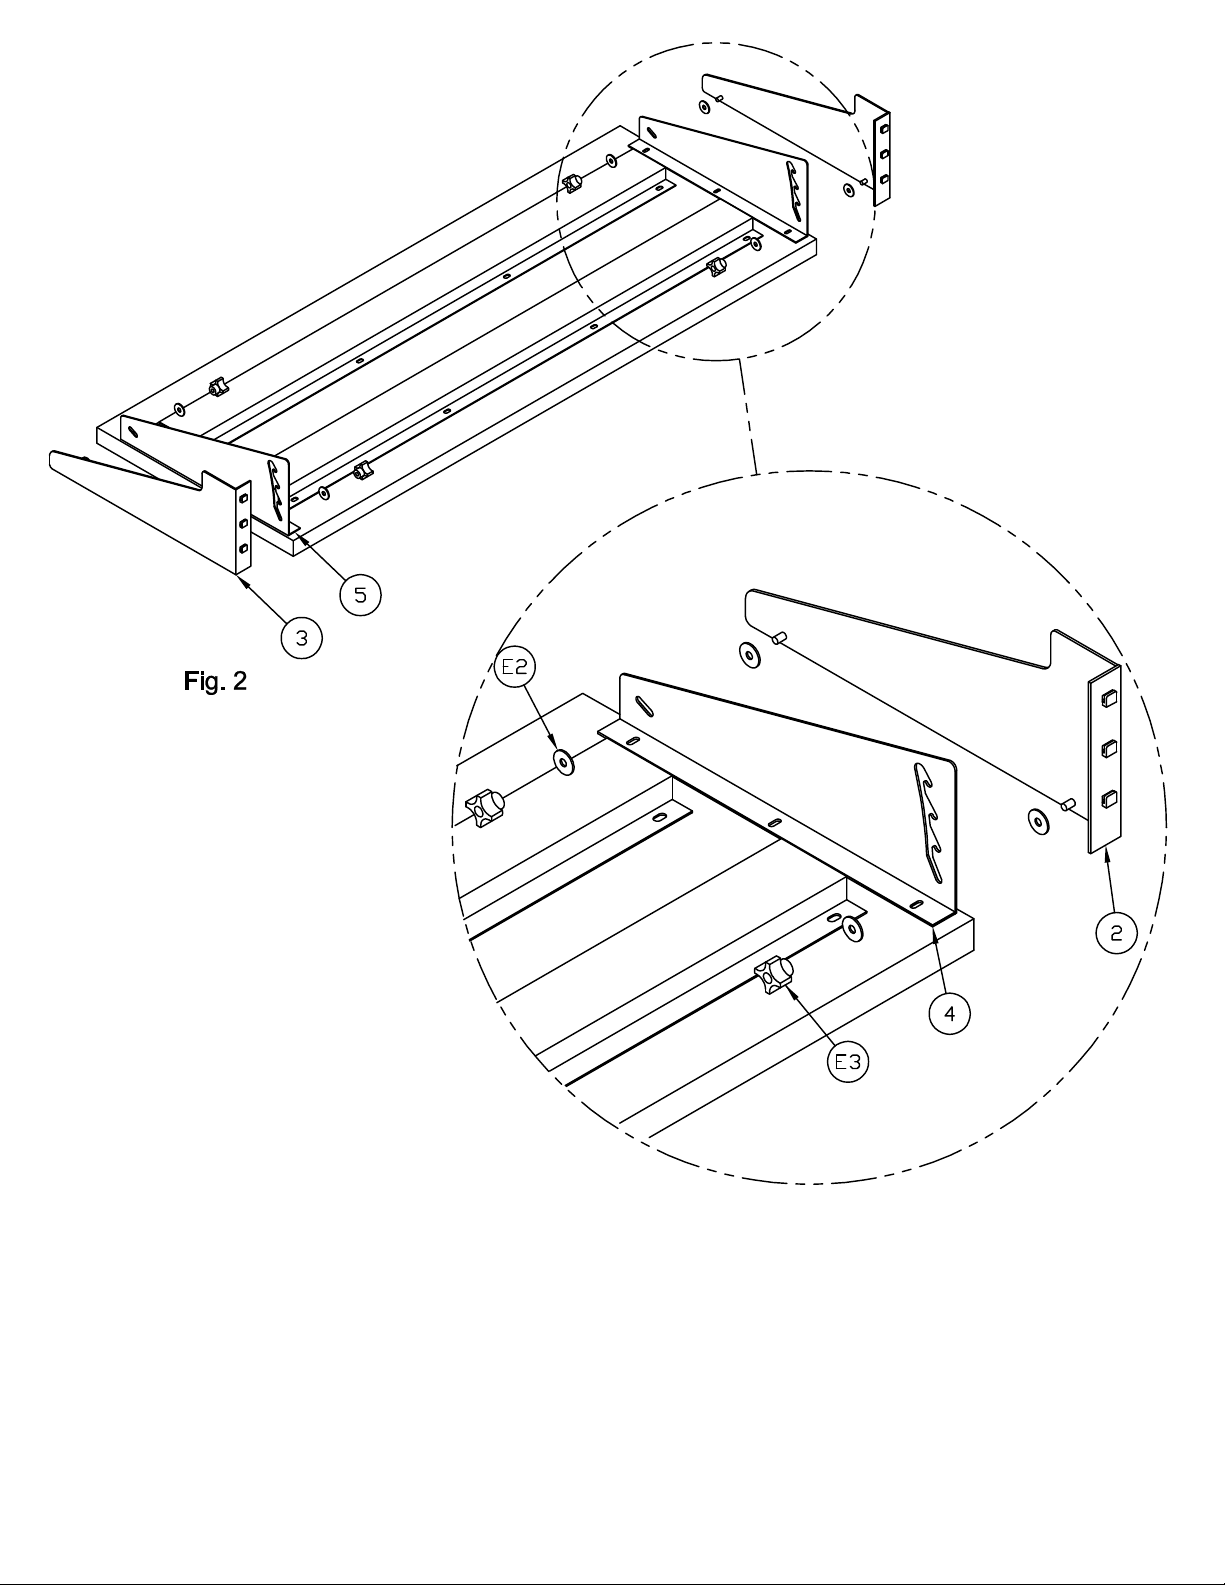
3. Attach the Outer Shelf Supports (2 and 3)
using the the Plastic Washers (E2) and the
Knobs (E3) as shown.
(Note: A washer must go one on each side of
the Inner Shelf Support (4 and 5). See Fig. 2
Page 3

4. Hang Shelf Assembly from organizer frame
and proceed to tighten Screws (E1).
Note: You may need to remove the Knob in
order to tighten the screws. See Fig. 3
Fig. 4
*Optional front safety lip
Use remaining Screws (E1) to
attach the Lip to the bottom,
front edge of the Shelf (1).
See Fig. 4
Page 4

Fig. 5
*Optional tilting (0°- 15°)
1. Loosen (Do Not Remove) the four
Knobs (E3).
2. Lift on the back of the shelf and push
up on the front of the shelf.
3. Rest the shelf in one of the four
notches:
a. Top notch = 0°
b. 2nd notch = 5°
c. 3rd notch = 10°
d. Bottom notch = 15°
See Fig. 5
 Loading...