

Page 1

ASSEMBLY INSTRUCTIONS
TM
TechWorks Organizer Frame
NOTE: Please count and inspect all pieces before disposing of any carton or packing materials.
COMPONENTS:
REF. # QTY. DESCRIPTION PART No.
1 2 CROSS WAY CALL~~**
2 2 UPRIGHT CALL~~**
3 1 , 2 CENTER UPRIGHT CALL~~**
4 1 L.H. FOOT B7683**
5 1 R.H. FOOT B7684**
HARDWARE BAG (PART No. A7698)
When ordering components, specific color and/or size information may be required.
Contact a Mayline Customer Service Representative. 1-800-822-8037
*for individual item, order that part number
REF. # QTY DESCRIPTION PART No.
E1 17 #10 X 1 SCREW X12*
E2 40 5/16-18 X 3/4 SCREW X410*
** Denotes Color Code
~~Denotes Size
1. Laying on a non-scatching surface, place Uprights (2
and 3) in Crossway (1) and attach using Screws (E2).
Do not tighten Screws.
*Be sure all upright trapezodial holes
are orientated in the same direction.
(1)
Page 2
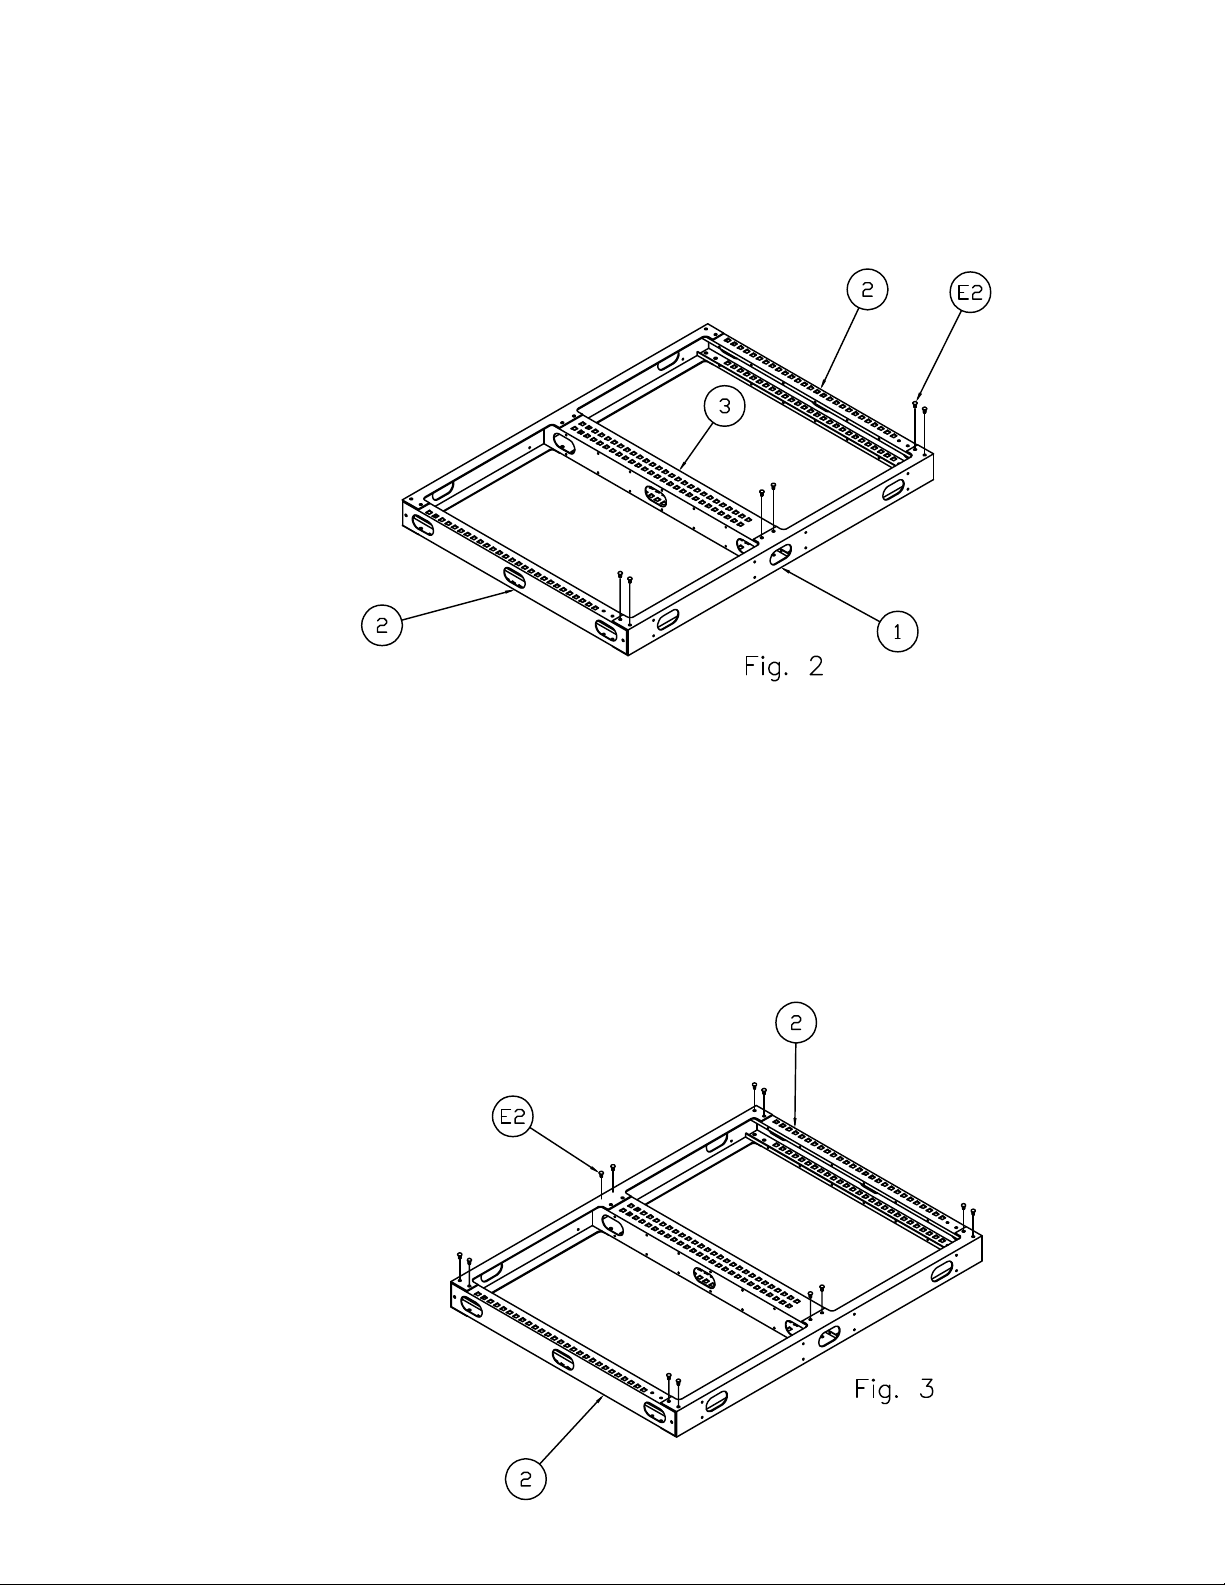
2. Place remaining Crossway (1) onto the opposite
end of the Uprights (2 and 3) and attach using
Screws (E2). Do not tighten.
3. Square the assembly by measuring diagonally.
4. Tighten all Screws (E2).
5. Flip assembly over and install Screws (E2
).
(2)
Page 3

6. Remove grommets from top of worksurface.
7. Place Organizer Frame Assembly onto worksurface and align grommet holes in
Crossway (1) and attach using Screws (E1).
(3)
8. Attach Feet (4 and 5) to outer Uprights (2)
using Screws (E2). Do Not Tighten.
9. Using Screws (E1) attach feet to worksurface
by pushing feet tight against the upright. Making
sure upright is perpendicular to floor.
10. Tighten Screws (E2).
11. Replace grommets into holes.
 Loading...