

Page 1

TECHNOLOGY WALL EZTW
A
D
E
C
F
G
B
ITEM QTY DESCRIPTION
A 4 BLANK DATA CUTOUT COVER
B 2 GROMMETS
C 4 HOLE COVERS
D 2 WIRE CLAMPS
E 2 3/8"-1 6 X 2.0 HEX CAP SCREW
F 2 HEX NUT 3/8"-1 6
G 4 WASHER 3/8"
Top Cladding
2
1
1 . Remove the side cladding by first
sliding up, then pulling out.
2. Remove the top cladding by
sliding the cladding to the side where
the side cladding was removed, then
2
lifting upward.
1
1
Side Cladding
Facing Panel
PRINTED IN USA 1
3. Remove the facing panel by
pulling outward.
9/4
I767 REV 2
Page 2
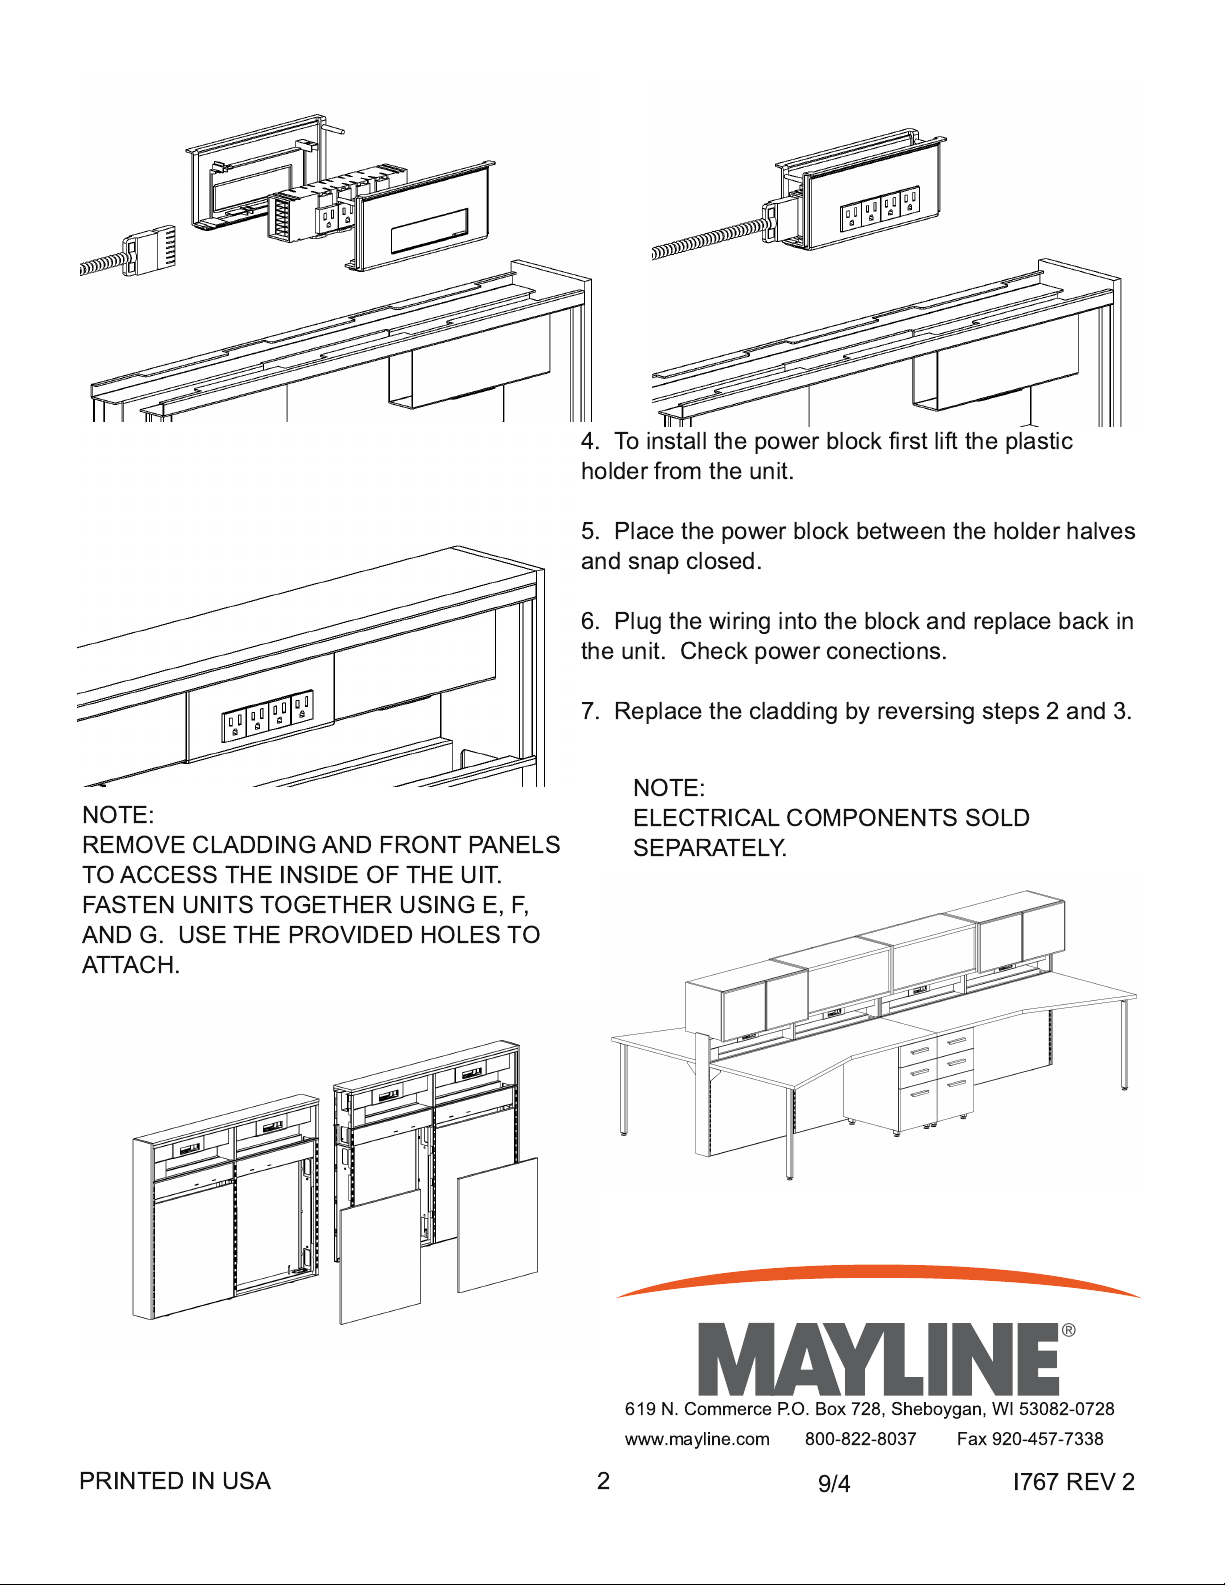
NOTE:
REMOVE CLADDING AND FRONT PANELS
TO ACCESS THE INSIDE OF THE UIT.
FASTEN UNITS TOGETHER USING E, F,
AND G. USE THE PROVIDED HOLES TO
ATTACH.
4. To install the power block first lift the plastic
holder from the unit.
5. Place the power block between the holder halves
and snap closed.
6. Plug the wiring into the block and replace back in
the unit. Check power conections.
7. Replace the cladding by reversing steps 2 and 3.
NOTE:
ELECTRICAL COMPONENTS SOLD
SEPARATELY.
PRINTED IN USA 2
61 9 N. Commerce P.O. Box 728, Sheboygan, WI 53082-0728
www.mayline.com 800-822-8037 Fax 920-457-7338
9/4
I767 REV 2
 Loading...