

Page 1
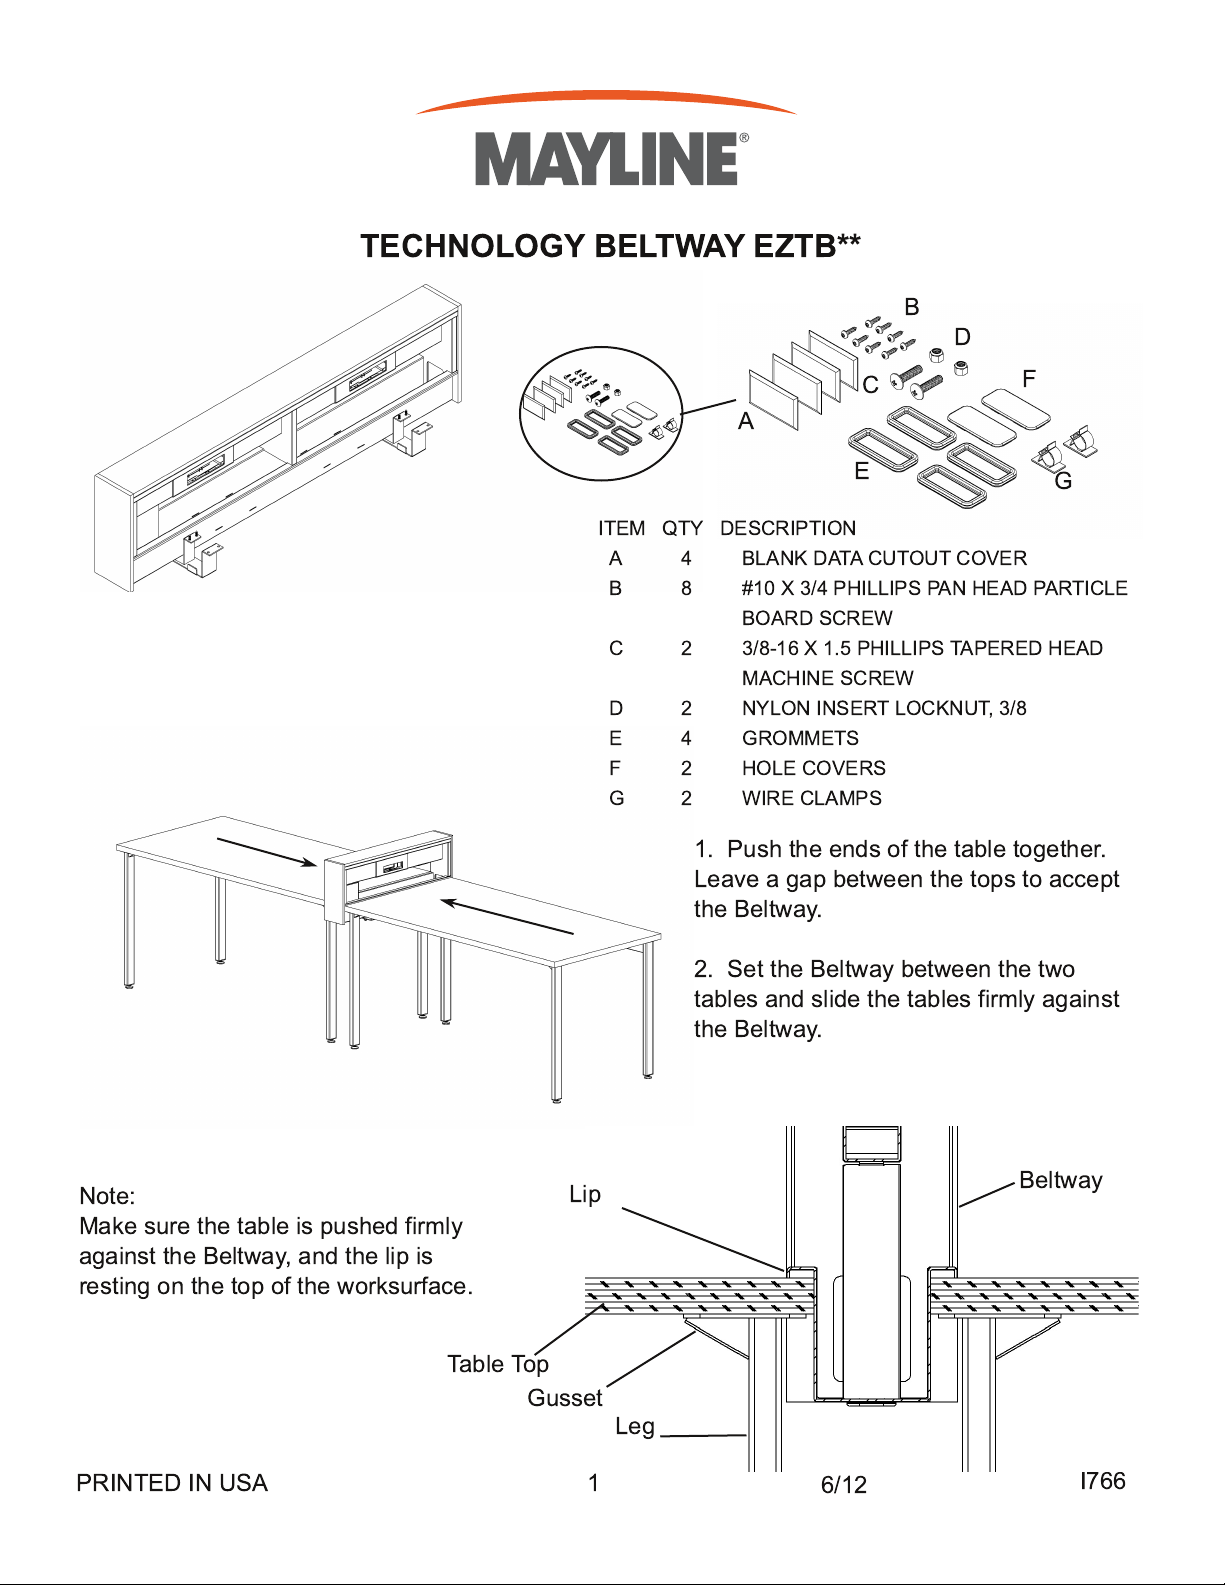
TECHNOLOGY BELTWAY EZTB**
B
D
C
F
A
E
ITEM QTY DESCRIPTION
A 4 BLANK DATA CUTOUT COVER
B 8 #1 0 X 3/4 PHILLIPS PAN HEAD PARTICLE
BOARD SCREW
C 2 3/8-1 6 X 1 .5 PHILLIPS TAPERED HEAD
MACHINE SCREW
D 2 NYLON INSERT LOCKNUT, 3/8
E 4 GROMMETS
F 2 HOLE COVERS
G 2 WIRE CLAMPS
G
1 . Push the ends of the table together.
Leave a gap between the tops to accept
the Beltway.
Note:
Lip
Make sure the table is pushed firmly
against the Beltway, and the lip is
resting on the top of the worksurface.
Table Top
Gusset
PRINTED IN USA 1
Leg
2. Set the Beltway between the two
tables and slide the tables firmly against
the Beltway.
Beltway
6/1 2
I766
Page 2
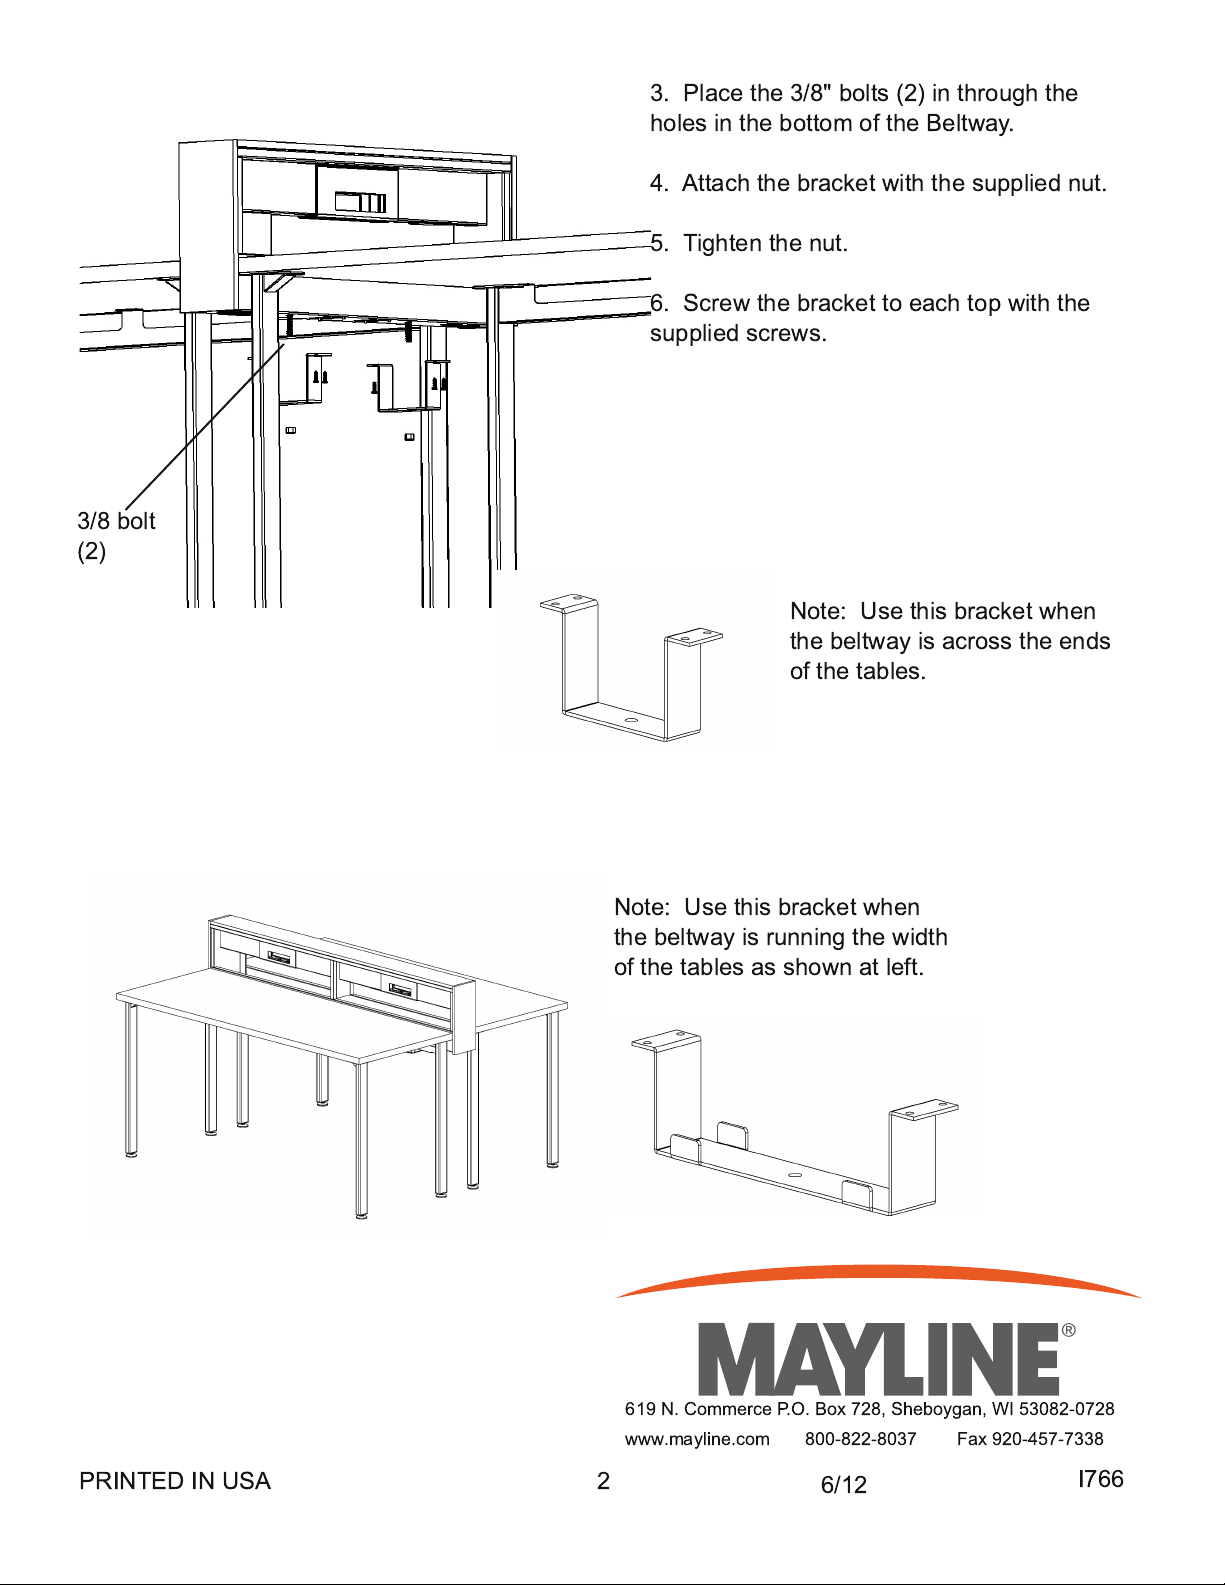
3/8 bolt
(2)
3. Place the 3/8" bolts (2) in through the
holes in the bottom of the Beltway.
4. Attach the bracket with the supplied nut.
5. Tighten the nut.
6. Screw the bracket to each top with the
supplied screws.
Note: Use this bracket when
the beltway is across the ends
of the tables.
PRINTED IN USA 2
Note: Use this bracket when
the beltway is running the width
of the tables as shown at left.
61 9 N. Commerce P.O. Box 728, Sheboygan, WI 53082-0728
www.mayline.com 800-822-8037 Fax 920-457-7338
6/1 2
I766
Page 3

Top Cladding
Side Cladding
9. Remove the power block holder by pushing
up on it.
1 0. Separate the 2 pieces and insert the power
block (ordered separately).
11 . Attach the appropriate wire harness into the
block and slide back in place.
Power Block
Holder
7. Remove the side cladding by
sliding up, then pulling out.
8. Remove the top cladding by
sliding in the direction of the arrow
and lifting.
NOTE:
ELECTRICAL COMPONENTS SOLD
SEPARATELY.
1 2. Reinstall the cladding by reversing steps 7
and 8.
Note: Test wiring before replacing the cladding.
61 9 N. Commerce P.O. Box 728, Sheboygan, WI 53082-0728
www.mayline.com 800-822-8037 Fax 920-457-7338
PRINTED IN USA 3
6/1 2
I766
 Loading...